Sebart Mini Avanti w/ K45 build thread


 01-22-2020, 07:36 AM
#877
What is the recommended pipe distance from the tail cone?
What is the Pipe I.D. that you are using?
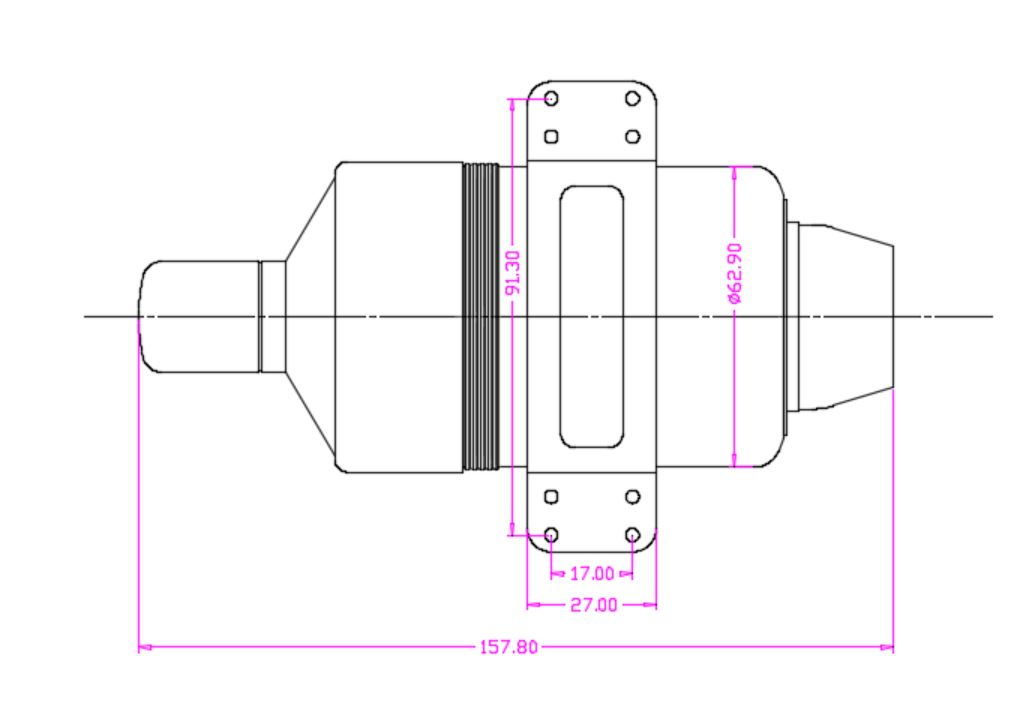
For the Grumania pipe, the recommended distance is based on the the distance from the leading edge of the bell mouth to the end of the Turbine tail cone, in the case the one shown is 30 mm.
The disk diameter I made is 2.12" 53.8 mm to fit that pipe.
What is the Pipe I.D. that you are using?
For the Grumania pipe, the recommended distance is based on the the distance from the leading edge of the bell mouth to the end of the Turbine tail cone, in the case the one shown is 30 mm.
The disk diameter I made is 2.12" 53.8 mm to fit that pipe.
01-22-2020, 07:49 AM
#878

My Feedback: (1)

What is the recommended pipe distance from the tail cone?
What is the Pipe I.D. that you are using?
For the Grumania pipe, the recommended distance is based on the the distance from the leading edge of the bell mouth to the end of the Turbine tail cone, in the case the one shown is 30 mm.
The disk diameter I made is 2.12" 53.8 mm to fit that pipe.
What is the Pipe I.D. that you are using?
For the Grumania pipe, the recommended distance is based on the the distance from the leading edge of the bell mouth to the end of the Turbine tail cone, in the case the one shown is 30 mm.
The disk diameter I made is 2.12" 53.8 mm to fit that pipe.
I'm getting my new pipe from Peter Liu at Bajahobby. Since the K45G3 is the same size as the K30 now, the original pipe Peter sent was too short. I've had him add an extra 1.75" to properly mount the turbine. That pipe will be here Friday. I'll email Peter and see if he can give me the ID of the pipe that he's sending me. If not, I'll measure it the second I get home on Friday and post here for you. The distance that the tail of the turbine needs to be away from the beginning of the pipe (not the bellmouth) is 1". Dirk from Pacific RC Jets said "use that measurement Scott...period". I said yes sir.
Thank you for helping me out. I was actually concerned how to figure out the proper distance. This is magic and I really appreciate this. I do have a laser cutter at work so, if you're doing this in Solid Works, I could just use the file.
 01-22-2020, 06:25 PM
#881
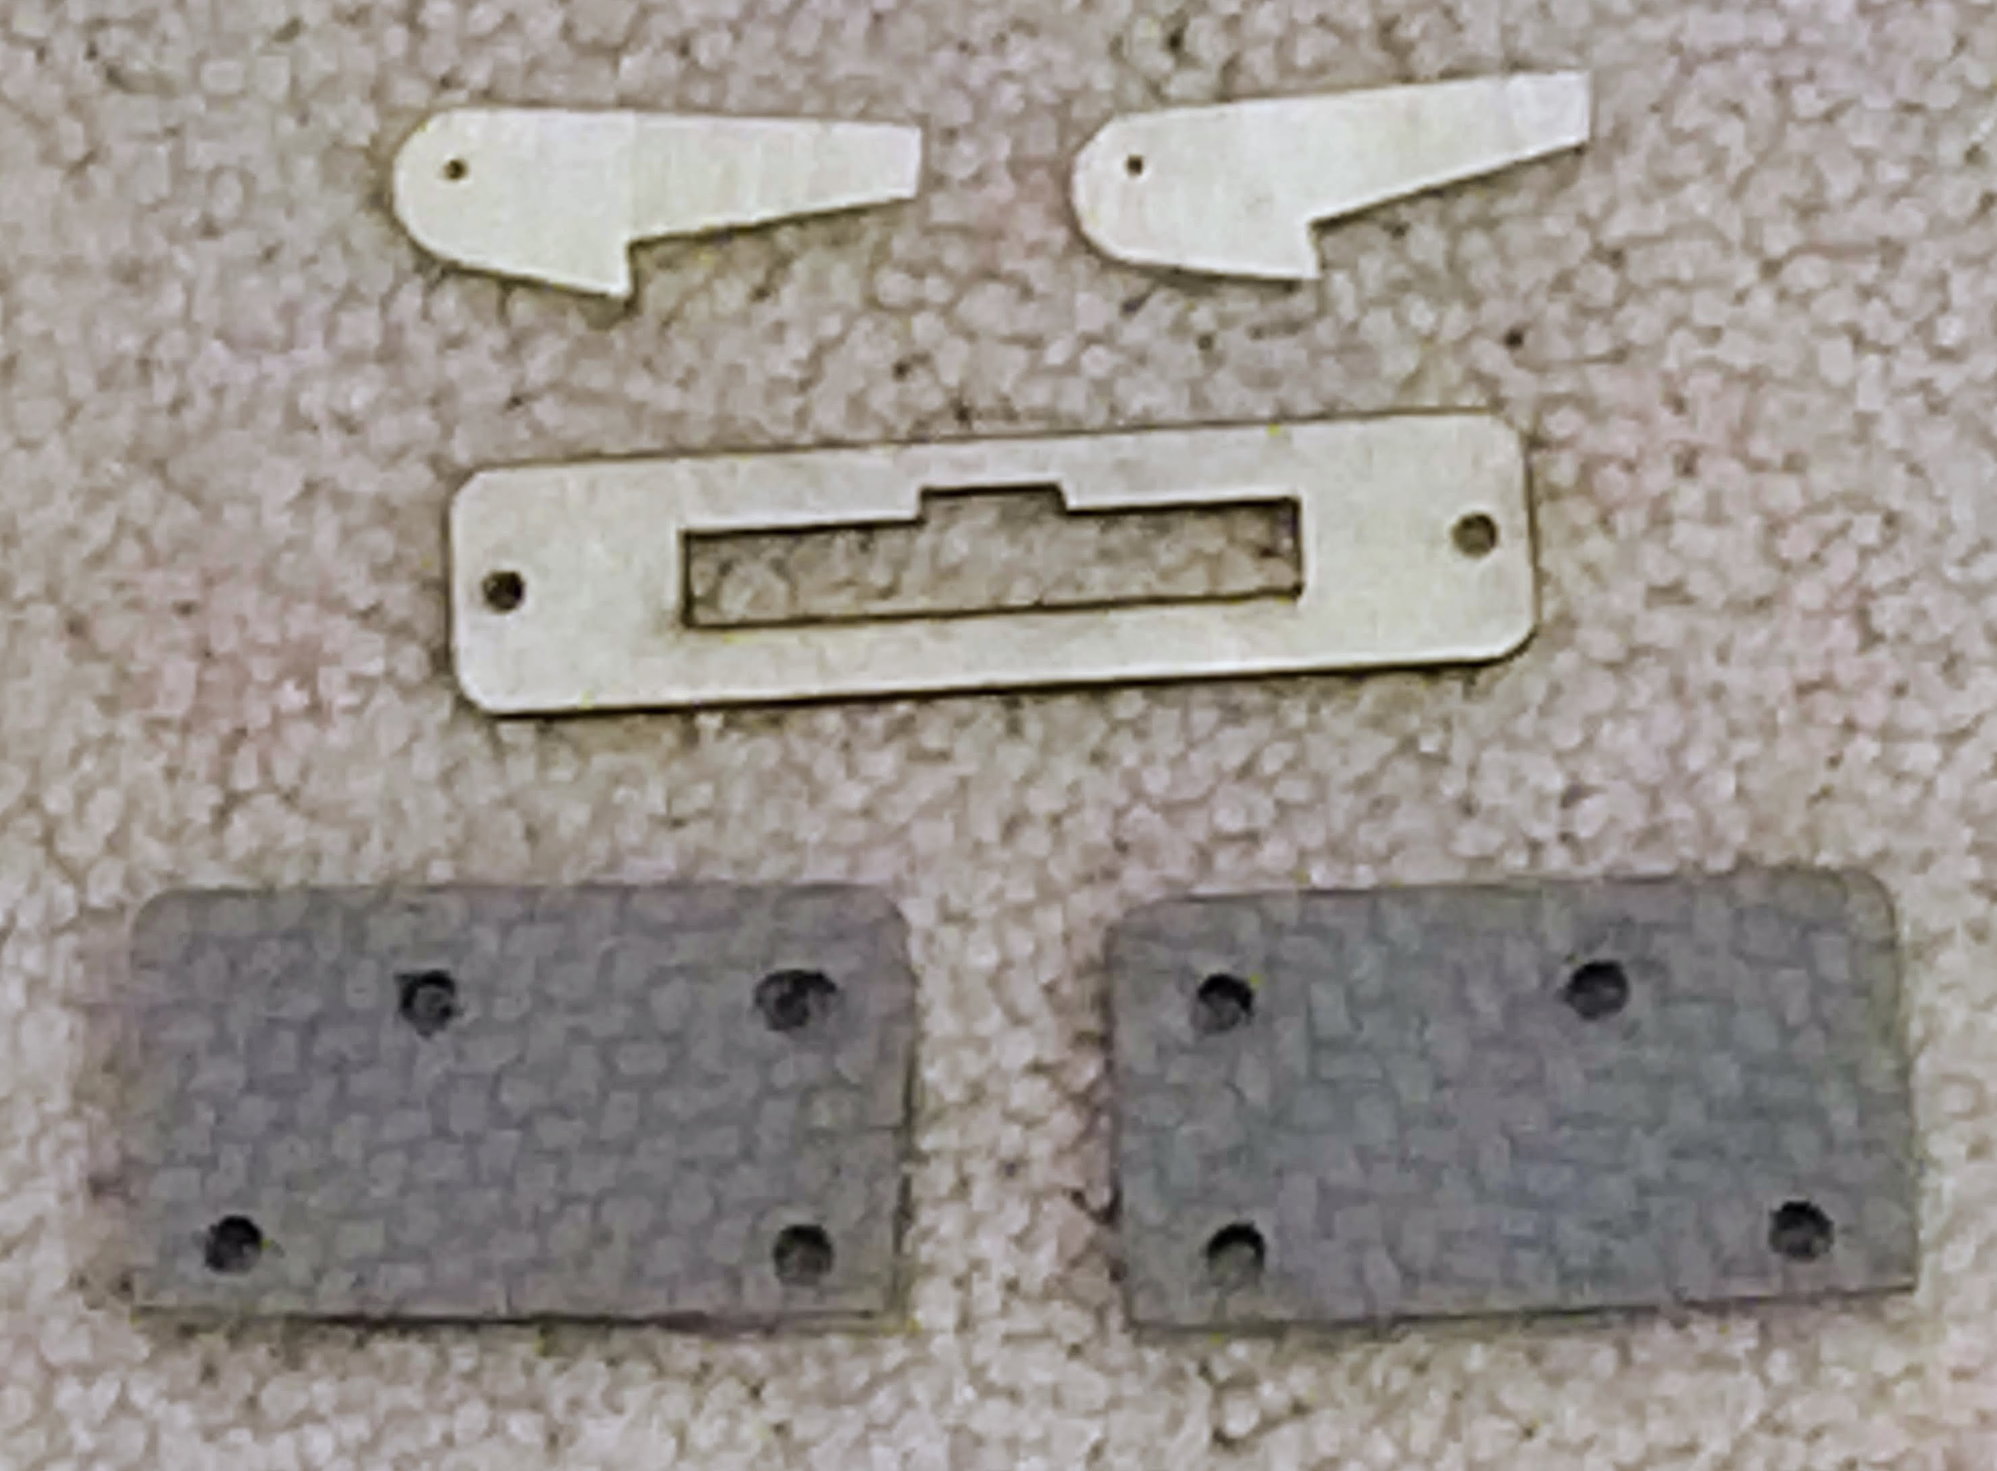
Here you go Scott
Created the Outline drawing and the Pipe Fixture Drawing,
Also it is interesting that the Gruminia recommendation of 30 mm from the leading edge of the Bell mouth to the end of the tail cone workes out to be 25.4 mm (1") from the end of the tail cone to the entrance of the pipe.
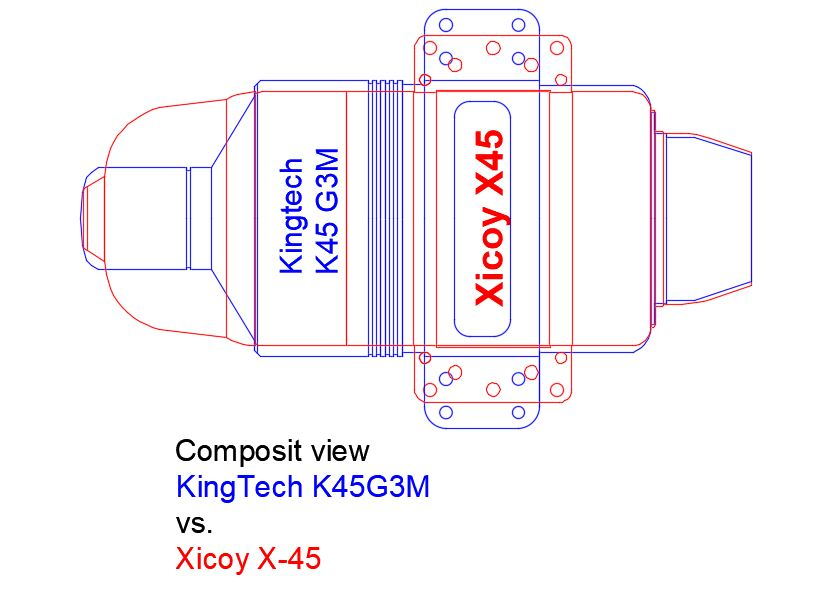
Lastly I thought it would interesting to have a direct outline comparison.
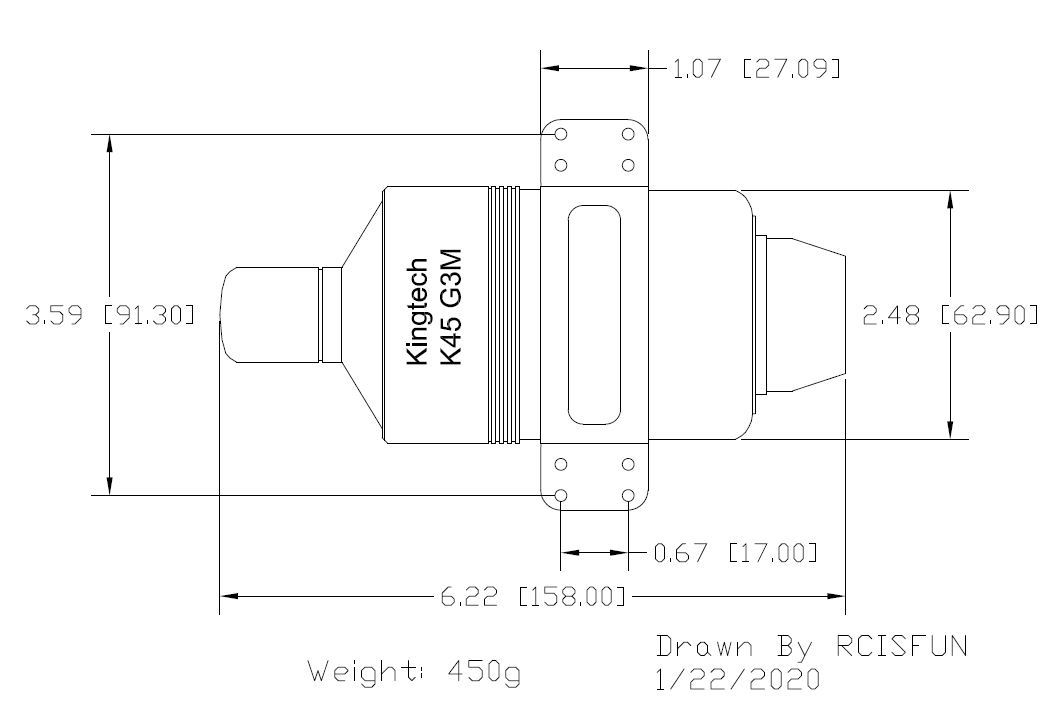
K45G3M Outline
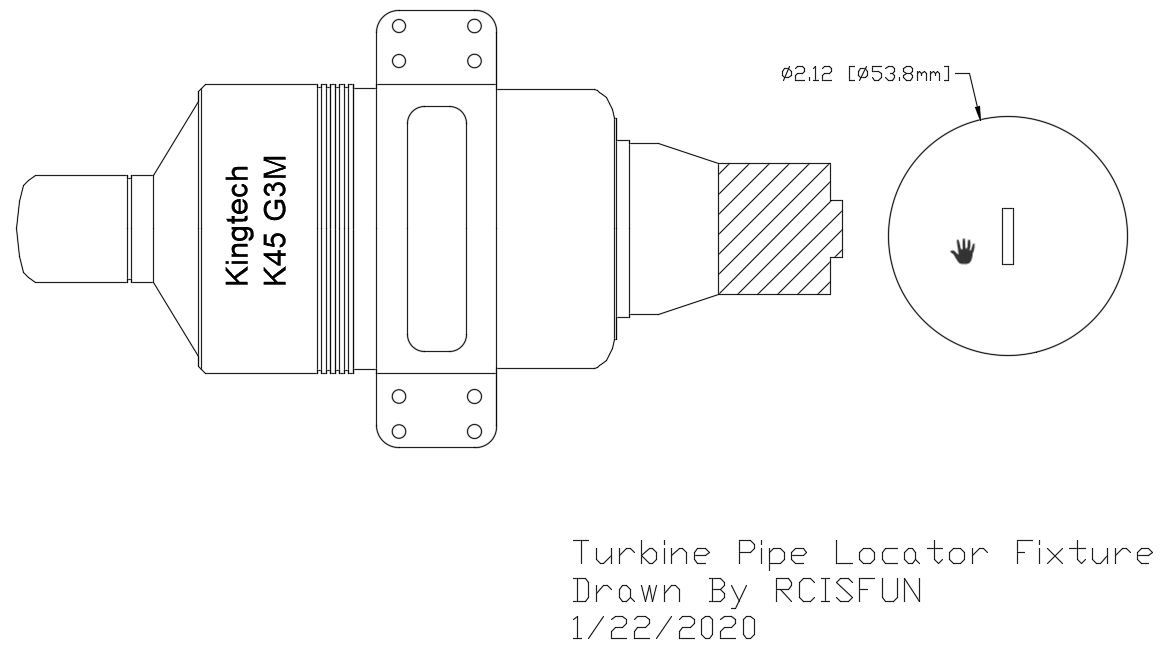
Kingtech K45 Pipe Fixture (DRAFT)
I thought this would be interesting
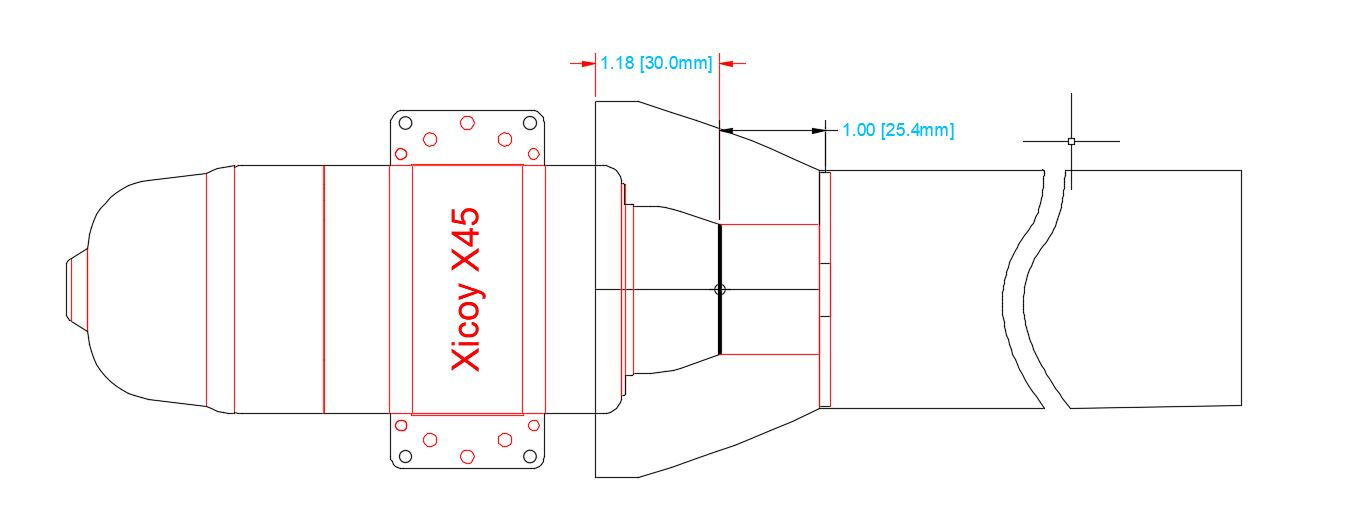
Xicoy K45 Gruminia Pipe Layout
Created the Outline drawing and the Pipe Fixture Drawing,
Also it is interesting that the Gruminia recommendation of 30 mm from the leading edge of the Bell mouth to the end of the tail cone workes out to be 25.4 mm (1") from the end of the tail cone to the entrance of the pipe.
Lastly I thought it would interesting to have a direct outline comparison.
K45G3M Outline
Kingtech K45 Pipe Fixture (DRAFT)
I thought this would be interesting
Xicoy K45 Gruminia Pipe Layout
The following users liked this post:
smcharg (01-23-2020)


The following users liked this post:
jcpl (02-10-2020)
01-23-2020, 05:17 AM
#887
My Feedback: (1)
Rich,
First off, thank you! I was curious about this distance as well for your engine vs. mine and was going to ask. I guess it's safer for the engine manufacturer to state this distance from the pipe vs. the edge of the bellmouth as the bellmouth could potentially be deeper or more shallow I guess. I'm going to laser cut that part out. This hobby is that much better because of folks like you sharing ideas and helping a brother out. Much appreciated!
Scott
PS - I haven't heard back from Peter yet on the ID of the pipe but I can take what you've given me and adjust the OD of the laser cut part once I find out.
The following users liked this post:
smcharg (01-23-2020)
01-24-2020, 02:00 AM
#889
My Feedback: (3)
Been working on my Avanti build.
I ordered the new Grumania Jet�s pipe specifically designed the mini Avanti and the Xicoy X-45 from Germany, order placed Jan 2nd, pipe delivered Jan 16th.
It was very well packed and the pipe looks like a work of art!
The new design has a bell mouth that fits within the Avanti formers with no modifications.
01-24-2020, 05:21 AM
#890
It looks like the new pipe was added to their web site after September 2019
01-25-2020, 03:32 PM
#891
My Feedback: (1)
I think I saw this somewhere in this thread. Are we using something like the wire loom from BVM to protect servo wires from the heat of the pipe or is the fiberglass tube sufficient if I'm running a dual-wall pipe? If we are, is this the correct product?
The following users liked this post:
flaz (08-23-2020)

The following users liked this post:
smcharg (01-27-2020)
01-27-2020, 05:48 PM
#893
Been making some progress on my build.
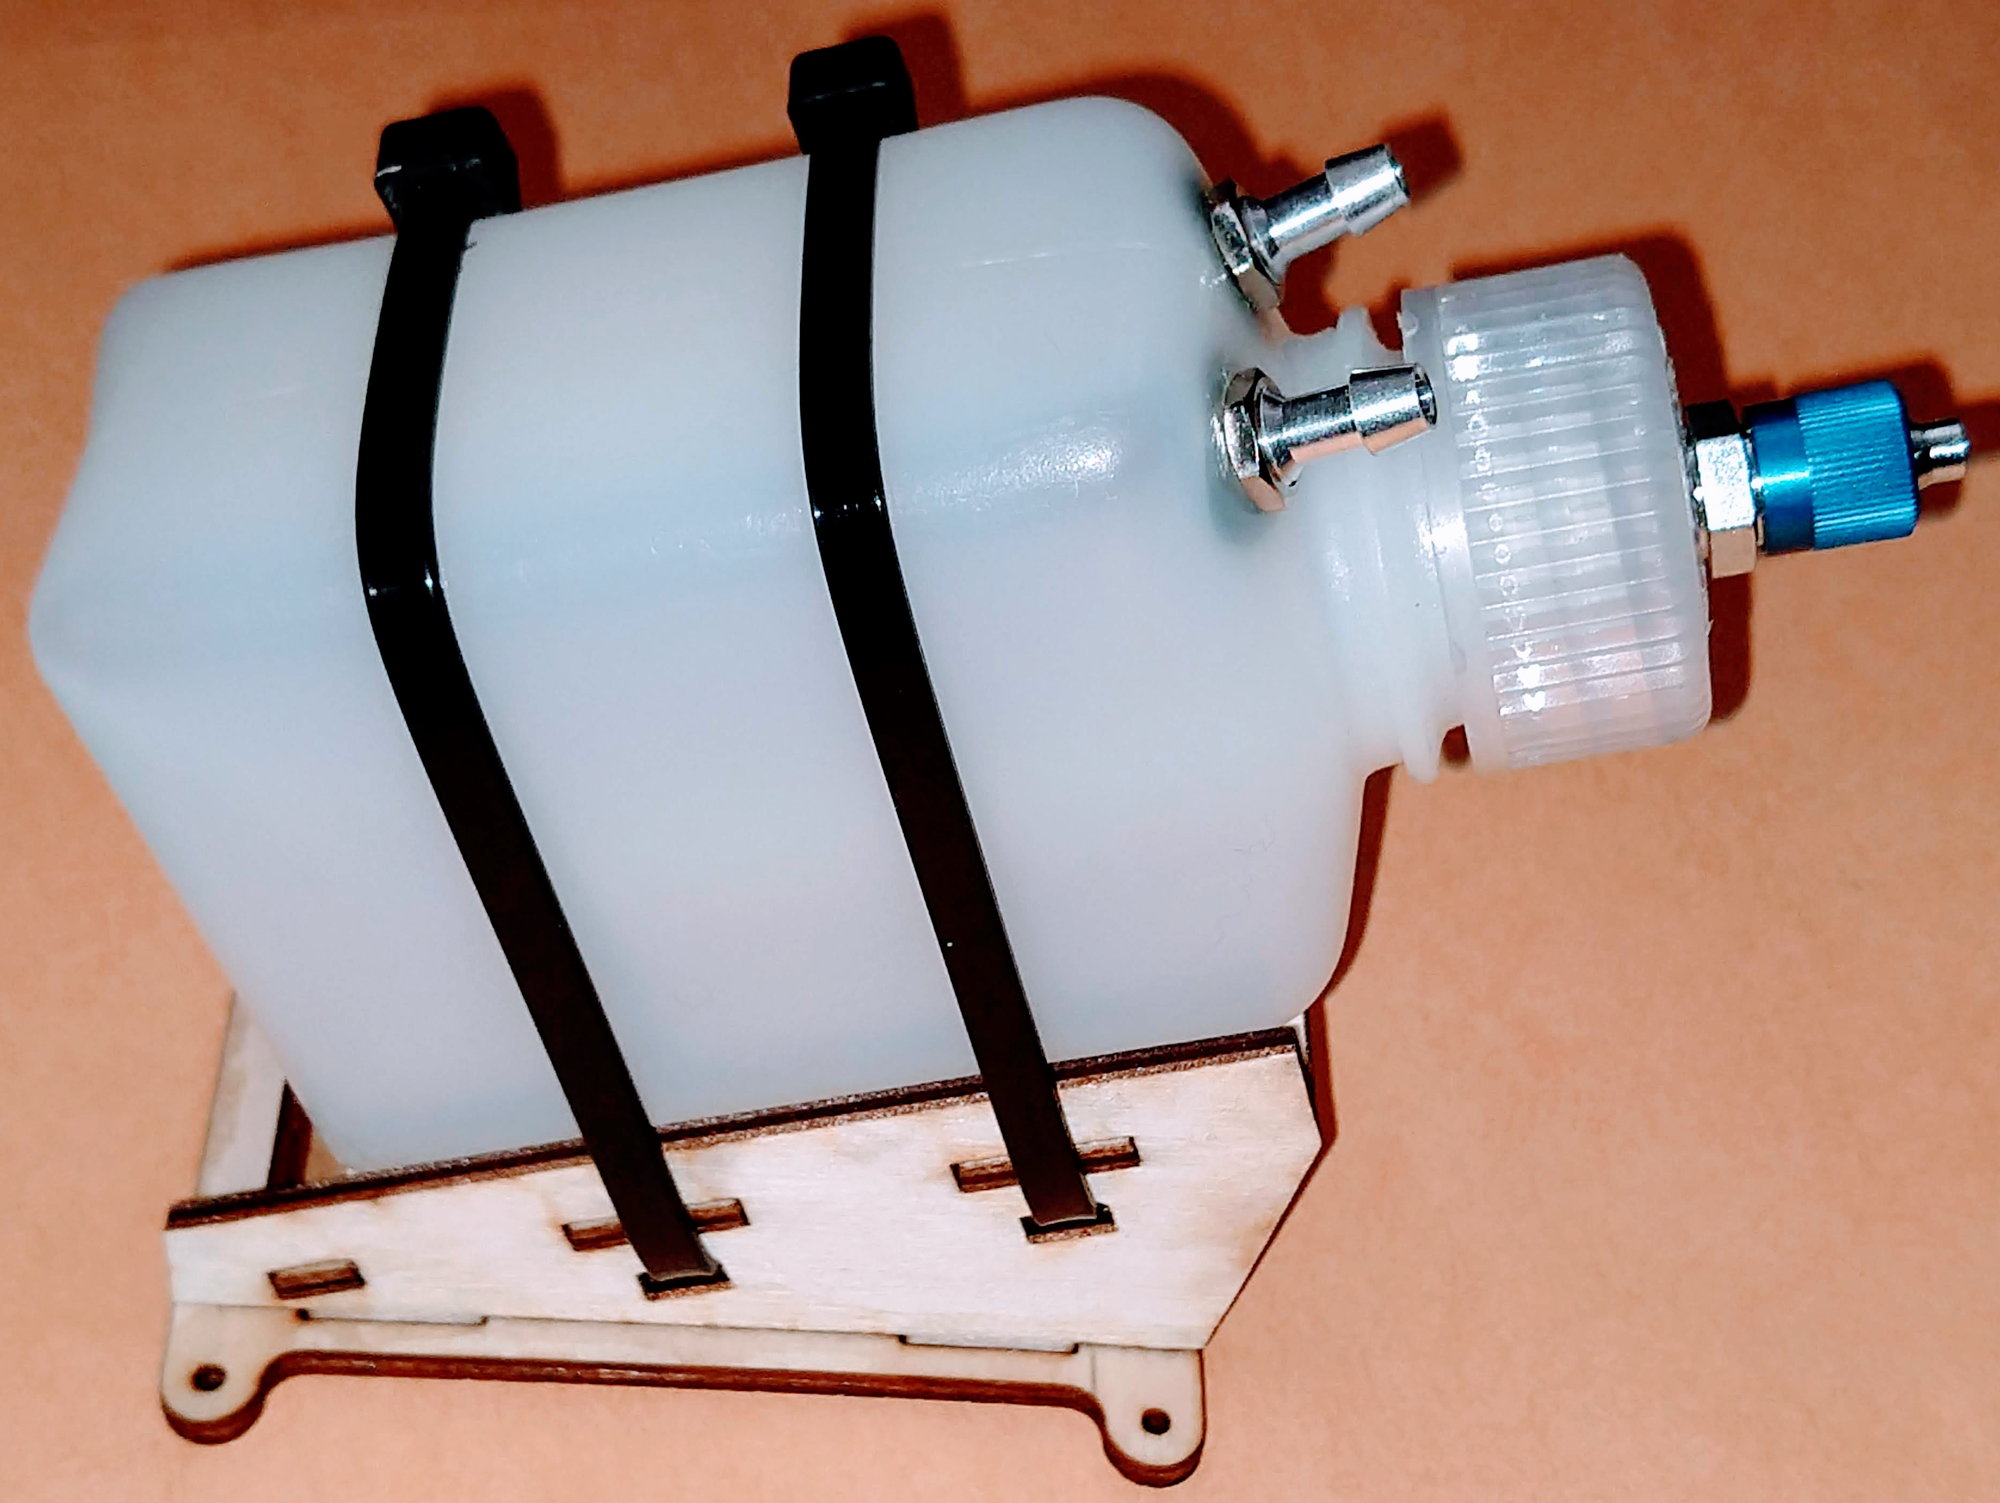
Came up with a 1 Liter fuel tank that fits perfect, it is from a body wash product sold at Sam's club in the US.
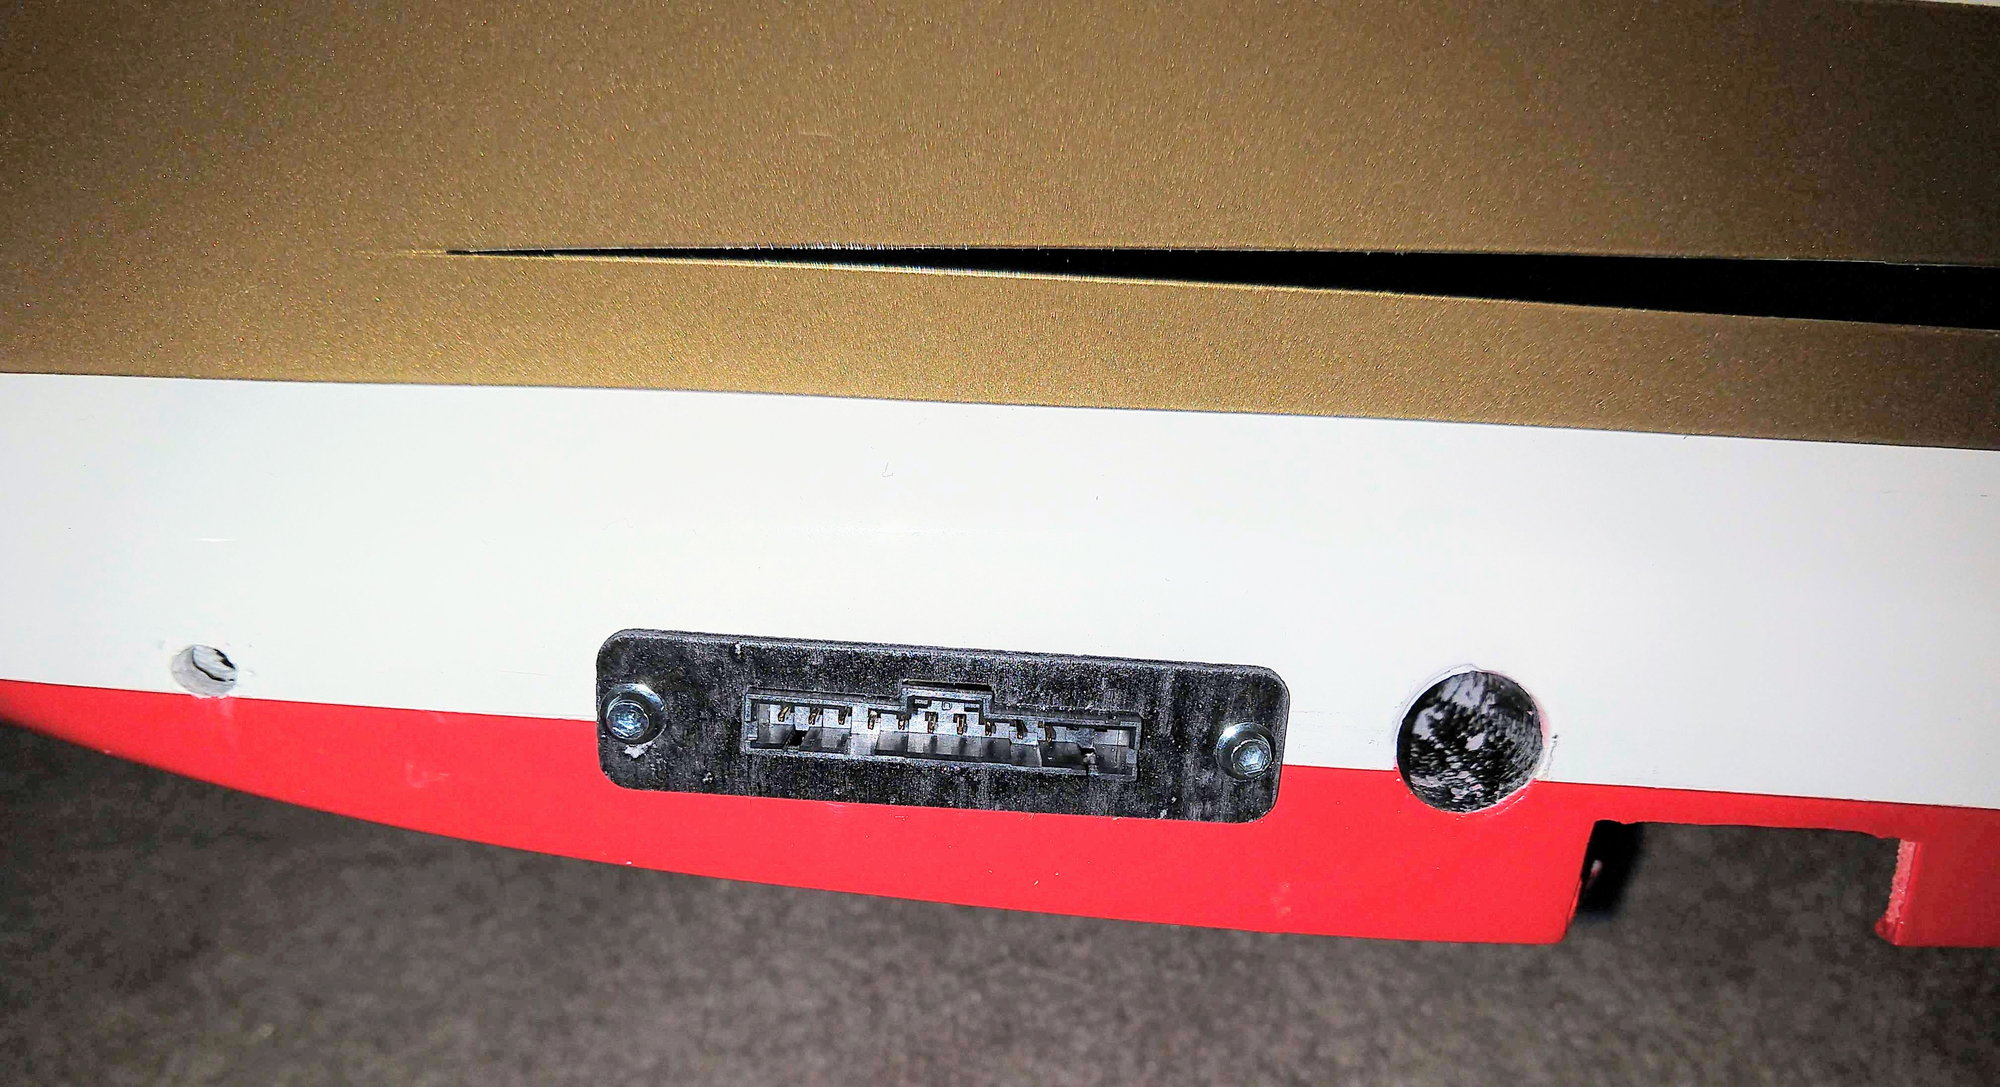
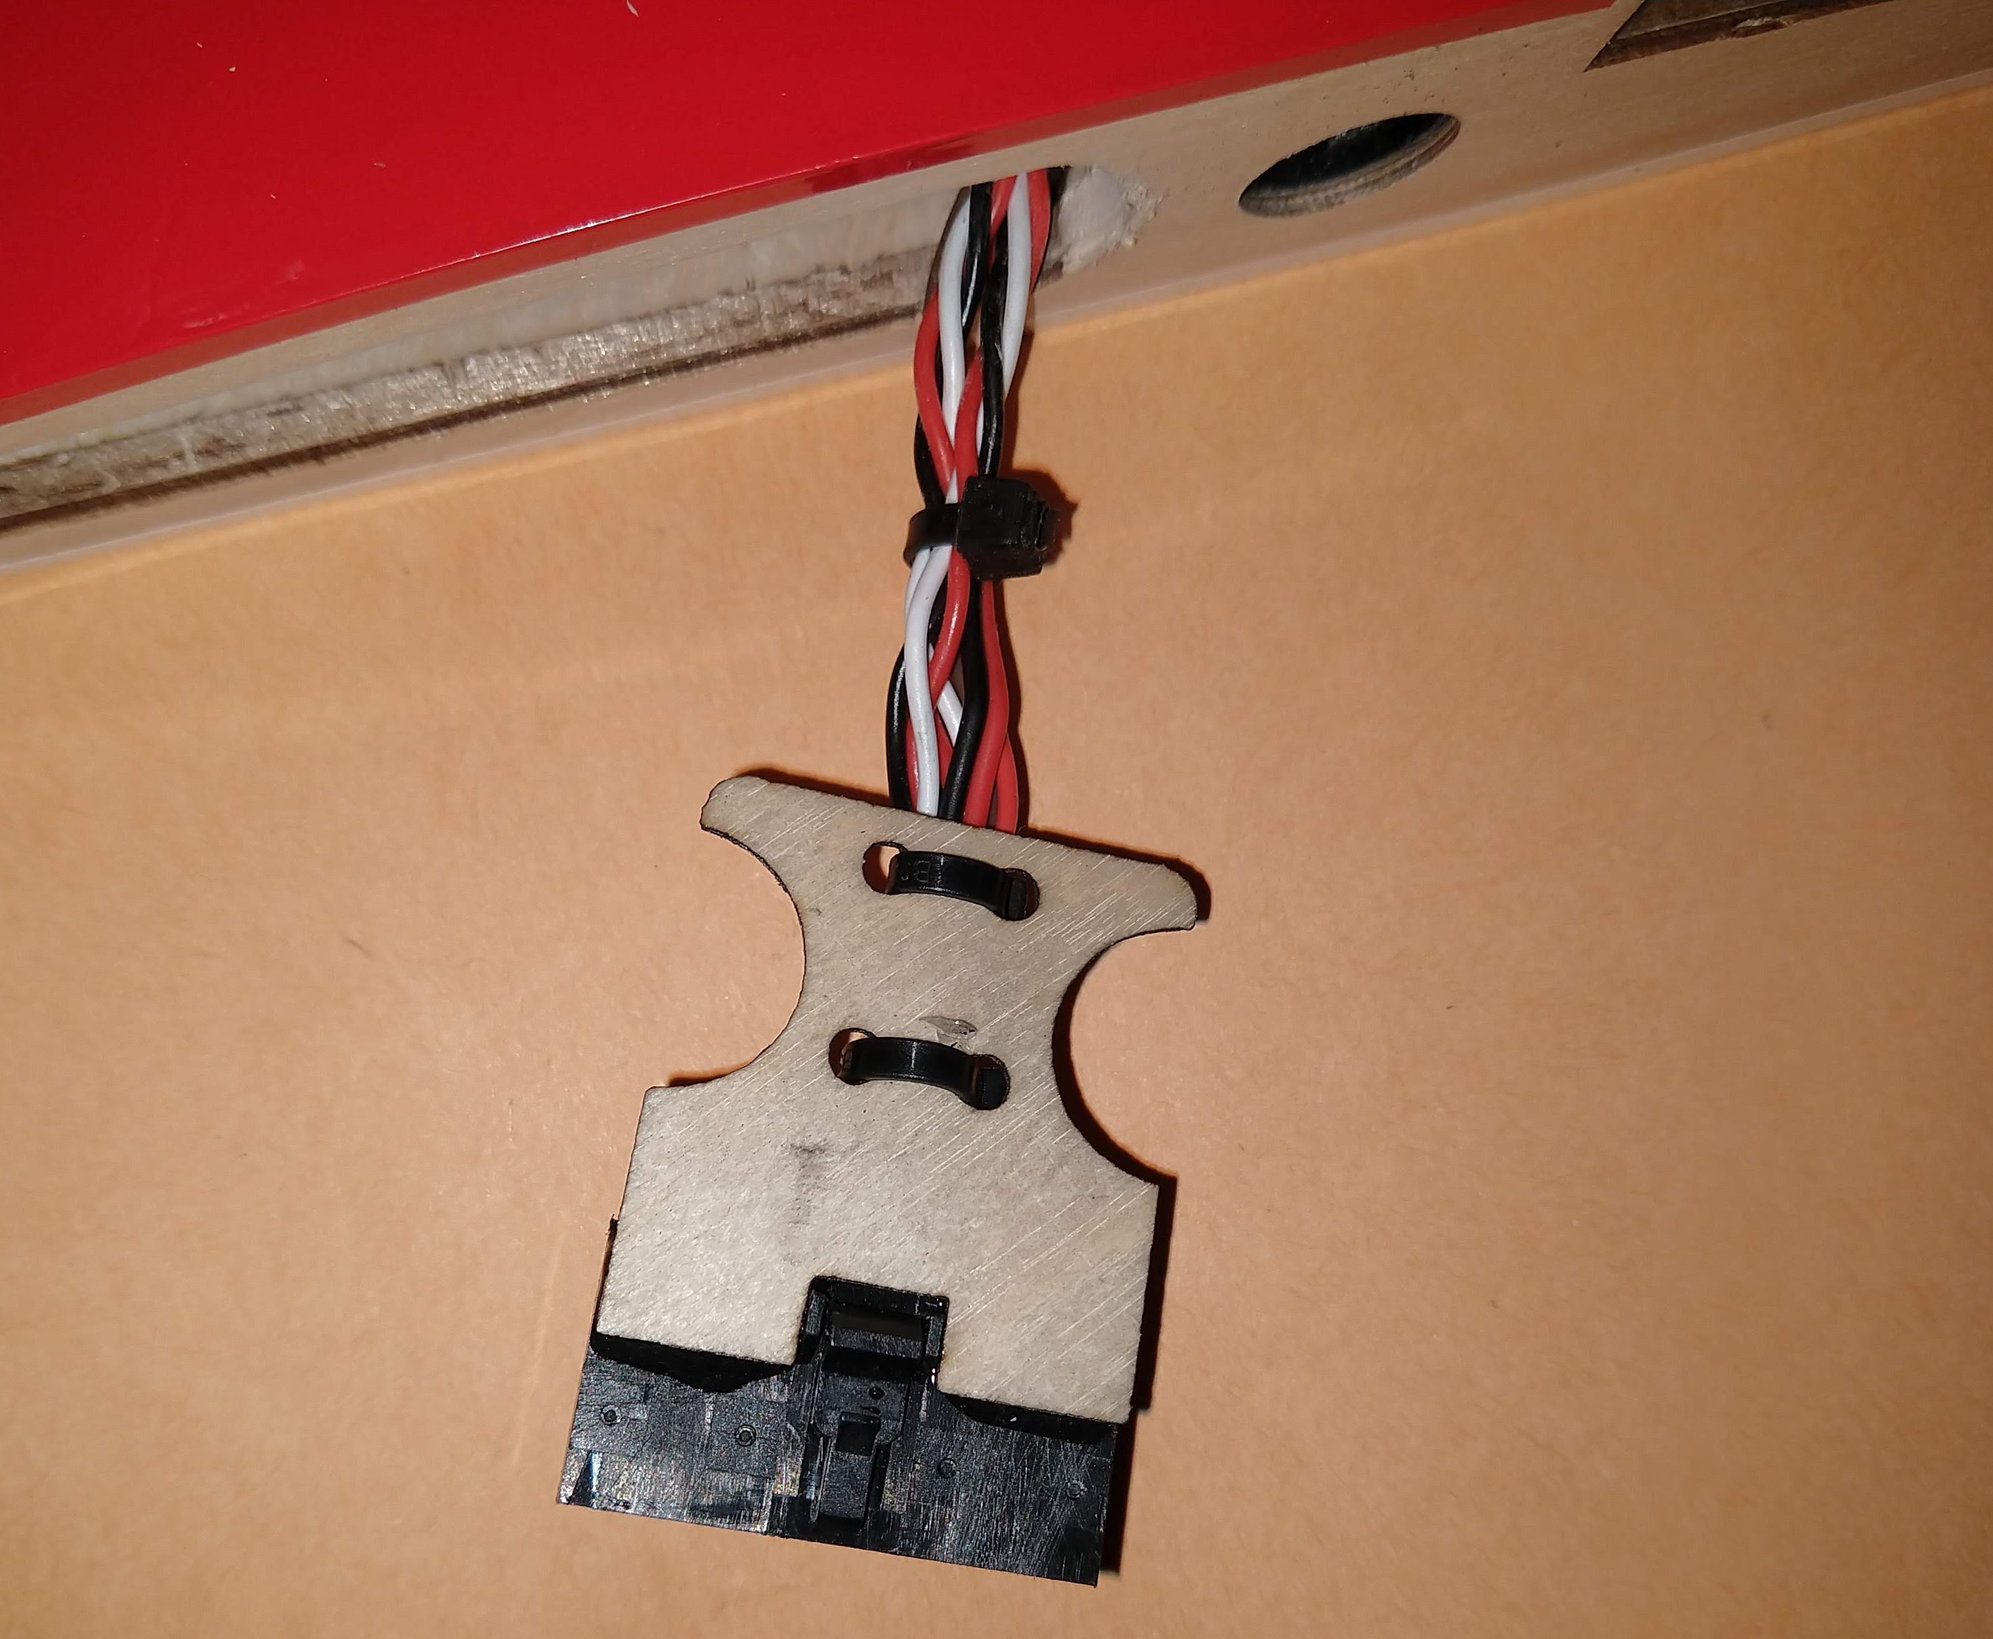
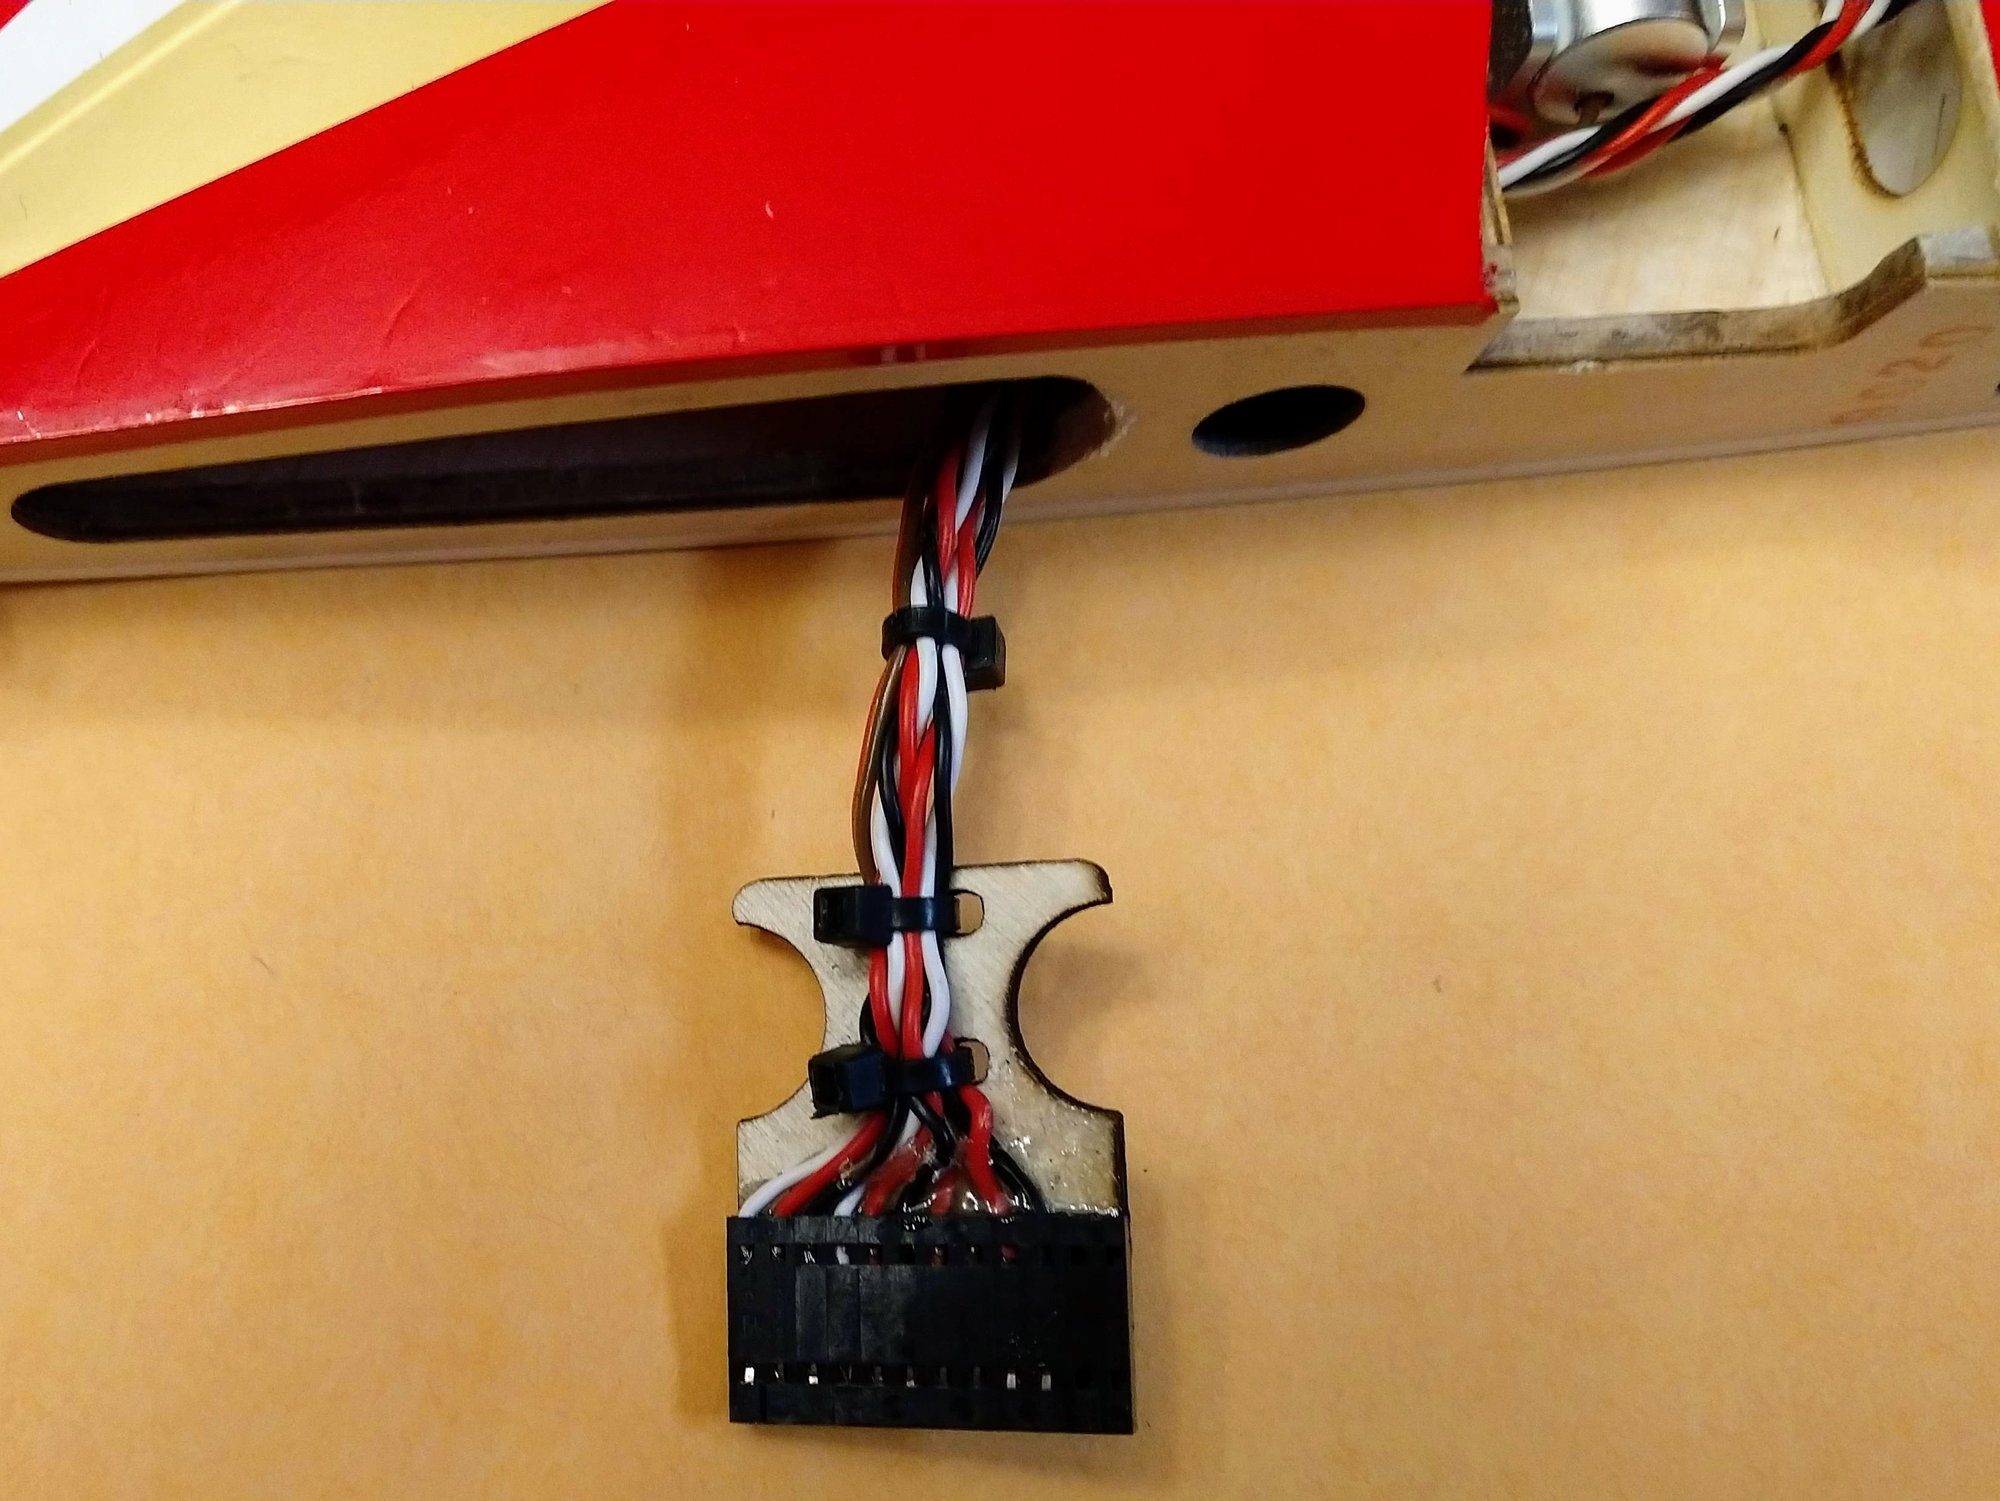
I also made a wing connector wire strain relief.
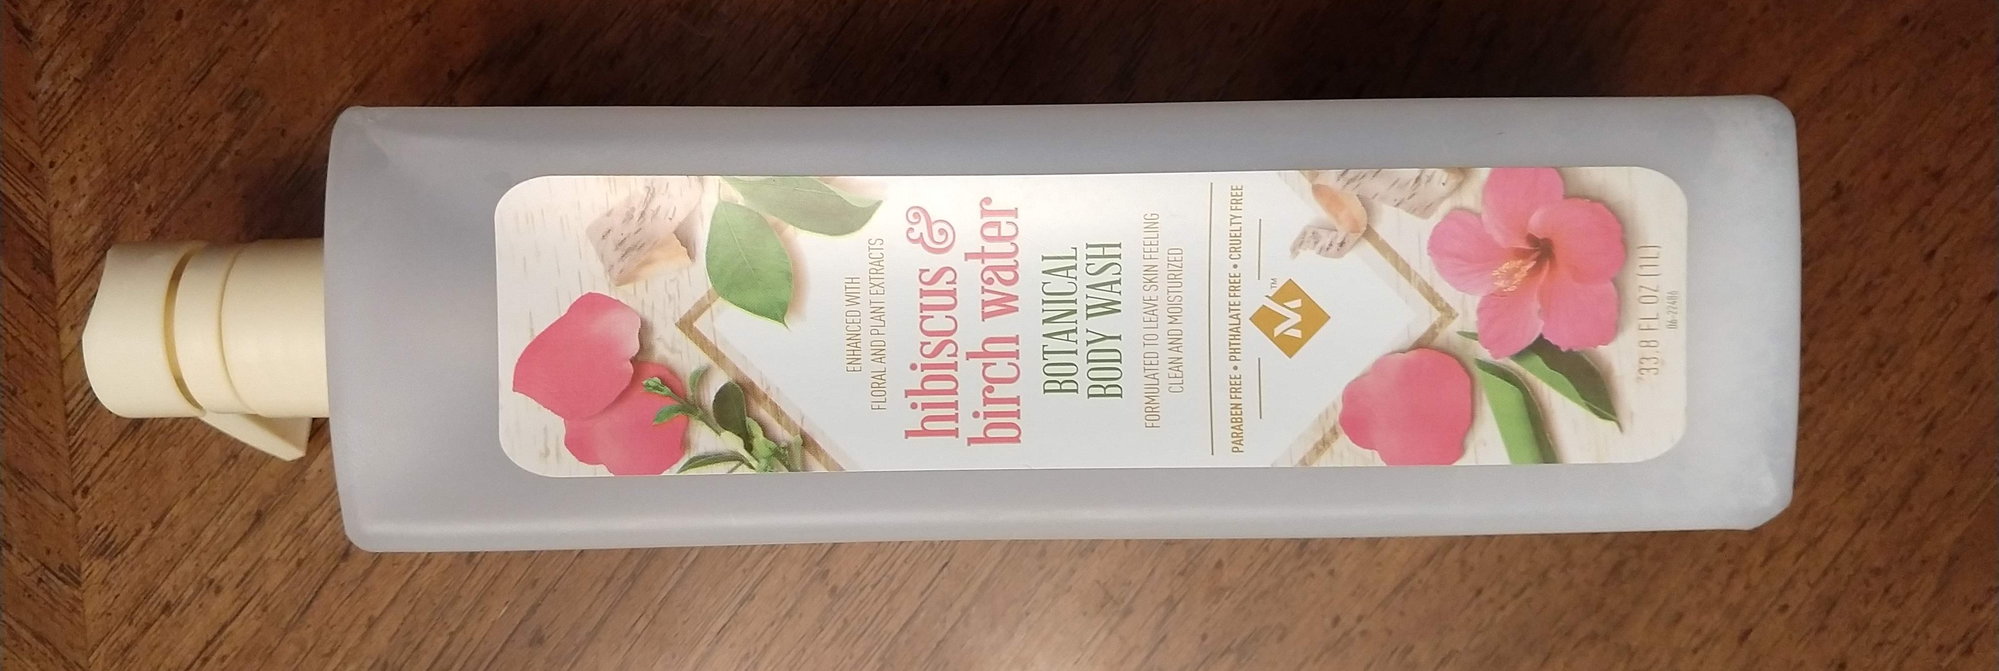
Tank donor from Body wash bottle
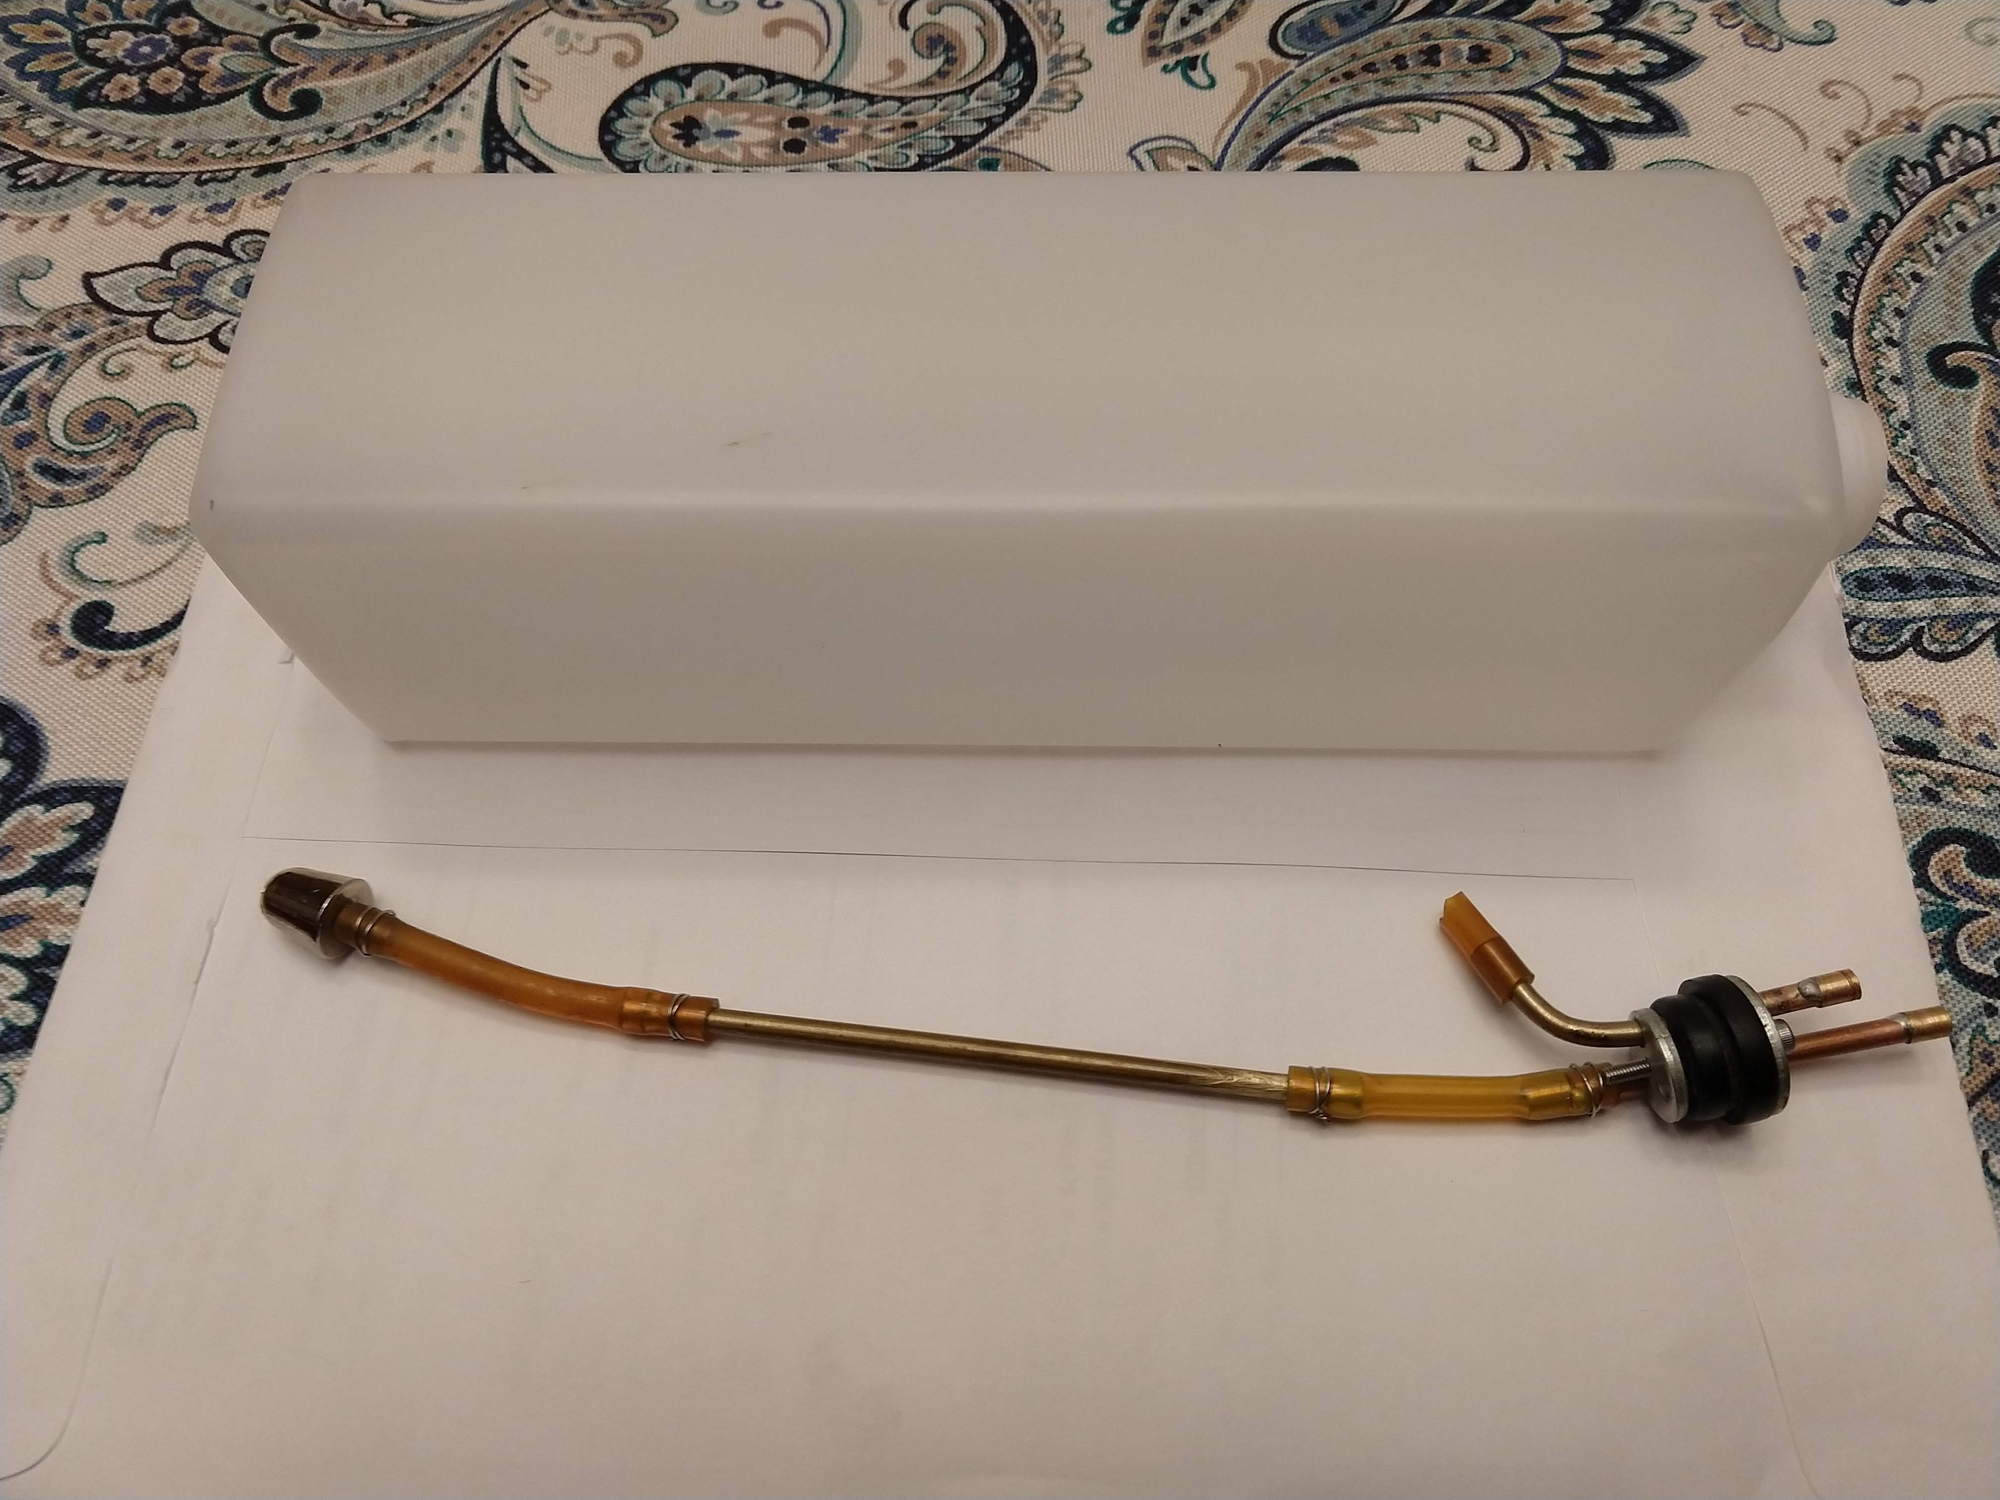
Clunk and vent tube prep.
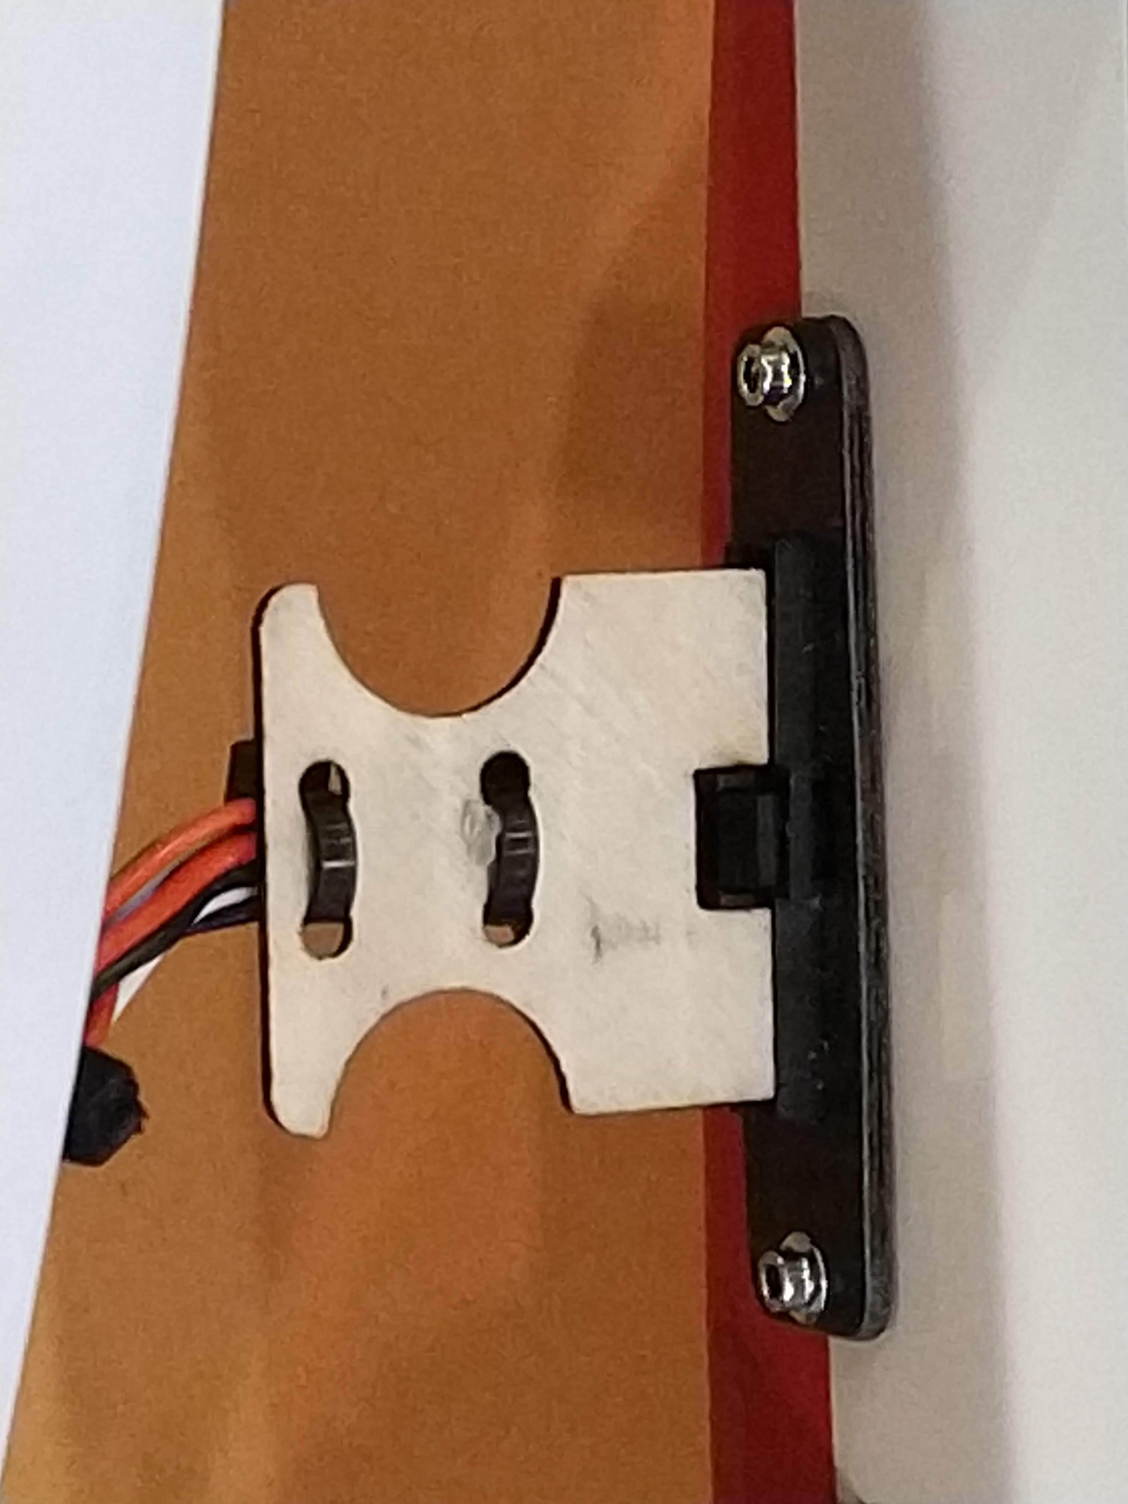
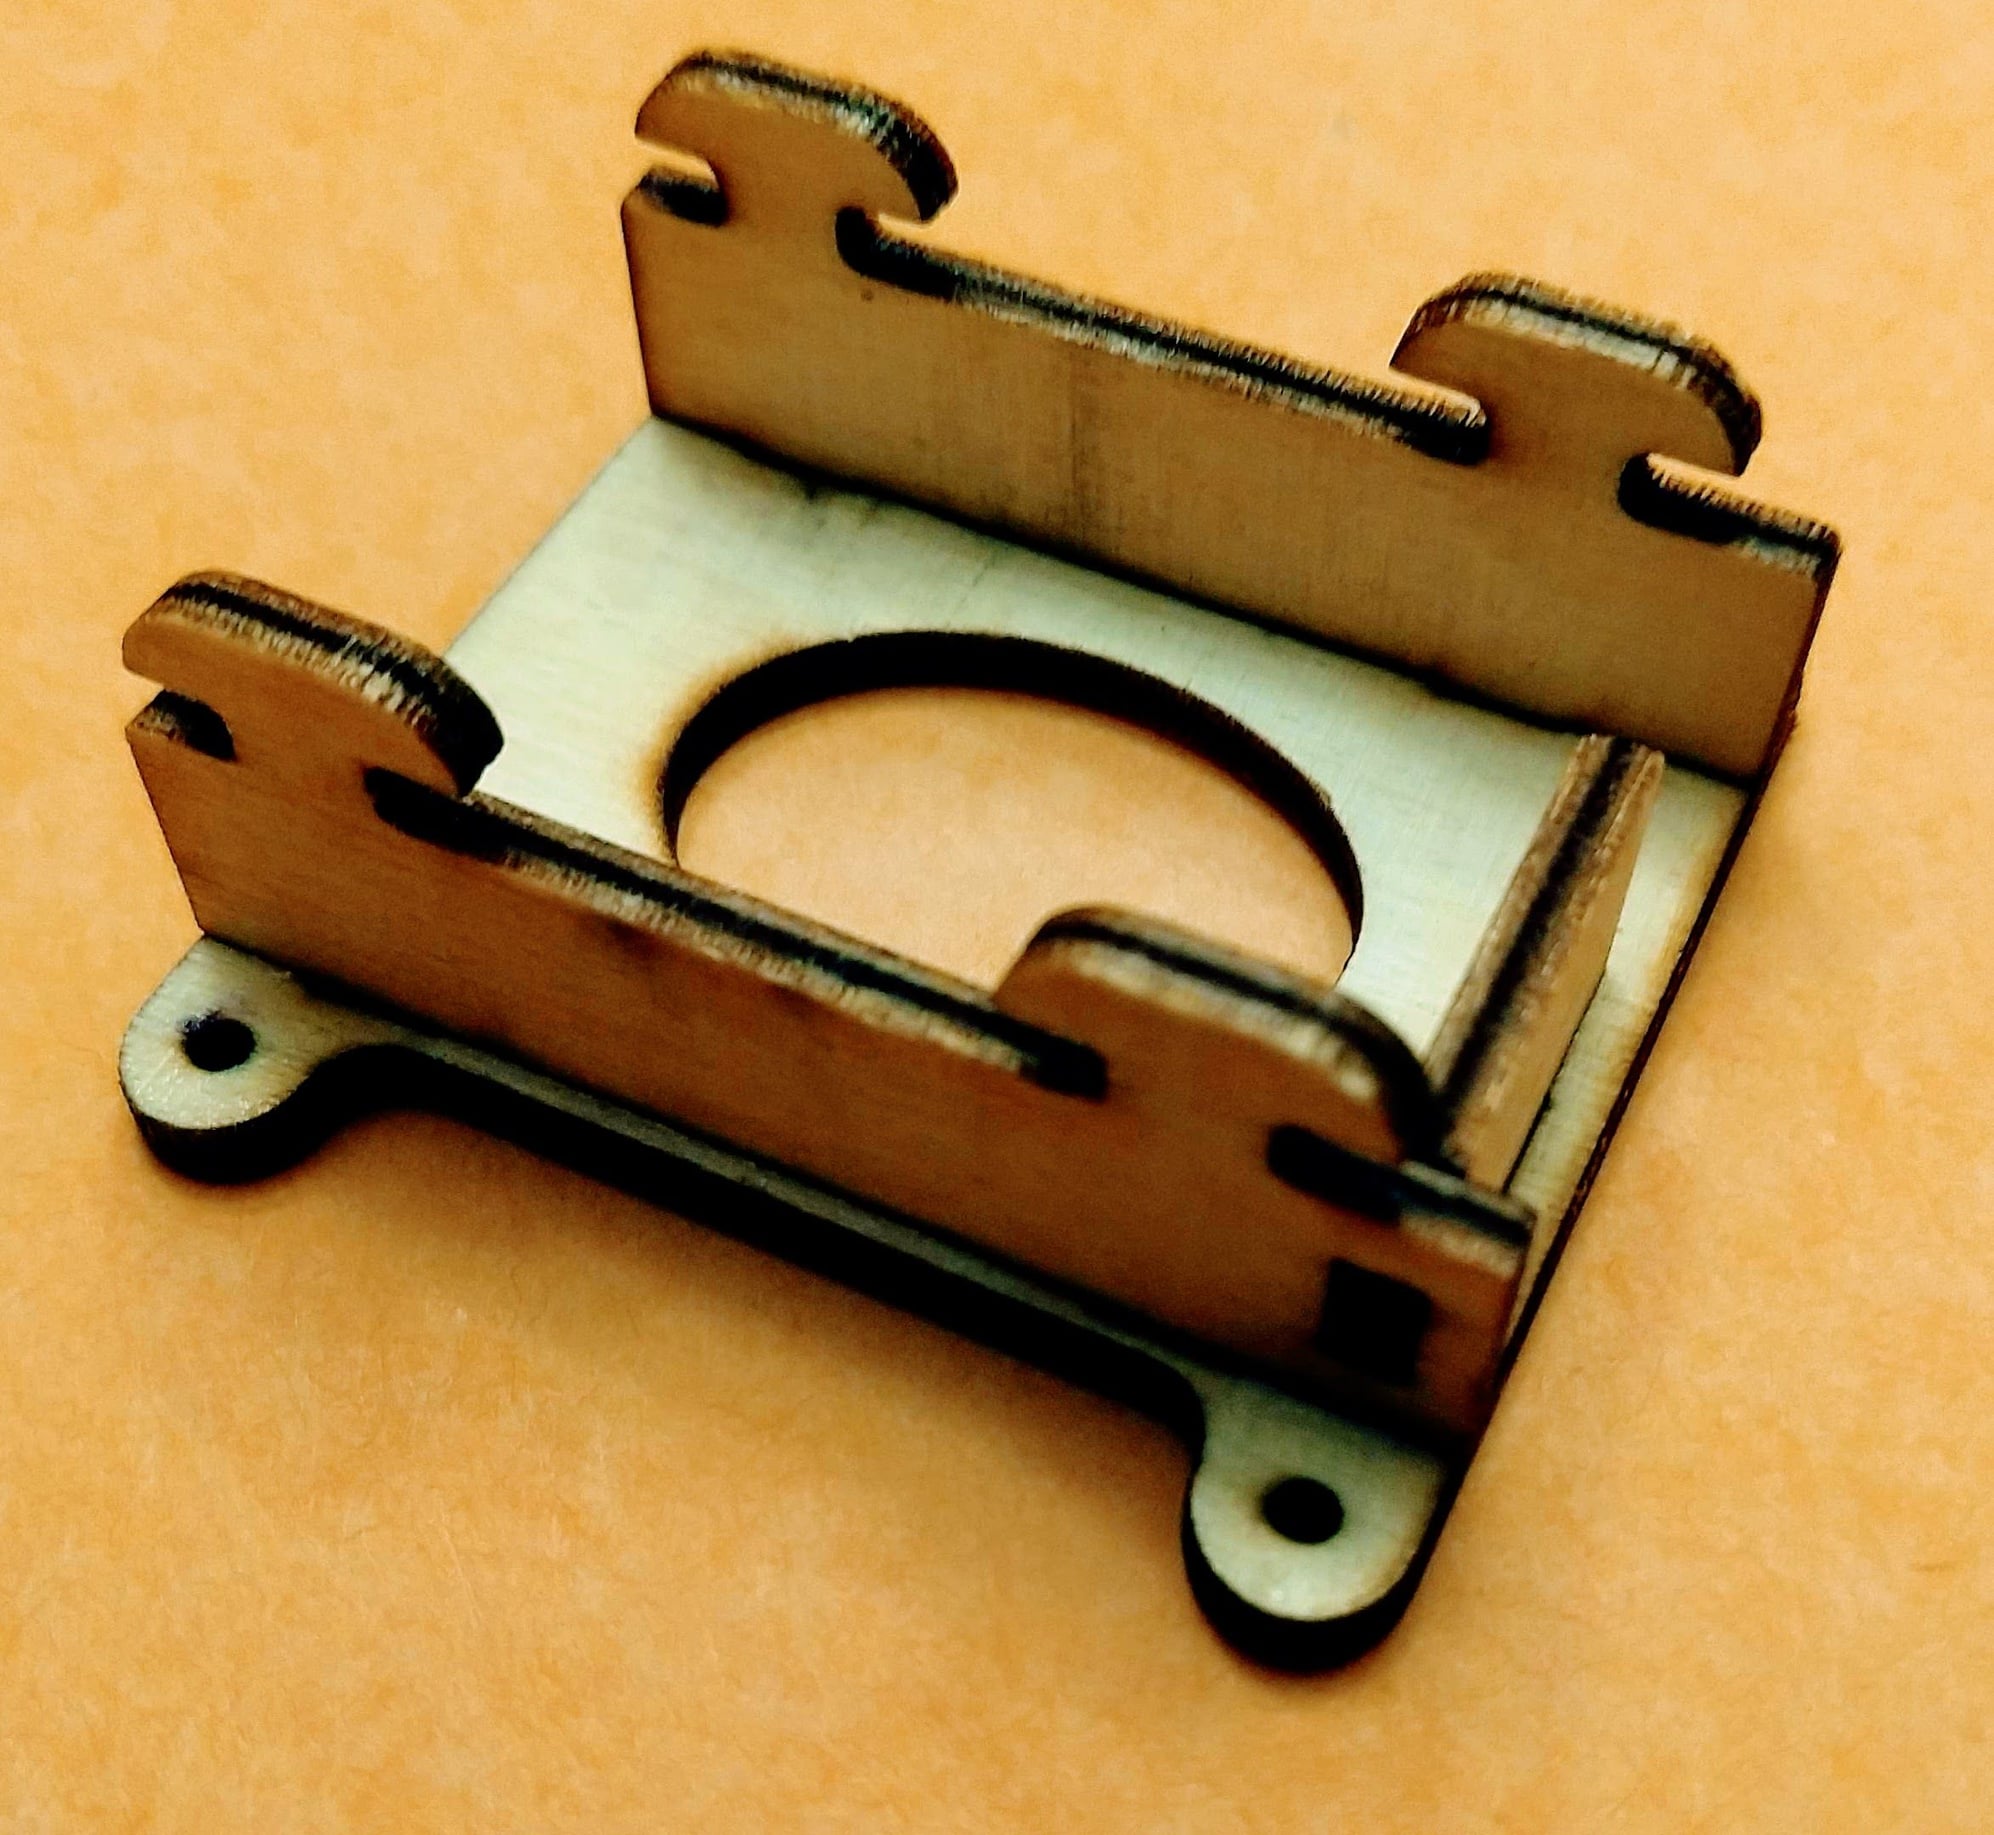
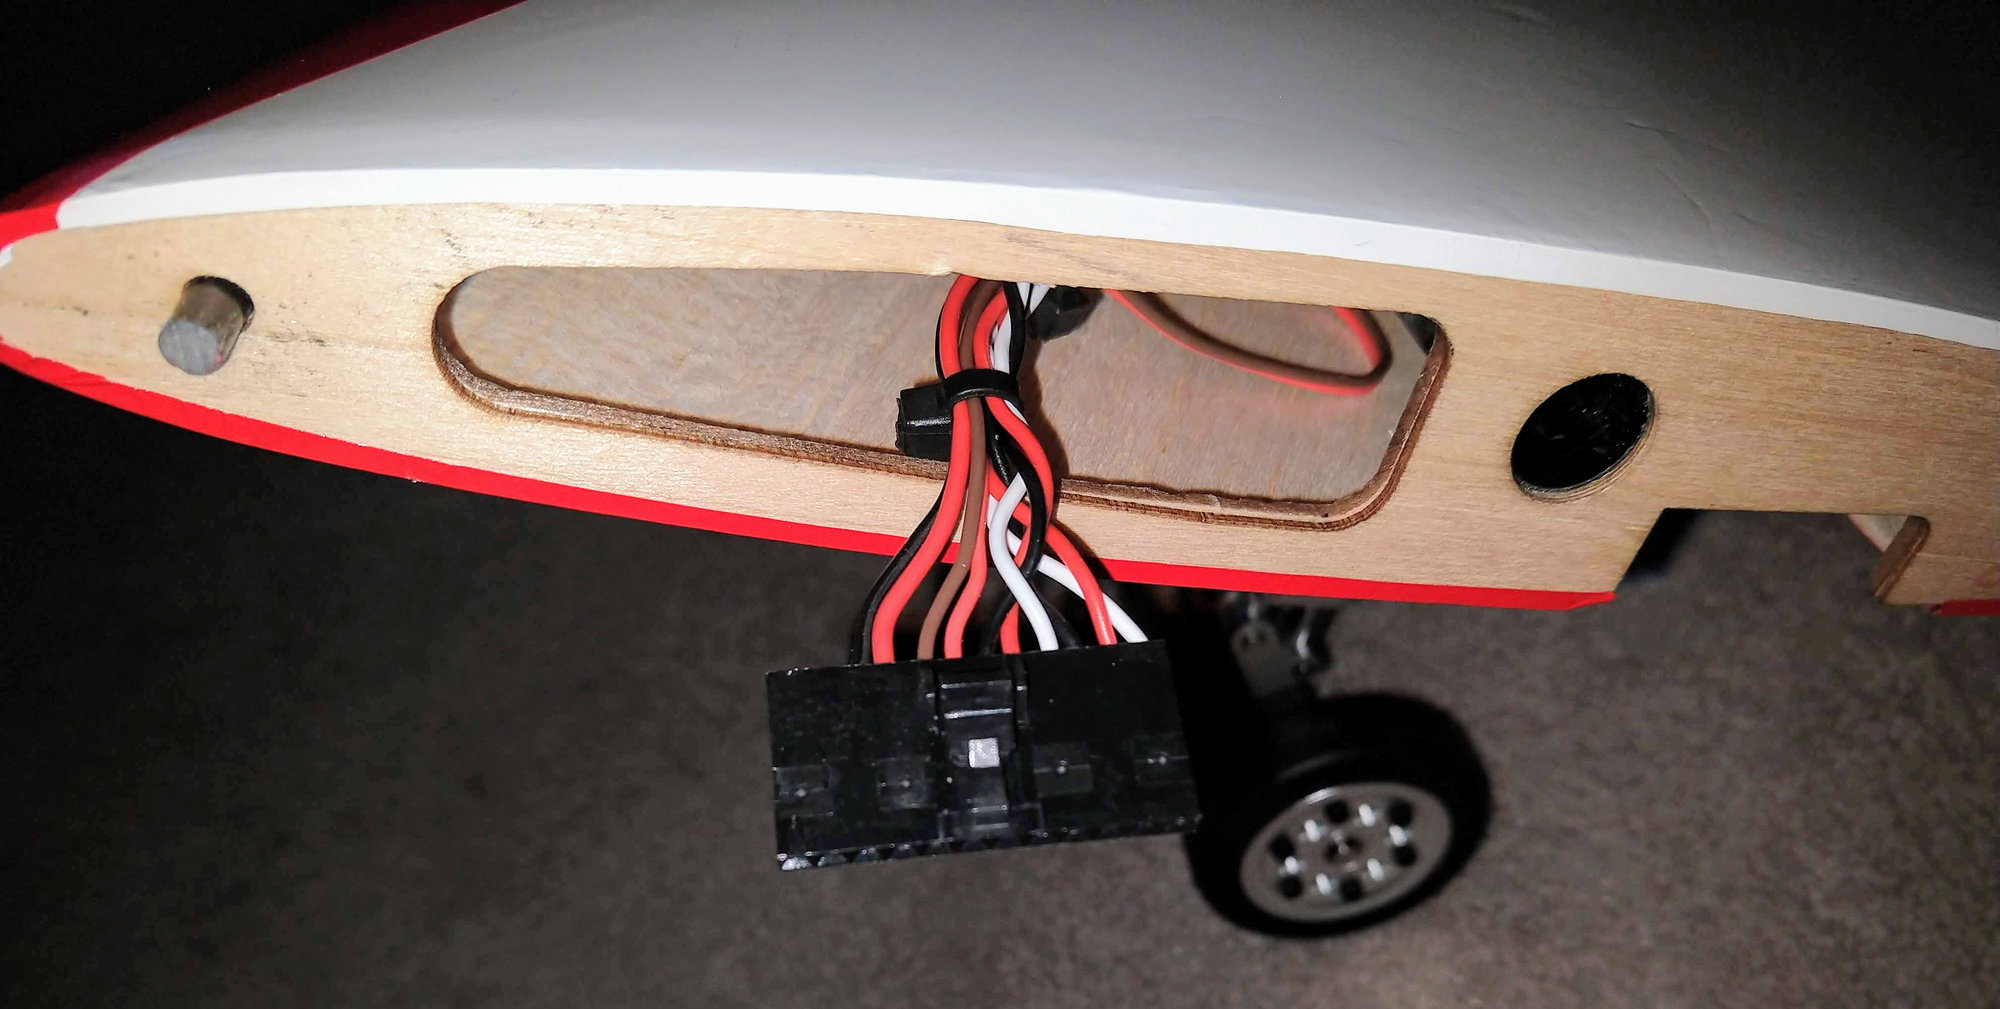
Decided to make a wire strain relief for the wing plug connector.
Came up with a 1 Liter fuel tank that fits perfect, it is from a body wash product sold at Sam's club in the US.
I also made a wing connector wire strain relief.
Tank donor from Body wash bottle
Clunk and vent tube prep.
Decided to make a wire strain relief for the wing plug connector.
The following users liked this post:
jcpl (02-11-2020)
 01-29-2020, 03:59 PM
#898

Join Date: May 2014
Posts: 344
Likes: 0
Received 0 Likes
on
0 Posts
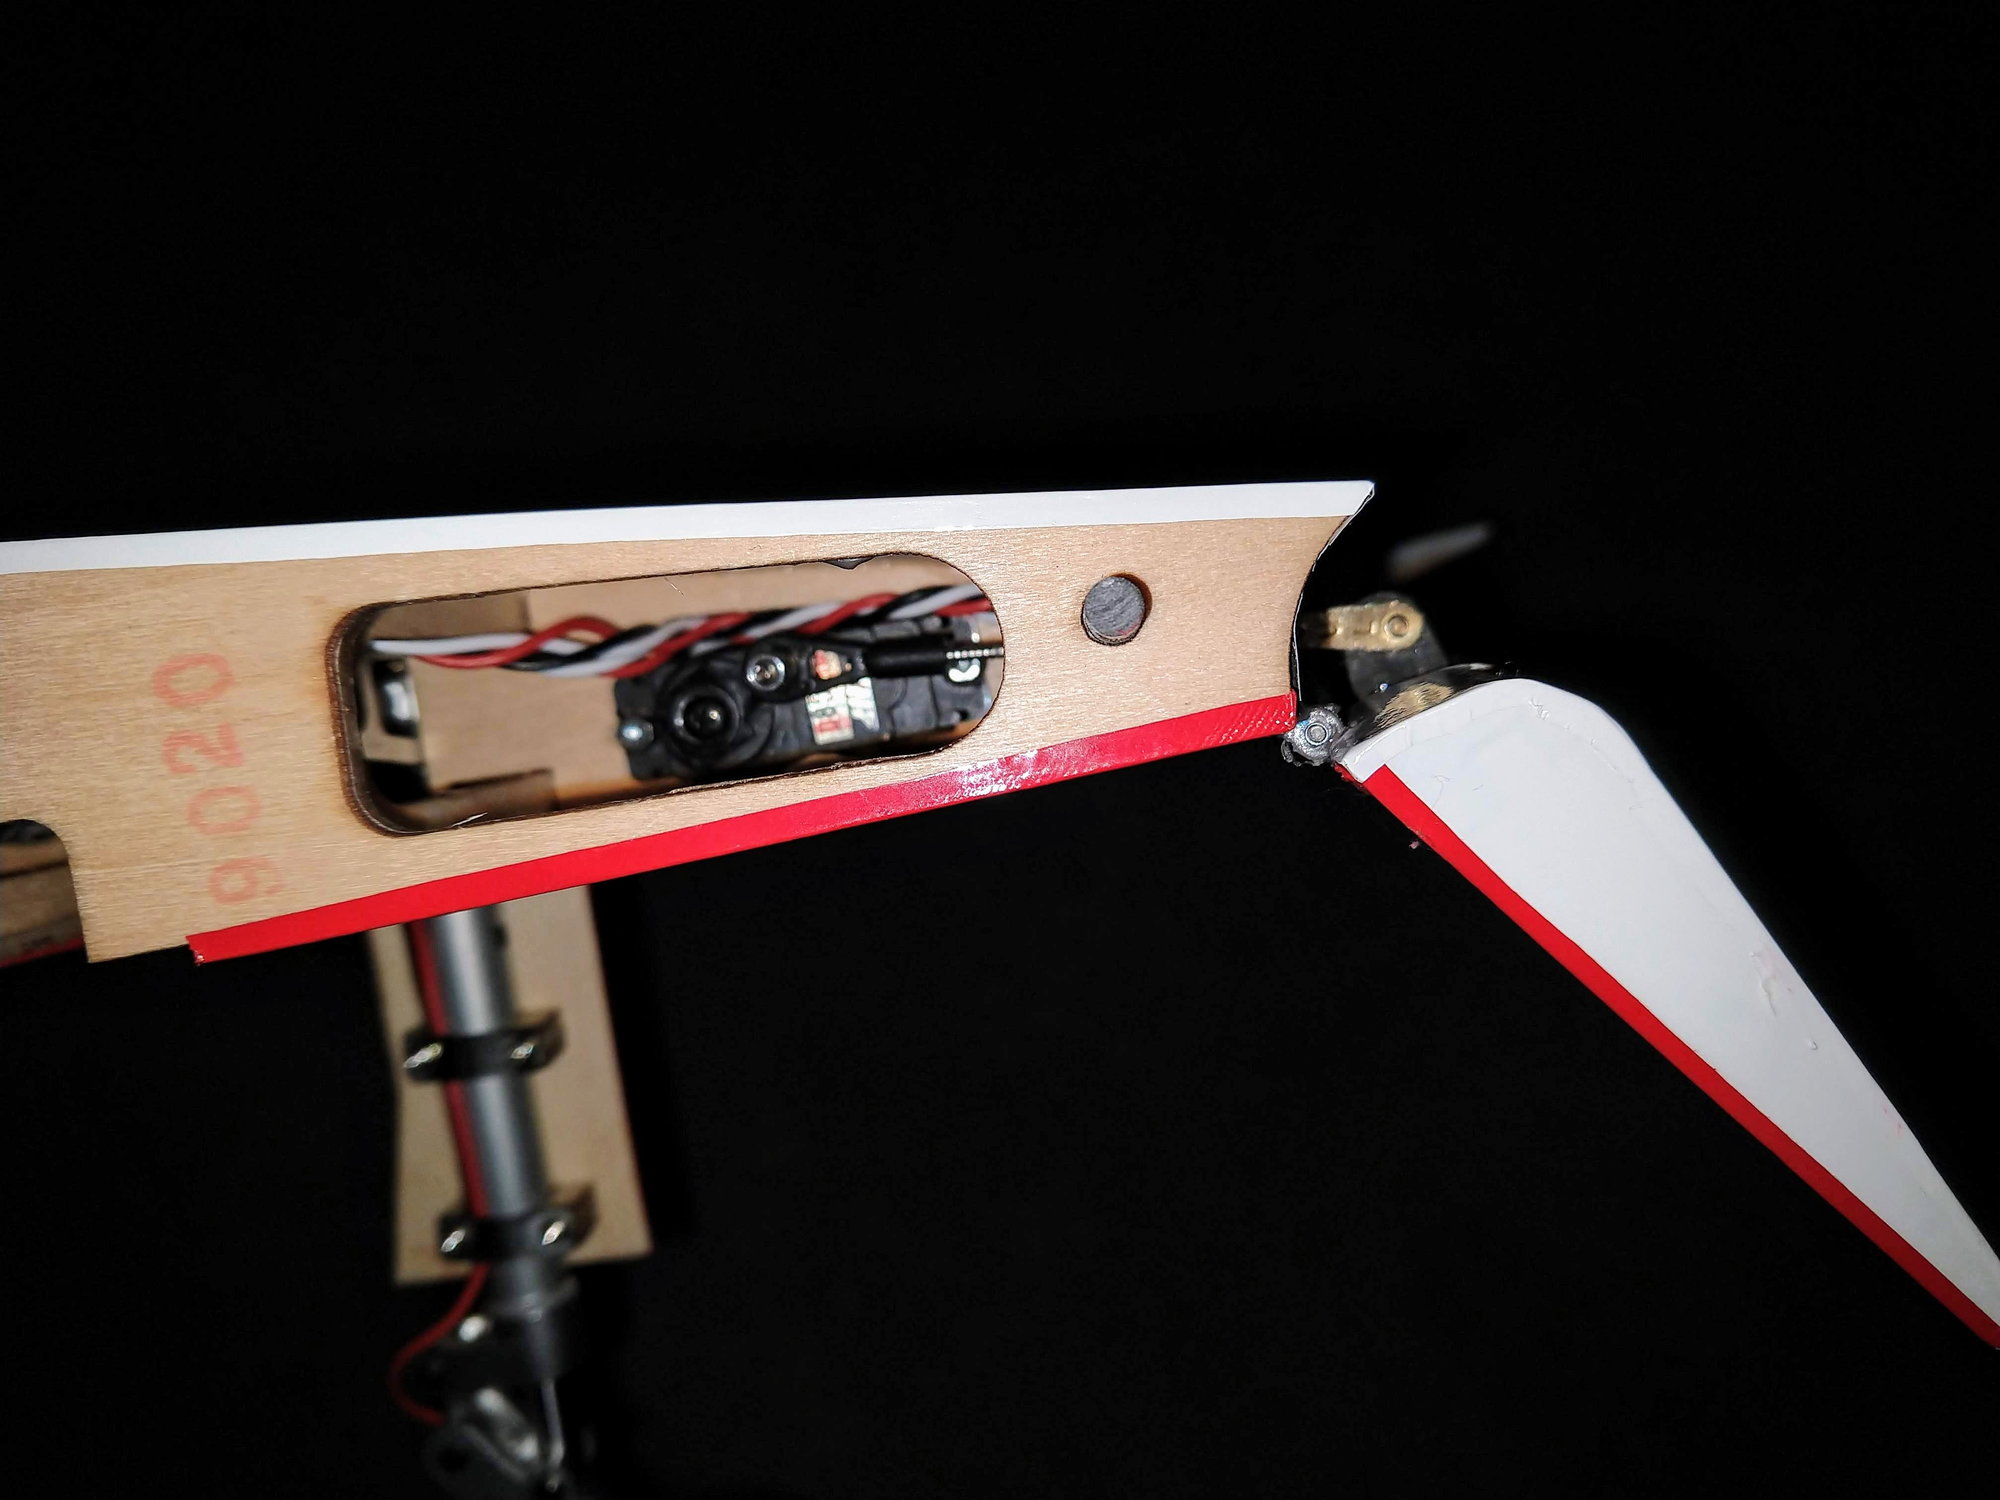
why did you choose to use the snap and break type ball link connector on the flap servo and not a solid ball link connector.. i only use the snap and break ones on a heli to save the gear train in a crash.. just my opinion..