


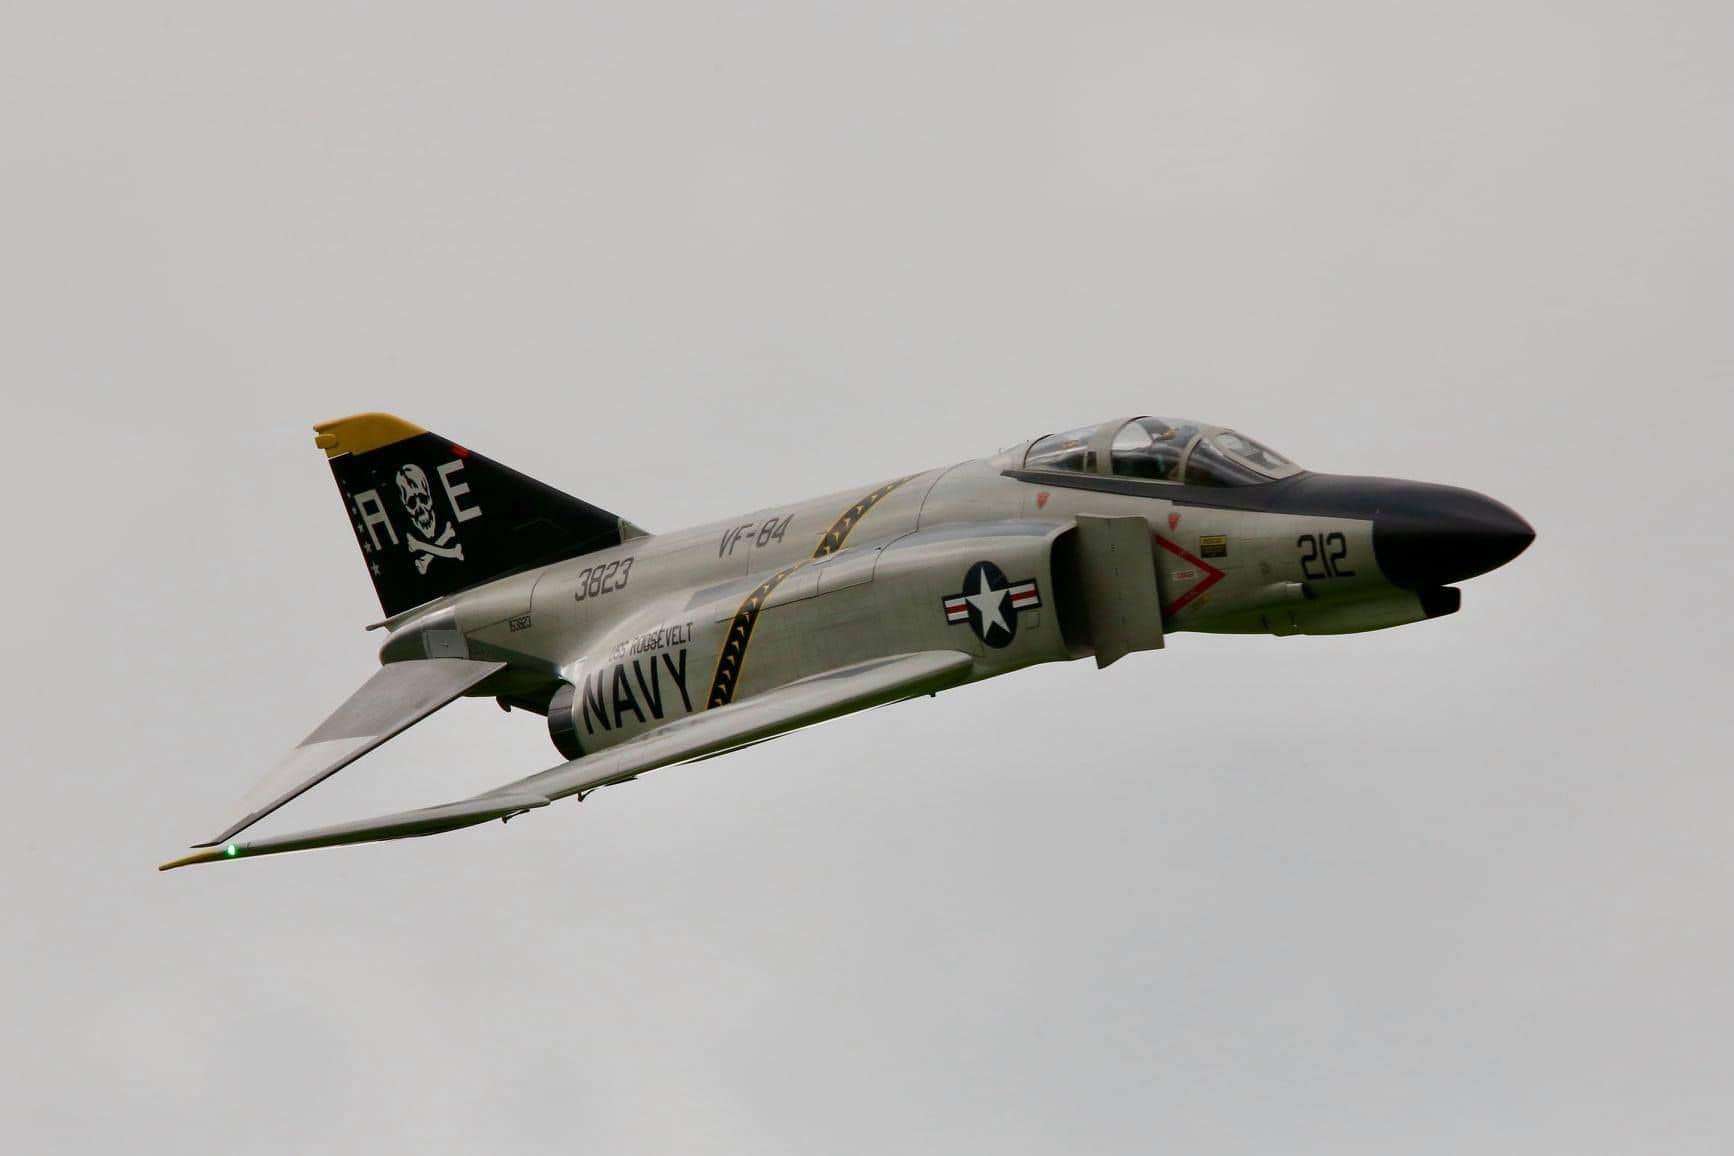
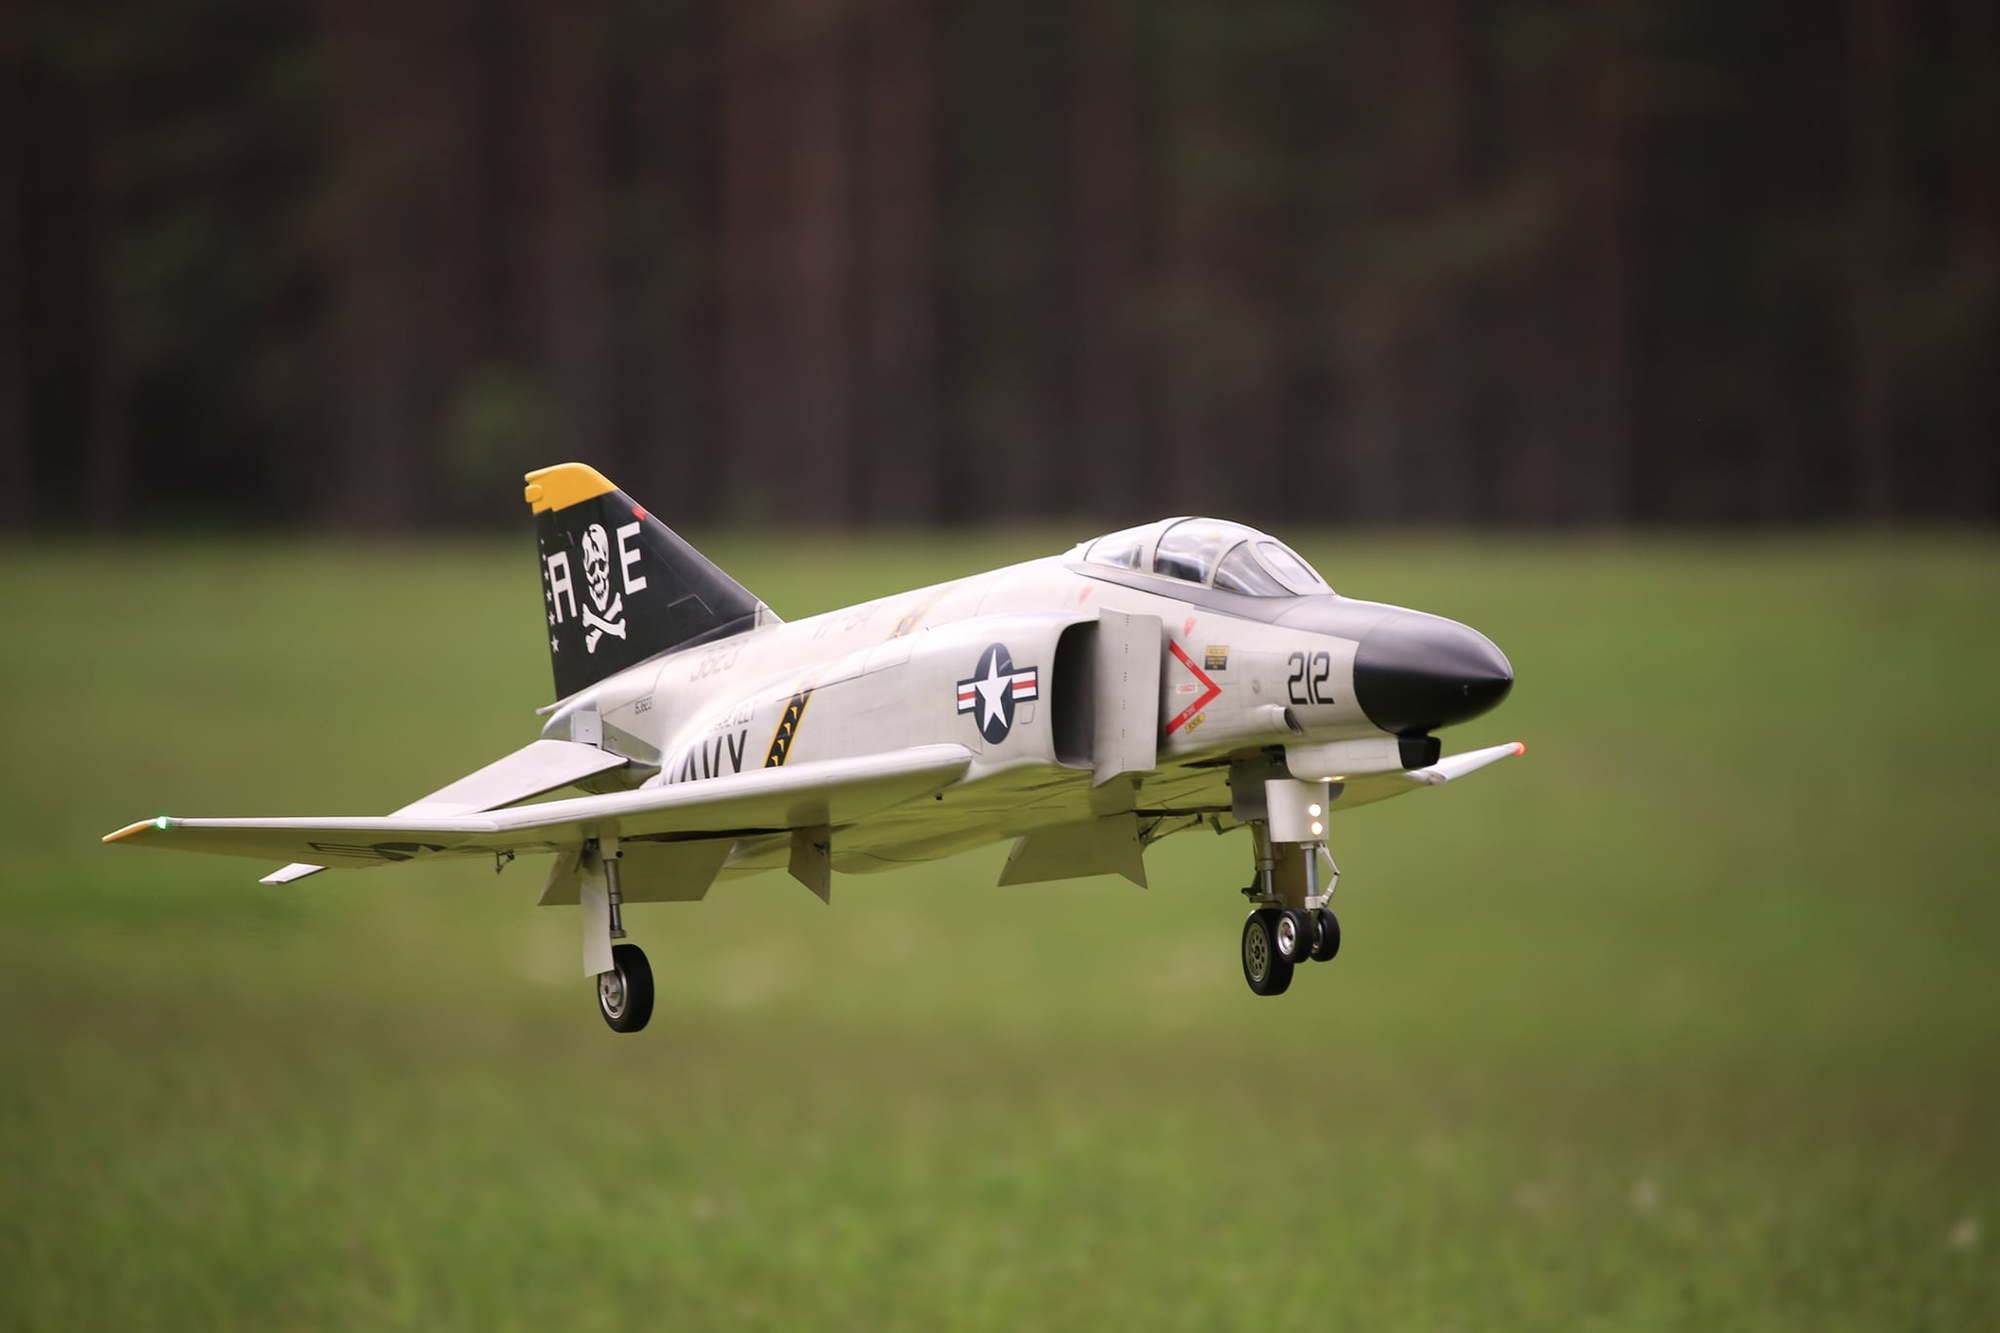
Skymaster 1:7.5 F-4 Phantom

The following users liked this post:
yeahbaby (06-19-2020)


 06-26-2020, 08:38 AM
#280

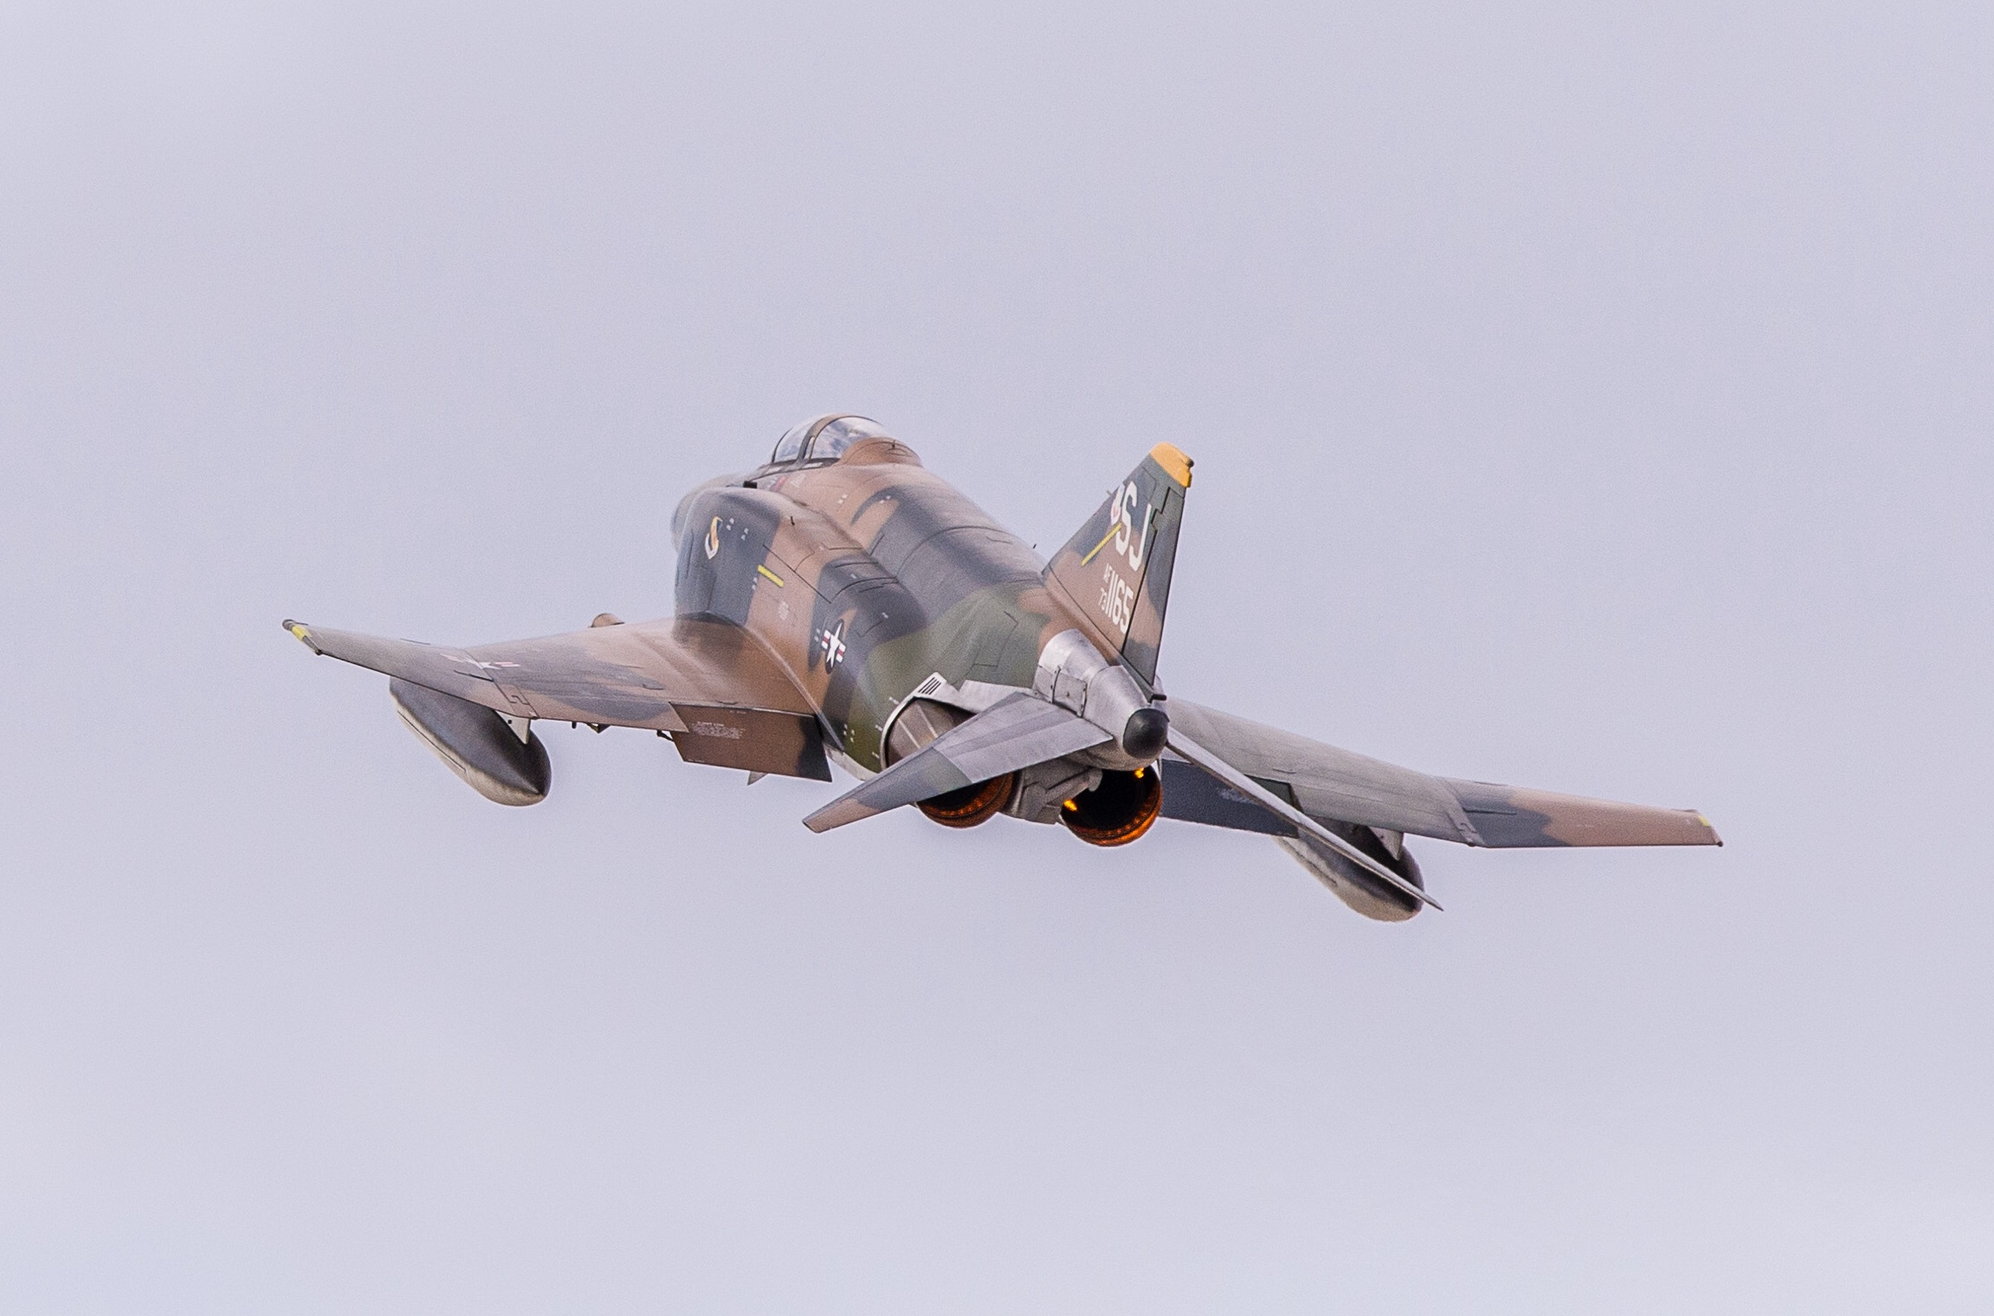
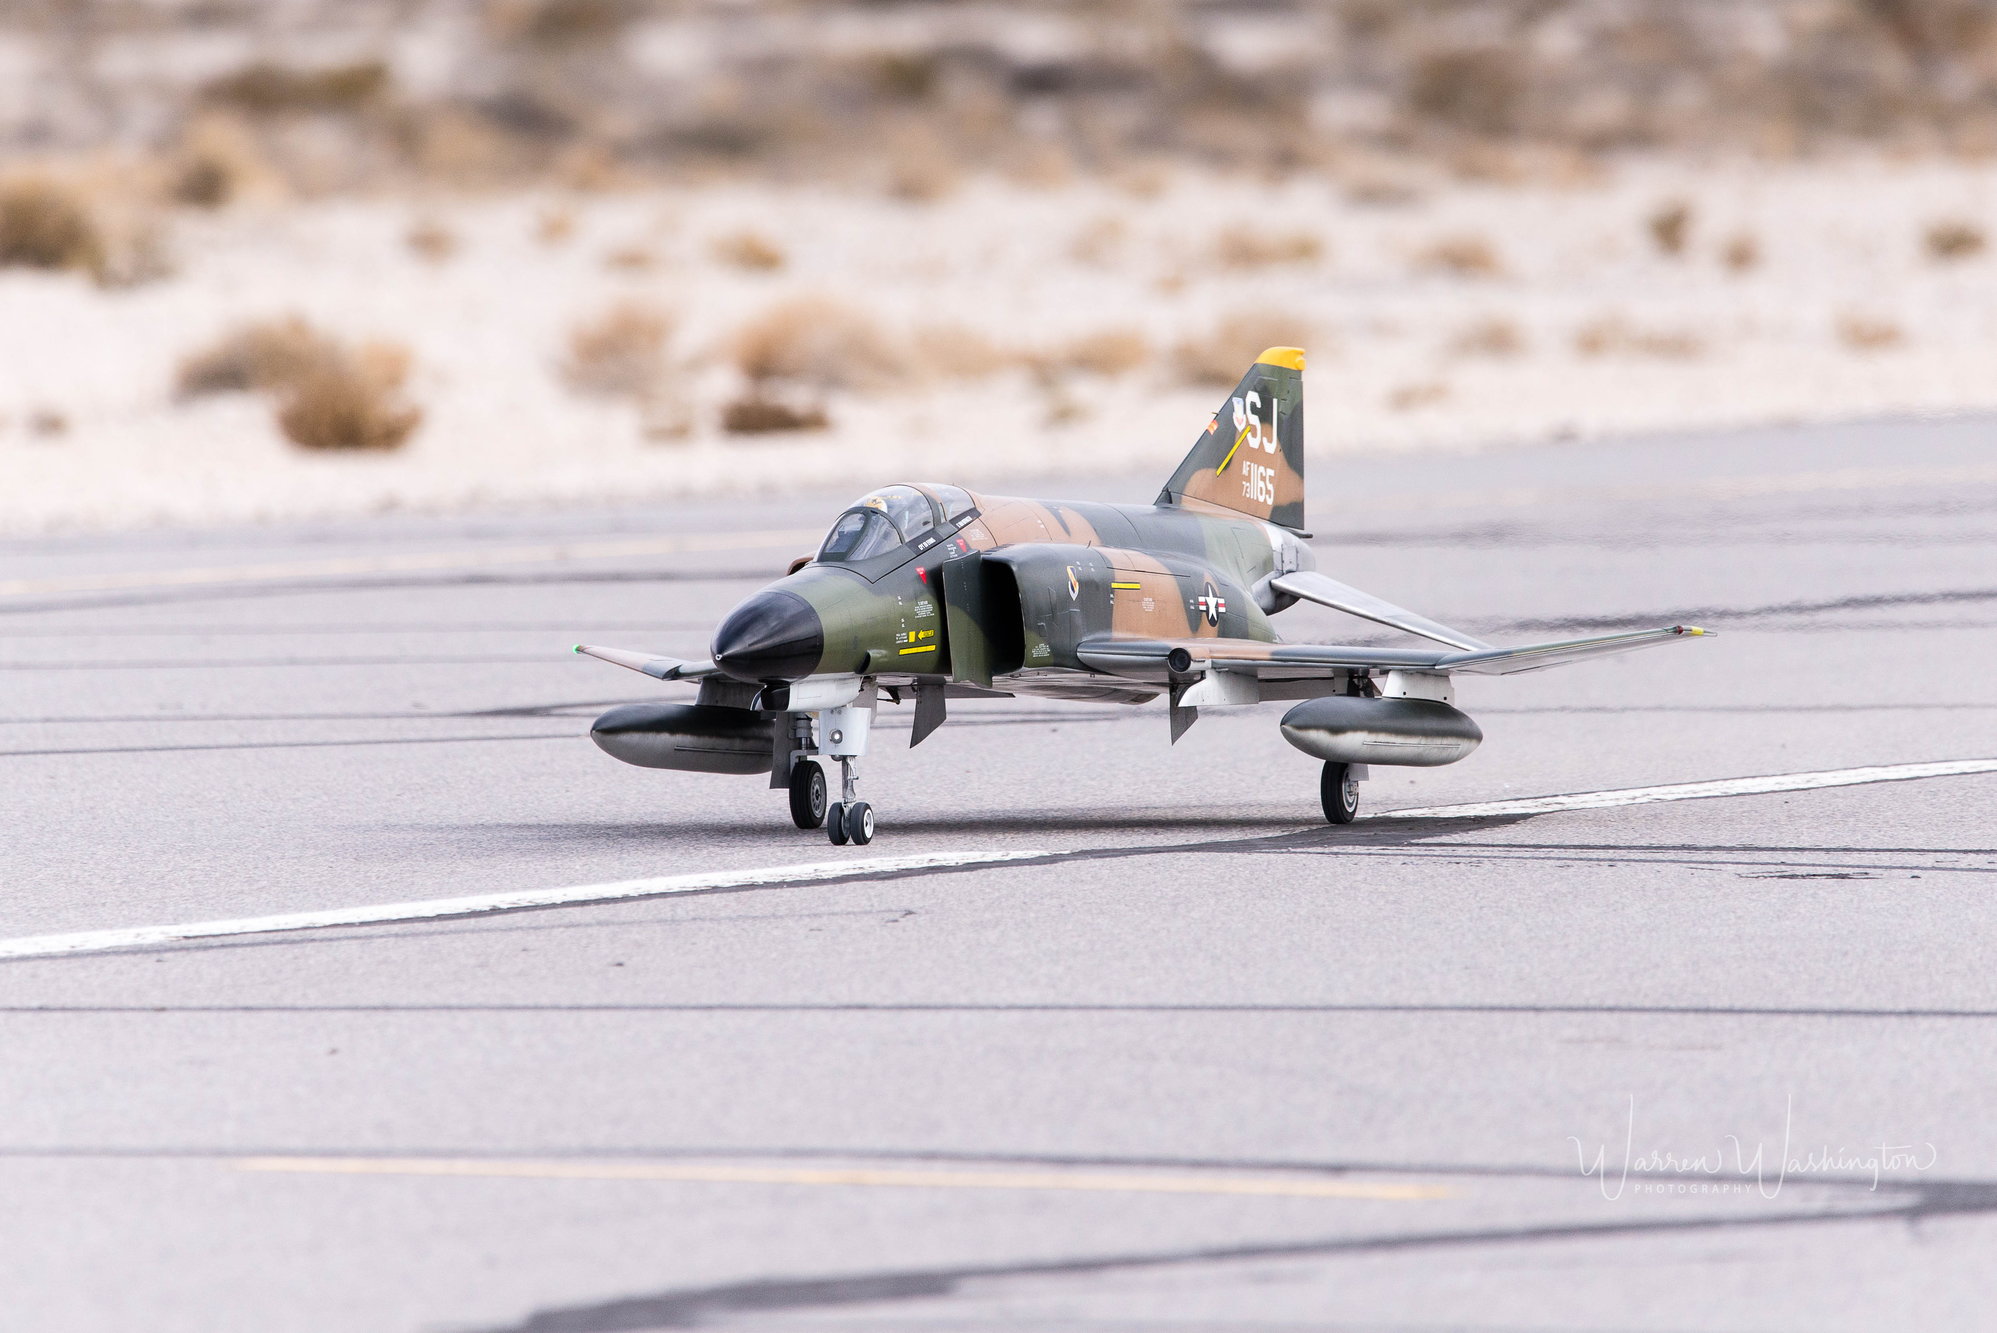
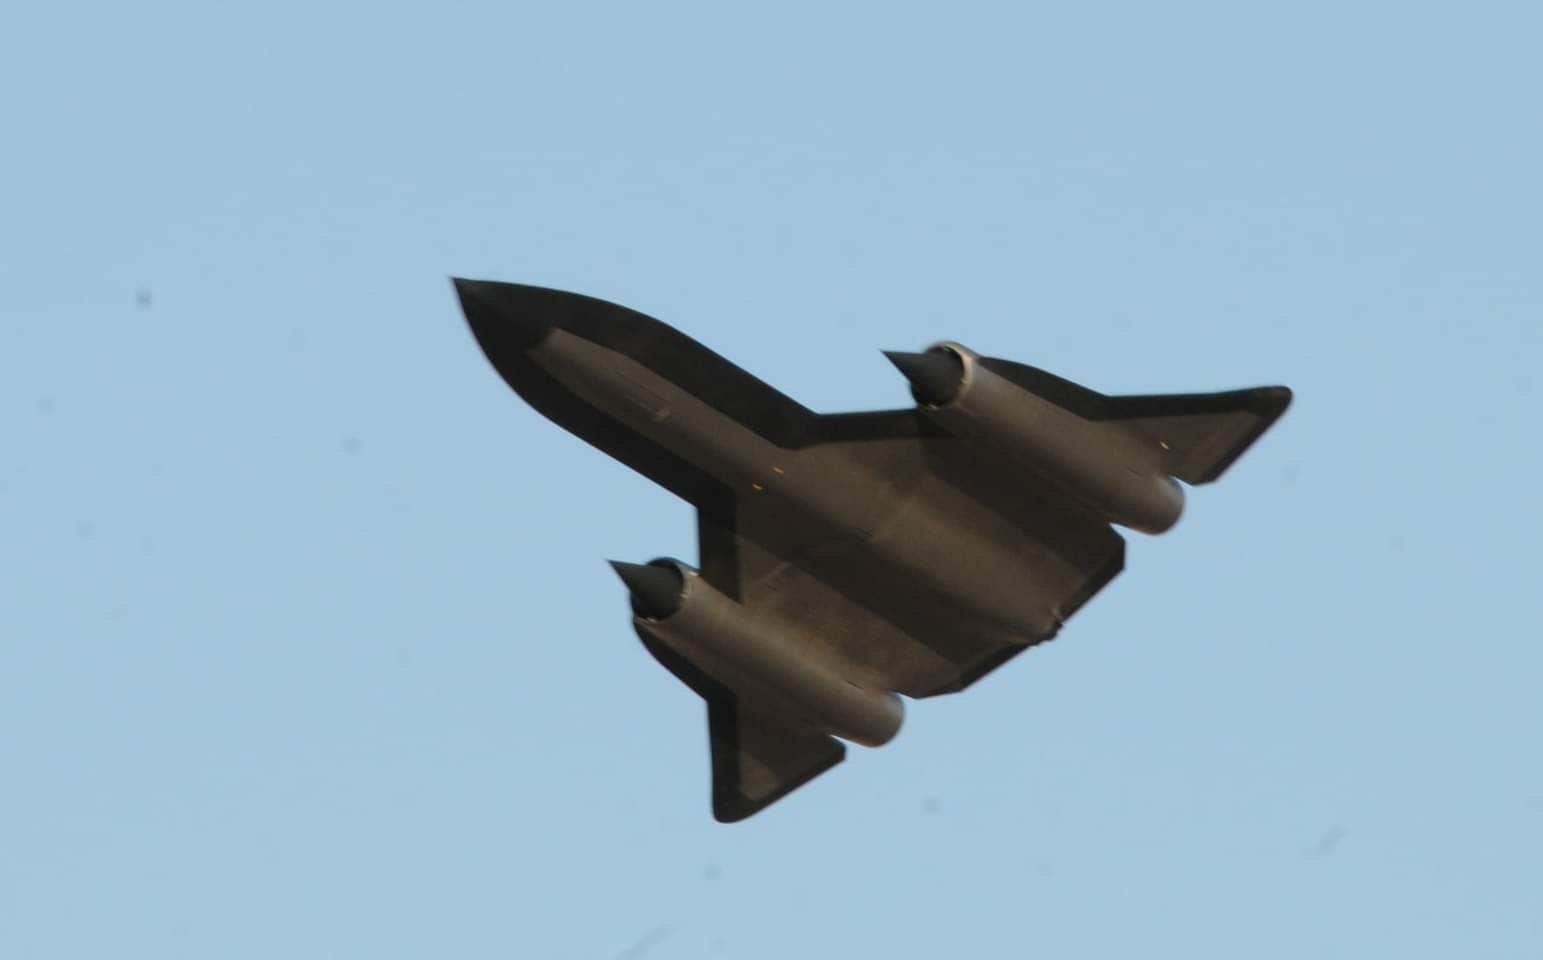
Hey F-4 Owners, Just wanted to give a "shout-out" to those who have posted there info on this Jet, HERE ! Thanx to a little skill and a LOT of research, I was able to SUCCESSFULLY Maiden my Skymaster 1/7.5 scale F-4 last weekend. I got her with 6 flights on her, by the builder. Had to switch from the existing "PowerBox" set-up, to a Futaba system. Went thru all of the systems over the winter, Re-C.G.'ed the airframe, No Fuel( except UAT), Canopy UP, Gear Deployed @ 320mm FLE. The aircraft flew quite well at that C.G. and after 2 trim flights, she was flying Great with the installed JetCat 160 Titan. Thanx for ALL of your Advice.....!
06-19-2021, 11:49 AM
#283

Hello,
I had the maiden flight of my Phantom last weekend.
It went well only thanks to the information I found in this thread quite a while back;
I have a build-thread over at rcscalebuilder, but thought I'd post here as well.
This is after all THE Phantom-thread on the planet.
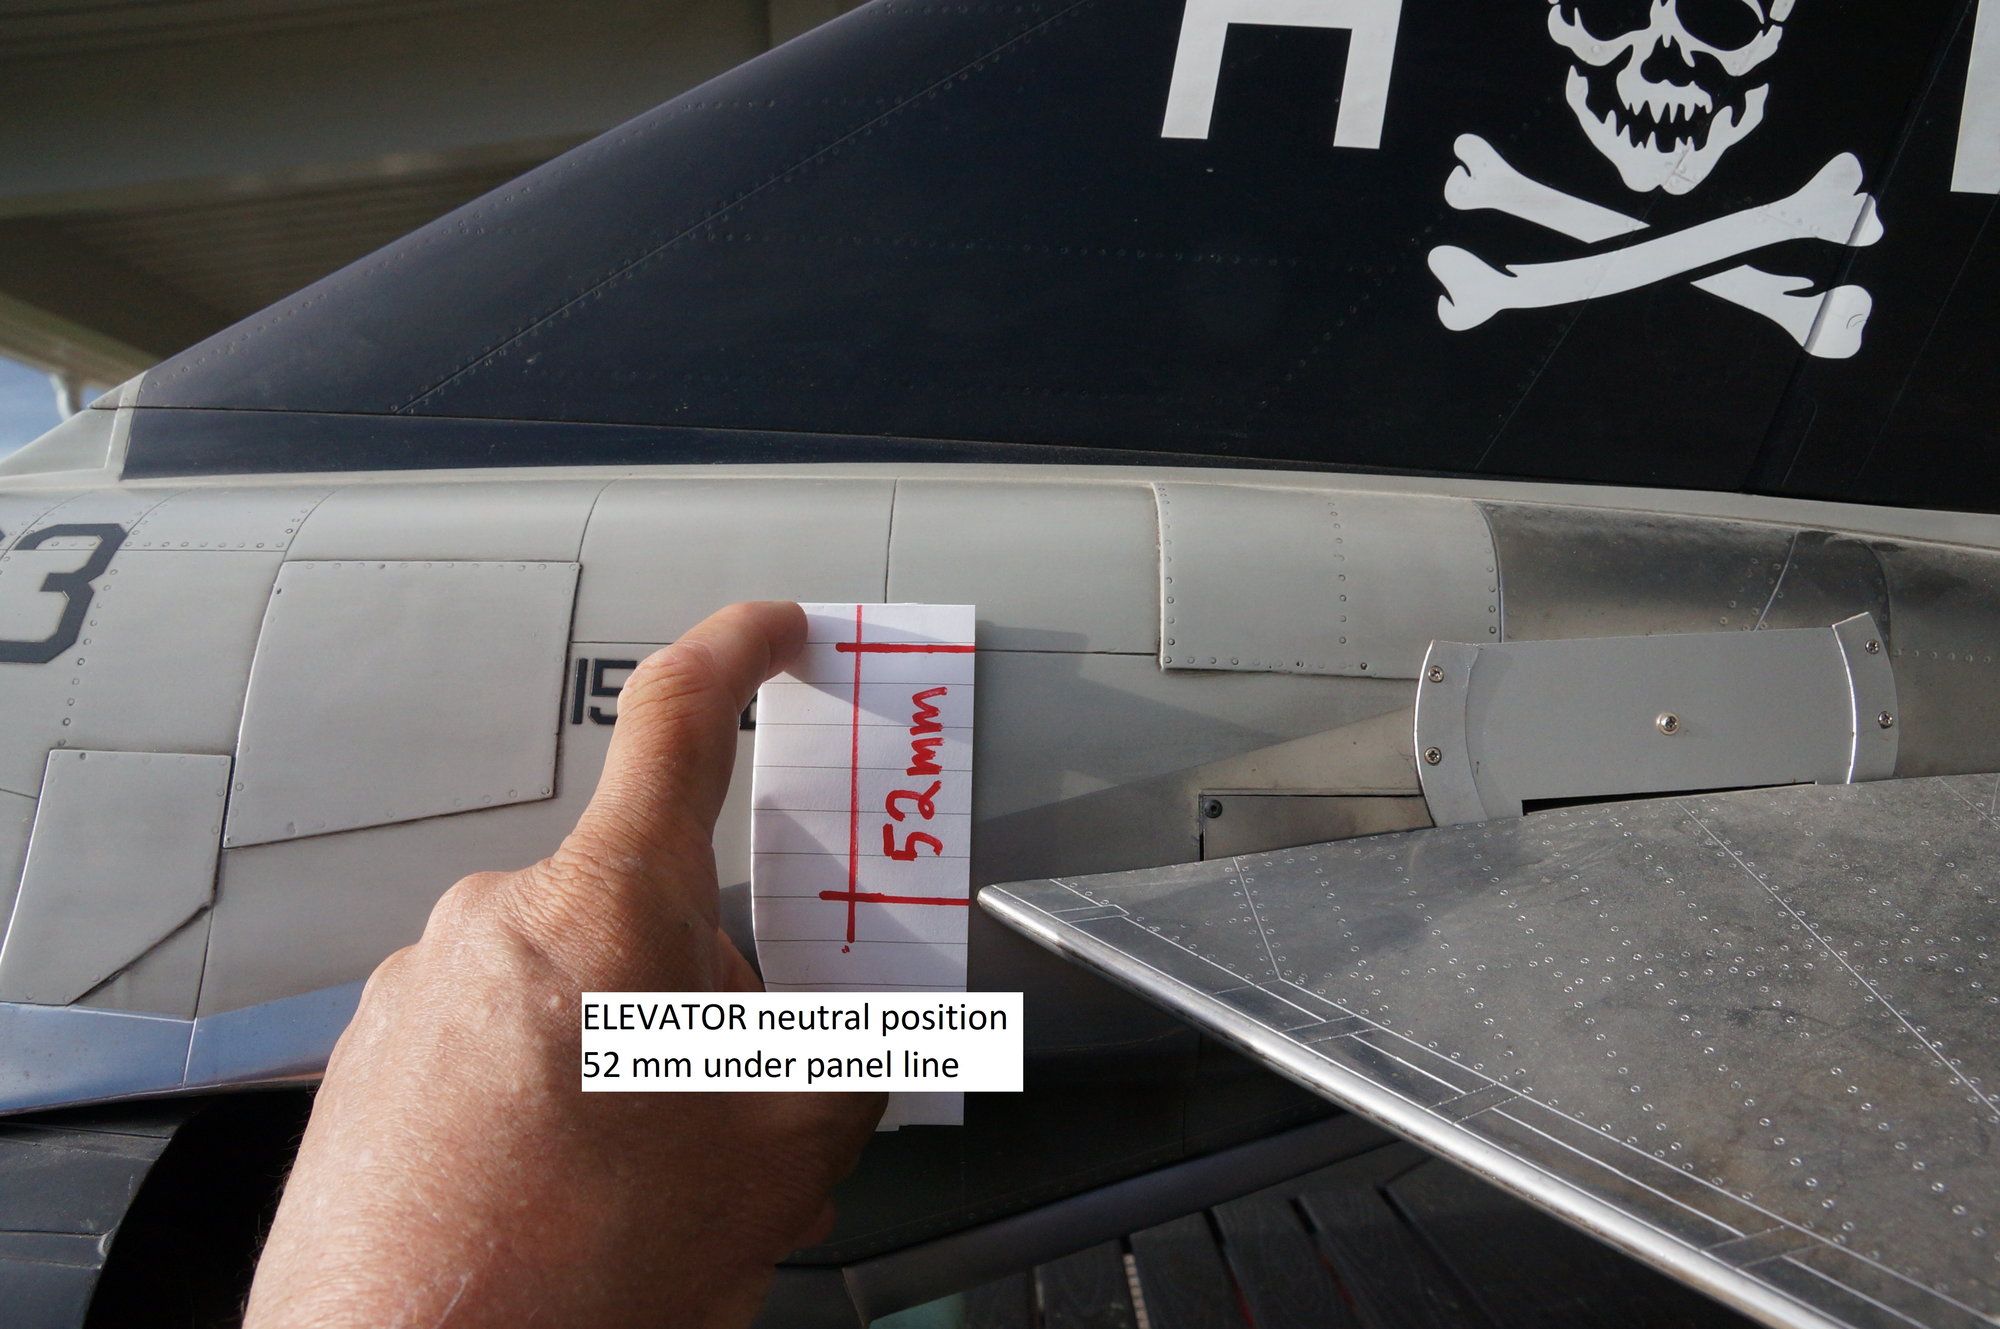
Here is my setup for the maiden flight;
Flaps: 85 mm down
Ailerons: 25 mm up-down
Elevator: 35 mm up-down
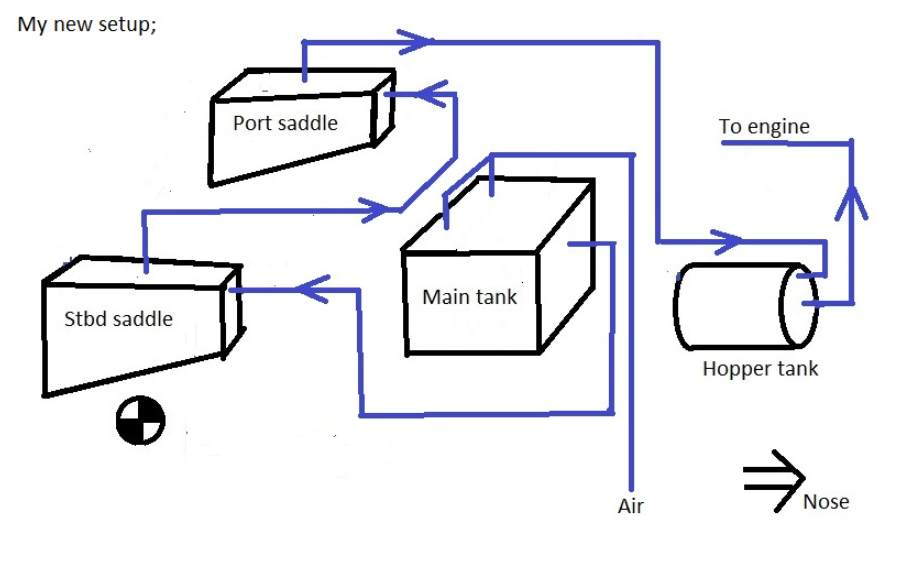
This setup means the front "main tank" will empty first;
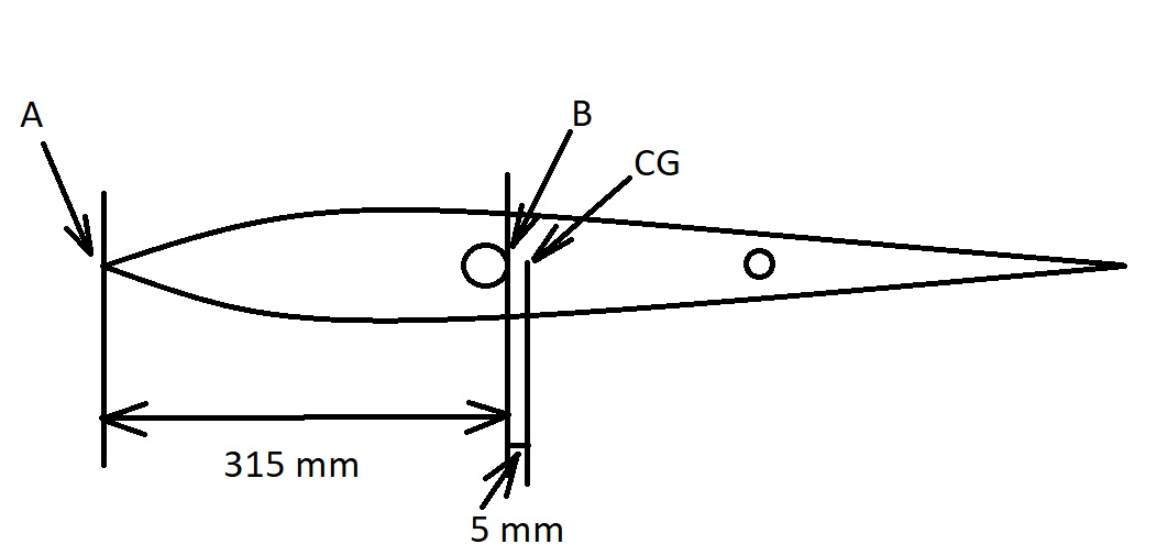
Yes, thanks to all the info here, I took off with CG at 320 mm;
And, I am very grateful that Per Olav got the flight on video;
I had the maiden flight of my Phantom last weekend.
It went well only thanks to the information I found in this thread quite a while back;
I have a build-thread over at rcscalebuilder, but thought I'd post here as well.
This is after all THE Phantom-thread on the planet.
Here is my setup for the maiden flight;
Flaps: 85 mm down
Ailerons: 25 mm up-down
Elevator: 35 mm up-down
This setup means the front "main tank" will empty first;
Yes, thanks to all the info here, I took off with CG at 320 mm;
And, I am very grateful that Per Olav got the flight on video;
Last edited by kwik; 06-20-2021 at 02:26 AM.
The following users liked this post:
Canadian Man (06-28-2022)
The following users liked this post:
Canadian Man (12-29-2022)
The following users liked this post:
kwik (06-26-2021)
07-26-2021, 01:18 PM
#286
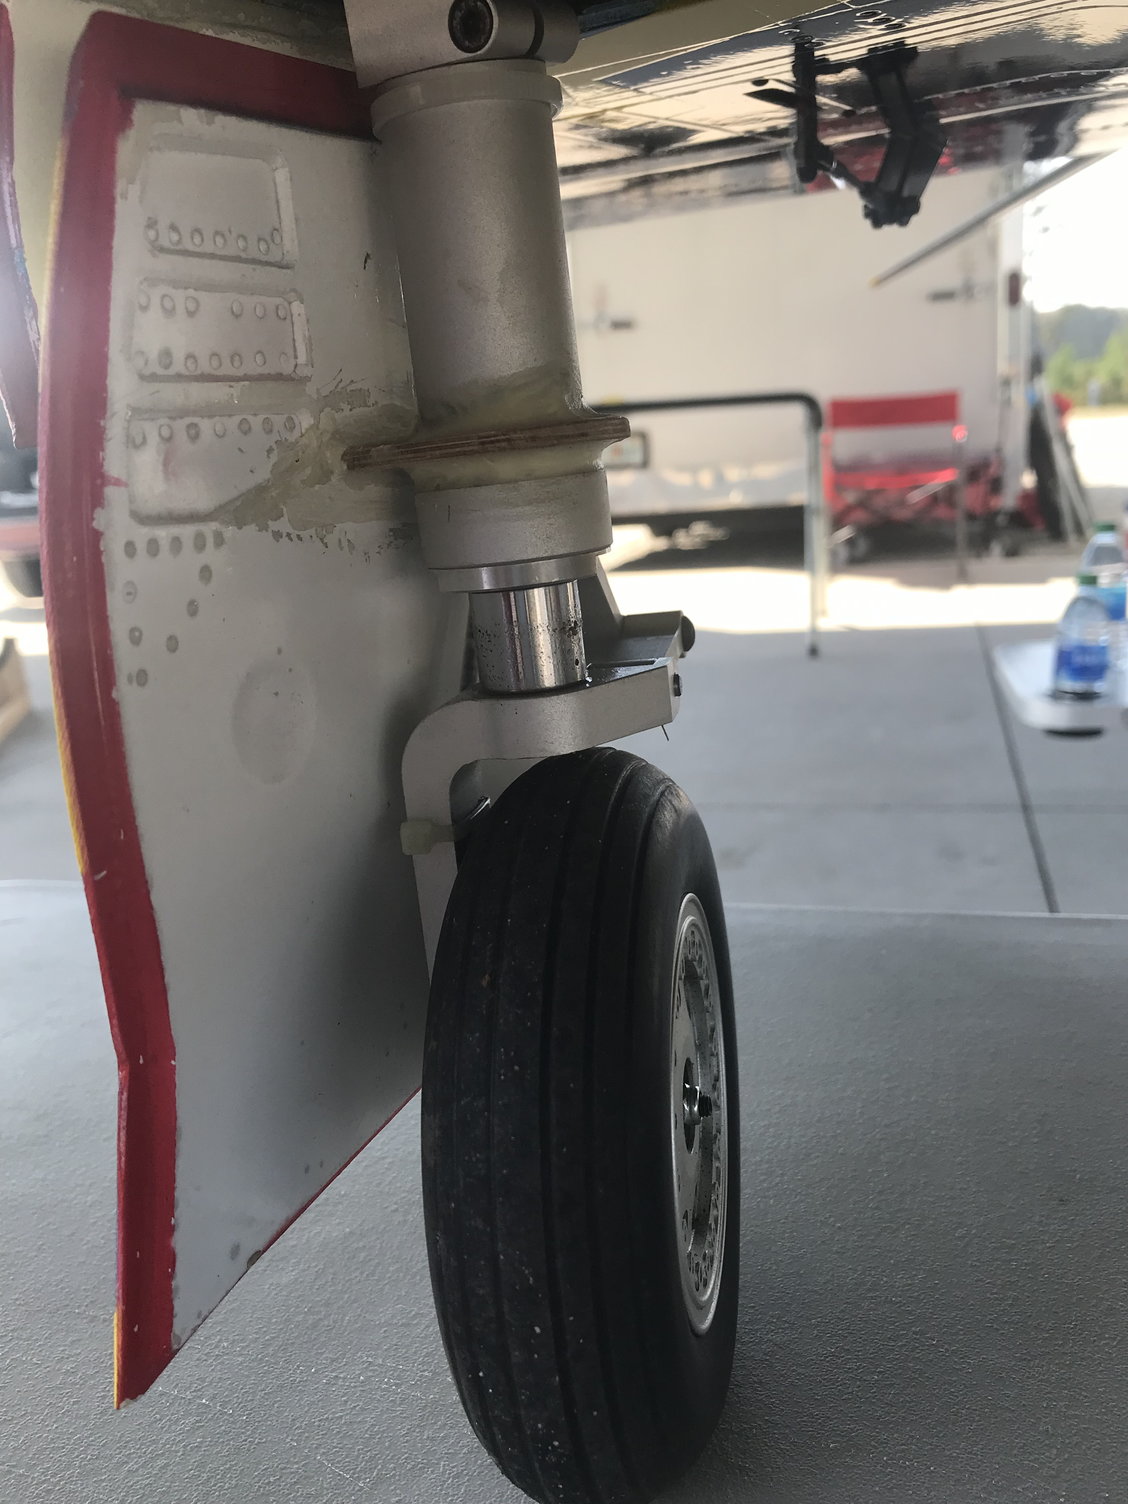
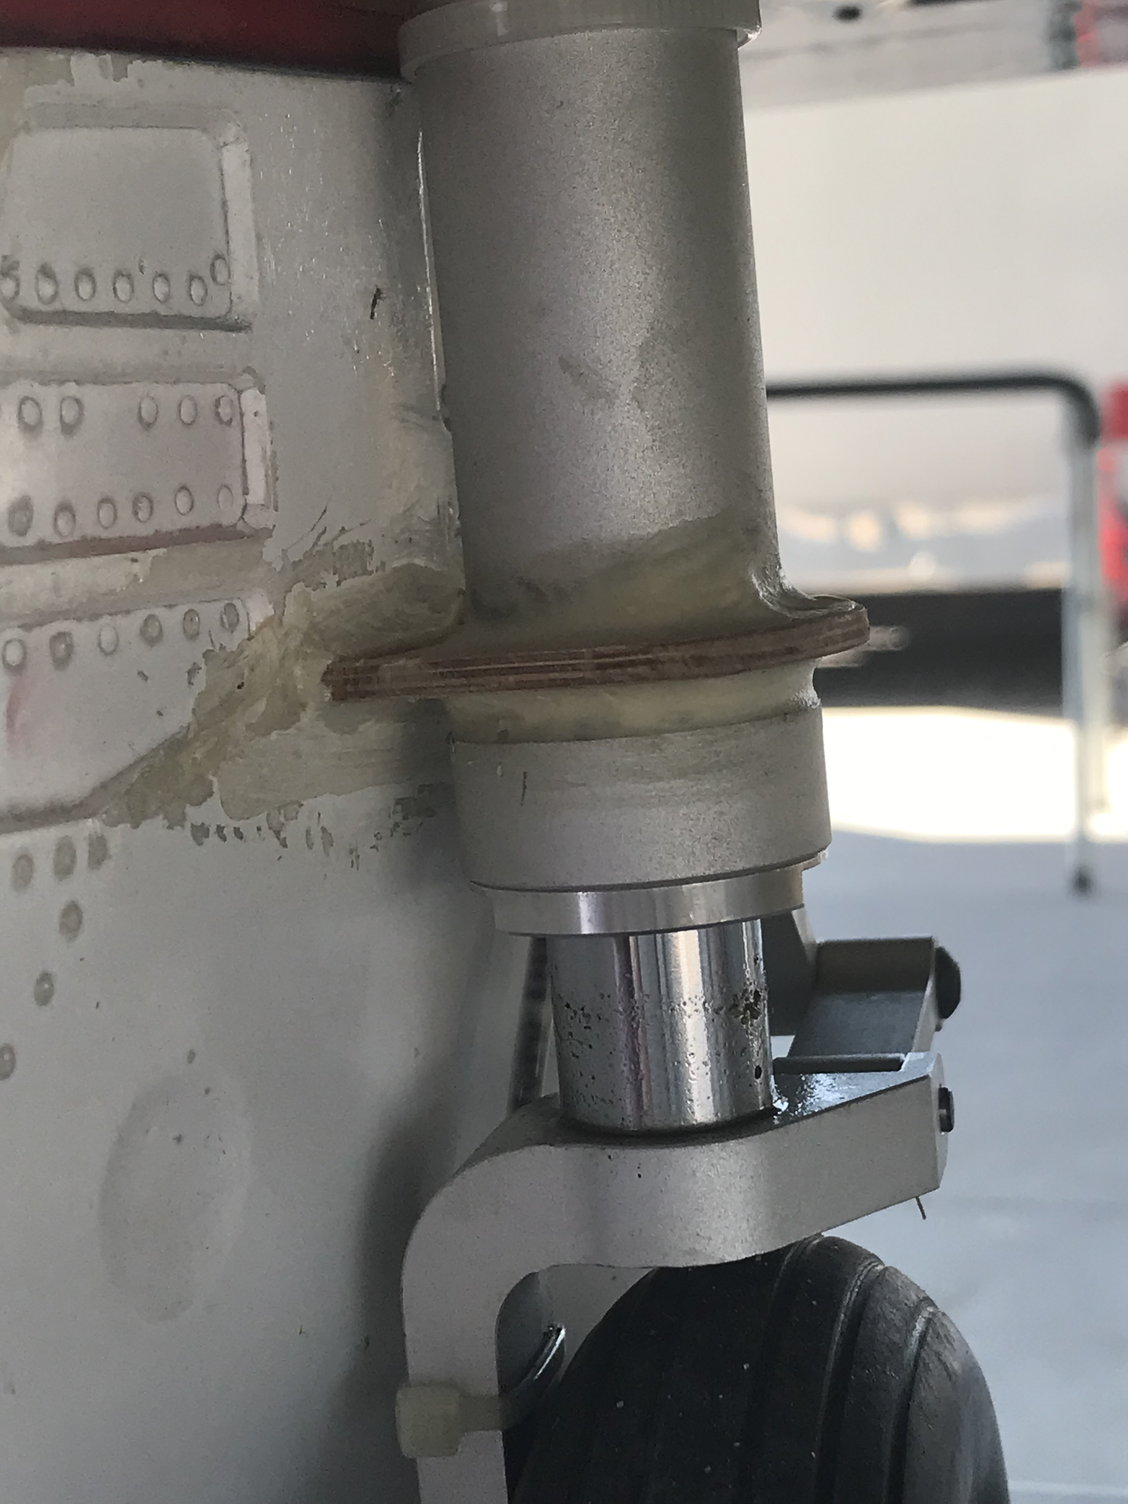
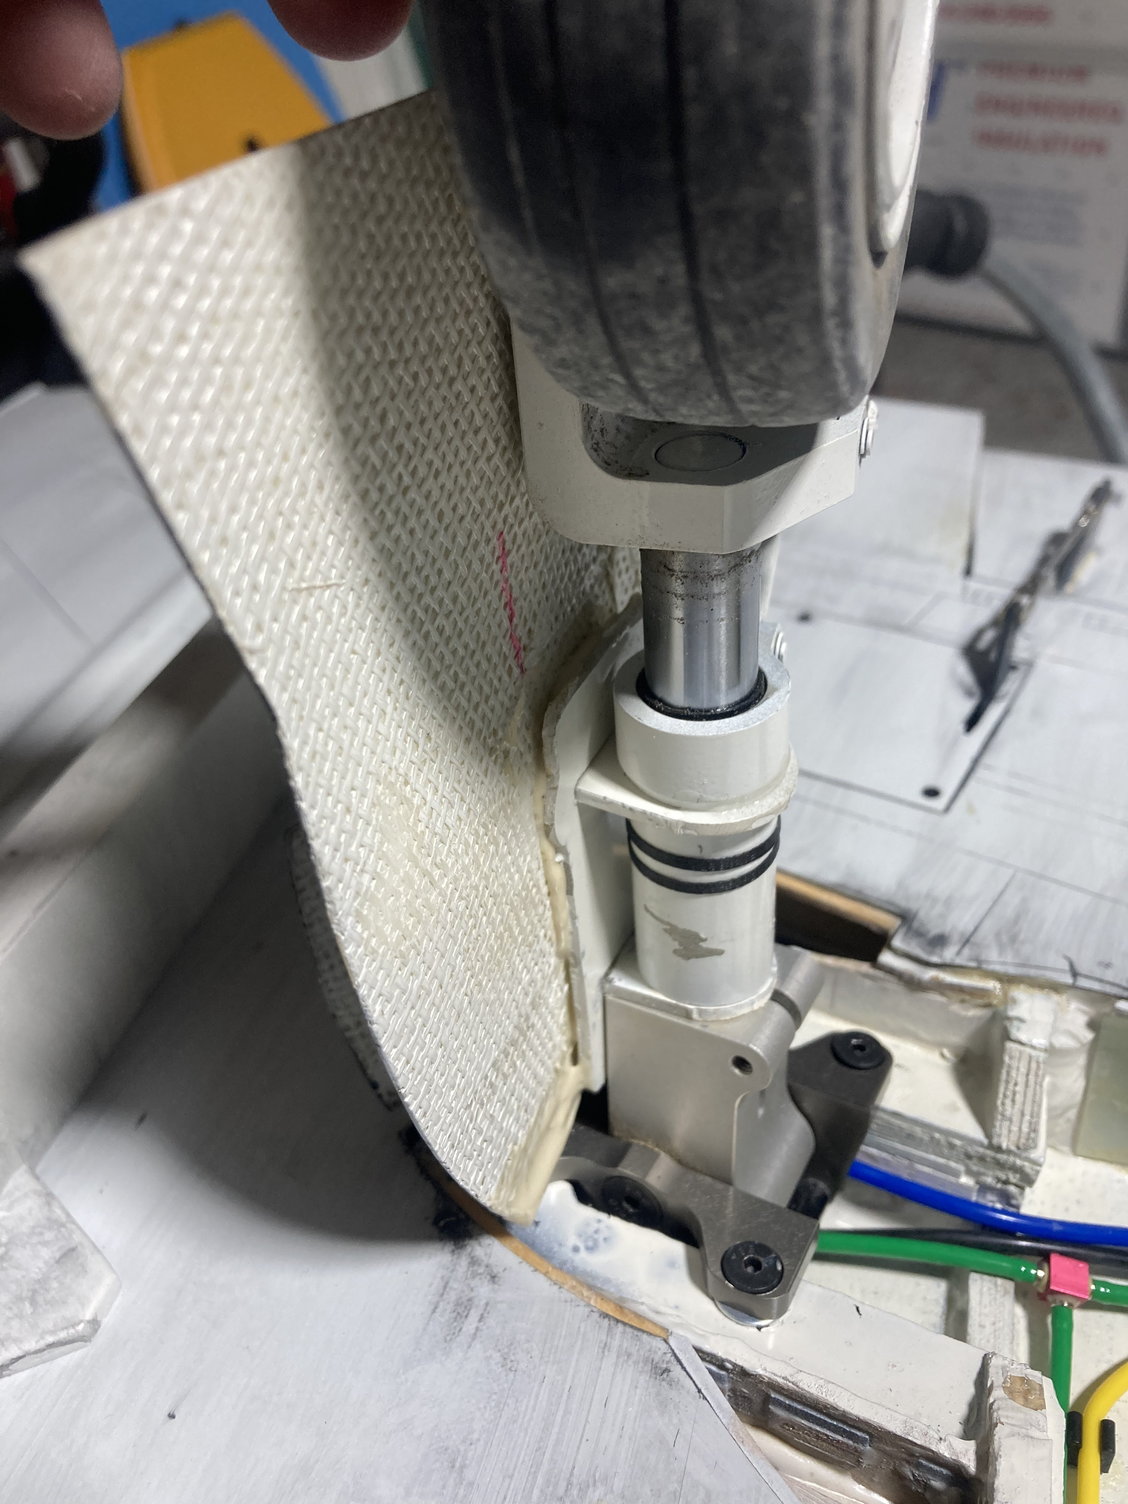
If you please could look at this picture of the nose-leg;
Does anyone know what the red arrow is pointing at?
I'm kind of hoping itsa connector for an air-tube, for raising the leg at takeoff.
But is it?
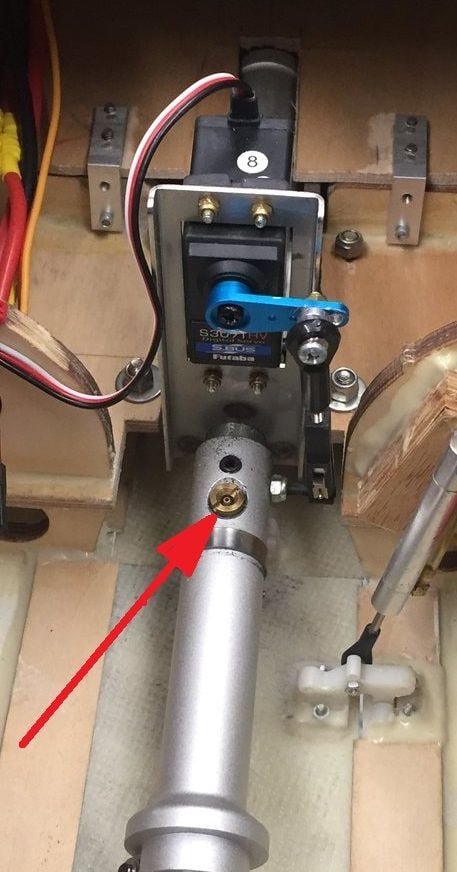
Does anyone know what the red arrow is pointing at?
I'm kind of hoping itsa connector for an air-tube, for raising the leg at takeoff.
But is it?
07-26-2021, 04:03 PM
#287
Bob
07-26-2021, 10:59 PM
#288
Thanks Bob.
So do you know how much pressure that is optimal here?
I saw a video on youtube of a SM F-4 takeoff. But that was a scale 1/6. And it clearly filled the noseleg with air just before takeoff, and it raised the front substansially.
It was quite impressive.
So do you know how much pressure that is optimal here?
I saw a video on youtube of a SM F-4 takeoff. But that was a scale 1/6. And it clearly filled the noseleg with air just before takeoff, and it raised the front substansially.
It was quite impressive.
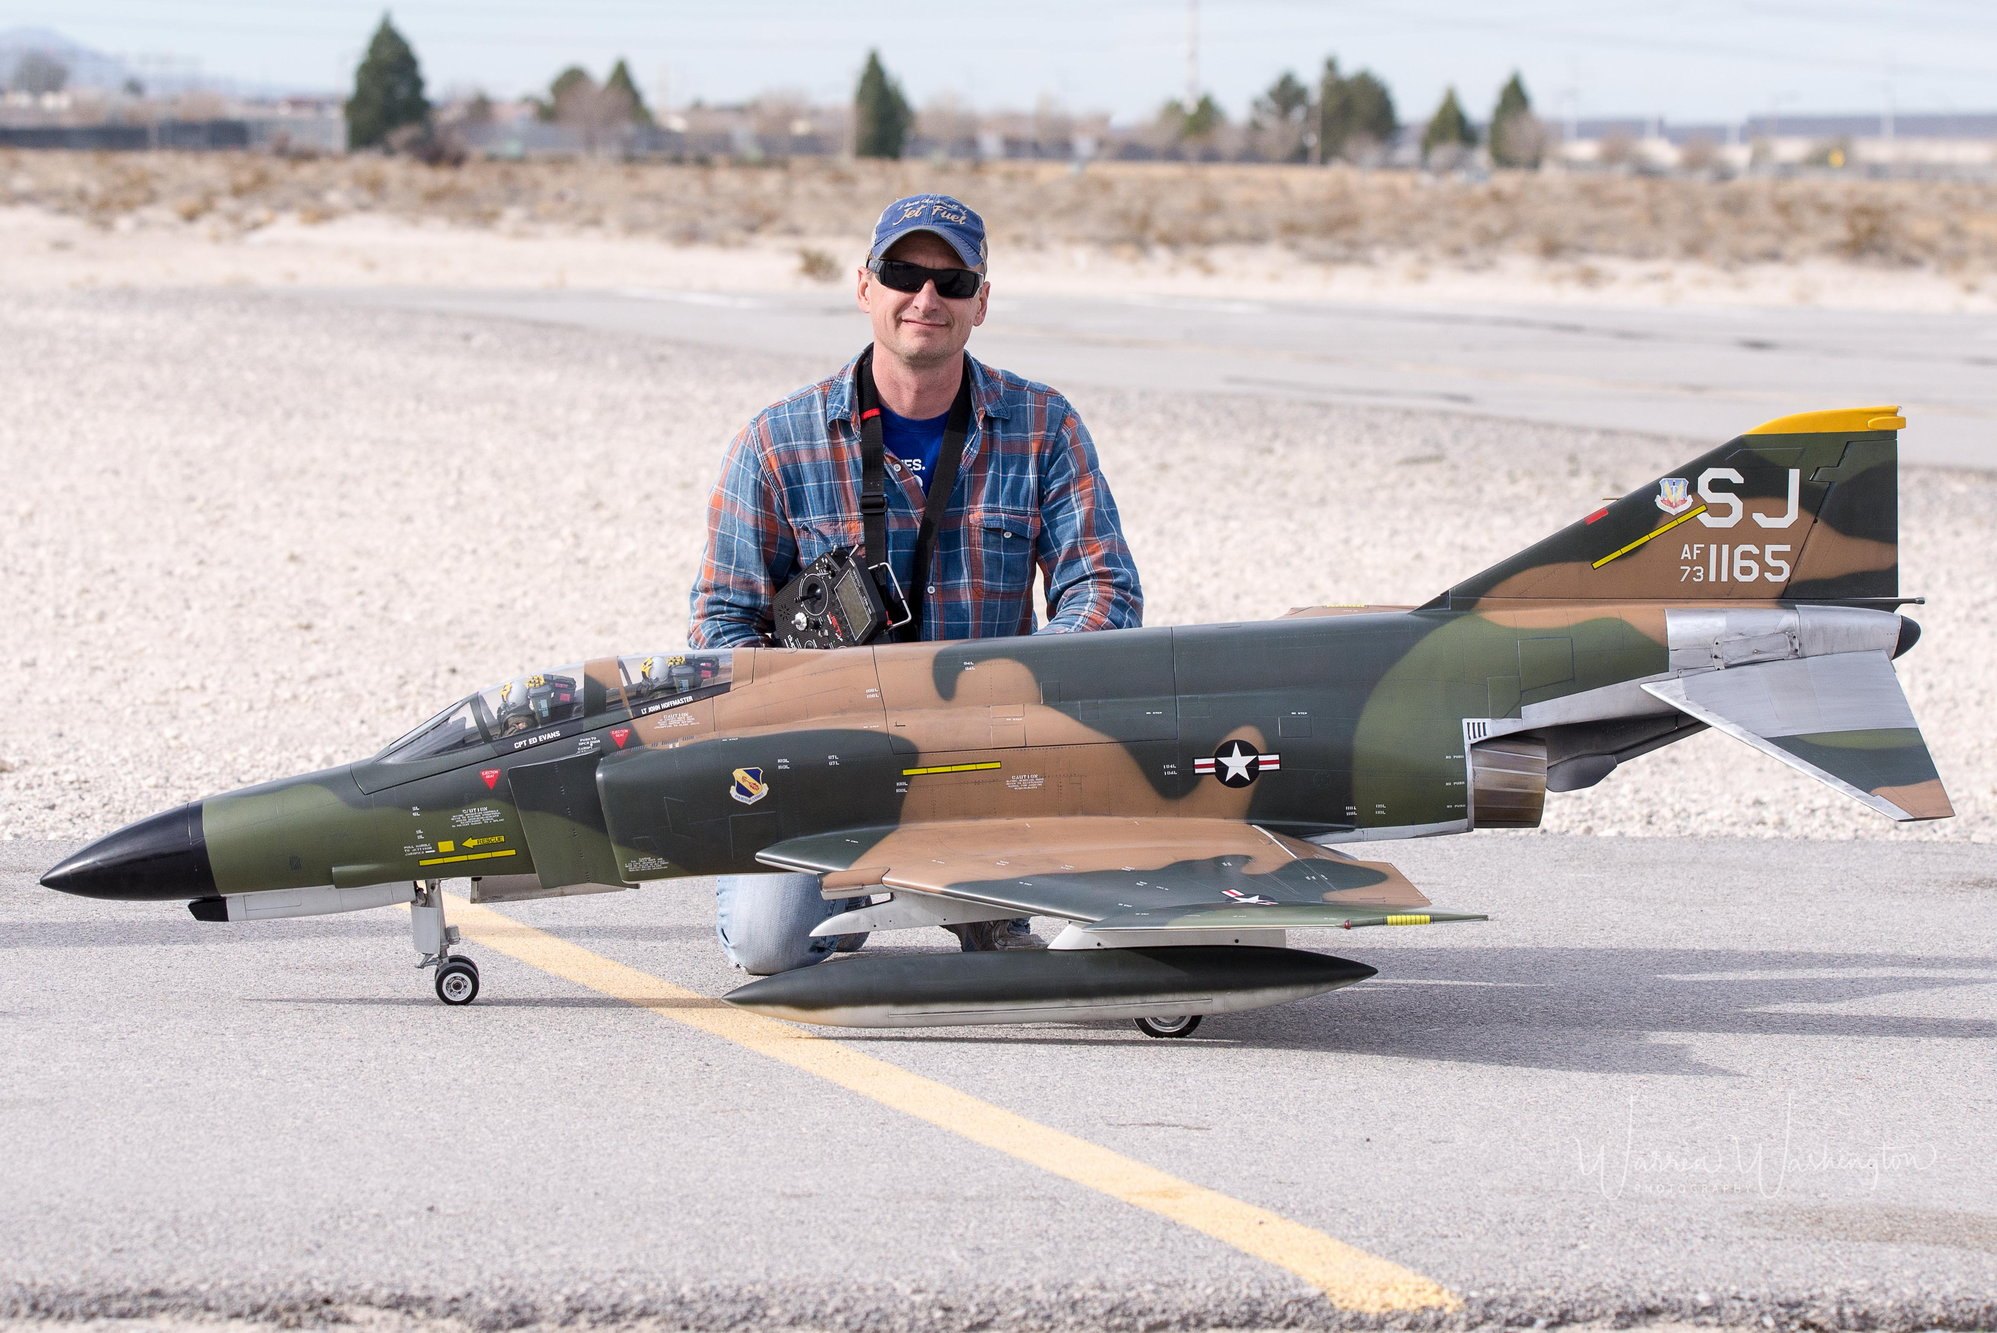
 11-07-2021, 06:16 PM
#293

My Feedback: (13)
Shawn
look for things like fuel tank feed order
Main gear reinforcement
CG
etc
i ran lights, drag chute, flitemetal on the aft end, Tam nozzles, matrix Nosegear etc. It�s awesome but a bit chubby so I upgraded to a kt260 and an airspeed monitor. Great combo at that weight. No more building energy etc. I can muscle through a loop no problem now
The following users liked this post:
CobraJet (11-07-2021)
 11-07-2021, 07:07 PM
#295
My Feedback: (13)
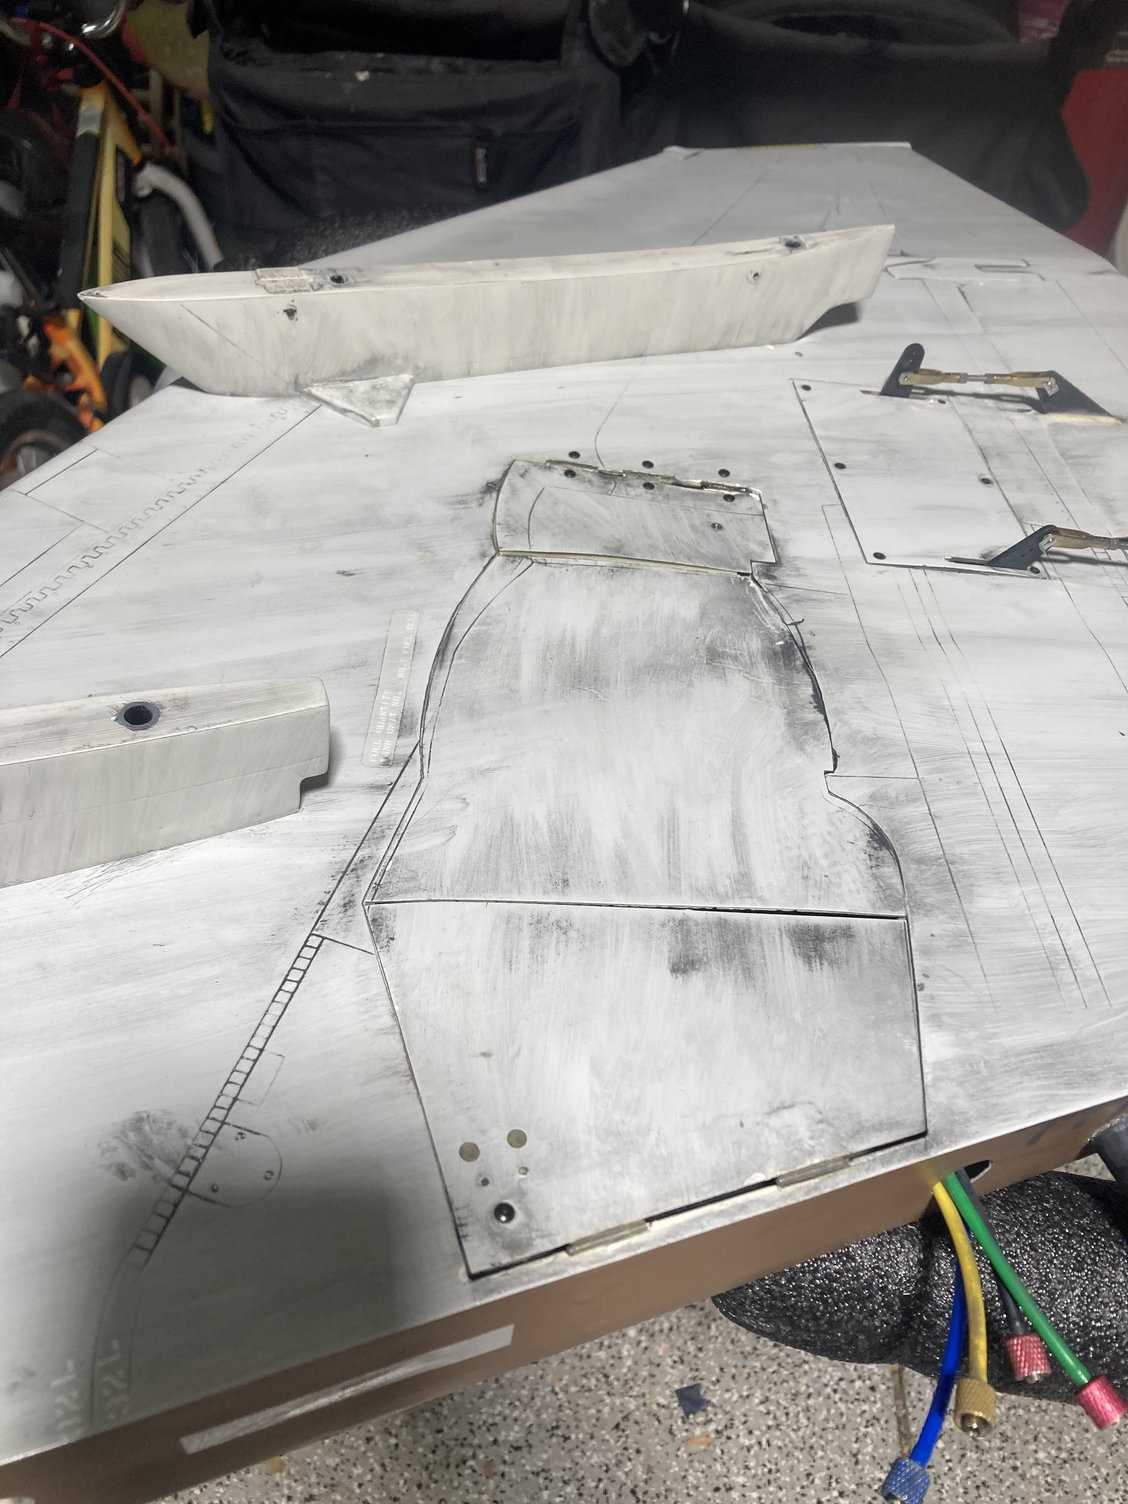
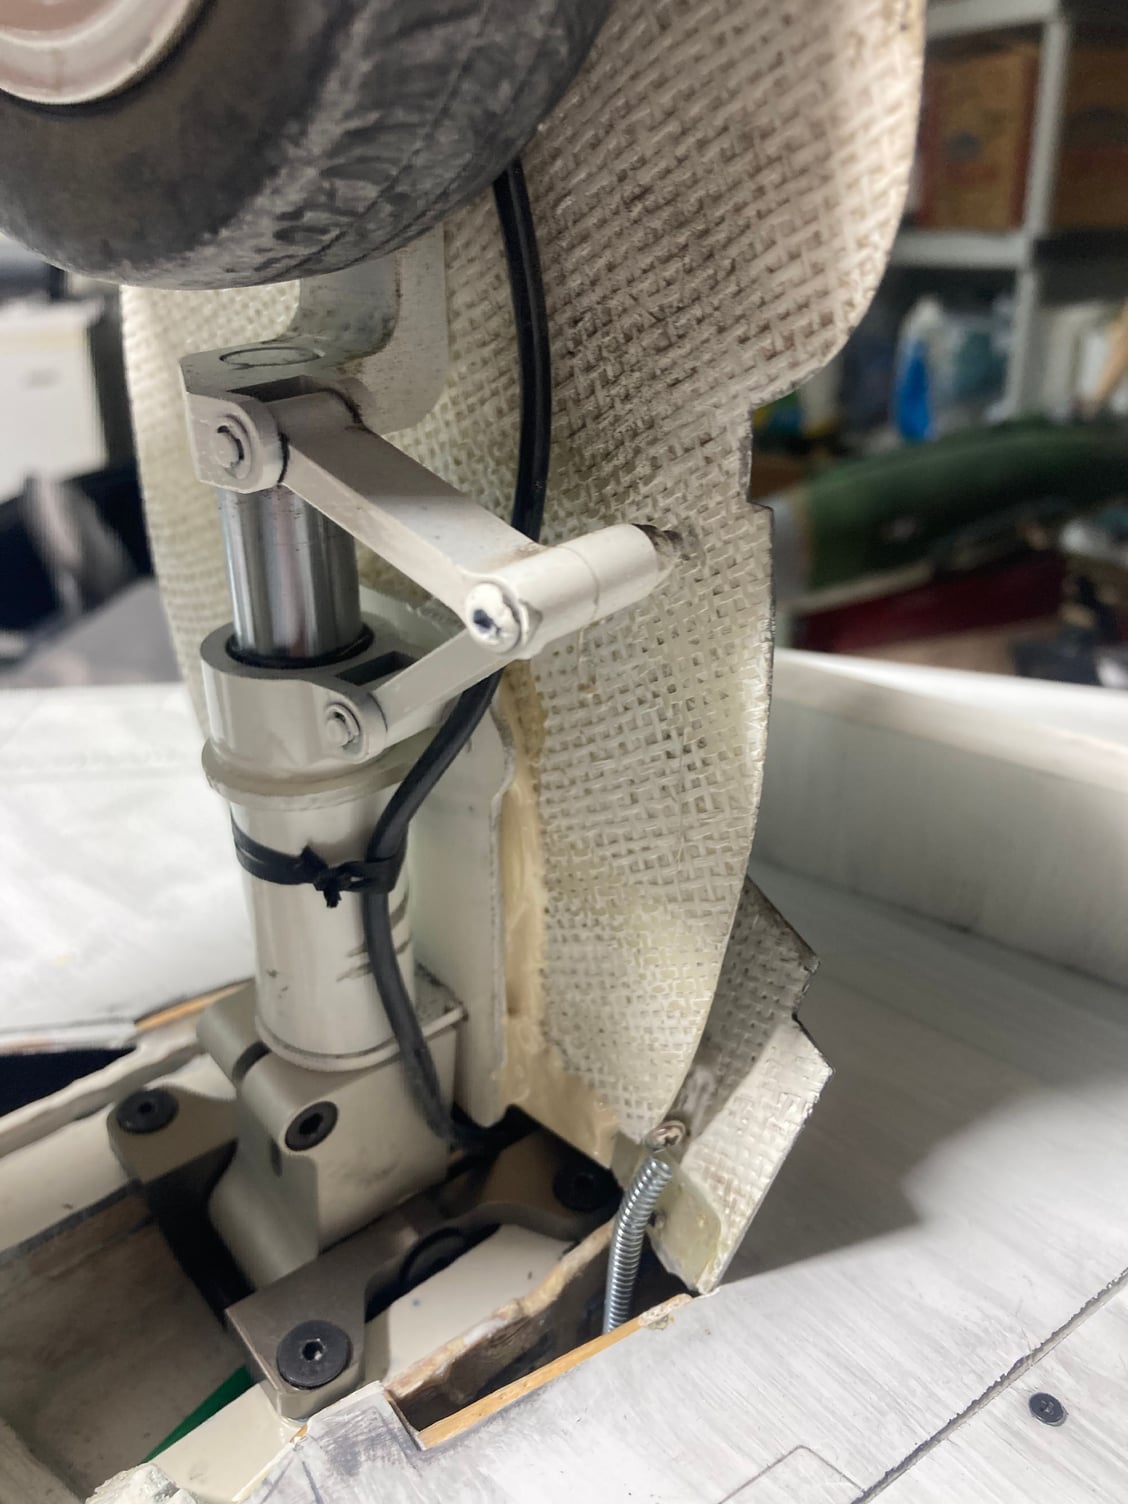
Here are some pics of how I changed the inner gear door actuator, main gear reinforcement and door mounting.
as I recall I popped those doors off with a heat gun and then put a blob of hysol on them, taped the door in place and flipped the wing right side up until the hysol had cured. It leaves the doors nice and tight but not binding

Main gear reinforcement. My buddy bought once of these and when I mentioned this he laughed and said just land it nice. He ended up blowing his wings apart on a botched landing
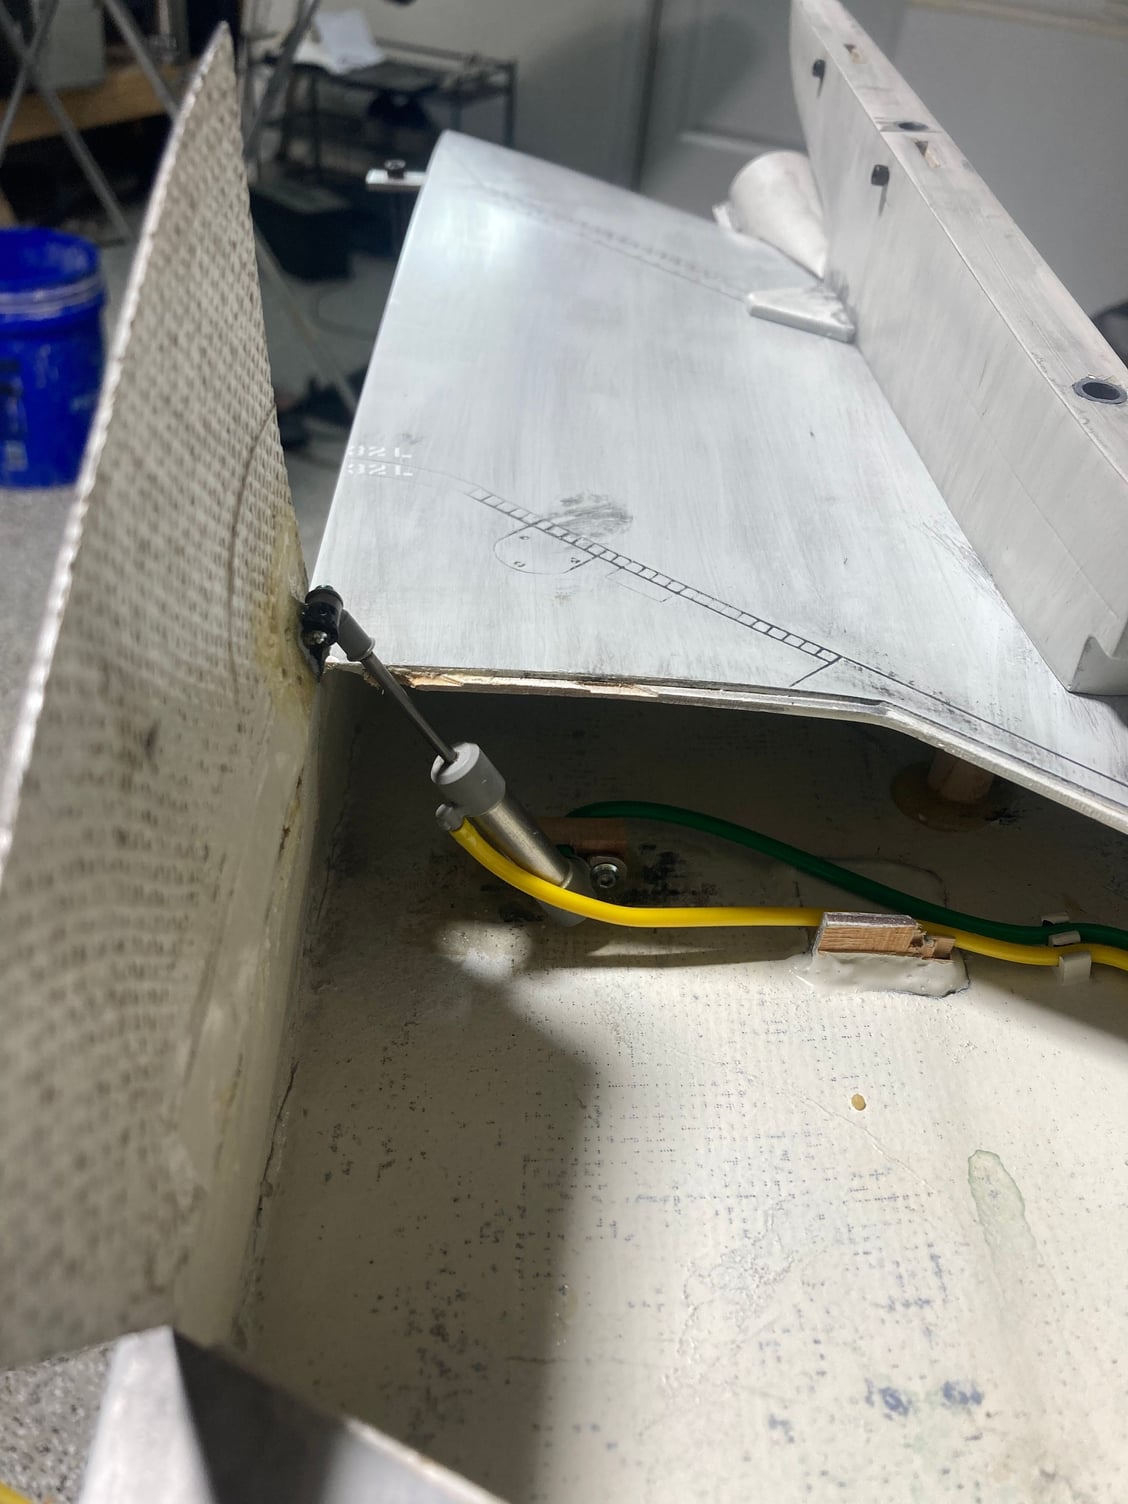
This is the only way I could get these inner doors to stay closed in flight. You can see the original mount much farther to the right in the pic
Door fit
Back side
Front
as I recall I popped those doors off with a heat gun and then put a blob of hysol on them, taped the door in place and flipped the wing right side up until the hysol had cured. It leaves the doors nice and tight but not binding
Main gear reinforcement. My buddy bought once of these and when I mentioned this he laughed and said just land it nice. He ended up blowing his wings apart on a botched landing
This is the only way I could get these inner doors to stay closed in flight. You can see the original mount much farther to the right in the pic
Door fit
Back side
Front
11-08-2021, 05:43 AM
#296
Wow,
Thanks for those. Nice stuff! I'm very interested in the main mount mods. Also, I see a couple different door mounts on the center main door. Which came first? I like your note about making sure the wing is right-side up so the gap is reflective of the gravity on the wheel and strut. That kind of thing takes time to get right, but it's worth it in the end. When I built the A-12, the main gear and door setup was a MAJOR PITA, and the gap formed on the outer doors when the big, heavy wheels and struts were in their right-side-up position was tough to get right. Upside-down, it seemed to tight and that the doors would break off the strut mounts, but in flight the effect worked perfectly. I hope to do that with this plane.
I also plan to keep the linkages internal. I measured, and I can get a full solid inch of horn from the hinge line to the clevis on the ailerons. I've had big, heavy, fast airframes with shorter horns so I'm pretty confident that will work fine with good servos and solid linkage. Agree?
gear doors up nice and tight
11-08-2021, 05:47 AM
#297
Here are some pics of how I changed the inner gear door actuator, main gear reinforcement and door mounting.
as I recall I popped those doors off with a heat gun and then put a blob of hysol on them, taped the door in place and flipped the wing right side up until the hysol had cured. It leaves the doors nice and tight but not binding
Main gear reinforcement. My buddy bought once of these and when I mentioned this he laughed and said just land it nice. He ended up blowing his wings apart on a botched landing
This is the only way I could get these inner doors to stay closed in flight. You can see the original mount much farther to the right in the pic
Door fit
Back side
Front
BTW,
Very nice work. Any issues with the gear or struts themselves? I'm building this for someone else, so how can I tell if he's got the Matrix struts? Which lighting kit did you use? What's your AUW?
Thanks!
11-08-2021, 07:27 AM
#298
My Feedback: (13)
I think the mounts on mine were before the other pic posted. Mine dates back to 2016 or so
i used the D4S light kit with the JetCat controller. Great combo if you can find Dan�s stuff anymore. I went overboard and did the lights under the intakes, two lights on the nose gear etc. I would probably do the beacon in the tail and landing light and call it good if I were to do it today.
I put hardwood blocks under the main gear rails and made that area one big block if that makes sense. Look at what you have and look at the pics I posted and you�ll see it
i think your internal linkage idea will work. Honestly that�s the biggest thing that sticks out for it being a model are those
i also reinforced the intakes themselves with milled fiber snd epoxy. I�d seen cracks somewhere on one from the suction or guys grabbing it etc and didn�t want that. Similar to how the bv Hun nose is reinforced
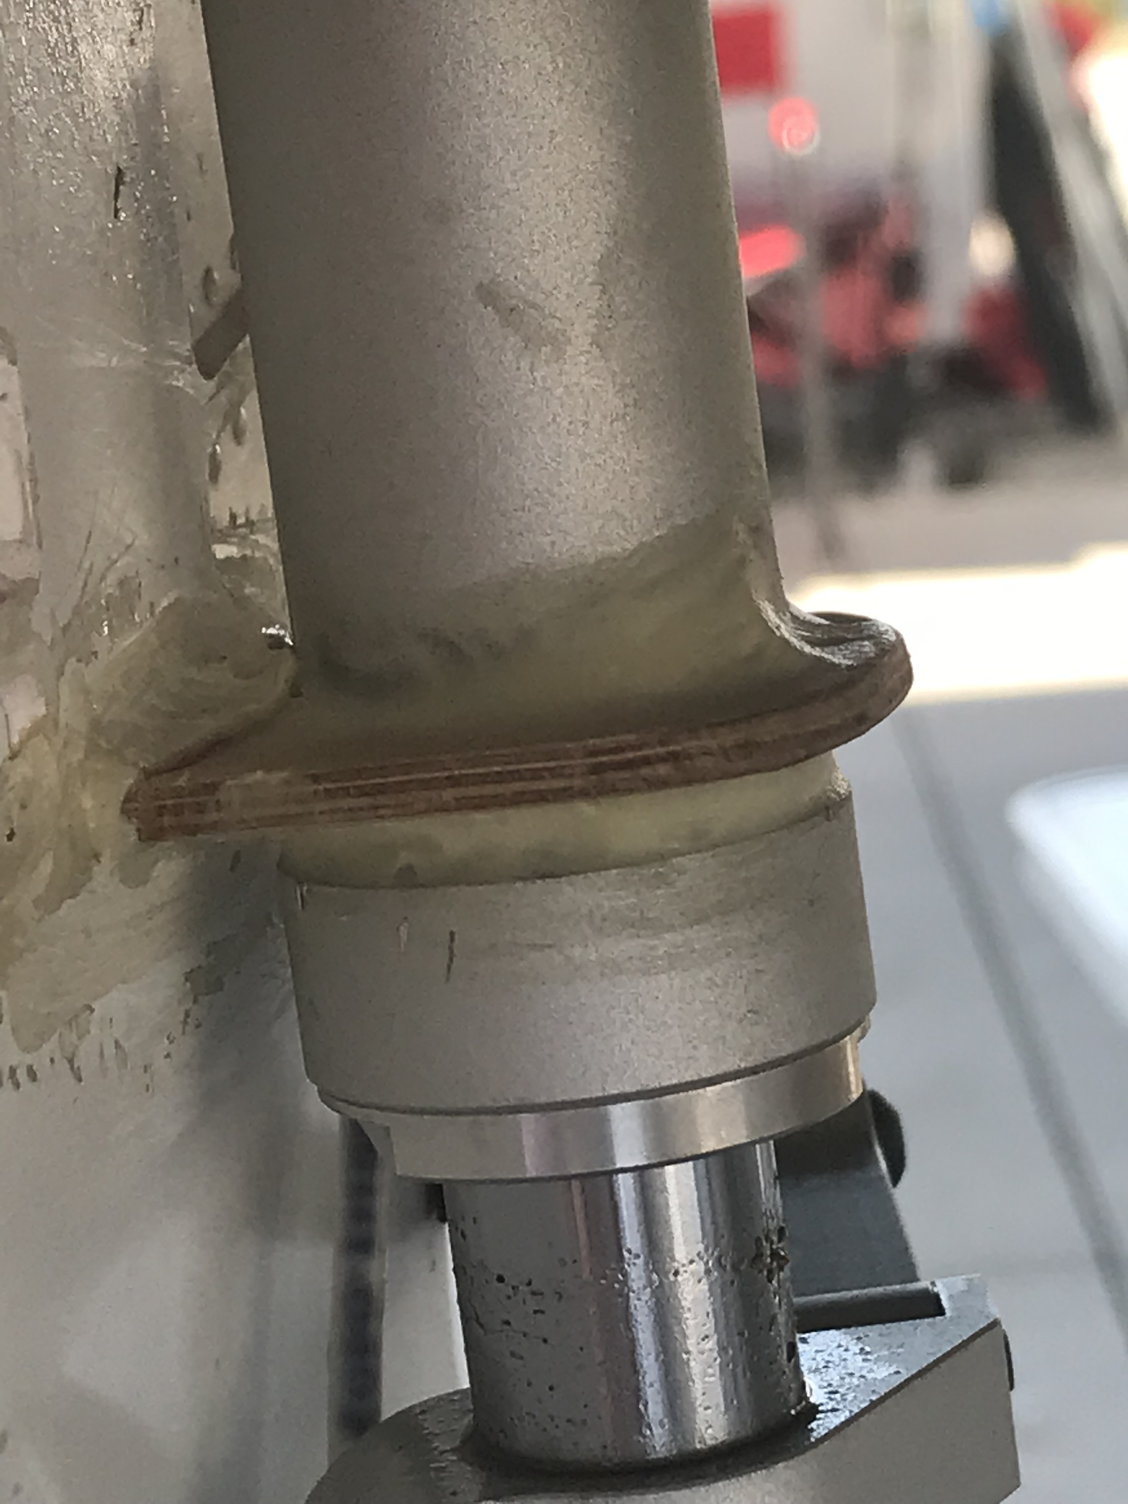
the matrix nose strut is the air extending strut. Phantoms need positive aoa to rotate nicely (look at the stock setup on the old BV ones-they all taxi around nose high-I�ll try to attach a pic. They do rotate beautifully though). I let pressure out of my nose strut on this one and it looked great on the ground but jumped off the runway. I didn�t want it nose high on the ground and so I bought the matrix nose strut. Now when I hit full power the nose strut inflates and it sits at the right attitude for rotation. The effect is that it looks like it�s accelerating hard as the nose comes up about 30� into the roll
the stock struts and gear have worked great but I only have 100ish flights on it
i used the D4S light kit with the JetCat controller. Great combo if you can find Dan�s stuff anymore. I went overboard and did the lights under the intakes, two lights on the nose gear etc. I would probably do the beacon in the tail and landing light and call it good if I were to do it today.
I put hardwood blocks under the main gear rails and made that area one big block if that makes sense. Look at what you have and look at the pics I posted and you�ll see it
i think your internal linkage idea will work. Honestly that�s the biggest thing that sticks out for it being a model are those
i also reinforced the intakes themselves with milled fiber snd epoxy. I�d seen cracks somewhere on one from the suction or guys grabbing it etc and didn�t want that. Similar to how the bv Hun nose is reinforced
the matrix nose strut is the air extending strut. Phantoms need positive aoa to rotate nicely (look at the stock setup on the old BV ones-they all taxi around nose high-I�ll try to attach a pic. They do rotate beautifully though). I let pressure out of my nose strut on this one and it looked great on the ground but jumped off the runway. I didn�t want it nose high on the ground and so I bought the matrix nose strut. Now when I hit full power the nose strut inflates and it sits at the right attitude for rotation. The effect is that it looks like it�s accelerating hard as the nose comes up about 30� into the roll
the stock struts and gear have worked great but I only have 100ish flights on it
11-08-2021, 02:03 PM
#299
The pics that I posted are of the factory mounting on my 1/6 scale. On my 1/7 scale I had aluminum sleeves machined that fit over the struts. The sleeves had flats that were drilled and tapped. The doors were screwed onto the sleeves.
I had the Matrix nose strut on both the 1/7 and 1/6. Well worth the effort. Mine is programmed to activate at 1/3 throttle with take off flaps only.
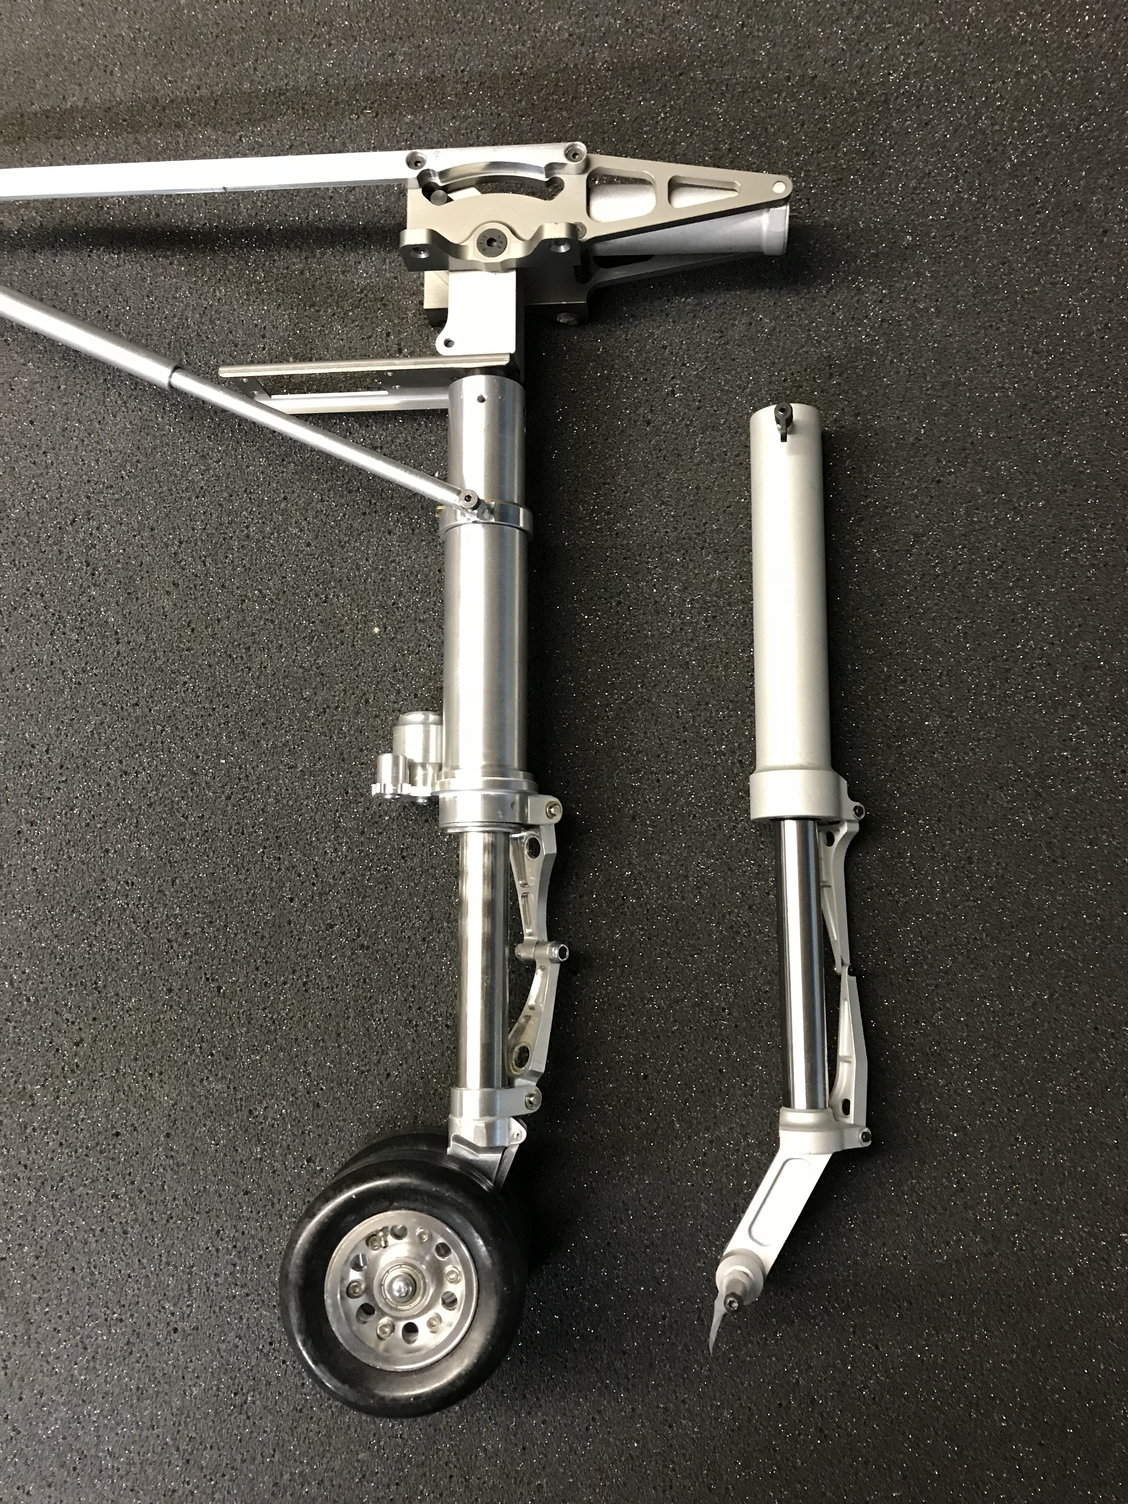
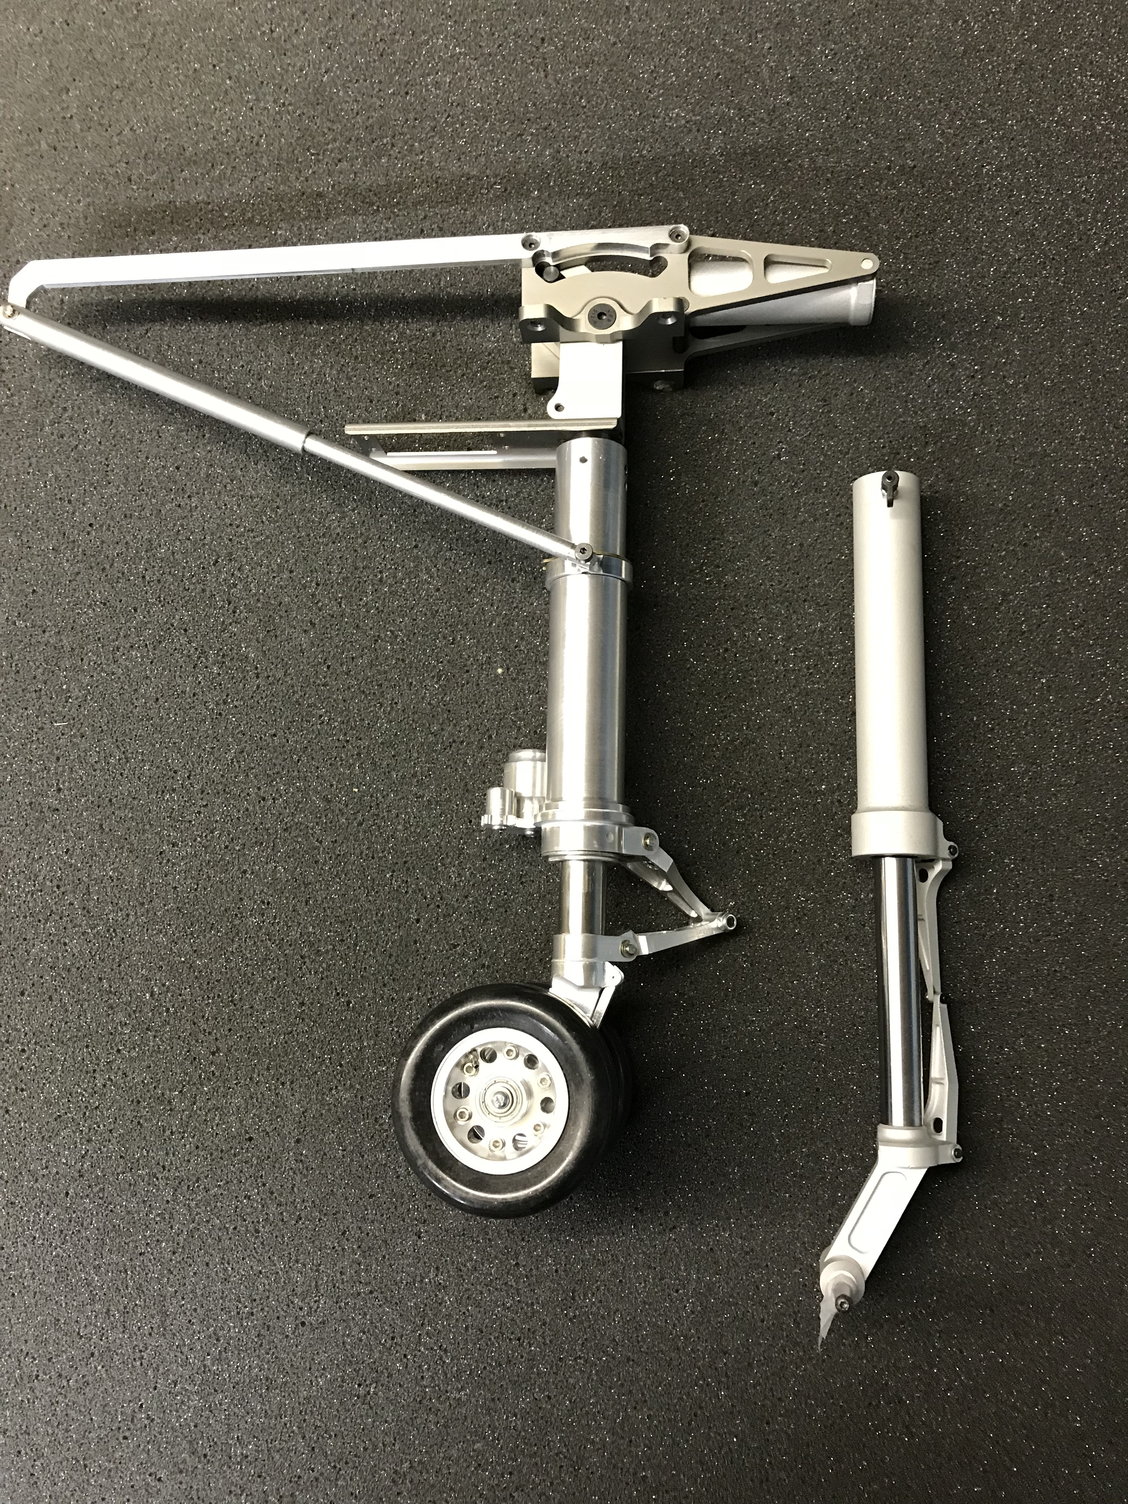
I had the Matrix nose strut on both the 1/7 and 1/6. Well worth the effort. Mine is programmed to activate at 1/3 throttle with take off flaps only.
Last edited by f106jax; 11-08-2021 at 02:15 PM.