1/6 Scale F-18 Build
 04-29-2019, 10:18 AM
#226

Thread Starter

It sold my Rebel Pro and kept the electronics, you can order them from Germany and occasionally esprit models has them in stock. This is the exact setup I use on all my models.
 04-29-2019, 05:14 PM
#227
Thread Starter
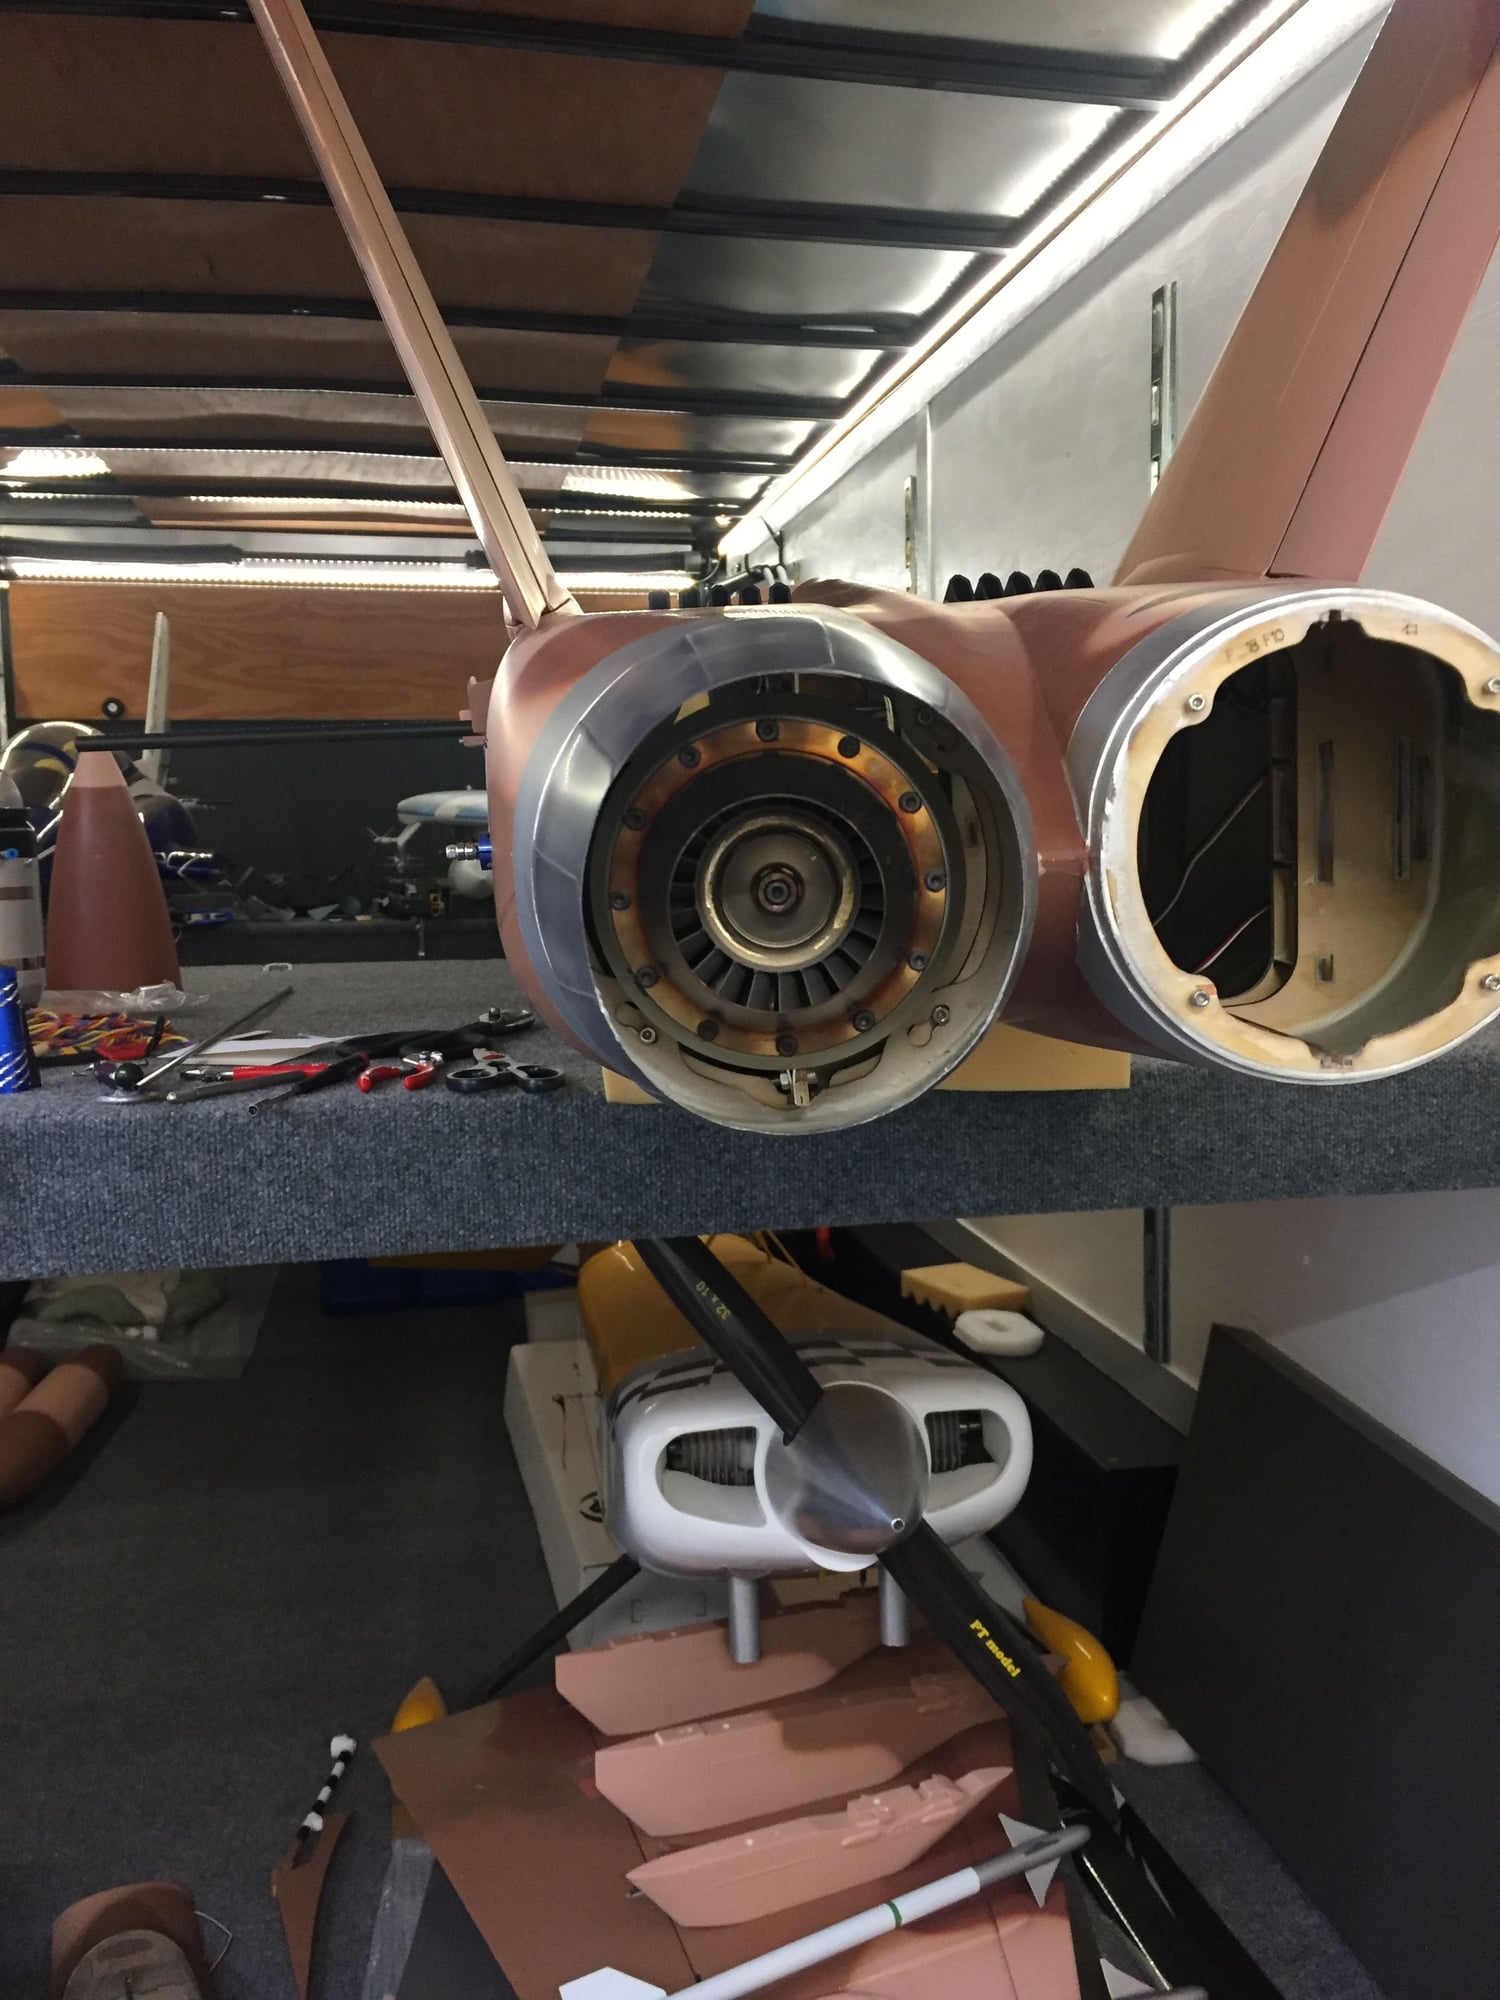
Still could use some help from current owners on their turbine mount setup and how the heck you found a route through the wings for the servo leads? Last two big hurdle
04-30-2019, 06:26 PM
#228
Thread Starter

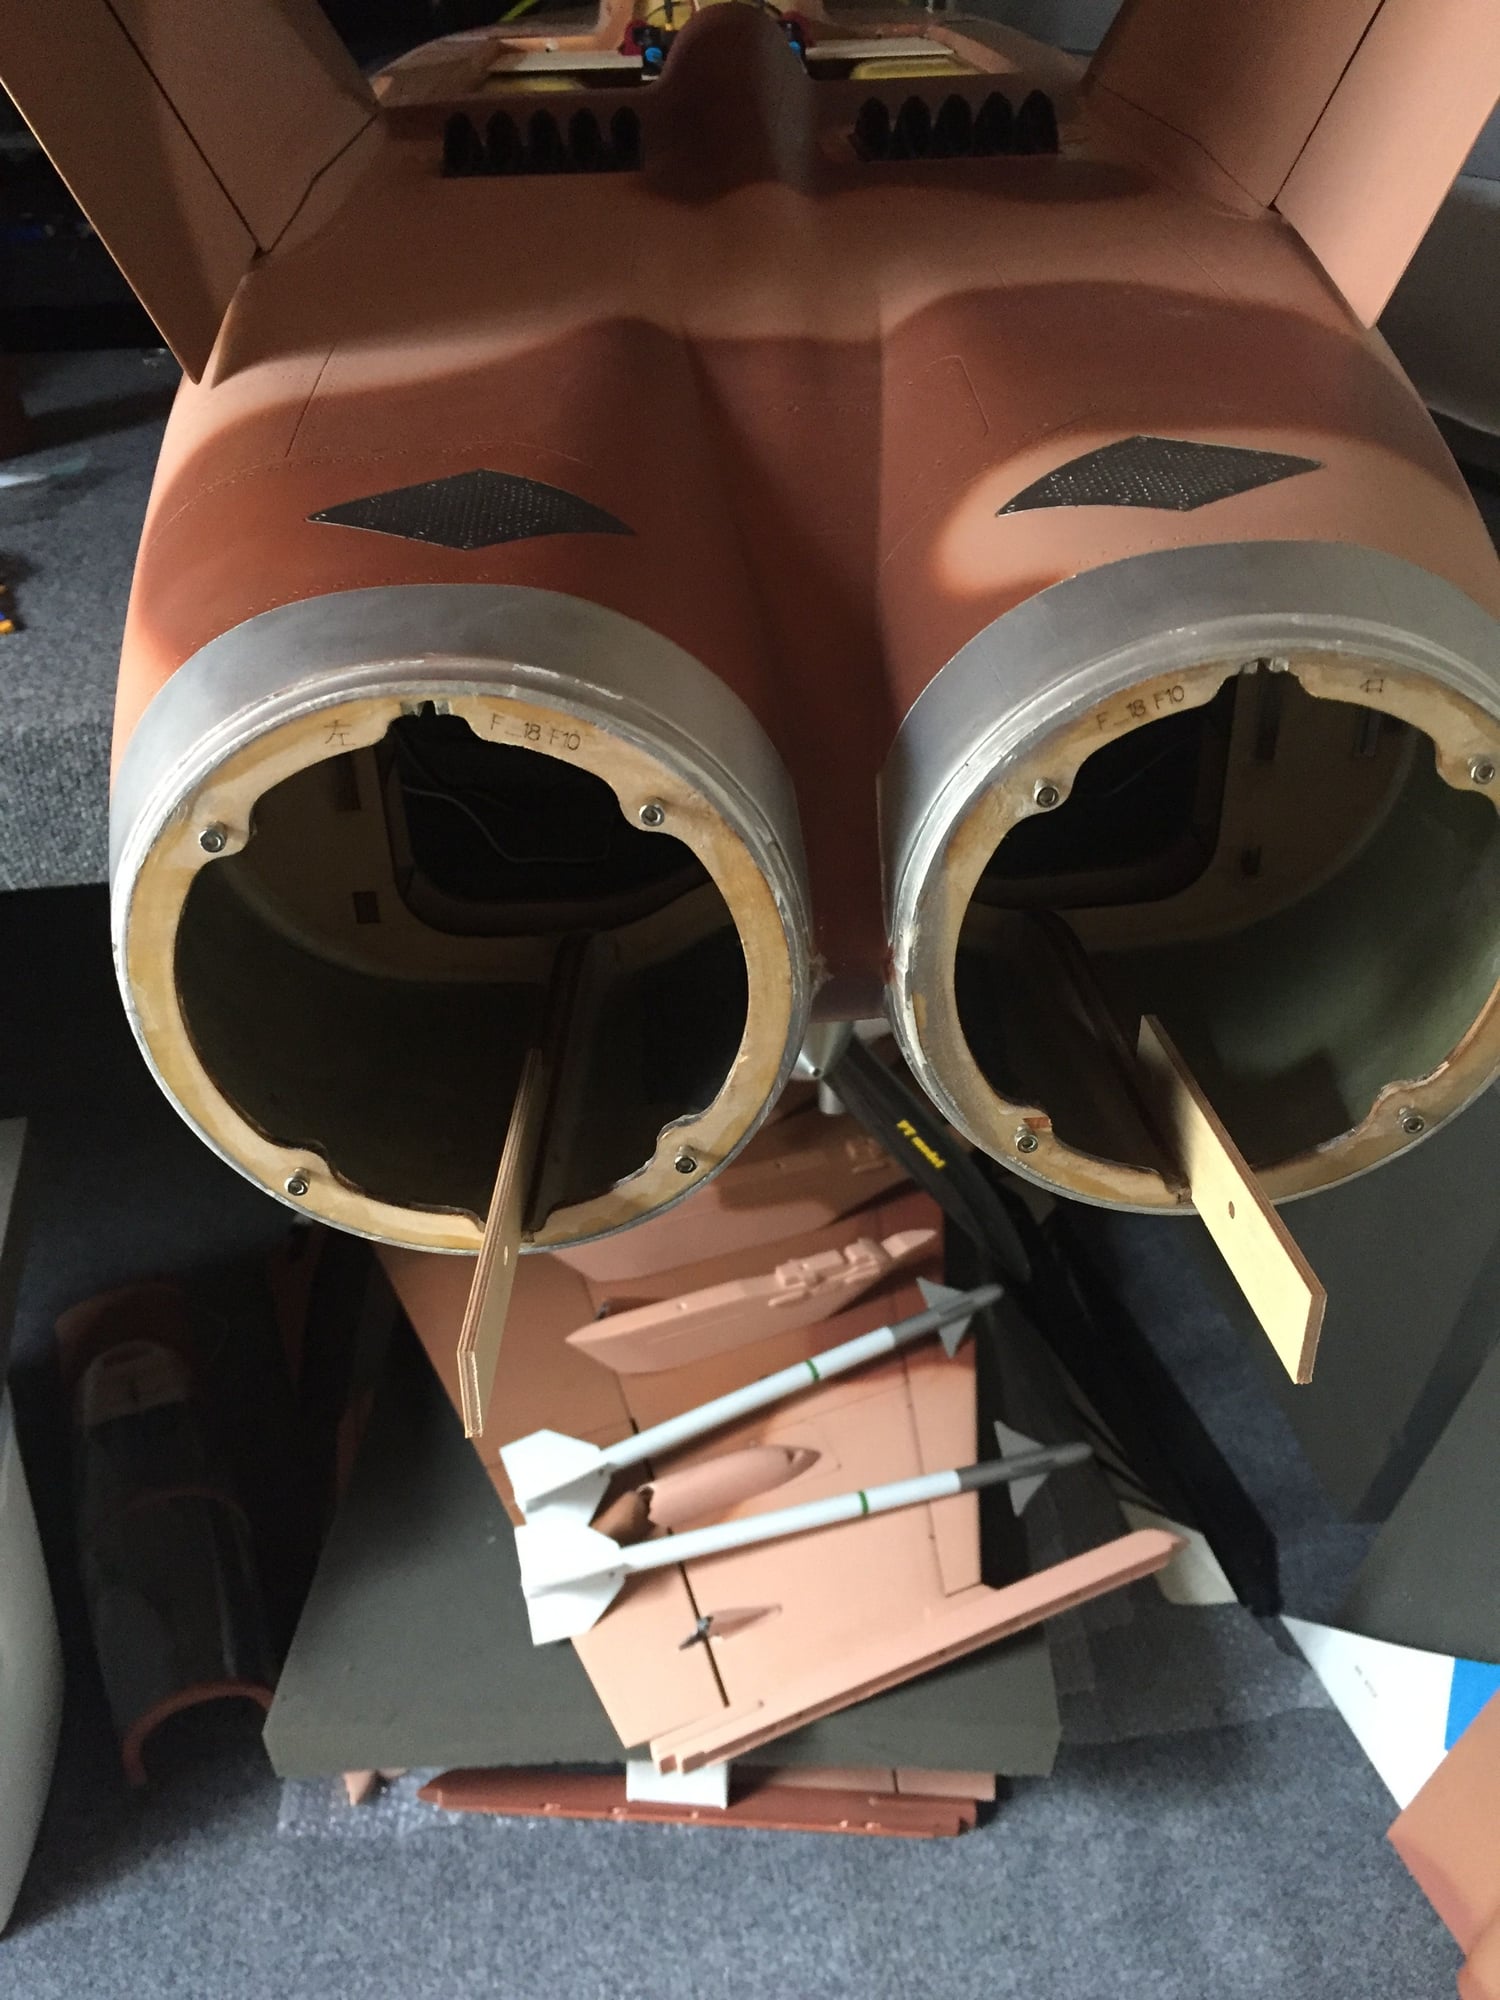
Okay so I had to change my wing servo connections since the there is no way to route all three to one location that I found. So in turbine install avoidance fashion I did more finishing things. Like wing store pylons and wing tip missile rails. The holes for the tip rails are off so unless you make new holes you cannot mount the tail in the scale position. The end of the tail should be to the center of the ailerons not the end. The supplied tip missile mount holes do not align with the rail lollipops, for some odd reason there are three?. Pylons hard points are installed but way off the correct positions, but at least they installed some. I�m planning fly with two of the wing pylons, tip rails/missiles and center tank to match the real 18 I used for the scheme.
05-04-2019, 07:19 AM
#229
Thread Starter
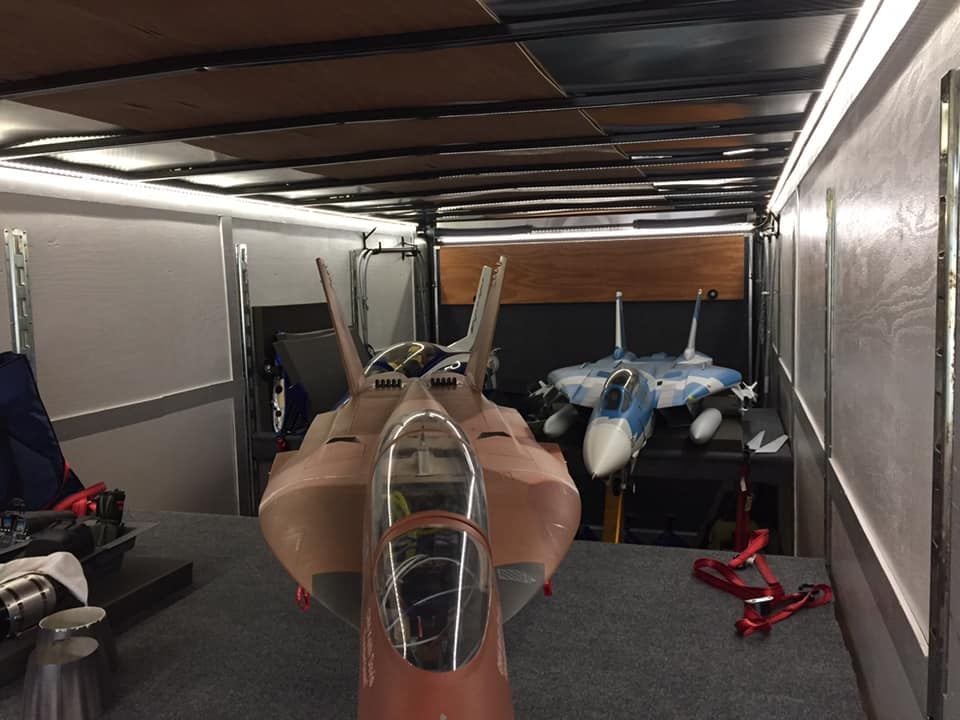
Slow going this week, in-laws and other things have slowed progress. Plus I decided to take some time to clean up the trailer and then it turned into a picture even lol
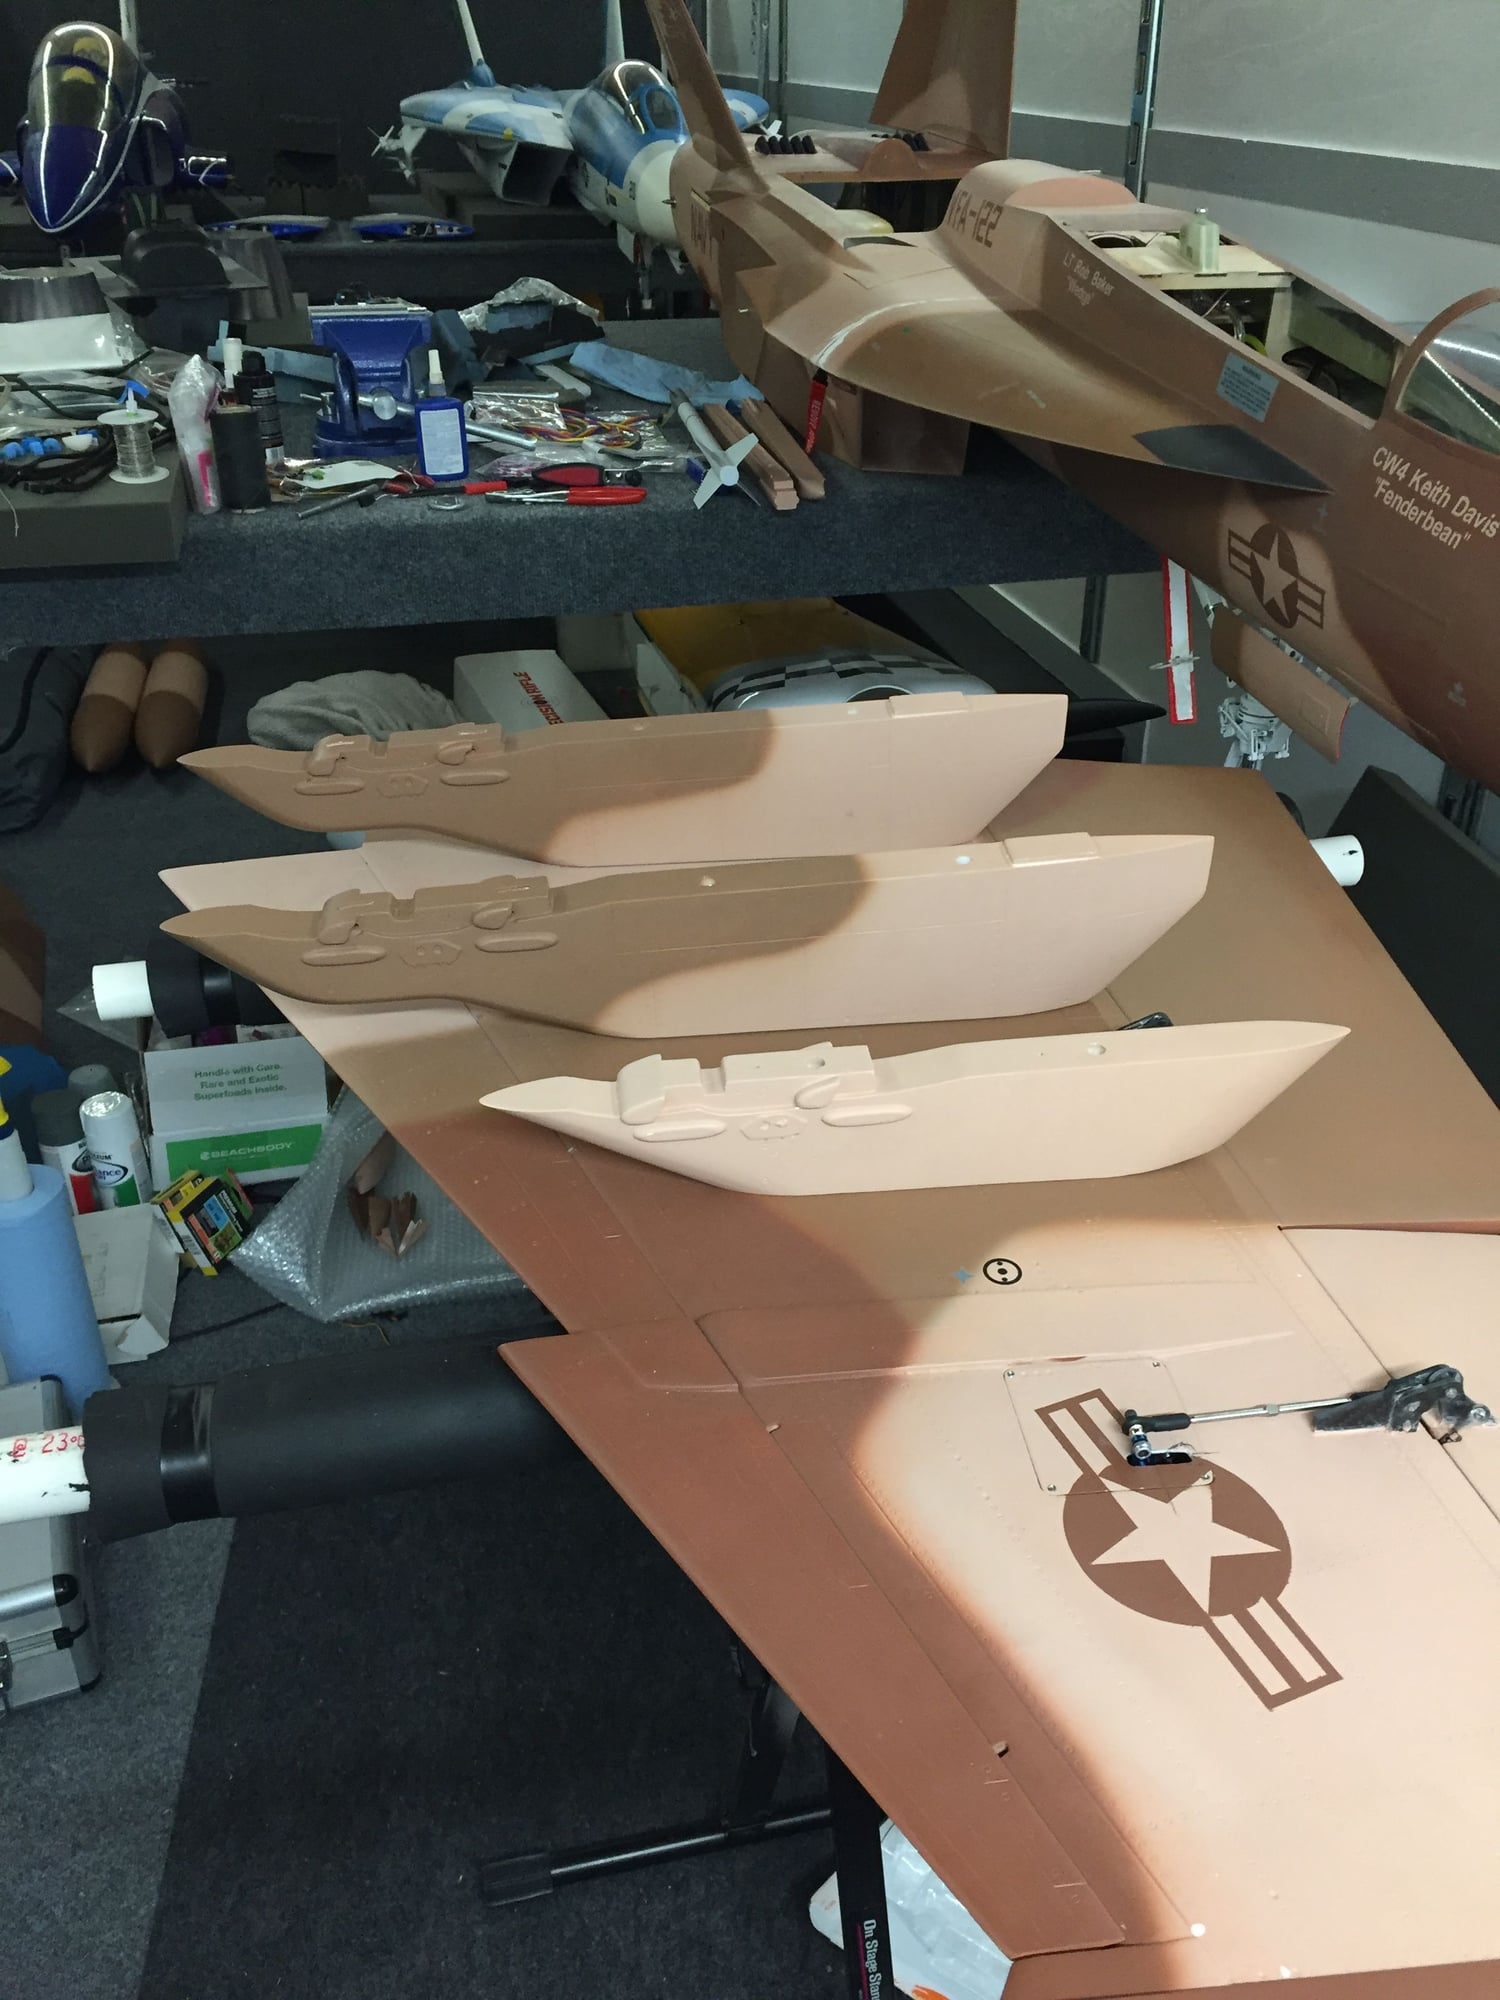
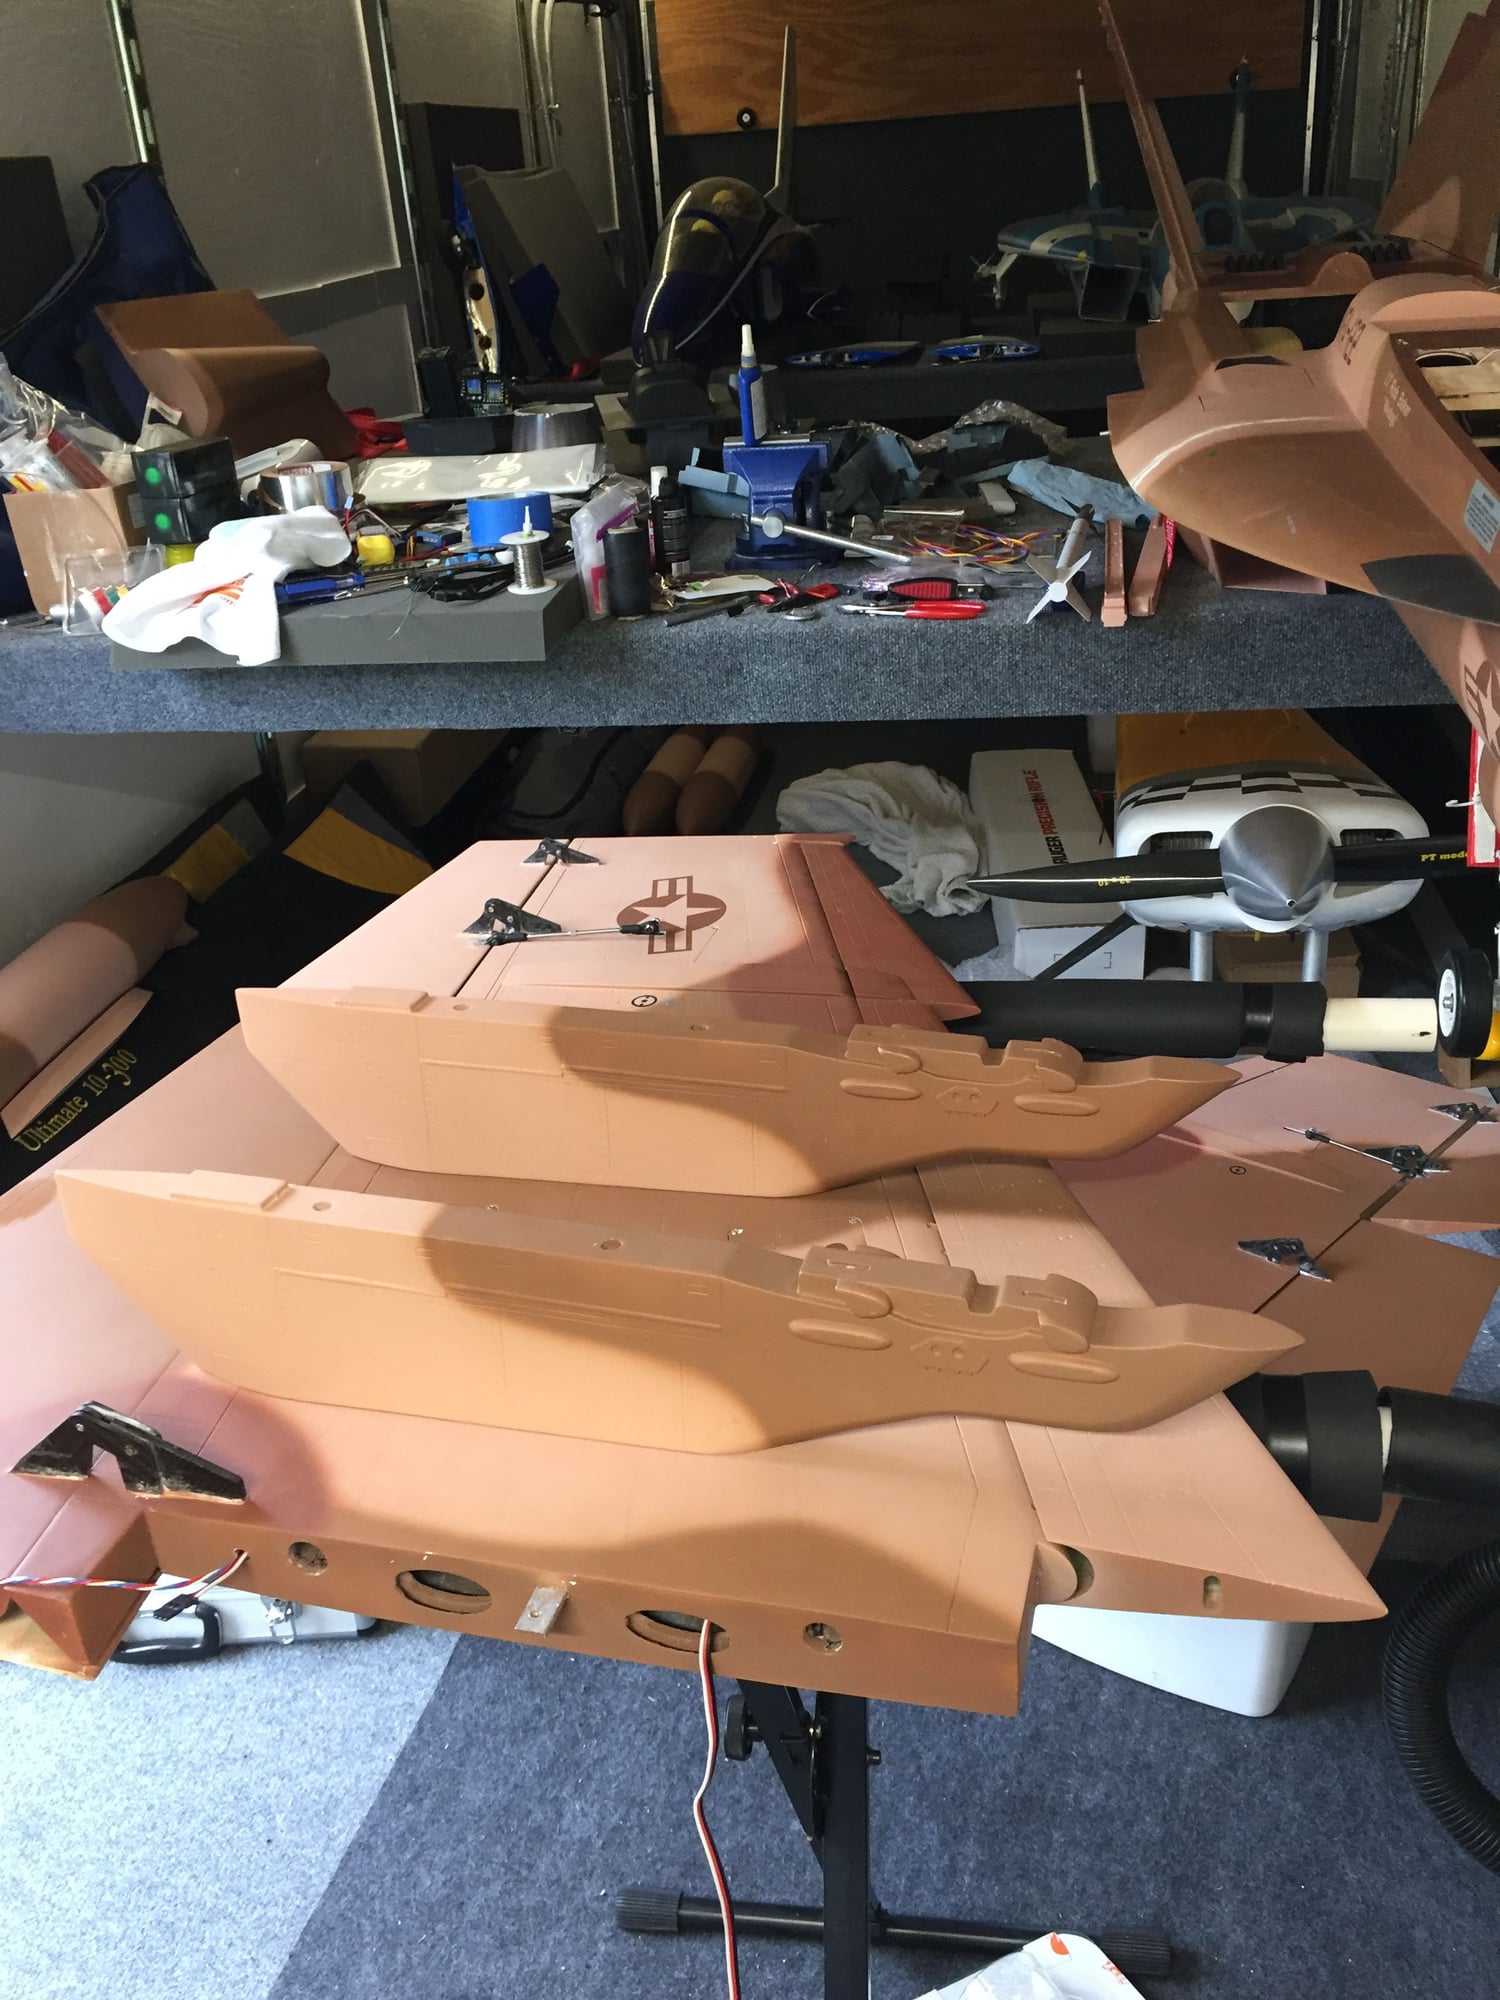
These colors really look great minus one color, sucks I have to repaint it and havent been able to match the current colors.
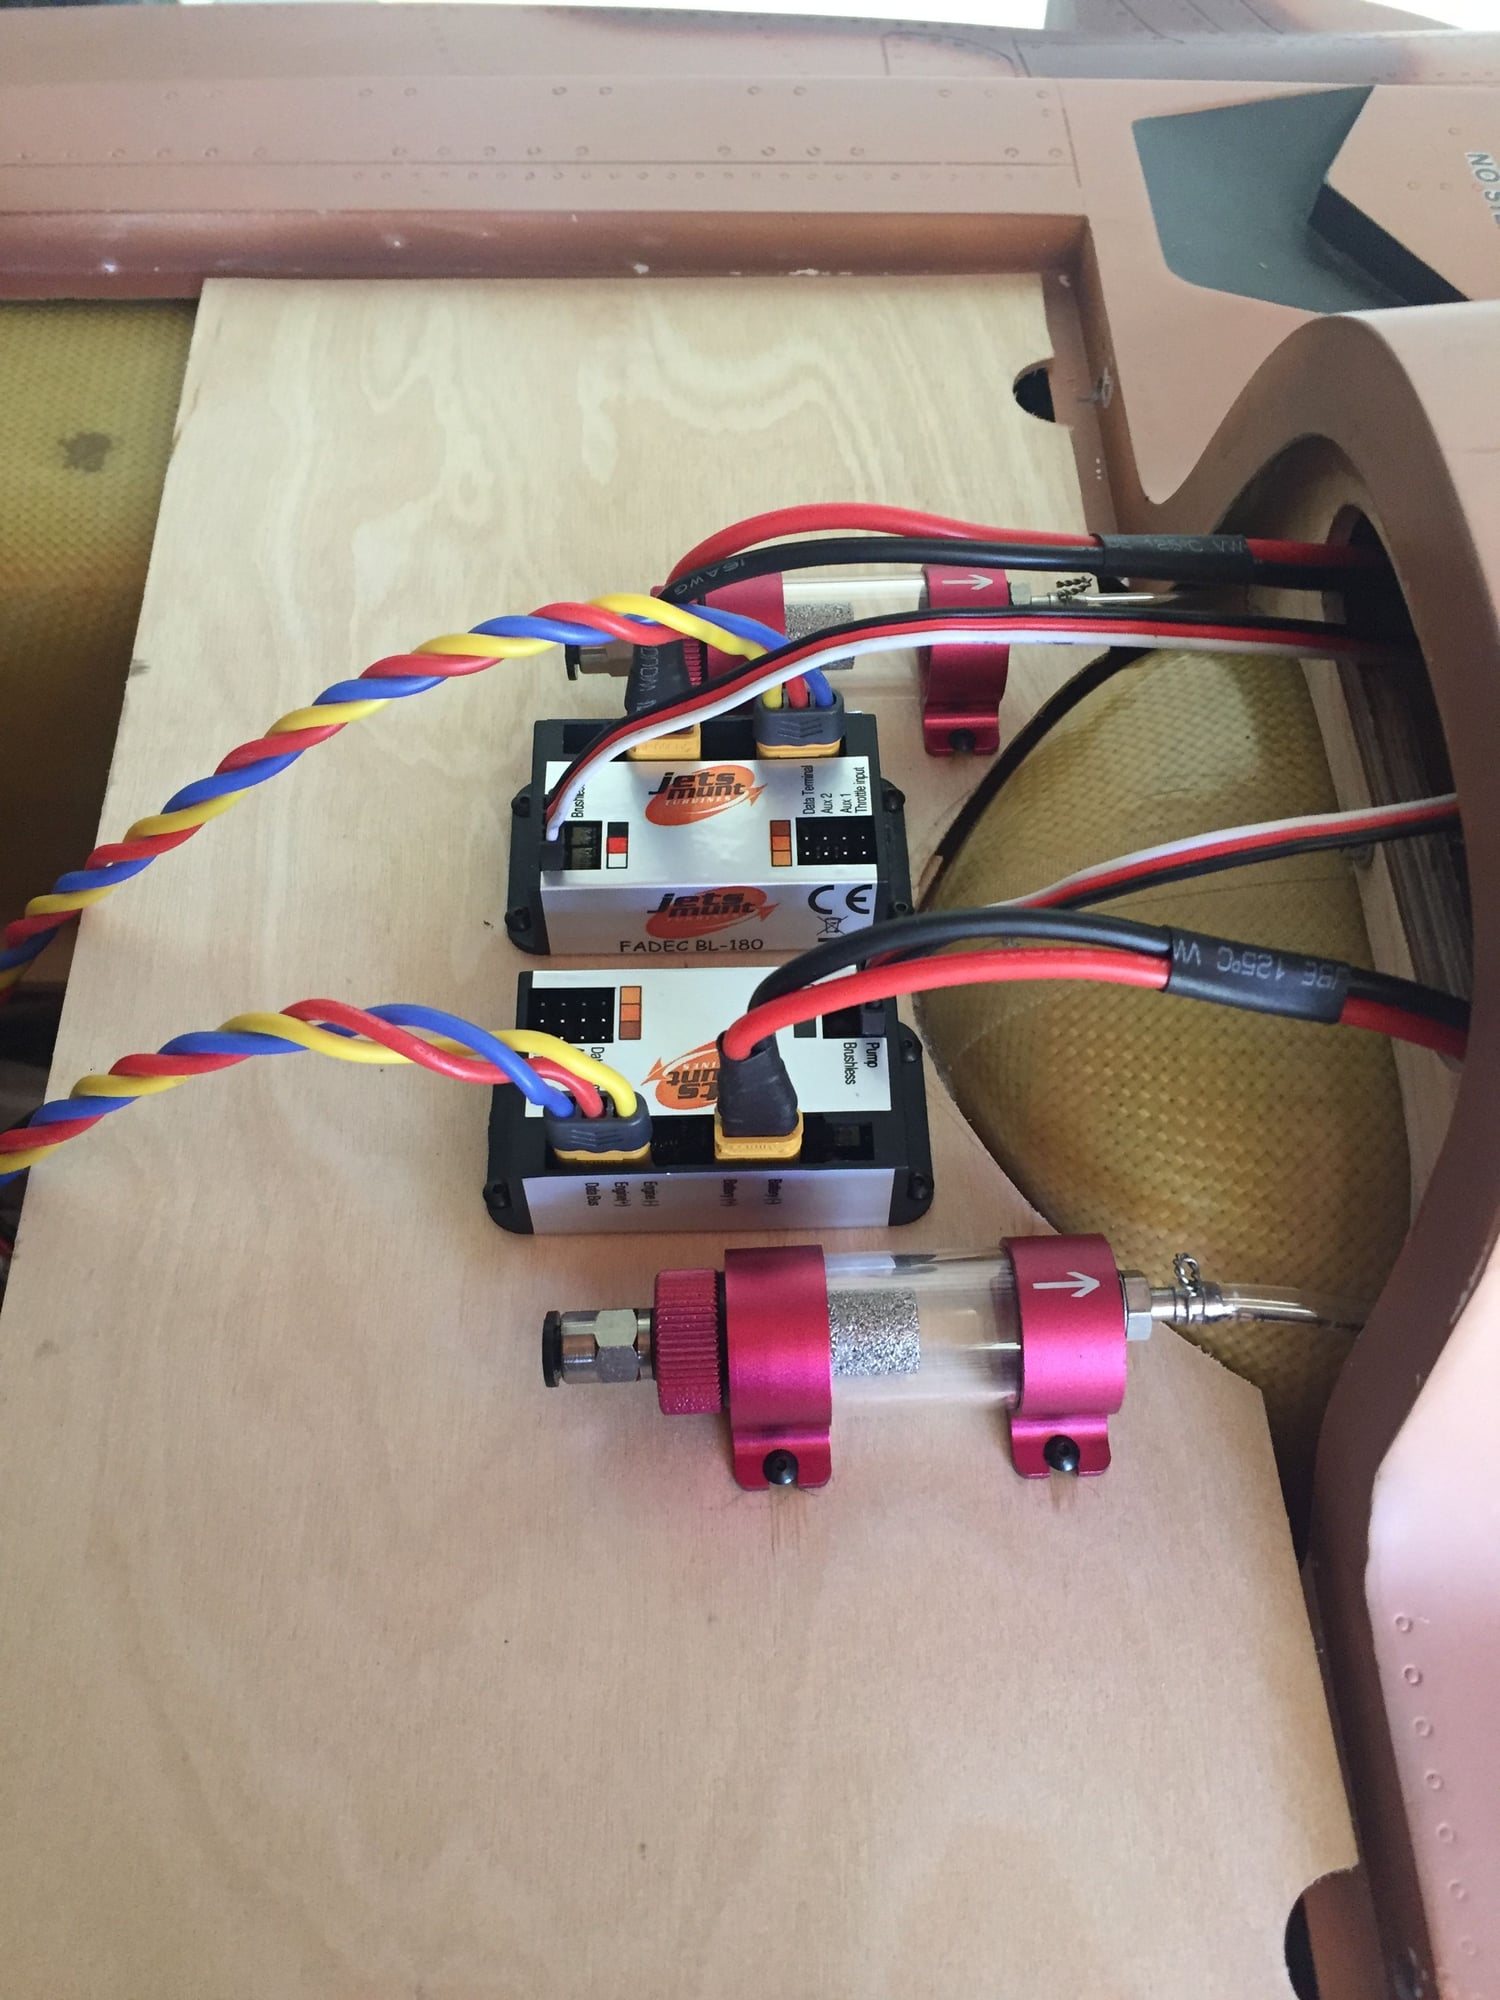
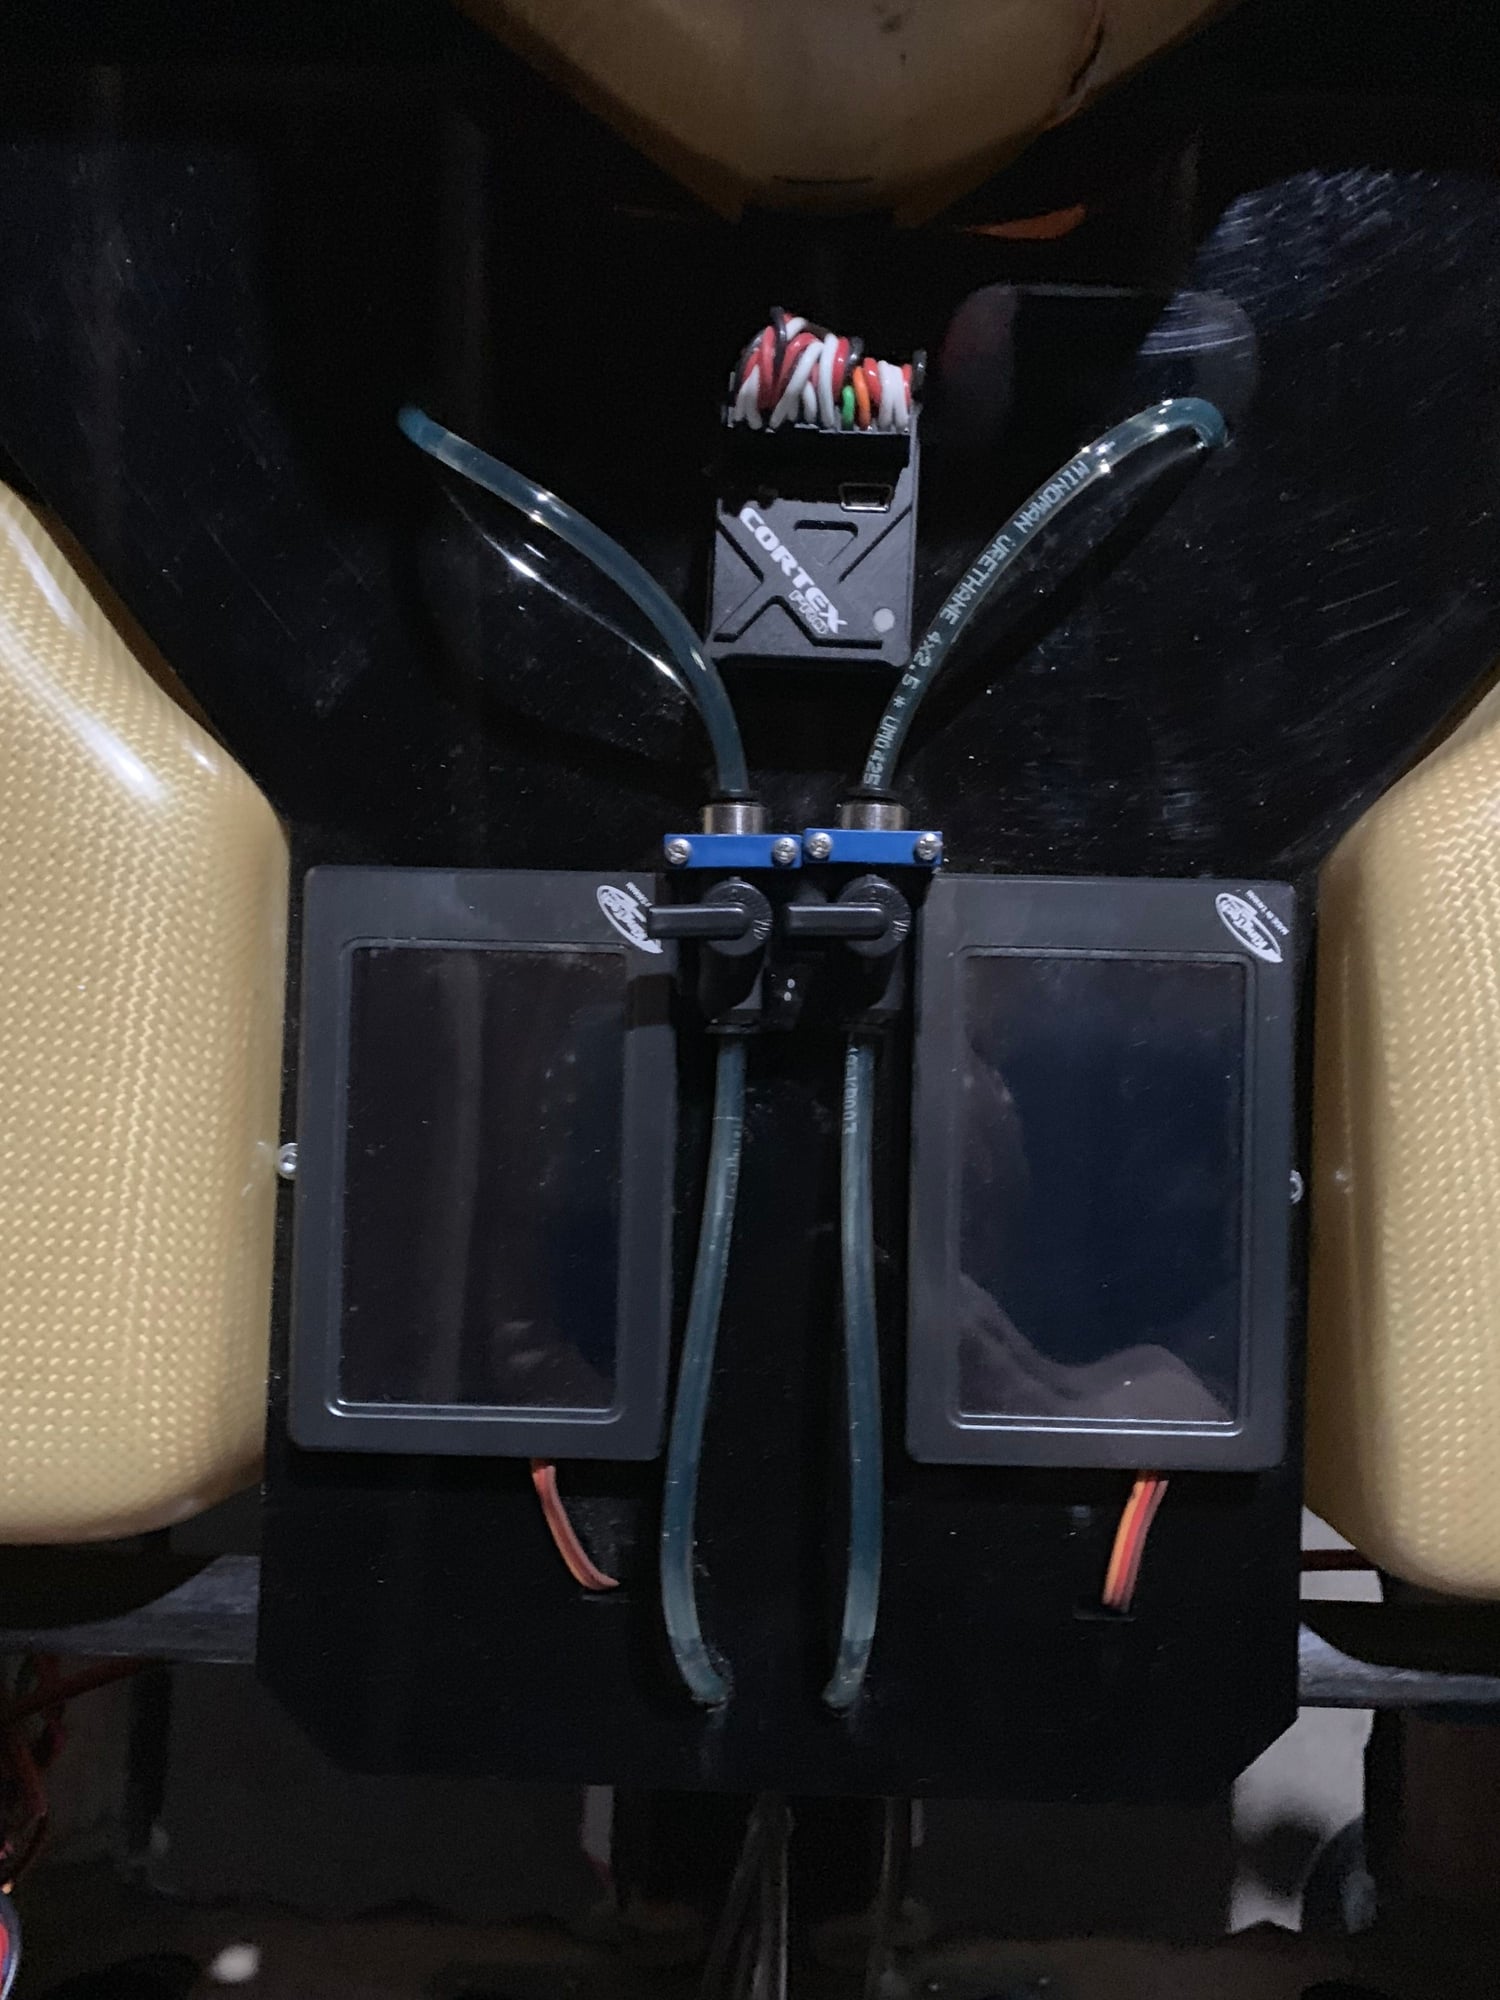
I started a small equipment board that will sit on top of the inlet duct/main gear for the ECUs, Shutoff valve and fuel filters. After that its just turbines, wire mounting/hook up and then cockpit install.
Oh and repaint, boooooo!
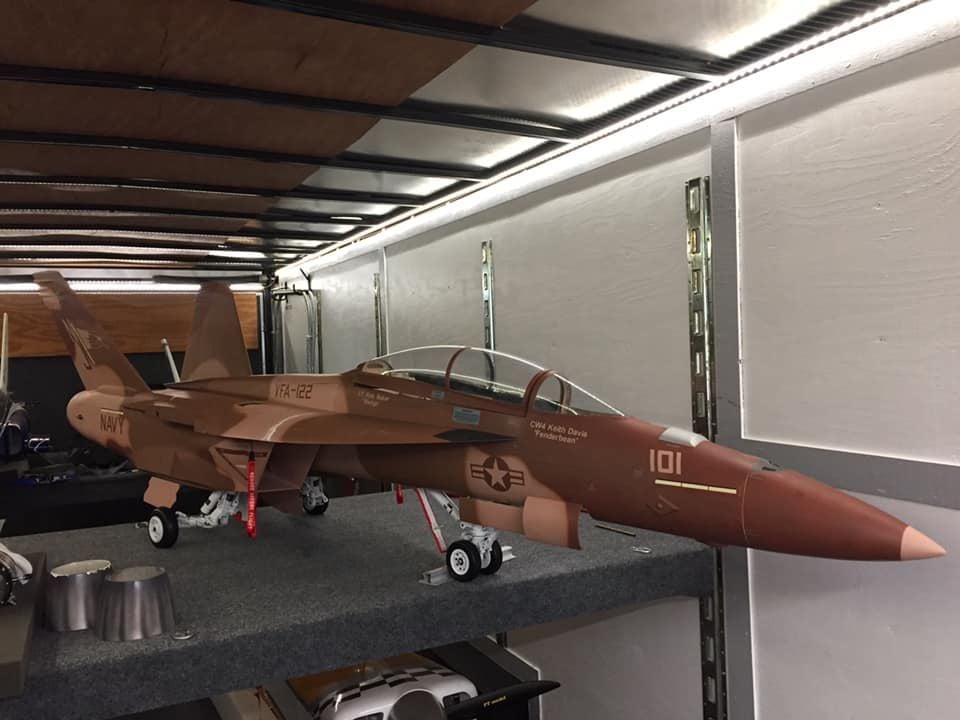
These colors really look great minus one color, sucks I have to repaint it and havent been able to match the current colors.
I started a small equipment board that will sit on top of the inlet duct/main gear for the ECUs, Shutoff valve and fuel filters. After that its just turbines, wire mounting/hook up and then cockpit install.
Oh and repaint, boooooo!


 05-07-2019, 01:58 PM
#235
Thread Starter
05-07-2019, 02:00 PM
#236
Thread Starter
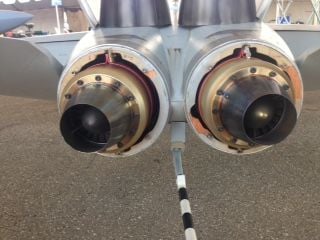
SM did not make them canted outboard like they should be, the wood dowels in the wings are about 1/2 in in diameter so I drilled them off center to give them as much as I could but nothing like the real jet.
05-07-2019, 02:02 PM
#237
Thread Starter
looks like Barry's, any chance you can send me the picture via email [email protected] when i click on the one above to enlarge it doesnt do anything. Thanks
05-07-2019, 02:16 PM
#238

Fwiw I don't have one of these, so what do I know.
If it were mine, I would create a jig that would let me accurately align each turbine's thrust line through the aircraft center of mass or maybe a bit aft of it.
EDIT: lateral alignment is important, I figured that was obvious
If it were mine, I would create a jig that would let me accurately align each turbine's thrust line through the aircraft center of mass or maybe a bit aft of it.
EDIT: lateral alignment is important, I figured that was obvious
Last edited by mr_matt; 05-07-2019 at 02:43 PM.
05-08-2019, 08:51 PM
#240
Thread Starter

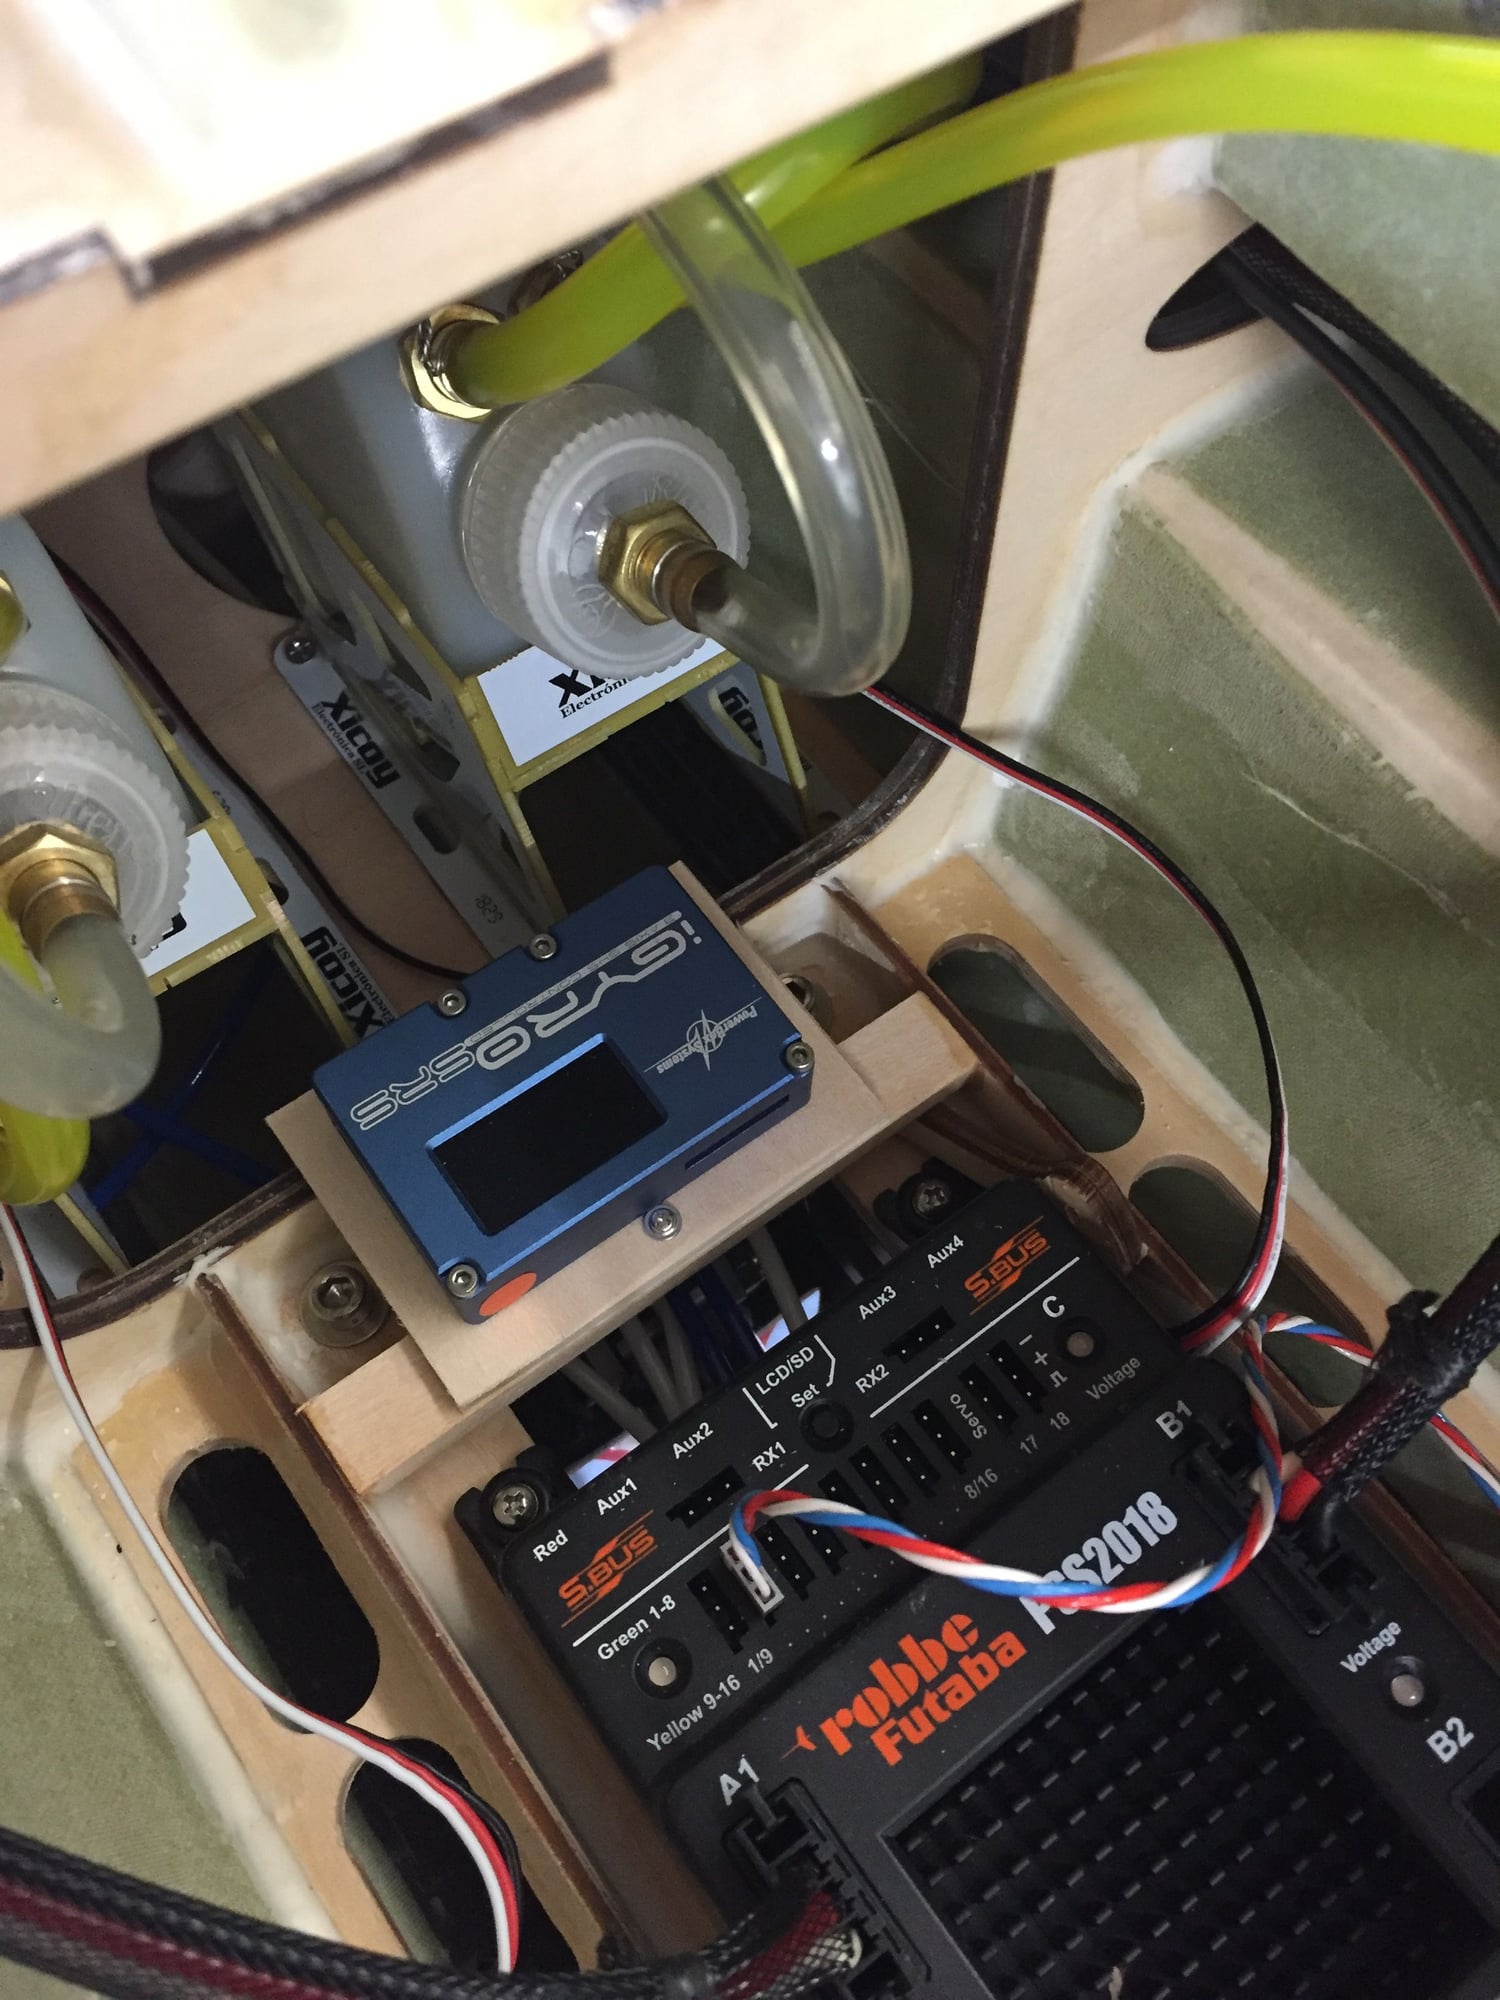
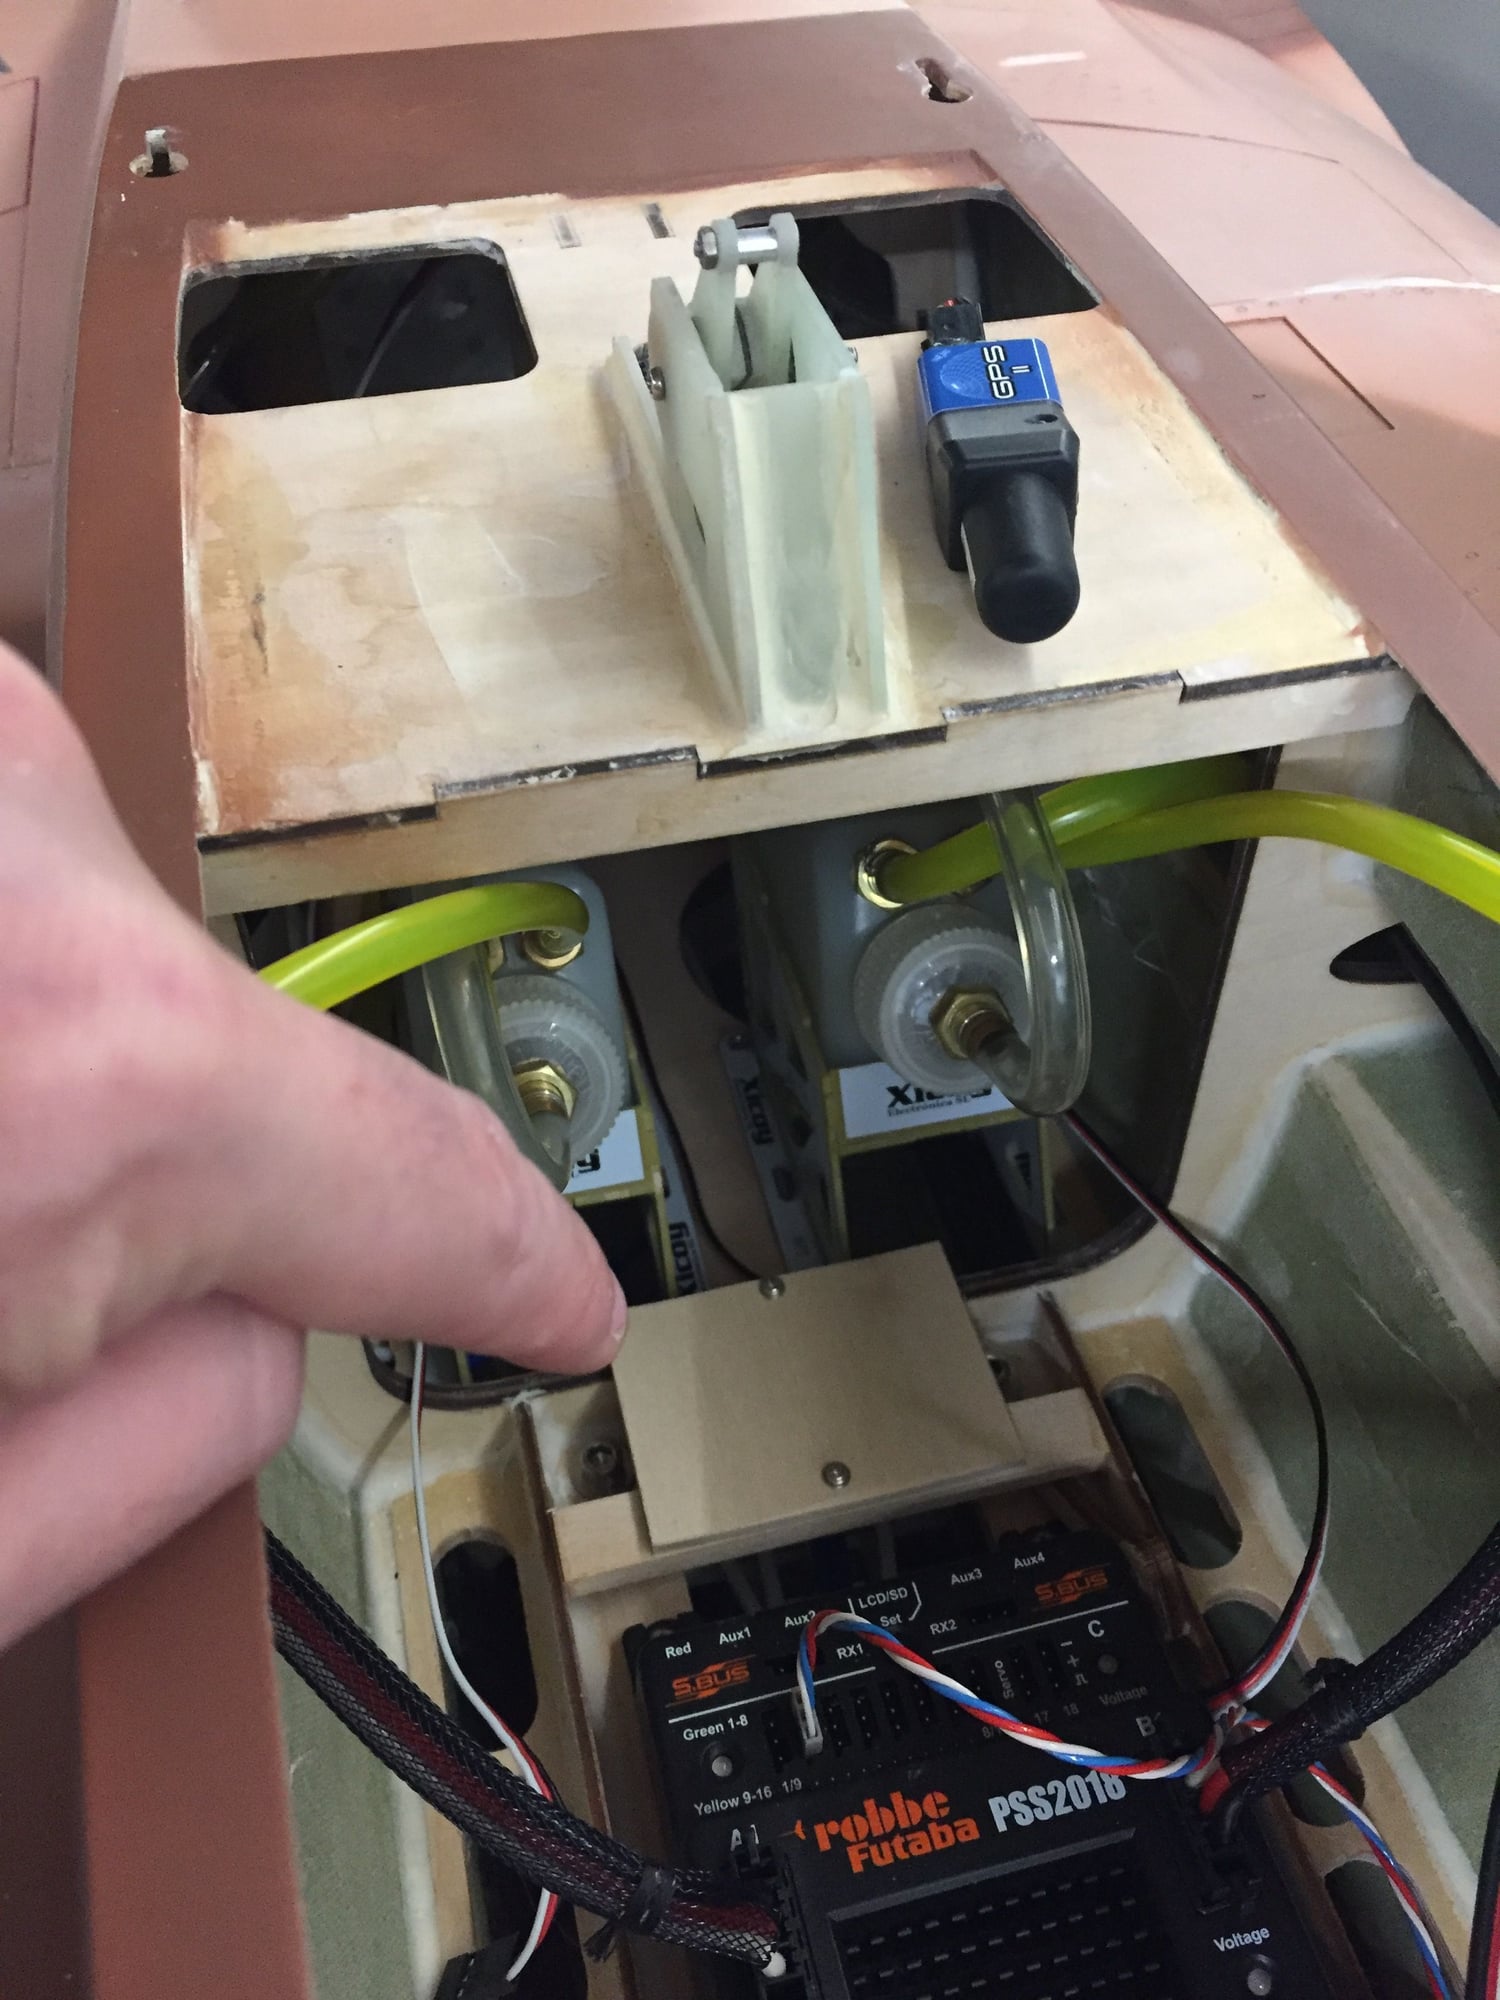
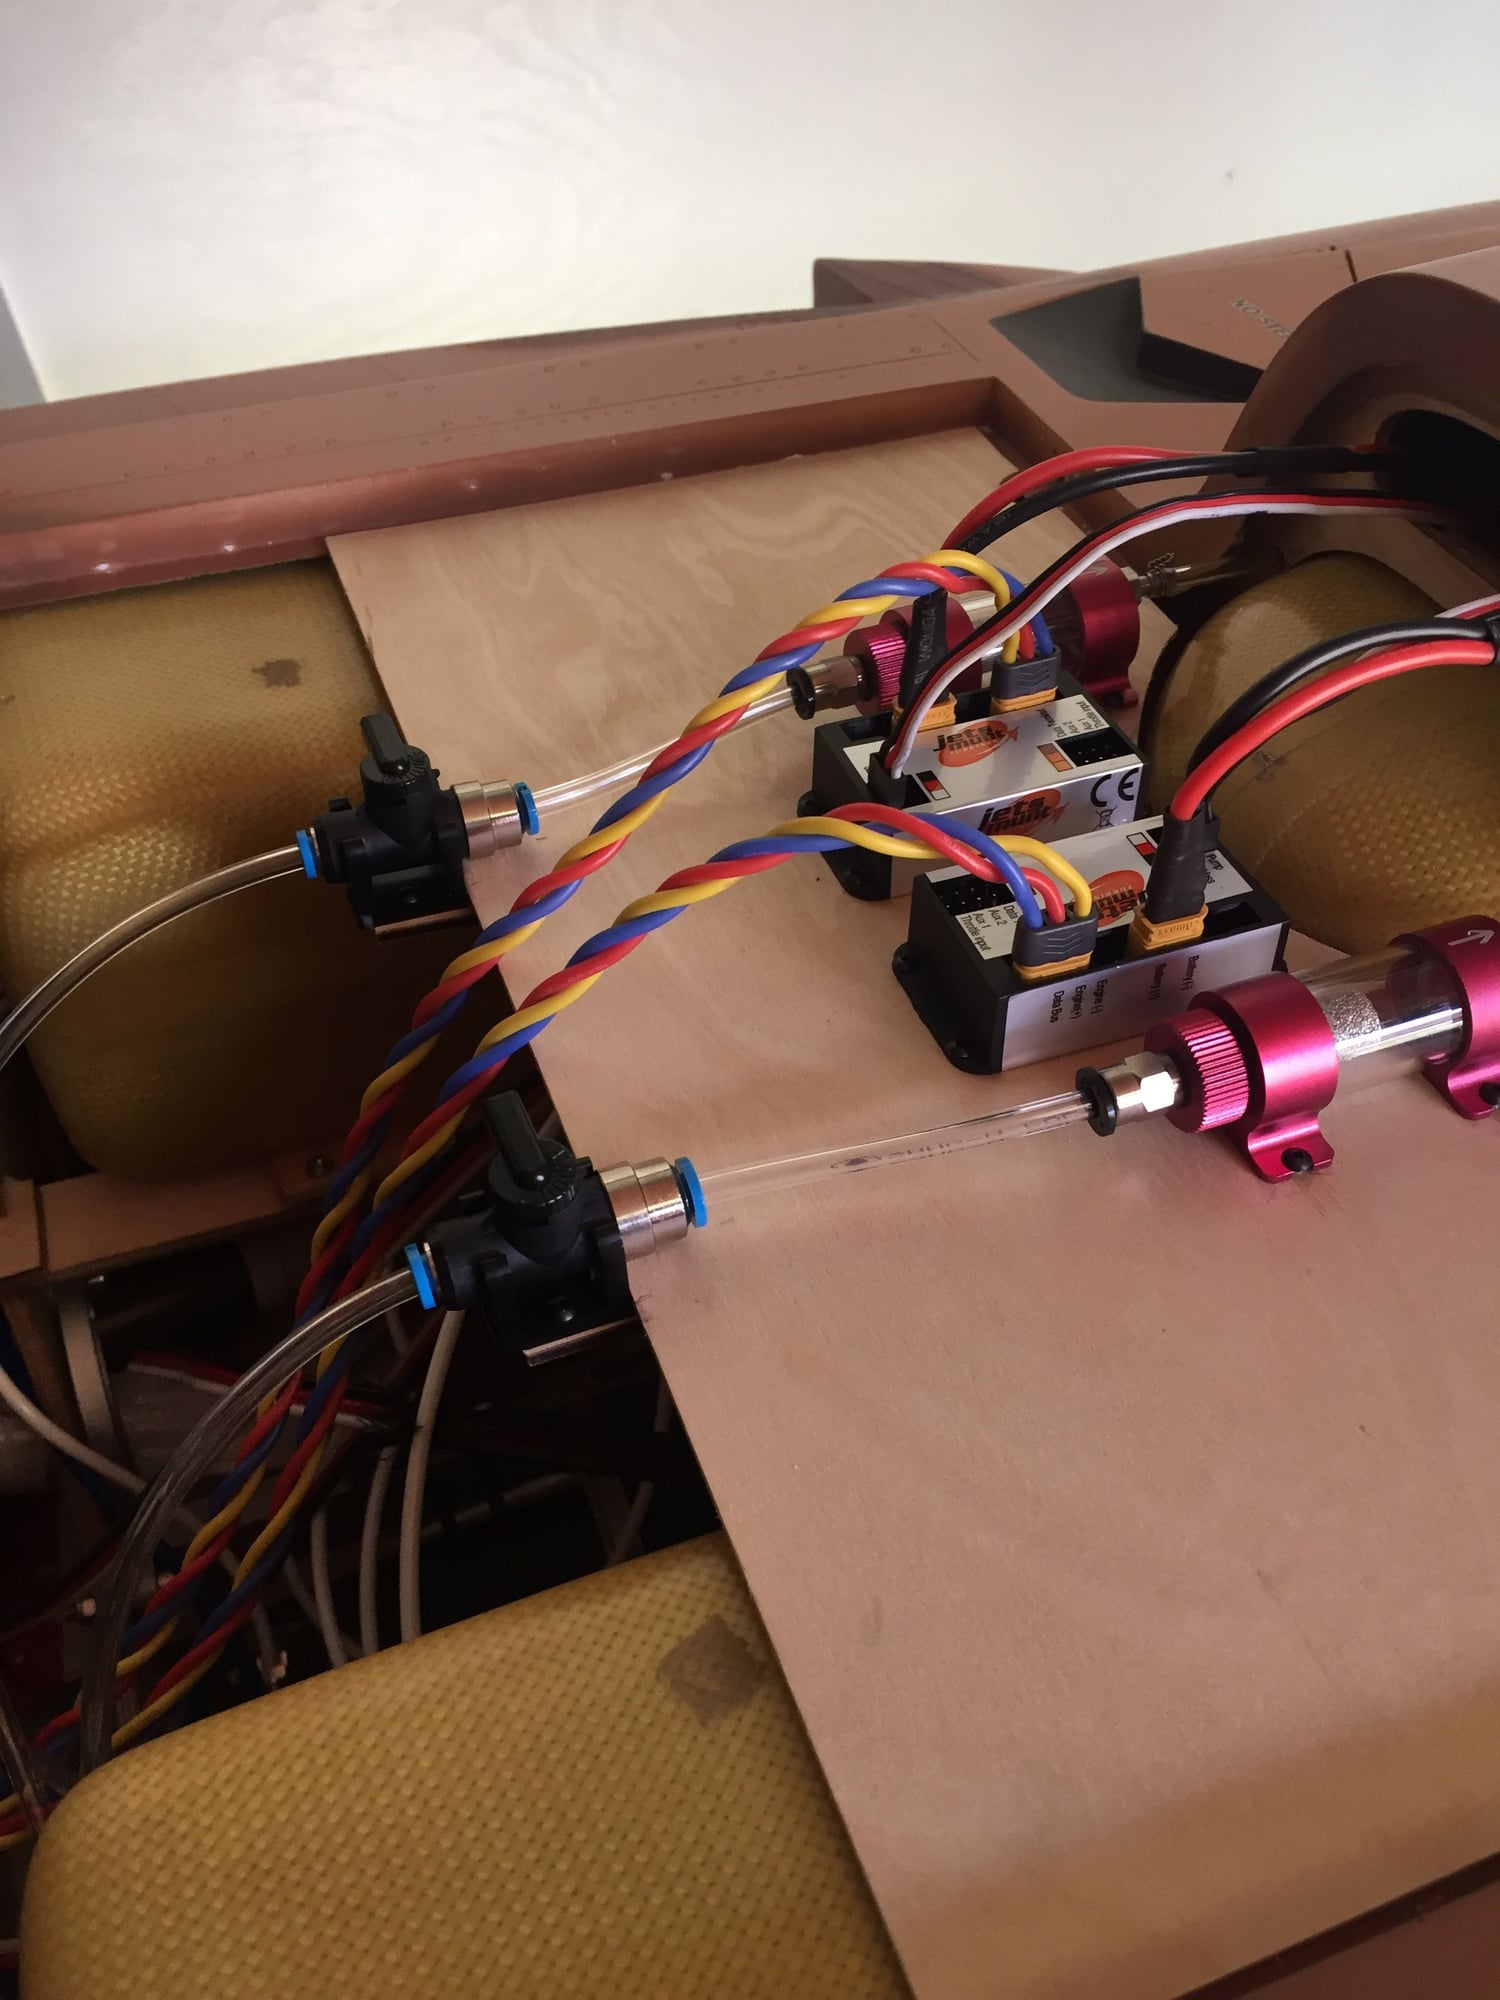
Small steps between turbine services, made a mount to support the back of the equipment tray and a mount for the gyro. I will start the turbine install tomorrow.

 05-09-2019, 08:37 AM
#242
Thread Starter


 05-09-2019, 12:40 PM
#244
Join Date: Jul 2016
Posts: 25
Likes: 0
Received 0 Likes
on
0 Posts
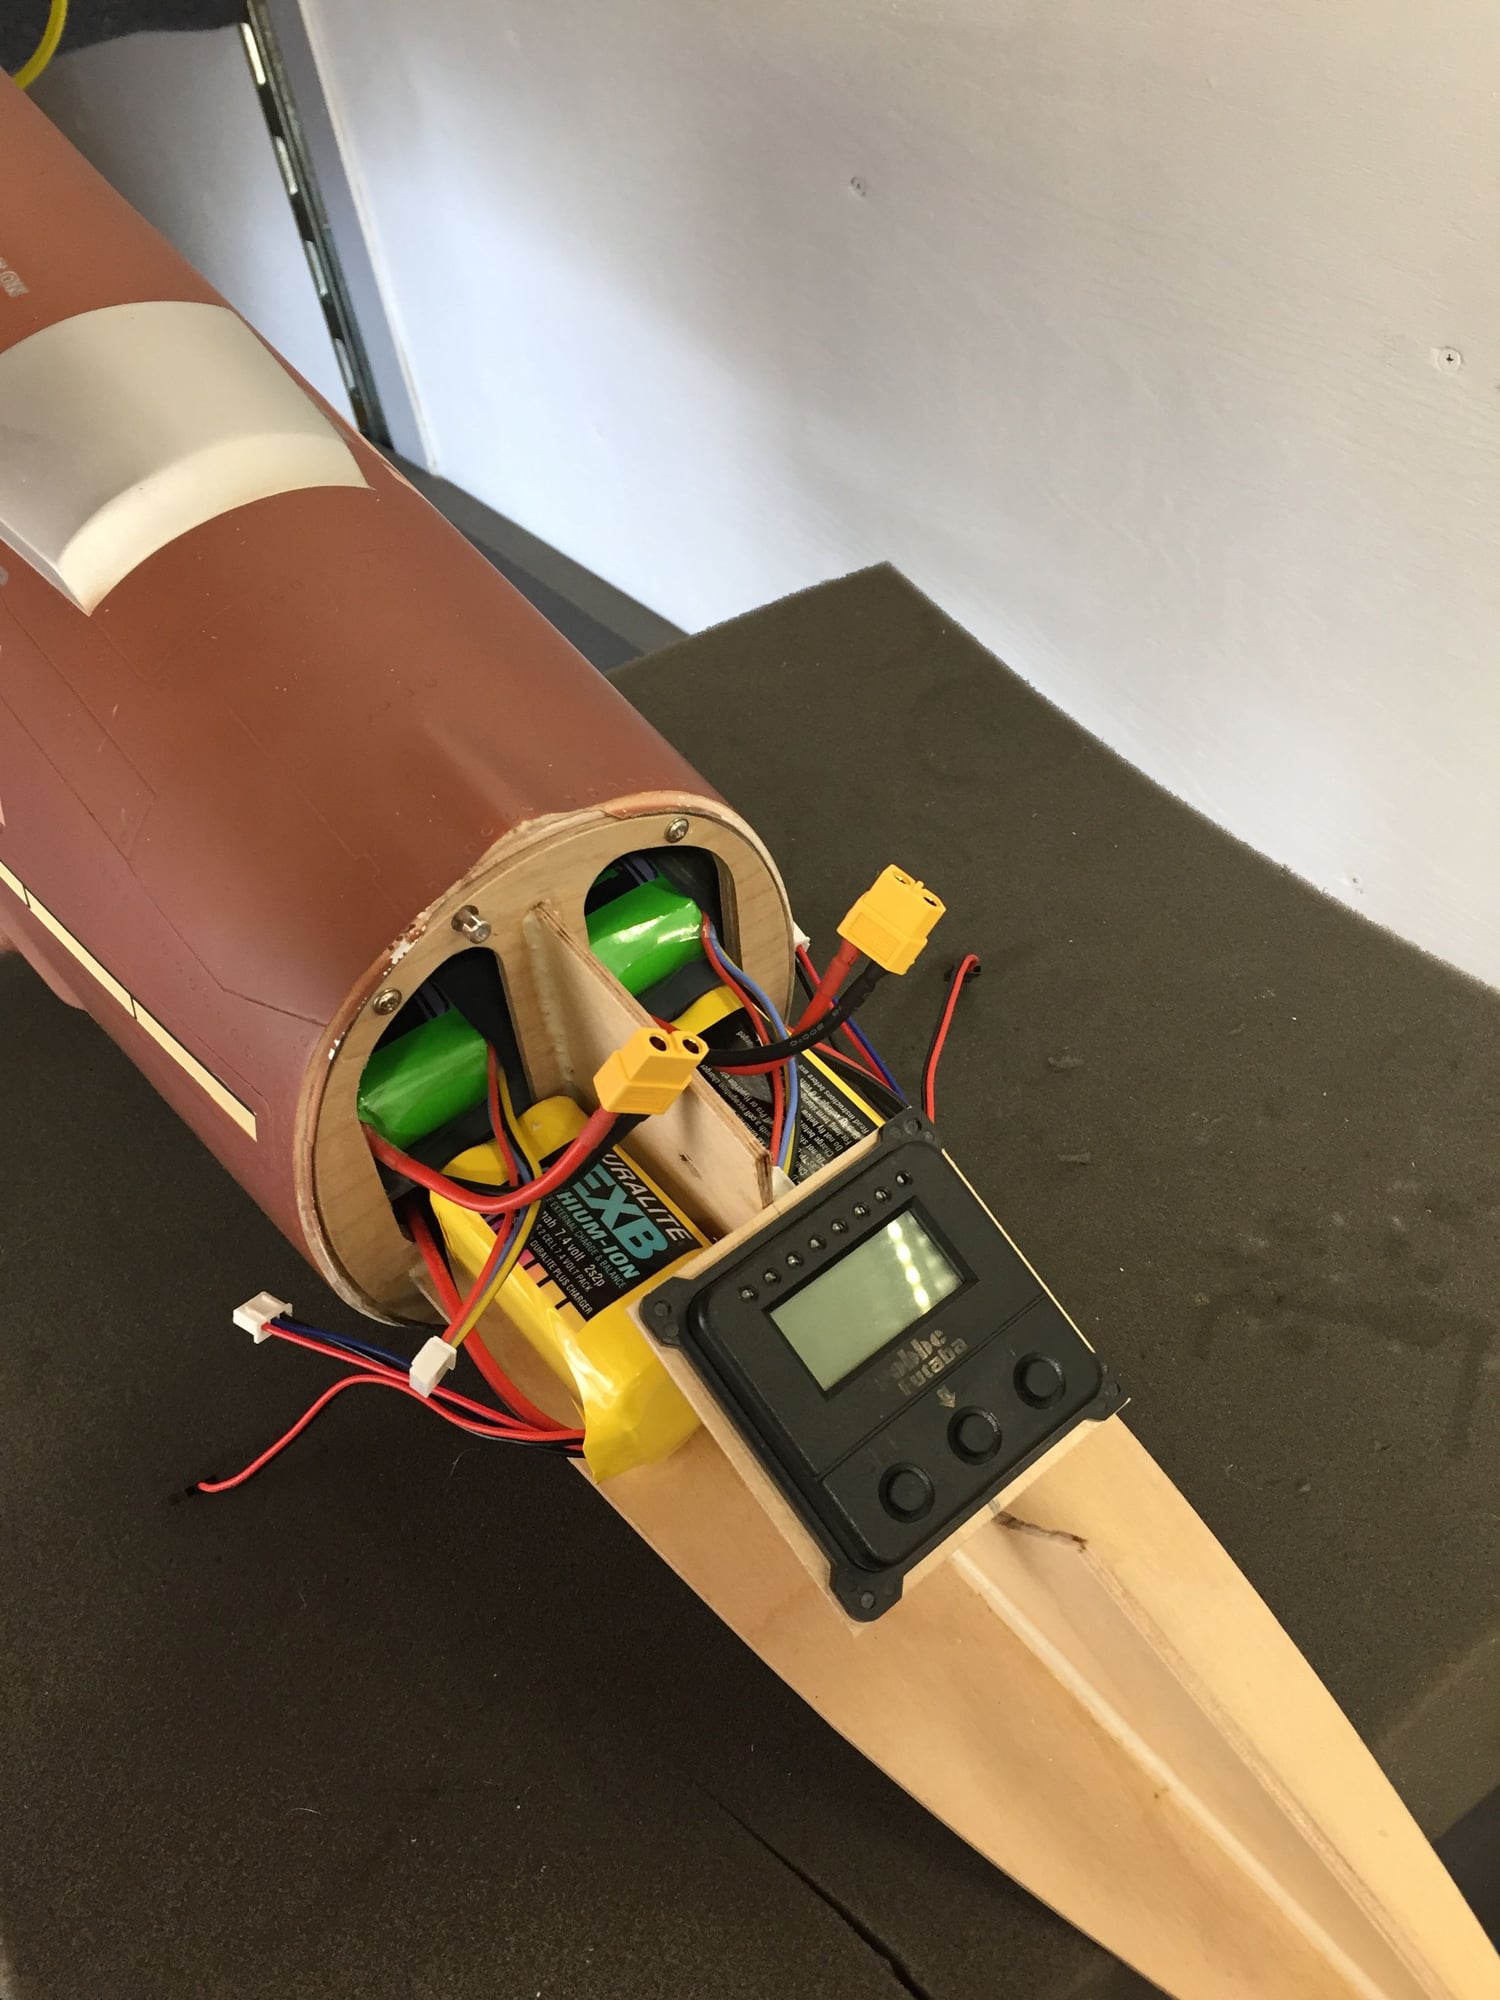
Here man. A friend and I drew up two files for this plane in Solid works. It is a drop in fit. this is what i used for mine. I can send the file your way If you'd like. i get that its a bit late in the Game. I had it laser cut. All you'd have to do is send the file someone who has a laser cutter and BAM!!! I put my batts behind the front former and didn't bother using the wood frame.
BTW balance on front spar.
BTW balance on front spar.
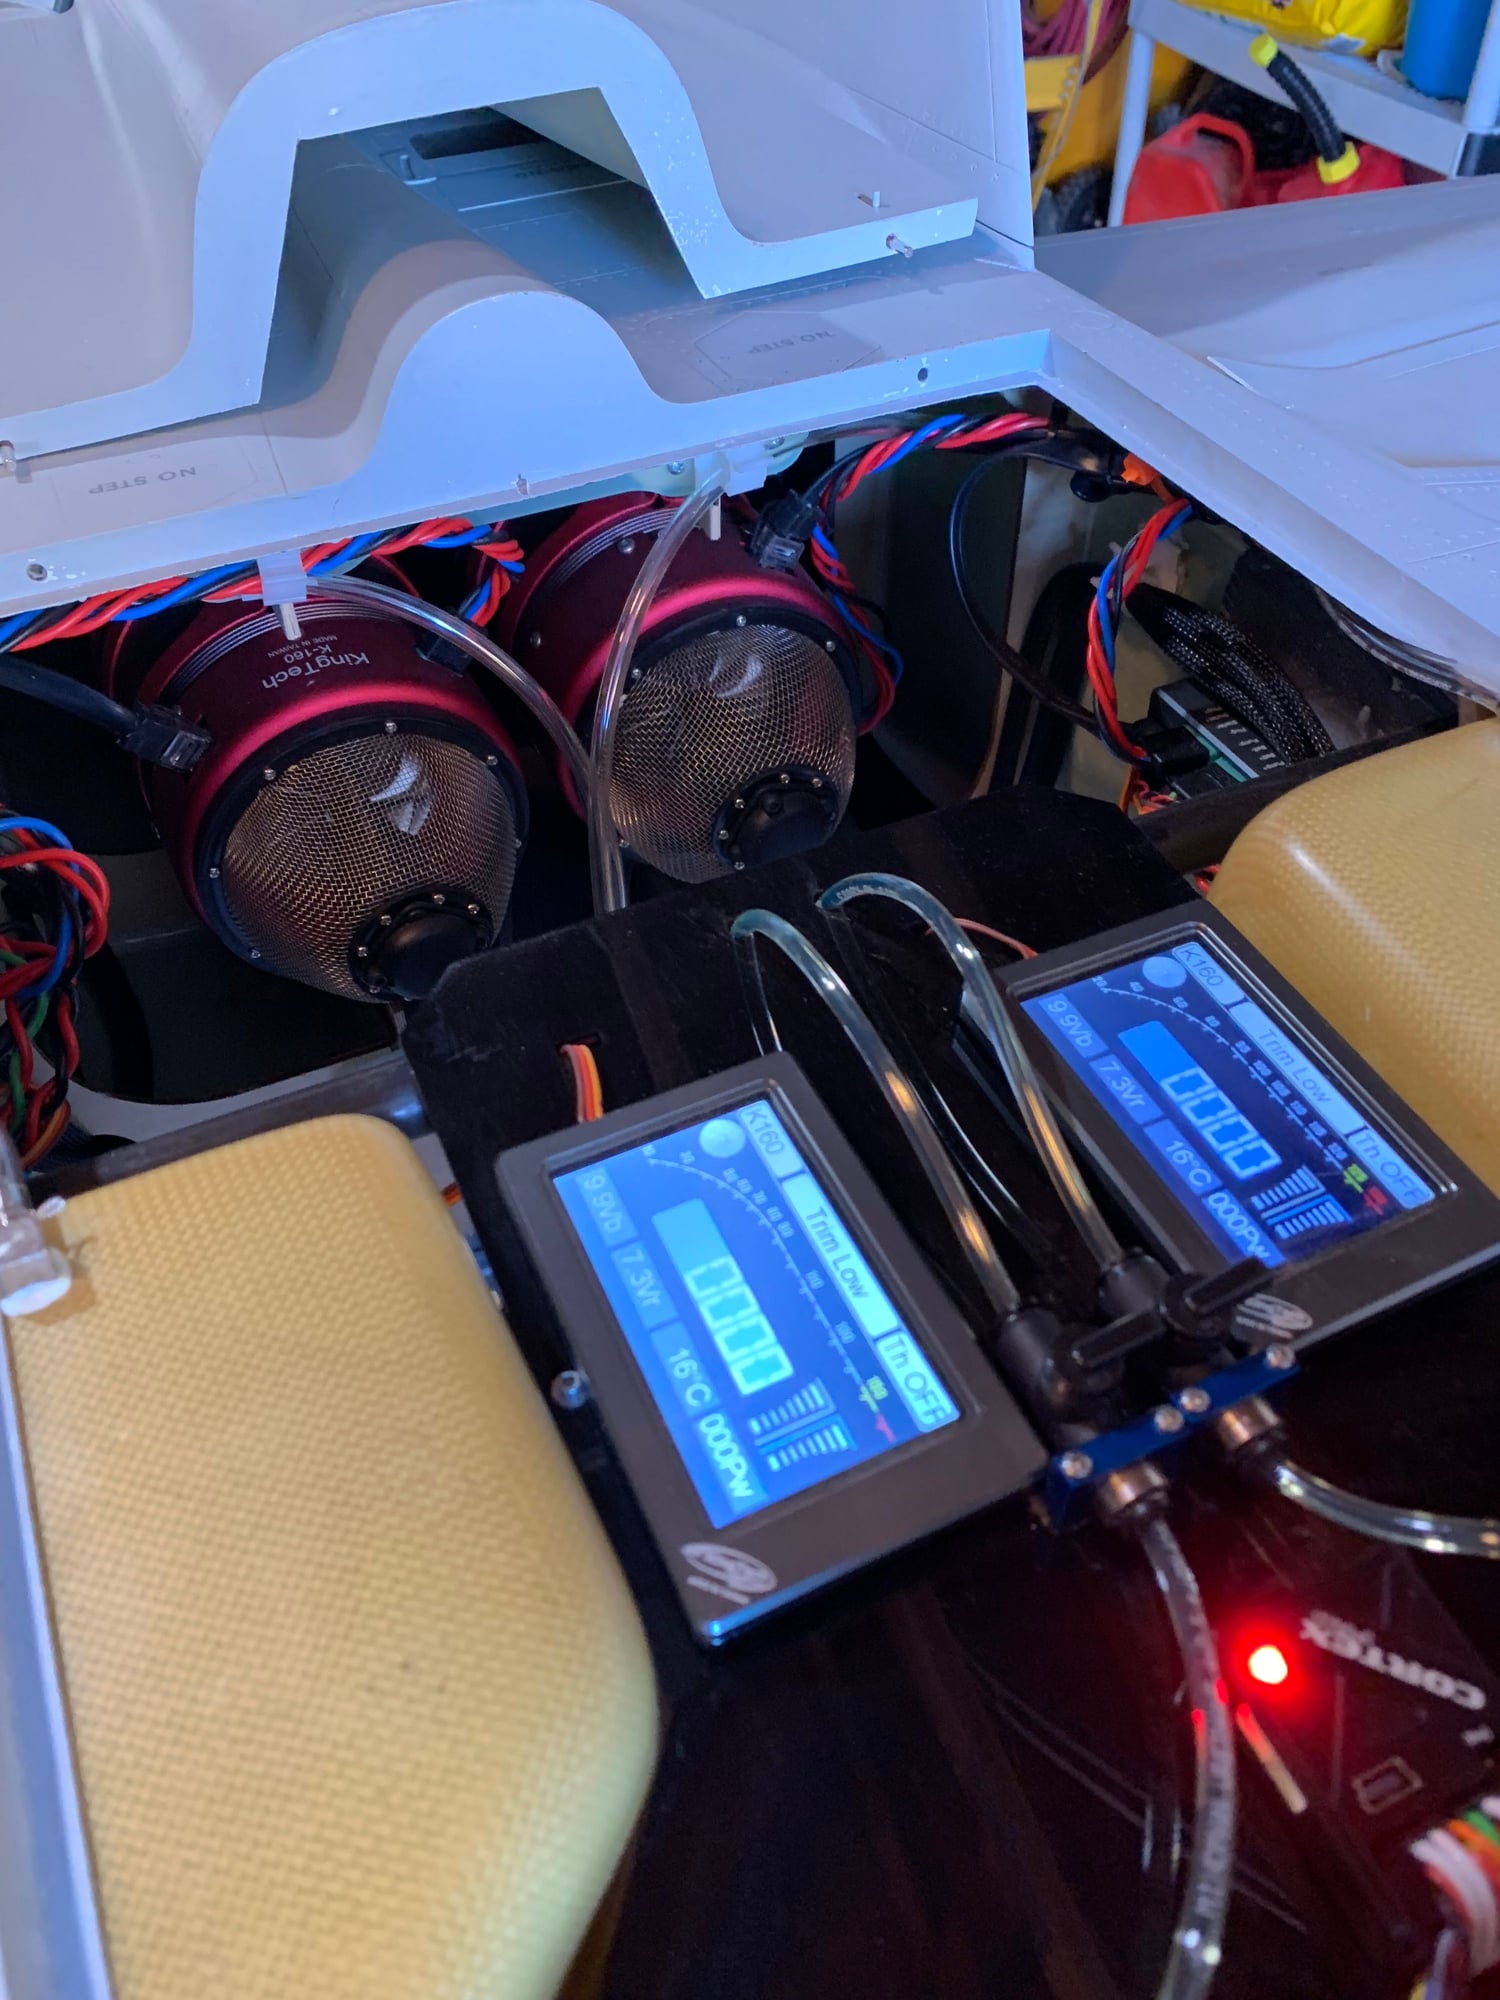
05-10-2019, 07:26 PM
#248
Thread Starter
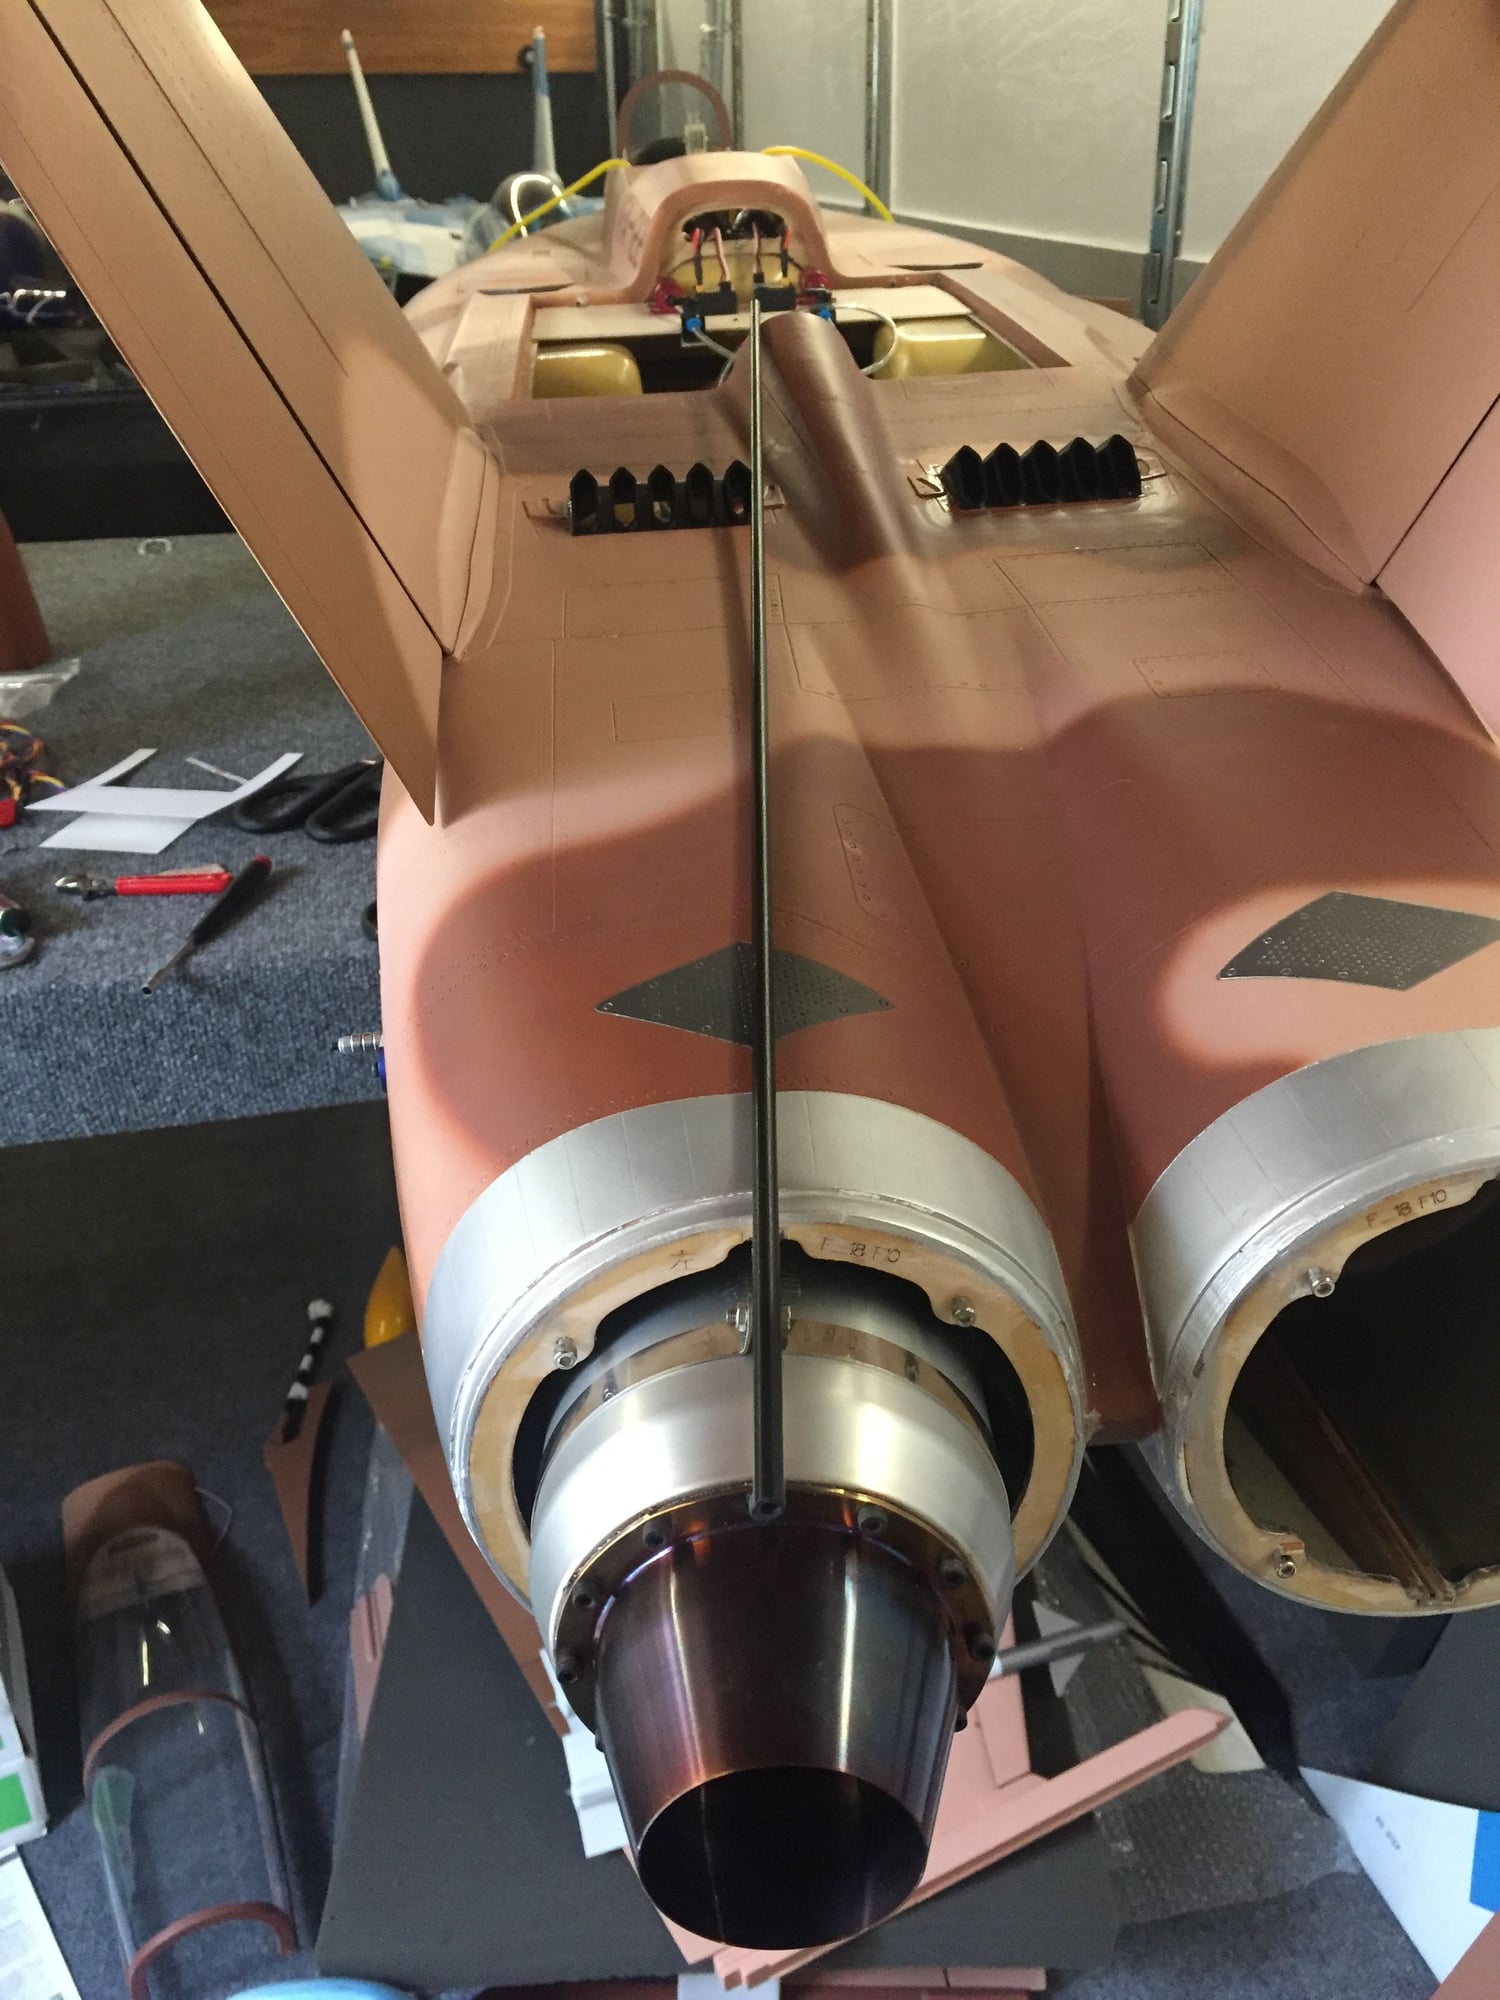
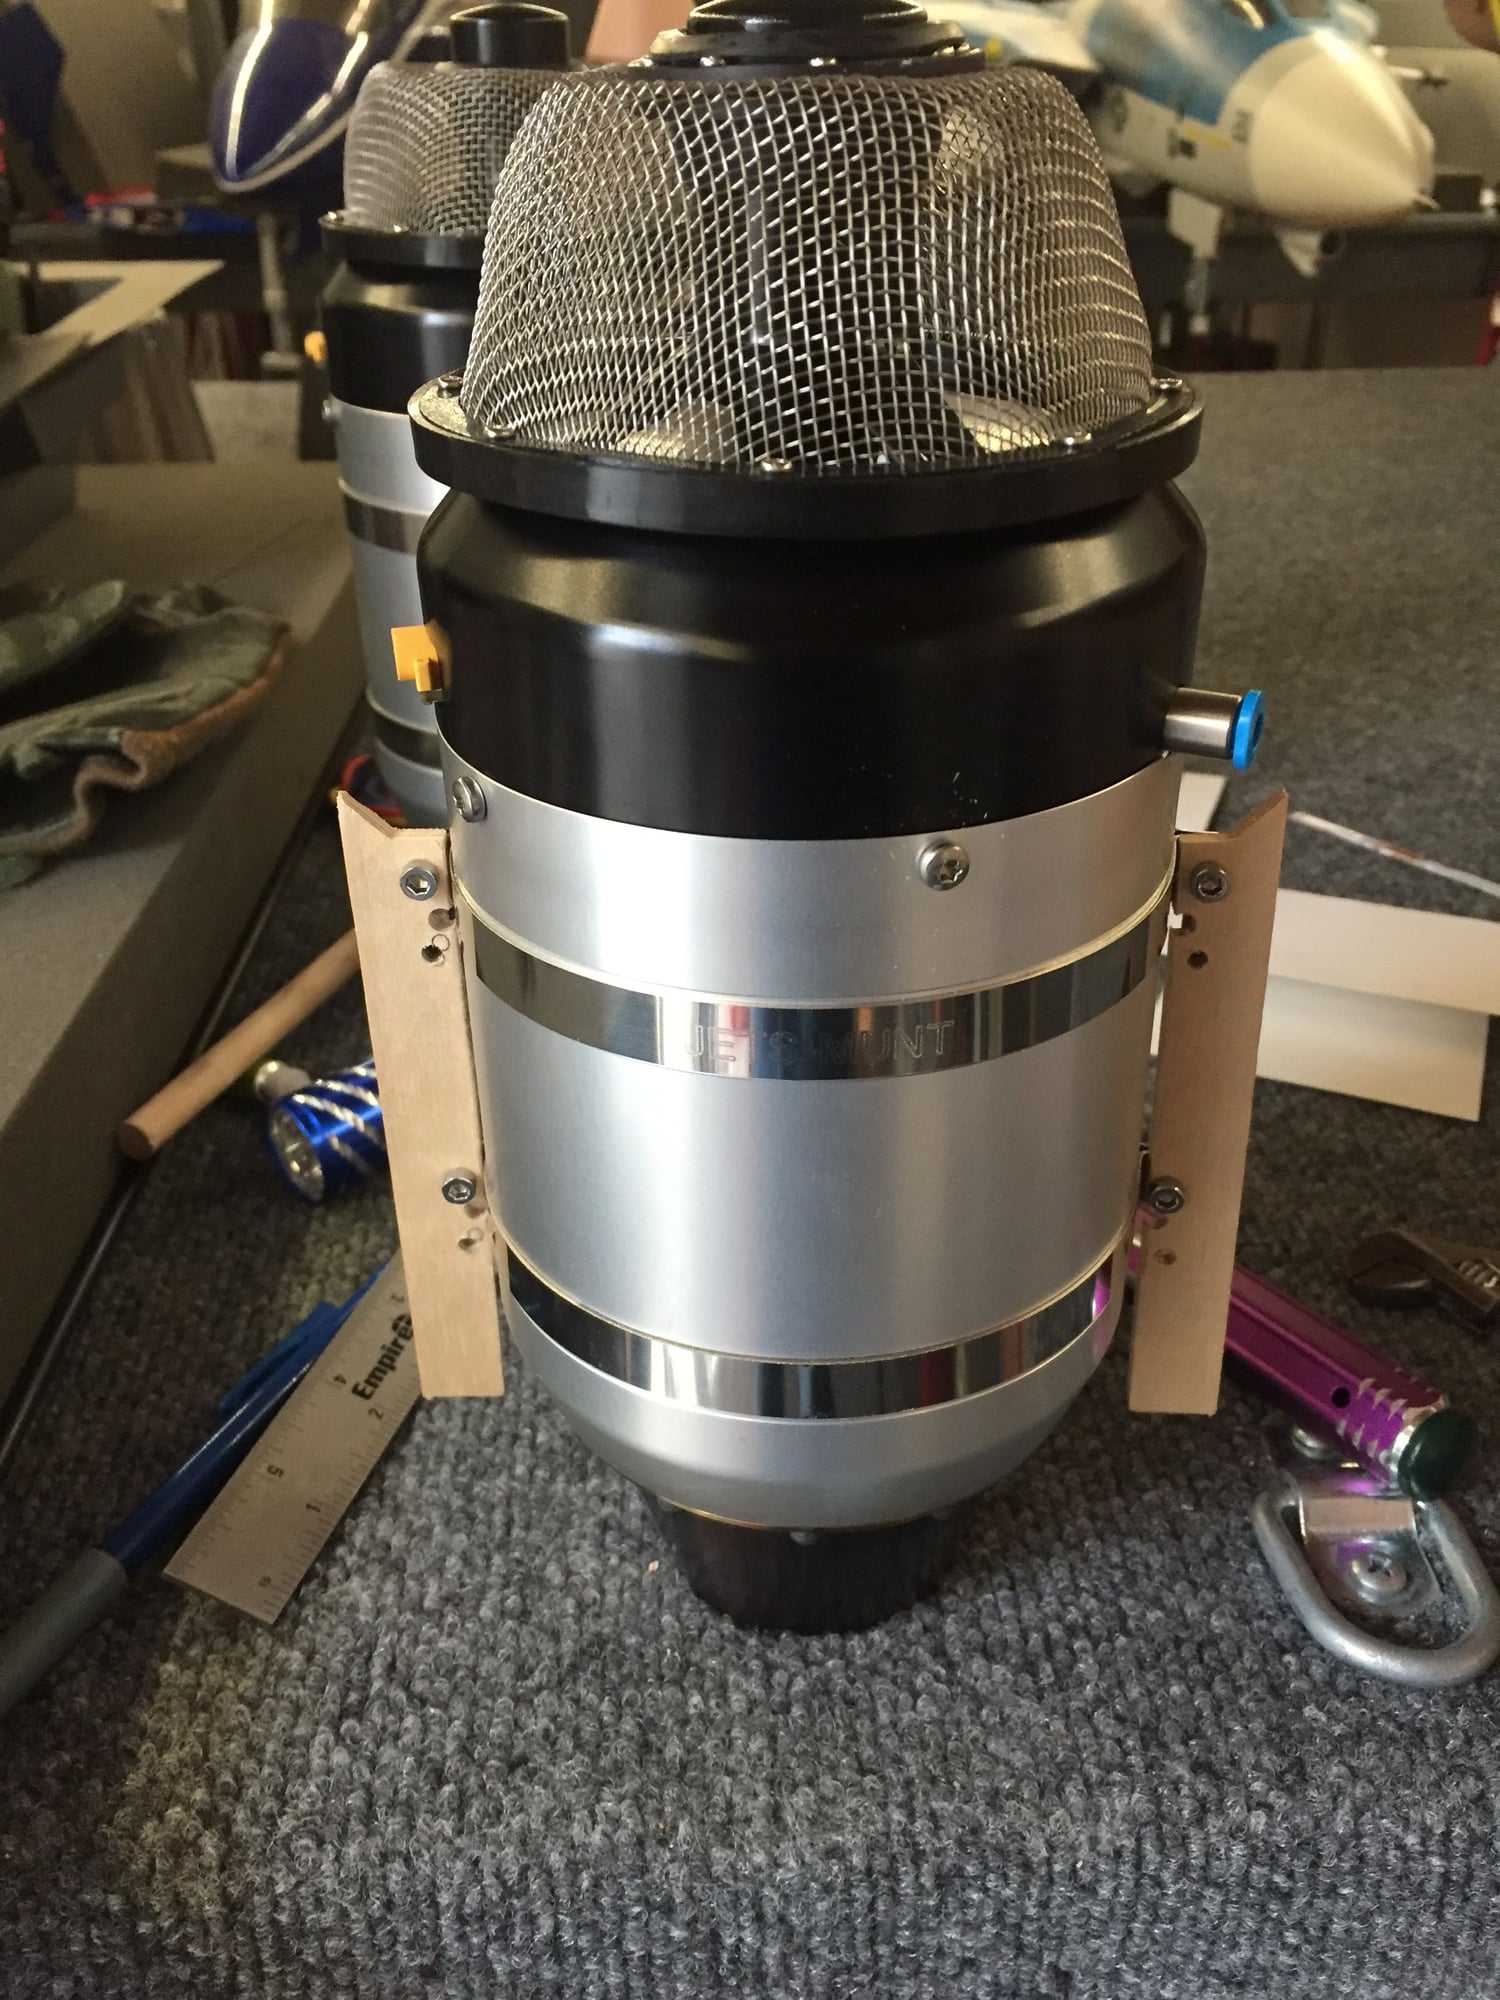
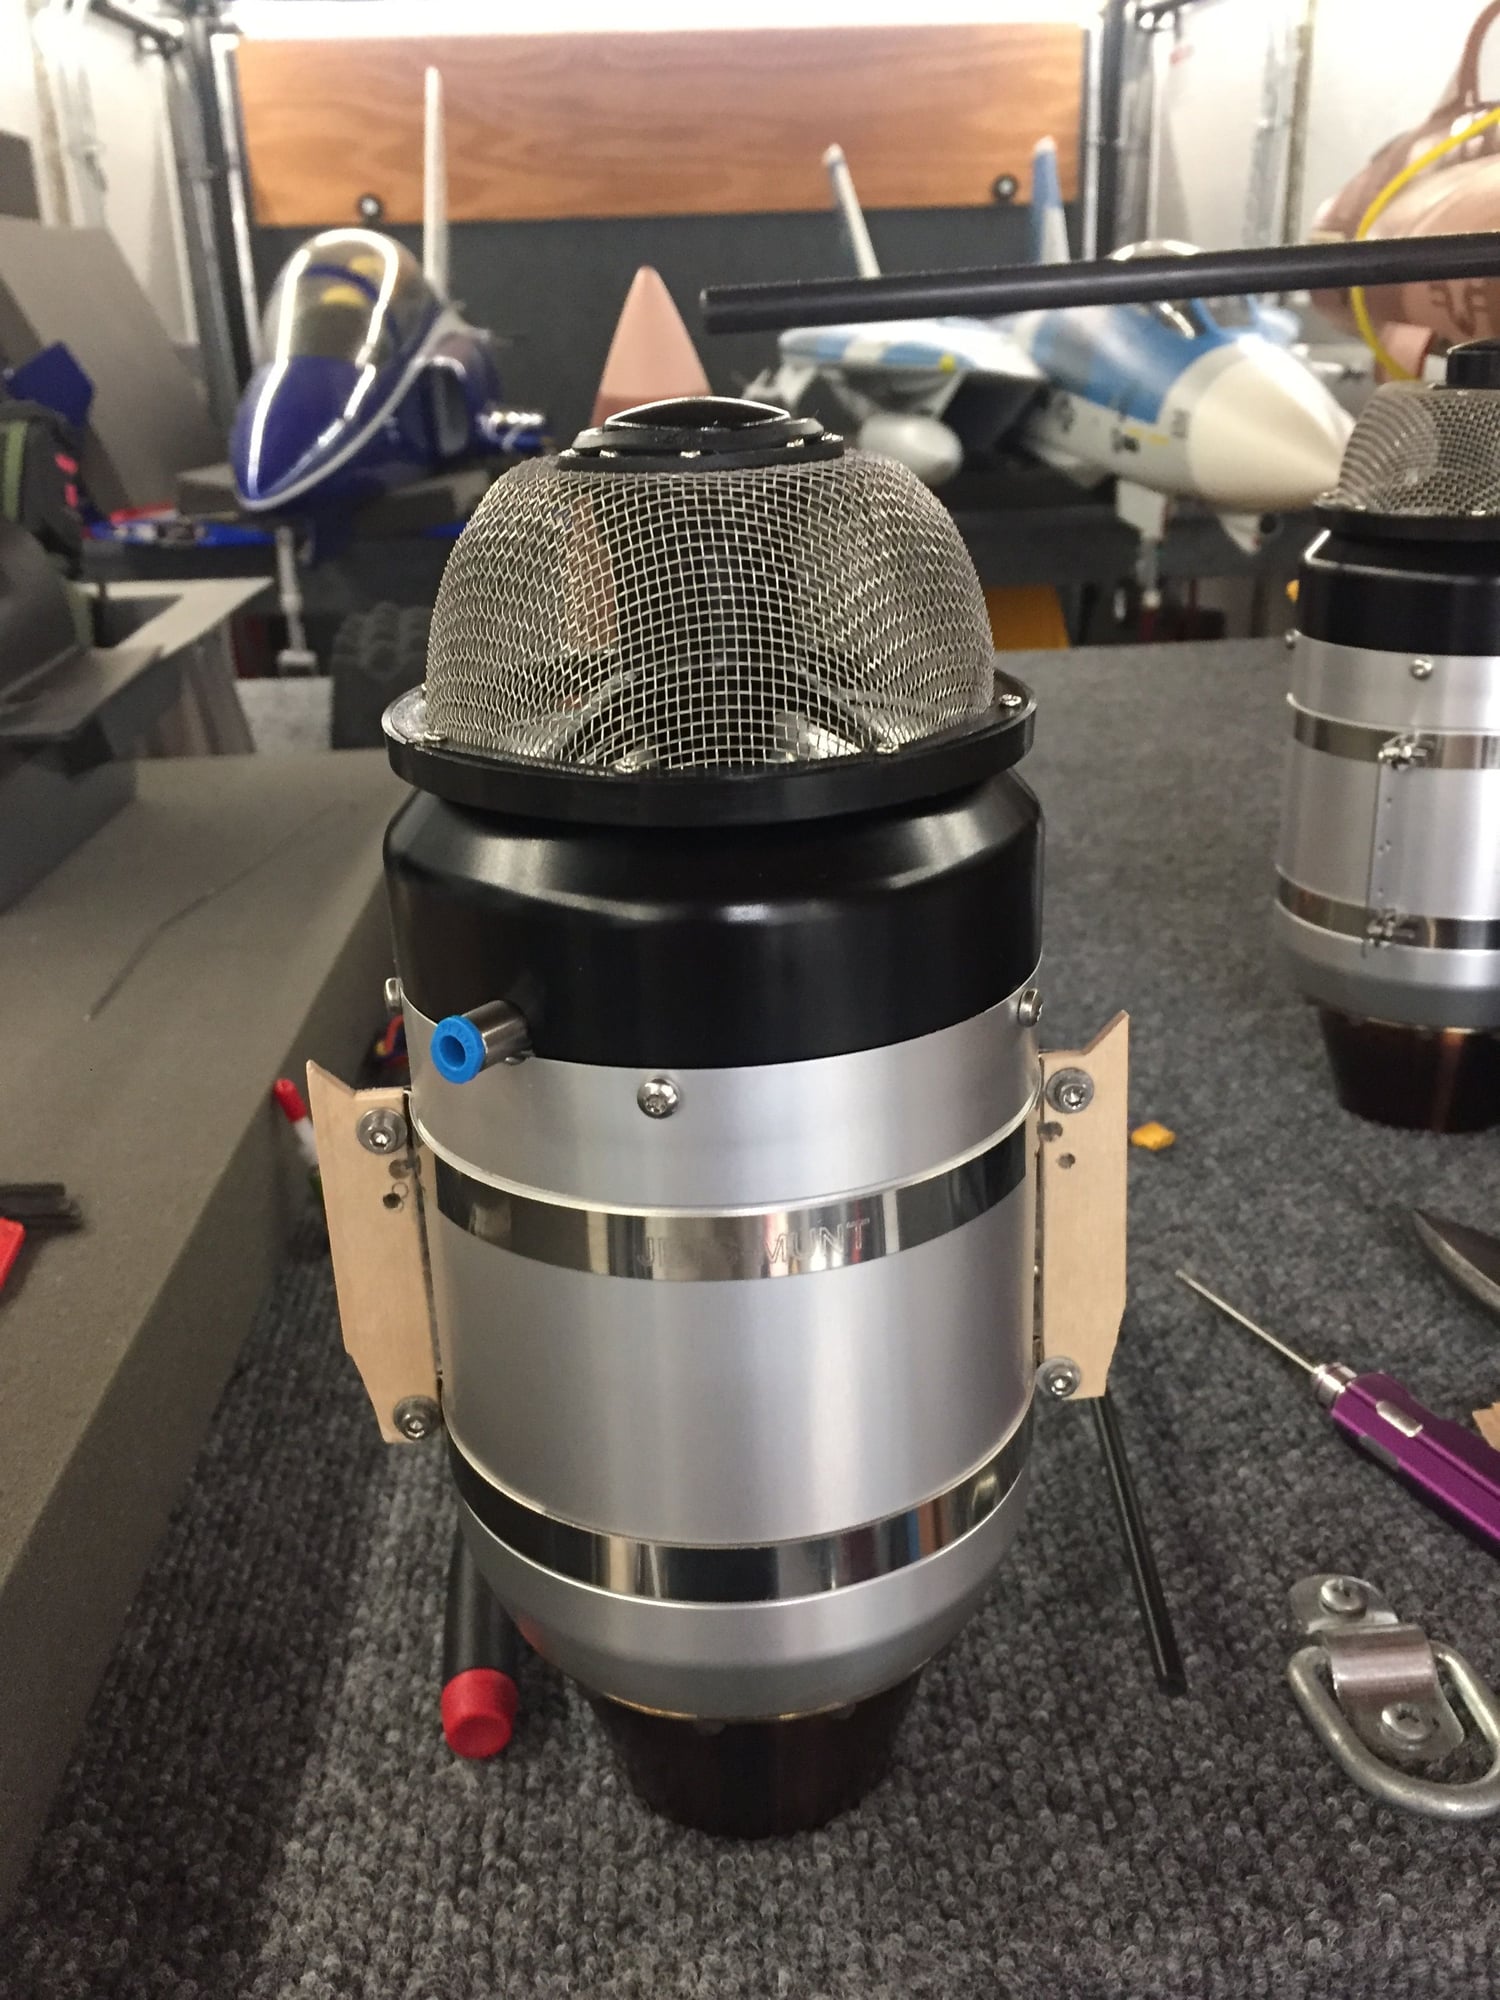
I finally cracked this nut! One in and one to go! It�s a lot of trial and error, the mounts supplied are waaaay to wide so you have to trim to fit. I ruined a pair on the first try and now I need to find some 1/8 aircraft ply to make a new one. I also had to cut the turbine clamp mounts to almost nothing. Once in it feels sturdy but I�m going to support the light ply tracks, they used their cheap ply for the track inside the jet. So I will laminate this track with carbon and resign. Home stretch now guys once the second motor is in it�s just a hook up and setup till the end. Oh and a repaint, that being said my time to work on this thing is about to an end. Need to get busy with real world flying. YouTube video will be uploaded soon showing the turbine install. Oh very important to note the angle of the motor, mine is set to point directly at the CG, which is what the carbon rod shows.