


1/6 Scale F-18 Build
 05-10-2019, 08:45 PM
#251

Thread Starter

Cool cool been reports of that, and the front mount motors are closer than the tail mount just making sure you heard about it. I know my motors don’t have the issue but I still mounted with the board facing out. One it works out since I want to run the ecu lead along the outside of the fuse and fuel lines down the middle.

 05-15-2019, 06:10 AM
#254

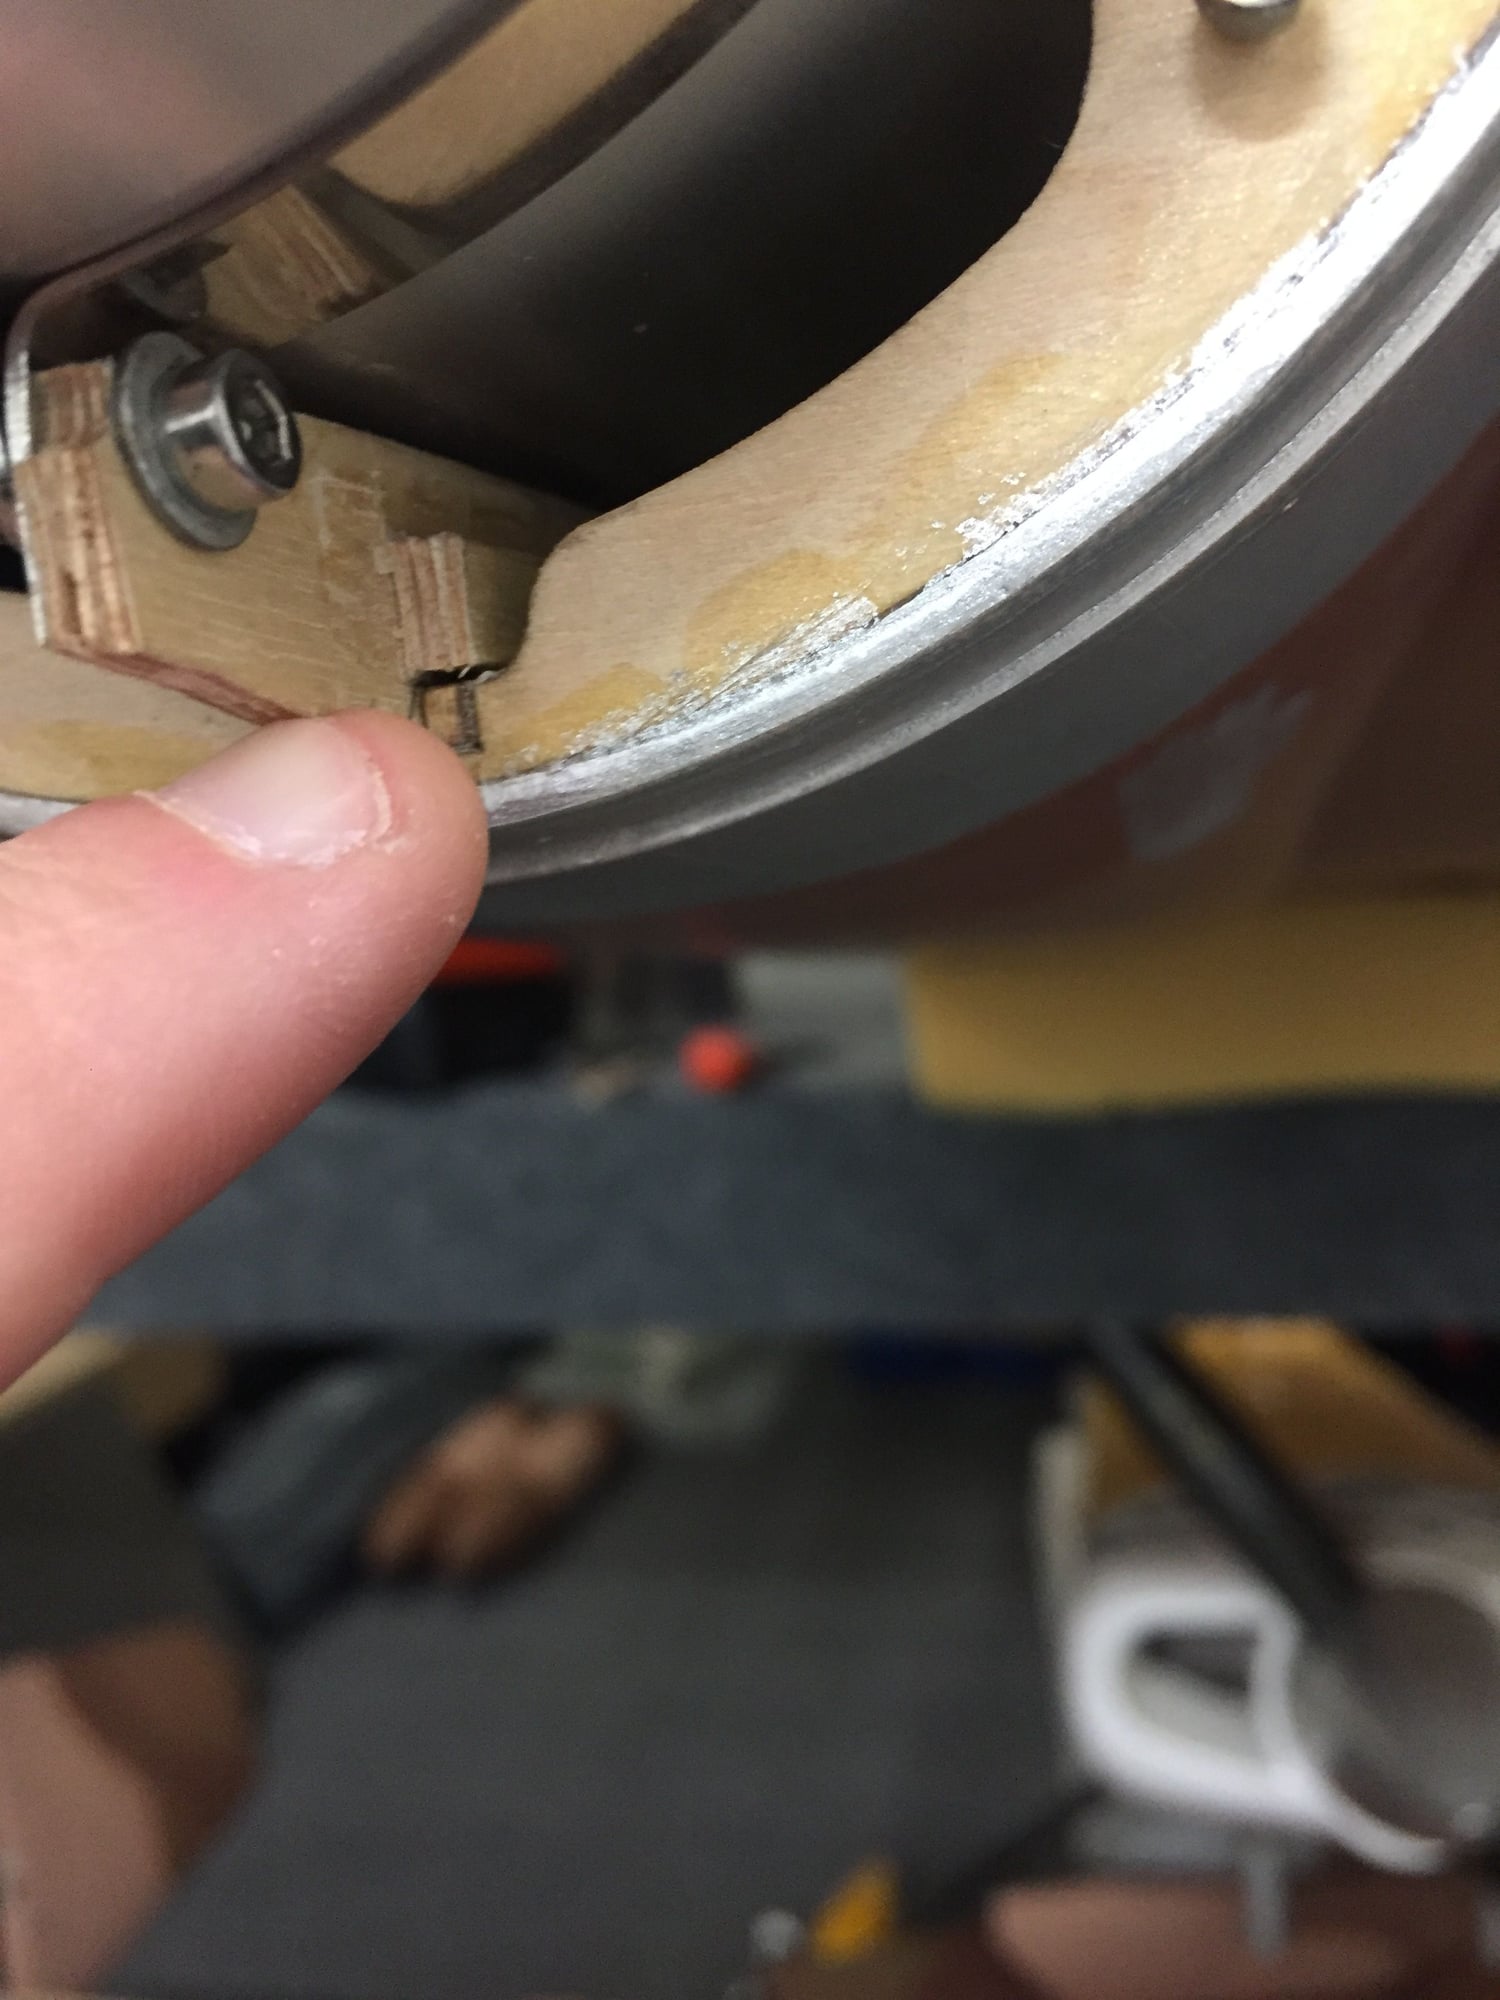
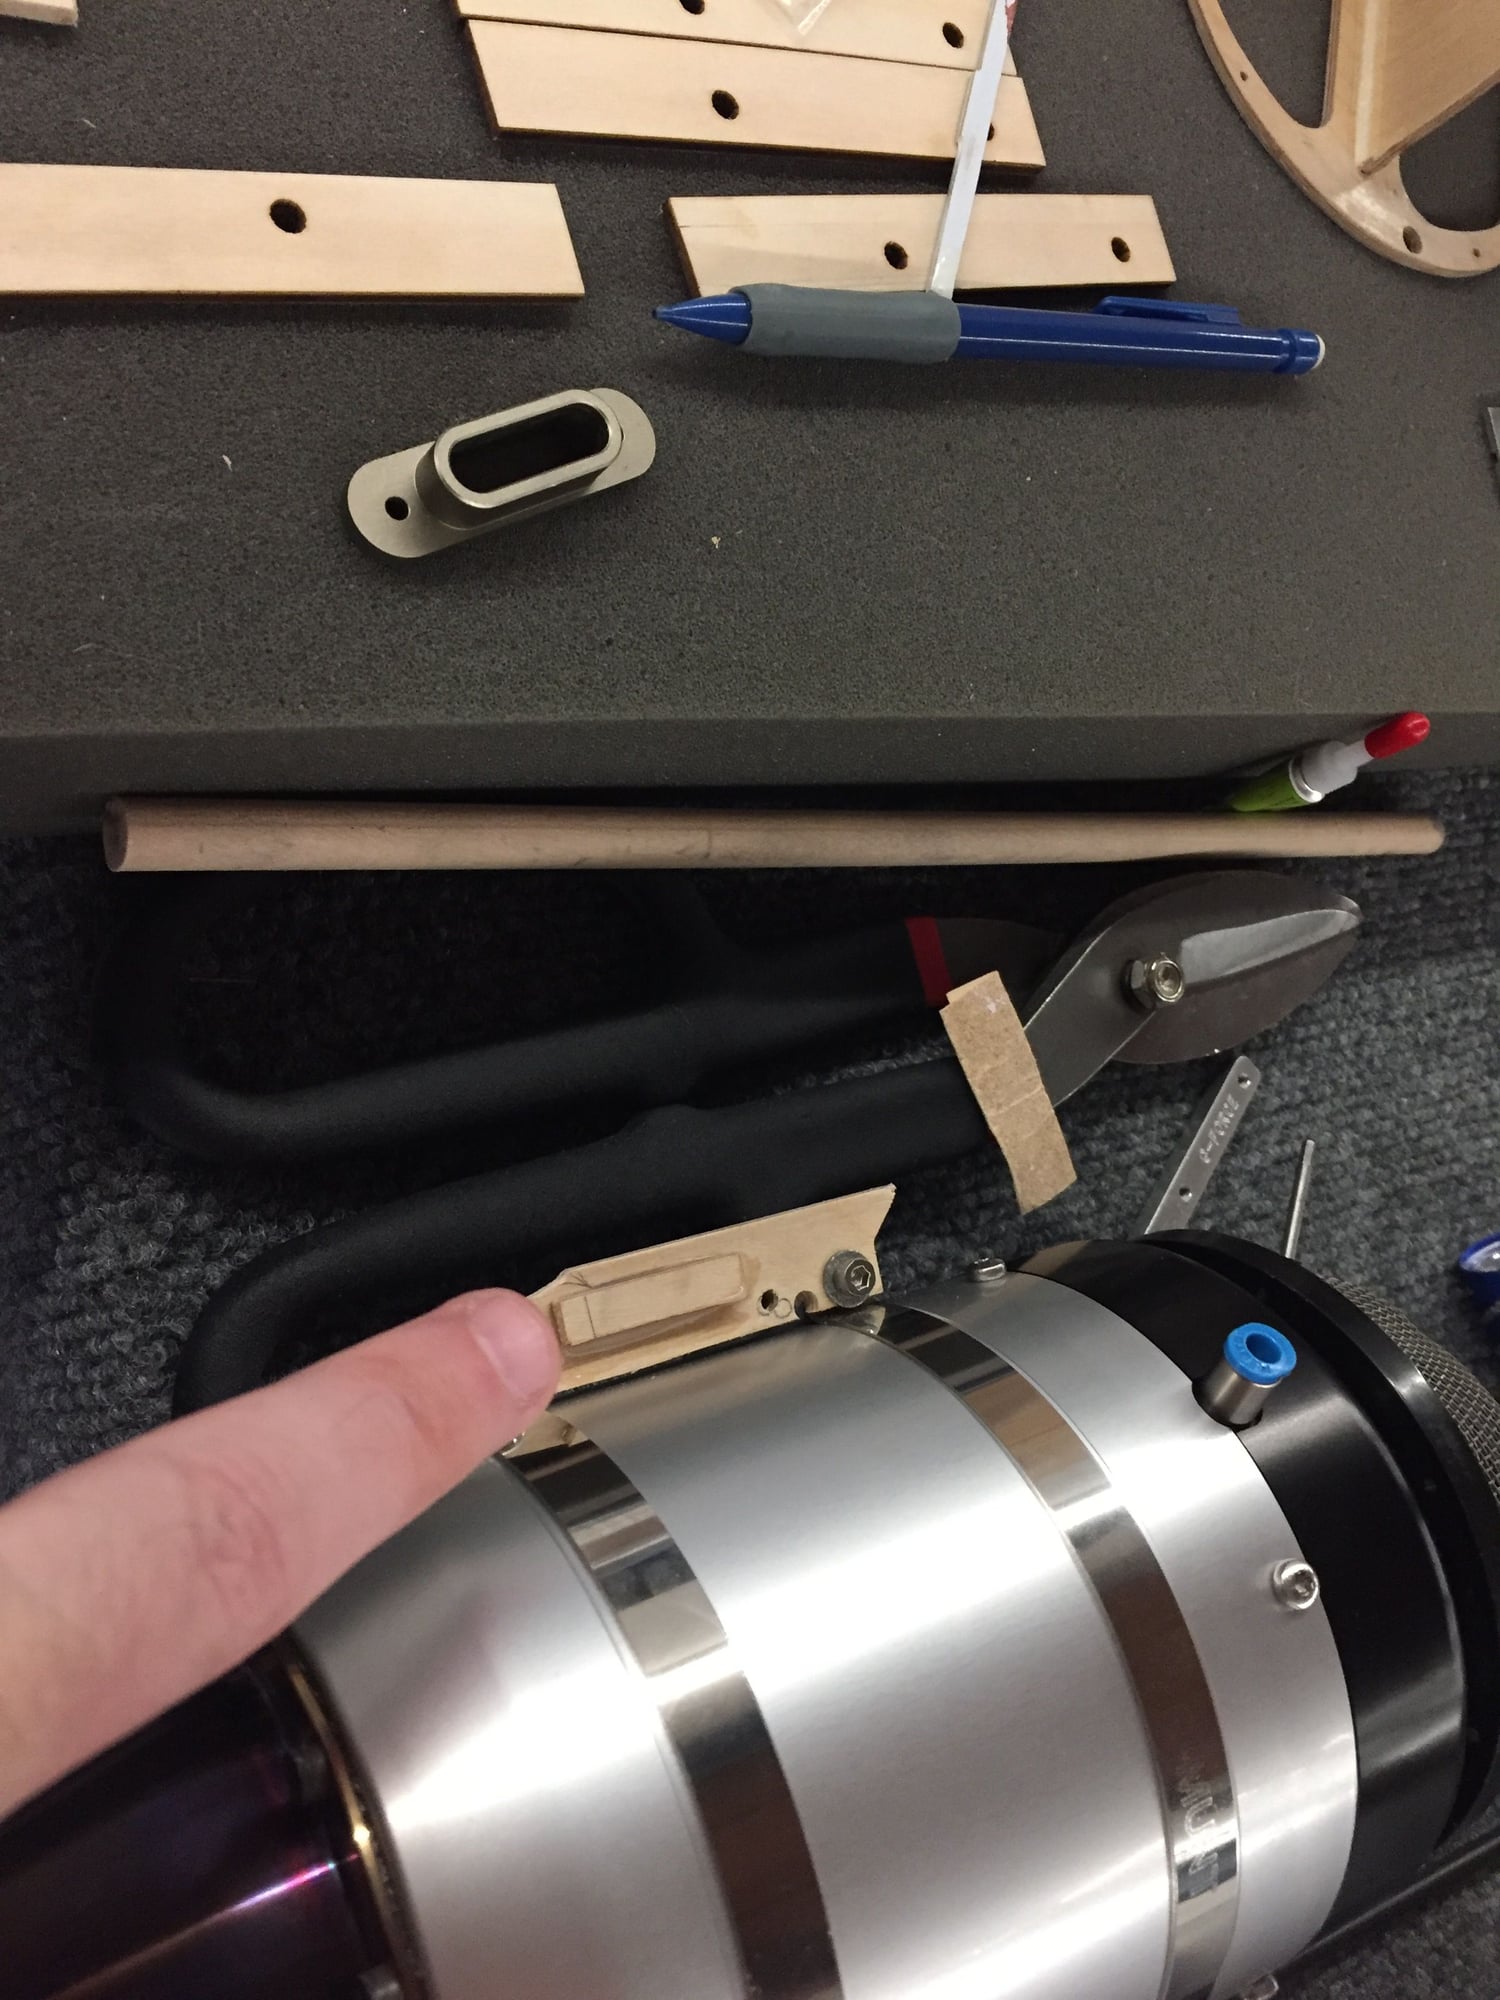
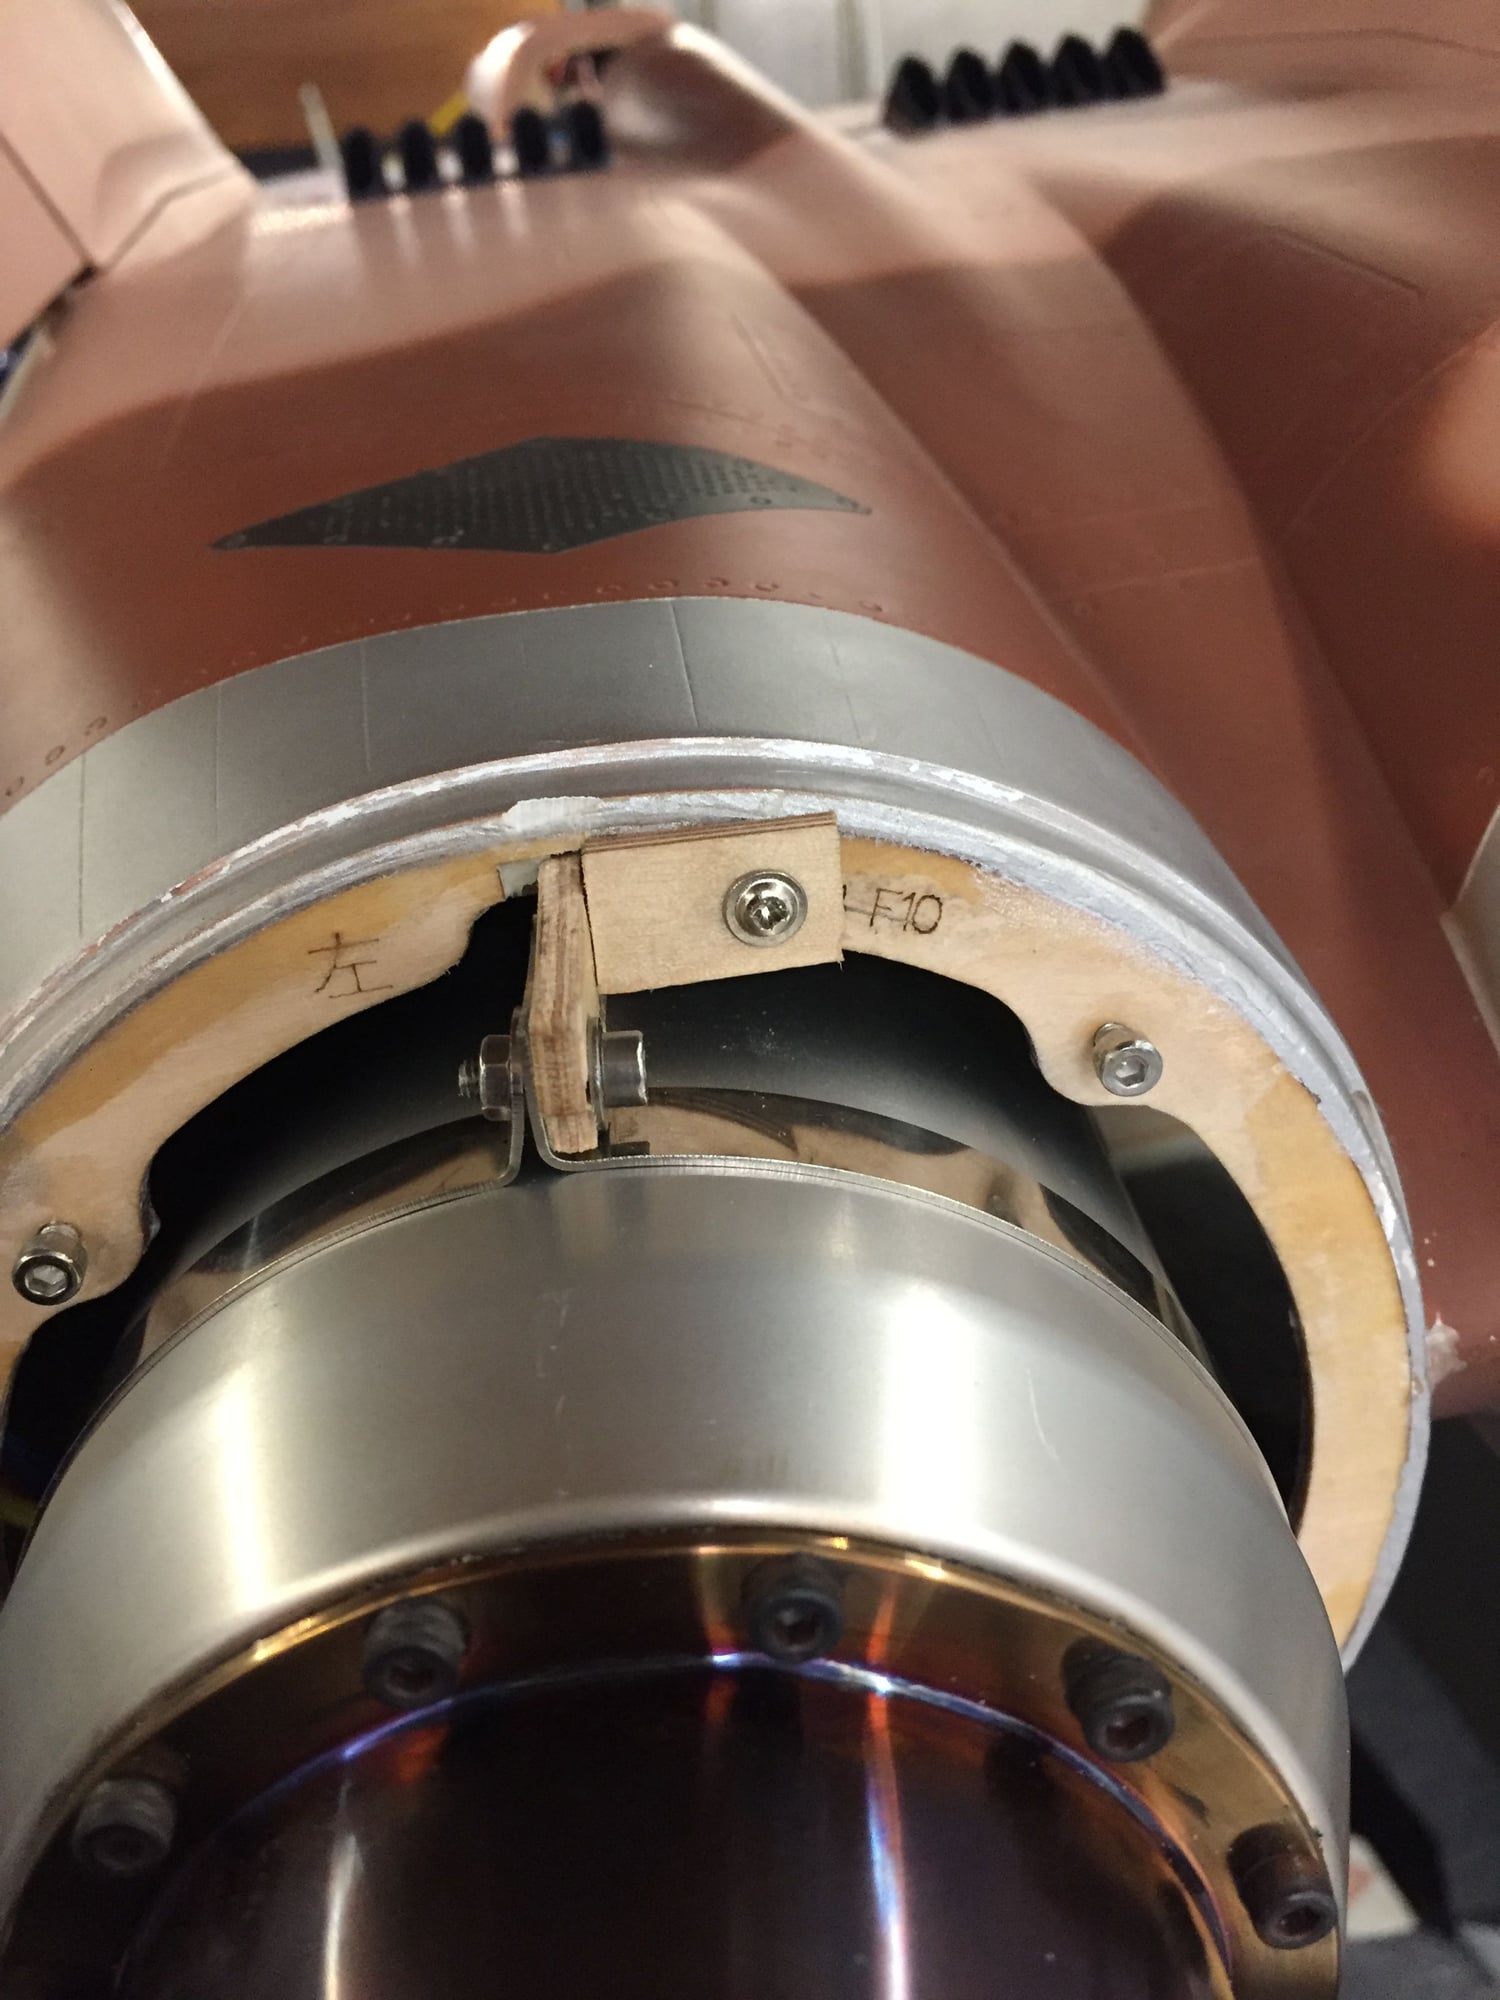
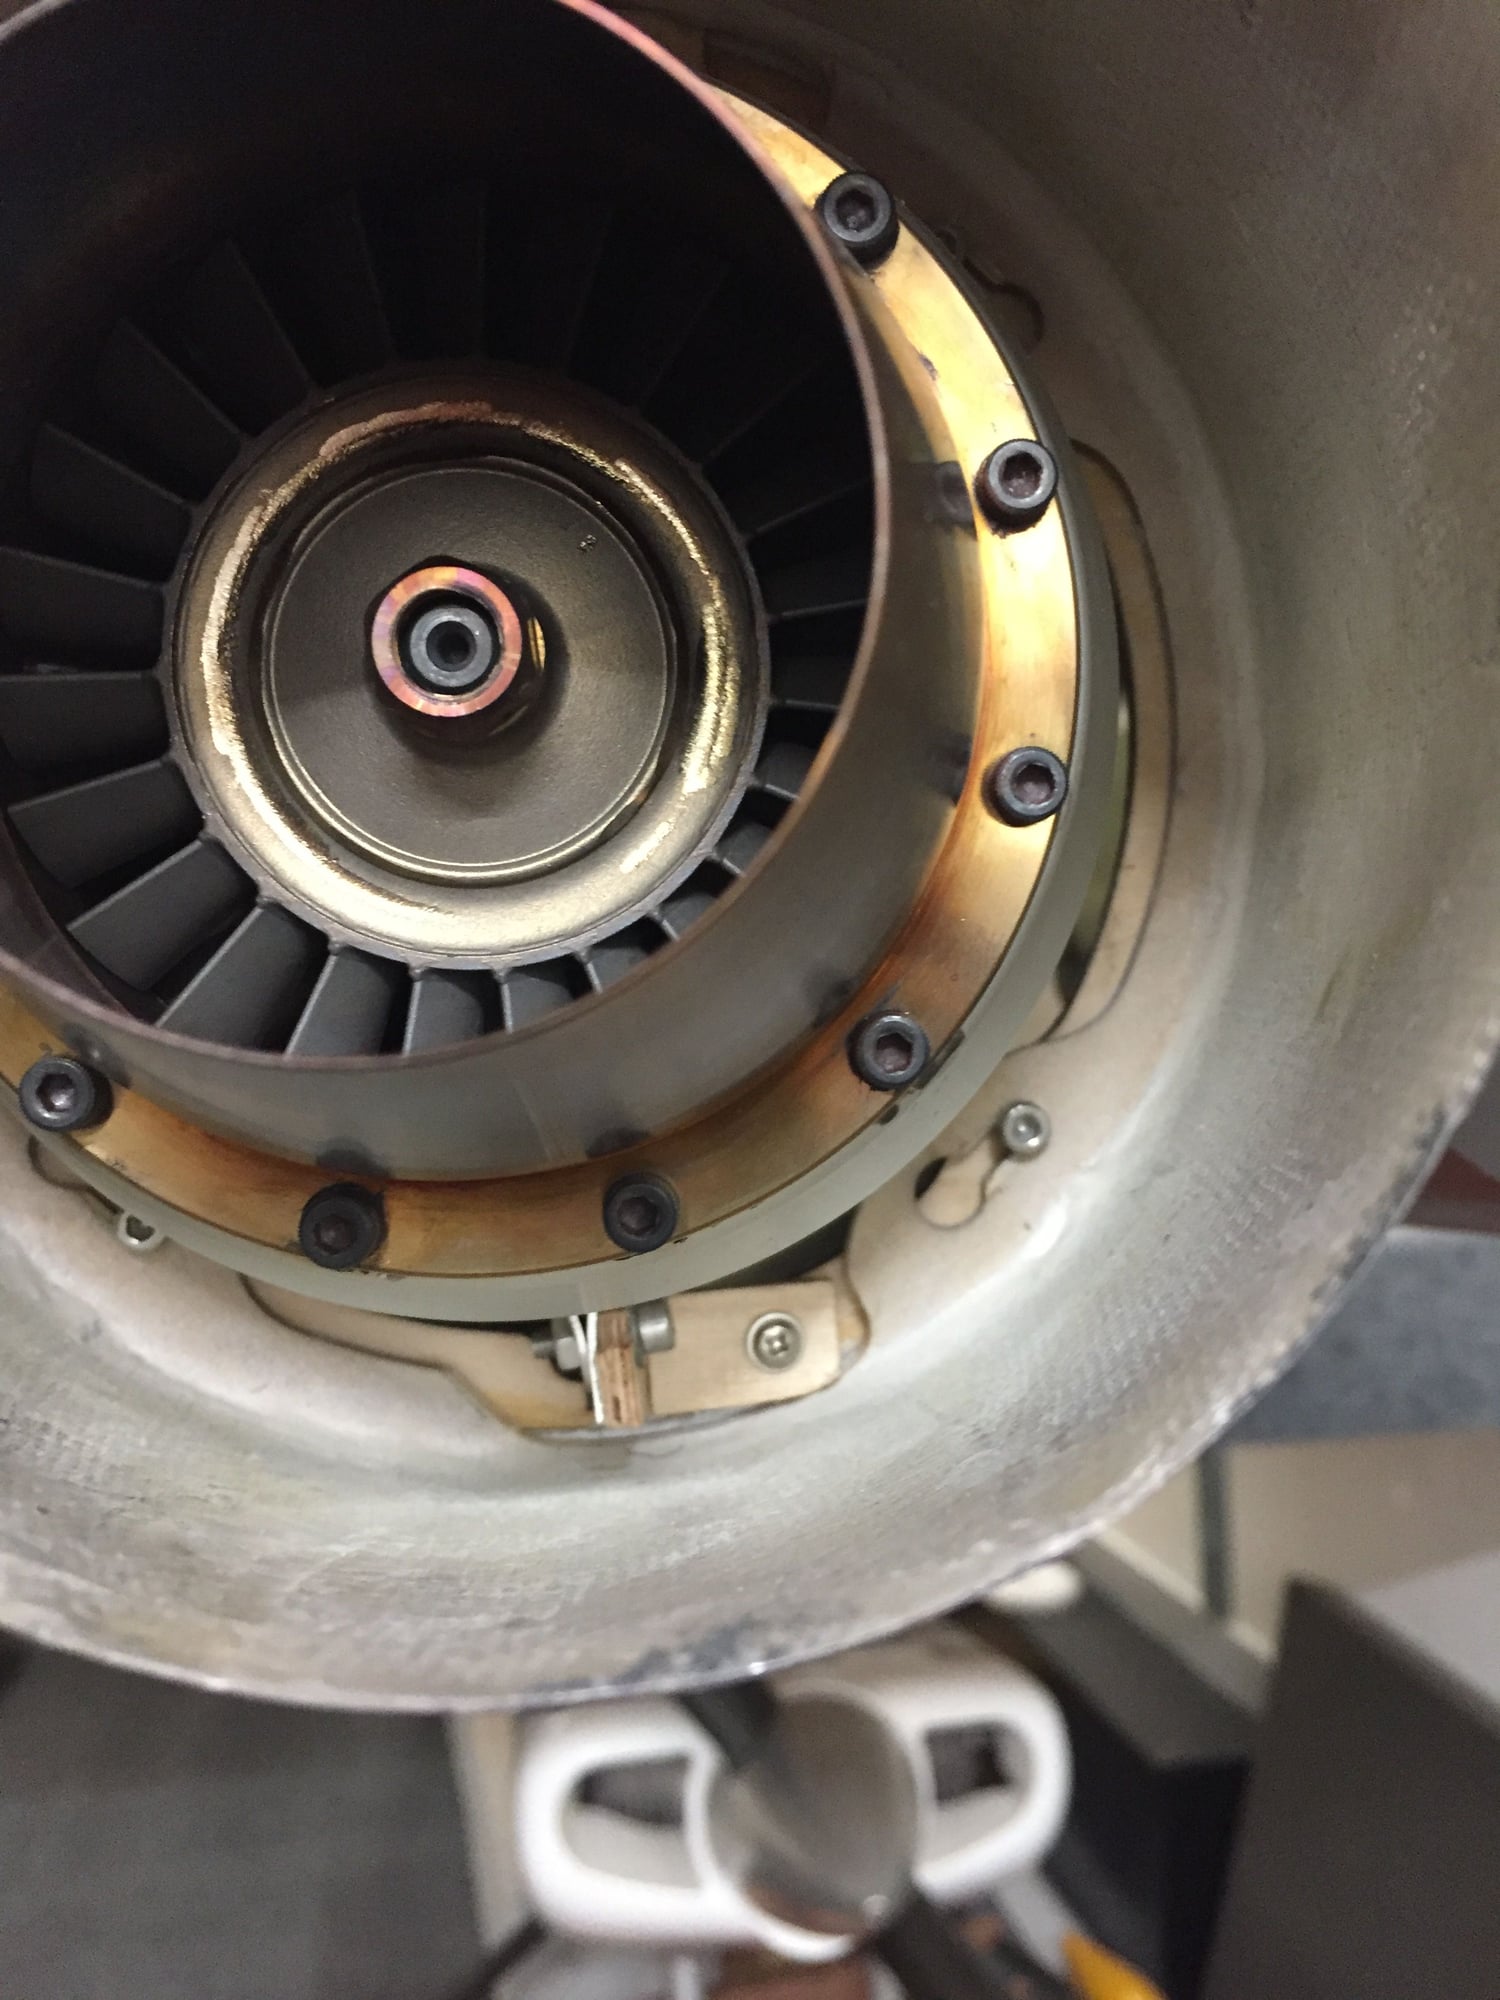
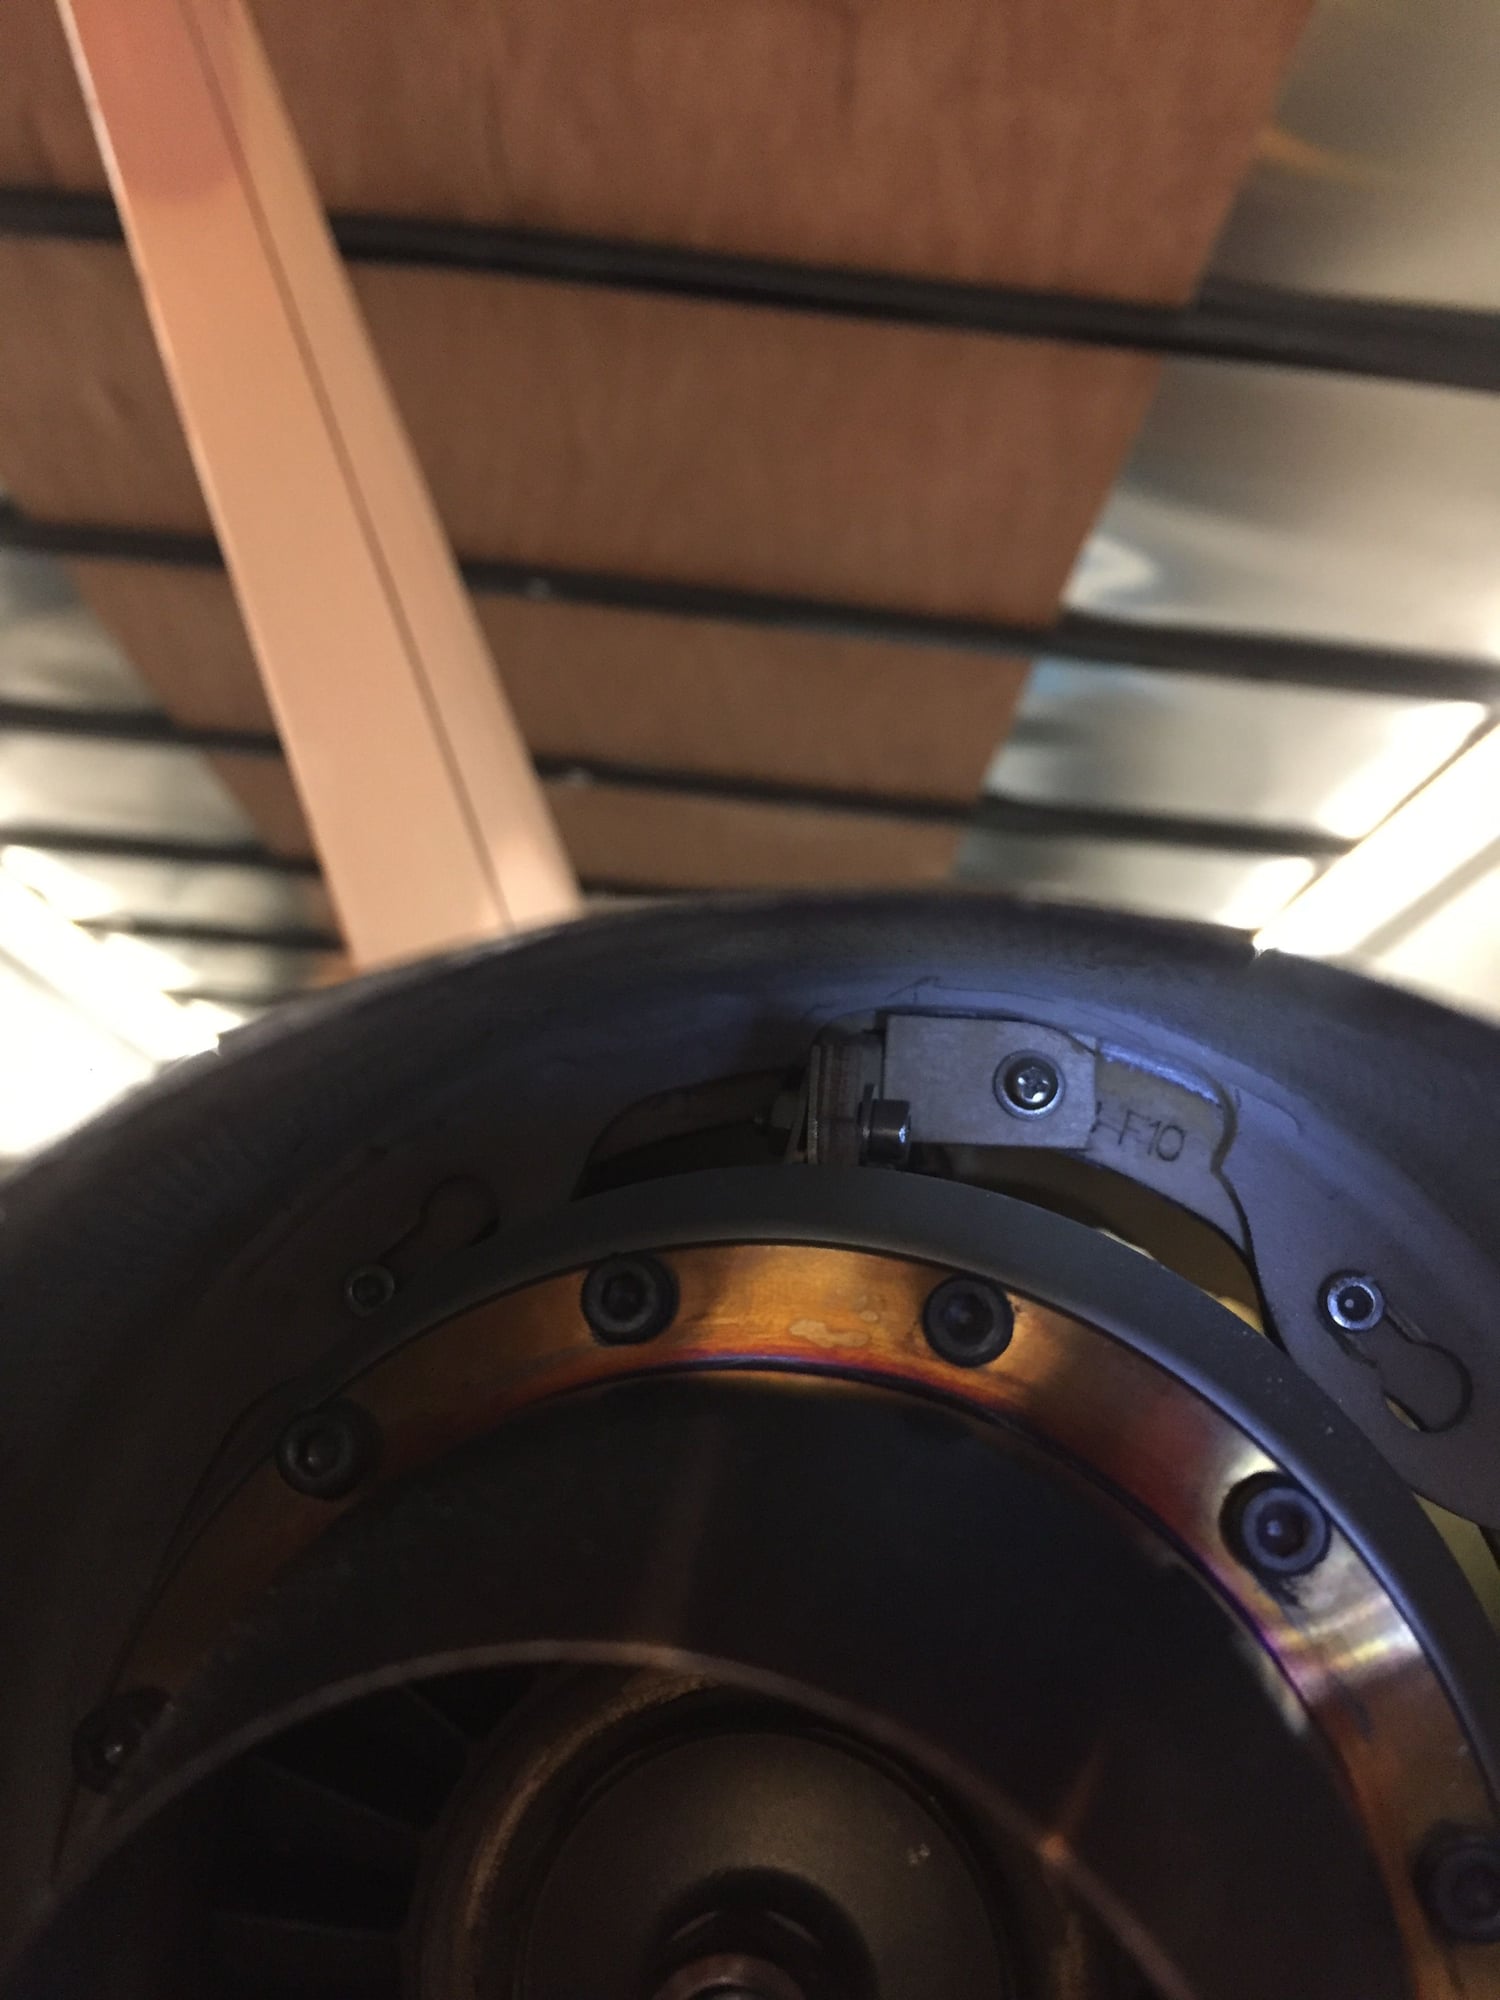
How are the turbines secured to the tracks after sliding them in place?
Last edited by Auburn02; 05-15-2019 at 06:18 AM.
05-15-2019, 07:00 AM
#255
Thread Starter
Well the first engine went in at this angle but if it�s not you have shim it. Second engine haven�t installed yet since I ruined the other set of mounts on my first try and can�t seem to find any hard 1/8 aircraft ply to cut new ones.
As for securing them once slid into the rail, there is none you will have to make your own like me. They will only slide in to the stop so the securing would be prevent aft movement. Once I finish this mod I will take some pictures, I started it yesterday but life got in the way.
As for securing them once slid into the rail, there is none you will have to make your own like me. They will only slide in to the stop so the securing would be prevent aft movement. Once I finish this mod I will take some pictures, I started it yesterday but life got in the way.
05-15-2019, 02:43 PM
#256
Thread Starter


Video uploading on YouTube showing the work
Managed to get the other motor in and it�s pretty close just needs about one washer to match the left on alignment. Also did a mod to lock the turbine in. Simple but affective!


 05-15-2019, 05:39 PM
#259
Thread Starter
I am about get reallllll business up to the event so we�ll see, I have about two weeks before I leave town to build.
minus few little things it about done. I still need to add the stab bearing races and fit the cockpit.

minus few little things it about done. I still need to add the stab bearing races and fit the cockpit.
05-24-2019, 09:09 PM
#260
Thread Starter
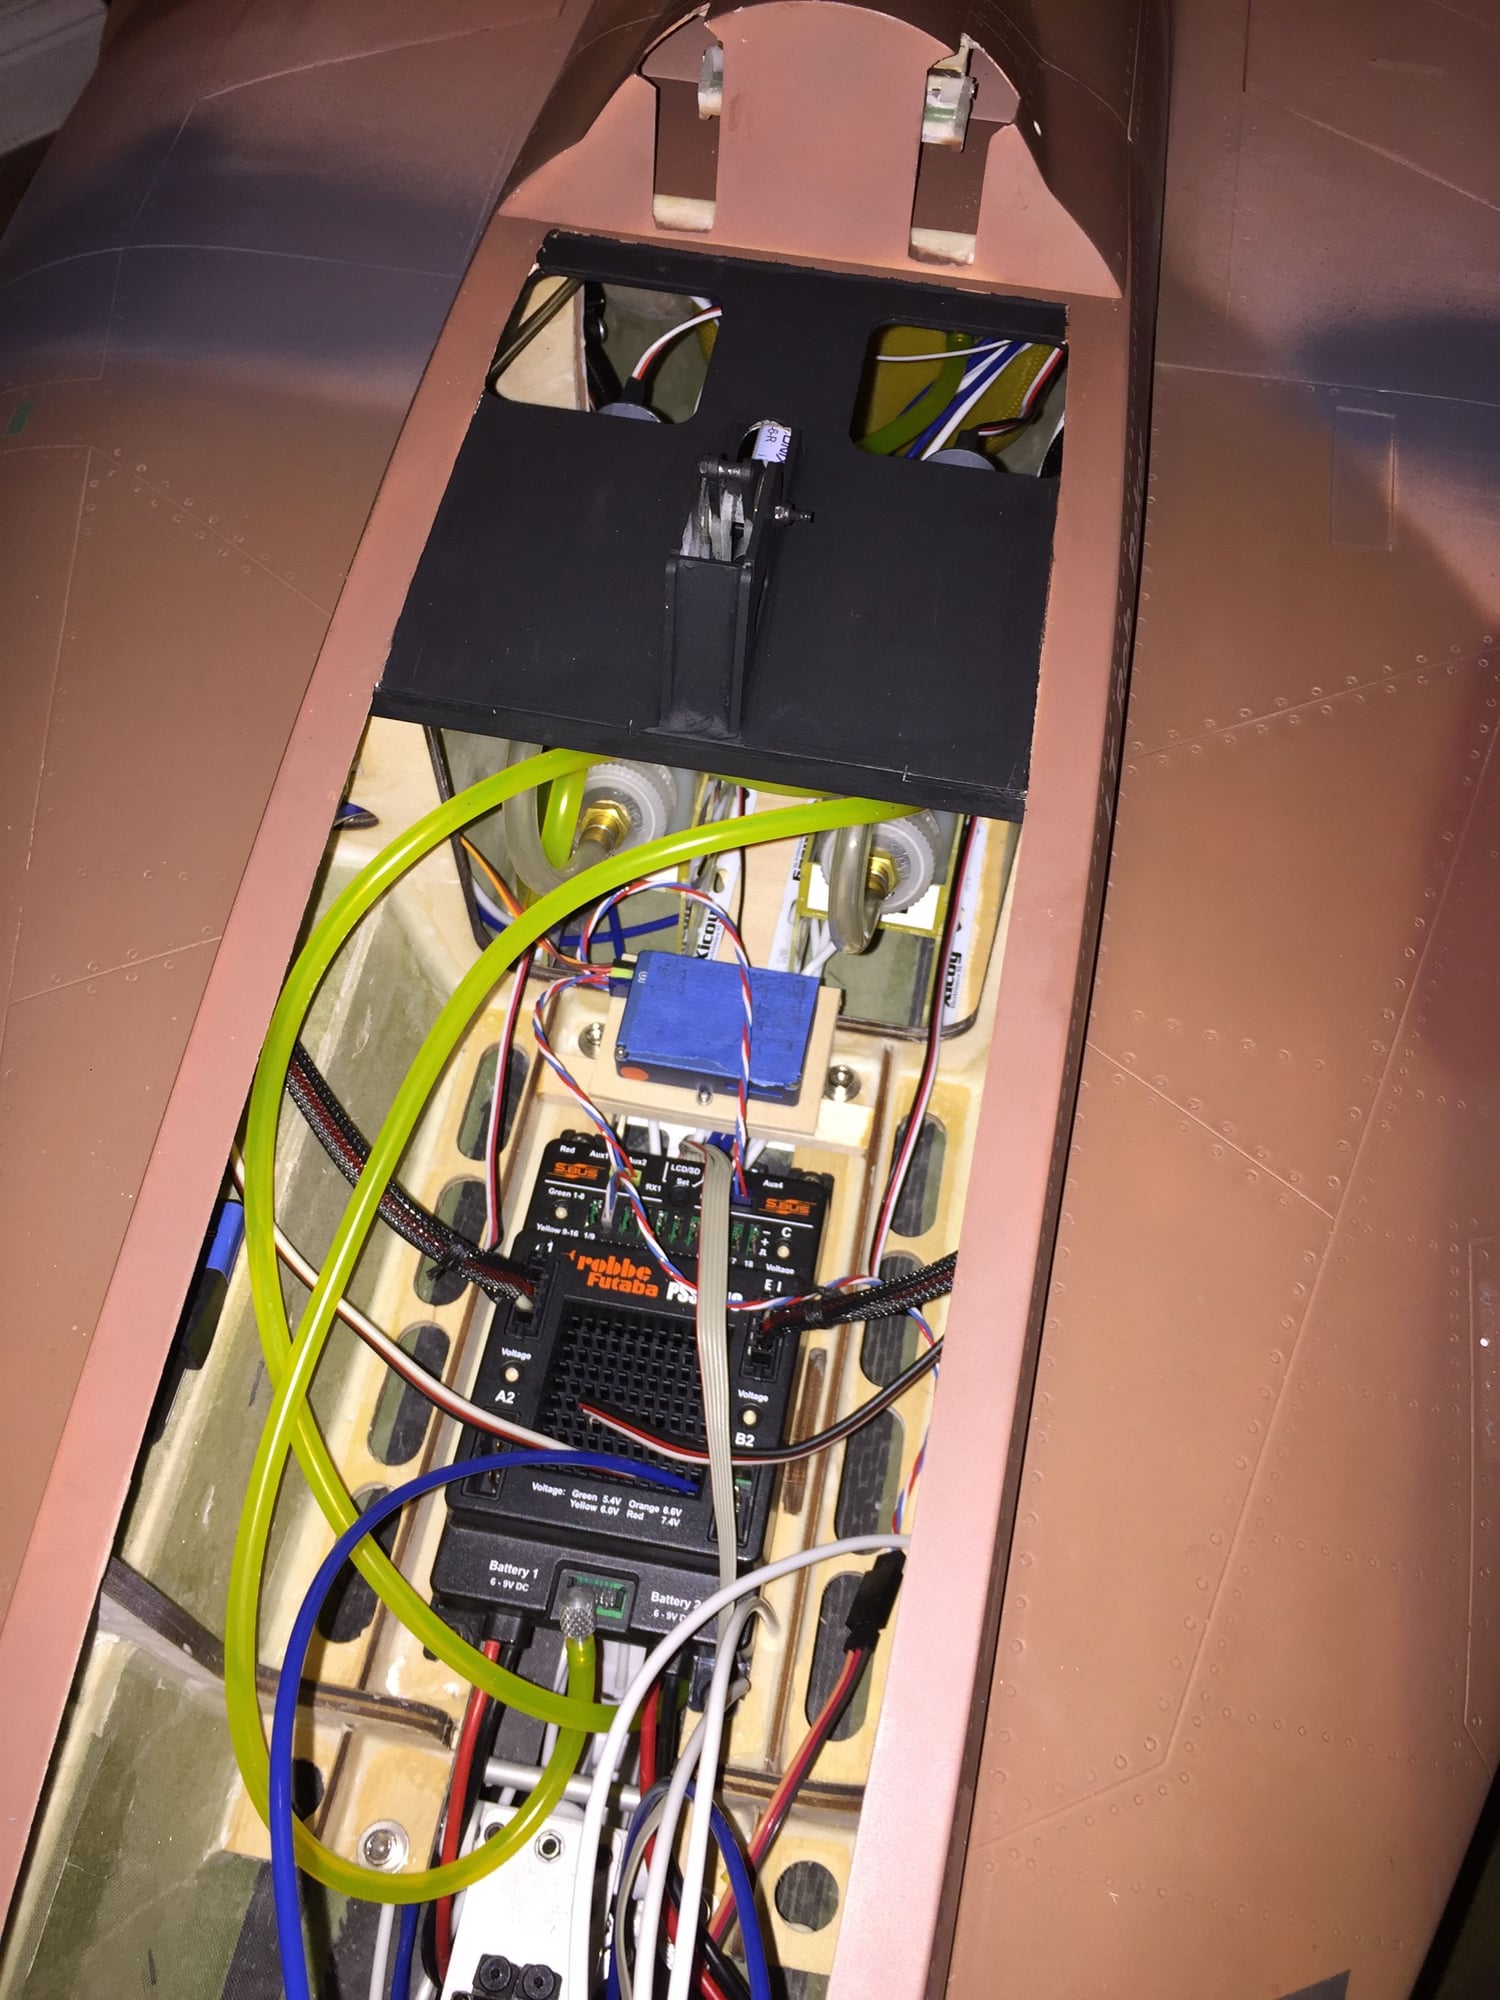
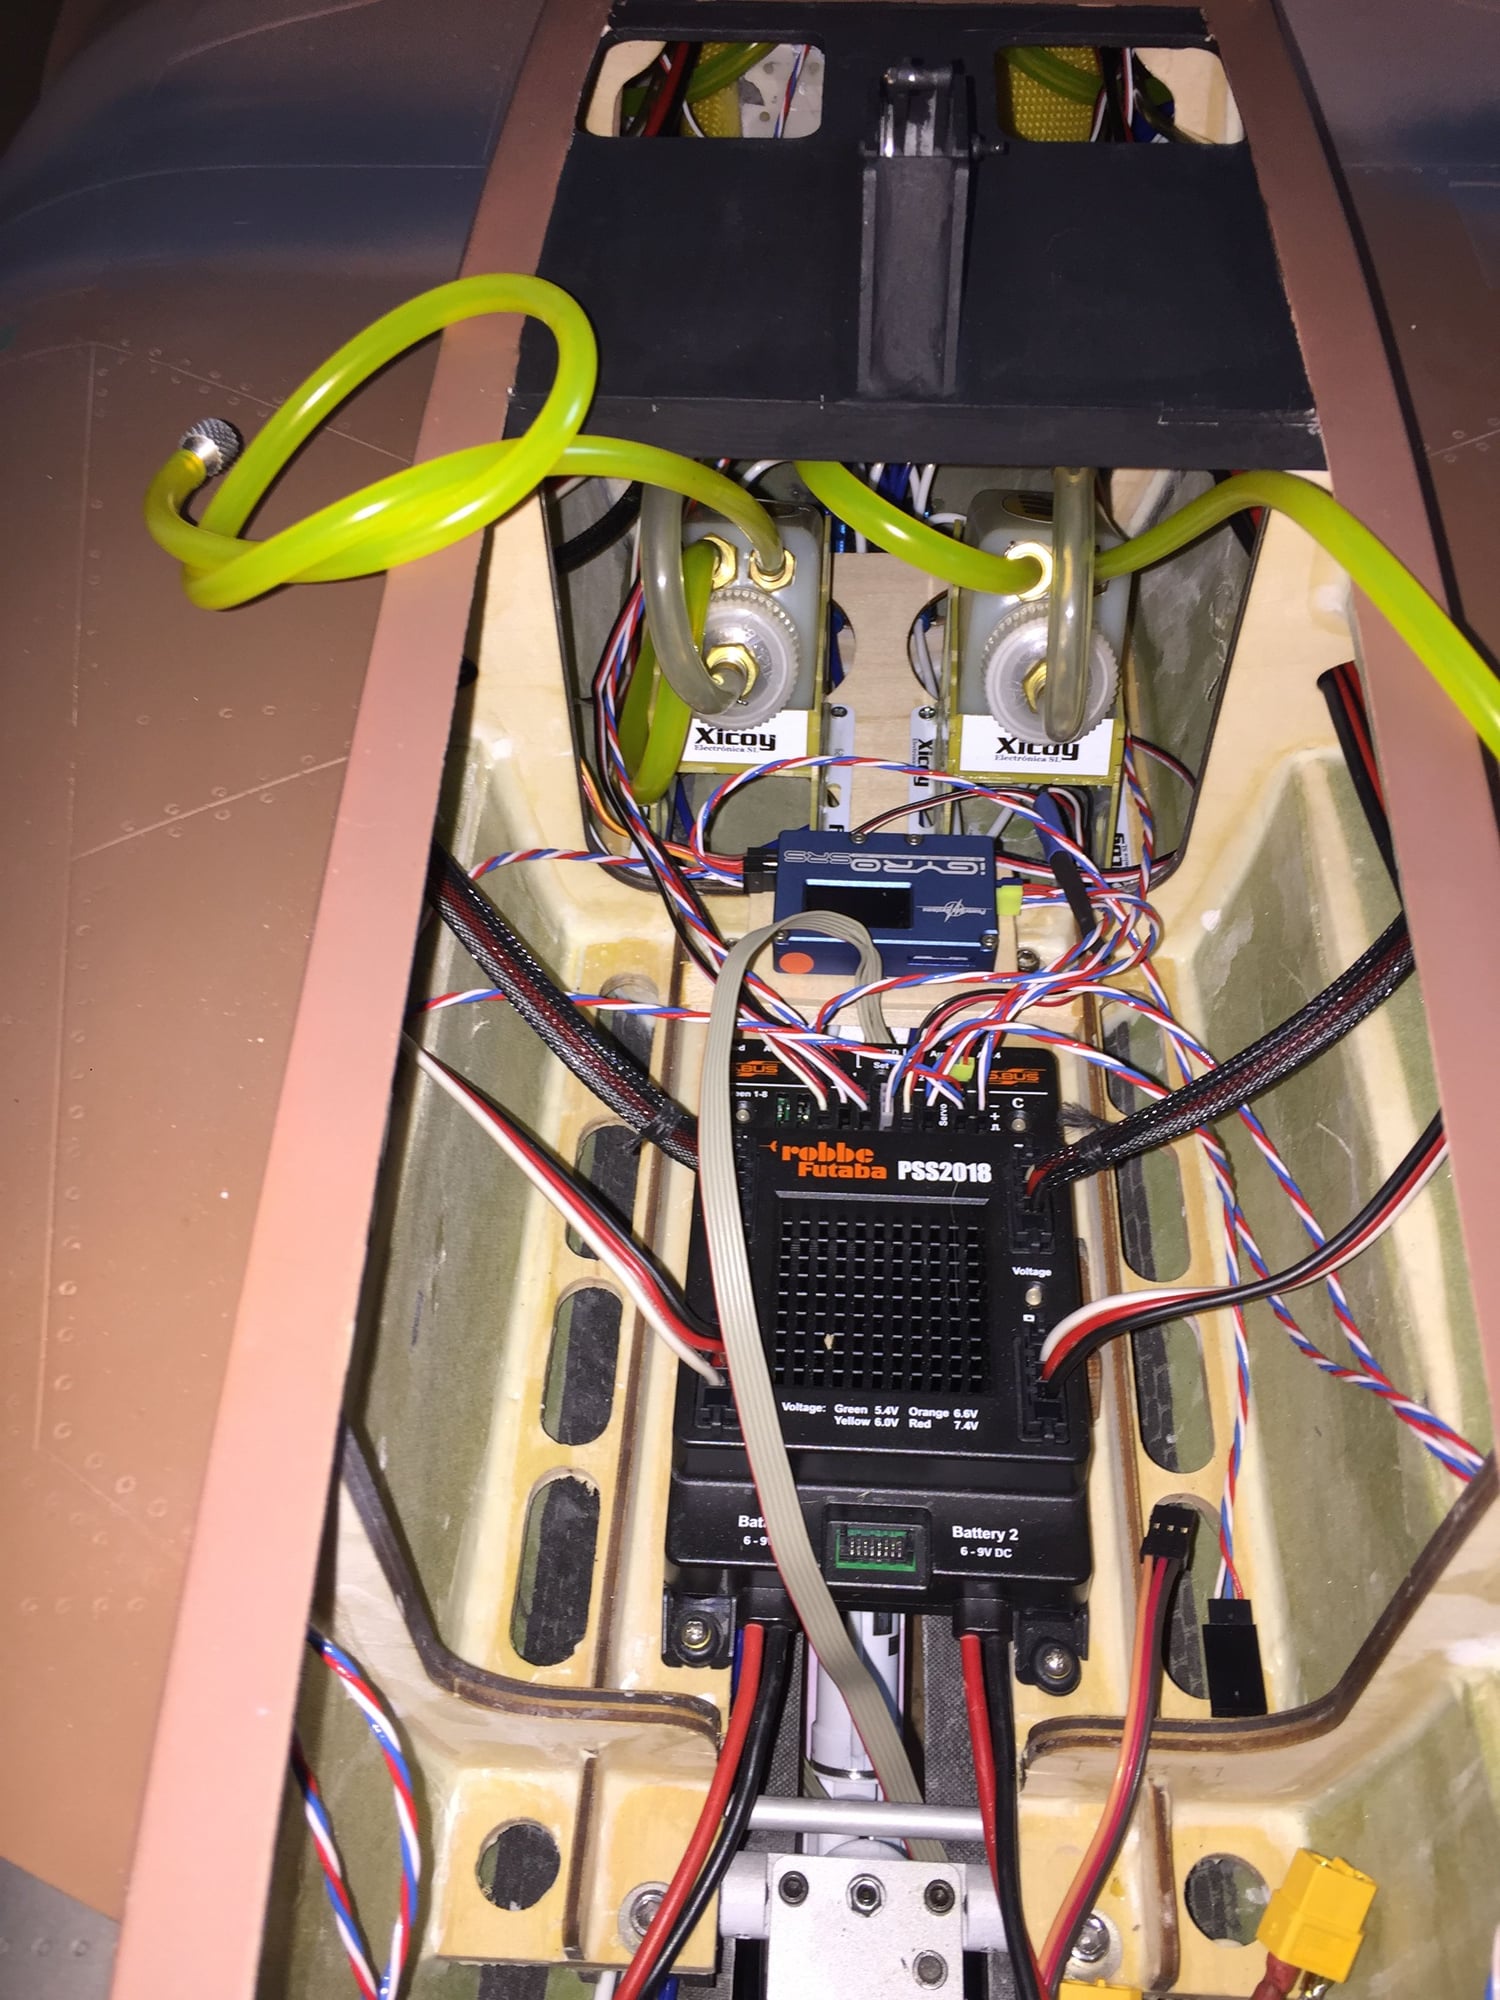
So I informed the wife it was the �that time.� I have taken the build to the house, getting a bit warm here in Texas and my little trailer a/c can�t keep up. It�s the final stretch on this build and I finally added the stab bearing race today. ATTENETION! Critical step here so make sure the bearings race sits perpendicular to the shaft. This is part of the reason for the instructions mentioning something about this. I had one screwed down it that was perfect, the other was a few degrees off.
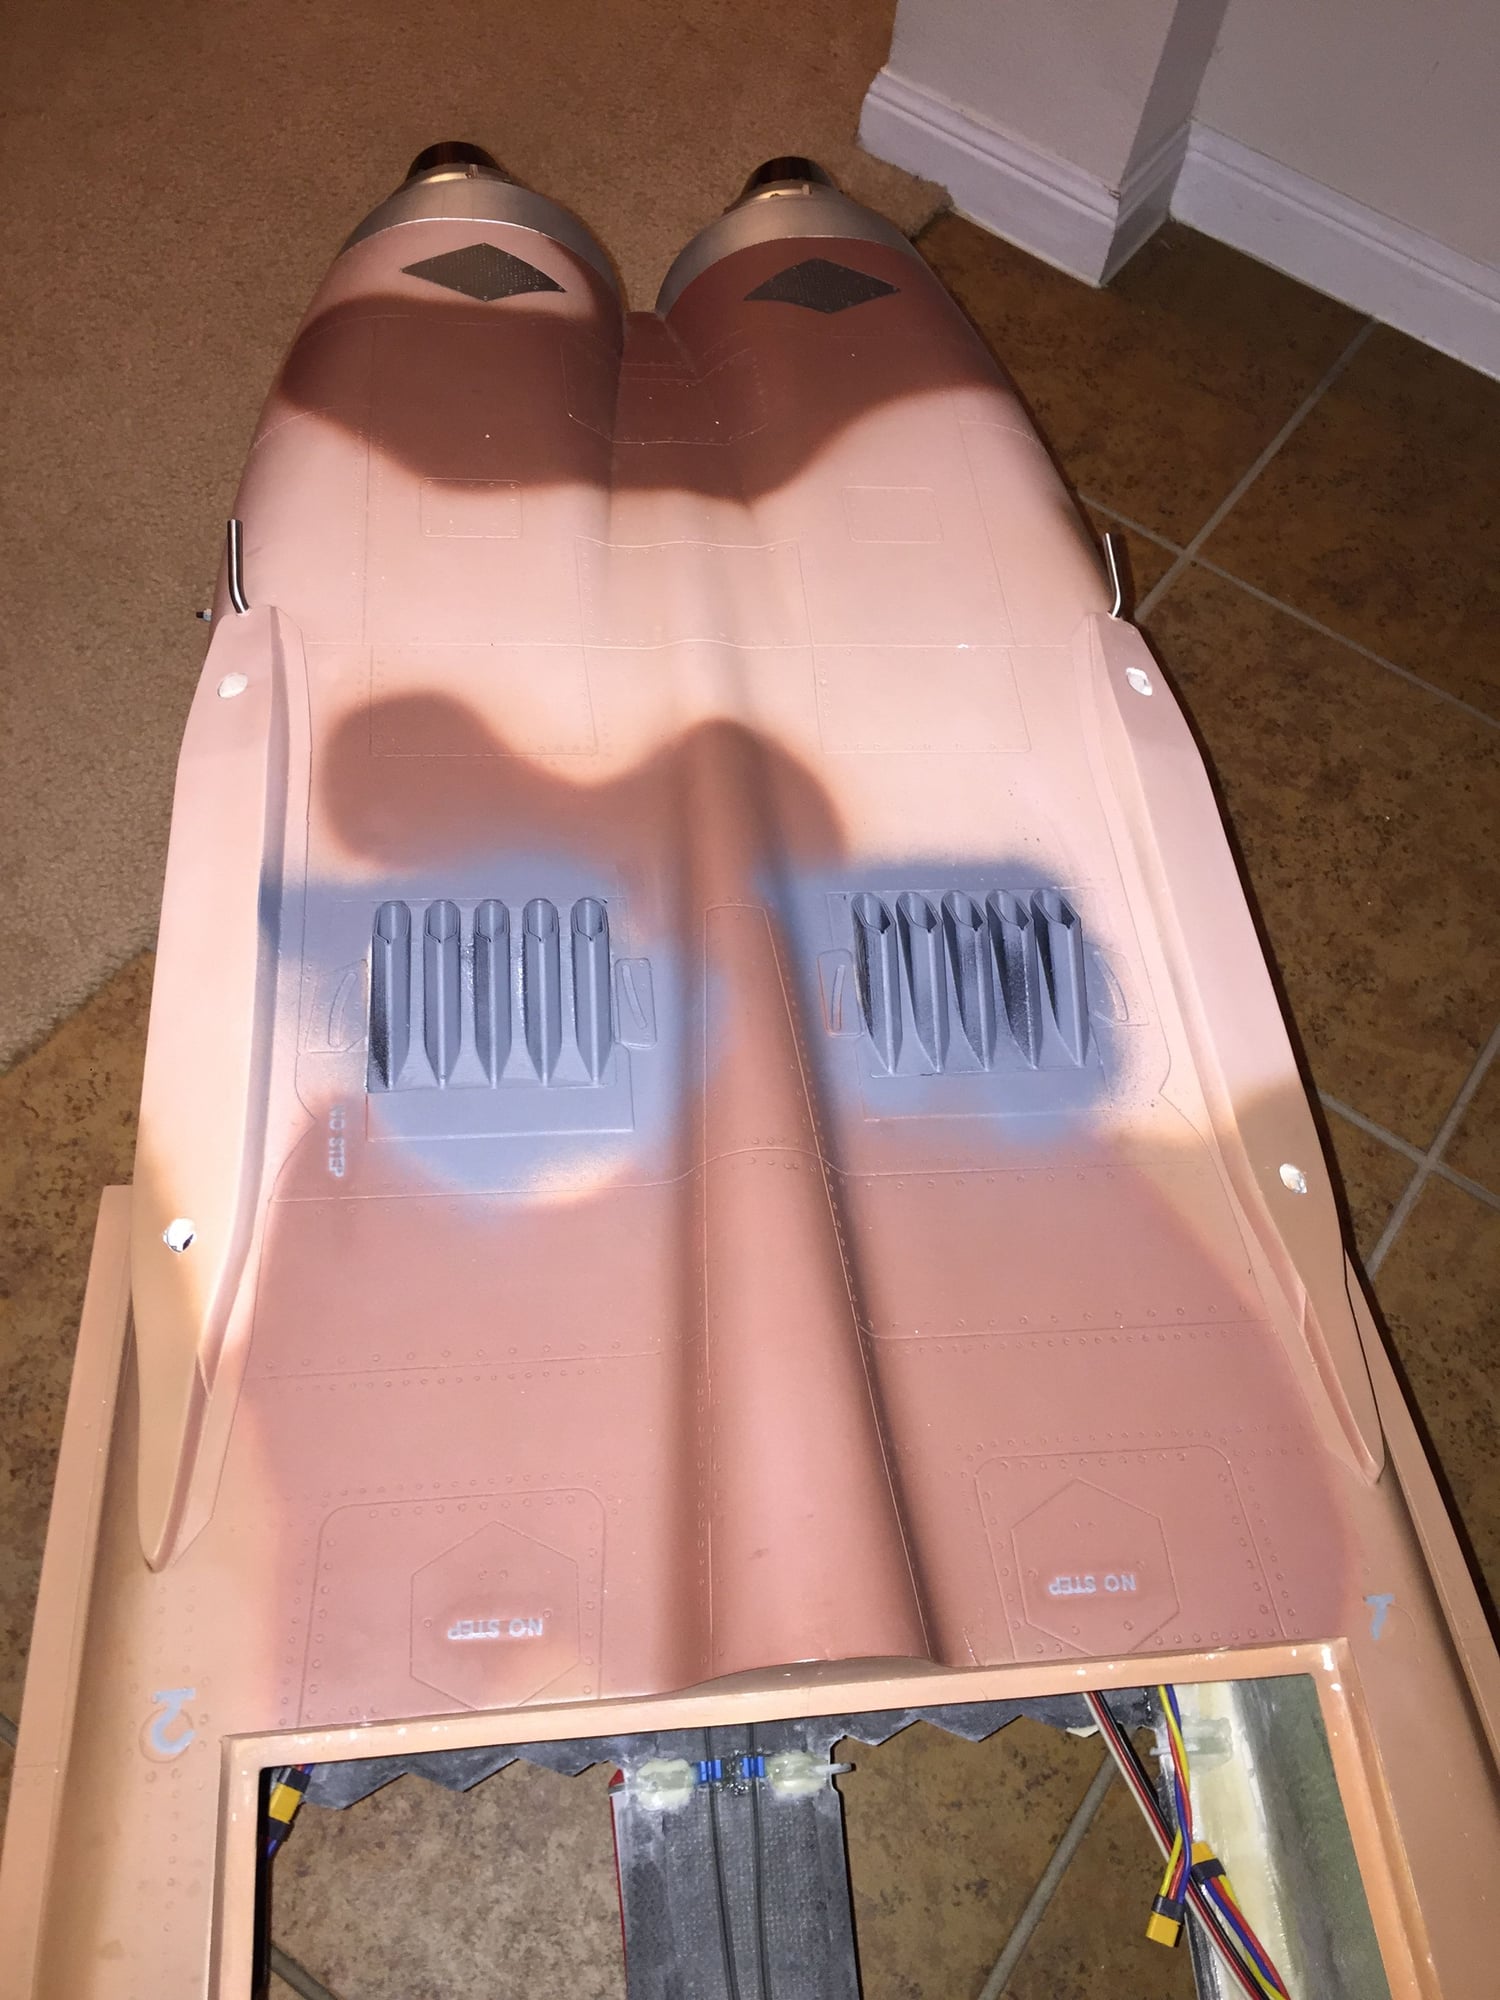
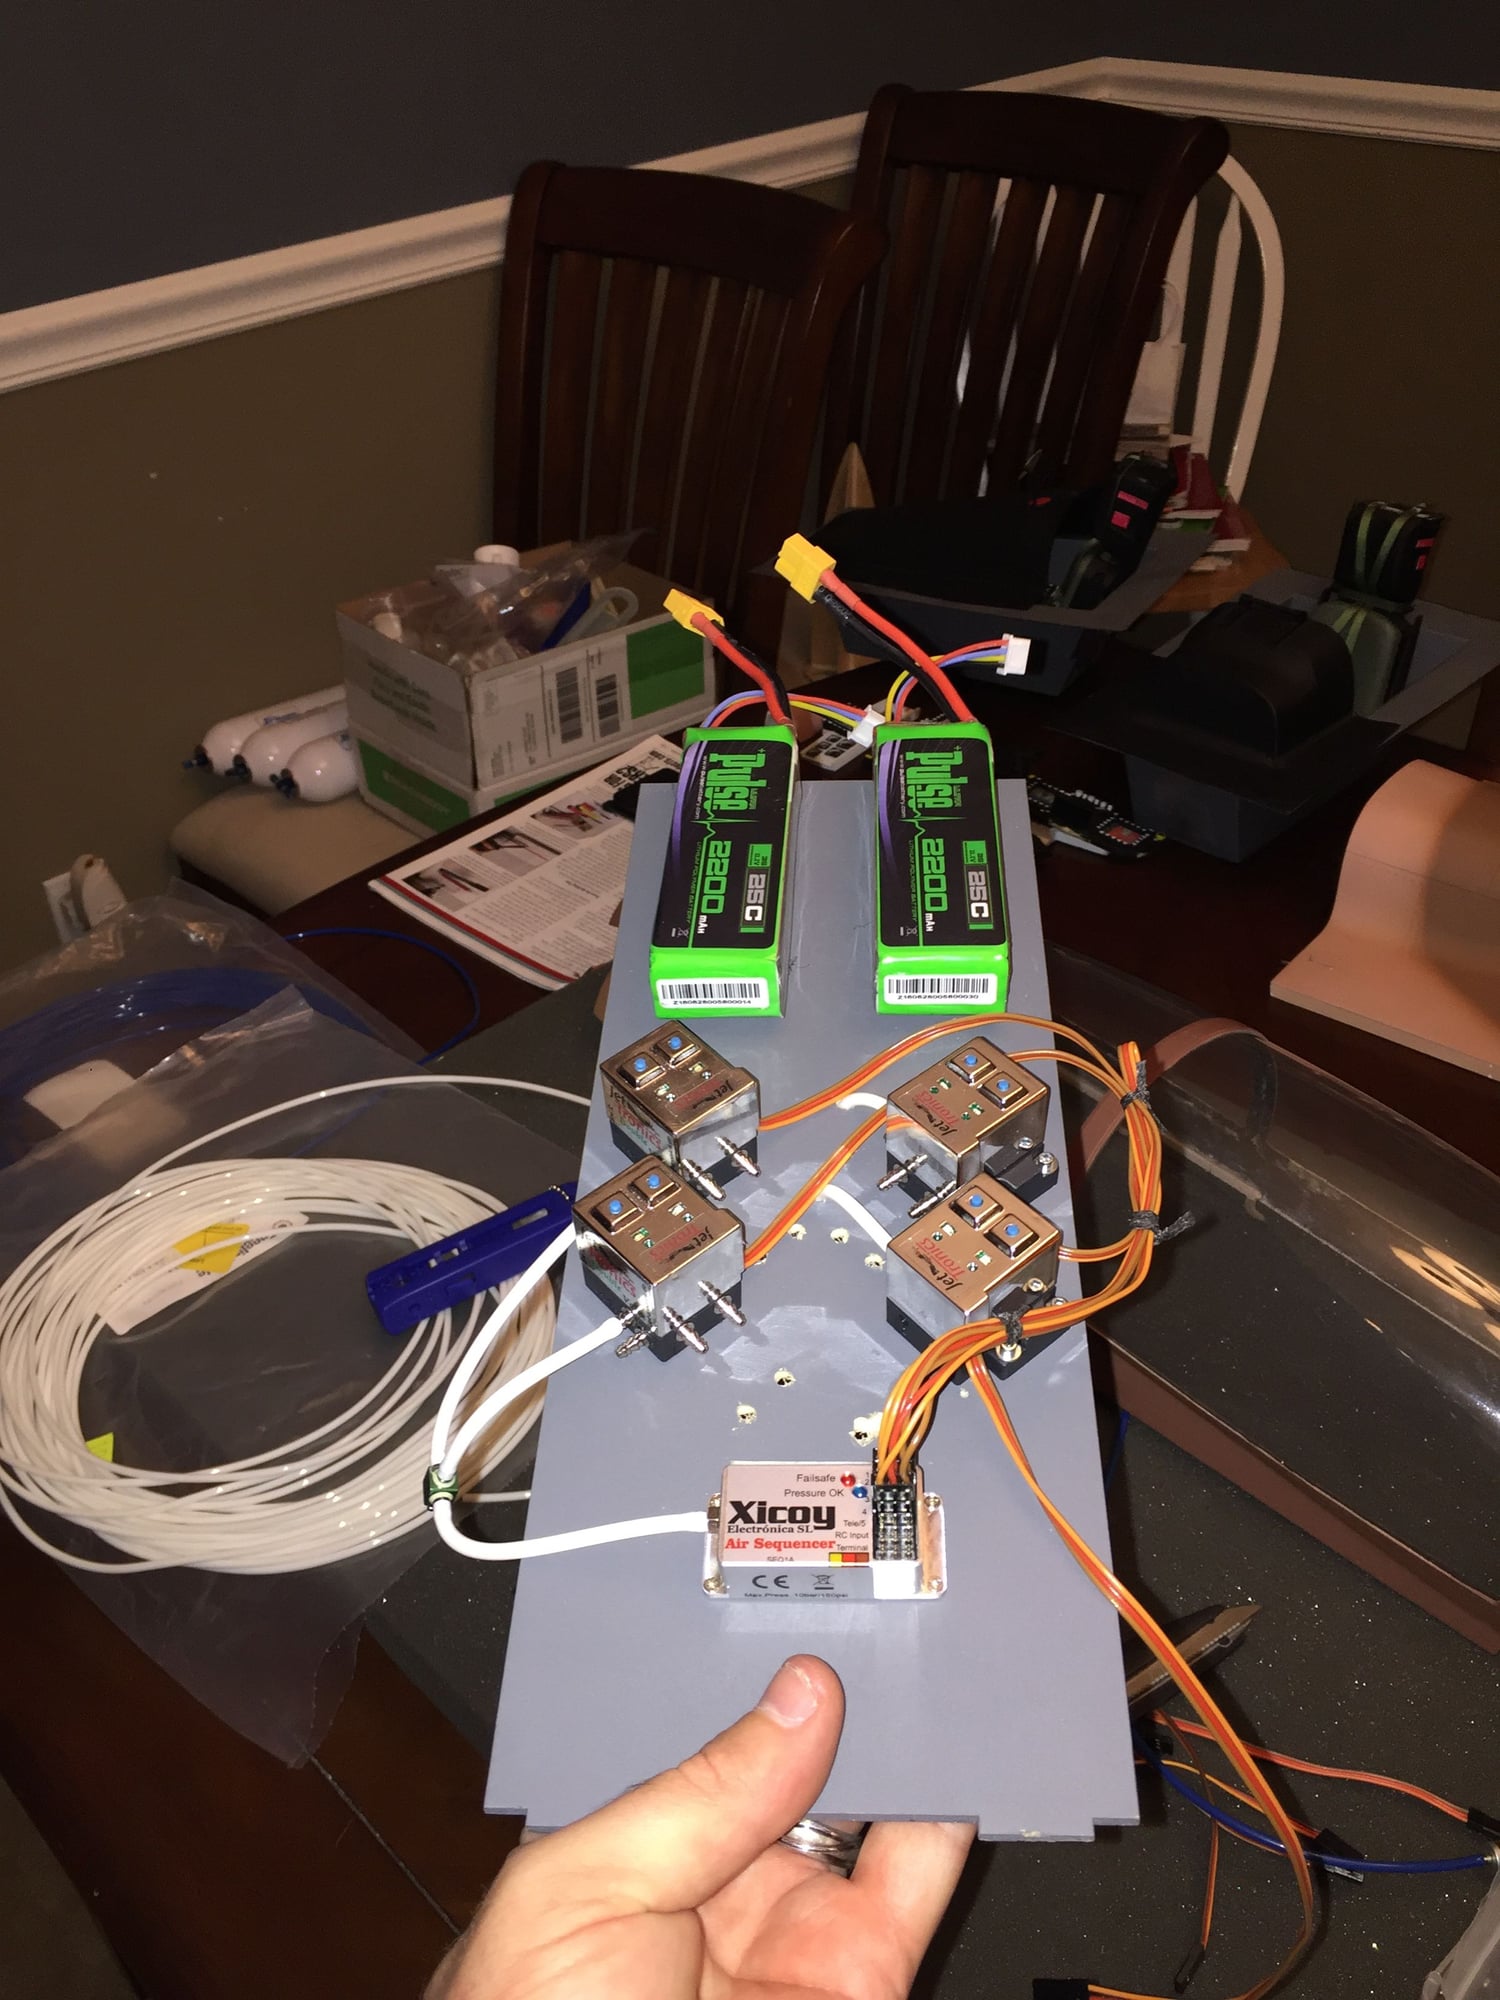
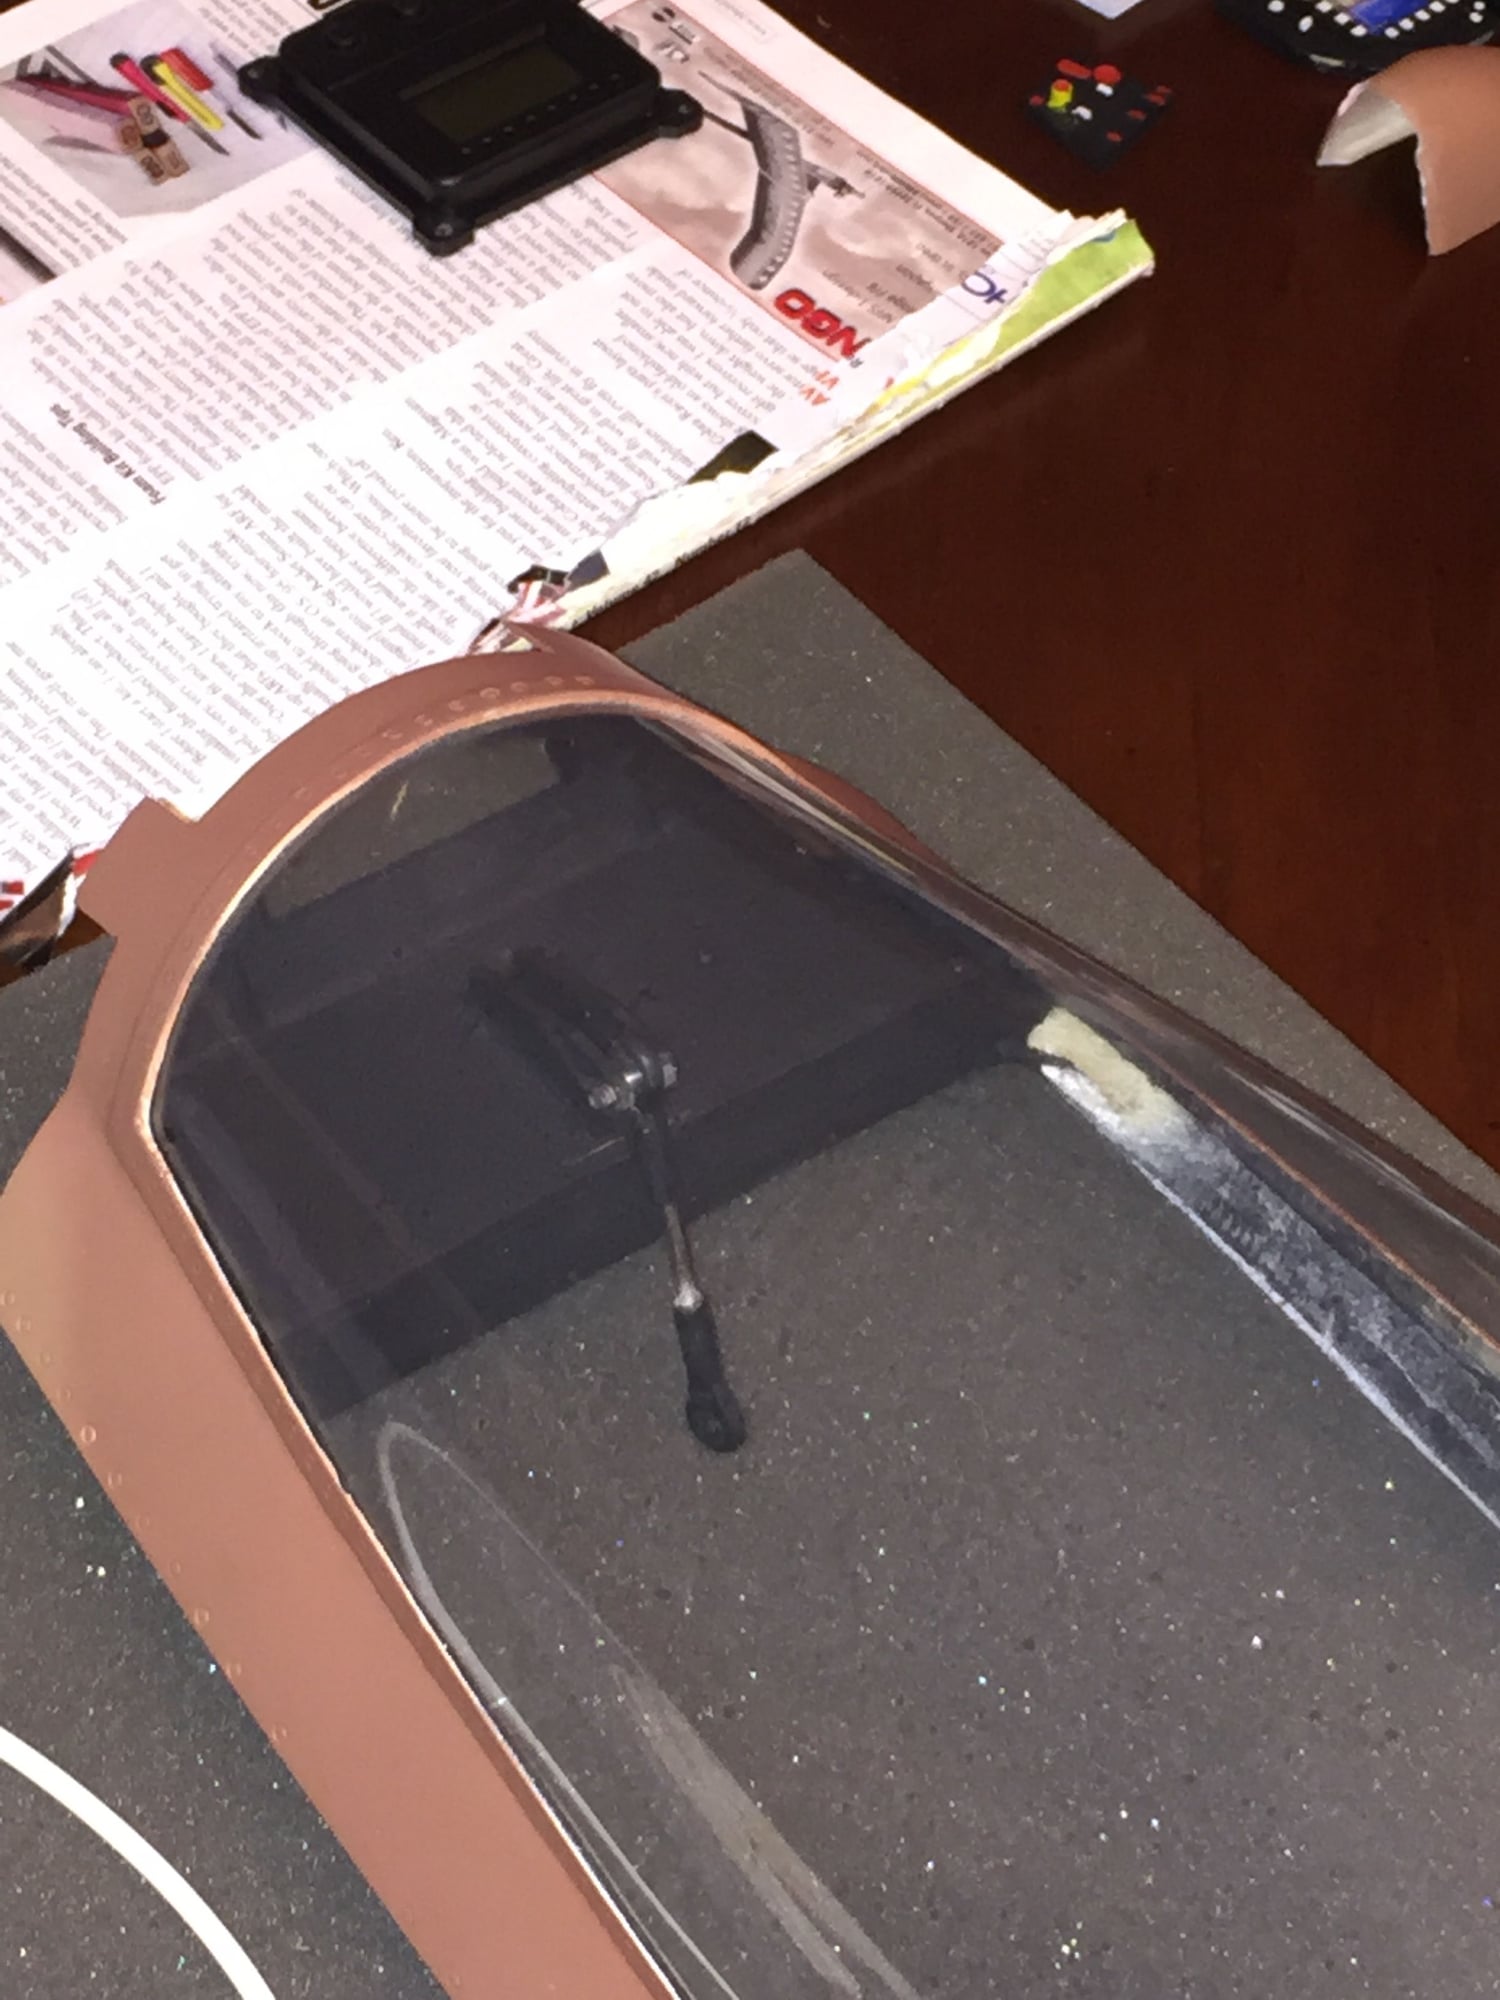
I applied hysol and with the race greased up and the screws loosely screwed down I put the stabs on and let the hysol cure. When done correctly insures no binding and no wear leading to possible flutter. Did some painting for the cockpit and you will see the new joint seam looks much better. Lastly I added two MAP micro air fill next to my ECUs, one for gear and one for gear doors/brakes. Oh I noticed the g10 notches for the stab quick release are not big enough the notch doesn�t slide down once the stab is in. Critical item to fix, this is what holds the stabs on.
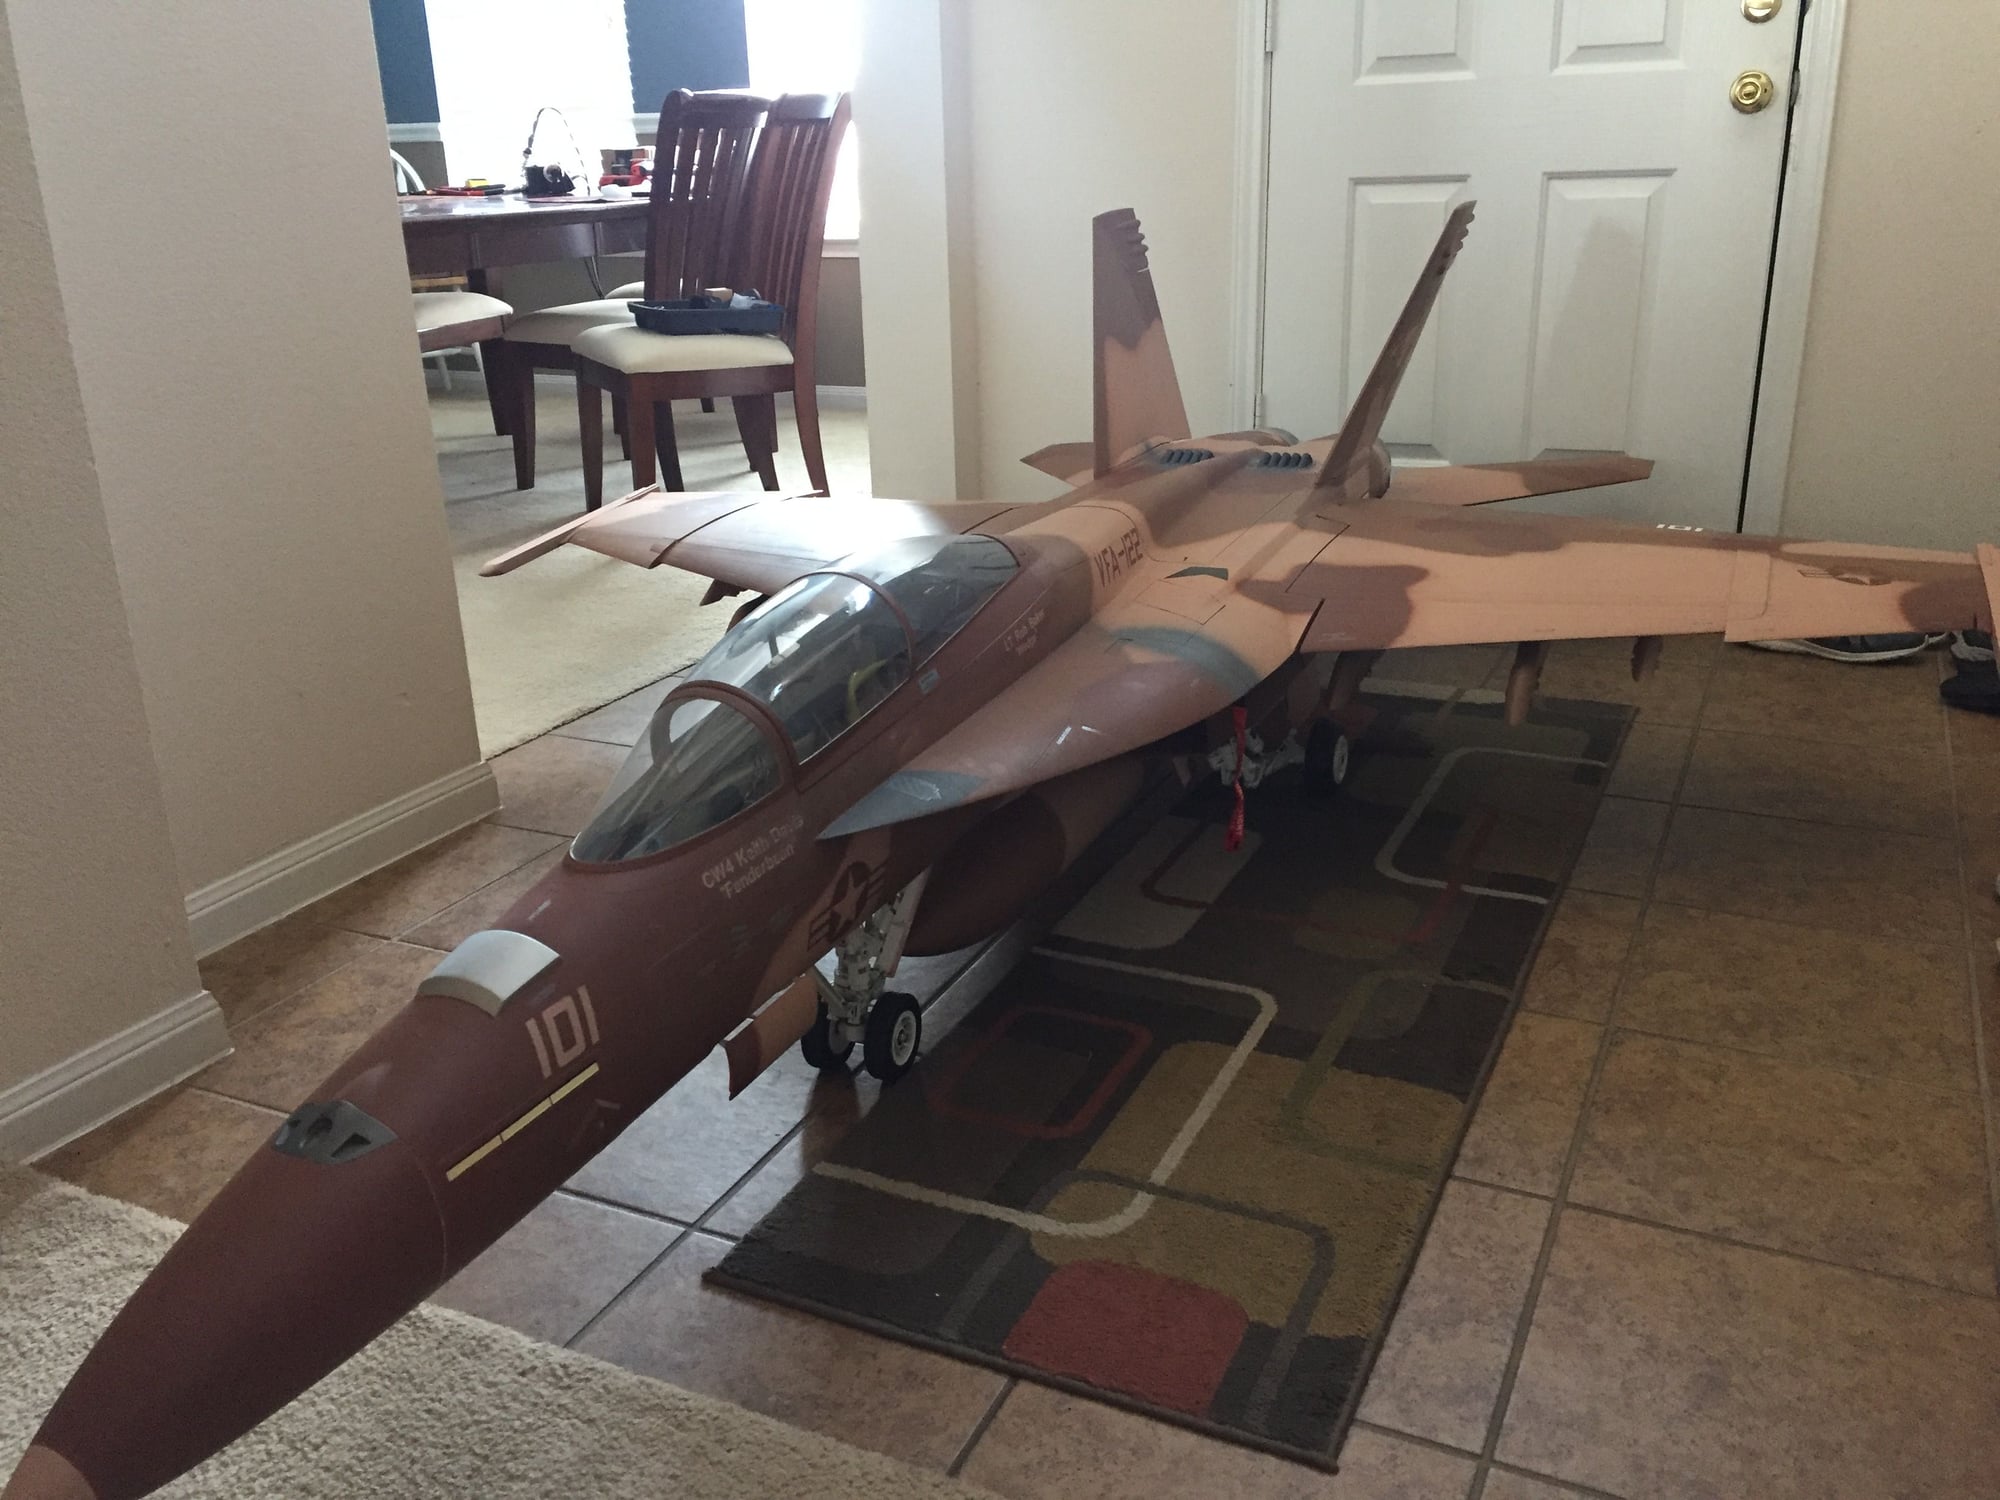
Taking over the dinning room again
More cockpit paint
Fixed that nasty gap and remade panel lines and primed
Primed
A little work on the equipment trayprim
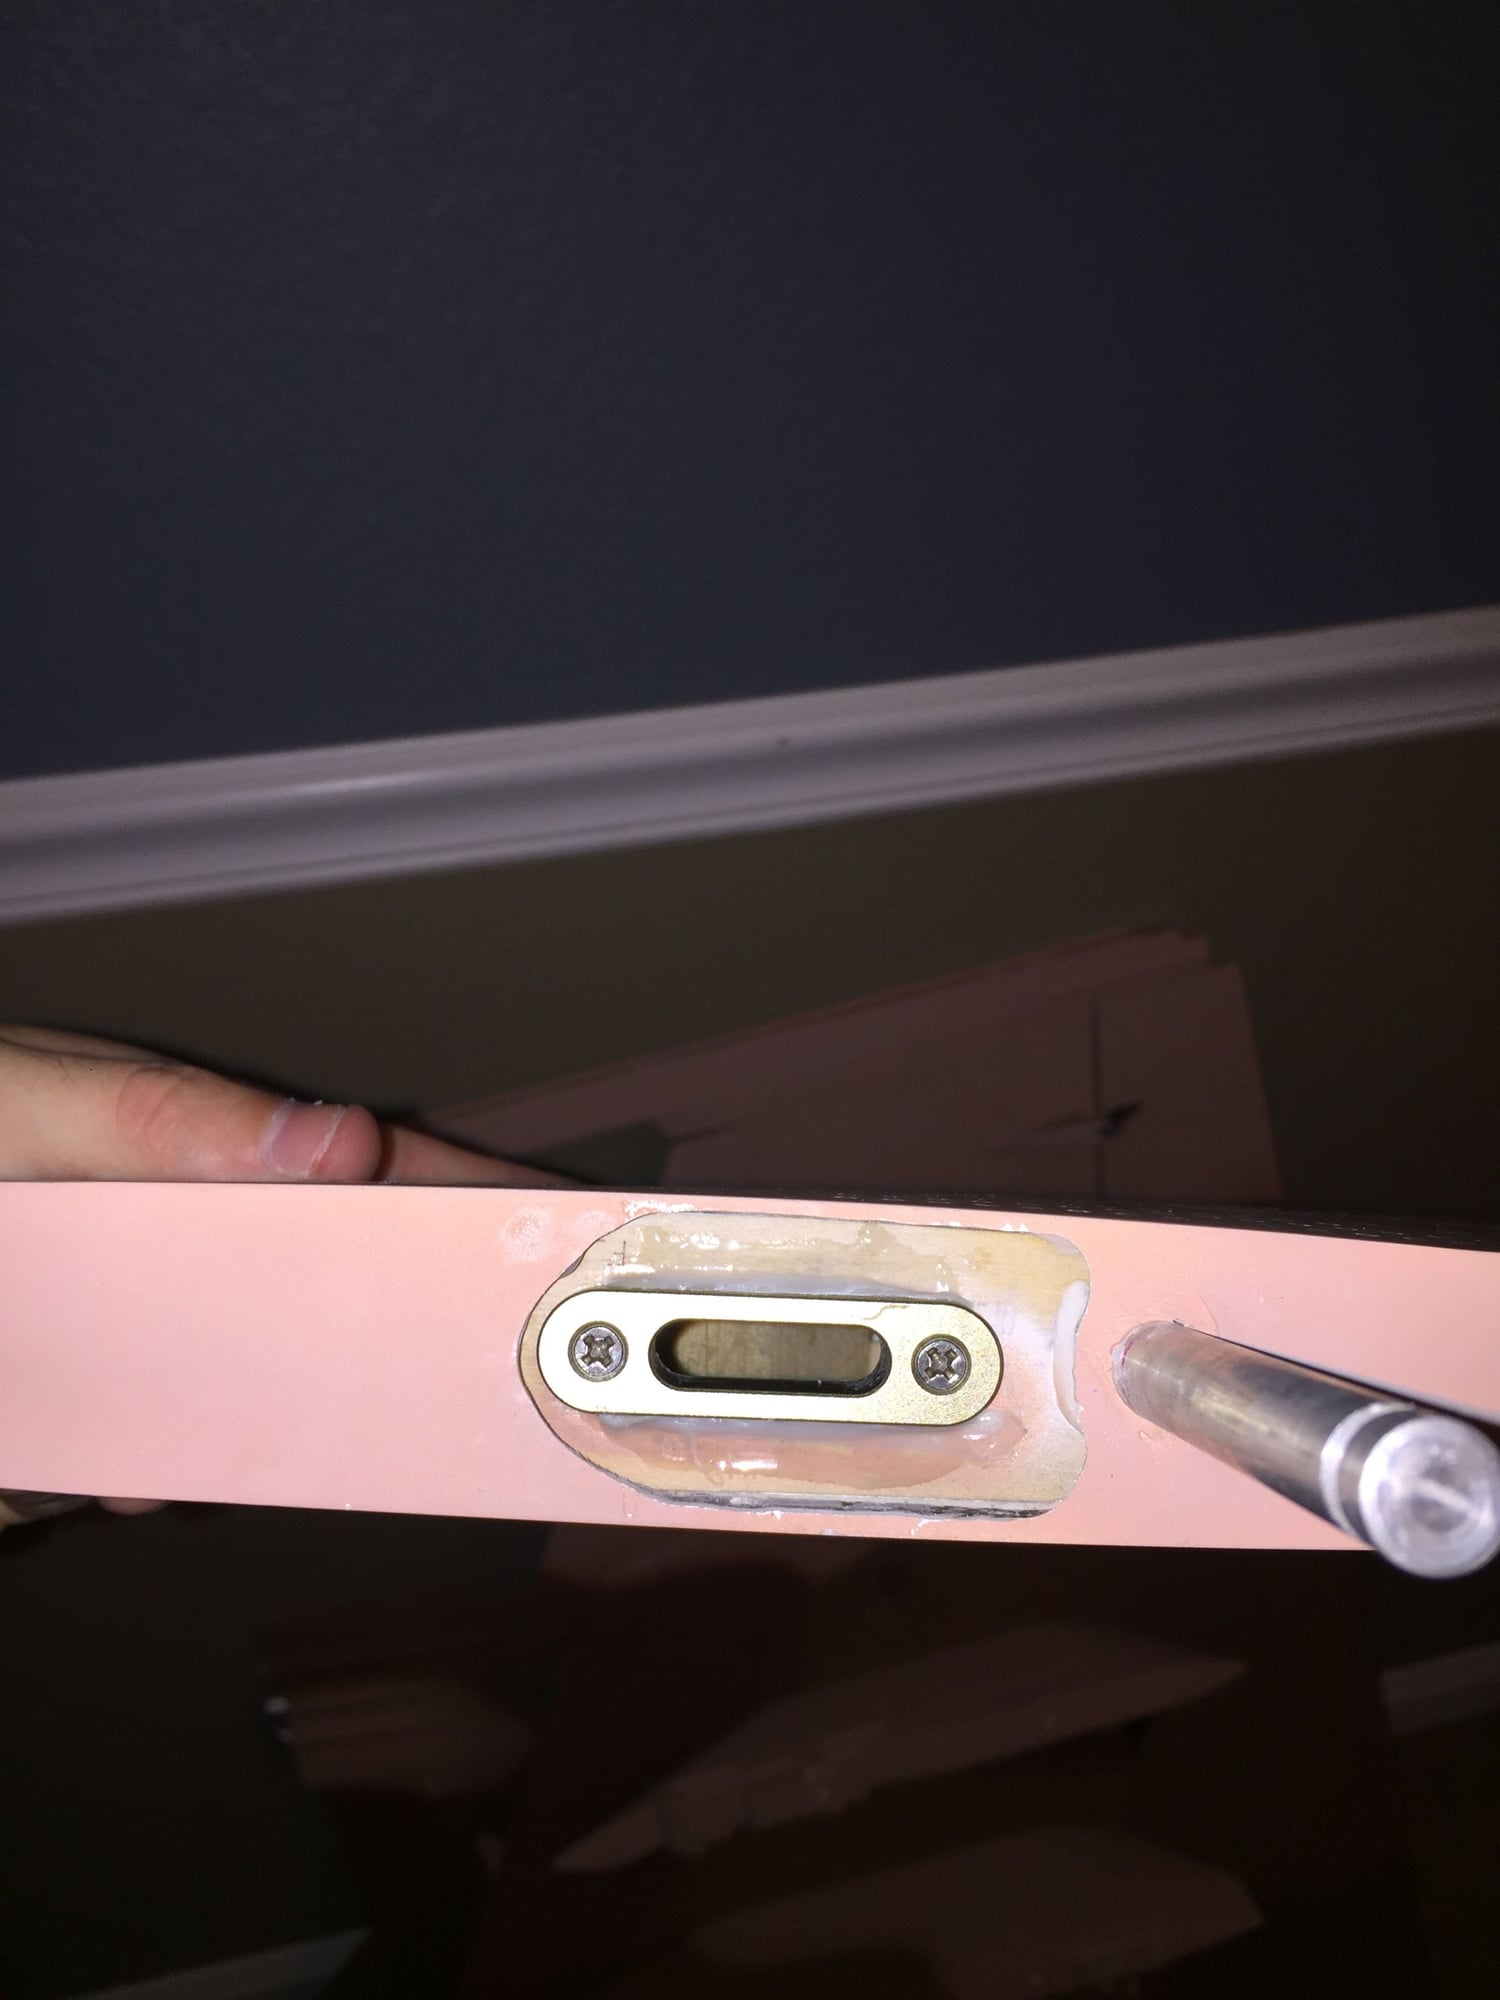
Critical step must be perpendicular to the shaft of the servo arm which should be made parallel to the shaft during servo install.
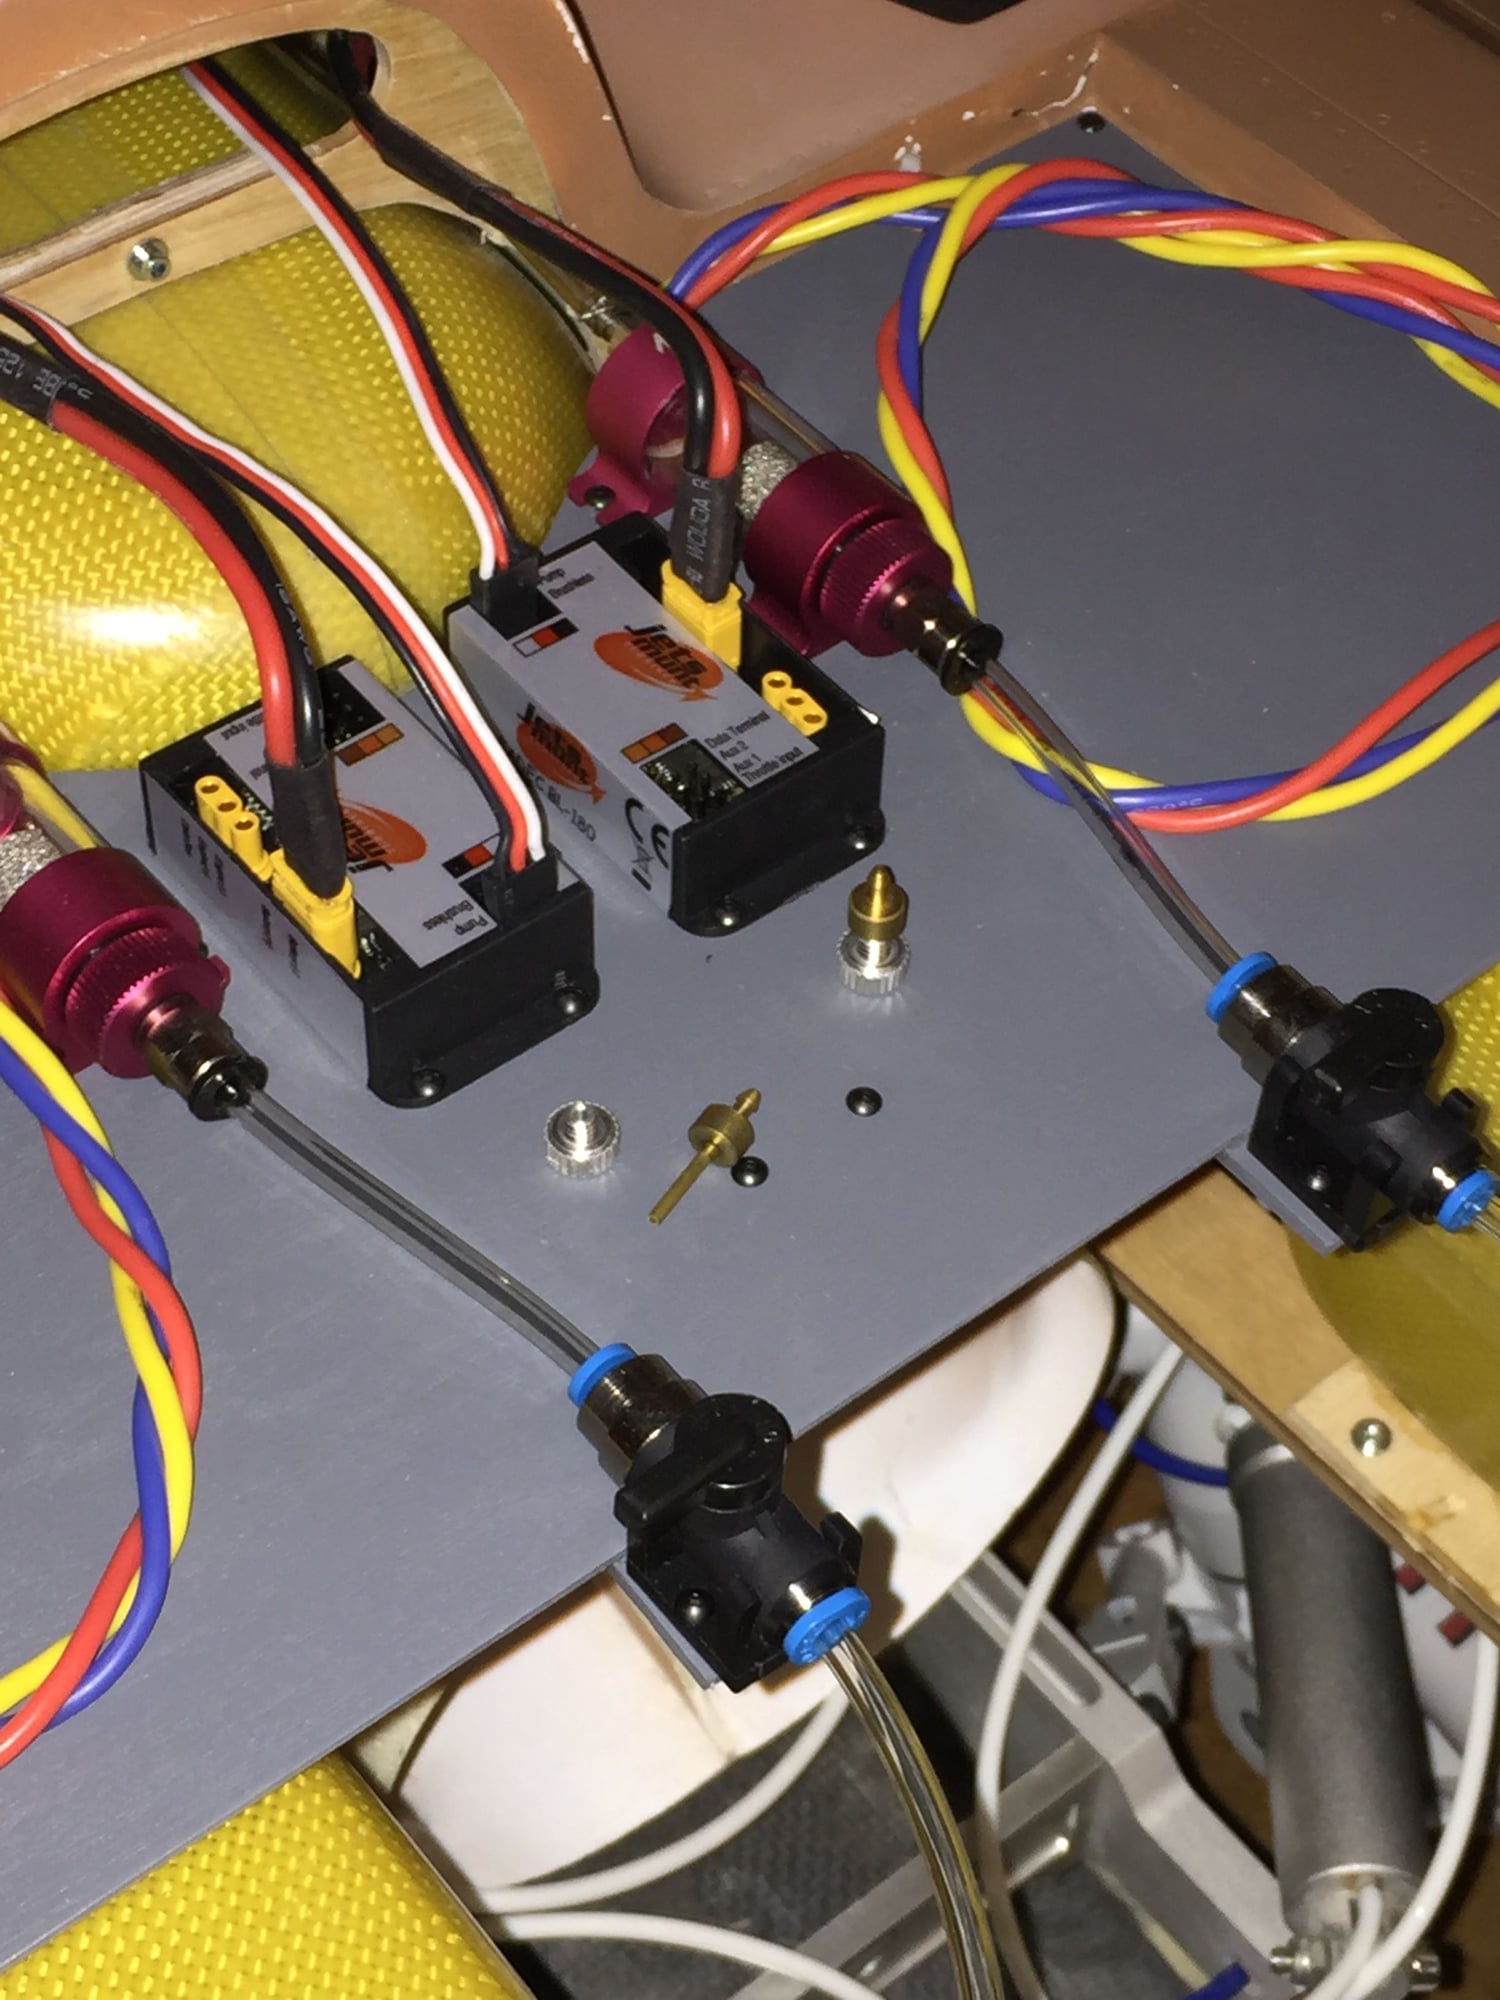
MAP micro air fill valves
A little paint
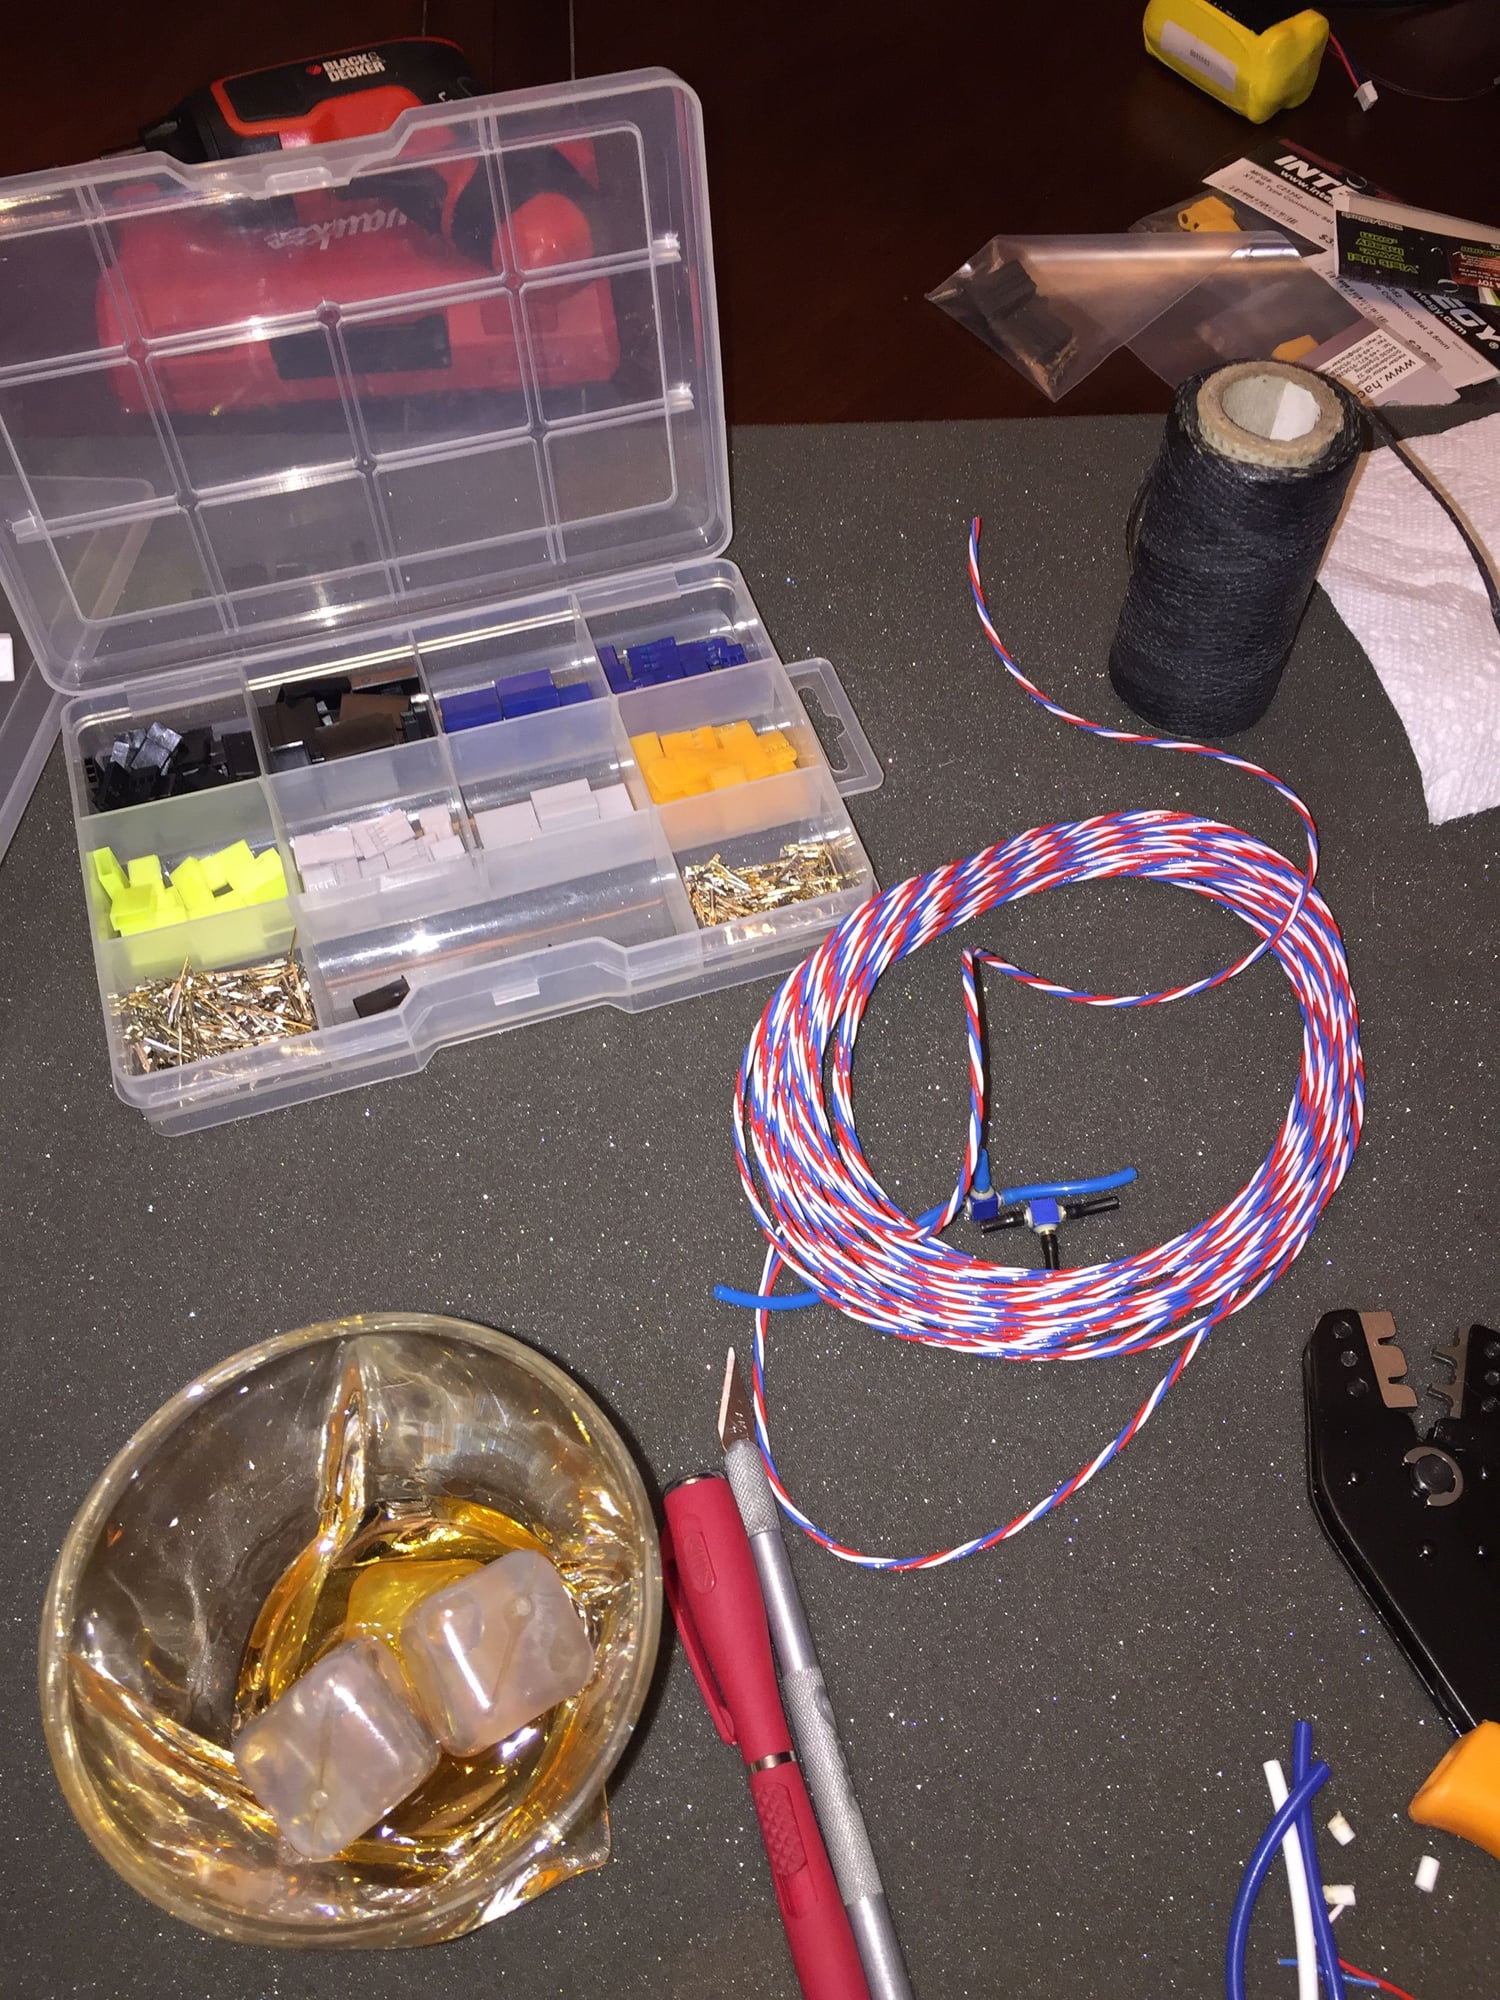
Lead making with PB wire and Gentleman Jack to make it bearable!
Last edited by FenderBean; 05-24-2019 at 09:22 PM.
05-29-2019, 11:26 AM
#261
Thread Starter
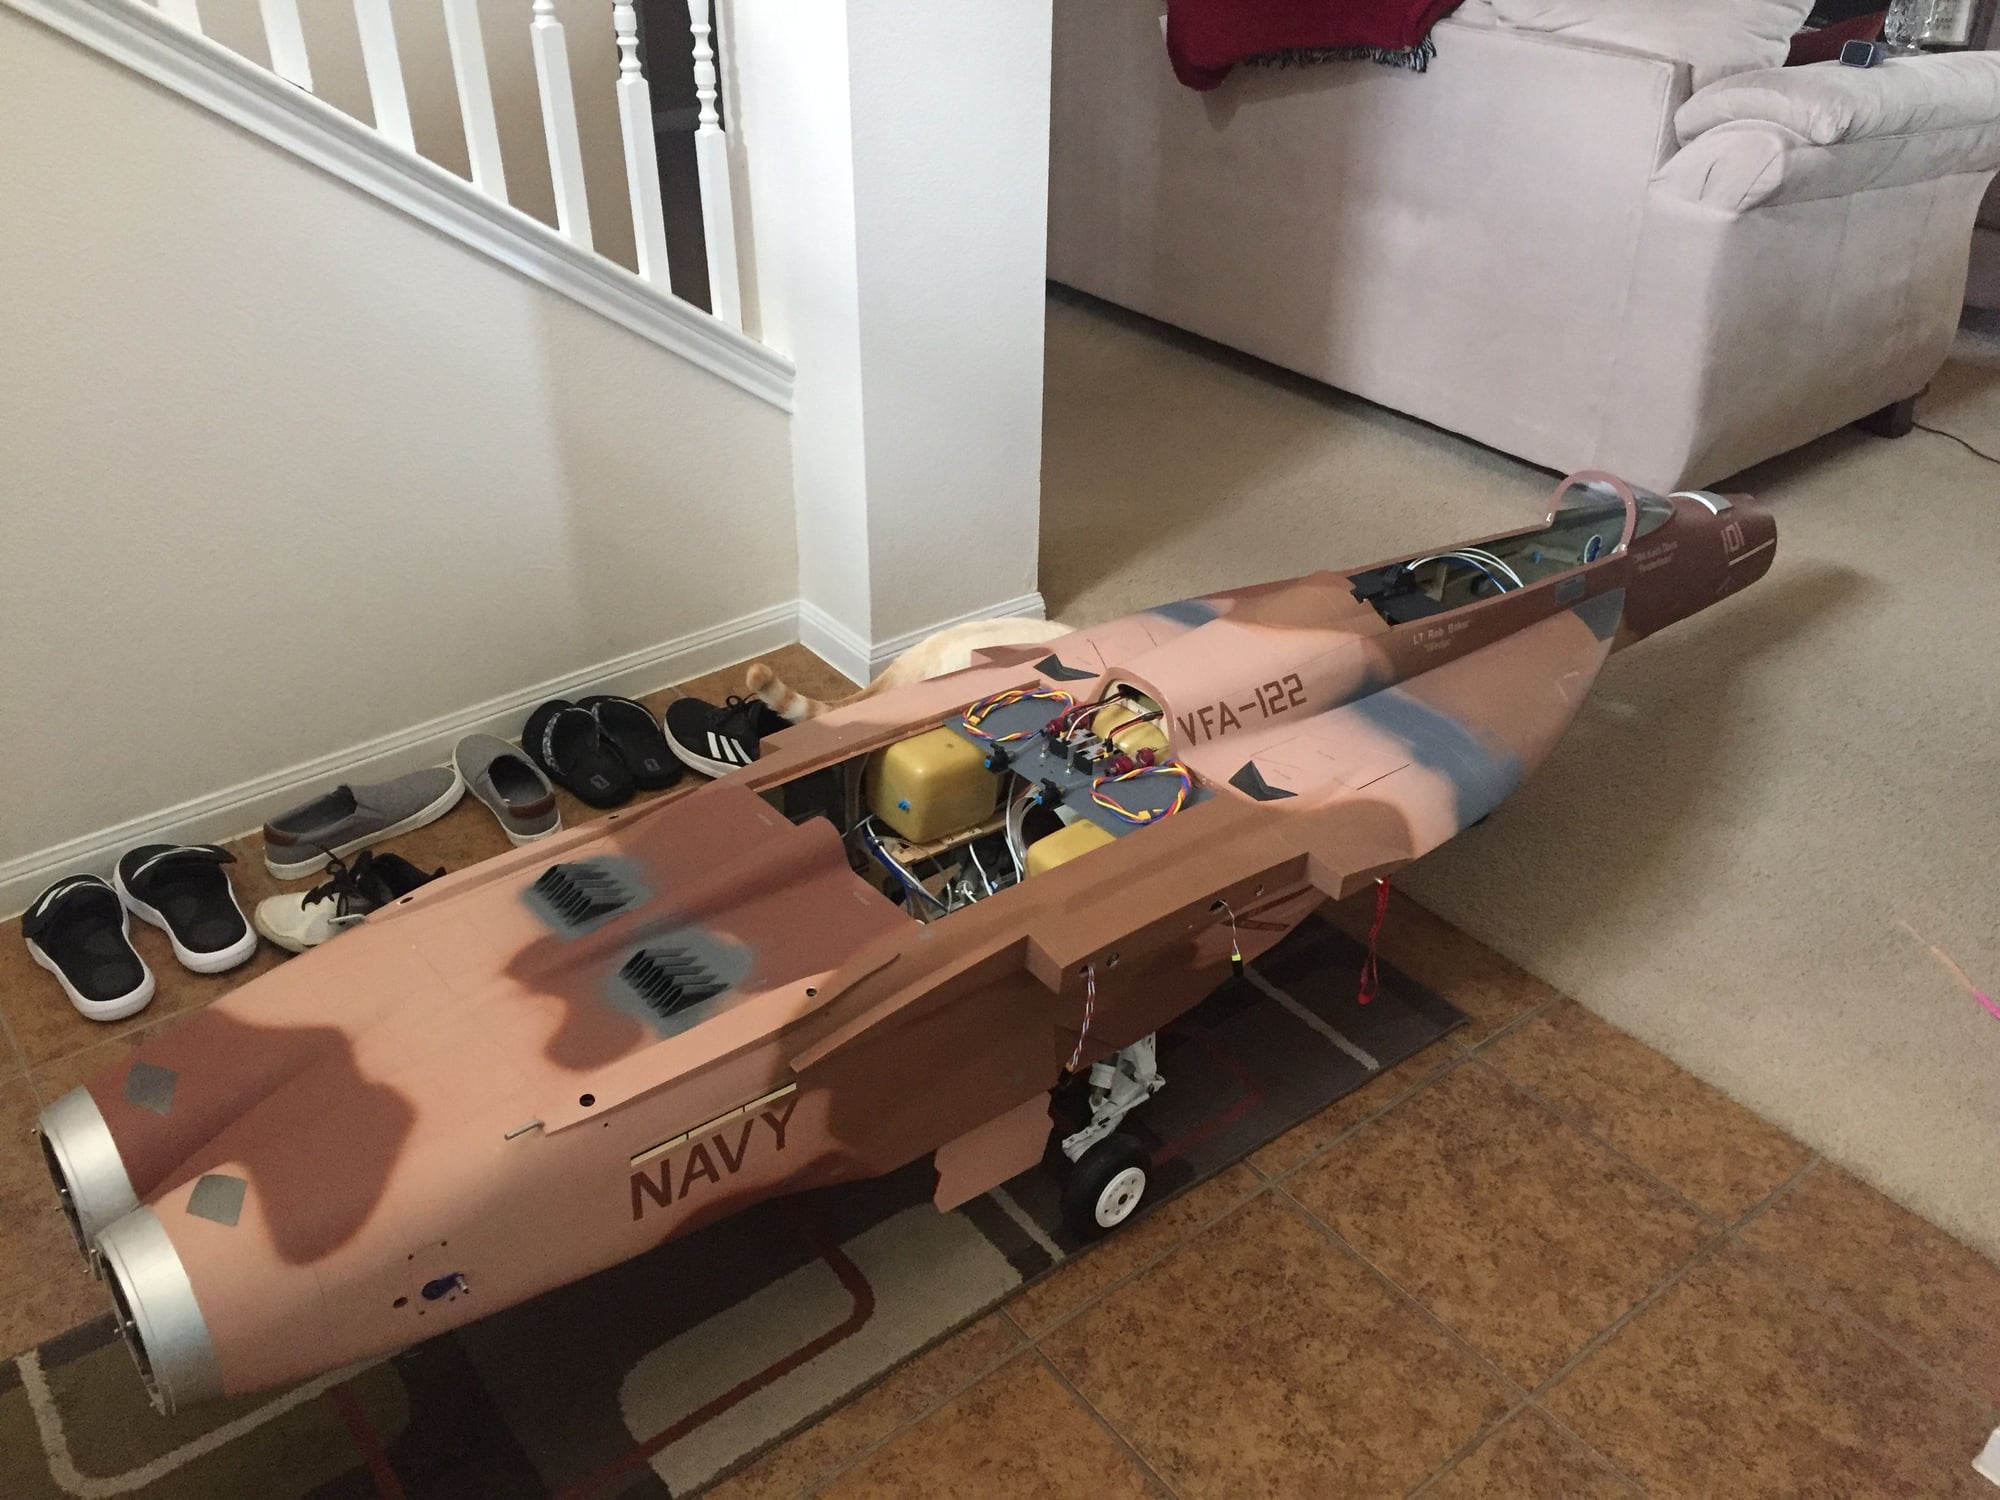
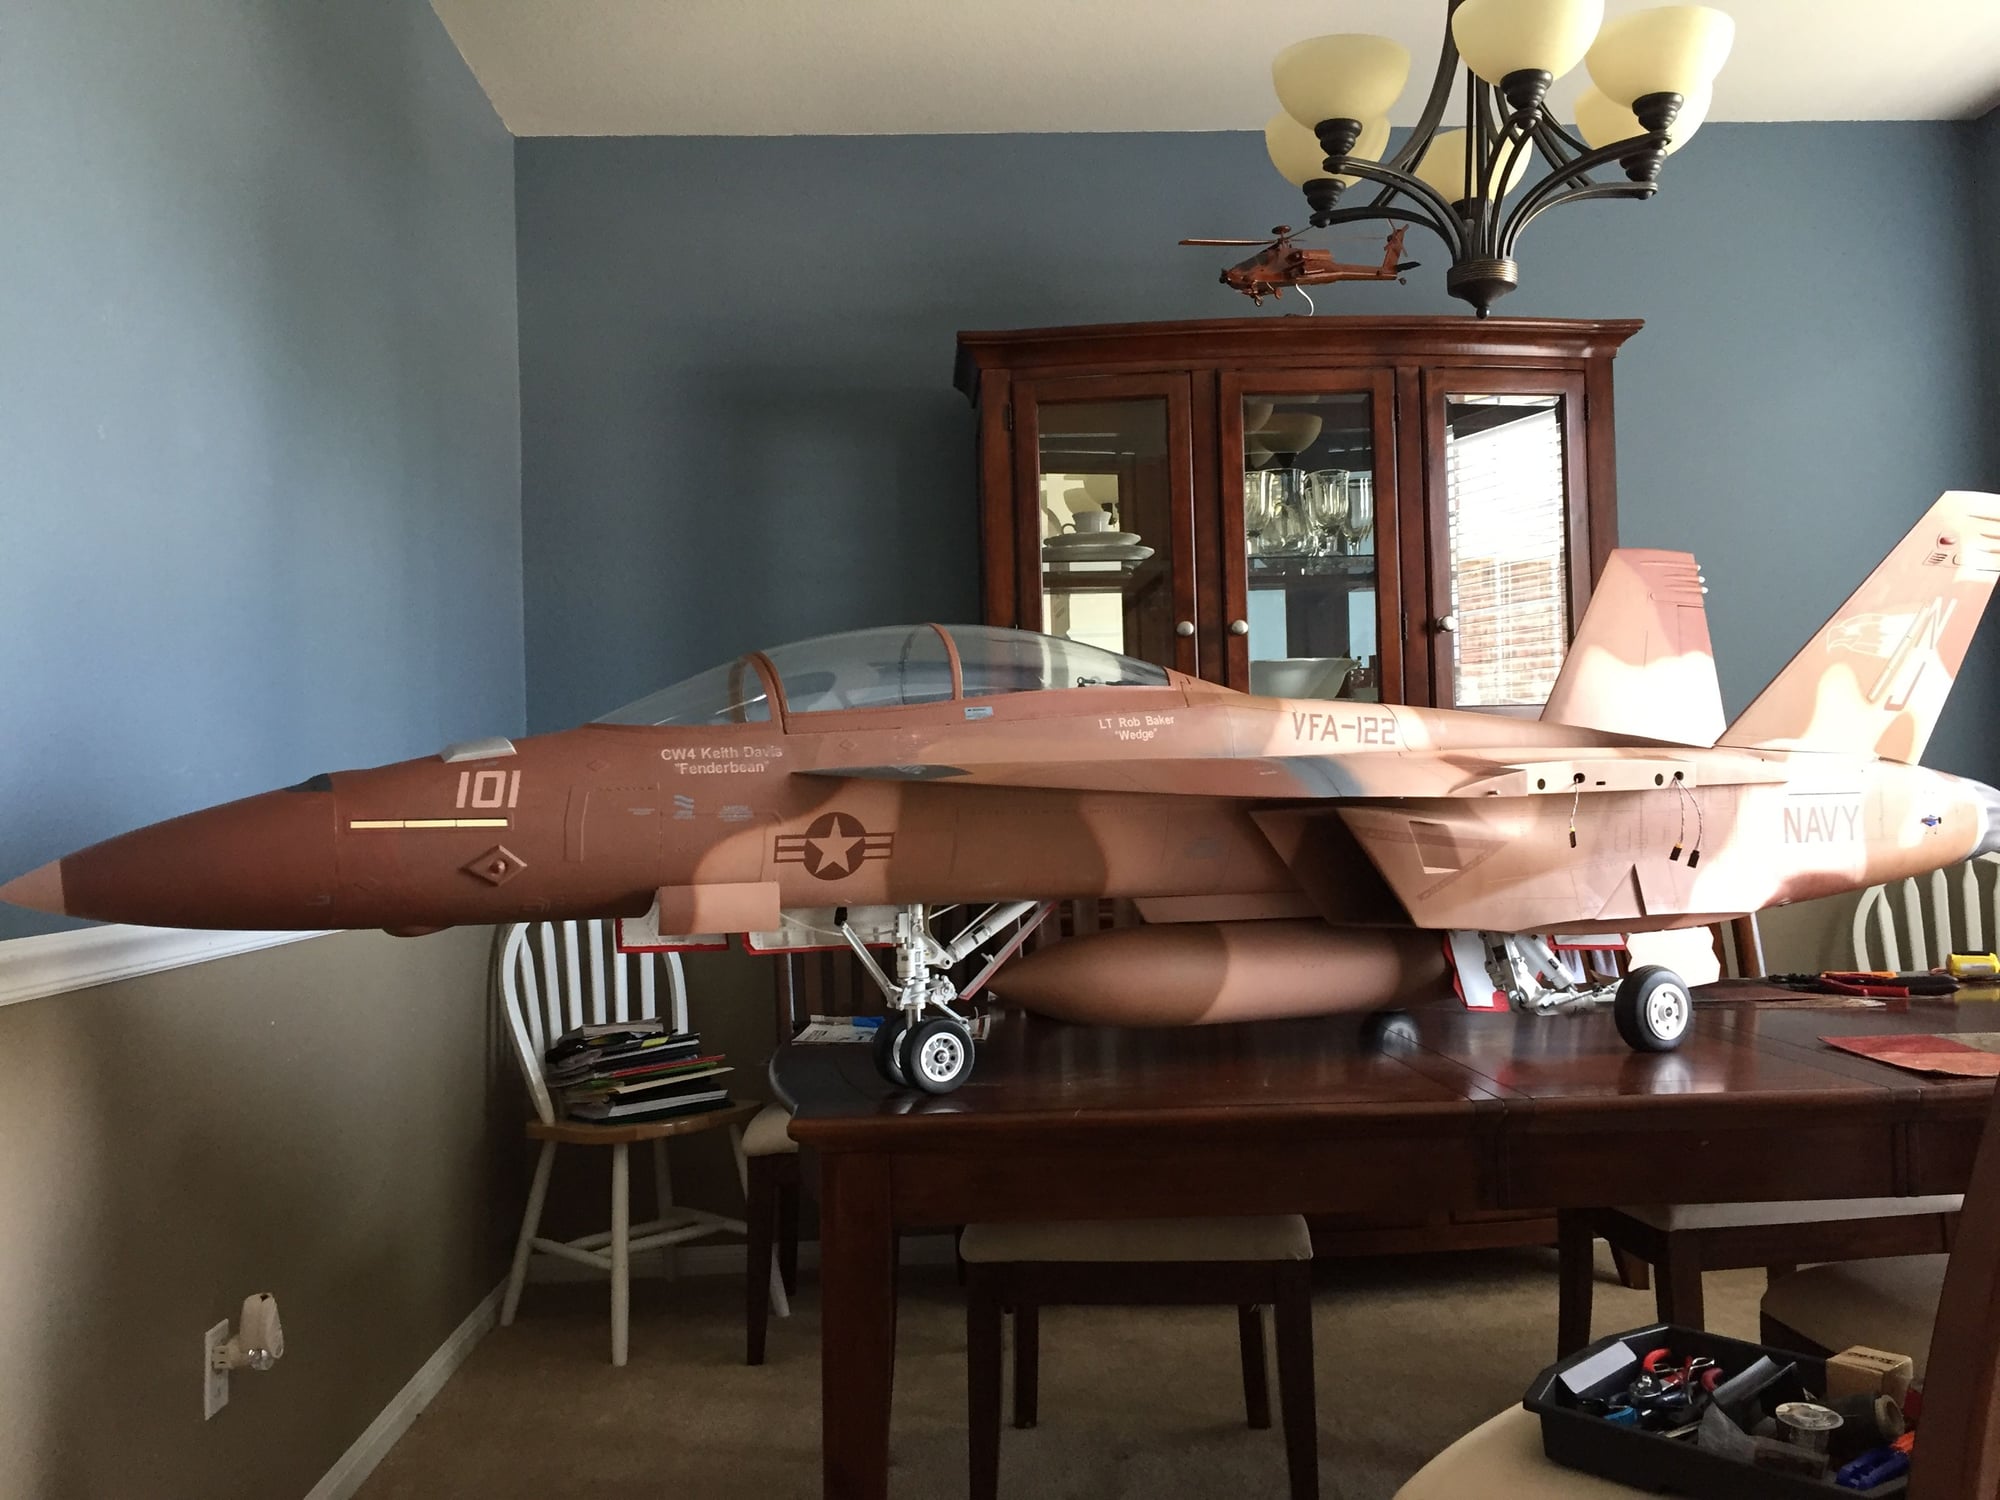
Well I ran into another problem right wing leading edge flap pin is about 10mm which is probably what the original the original flap was jammed to. Anyway pretty much got everything in so I checked the cg and holy cow it�s soooooo tail heavy I�m not sure I can get enough weight in the nose that I would be comfortable with.
The instructions say 165mm which I�m guess is from the wing root leading edge back. Others say balance it on the forward spar which I checked and I got the results I mentioned about.
Can any current owners verify your current cg location. It balances about halfway to the aft spare I have all the batteries in the nose. Pretty much anything with weight is forward of the CG
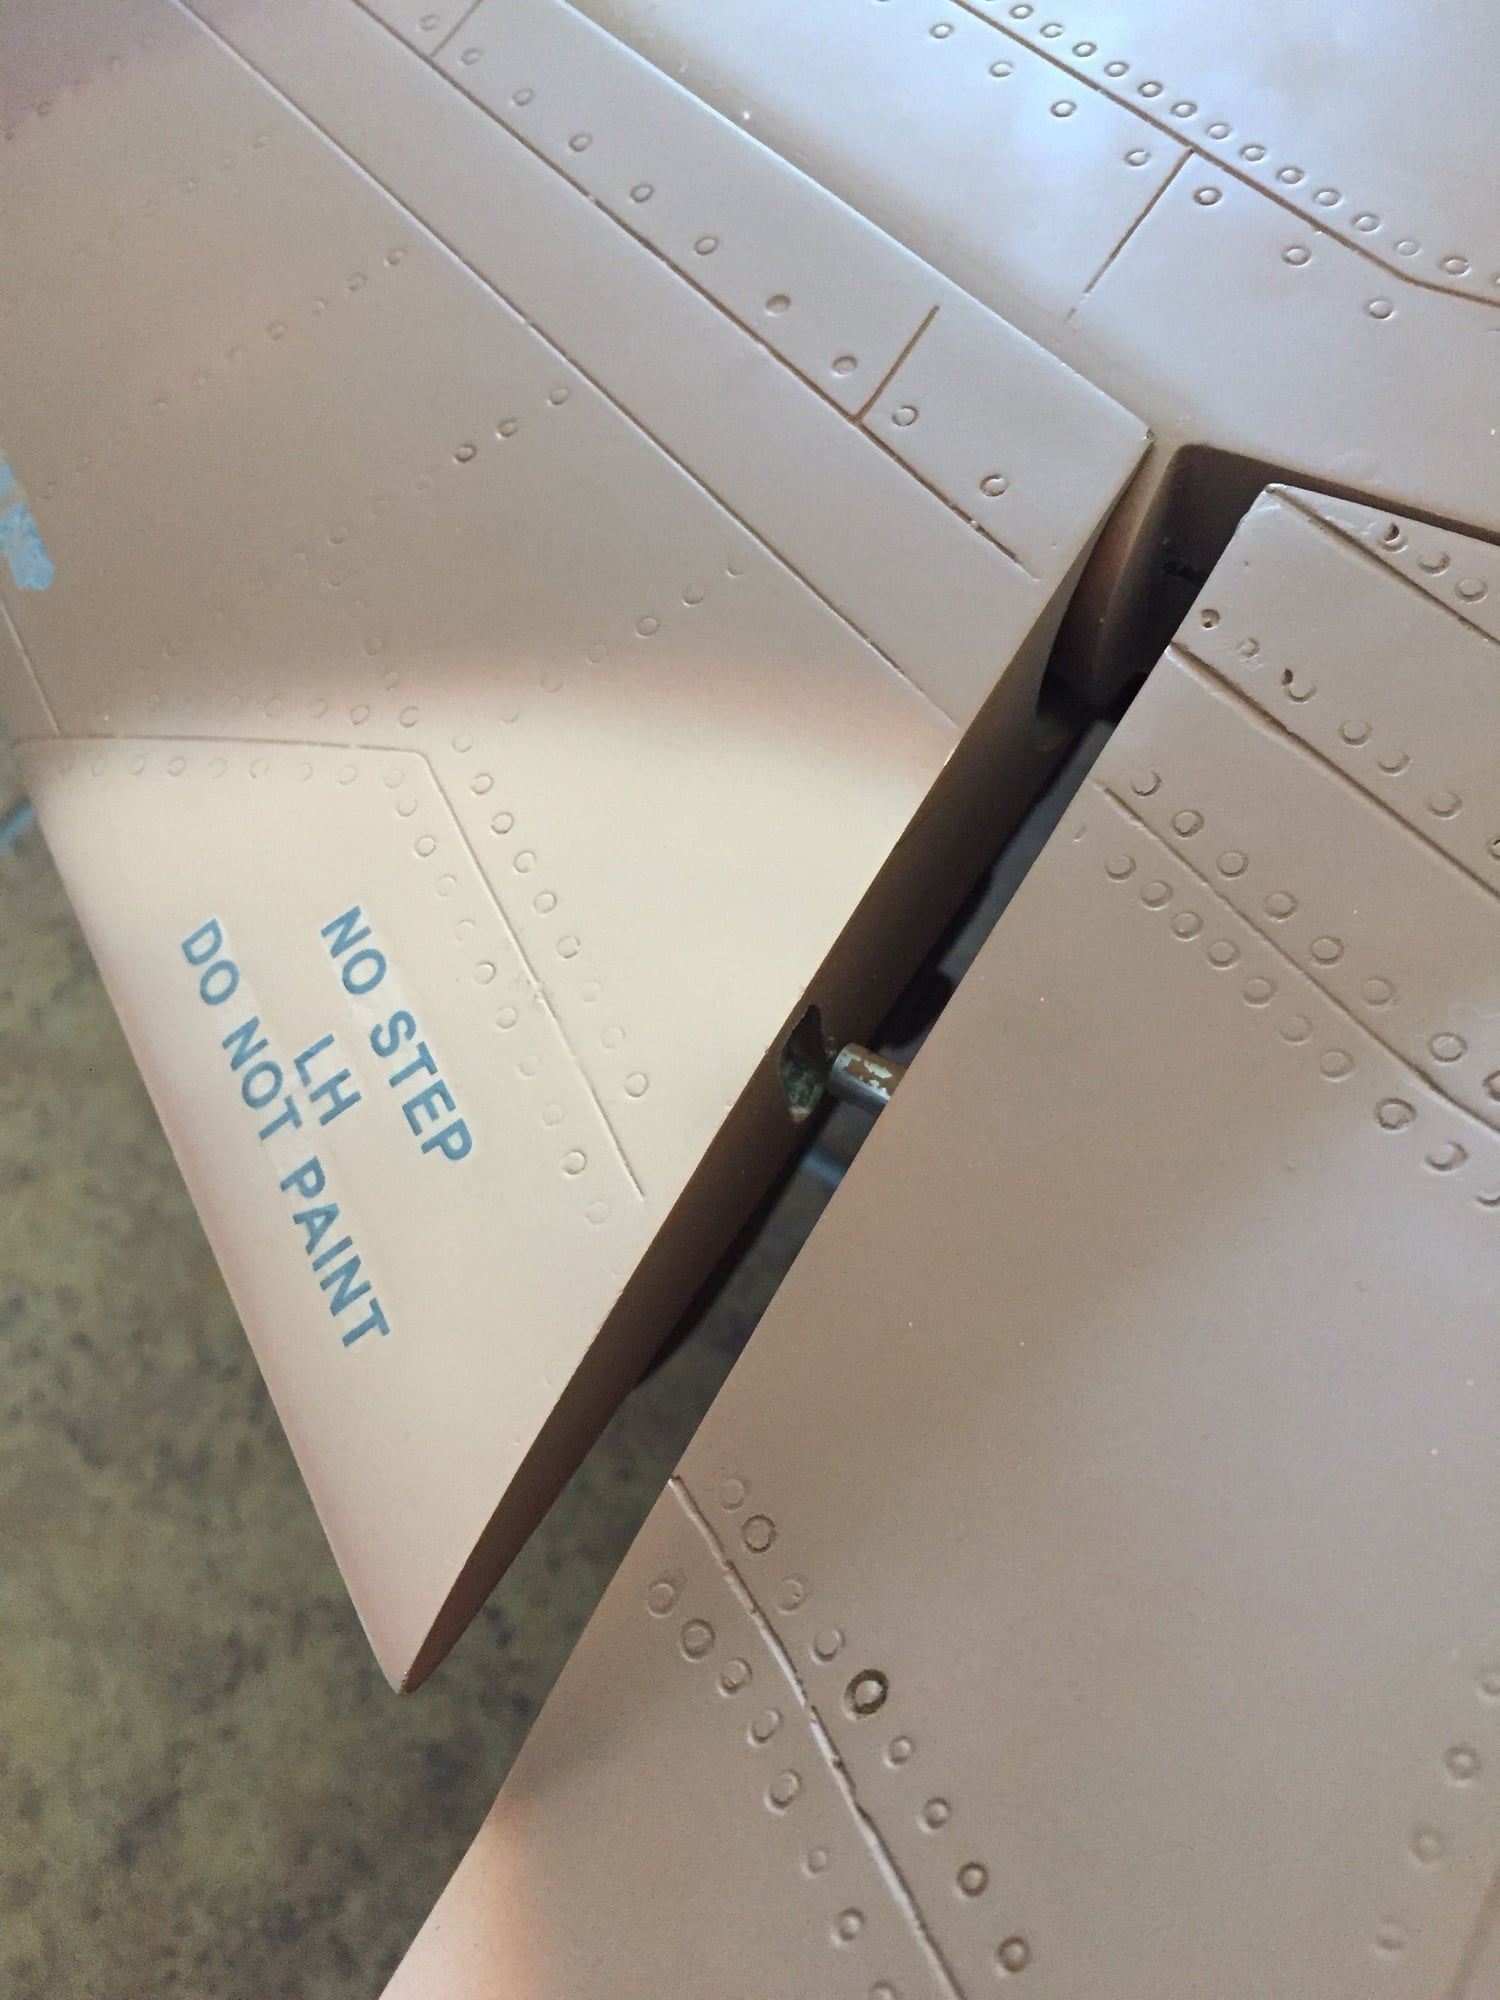
The right wing leading edge flap guide pin is about 10mms off. So more fixing to do.
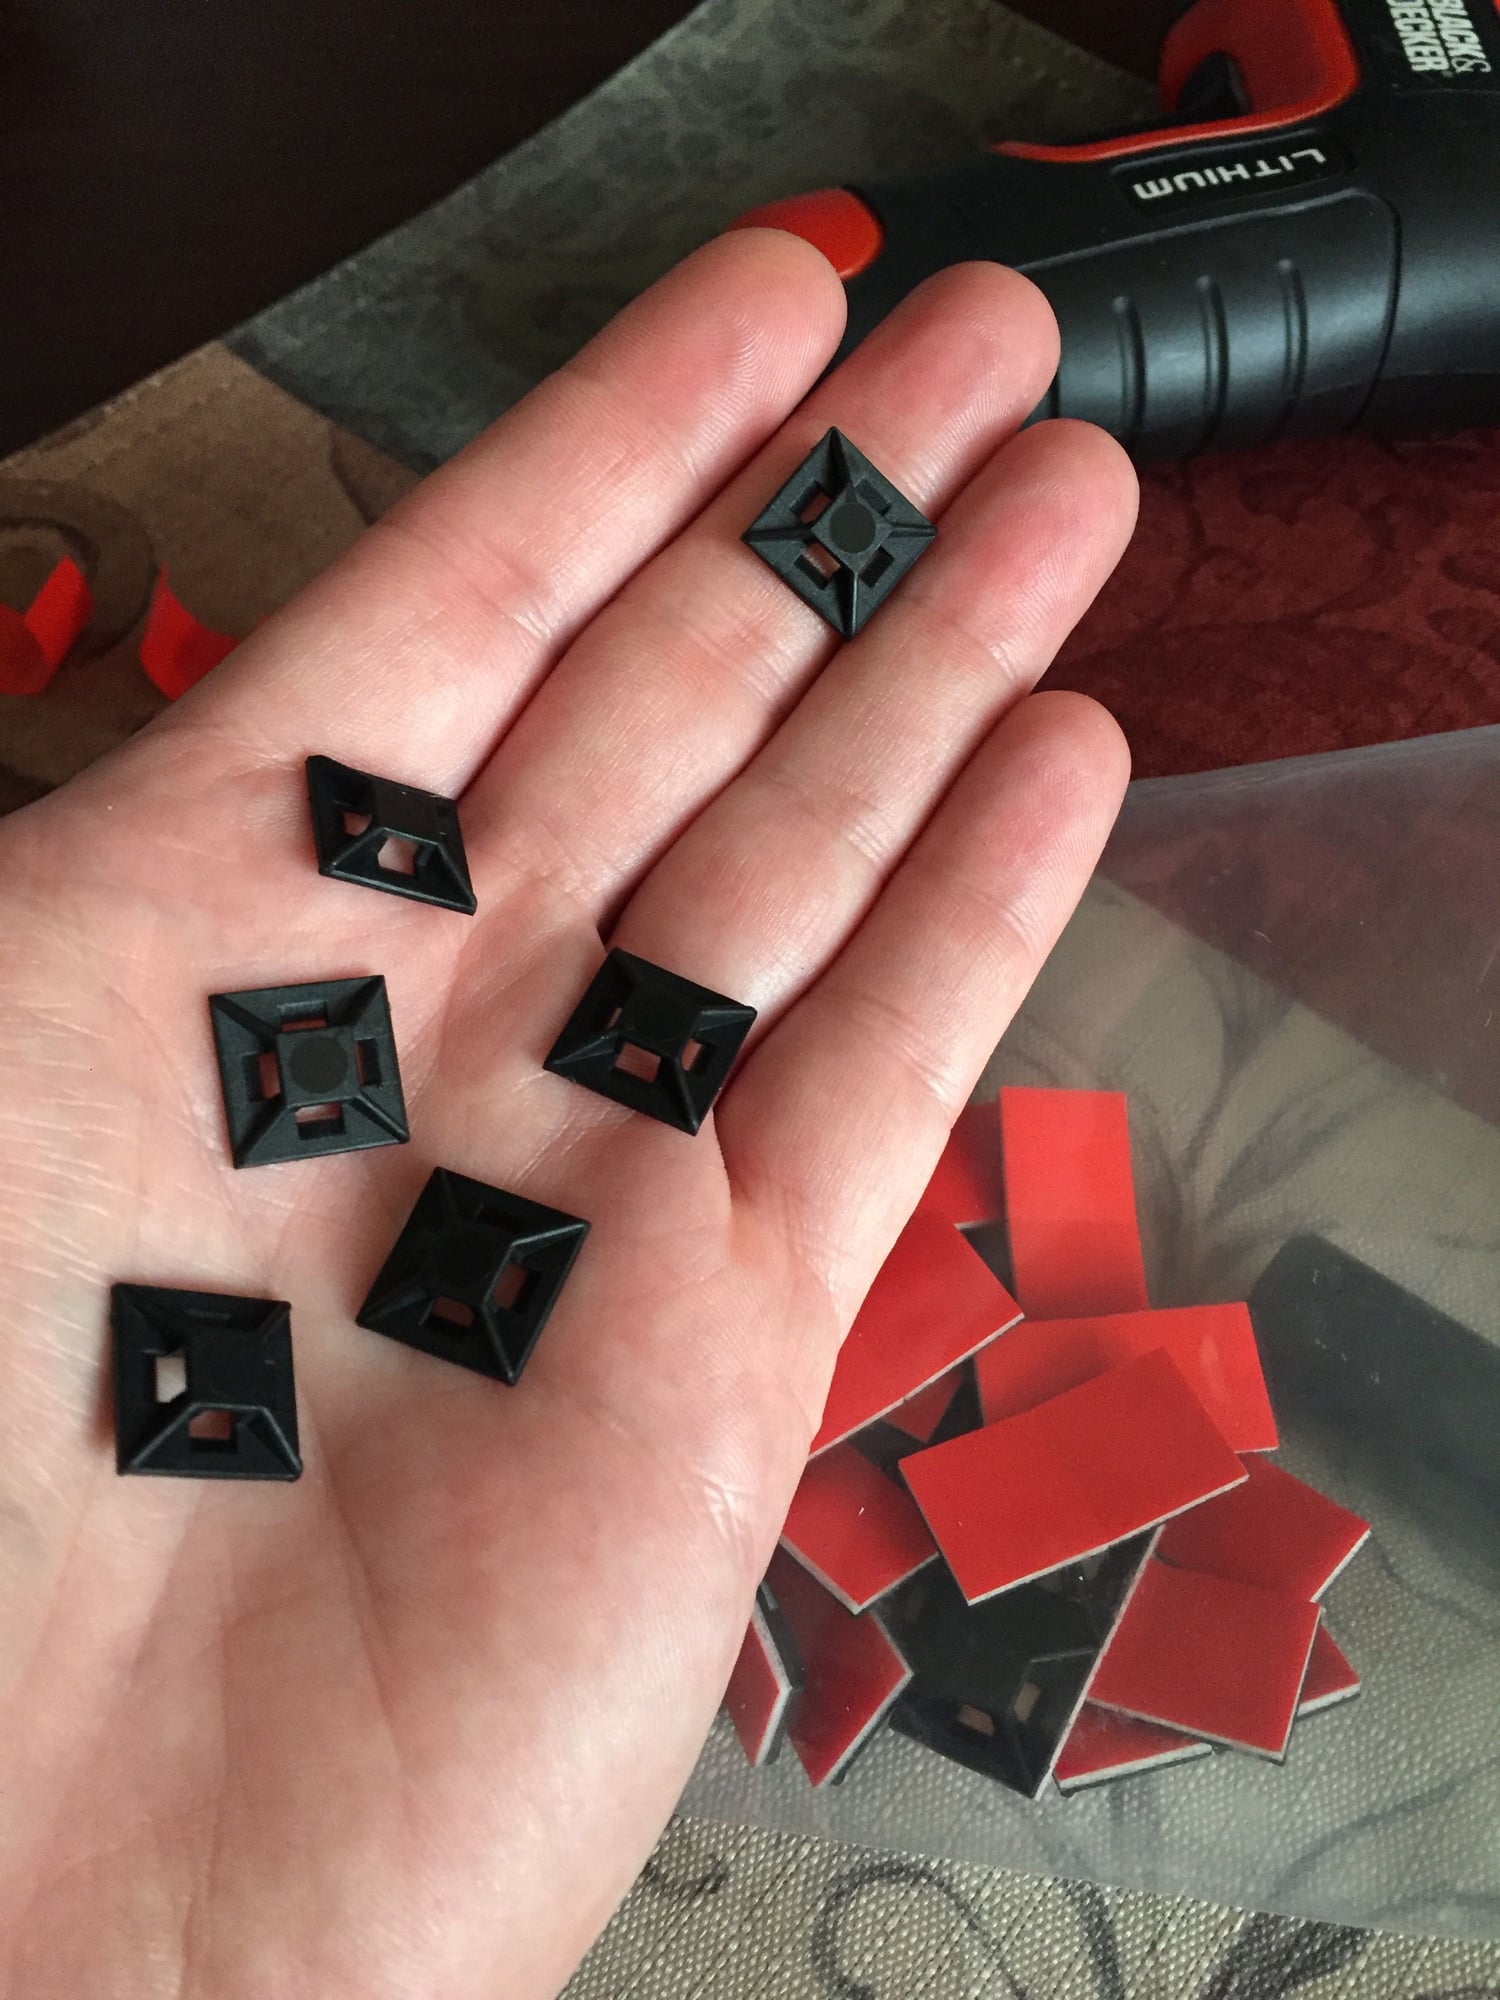
1/2 inch version for securing wires
Looks good with center tank
Aahhhhhh wires
First CG check and I�m about sell this thing
More ahhhhhh wires
The instructions say 165mm which I�m guess is from the wing root leading edge back. Others say balance it on the forward spar which I checked and I got the results I mentioned about.
Can any current owners verify your current cg location. It balances about halfway to the aft spare I have all the batteries in the nose. Pretty much anything with weight is forward of the CG
The right wing leading edge flap guide pin is about 10mms off. So more fixing to do.
1/2 inch version for securing wires
Looks good with center tank
Aahhhhhh wires
First CG check and I�m about sell this thing
More ahhhhhh wires
 05-29-2019, 11:36 AM
#263
05-29-2019, 12:11 PM
#265
Thread Starter
so you you are balancing on the forward wing spare not the rear correct? Ugggh took about 3 pounds laying just forward of the canopy to get it close but still tail heavy. If this is the case im gonna have to start over and rework a lot of stuff......Ughhh so much for KY jets
05-29-2019, 01:07 PM
#266

Not to be a pessimist or anything Fenderbean, but who advised you that putting a twin in the rear of the airplane would be a good idea? Have others done this on this model? I didn't see any heat wrap on around the turbine area in the tail that would add even more weight. Before adding any balance weight, I would move everything you possibly can, more forward. You have that whole space under the nose tray to use. Rearrange all of those air valves closer to save space to put more stuff on the top tray. Get rid of mounting those Kingtech Data terminals completely. They don't need to be in the jet. Move that Futaba Pss2018 in the nose. Same with the Turbine controllers. You can move the fuel filters and the UAT's closer to the nose to. Hey, I'm just offering advise, but with all of the goodies you have packed in that jet you have a lot of extra weight. Also, you can put the batteries in the nose and not on that tray to free up even more space to put stuff. Also, I would get rid of that black plate that you have the cortex mounted on. It's just cosmetic right? And if it's carbon fiber plate it's heavy.
Last edited by AndyAndrews; 05-29-2019 at 01:21 PM. Reason: adding more info
05-29-2019, 05:42 PM
#267
Join Date: Jul 2016
Posts: 25
Likes: 0
Received 0 Likes
on
0 Posts
Haven�t looked at all the pictures but the �black plate� in not on his just it�s on mine. On my jet I have one strip of lead in the nose and in all honesty that can even go. I posted pics of mine for inspiration. The plane with the black plate is mid mount not rear.
I did mid for a few reasons
A. Was not sure about how to angle them.
B. They are even closer to each other in the rear and I didn�t want the RPM sensors talking to each other.
C. I knew the CG was going to be a problem anyway let alone having the motors in the back.
But he cant. Change that now. He will need to add the weight. Not other way for him. I mean he could redesign the hole install but that�s not going to help much. Just add the weight
05-29-2019, 05:46 PM
#268

This plane flies very light don�t worry about the weight. You will be surprised it�s like a kite. Just stick the 3 or 4 lbs in the nose and fly it.
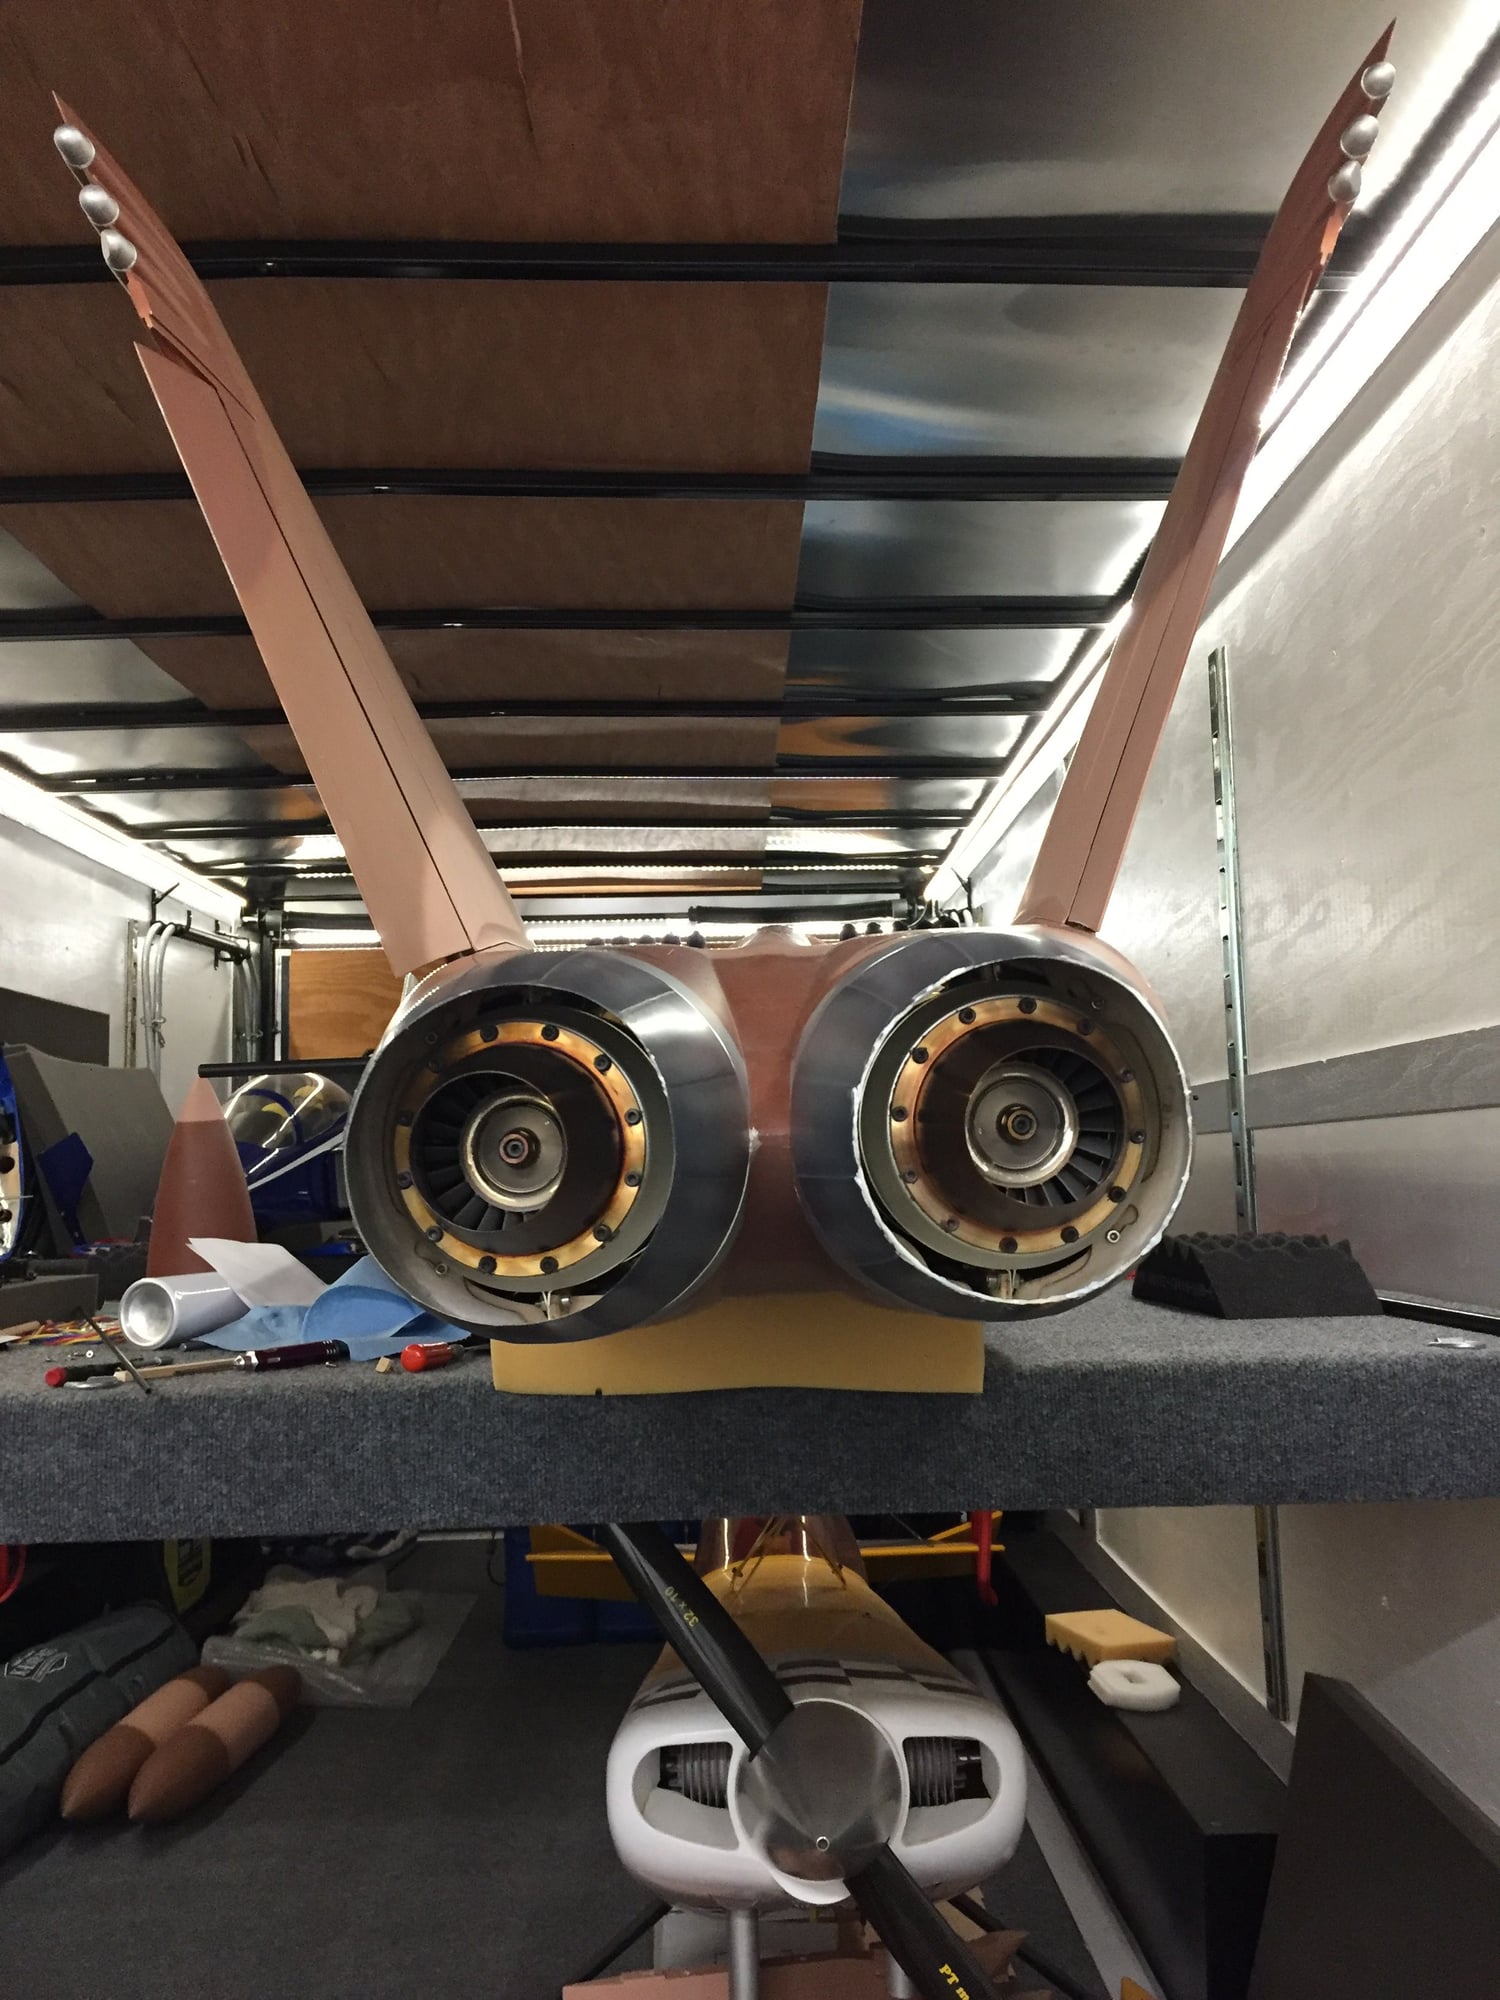
But but like I said a few years ago sticking the engines in the tail is not the way to go in many different aspects.
Access sucks
if you don�t have them aligned perfectly during single engine you crash!
Cg sucks
tailcones melt
so why deal with all those issues to save a little weight on pipes.... at the end of the day you add more in the nose anyway
05-29-2019, 06:15 PM
#270

I still can’t get over the need to angle the engines so much toward the center of gravity. The SM F-14 has been flown and tested with one engine successfully and those are much further apart. There are other examples of twins flown on a single engine either by design or by accident with good results. Why is this Hornet so different especially when the engines are so close together? Just an observation and question...
I would prefer to set this model up with the engines mounted further forward with fairly short pipes to save weight and have ease of access.
Bummer about the LE flaps not fitting correctly, sorry to see that. Keep up the good work!
I would prefer to set this model up with the engines mounted further forward with fairly short pipes to save weight and have ease of access.
Bummer about the LE flaps not fitting correctly, sorry to see that. Keep up the good work!
05-29-2019, 06:43 PM
#271
This plane flies very light don�t worry about the weight. You will be surprised it�s like a kite. Just stick the 3 or 4 lbs in the nose and fly it.
But but like I said a few years ago sticking the engines in the tail is not the way to go in many different aspects.
Access sucks
if you don�t have them aligned perfectly during single engine you crash!
Cg sucks
tailcones melt
so why deal with all those issues to save a little weight on pipes.... at the end of the day you add more in the nose anyway
he he needs to check that the RPMs don�t get crossed before flight.
Last edited by AndyAndrews; 05-29-2019 at 06:50 PM.
05-29-2019, 09:46 PM
#273
Thread Starter
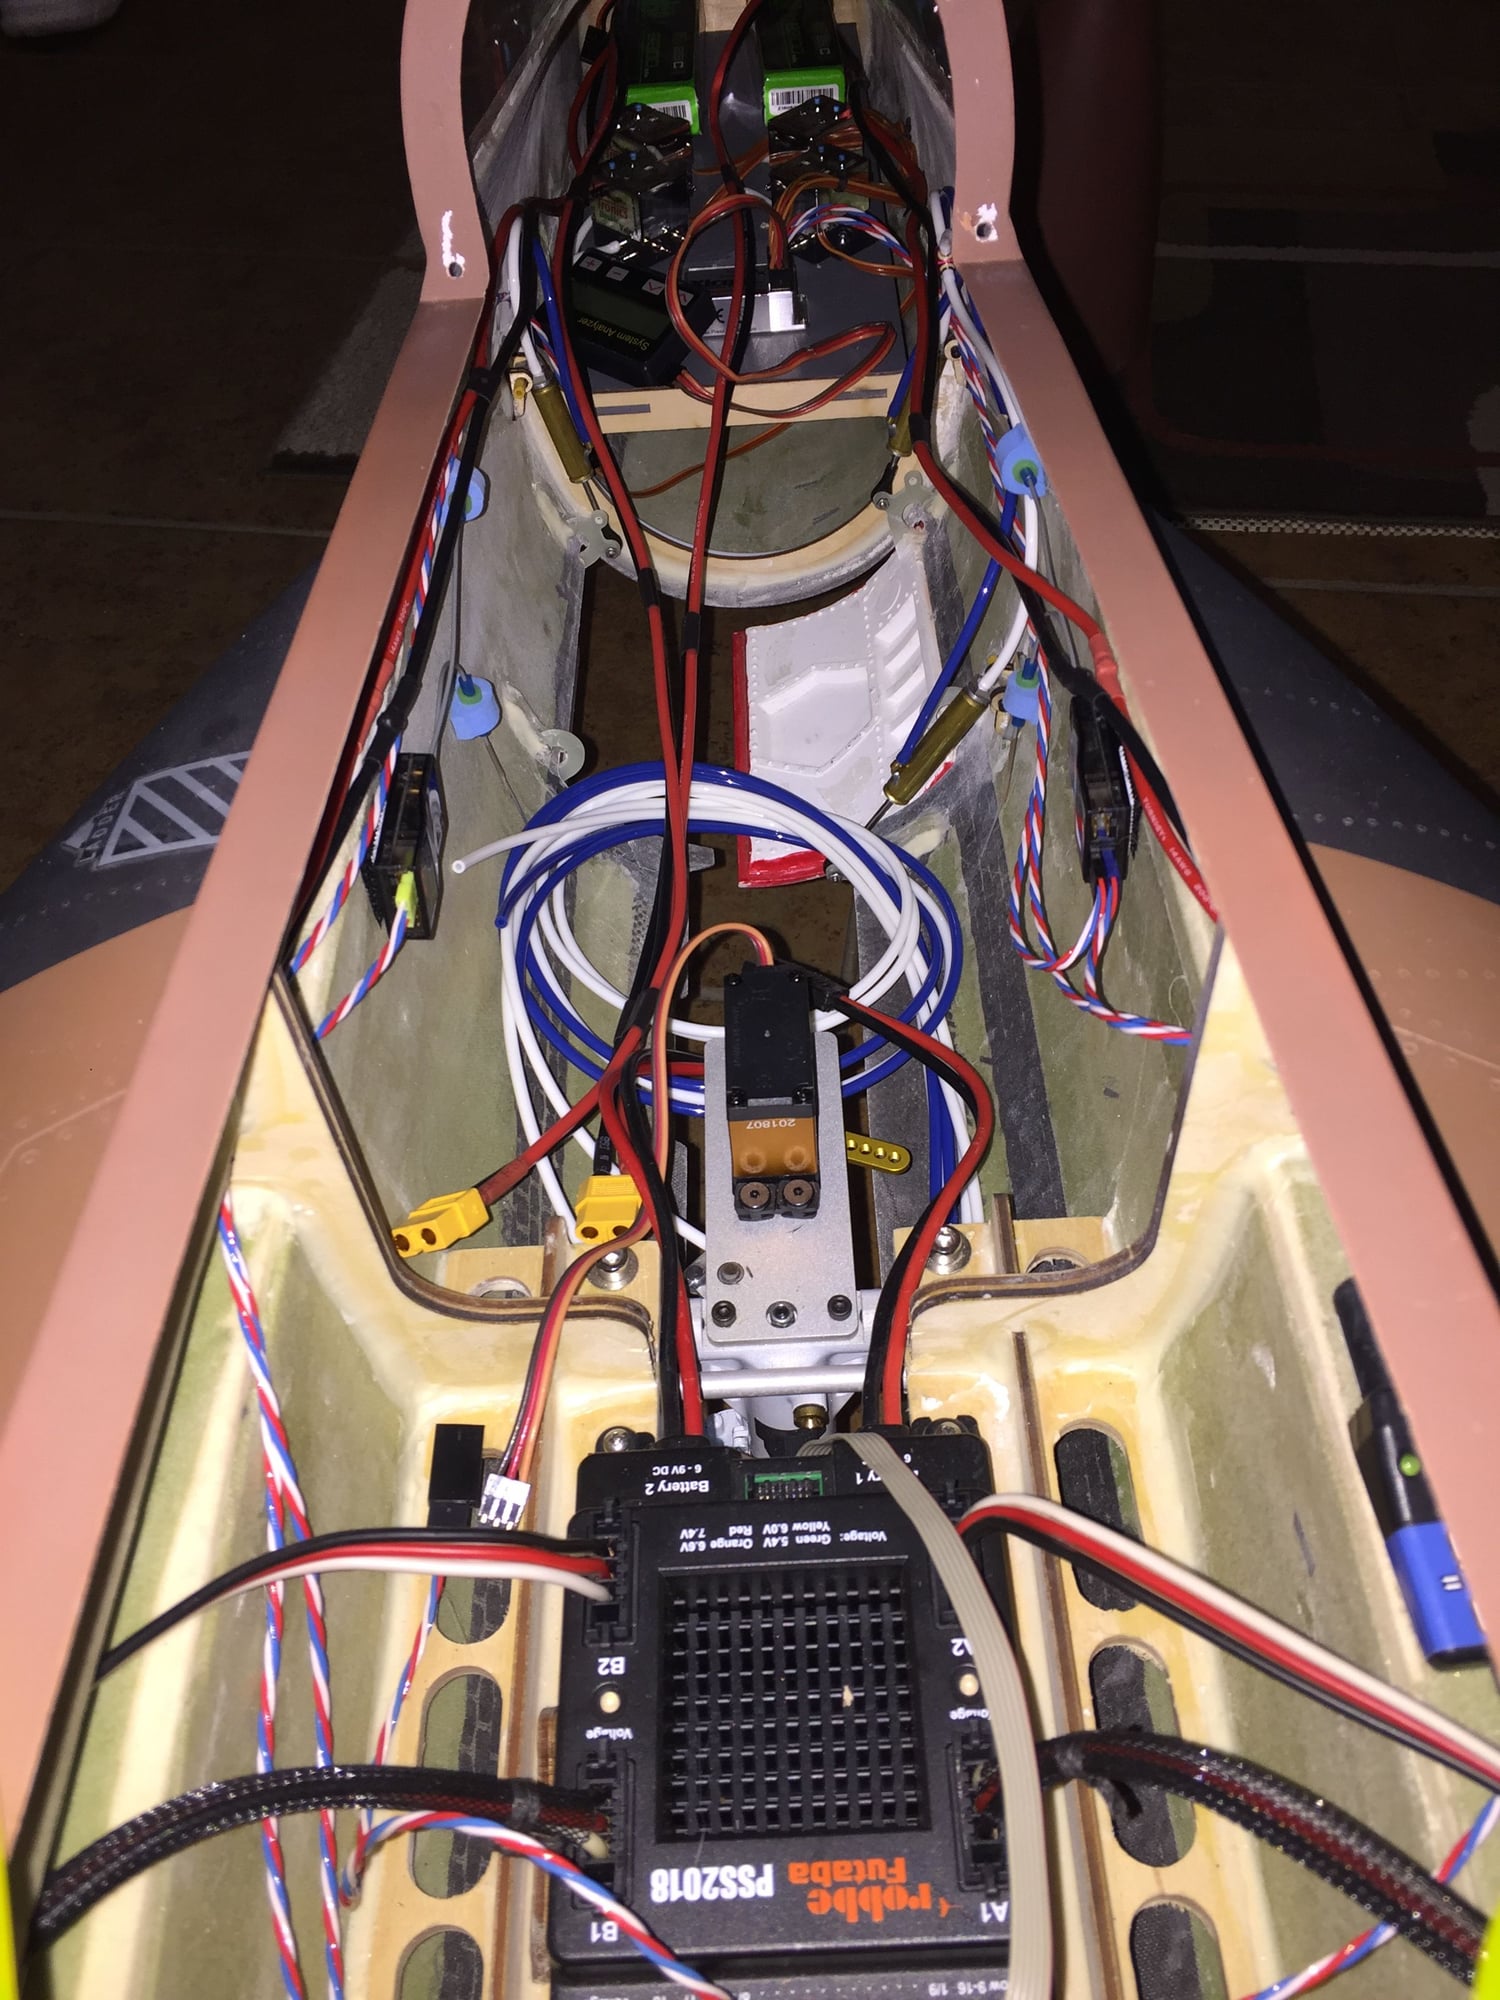
Well let’s start with Andy, no extra goodies in the jet I went minimal equipment. The Kingtech box is for programming the Xicoy sequencer which is removed afterwards. As I said this was a cg check to see how much I need to shift and I wanted to verify the proper cg, since the 165mm listed isn’t the forward spare. I already planned to move a few things forward and I still have plenty to do on the jet, ceramic blanket is pretty lightweight and shouldn’t add much. If there was even a chance I could’ve gotten a refund on this jet I would have. It was act of Congress to get the botched paint job money refunded and mine was already built when the tail issues that Gun brought up happened. I’m not sure what the barking at me in your message is all about nobody advised anything, it’s how the jet was designed. It’s not like any of us knew these issues when we bought these jets until Gun had his crash.
These jets do fly with tail mounted motors, more than a few people are flying this model configuration, that doesn’t bother me.
My turbine rails are aligned to the center of the cg, both ended really close and cross talk on rpm sensors is not an issue with my turbines.
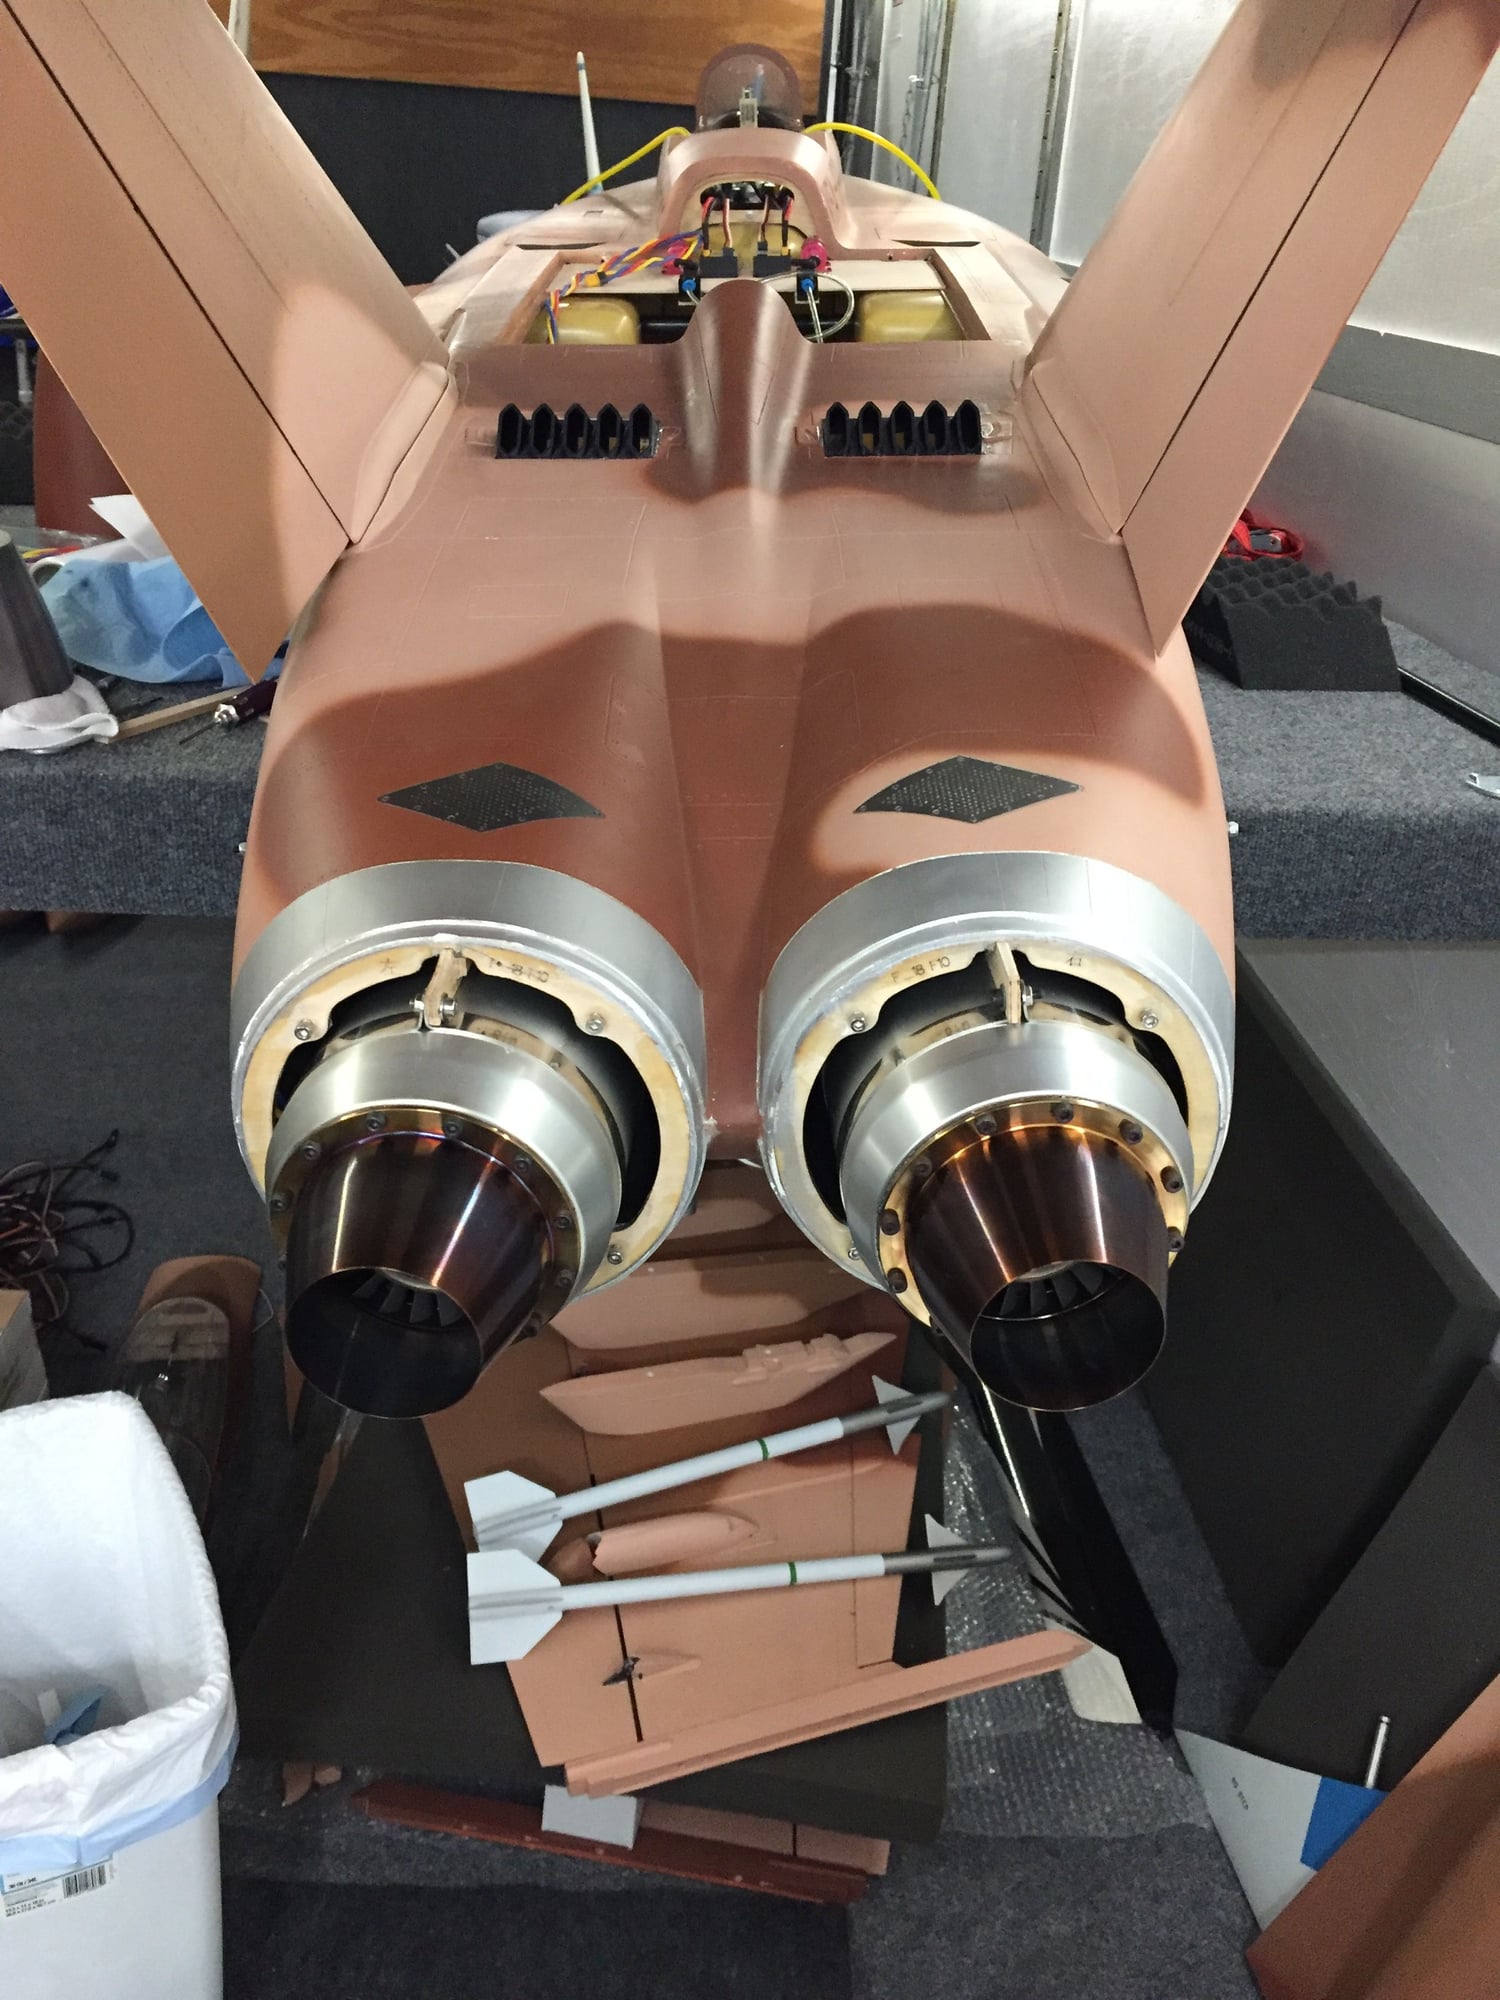
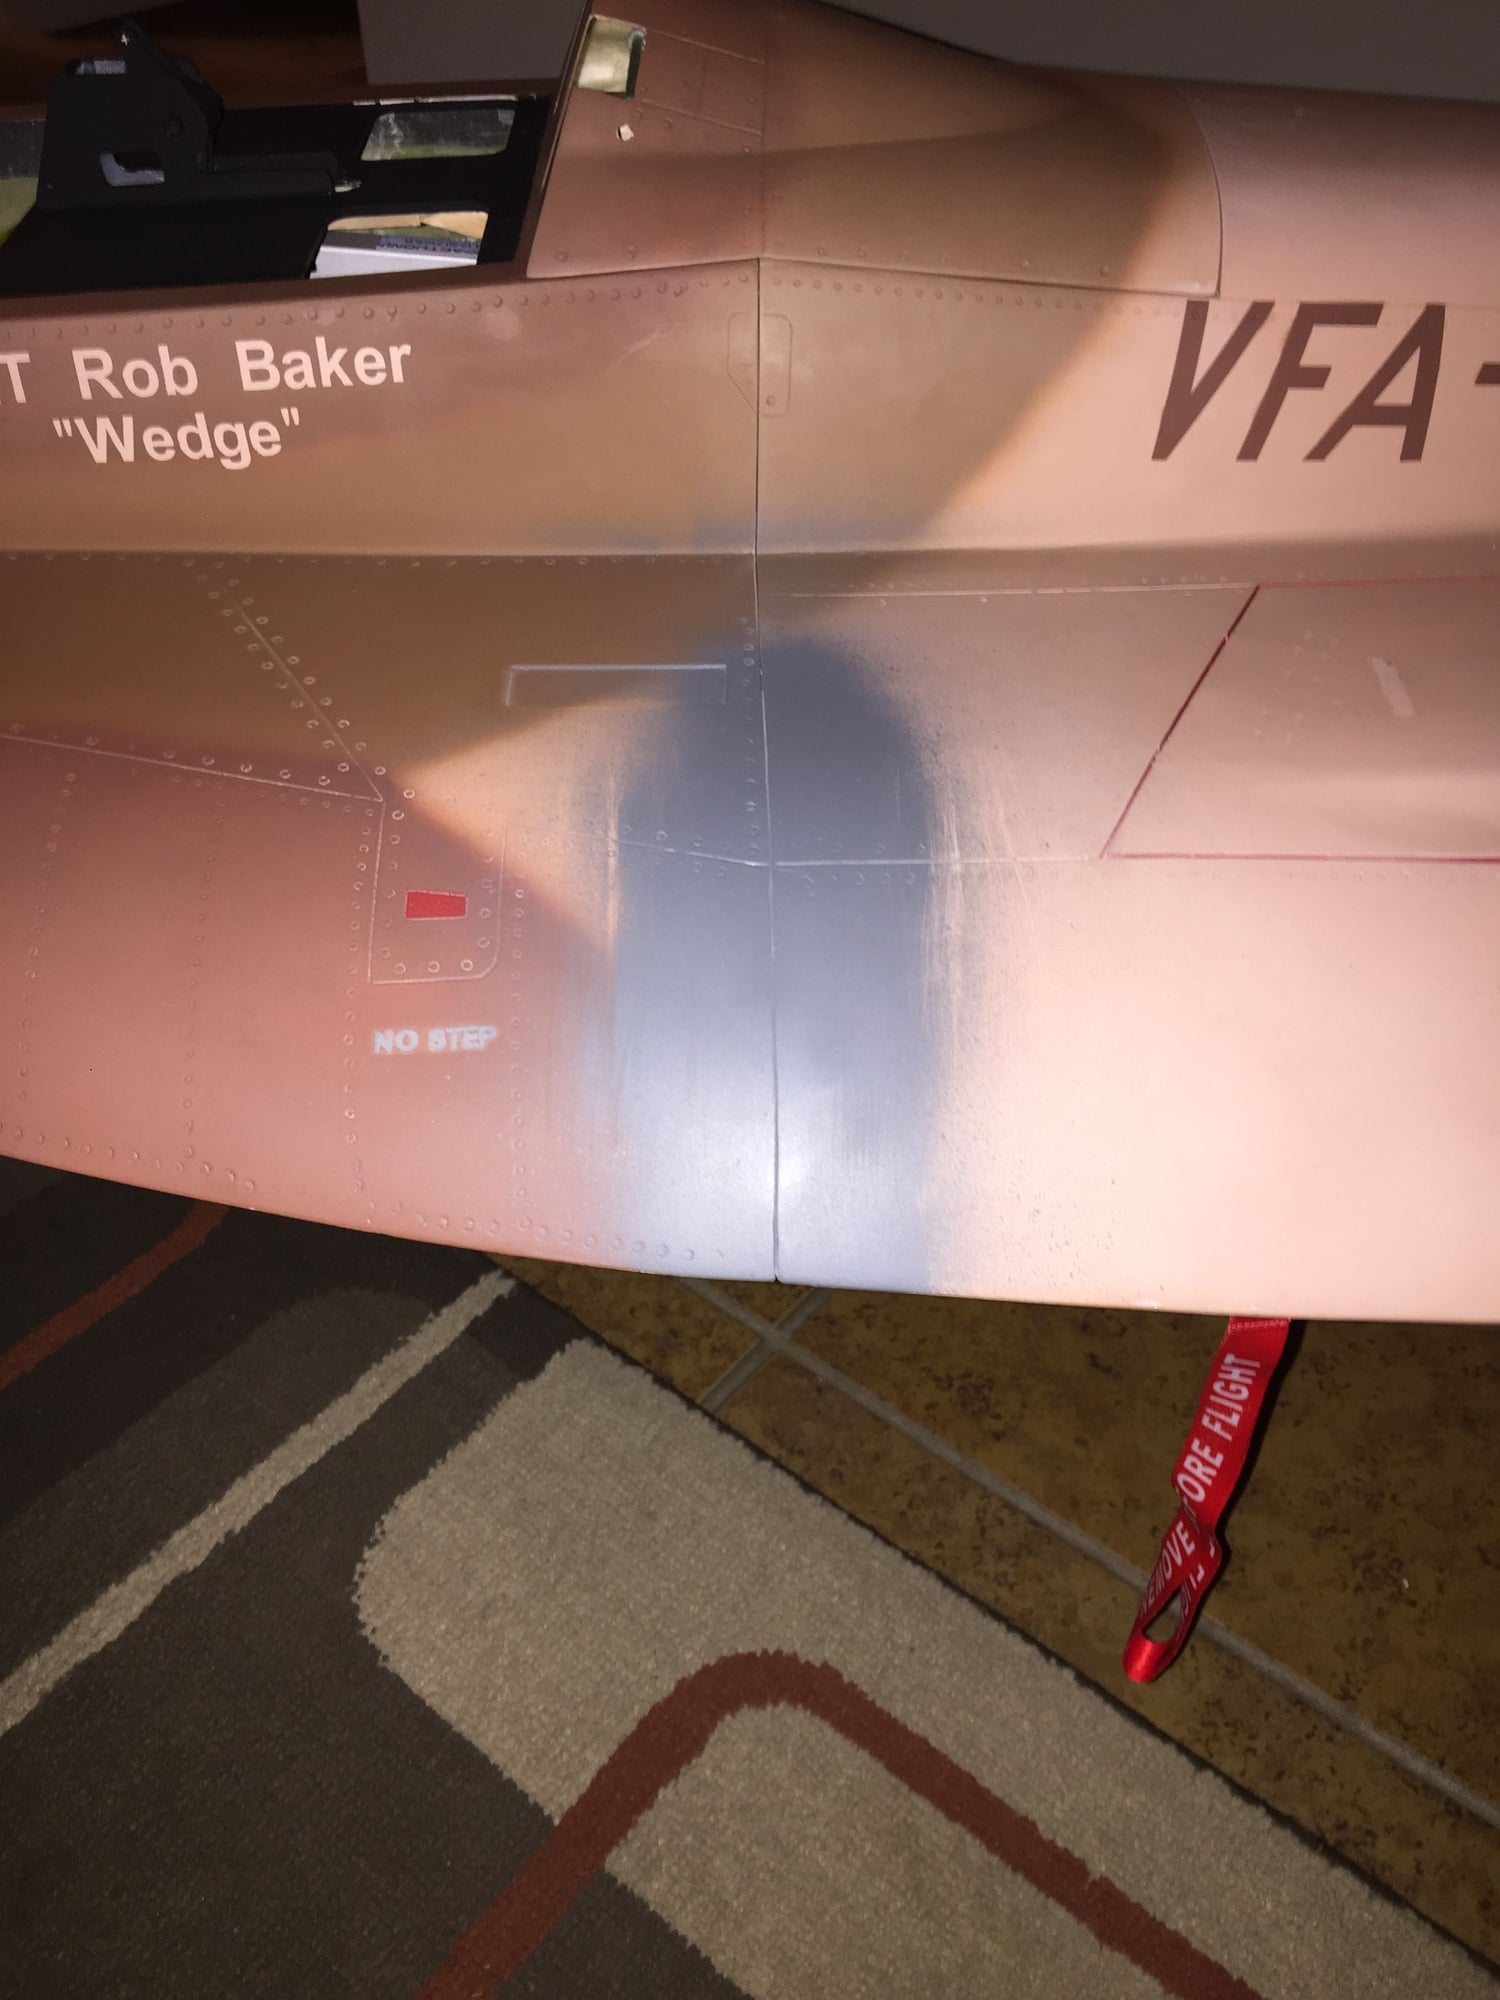
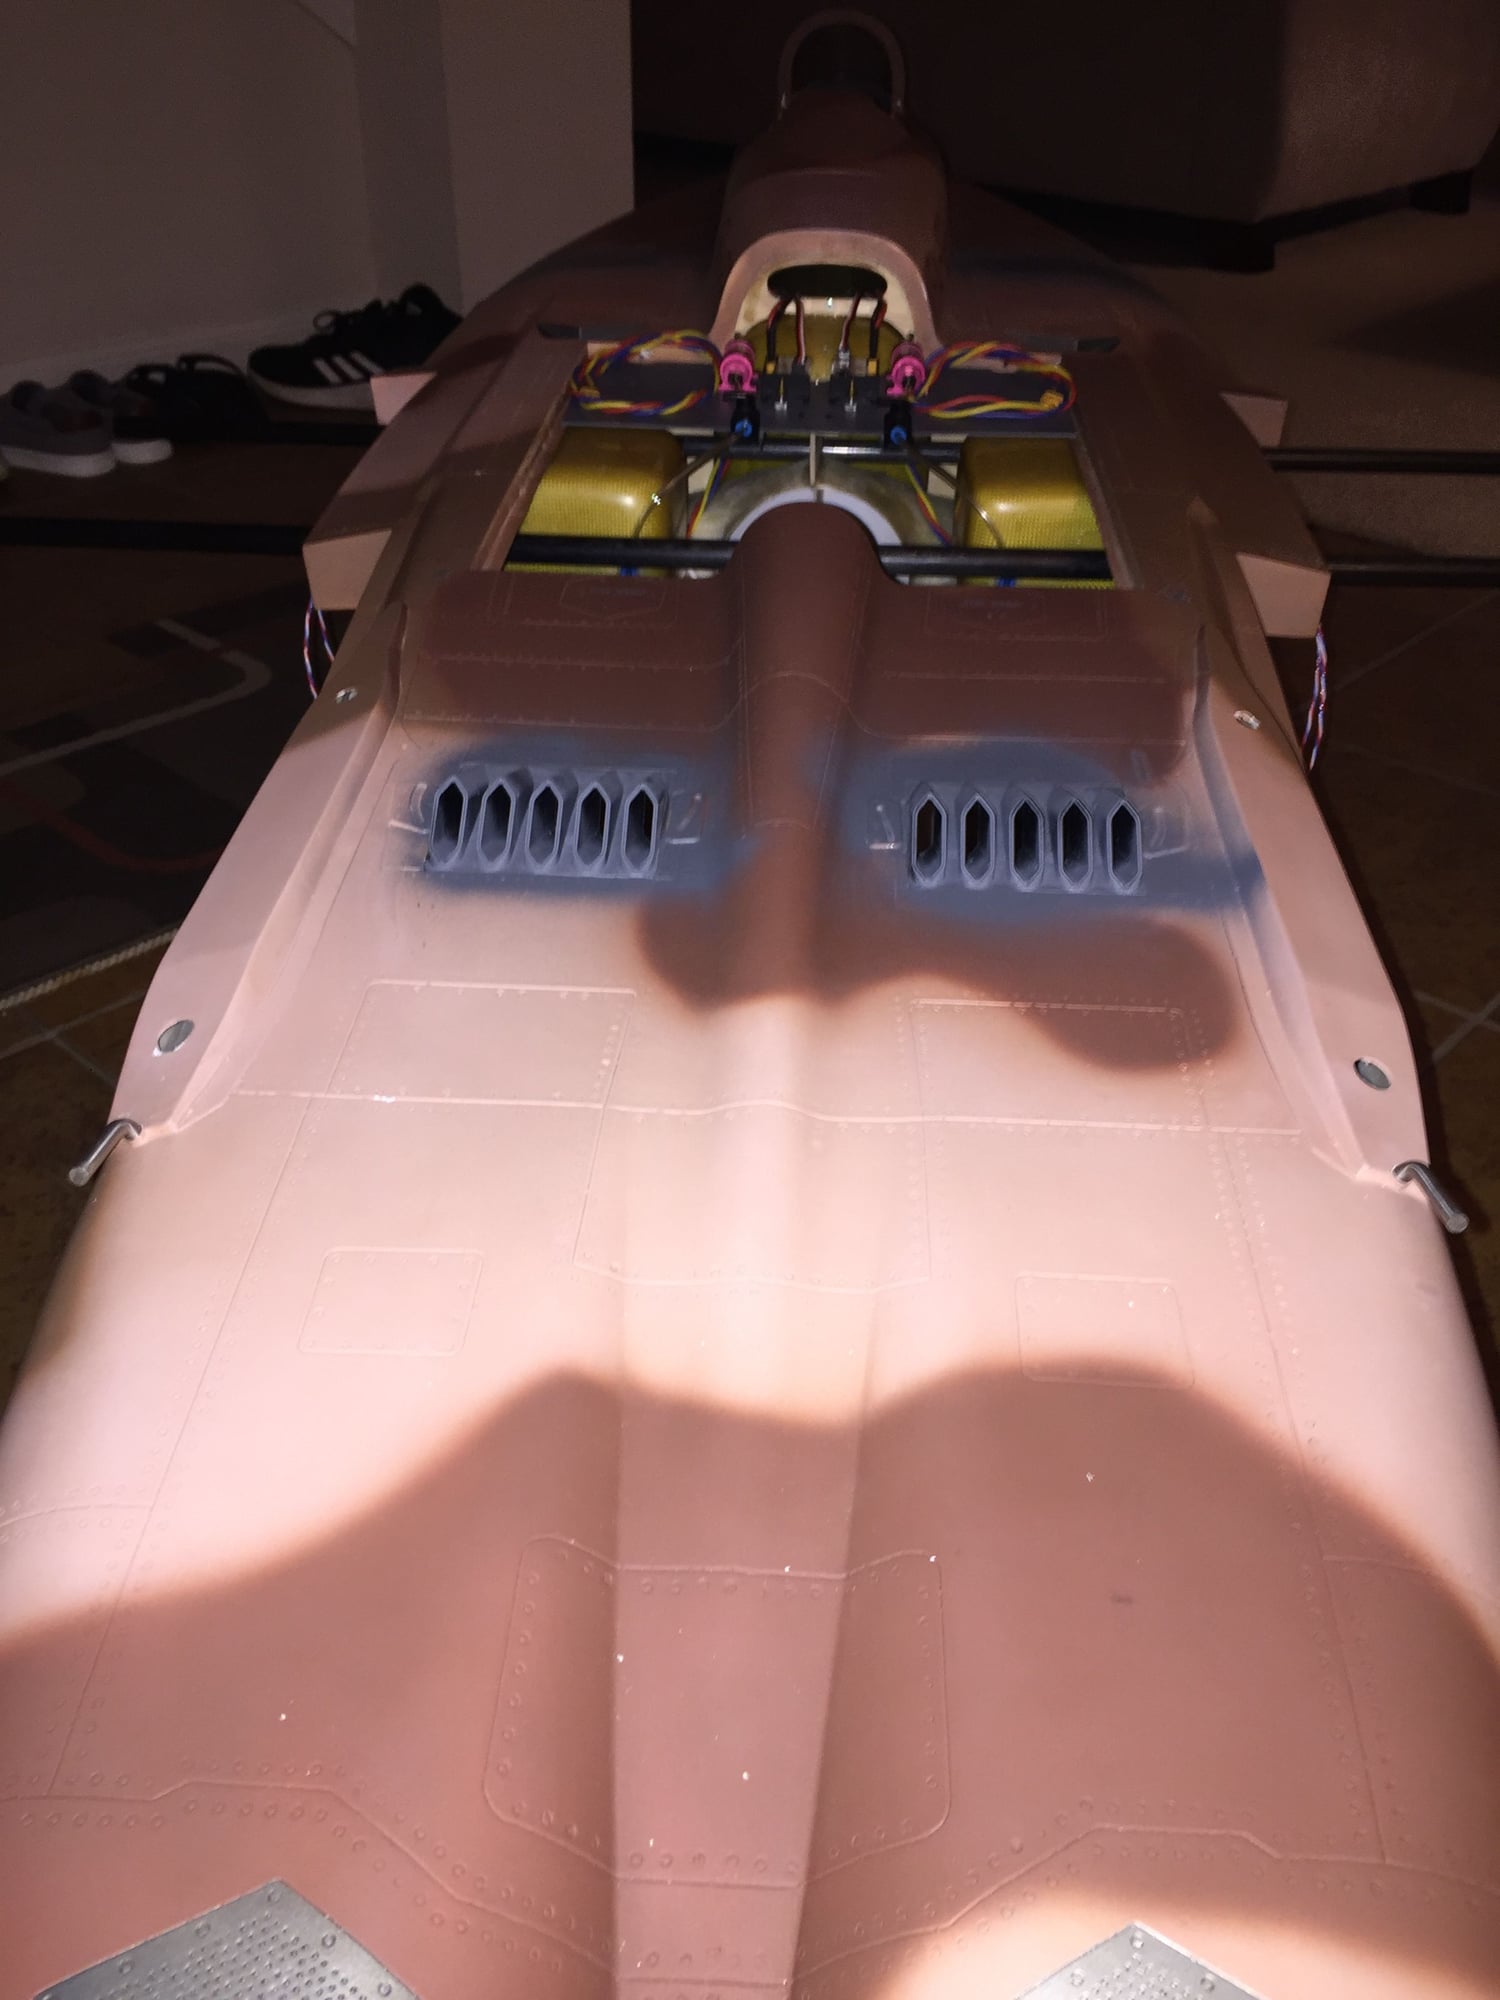
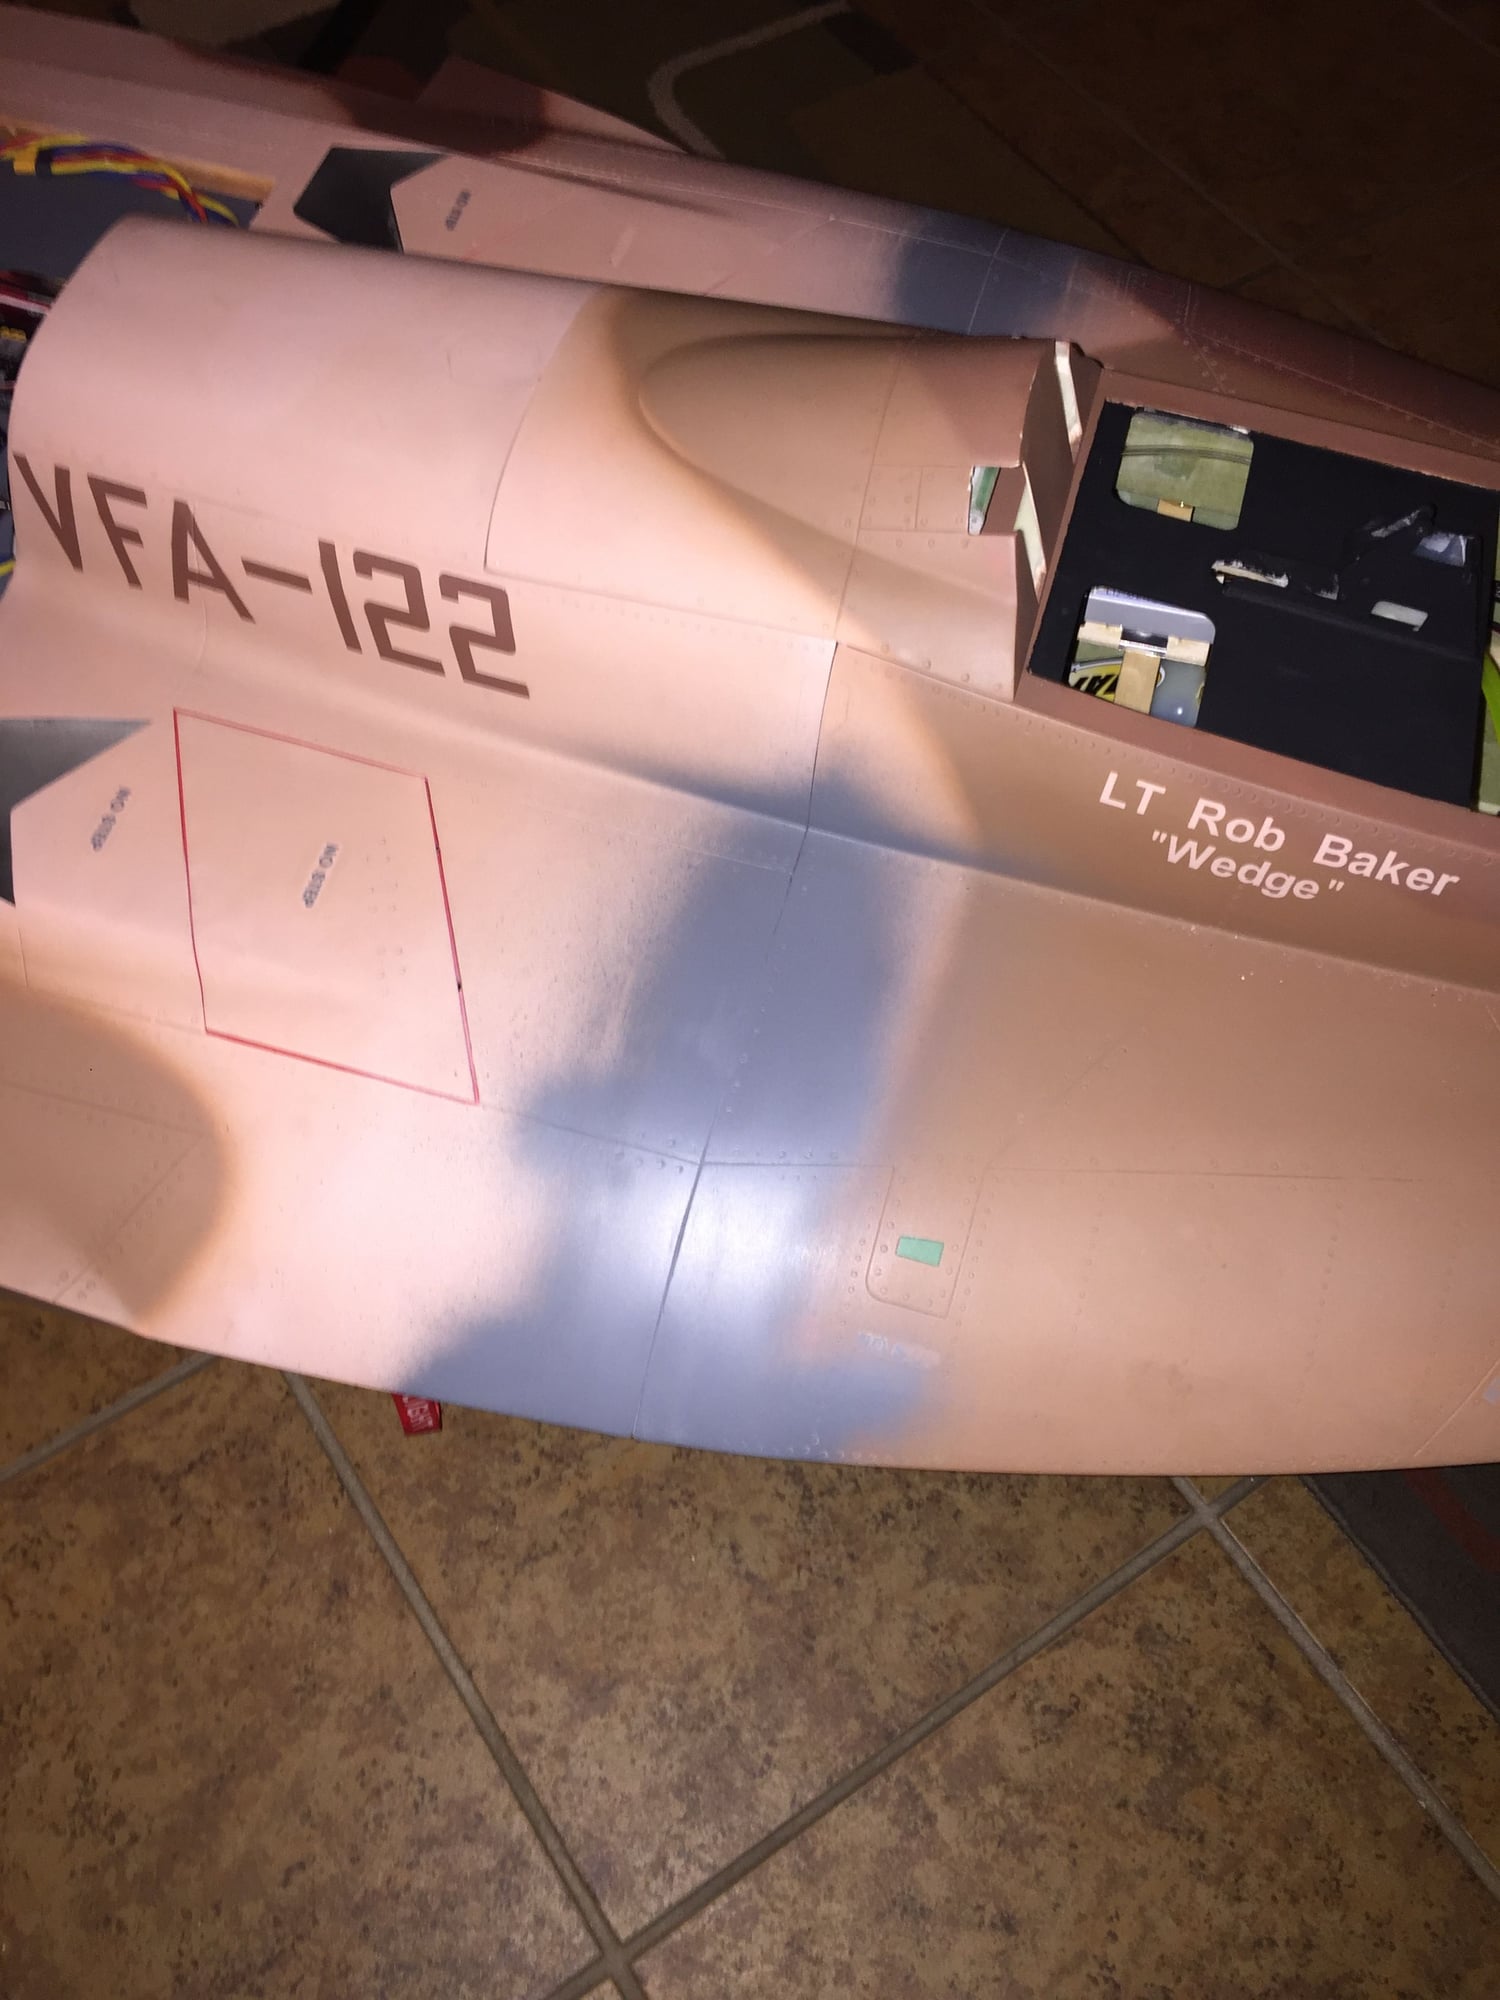
Thanks Chris, in retrospect I wish I had the center mounts but like I said by the time Gun brought the topic up it was a bit late. The access to the engines is really easy on the tail mounts, two screws that lock the tail cones from turning and you have them out. This model has had a ton of issues, and I’m still finding them, yesterday I noticed the stab shaft locks are not large enough so the don’t push over the shaft channel to hold them in. The right aileron gap cover has such a warp it looks like I have up aileron applied.
These jets do fly with tail mounted motors, more than a few people are flying this model configuration, that doesn’t bother me.
My turbine rails are aligned to the center of the cg, both ended really close and cross talk on rpm sensors is not an issue with my turbines.
Thanks Chris, in retrospect I wish I had the center mounts but like I said by the time Gun brought the topic up it was a bit late. The access to the engines is really easy on the tail mounts, two screws that lock the tail cones from turning and you have them out. This model has had a ton of issues, and I’m still finding them, yesterday I noticed the stab shaft locks are not large enough so the don’t push over the shaft channel to hold them in. The right aileron gap cover has such a warp it looks like I have up aileron applied.
Last edited by FenderBean; 05-29-2019 at 10:03 PM.
05-29-2019, 10:07 PM
#274
Thread Starter
05-30-2019, 04:57 AM
#275
Also, sorry about the bark Fender. I didn�t mean to come off that way.