Mibo A-10 Gen 6


 12-03-2019, 06:20 PM
#152

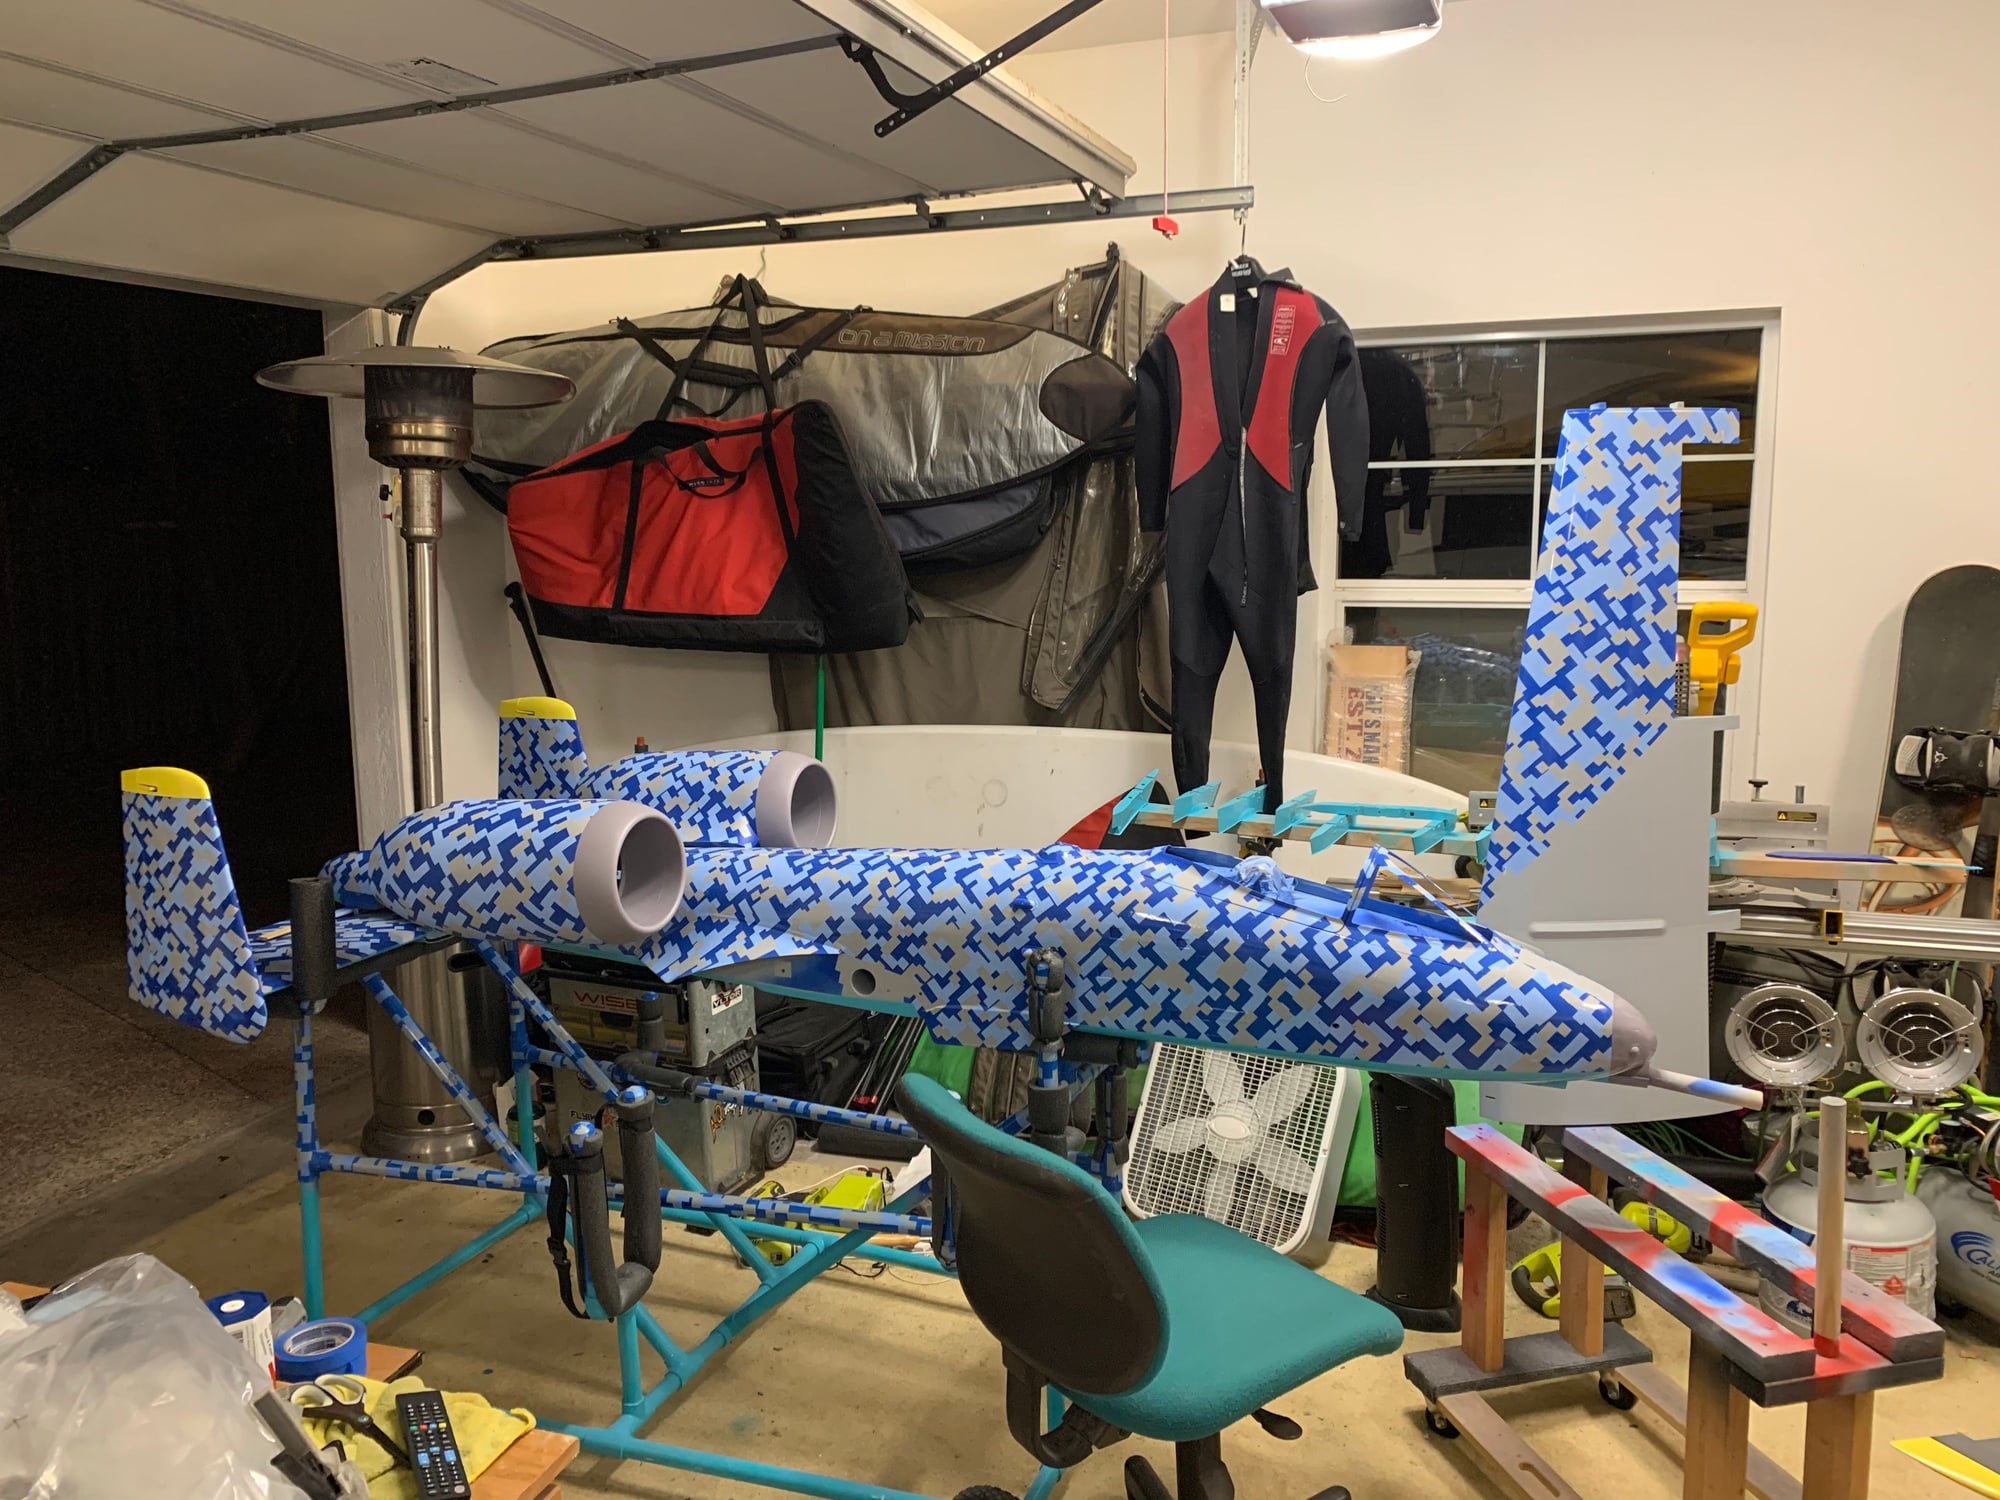
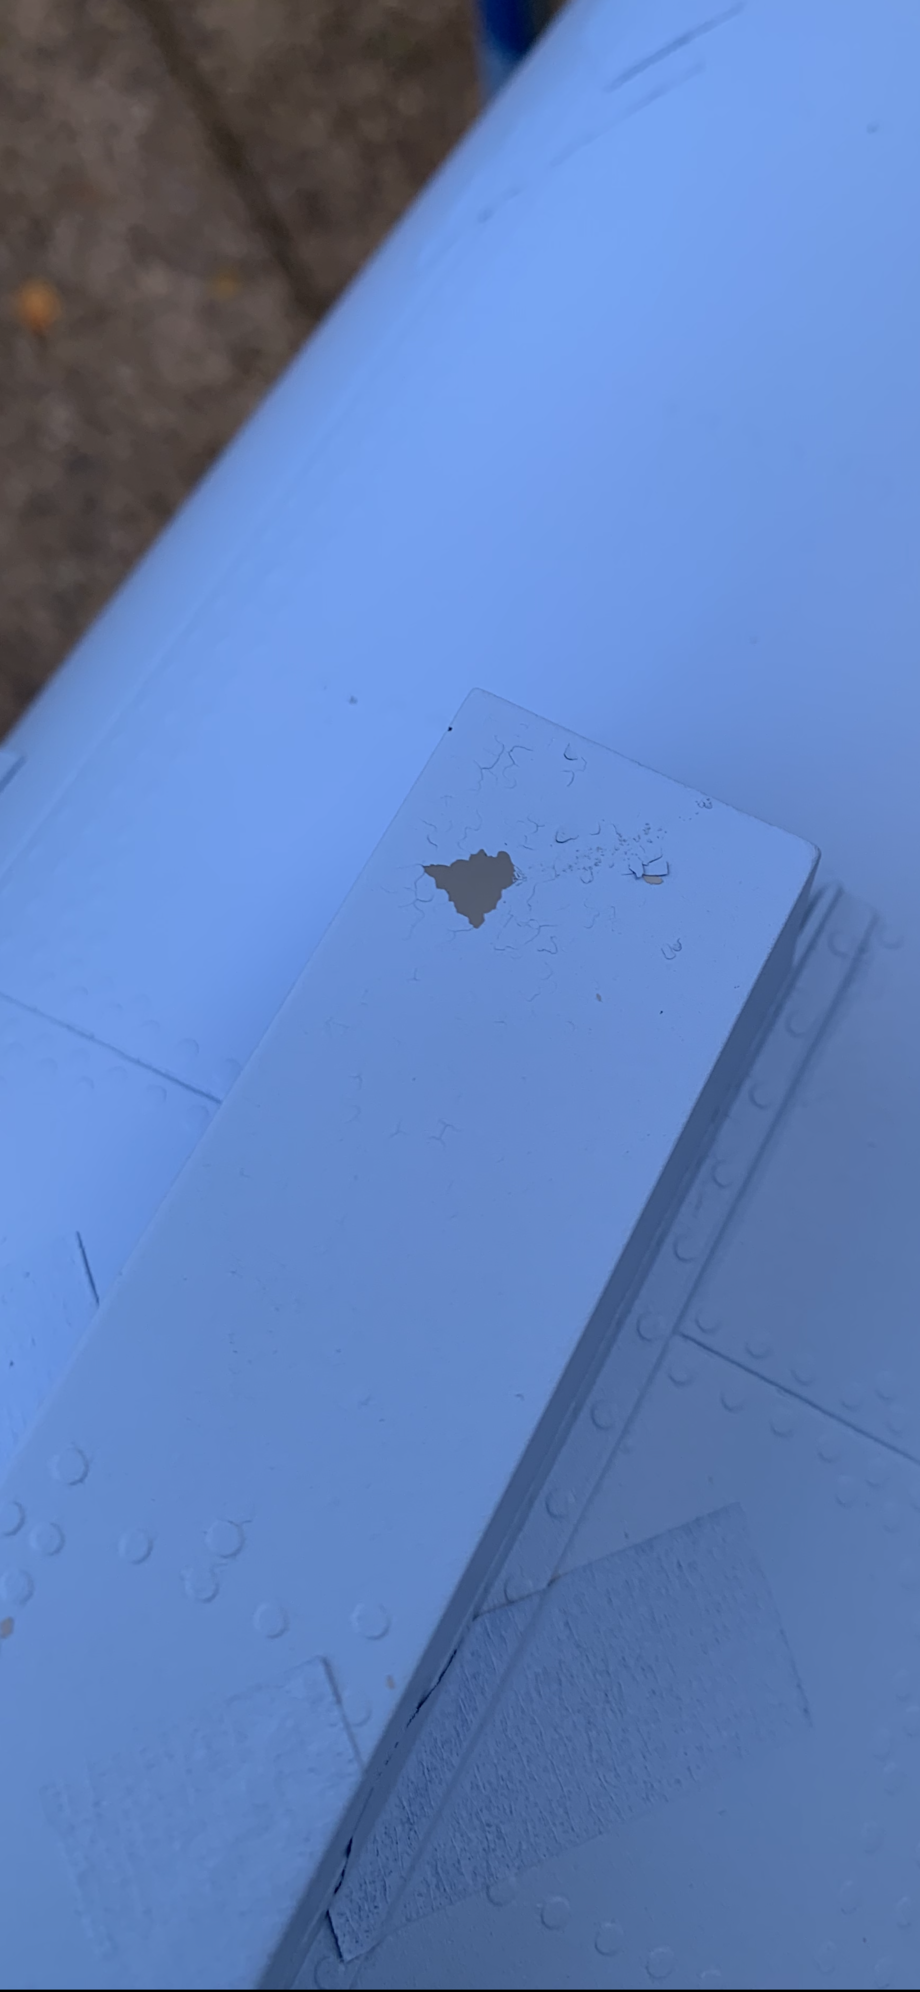
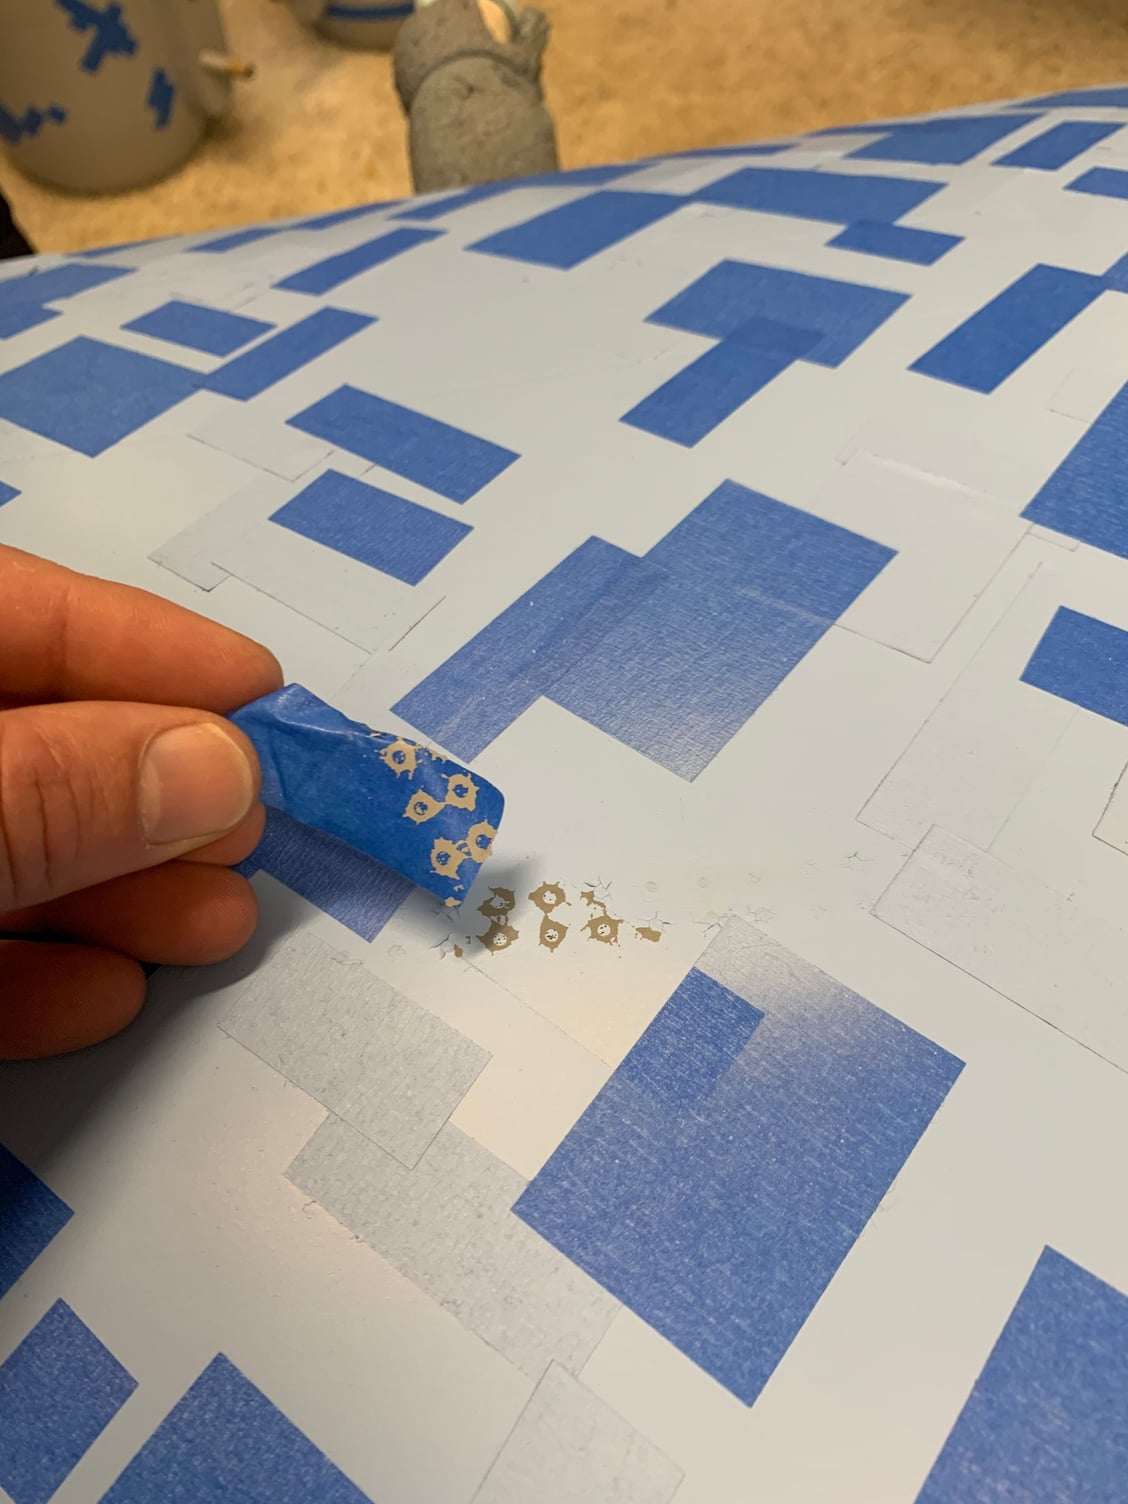
More paint problems.
I still have some paint peeling and what looks like reacting. I am sanding down and repainting all the defects.
I have to say, painting with this ppg paint on fiberglass has been a PITA.
Rustoleum would at least stick after 24-48 hours.
My practice pieces were a dream, this has been less so.
I’m hoping all my paint touch ups will add to the weathering.
12-03-2019, 08:28 PM
#154
Hmmm, these base coats say that all you need is 17 minutes after final to apply tape and/or clear. There is no mention of time to spray next coat/clear.
From my practice pieces, there was fantastic adhesion with quick dry to tape/masking/clear coat application. I must have left the mold release on some how, even with my detergent scrub and 3m scotch brite scuffing.
Obviously people have been painting these without problems, so there is something I’m doing wrong.

 12-03-2019, 09:10 PM
#156
While I wait for your response I'll make an assumption based on your comments about detergent and scotch brite.
1. Mold release can be a real biatch. It requires a good wax and grease remover. If you are using a detergent it needs to be very hot water and scrub the crap out of the gel coat. Also, the only detergent I can recommend is tide unscented powdered detergent. Anything scented and every liquid detergent I have ever seen has oils in it. So in essence you are contaminating the surface while you are trying to remove contaminants.
2. Scotch brite is nowhere near enough for scuffing a gel coat. For solid colors like you are using I would prep with nothing finer than 600 grit wet/dry paper used wet. Of course if you still have mold release wax or oil on the surface and sand it you are just grinding those contaminants into the surface.
3. I do not know what mibo uses for their "gel coat". Most real gel coats are polyester. Some of our model manufactures use an epoxy primer and call it a gel coat. Epoxy is a funny creature. The only thing that sticks to epoxy is epoxy. In order to get your base coat to adhere properly to the surface you need to do a "wet on wet" application. Basically you spray a coat of epoxy primer onto the surface, let it flash and spray the base coat directly onto that primer (this is assuming you are using solvent based paints).
There is a window of time for optimum adhesion without sanding however this is from base coat to base coat and then clear. PPG DBC paint (almost all urethane base coat paints) are no more than 36 hours without sanding however this is for ideal adhesion for automotive use where it will be exposed to the elements over and over. Out models don't suffer that kind of exposure. It won't cause your first base color to peel, that is an issue between the gel coat and the first coat of paint.
4. We all want to paint "light" but what most do not realize is these paints are designed to work with a minimum film build. If the paint coat is too thin it will peel for sure. Base coat paint should be at least 2 wet coats. Many modelers like to apply a dust coat first. A dust coat does not lay into the sanding grooves and does not allow a good mechanical bite. Couple that with thin of a film build and your paint will peel.
12-04-2019, 08:08 AM
#157
I used only Costco detergent (and it had nice smelling stuff in it! Ack!) in warm water. I scrubbed the paint with a two part sponge- with a scotch brite pad on one side.
I let it dry then I scuffed it again with a new 3M scotch brite pad.
I painted the JBX ppg (I am limited to this ppg line in commiefornia) reducing it 1:1 as per directions. I would apply a light first coat and then a nice wet coat.
This mask job is VERY involved and it takes me days to mask.
12-04-2019, 10:34 AM
#158

My Feedback: (26)
Hmmm, these base coats say that all you need is 17 minutes after final to apply tape and/or clear. There is no mention of time to spray next coat/clear.
From my practice pieces, there was fantastic adhesion with quick dry to tape/masking/clear coat application. I must have left the mold release on some how, even with my detergent scrub and 3m scotch brite scuffing.
Obviously people have been painting these without problems, so there is something I’m doing wrong.
From my practice pieces, there was fantastic adhesion with quick dry to tape/masking/clear coat application. I must have left the mold release on some how, even with my detergent scrub and 3m scotch brite scuffing.
Obviously people have been painting these without problems, so there is something I’m doing wrong.
Something else, are you using a filter at your gun to eliminate any oil that may have carried over from your compressor? My setup includes a 3' length of desiccant hose (don't paint enough for the cost of a good air drier) just before my gun whip, and a filter at the gun, between the two they insure I get clean, dry air to the gun. Have your parts been near where someone might have sprayed armor all or similar products onto a car? A lot of car care products have silicone in them and the slightest bit will cause paint not to adhere.
It can't be stressed enough 95% of a good paint job is the prep.
12-04-2019, 09:02 PM
#160
I am using a filter, right at my gun, right before another pressure regular. Thank you for your insight too. I may be having some timing issues on top of it all as well.
Well, Jeremy ( LGMgraphix ) was nice enough to spend some time with me on the phone and he gave me a road map.
I learned a lot, and I was most surprised at not letting masking tape stay on too long and work only on parts I can finish all at one time.
This last part is the toughest as I have 2 little guys with me. The oldest will sit on the couch and wait for Dad, but the youngest one always wants to see what Dad is up to, so I can only paint when he is napping. I may have to tap into Grandma’s babysitting for a good solid day to paint.
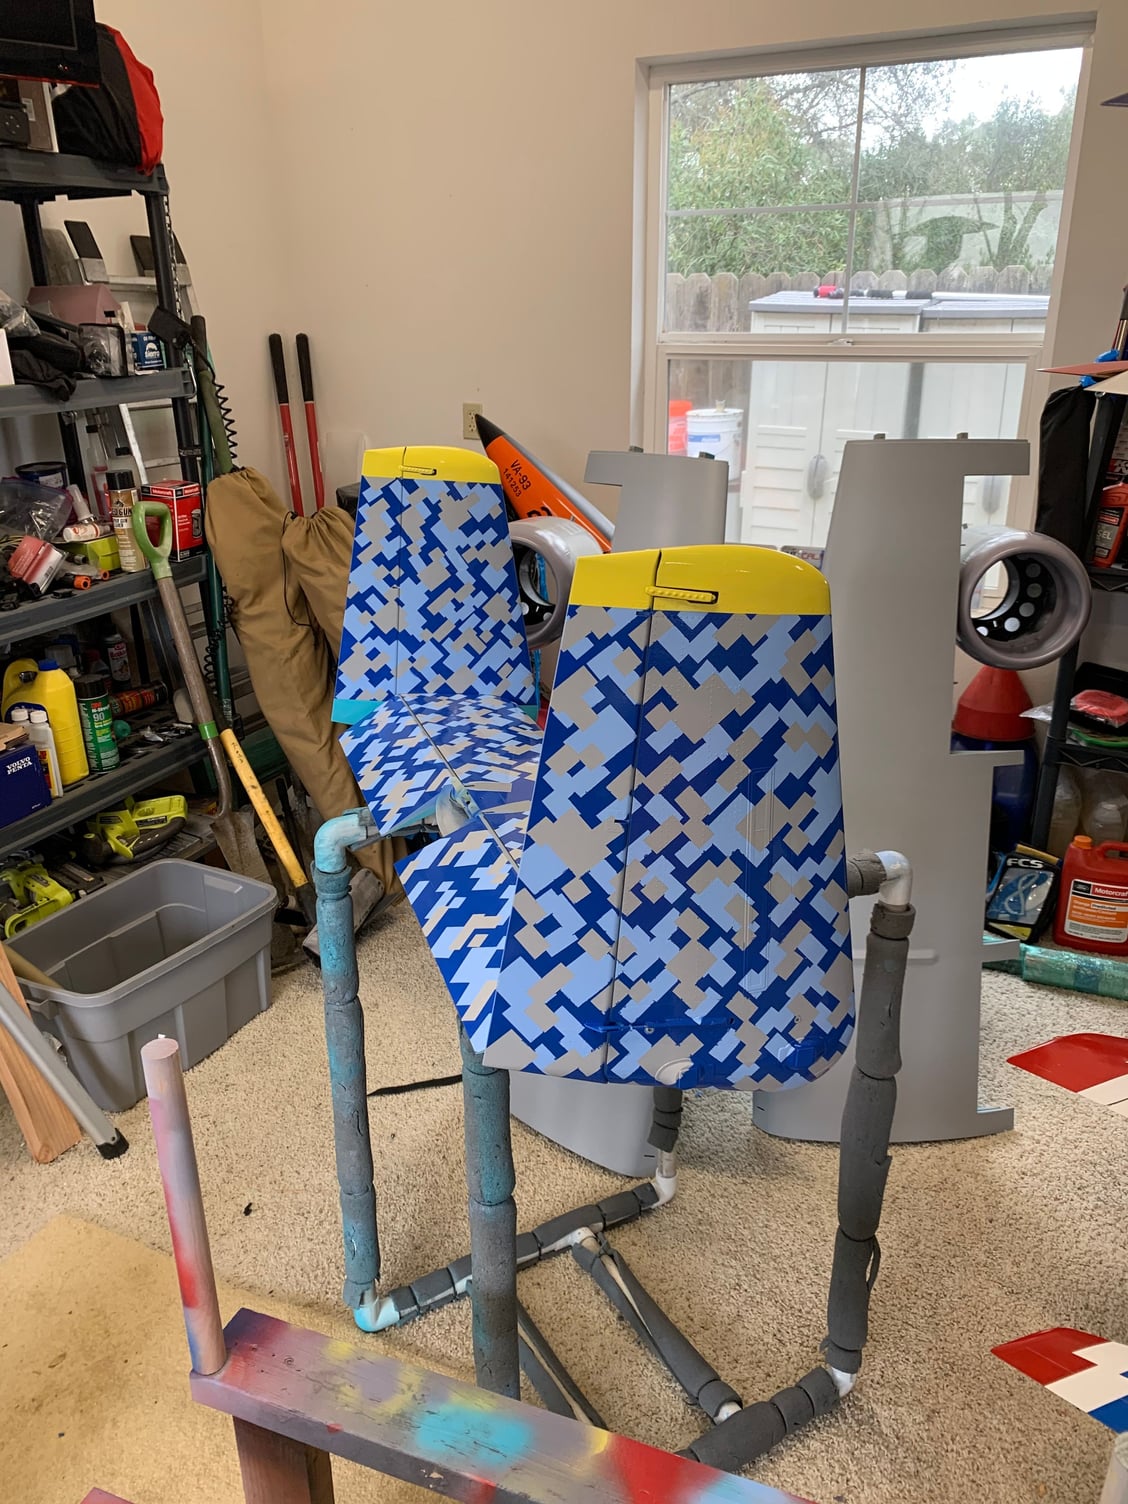
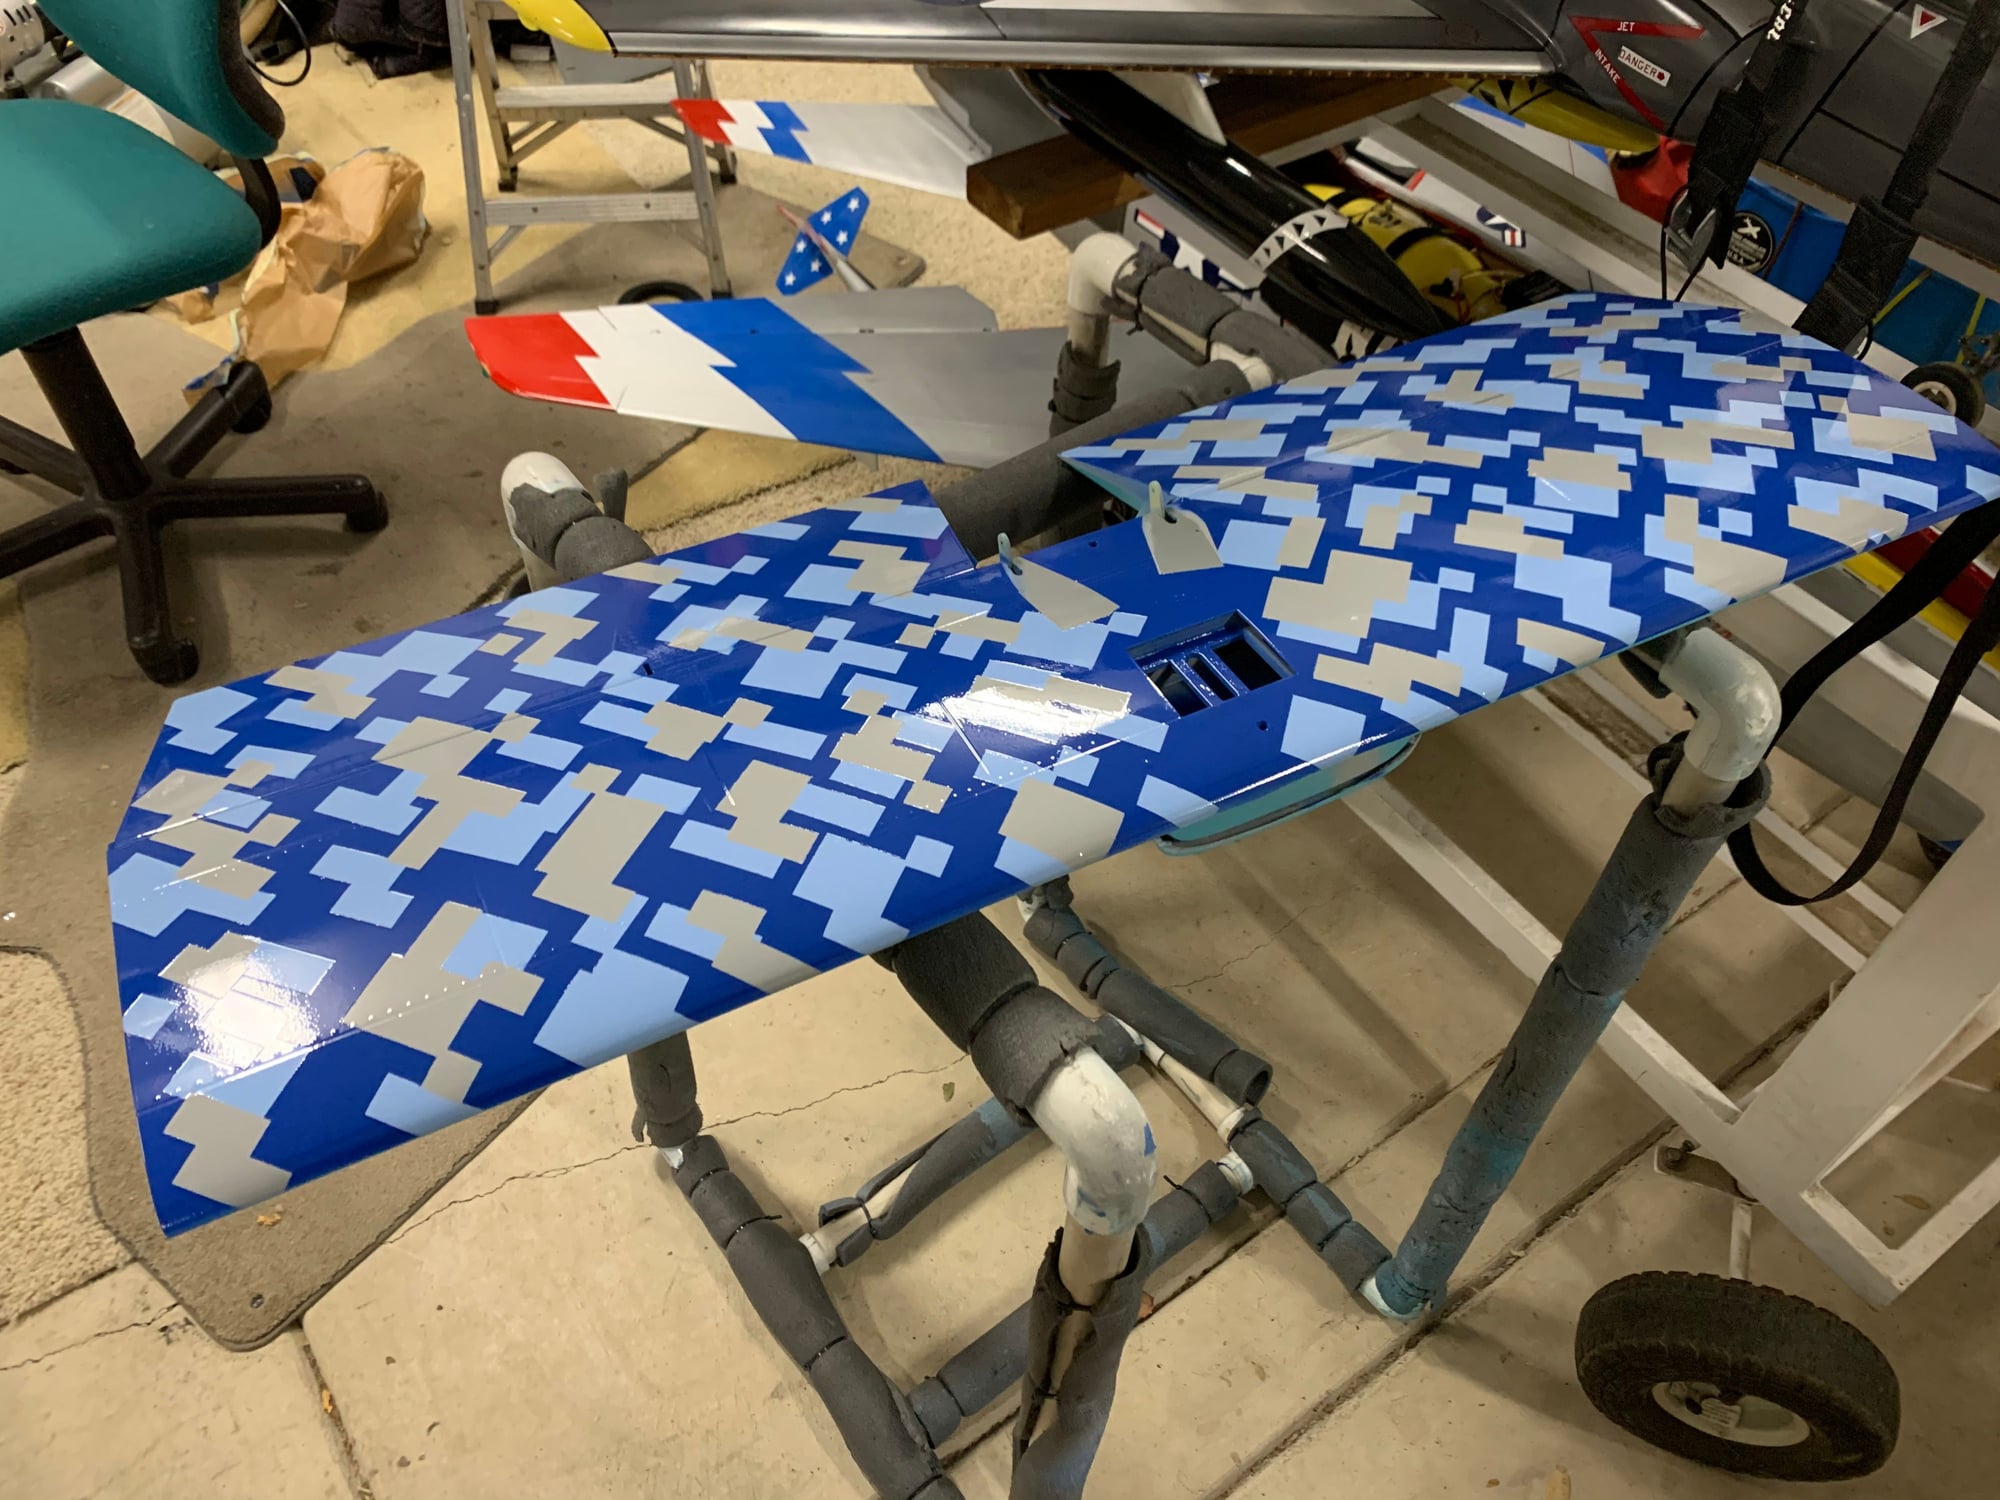
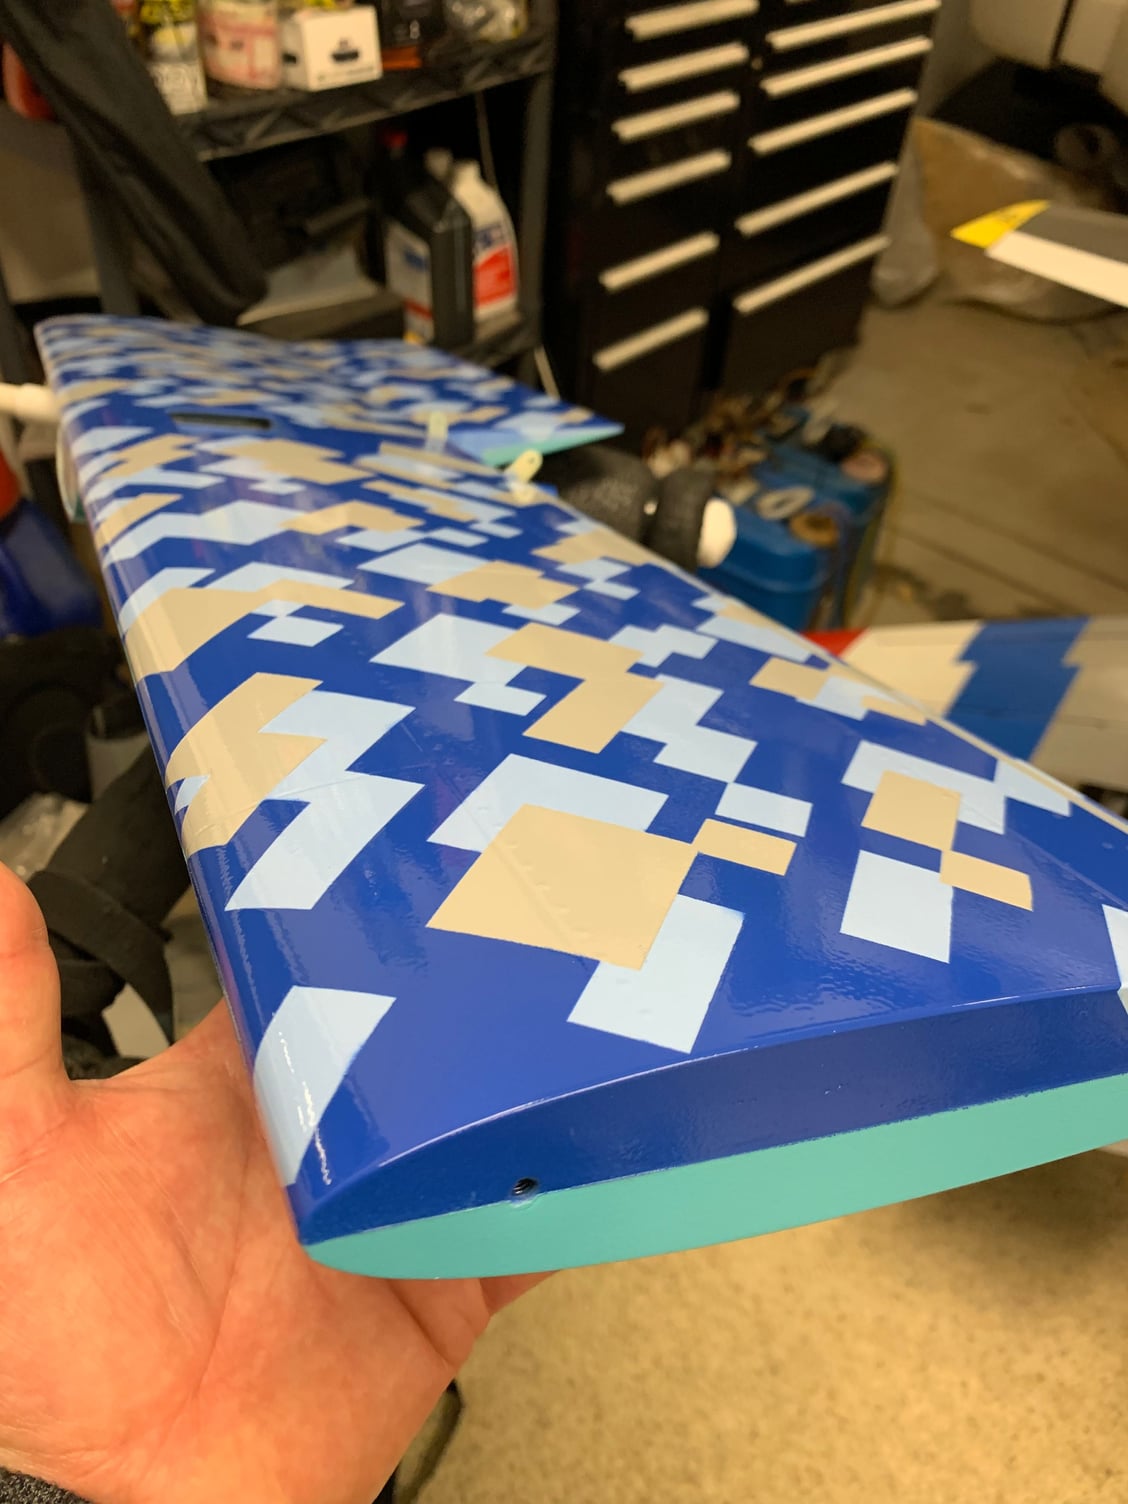
As you can imagine, double masking a digital camo scheme is VERY masking tape intense. I have picked a great first time paint project!!!! (Dripping with sarcasm...)
Well, Jeremy ( LGMgraphix ) was nice enough to spend some time with me on the phone and he gave me a road map.
I learned a lot, and I was most surprised at not letting masking tape stay on too long and work only on parts I can finish all at one time.
This last part is the toughest as I have 2 little guys with me. The oldest will sit on the couch and wait for Dad, but the youngest one always wants to see what Dad is up to, so I can only paint when he is napping. I may have to tap into Grandma’s babysitting for a good solid day to paint.
As you can imagine, double masking a digital camo scheme is VERY masking tape intense. I have picked a great first time paint project!!!! (Dripping with sarcasm...)
 12-19-2019, 09:23 PM
#162
Ok. Thank you to all who have helped and and big THANK YOU to Jeremy!! (LGMgraphics)
He spent the better part of an hour with me on the phone giving me pointers.
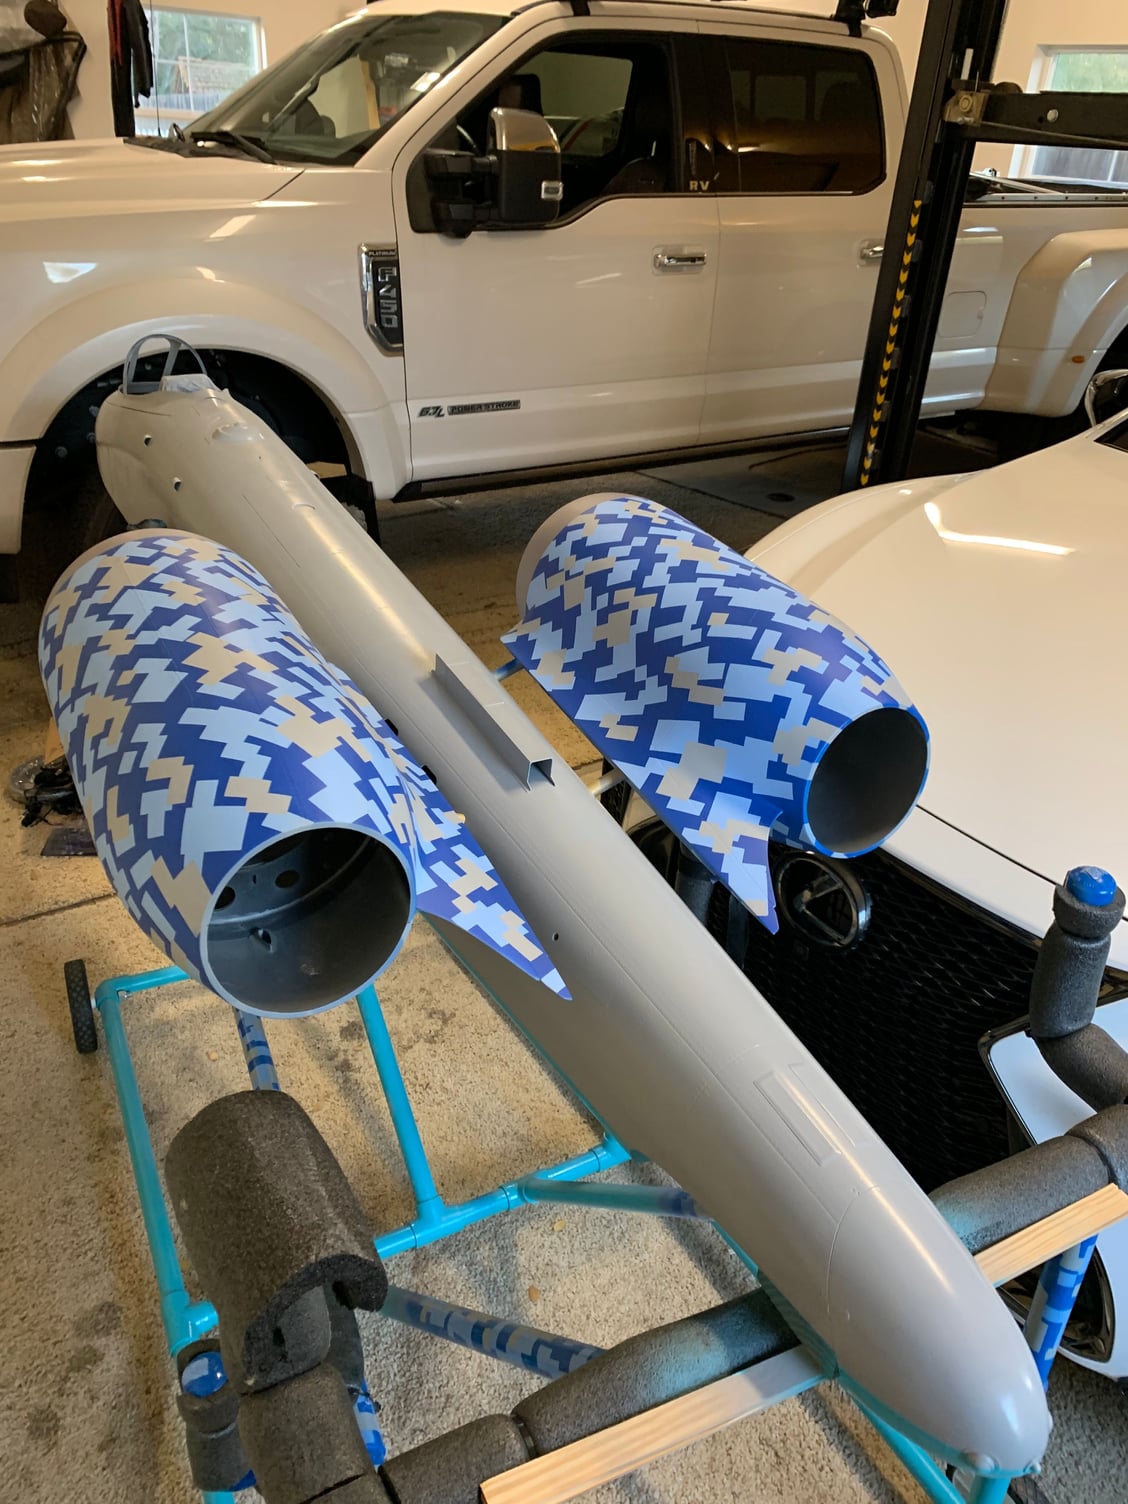
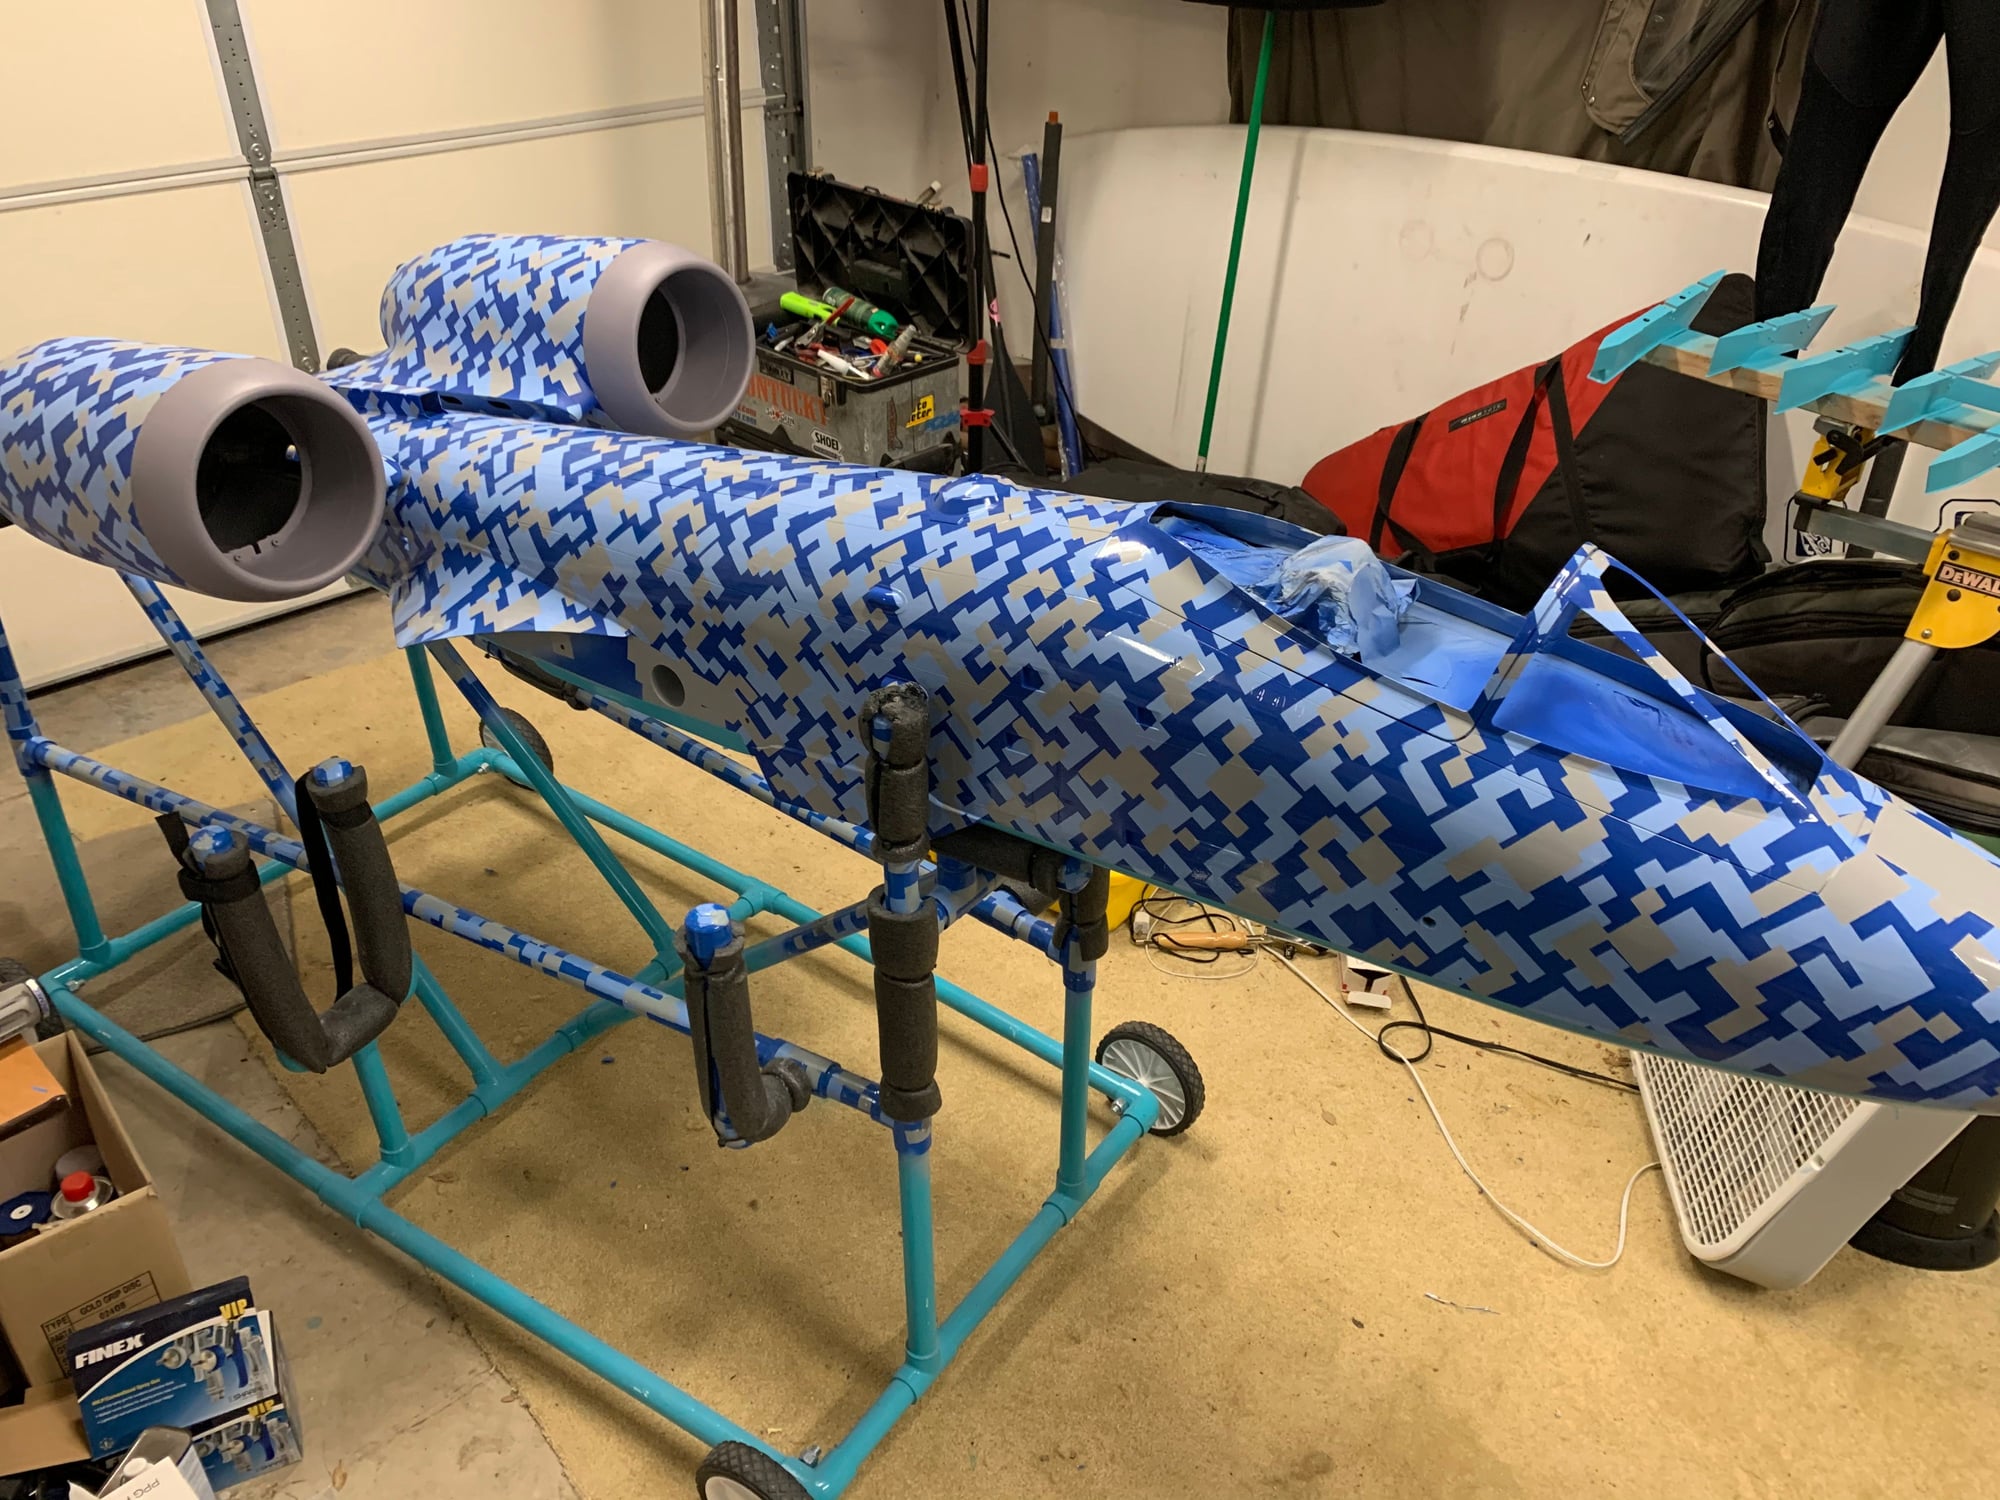
This paint job is going to be labor INTENSIVE.
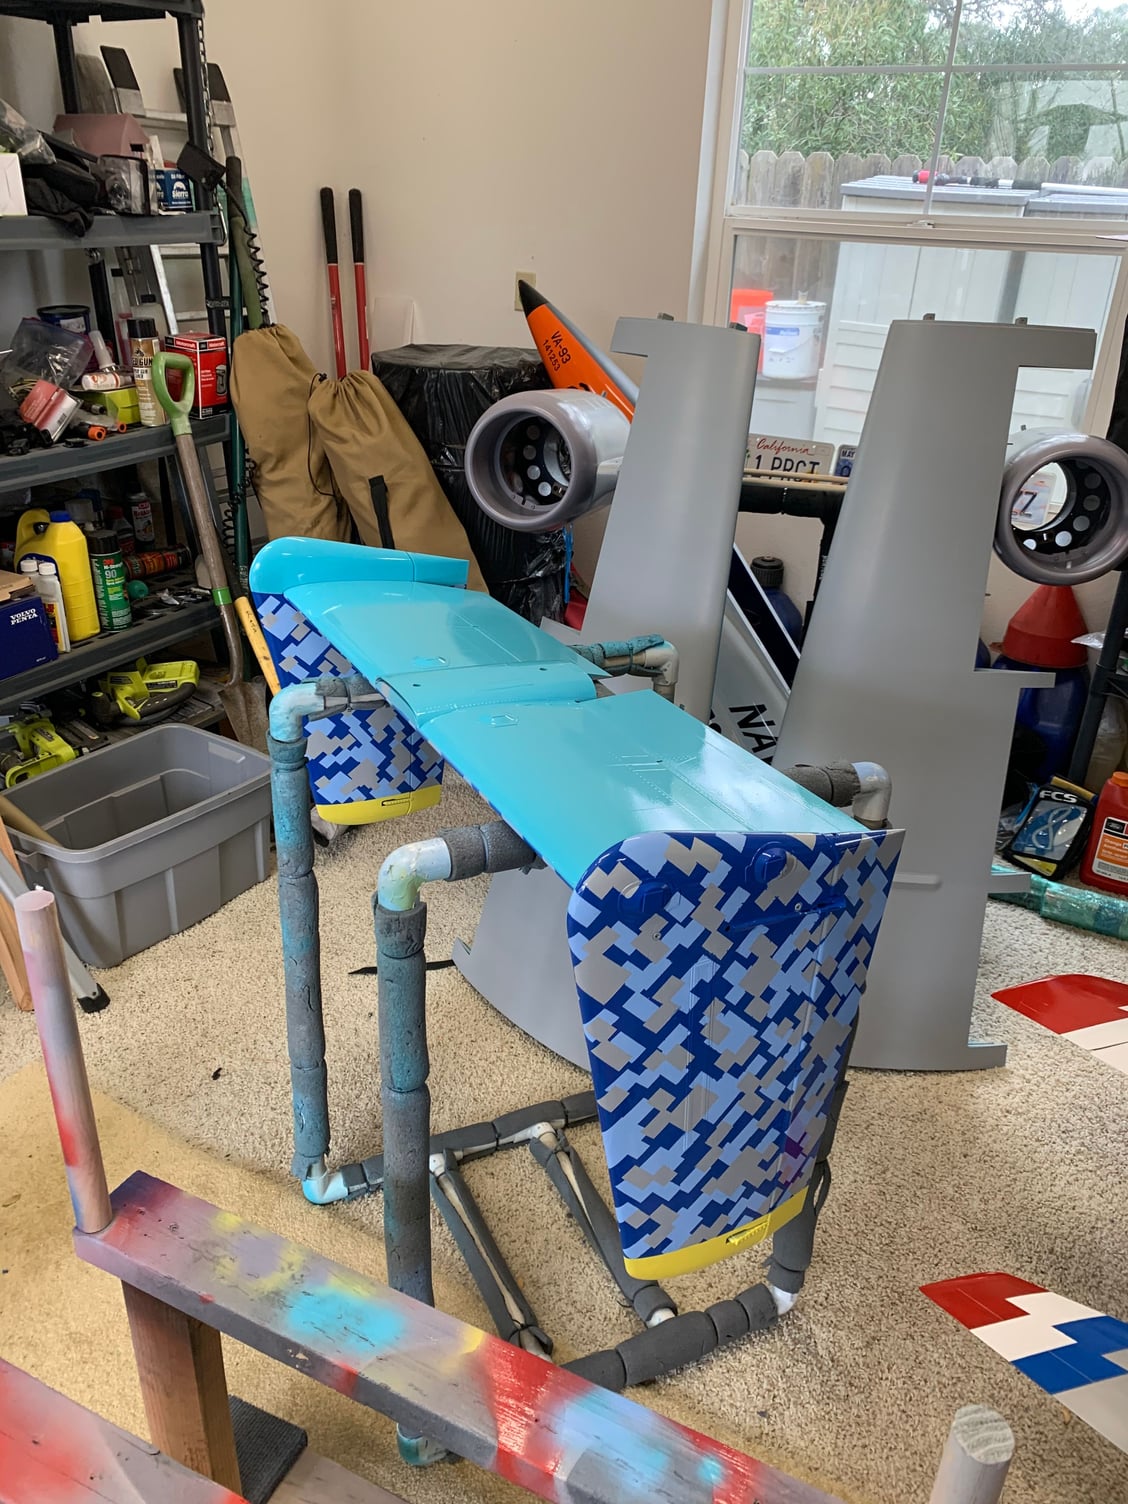
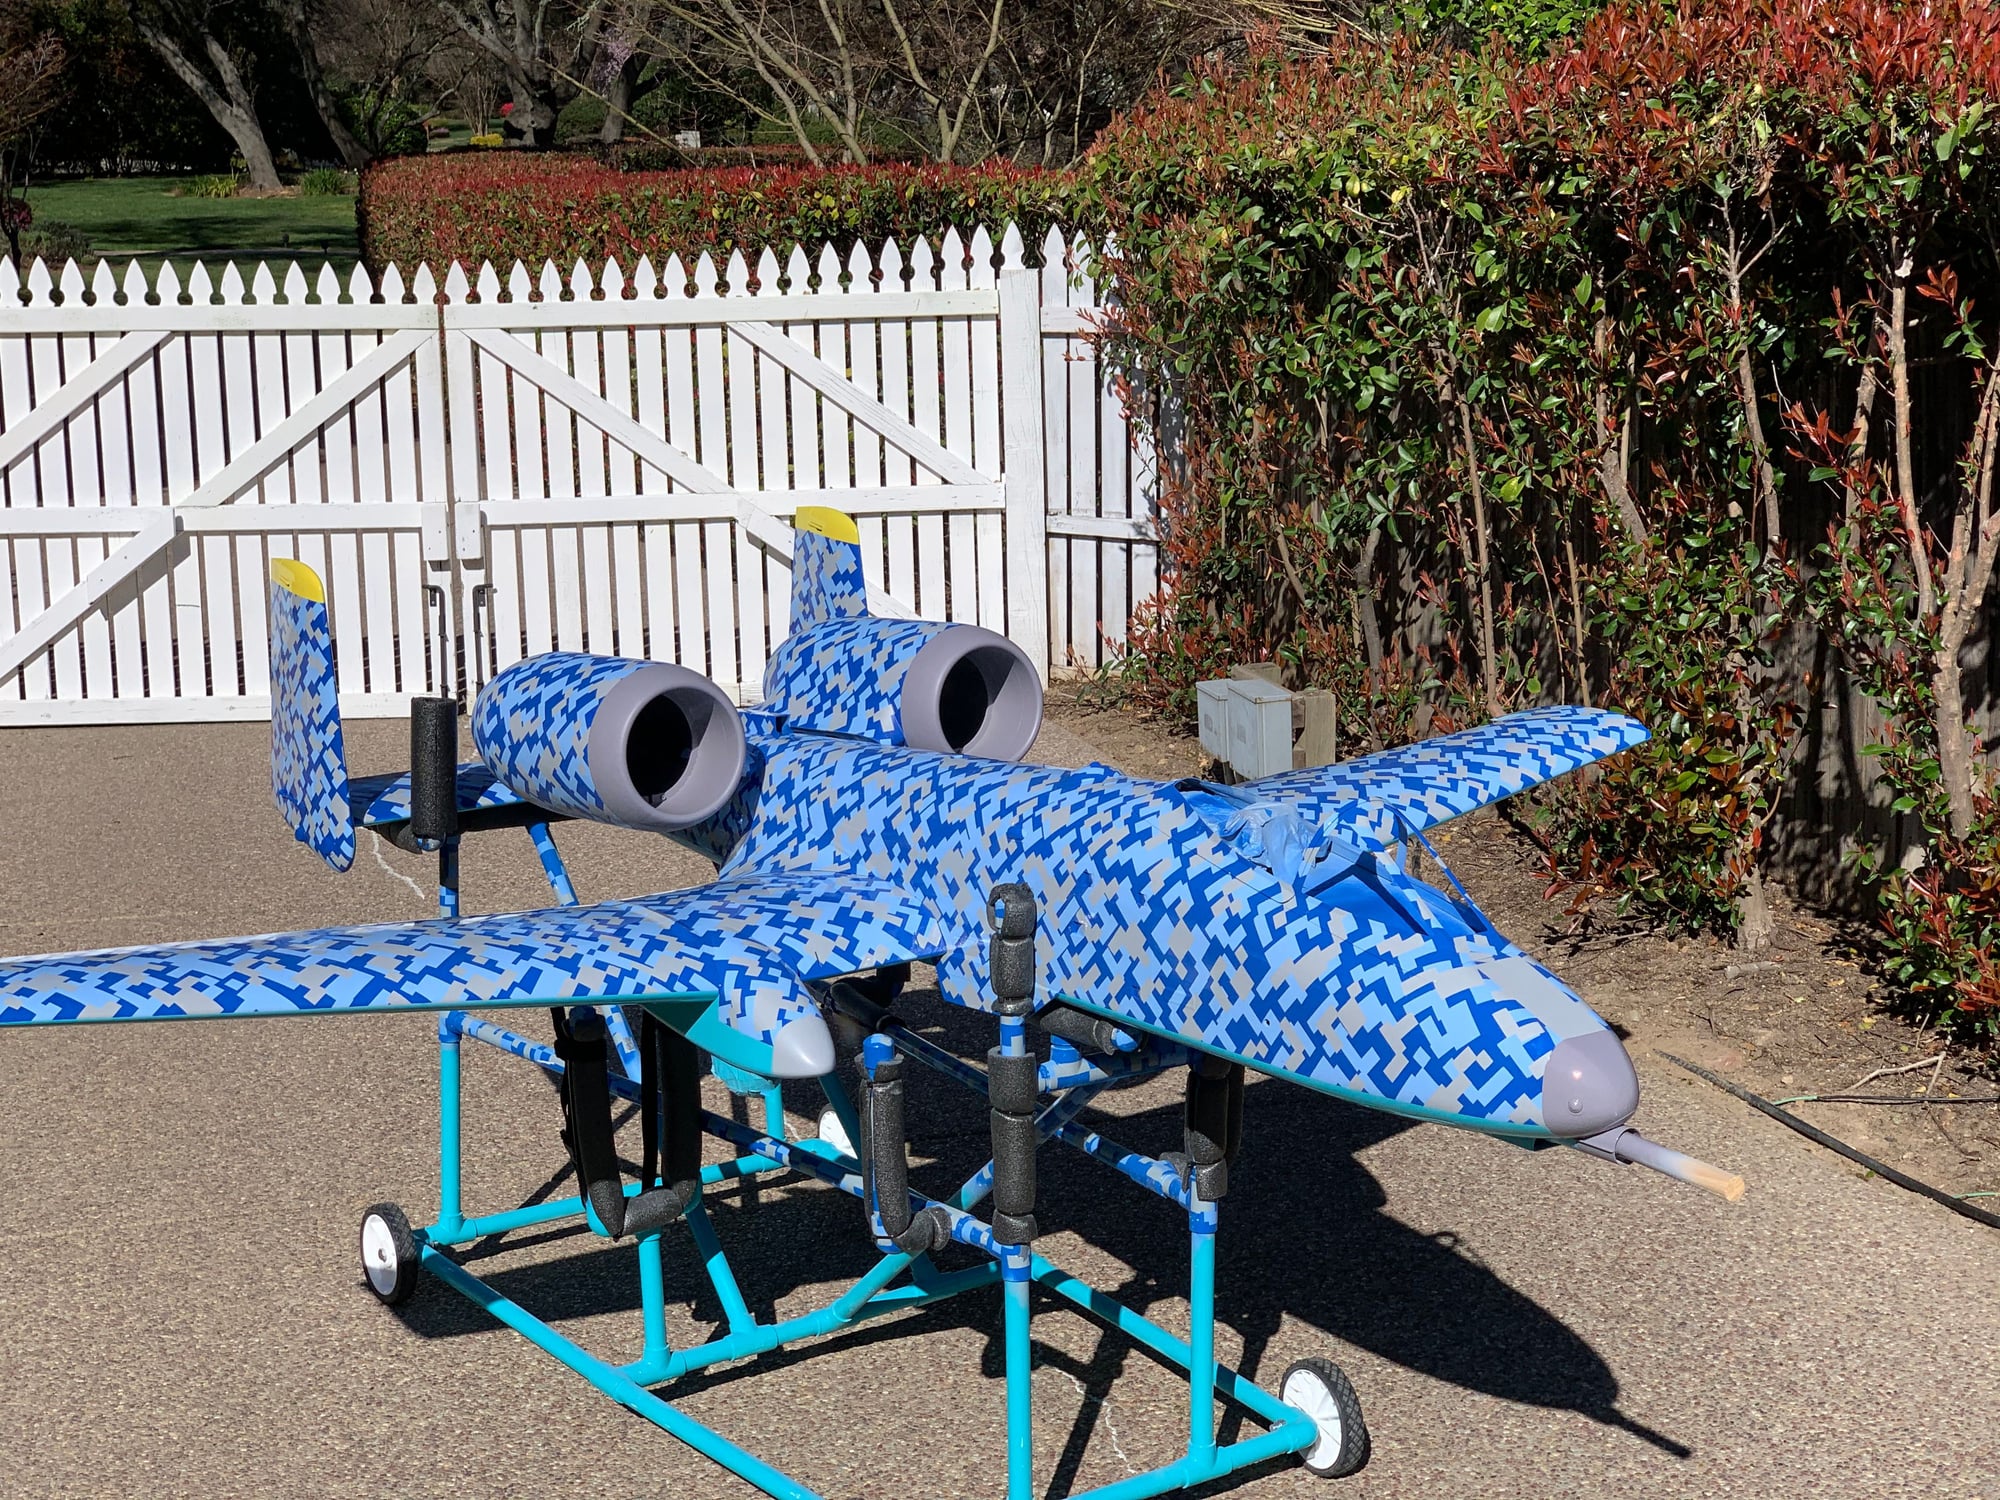
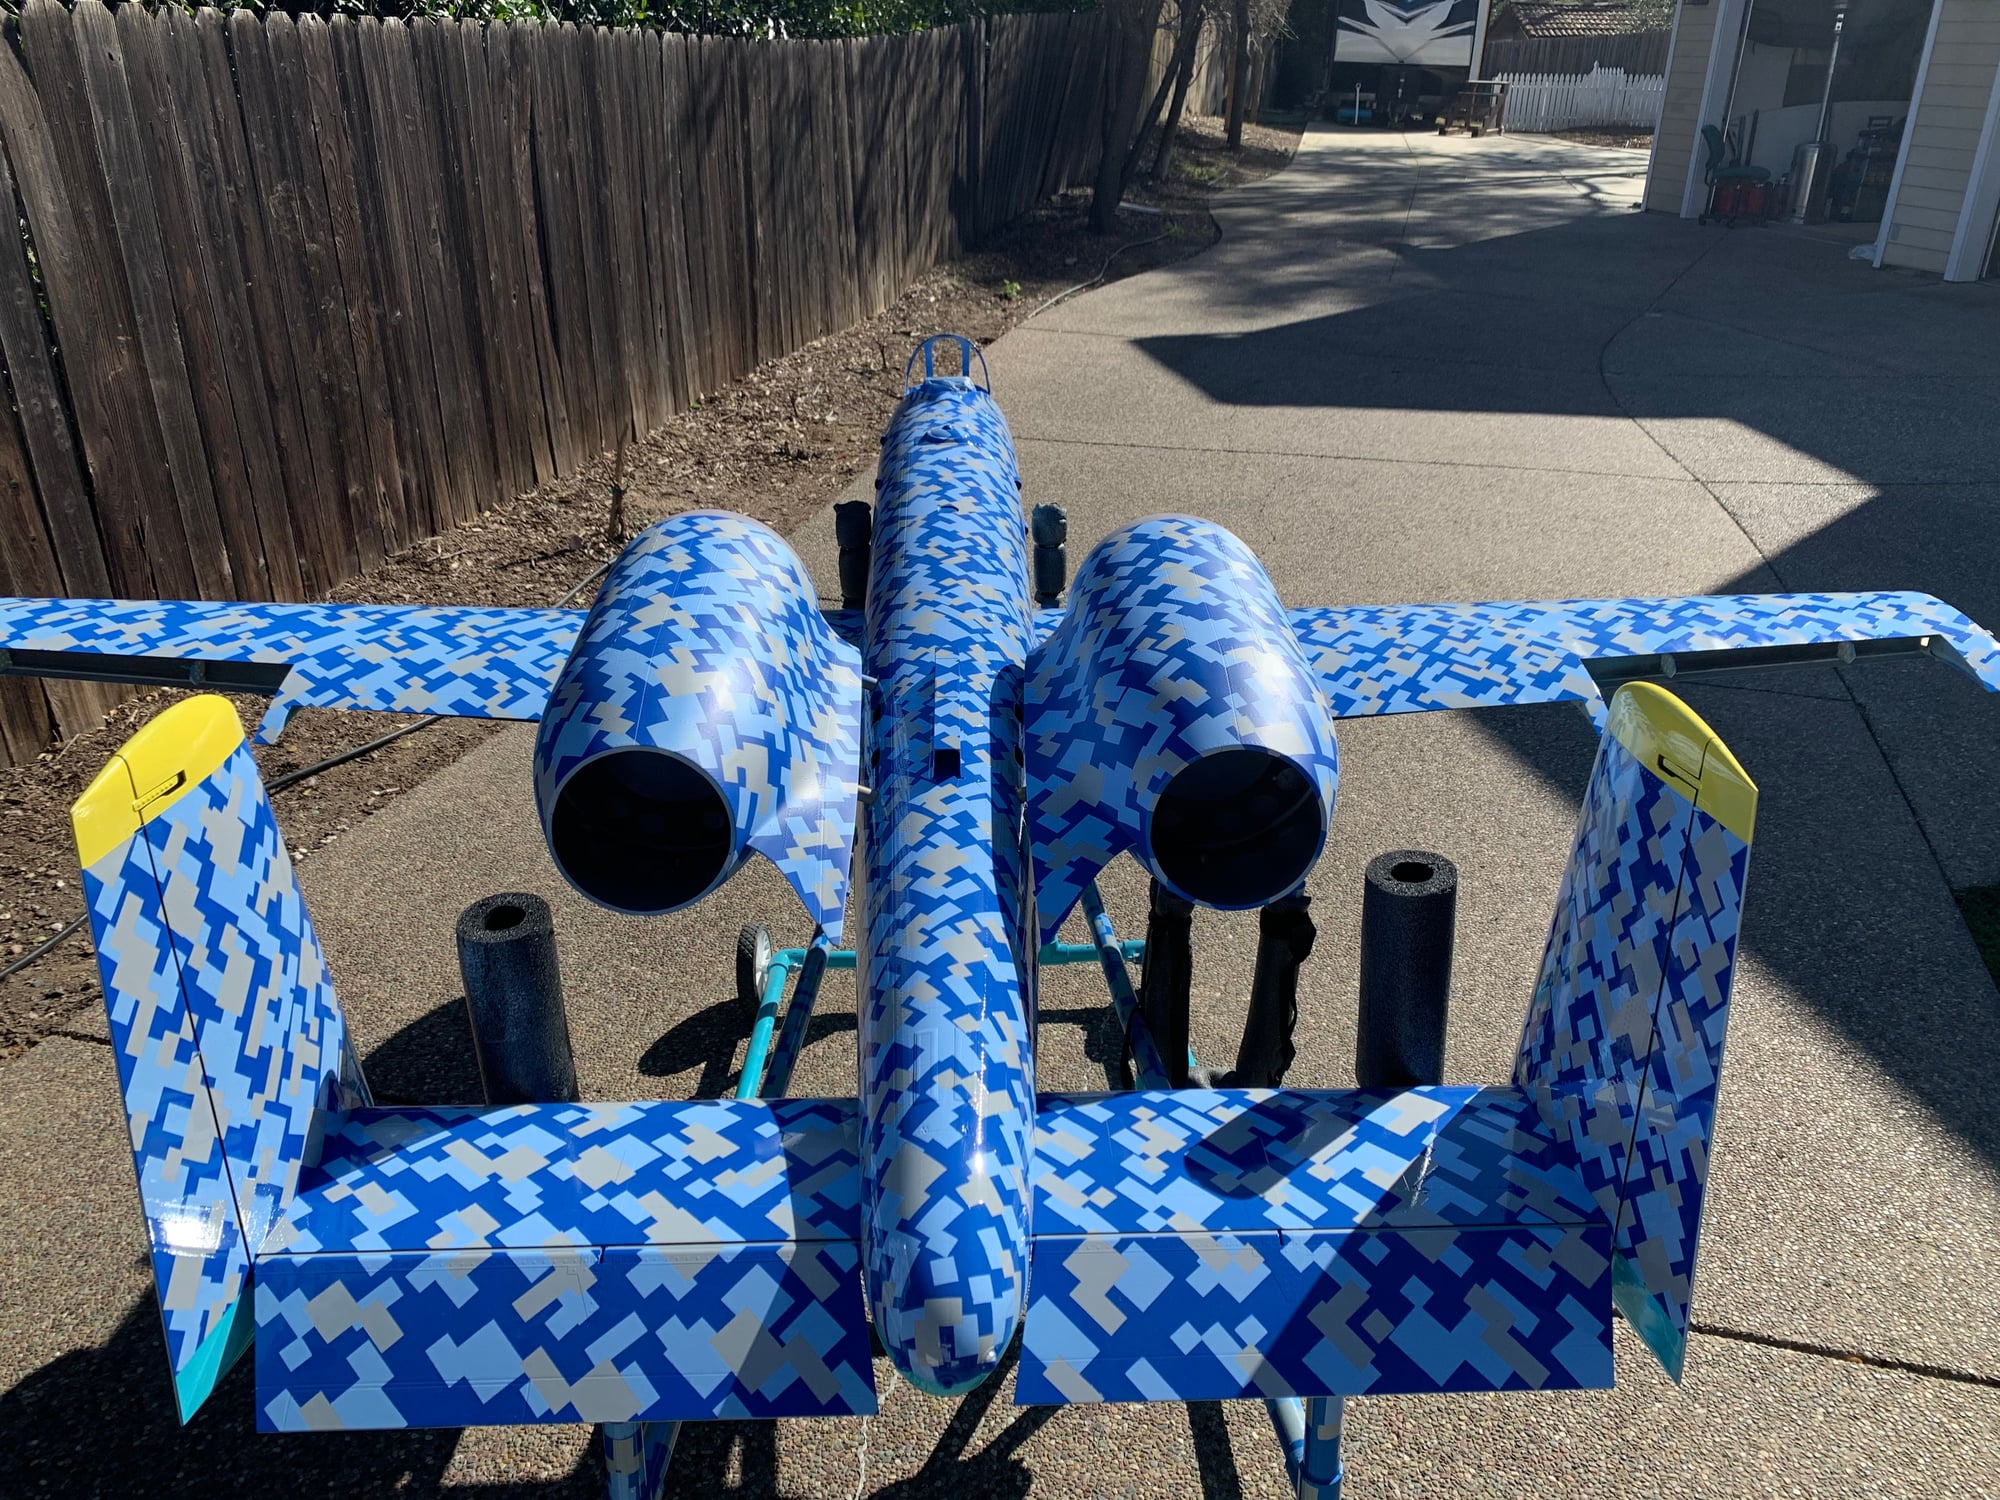
Here is the first finished part: the horizontal stab.
It has a gloss clear on top to protect the paint. As I won’t be able to get to it for weeks for decal application (I want the airplane cleared first so I can see it in its entirety) and the clear gloss will do 3 things:
a: protect the paint
b: better adhesion for the decals, especially the wet transfers.
c: let me experiment with weathering before committing as I hate over weathered jets
12-19-2019, 09:55 PM
#163
You have only confirmed my suspicion that Californians are crazy! You have way more patience than I do my friend, I just wouldn't even try digital camo!
I'm so glad that things are working for you now. You have no idea how horrible i felt telling you that you were going to have to strip all your previous paint off of the airplane..... I know that pain all too well!
I'm so glad that things are working for you now. You have no idea how horrible i felt telling you that you were going to have to strip all your previous paint off of the airplane..... I know that pain all too well!