


1/7 Scale Blackburn Buccaneer All Composite Scratch Build


 01-14-2019, 12:36 PM
#178
Well, one step back. I started cutting the weapon bay foam, using up the last remaining sheets that I bought 6 months ago to build the fuselage from. I did not have enough, so went to Lowes to buy another sheet. When I stacked up the parts from the 'old' foam sheet, it was noticeably taller than the same parts cut from the new sheet.
It turns out that there is a significant difference in sheet thickness for nominally the same 3/4" sheet, about 1.3mm thinner, probably a different batch, which would have resulted in the weapon bay plug being nearly 2 inches too short. I need to re-slice the CAD model and come up with new ply formers based on the new foam thickness, and probably make new 3D printed end pieces too.
Paul

 01-14-2019, 07:28 PM
#181
I guess I could, but it only took me less than 2 hours to re-CAD the templates and cut them out, so I am back up to where I was last night. The new aft section is printing on the 3D printer right now and will be done in a couple of hours. Hopefully I am now done with ply and foam cutting for this project. I just have to assemble and sand the plug.
Paul
Paul
01-16-2019, 06:46 AM
#185
Thanks guys for the comments. I got really frustrated very early on when I couldn't get the polyester-based mold making approach to work. Switched to an epoxy-based workflow and all was fine. Got close to giving up at that point, but I knew it had to be possible.
Iterating on a design in CAD doesn't seem to be anywhere near as frustrating as the traditional cut & try/ scrap and repeat method in the workshop. I have spent countless hours in front of the computer getting the design to where I'm reasonably happy with it to then commit to actual part manufacture.
I just hope I don't burn-out on this before it is done!
01-16-2019, 06:50 AM
#186
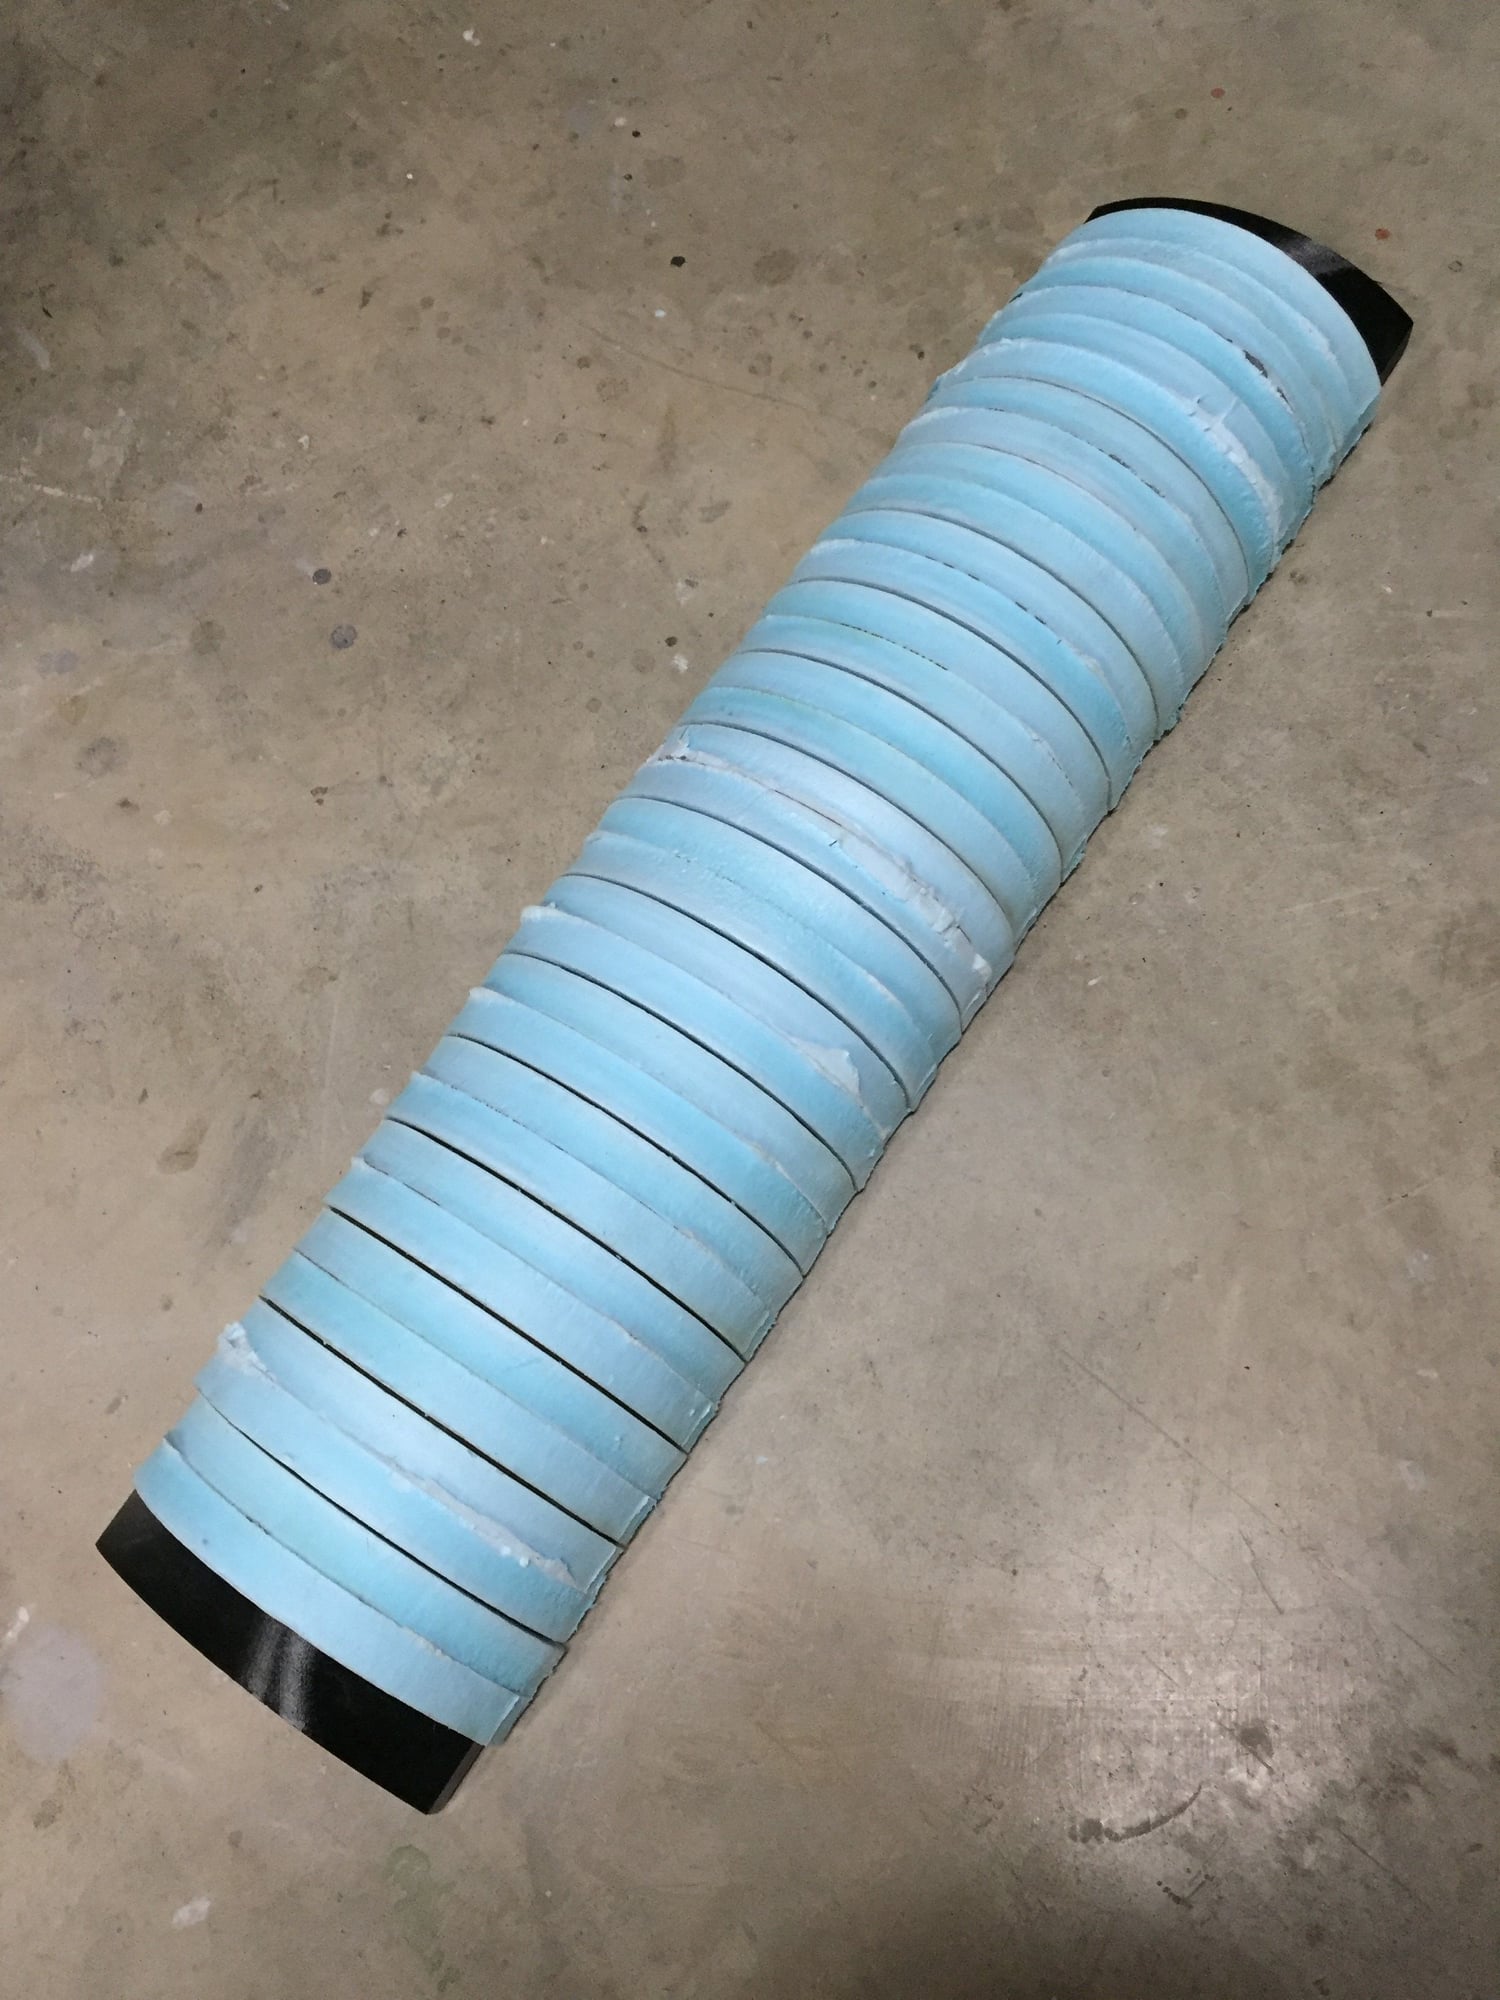
Prior to assembling the weapon bay ply/ foam, and as a lesson learned from assembling the same for the fuselage plug, I made a small tool to align the individual pieces to ensure that they were all square and not mis-aligned, which would result in a deformed plug.
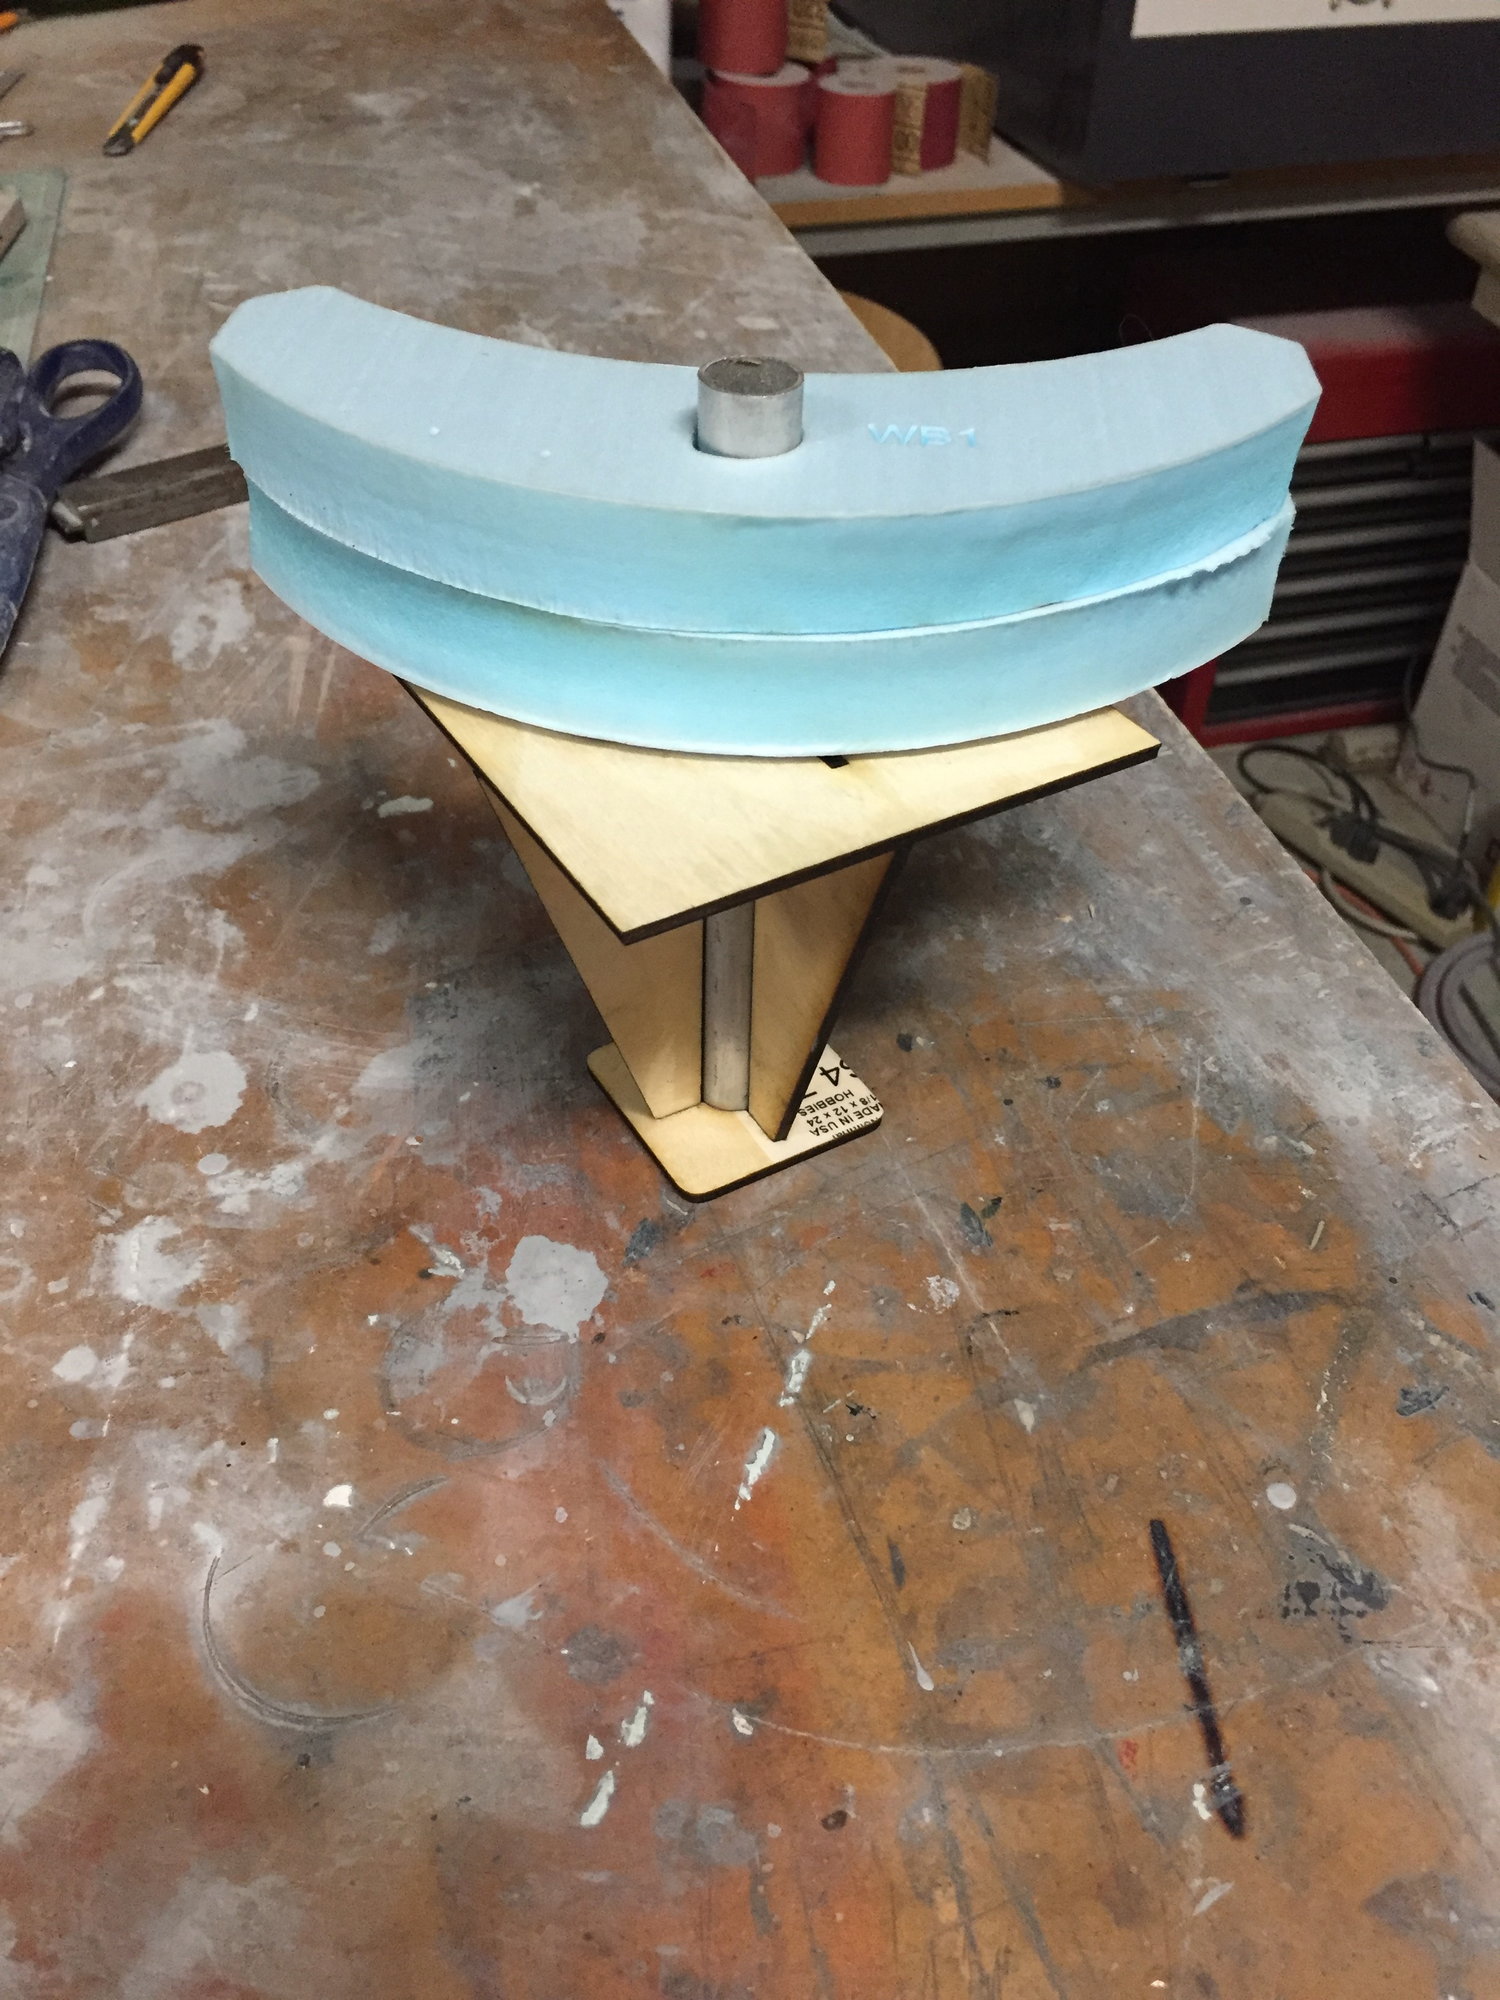
Complete weapon bay/ fuel tank plug ply and foam bonded together, ready for foam sanding and profiling.
Paul
Complete weapon bay/ fuel tank plug ply and foam bonded together, ready for foam sanding and profiling.
Paul
01-16-2019, 09:51 AM
#187

Paul
You have to stick with it, if RCU ran an award for project-thread of the year you would win! There are people with a professional modelling background and workshop access that produce projects from scratch, but you are a real aeromodeller. The RC modelling community is rooting for you
Dave
You have to stick with it, if RCU ran an award for project-thread of the year you would win! There are people with a professional modelling background and workshop access that produce projects from scratch, but you are a real aeromodeller. The RC modelling community is rooting for you
Dave
 01-16-2019, 11:54 AM
#190
My Feedback: (20)
Paul
You have to stick with it, if RCU ran an award for project-thread of the year you would win! There are people with a professional modelling background and workshop access that produce projects from scratch, but you are a real aeromodeller. The RC modelling community is rooting for you
Dave
You have to stick with it, if RCU ran an award for project-thread of the year you would win! There are people with a professional modelling background and workshop access that produce projects from scratch, but you are a real aeromodeller. The RC modelling community is rooting for you
Dave
Gary
 01-17-2019, 06:08 PM
#191
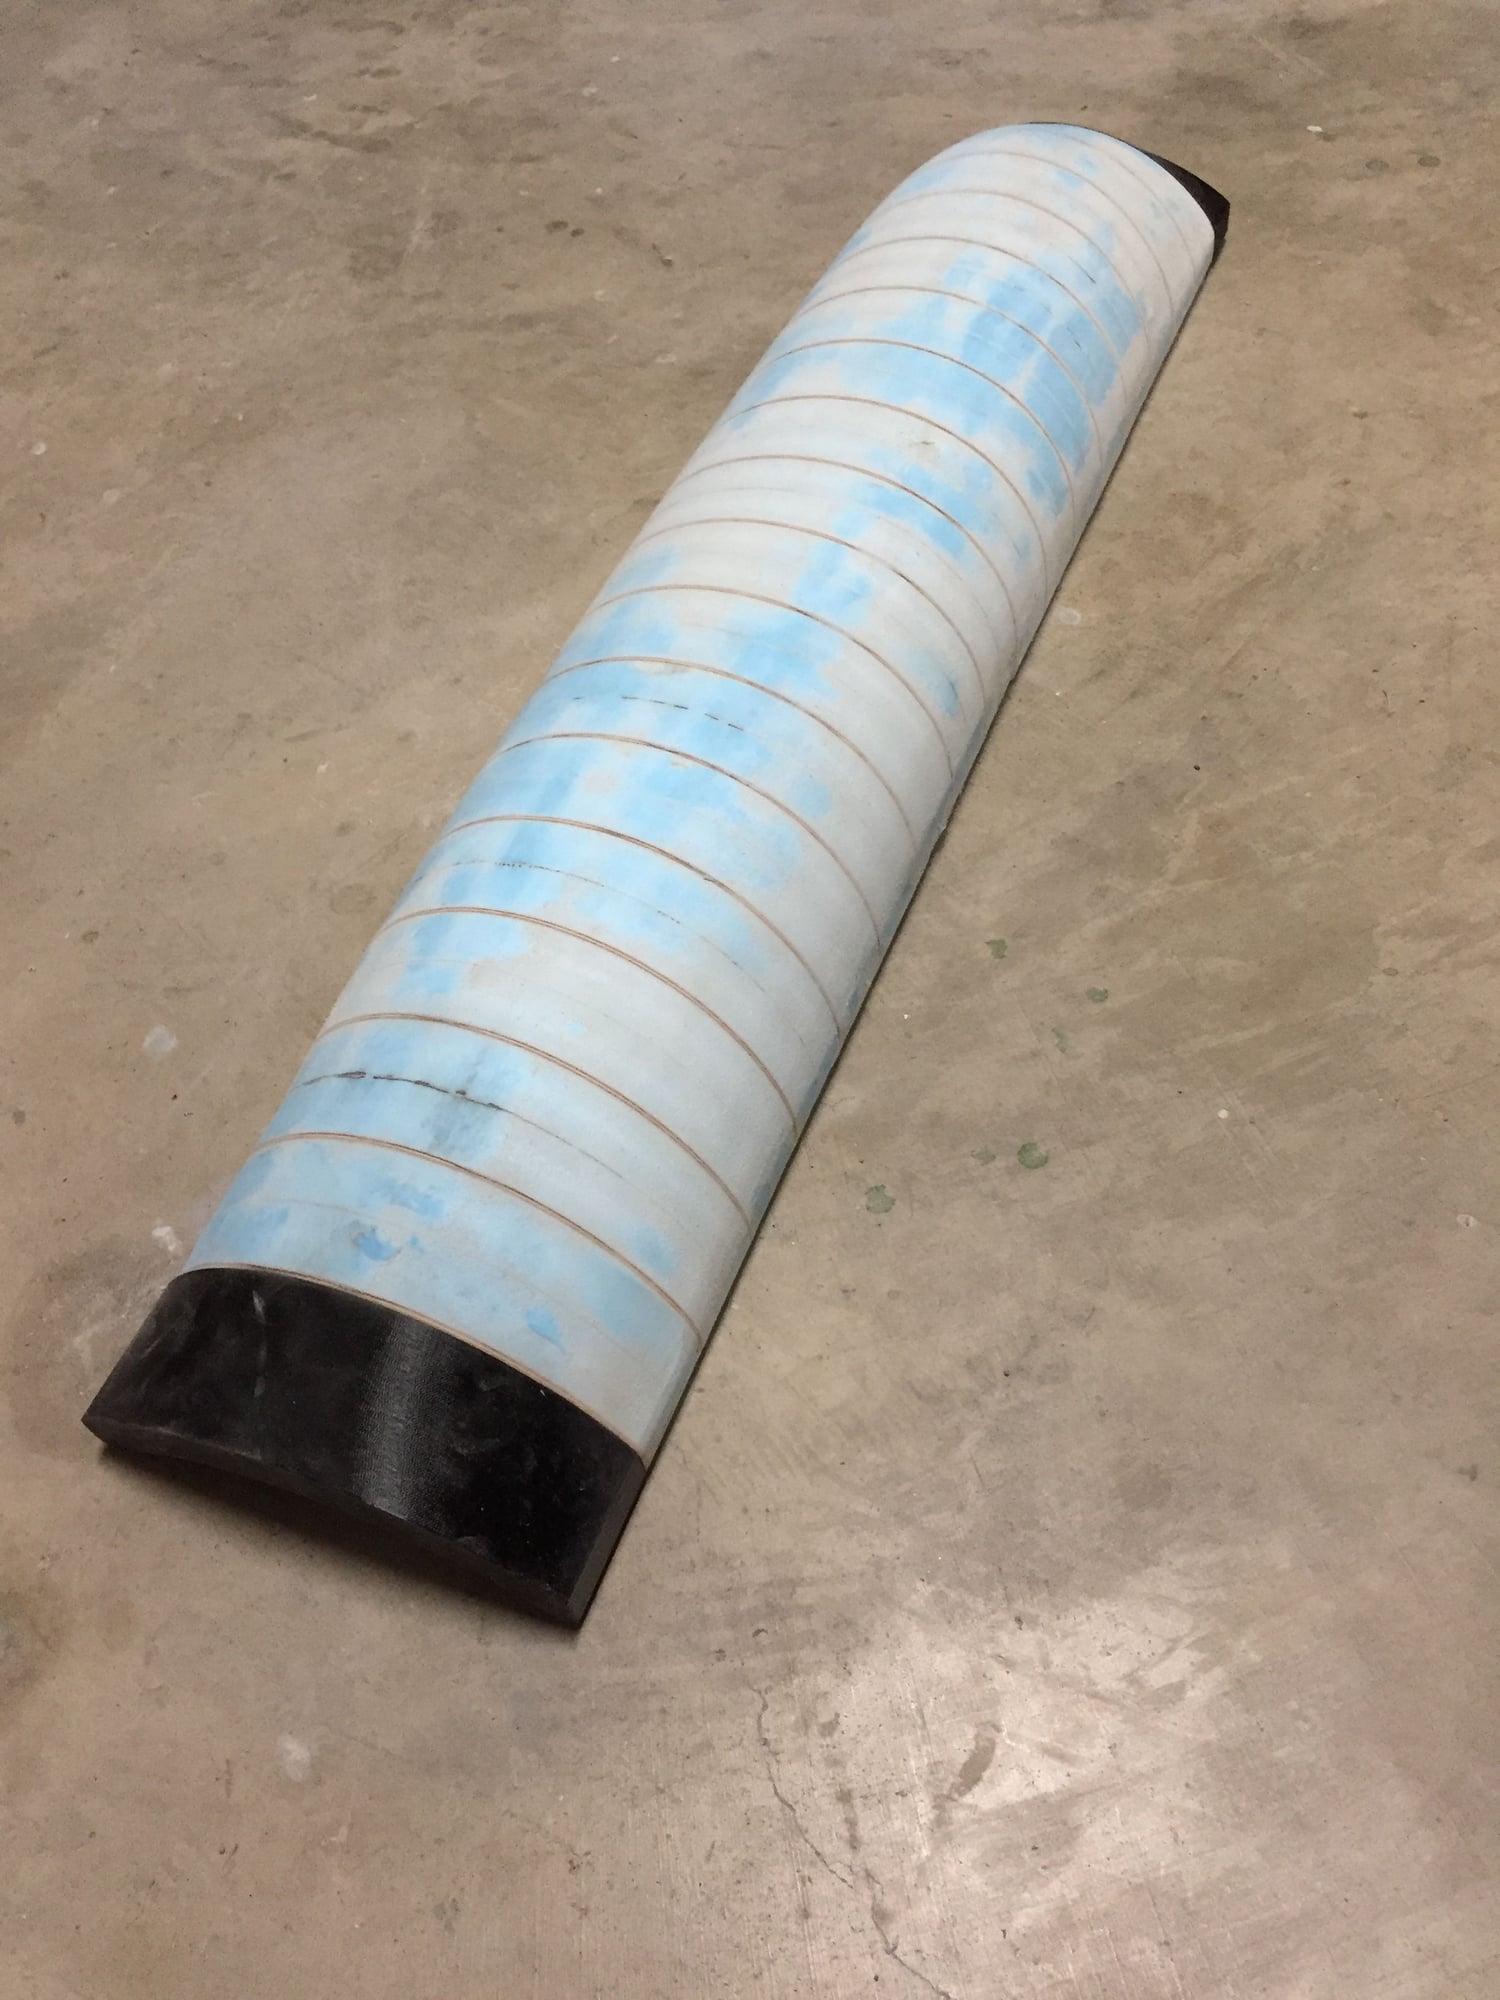
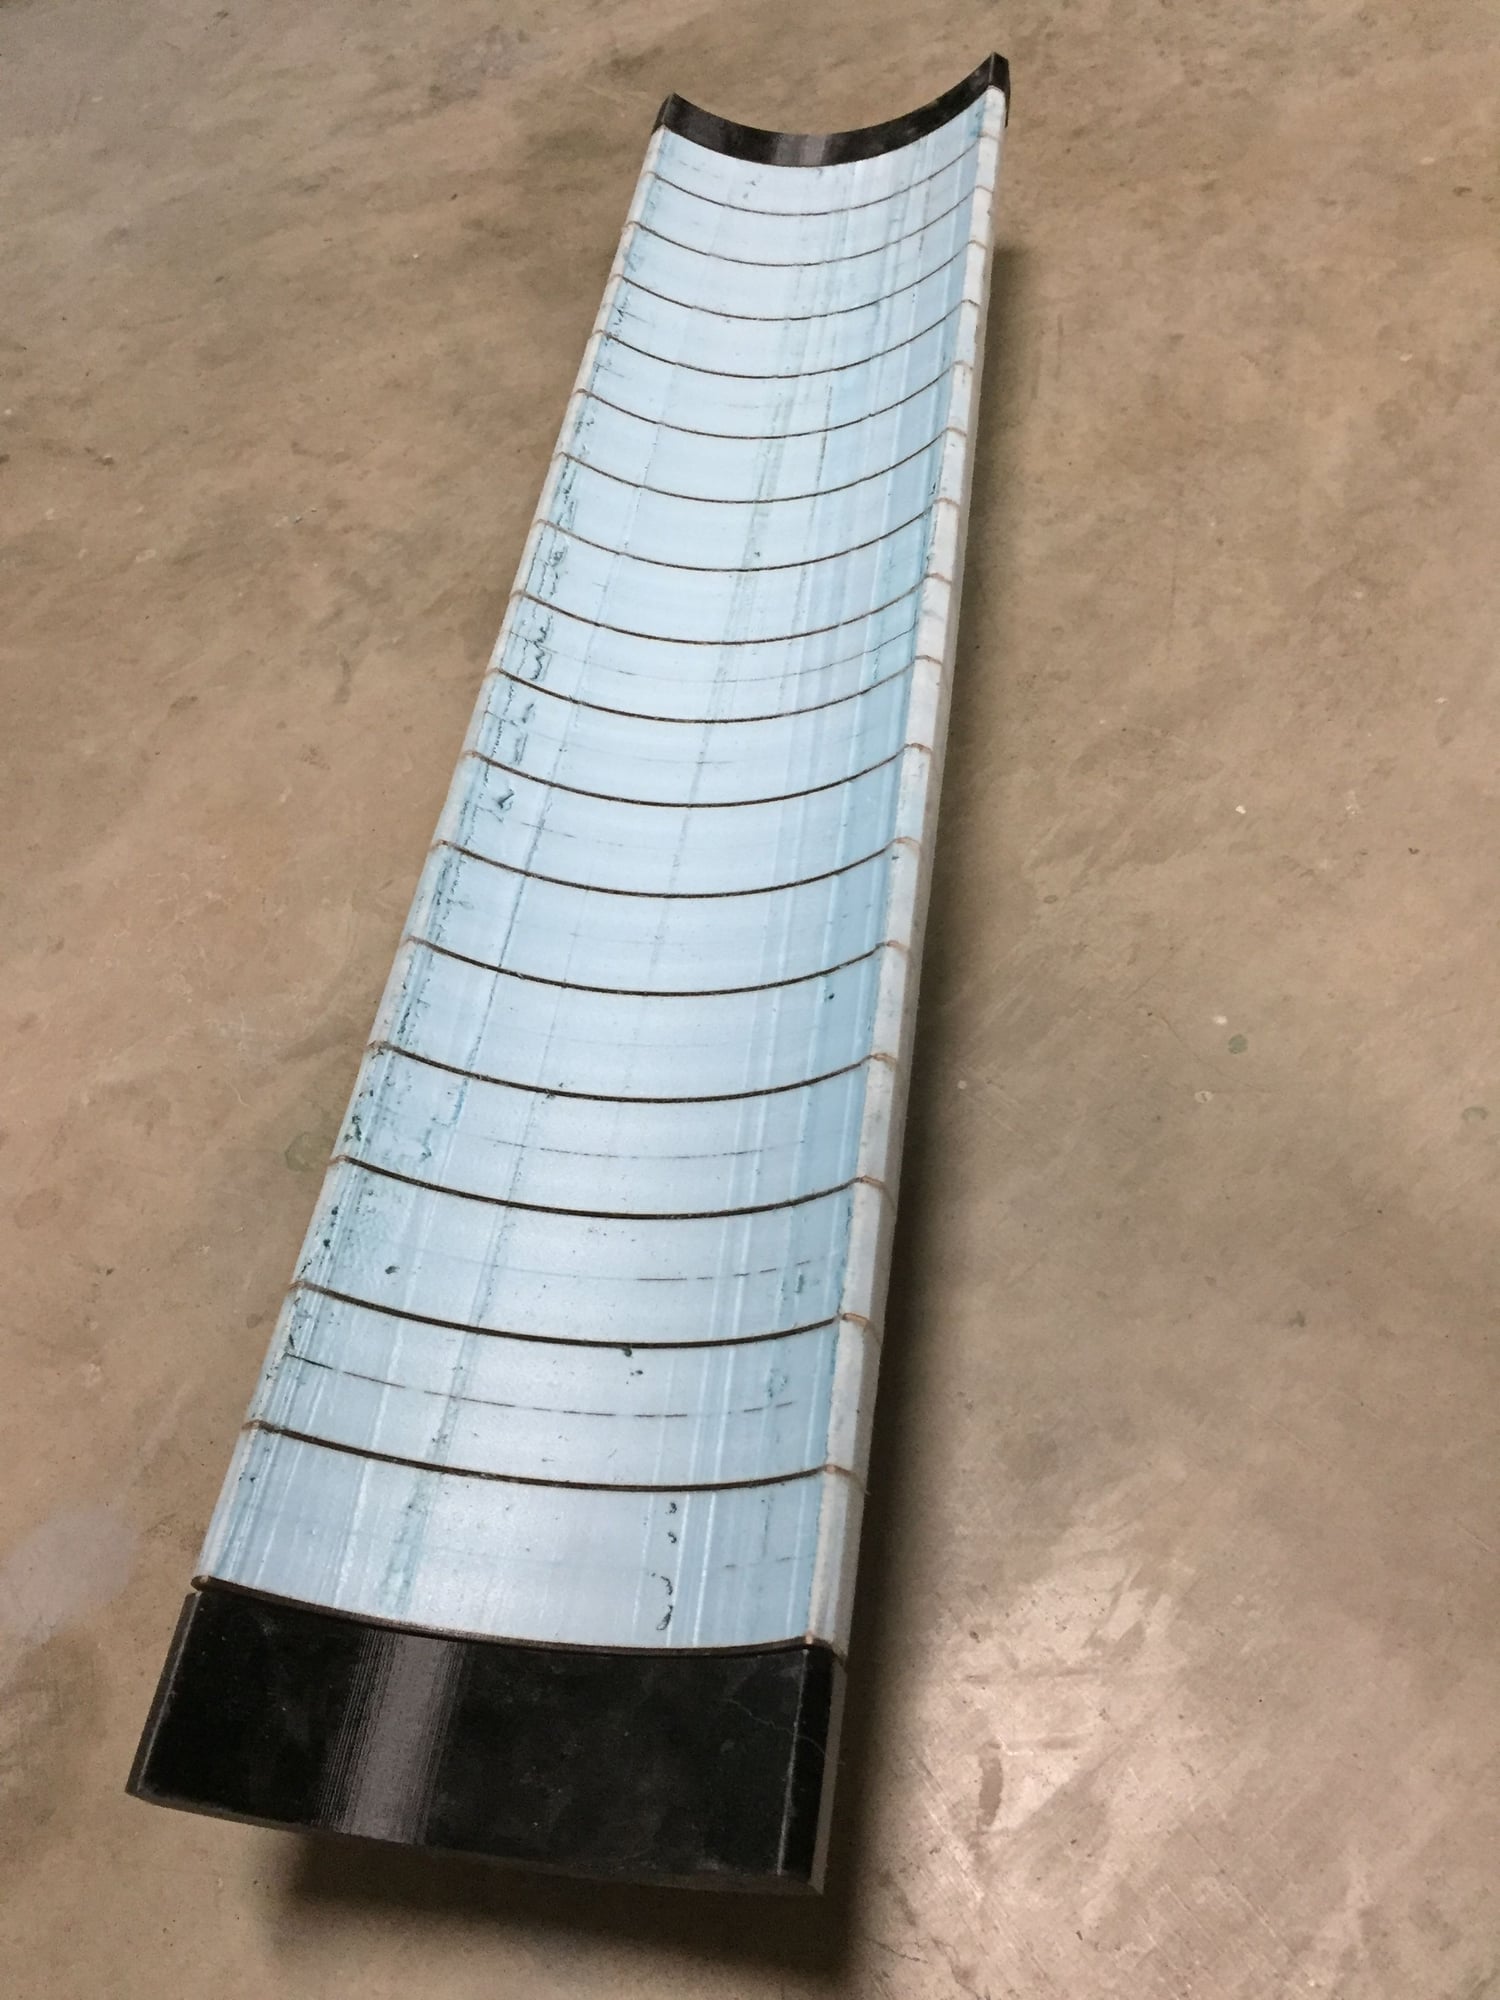
To trim the foam on the concave, inner surface, rather than sand it, I decided the easiest way would be to hot-wire cut it, as it was a straight cut forward/ aft, so I built a crude tension-bow hot wire cutter, using some 0.025" stainless locking wire as the cutter. I powered it using my battery charger which has a brushed motor drive function. It took about 12V/ 5A to get a nice clean cut. Running the hot wire over the ply templates gave a great finished surface much quicker than trying to sand it down. Took less than an hour to build the cutter and trim the plug.

Sanding the outer surface was a bear, seemed much tougher than when I did the fuselage. Must be something about this batch of blue foam. It ate up the 80grit paper on the power sander. After a tough couple of hours making piles of blue dust, I have finally got a finished plug, ready for minor filling then glassing.
Sanding the outer surface was a bear, seemed much tougher than when I did the fuselage. Must be something about this batch of blue foam. It ate up the 80grit paper on the power sander. After a tough couple of hours making piles of blue dust, I have finally got a finished plug, ready for minor filling then glassing.
01-17-2019, 06:28 PM
#192

Paul,
are you spraying the duratec primer over traditional 2k automotive primer? I like the results your getting with the duratec and am tempted to break my cardinal rule or refusing to work with a polyester based product to try it.
Also, what are you using to spray it, a cup gun or???
thanks,
thomas
are you spraying the duratec primer over traditional 2k automotive primer? I like the results your getting with the duratec and am tempted to break my cardinal rule or refusing to work with a polyester based product to try it.
Also, what are you using to spray it, a cup gun or???
thanks,
thomas
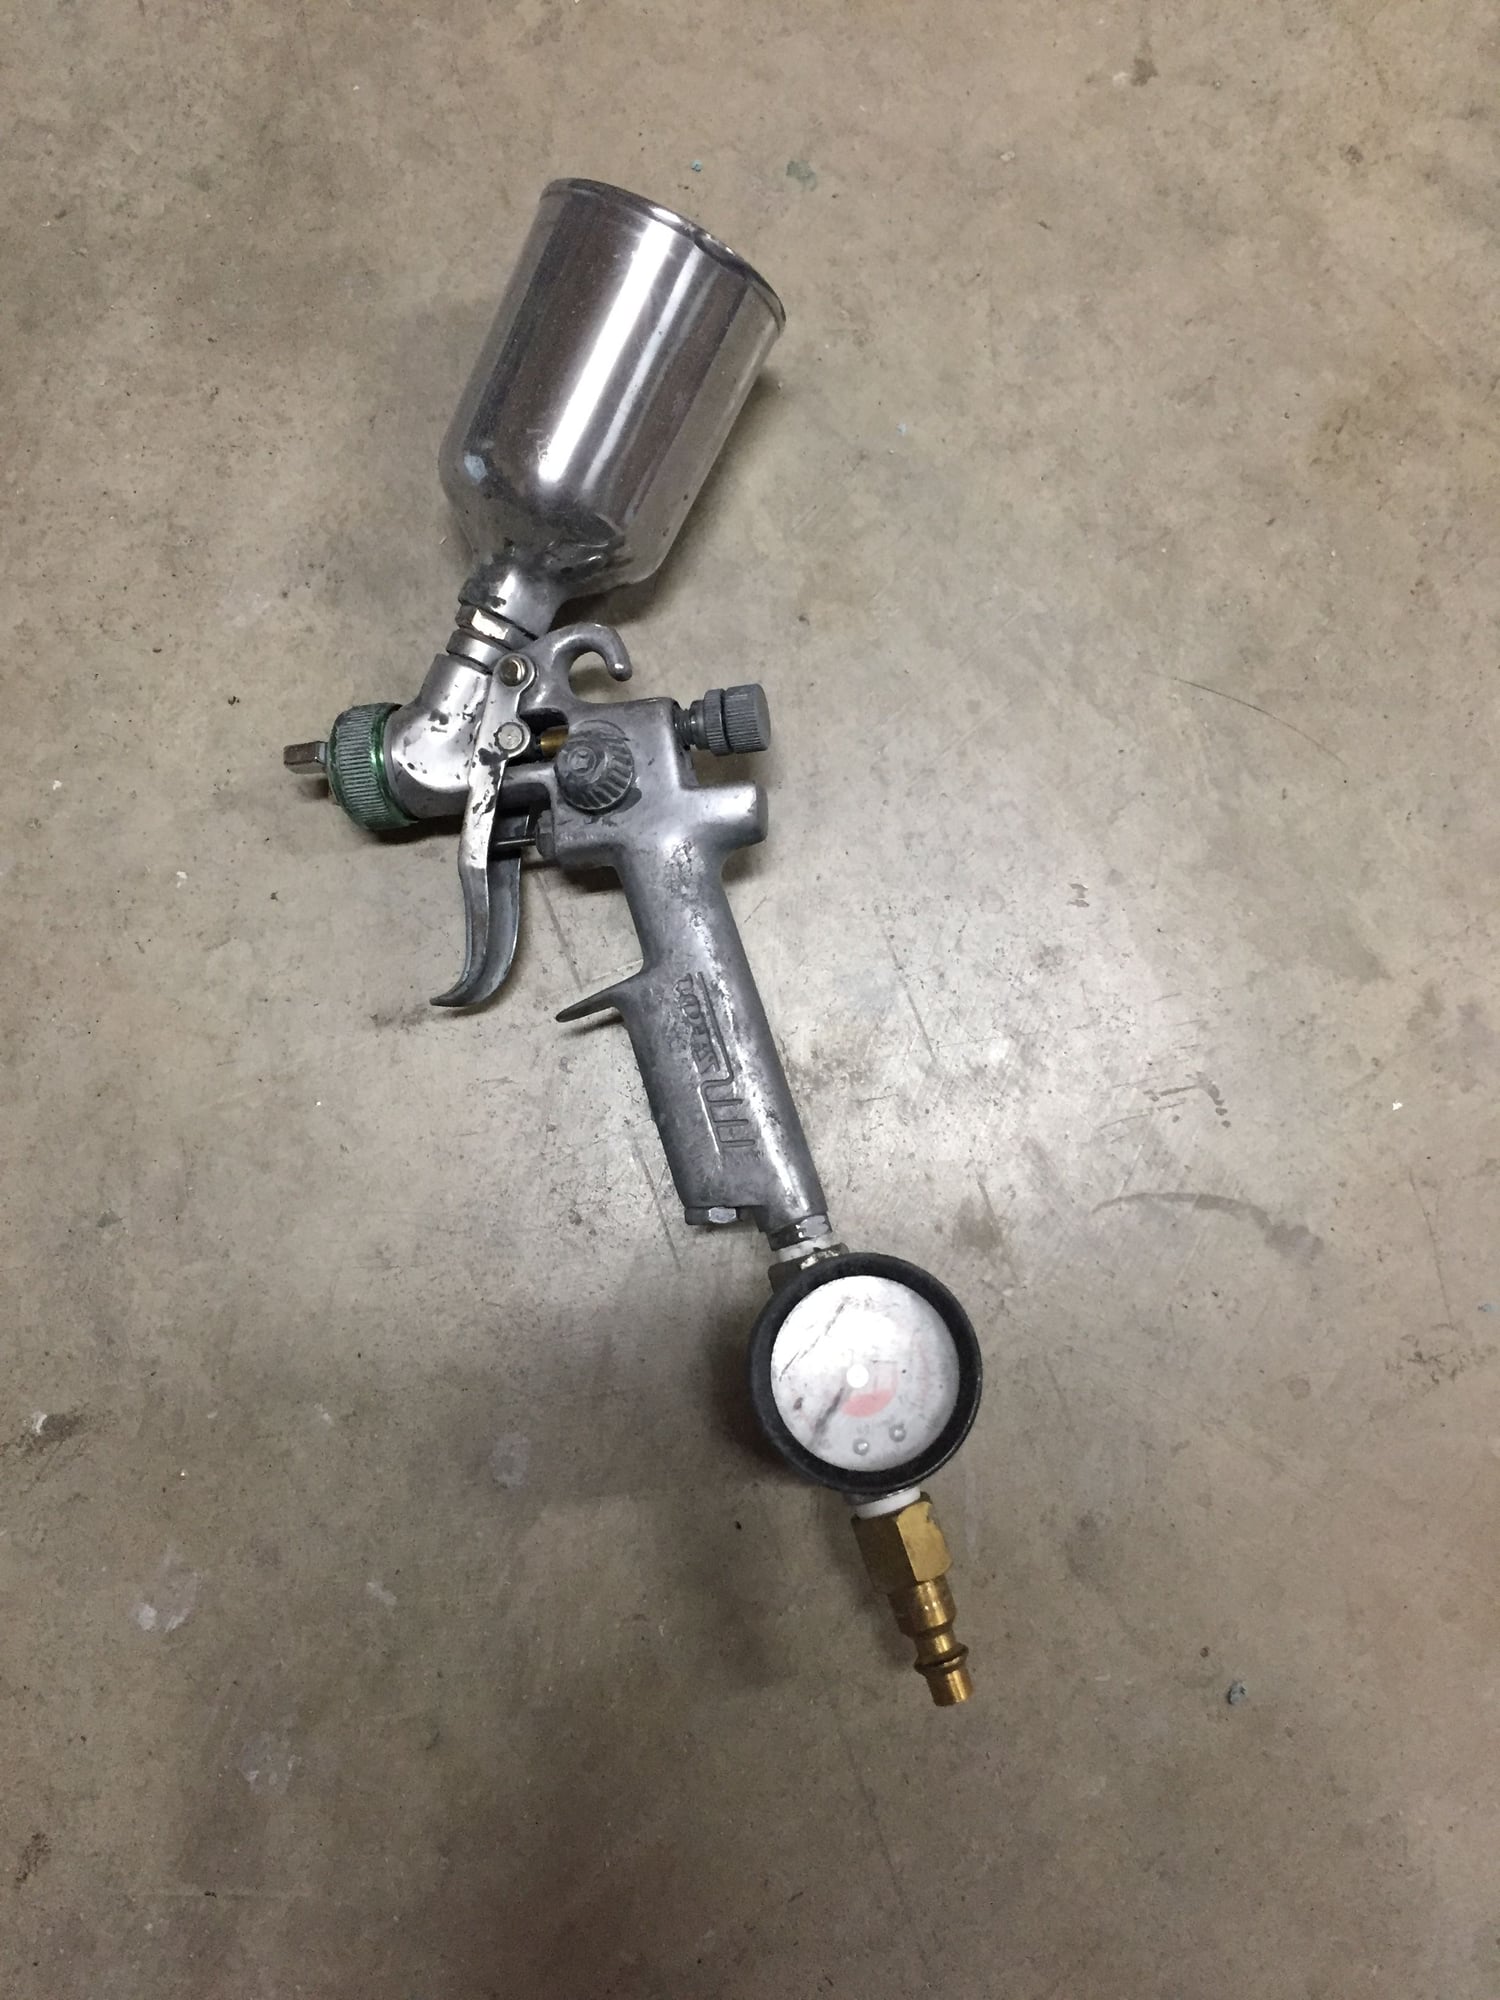
01-17-2019, 06:51 PM
#193
Thomas,
Yes, I'm using Advantage 302 2k Primer initially, but I have continued to question exactly why - it isn't much cheaper than Duratec, and Duratec builds up much quicker.
I think the main benefit is to get a neutral, even surface to see any contour defects and to fill them before using the Duratec.
For most parts I think you could just use the Duratec and it sands beautifully. I have skipped the 2k primer on the 3D printed parts with good results.
I use a simple 4oz cup gun from Harbor Freight that I have used for years. Sprays at about 60-80psi and I thin it 20% with the Duratec thinner and get virtually no orange peel, and it still builds up with minimal risk of running.
Paul
01-18-2019, 08:21 AM
#194
Thomas,
Yes, I'm using Advantage 302 2k Primer initially, but I have continued to question exactly why - it isn't much cheaper than Duratec, and Duratec builds up much quicker.
I think the main benefit is to get a neutral, even surface to see any contour defects and to fill them before using the Duratec.
For most parts I think you could just use the Duratec and it sands beautifully. I have skipped the 2k primer on the 3D printed parts with good results.
I use a simple 4oz cup gun from Harbor Freight that I have used for years. Sprays at about 60-80psi and I thin it 20% with the Duratec thinner and get virtually no orange peel, and it still builds up with minimal risk of running.
Paul
Yes, I'm using Advantage 302 2k Primer initially, but I have continued to question exactly why - it isn't much cheaper than Duratec, and Duratec builds up much quicker.
I think the main benefit is to get a neutral, even surface to see any contour defects and to fill them before using the Duratec.
For most parts I think you could just use the Duratec and it sands beautifully. I have skipped the 2k primer on the 3D printed parts with good results.
I use a simple 4oz cup gun from Harbor Freight that I have used for years. Sprays at about 60-80psi and I thin it 20% with the Duratec thinner and get virtually no orange peel, and it still builds up with minimal risk of running.
Paul
Thanks Paul!
I have been using Evercoat Dura-Build primer that i either roll or brush on depending on the surface finish. I�ve got a gallon of that, so i�ll probly just use it and cap off the body filler with the duratec like you have been doing.
Im debating on picking up a 100w Co2 laser cutter and have been wondering if it would be possible to turn down the power low enough to engrave the surface detail of the wings/tail with that...
01-18-2019, 08:33 AM
#195
Don't know how the Duratec would respond to the laser. I might try on a scrap piece and let you know.
I have used the laser to cut surface detail stencils for either doing raised detail with Duratec, or as a scribing guide.
Paul
01-18-2019, 08:36 AM
#196
10% power on my 50W cutter is low enough to engrave the blue foam sheets, especially if you keep the speed up. From what I've heard elsewhere, Duratec doesn't respond to the hot tube in a soldering iron rivet method, so I don't think low power settings would be a concern, more about getting enough power without doing damage.
Paul
Paul
01-18-2019, 03:10 PM
#197
10% power on my 50W cutter is low enough to engrave the blue foam sheets, especially if you keep the speed up. From what I've heard elsewhere, Duratec doesn't respond to the hot tube in a soldering iron rivet method, so I don't think low power settings would be a concern, more about getting enough power without doing damage.
Paul
Paul
if you try it, i would be interested in the results. I hadnt thought of the focus issue.... my T38 wings are pretty flat, so it would probly work fine for them.
If the duratec doesnt respond well, maybe a coat of 2k auto primer over the top of the duratec may work?
 01-22-2019, 06:22 AM
#199
Finished the plugs for the speedbrake drag beam panels. Added the raised rivets per the full size using my stencil method.
A slight change to my process, I now laser cut the stencil from a double layer of self-adhesive stencil paper. Once the Duratec is cured I sand it down level with the stencil. While sanding the top layer of the stencil gets sanded too, so this is where the top layer comes into its own as it acts to protect the bottom layer. Once sanded, I peel off the top layer of stencil, leaving a clean bottom layer. A very light sand with 600 grit levels out the rivets to the bottom layer which can then be removed. With only one layer, you can thin the detail too much during sanding.
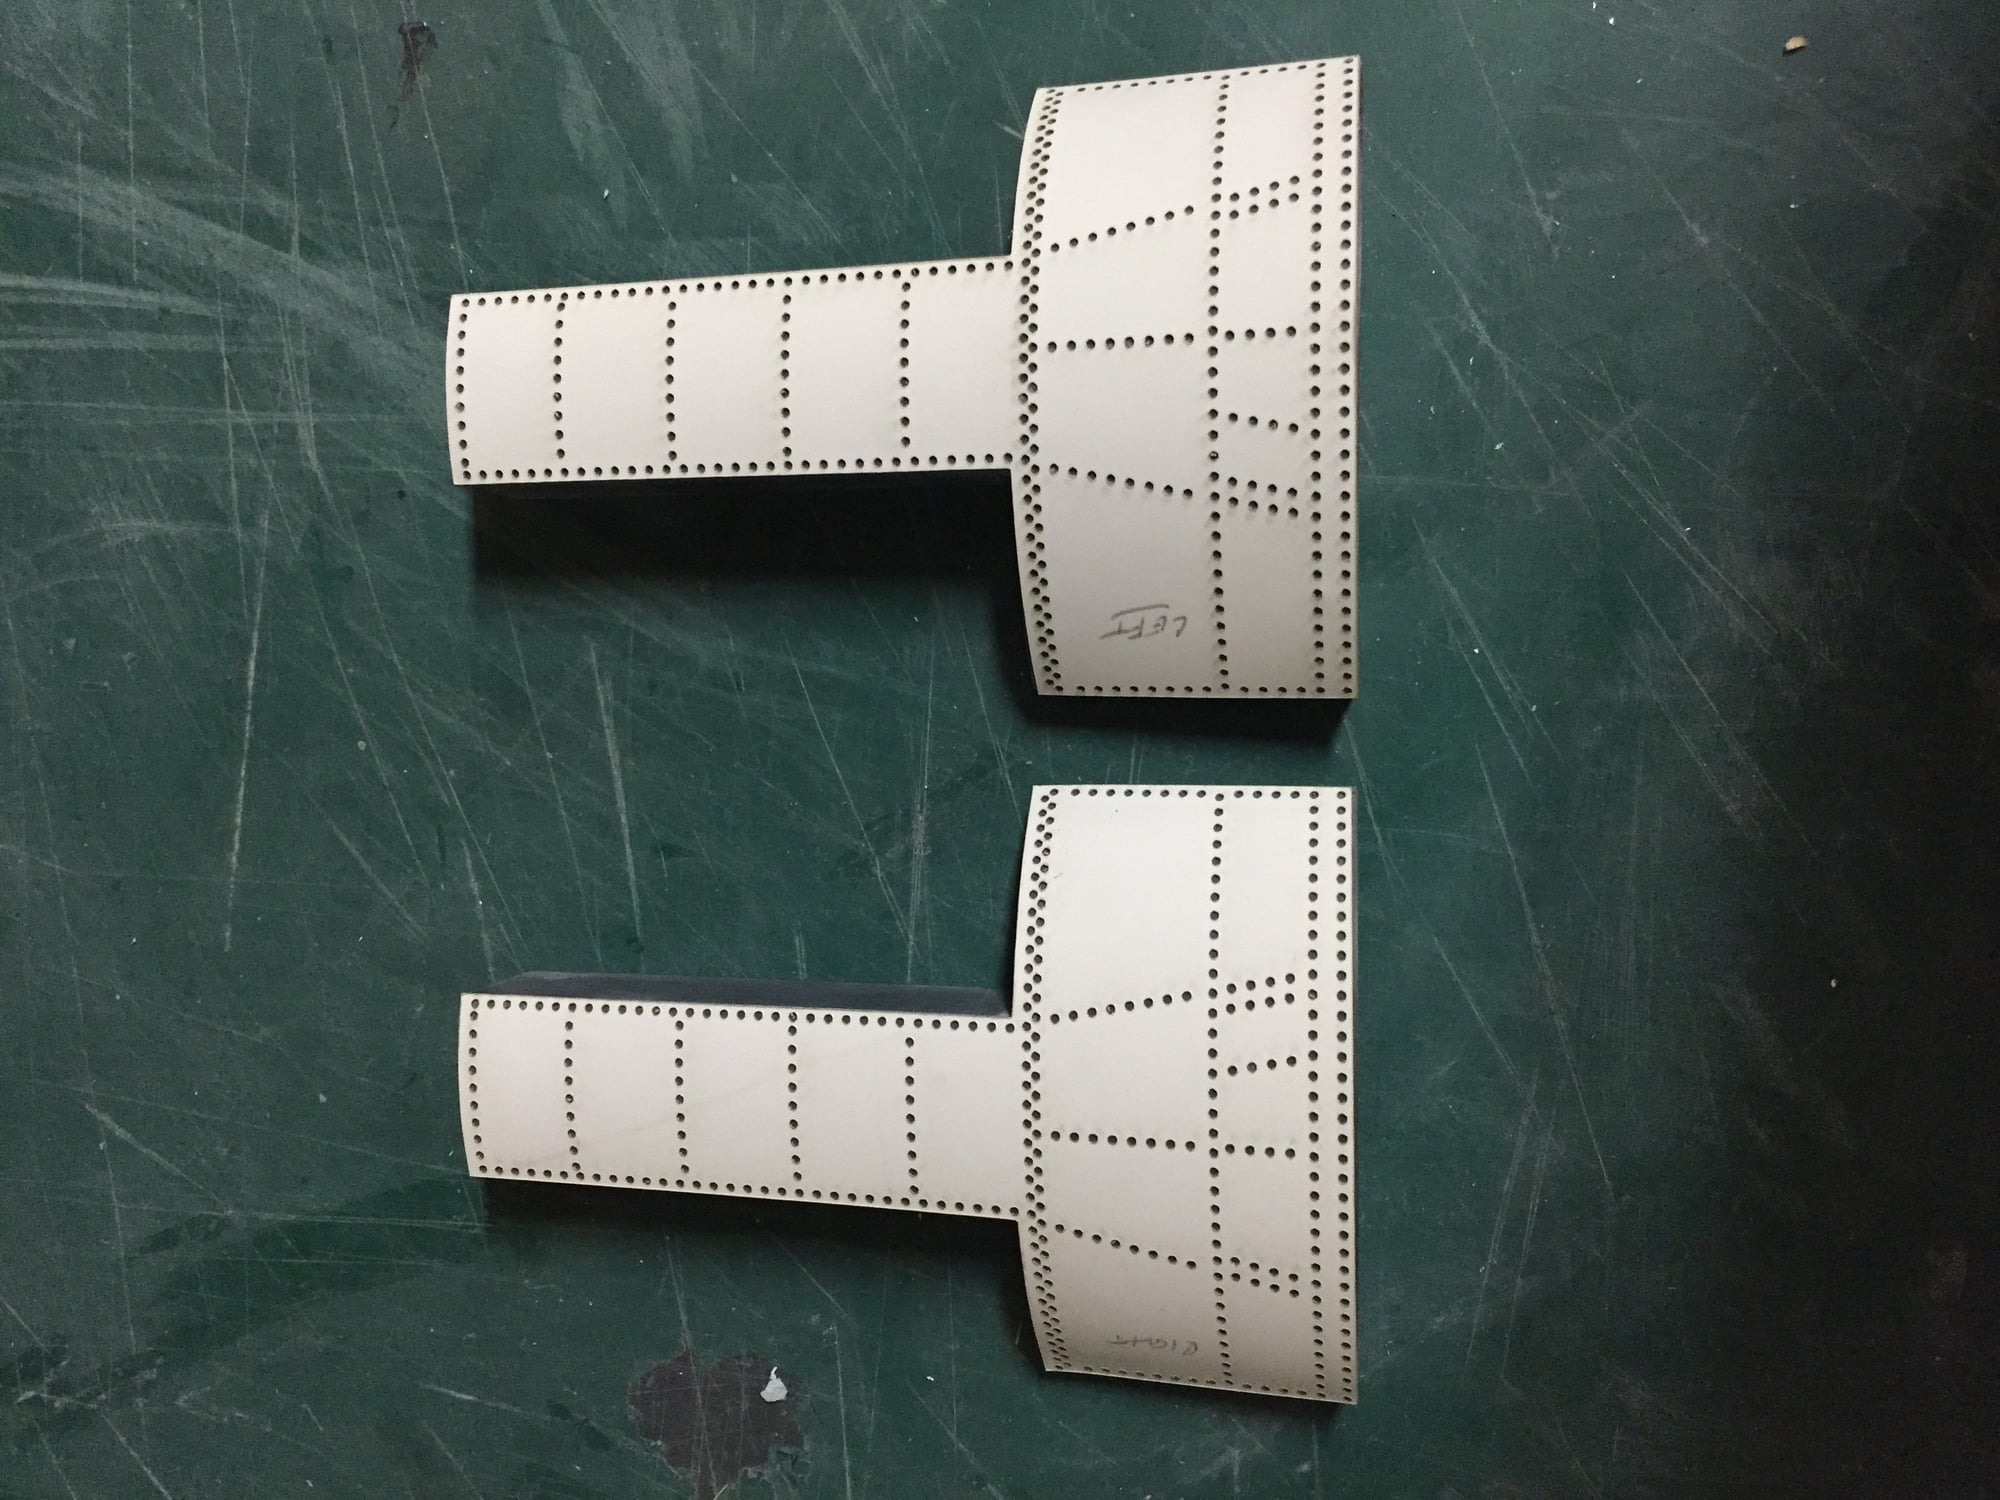
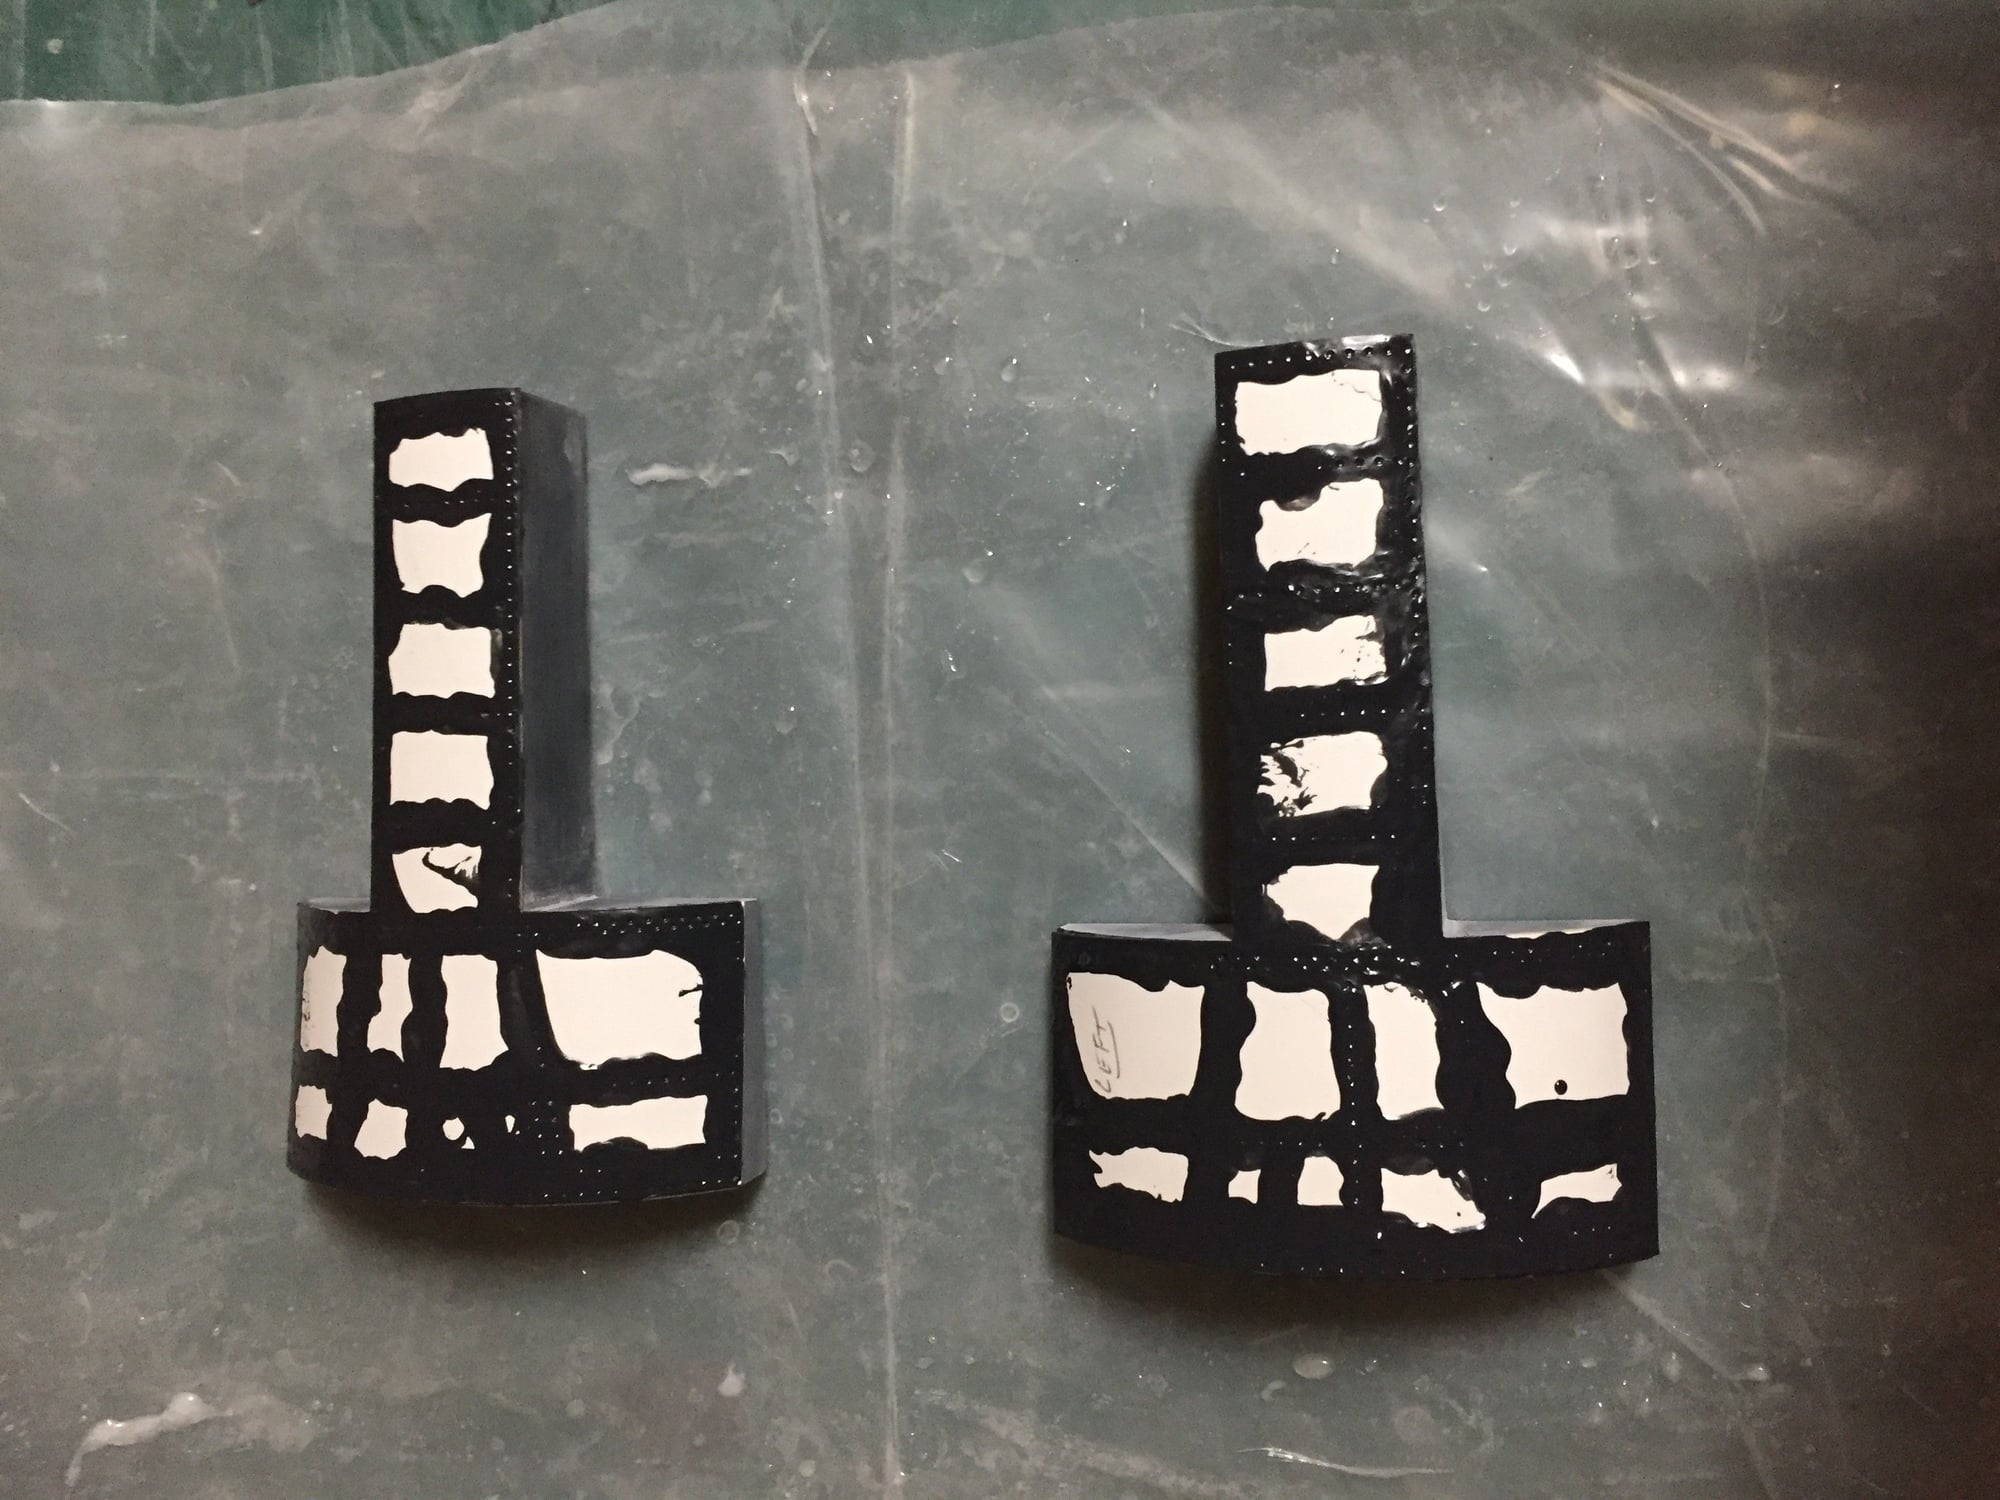
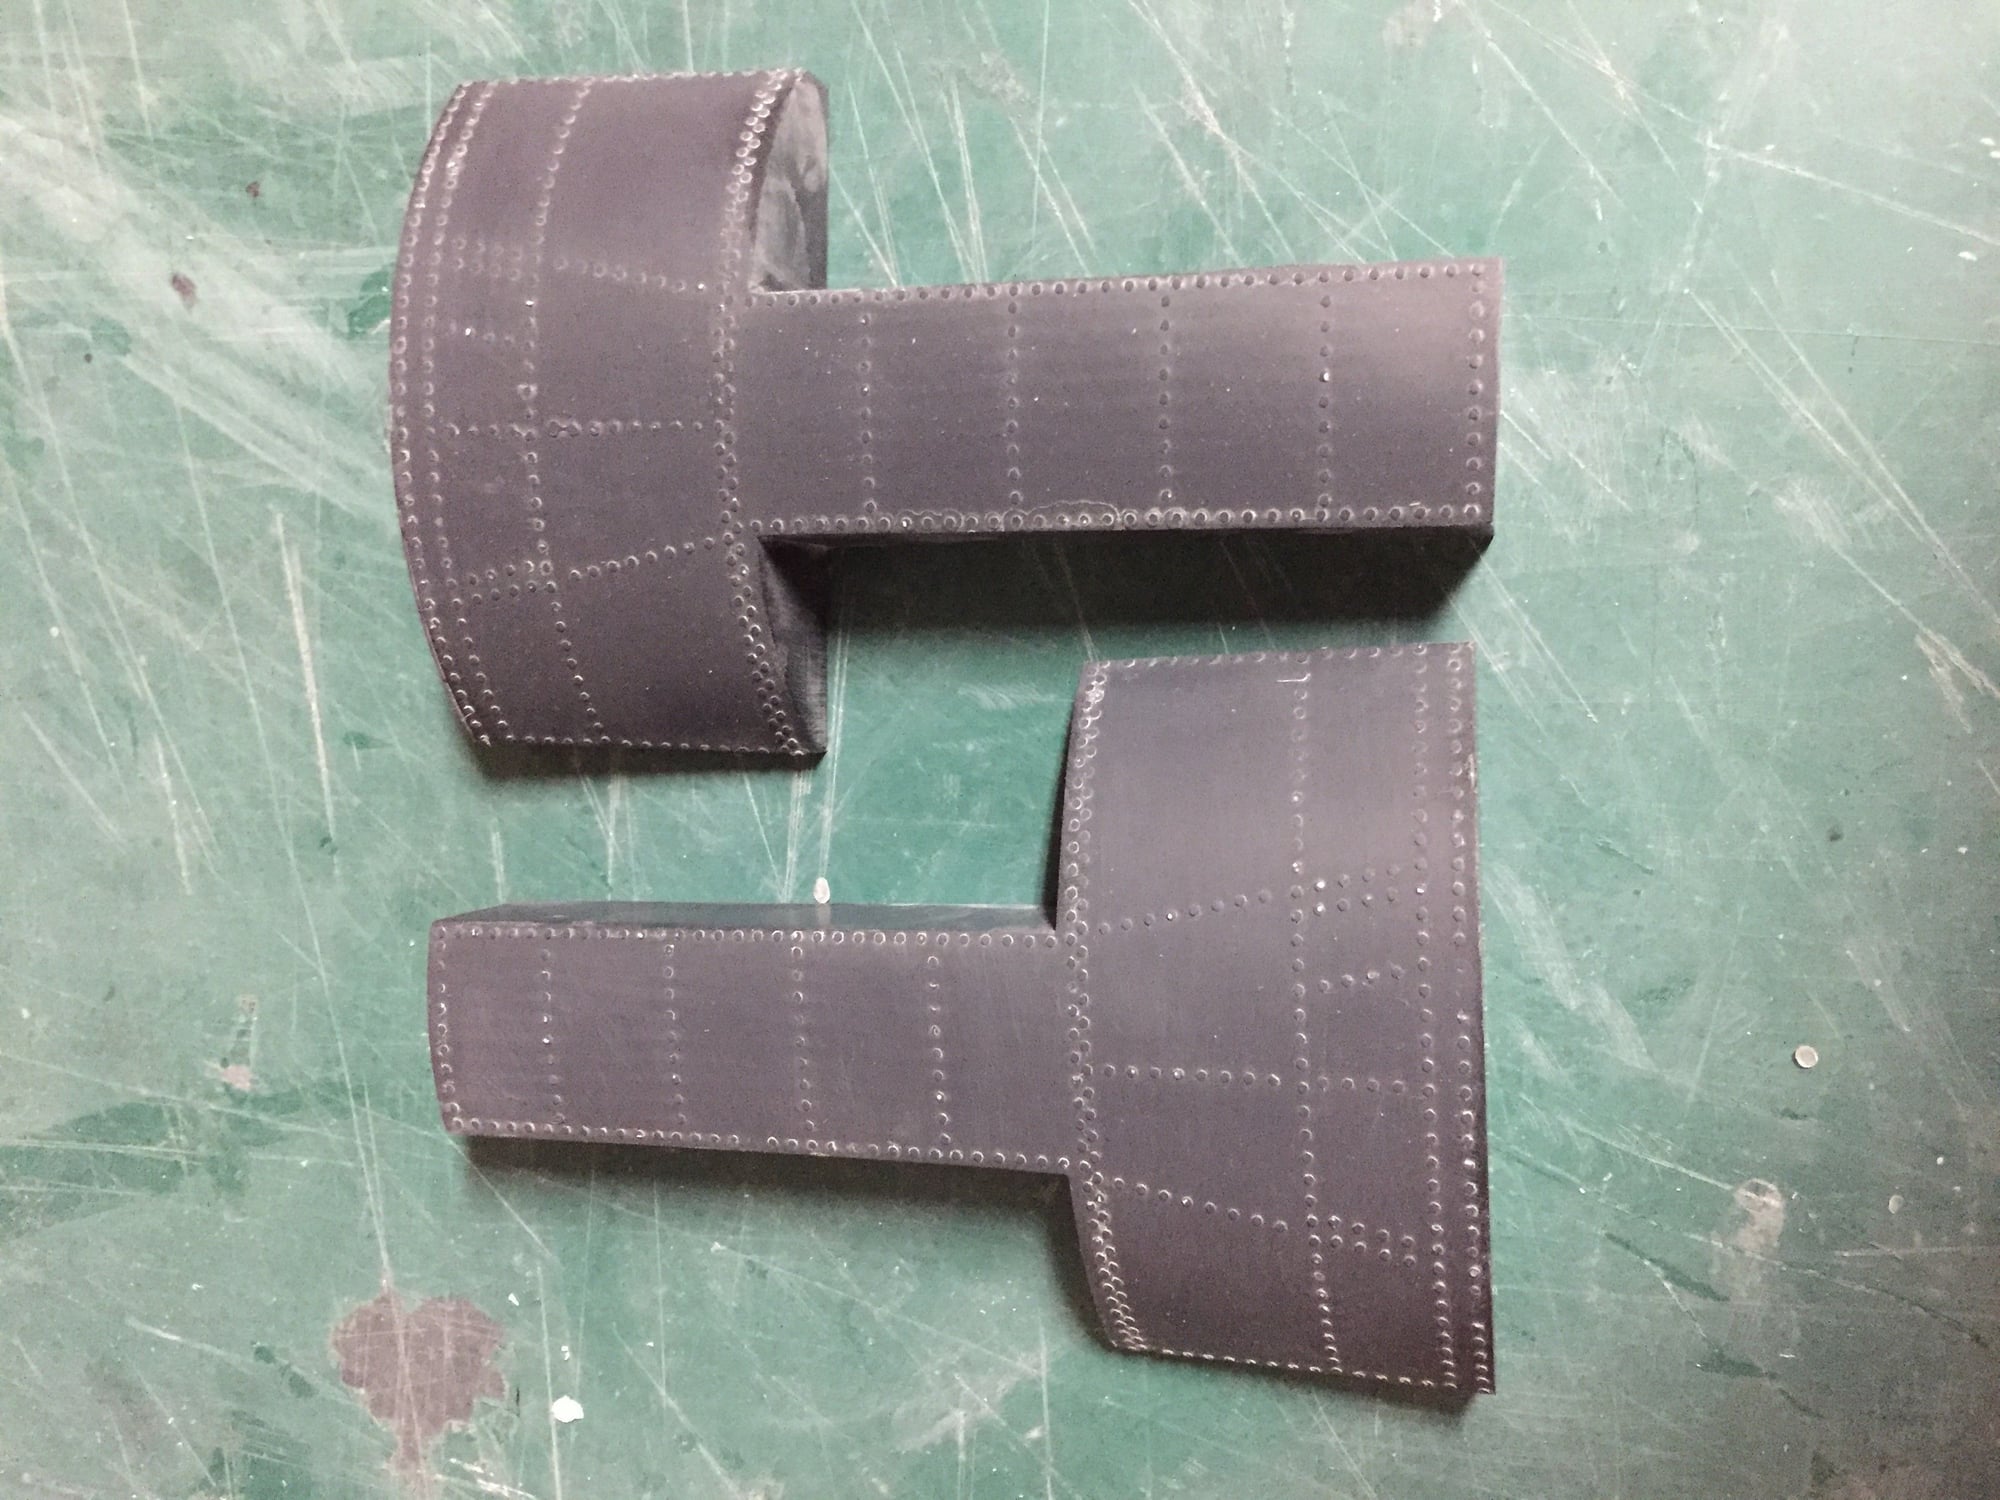
Photo of the full-scale for comparison. Didn't quite get the exact rivet counts, so don't be too critical...........

Paul
A slight change to my process, I now laser cut the stencil from a double layer of self-adhesive stencil paper. Once the Duratec is cured I sand it down level with the stencil. While sanding the top layer of the stencil gets sanded too, so this is where the top layer comes into its own as it acts to protect the bottom layer. Once sanded, I peel off the top layer of stencil, leaving a clean bottom layer. A very light sand with 600 grit levels out the rivets to the bottom layer which can then be removed. With only one layer, you can thin the detail too much during sanding.
Photo of the full-scale for comparison. Didn't quite get the exact rivet counts, so don't be too critical...........
Paul
