


1/4.5 T-38C Talon scratch build
 04-16-2020, 10:15 AM
#101

Too bad. It is so easy to transport and set up my F-16 and large scale P-51 as they can just be placed into the Ford Expedition wheels down and then set up to go at the field by just putting on wing tips. I am considering buying another set of wings just to see how hard it would be to cut them between the flaps and ailerons. It does not have to be a real 3 piece wing, just that the wing tips come off and on easy enough leaving the connection to the body the same. It would actually be a 4 piece wing.
AEHaas
AEHaas
 04-16-2020, 04:58 PM
#104

Too bad. It is so easy to transport and set up my F-16 and large scale P-51 as they can just be placed into the Ford Expedition wheels down and then set up to go at the field by just putting on wing tips. I am considering buying another set of wings just to see how hard it would be to cut them between the flaps and ailerons. It does not have to be a real 3 piece wing, just that the wing tips come off and on easy enough leaving the connection to the body the same. It would actually be a 4 piece wing.
AEHaas
AEHaas
I understand the need and actually prefer most of models to be able to stay on the gear.
this one though had enough design challenges due to the mostly scale wing (it was only thickened 10% so that off the shelf retract units) and keeping it strong enough.
04-16-2020, 05:06 PM
#106

My Feedback: (12)

Join Date: Aug 2002
Location: Scottsdale, AZ
Posts: 4,462
Likes: 0
Received 0 Likes
on
0 Posts
LOL, Im around creeping in the shadows. Been a busy 18 months. Moved out to Scottsdale which has been great and raisin the kiddos. I am 10 minutes away from a flying field so its been the perfect excuse to get back in the groove!!
04-16-2020, 05:07 PM
#107
A pretty productive day today.
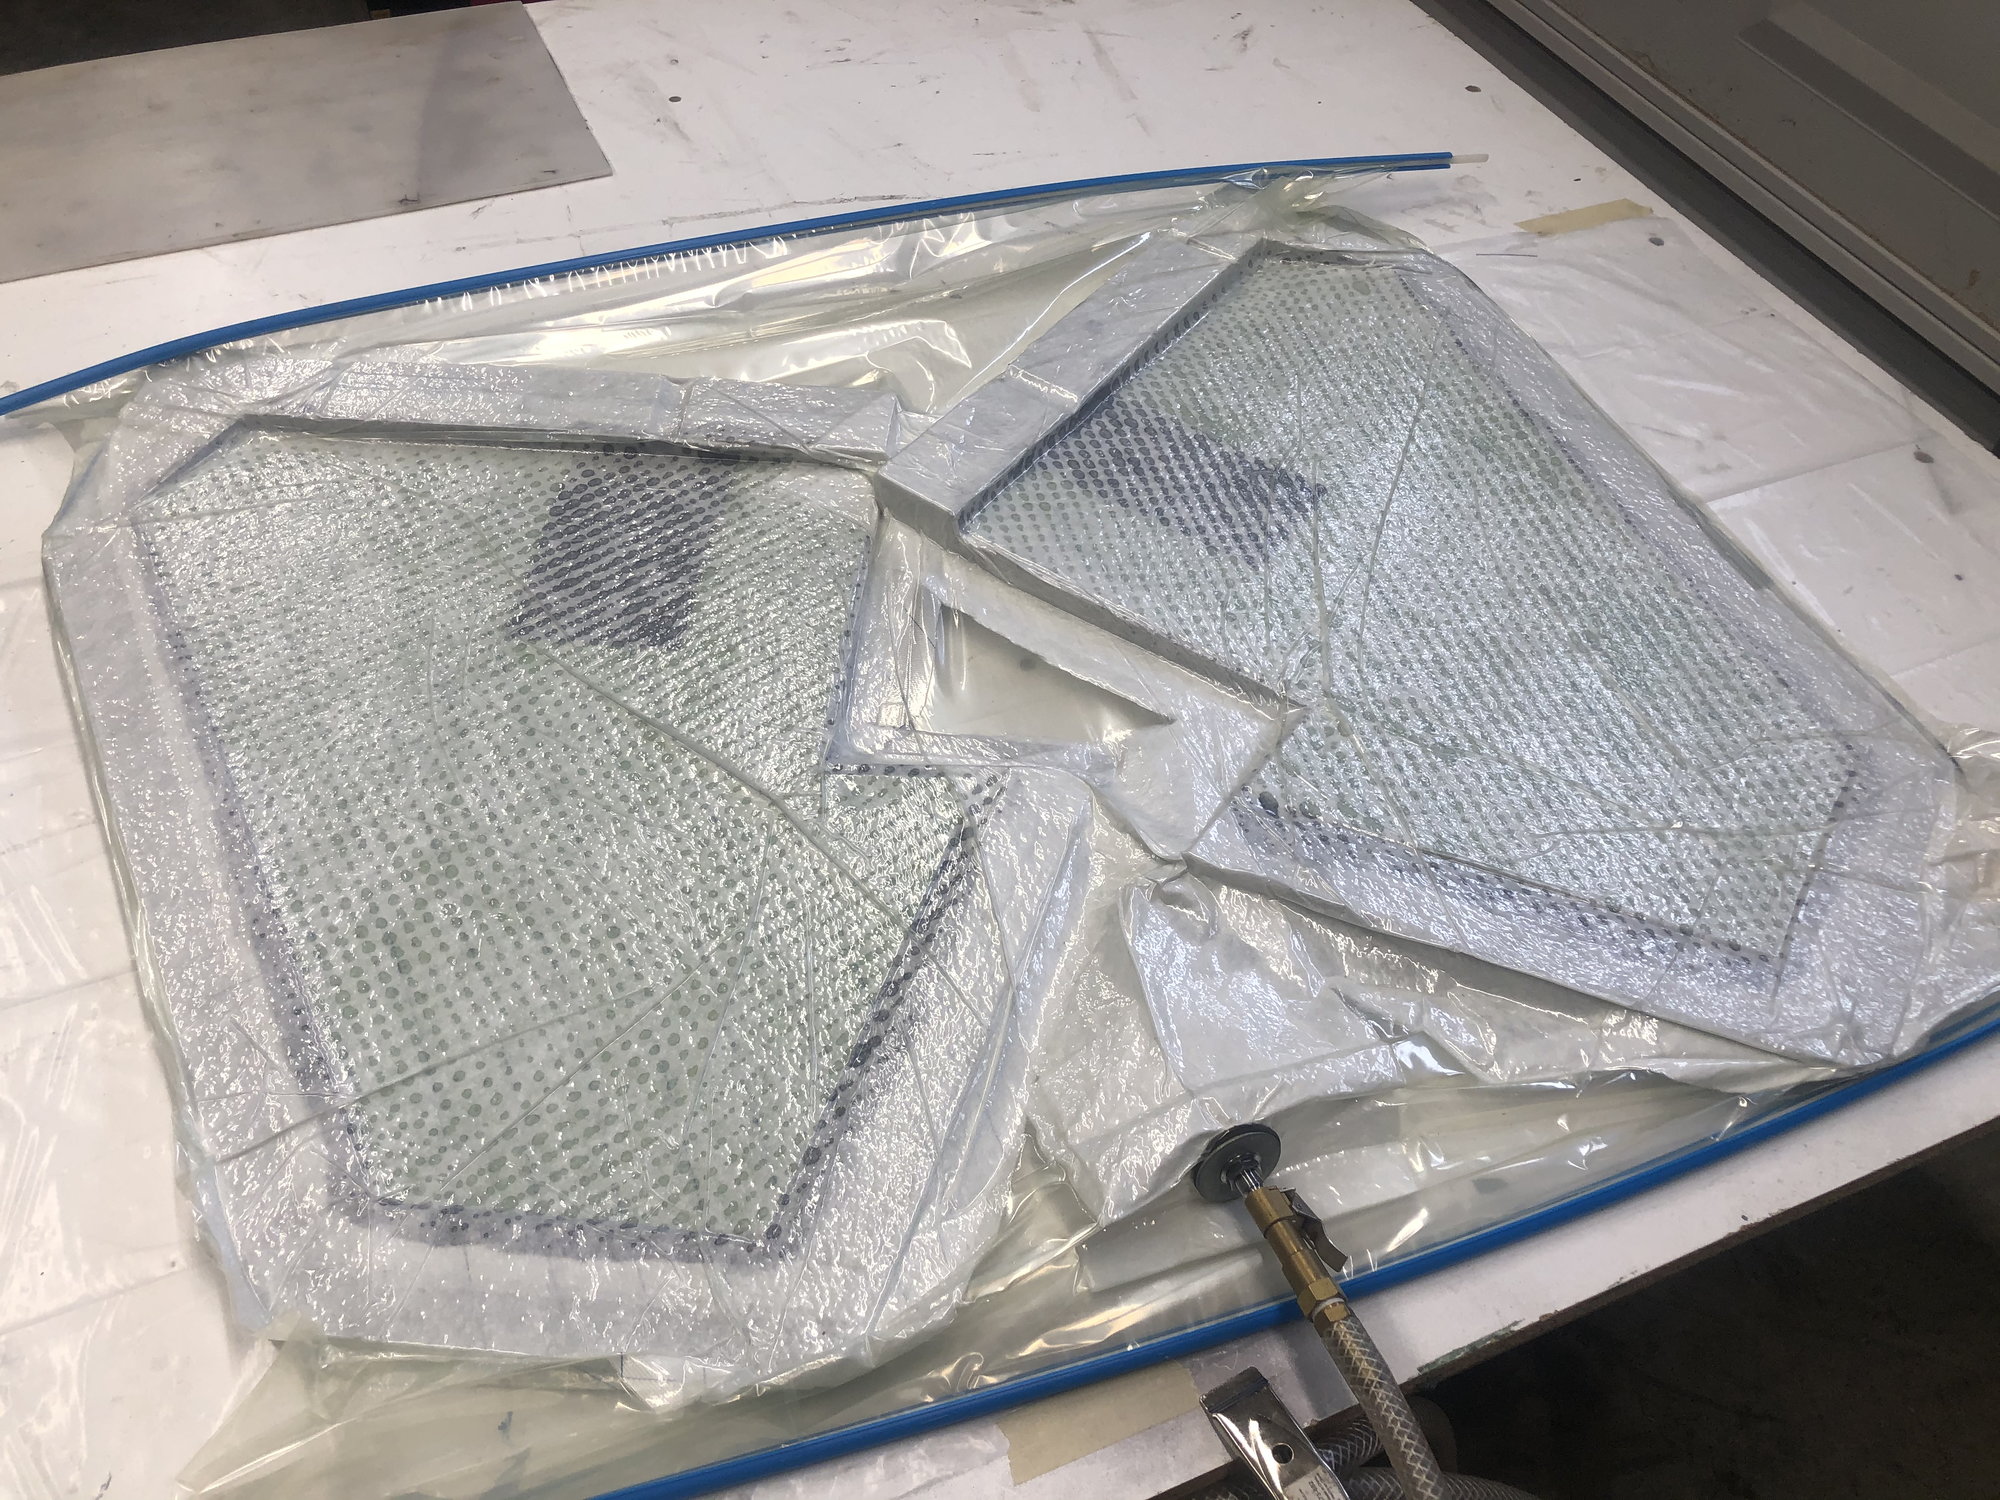
i got up this morning and pulled the parts out of the bag and trimmed them up.
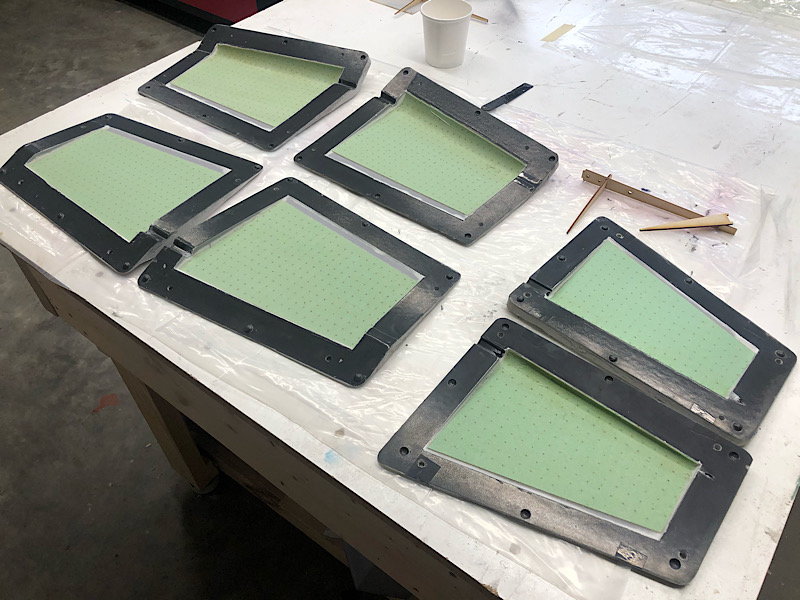
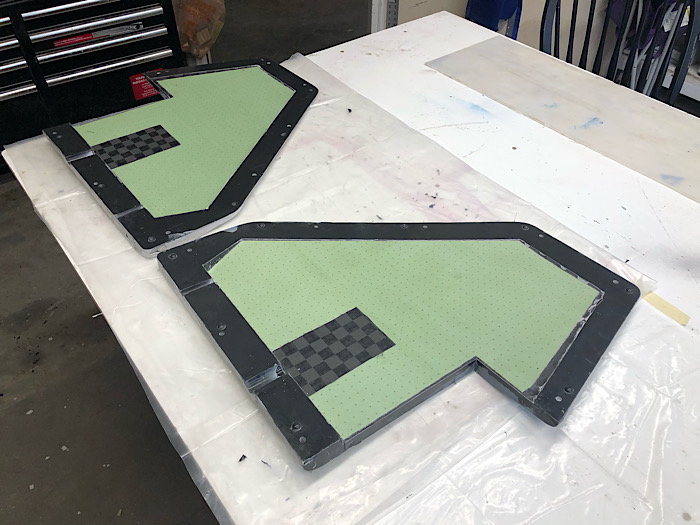
I then ran so errands and when i came back i set out to cnc cut out the internals for the vertical stab, rudder and flaps.
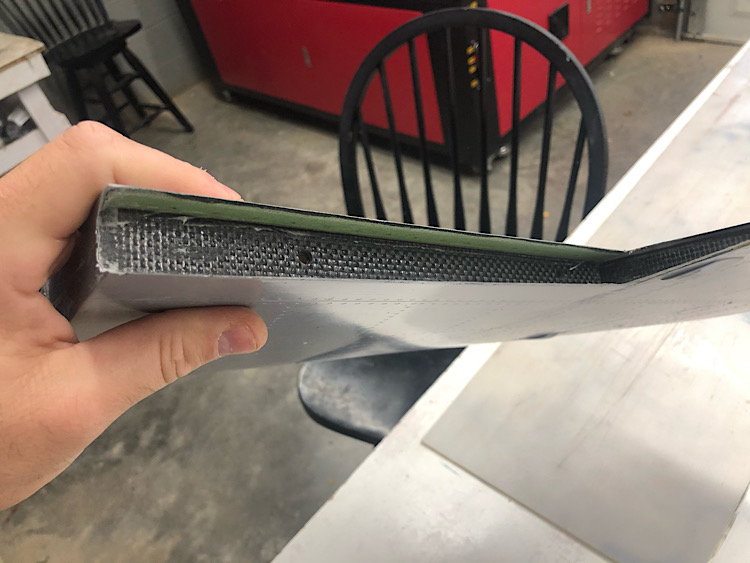
all of the internal structure is 3mm airex w/ carbon on both sides Except the rudder spar which is 1/8� plywood bc the aluminum rudder torque rod gets bolted to it.
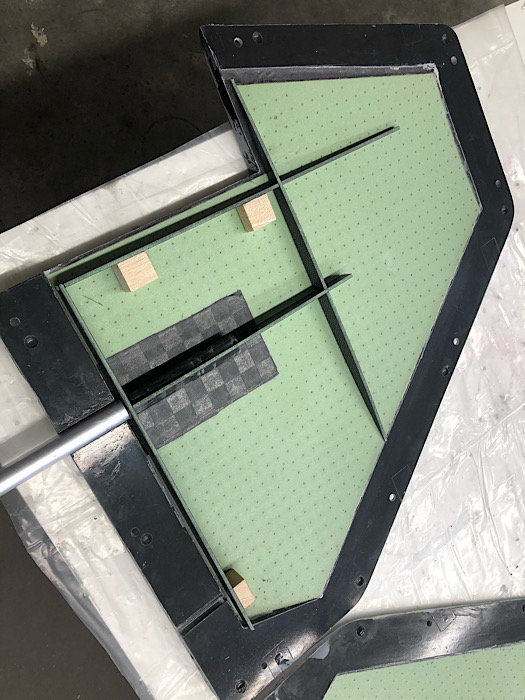
with all the parts cut, i assembled them all (which is a VERY tight push fit) and started fitting them to the molded skins.
after a few tweaks and correcting the CAD models as i went along, i got everything fitting perfect and glued in the hinge blocks as well. I didnt get a picture of the outer flap hinge block, but its there.
one thing i did to make hinging this thing easier, i pre-drilled the holes for the 3/16 robart hinge points in the Vertical stab and rudder spars.
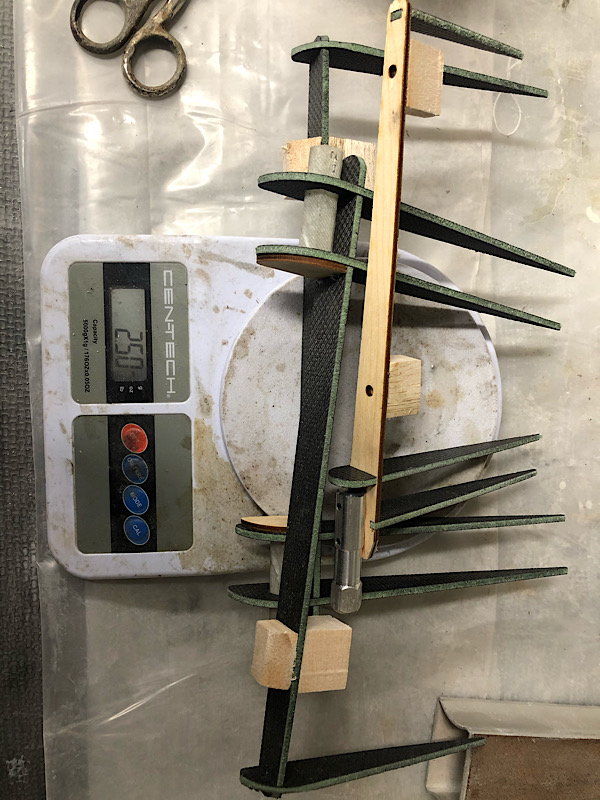
here is the complete internal structure for the flaps and rudder, only 2 1/2 ounces.
molds are all closed up, first parts will be here tomorrow!
i also cut out some fabric templates for the Spread tow CF on the laser for the wings and stabs.
i got up this morning and pulled the parts out of the bag and trimmed them up.
I then ran so errands and when i came back i set out to cnc cut out the internals for the vertical stab, rudder and flaps.
all of the internal structure is 3mm airex w/ carbon on both sides Except the rudder spar which is 1/8� plywood bc the aluminum rudder torque rod gets bolted to it.
with all the parts cut, i assembled them all (which is a VERY tight push fit) and started fitting them to the molded skins.
after a few tweaks and correcting the CAD models as i went along, i got everything fitting perfect and glued in the hinge blocks as well. I didnt get a picture of the outer flap hinge block, but its there.
one thing i did to make hinging this thing easier, i pre-drilled the holes for the 3/16 robart hinge points in the Vertical stab and rudder spars.
here is the complete internal structure for the flaps and rudder, only 2 1/2 ounces.
molds are all closed up, first parts will be here tomorrow!
i also cut out some fabric templates for the Spread tow CF on the laser for the wings and stabs.
 04-16-2020, 07:06 PM
#109
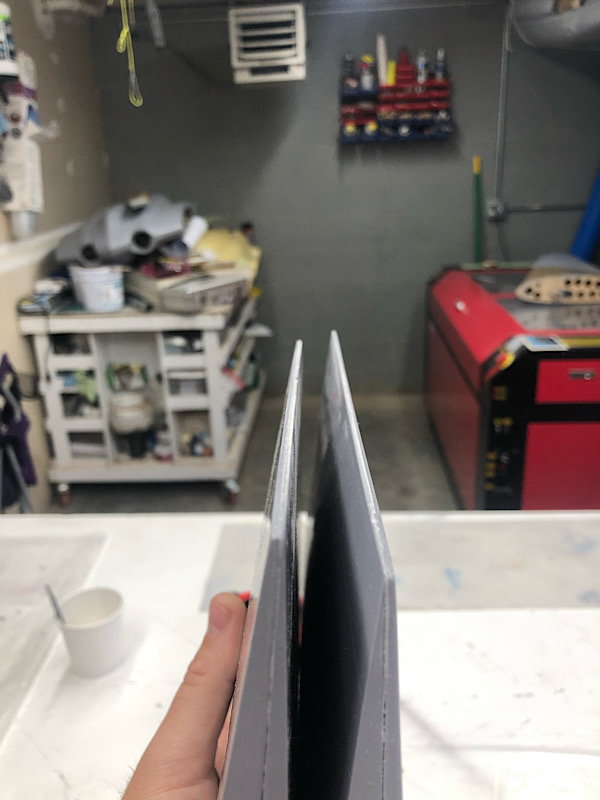
Sort of... i tried cutting it in one pass (roughly 100watts and 12mm/sec) and it didnt like it. The epoxy caught fire, but it did cut the carbon and the airex.
im going to purchase lightburn and some different focal length lenses and see if multiple lower power passes and different lenses will help cut it without firing it up.
04-16-2020, 07:14 PM
#110
Have you tried using K40 Whisperer software to run your laser cutter?
https://www.scorchworks.com/K40whisp...whisperer.html
Freeware and he updates it on a regular basis. I ditched the software that came with my cutter and use this. It works very well.
Paul
https://www.scorchworks.com/K40whisp...whisperer.html
Freeware and he updates it on a regular basis. I ditched the software that came with my cutter and use this. It works very well.
Paul
04-16-2020, 07:19 PM
#111
Have you tried using K40 Whisperer software to run your laser cutter?
https://www.scorchworks.com/K40whisp...whisperer.html
Freeware and he updates it on a regular basis. I ditched the software that came with my cutter and use this. It works very well.
Paul
https://www.scorchworks.com/K40whisp...whisperer.html
Freeware and he updates it on a regular basis. I ditched the software that came with my cutter and use this. It works very well.
Paul
that doesnt work with my controller (topwisdom). The lightburn software is only $80, so its not an expensive investment
 04-17-2020, 08:22 AM
#115
LoL.. i get asked this at least once or twice a week. LoL
The answer is most likely, Yes. I'm planning on doing 4 airframes at the beginning, 2 will be EDF and then one (mine) will be Single turbine. One of those is unspoken for, unless i decide to keep it as a spare.. haha
Twin turbine is an option, but i don't plan to design and re-tool for specific fuel tanks, inlets, etc to make that a fully bypassed install like the single turbine setup will be.
04-17-2020, 11:06 AM
#116
Thomas,
You can be even lazier!! I discovered a while ago you can also cut glass (kevlar too) with the laser with resin! I wet it out between two pieces of plastic (drop cloth etc.) and cut it. Peel pne side and right into the mold. It has worked fantastic for me and you don't have to store a bunch of small cut up pieces. The cloth stays nice too since you aren;t handling it as much. Its quicker and avoids excess resin build u p as well.
Love the T-38 and following your progress, keep it up.
Cheers
Red
04-17-2020, 01:57 PM
#117
Thomas,
You can be even lazier!! I discovered a while ago you can also cut glass (kevlar too) with the laser with resin! I wet it out between two pieces of plastic (drop cloth etc.) and cut it. Peel pne side and right into the mold. It has worked fantastic for me and you don't have to store a bunch of small cut up pieces. The cloth stays nice too since you aren;t handling it as much. Its quicker and avoids excess resin build u p as well.
Love the T-38 and following your progress, keep it up.
Cheers
Red
You can be even lazier!! I discovered a while ago you can also cut glass (kevlar too) with the laser with resin! I wet it out between two pieces of plastic (drop cloth etc.) and cut it. Peel pne side and right into the mold. It has worked fantastic for me and you don't have to store a bunch of small cut up pieces. The cloth stays nice too since you aren;t handling it as much. Its quicker and avoids excess resin build u p as well.
Love the T-38 and following your progress, keep it up.
Cheers
Red
haha. That is Awesome! I have determined it does not like Carbon and airex foam... it just kills the bond between the two. Glass and airex seems fine though.
04-17-2020, 03:42 PM
#118
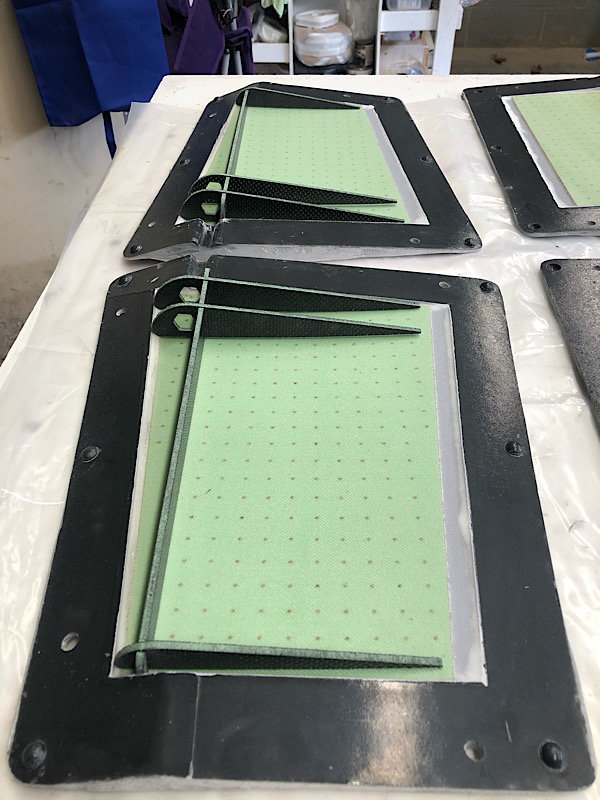
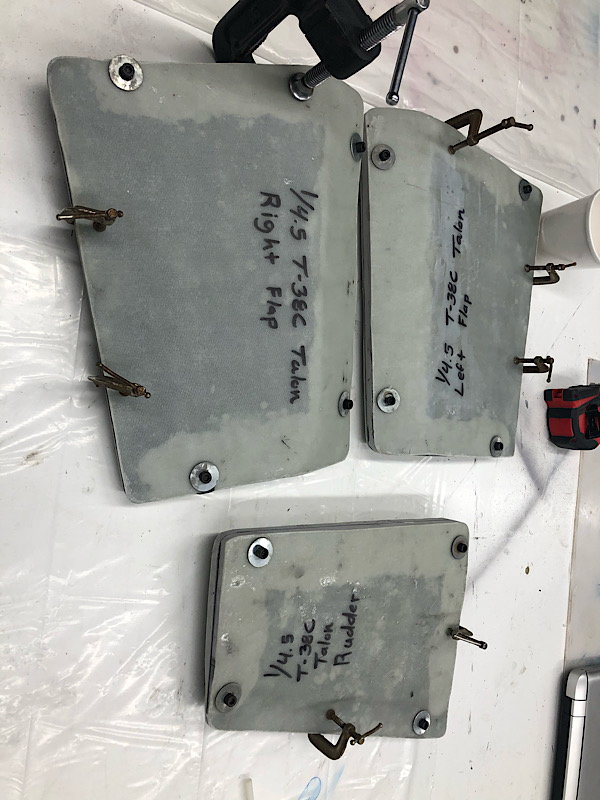
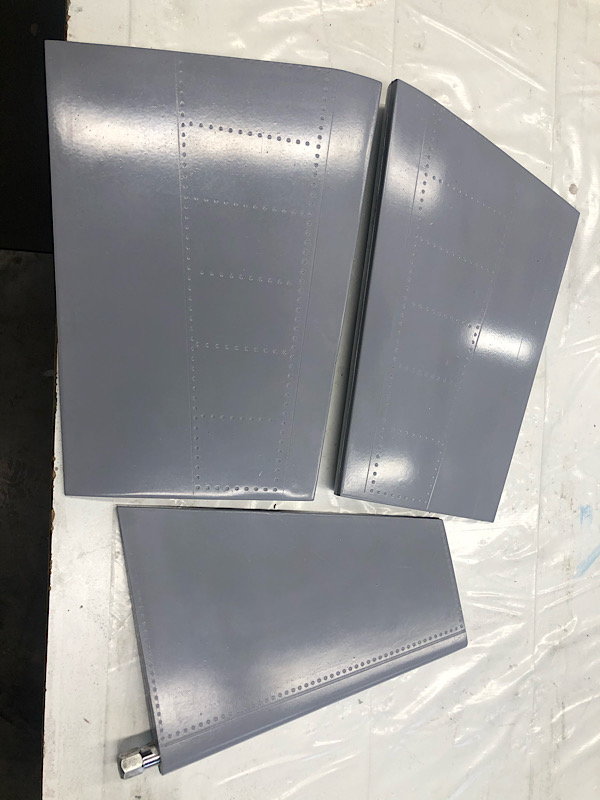
The Flaps and rudder are out of the molds and they turned out PERFECT!
weights:
4.5oz for each flap
3.5oz for the rudder
that works out to .03oz per square inch Based on this number, the vertical stab should be about 14oz.
i�ve already decided to remove a layer of glass from each part to try and reduce the weight just a little more. I may add a few lightening holes to the flap spar and ribs as well.
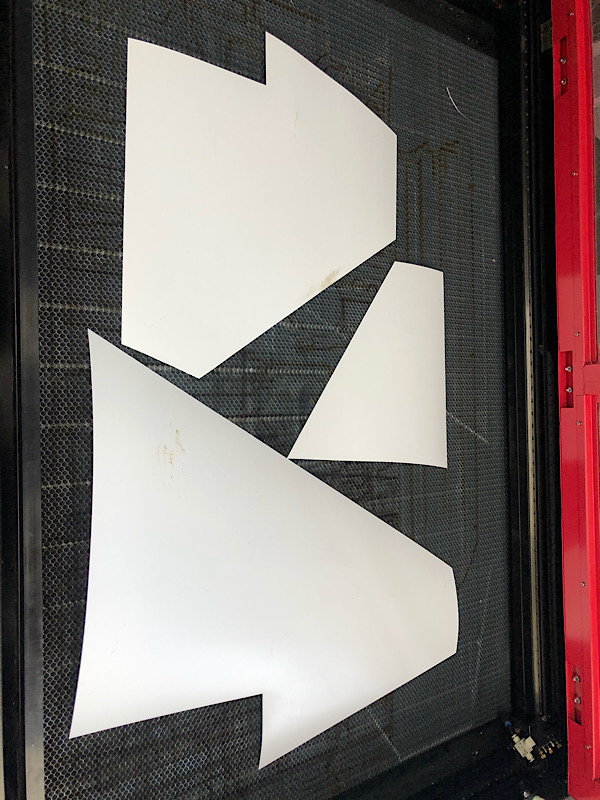
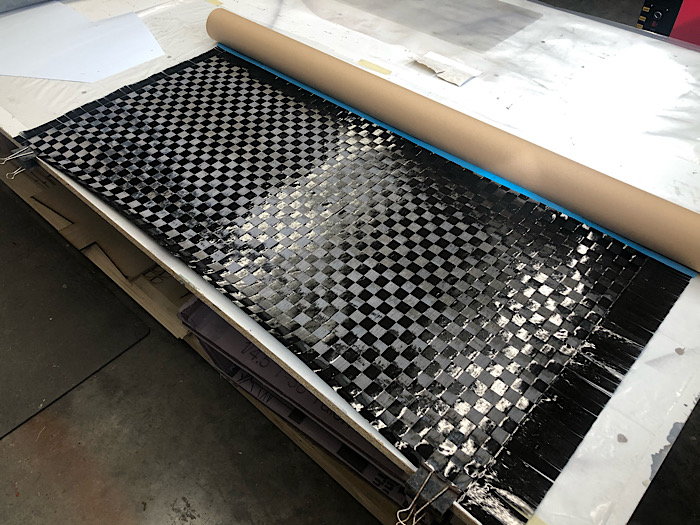
After getting some parting plane material cut for my Ho-229 project, i got all the fabric layers for the vertical stab done. I�ll get up early in the AM and do that layup. There should be a complete vertical tail on sunday.
here is a photo of the spread tow carbon fiber that will be used extensively on the wings and stabilizers.
weights:
4.5oz for each flap
3.5oz for the rudder
that works out to .03oz per square inch Based on this number, the vertical stab should be about 14oz.
i�ve already decided to remove a layer of glass from each part to try and reduce the weight just a little more. I may add a few lightening holes to the flap spar and ribs as well.
After getting some parting plane material cut for my Ho-229 project, i got all the fabric layers for the vertical stab done. I�ll get up early in the AM and do that layup. There should be a complete vertical tail on sunday.
here is a photo of the spread tow carbon fiber that will be used extensively on the wings and stabilizers.
 04-18-2020, 03:57 PM
#122
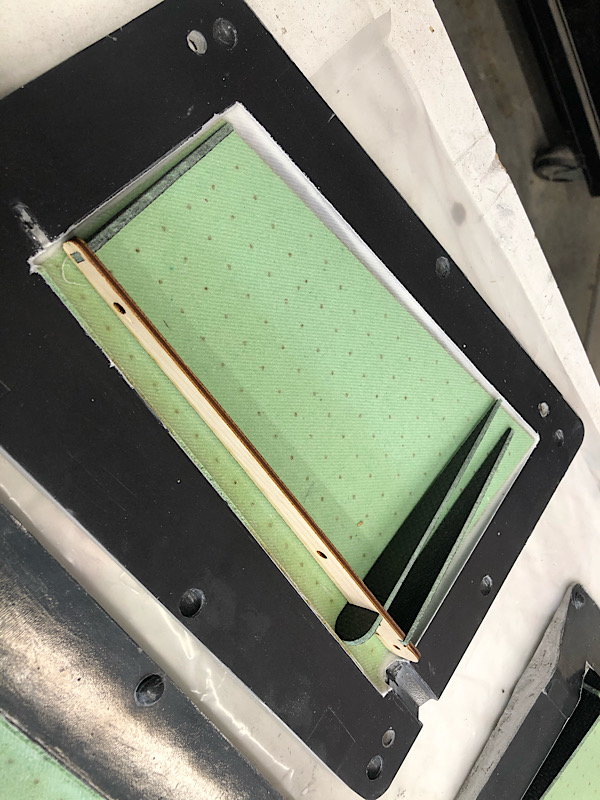
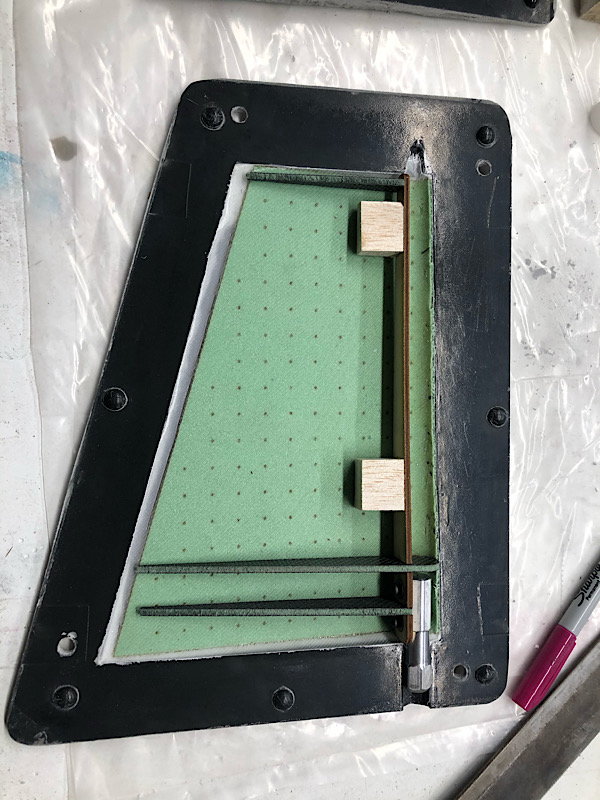
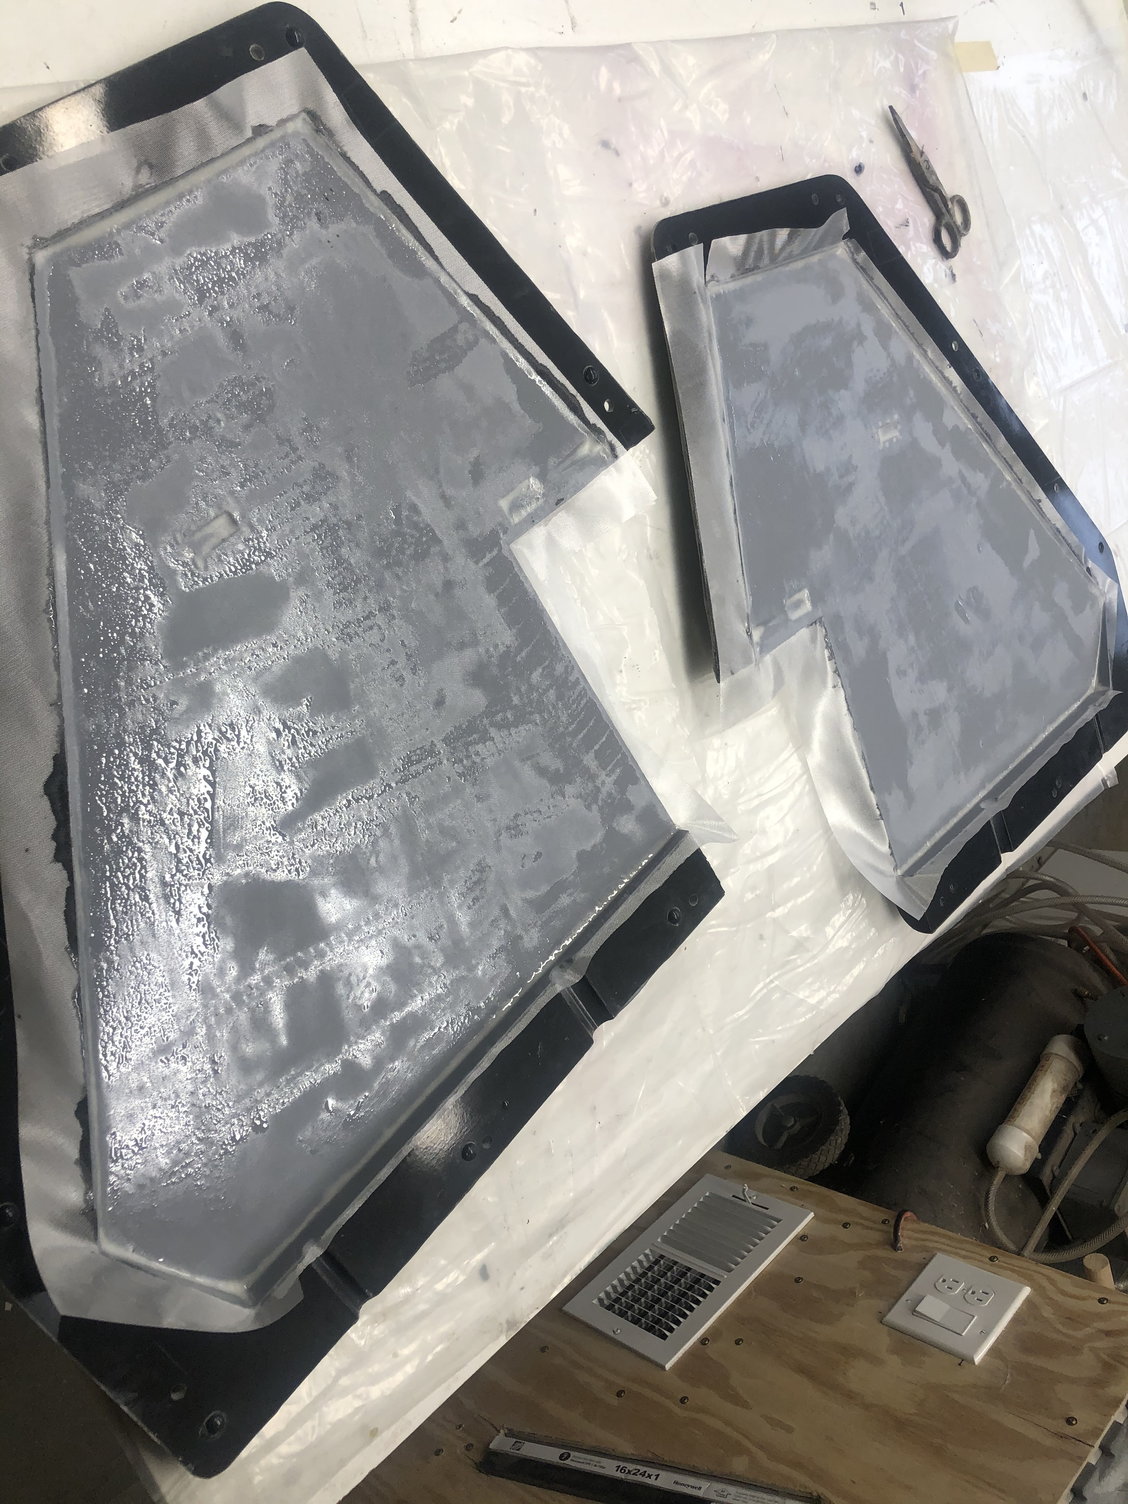
After going to town for some stuff for the Wife, i can home, pulled it all out of the bag and trimmed it up:
I then cut the balsa hinge blocks and the spruce hard point block for the attachment bolt
Then a splooge mixture was made up and placed on all of the structure/skin and skin/skin joints. That stab tube socket is Very close to the skins so alot of splooge is placed on the socket to ensure it gets a goos bond to the skins. On the next one, i will probly put an additional spar forward and aft of the tube to ensure that splooge stays where i want it. These spars will probly be something simple like 1/8� balsa

Then i closed the molds and clamped them together.
I then cut the balsa hinge blocks and the spruce hard point block for the attachment bolt
Then a splooge mixture was made up and placed on all of the structure/skin and skin/skin joints. That stab tube socket is Very close to the skins so alot of splooge is placed on the socket to ensure it gets a goos bond to the skins. On the next one, i will probly put an additional spar forward and aft of the tube to ensure that splooge stays where i want it. These spars will probly be something simple like 1/8� balsa
Then i closed the molds and clamped them together.
04-19-2020, 05:39 AM
#123
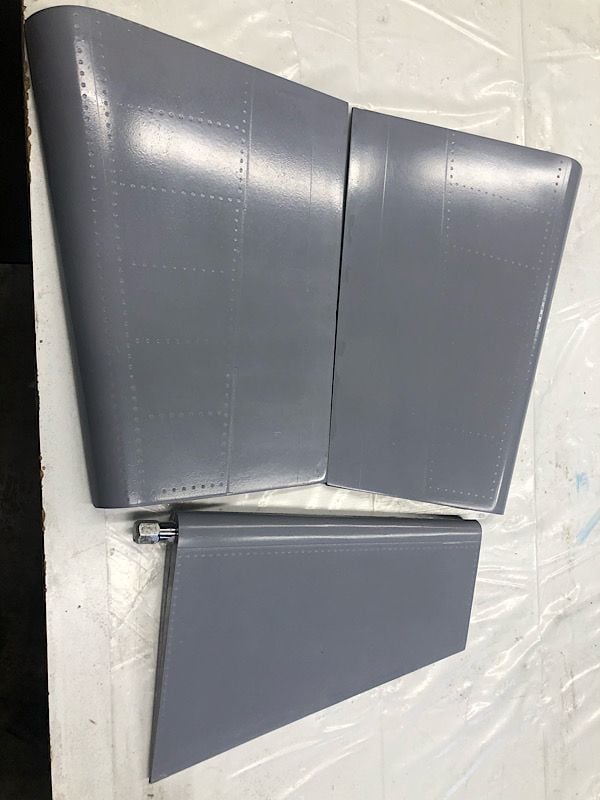
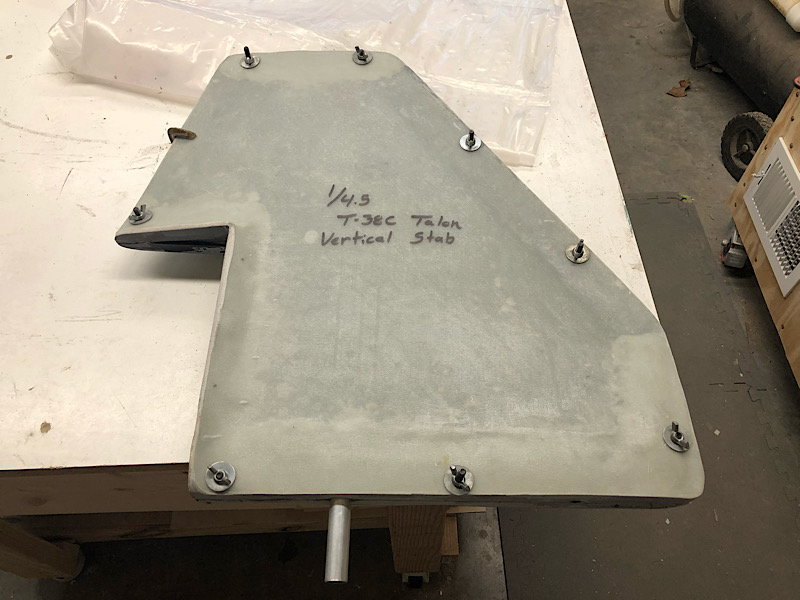
The vertical stab is out of the mold!
Final weight- 11.3oz which makes the rudder and stab assembly a total of 1.65oz. I�m happy with that.
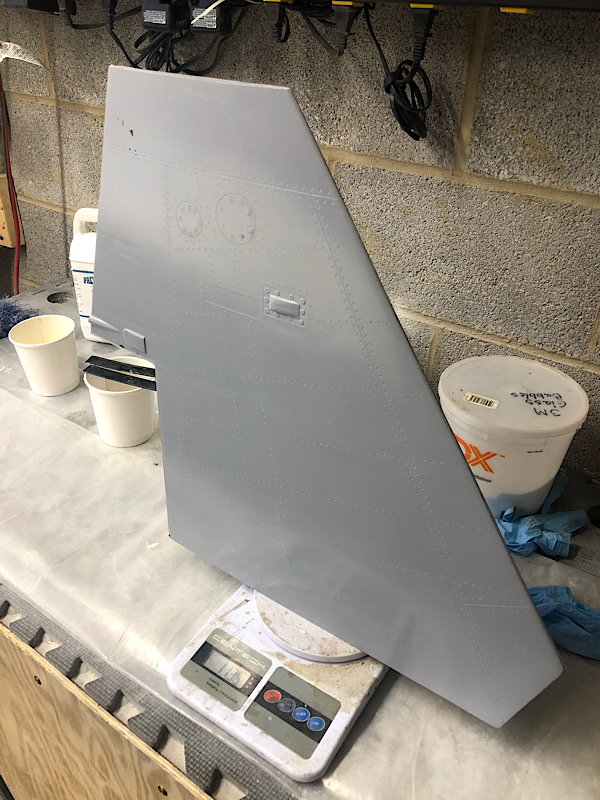

After i pulled if out and trimmed away the flashing, I sanded the 1/2 round into the base layers of the root flange of the vertical stab. I then drilled the 3/16� holes for the hinge points into the vertical stab.
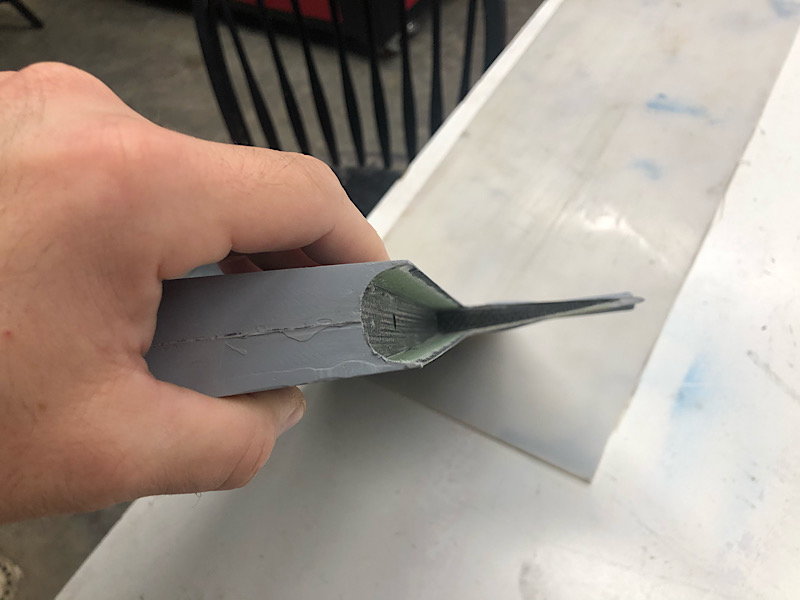
I stuck the hinge points into the V. Stab and used it to mark the locations on the leading edge of the rudder to cut the hinge clearance slots. I then used a combination of a end mill bit and a small sanding drum to cut the slot. These ended up EXACTL over the predrilled holes in the rudder spar for the hinge point locations. I drilled those holes and had the entire rudder hinged in about 5 minutes
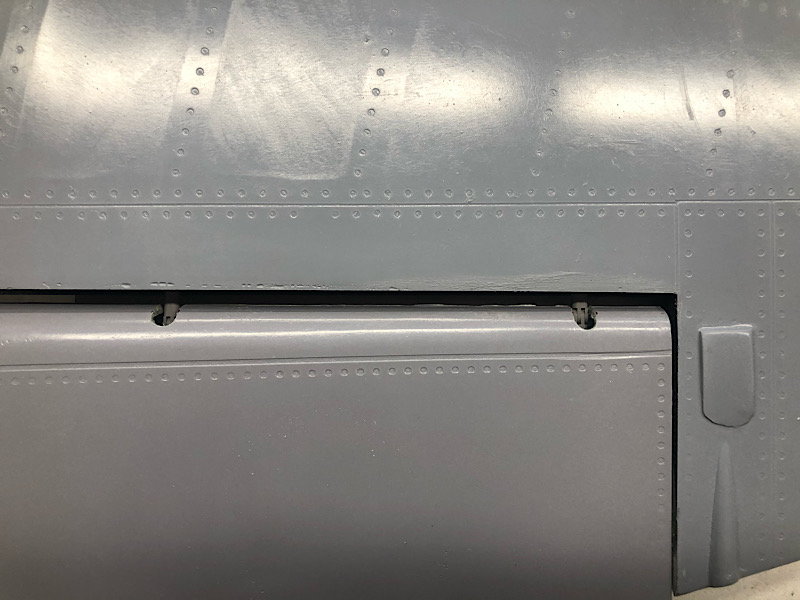
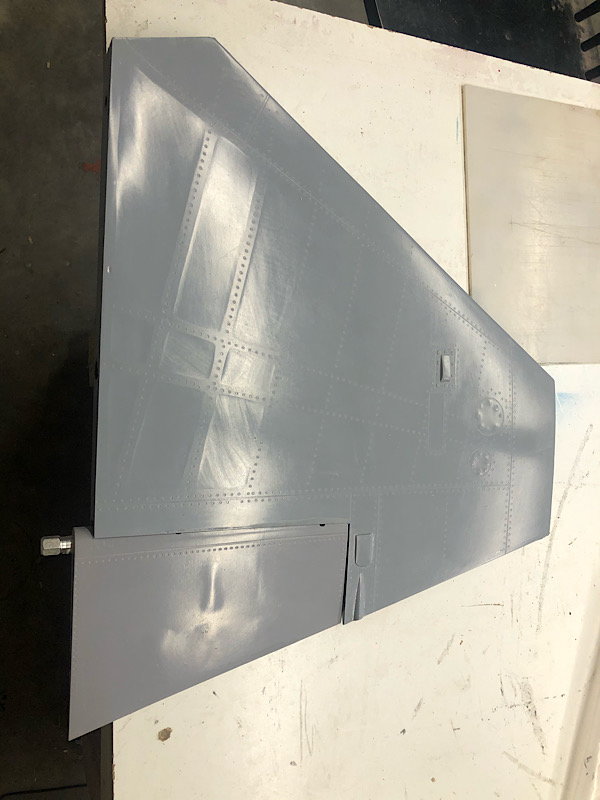
I then fit the Vertical stab to the fuselage. As expected (due to the unsanded duratec on the fuselage) it doesnt fit perfectly at the leading edge (yes, the plug has the same fit as the molded part). I expected this as i wanted the useable parts done before i finished the fuselage so i could ensure the fuselage fit those parts perfectly

Final weight- 11.3oz which makes the rudder and stab assembly a total of 1.65oz. I�m happy with that.
After i pulled if out and trimmed away the flashing, I sanded the 1/2 round into the base layers of the root flange of the vertical stab. I then drilled the 3/16� holes for the hinge points into the vertical stab.
I stuck the hinge points into the V. Stab and used it to mark the locations on the leading edge of the rudder to cut the hinge clearance slots. I then used a combination of a end mill bit and a small sanding drum to cut the slot. These ended up EXACTL over the predrilled holes in the rudder spar for the hinge point locations. I drilled those holes and had the entire rudder hinged in about 5 minutes
I then fit the Vertical stab to the fuselage. As expected (due to the unsanded duratec on the fuselage) it doesnt fit perfectly at the leading edge (yes, the plug has the same fit as the molded part). I expected this as i wanted the useable parts done before i finished the fuselage so i could ensure the fuselage fit those parts perfectly