


MIG21F13 in scale 2/7 project thread
 08-11-2021, 04:18 AM
#1

I was wondering aloud what to do next. Right people overheard me and some time later i was handed 3D-scan of MIG21F13 as a payback about my services.
To make things harder i decide to built it in 2/7 scale and still make it weight under 20kg.
I will machine molds as fast as possible and try to make prototype flying asap. This is no commercial project and i don't care if only few parts can be produced. This is very much "having fun" project.
I tried to add picture of the scan from my computer, but i receive message, that i'm not allowed to add url? maybe later.


Popular Reply
04-03-2022, 07:21 AM
Brakes, rims, some wire harnesses, cabin locking mechanism etc. are done. Soon I spray some paint on.
13kg at this point. Still missing engine with it's accessories and all batteries. Some lead will be needed ti fix CG.
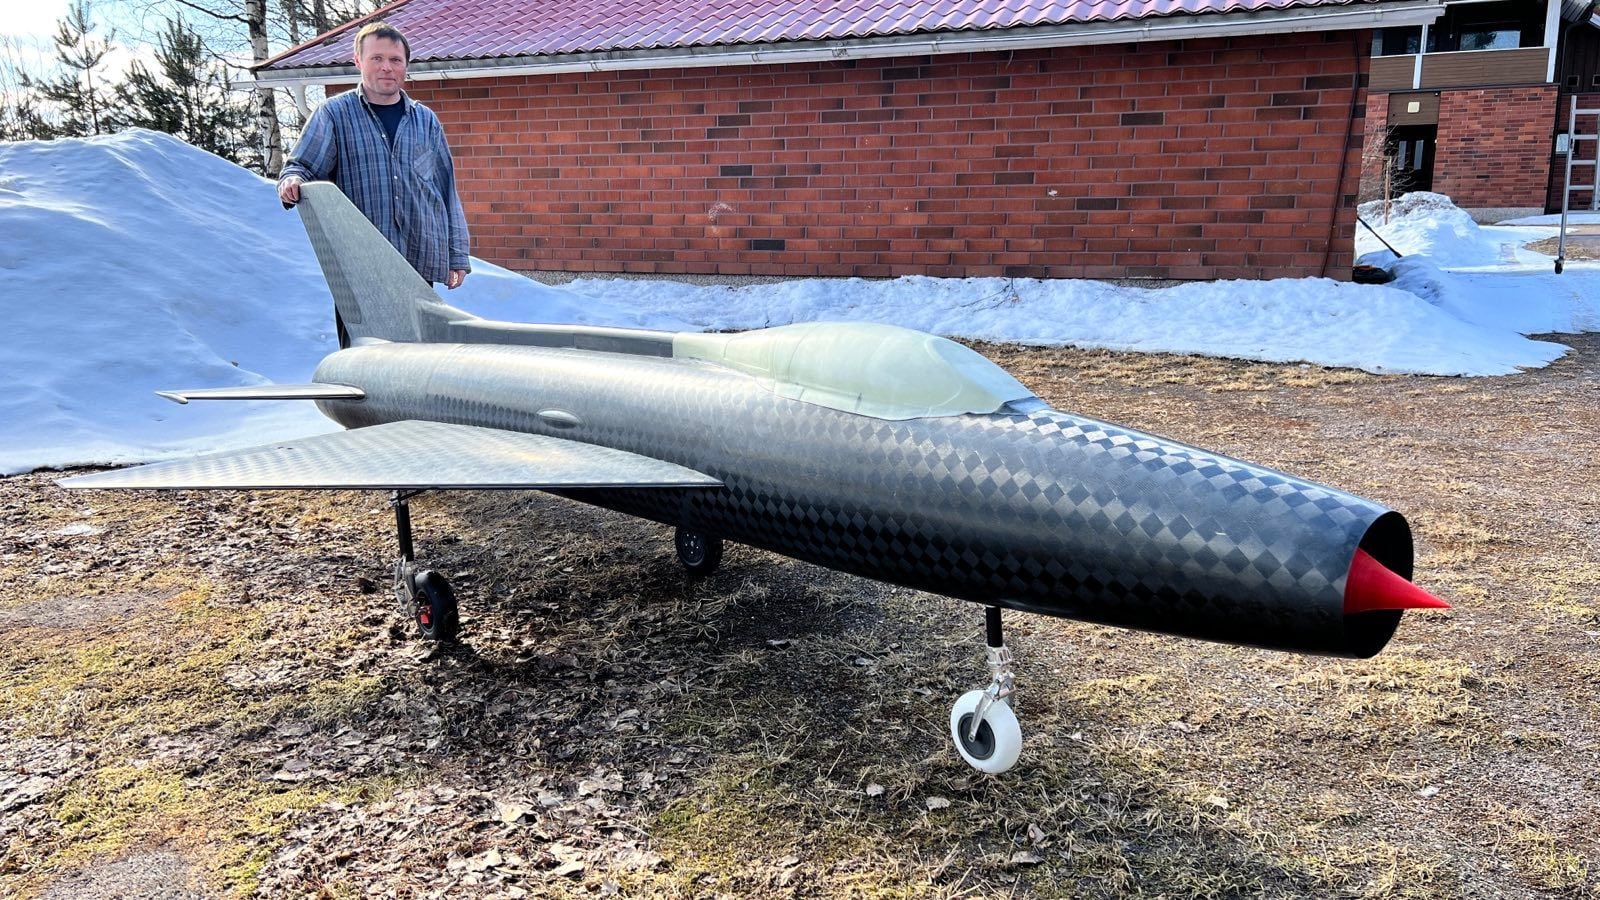
After 2.5 years work, it starts to feel like an ARF.
13kg at this point. Still missing engine with it's accessories and all batteries. Some lead will be needed ti fix CG.
After 2.5 years work, it starts to feel like an ARF.
08-11-2021, 11:25 AM
#2
First i machined mold for elevator. It seemed easiest part to start. It was also first time i tried to make mold from MDF and i knew that i have to learn some new tricks.
Once again, you have to imagine picture on the mold i tried to attach. For some reason, picture i try to upload is thought to be URL.
Once again, you have to imagine picture on the mold i tried to attach. For some reason, picture i try to upload is thought to be URL.
The following users liked this post:
Smokeyr67 (08-11-2021)
08-11-2021, 11:43 AM
#3
Finishing touch was to spray machined mold with epoxy primer. Some sanding and after applying release agent it was ready to give birth for the first composite part of the project.
With good imagination you can see me with finished mold.
With good imagination you can see me with finished mold.
The following users liked this post:
Smokeyr67 (08-11-2021)
08-11-2021, 11:52 AM
#4
After elevator i thought it was time for fin mold. It has a bit more complex shape and therefor i had to use bull nose bit to machine it. I also learned a lot while making elevator mold and tried to use this new information for my benefit.
Ready to rock
Ready to rock
The following users liked this post:
Smokeyr67 (08-11-2021)
The following 2 users liked this post by Kristola:
drfred58809 (08-11-2021),
perttime (08-12-2021)
08-12-2021, 04:24 AM
#6

Watching with interest. I've done the same, starting with a 3D scan, but of a 1/48 plastic model - would love to start with a full-scale scan though.
Very interested in your approach to mold making. I've always found it easier to sand on a convex surface (such as a wing/ fuselage plug) rather than the concave surface of the mold.
I watched a YouTube video of someone 3D printing these types of molds with no plugs to make a large A350 airliner.
Also, are you planning on adding surface detail (rivets/ panel lines)? I'd be really interested in how you approach that compared to the scribing method as you have to add raised detail to the plug to get recessed detail on the final part.
Keep posting.
Paul


 In the mean time, here are a couple pics of the F13 that is at the outdoor museum at Barksdale air base, in Louisiana.

 08-25-2021, 02:14 AM
#10
My first goal is to make it airborne asap. Then it is time for details. Unfortunately Finnish color schemes are boring, but that is probably the way i go anyway.
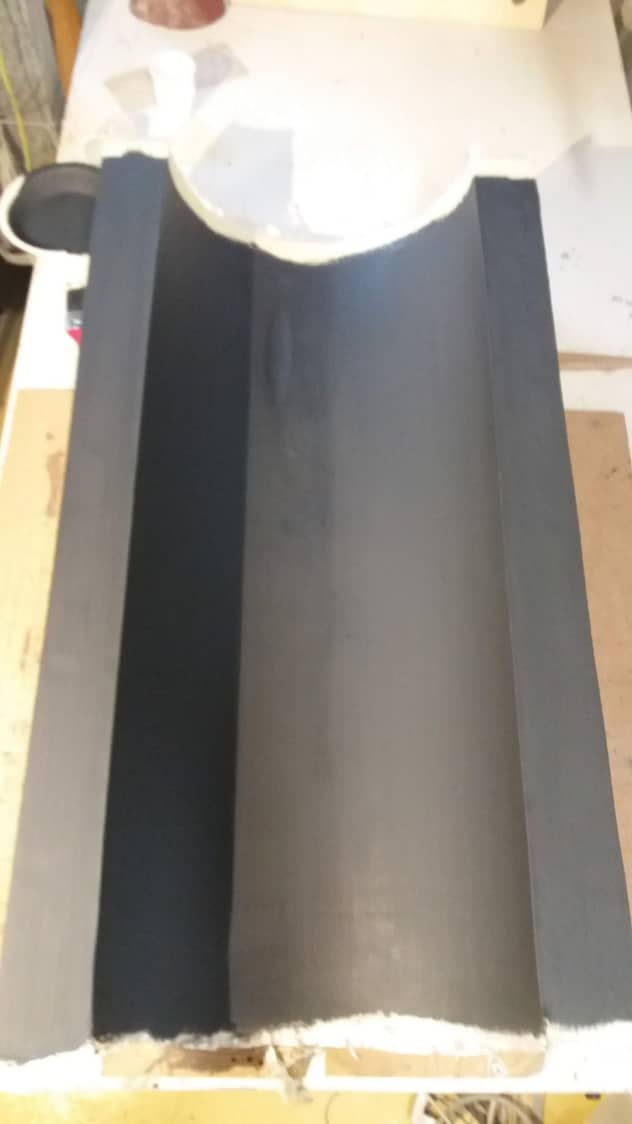
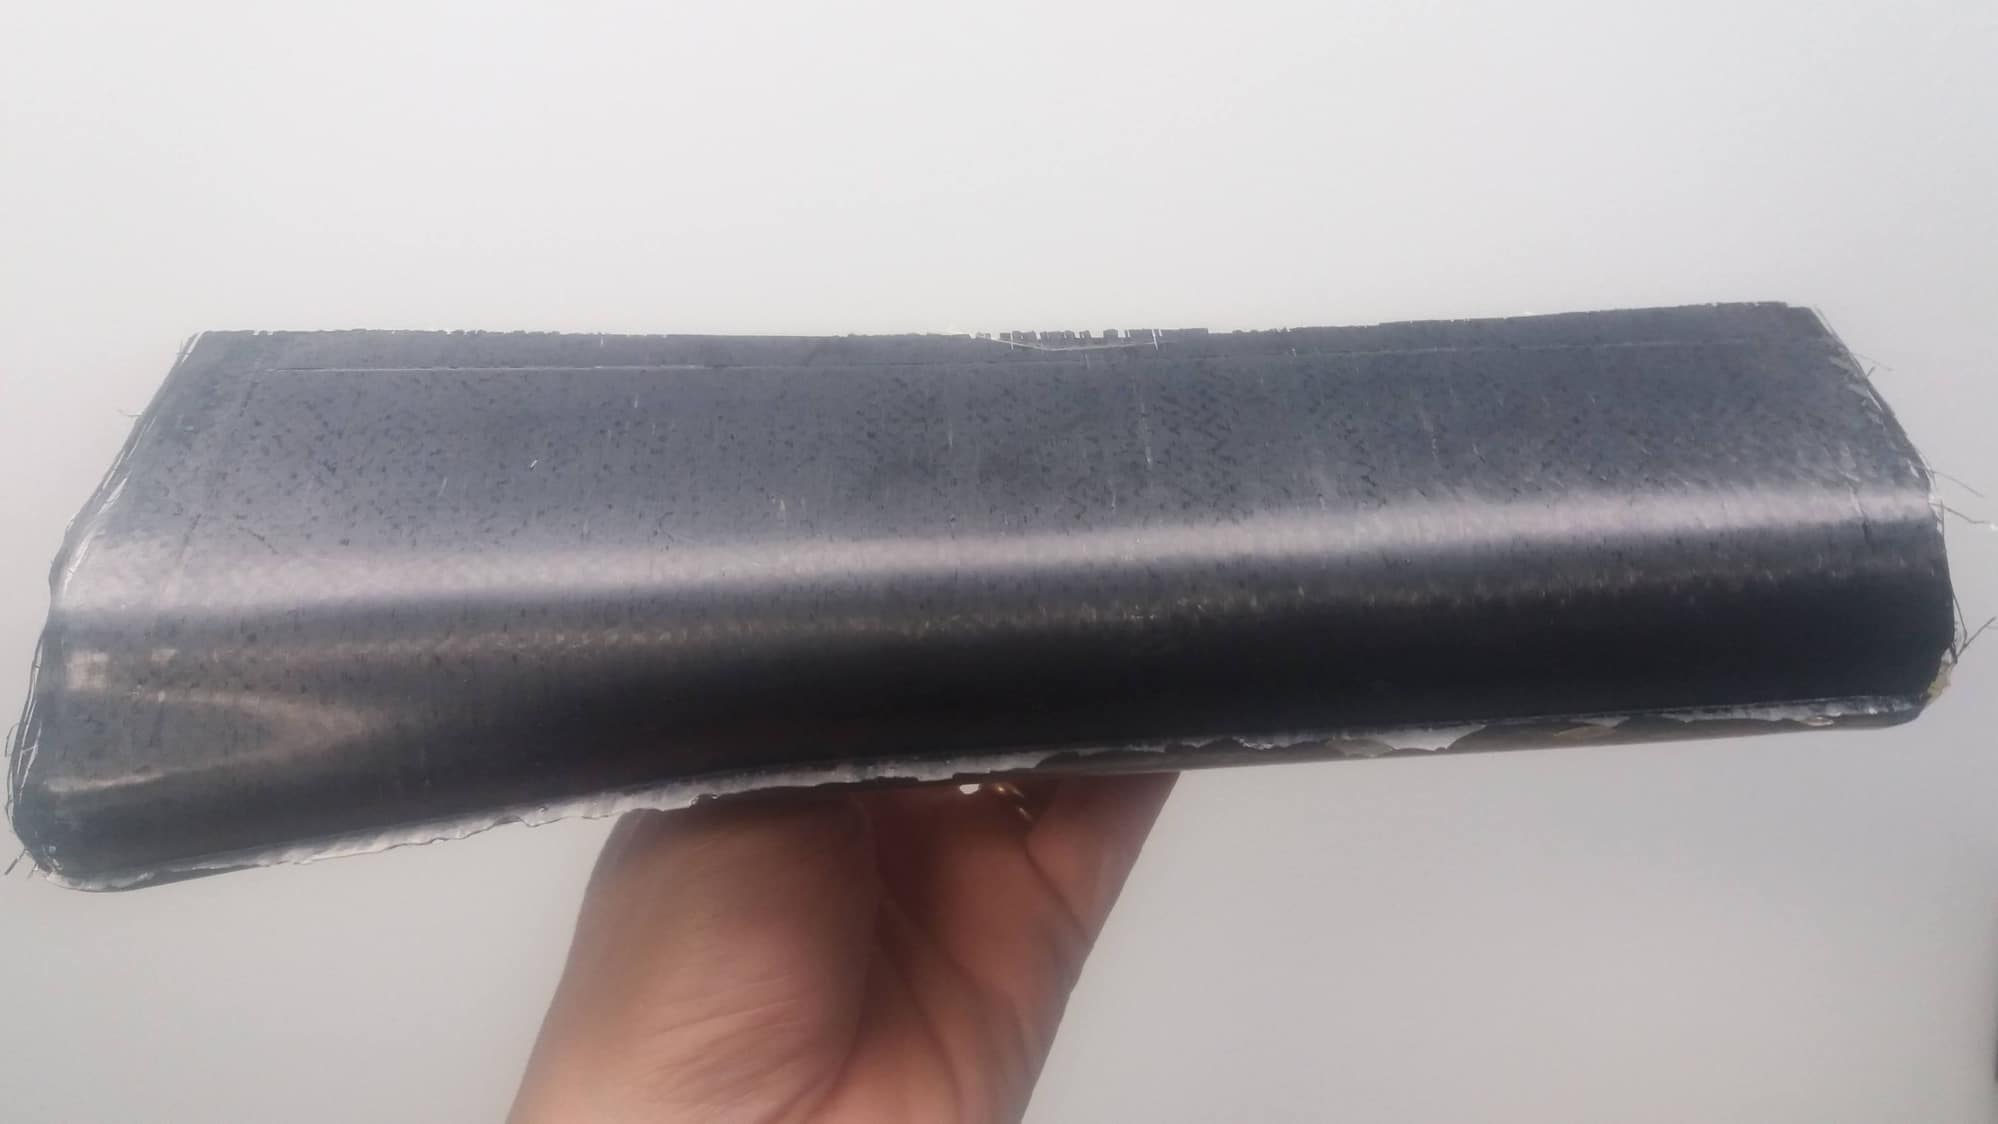
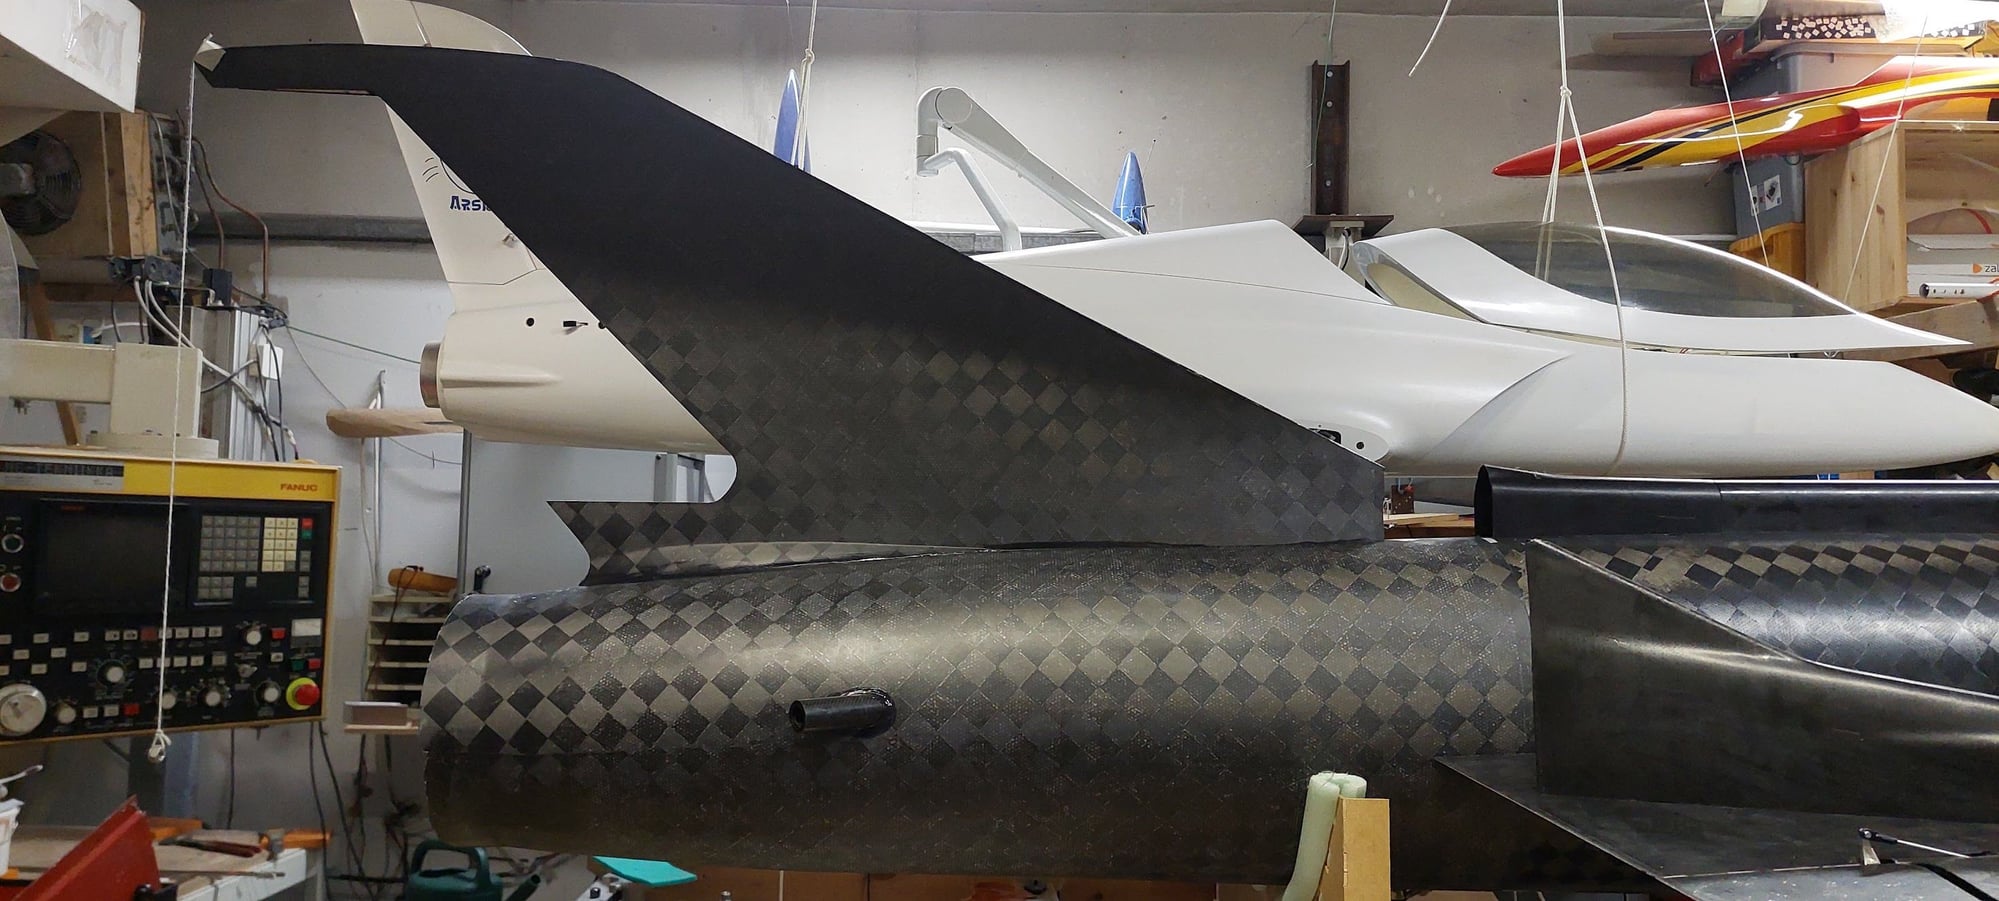
Tail section out from the molds, untrimmed though.
Tail fuselage mold was also made from MDF, but it came obvious that front part of the fuselage mold needed new (lighter) ideas.
I have some detailing ideas but i will let them progress until first flight is done.
Tail section out from the molds, untrimmed though.
Tail fuselage mold was also made from MDF, but it came obvious that front part of the fuselage mold needed new (lighter) ideas.
I have some detailing ideas but i will let them progress until first flight is done.
08-27-2021, 07:32 AM
#11
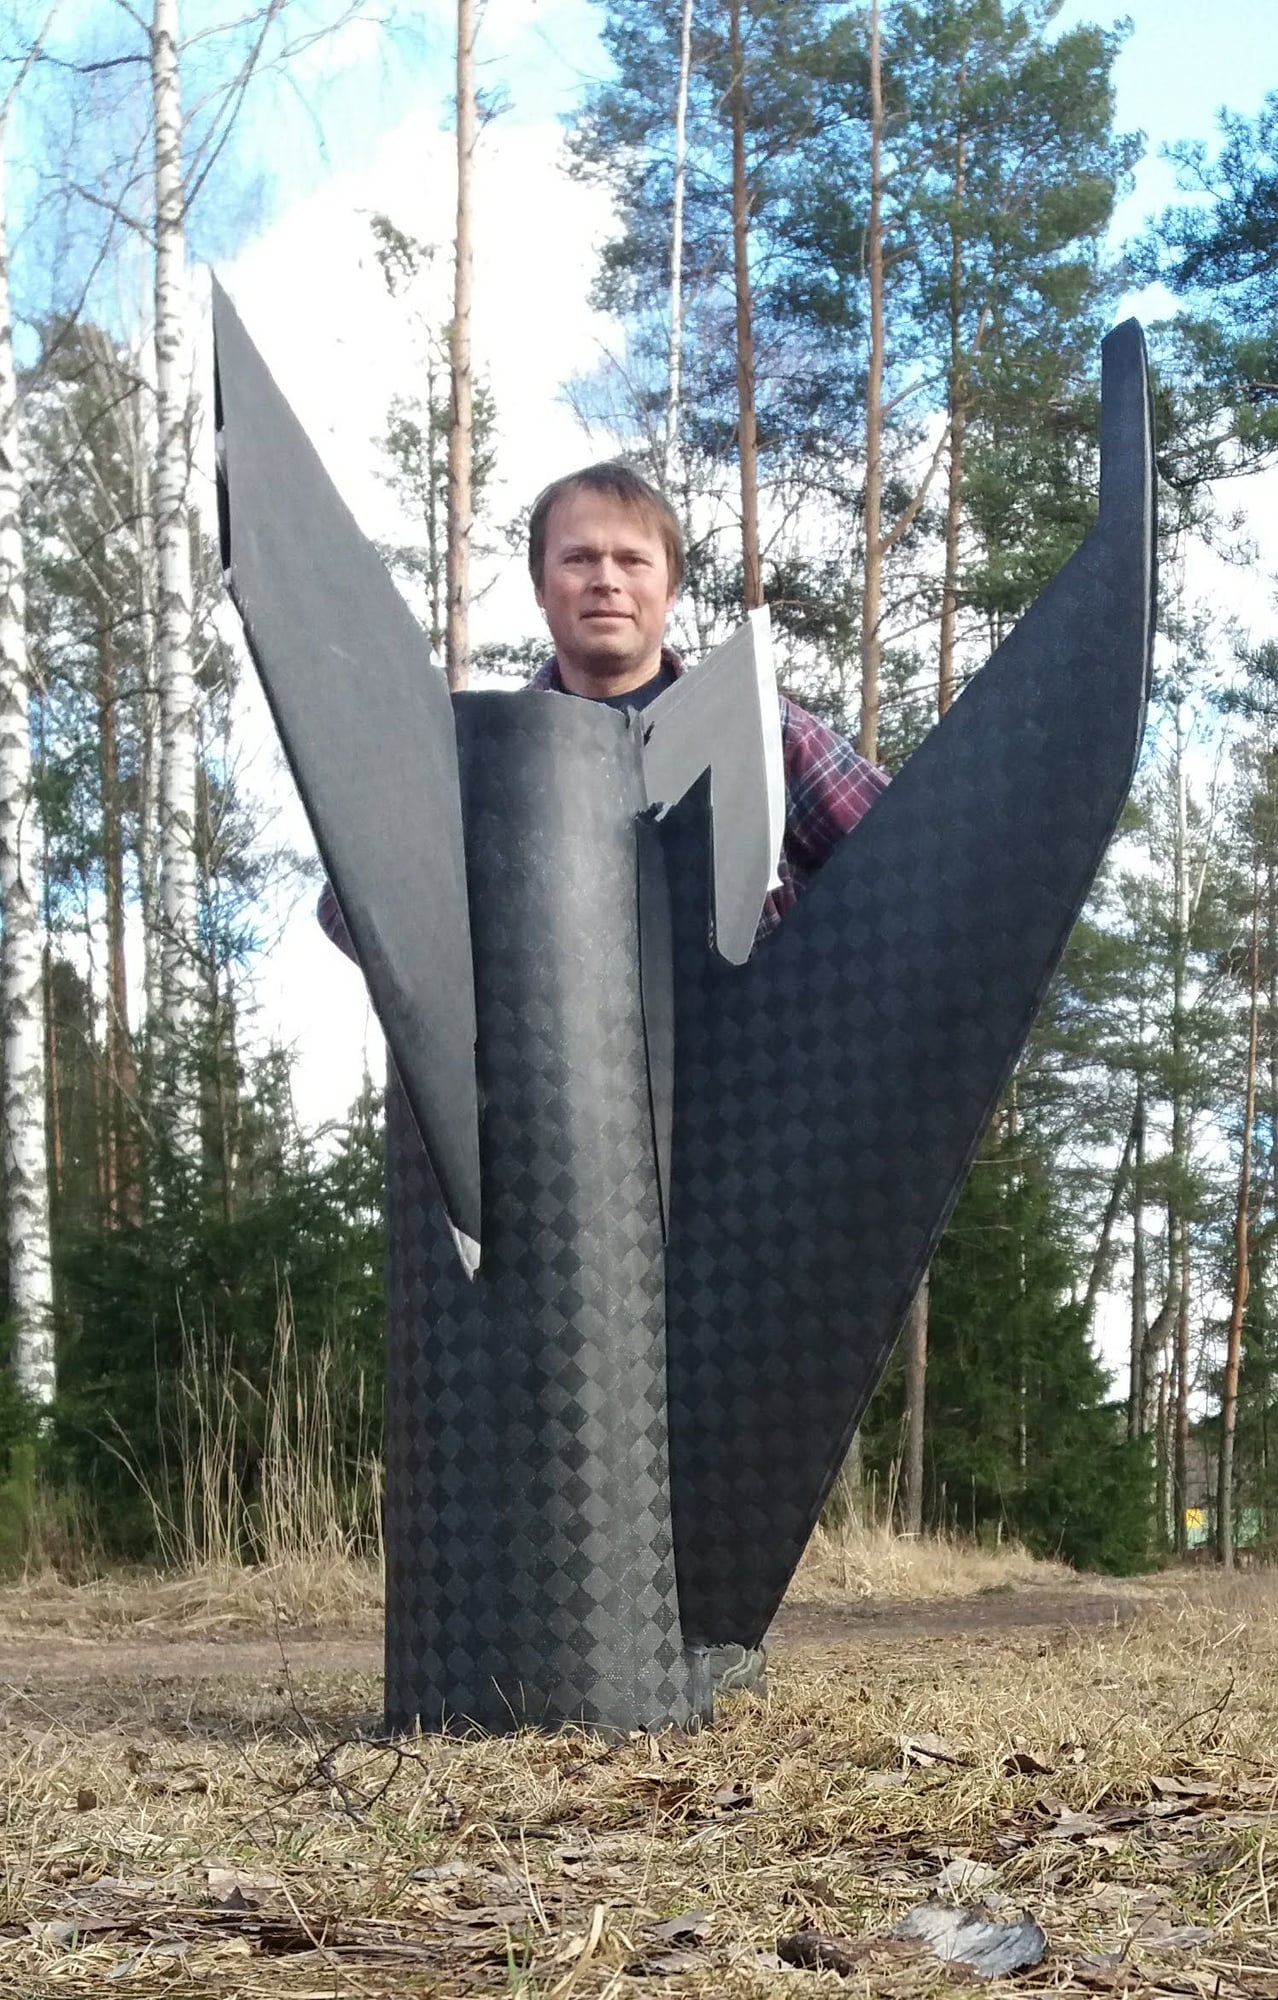
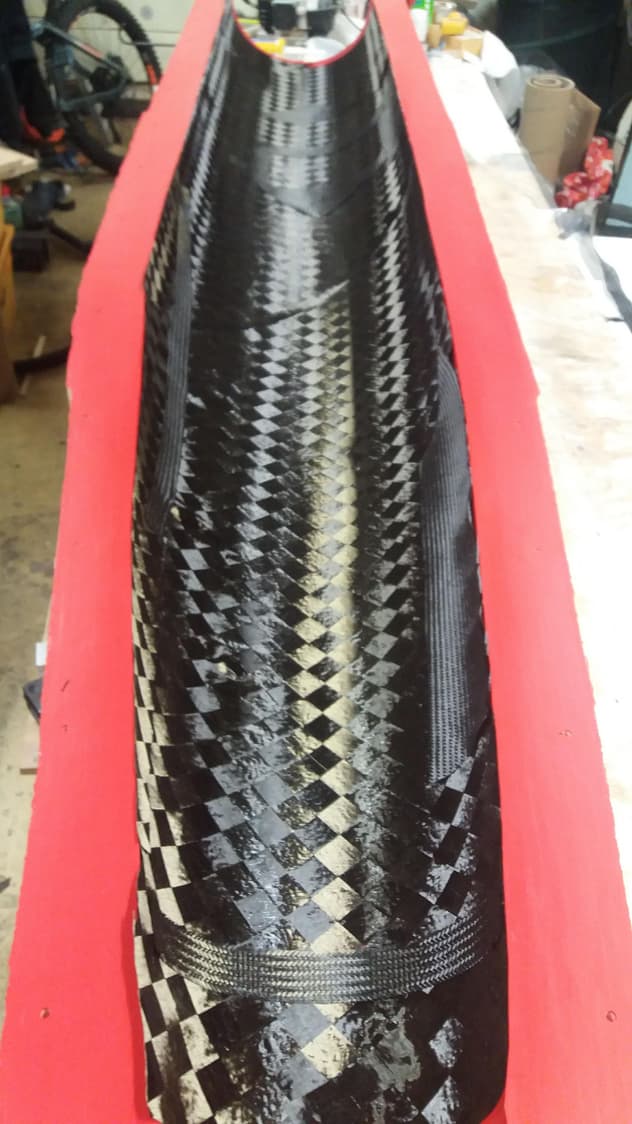
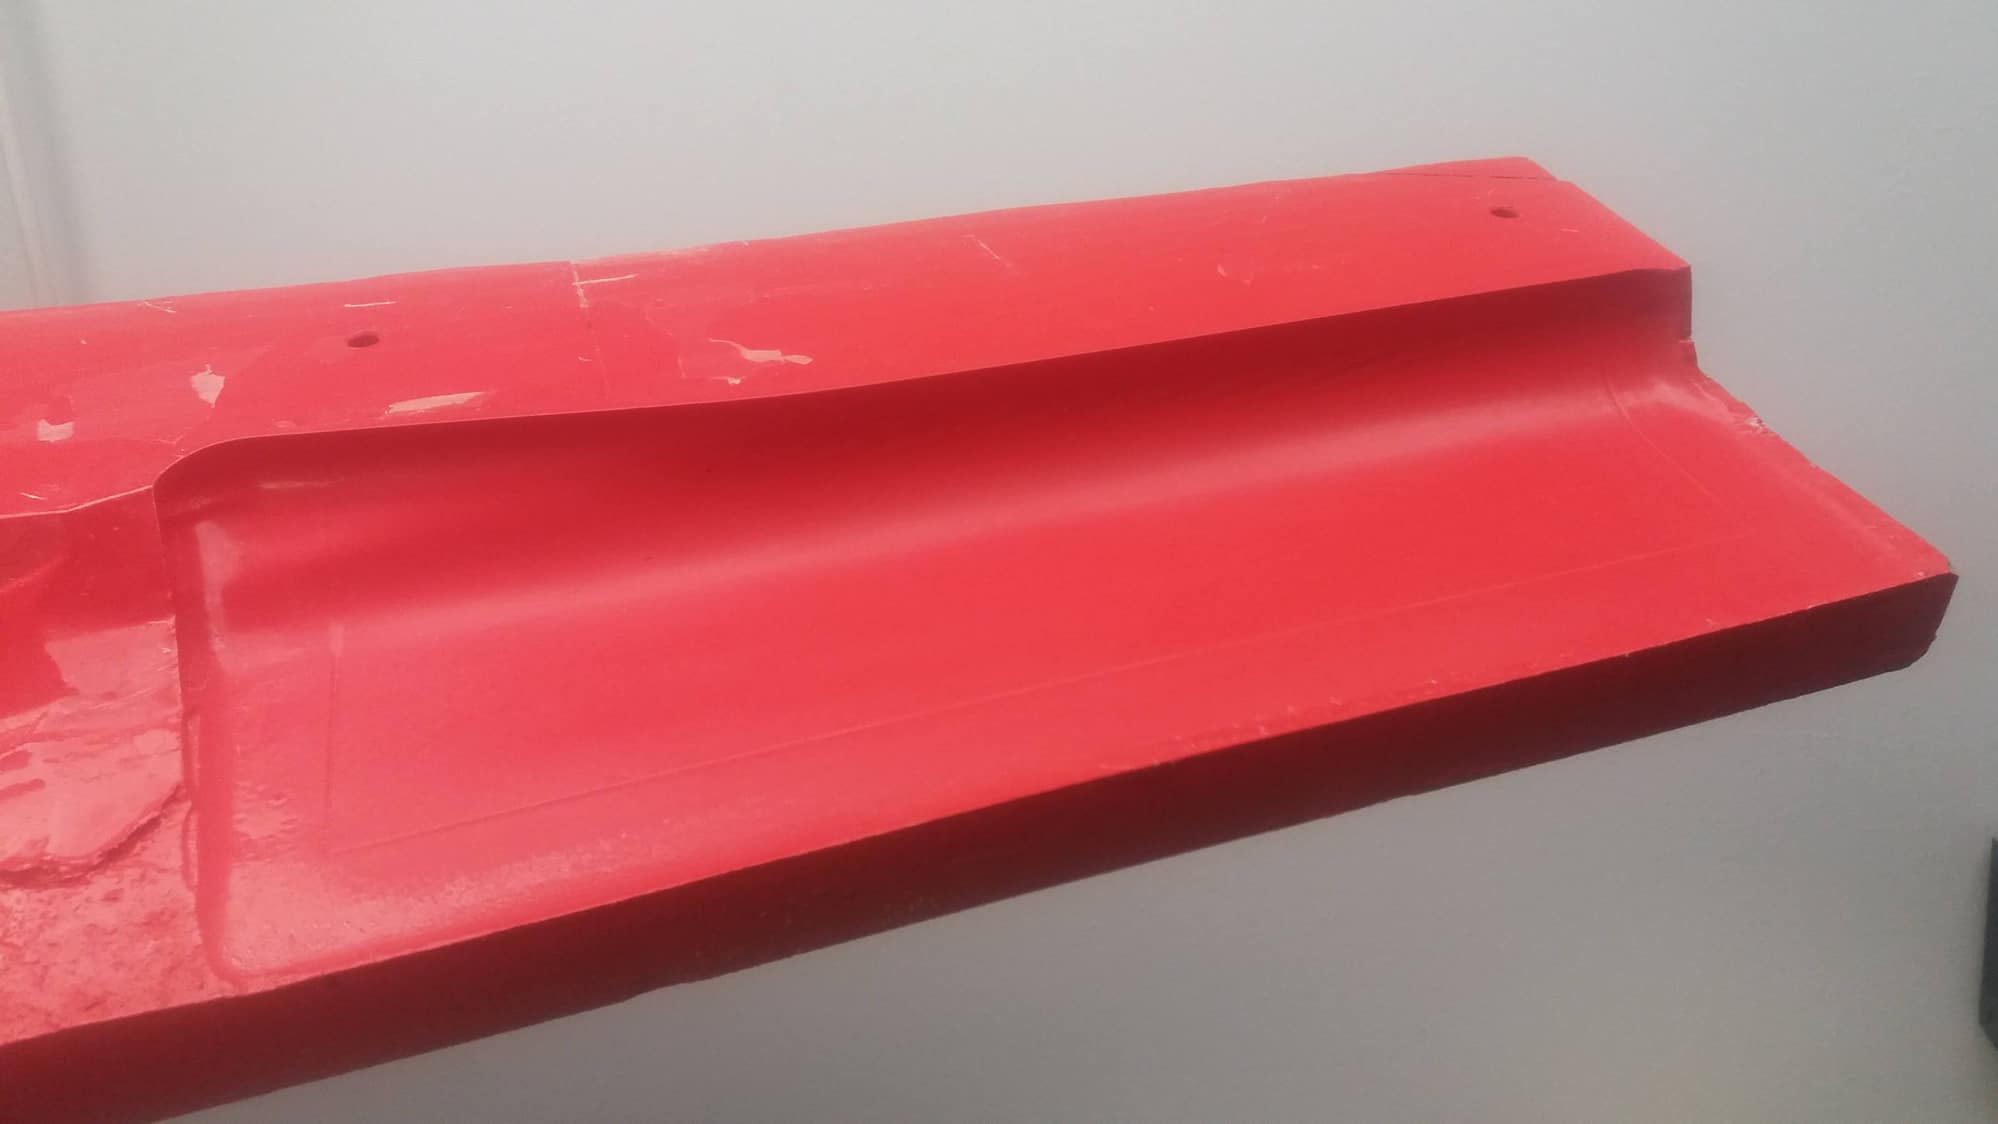
As i had to think way to make lighter front fuselage mold, bottom fin was perfect test subject.
Mold was machined to urethane foam, which was then glassed and glass painted with special polyester coating material.
Then mold was machined once again. As a final touch, mold was painted and buffed.
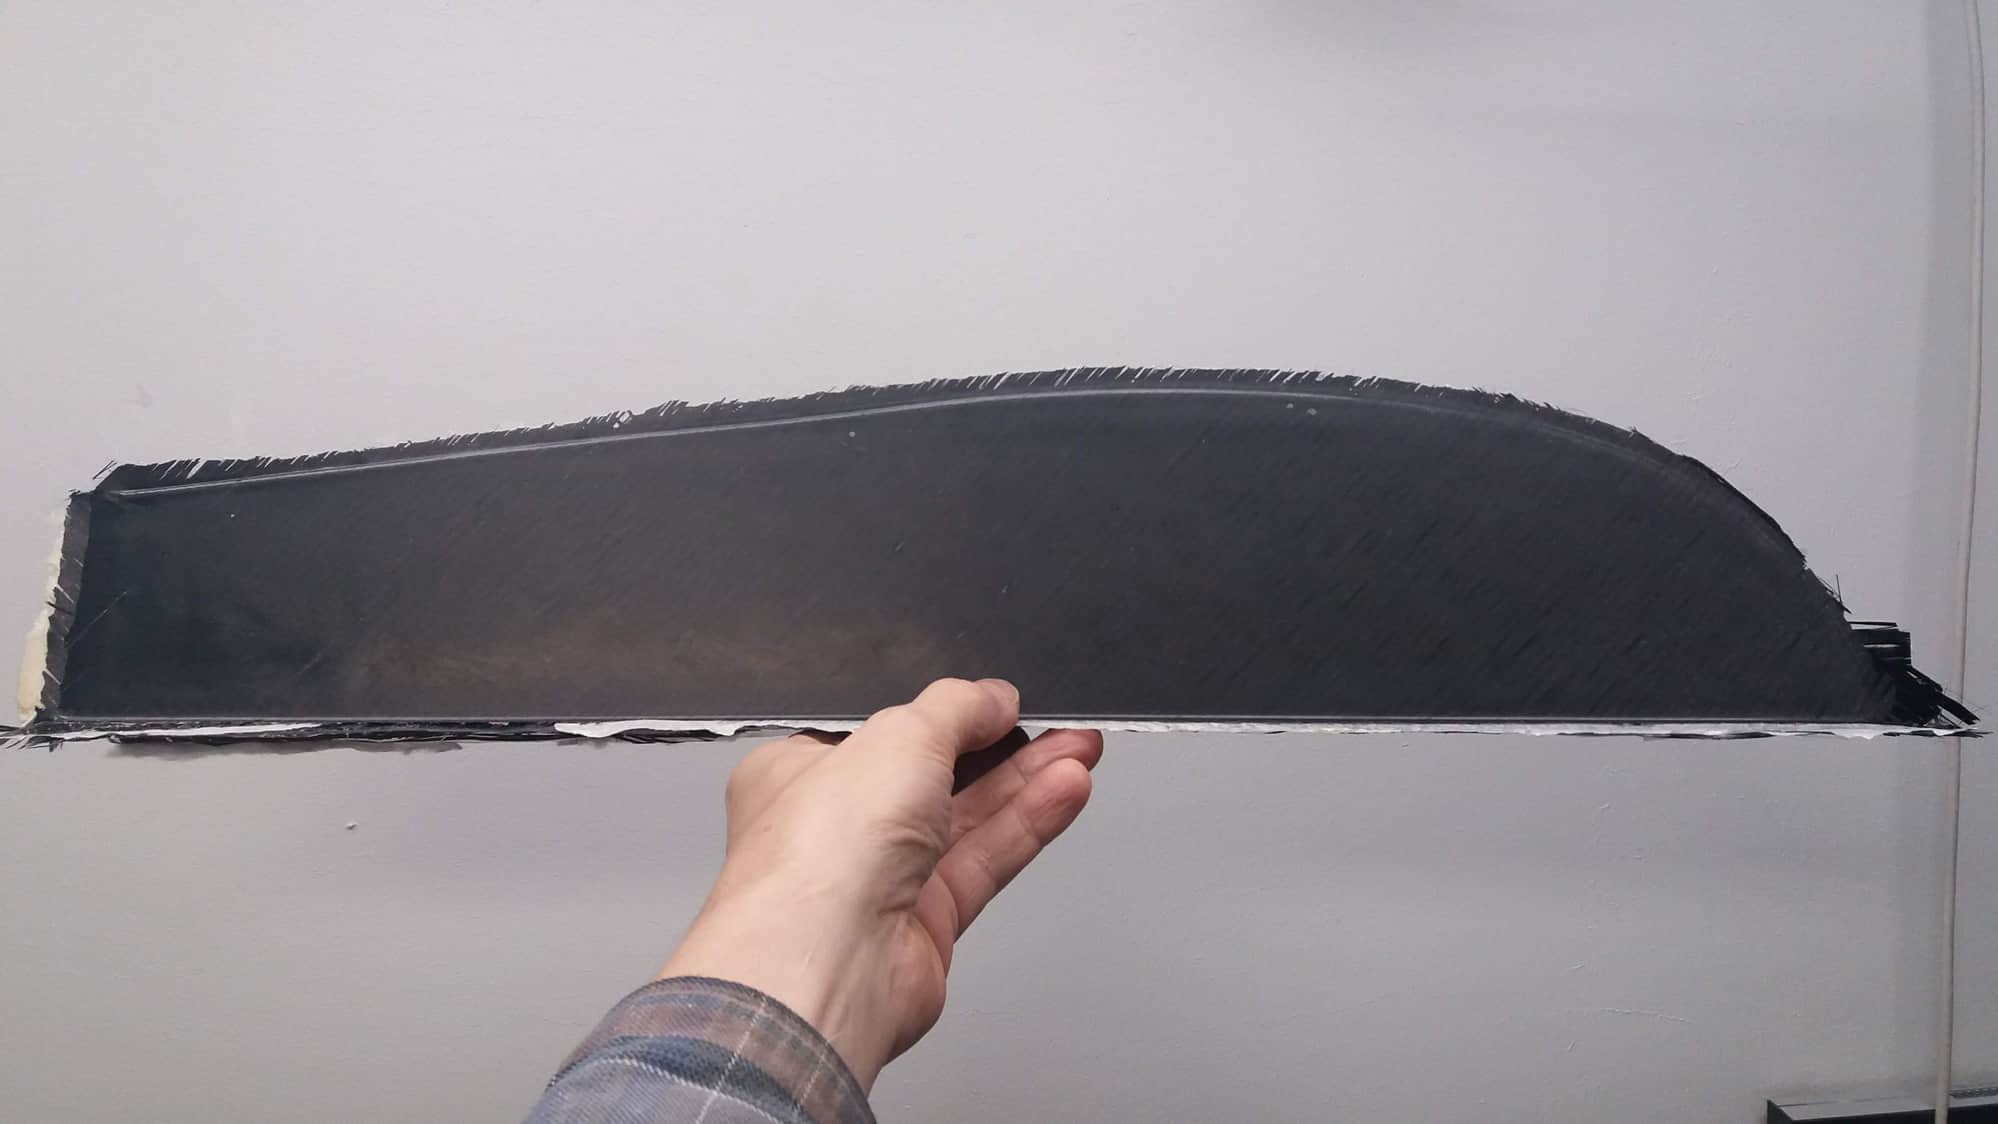
Bottom fin, once again untrimmed. I hate carbon dust and i trim parts only when it is absolutely necessity.
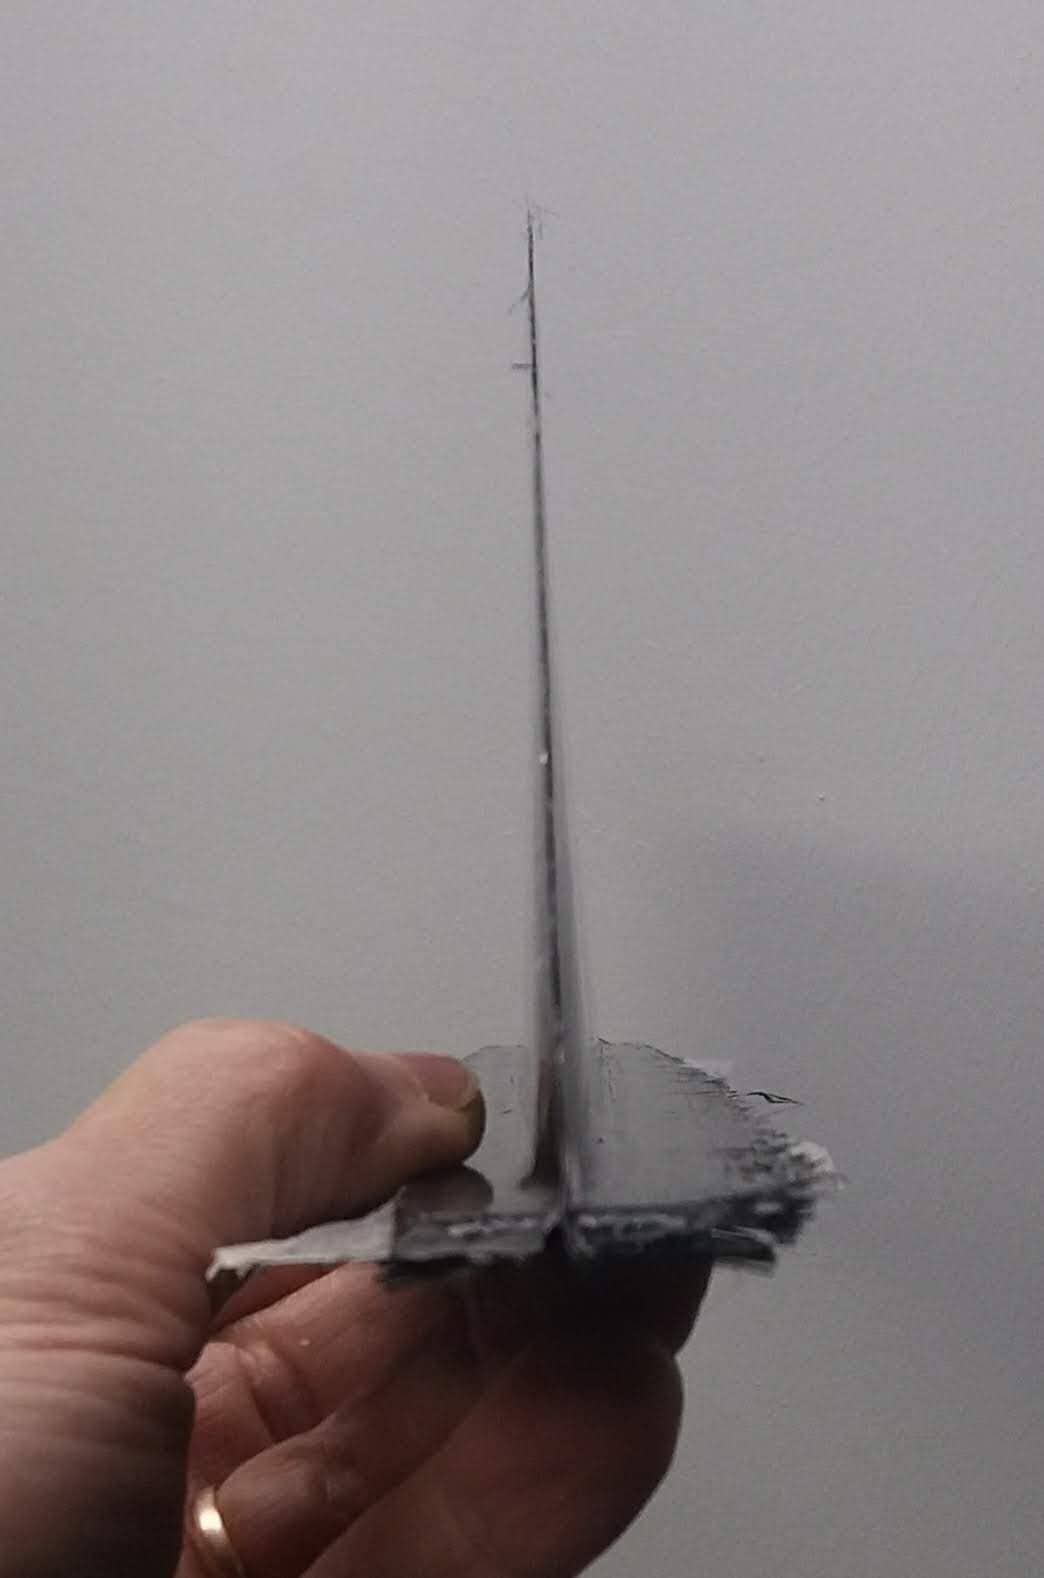
Hmmm.... Mach 2
Mold was machined to urethane foam, which was then glassed and glass painted with special polyester coating material.
Then mold was machined once again. As a final touch, mold was painted and buffed.
Bottom fin, once again untrimmed. I hate carbon dust and i trim parts only when it is absolutely necessity.
Hmmm.... Mach 2
08-30-2021, 03:17 AM
#13
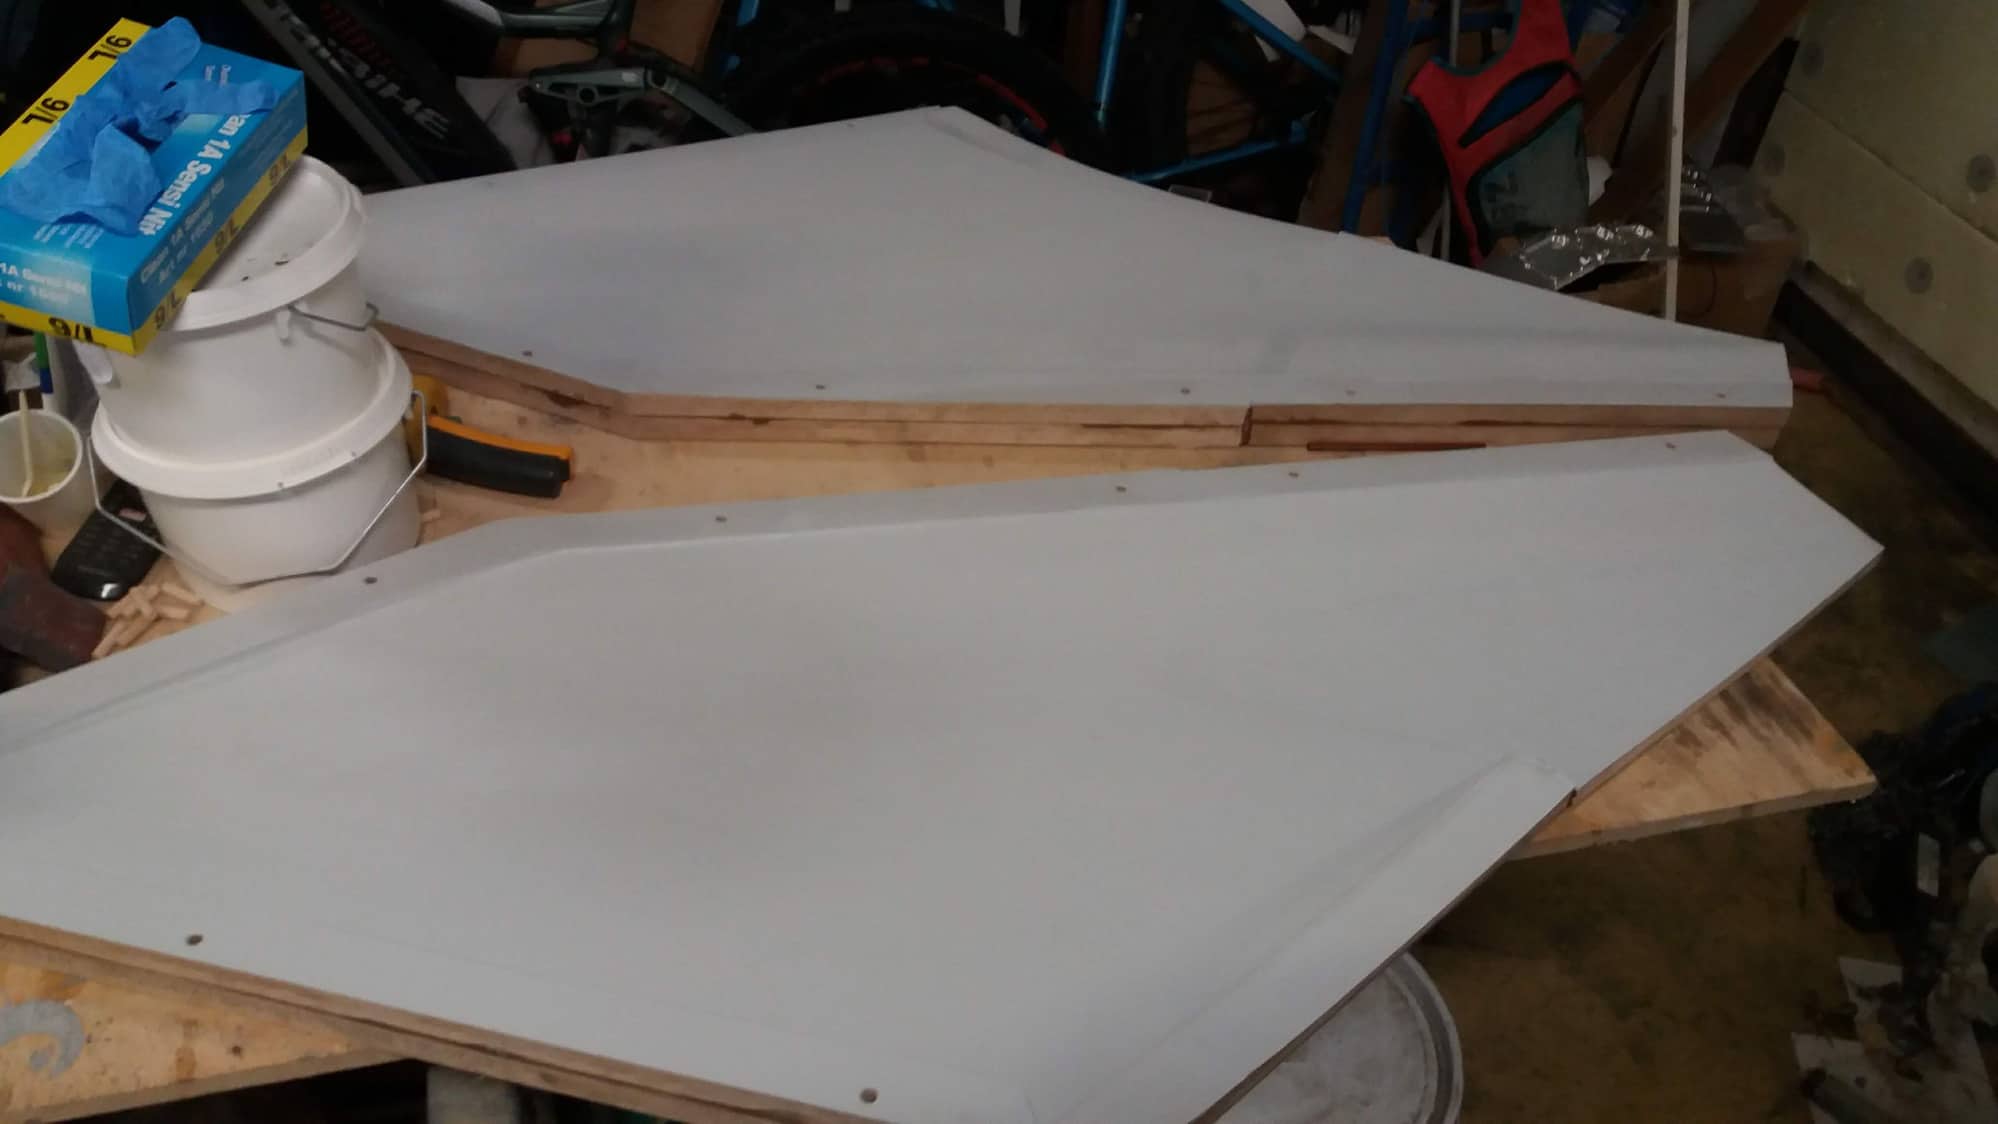
Front fuselage haunted in my mind while i machined wing molds.
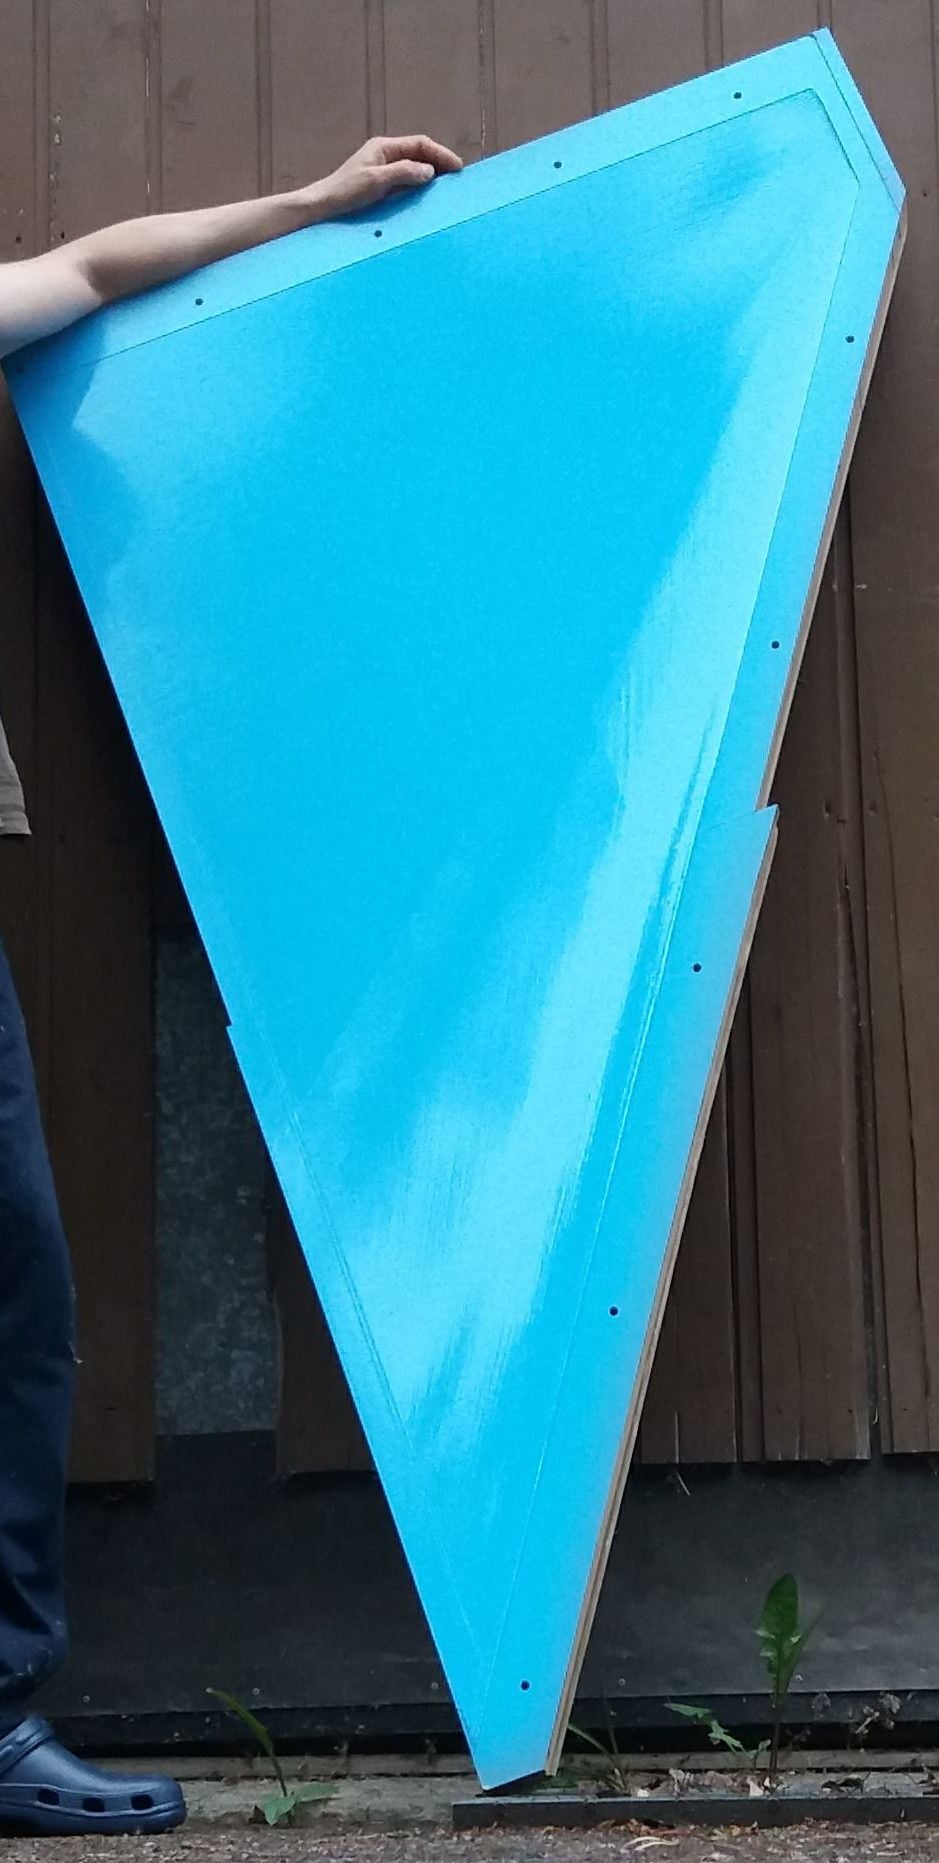
Very heavy piece of MDF.
Load handling wing internals were also made in molds. That way i had good control for material thickness and had big area for glue.
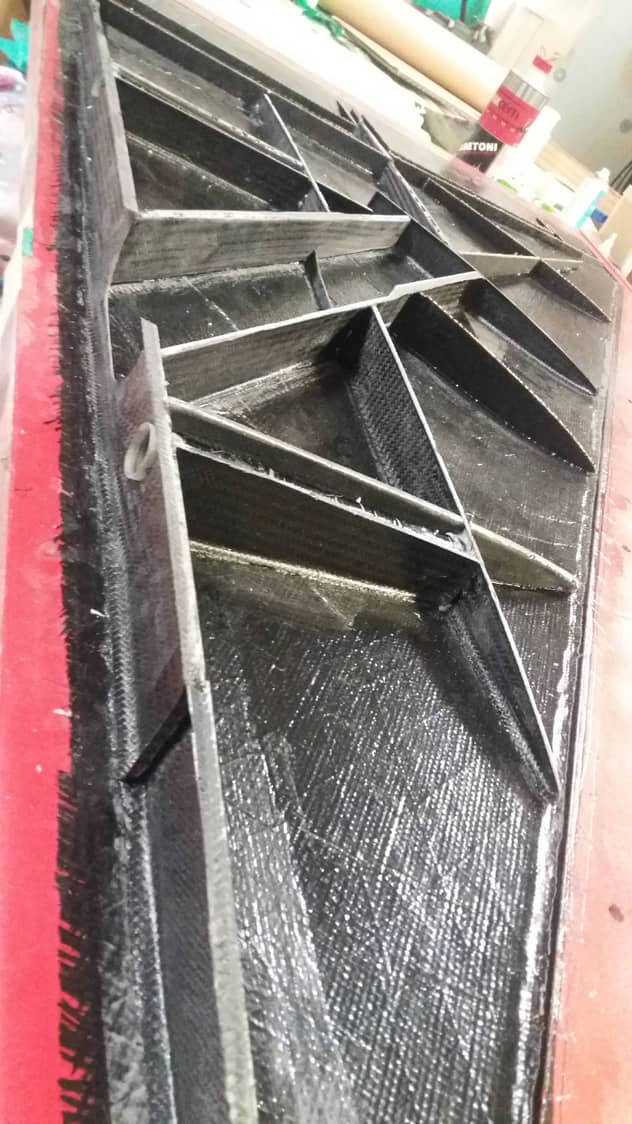
Important structures were made in molds, while not so important parts were milled from carbon sandwich.
Side note: Profile thickness 4.8%
Very heavy piece of MDF.
Load handling wing internals were also made in molds. That way i had good control for material thickness and had big area for glue.
Important structures were made in molds, while not so important parts were milled from carbon sandwich.
Side note: Profile thickness 4.8%
The following users liked this post:
jcterrettaz (08-30-2021)
08-30-2021, 06:42 AM
#14
You are working very quickly. This thread started Aug 11... Did you start this project well before that date? 
Just that I see a lot of work done - I'd not want to have non-builders get the idea one can design/machine/build aft fuselage and wing structure in just 2 weeks... ???
I certainly can't!
Just that I see a lot of work done - I'd not want to have non-builders get the idea one can design/machine/build aft fuselage and wing structure in just 2 weeks... ???
I certainly can't!
08-30-2021, 09:02 AM
#15
I started this some time ago. I'm just trying to get this up to date asap.
Don't worry, this will slow down very soon. My previous 2/11 F/A-18D project took me 10 years. It has flown, but it's still not finished (14 years and still counting).
Don't worry, this will slow down very soon. My previous 2/11 F/A-18D project took me 10 years. It has flown, but it's still not finished (14 years and still counting).
08-30-2021, 09:49 AM
#16
I have't really taken much pictures about my building progress. These two are only ones i could find about making off front fuselage mold.

Foam block been machined.
Laminated and coated.
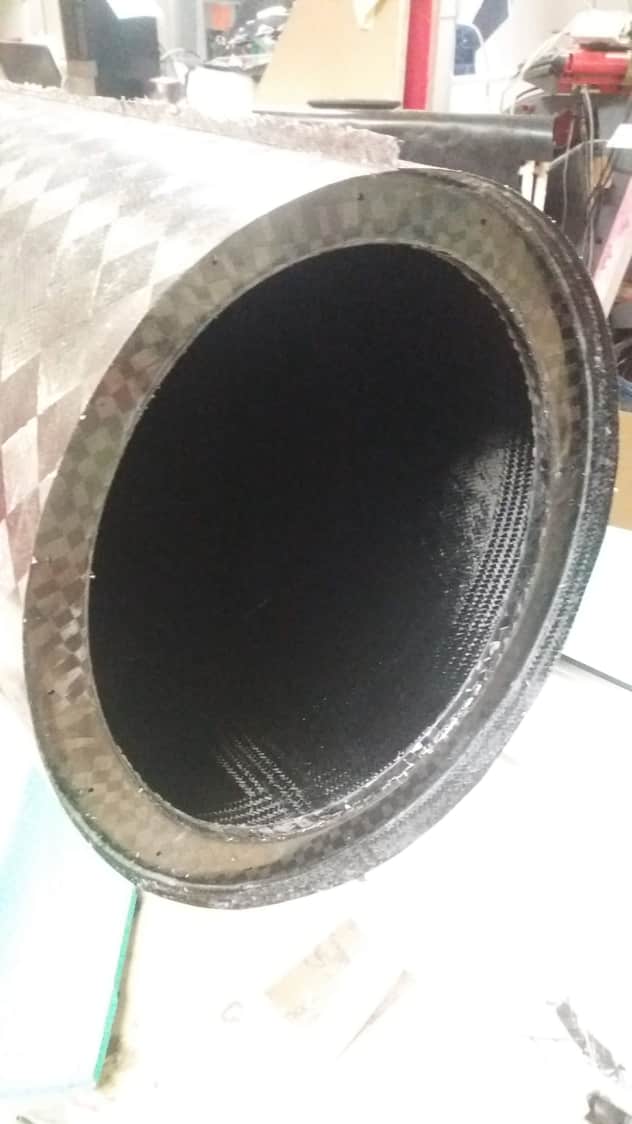
Front fuselage mold is nearly 3 meters long, so i had to machine it in three separate parts per side (my milling machine has some limitations).
I glued and laminated parts together and finished them as a solid piece.
Only picture about finished mold i could find is where outer layer is fitted in to the mold.
Carbon fabric test fit before mixing lamination epoxy.
I decided to make molds as simple as possible. Most of the details (like bullets) will be made in separate mold or they are 3D-printed. That brings first flight, years closer.
Foam block been machined.
Laminated and coated.
Front fuselage mold is nearly 3 meters long, so i had to machine it in three separate parts per side (my milling machine has some limitations).
I glued and laminated parts together and finished them as a solid piece.
Only picture about finished mold i could find is where outer layer is fitted in to the mold.
Carbon fabric test fit before mixing lamination epoxy.
I decided to make molds as simple as possible. Most of the details (like bullets) will be made in separate mold or they are 3D-printed. That brings first flight, years closer.
09-02-2021, 08:49 AM
#18
I built my milling machine with help of my friends from industrial waste (it has been updated a lot) over two decades ago and it has moved many times. Last ten years it has been sitting in the corner of my garage.
I'll attach some pictures of making MDF-mold. First i mill mold close to the true dimensions and impregnate it with epoxy resin.
After curing i mill the mold to the final dimensions and paint it with two component acrylic car paint.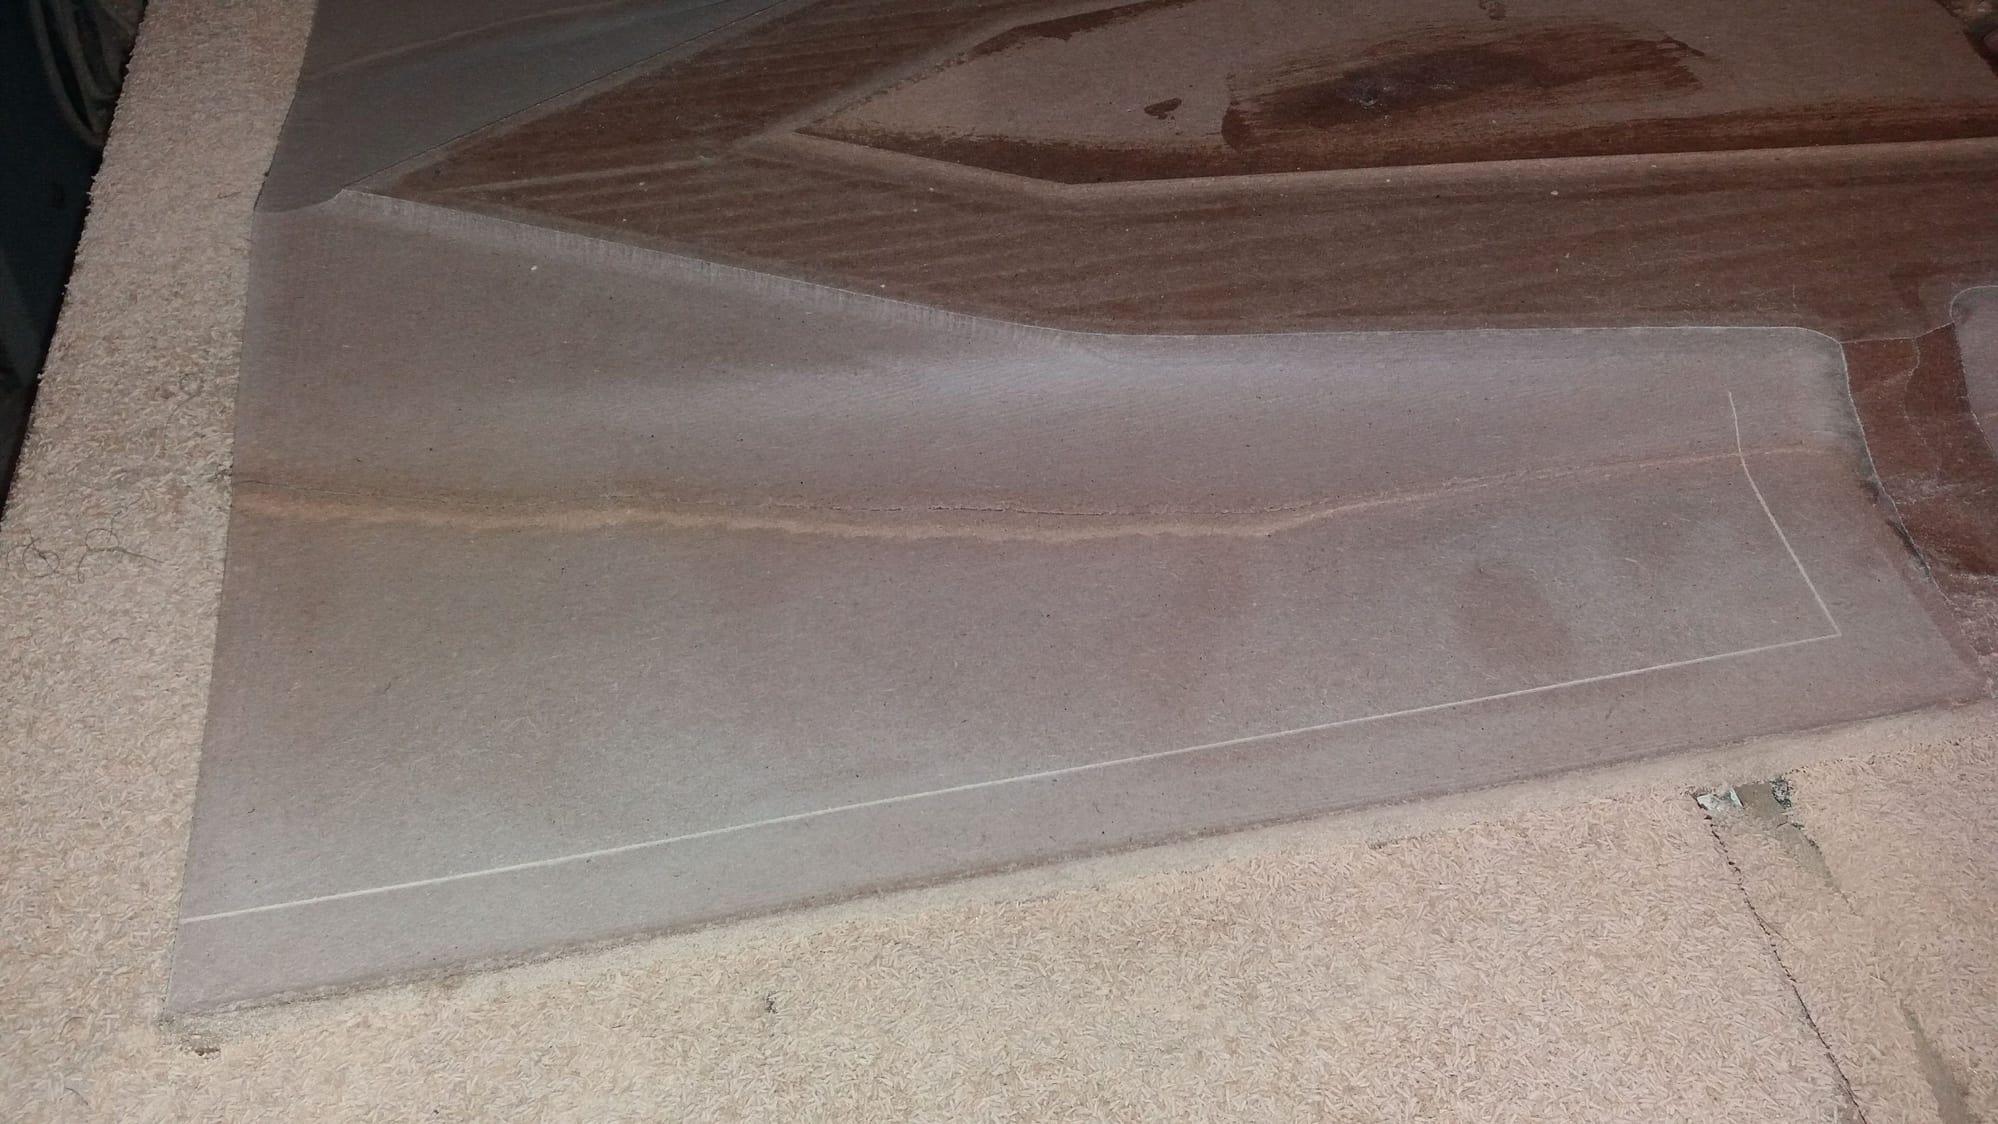
Mold after last milling phase
Painted and used one time
Part from mold
I have done all parts using only carbon, and i know that it is not the way to go, if you want the best surface finish. Thin glass layer would help with that, but on the other hand, my prototype is not beauty queen either.
Carbon likes to suck all the resin there is, leaving voids between fiber and mold. But having an extra fiber layer is not only extra weight, but also very annoying to work with. I'm just happy, if i don't have to make "perfect" paint job look crappy afterwards
The following users liked this post:
patf (09-02-2021)
09-04-2021, 09:34 AM
#19
Front fuselage was big achievement. Making it's mold was very complicated and just laminating the part was also not an easy task.

Happy man
Also ribs are made in mold
3D-printing helps a lot with some parts.

These parts will be made with glass fiber. Plan is to install radio antennas in this area.
Happy man
Also ribs are made in mold
3D-printing helps a lot with some parts.
These parts will be made with glass fiber. Plan is to install radio antennas in this area.
The following users liked this post:
perttime (09-04-2021)


 01-28-2022, 06:01 AM
#25
Tail is looking nice!
Since you mentioned CF absorbing a lot of resin, are you saying you are getting a lot of surface porosity on your parts?
That can be a pain to deal with, before painting...
Priming in the mold can probably help with that, but I suspect what you really end up with is the porosity still there - it's just below the thin layer of primer ...