Huracan Sports Jet Build.
 11-27-2021, 07:19 AM
#51

Best Regards,
The Ozaero Team

The following users liked this post:
Canadian Man (12-06-2021)
The following 2 users liked this post by Rudeboy:
Canadian Man (12-06-2021),
OzaeroCustomDesigns (11-29-2021)

")
The following users liked this post:
OzaeroCustomDesigns (11-29-2021)
The following users liked this post:
AEROSHELDON (12-06-2021)
12-15-2021, 09:21 AM
#57

Thread Starter
My Feedback: (1)

Time to add some more pics to catch up.

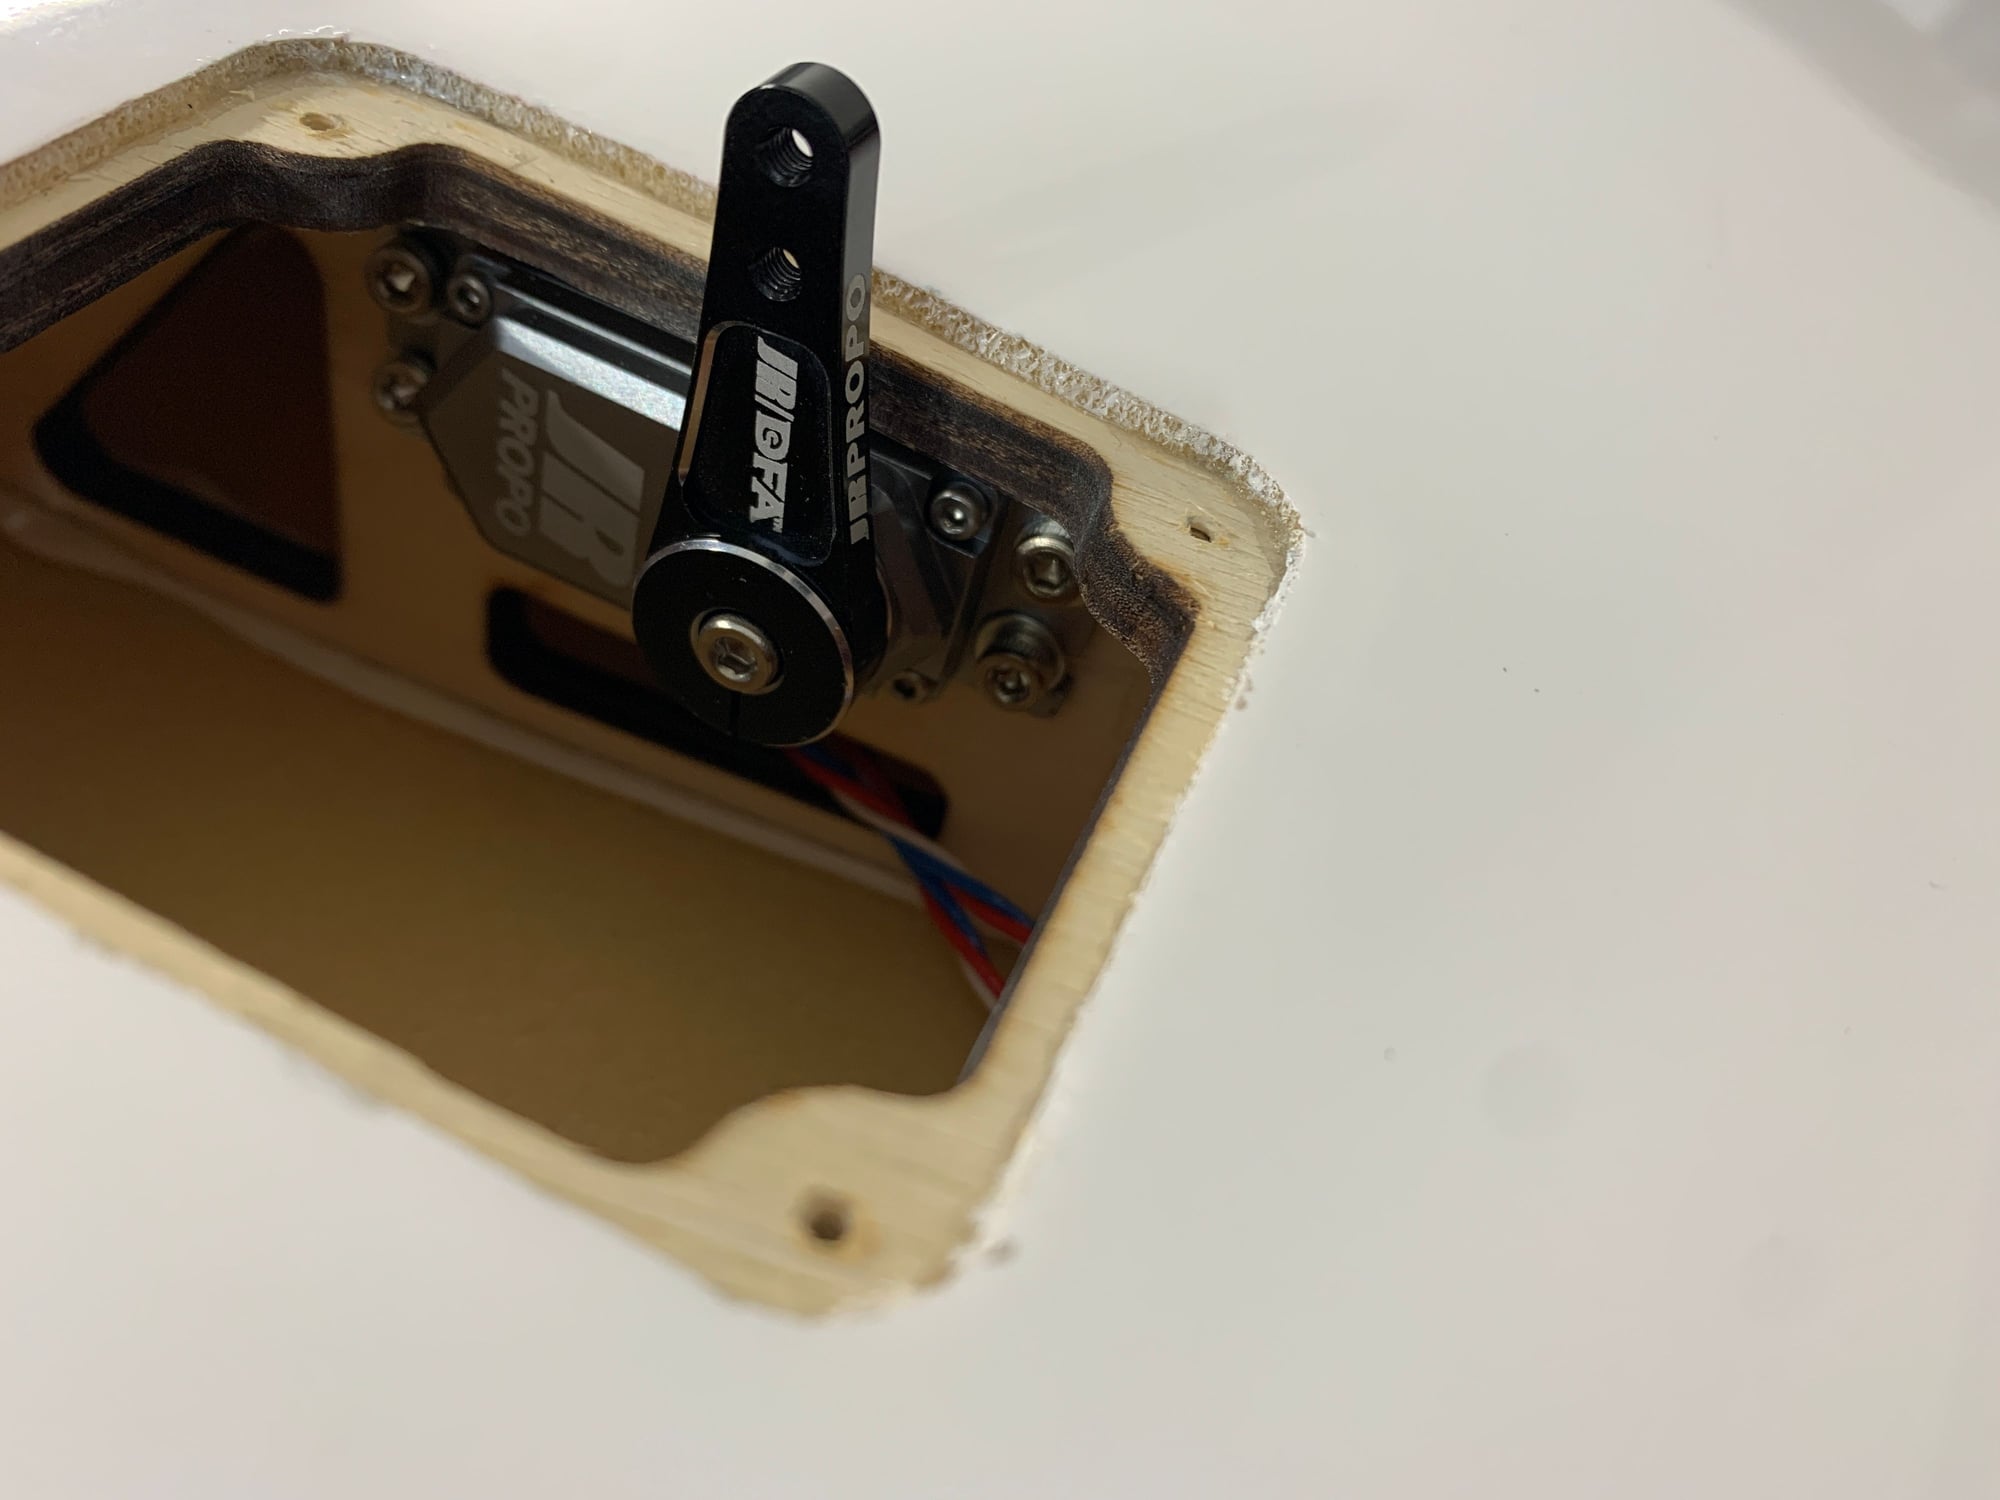
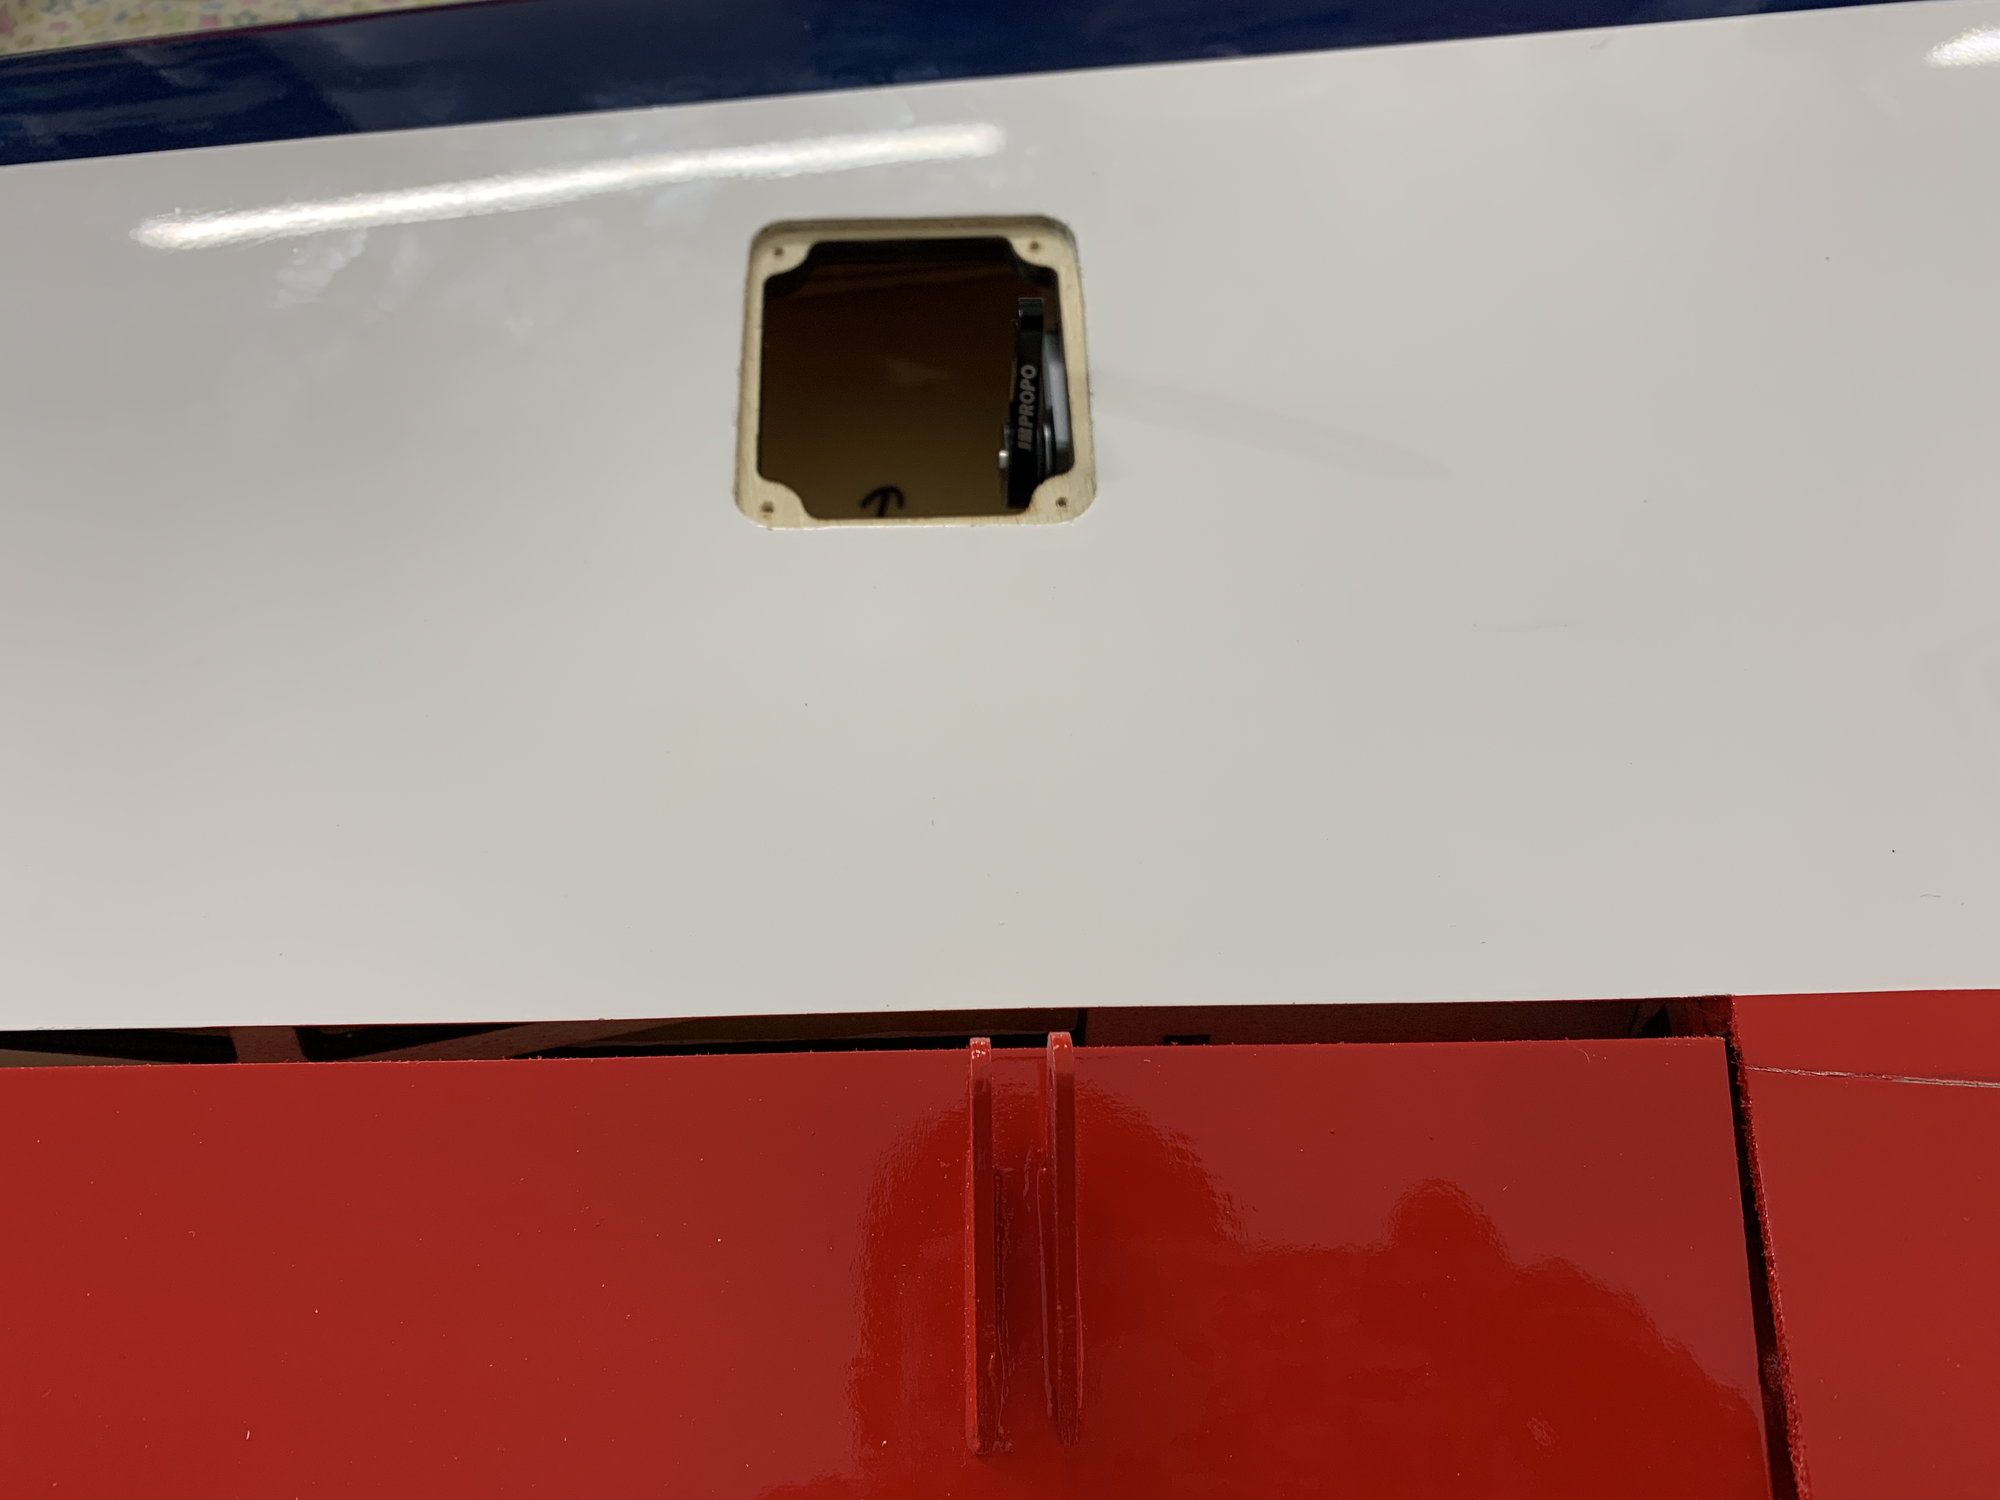
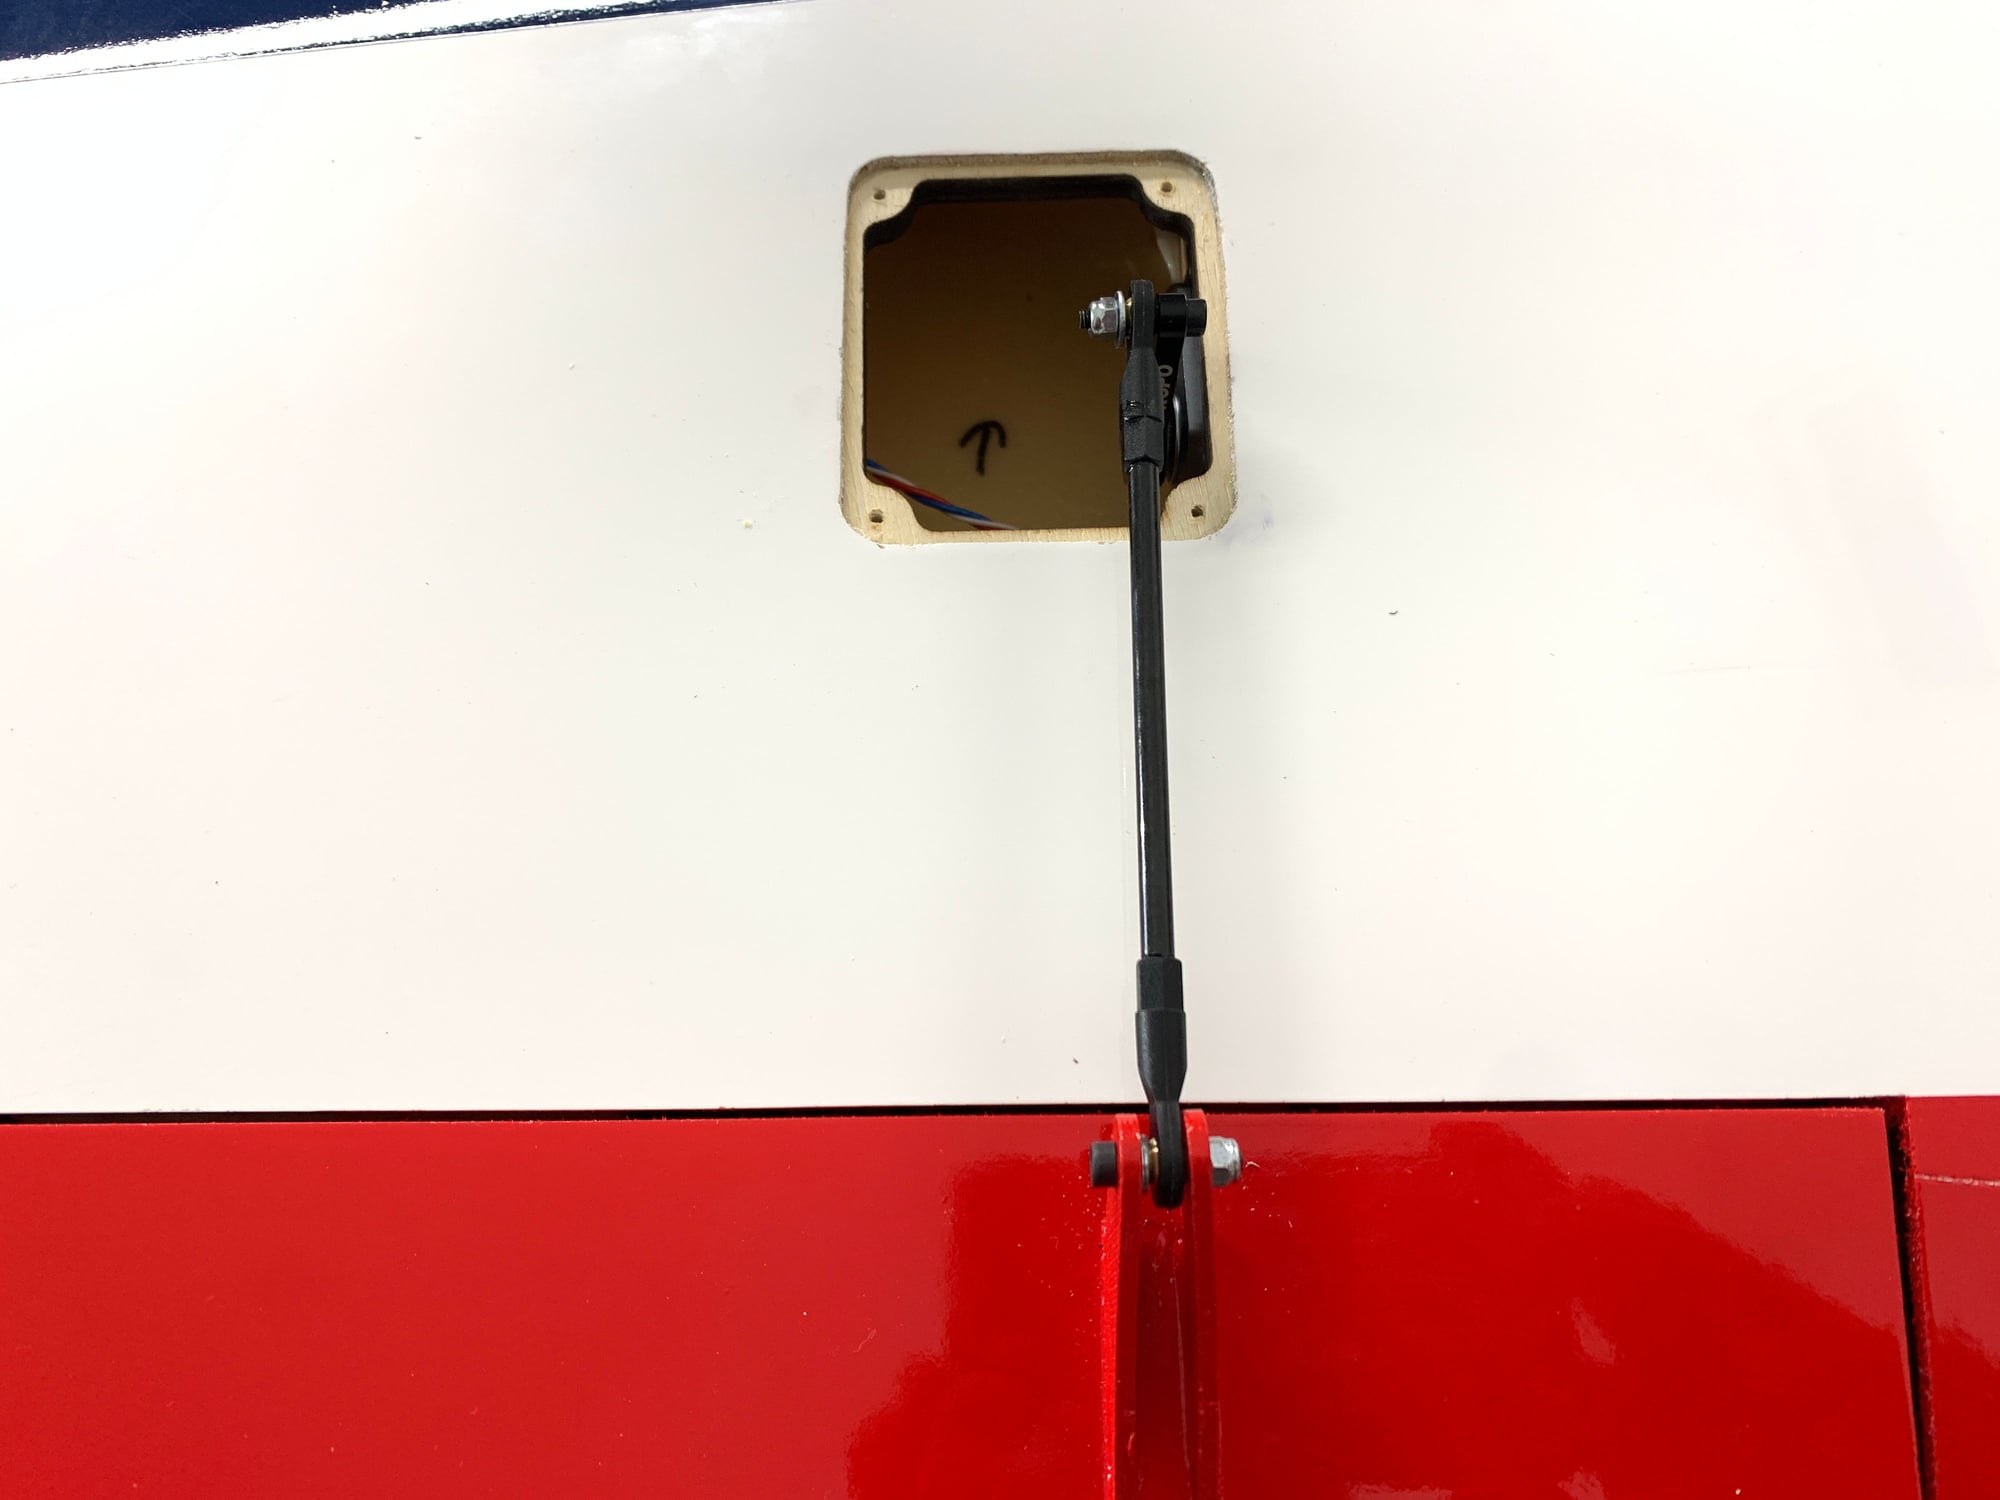
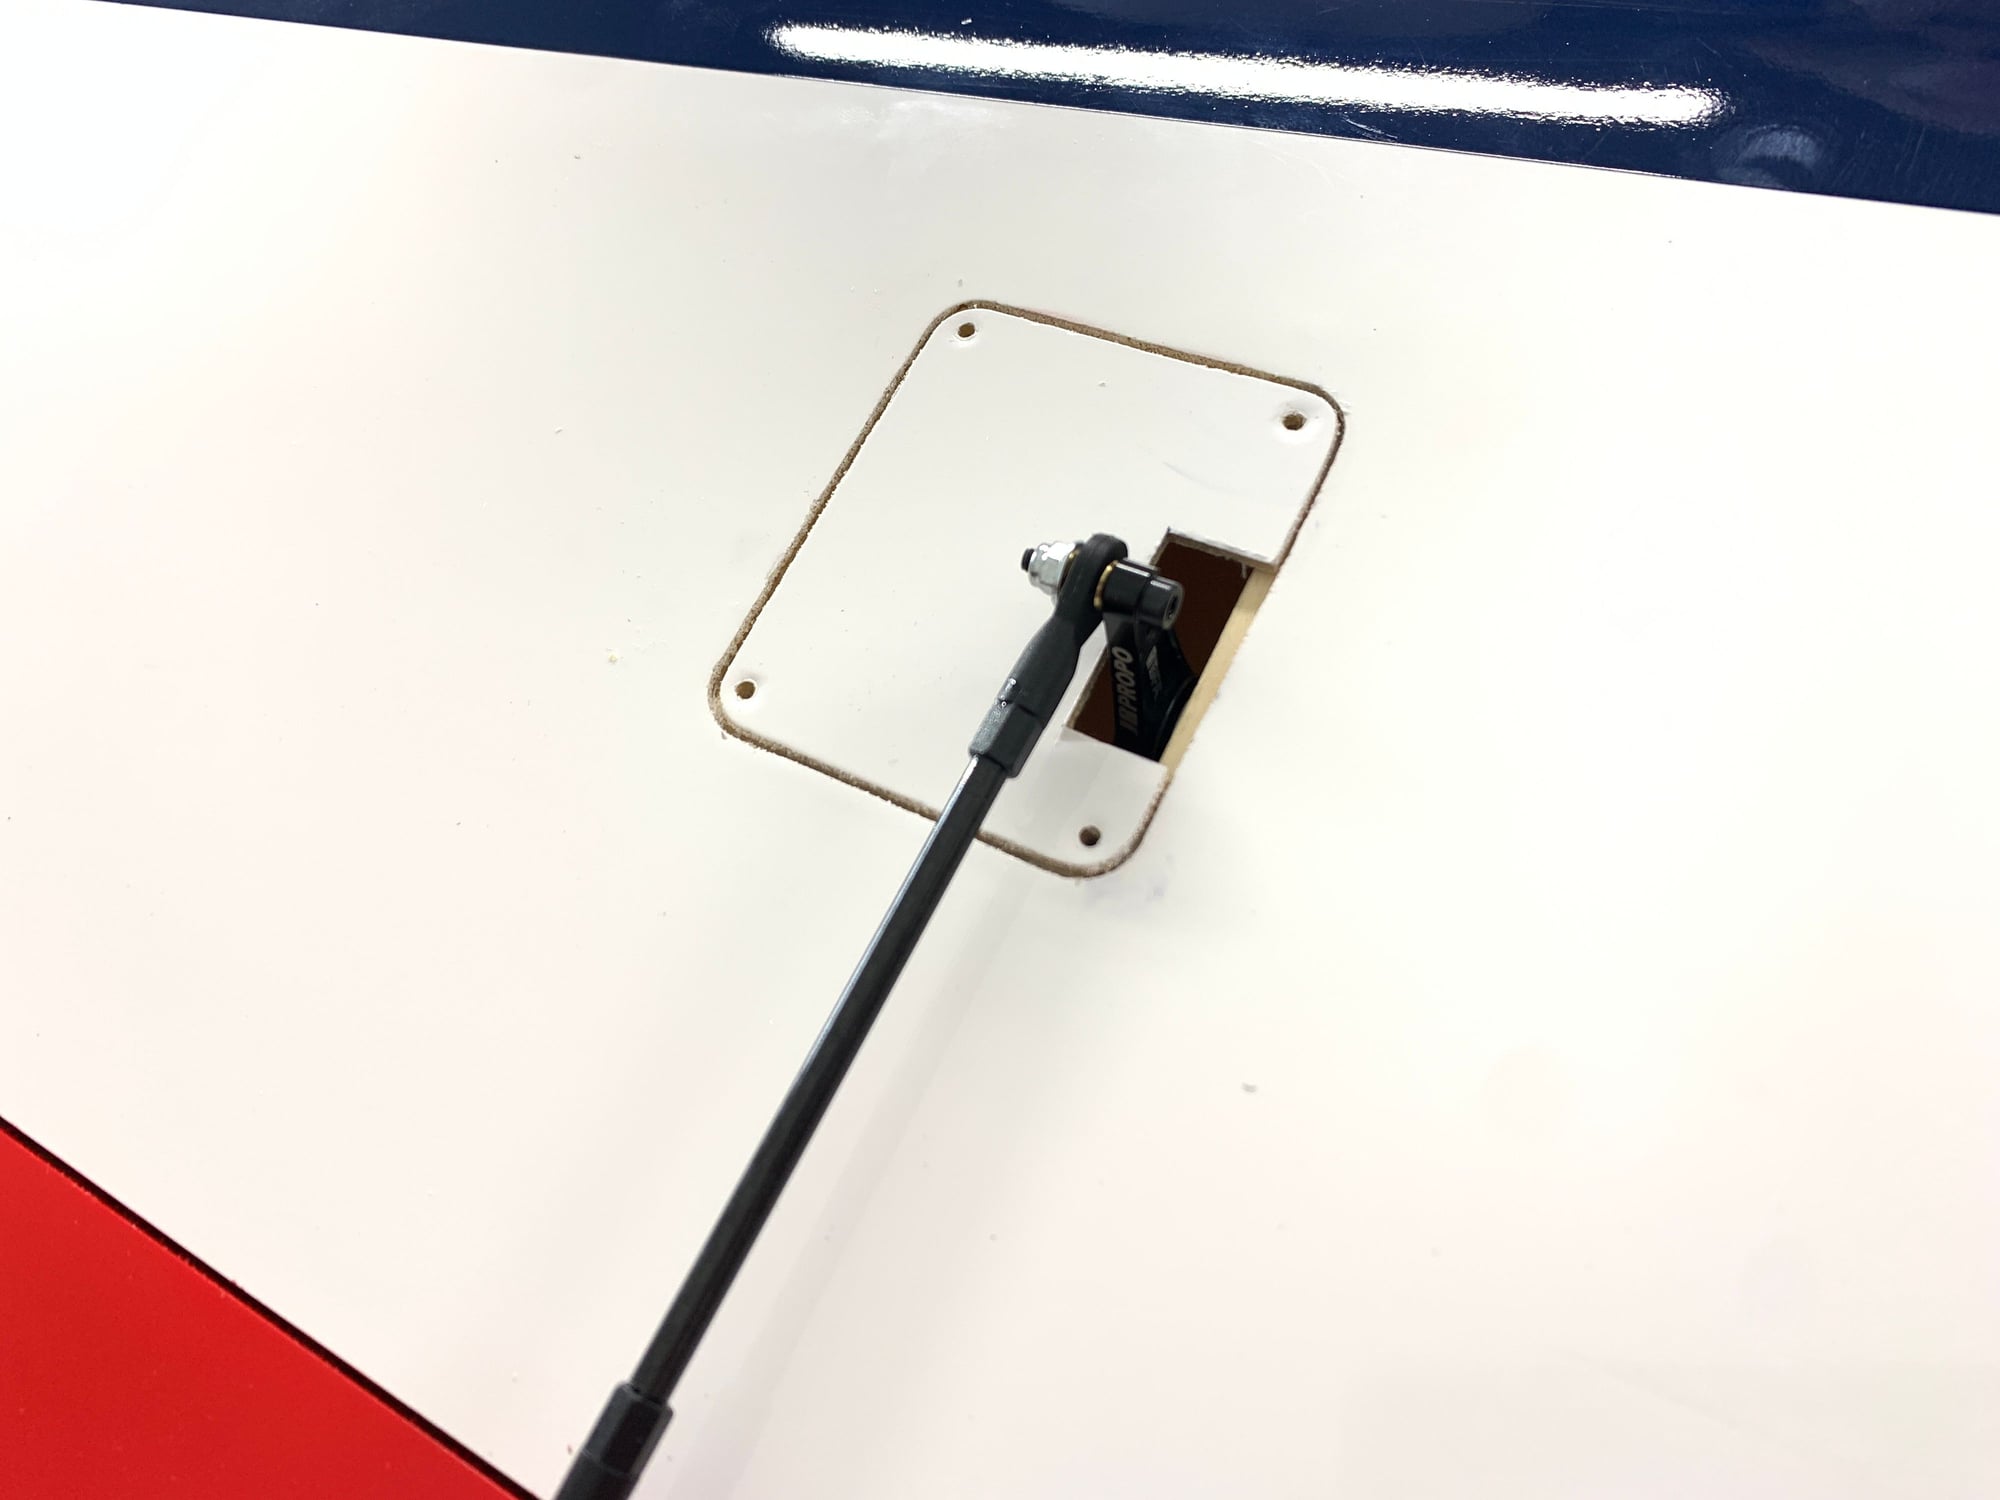
Front gear door servo mounting location. Made a arm mount and glued it to the front door in line with the servo linkage.

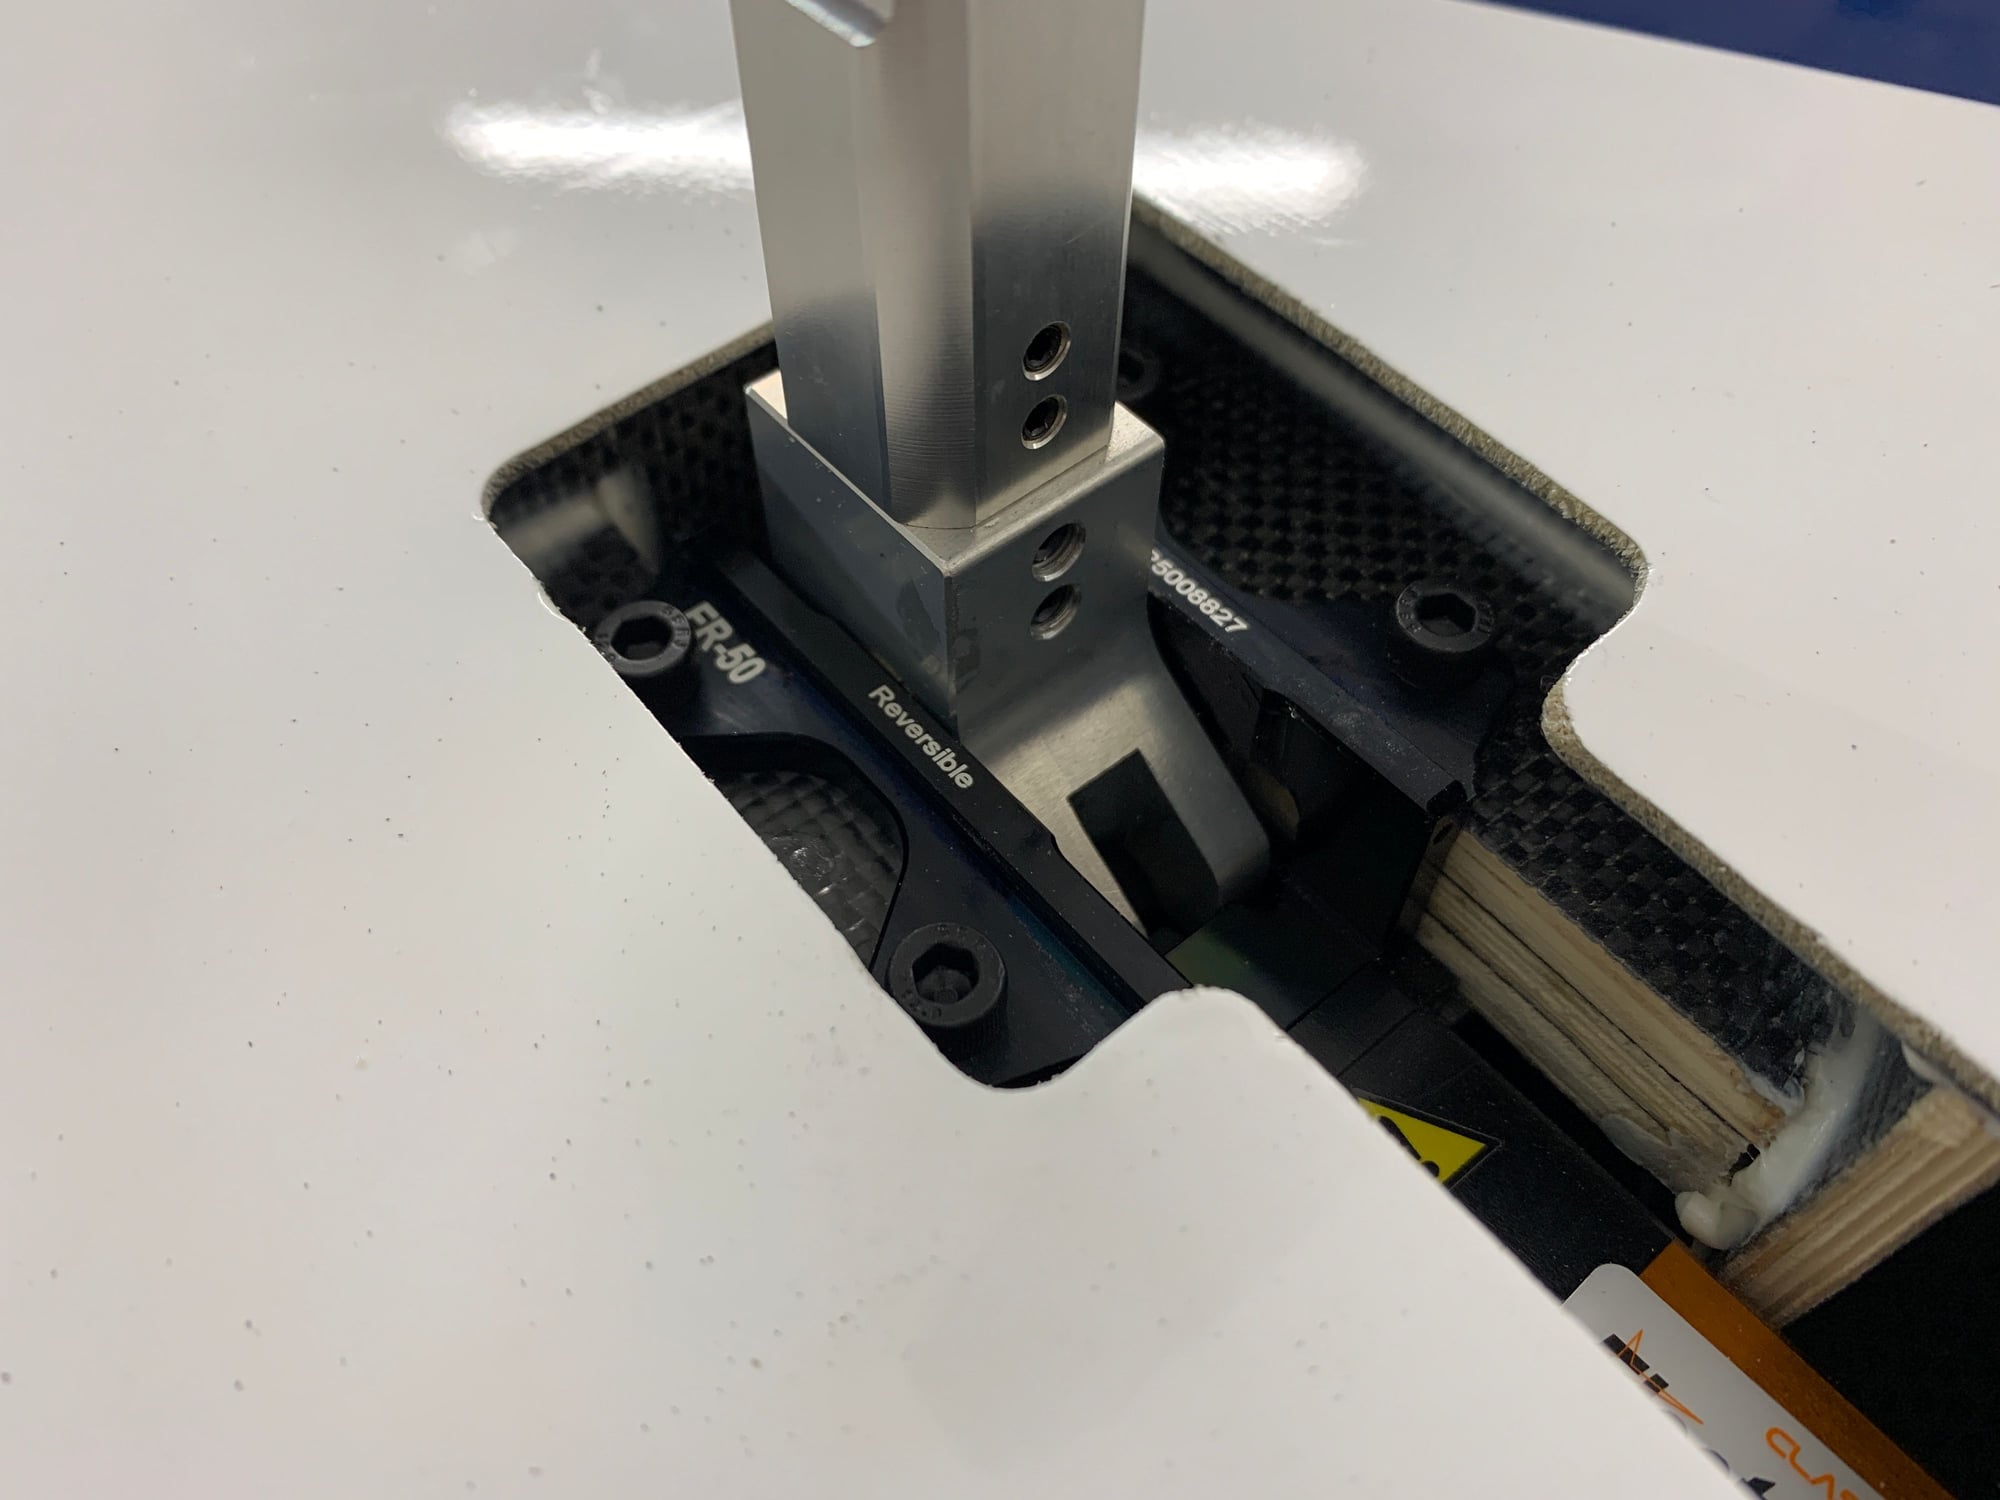
Main equipment tray.
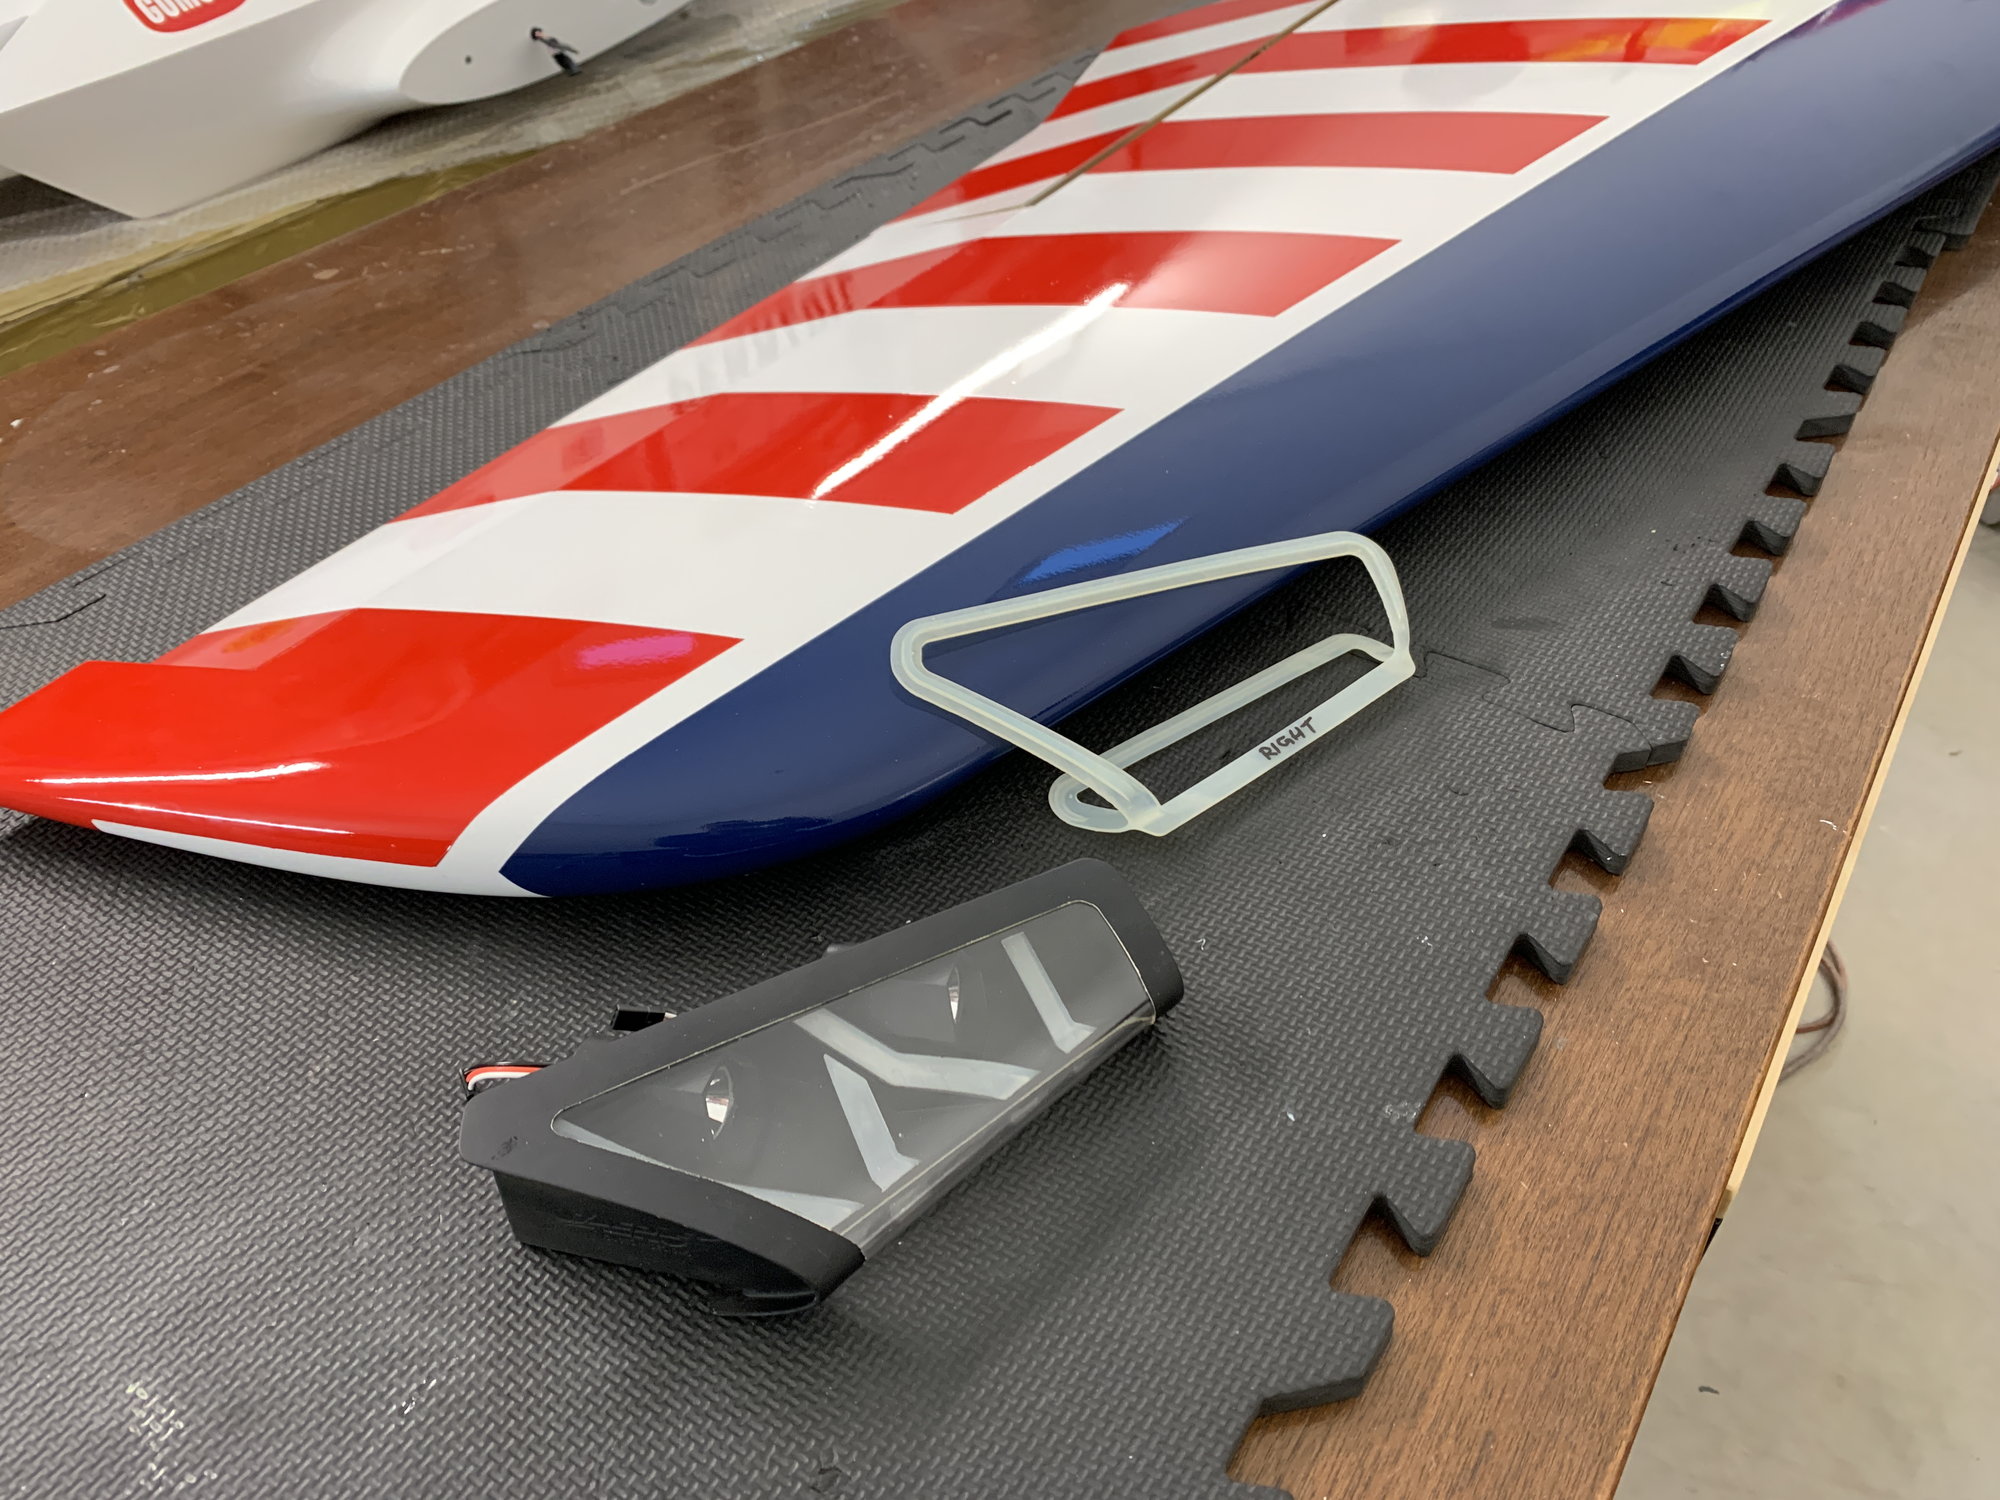
These are the first set of light housings from Ozaero and cut out templates included.
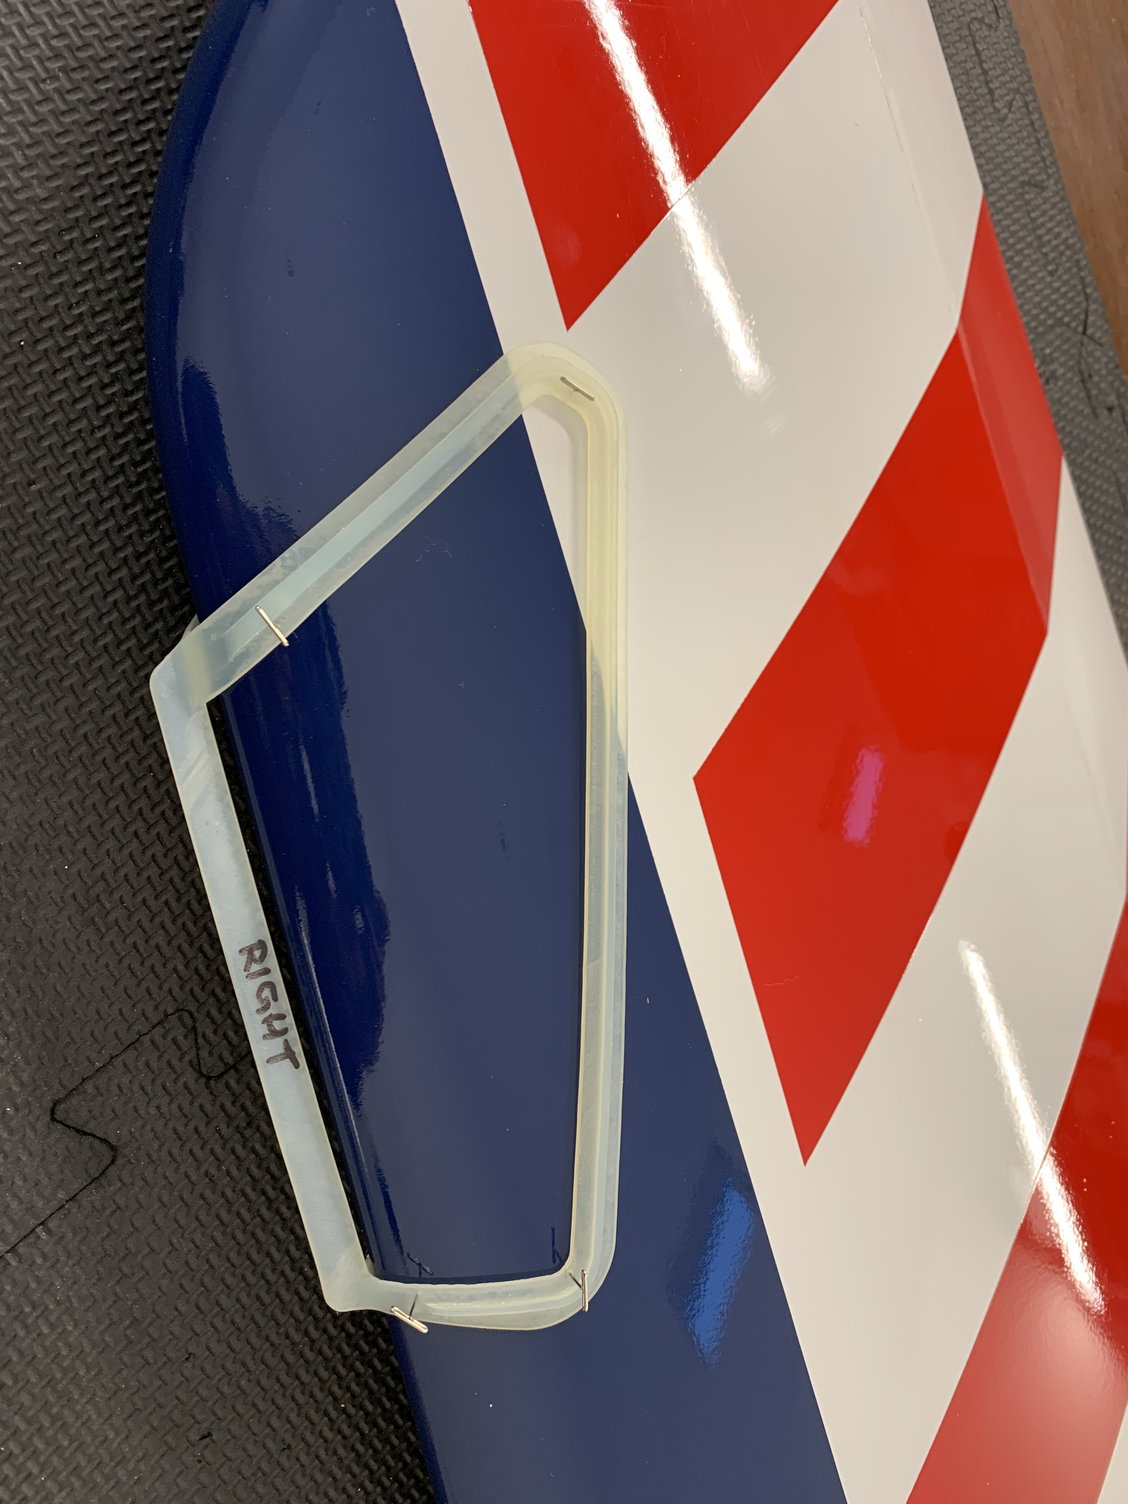
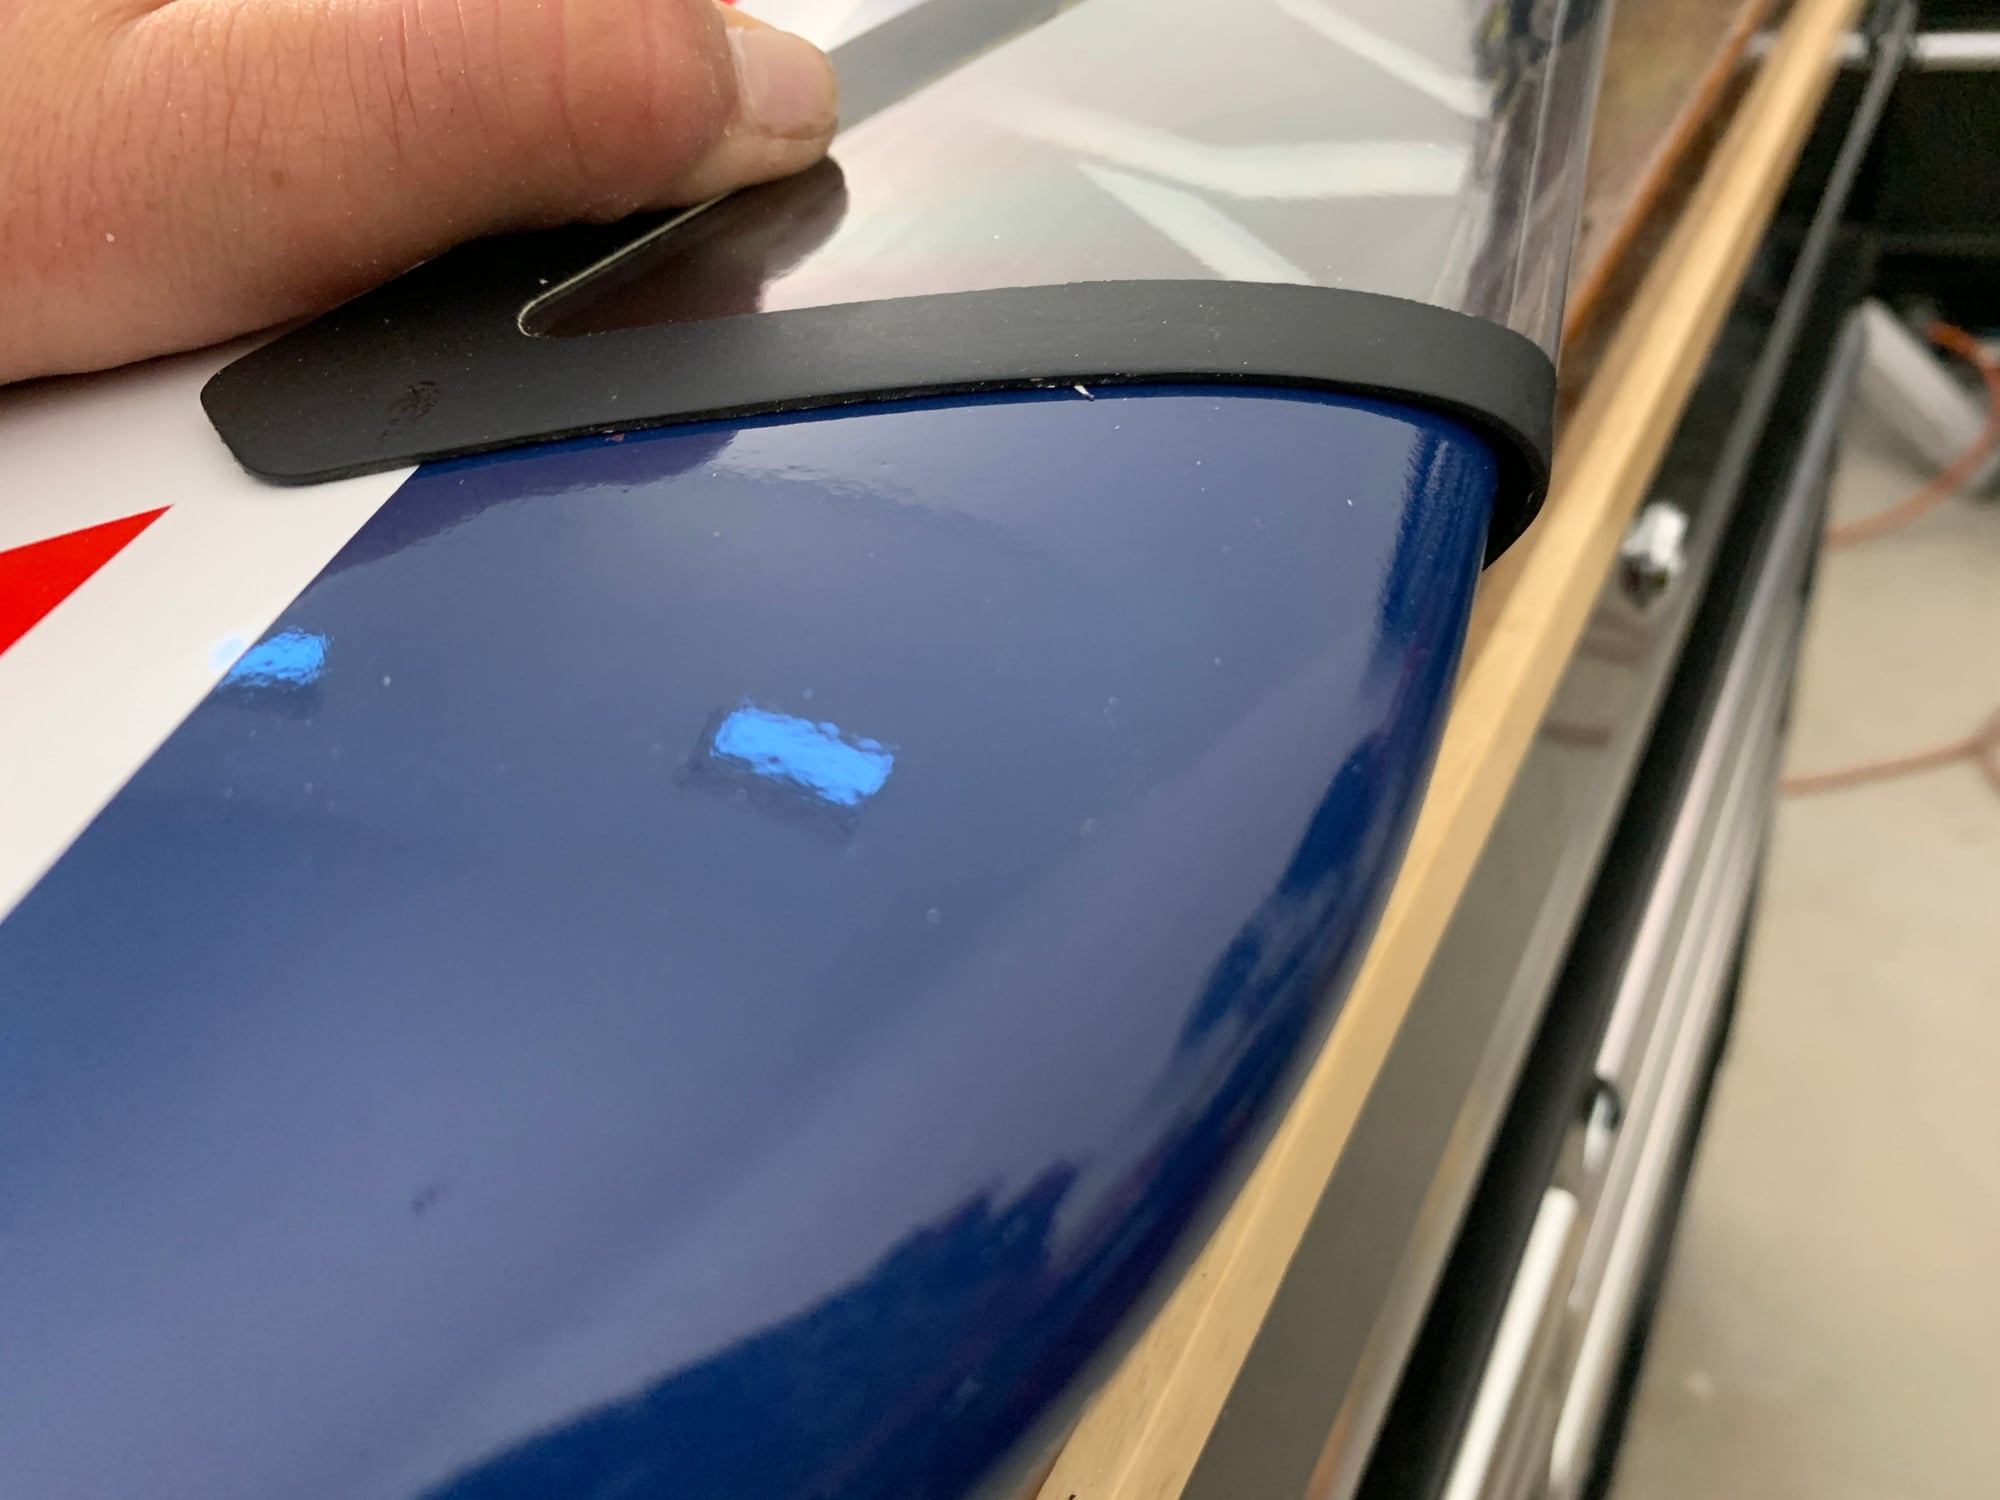
Cutout template located on the wing and positioned where I wanted the lights mounted. The template has pin holes already in place so you can pin into the wing.
Front gear door servo mounting location. Made a arm mount and glued it to the front door in line with the servo linkage.
Main equipment tray.
These are the first set of light housings from Ozaero and cut out templates included.
Cutout template located on the wing and positioned where I wanted the lights mounted. The template has pin holes already in place so you can pin into the wing.
The following users liked this post:
OzaeroCustomDesigns (12-15-2021)
12-15-2021, 09:25 AM
#58
My Feedback: (1)

Jonathan,
On the "deck" for the parts that you screwed in, did you take scrap wood and glue underneath to give the screws some bite? I'm assuming you used some 3M double-sided tape for the Cortex and other light products? Aside from the obvious stuff, i.e. UAT, and power distribution board, are there certain items that you absolutely would not "tape"?
On the "deck" for the parts that you screwed in, did you take scrap wood and glue underneath to give the screws some bite? I'm assuming you used some 3M double-sided tape for the Cortex and other light products? Aside from the obvious stuff, i.e. UAT, and power distribution board, are there certain items that you absolutely would not "tape"?
The following users liked this post:
Canadian Man (12-15-2021)
12-15-2021, 09:28 AM
#59
Thread Starter
My Feedback: (1)
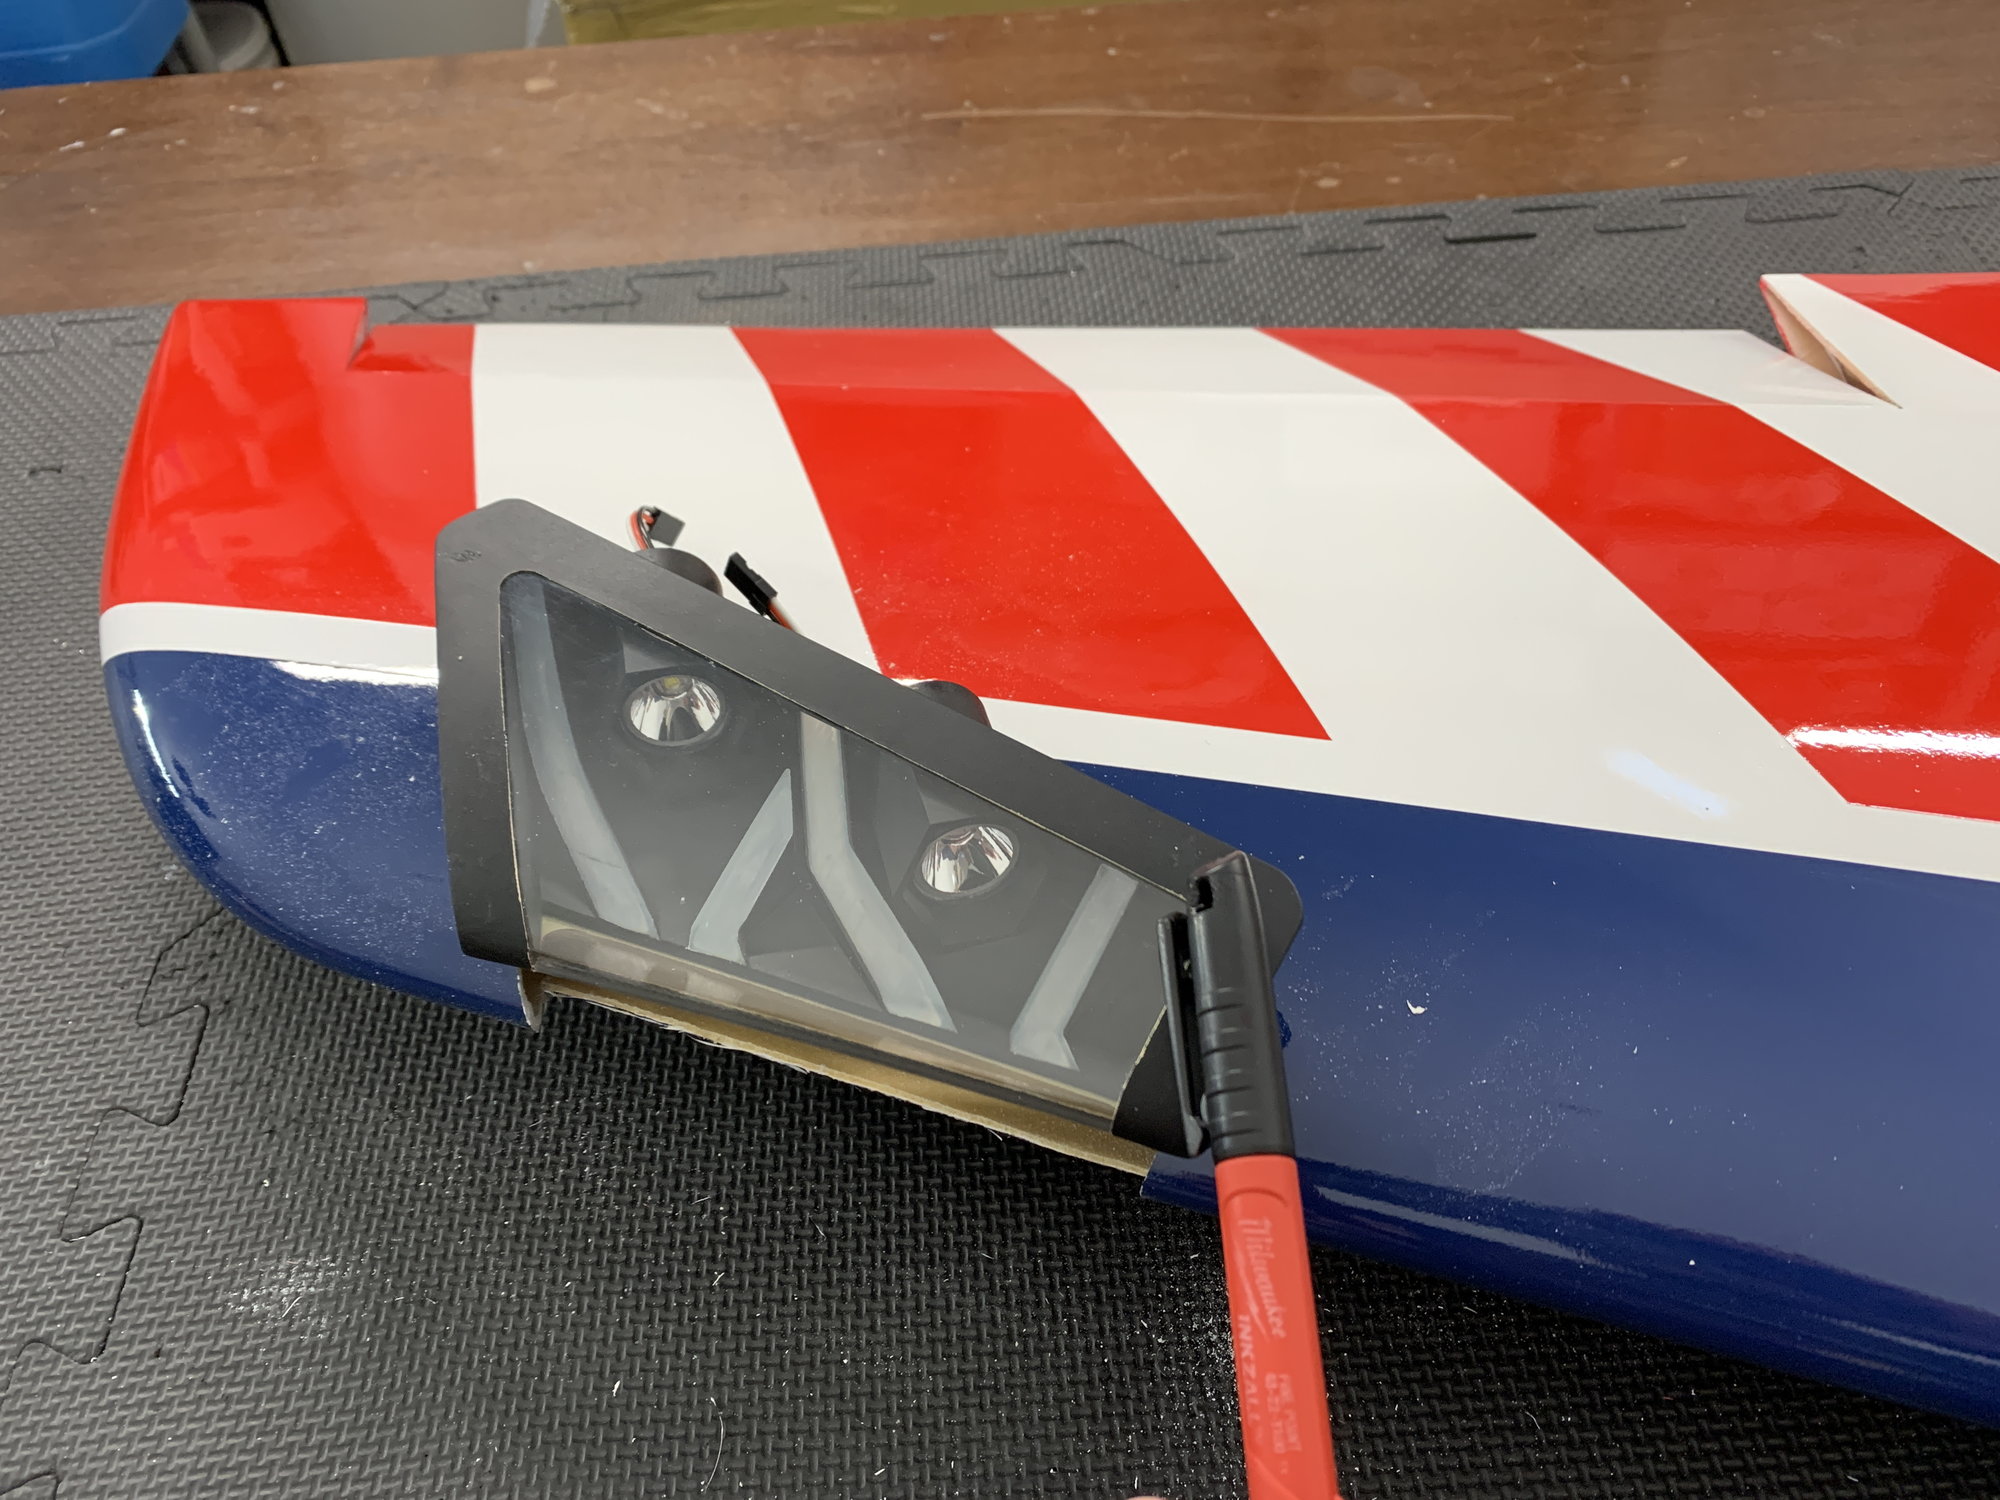
unfortunately with the angles both facing inward the lights would not fit into the wing. It's explained in the video but I opened up the opening as much as needed to fit. Sent the housings back to Ozaero and Ozzie is taking care of the redesign to make them fit.
Once the opening was opened up I was able to install. The fit is amazing and when the new ones arrive these things are going to be nuts!!!!

Here is a shot of the final cutout. had to remove the rib in the wing. This area will have to be reinforced. Will cover in detail when it's completed.
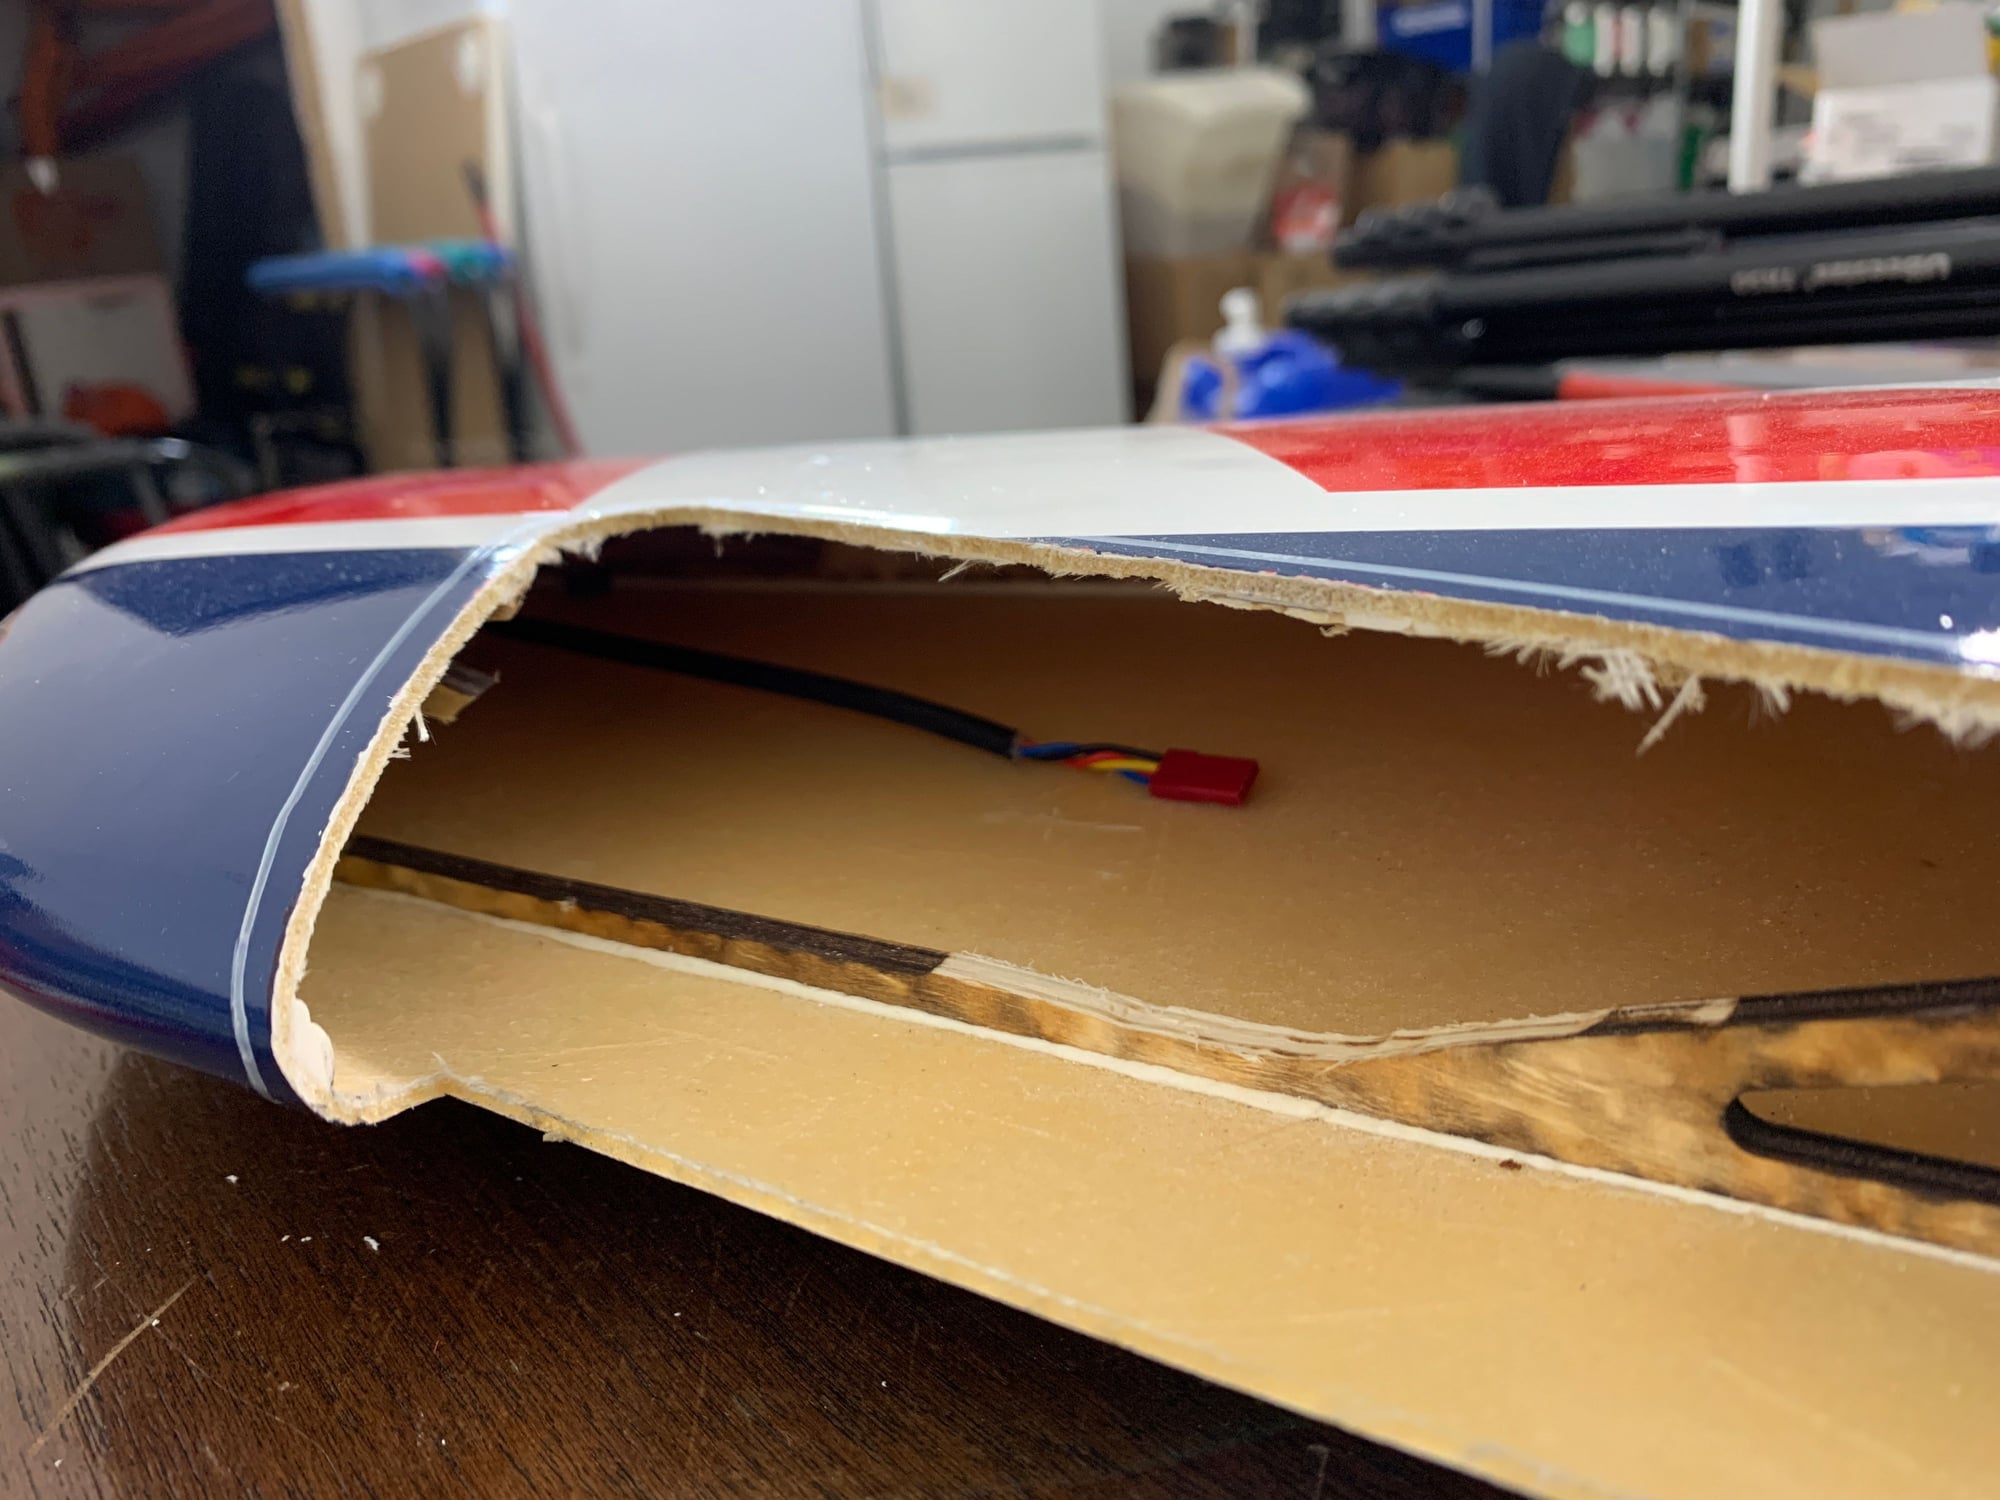
Better shot of removed wood.
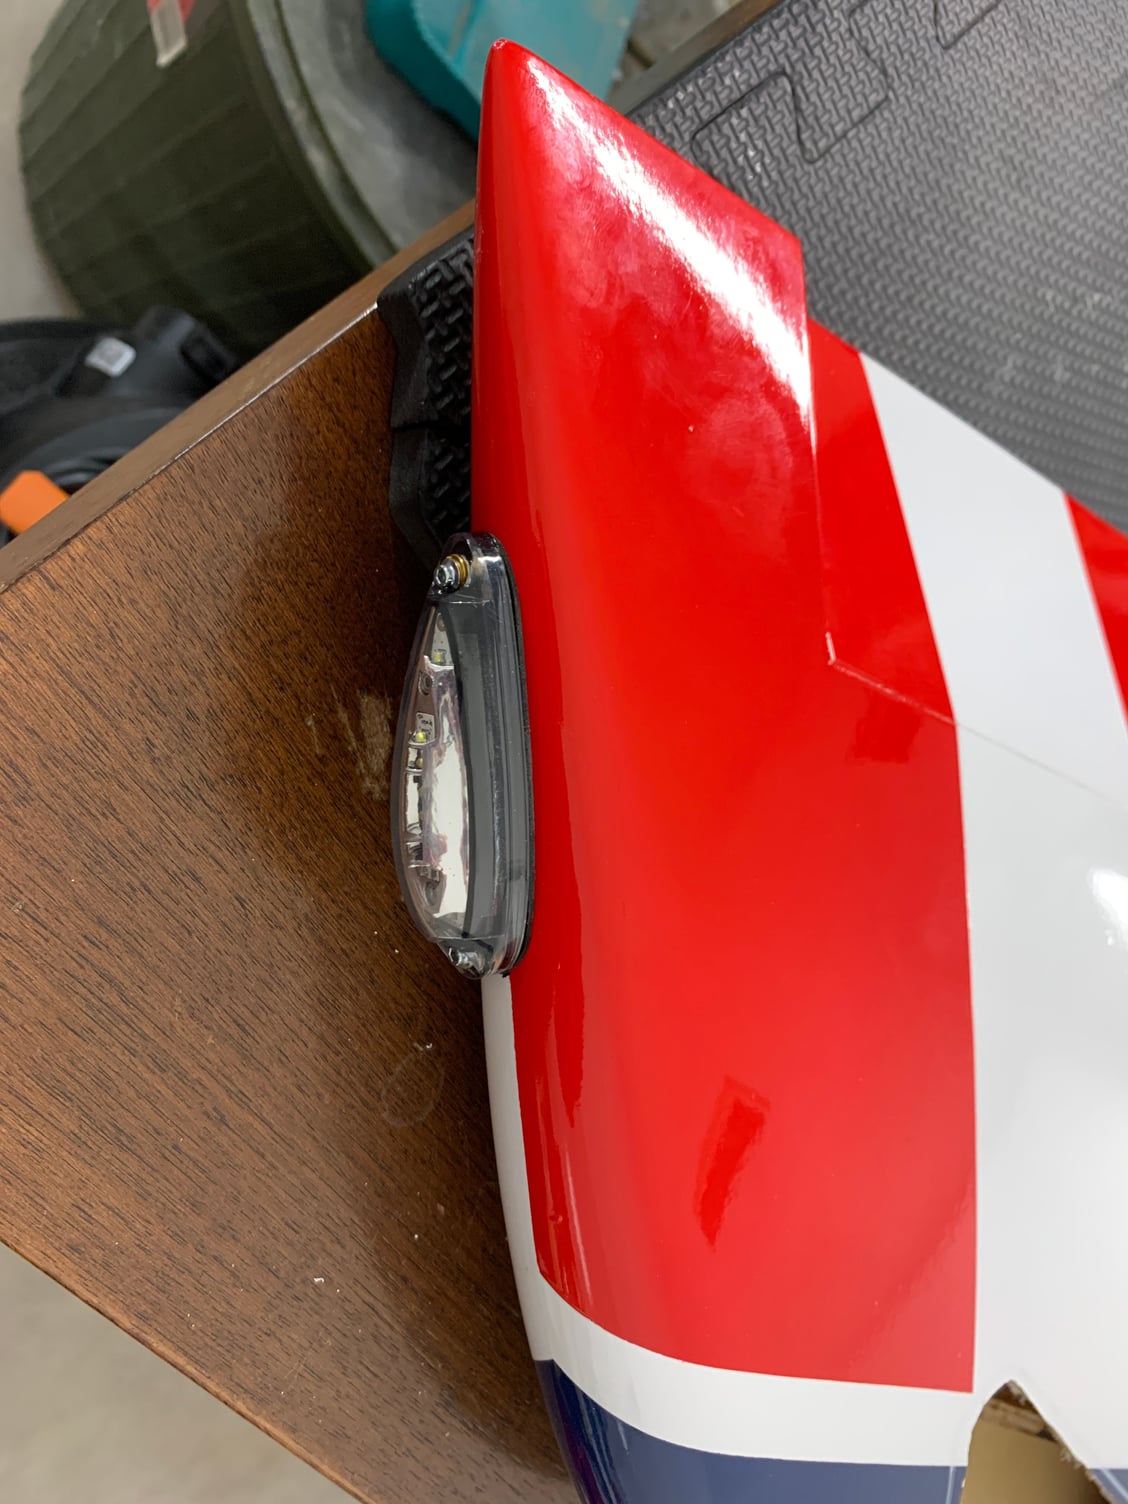
Wing tip lights from Skycandy! These are nuts! Just as bright as the setup that was installed on my Diamond Build!
12-15-2021, 09:31 AM
#60
Thread Starter
My Feedback: (1)
Aileron servo. this is a 1.25" horn. Pretty straight forward. Rib in wing has a cutout for the servo. Screw it in place.
The JR Servo and Arm combo work perfect.

Linkage all setup.
 12-15-2021, 09:40 AM
#61
Thread Starter
My Feedback: (1)
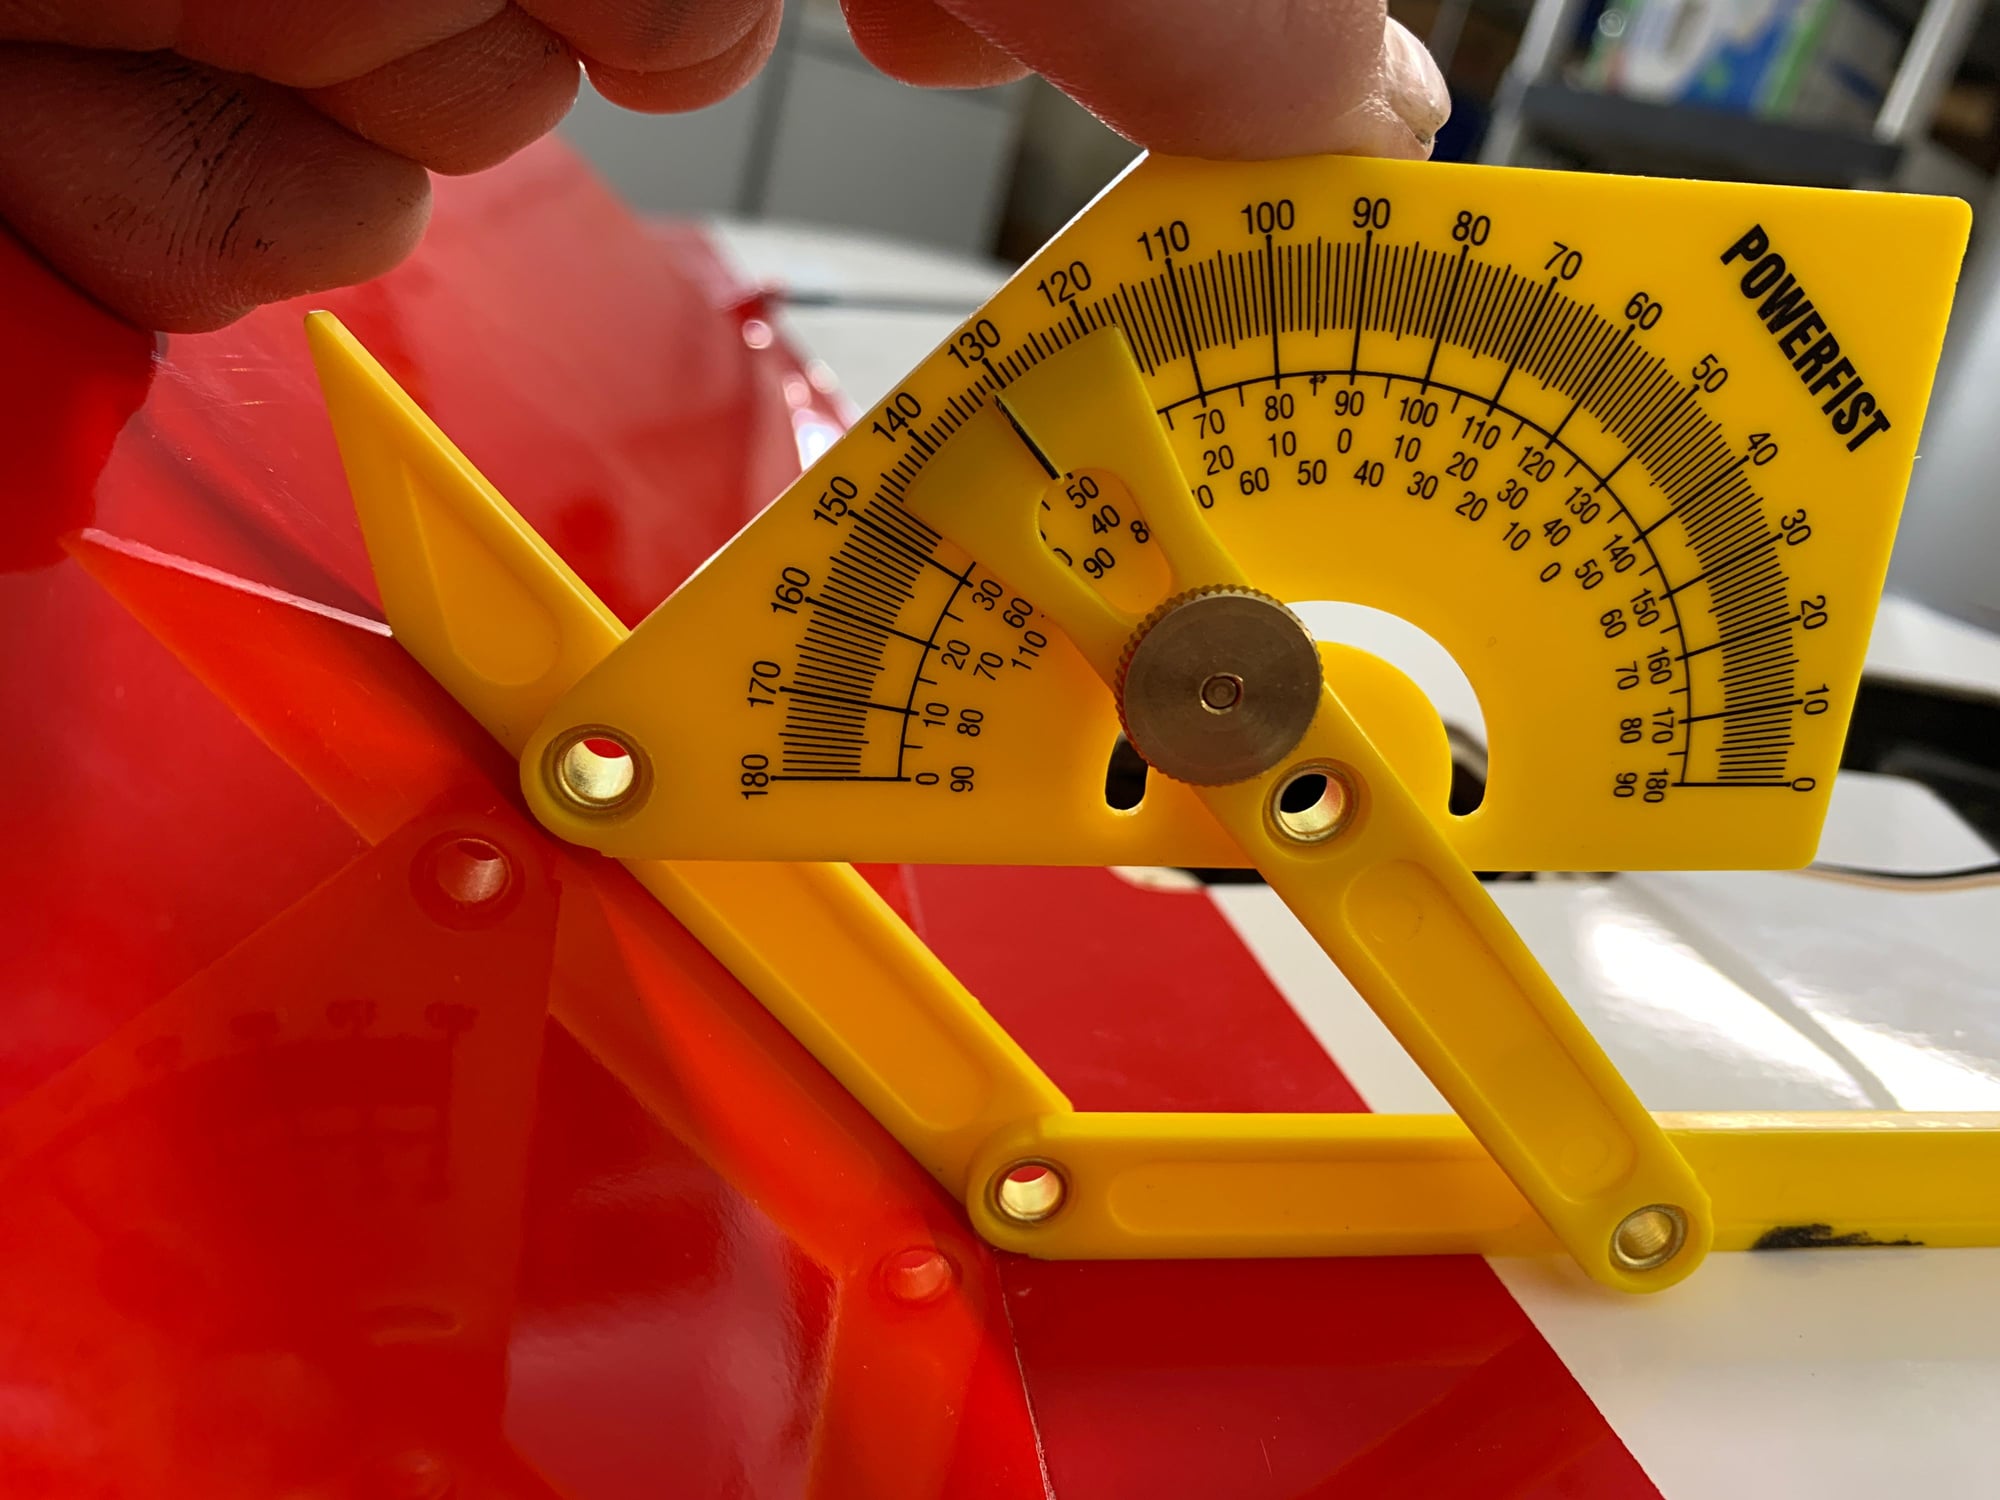
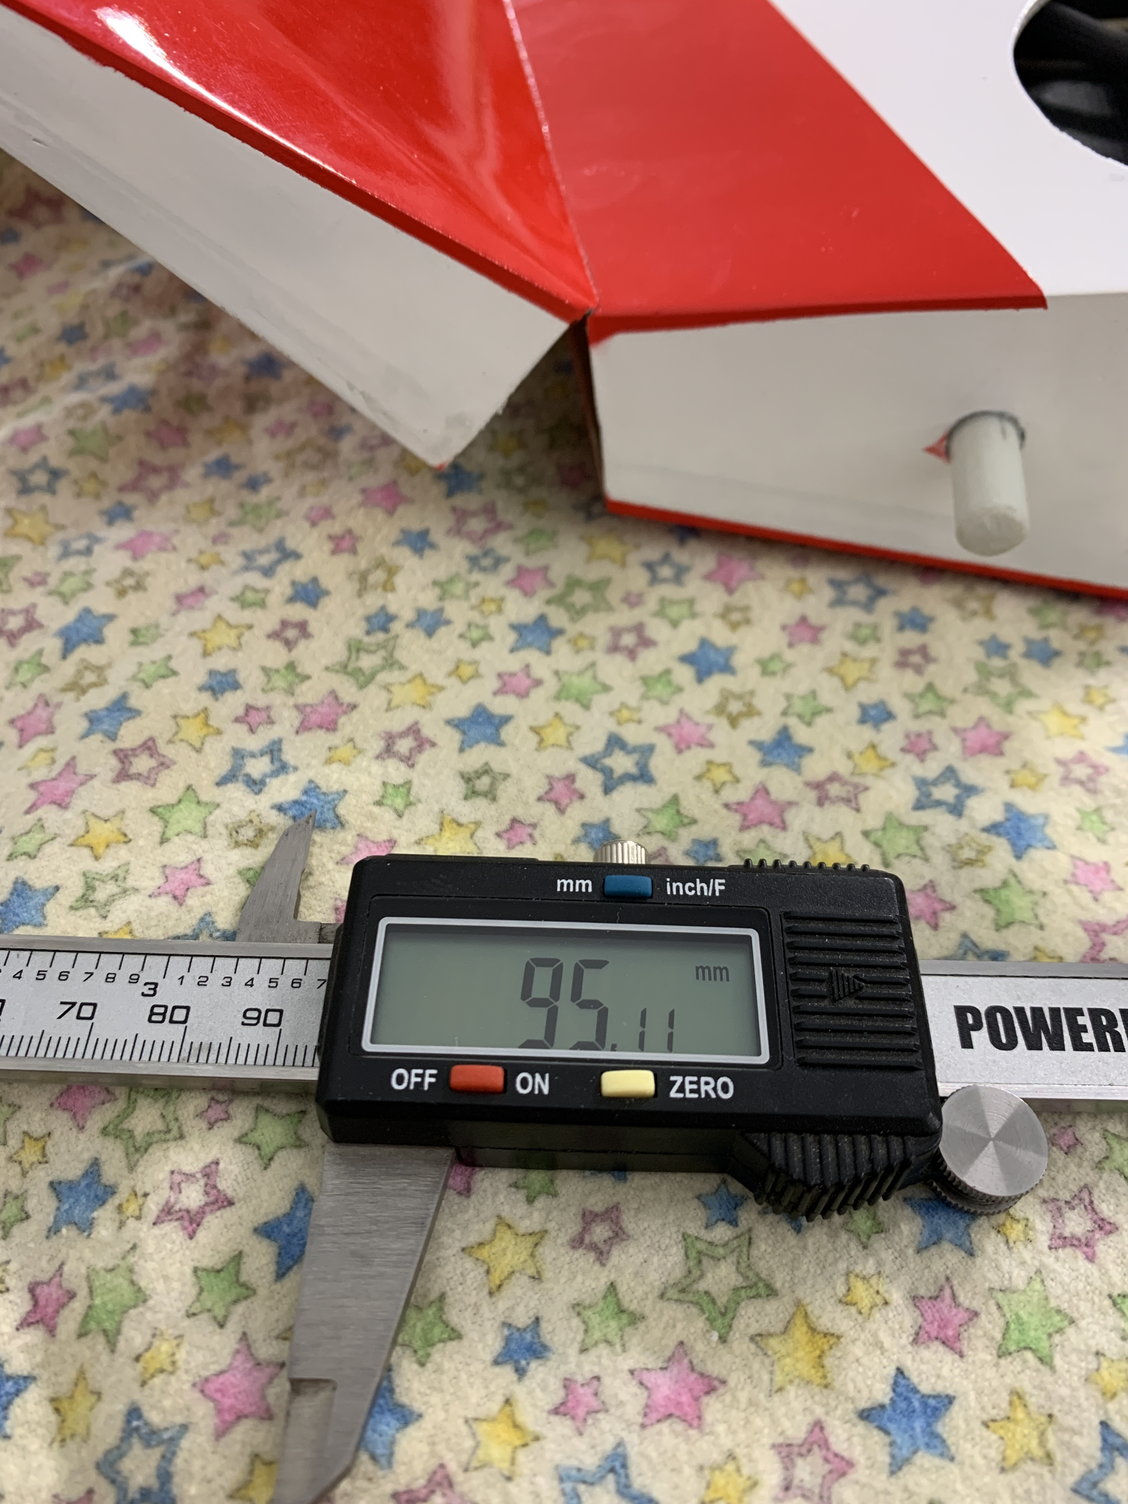
Flap mounting/Setup. Manufacture calls for 95mm of travel. What I like to do is get the travel setup and then use my angle finder to figure out the angle. This way you have the angle your shooting for and don't have to try to measure travel when it's not on the aircraft.
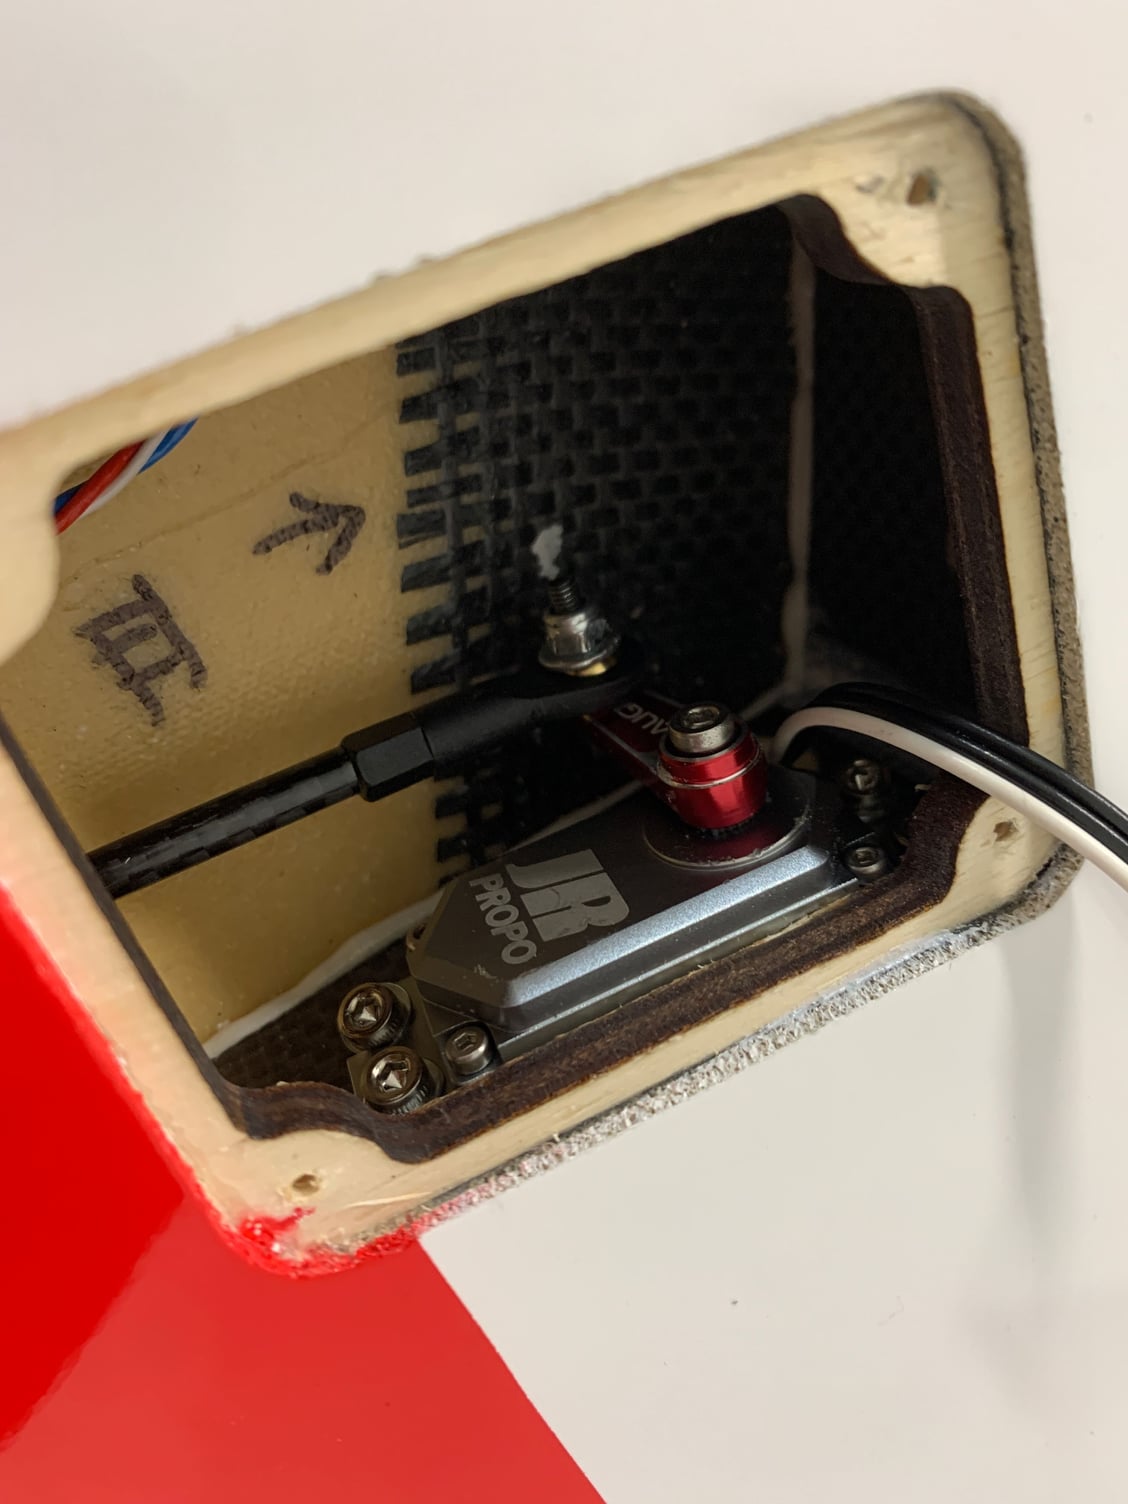
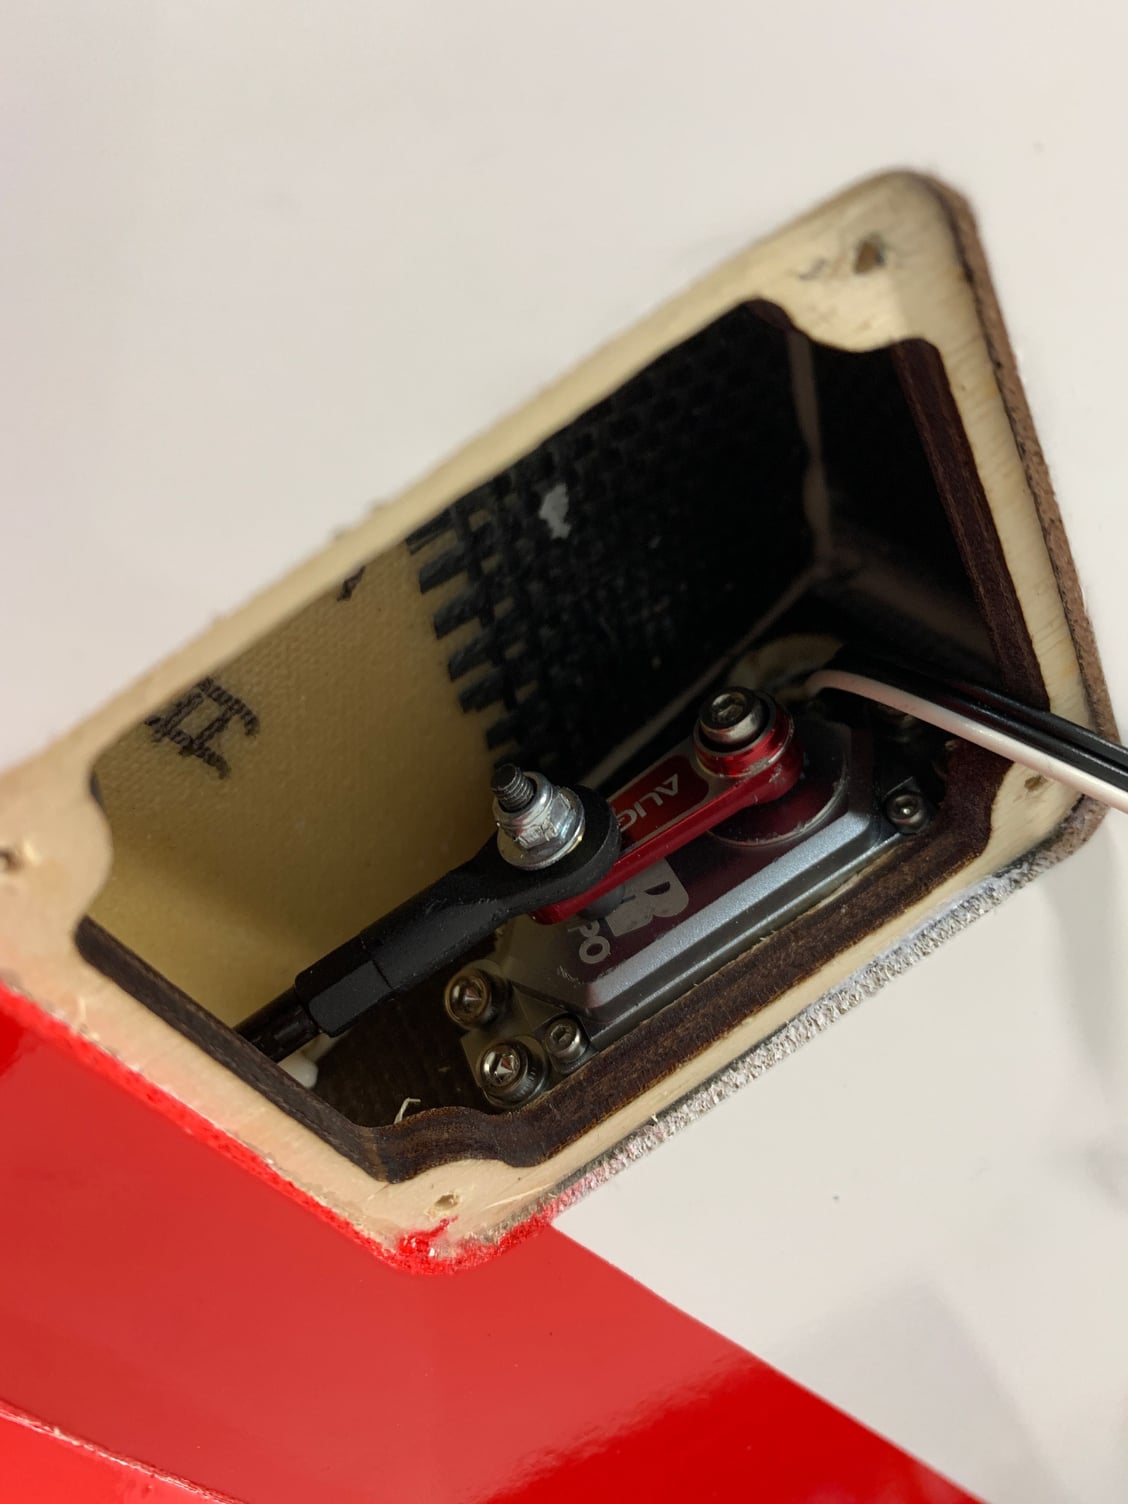
Tried multiple horns. The Seacraft 19mm ones I tried were good for travel but way too much flex in the servo arm. Settled on these Align Heli Servo arm. They are thick and stiff. I did loose about 5mm of flap travel as I belive the horns are 16mm to 18mm in length but that's ok. A 1" Servo arm is too long for the flaps. you will get interference with the wing skin.
 12-15-2021, 09:46 AM
#62
Thread Starter
My Feedback: (1)
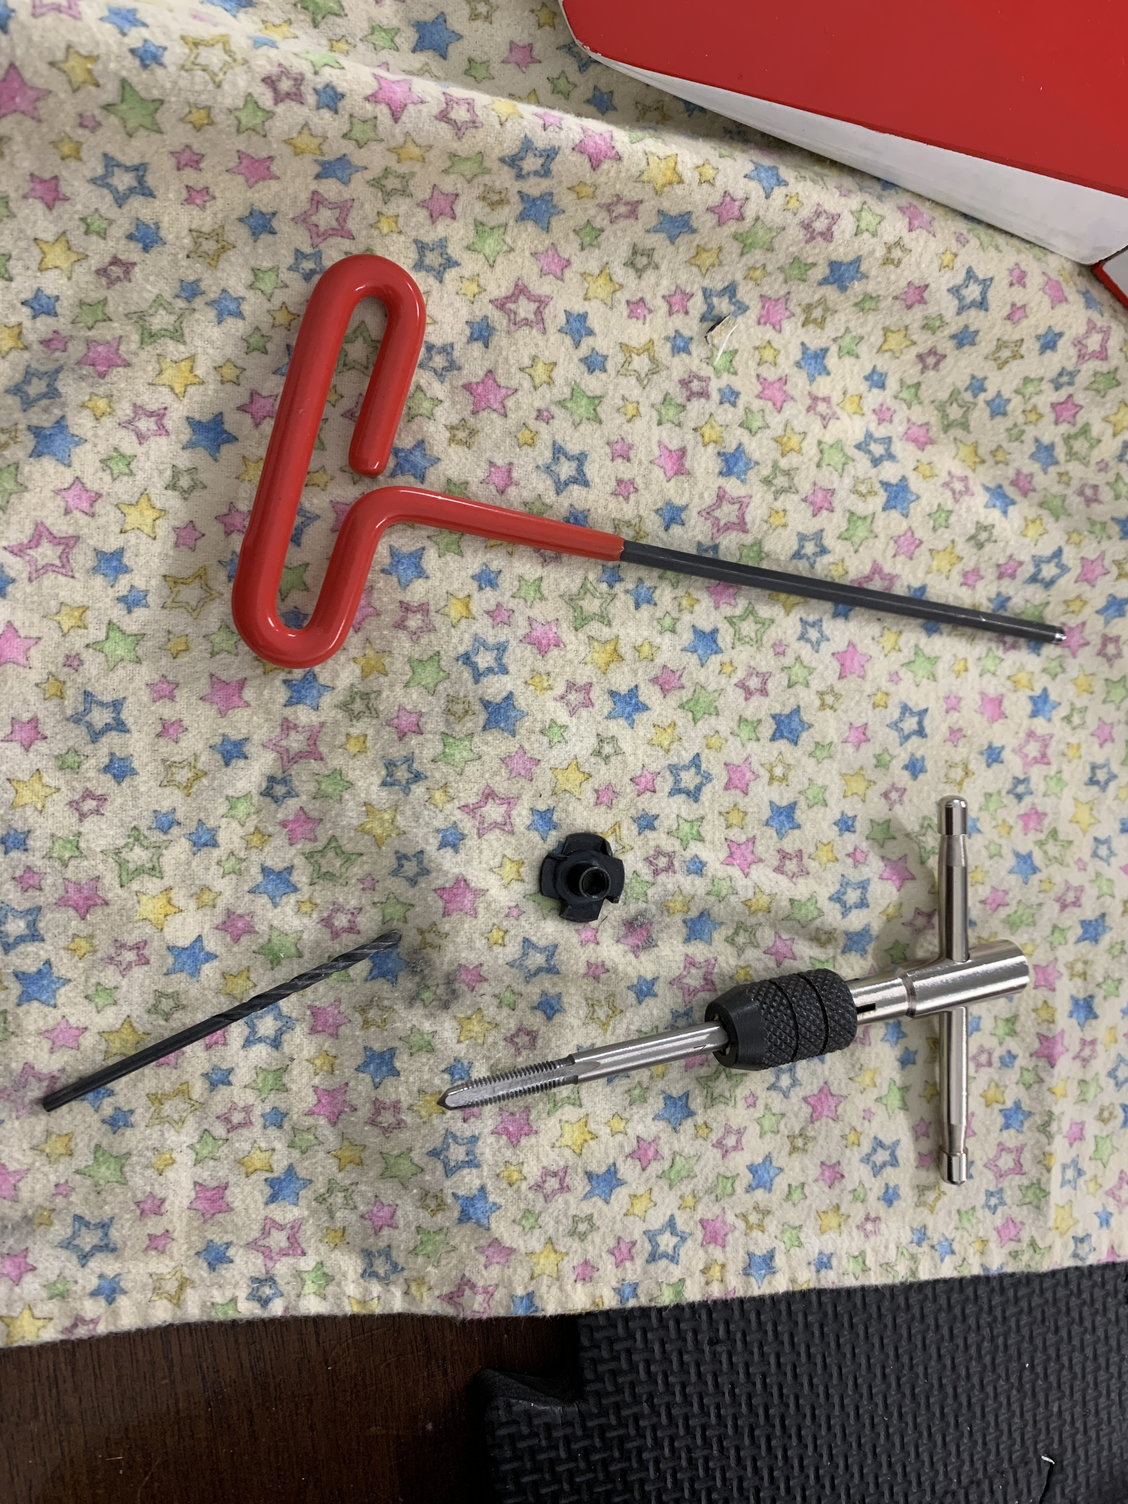
Last picture is main gear mounting. I ended up not using the blind nuts and drilled and tapped the 3 layers of ply. Primary reason is the bolts were not long enough to reach the blind nuts. This is typically how I would mount the gear. I will probably keep it this way but may install the blind nuts as the front was done this way. Still thinking on it.
Main gear installed.
12-15-2021, 12:51 PM
#63
Thread Starter
My Feedback: (1)
Jonathan,
On the "deck" for the parts that you screwed in, did you take scrap wood and glue underneath to give the screws some bite? I'm assuming you used some 3M double-sided tape for the Cortex and other light products? Aside from the obvious stuff, i.e. UAT, and power distribution board, are there certain items that you absolutely would not "tape"?
On the "deck" for the parts that you screwed in, did you take scrap wood and glue underneath to give the screws some bite? I'm assuming you used some 3M double-sided tape for the Cortex and other light products? Aside from the obvious stuff, i.e. UAT, and power distribution board, are there certain items that you absolutely would not "tape"?
If the item is screwable, I would screw it. It it's not (gyro, GPS unit, Small Reciever, Sattelites) I would use double sided tape or velco.
The following users liked this post:
smcharg (12-15-2021)
12-15-2021, 01:12 PM
#64

My Feedback: (53)

Jonathan,
On the "deck" for the parts that you screwed in, did you take scrap wood and glue underneath to give the screws some bite? I'm assuming you used some 3M double-sided tape for the Cortex and other light products? Aside from the obvious stuff, i.e. UAT, and power distribution board, are there certain items that you absolutely would not "tape"?
On the "deck" for the parts that you screwed in, did you take scrap wood and glue underneath to give the screws some bite? I'm assuming you used some 3M double-sided tape for the Cortex and other light products? Aside from the obvious stuff, i.e. UAT, and power distribution board, are there certain items that you absolutely would not "tape"?

 12-16-2021, 06:53 AM
#66
Thread Starter
My Feedback: (1)
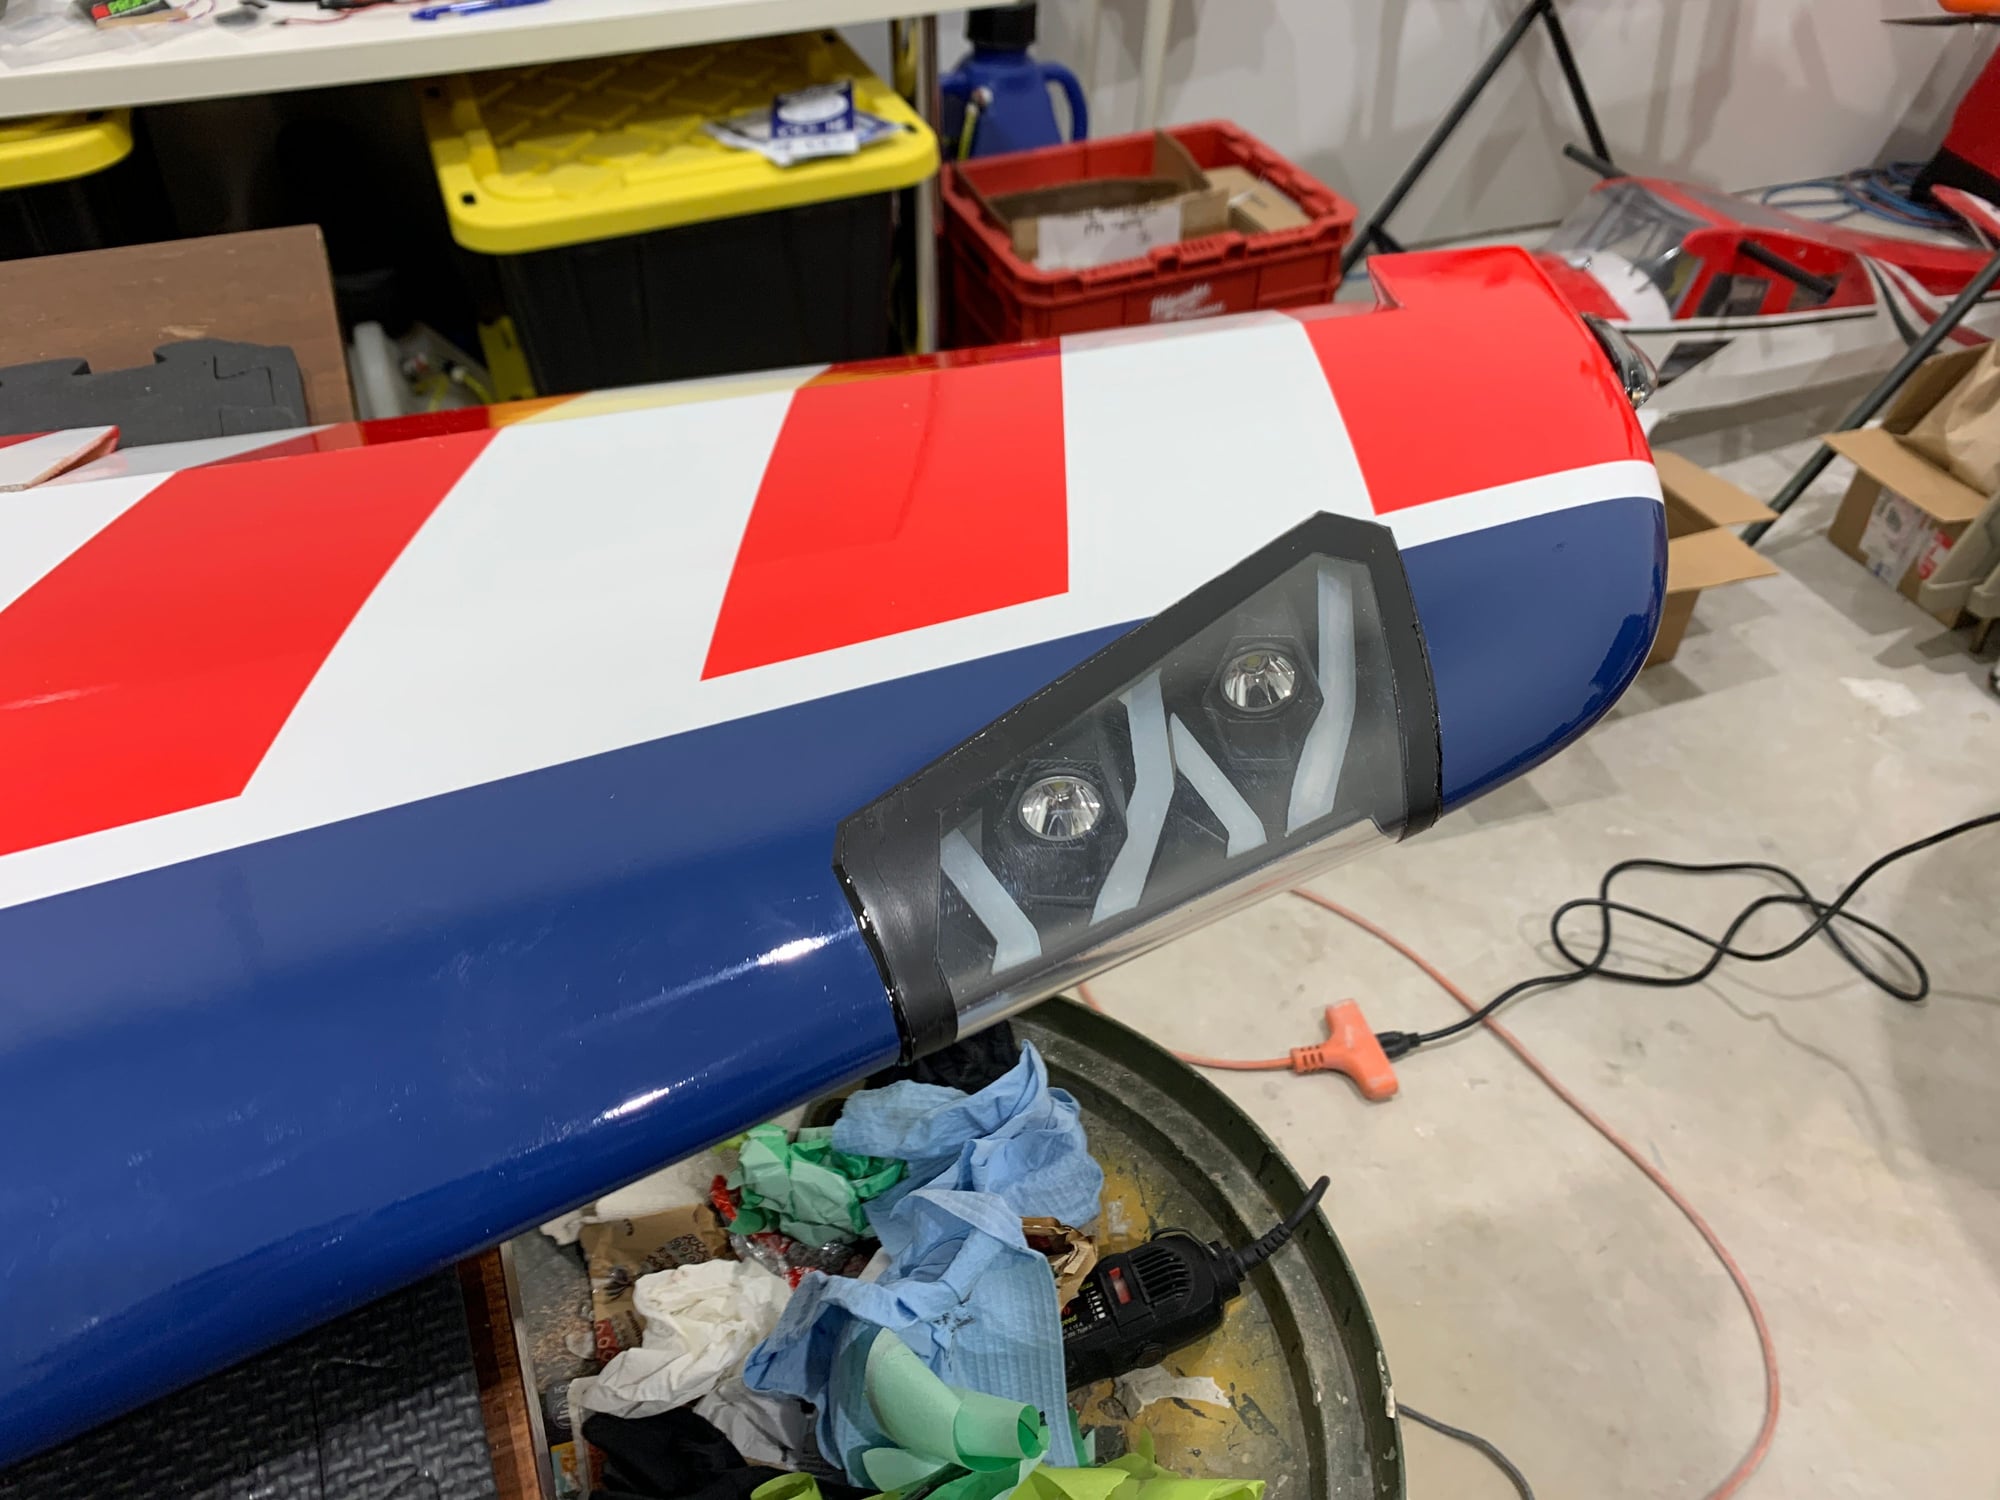
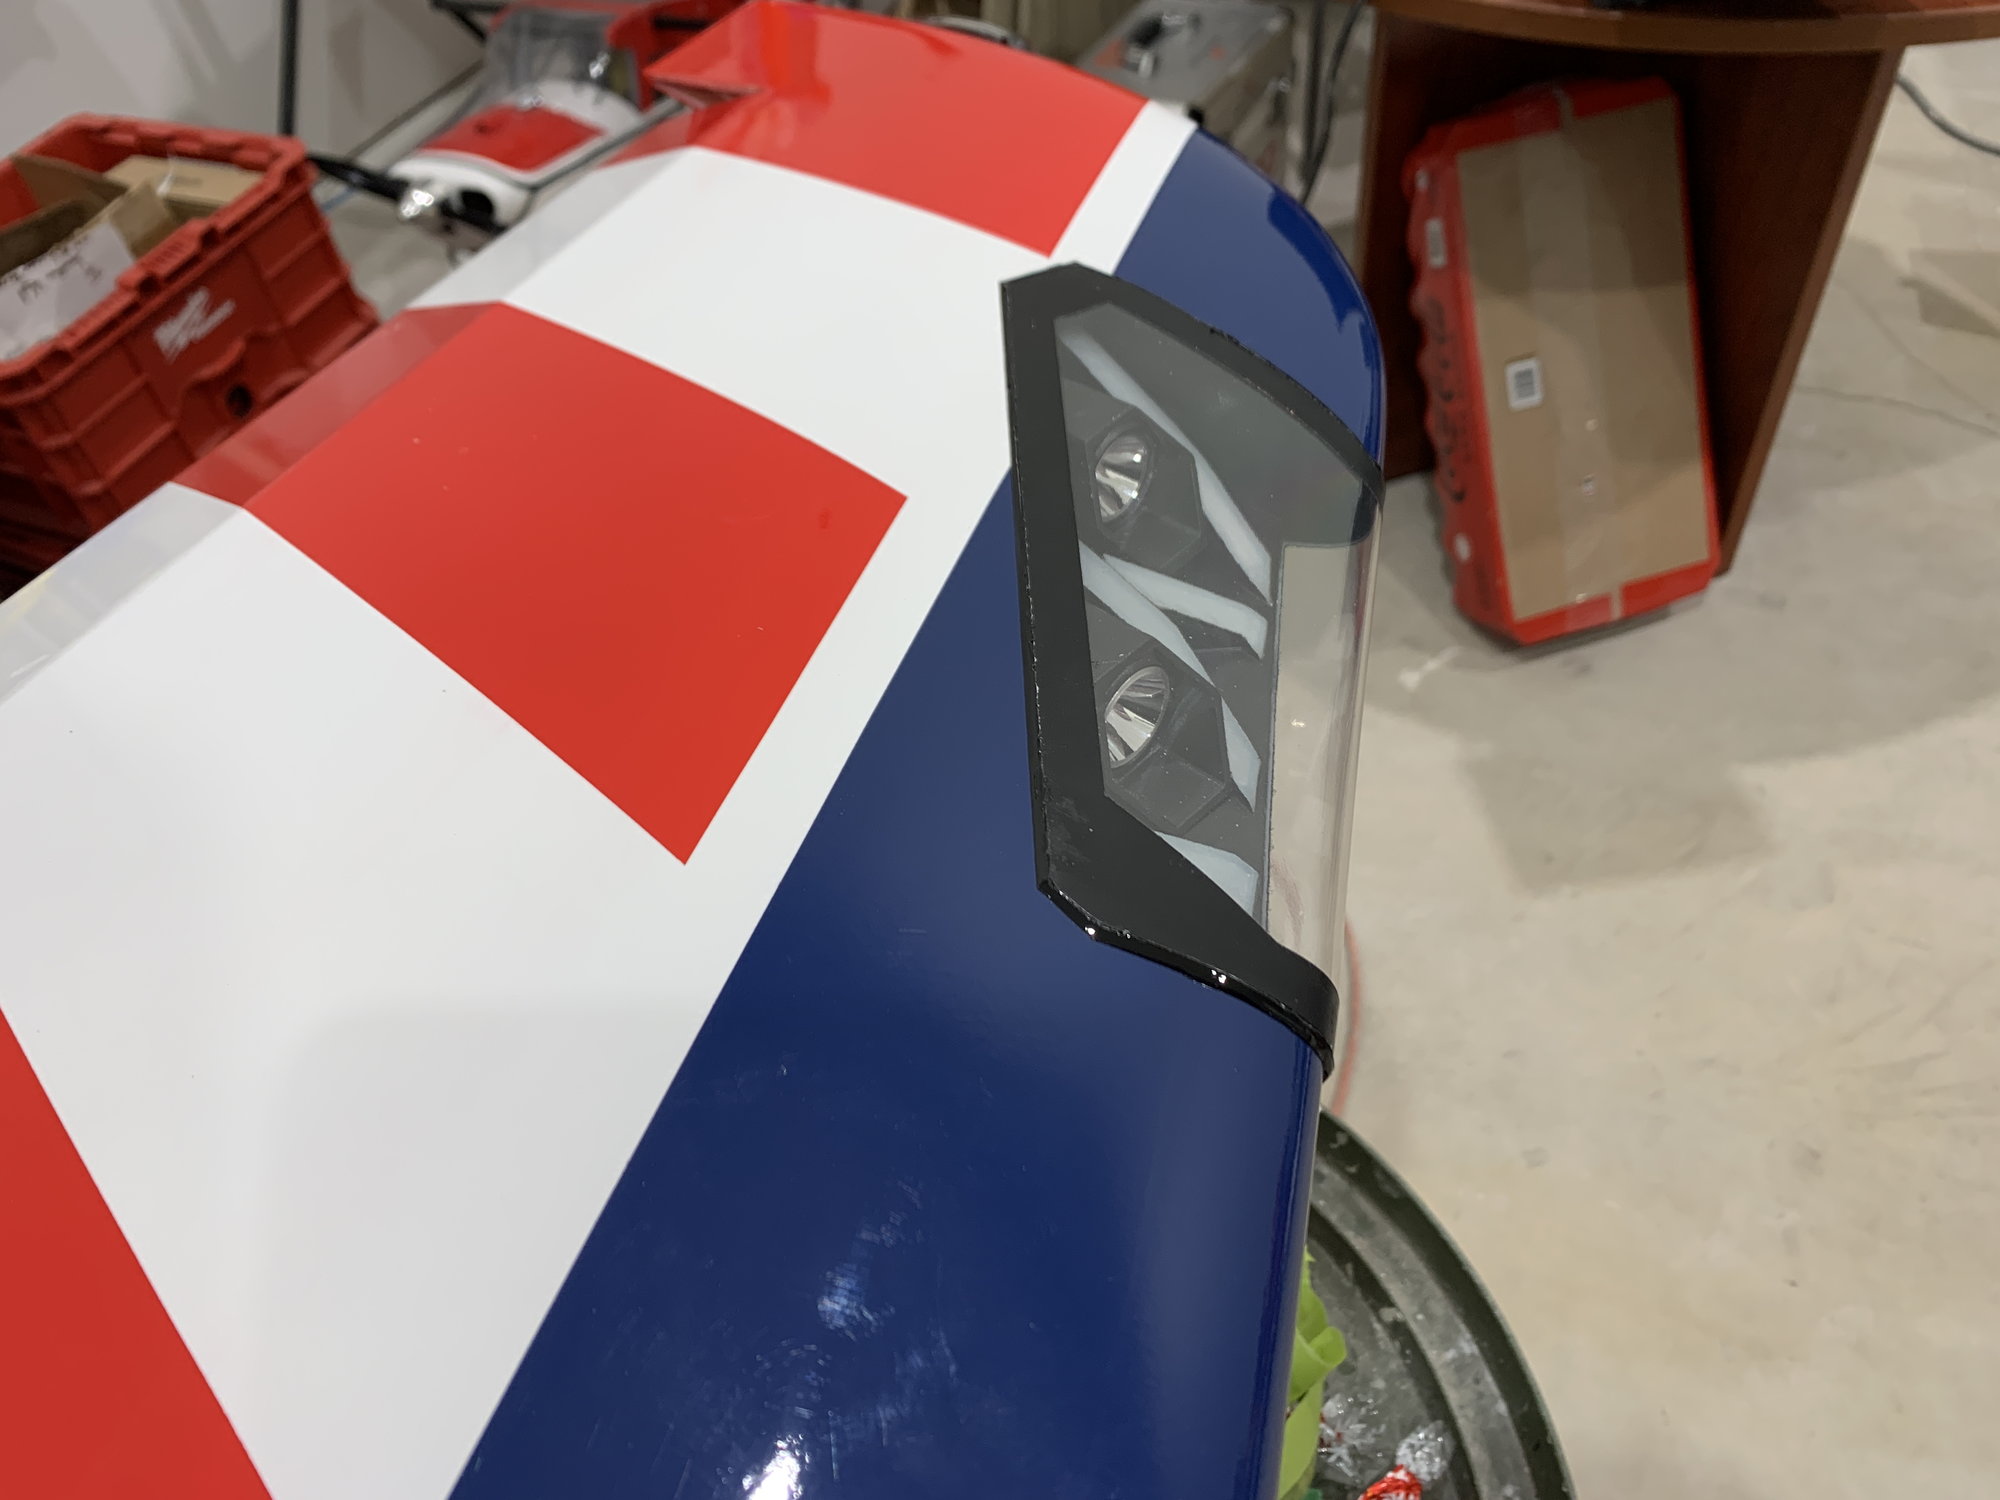
They were purpose designed with all the angles and such to fit like I have shown. They are replicas of the Lamborghini Huracan headlights. If you switched the lights to the other side the sweep of the wings and the angles on the lights would cause the lights to point at probably a 45 degree angle outward.
New lights supposed to arrive this week.
12-16-2021, 10:16 AM
#67
Great Question Tom.
They were purpose designed with all the angles and such to fit like I have shown. They are replicas of the Lamborghini Huracan headlights. If you switched the lights to the other side the sweep of the wings and the angles on the lights would cause the lights to point at probably a 45 degree angle outward.
New lights supposed to arrive this week.
Tone
12-29-2021, 07:32 AM
#69
Thread Starter
My Feedback: (1)
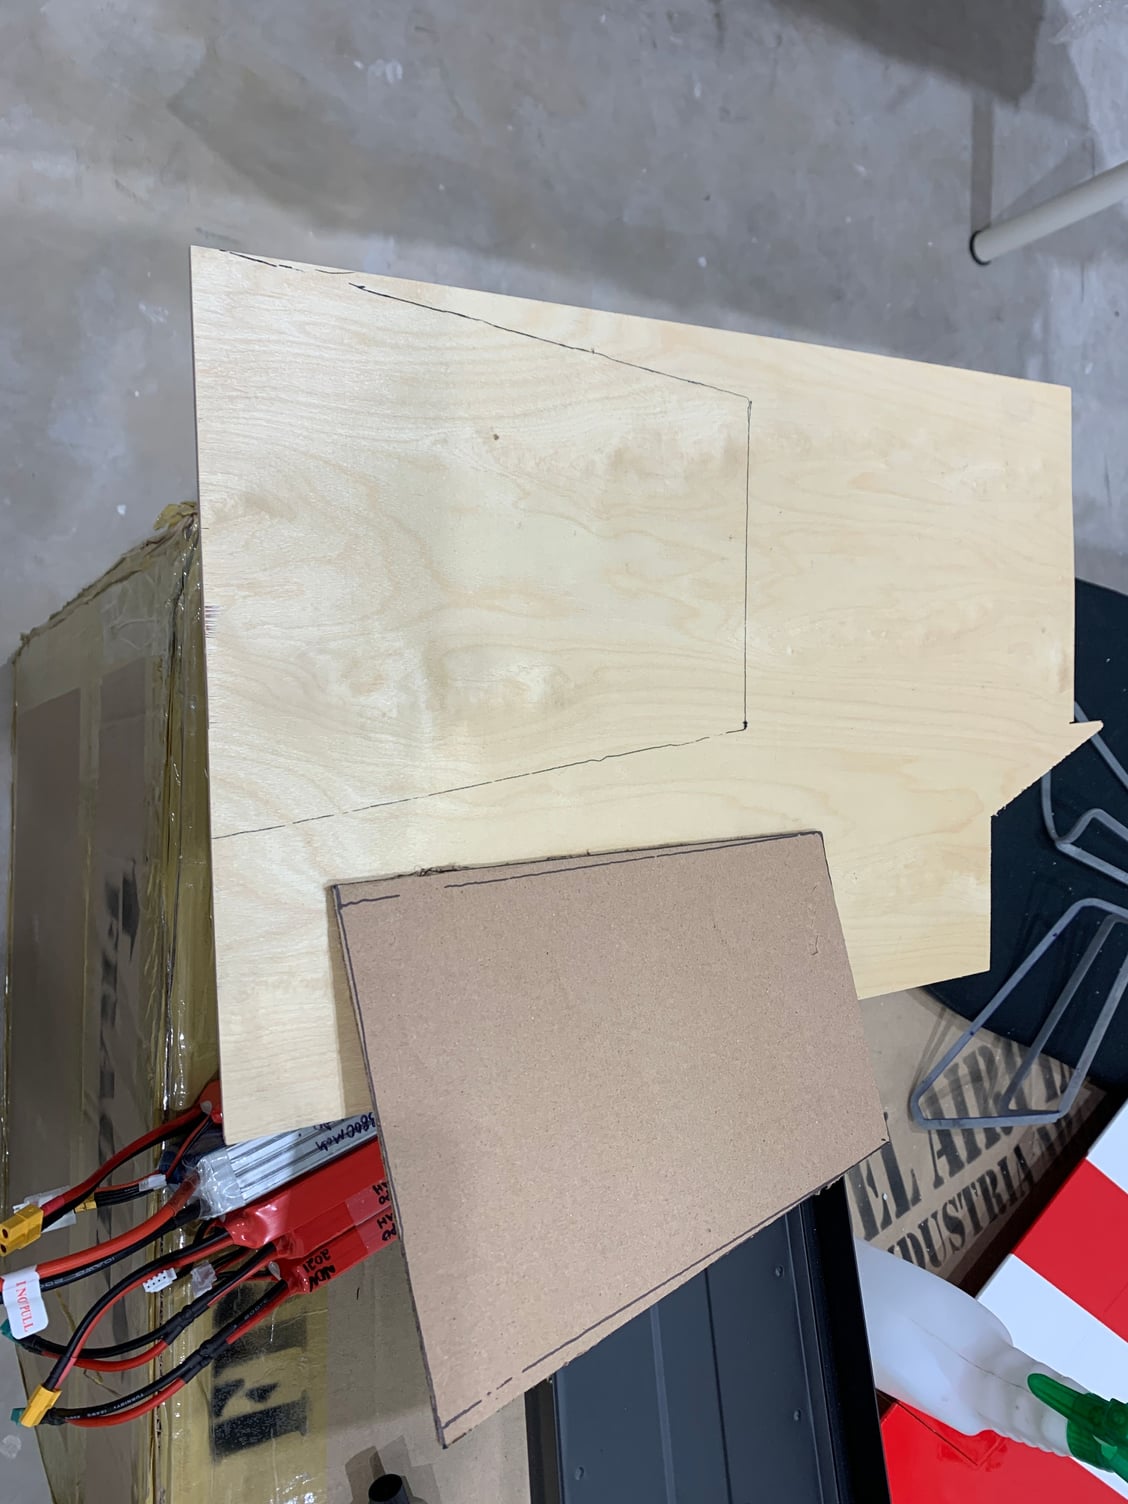
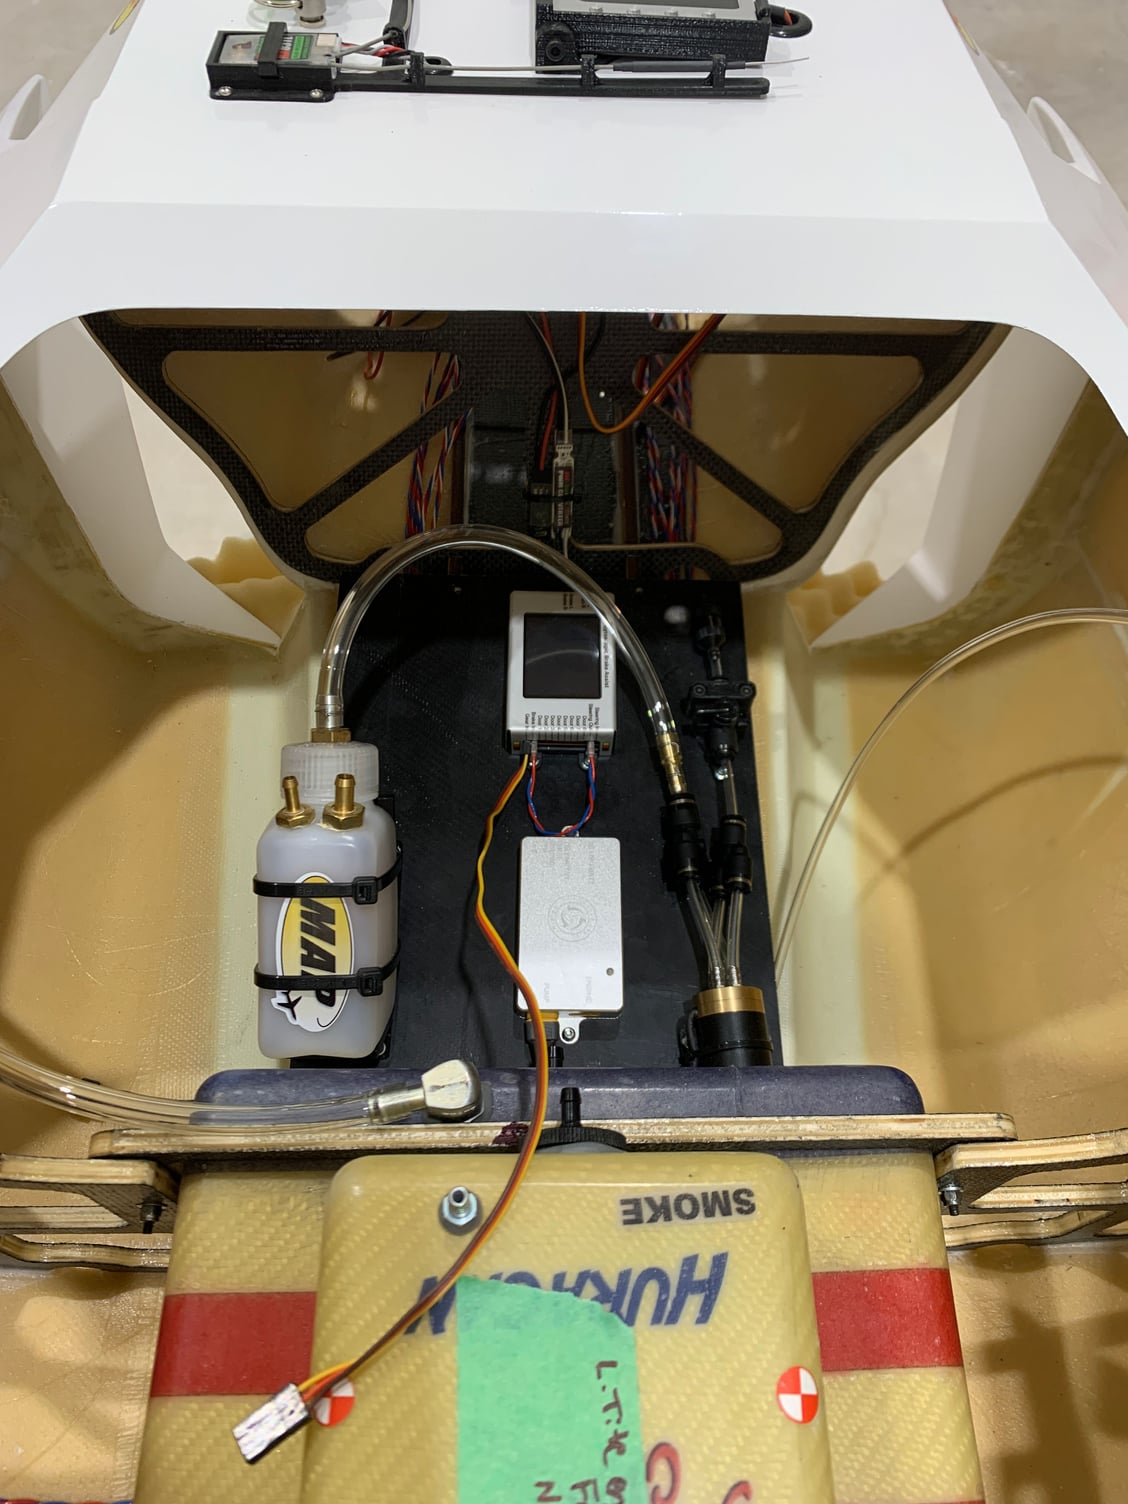
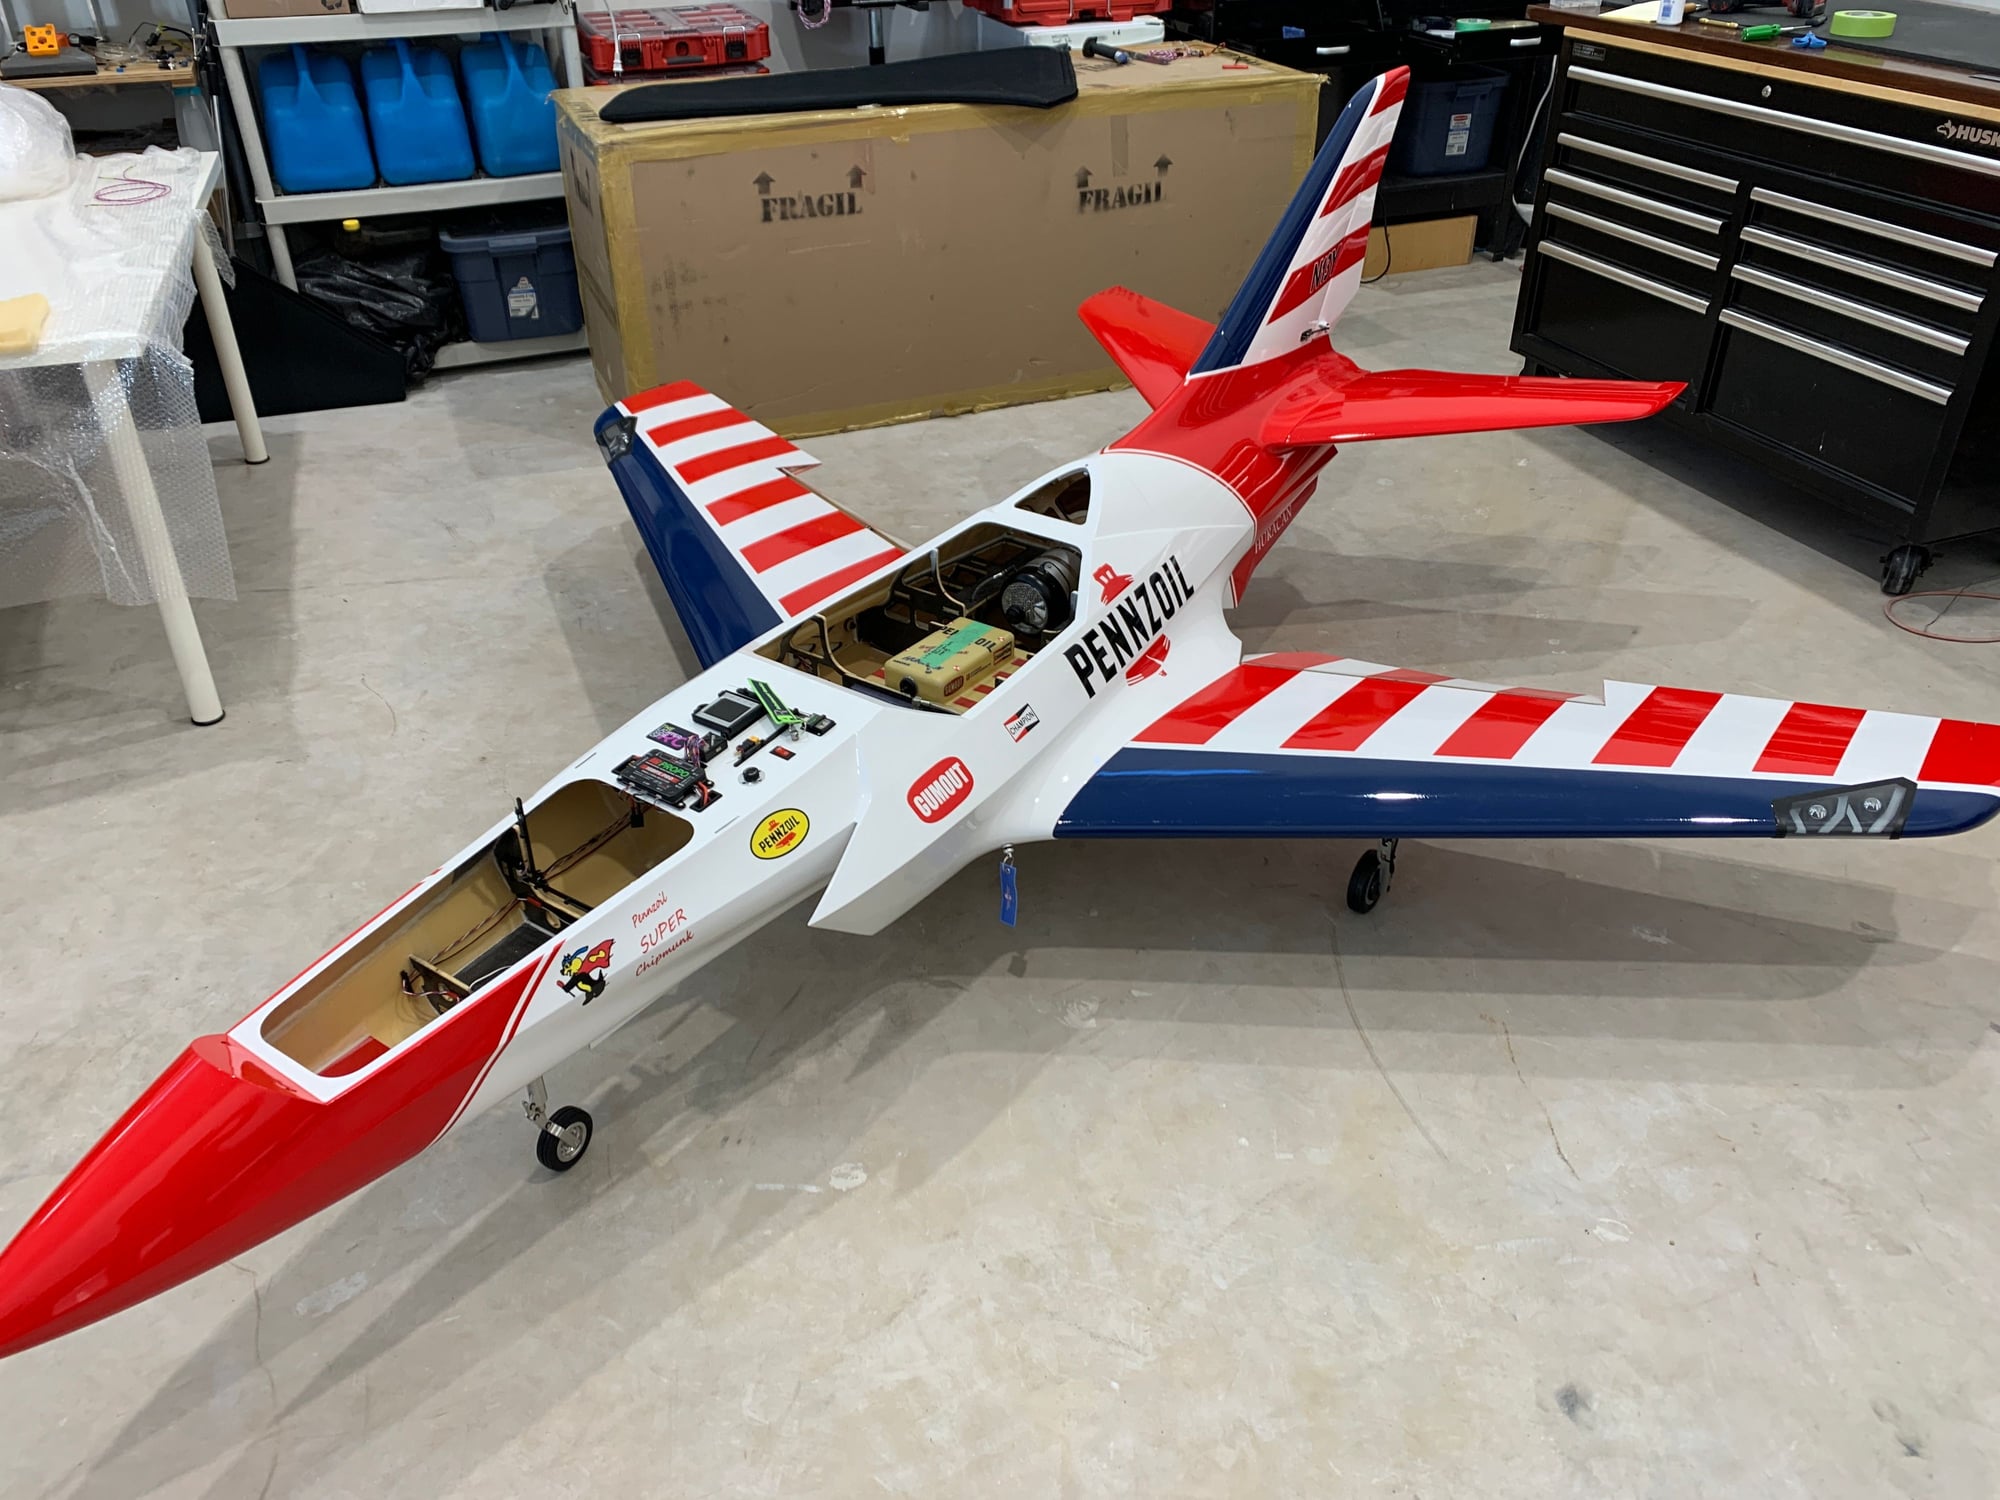
Working on the interior. Made a template for the front battery tray from cardboard. Once fit was good cut it out out 1/8" aircraft ply. As I was unsure of how much nose weight will be needed, I kept it light and just painted it red. Typically I would laminate Faux Carbon onto it but the Red matches of course.
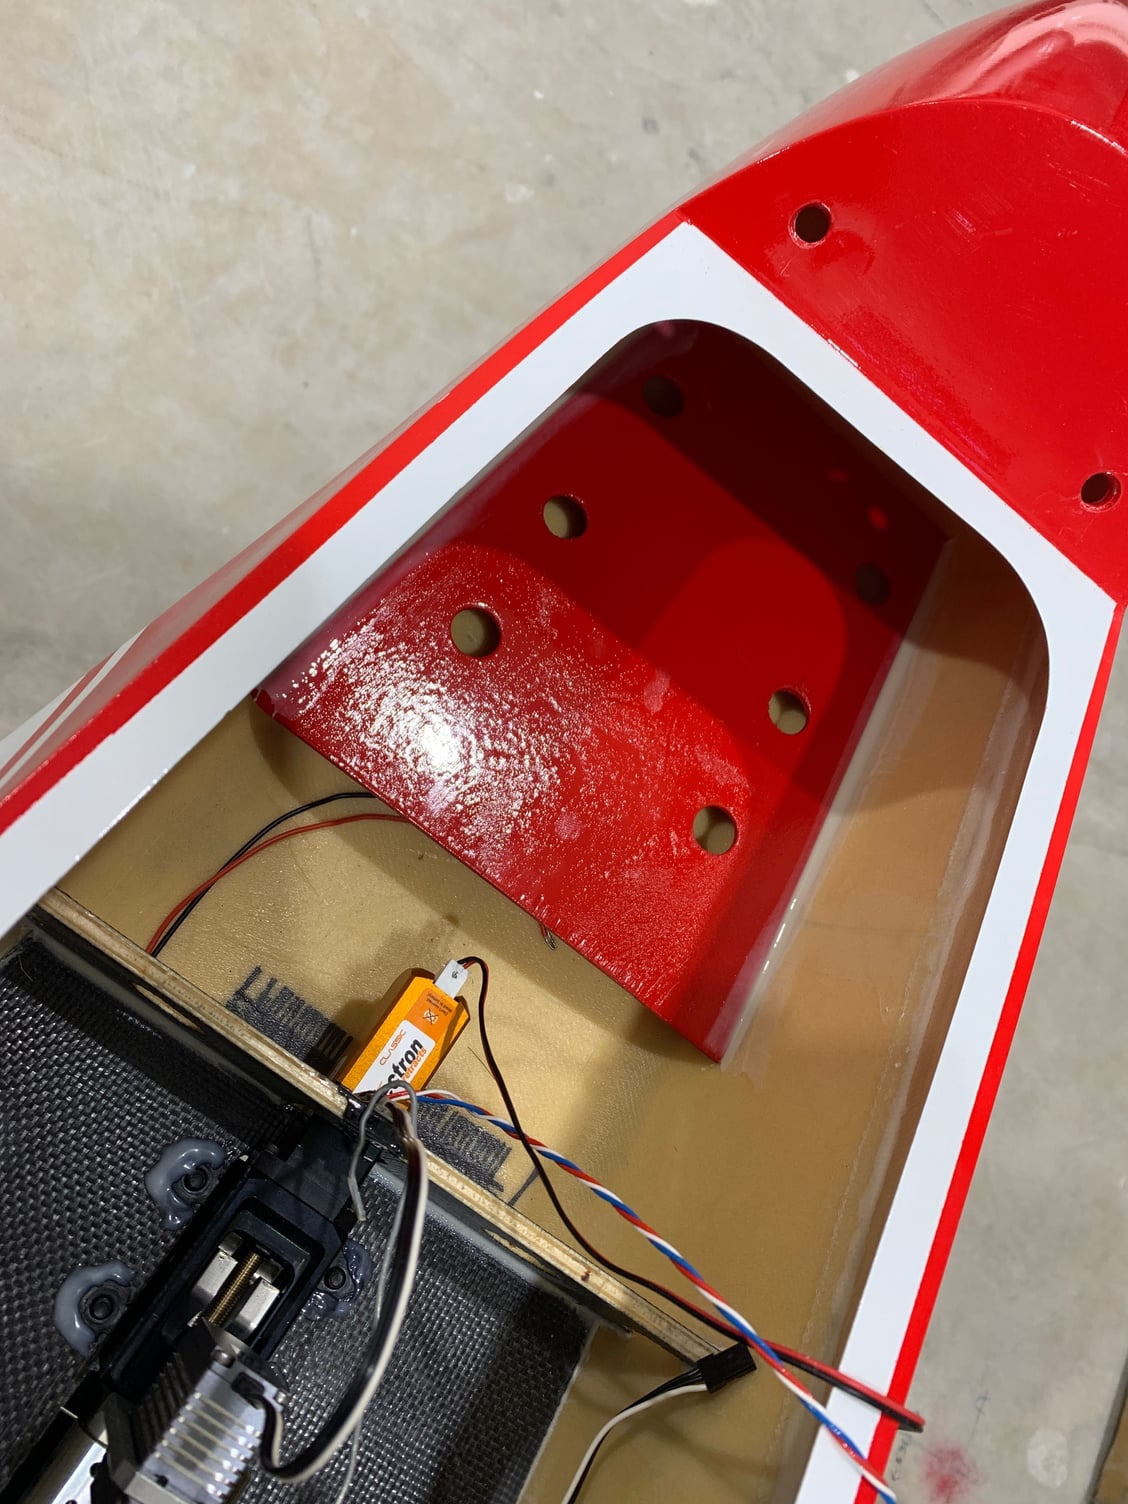
Tray Hysol'ed in place.
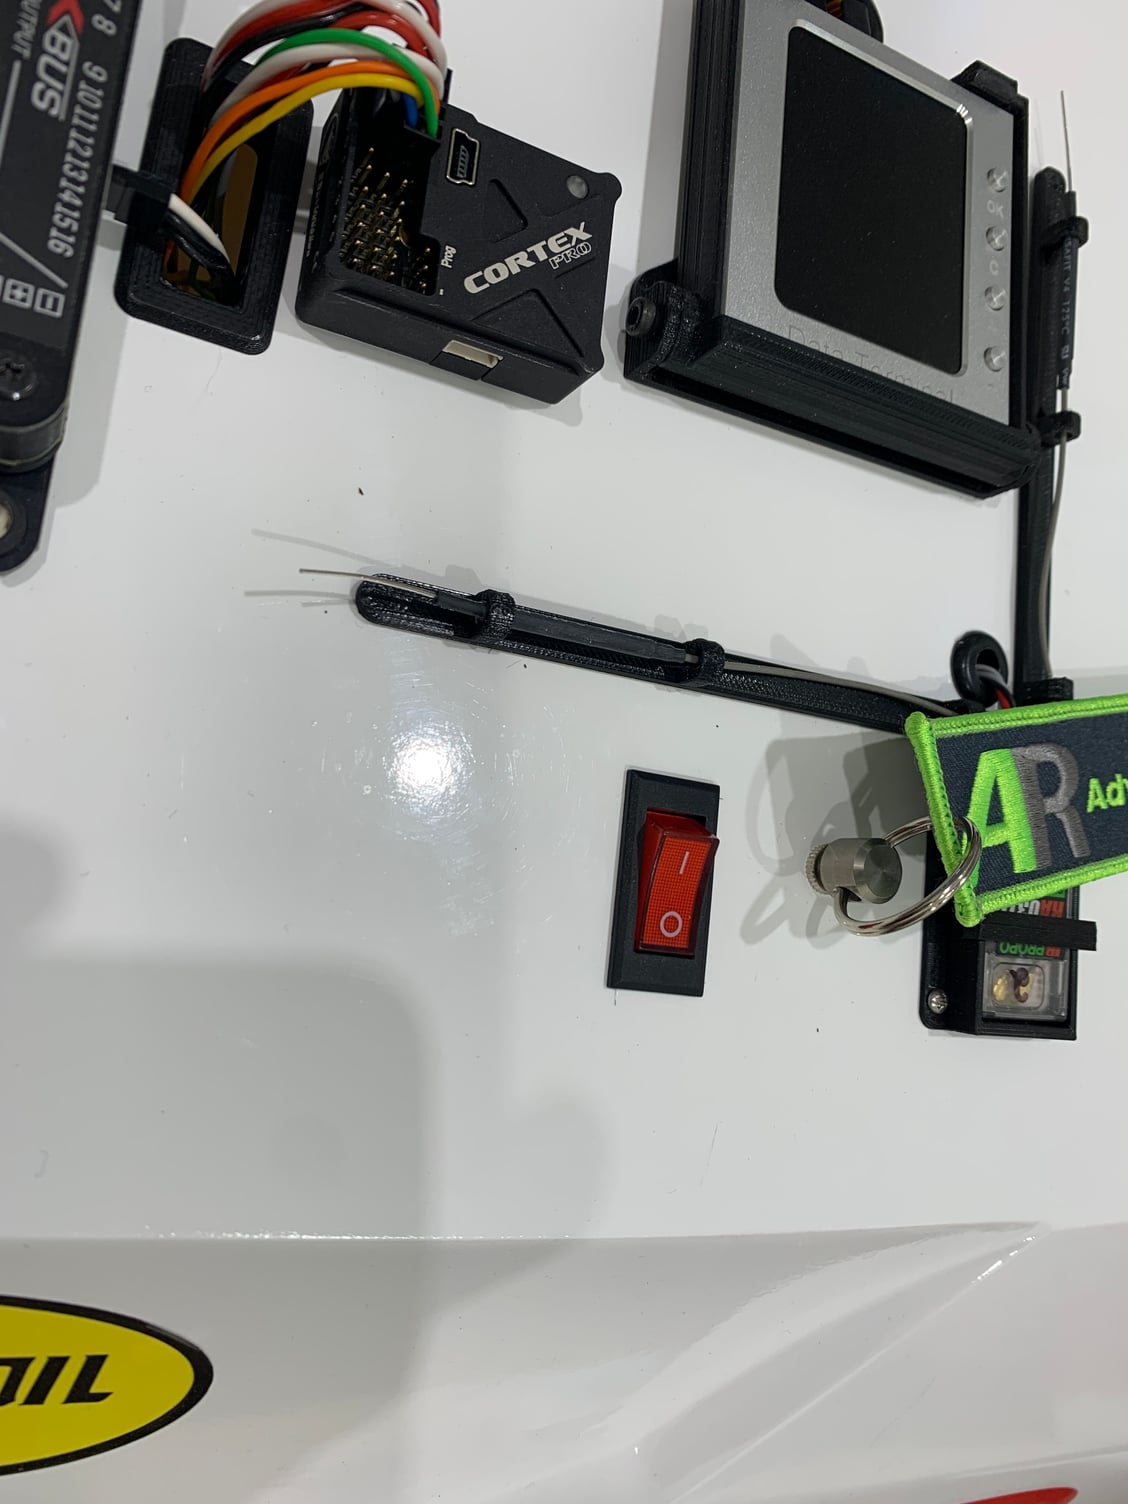
Added a Lit up switch to the main tray for the lighting system. I like the switch as it's easy on/off as it's just beside the main pin switch. With the Digital switches used in the skycandy landing light system, the lights have to be un powered before turning off the aircraft and powered after the receiver is turned on.
12-29-2021, 07:39 AM
#70
Thread Starter
My Feedback: (1)

Replacement lights from Ozaero arrived.
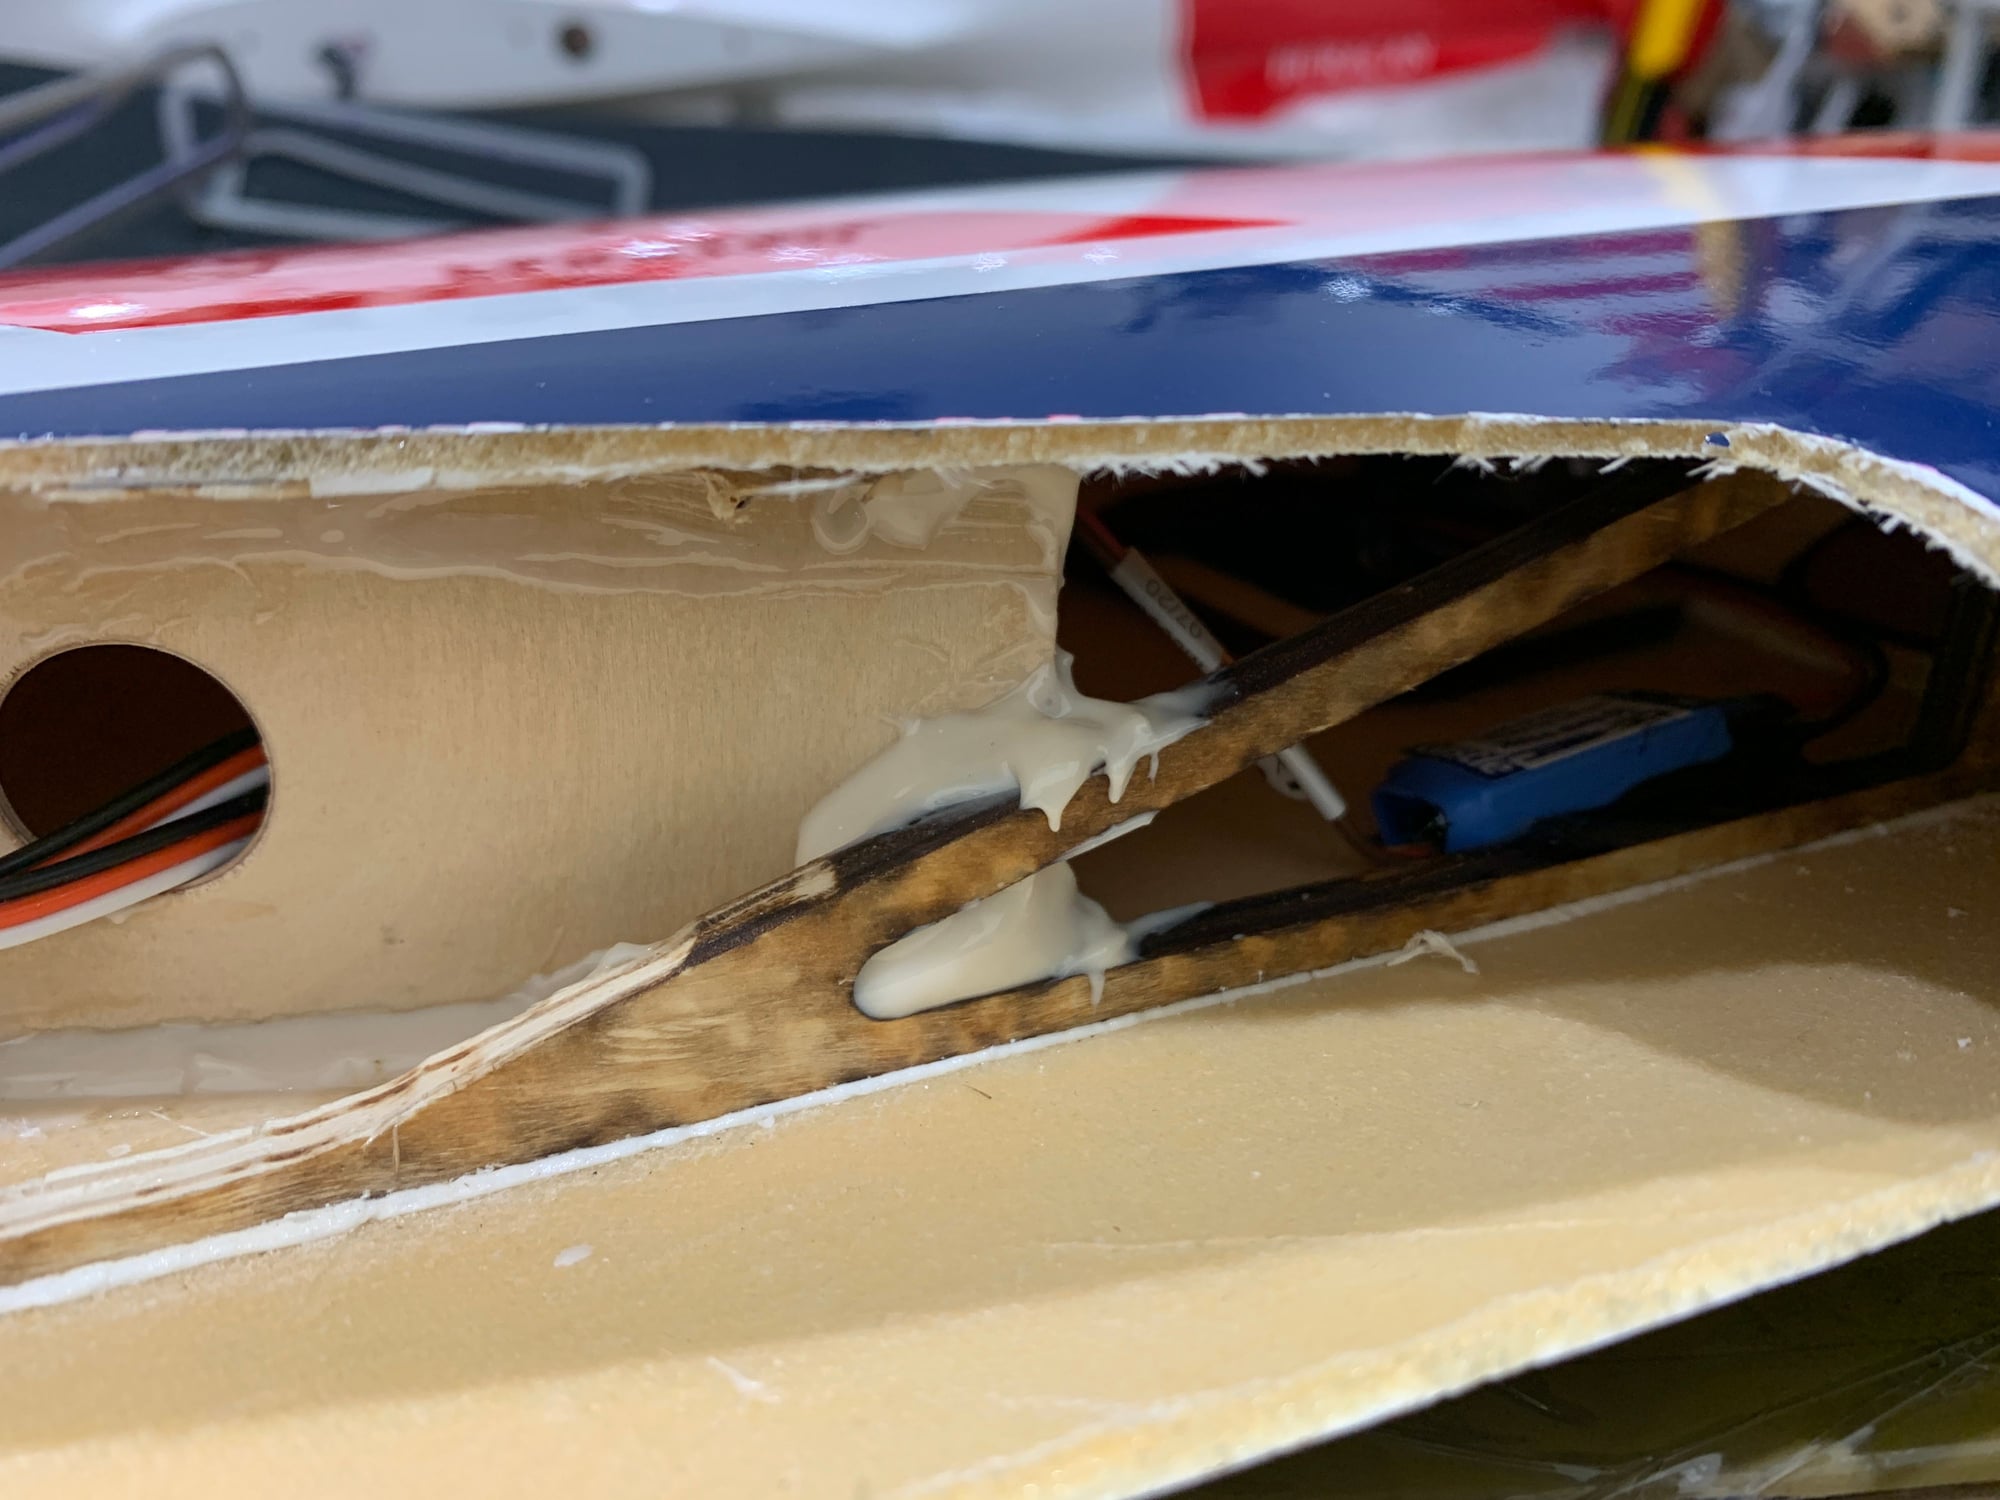
Adding 1/8" aircraft ply formers after cutting into the leading edge support. With this reinforcement installed it's extremely strong/stiff again. This support was installed and allowed to cure before lights were installed so the wing retains it's original shape.

Don't mind the Goopy Hysol Job. It's all hidden!
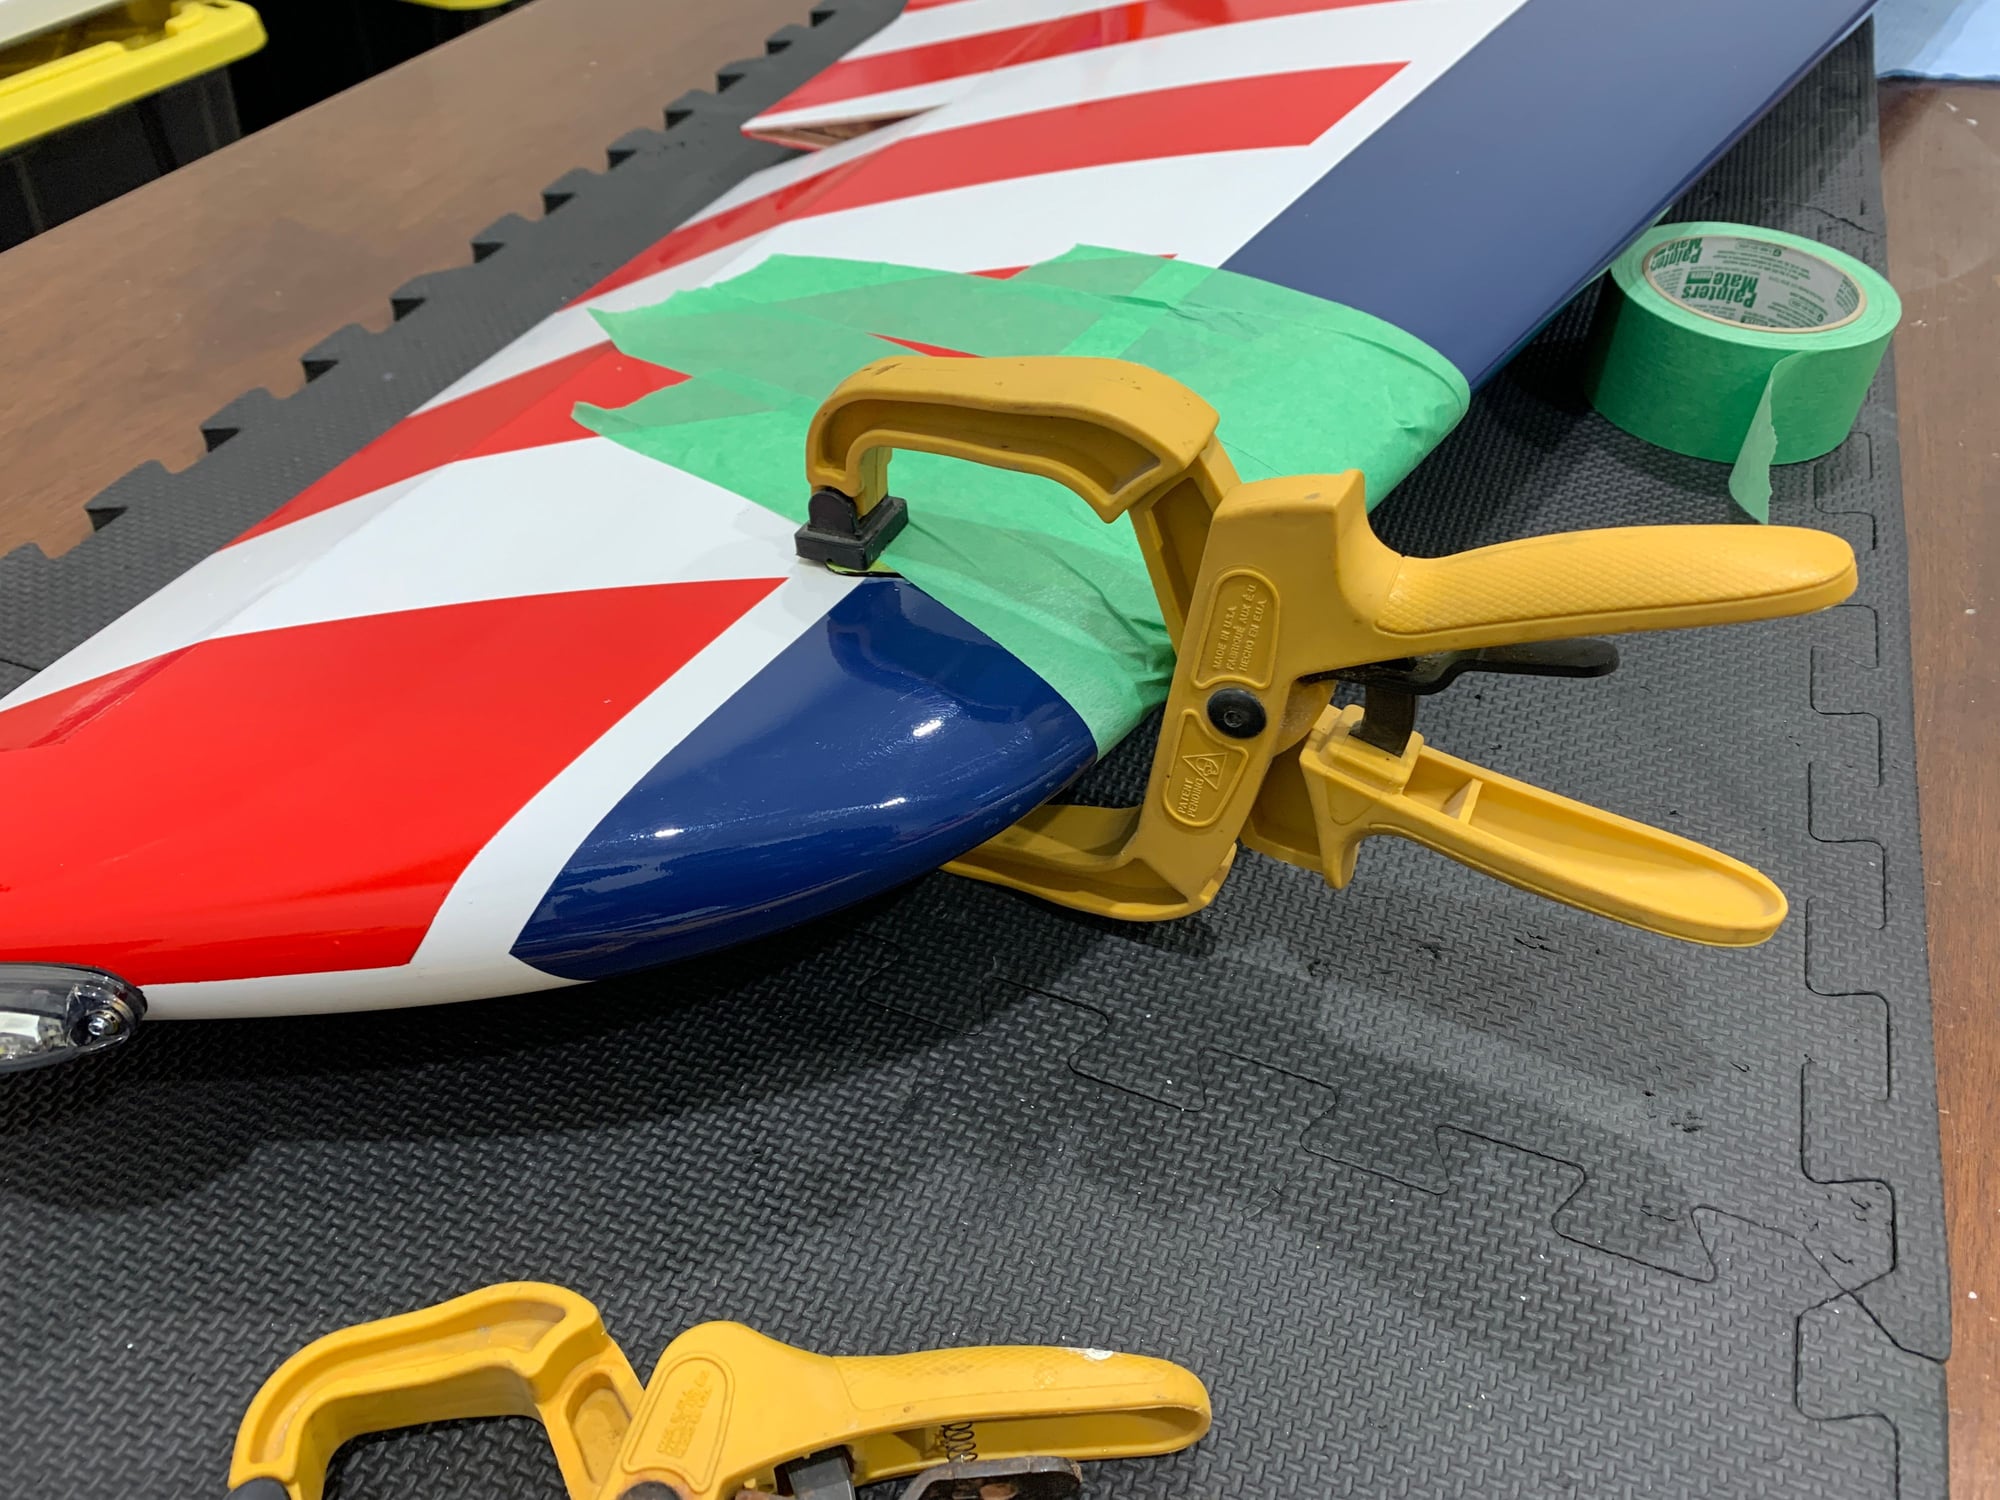
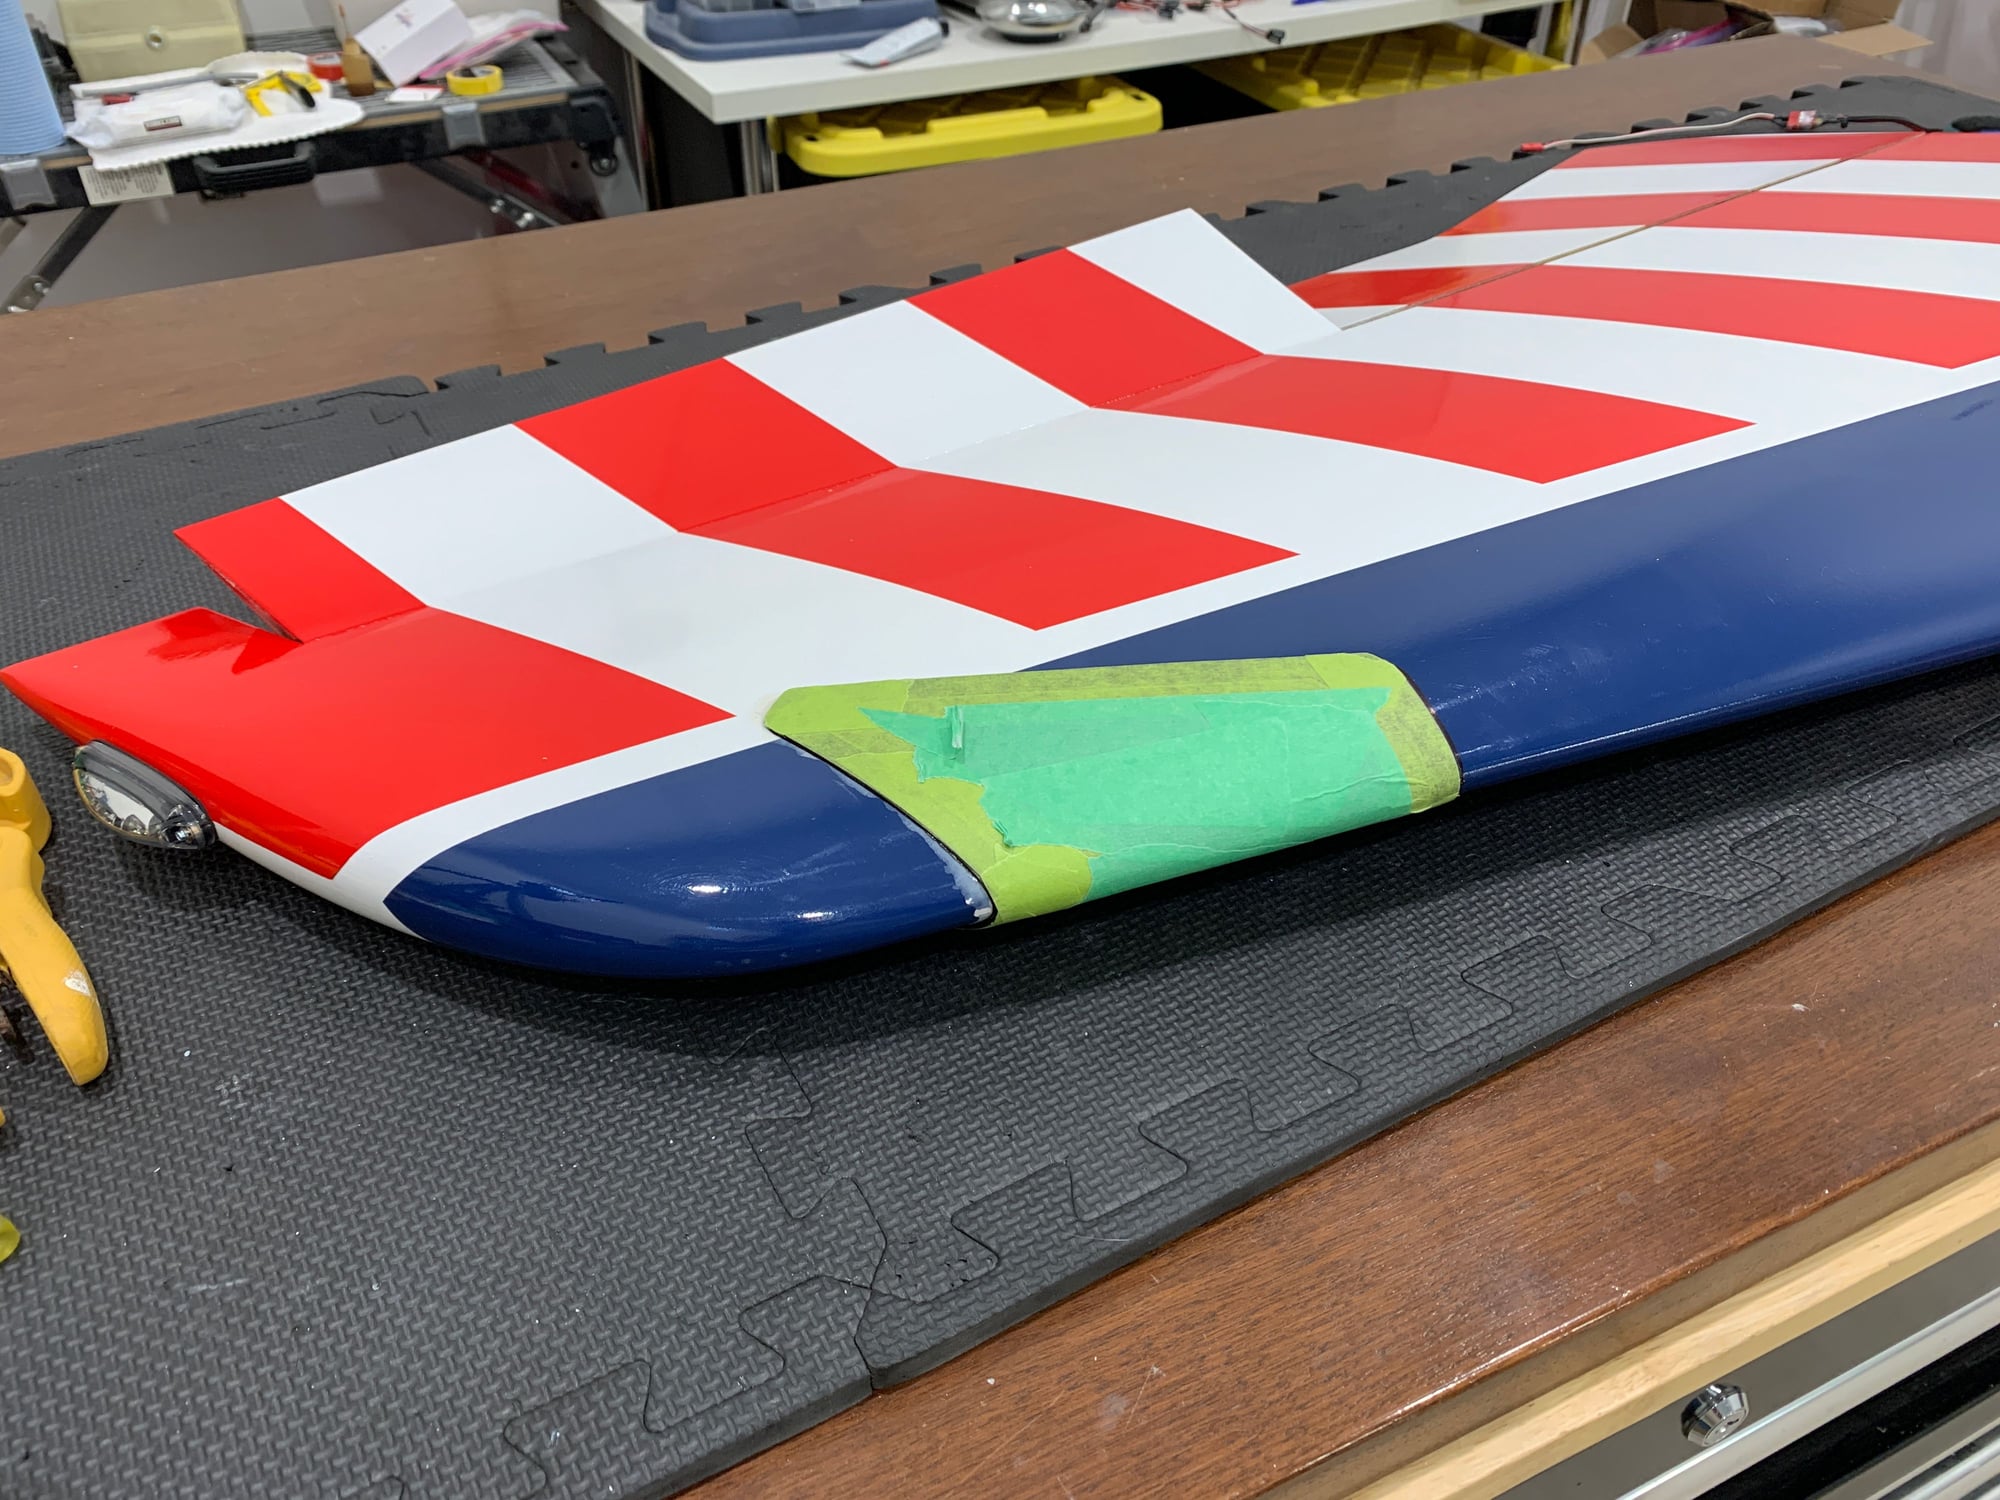
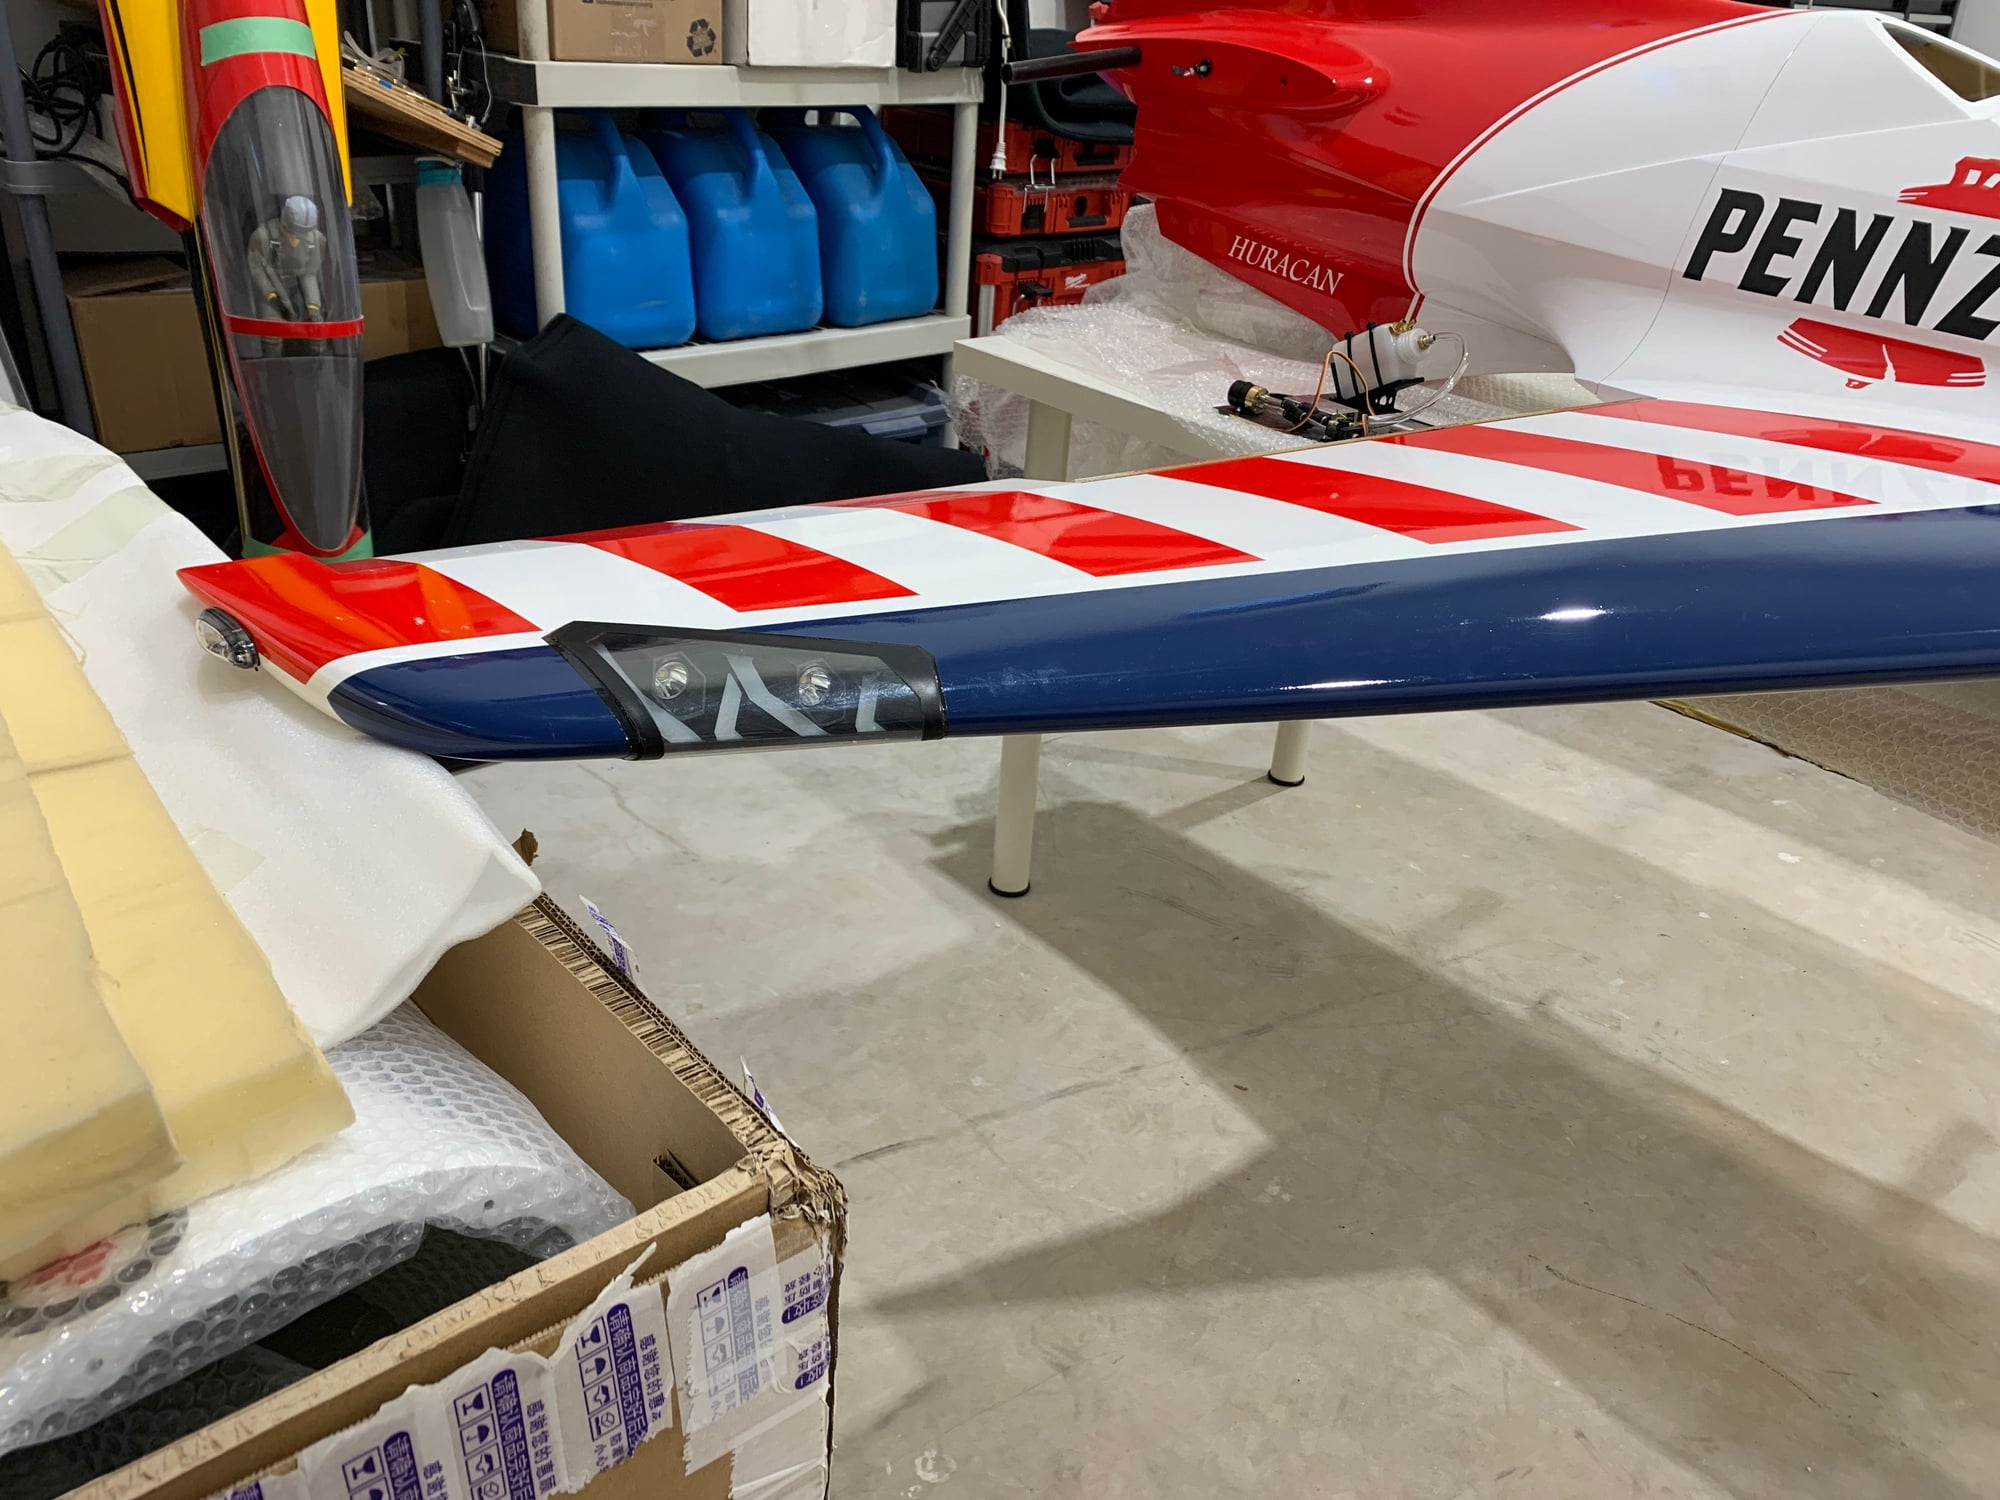
Light installed. Used GOOP/E6000 to install in the wing. If it ever needs to be removed, with some manipulation it will come out.
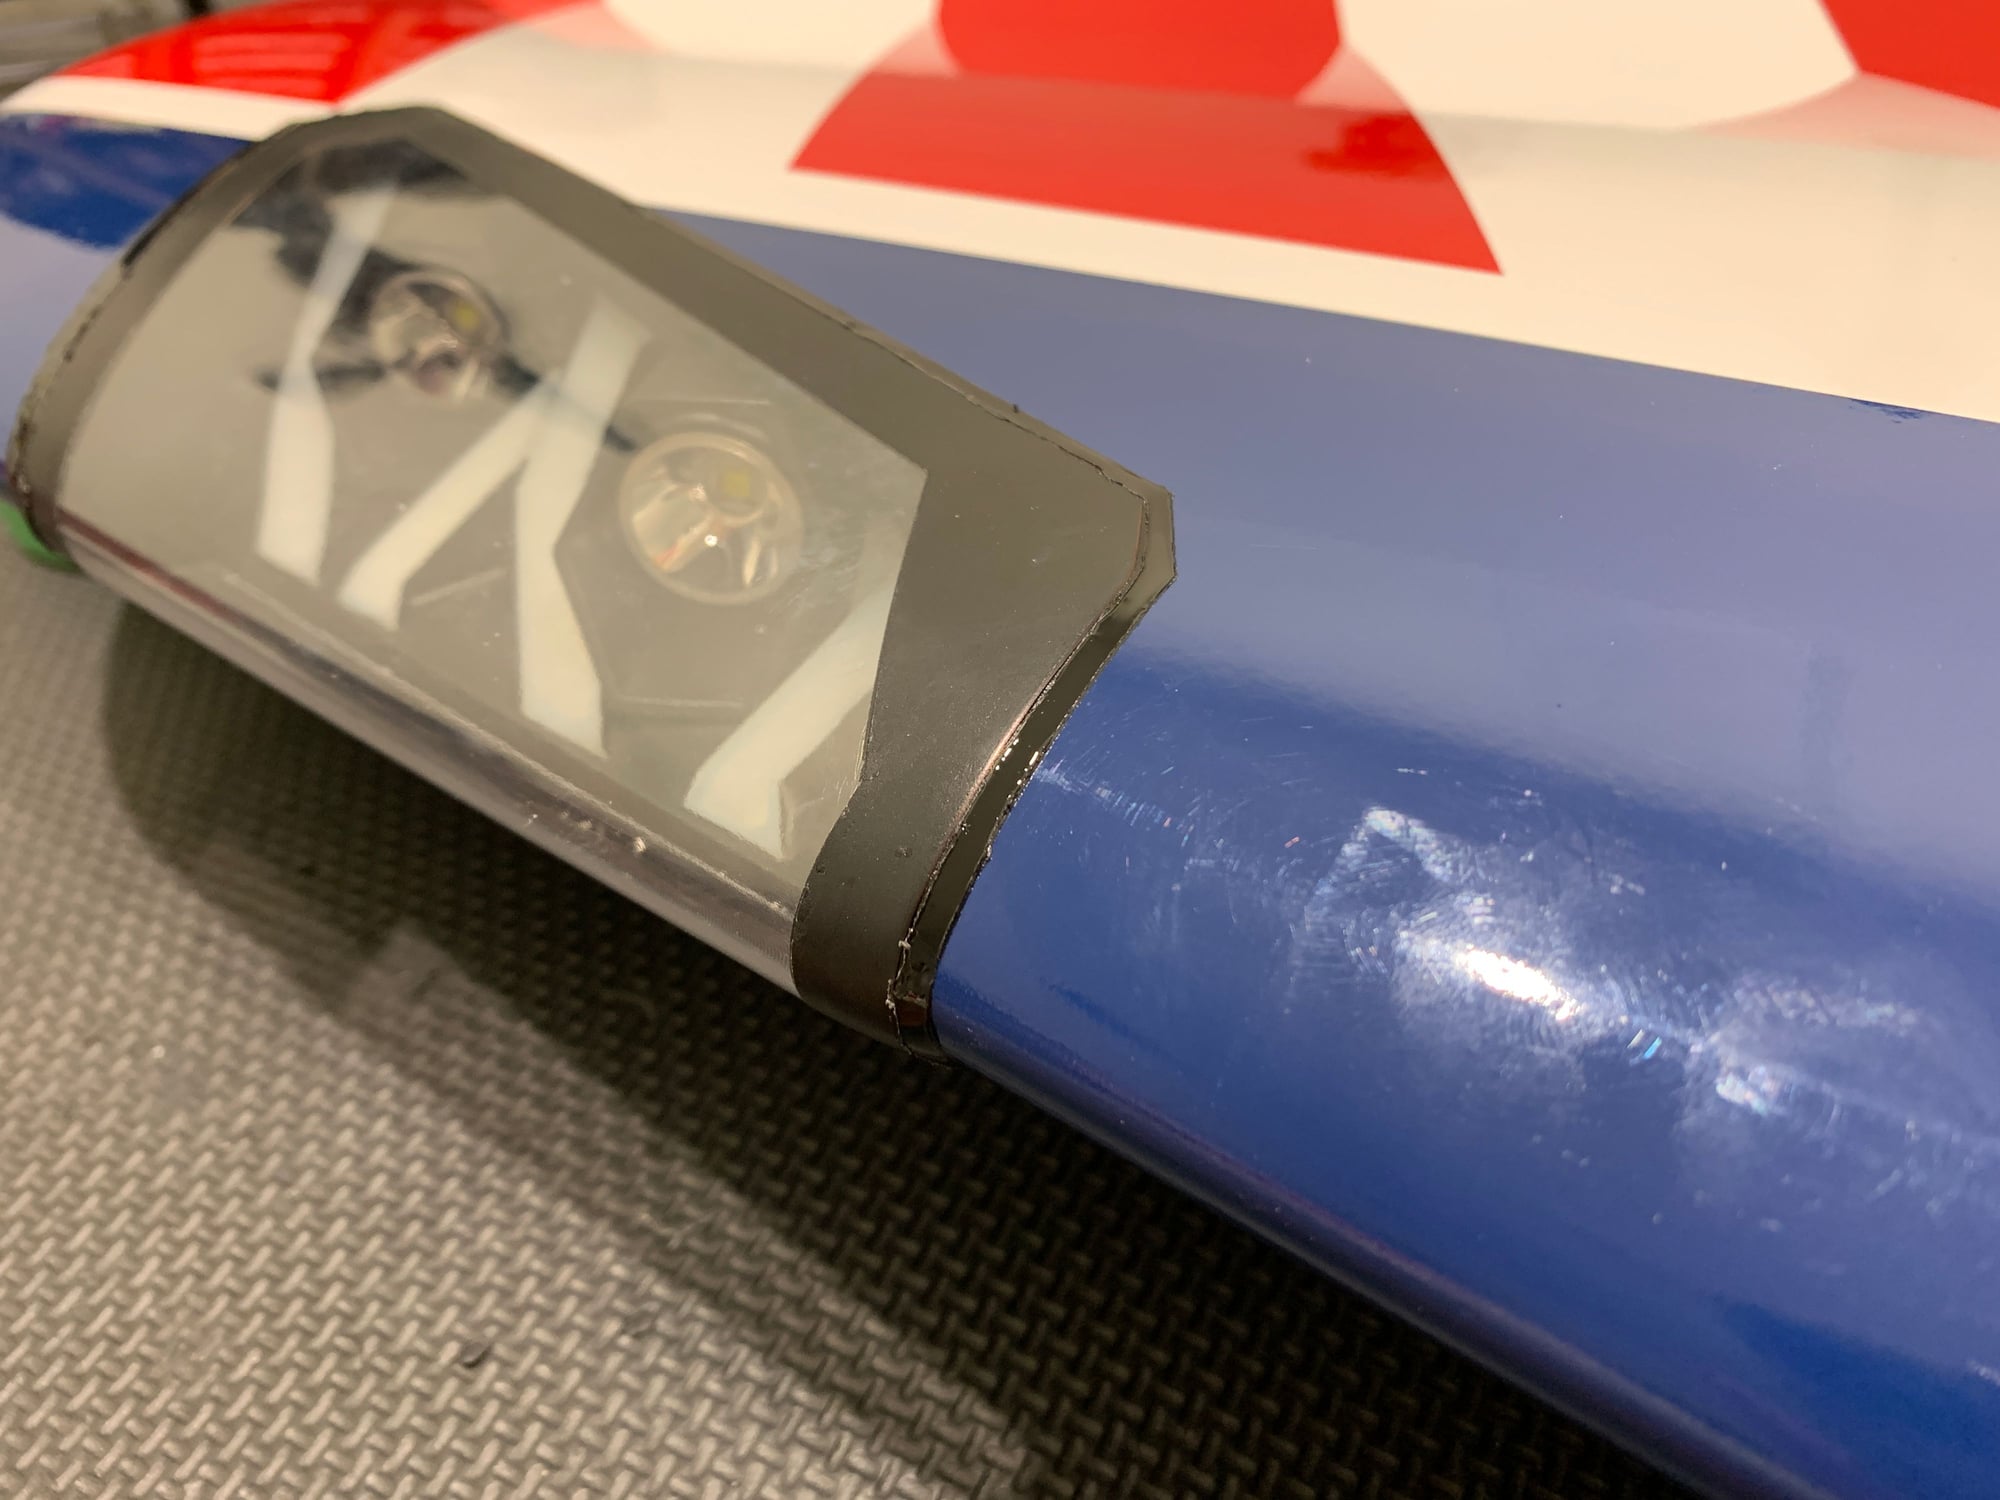
Light installed.
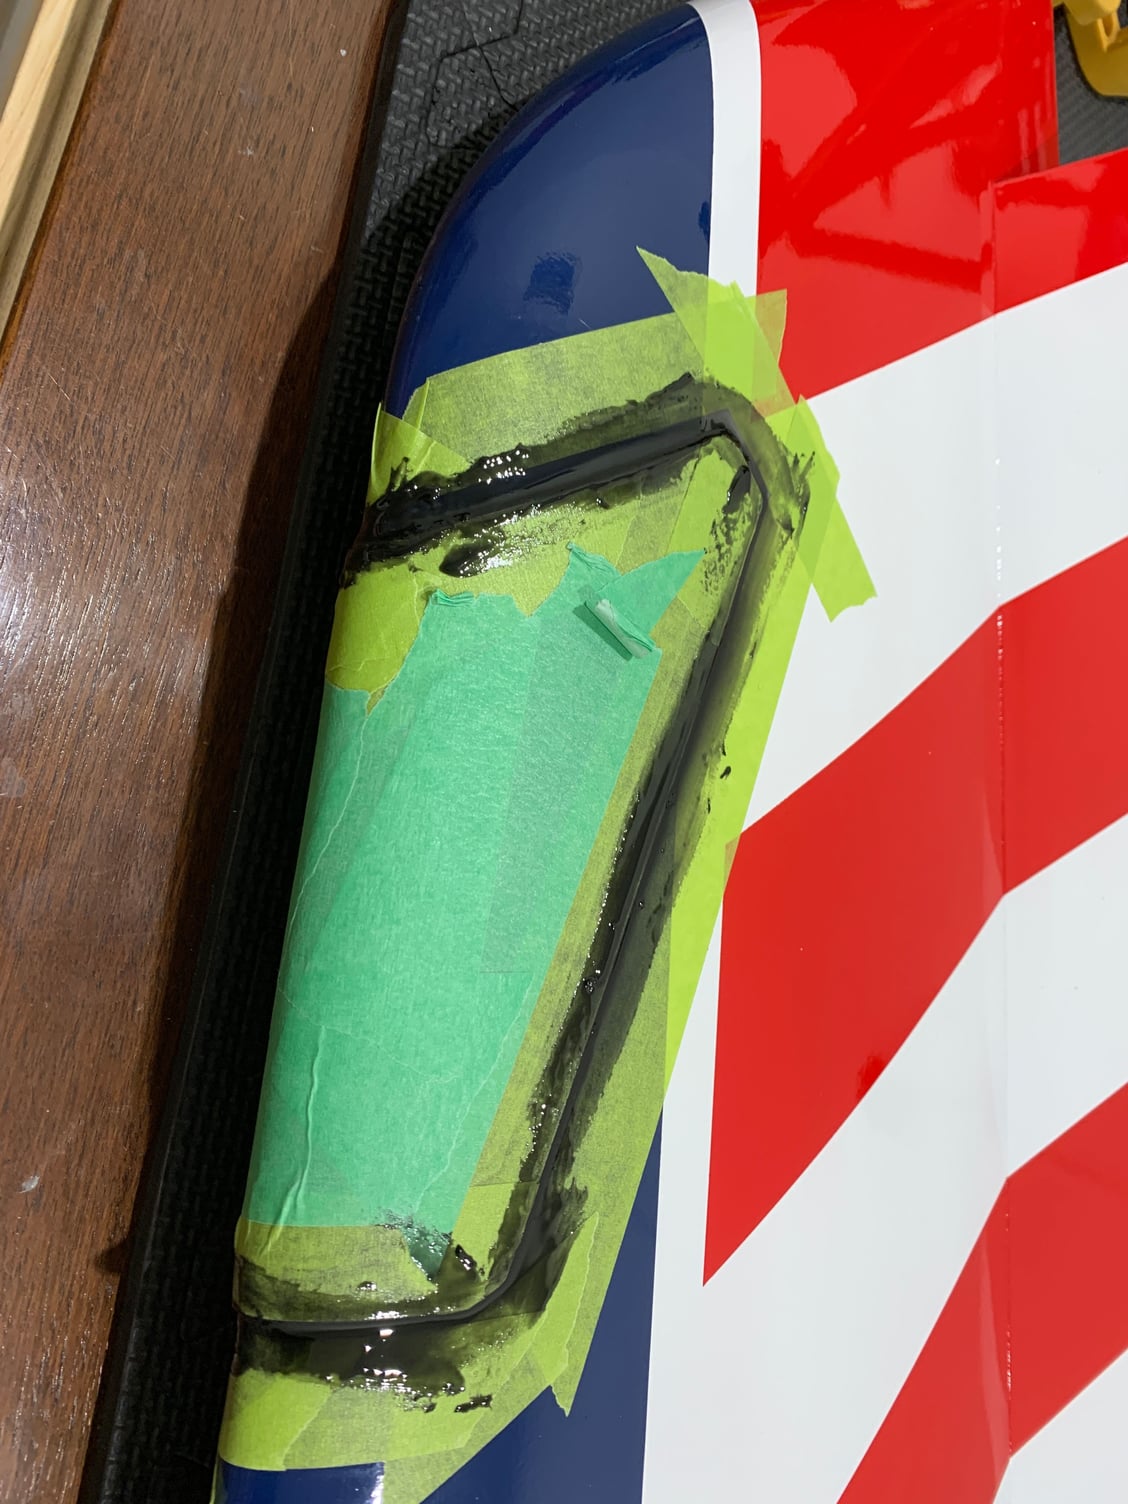
Trimmed light out with black GOOP.
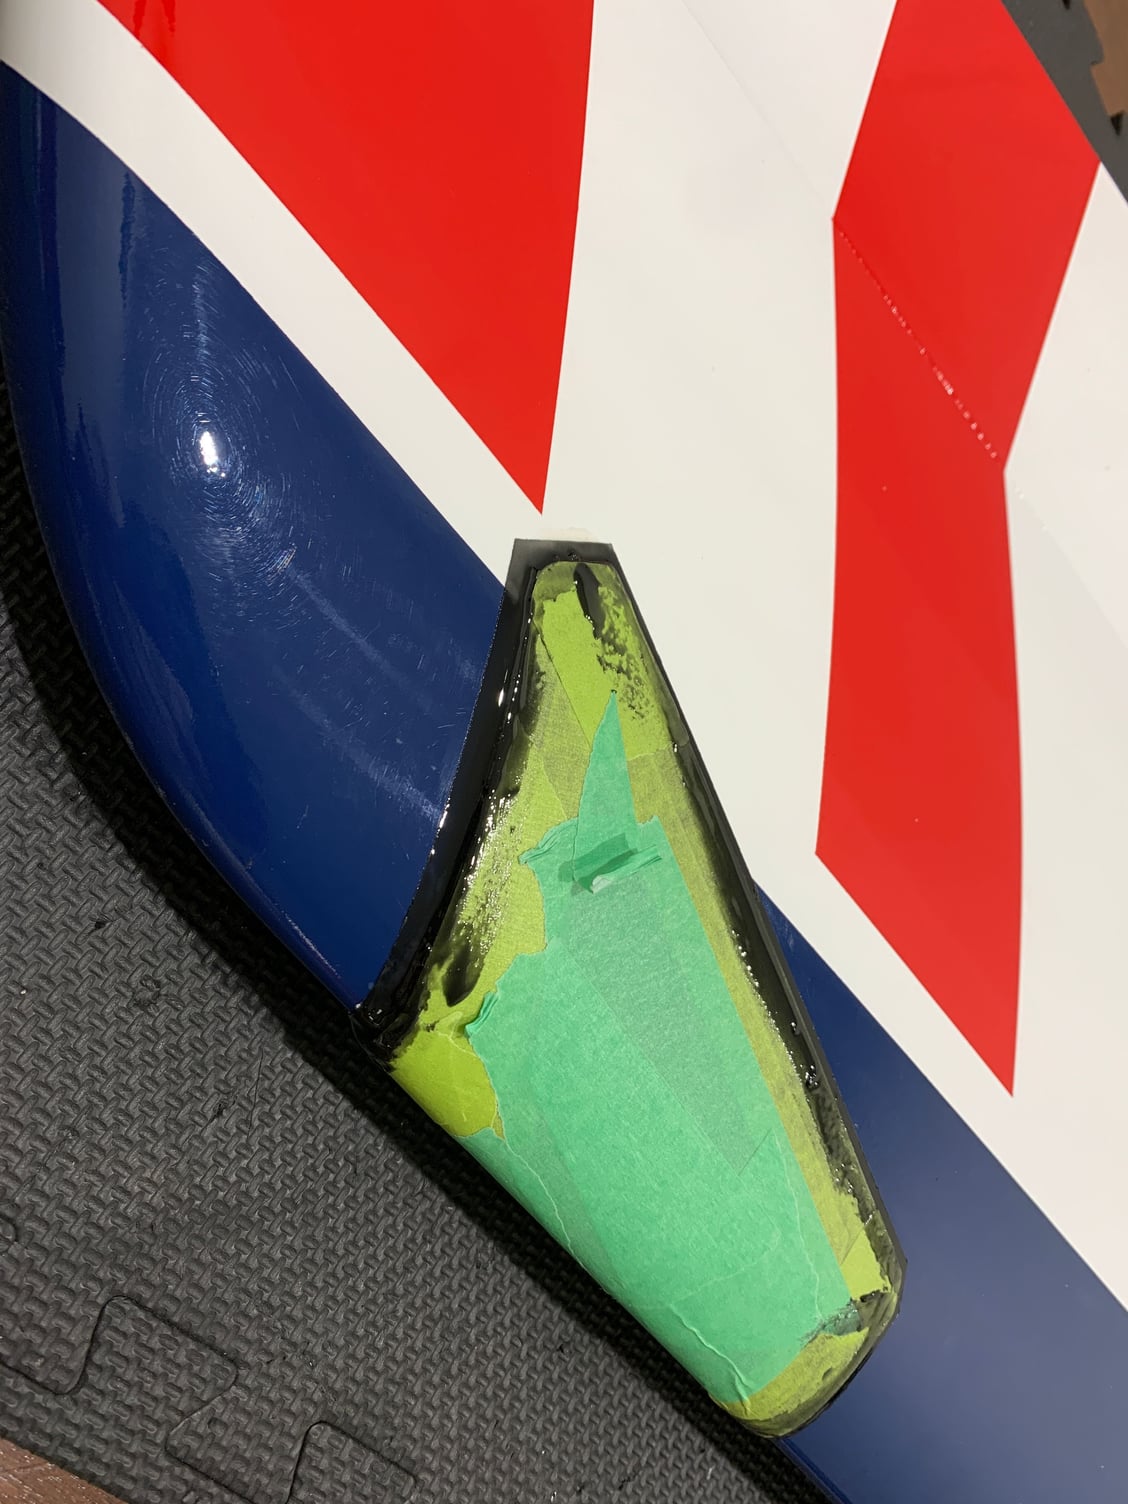
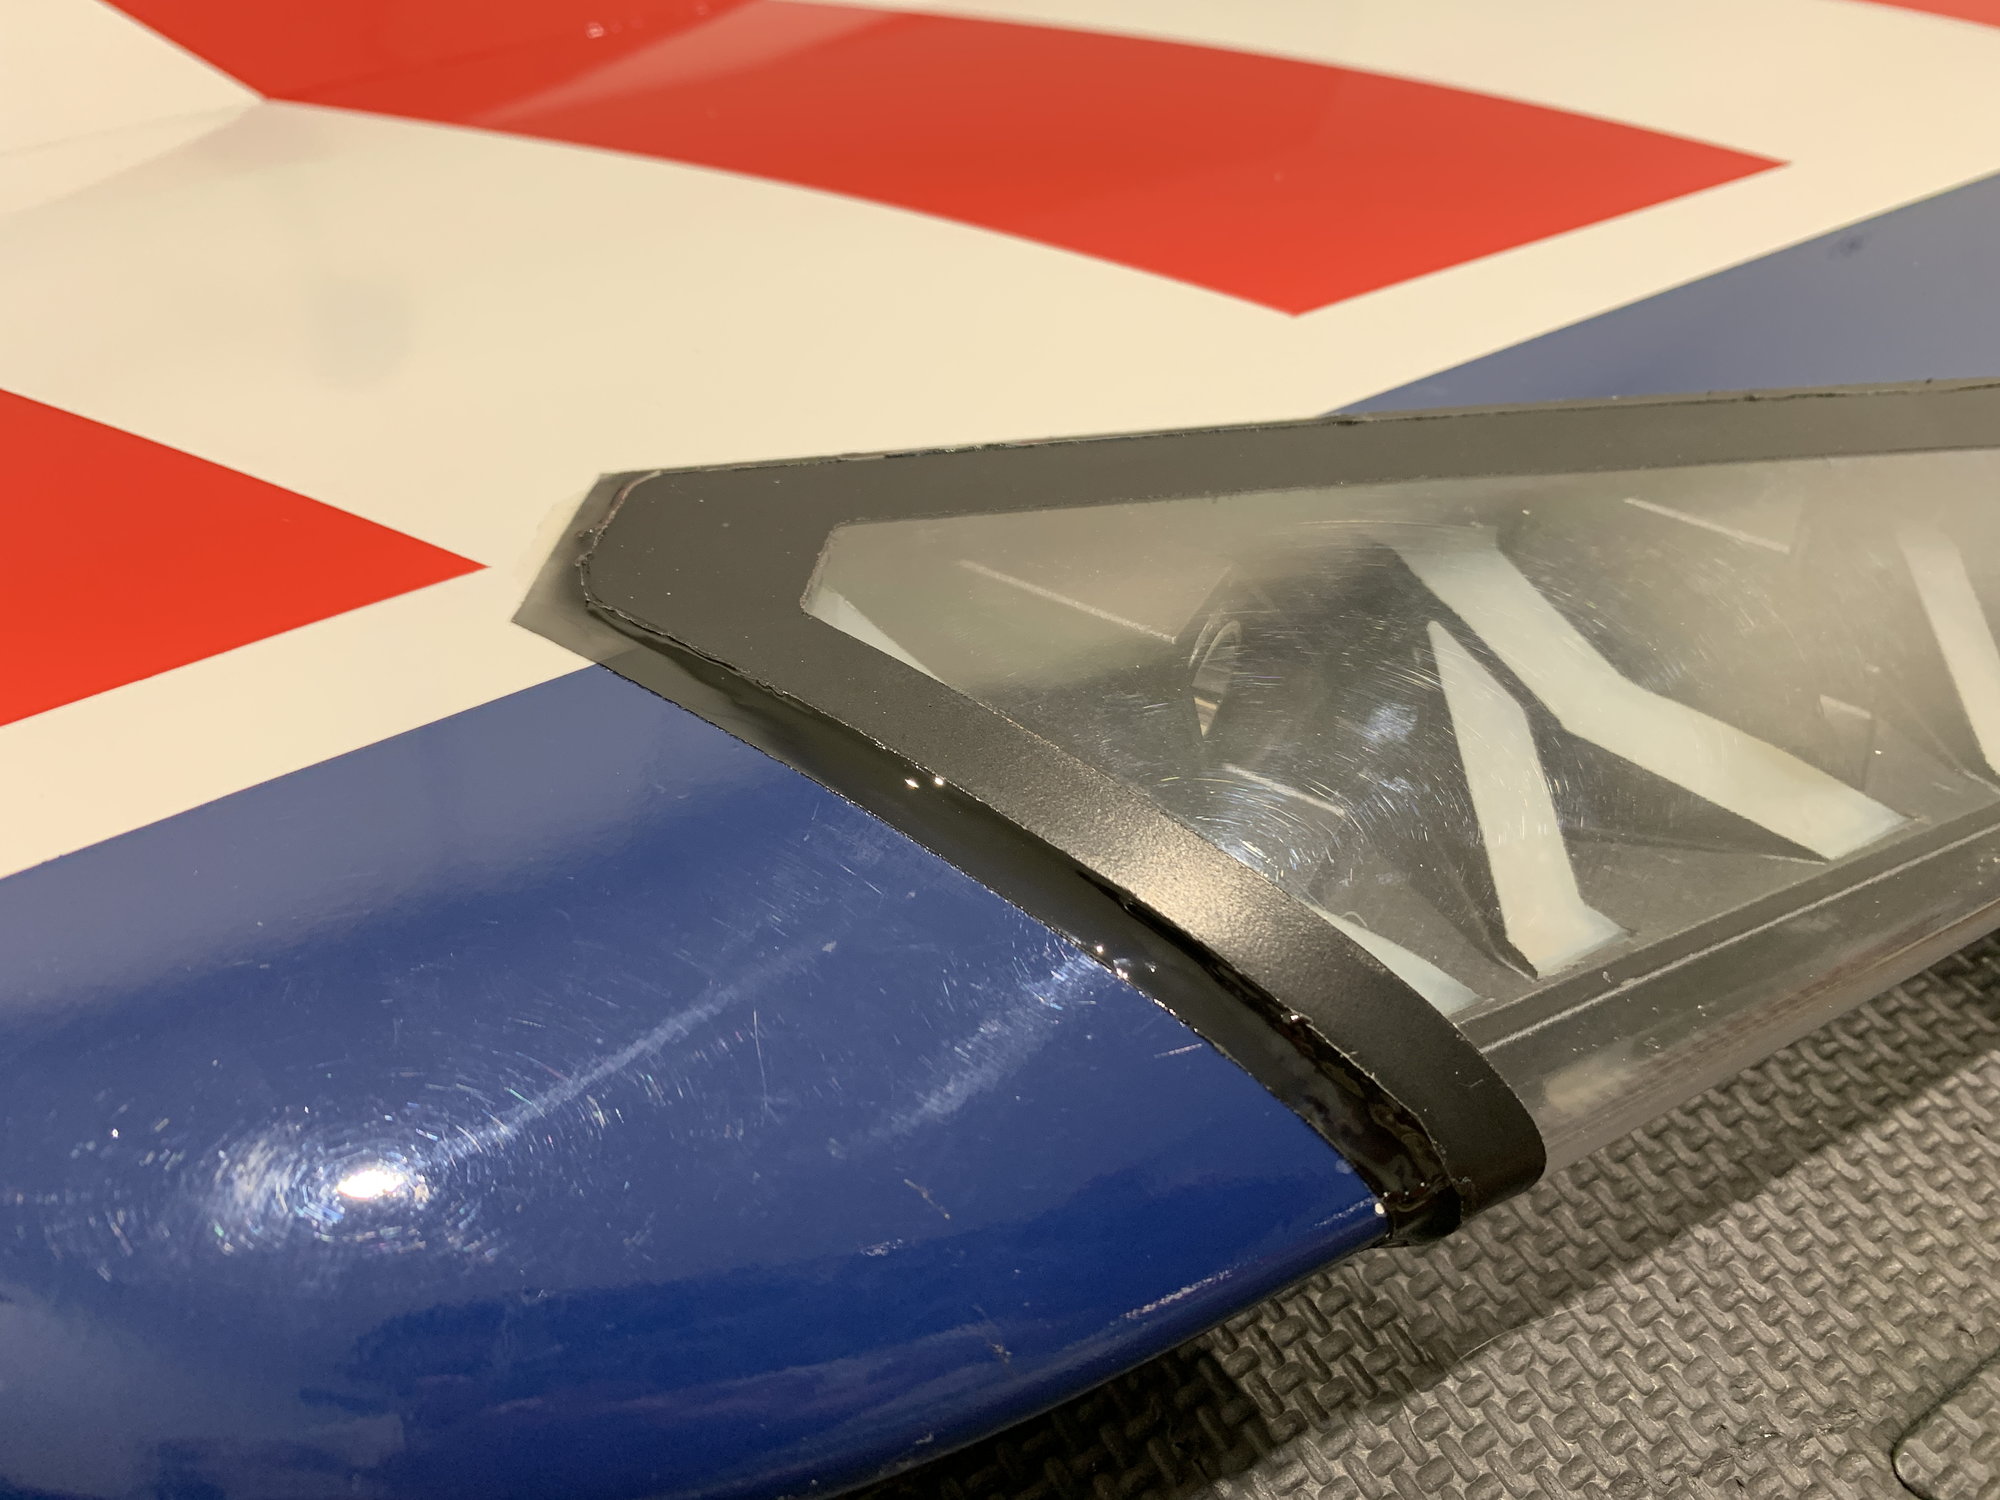
Very happy with the final result.
This was the first wing. The cutout was a bit excessive for the new light housing. All the details are covered in the video.
12-29-2021, 07:42 AM
#72
Thread Starter
My Feedback: (1)
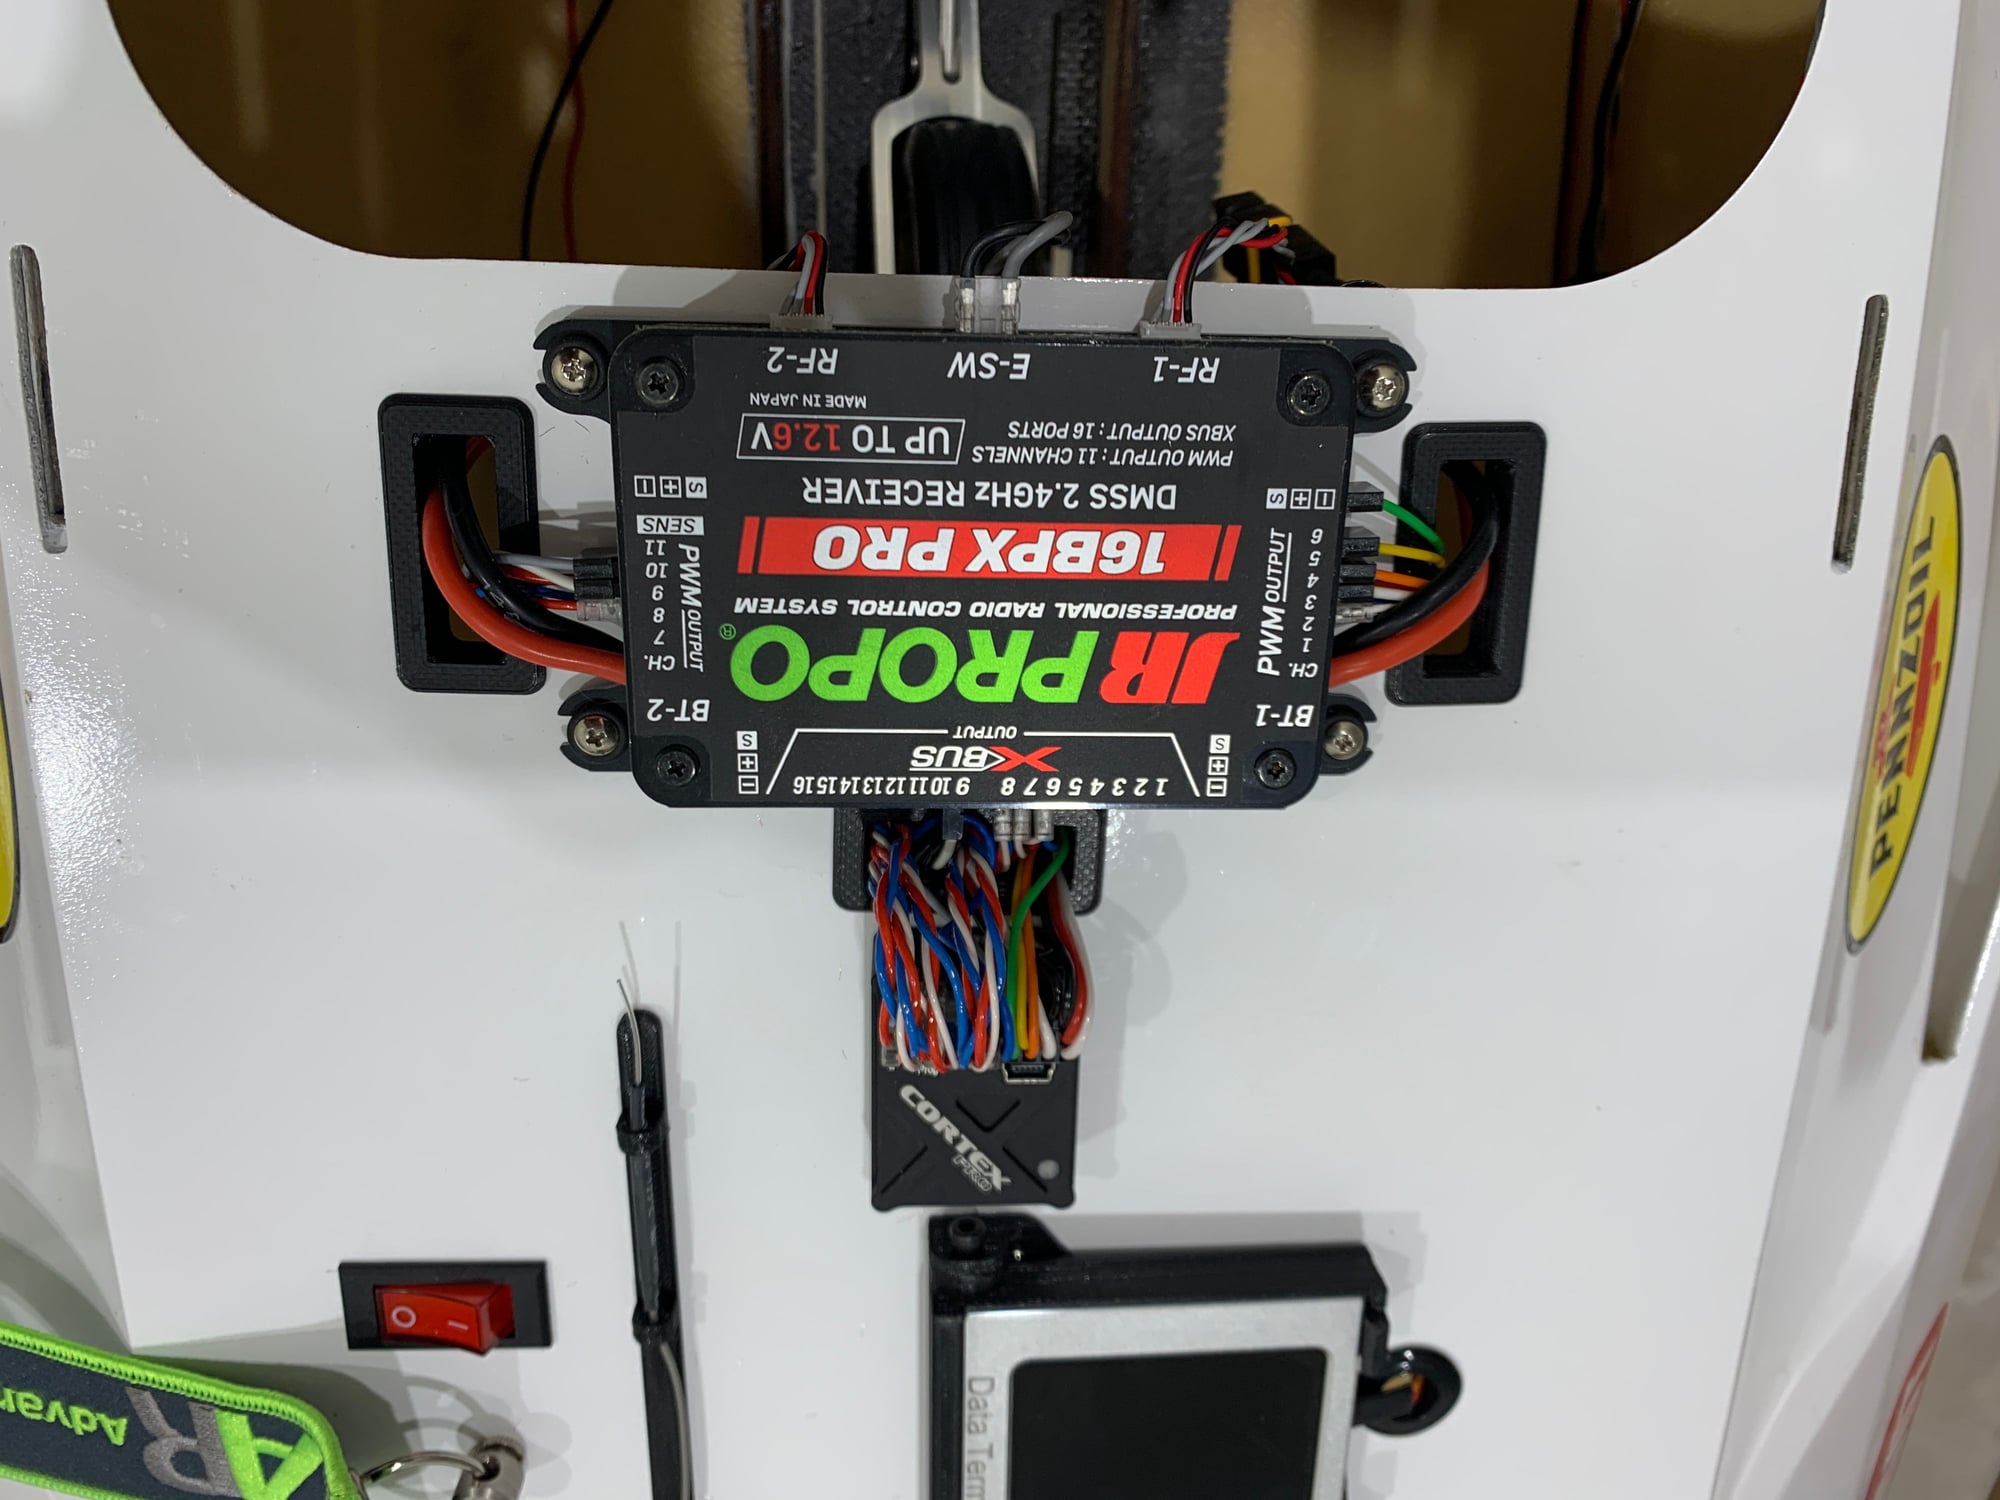
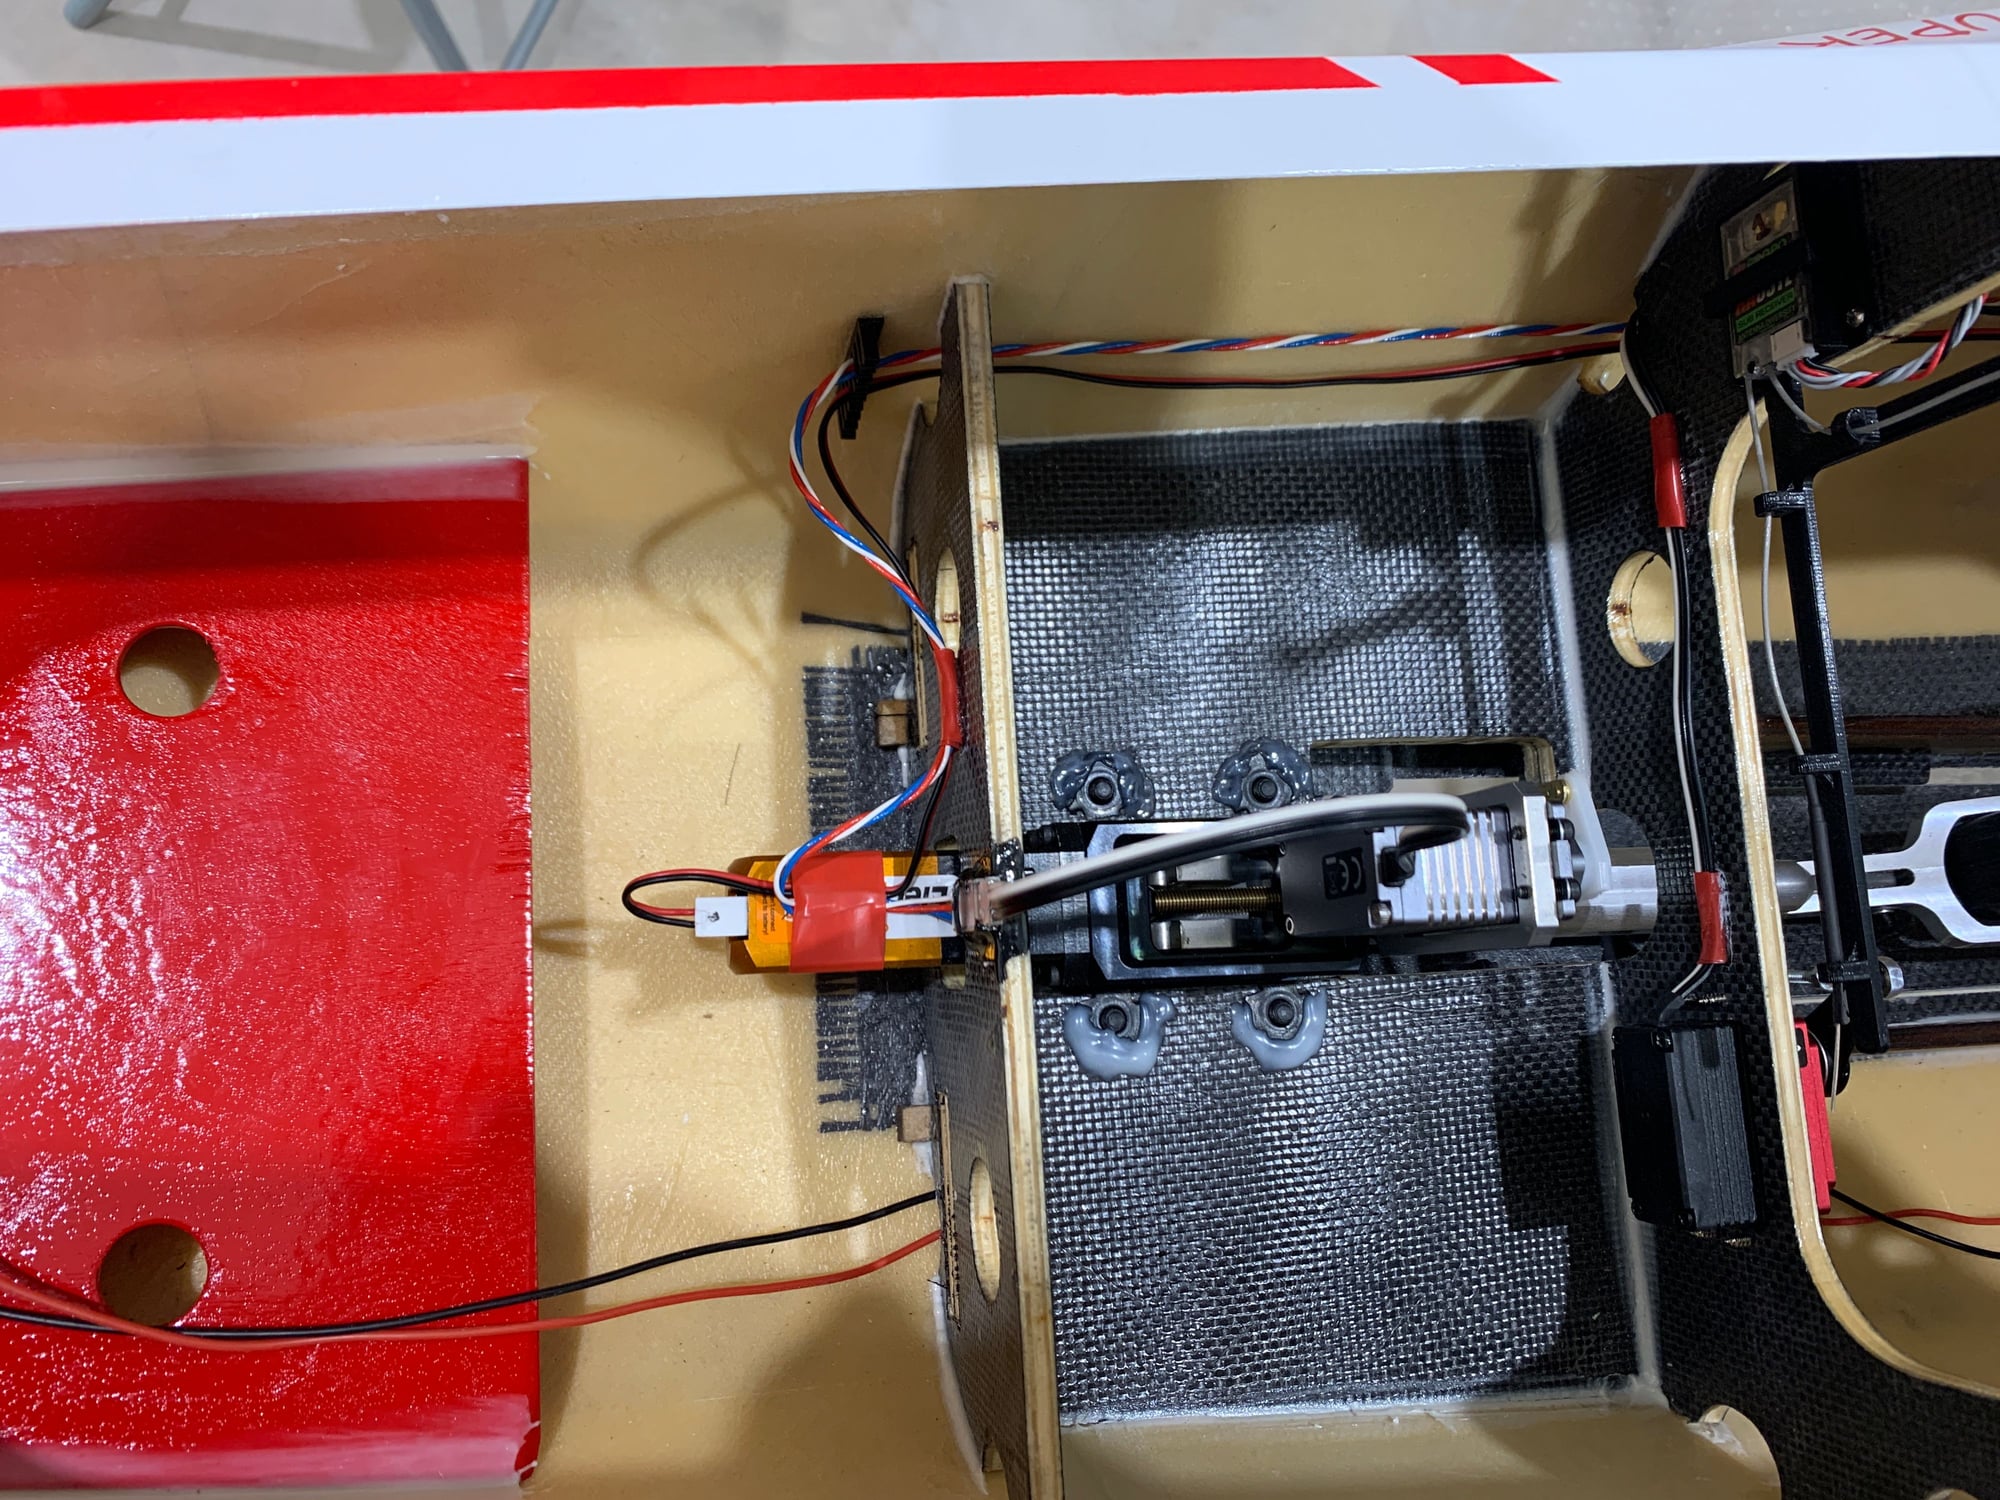
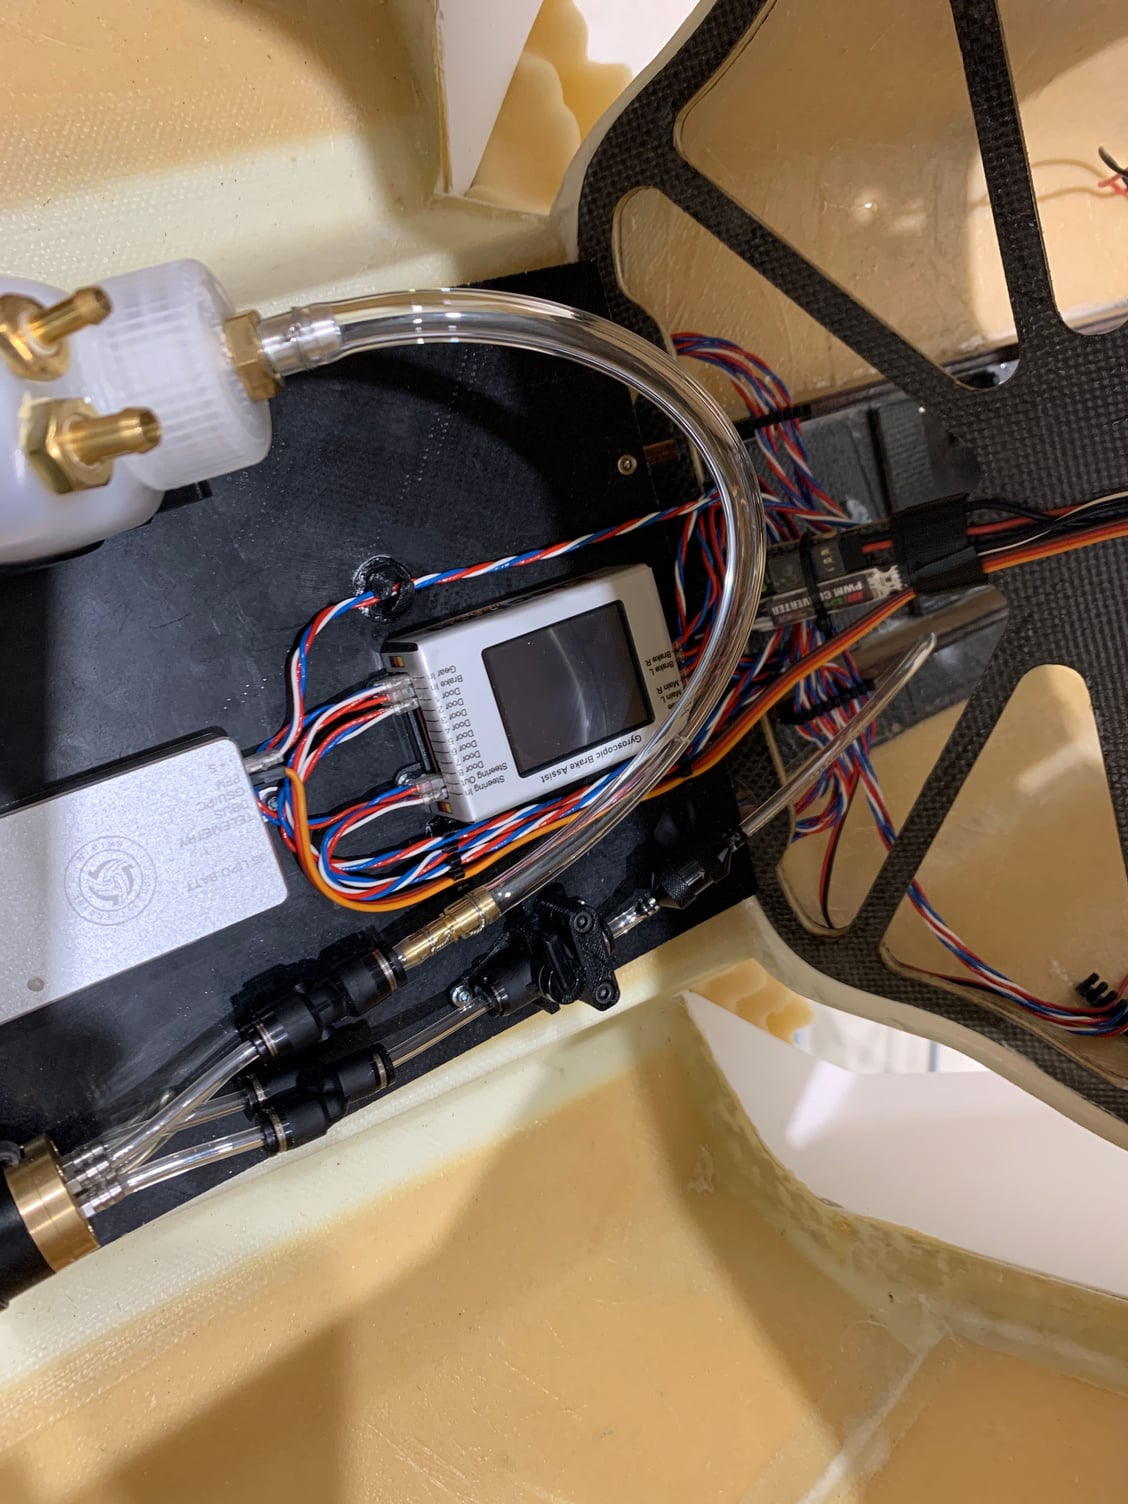
Light harness all installed, plugged in and wired. It will be hidden under the central tray.
Central tray installed.
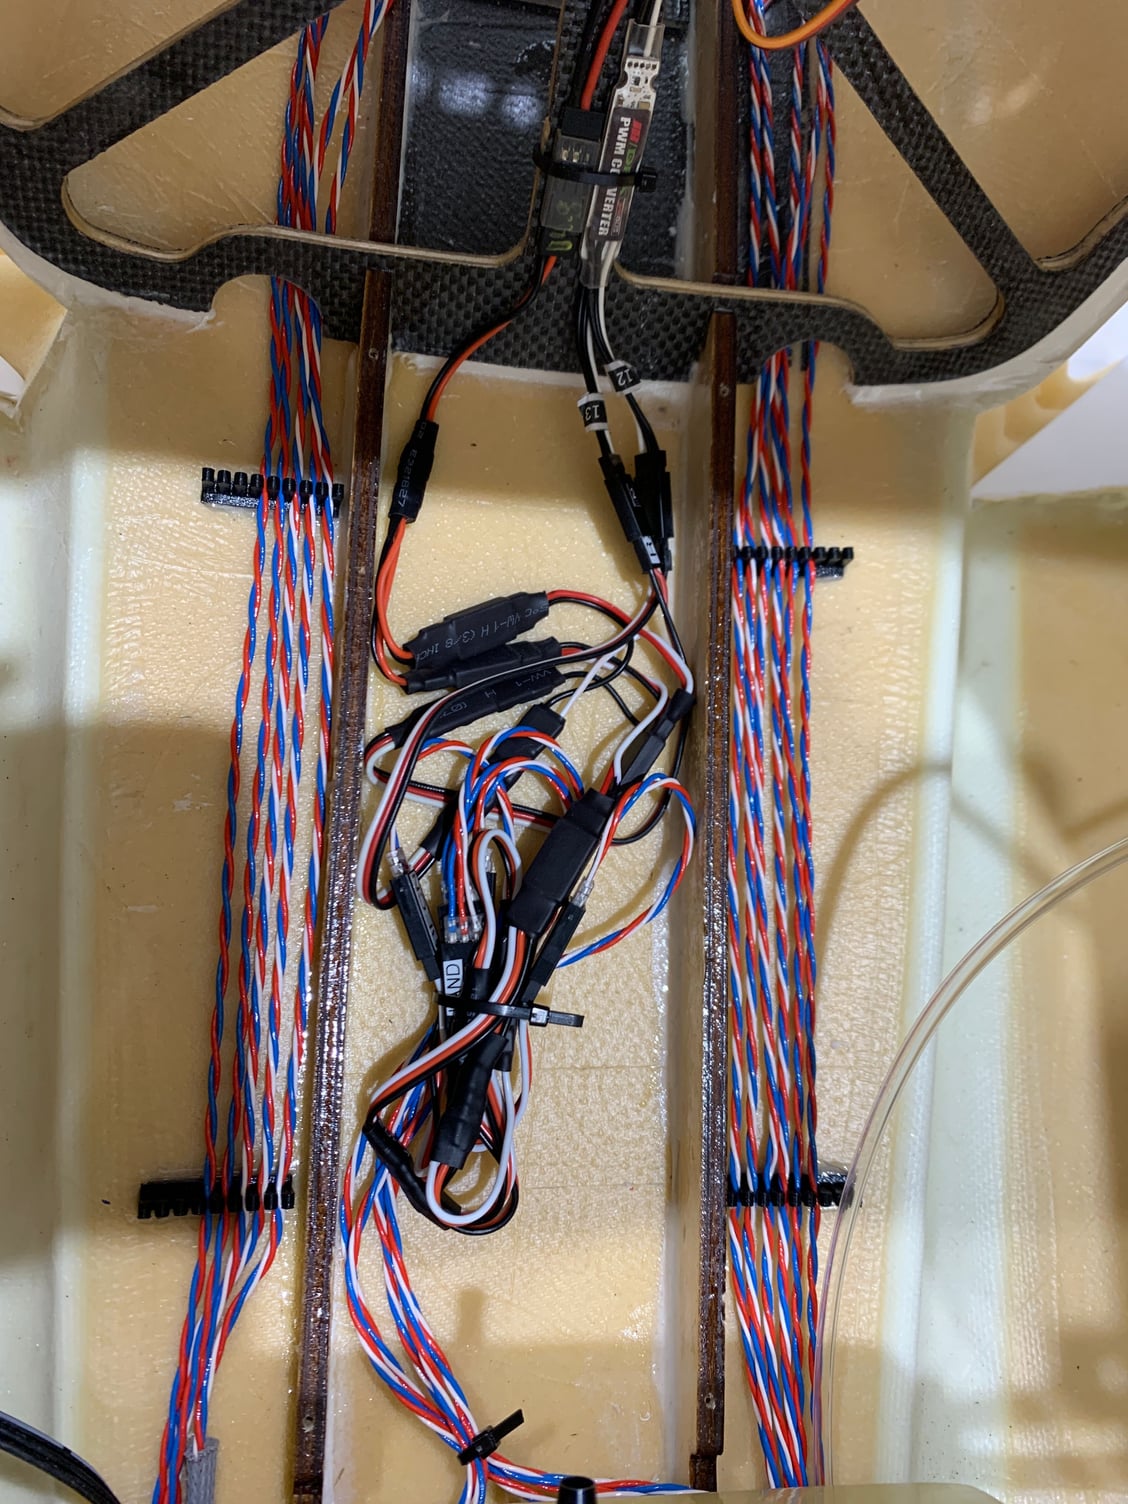
Wiring for the surfaces and Cortex complete.
Shot of the servo wiring all installed and in place.
12-29-2021, 07:46 AM
#74
Thread Starter
My Feedback: (1)
Right wing installed. This was the first light housing.
Left wing light housing complete. Worked out great! Kept the Goop Trim tighter than the right wing as we didn't have any Ooopsies to cover.
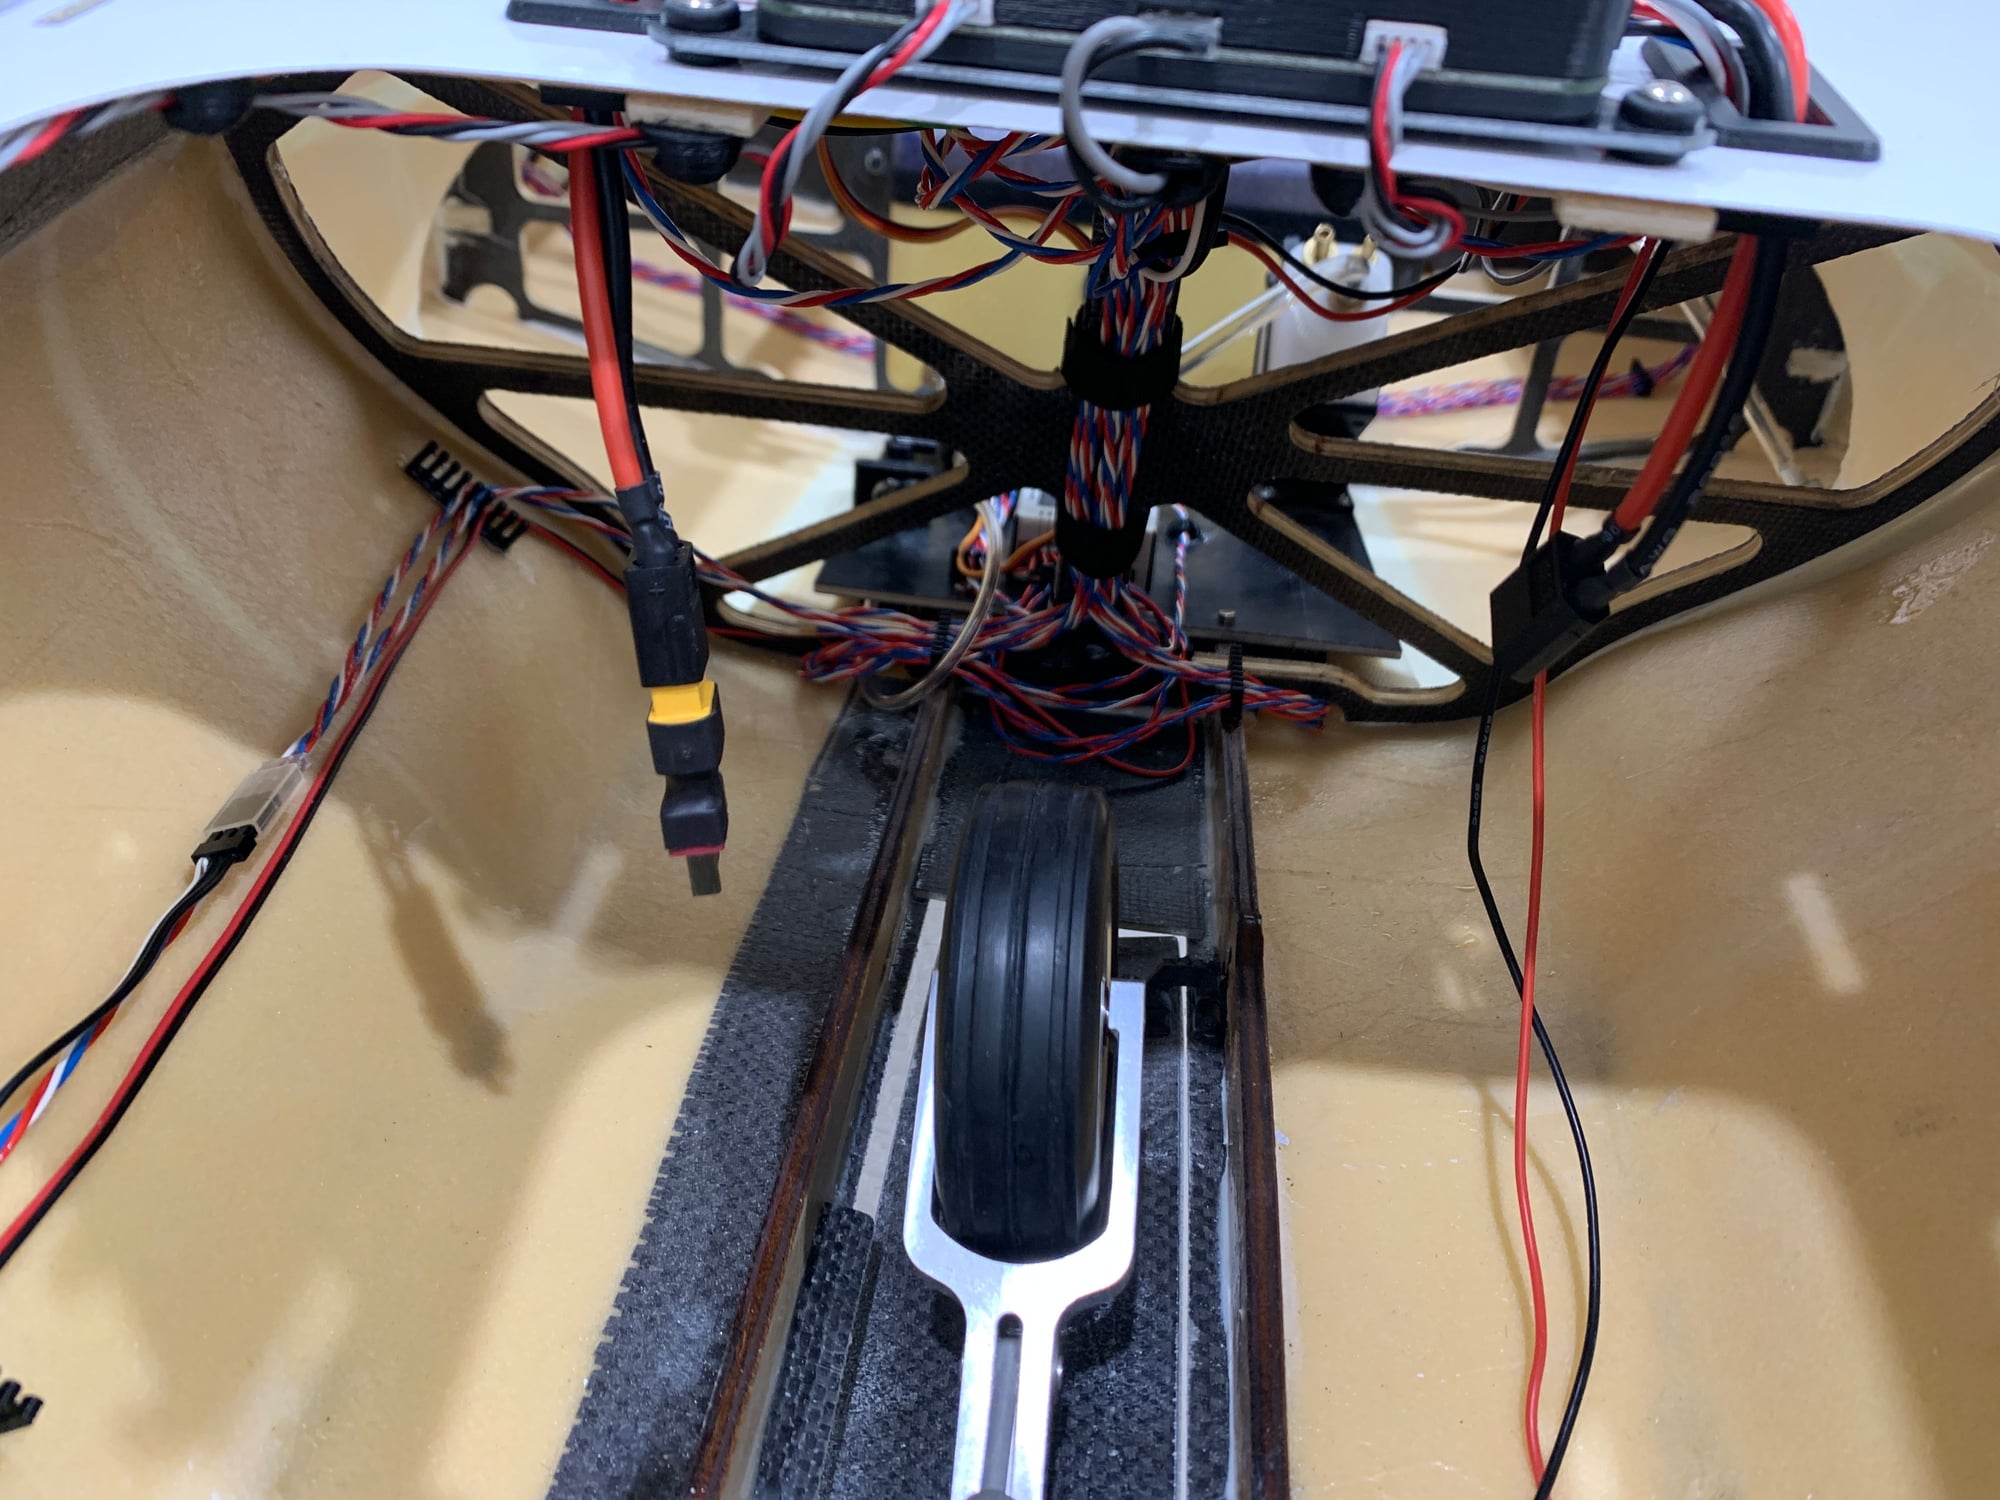
Front end Gear, Servo, Door Servo wiring complete.
 12-29-2021, 07:54 AM
#75
Thread Starter
My Feedback: (1)
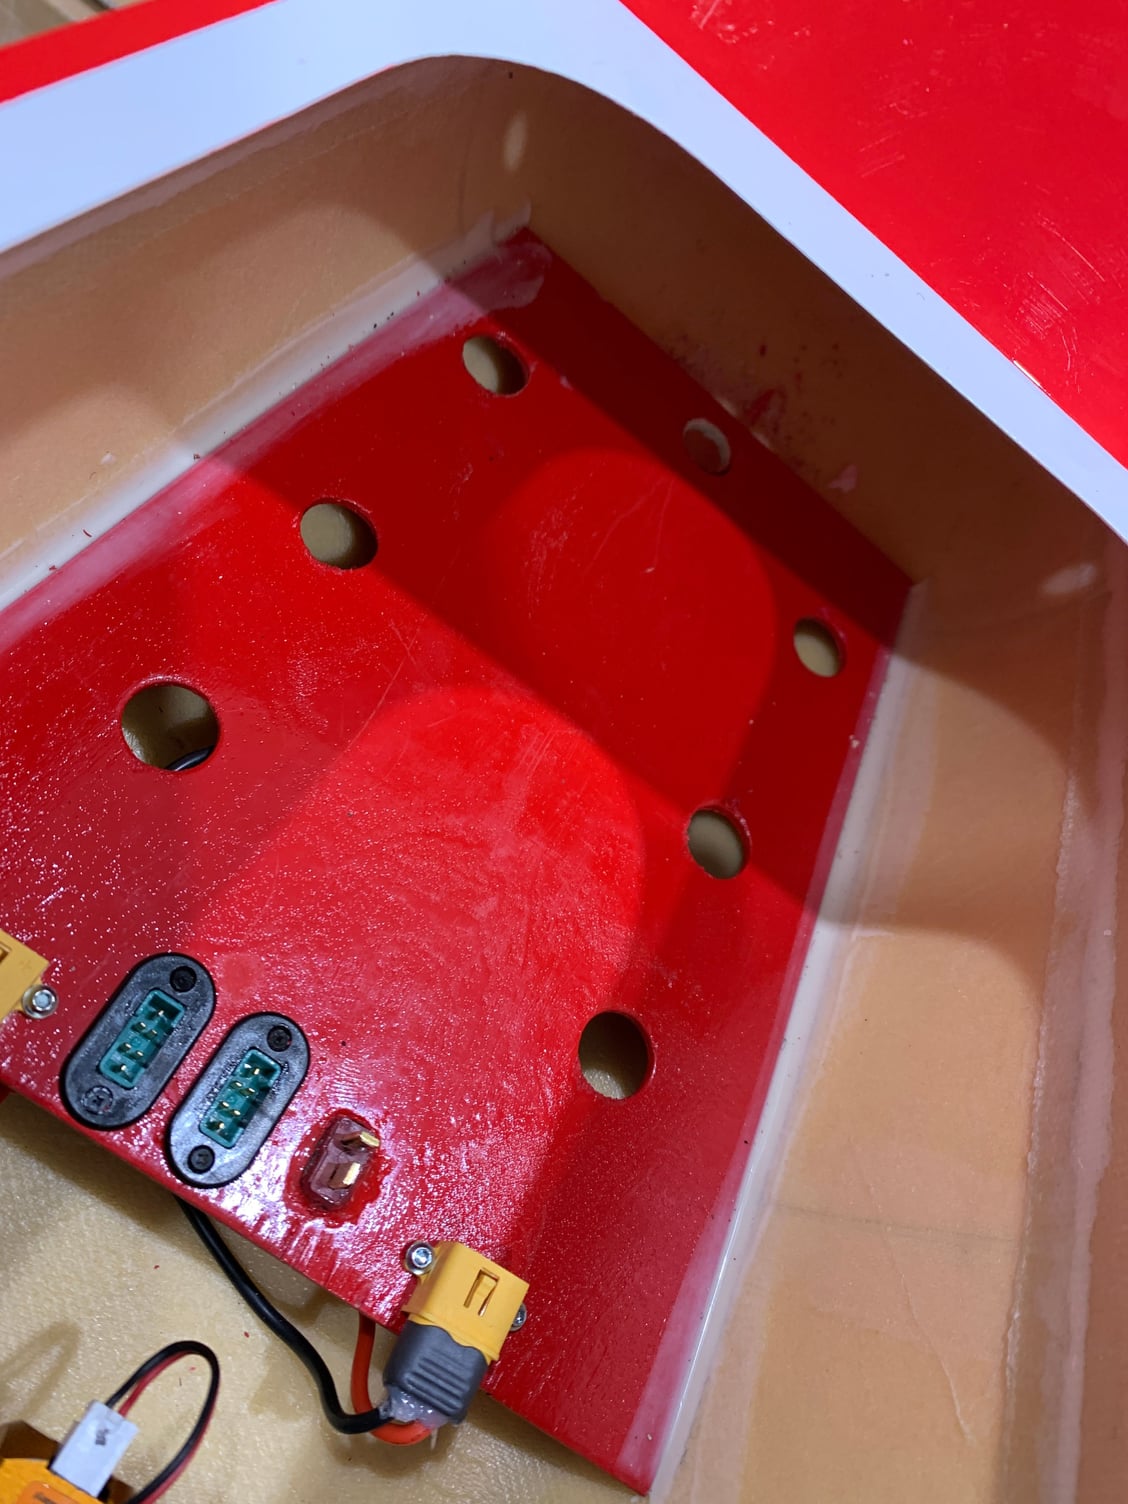
Installed all the battery plugs on the front tray. . at the very front of the tray you can see the center hole. This is the receiving hole for the battery tray.
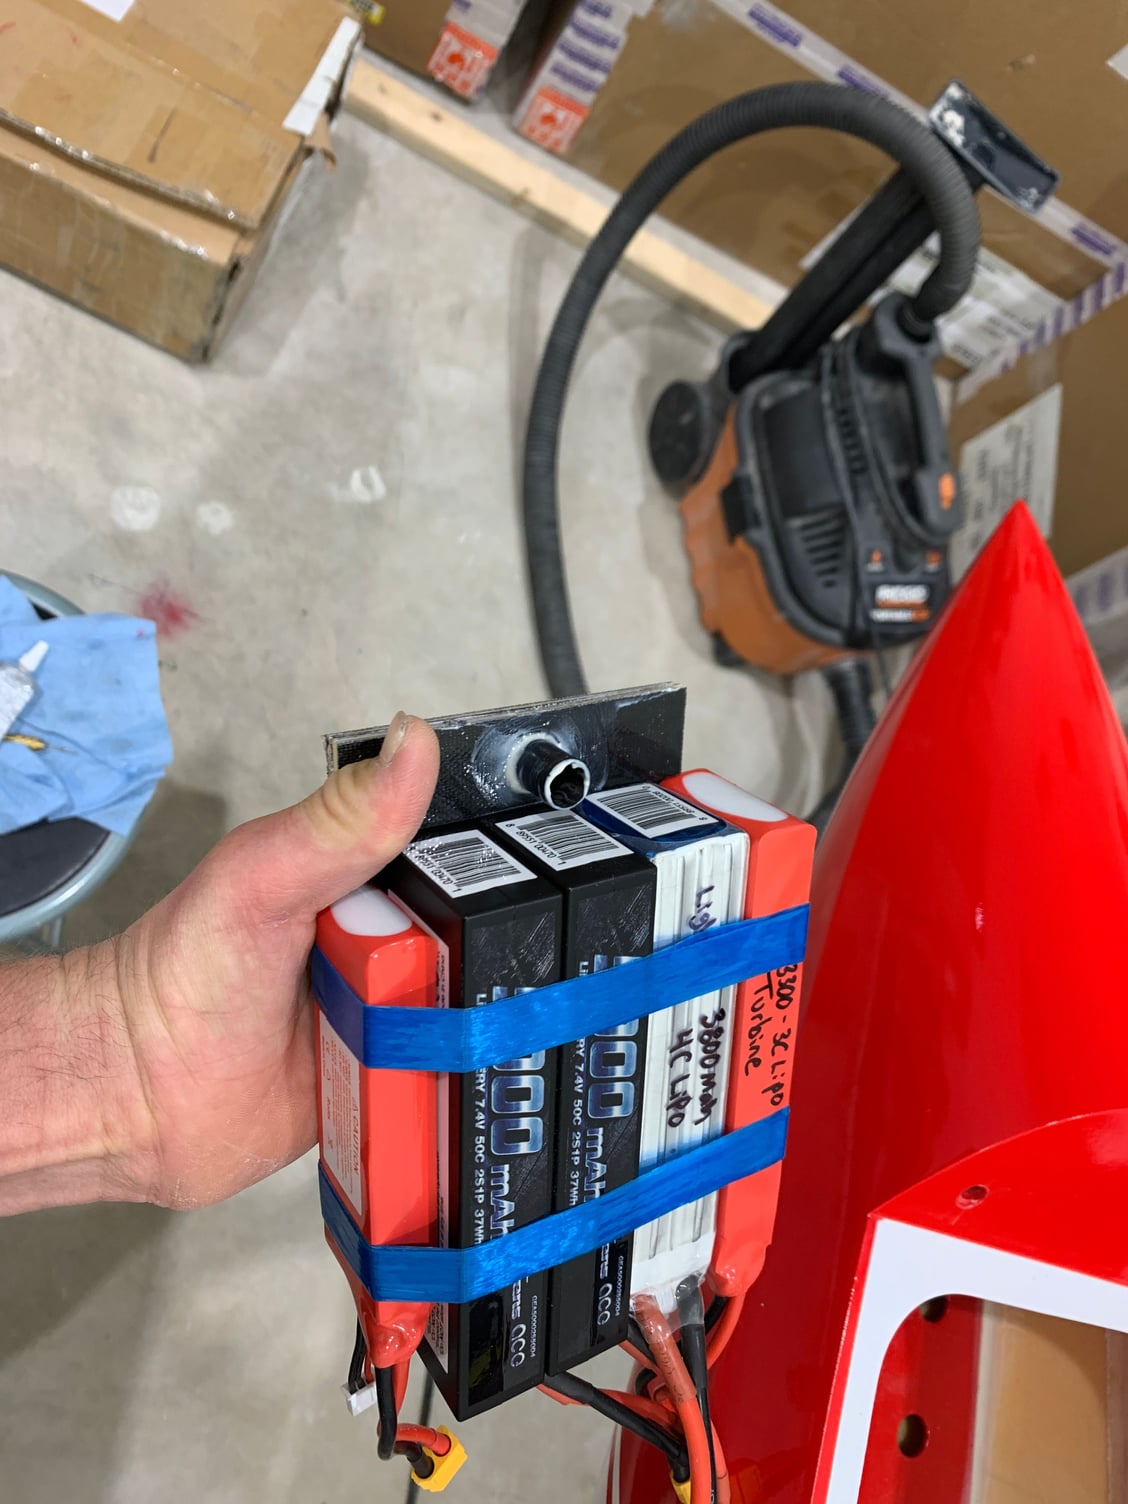
Battery layout complete. This was after I did the C of G and I had LOTS of wiggle room to play with for weight. Turbine battery is a 3300MAH 3 Cell lipo. Light battery is a 3800Mah 4 Cell Lipo. Receiver batteries are 5000 Mah 2 Cell Lipos and the Gear Battery is a 2200 Mah 2 Cell Lipo. With this load of batteries and balancing on the front edge of the wing tube I still need to add a fair bit of strip weights to the nose.
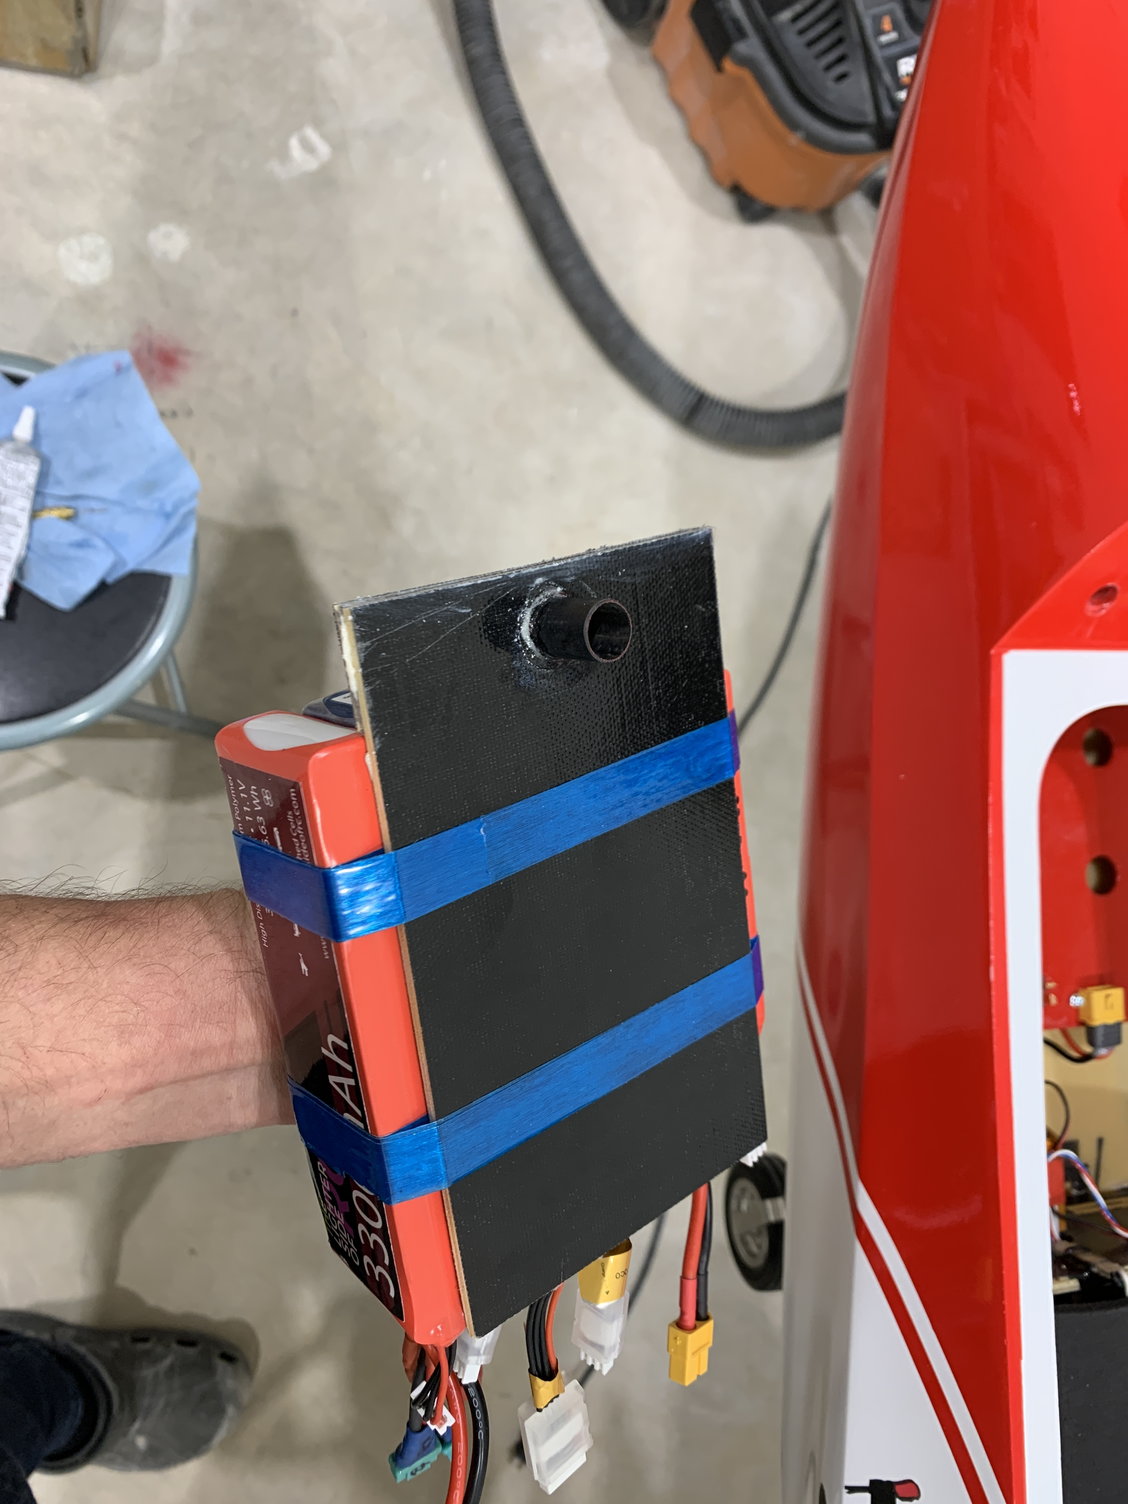
This scenario is ideal as we can easily remove weight from the nose to move the C of G Aft as desired/needed. Shot of the underside of the battery tray. The batteries are stuck together with double sided tape and then fiberglass tape to hold it all together. Battery bundle installed to battery tray with fiberglass tape.
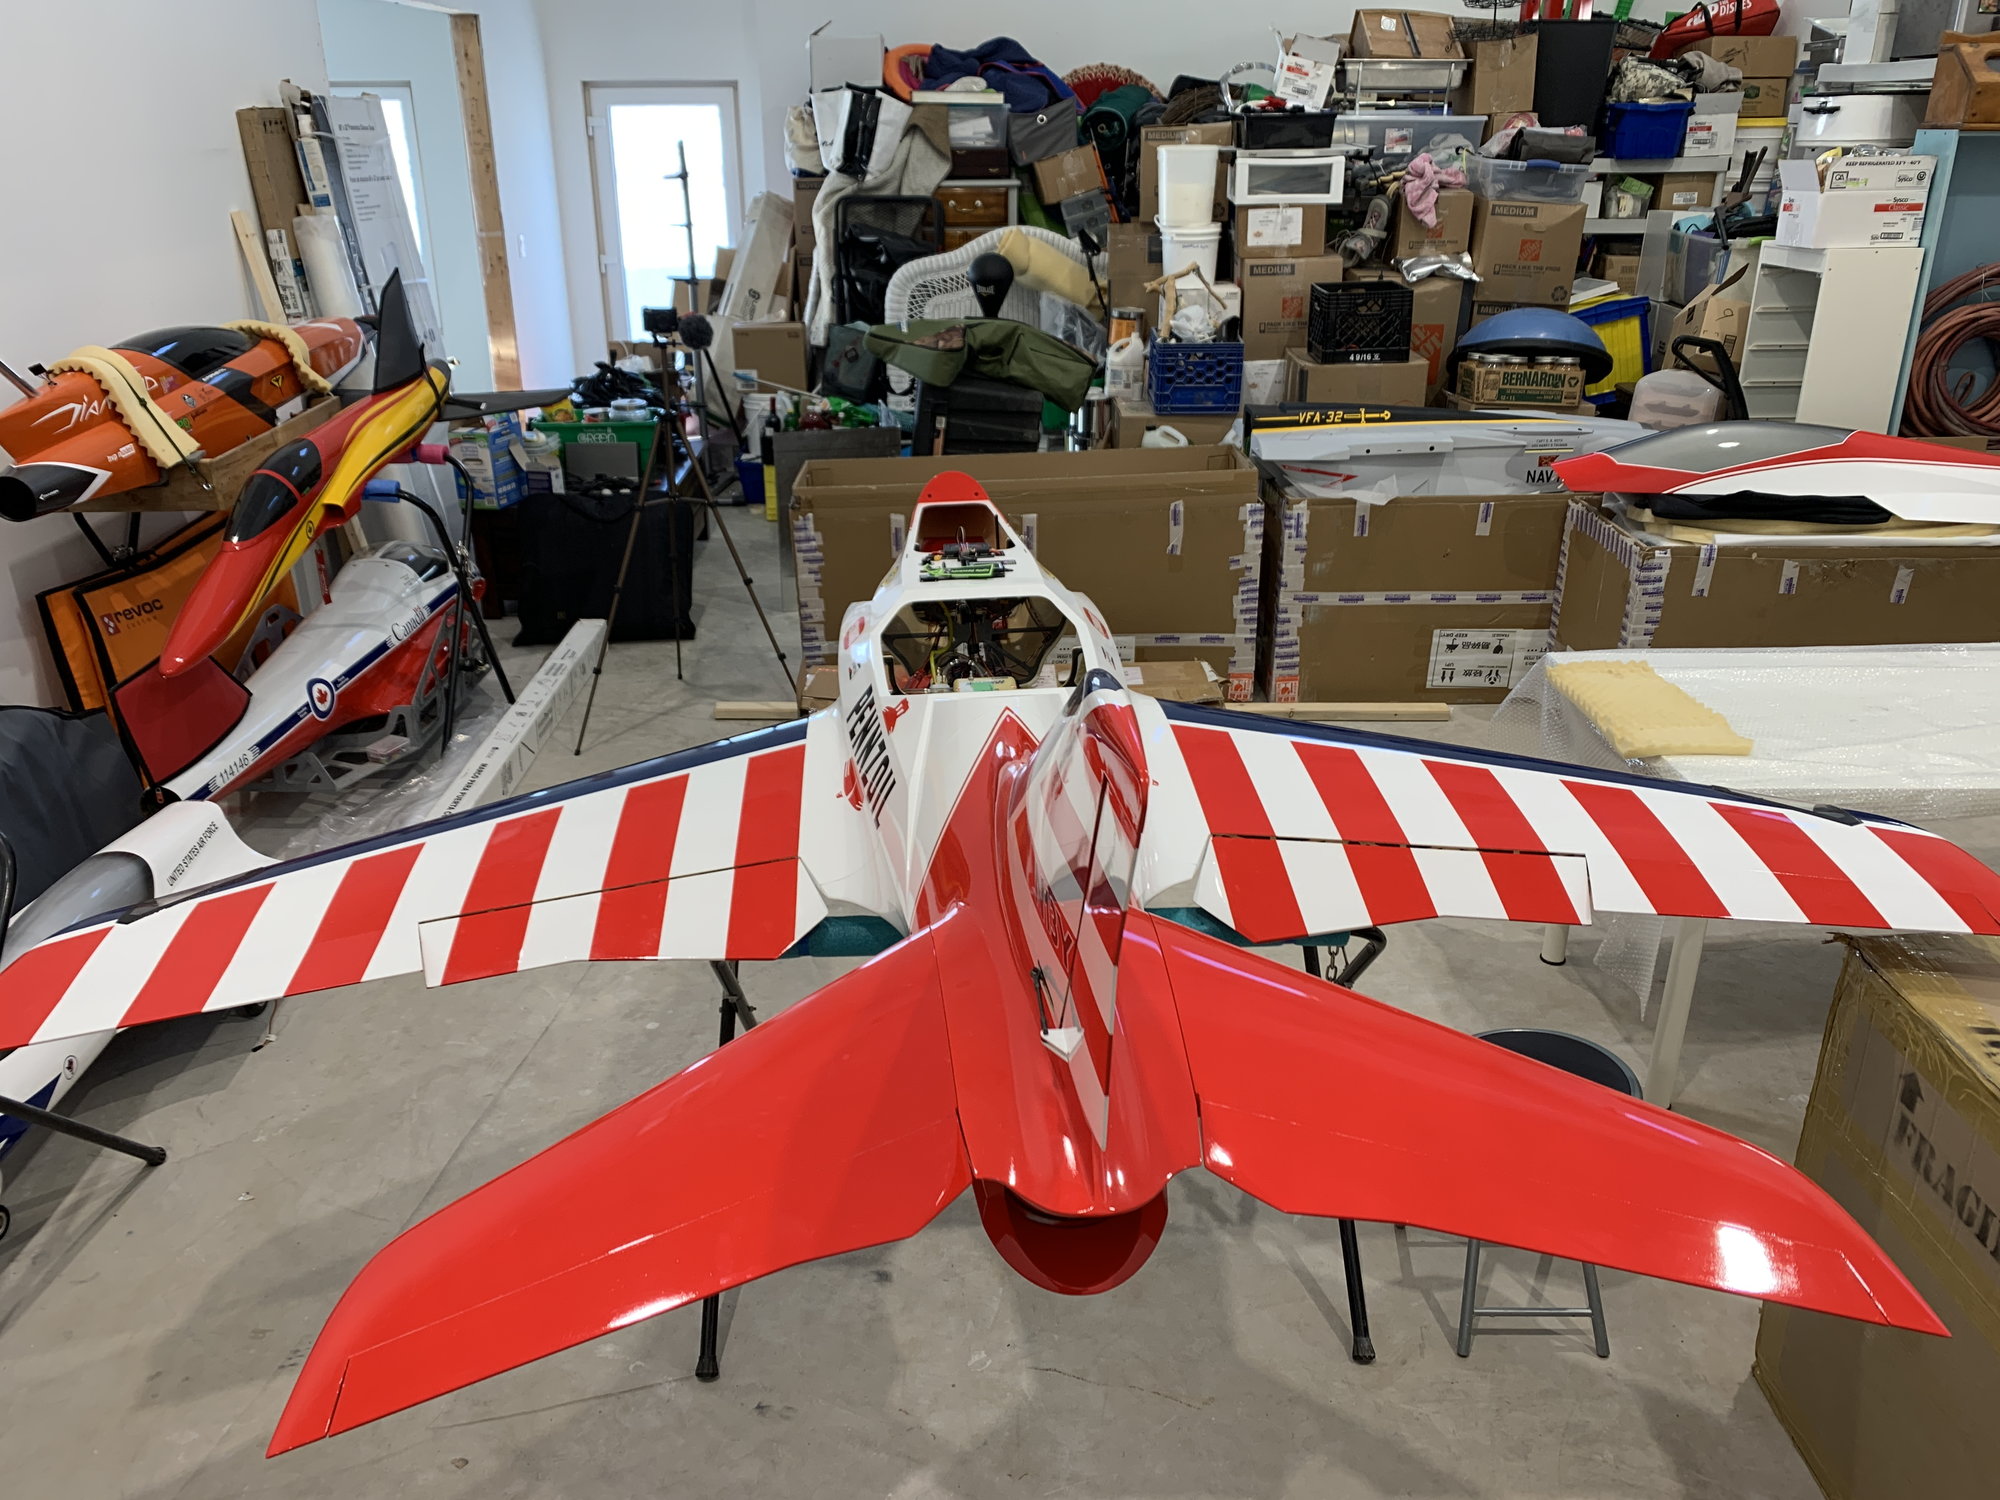
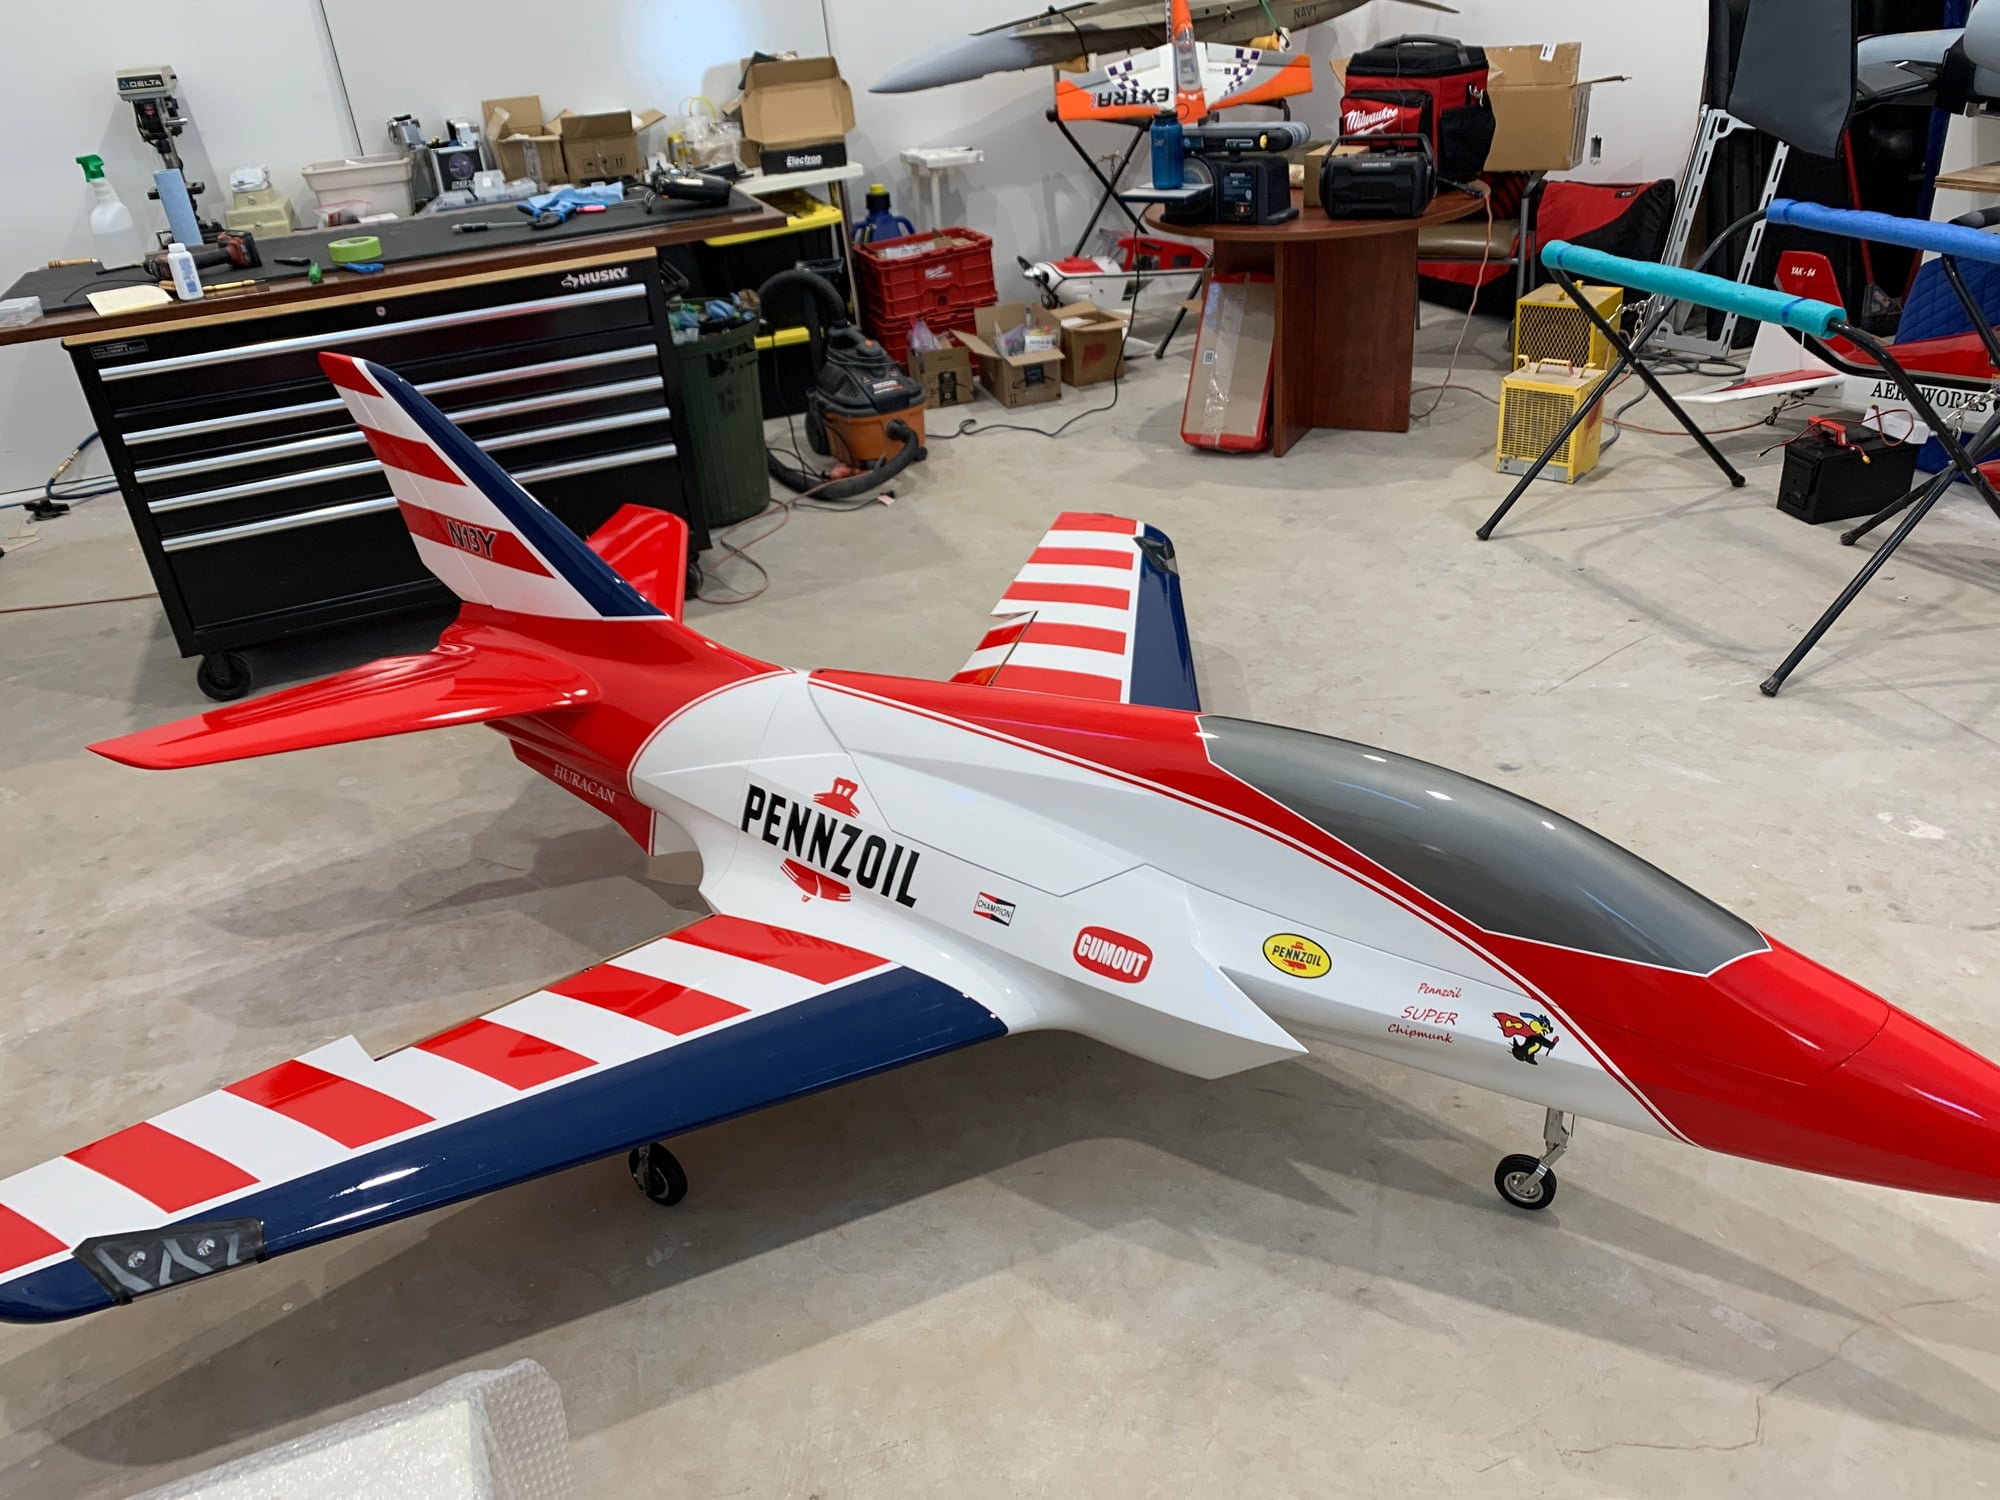
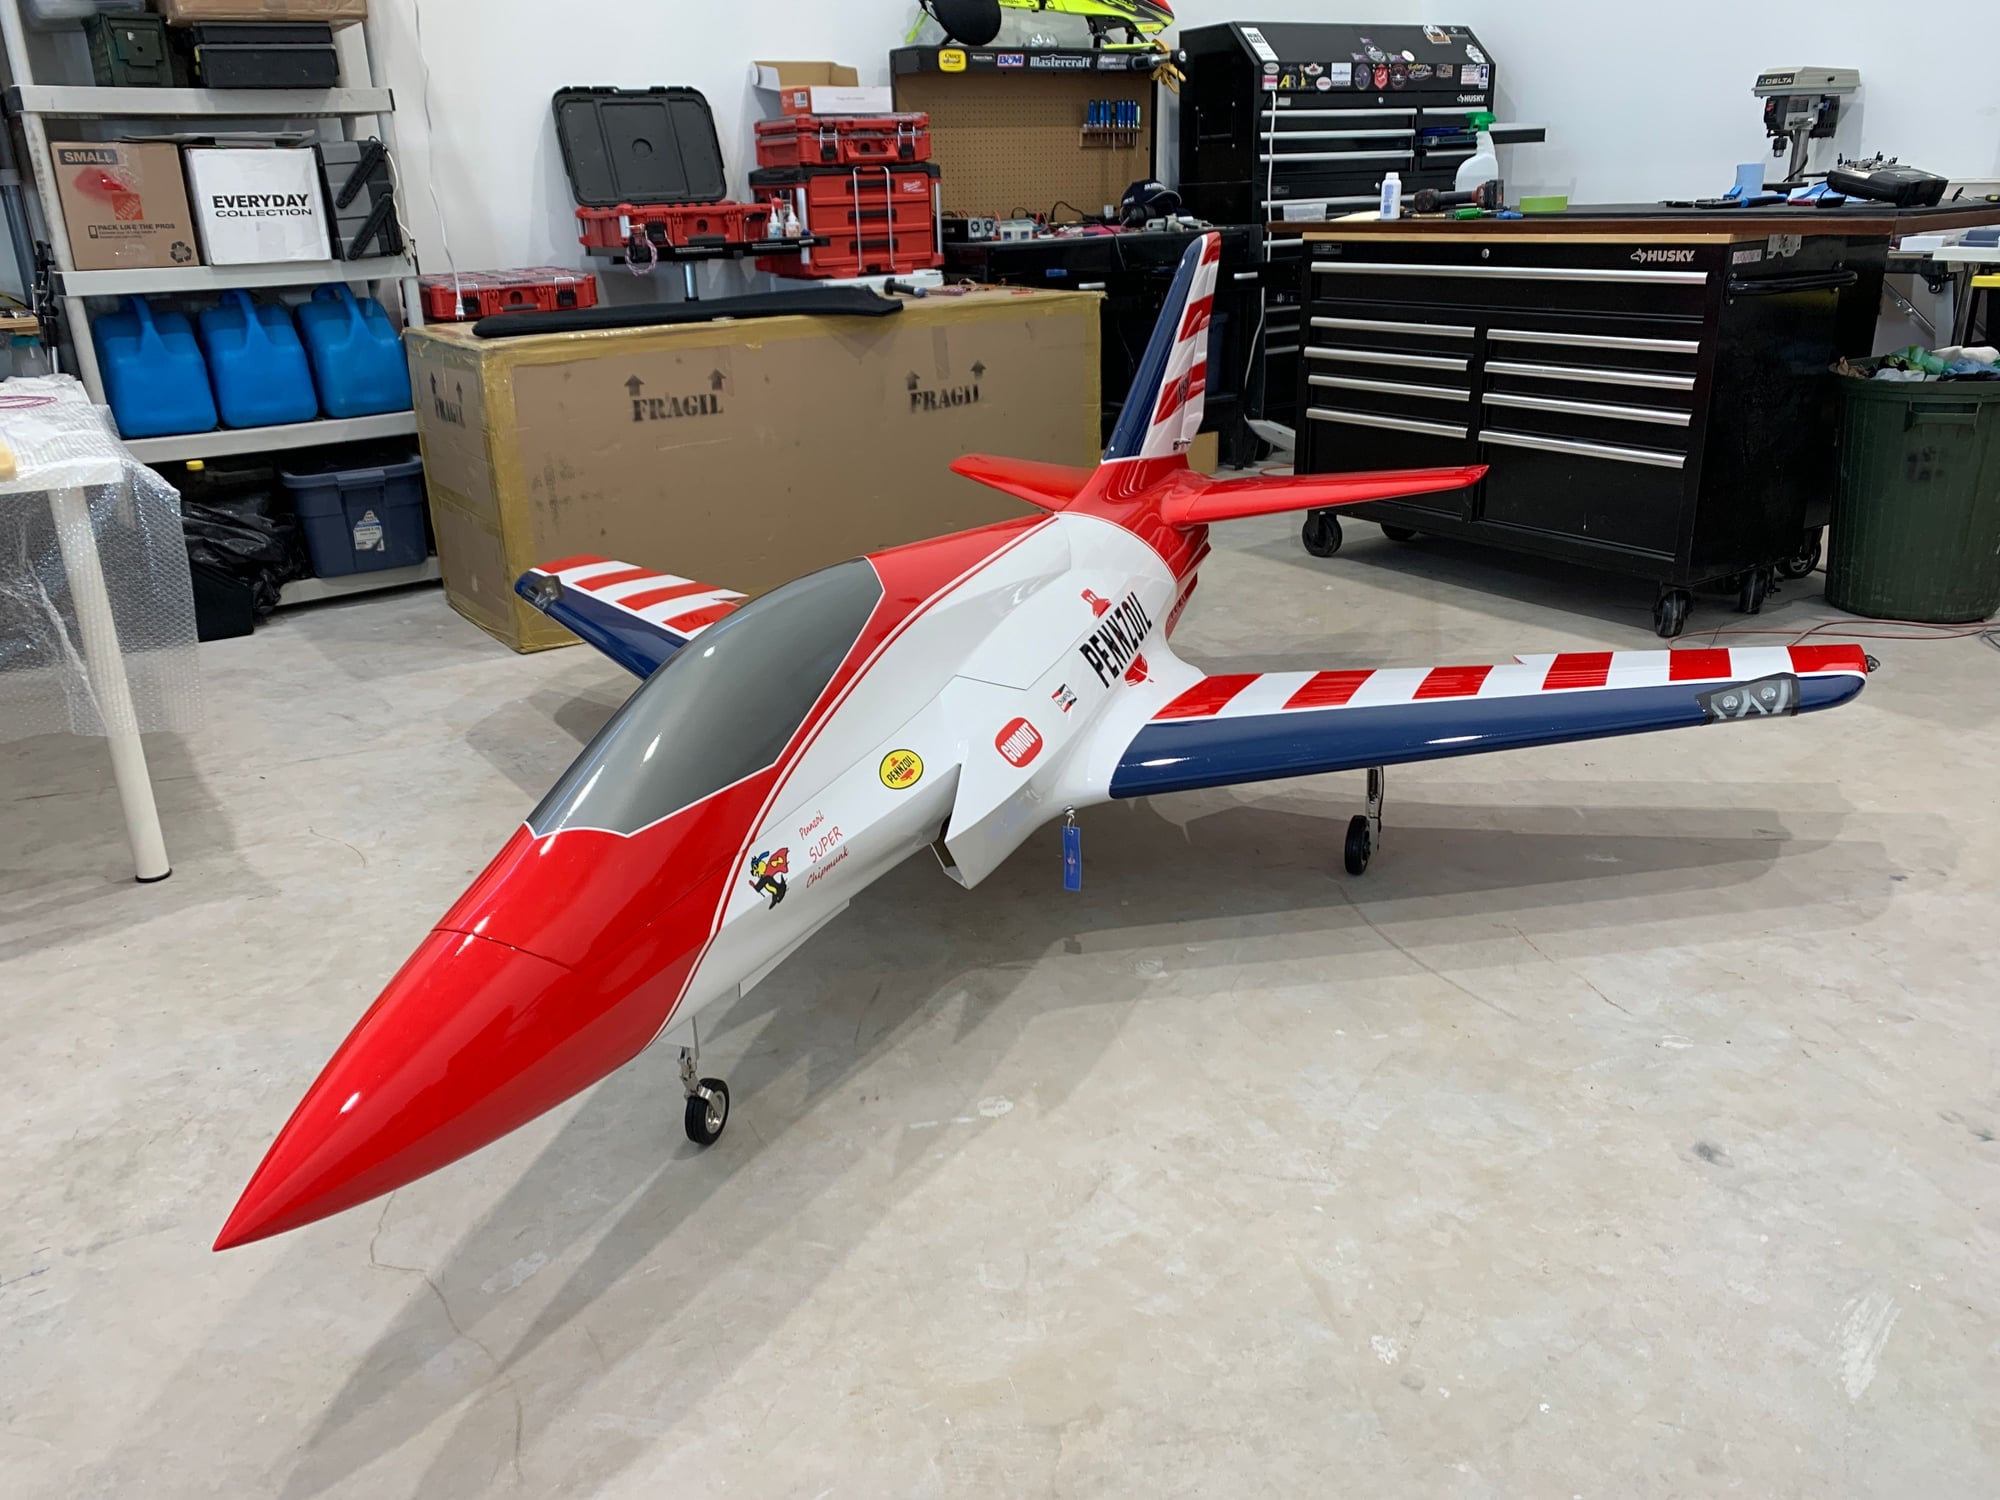
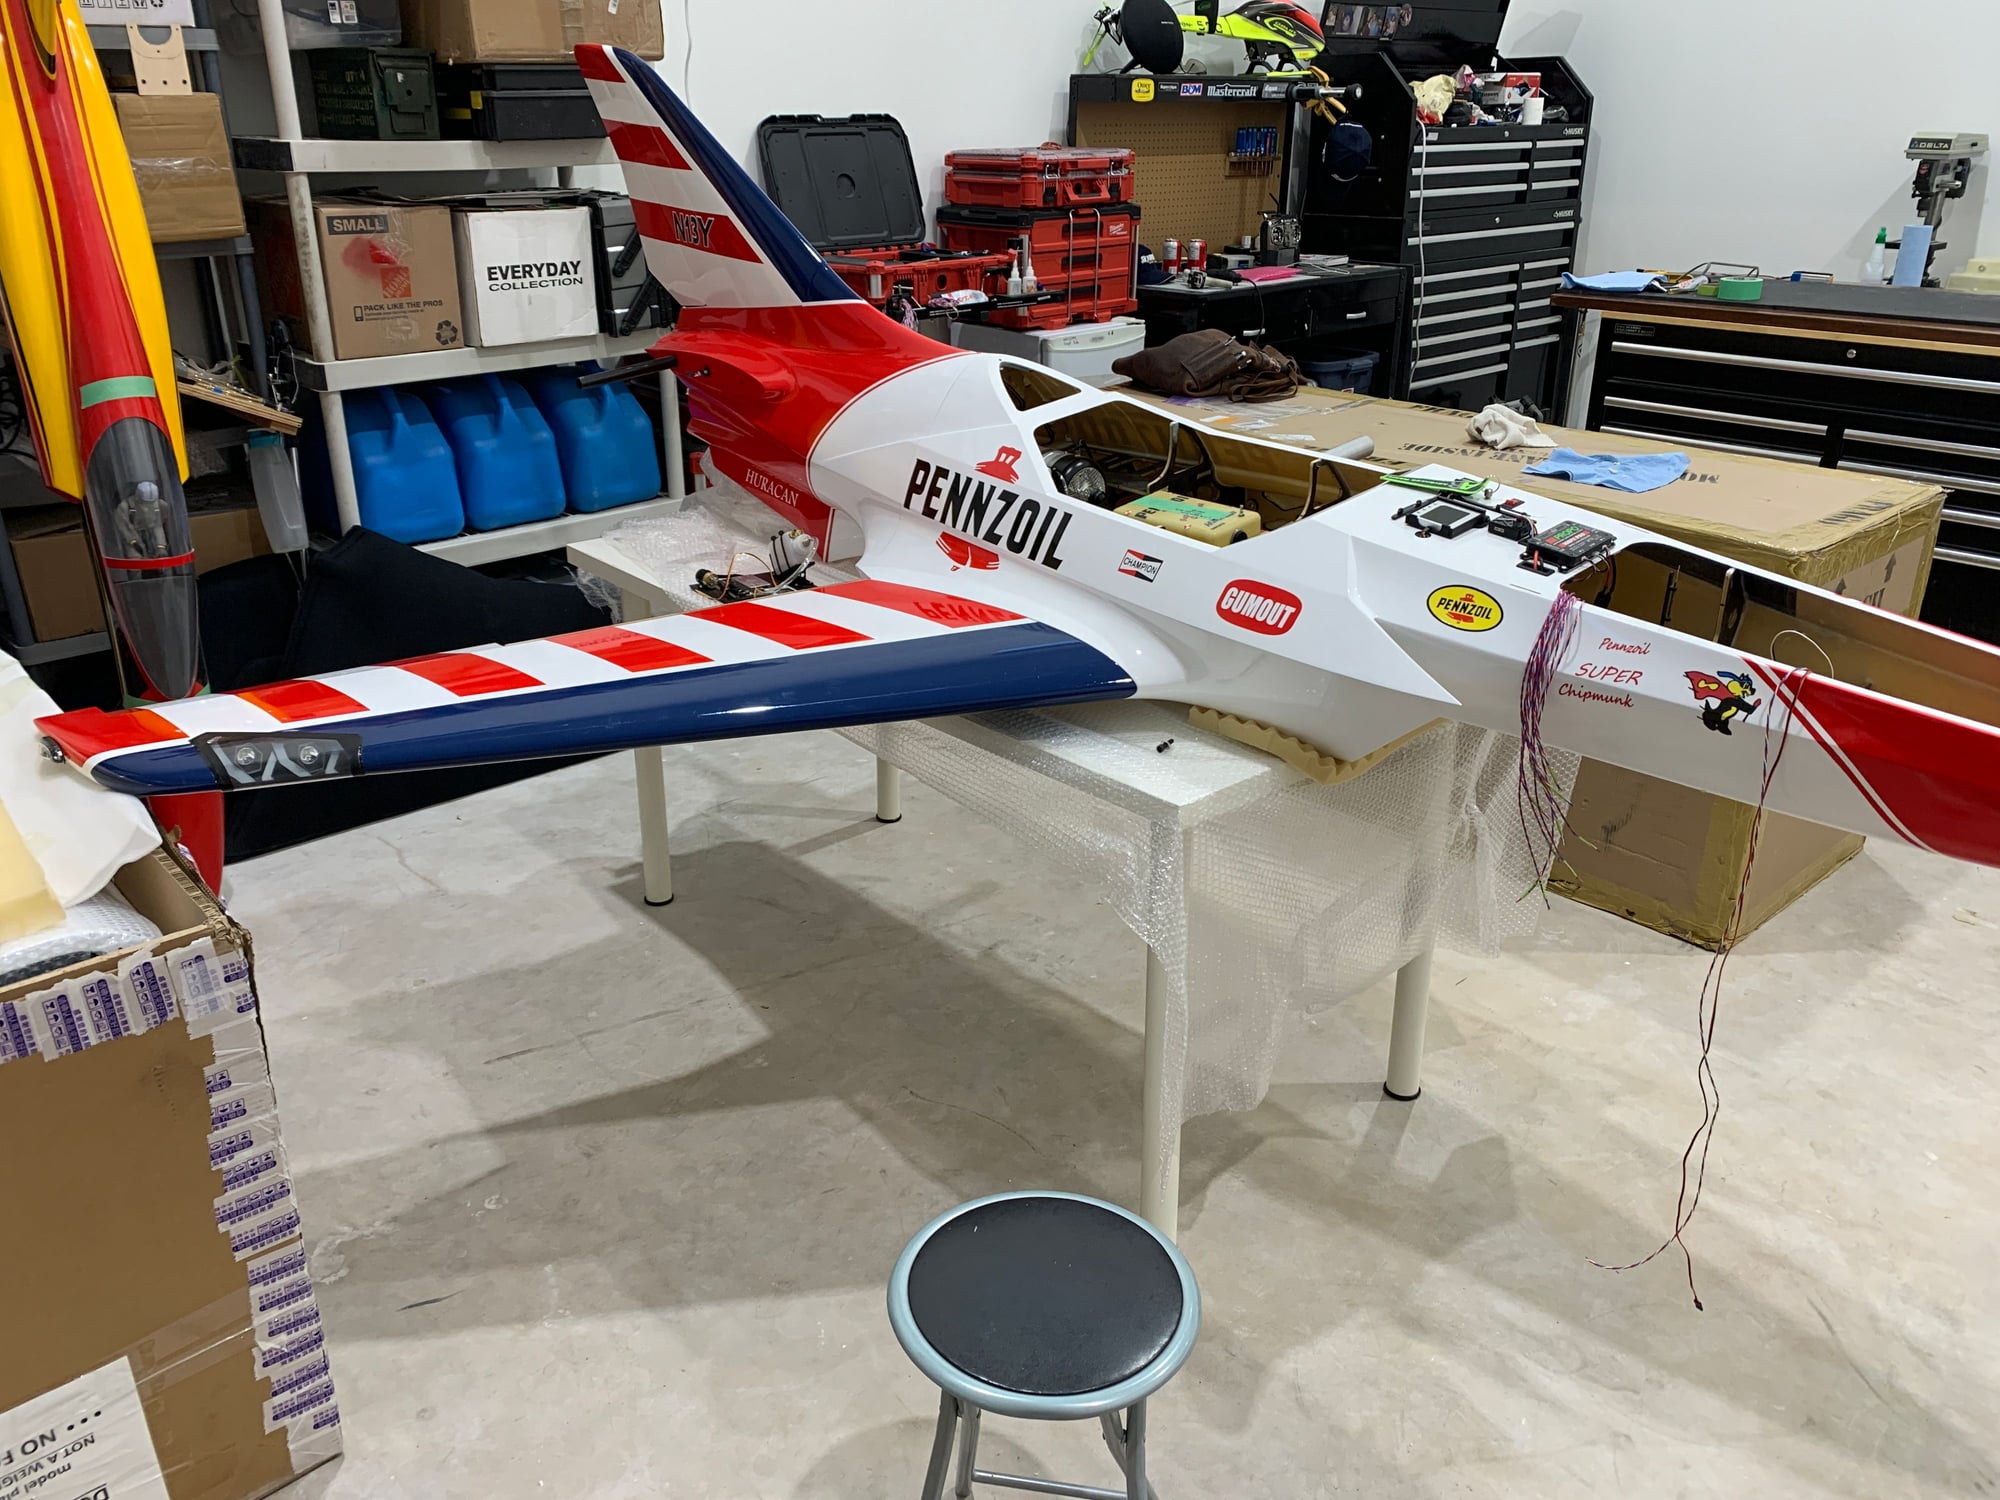
This is a big plane! Don't mind our stuff/junk in the background! still in move in phase!
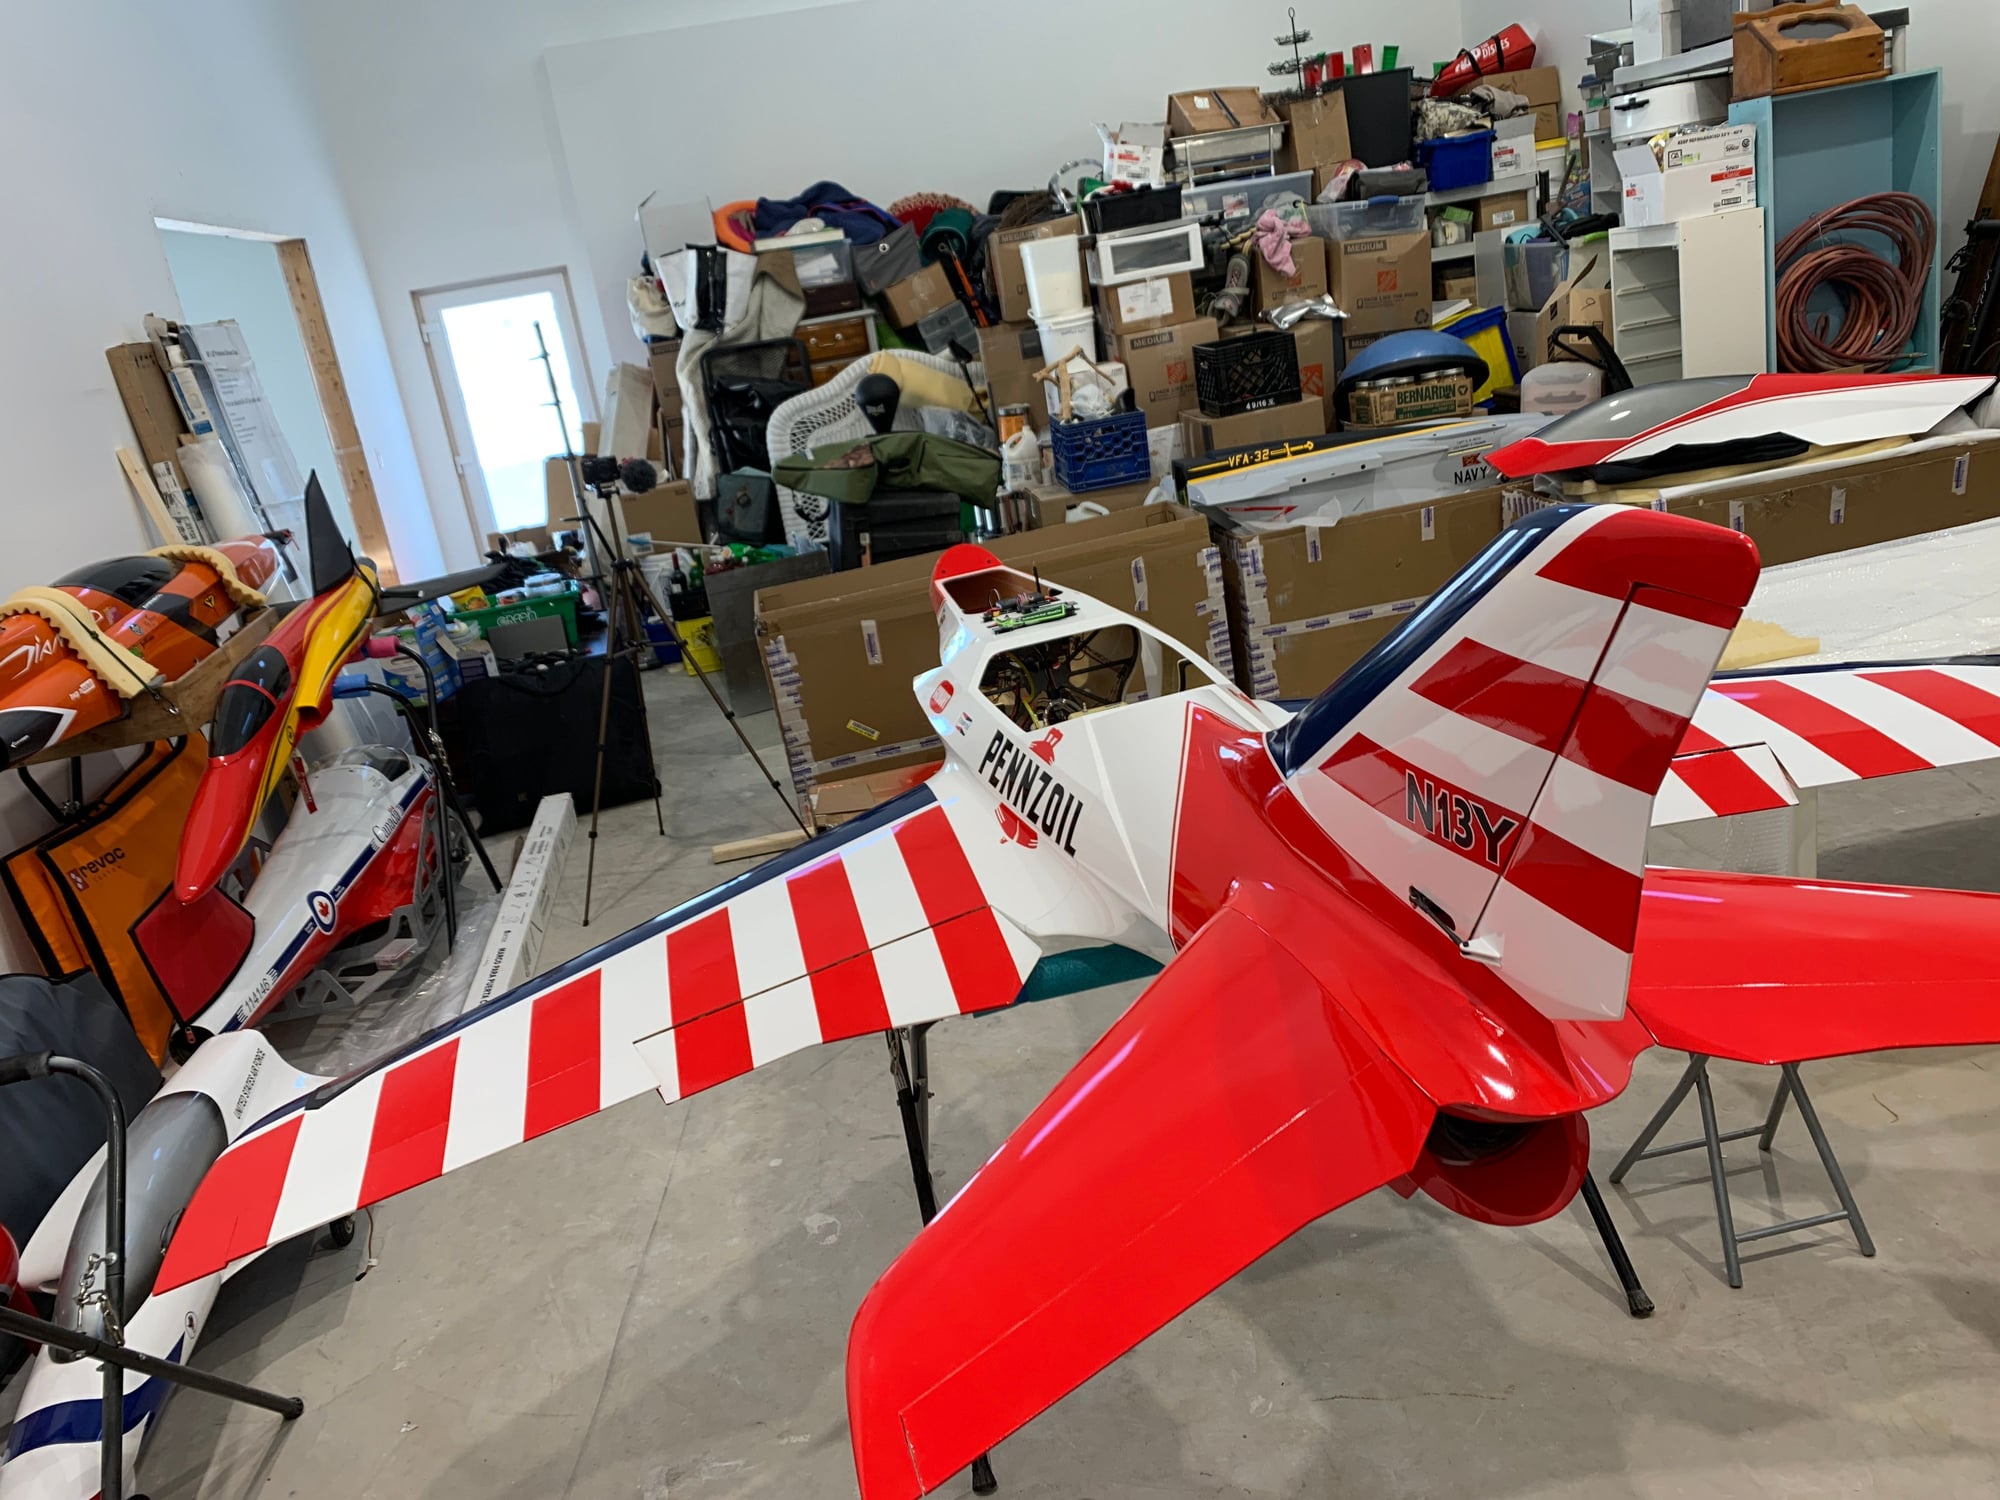
On her legs for the first time!