


CARF Ultra Flash EVO tank in original Flash?
 04-07-2022, 07:29 PM
#1

I feel like I’ve read in a thread or two that the original Flash and Ultra Flash only had different wings and stabs but the fuselage is the same, is that true? I’m battling a nagging leak below the main tank stopper where I can’t really get to it. Before I cut the tank apart to repair and rebuild it I’m also trying to determine if the current Ultra Flash EVO fuel tank would fit in an old classic Flash. Being able to not have to use the wing tank would be a nice added benefit. Of course I understand the inlet joiner would need to come out and possibly hack away at the intakes as well.
 04-07-2022, 08:53 PM
#2

Yes. Exactly the same. So if you cut back the inlets you can use an Evo tank.
If the alloy tank ring has a crack under it the only fix is to remove it and re Hysol. It can all be done from outside. Use a small ball ended Dremel tool to remove as much of the resin around the tank ring flange, then put a tube through the hole and flex- it should pop out.
You can clean up and glue it back in. Just make sure you flush the tank with some Alcohol before rebuilding

 04-08-2022, 07:48 AM
#4
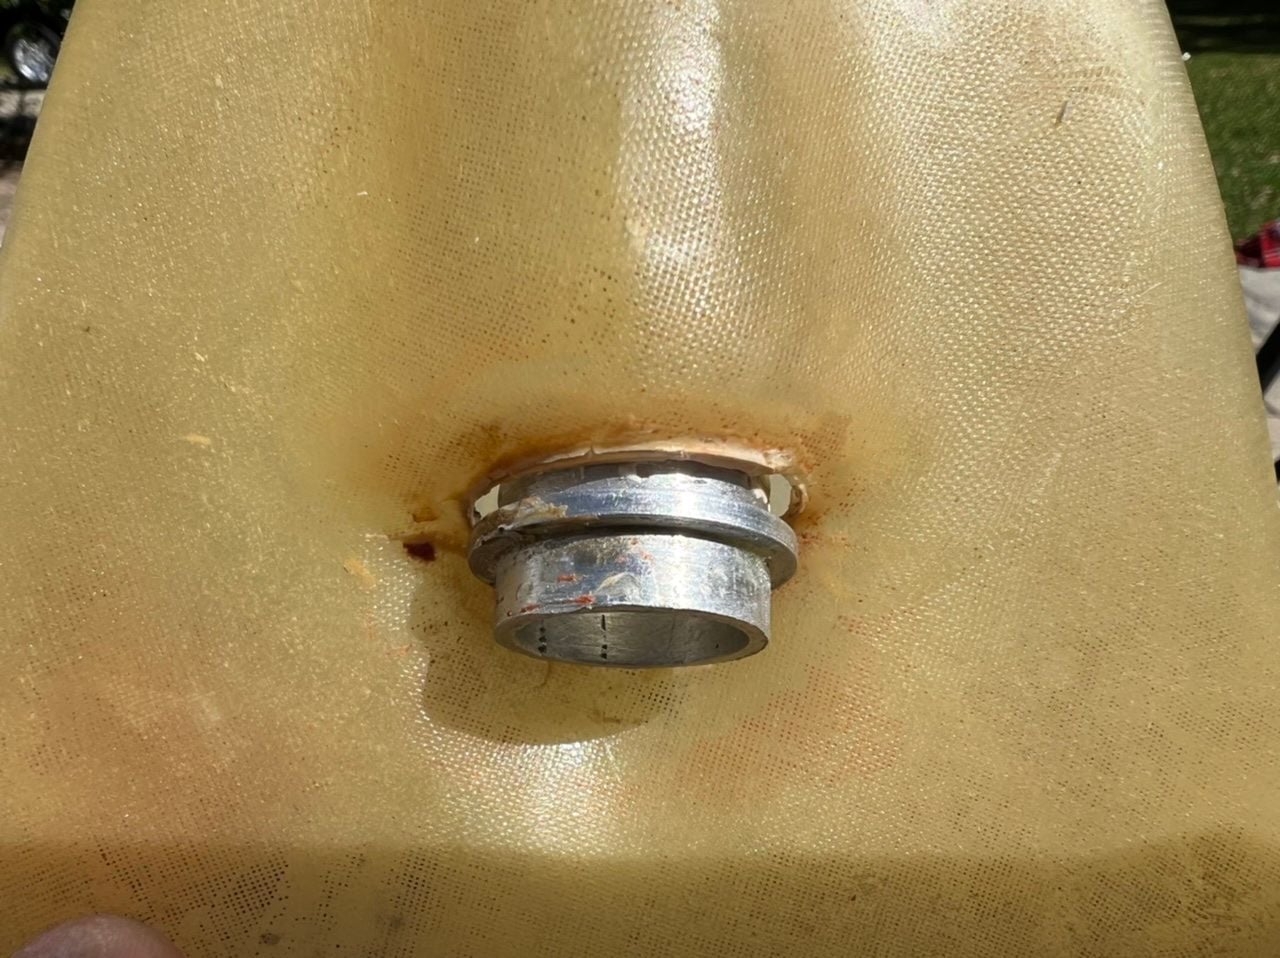
Well thanks again Dave, that came out much easier than I expected and with no damage to the tank. I’m a little perplexed though that the OD of the ring is approximately 21mm, but the ID of the hole cut in the tank is 25mm. Lots of space that just has to be filled with hysol. But, this has clearly been holding up well in hundreds of models for years upon years, no reason to think mine won’t last another good many years as long as I get enough glue in there. Or I lay up some new layers of glass to close off the hole and cut a new, better fitting one.
Last edited by Auburn02; 04-08-2022 at 08:18 AM.
04-08-2022, 11:40 AM
#5
Guess that one slipped though early on. They are normally a snug fit on the alloy. Actually did you buy the model used? The ring was never Hysol in from the factory! Clear resin only.
Clean up the glass work. Use a strong cleaner/thinners and I would then wick the area in thin CA (pink Zap) to fill any pin holes, flat this back lightly and Hysol the ring back in.
Be good as new 👍
Clean up the glass work. Use a strong cleaner/thinners and I would then wick the area in thin CA (pink Zap) to fill any pin holes, flat this back lightly and Hysol the ring back in.
Be good as new 👍
