


Mirce models 1:4 F 86
 07-14-2022, 03:11 AM
#1

Thread Starter
The F 86 Saber is the best selling "Mirce models" wooden kit.
Designed by a top Italian RC model designer, it is completely constructed in a 3D program, and all parts are cut on a laser cut machine.
All of this guarantees easy and precise manufacturing and top flight characteristics.
This is more than a proven design, because the Saber that the constructor made has at least 500 flights!!!
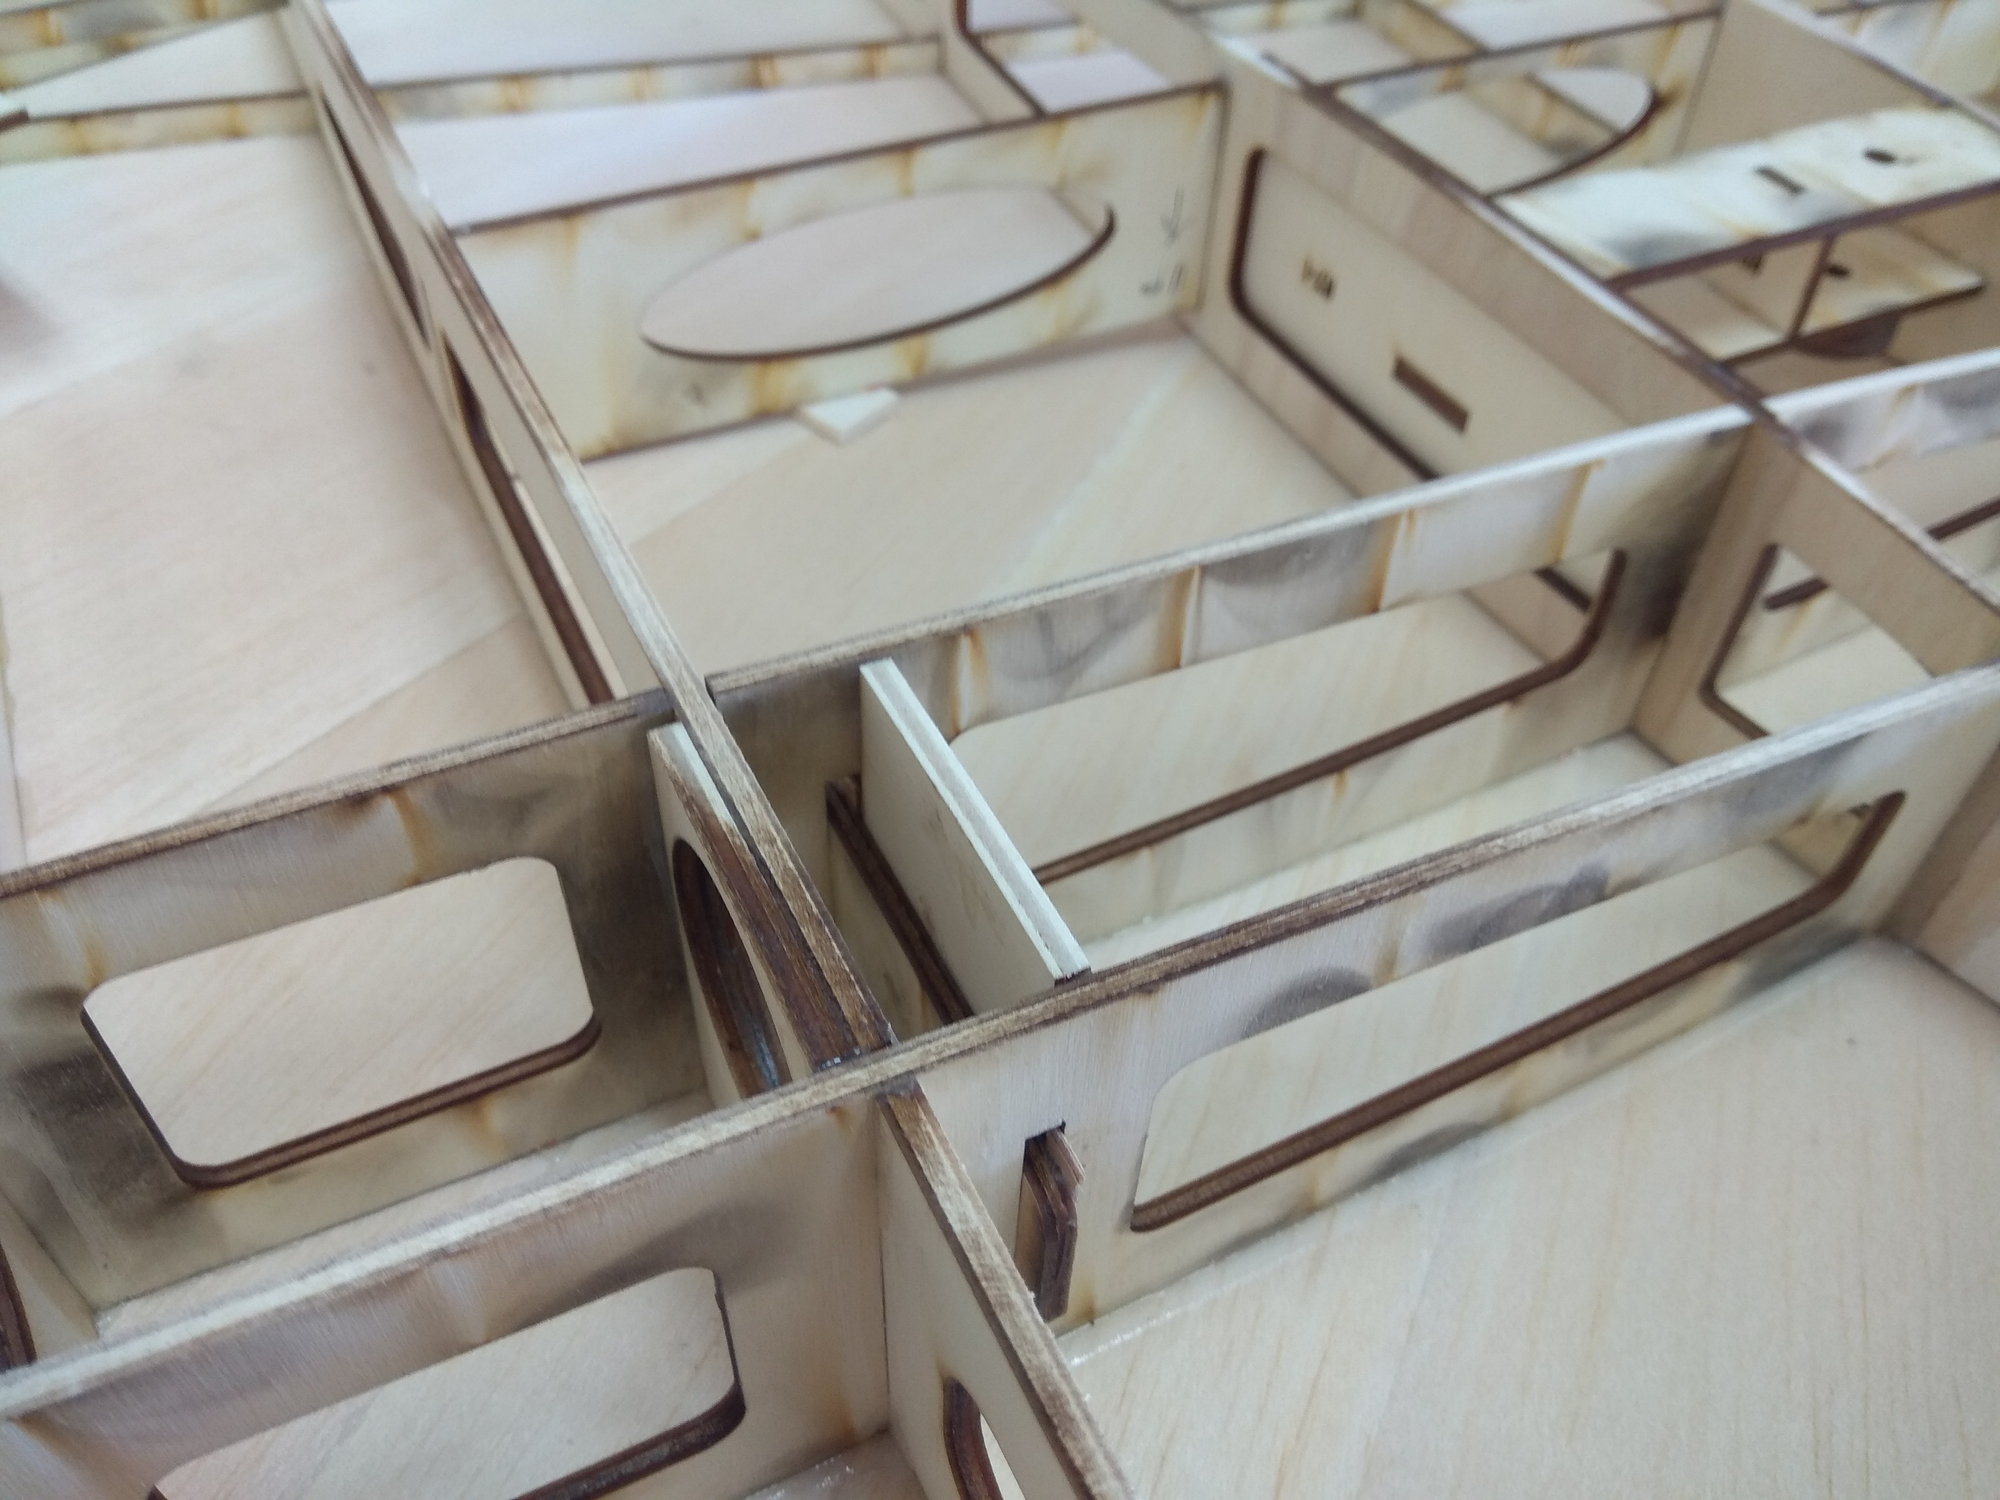
The construction is extremely unusual, the pieces fit together like a Puzzle and no two pieces are the same, so you can't reverse the pieces.
Over time plate templates were made for the wings and horizontal stabilizers, which resulted in even better manufacturing precision.
We also offer sets for the scale surface (threads, screws, panels...) as well as the cockpit. You will see all this when the build is nearing completion...
It is interesting that there are no paper plans, when you buy a wooden kit you get drawings, and a lot of pictures make it easier to make.
Almost all "Mirce models" wooden kits are made in the same way, you can find more information on our website: www.nsmodelers.rs
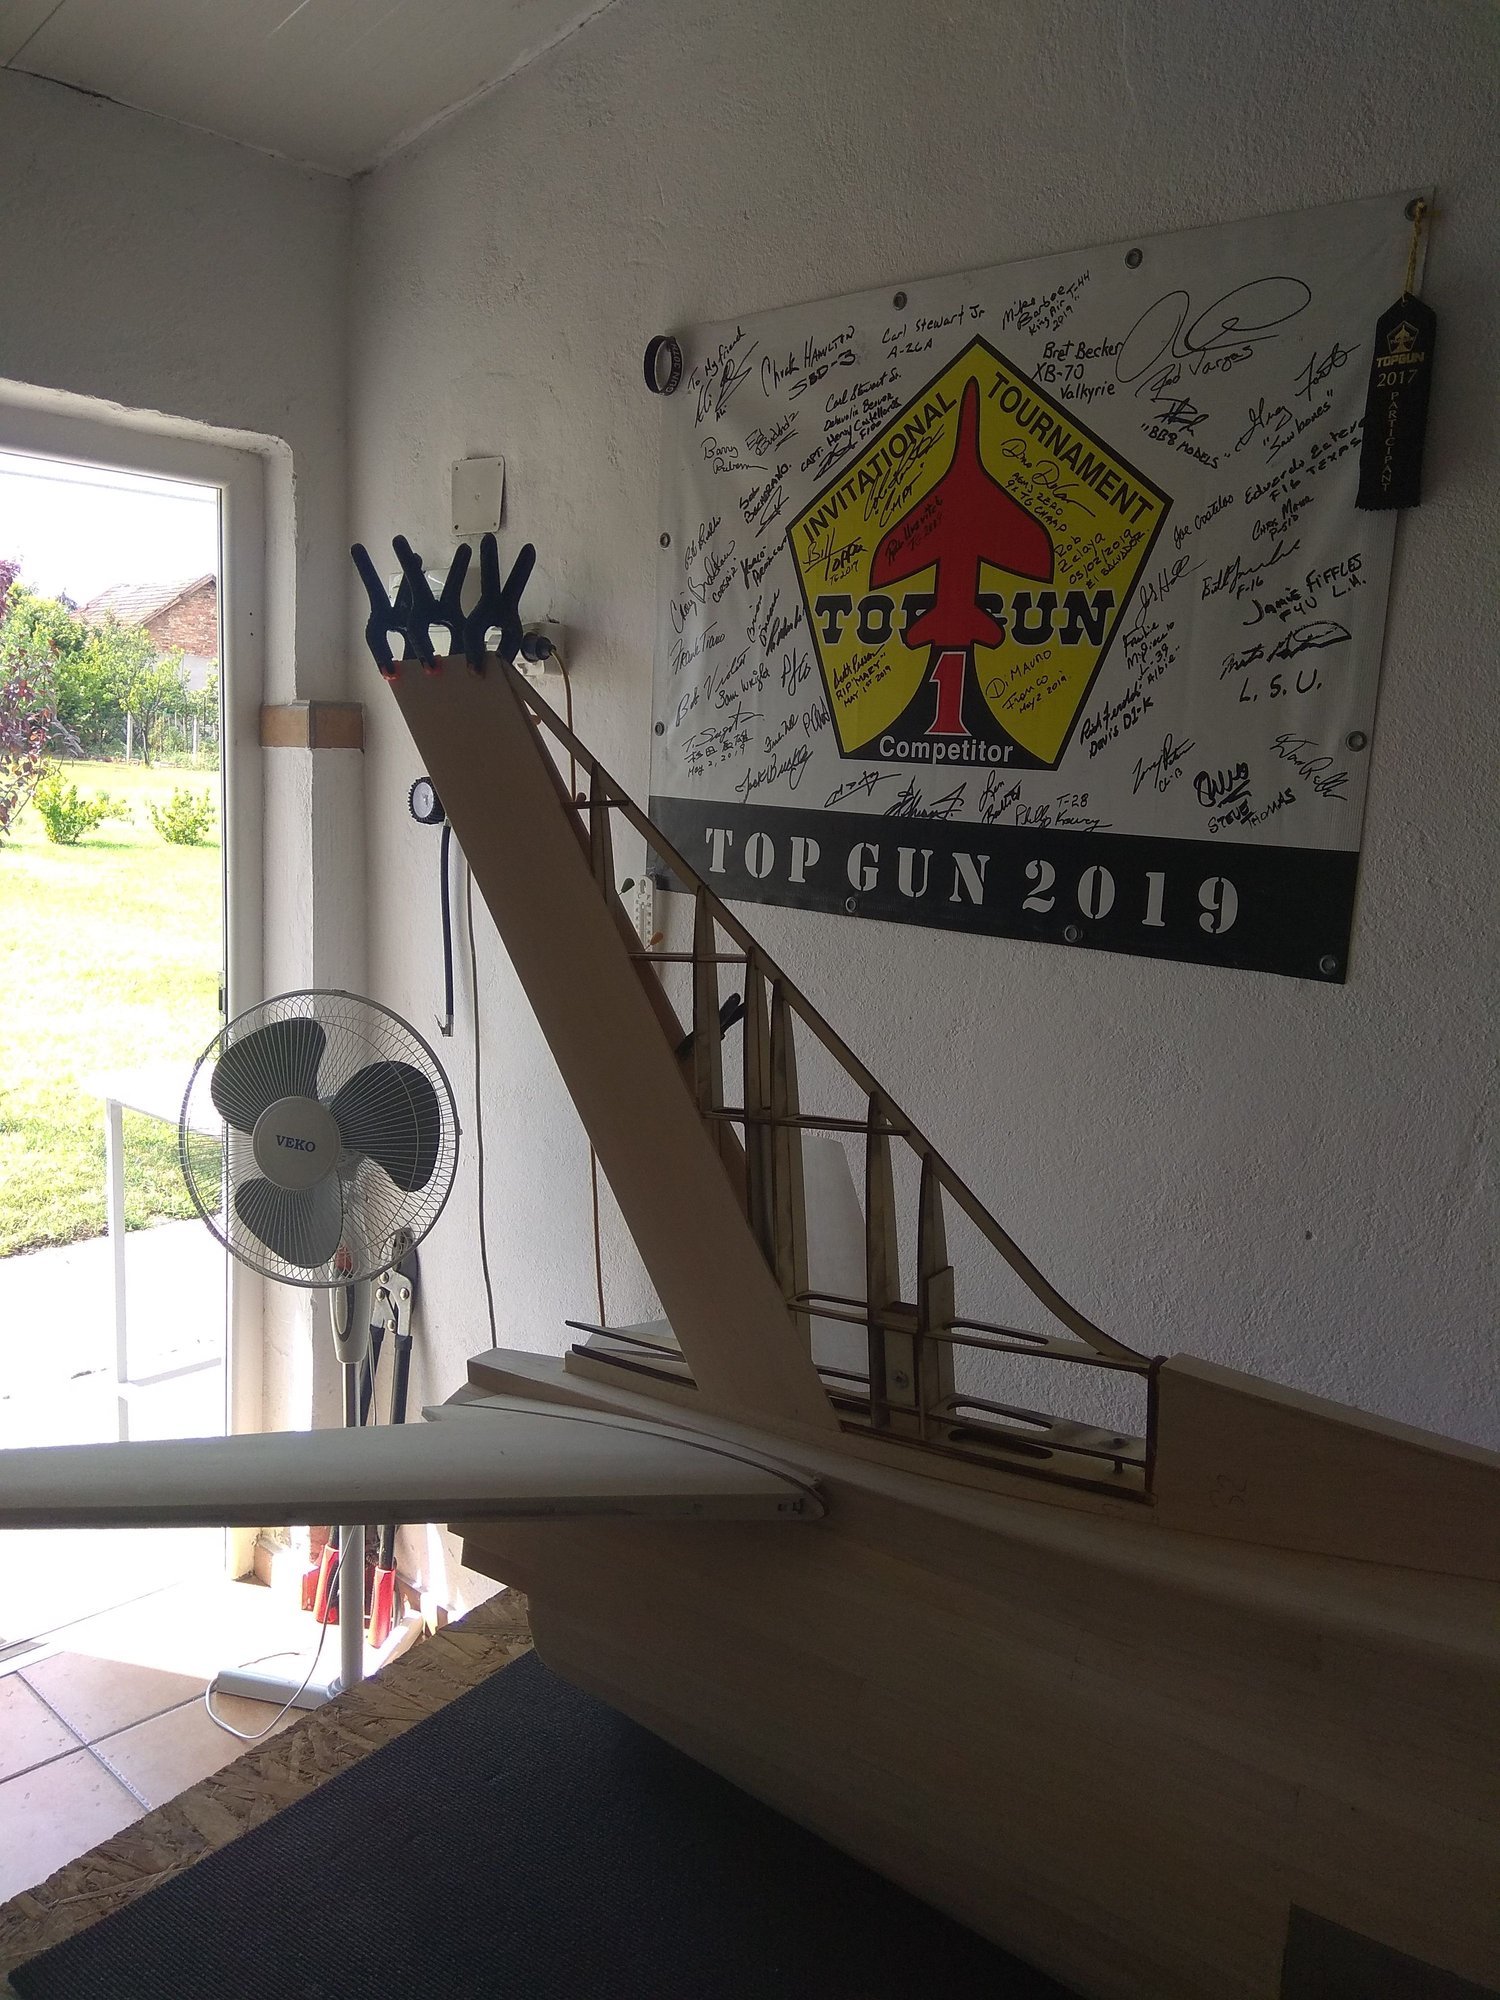
In my workshop I made a couple of these models that were sent to the USA. Unfortunately I haven't shown the build here, but since I'm building a model for myself now, here's an opportunity to do so.
"Mirce models" offers two F 86 wooden kits, the larger one is 1:4 and the smaller one is 1:5.3 scale.
This time I'm making a bigger model:
Wingspan: 2825 mm / 111.2"
Length: 2850 mm / 112.2"
Weight: around 20 kg
Turbines: from 180 Nm
Radio: minimum 6 channels
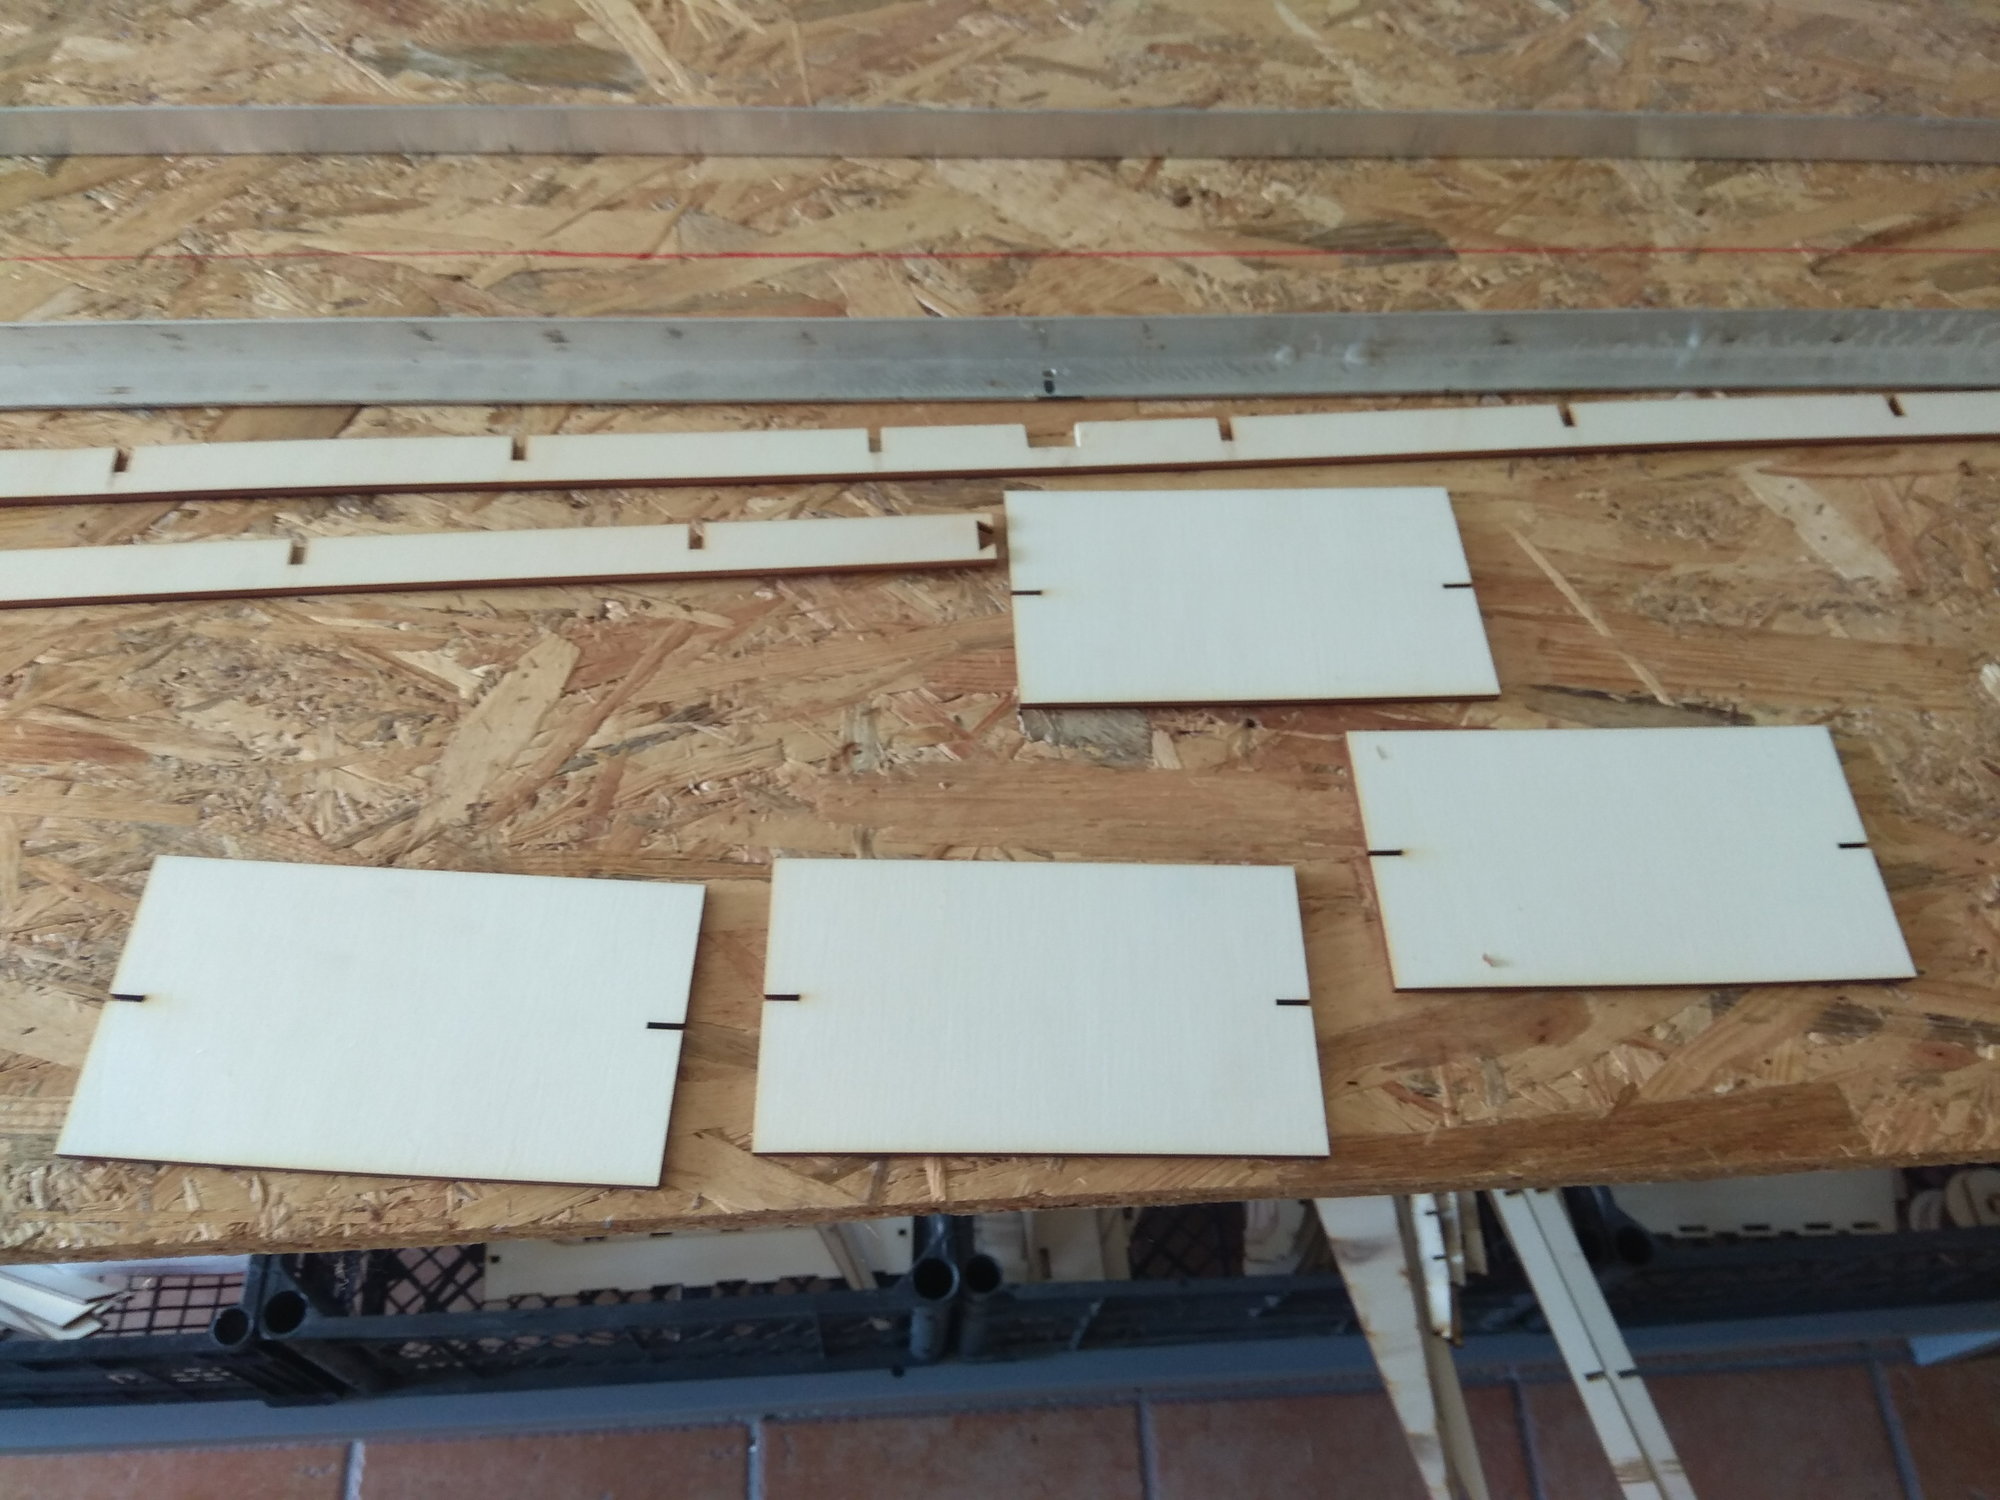
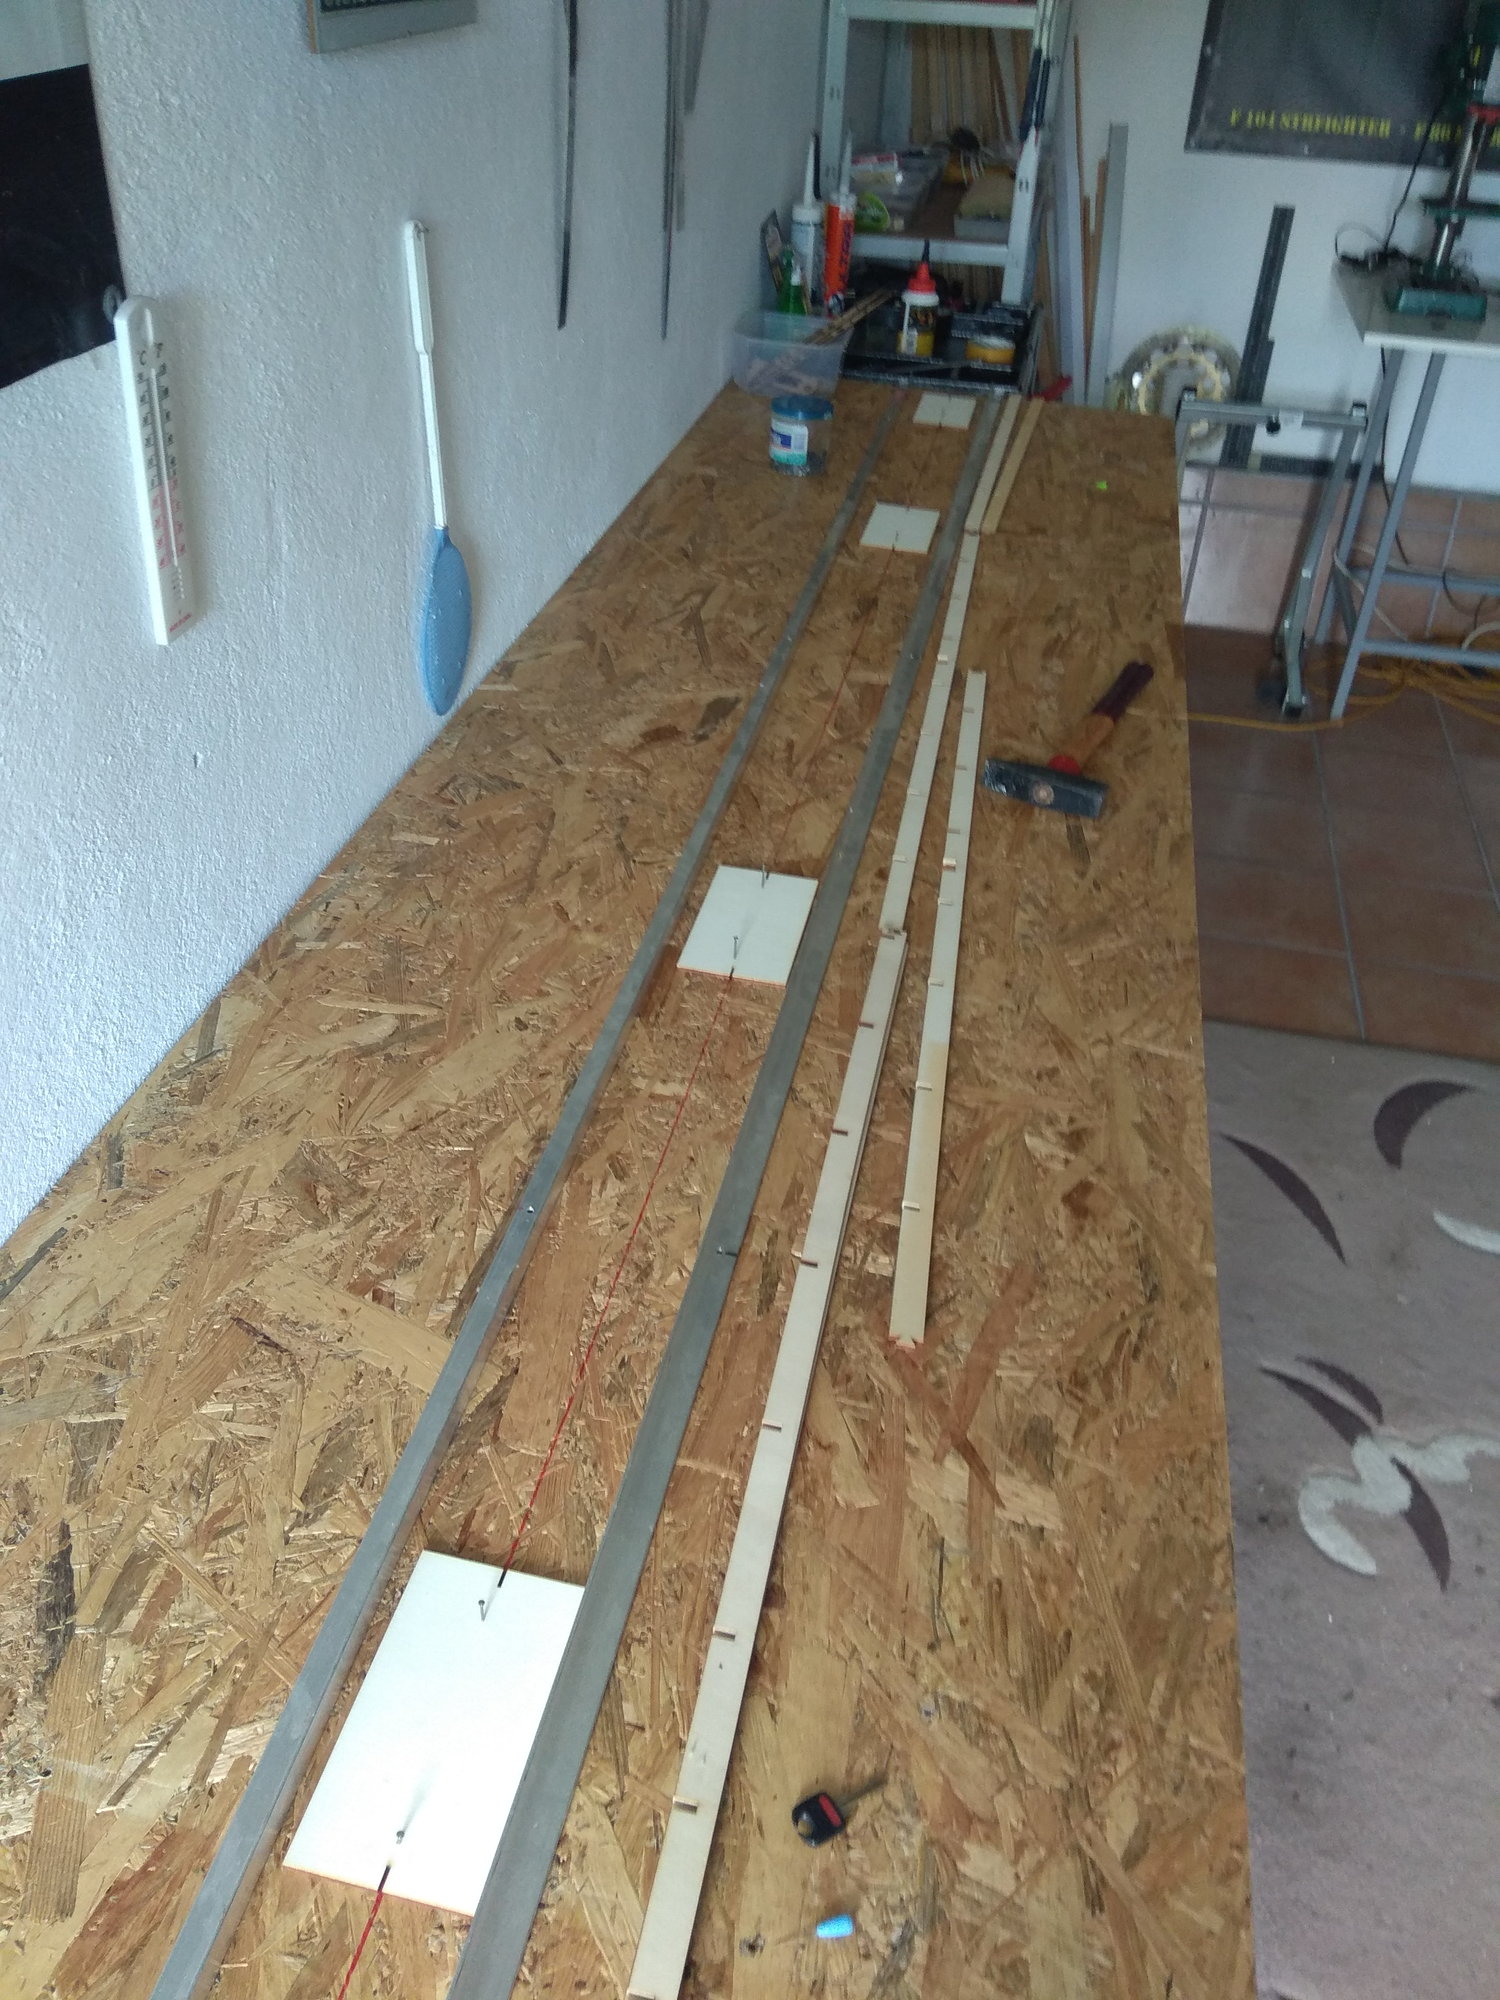
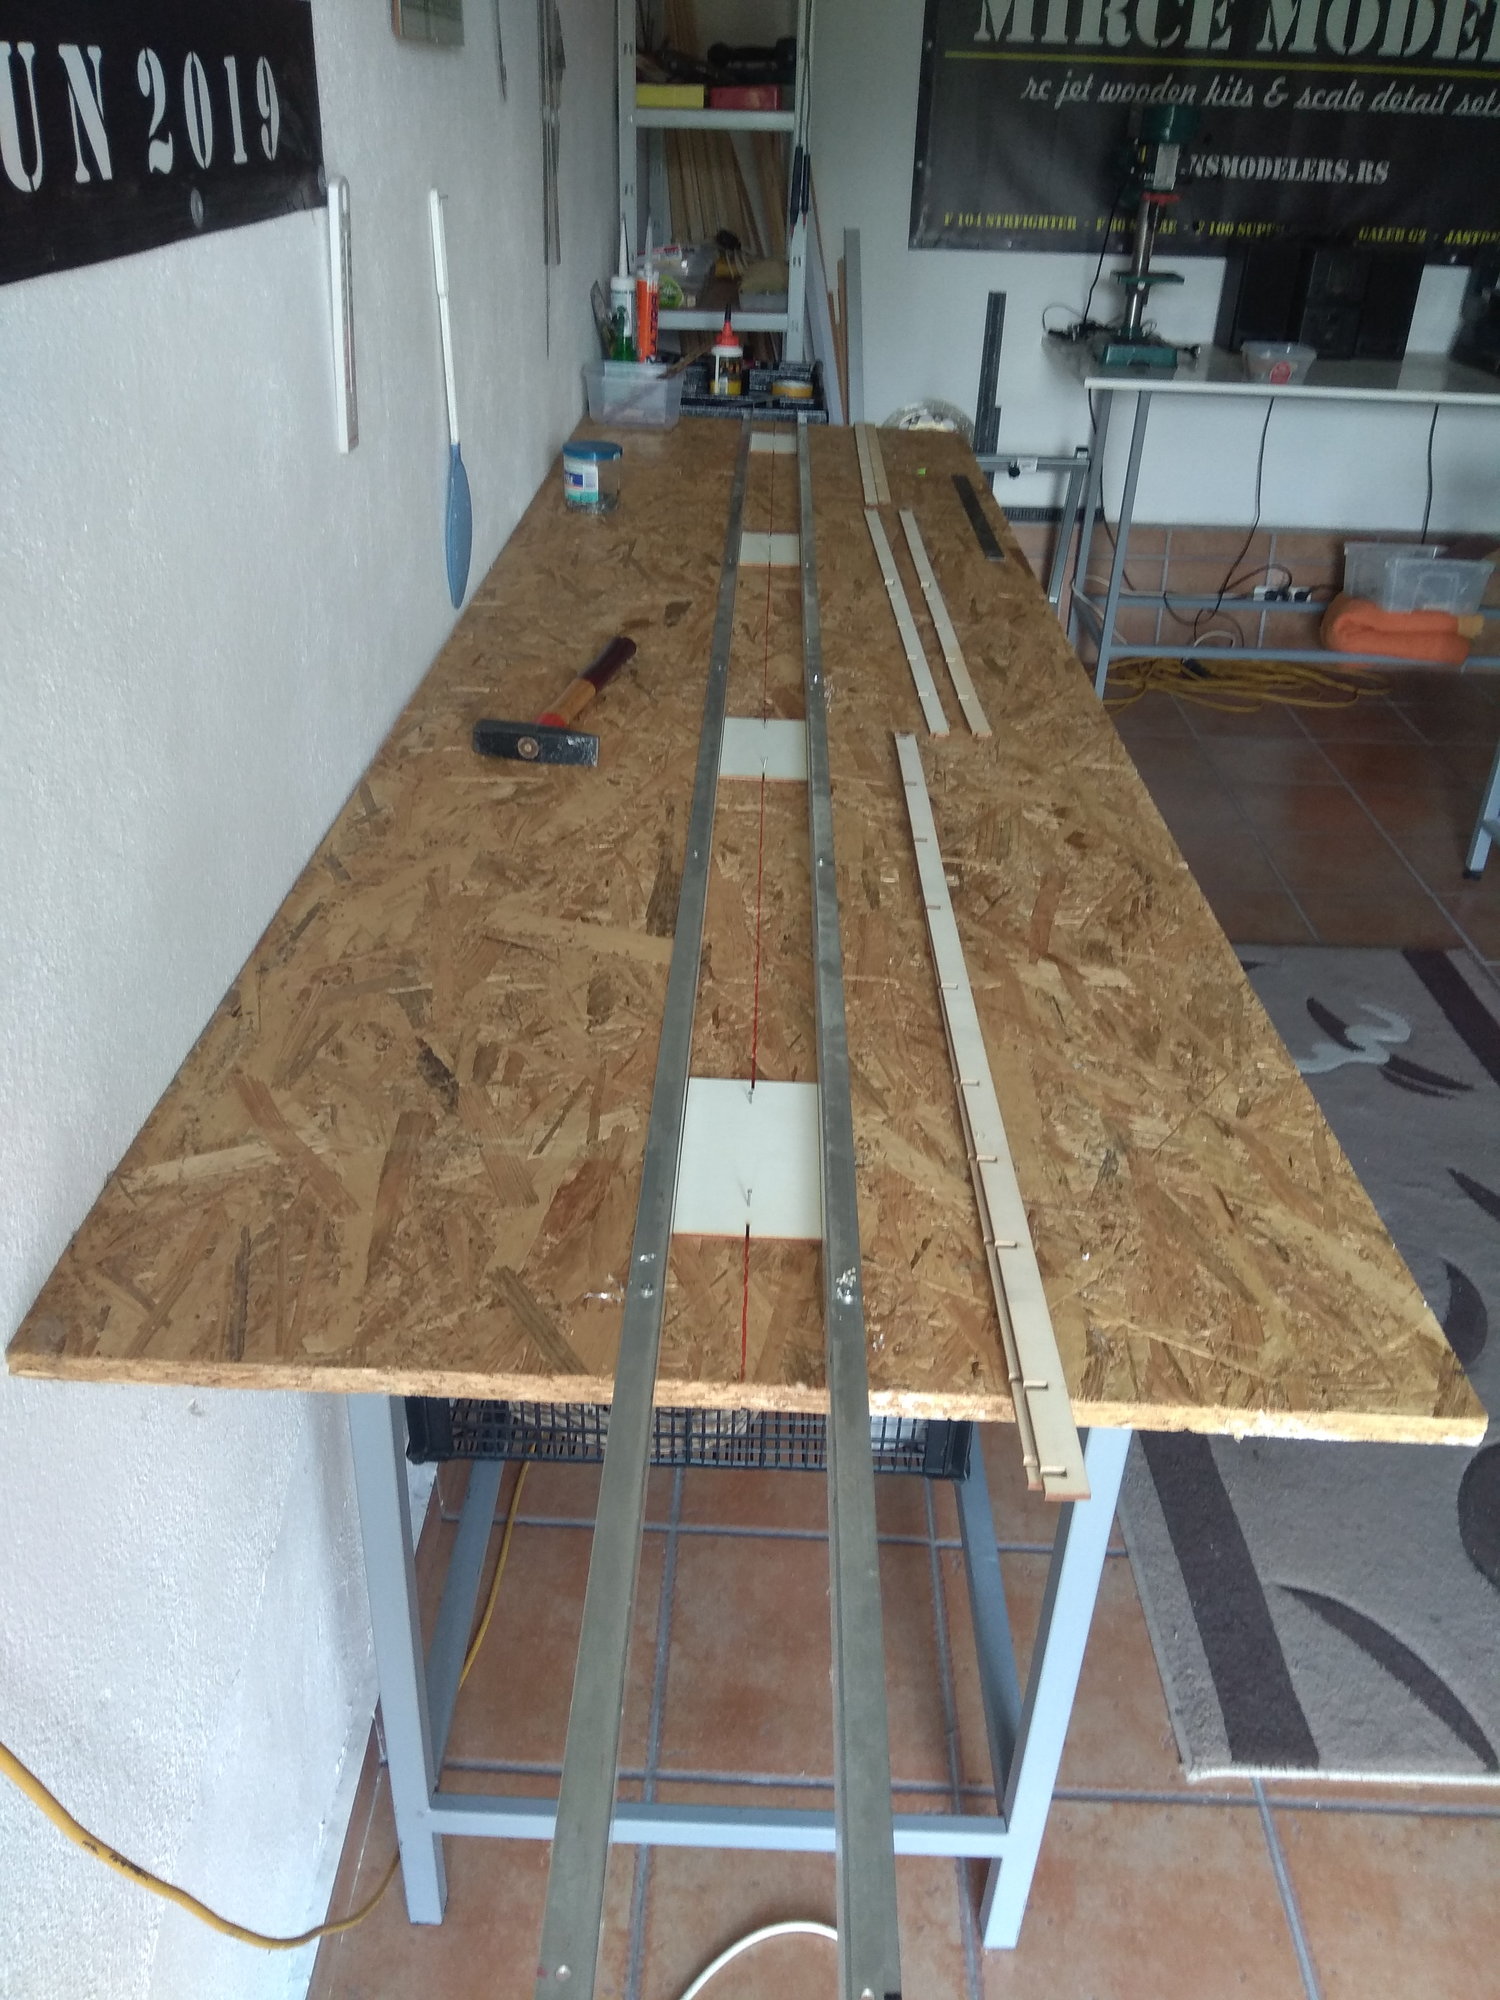
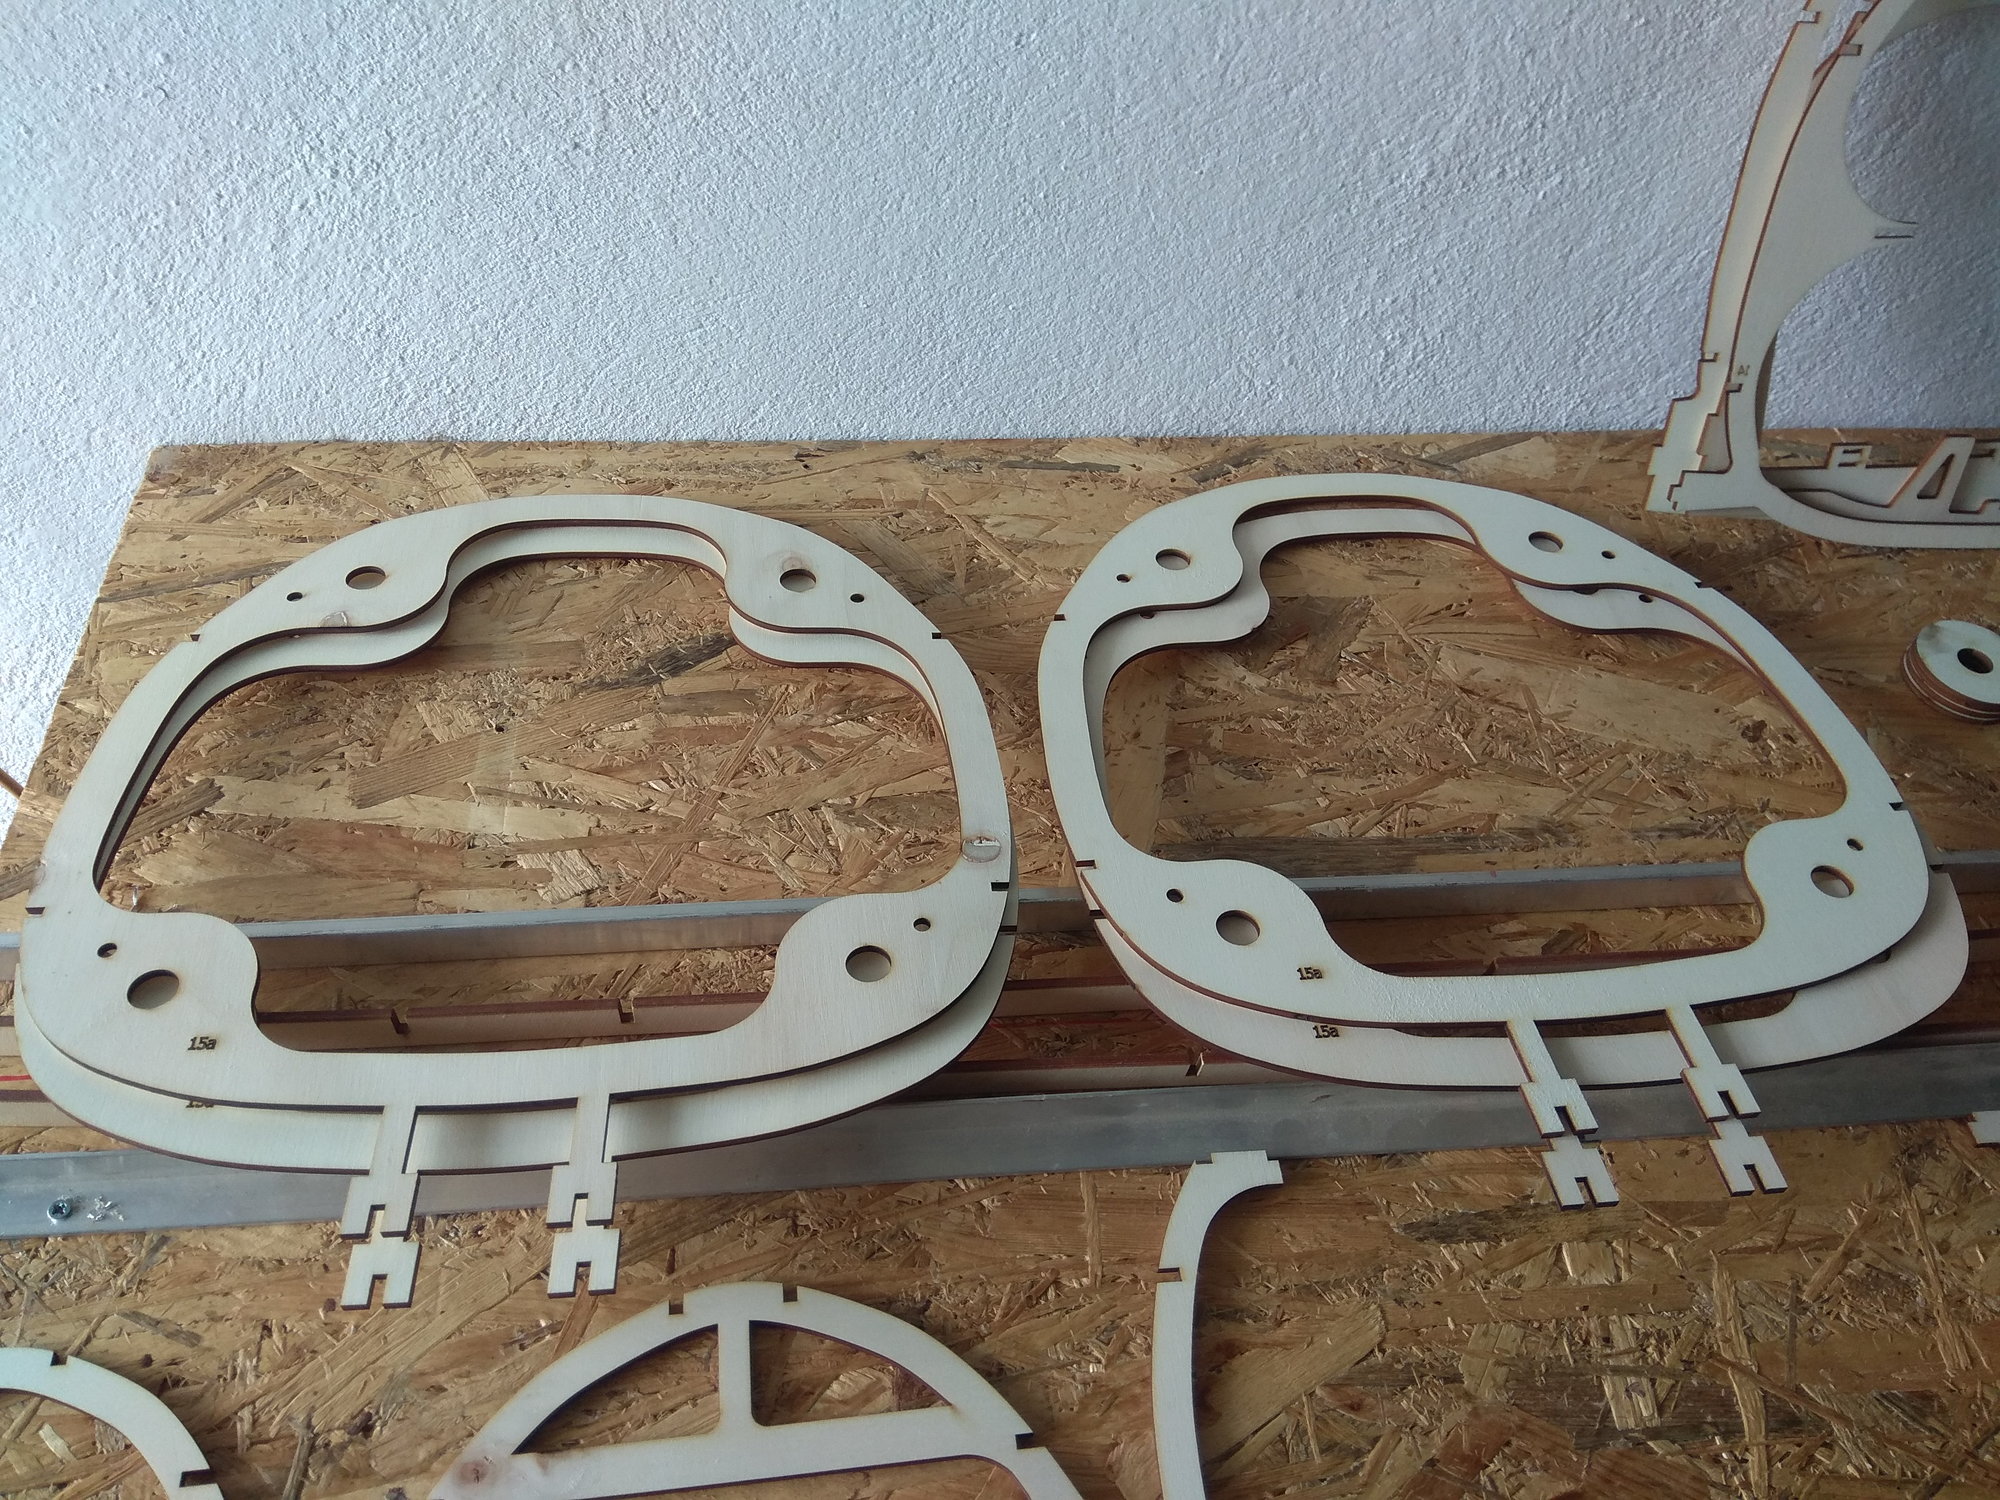
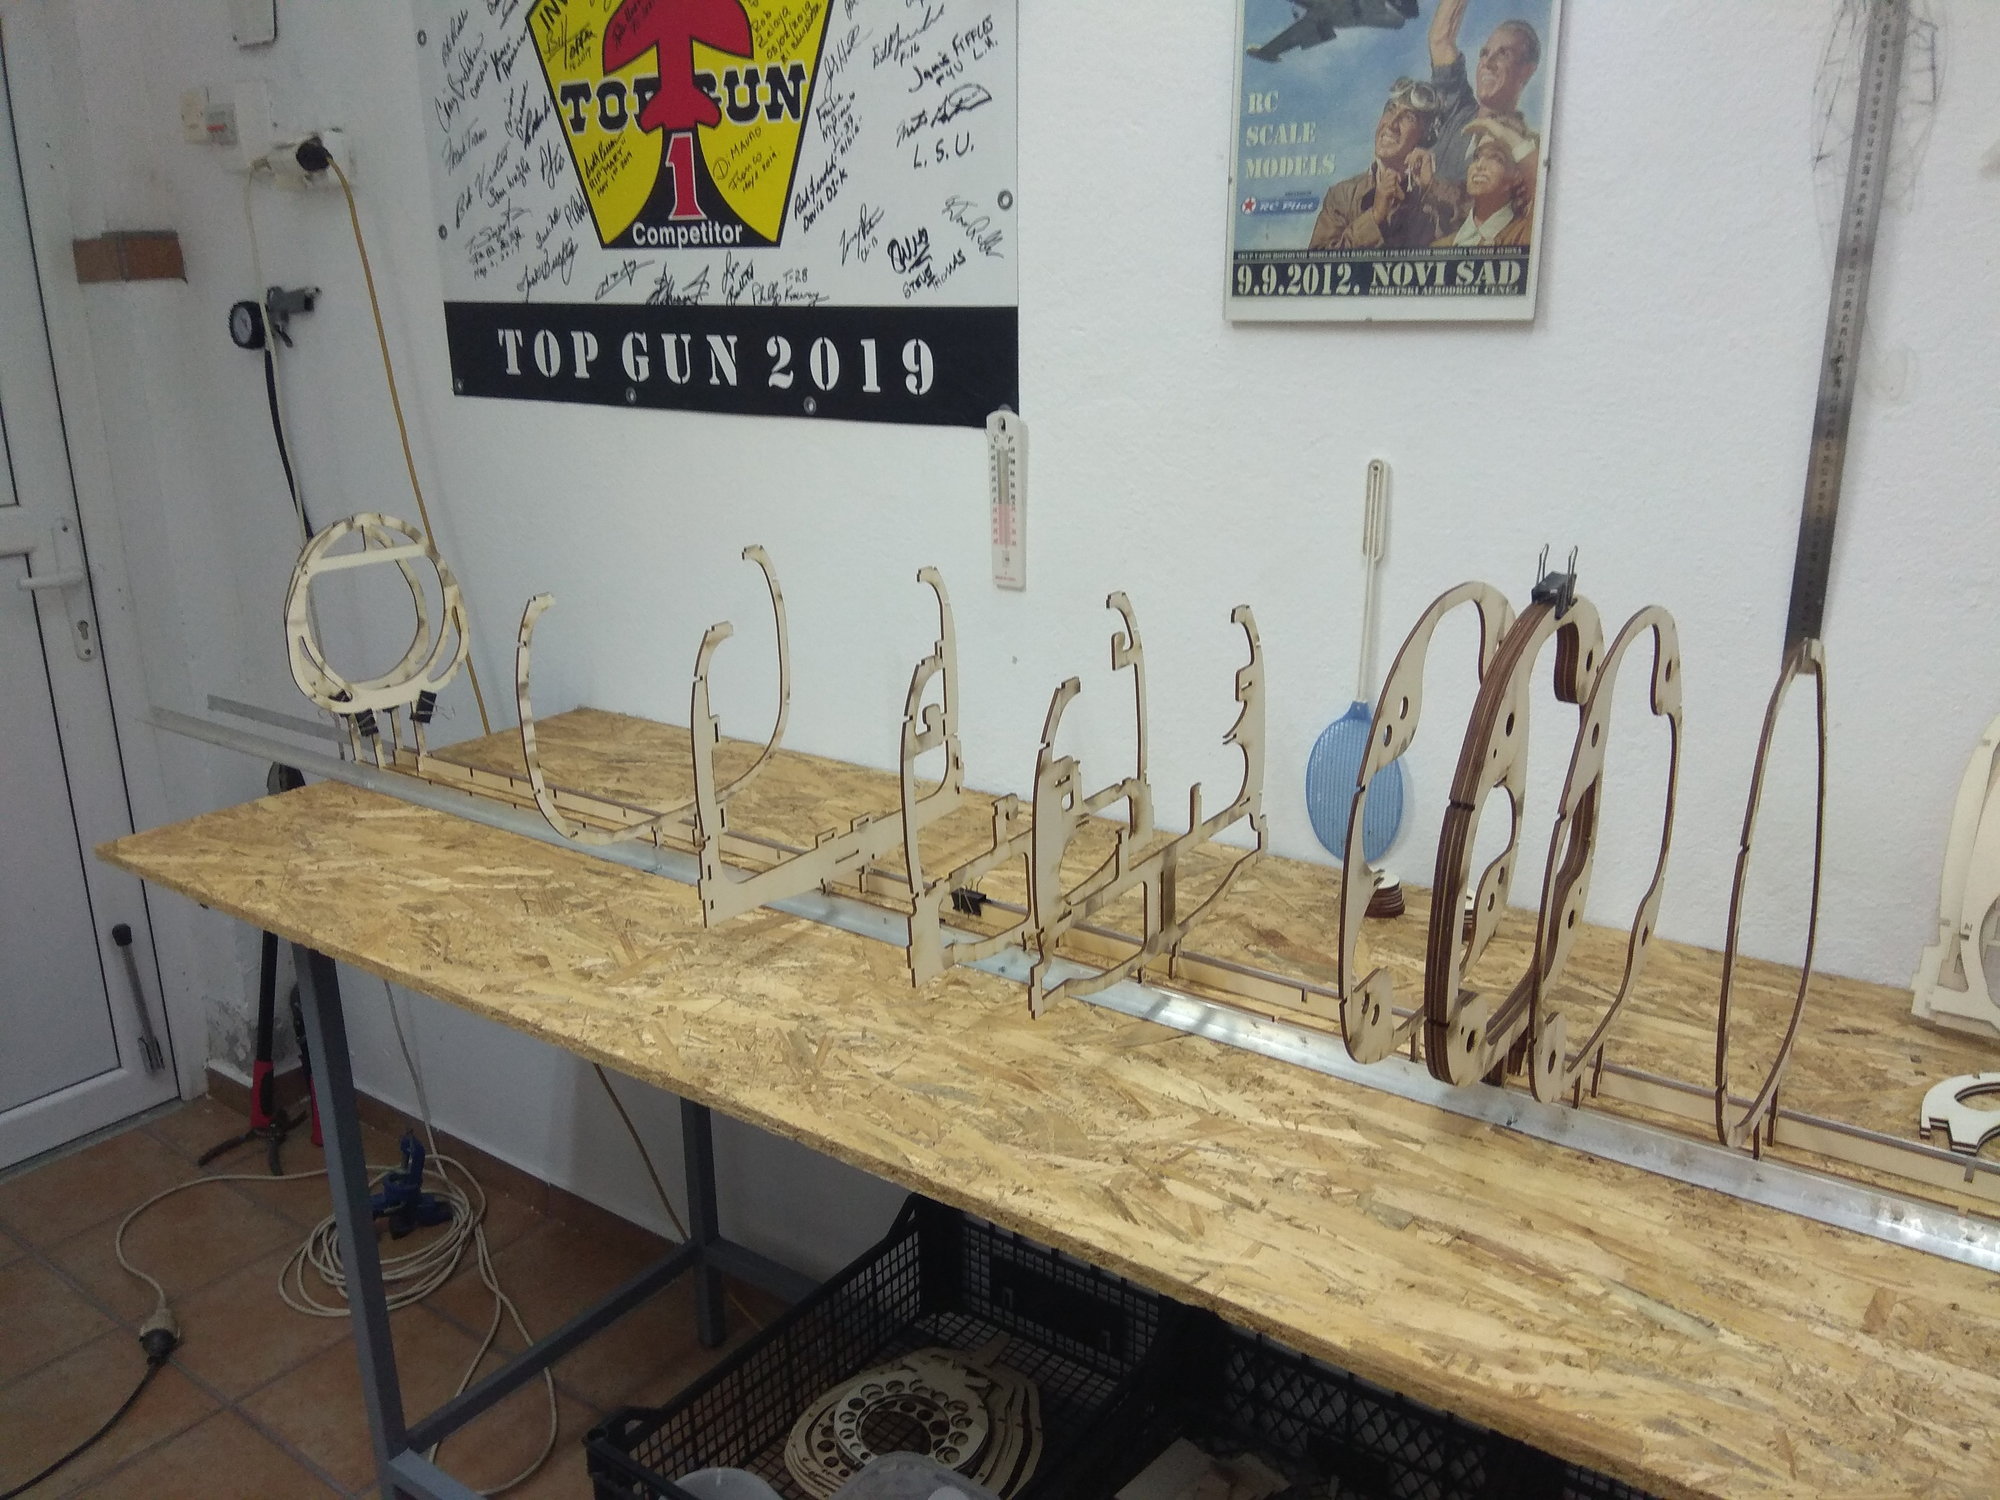
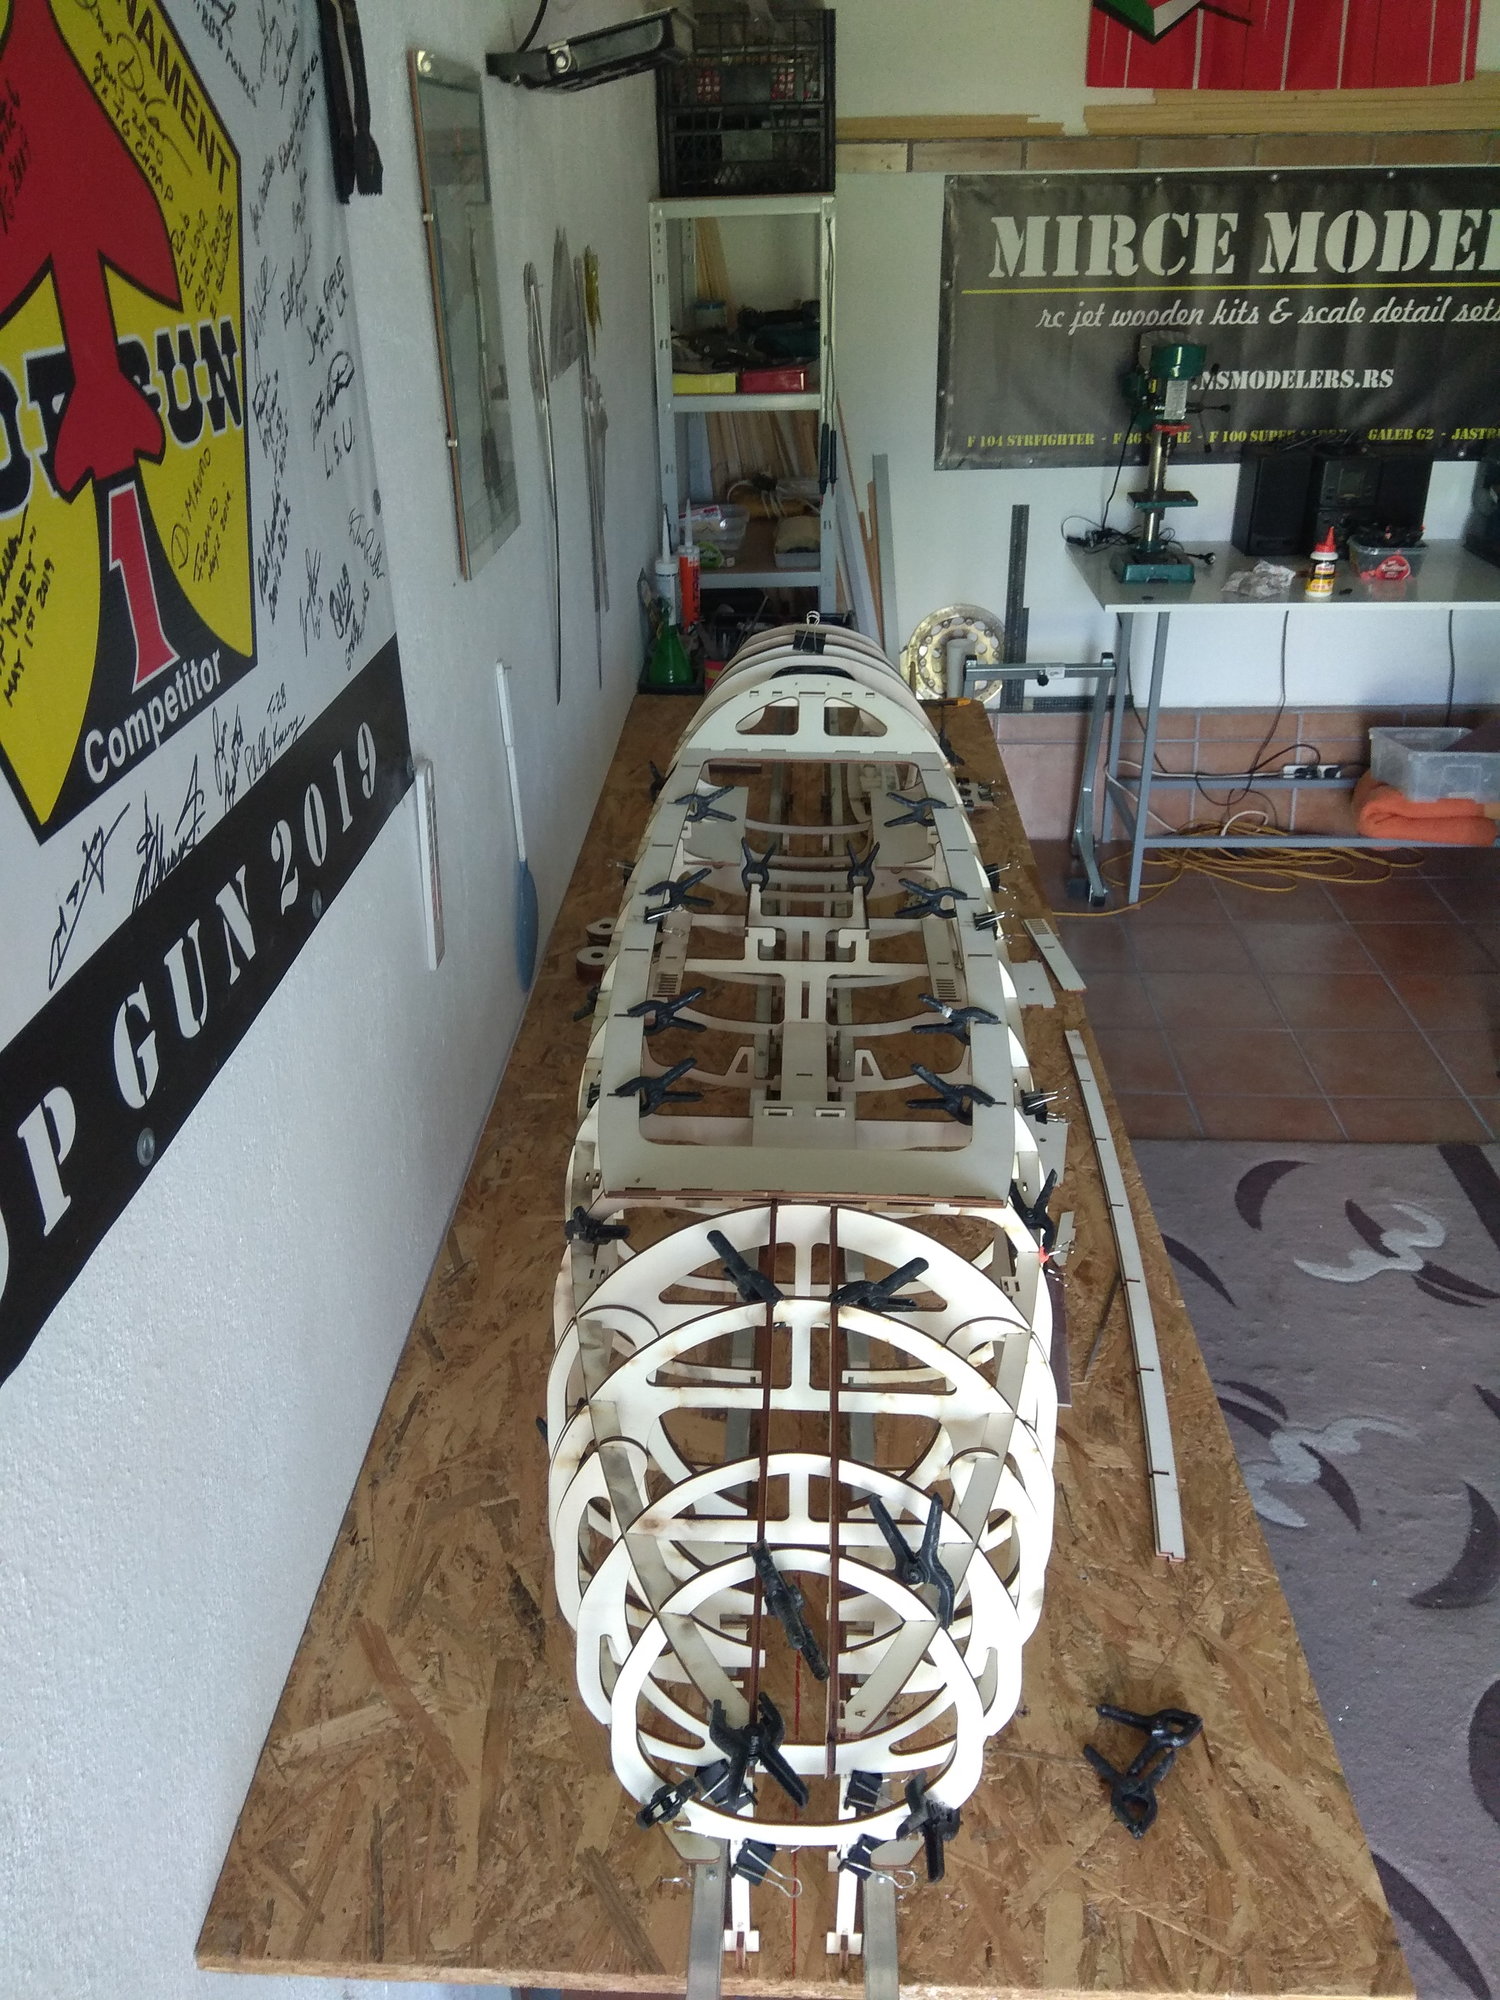
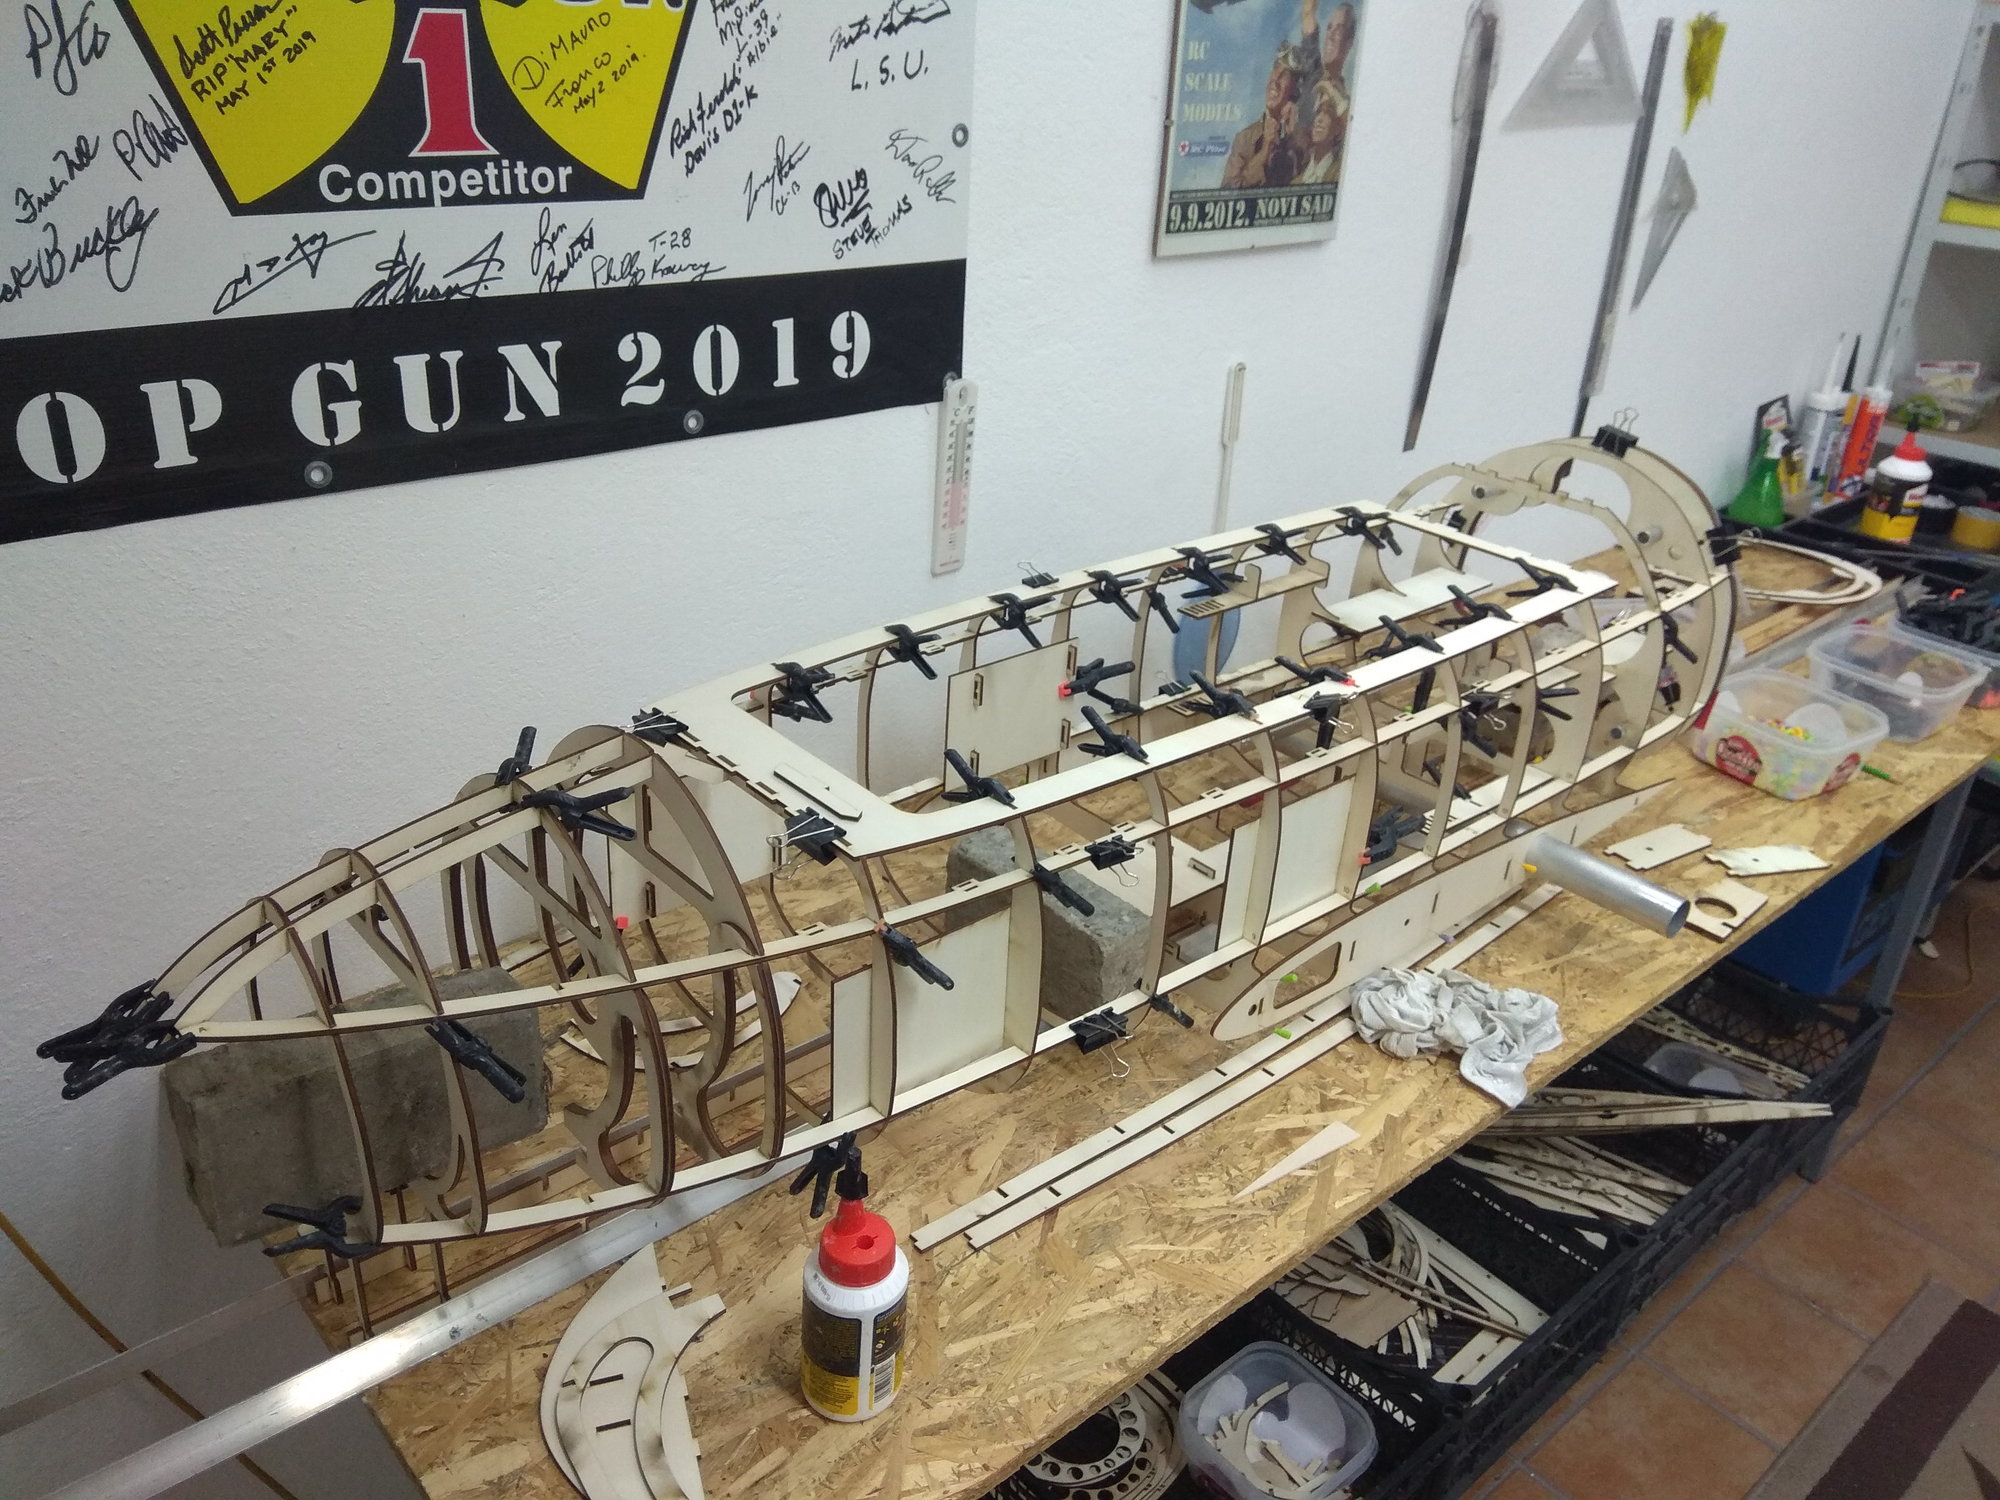
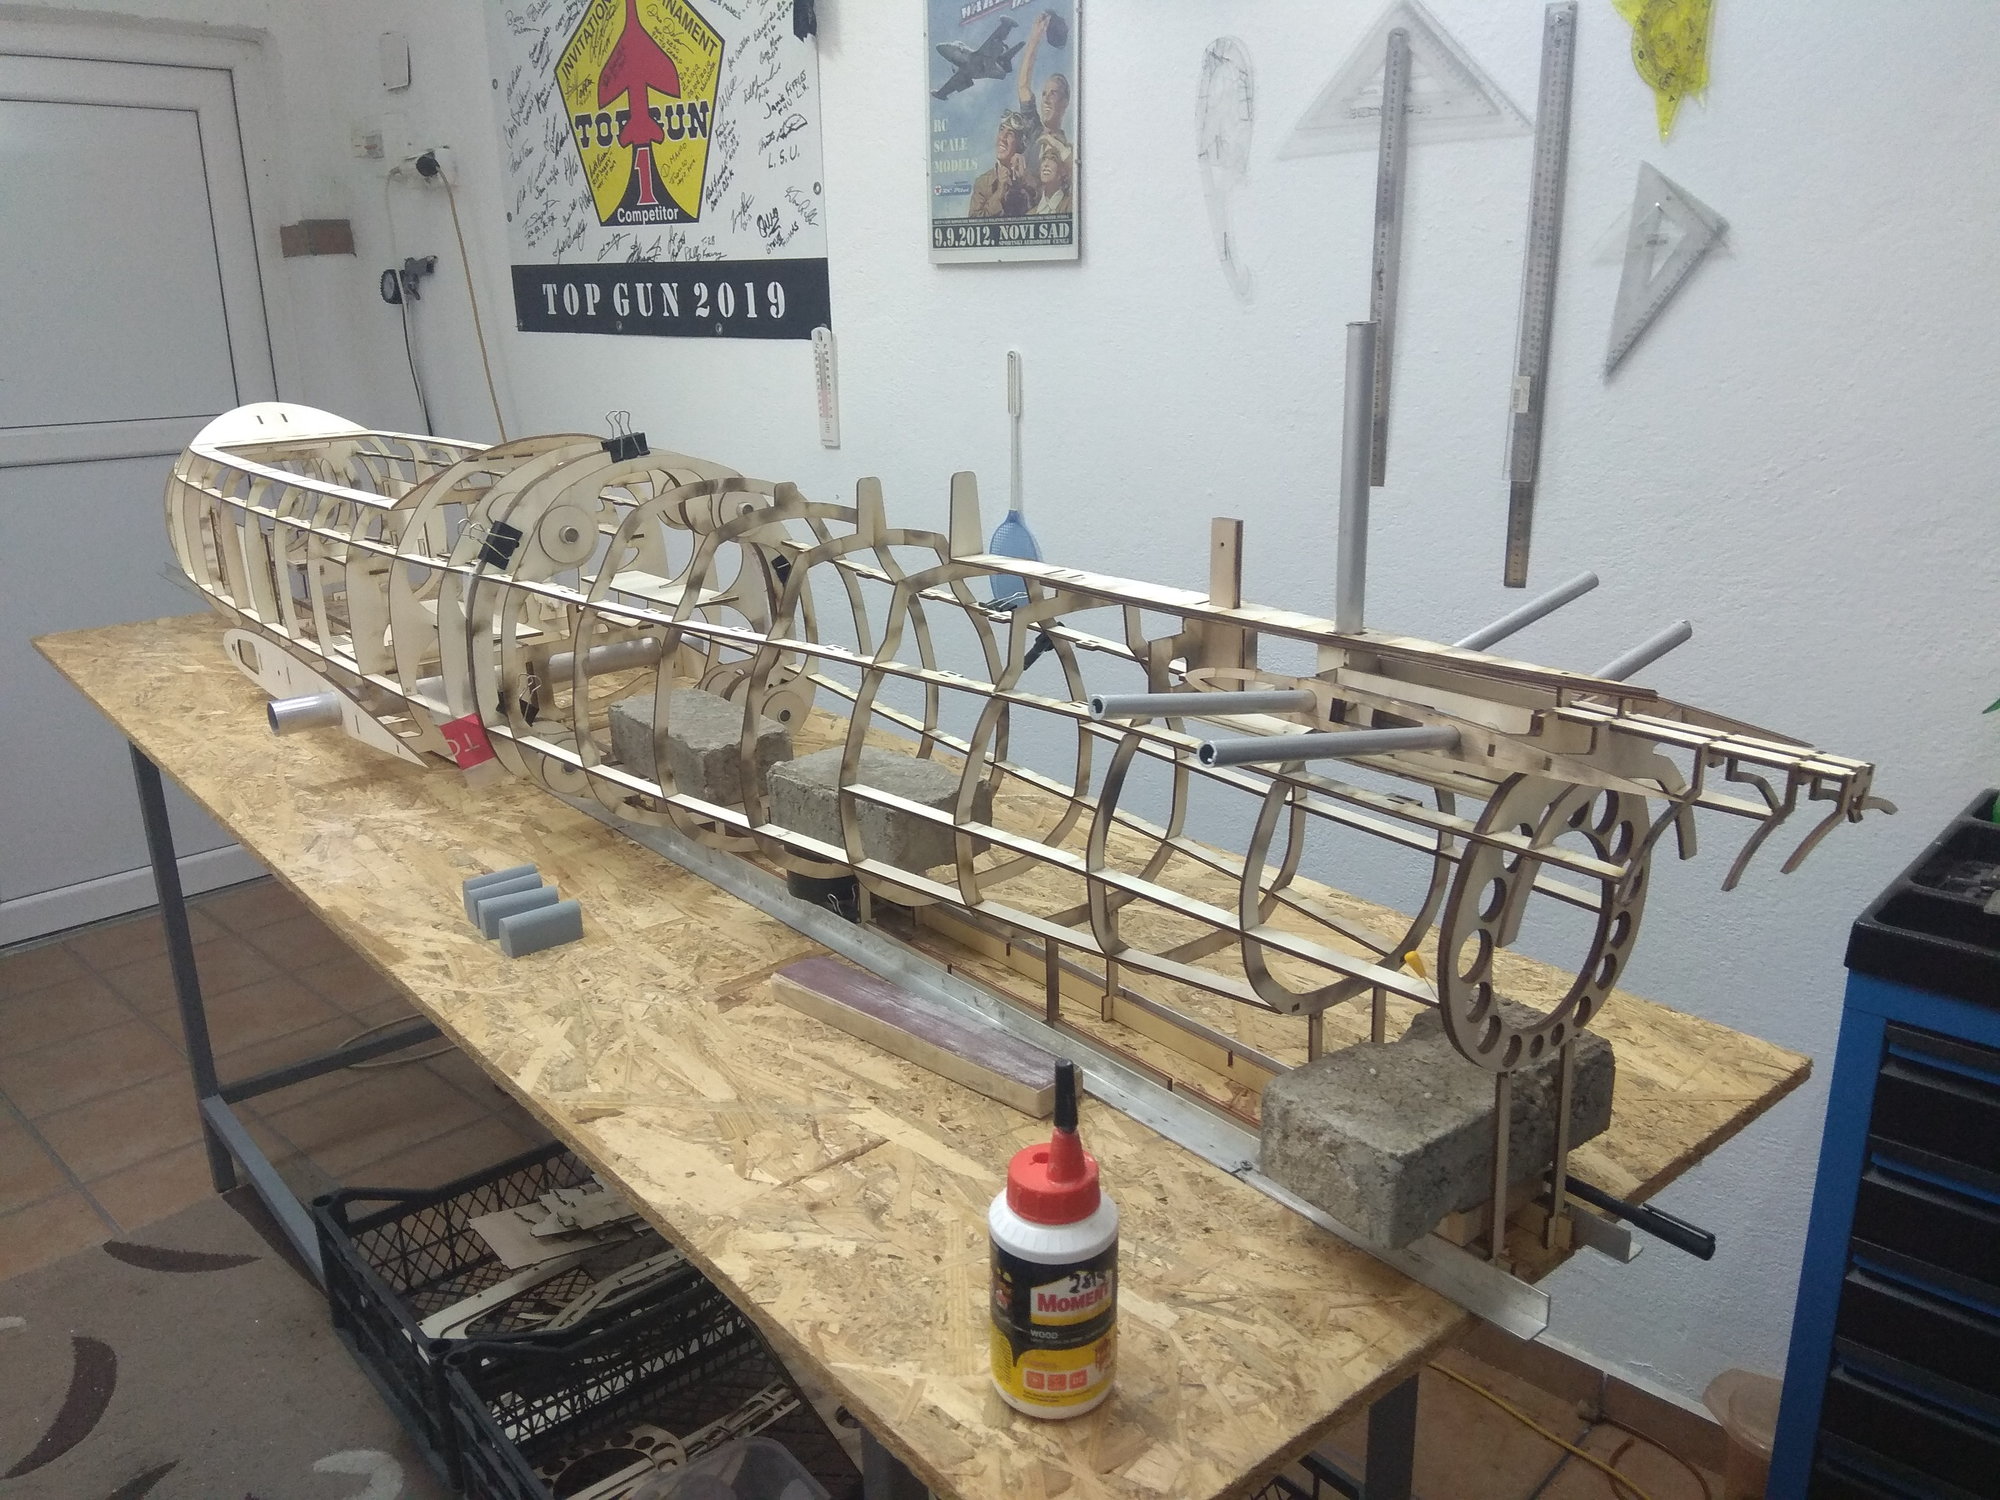
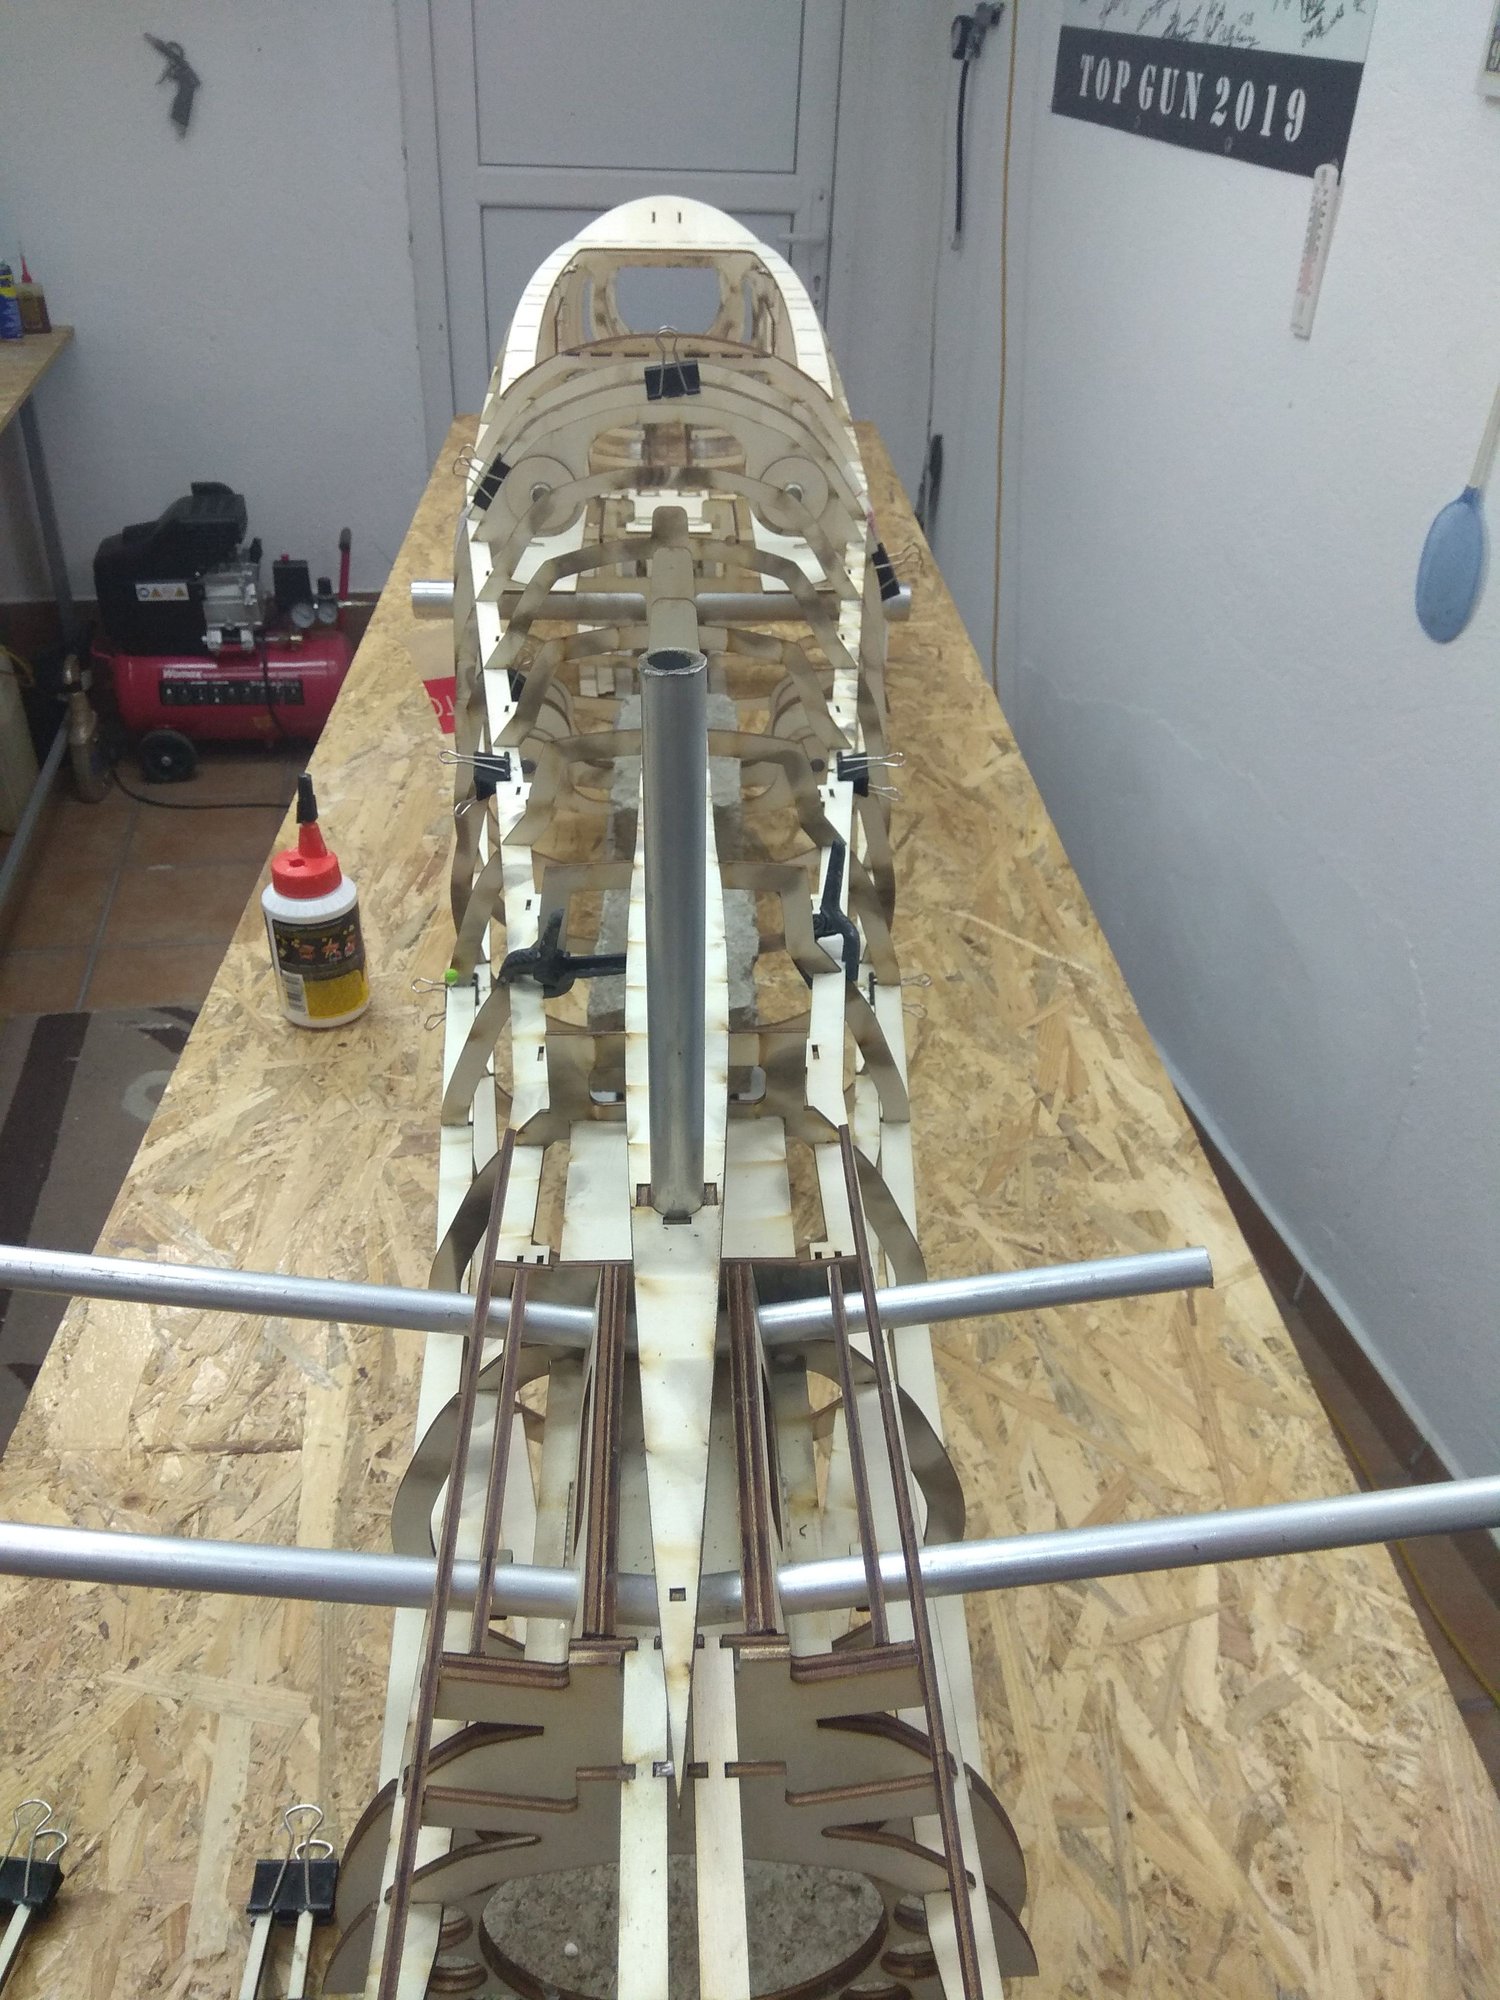
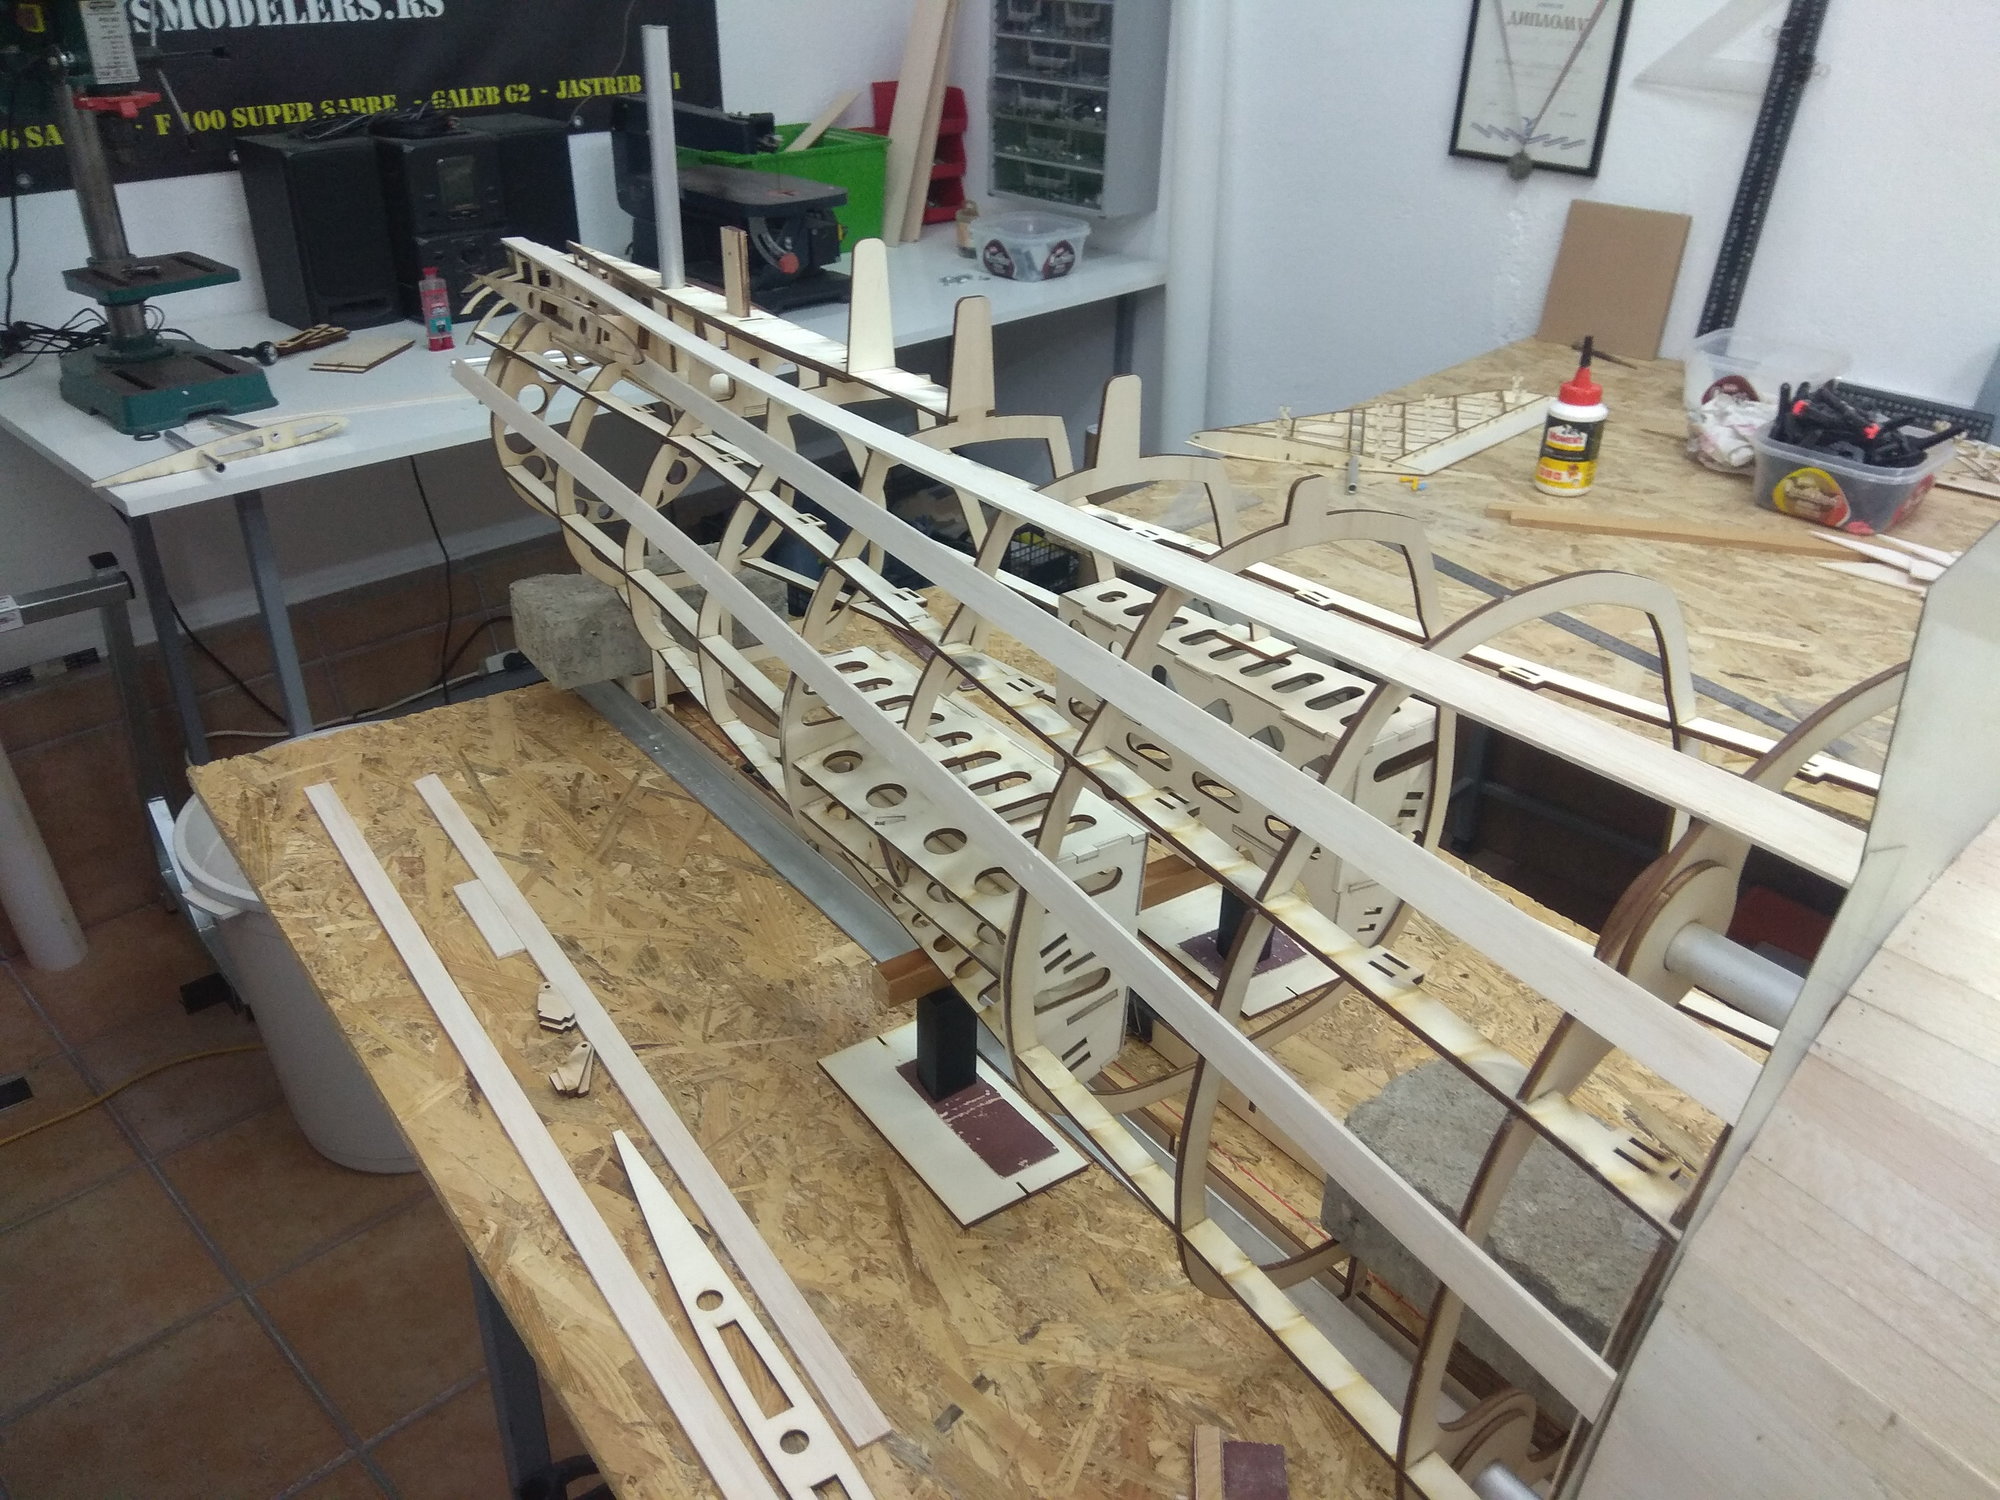
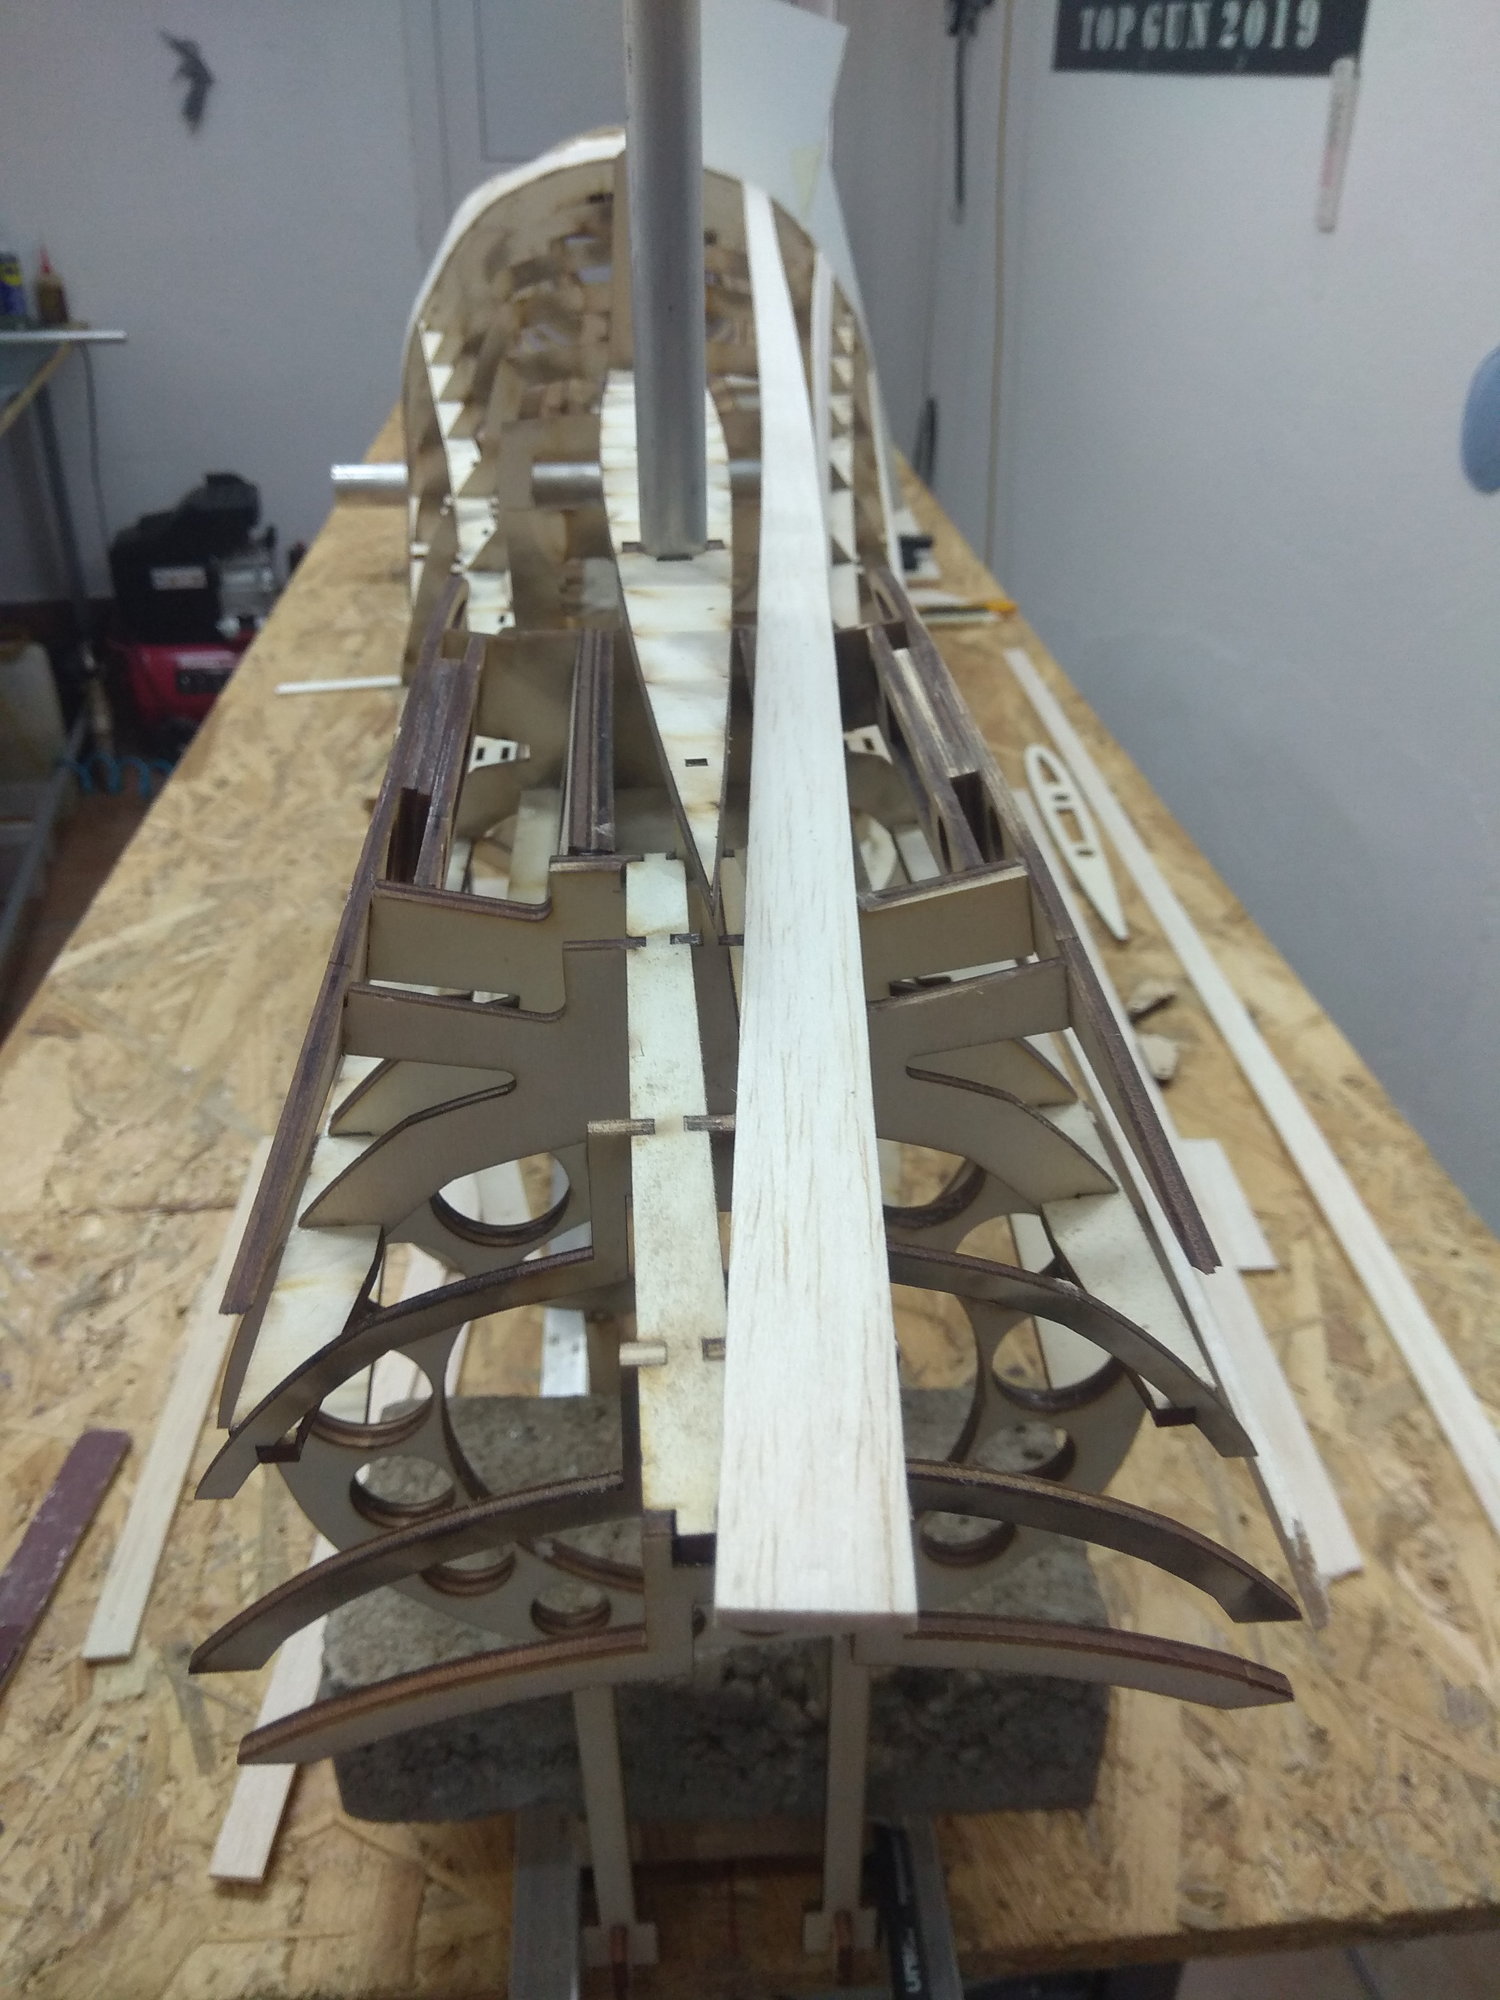
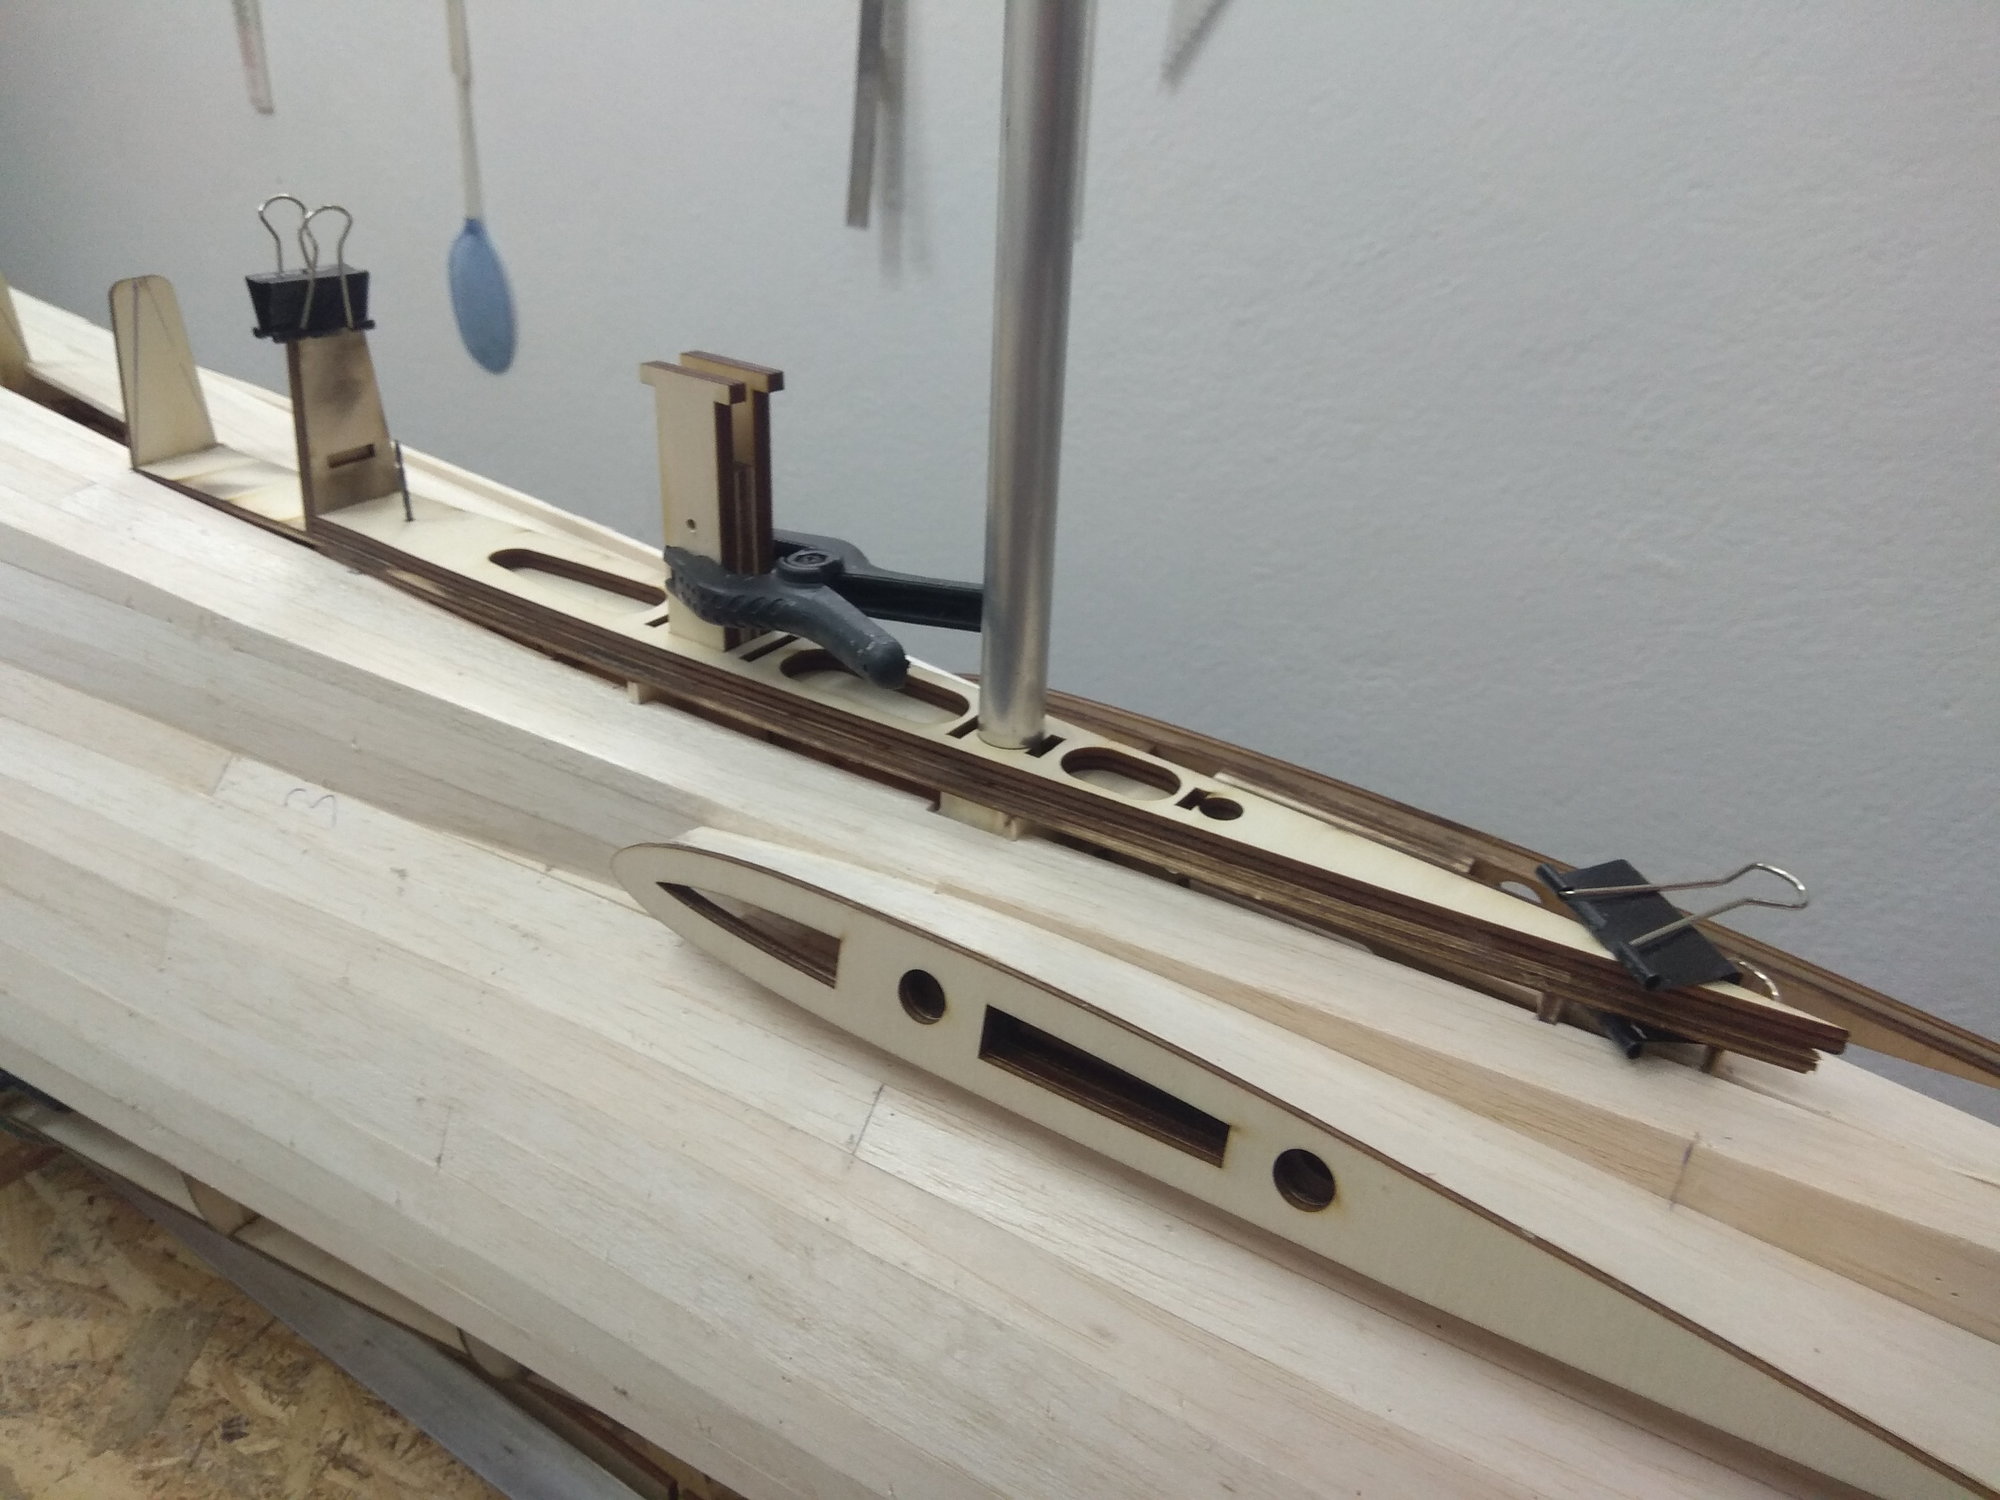
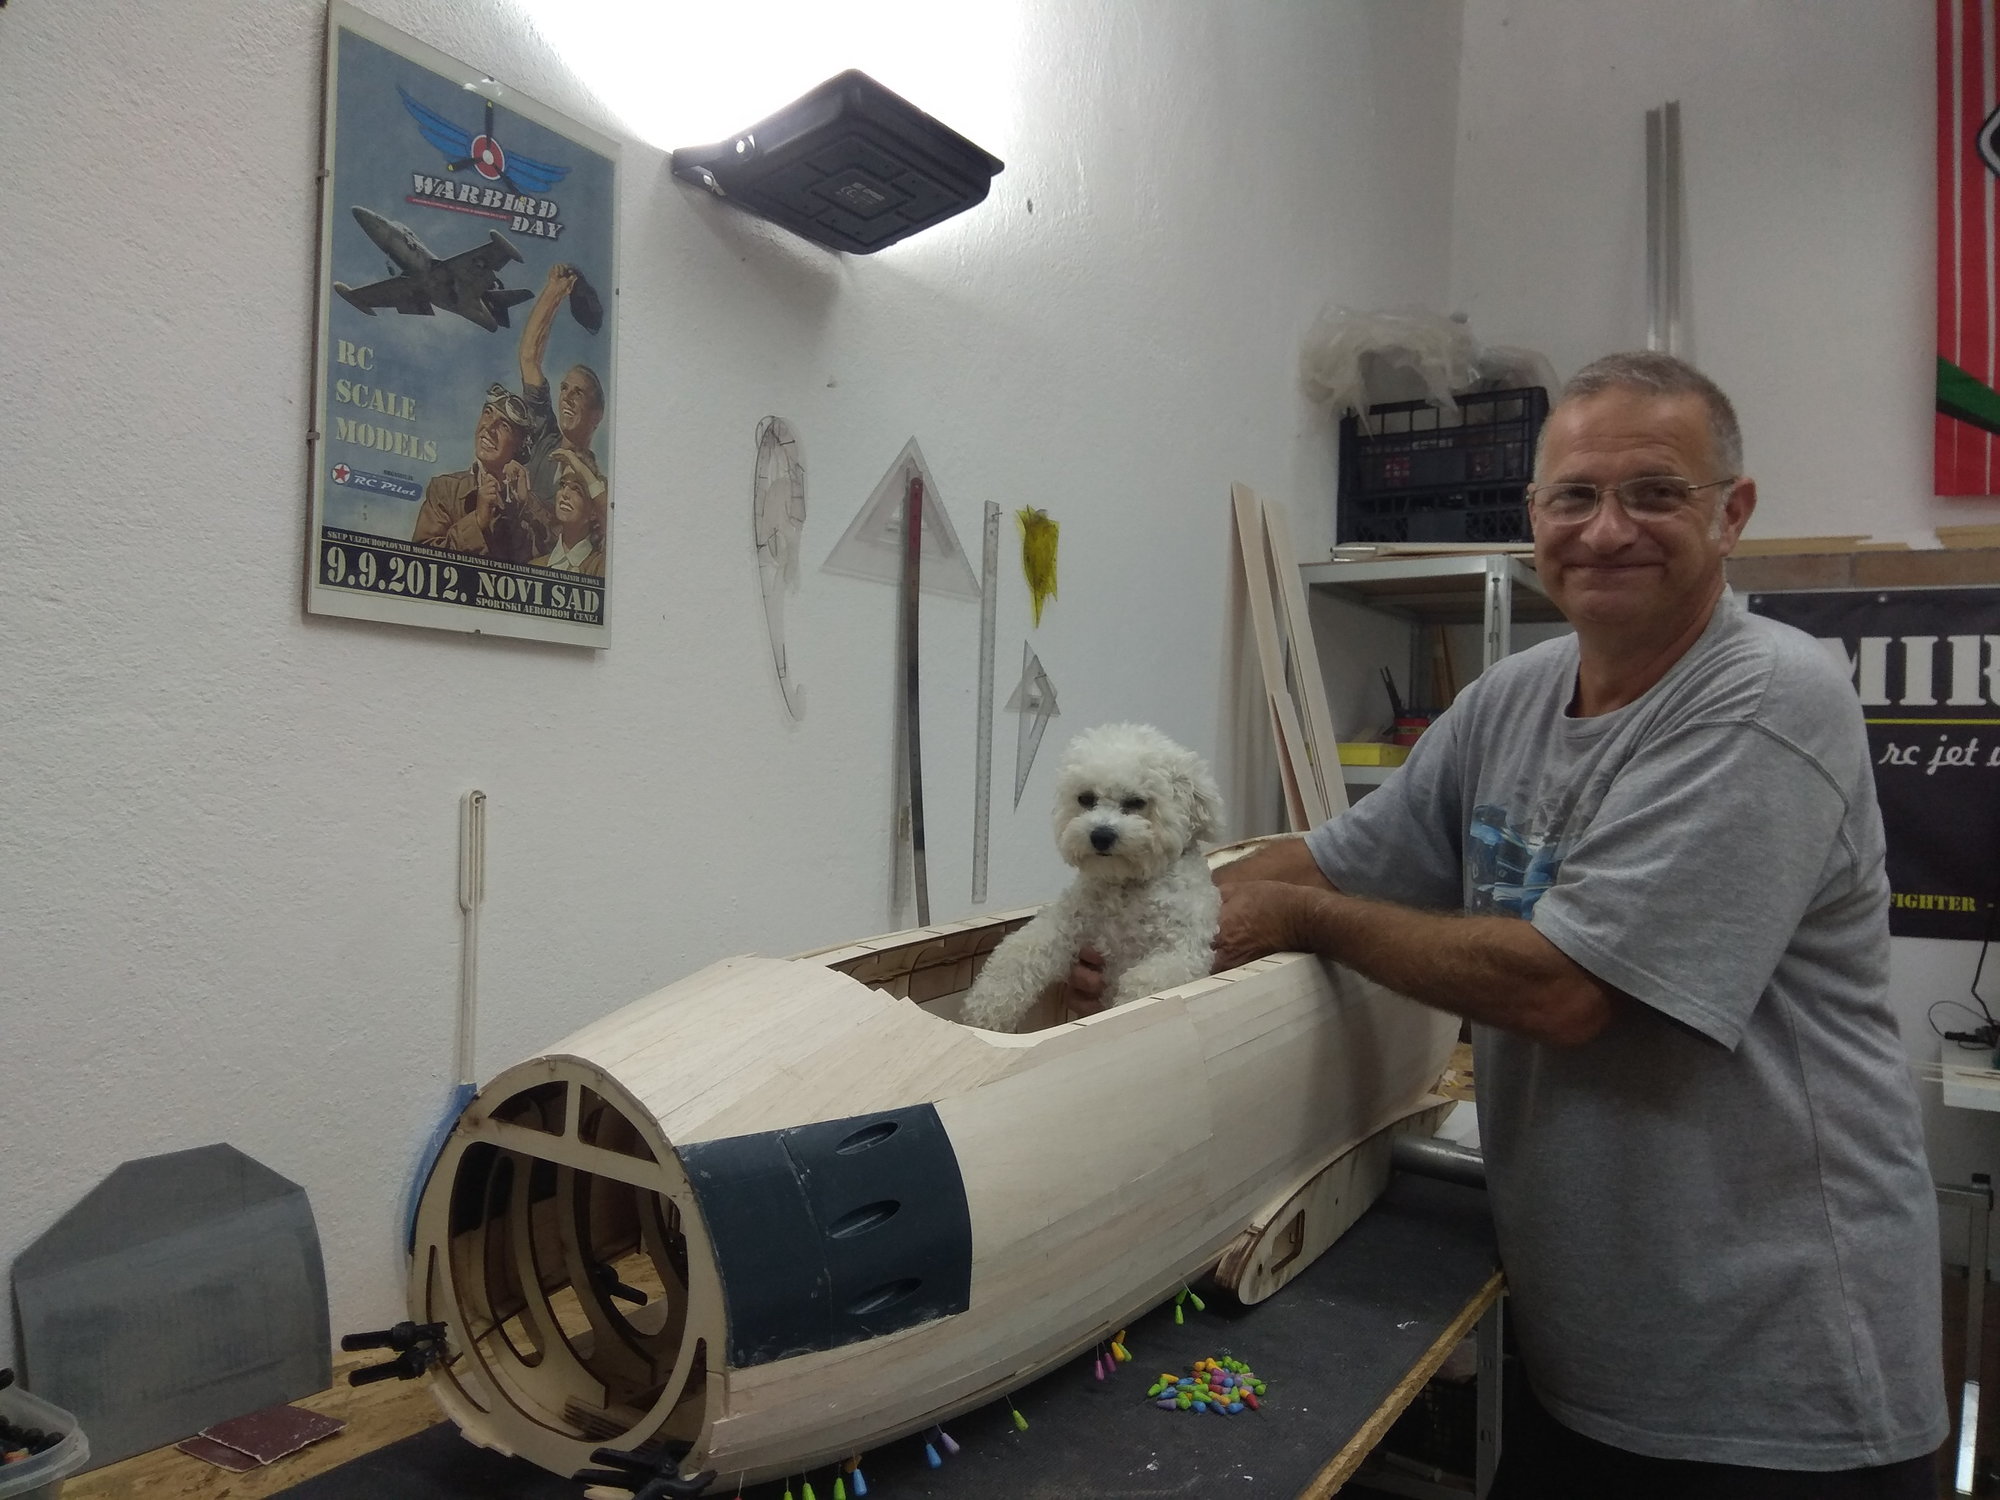
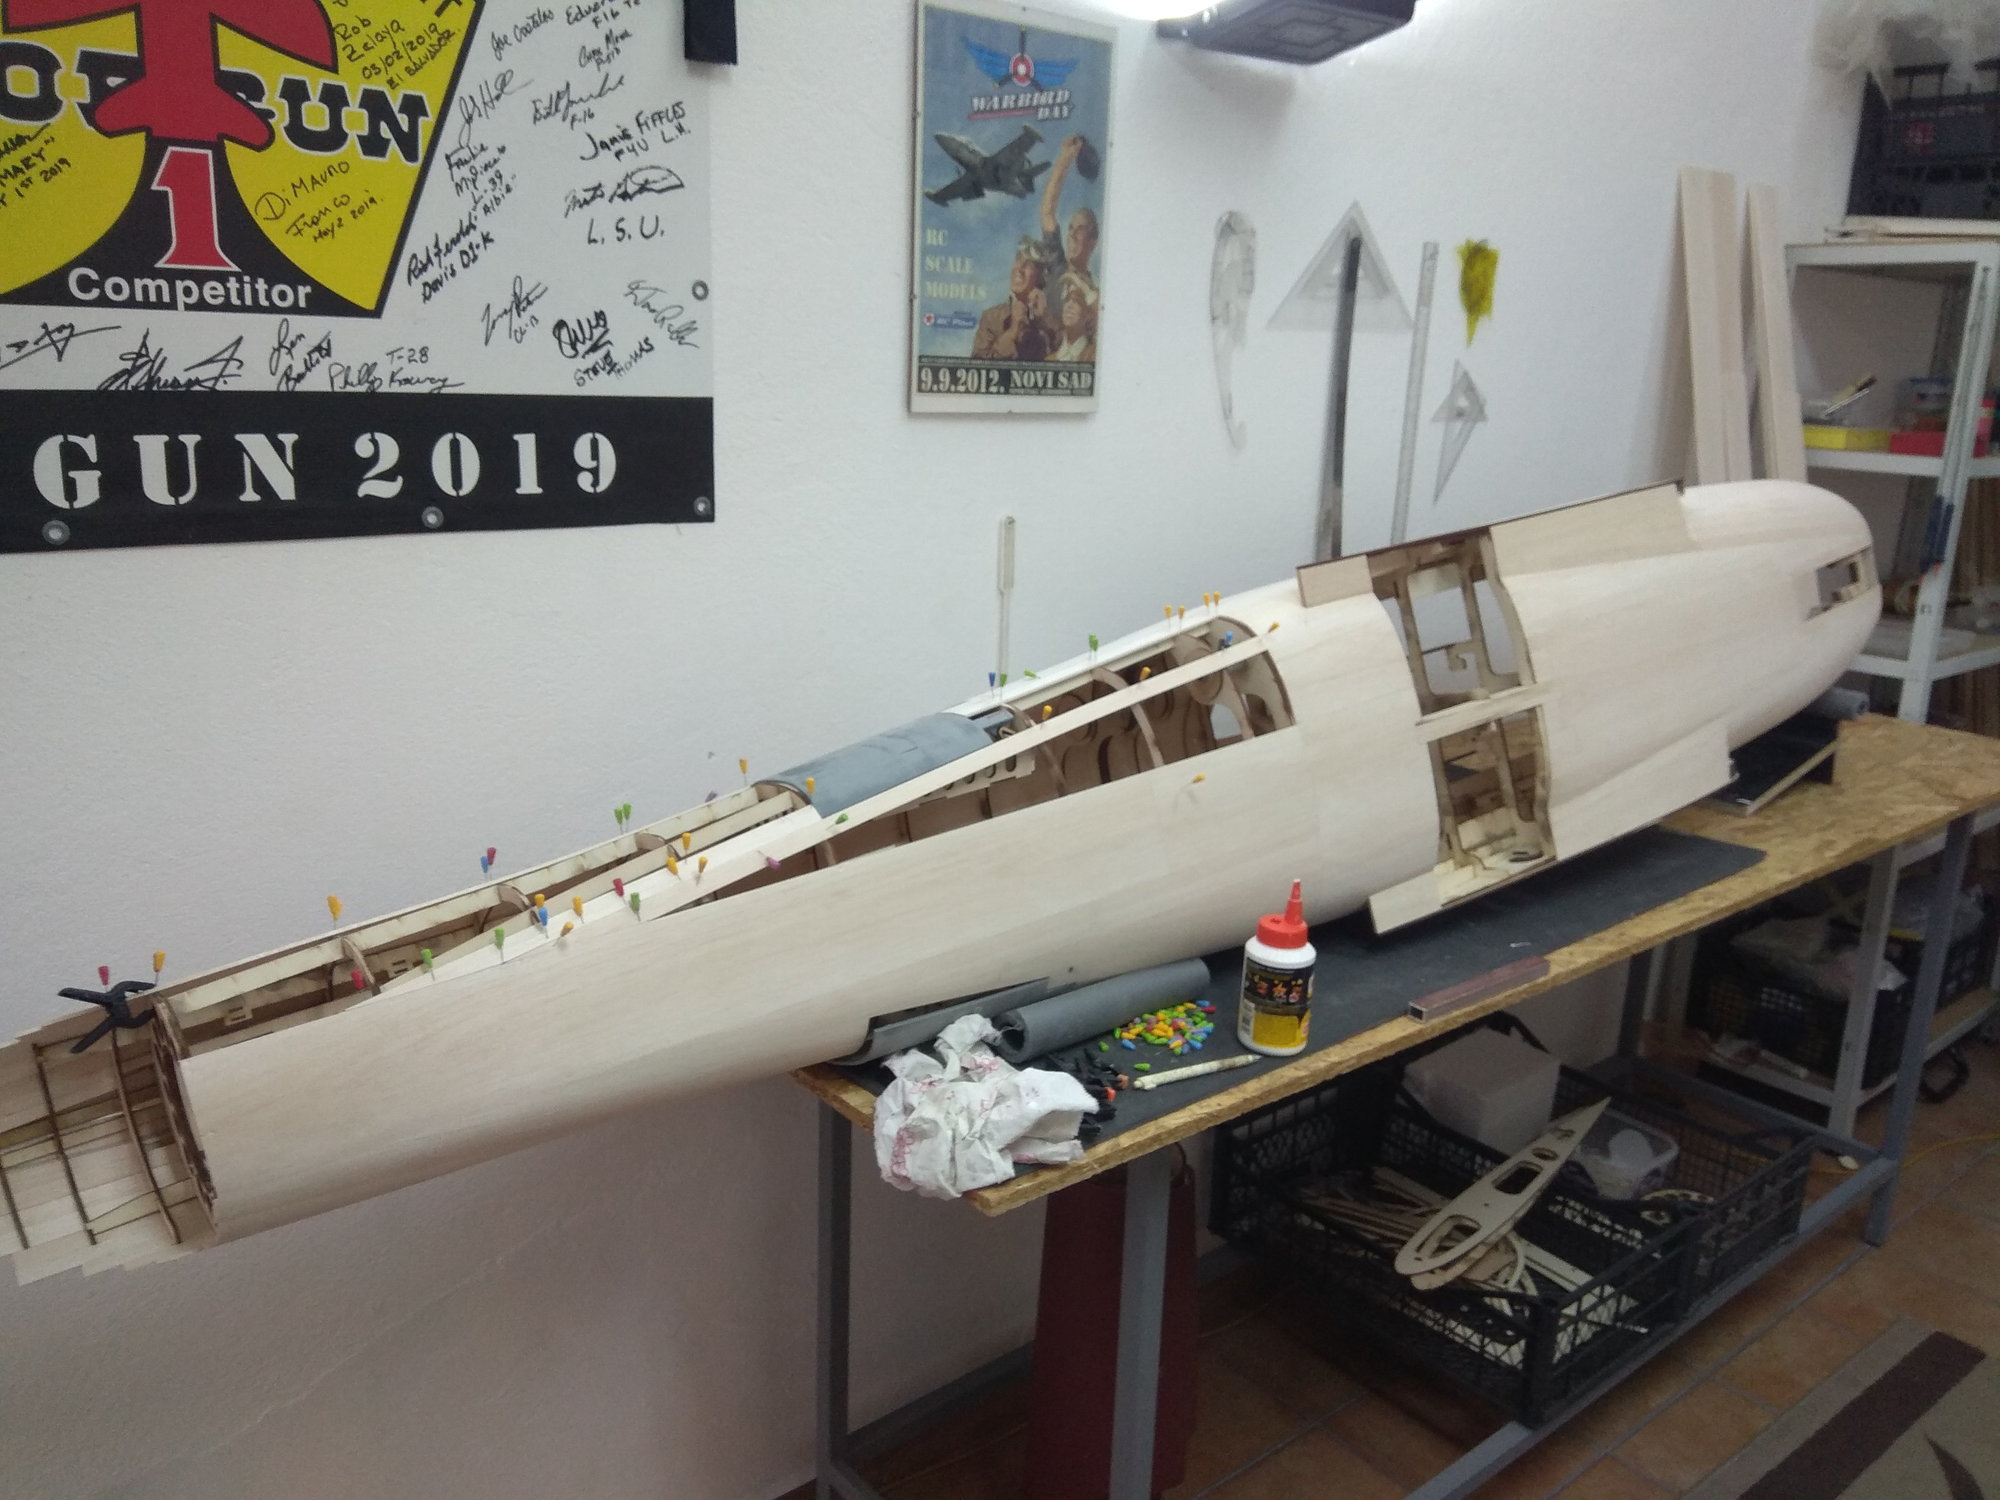
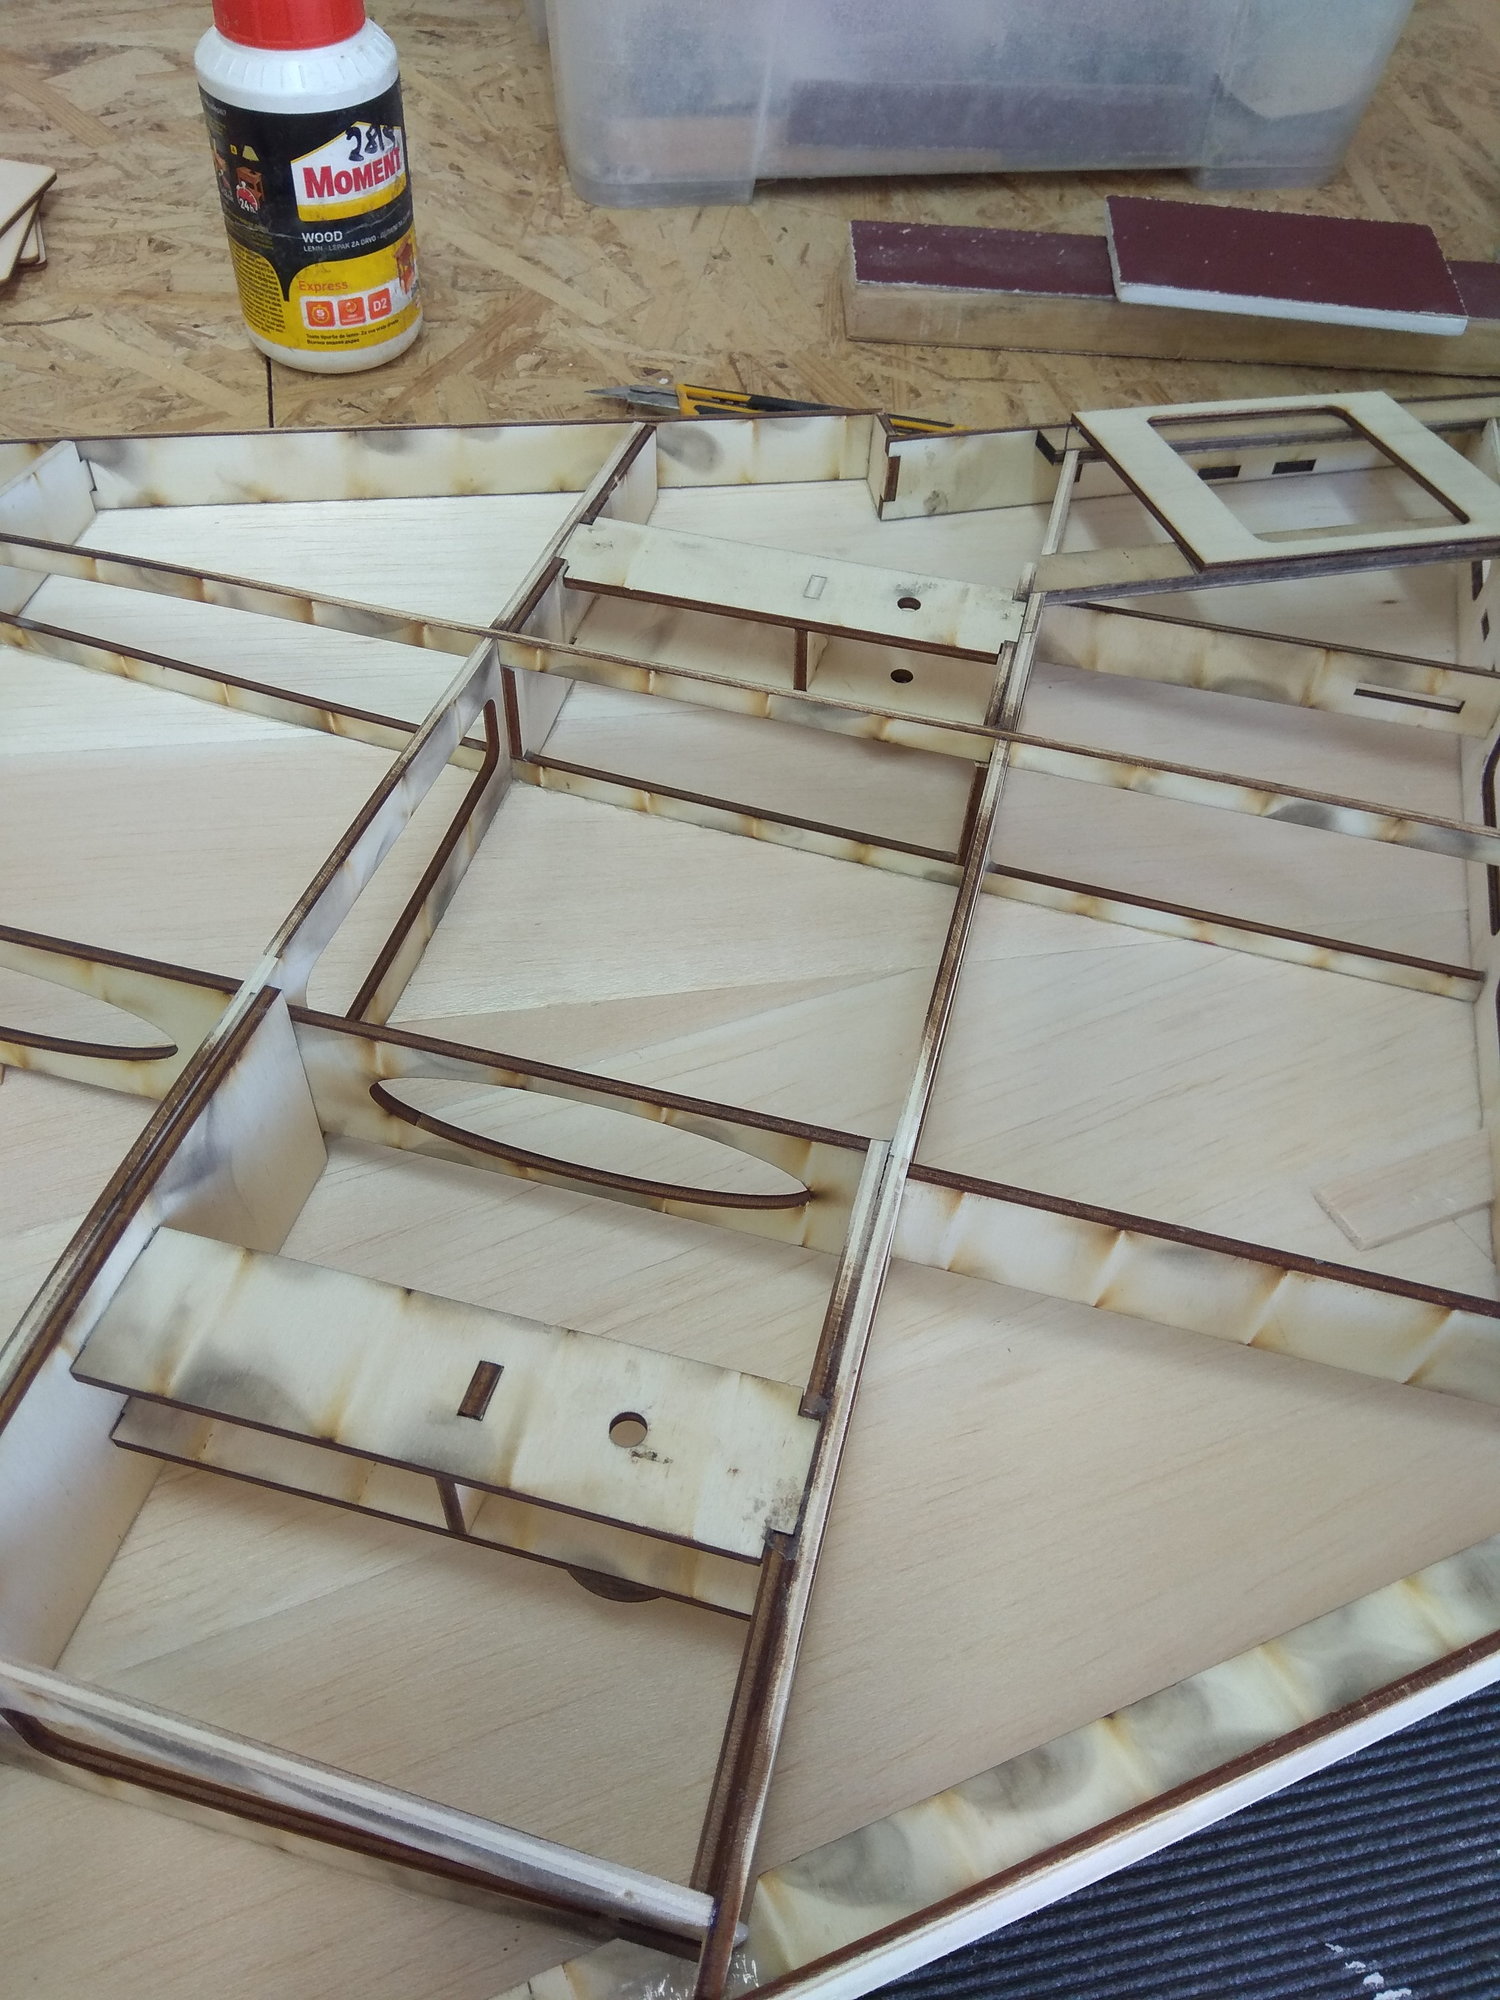
I started this project by making the fuselage.
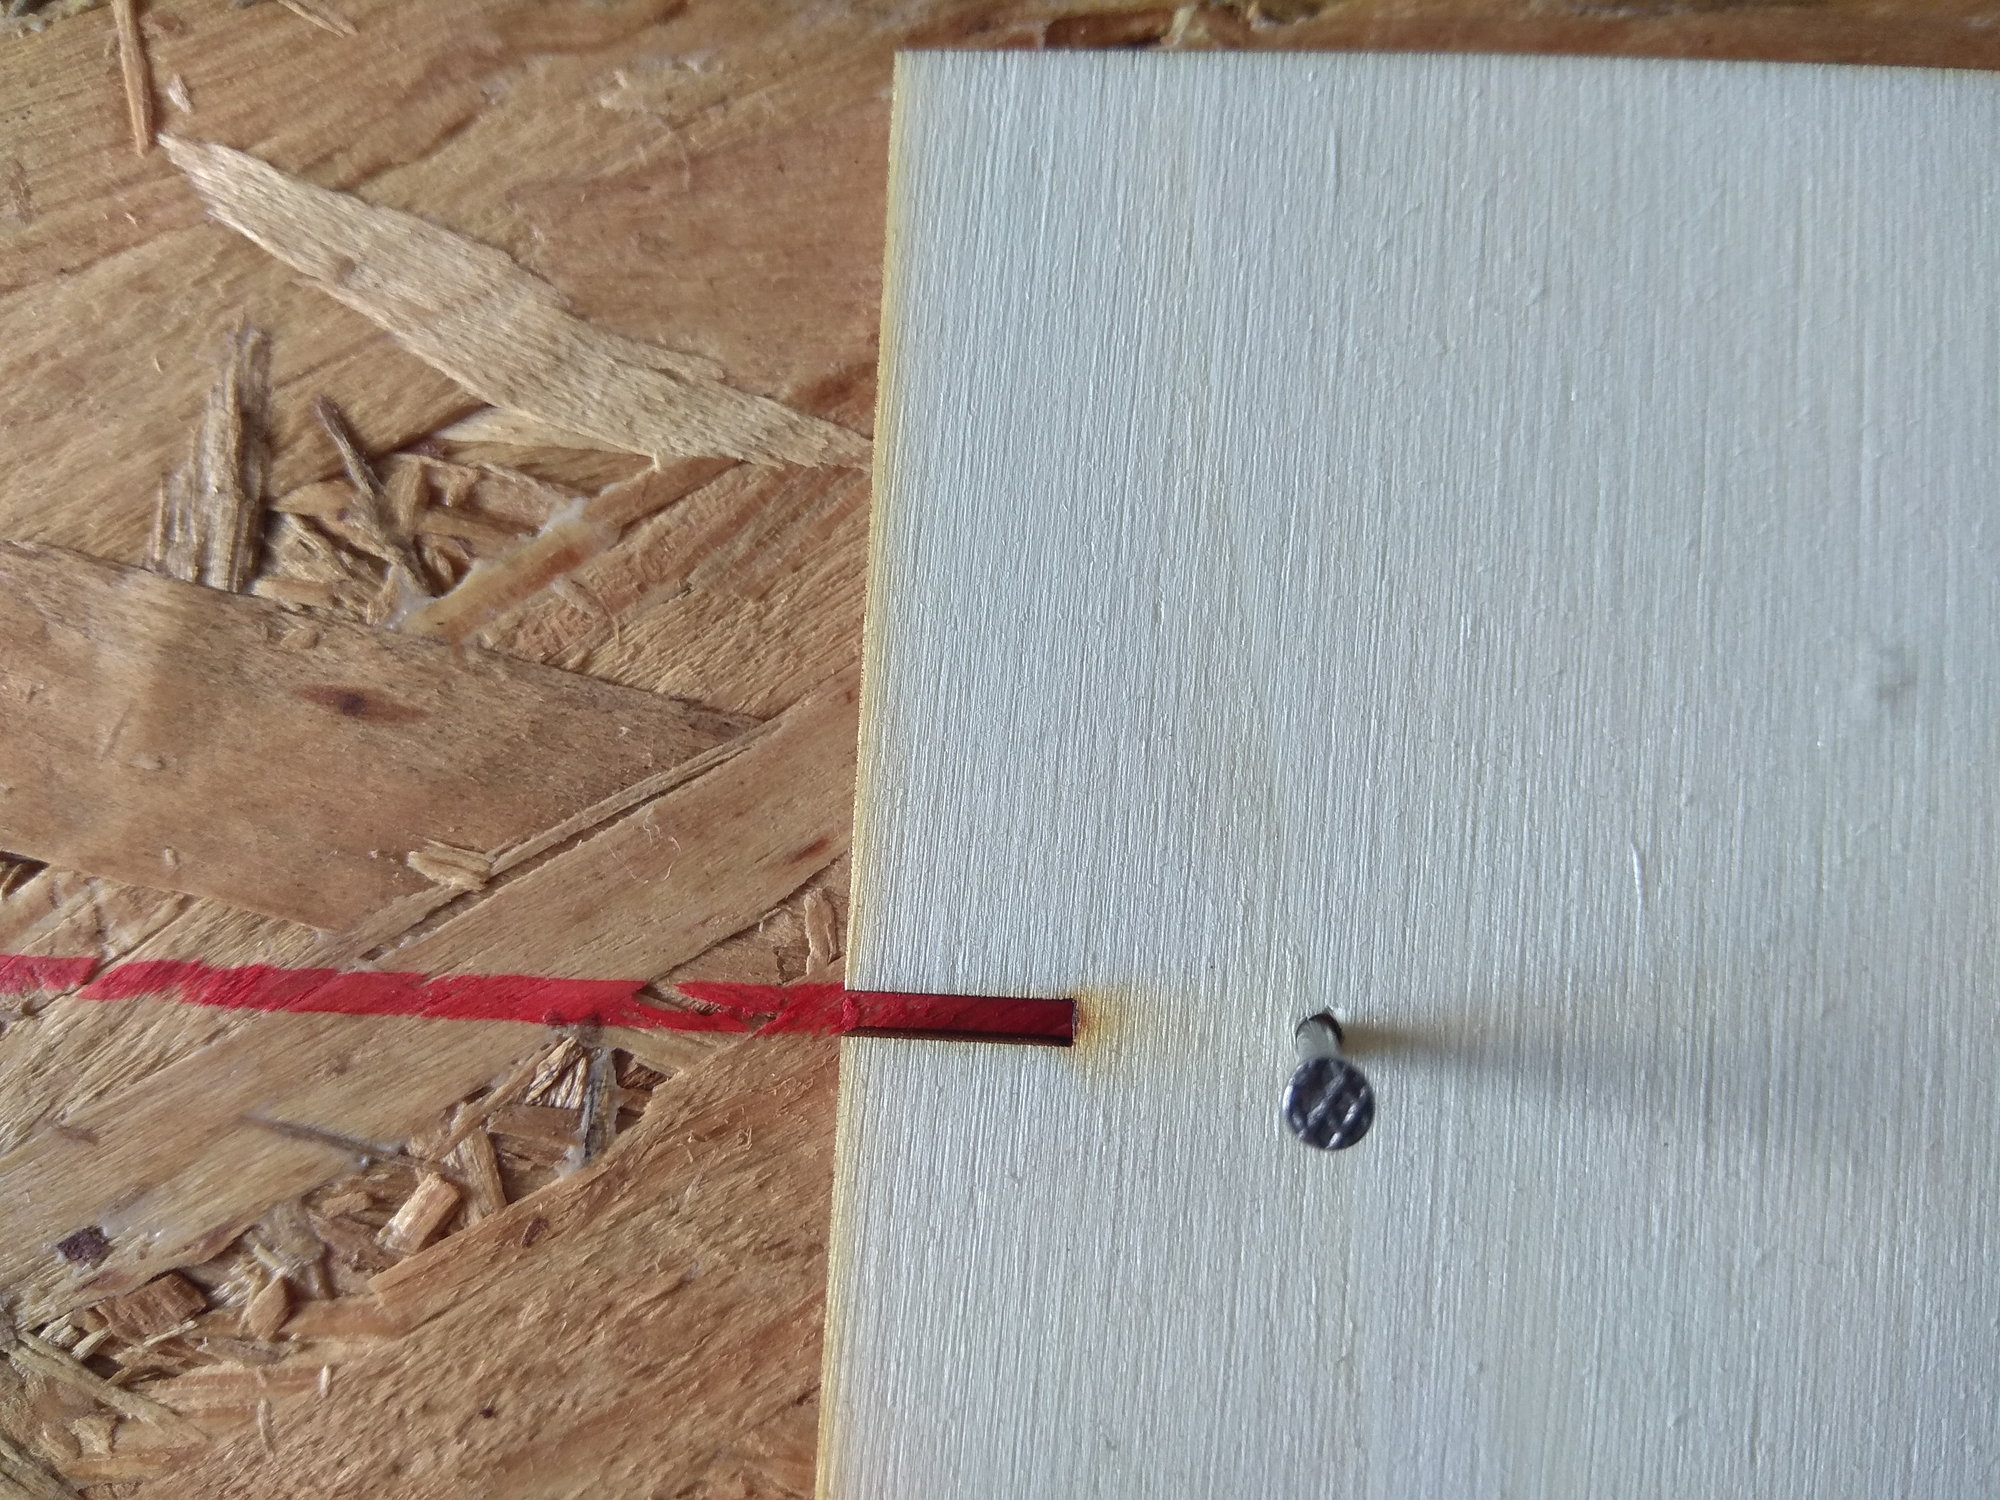
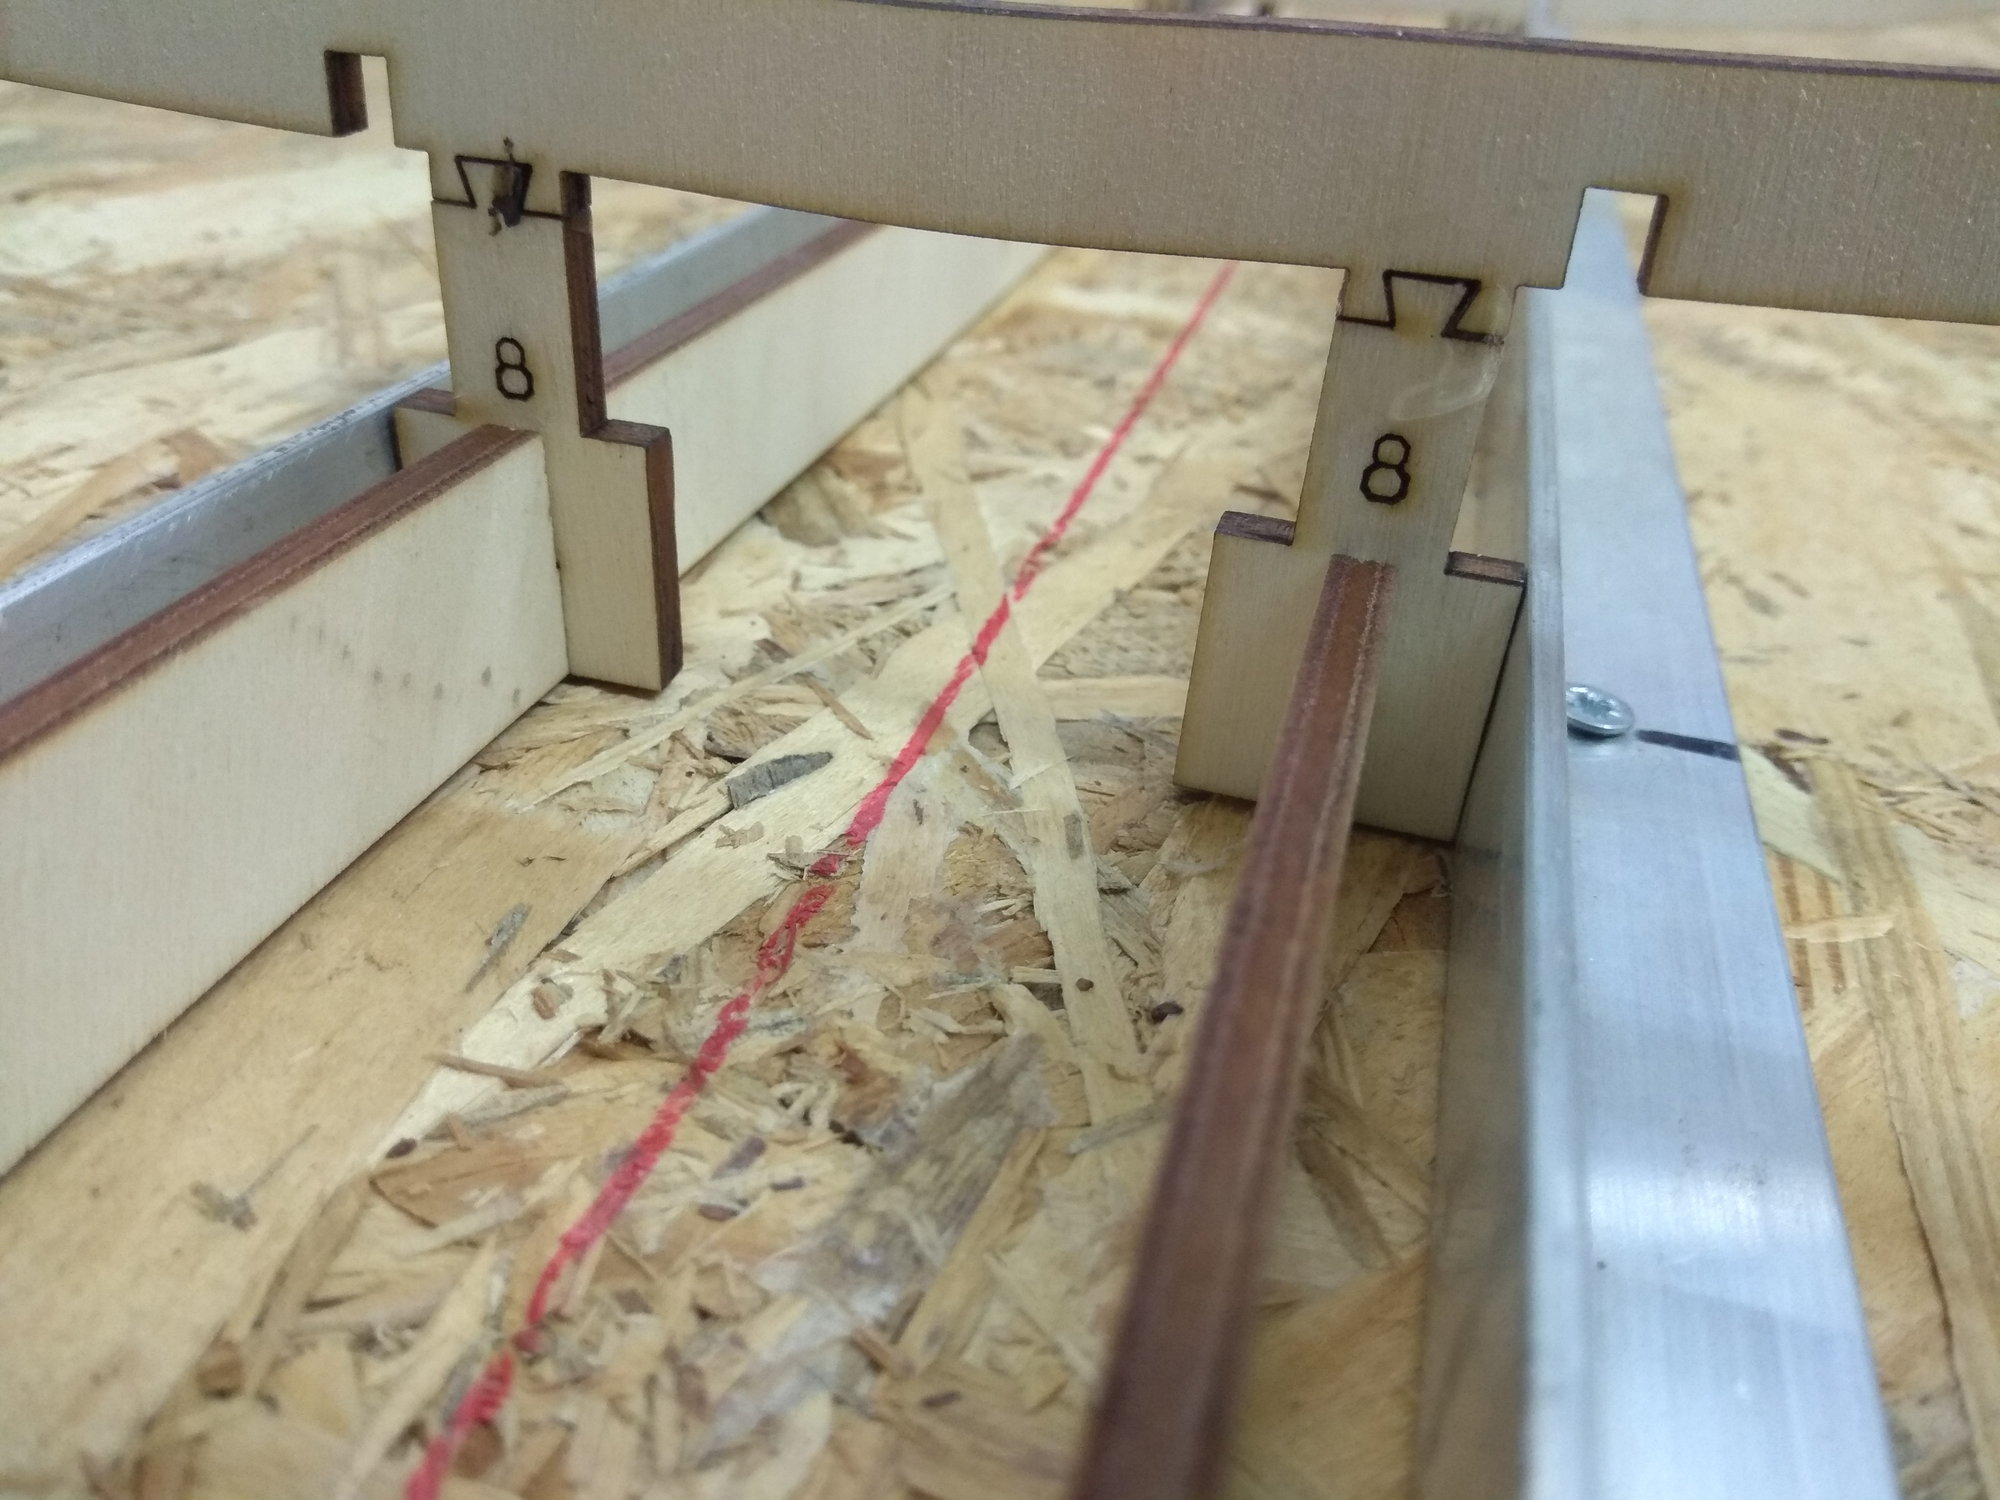
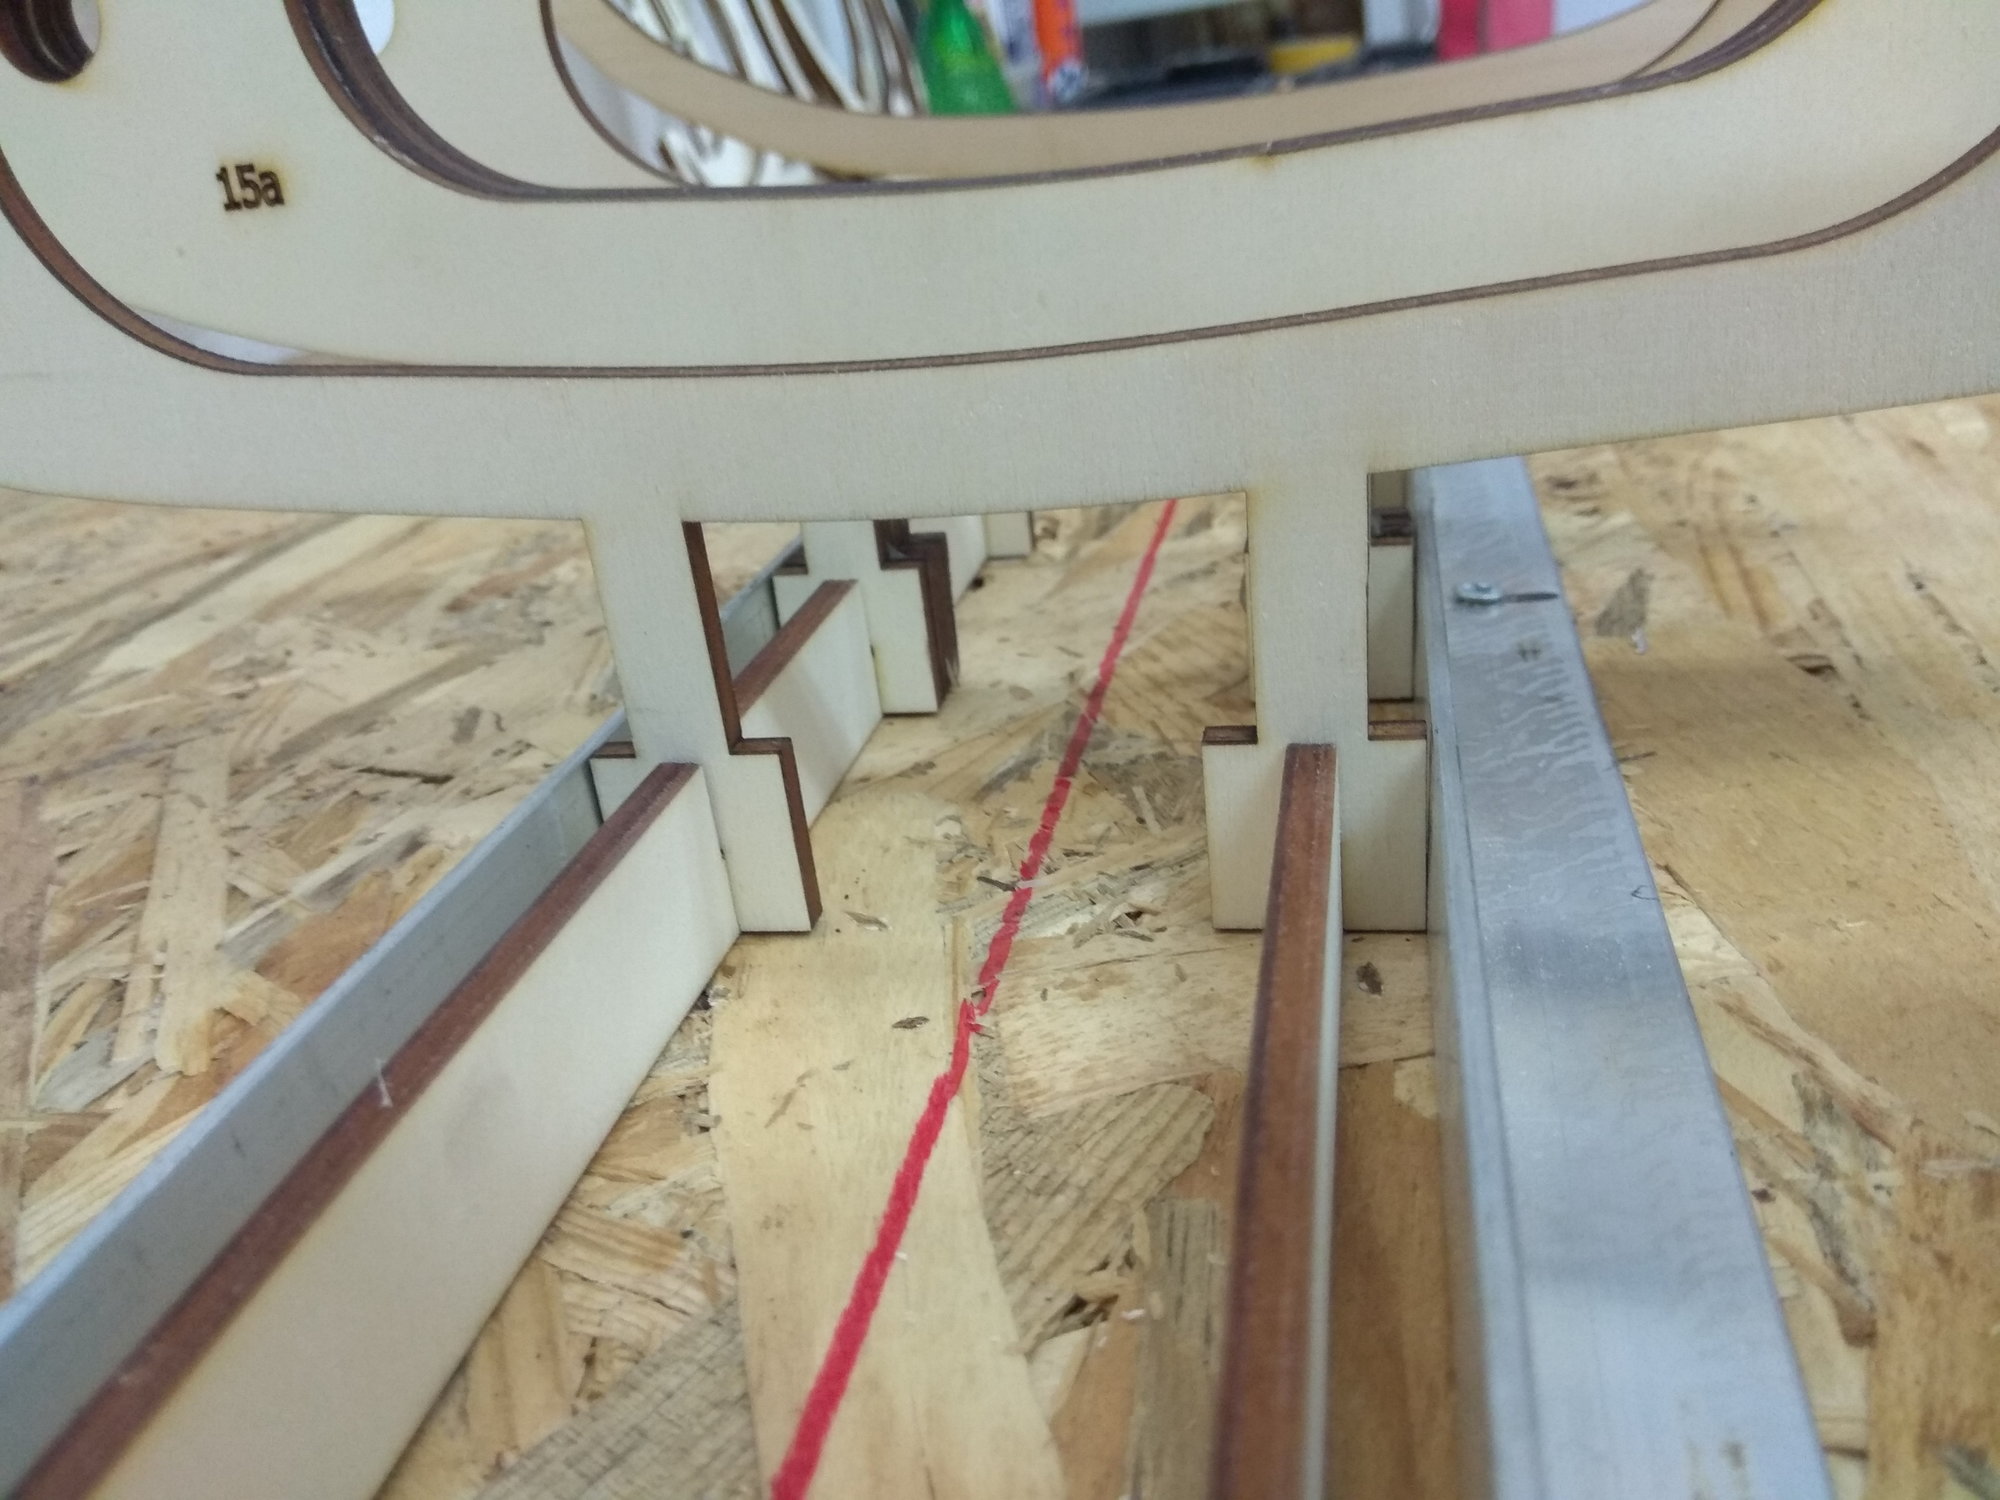
I prepared a new workbench, drew a line down the middle and with the new "tools" I determined exactly where the left and right rails for the legs of the fuselage ribs come.

When ordering a wooden kit, you can choose a one-piece or two-piece fuselage.
I make a two-piece fuselage, for easier transport. The vertical stabilizer can also be removed.
OK, let's start, I cut out the pieces for the fuselage, glued the pieces that go in two or more layers, glued the legs to the ribs and set the first ribs in place.
Since the parts are made of 4 mm poplar plywood, I use white glue for all gluing.
I must mention that when making "Mirce models" of wooden kits, use only white glue!!!


To be continued...
Designed by a top Italian RC model designer, it is completely constructed in a 3D program, and all parts are cut on a laser cut machine.
All of this guarantees easy and precise manufacturing and top flight characteristics.
This is more than a proven design, because the Saber that the constructor made has at least 500 flights!!!
The construction is extremely unusual, the pieces fit together like a Puzzle and no two pieces are the same, so you can't reverse the pieces.
Over time plate templates were made for the wings and horizontal stabilizers, which resulted in even better manufacturing precision.
We also offer sets for the scale surface (threads, screws, panels...) as well as the cockpit. You will see all this when the build is nearing completion...
It is interesting that there are no paper plans, when you buy a wooden kit you get drawings, and a lot of pictures make it easier to make.
Almost all "Mirce models" wooden kits are made in the same way, you can find more information on our website: www.nsmodelers.rs
In my workshop I made a couple of these models that were sent to the USA. Unfortunately I haven't shown the build here, but since I'm building a model for myself now, here's an opportunity to do so.
"Mirce models" offers two F 86 wooden kits, the larger one is 1:4 and the smaller one is 1:5.3 scale.
This time I'm making a bigger model:
Wingspan: 2825 mm / 111.2"
Length: 2850 mm / 112.2"
Weight: around 20 kg
Turbines: from 180 Nm
Radio: minimum 6 channels
I started this project by making the fuselage.
I prepared a new workbench, drew a line down the middle and with the new "tools" I determined exactly where the left and right rails for the legs of the fuselage ribs come.
When ordering a wooden kit, you can choose a one-piece or two-piece fuselage.
I make a two-piece fuselage, for easier transport. The vertical stabilizer can also be removed.
OK, let's start, I cut out the pieces for the fuselage, glued the pieces that go in two or more layers, glued the legs to the ribs and set the first ribs in place.
Since the parts are made of 4 mm poplar plywood, I use white glue for all gluing.
I must mention that when making "Mirce models" of wooden kits, use only white glue!!!
To be continued...
 07-15-2022, 10:47 PM
#2
Thread Starter
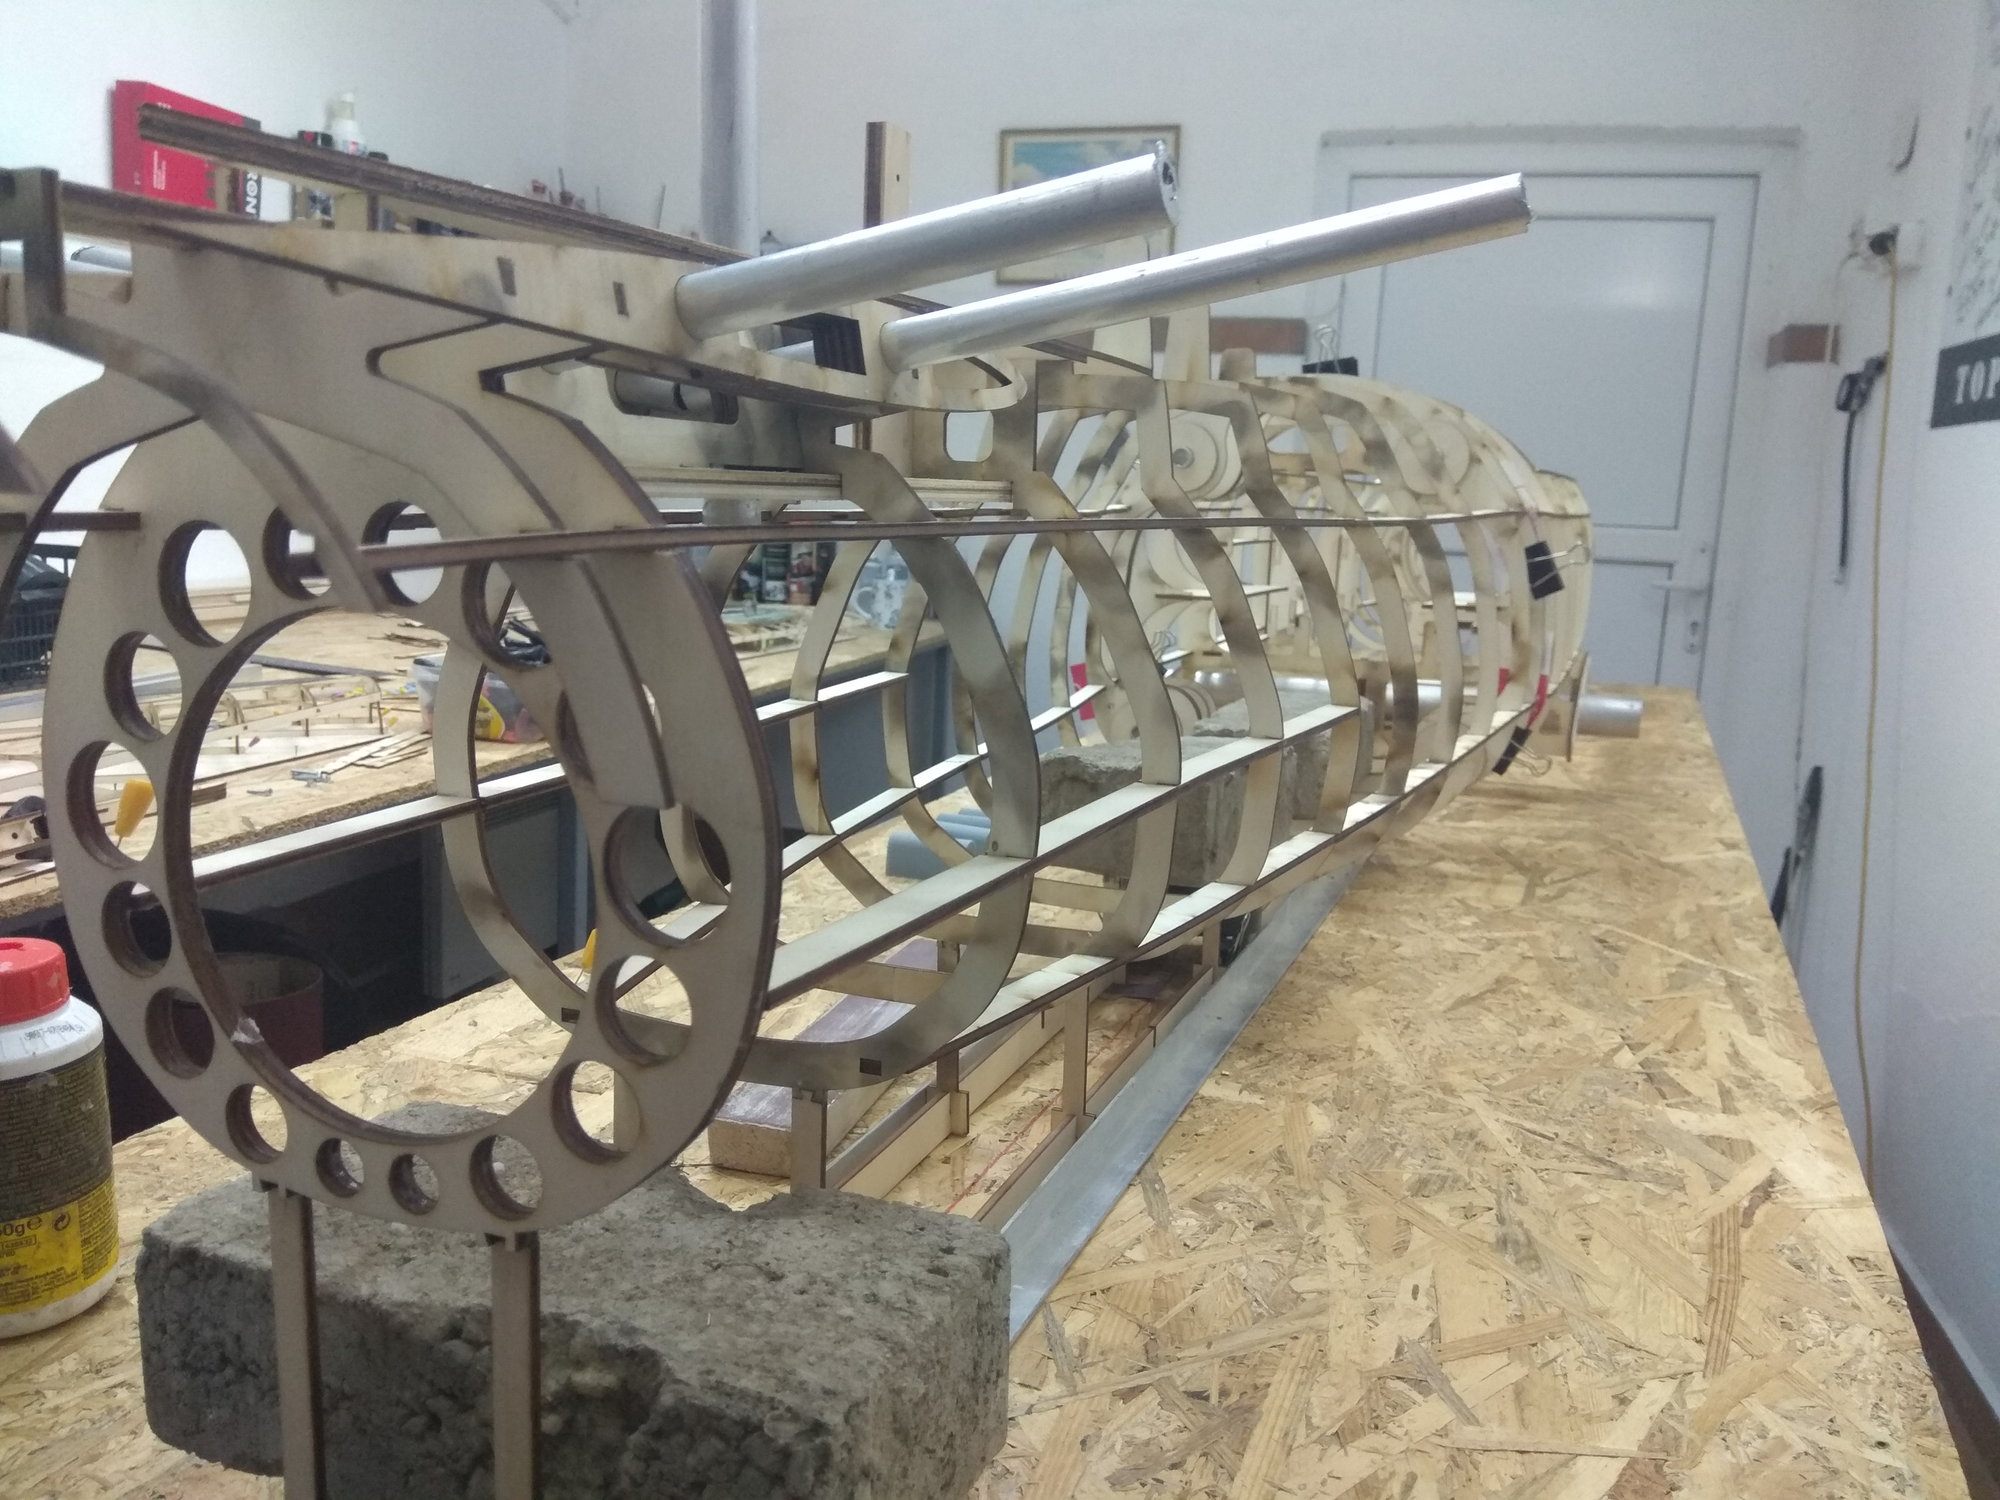
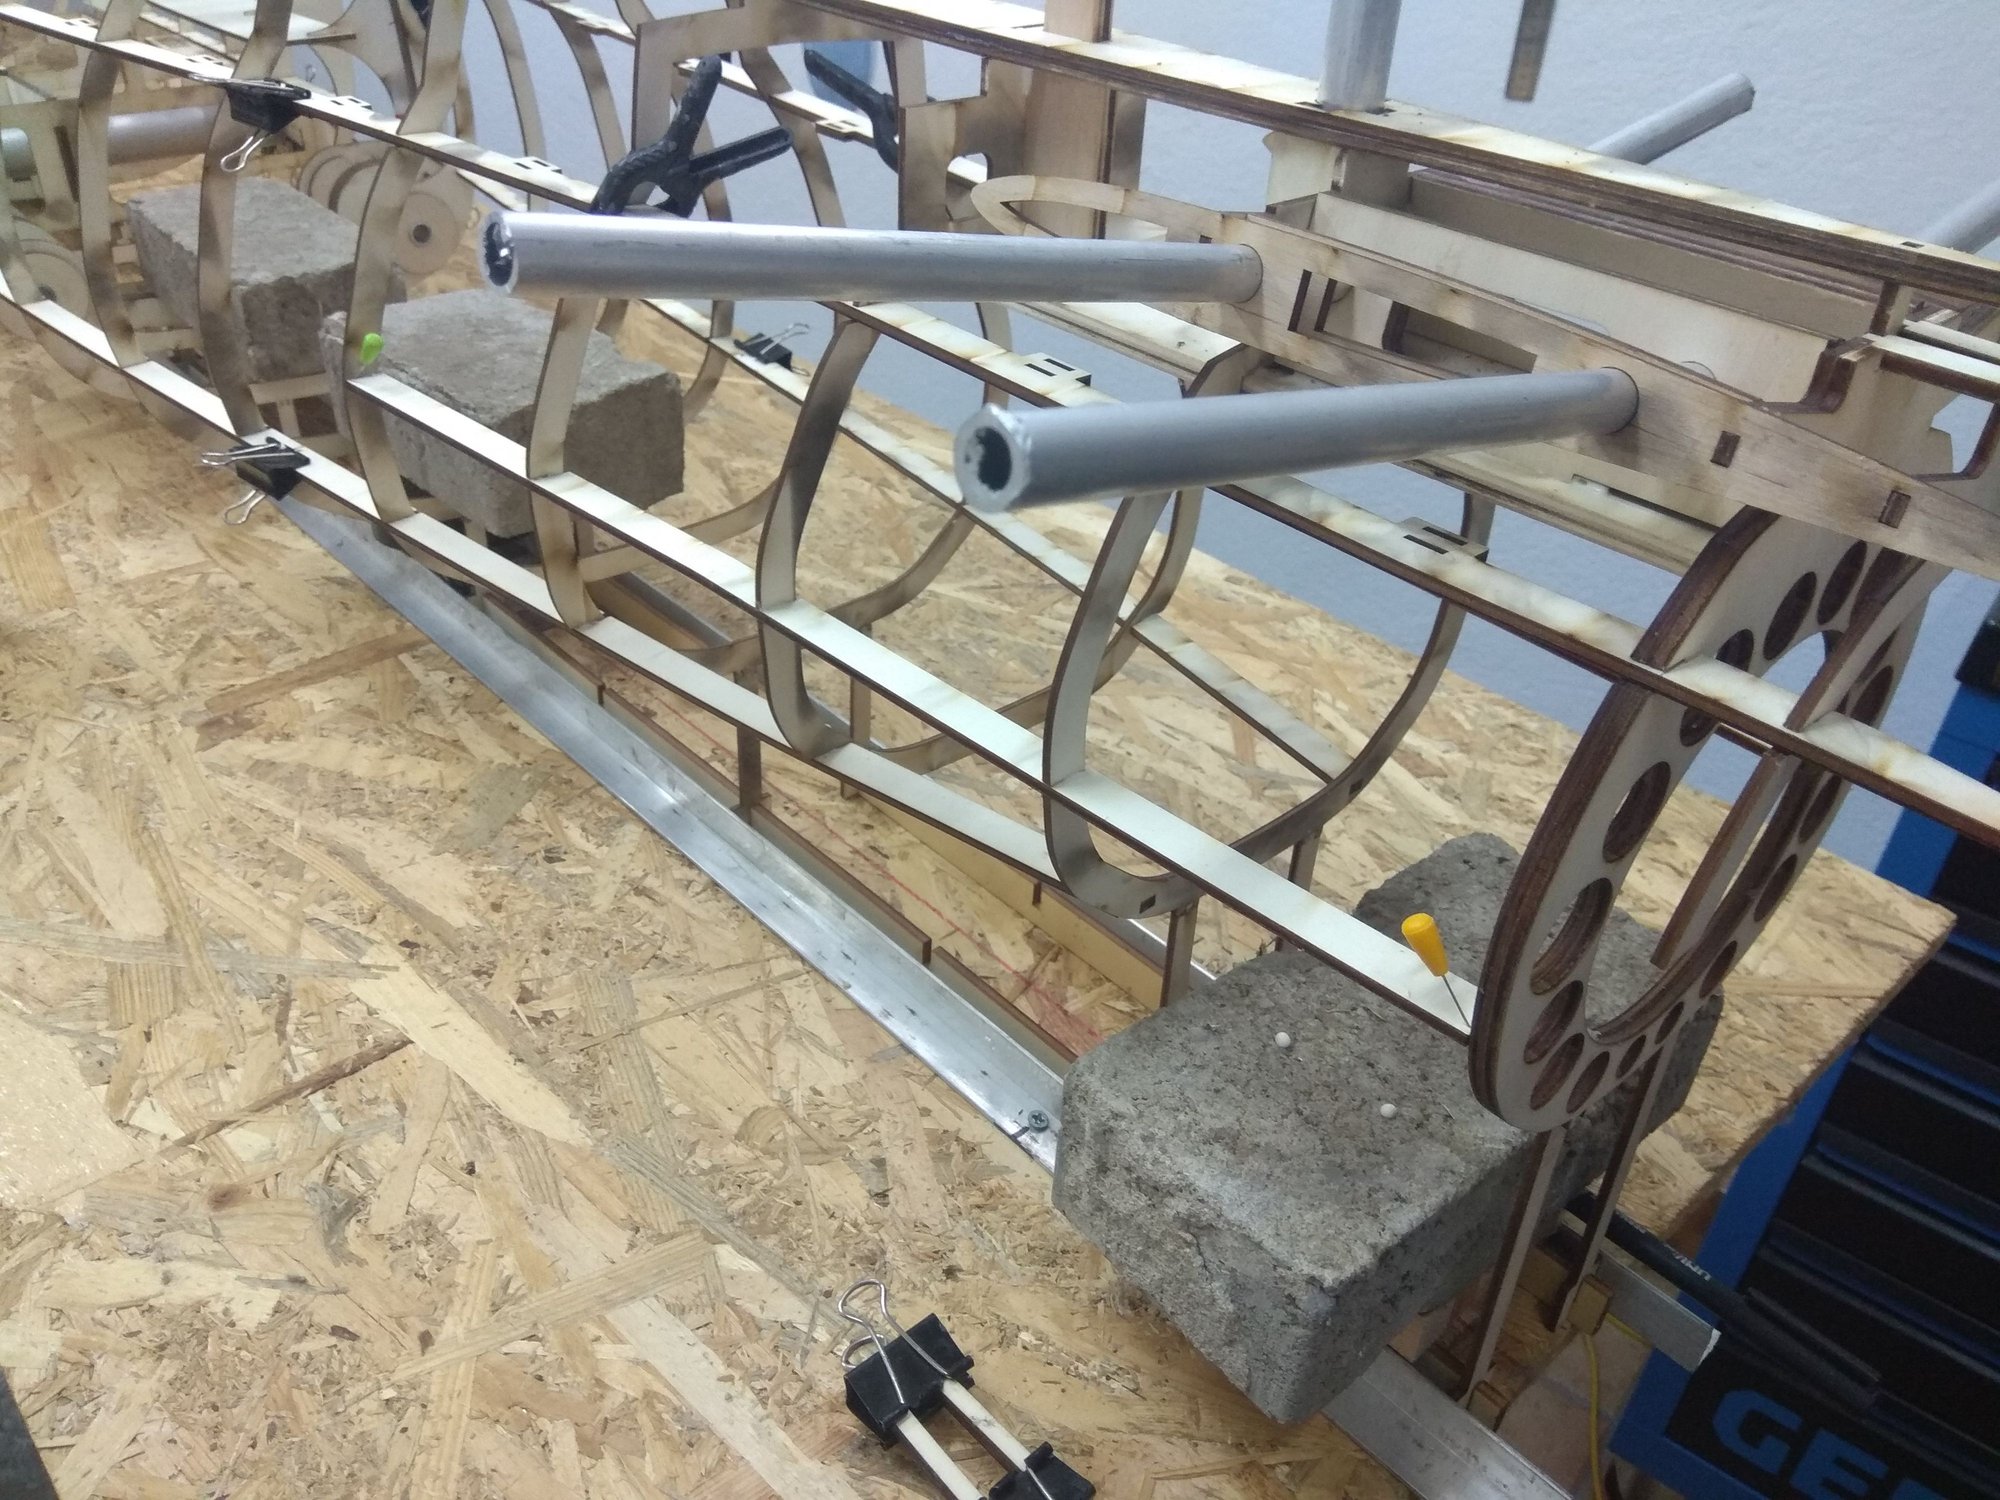
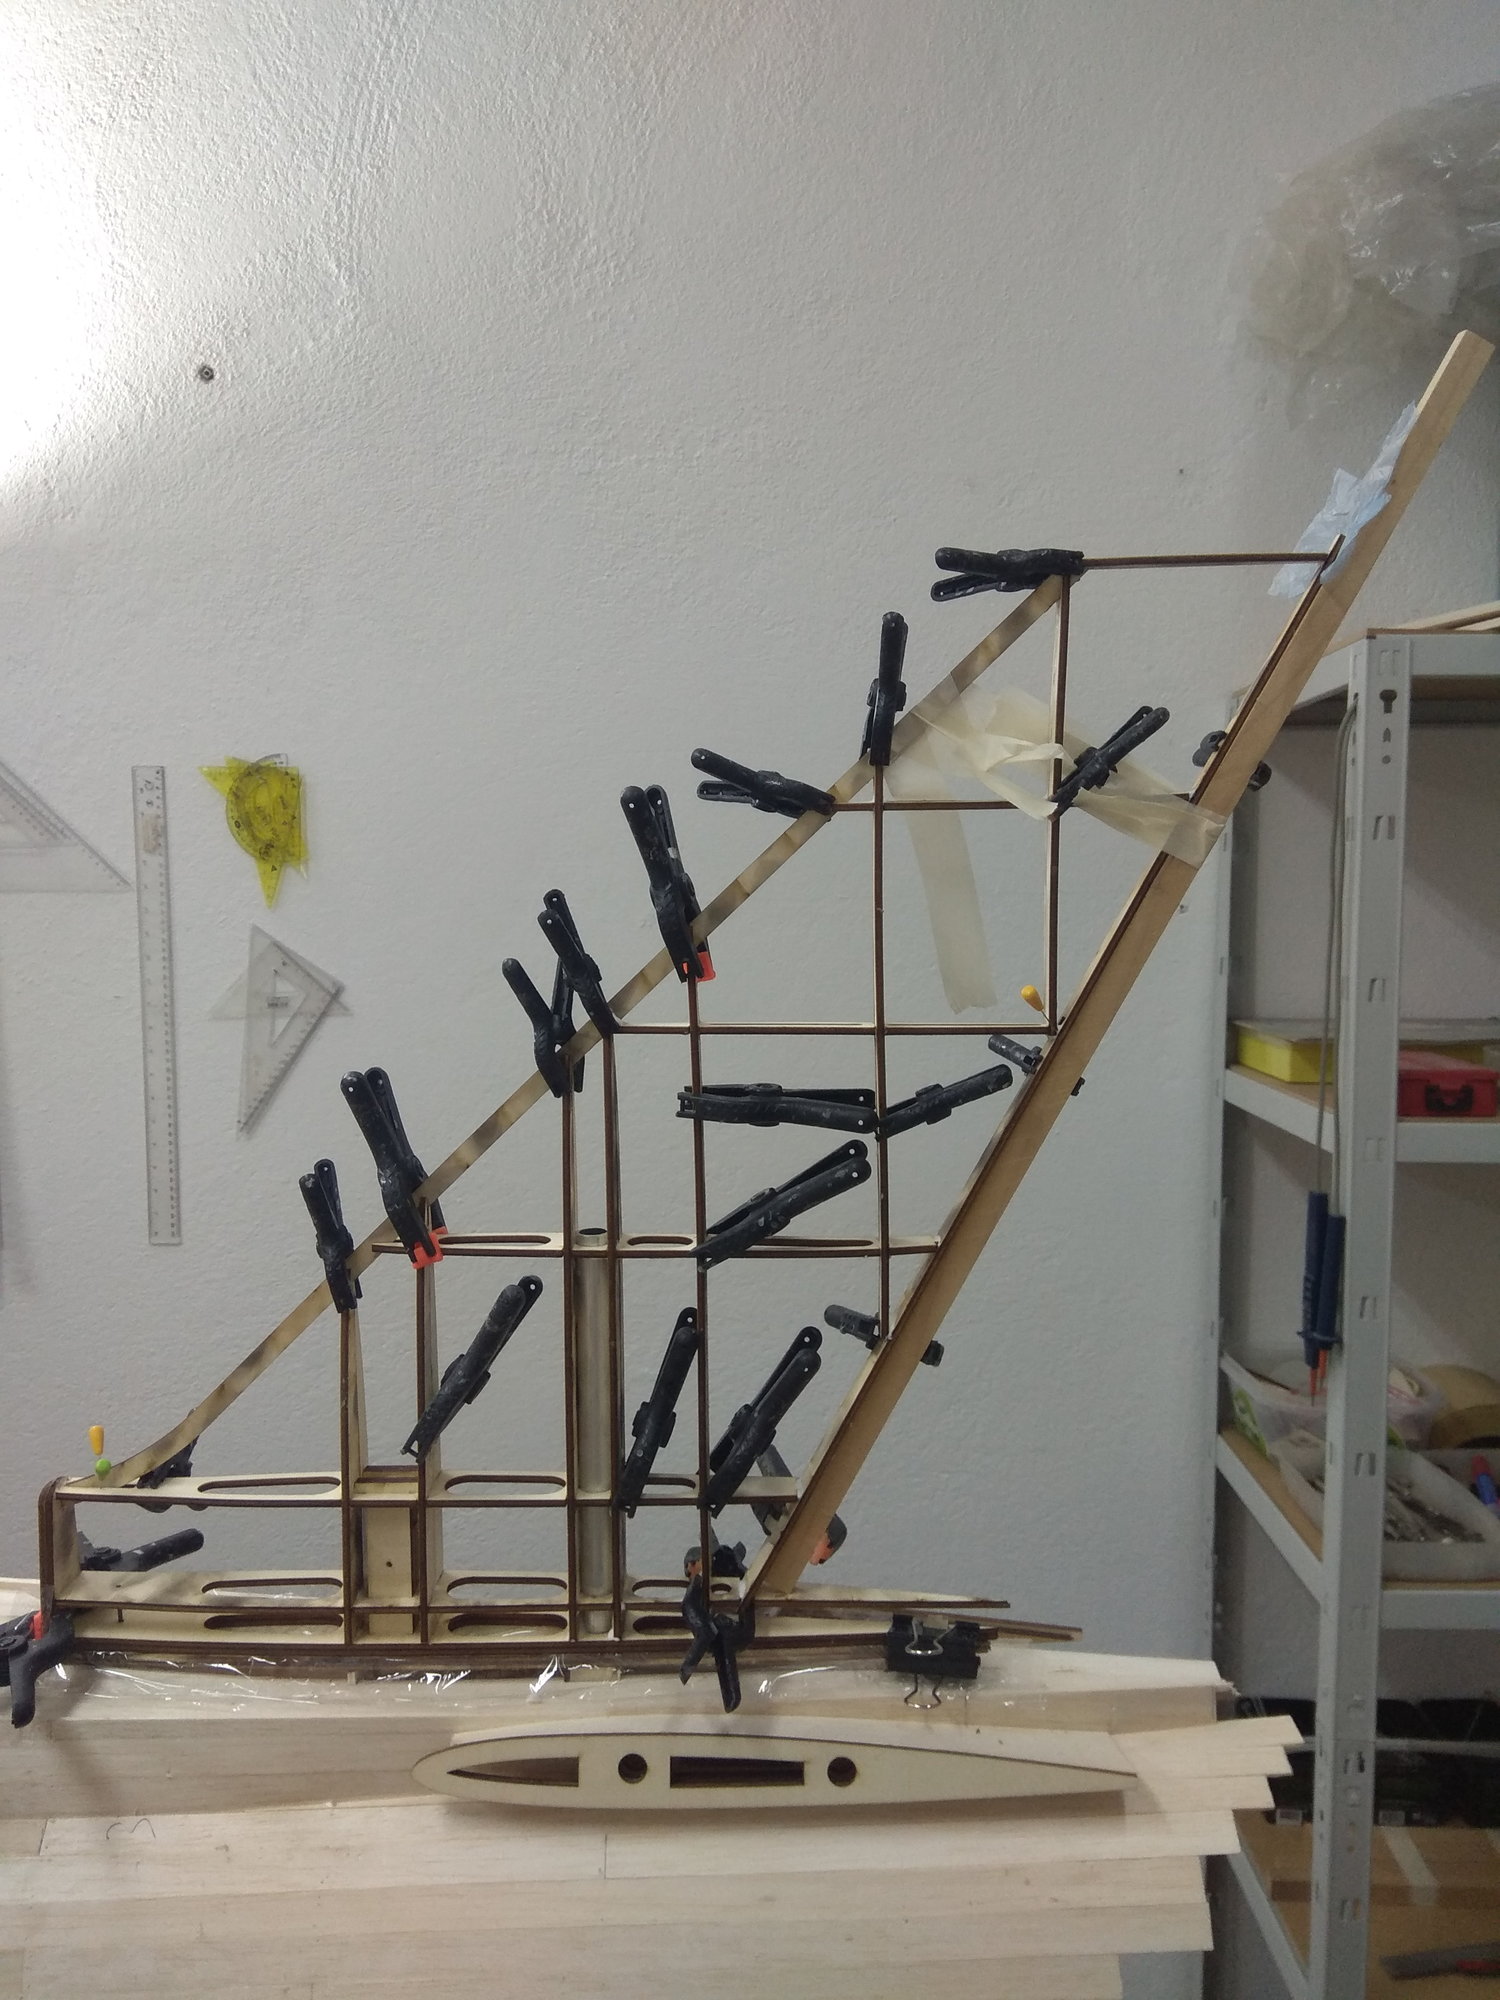
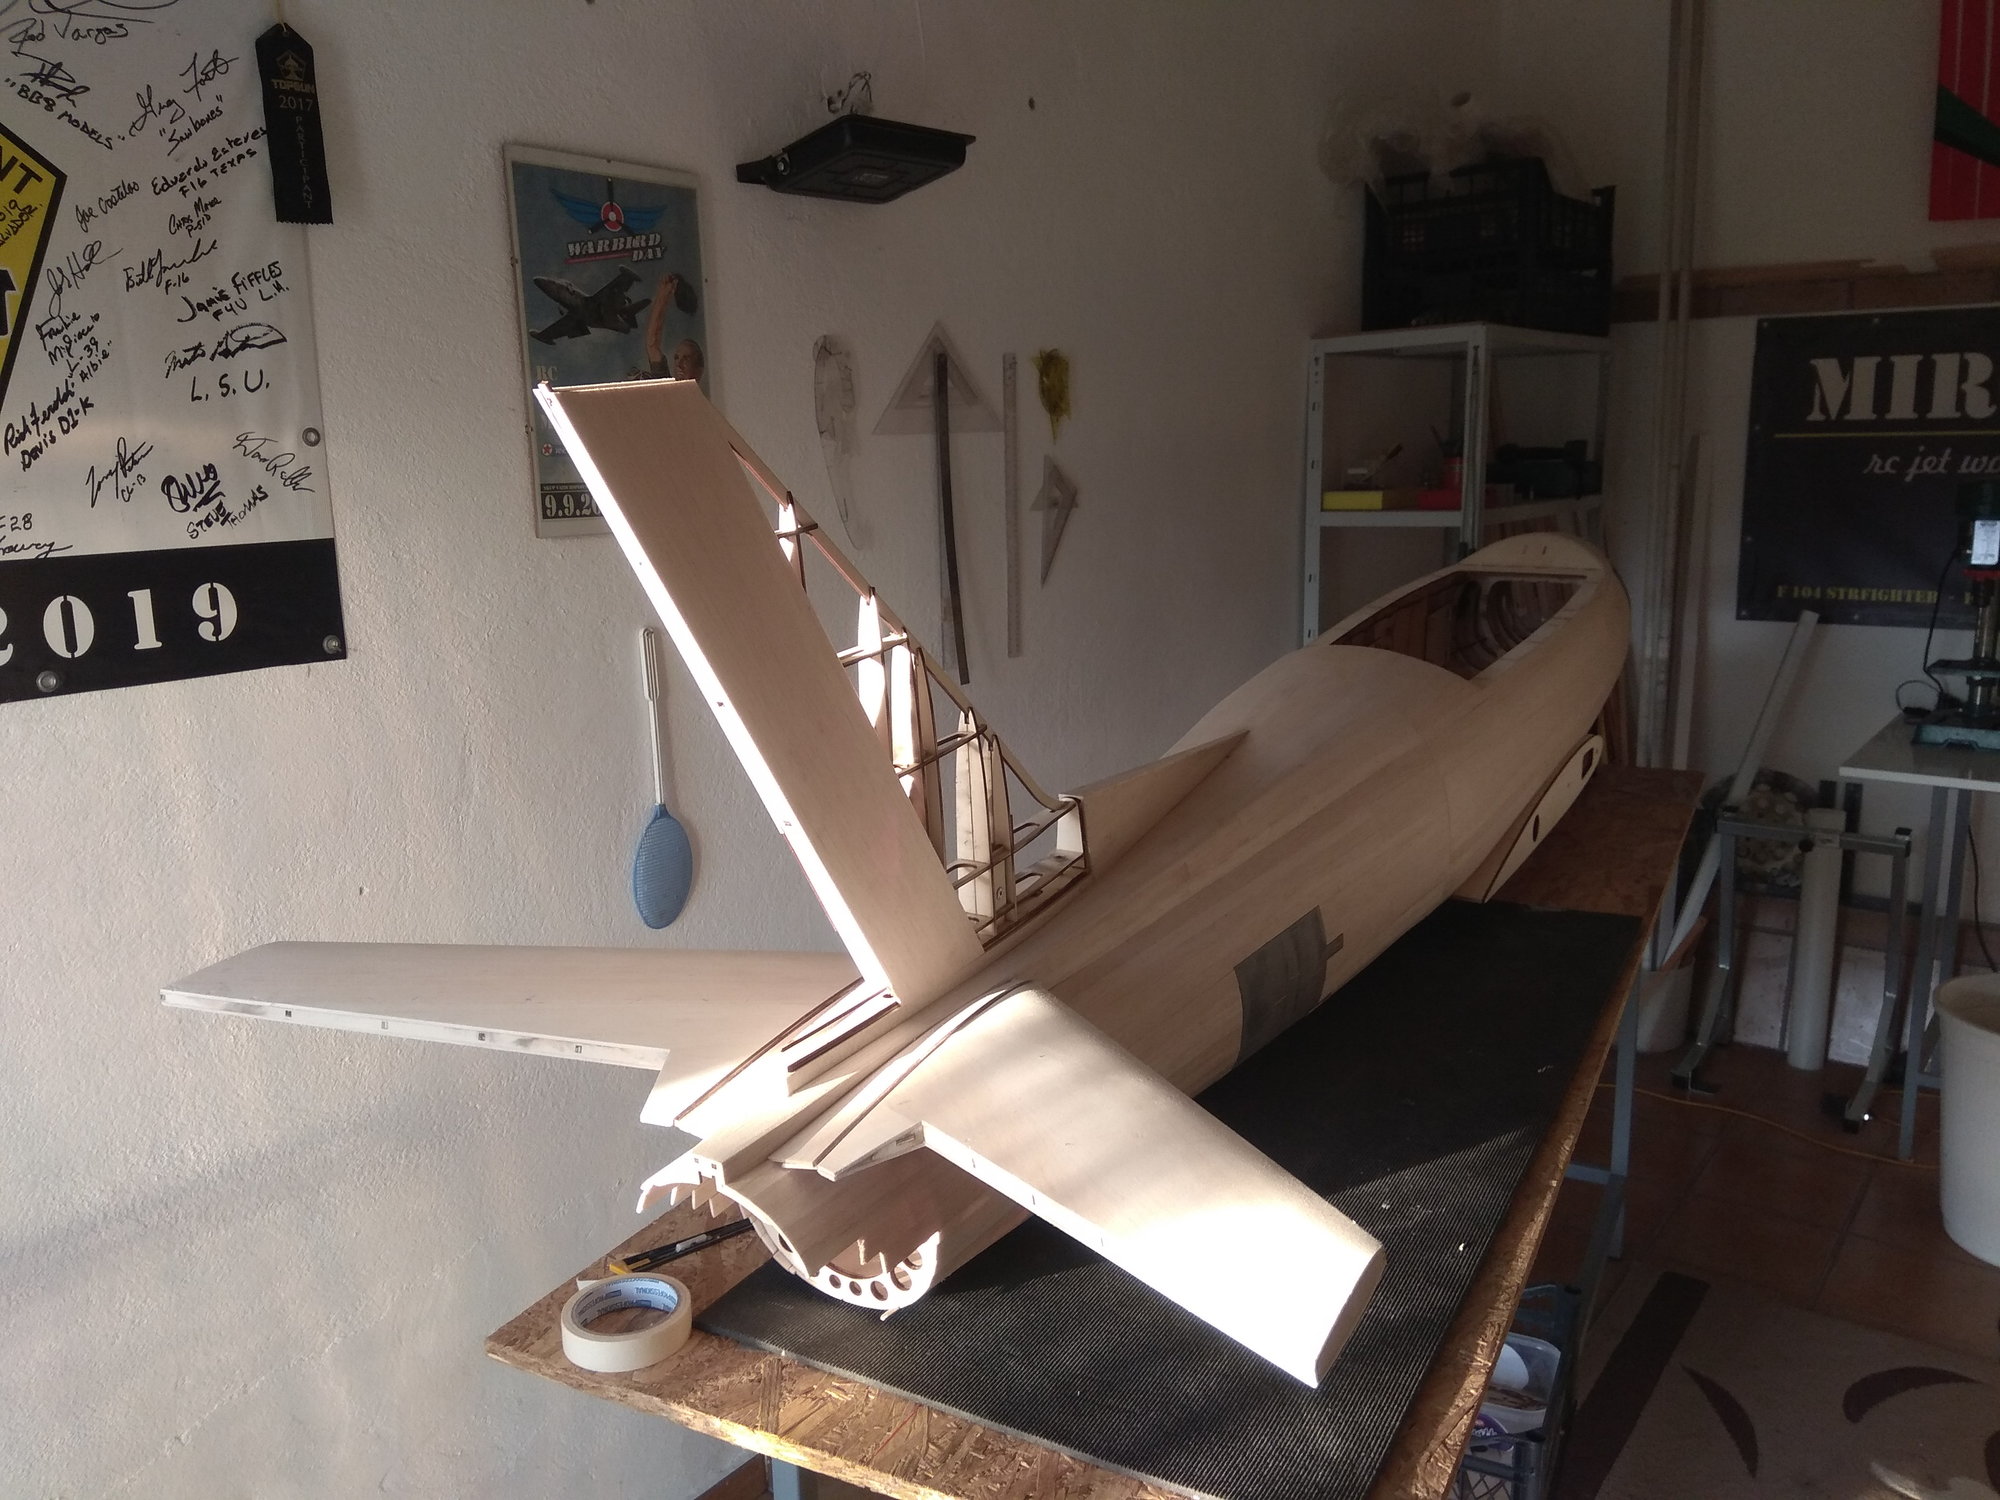
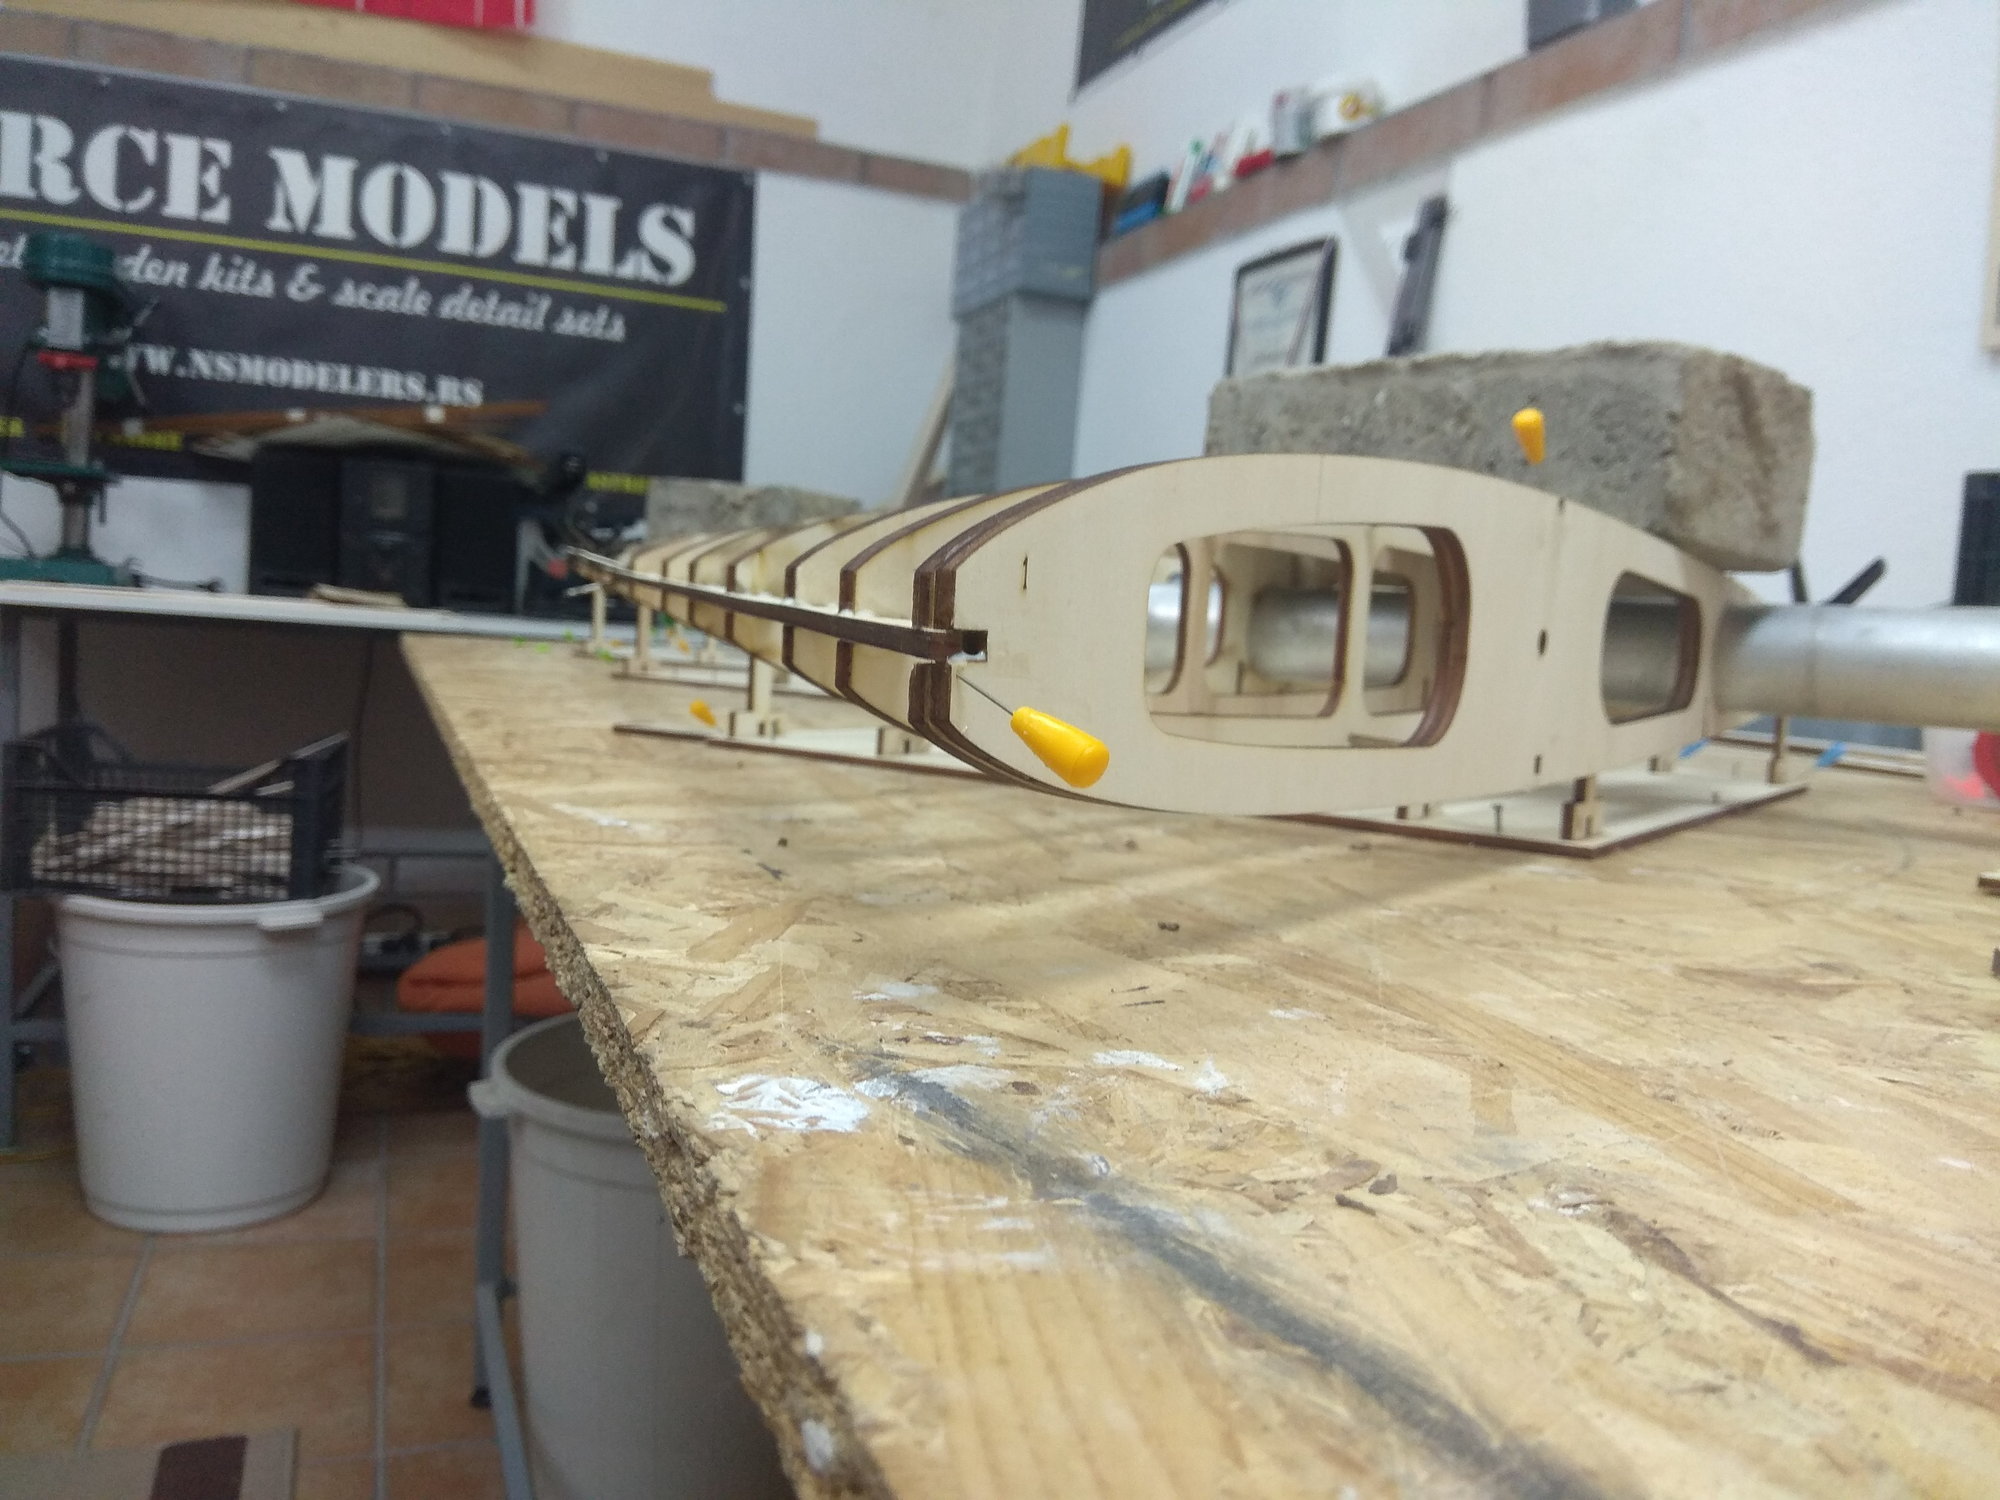
Well, the front part of the F 86 fuselage is folded and glued.
I'm going to make a fuselage in two parts, because it's a better option for me to transport.
The vertical stabilizer will also be removable.
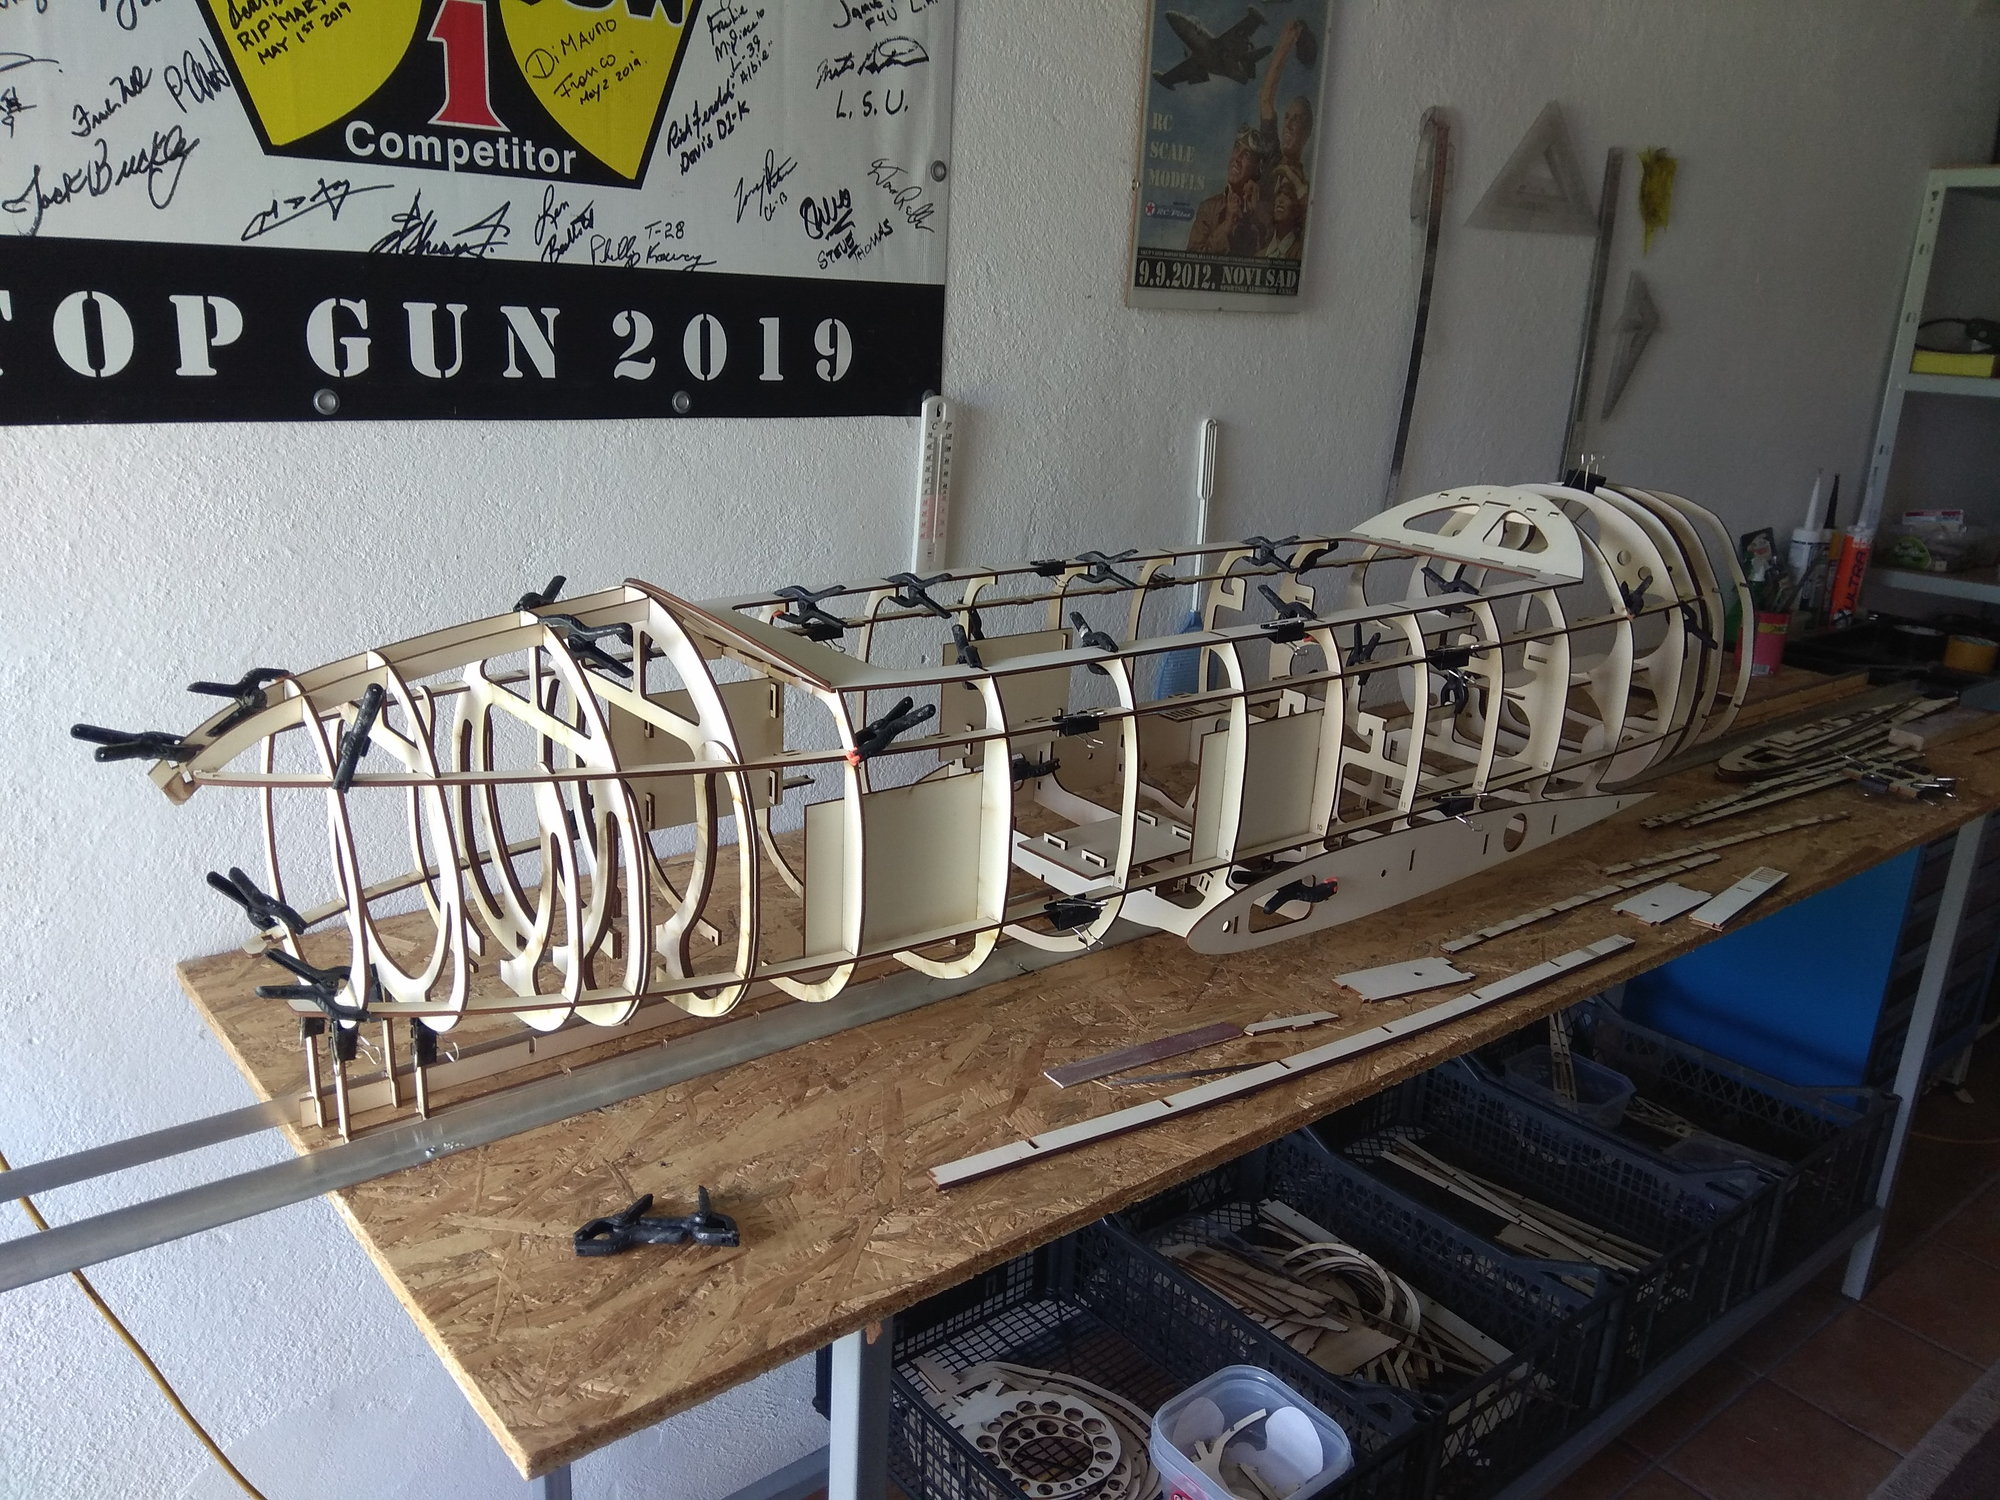
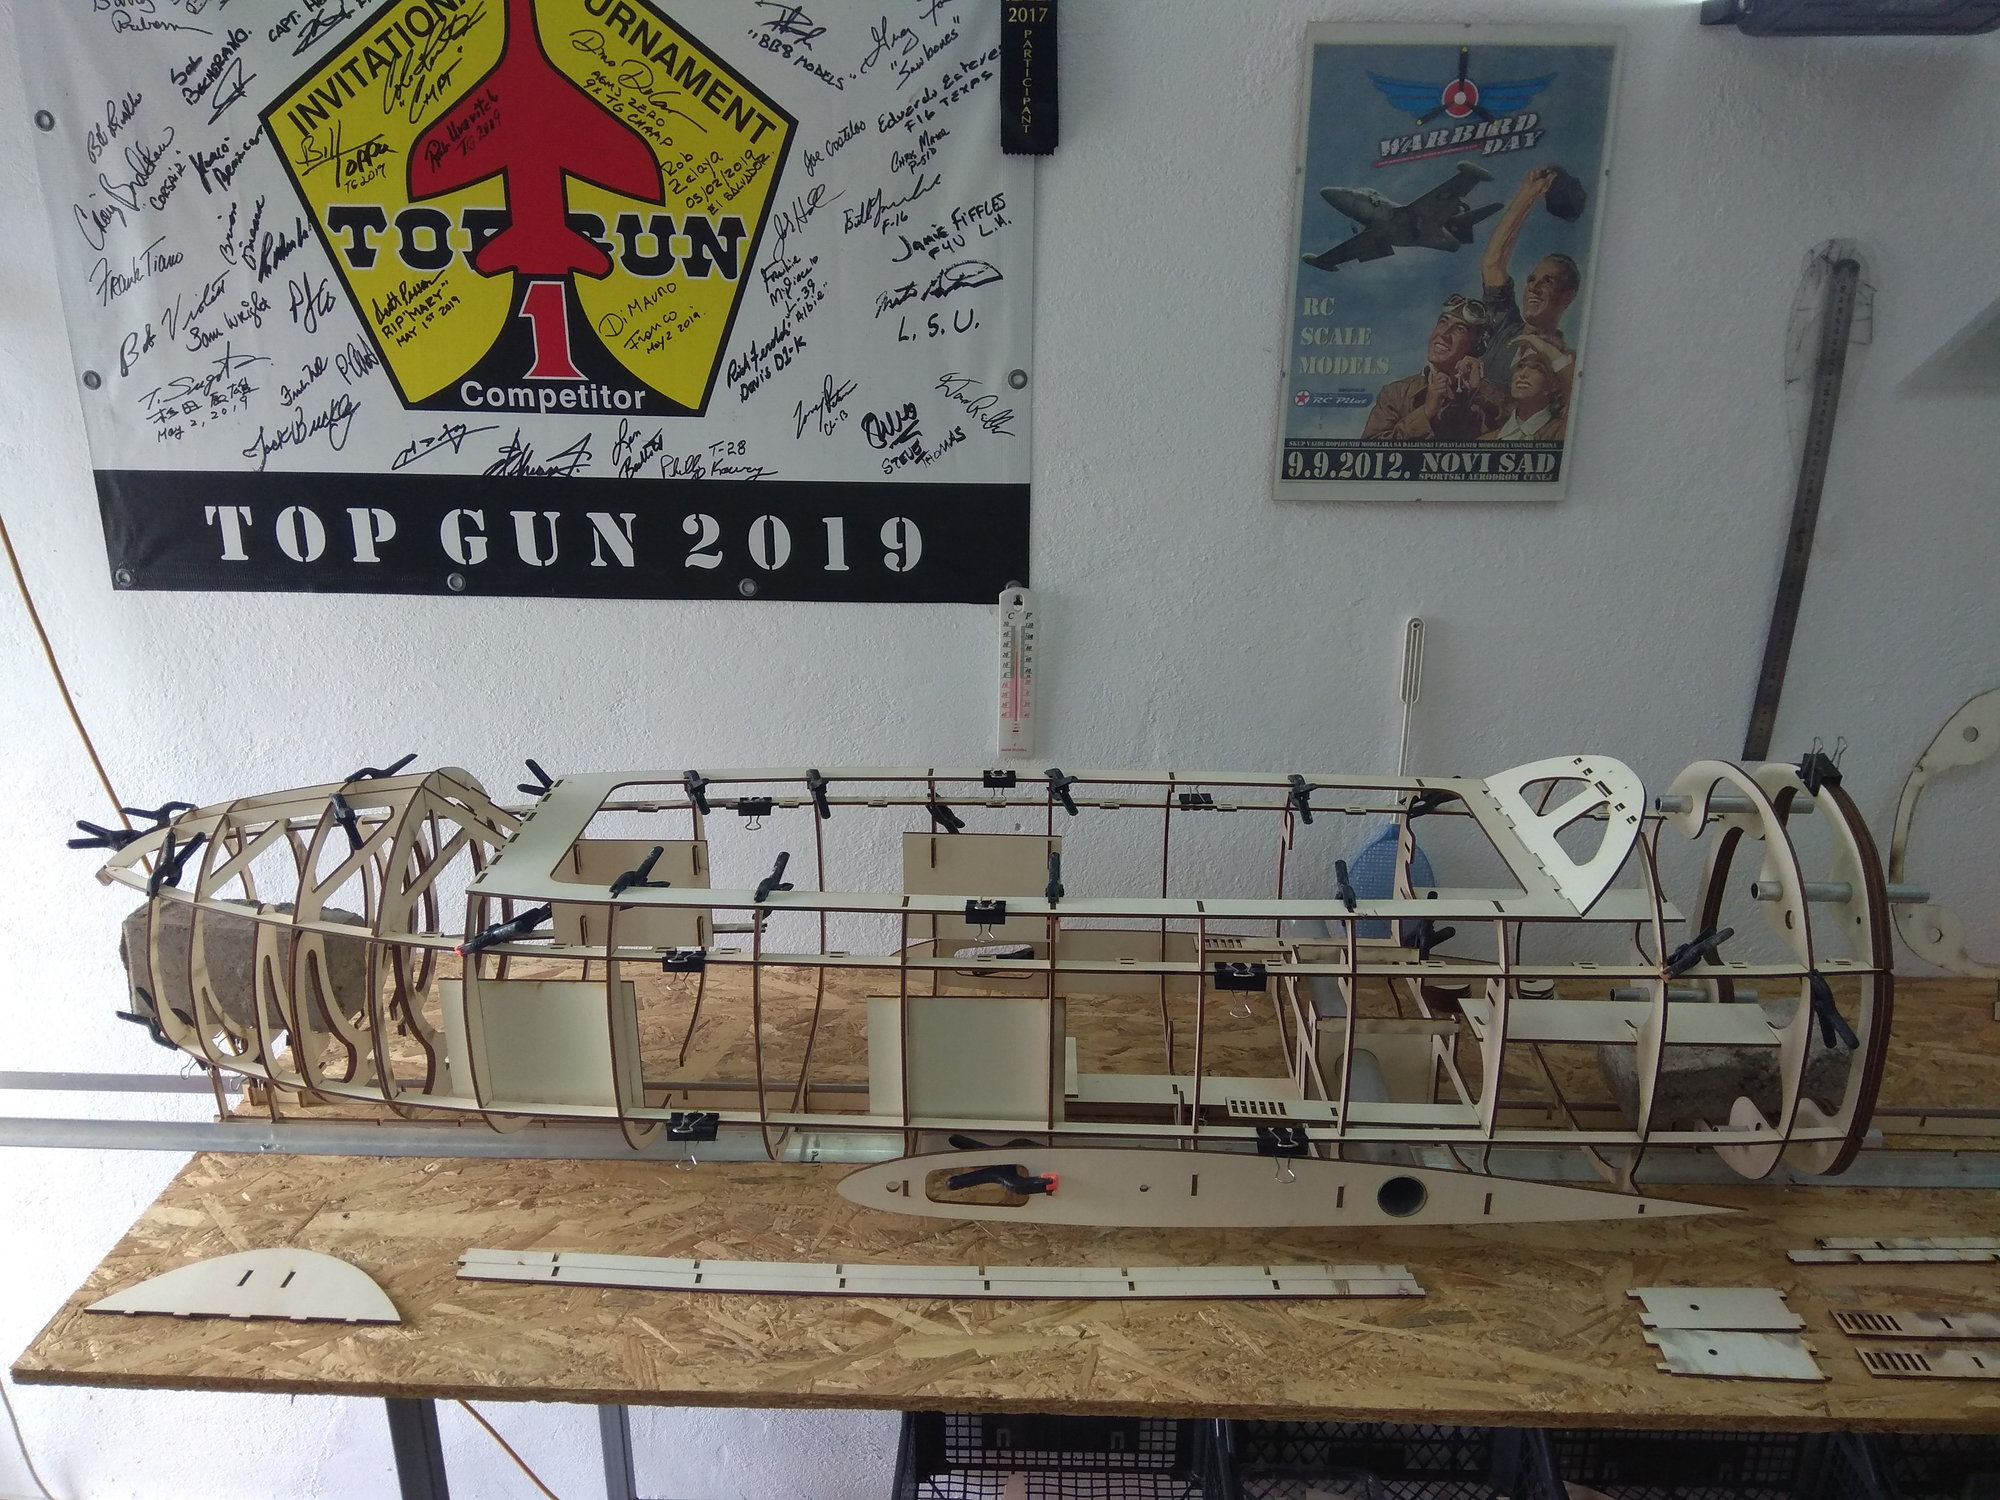
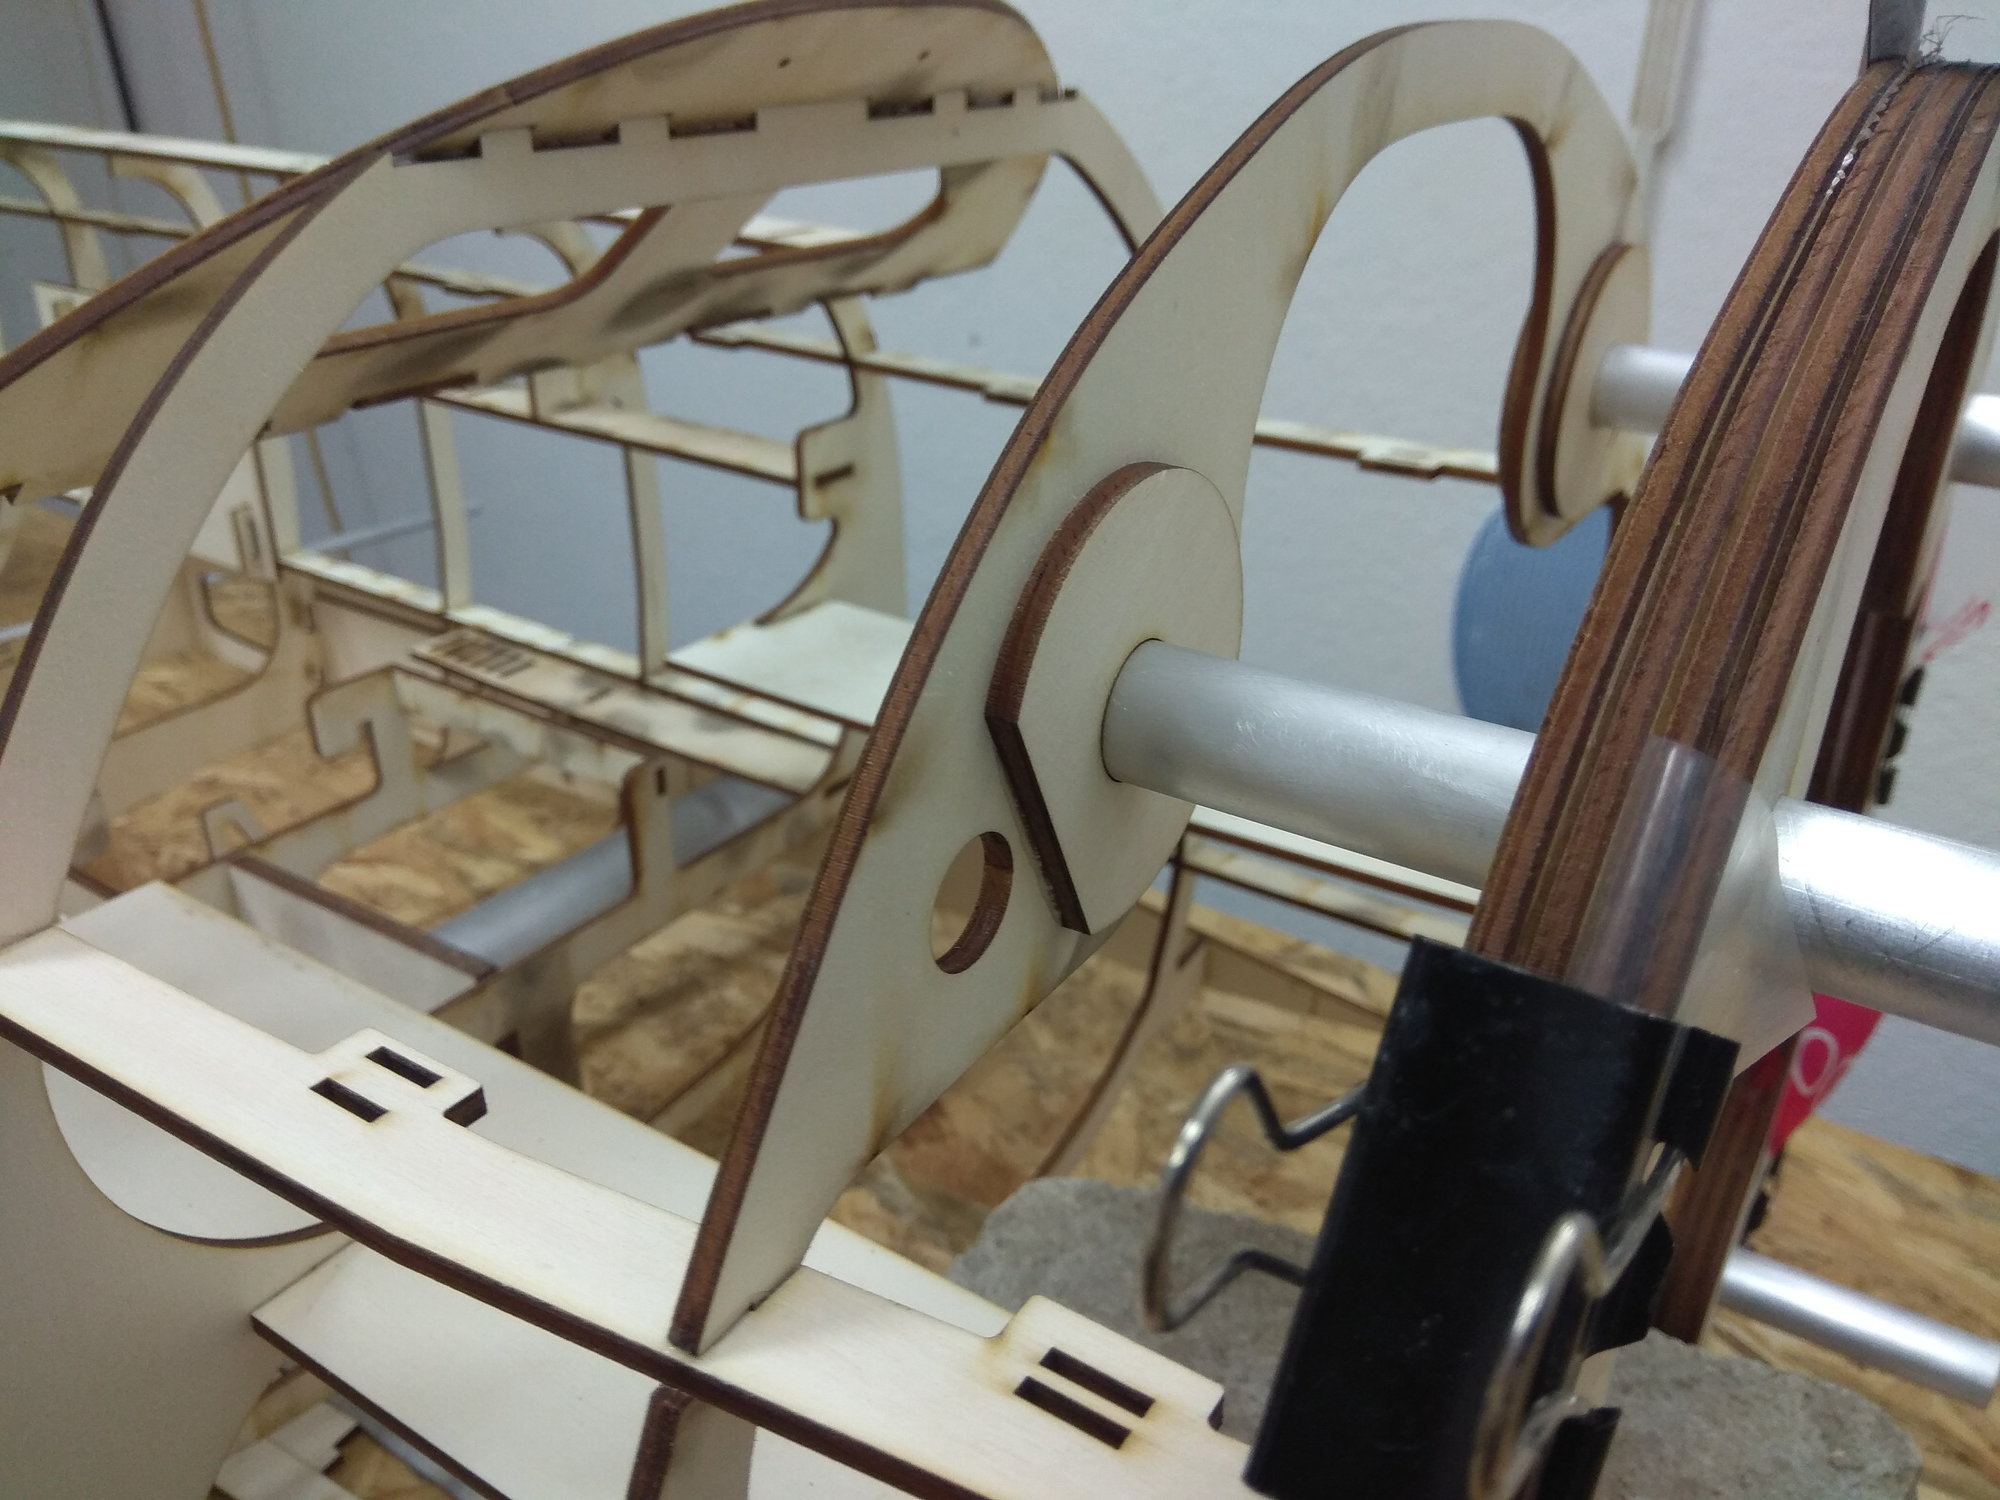
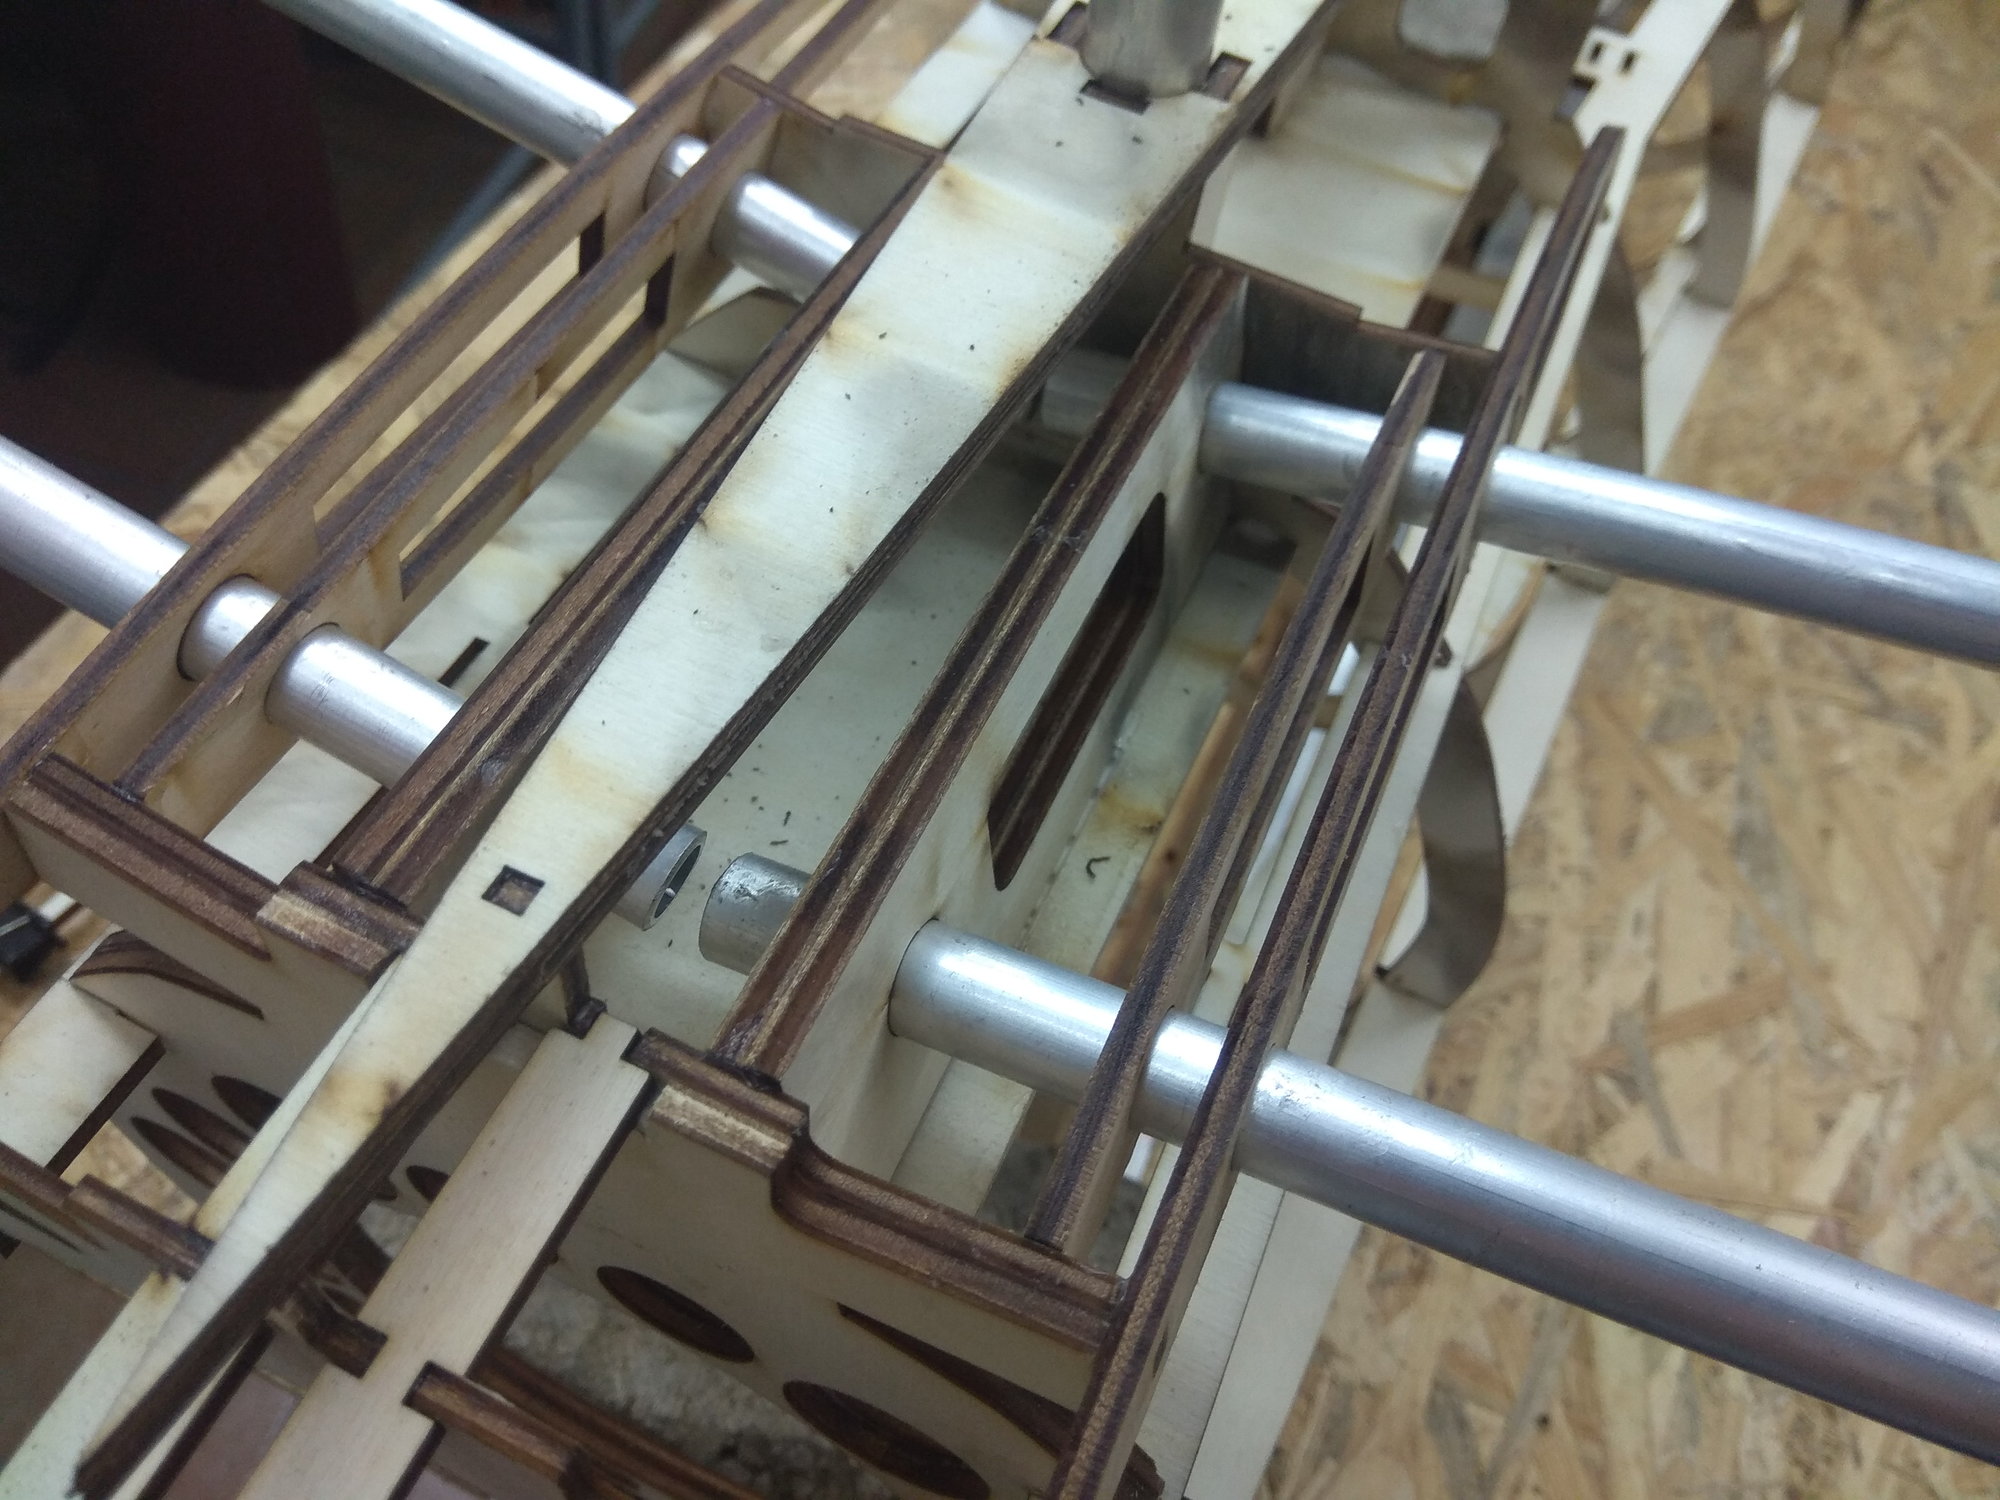
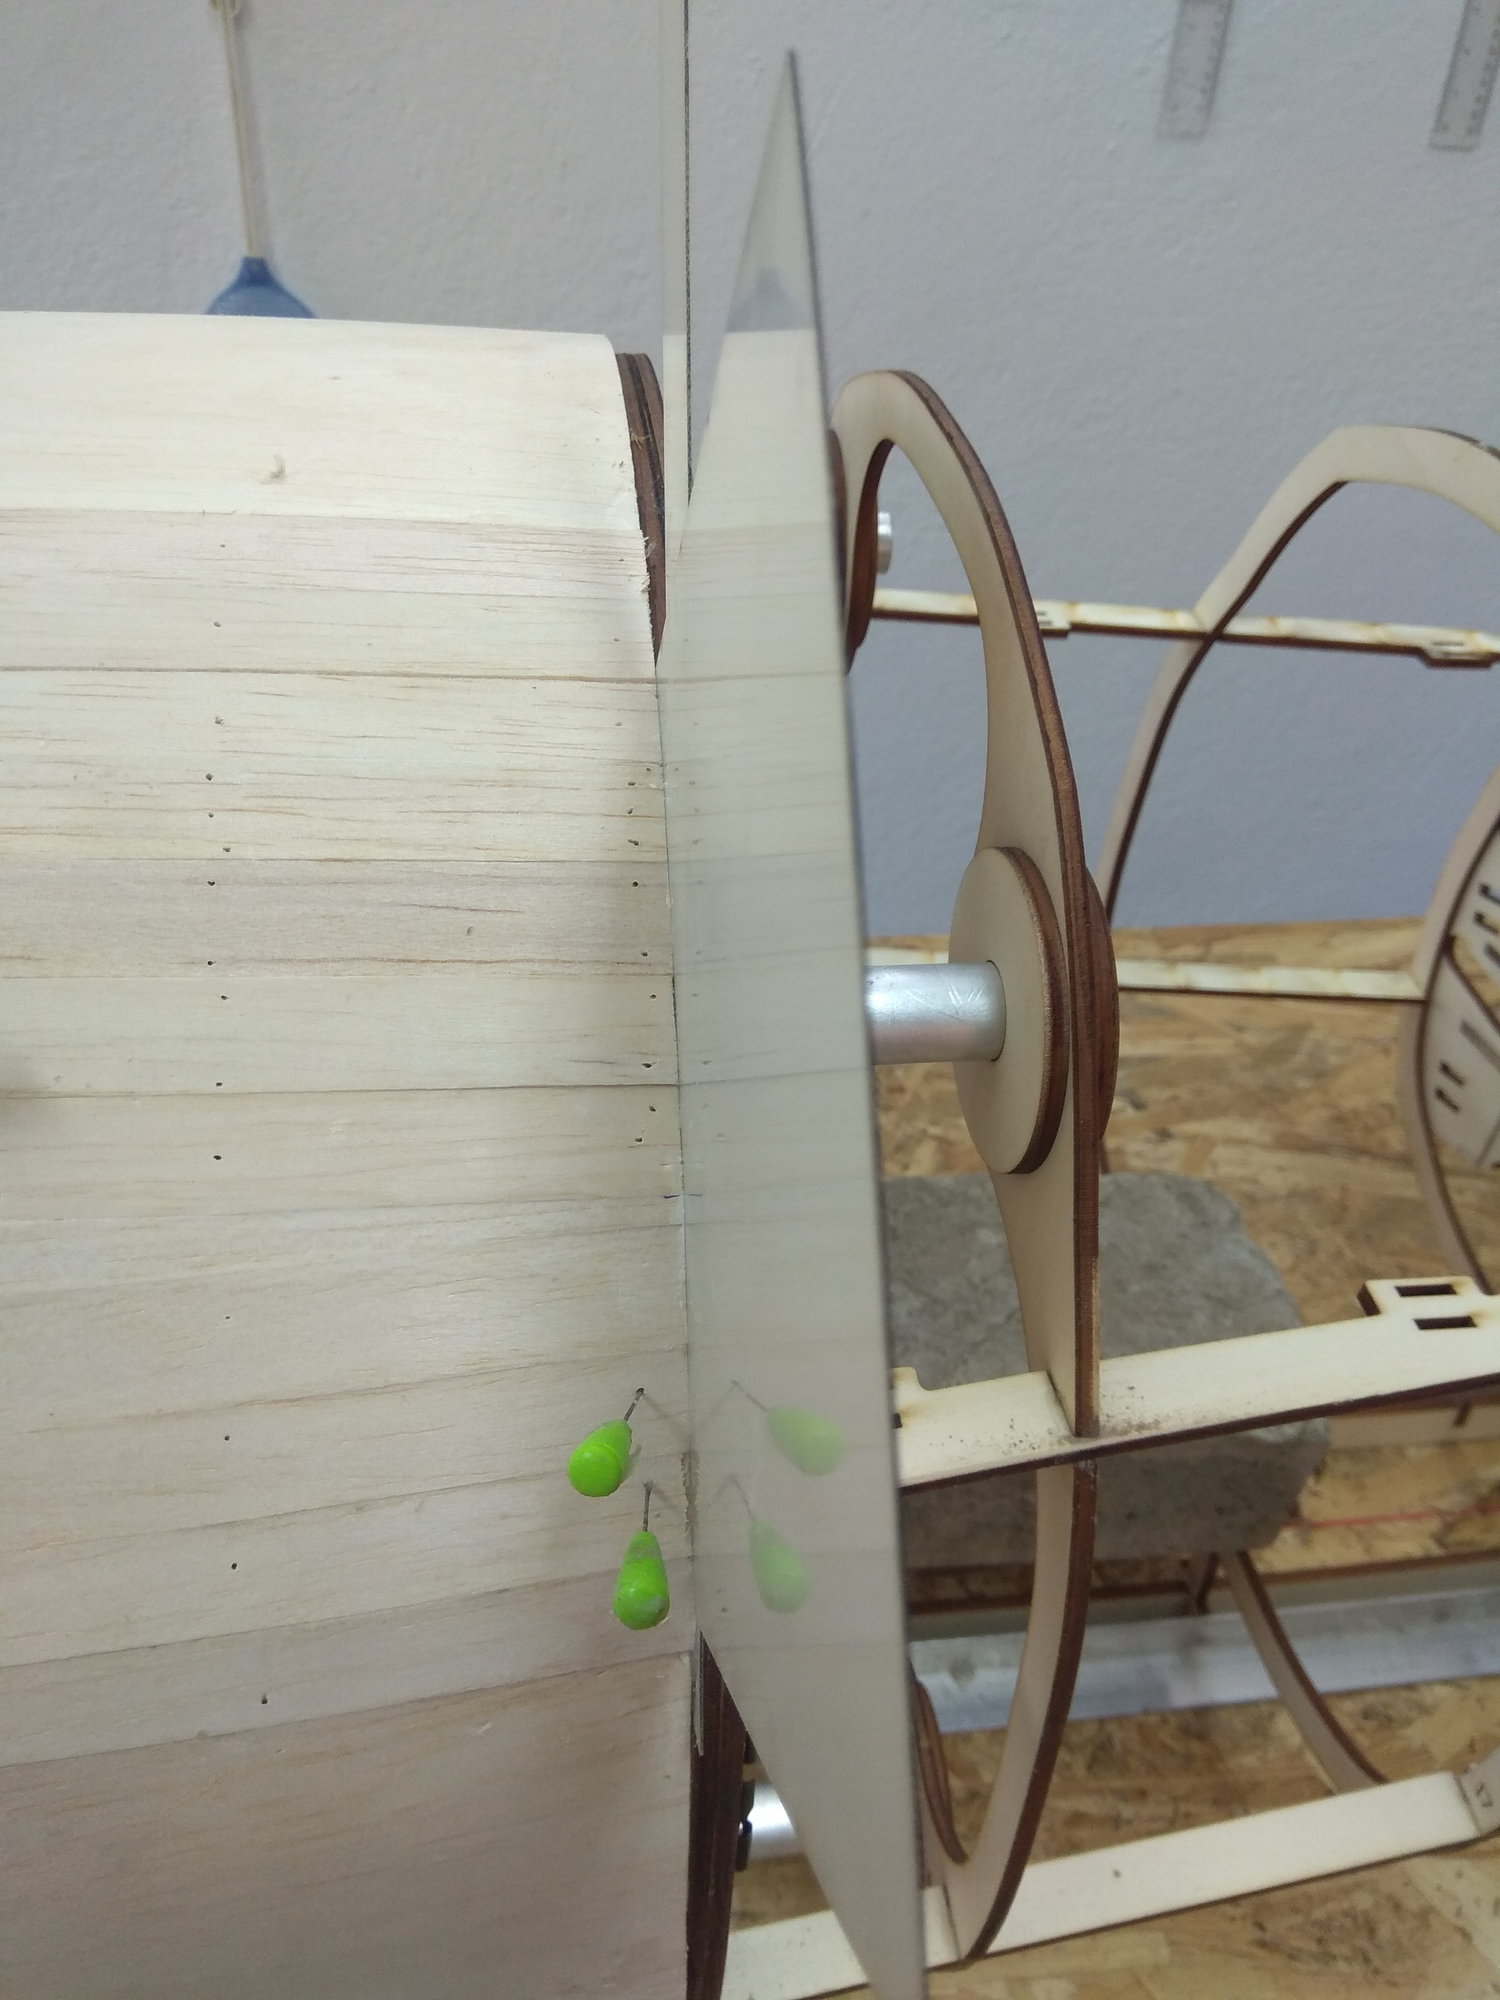
Aluminum wing joiner is placed before gluing, same like all other aluminum tubes and it must be mandatory so that the fuselage would not be twisted!!!
When I lined up all the parts, saw that they fit nicely, I glued them with white glue. I use a glue that is strong enough to work with in about 30 minutes. However, the full strength of the adhesive is after 24 hours.
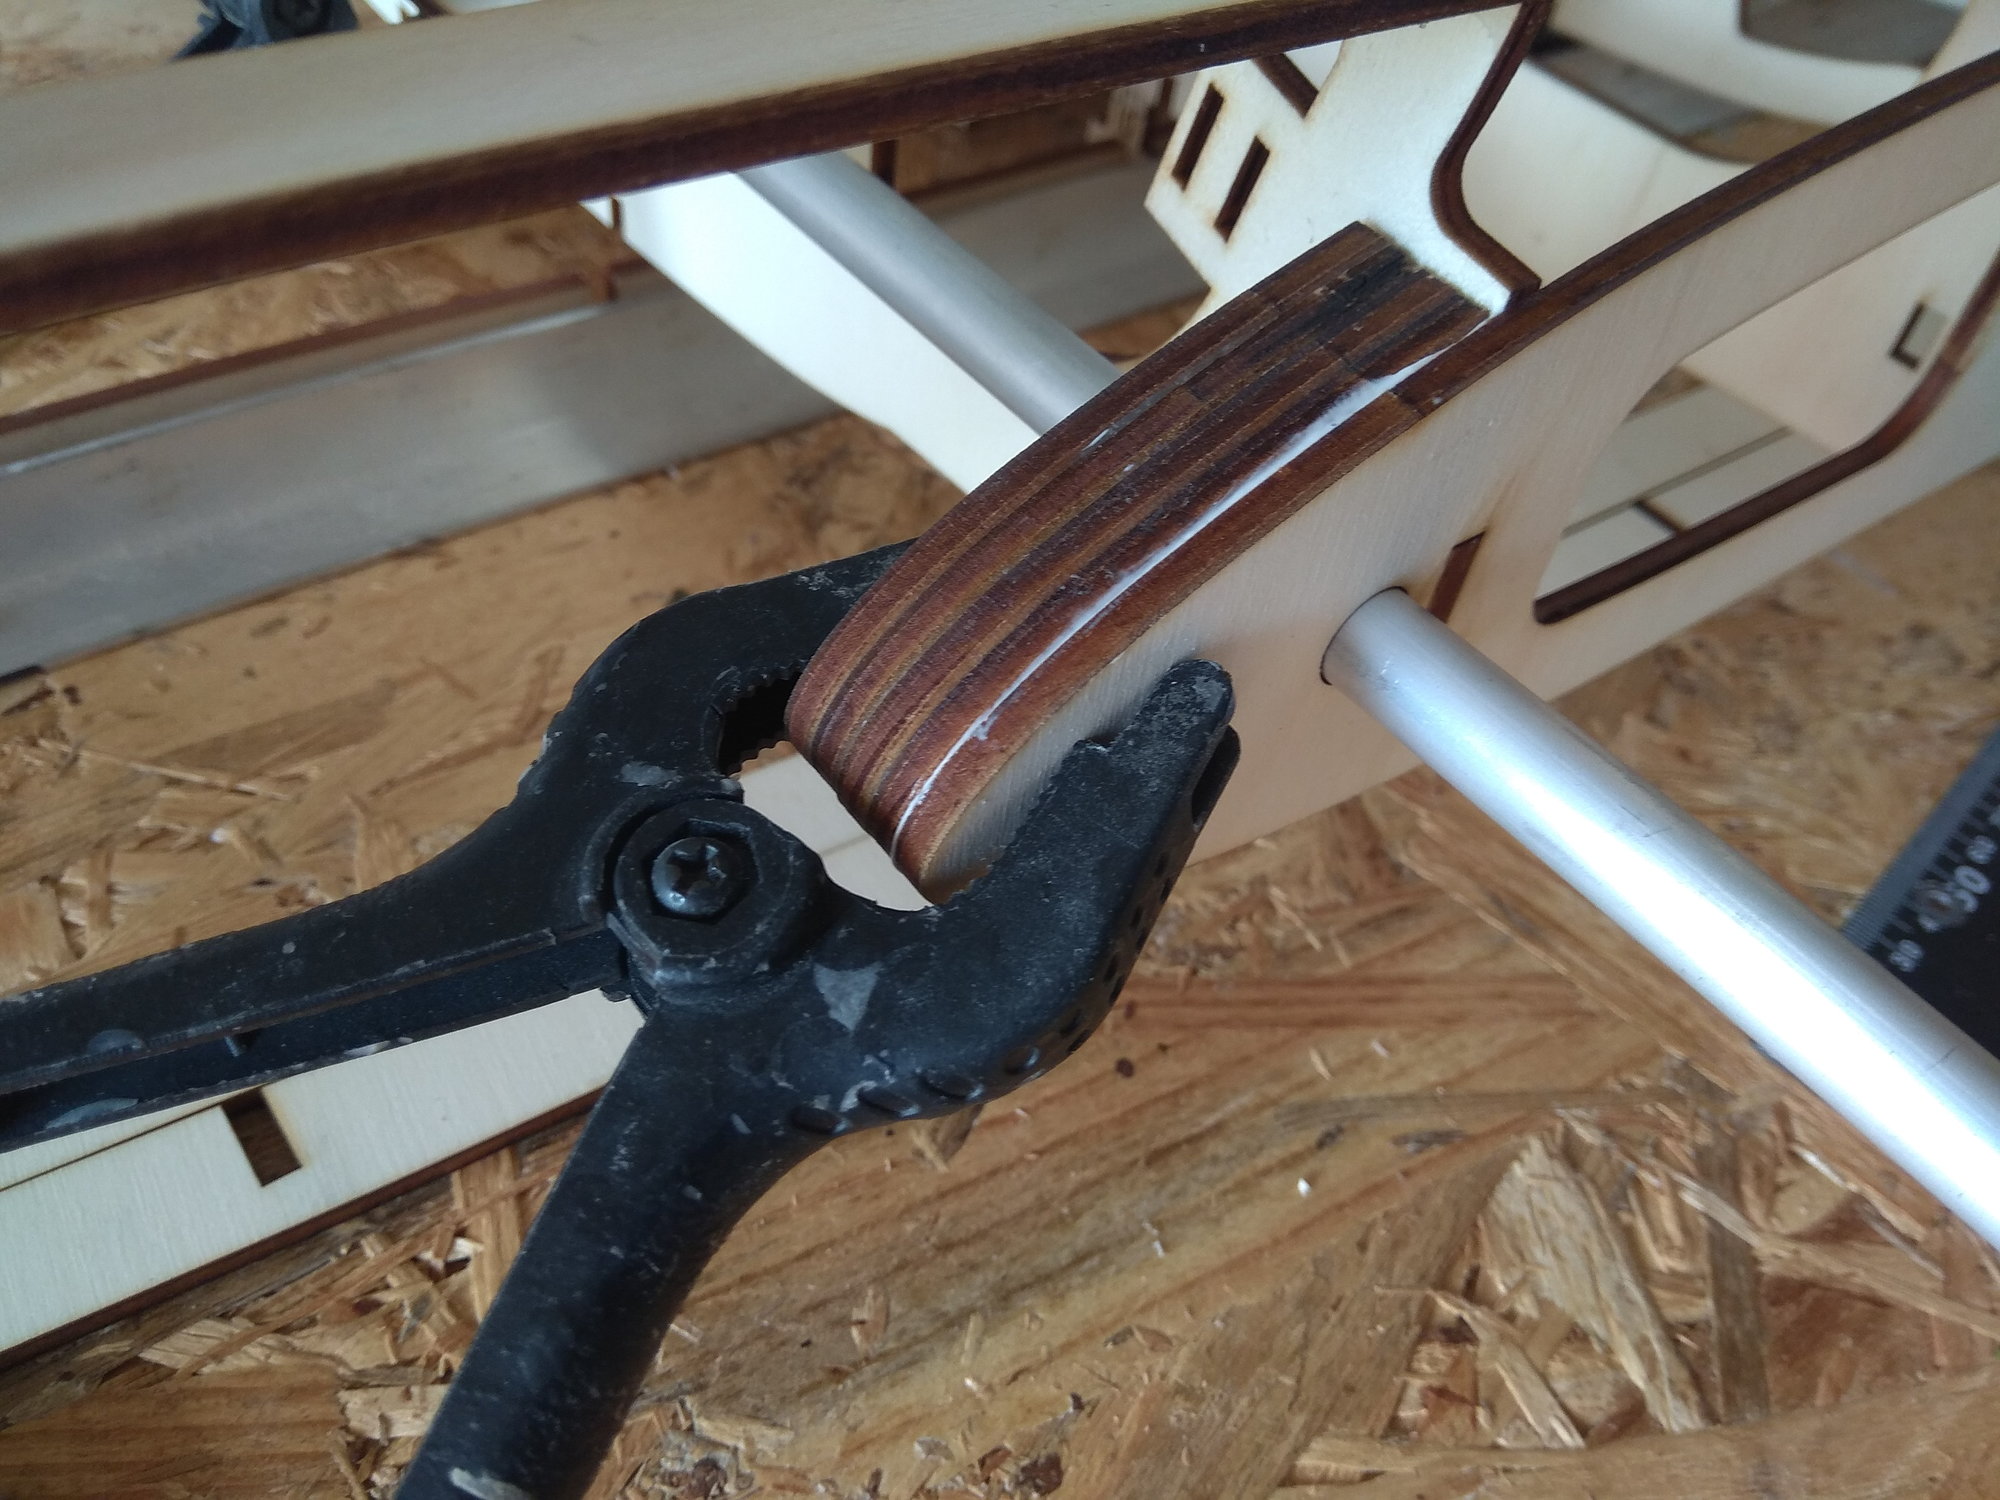


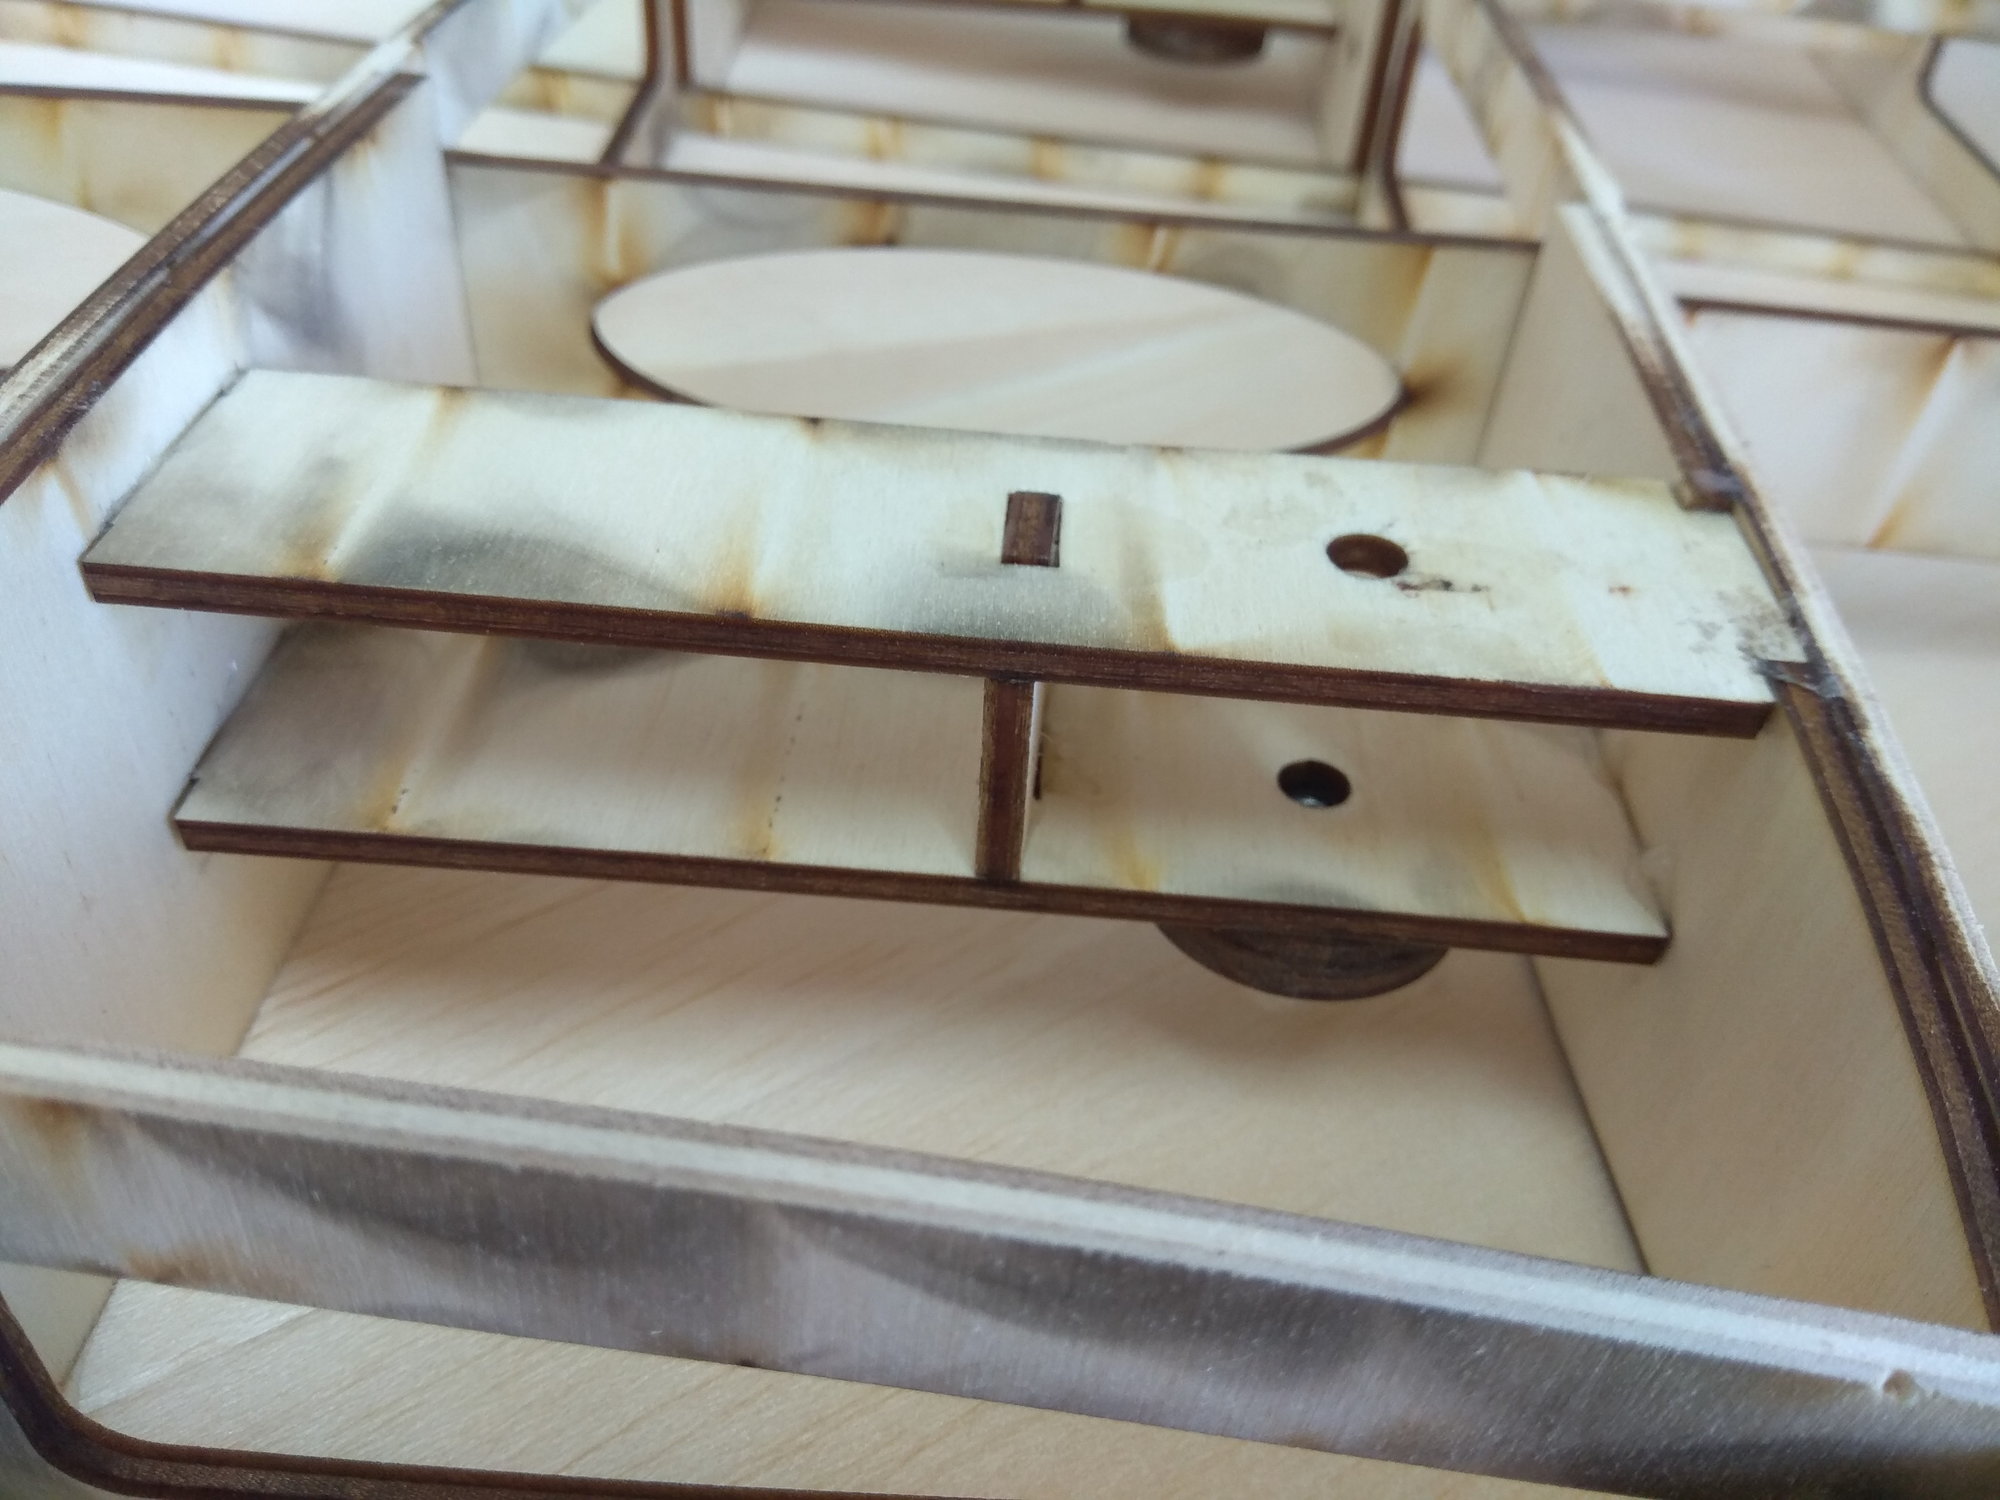
I also installed the front gear support, made of stronger plywood, but I haven't glued that part yet.
Tomorrow I will start working on the rear part of the fuselage...
P.S. Bricks are not part of the wooden kit...
I'm going to make a fuselage in two parts, because it's a better option for me to transport.
The vertical stabilizer will also be removable.
Aluminum wing joiner is placed before gluing, same like all other aluminum tubes and it must be mandatory so that the fuselage would not be twisted!!!
When I lined up all the parts, saw that they fit nicely, I glued them with white glue. I use a glue that is strong enough to work with in about 30 minutes. However, the full strength of the adhesive is after 24 hours.
I also installed the front gear support, made of stronger plywood, but I haven't glued that part yet.
Tomorrow I will start working on the rear part of the fuselage...
P.S. Bricks are not part of the wooden kit...
07-21-2022, 02:19 AM
#3
Thread Starter
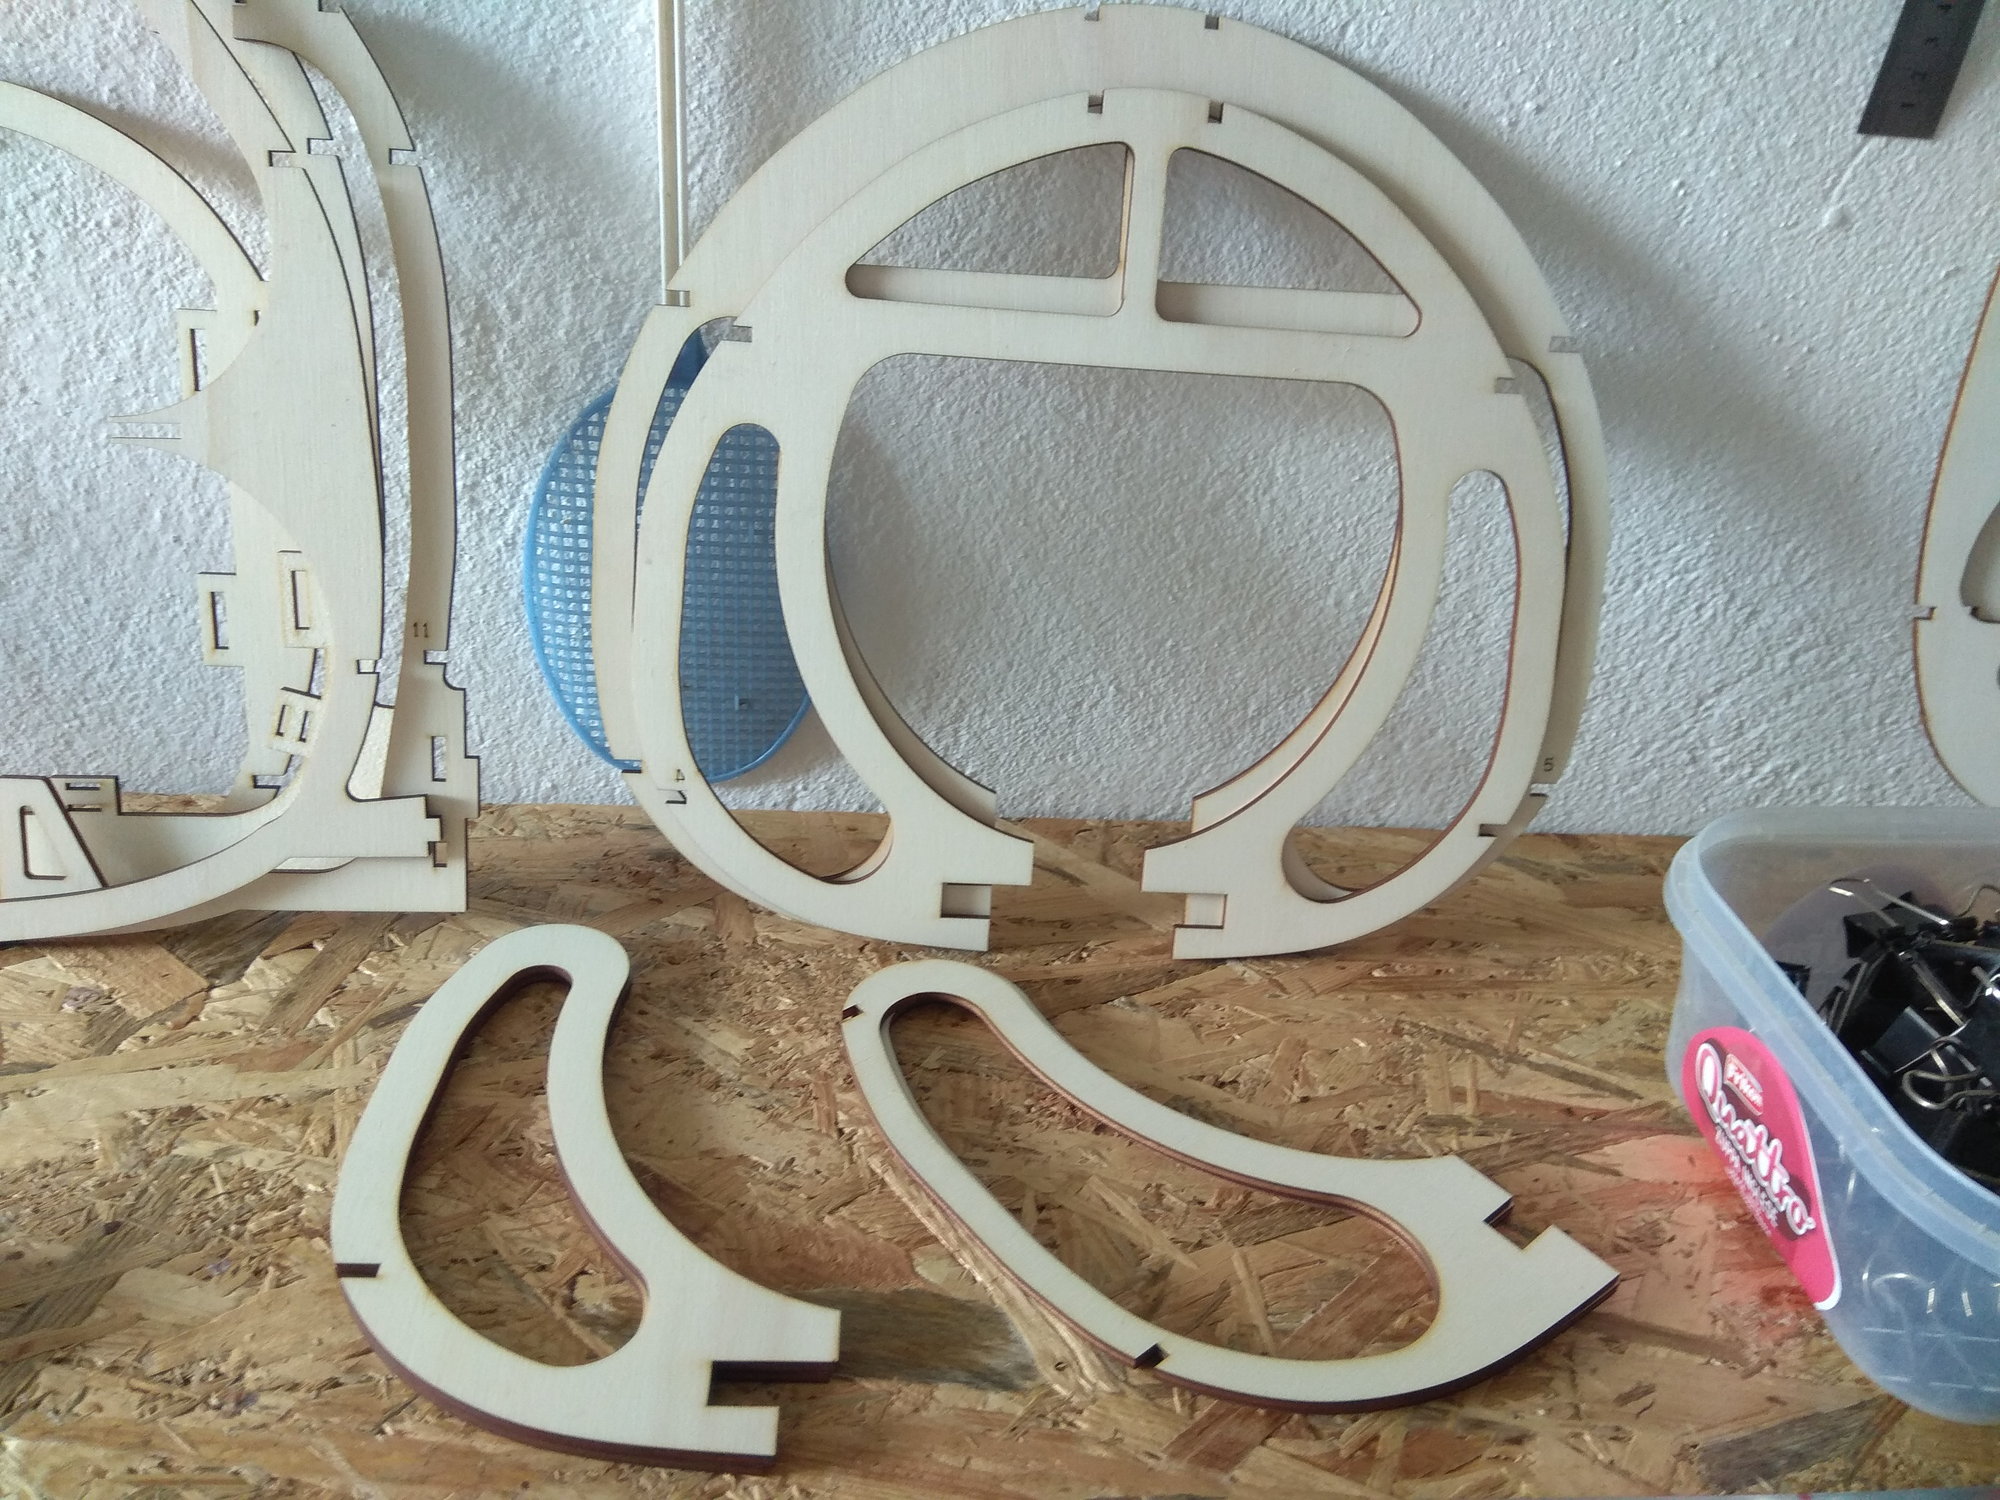
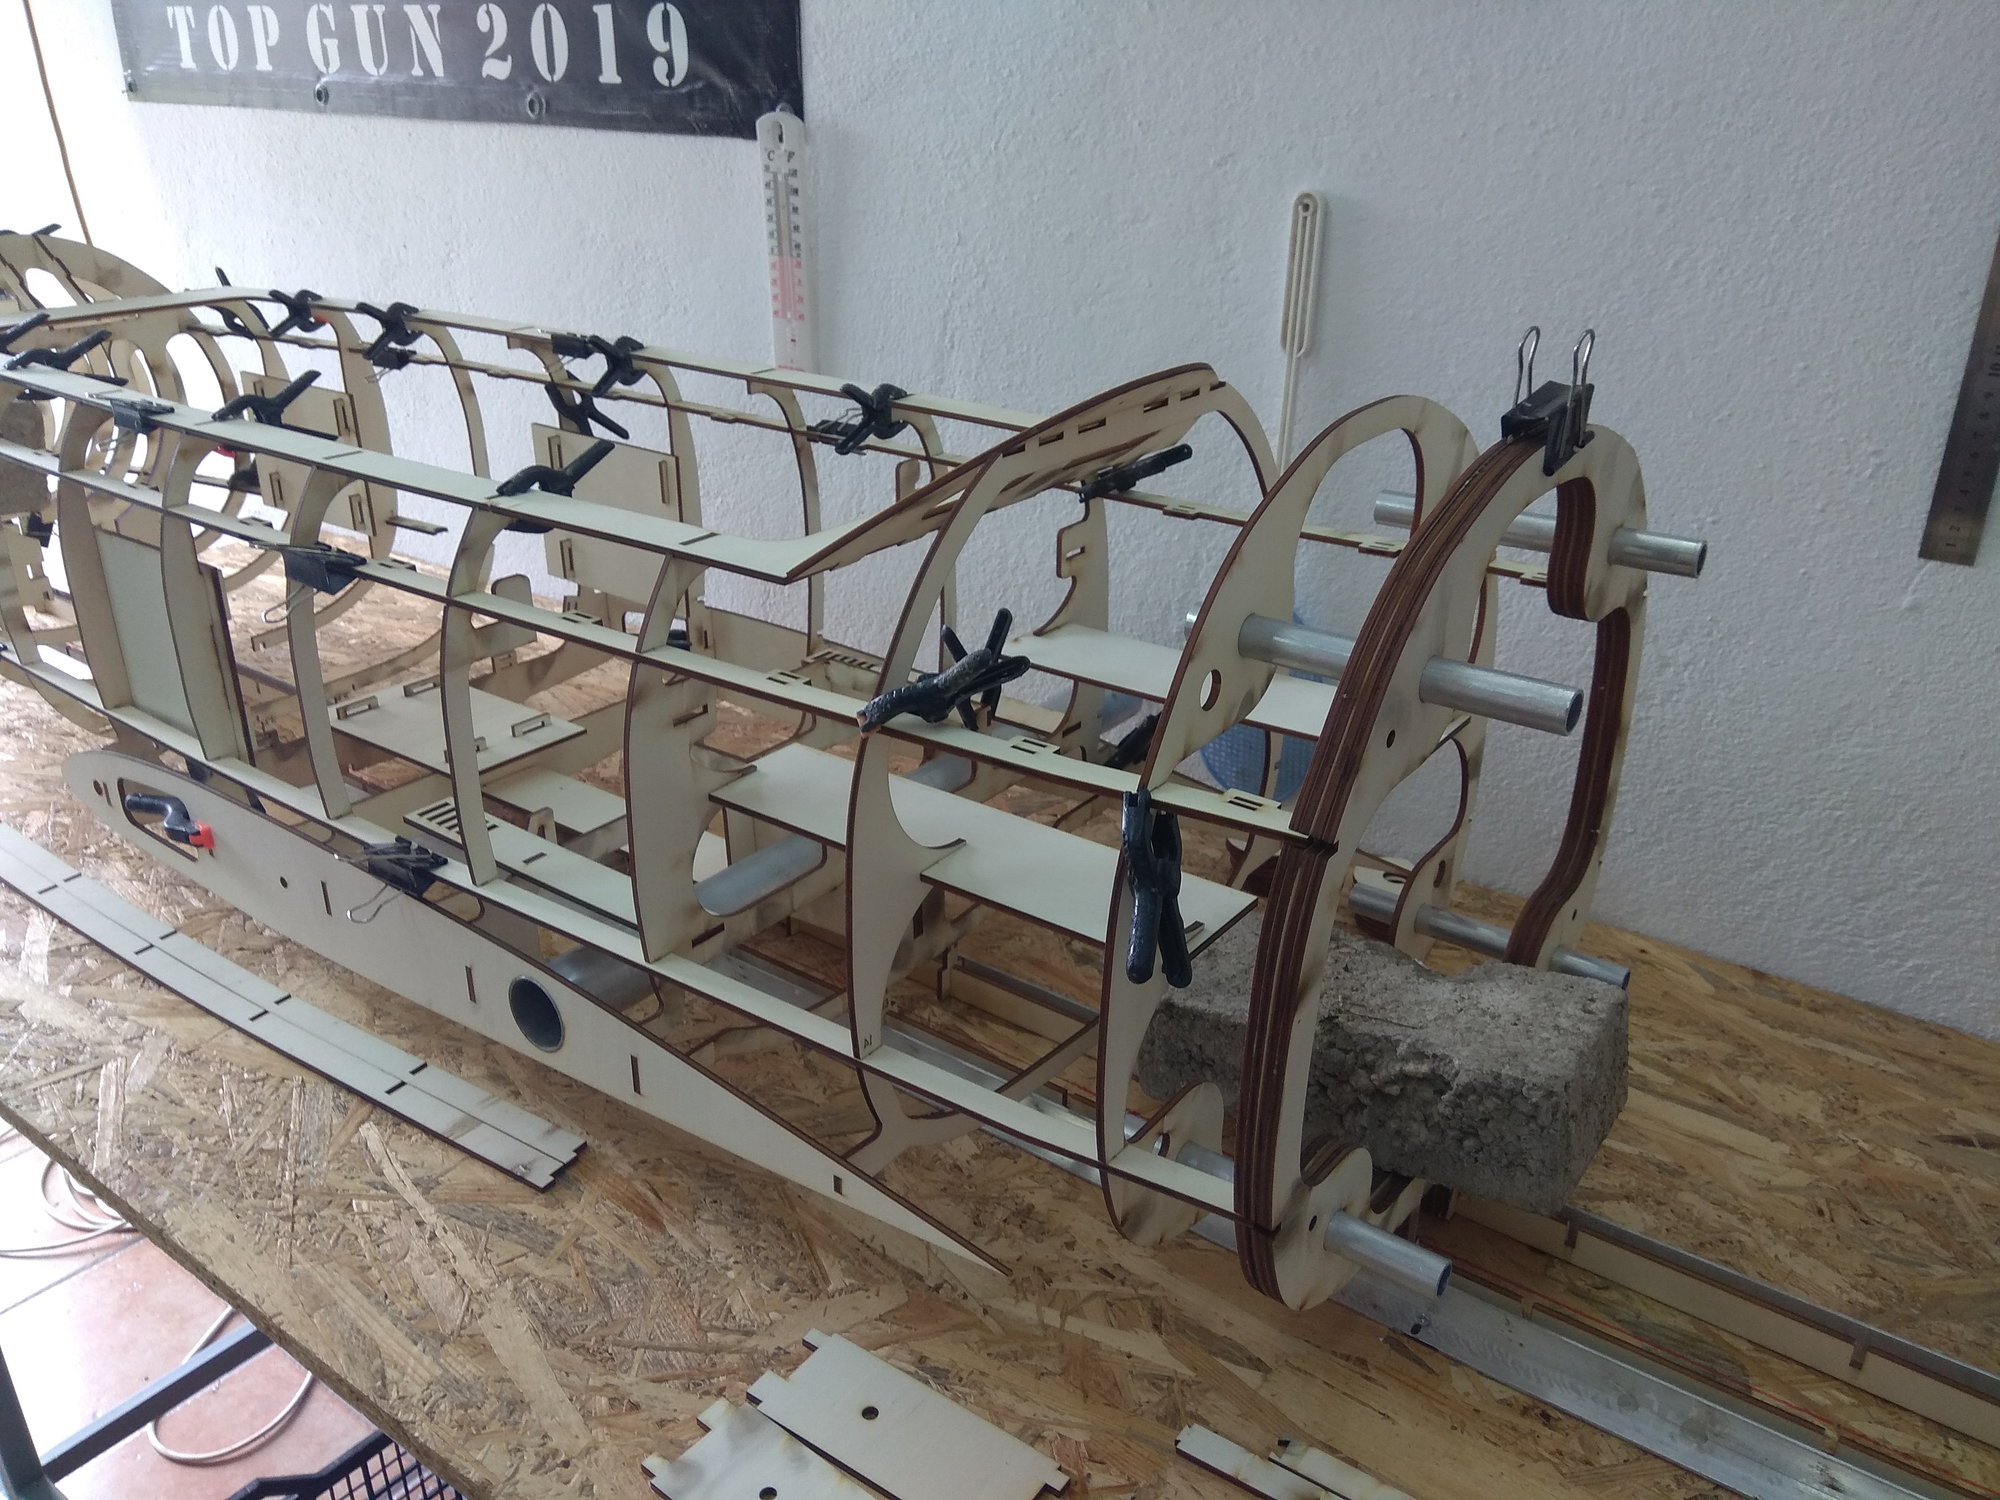
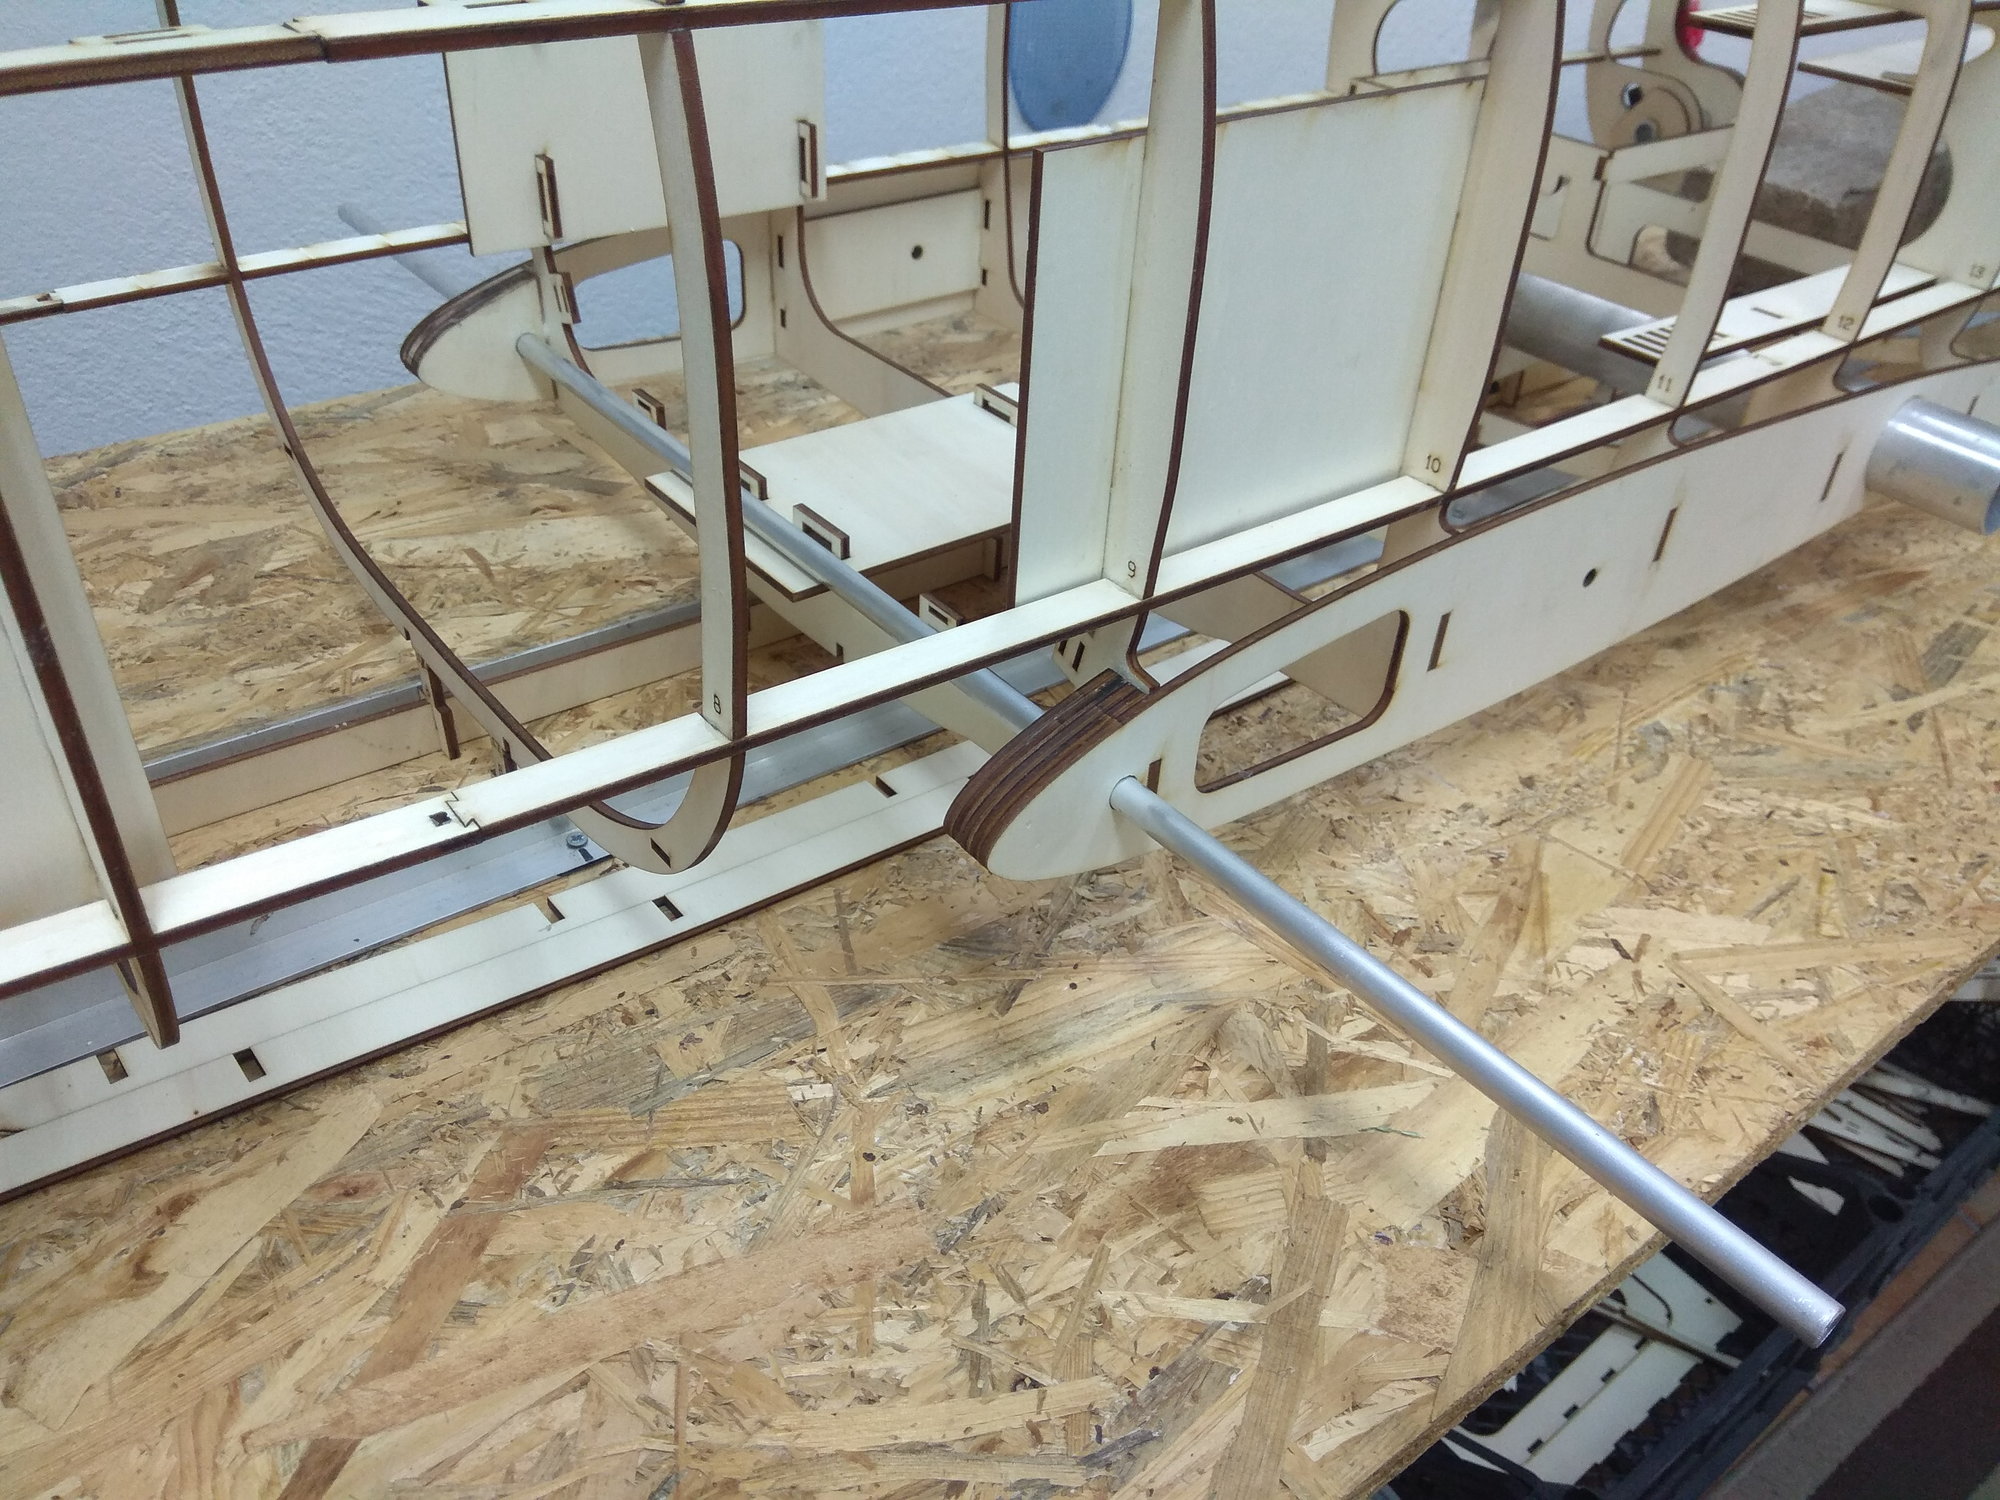
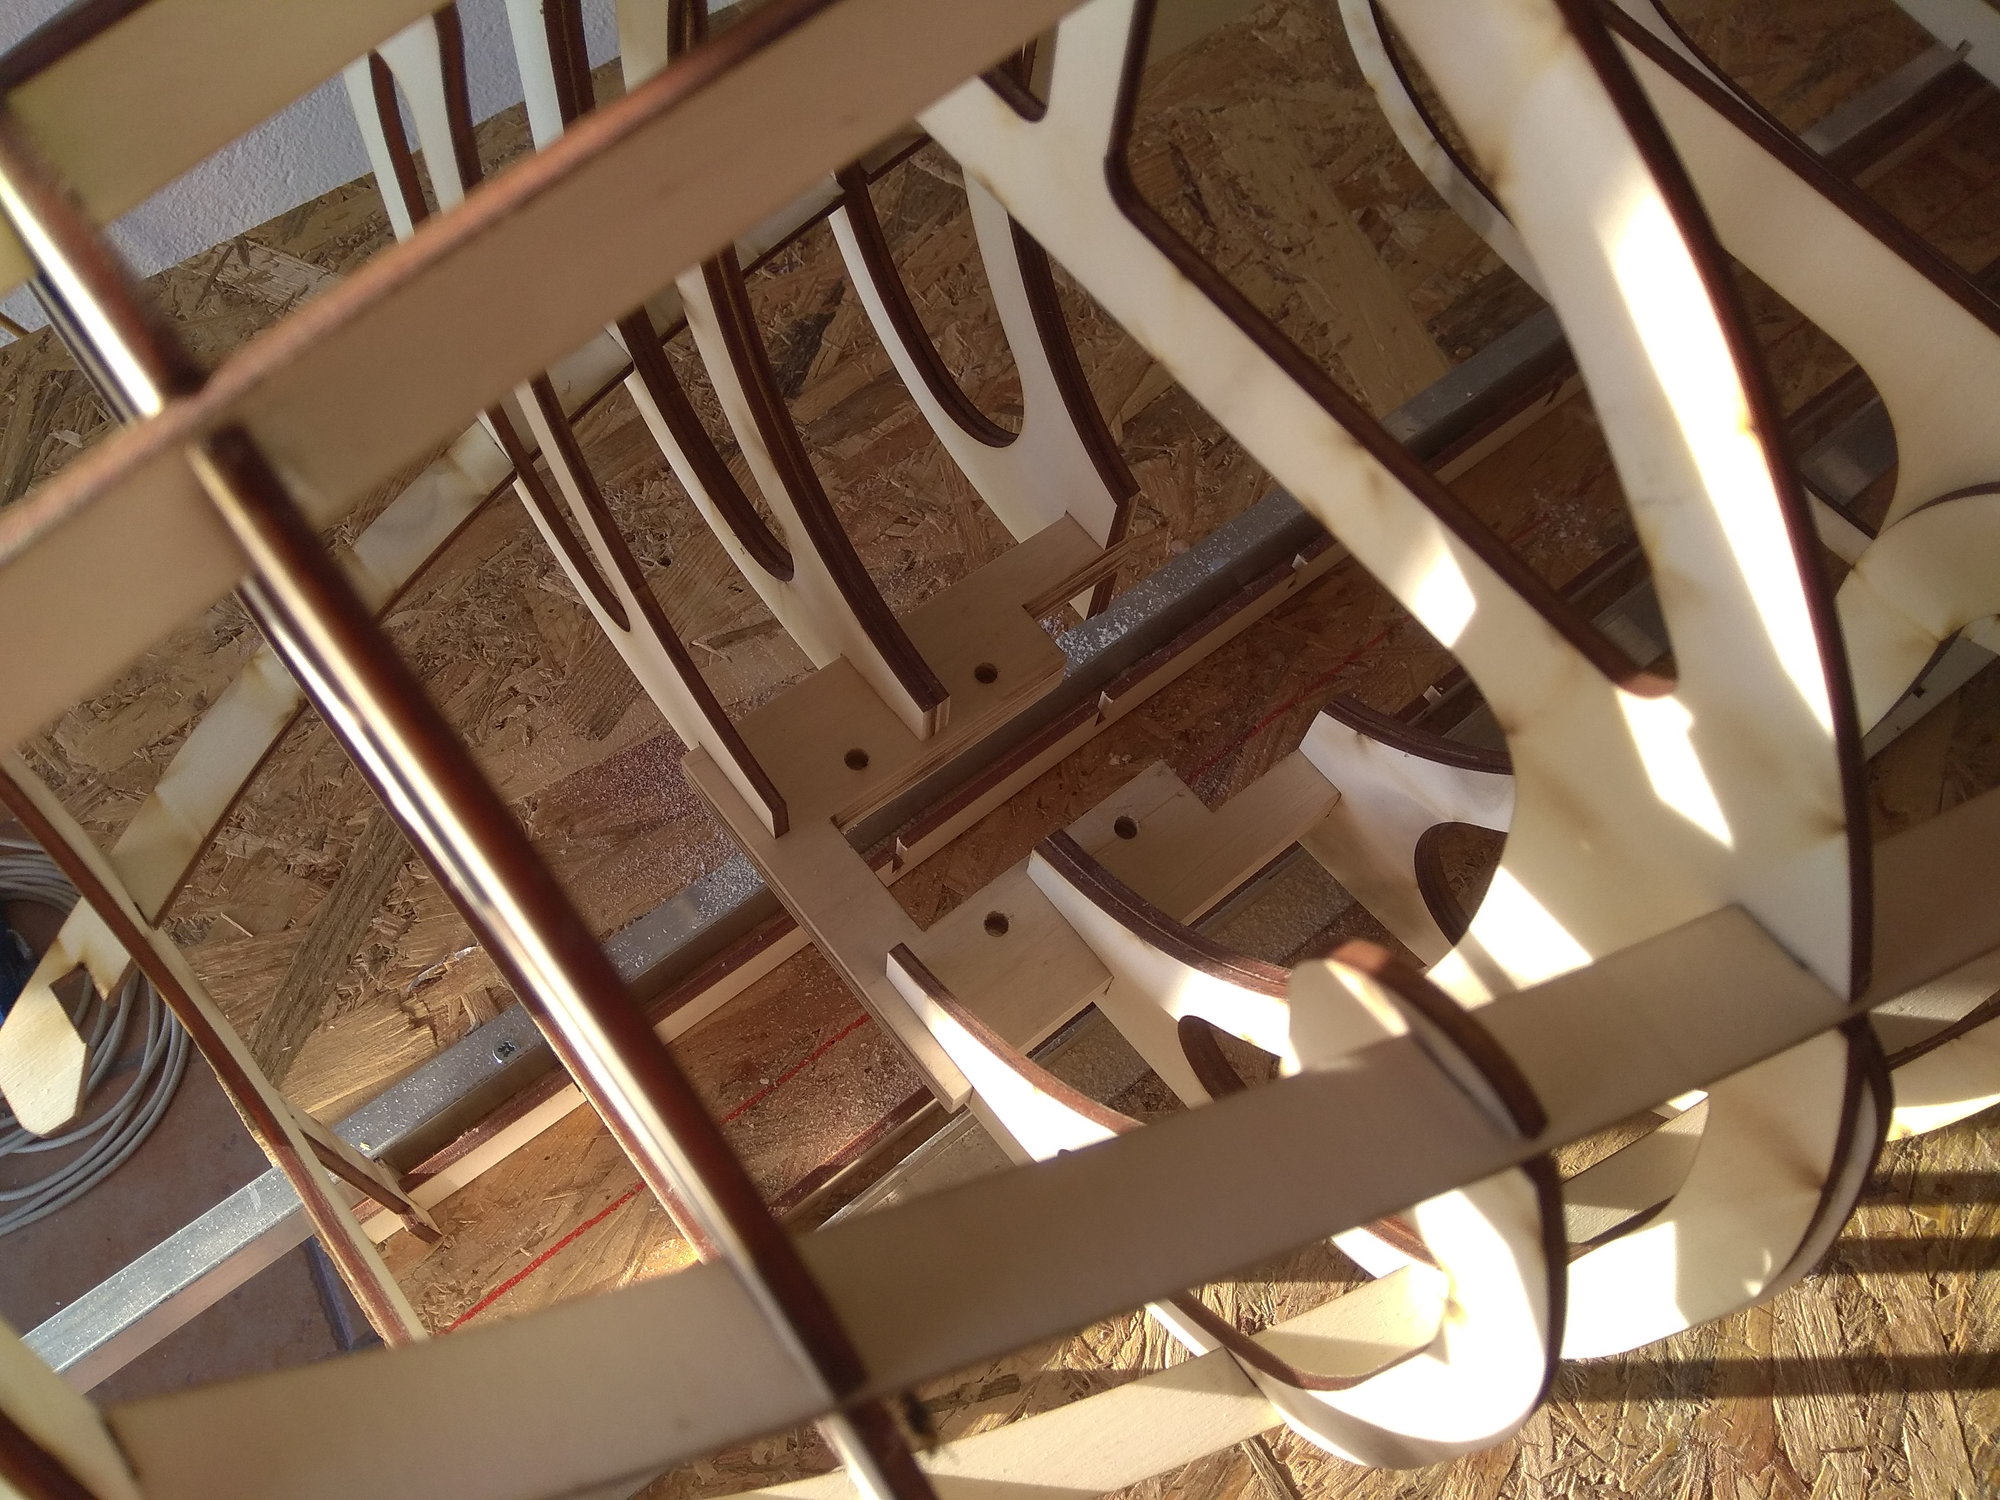
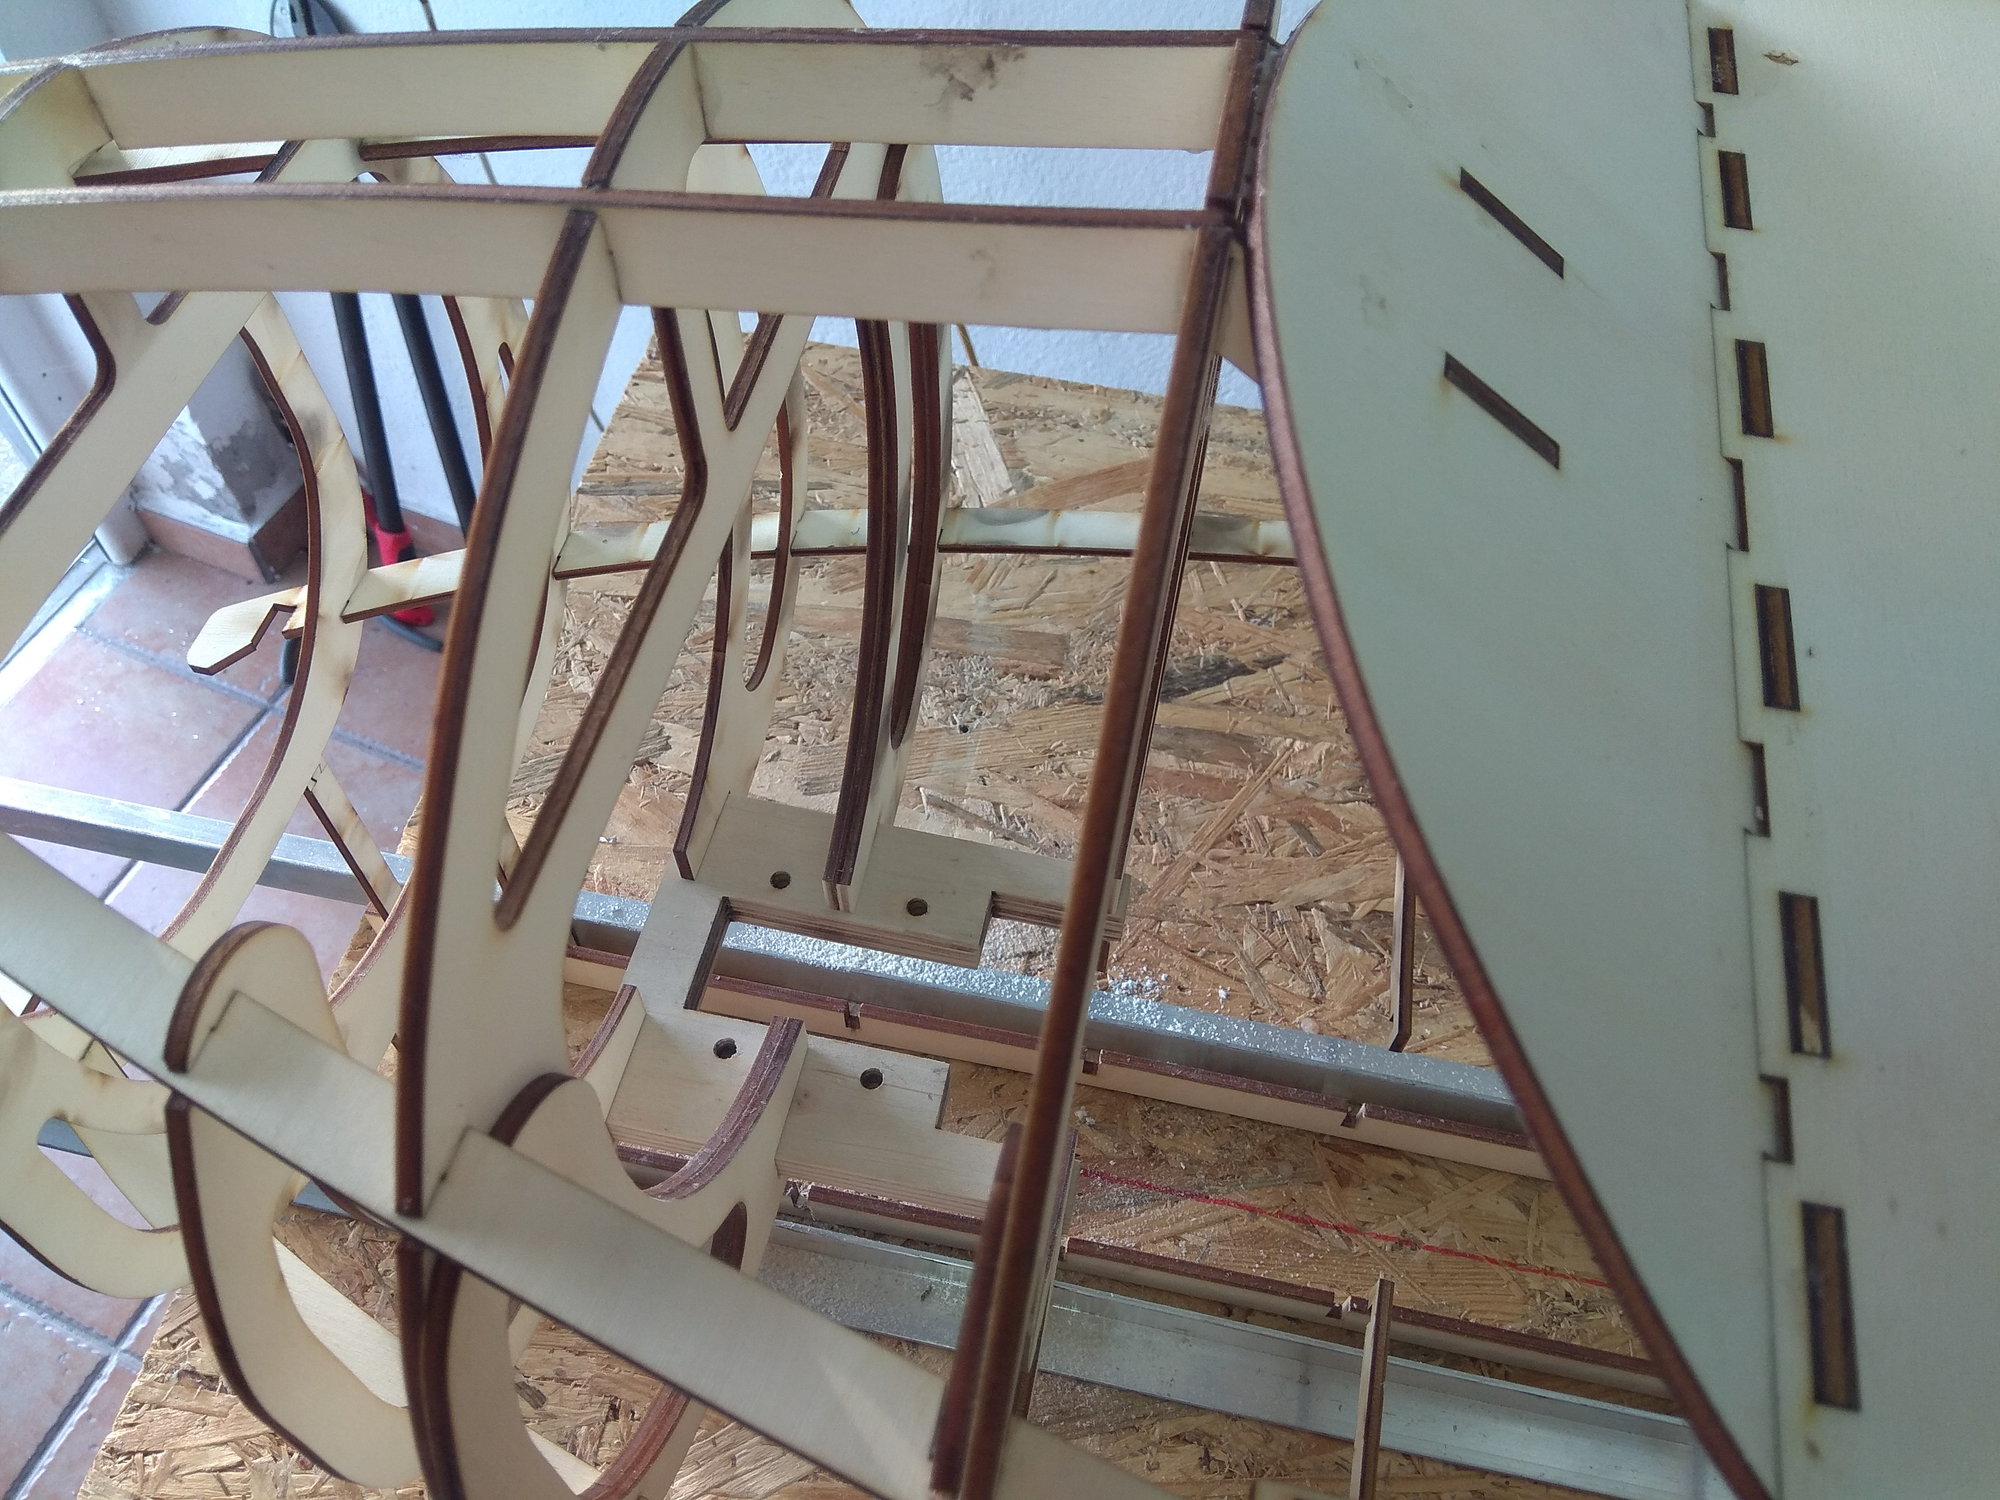
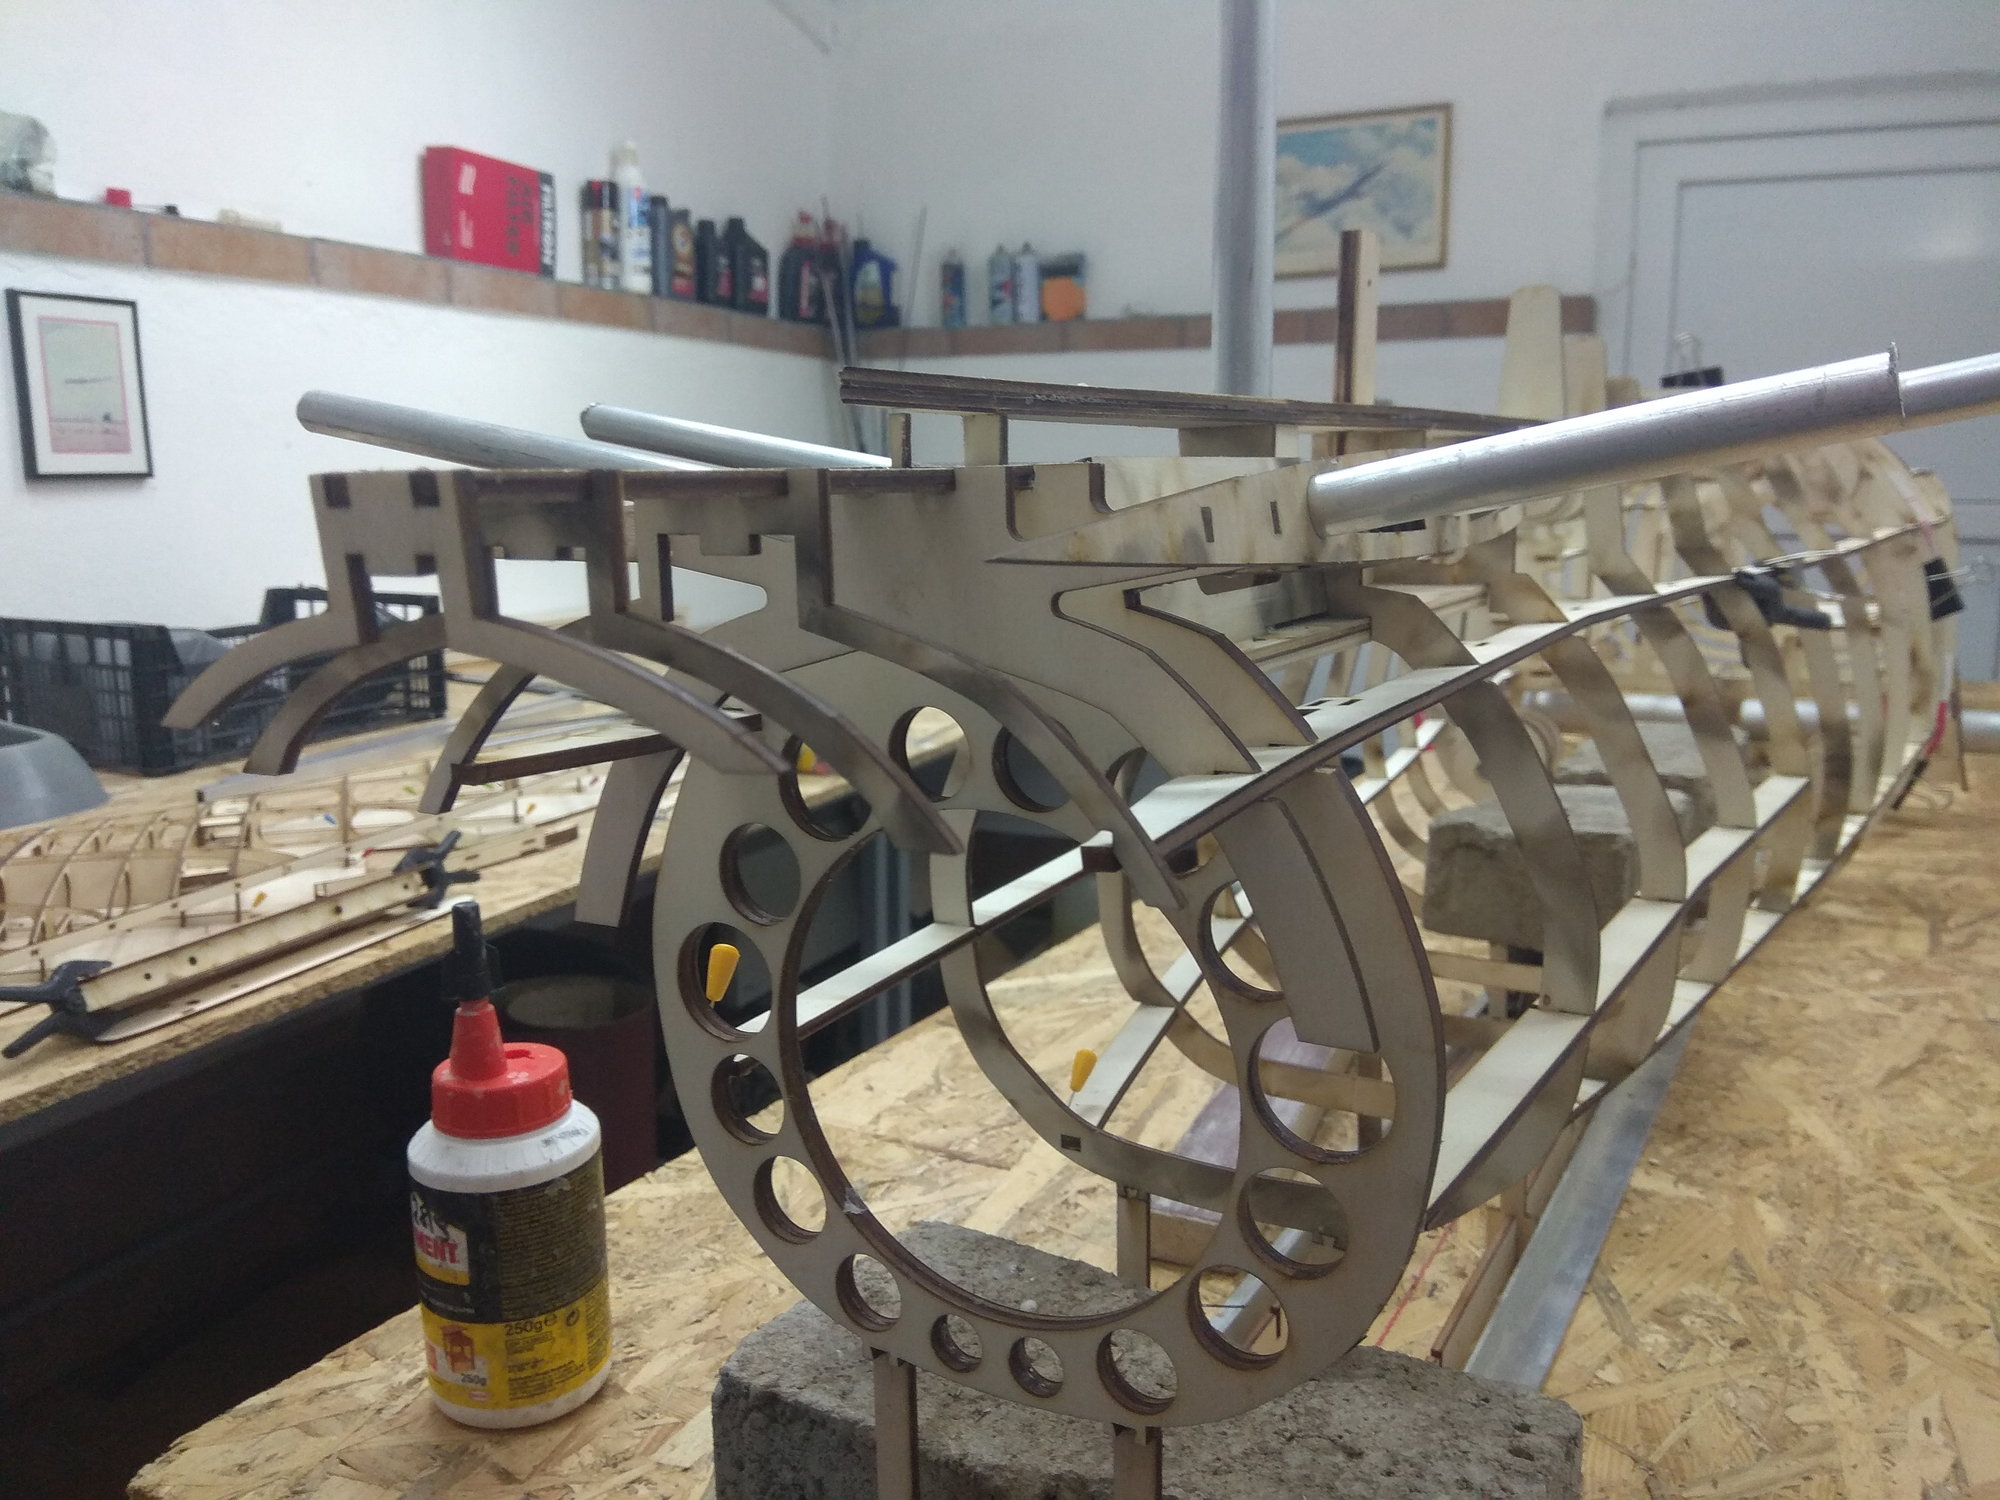
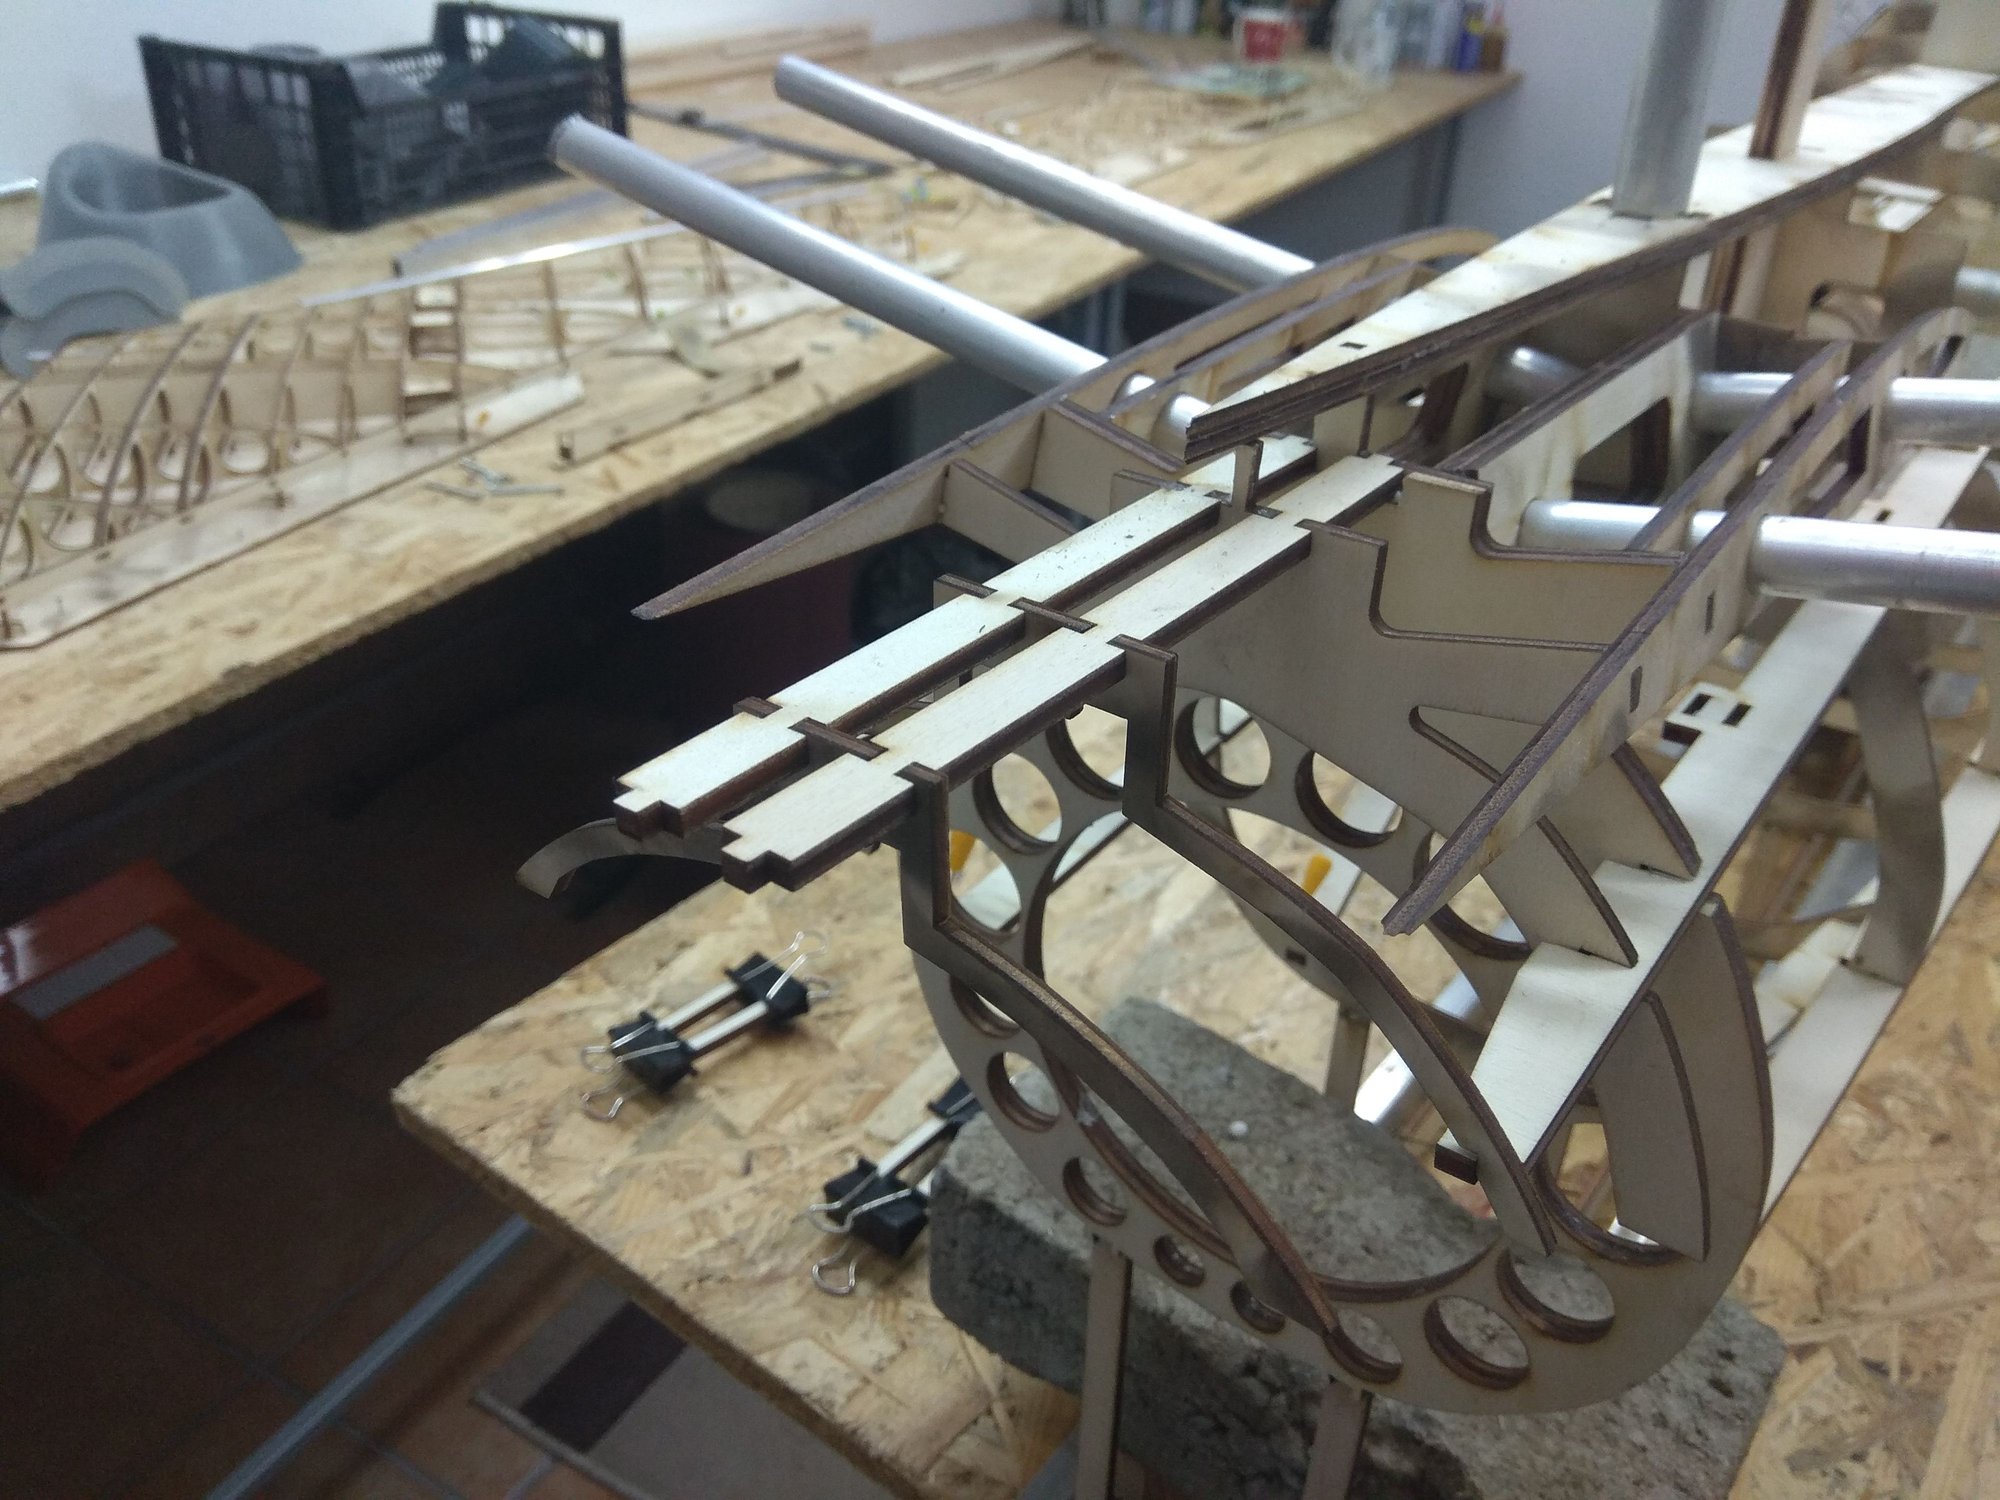
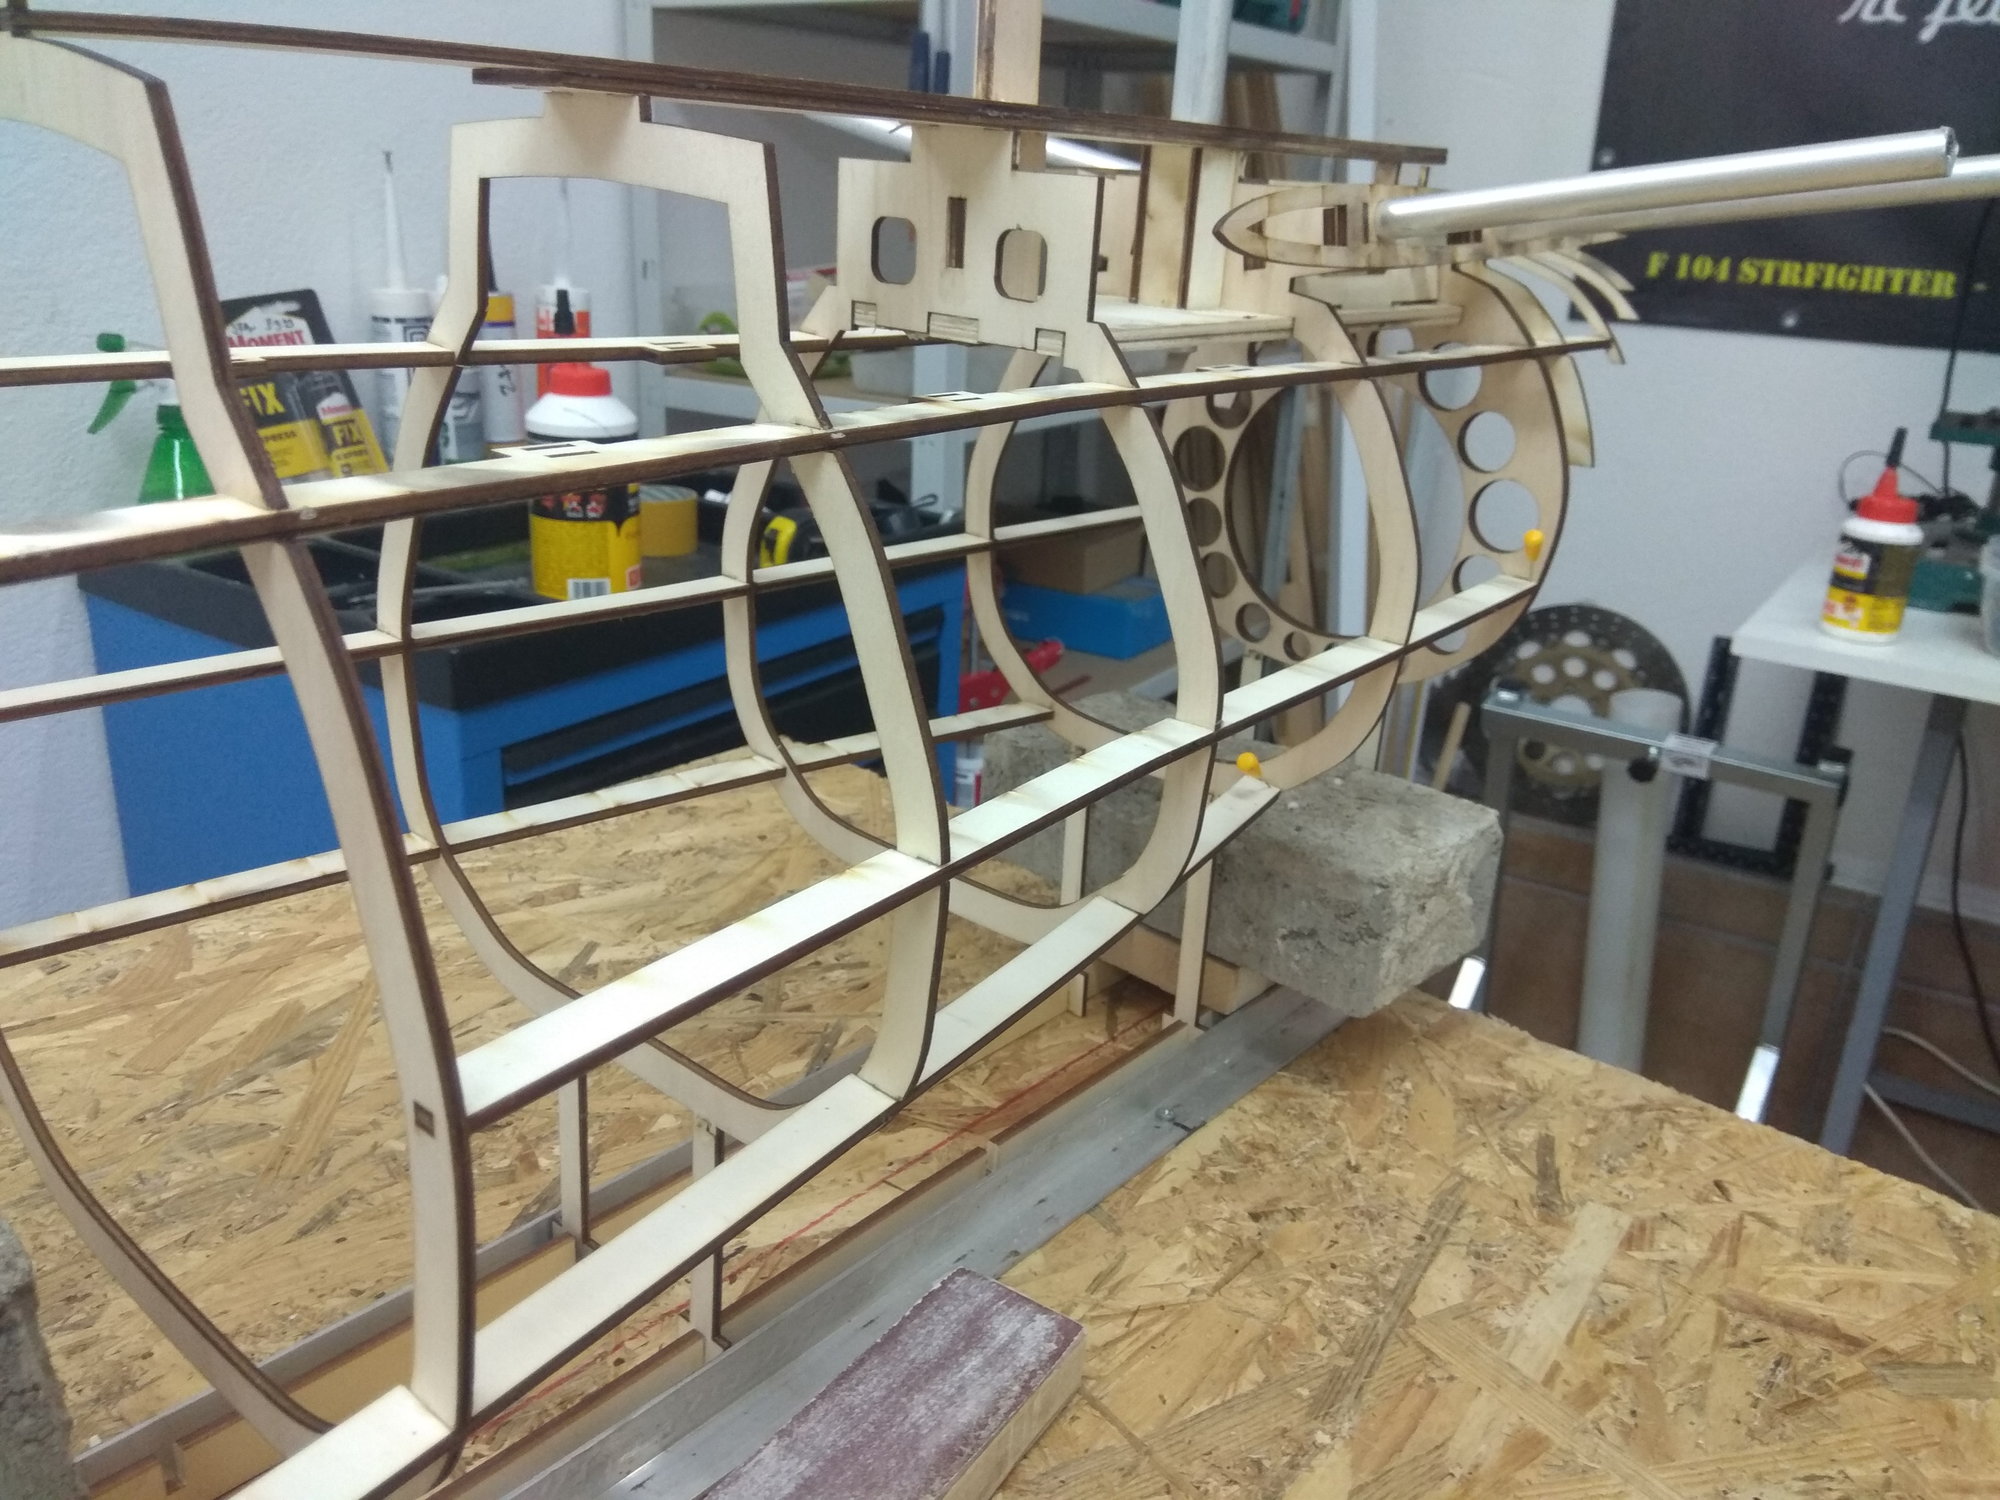
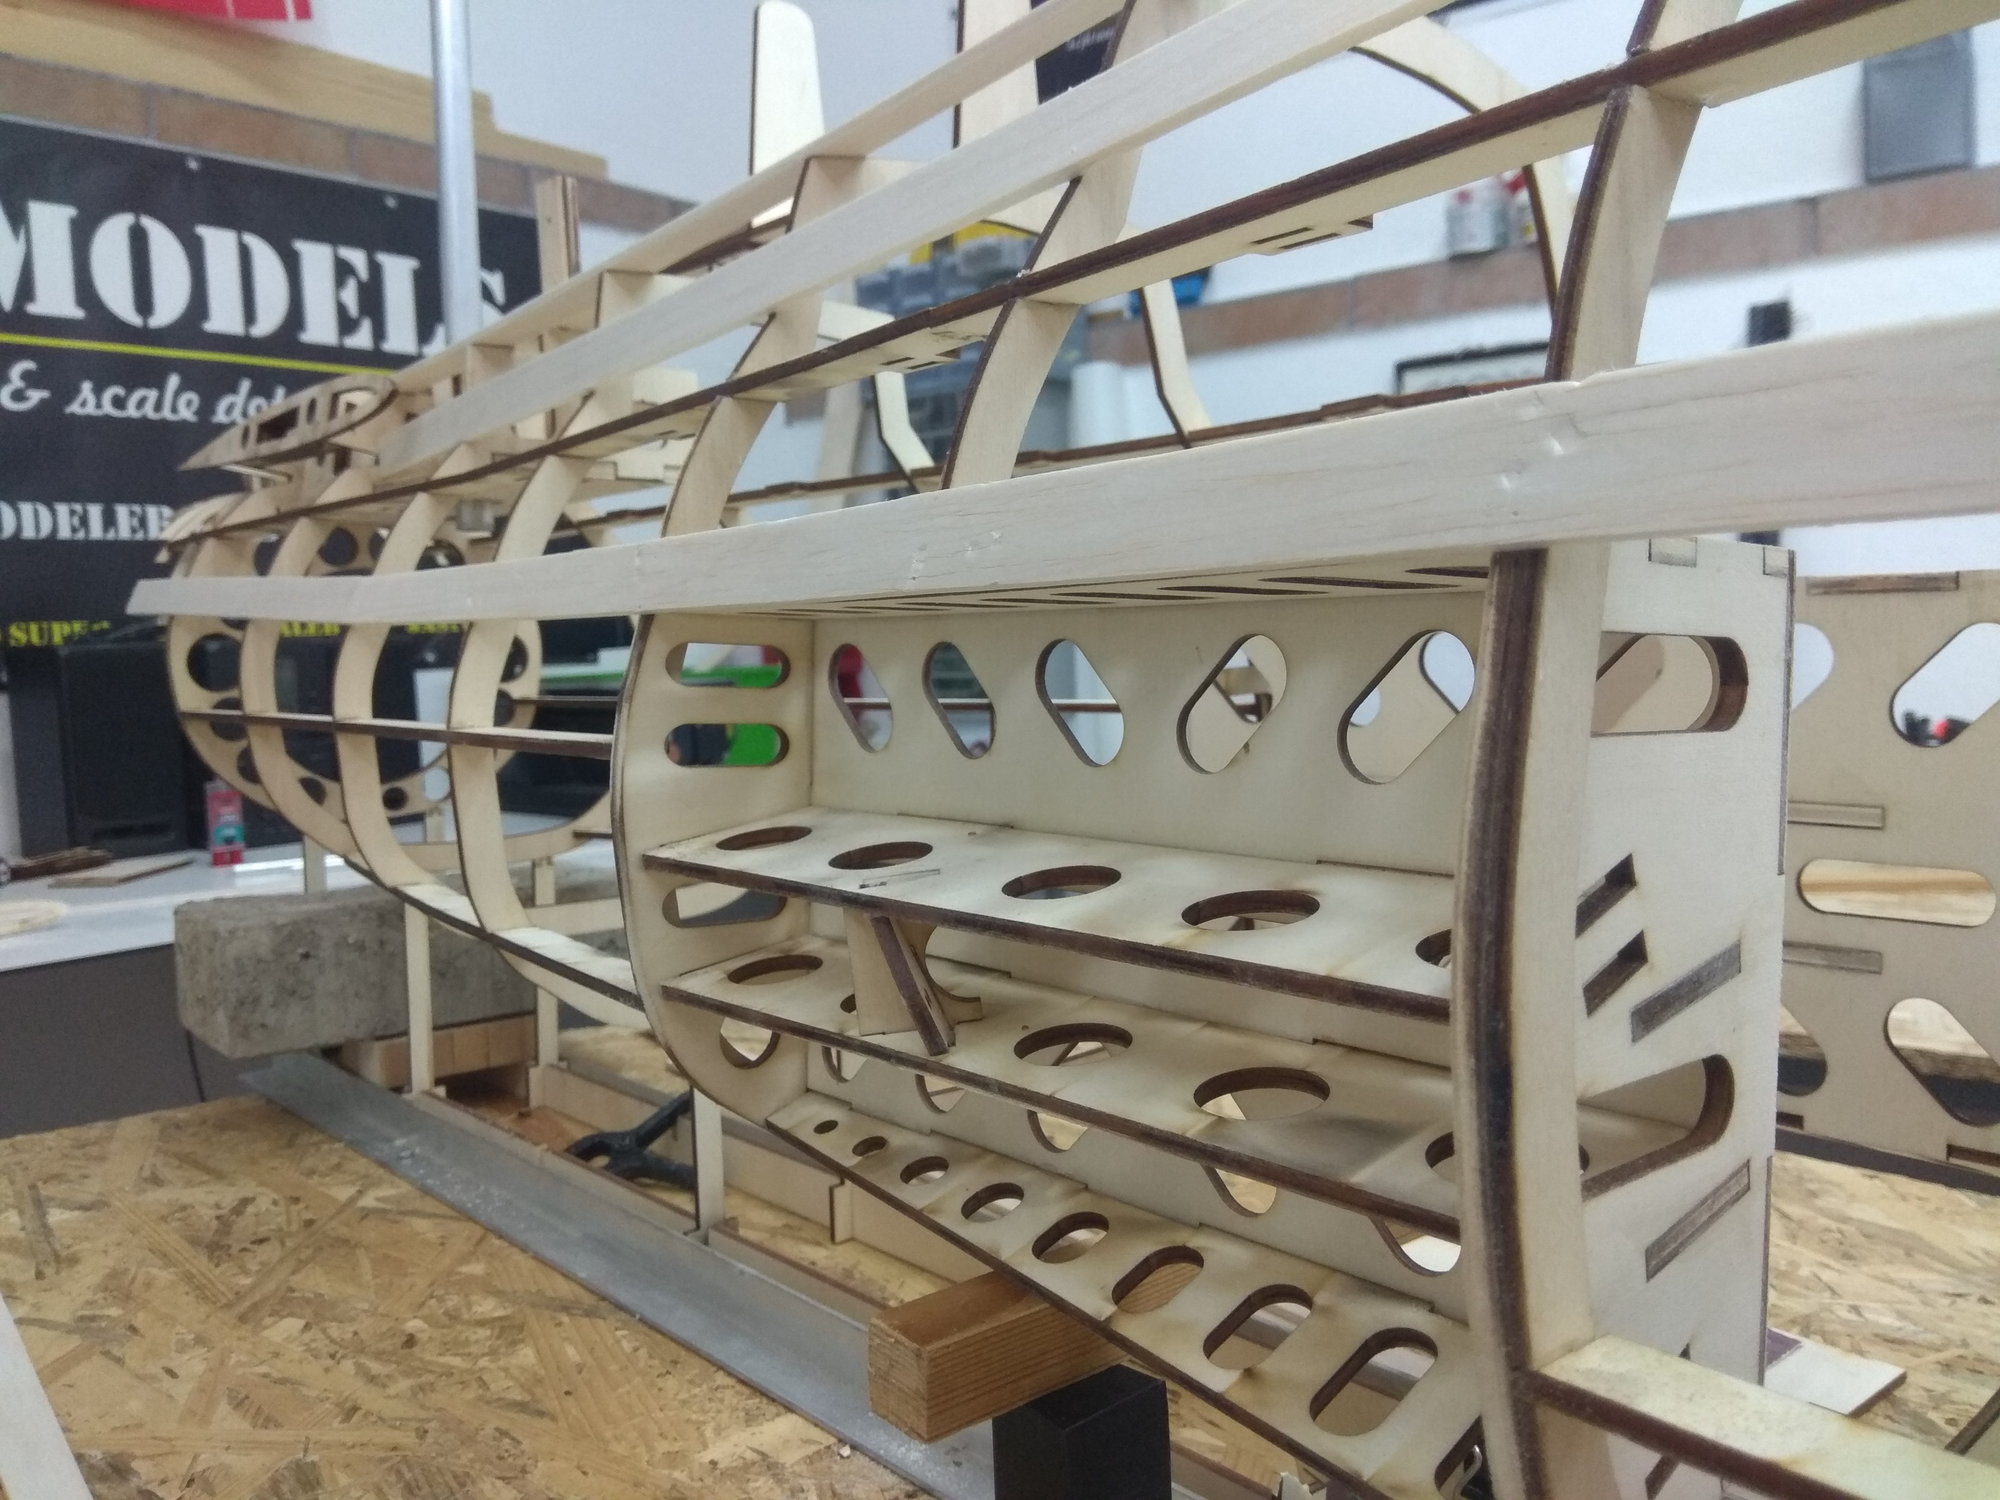
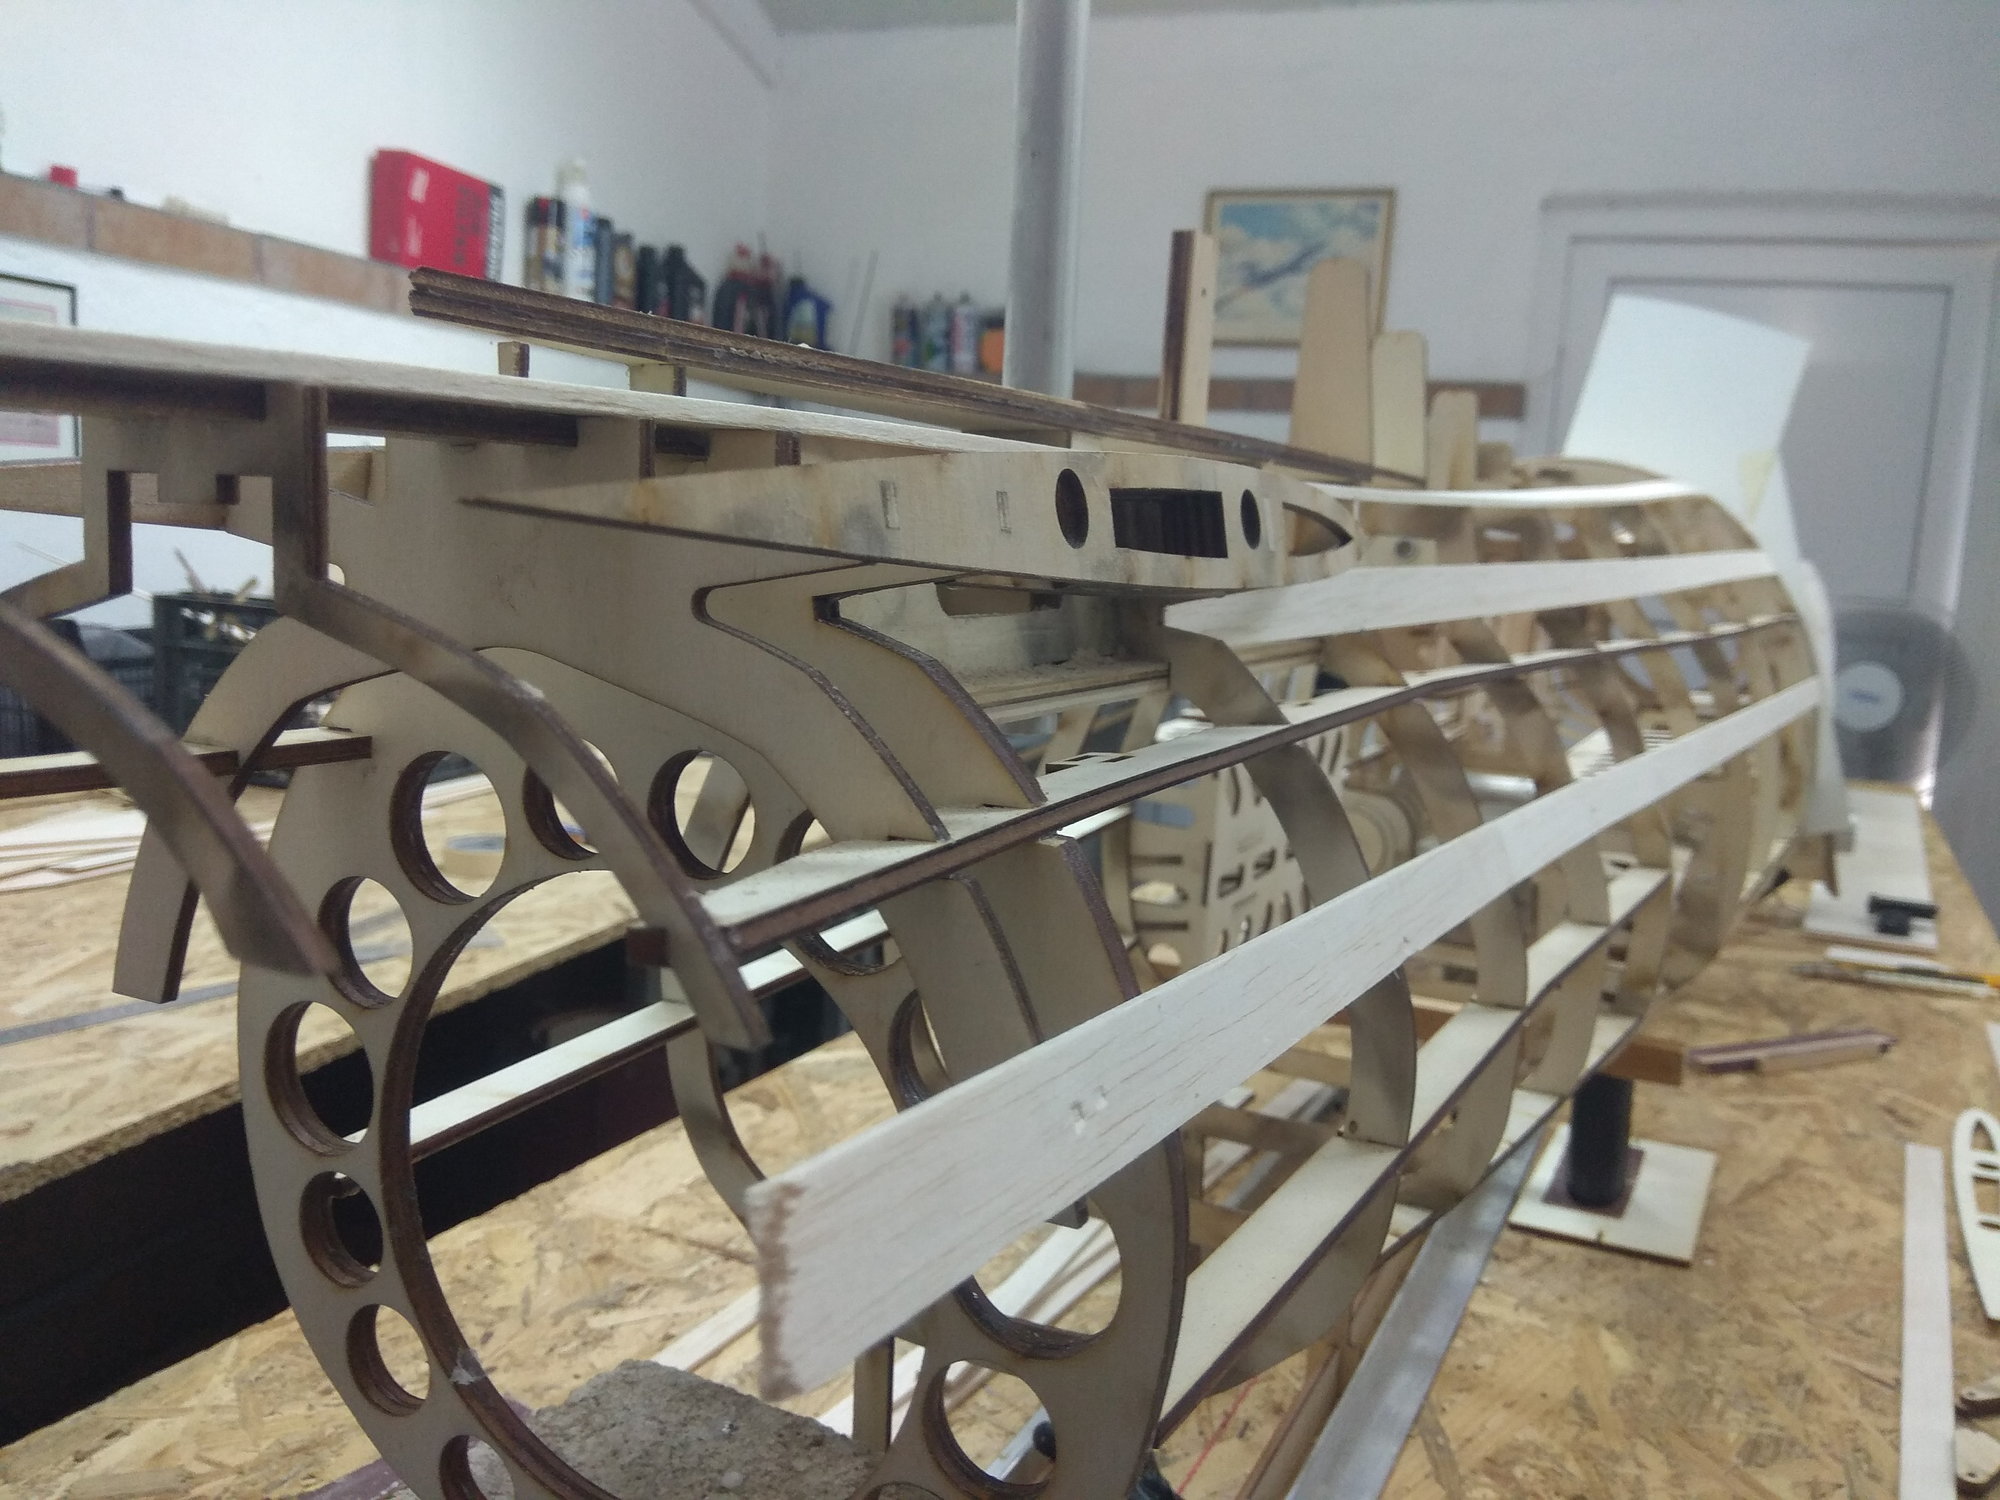
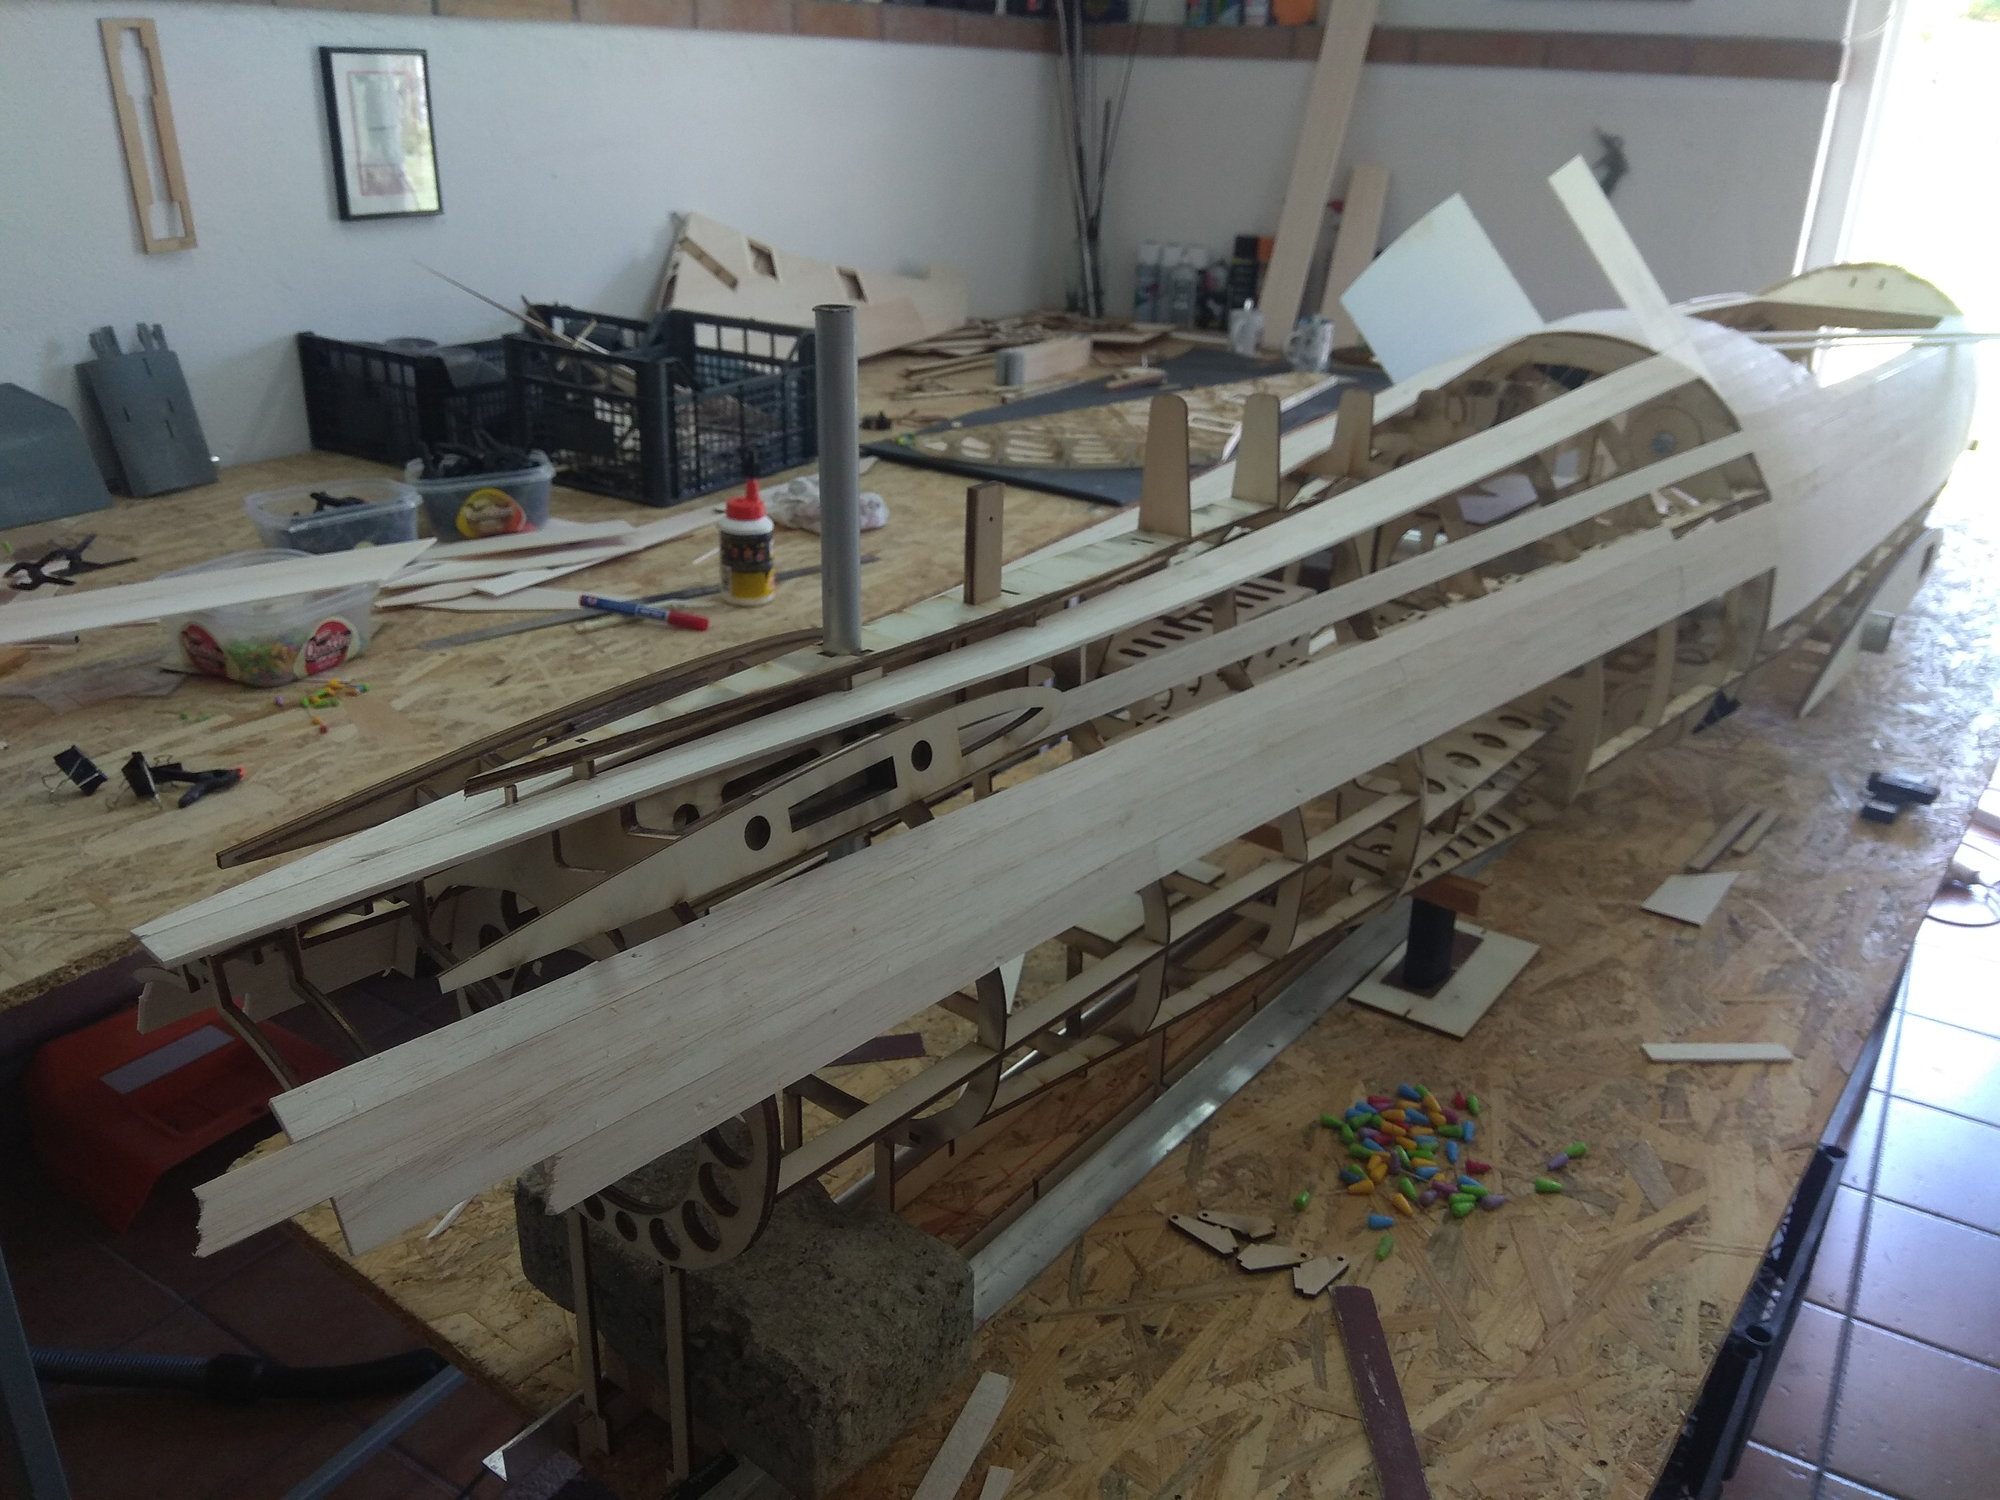
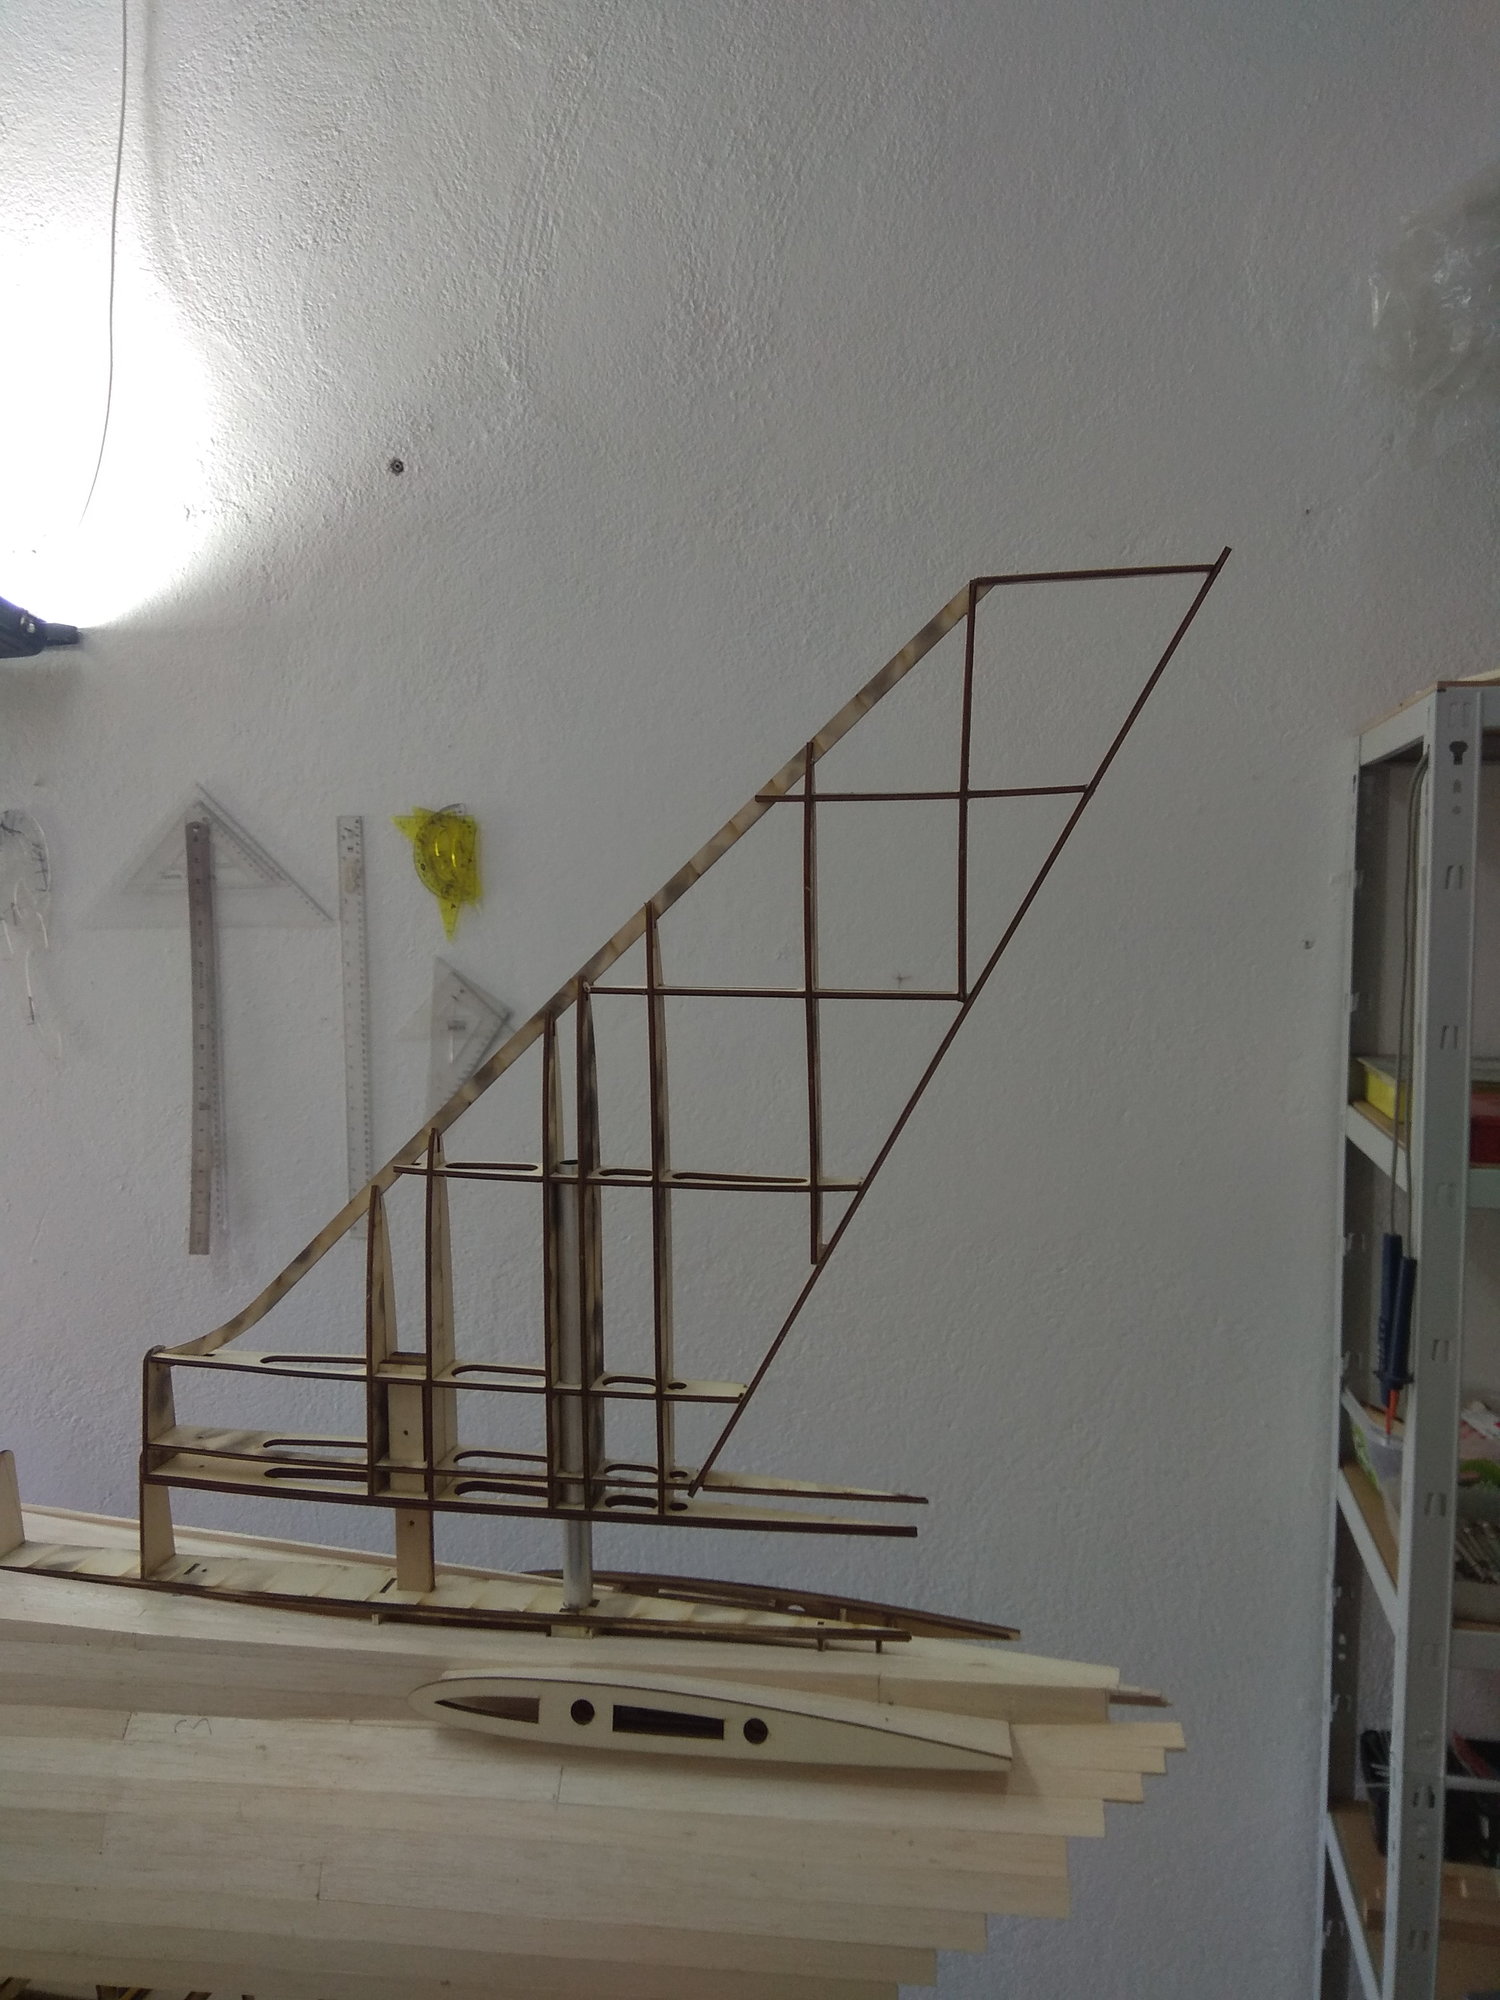
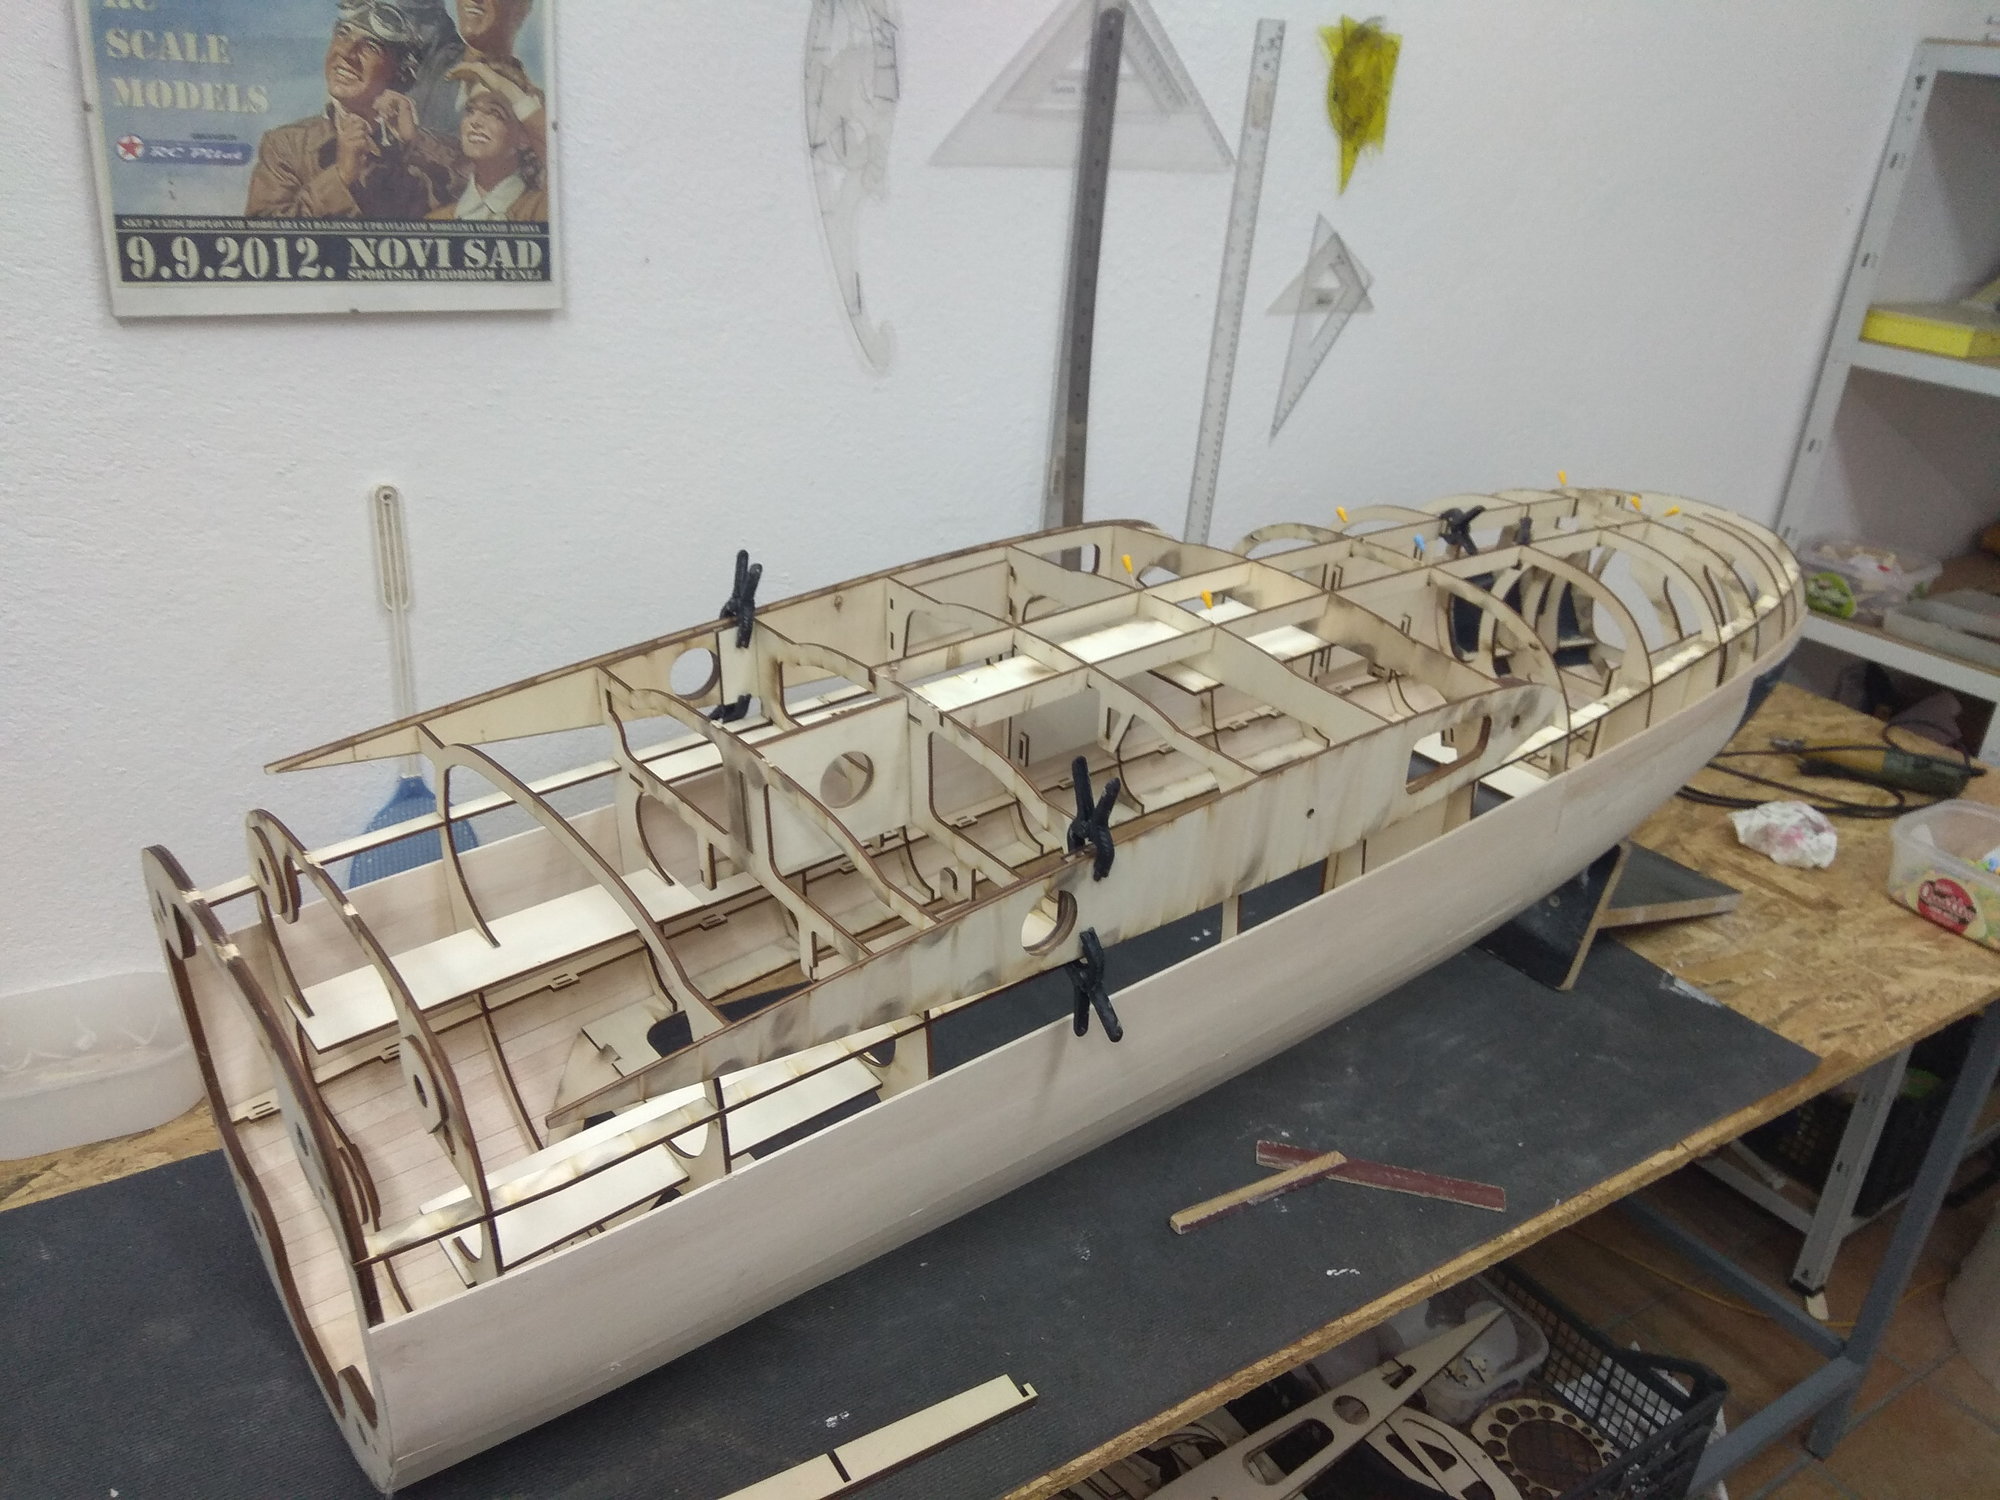
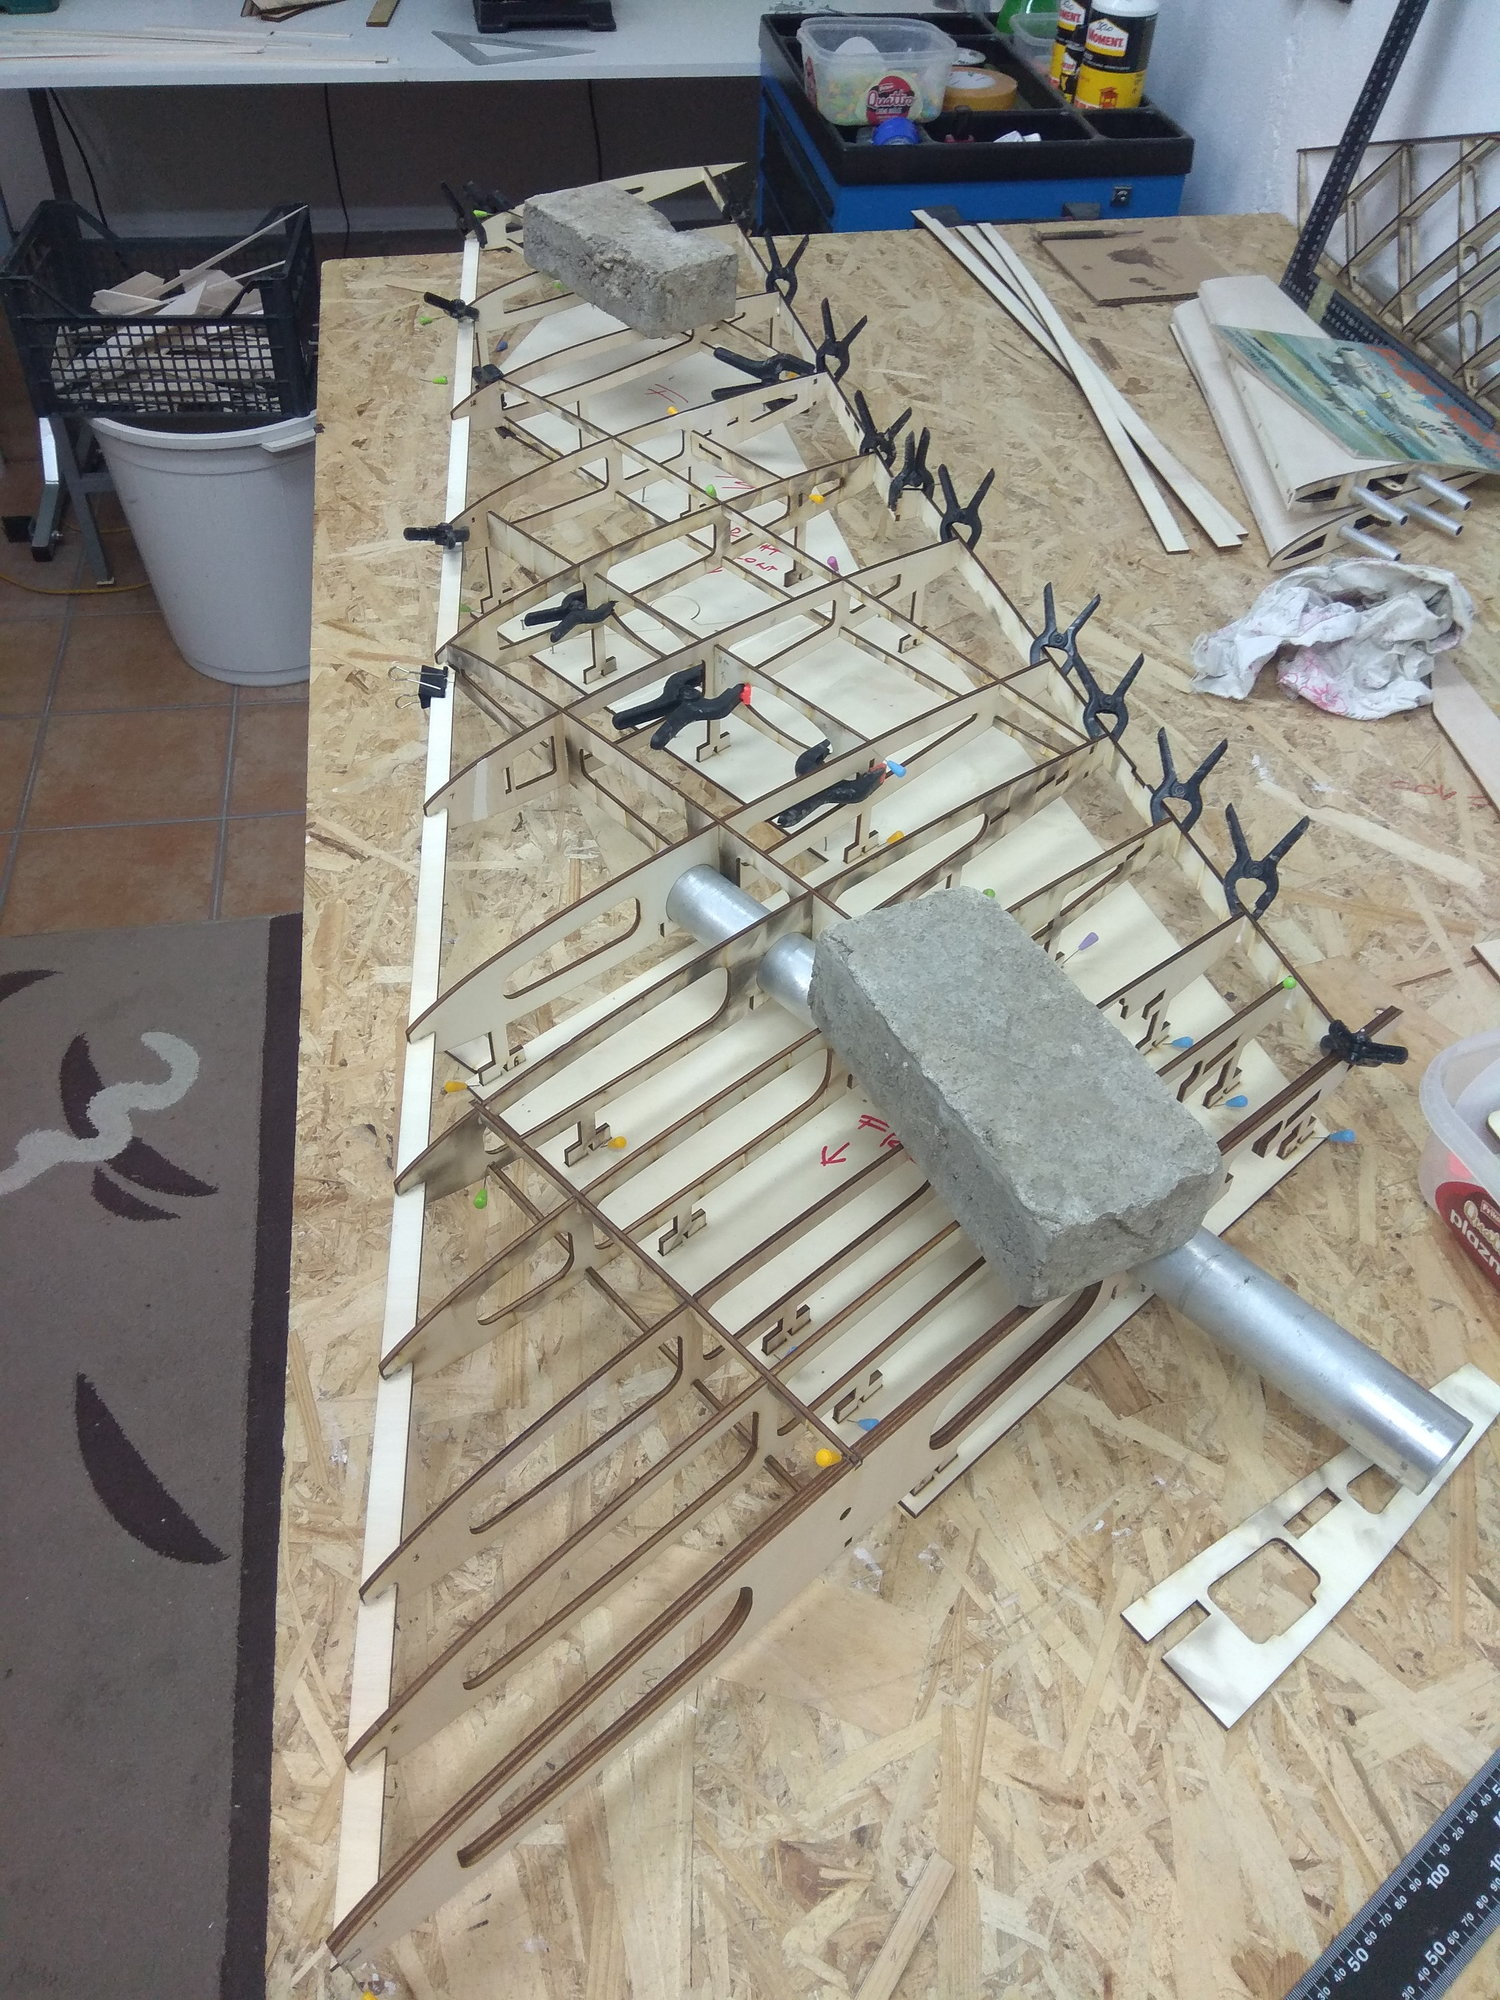
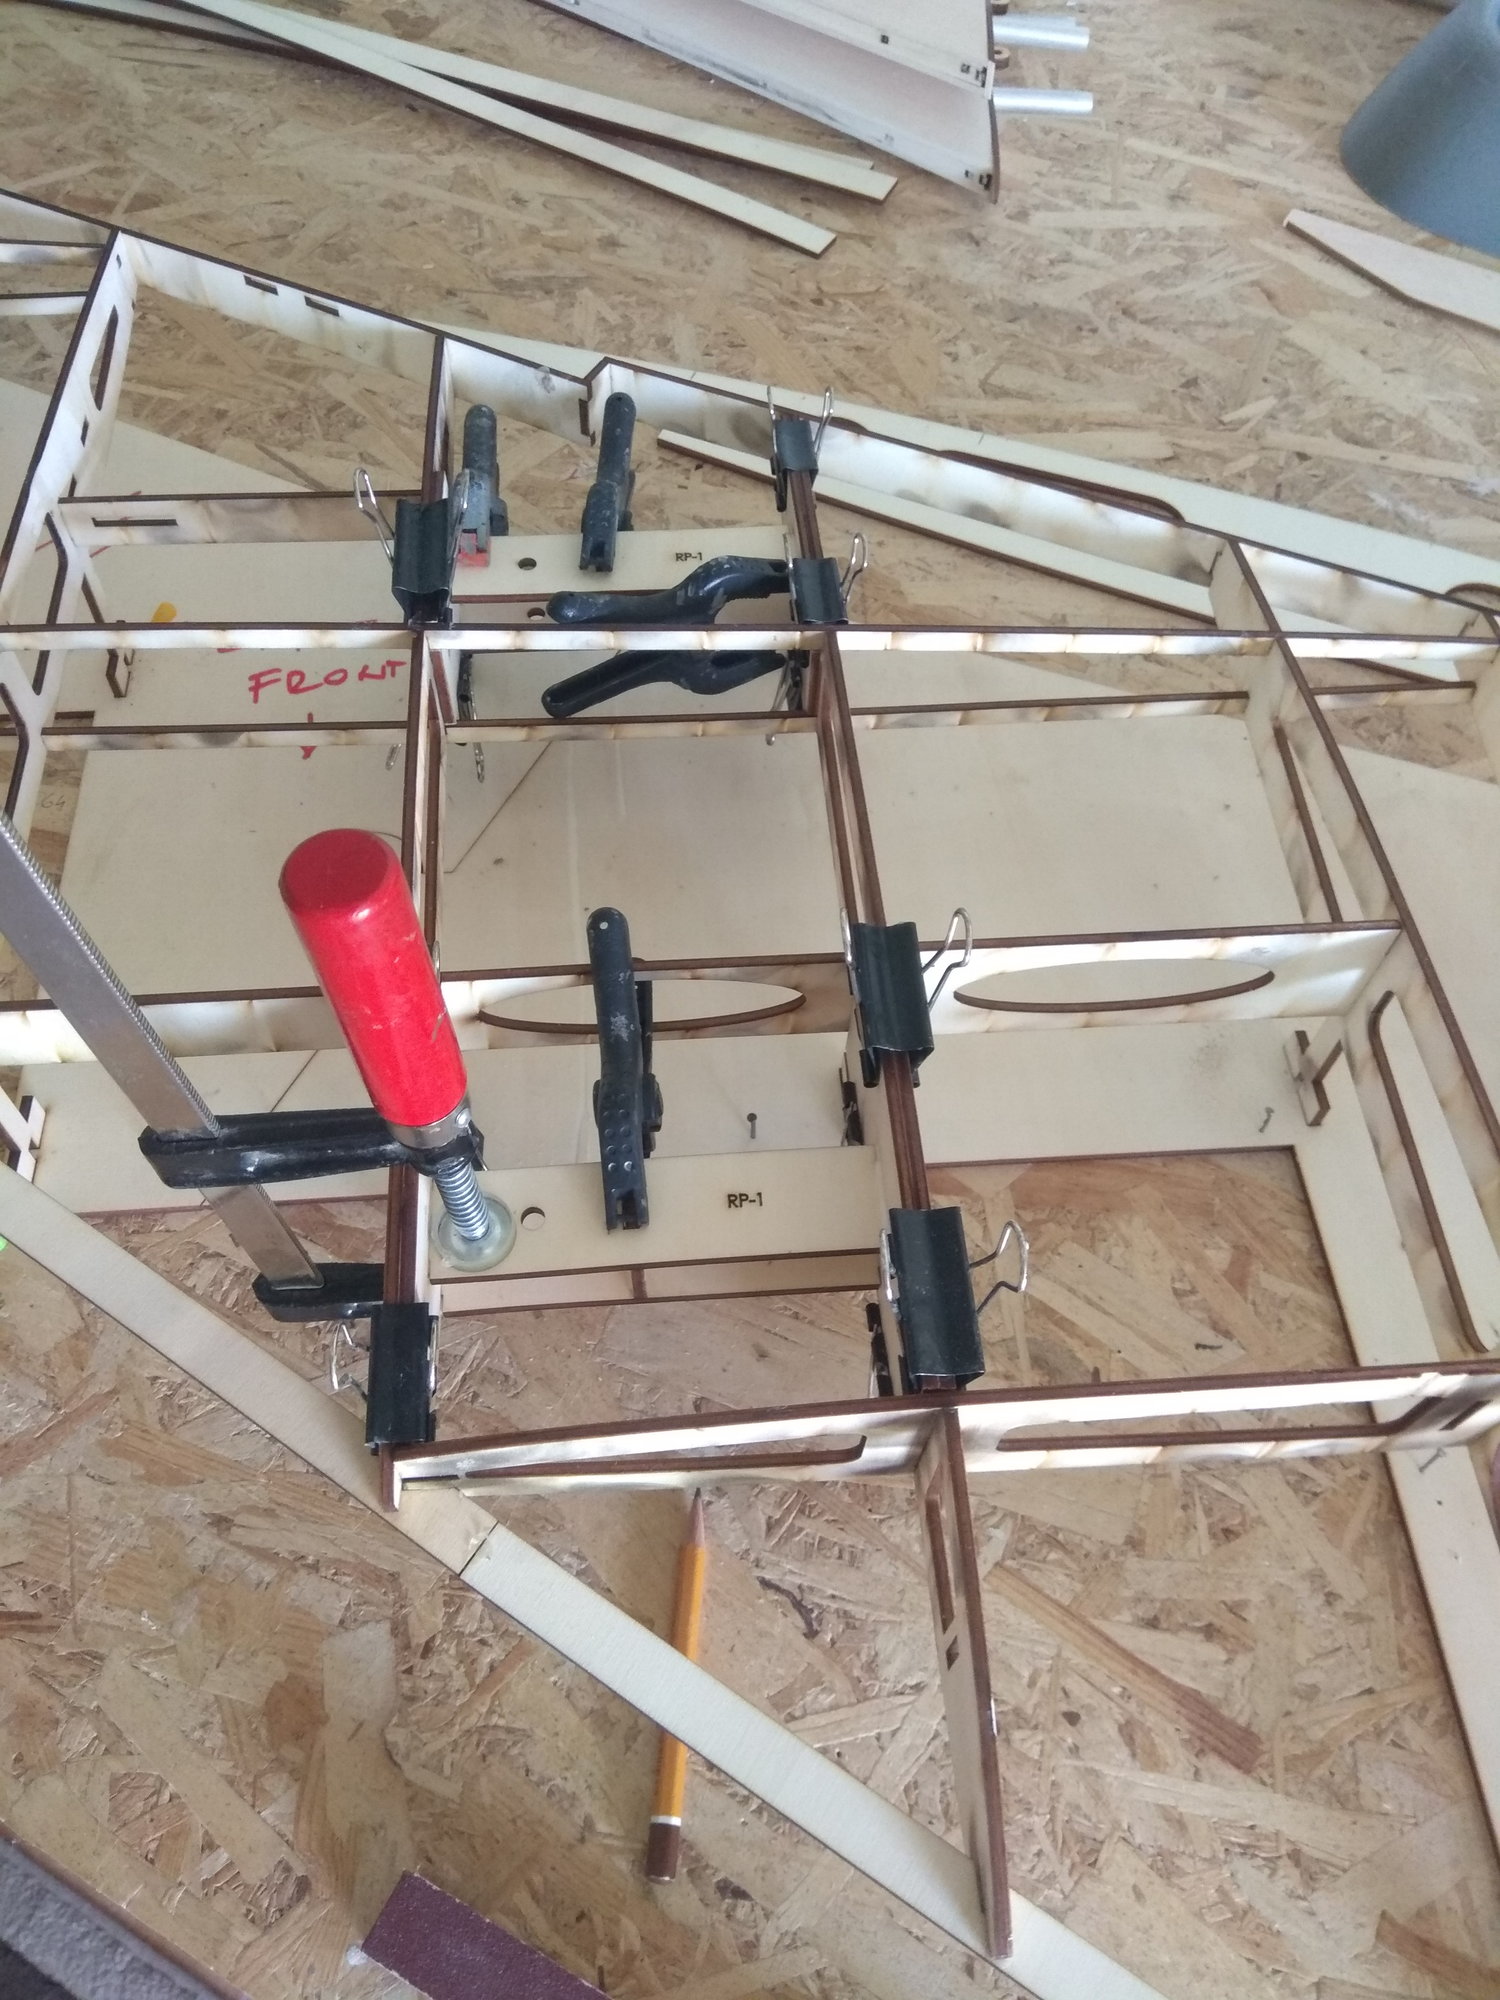
The start of construction always goes quickly, thanks to the model constructed in a 3D program and the parts cut on a laser, everything fits together like a Puzzle.
Therefore, it only took a couple of hours to assemble and glue all the ribs of the rear part of the fuselage.
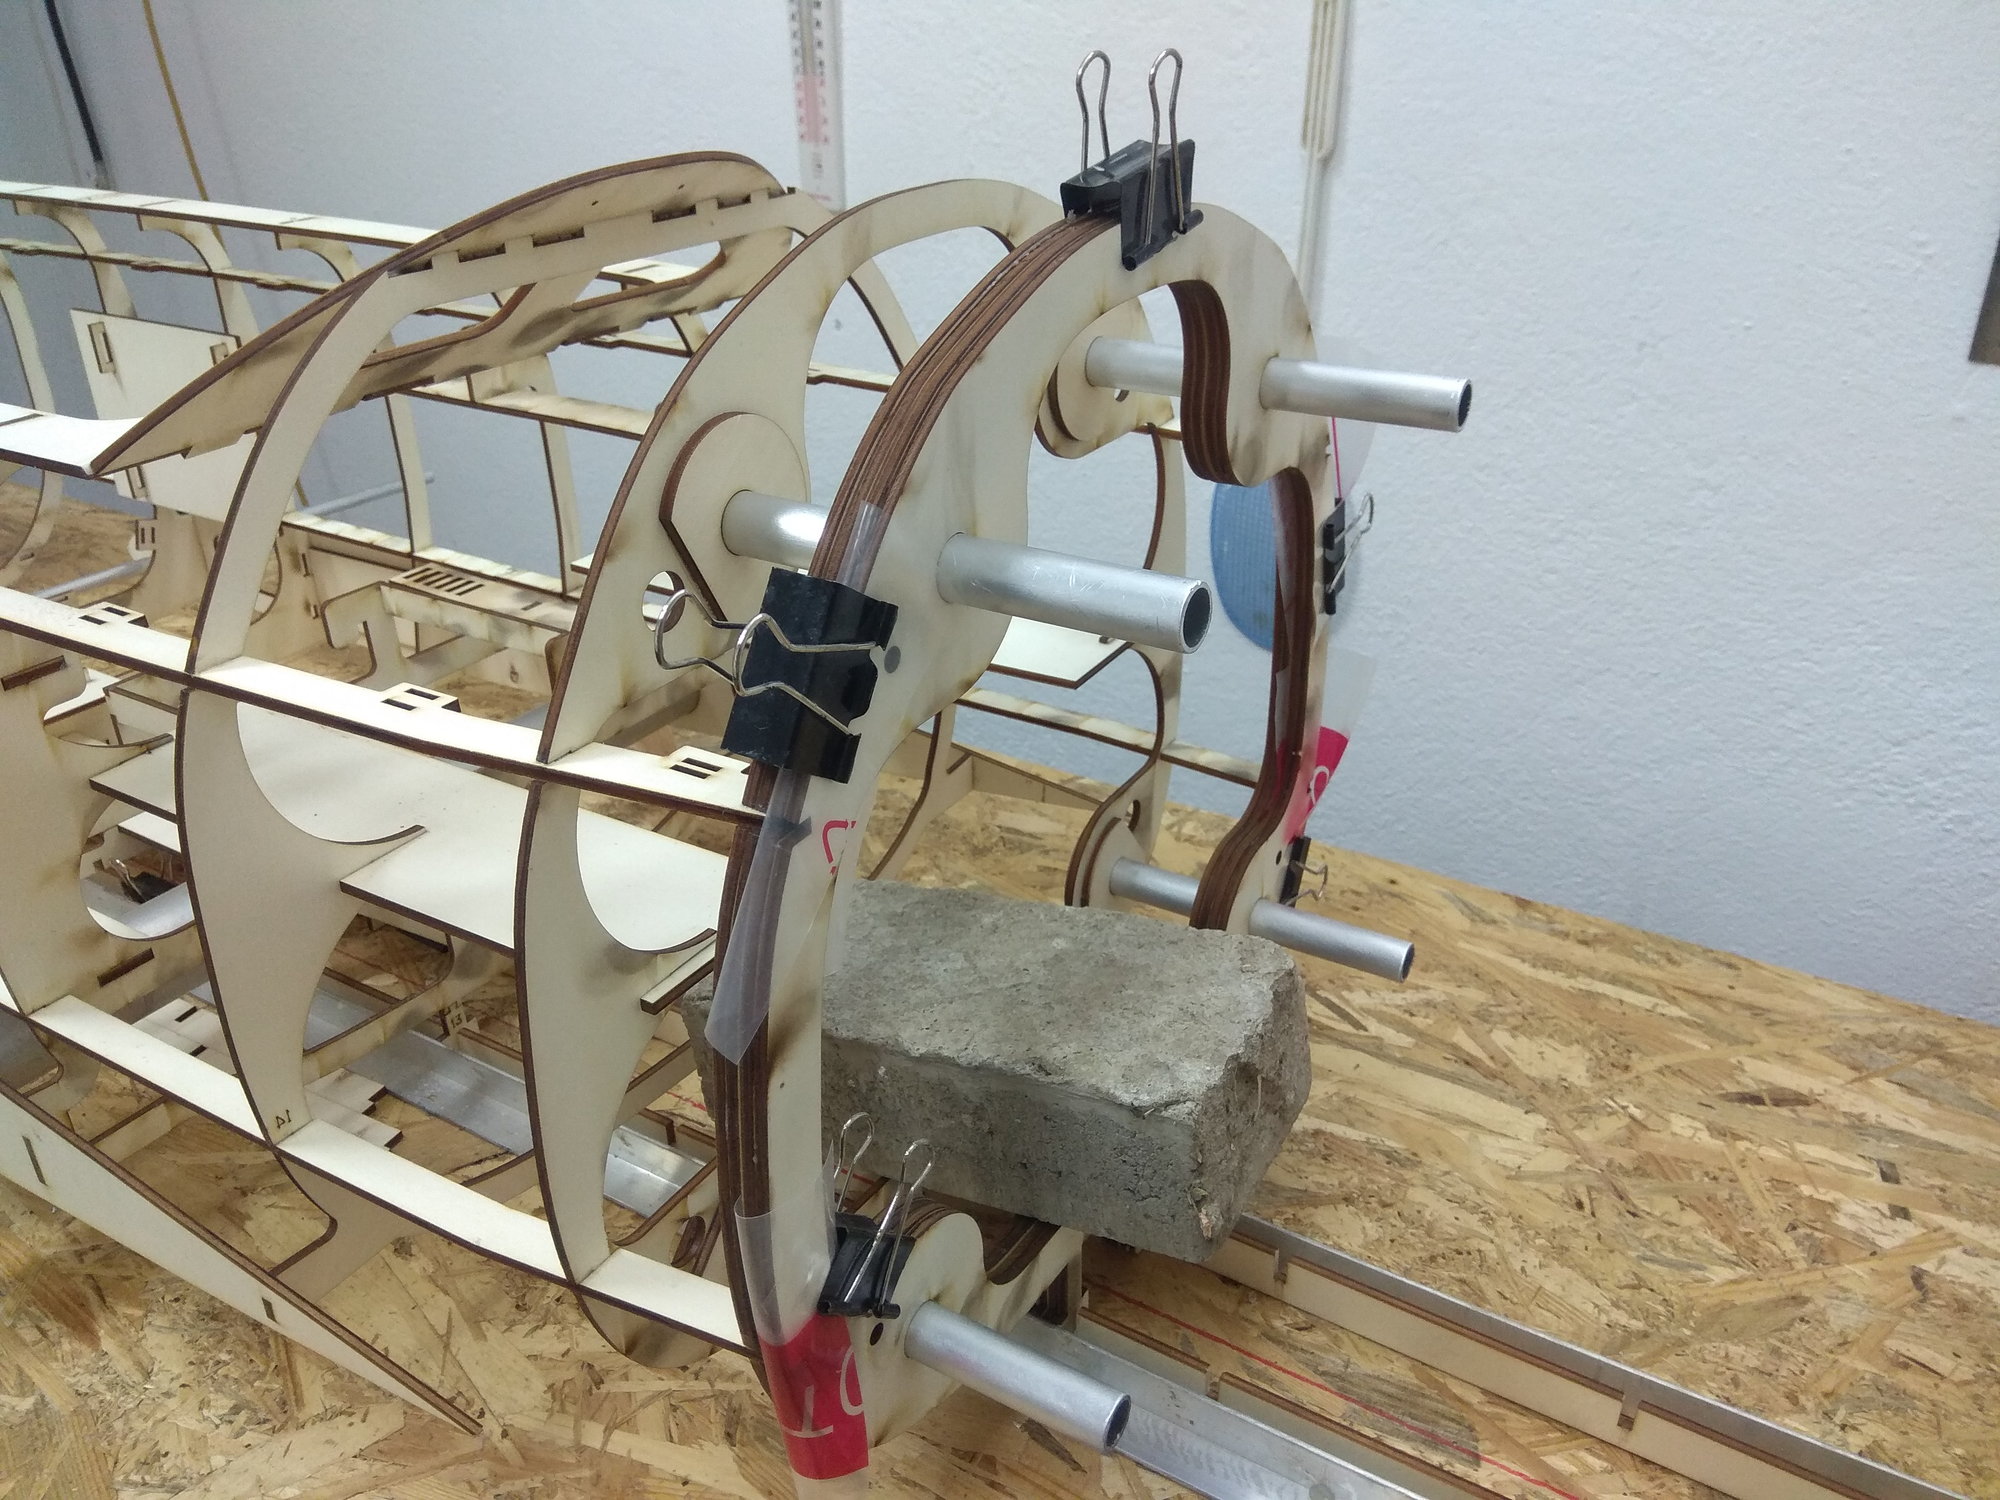
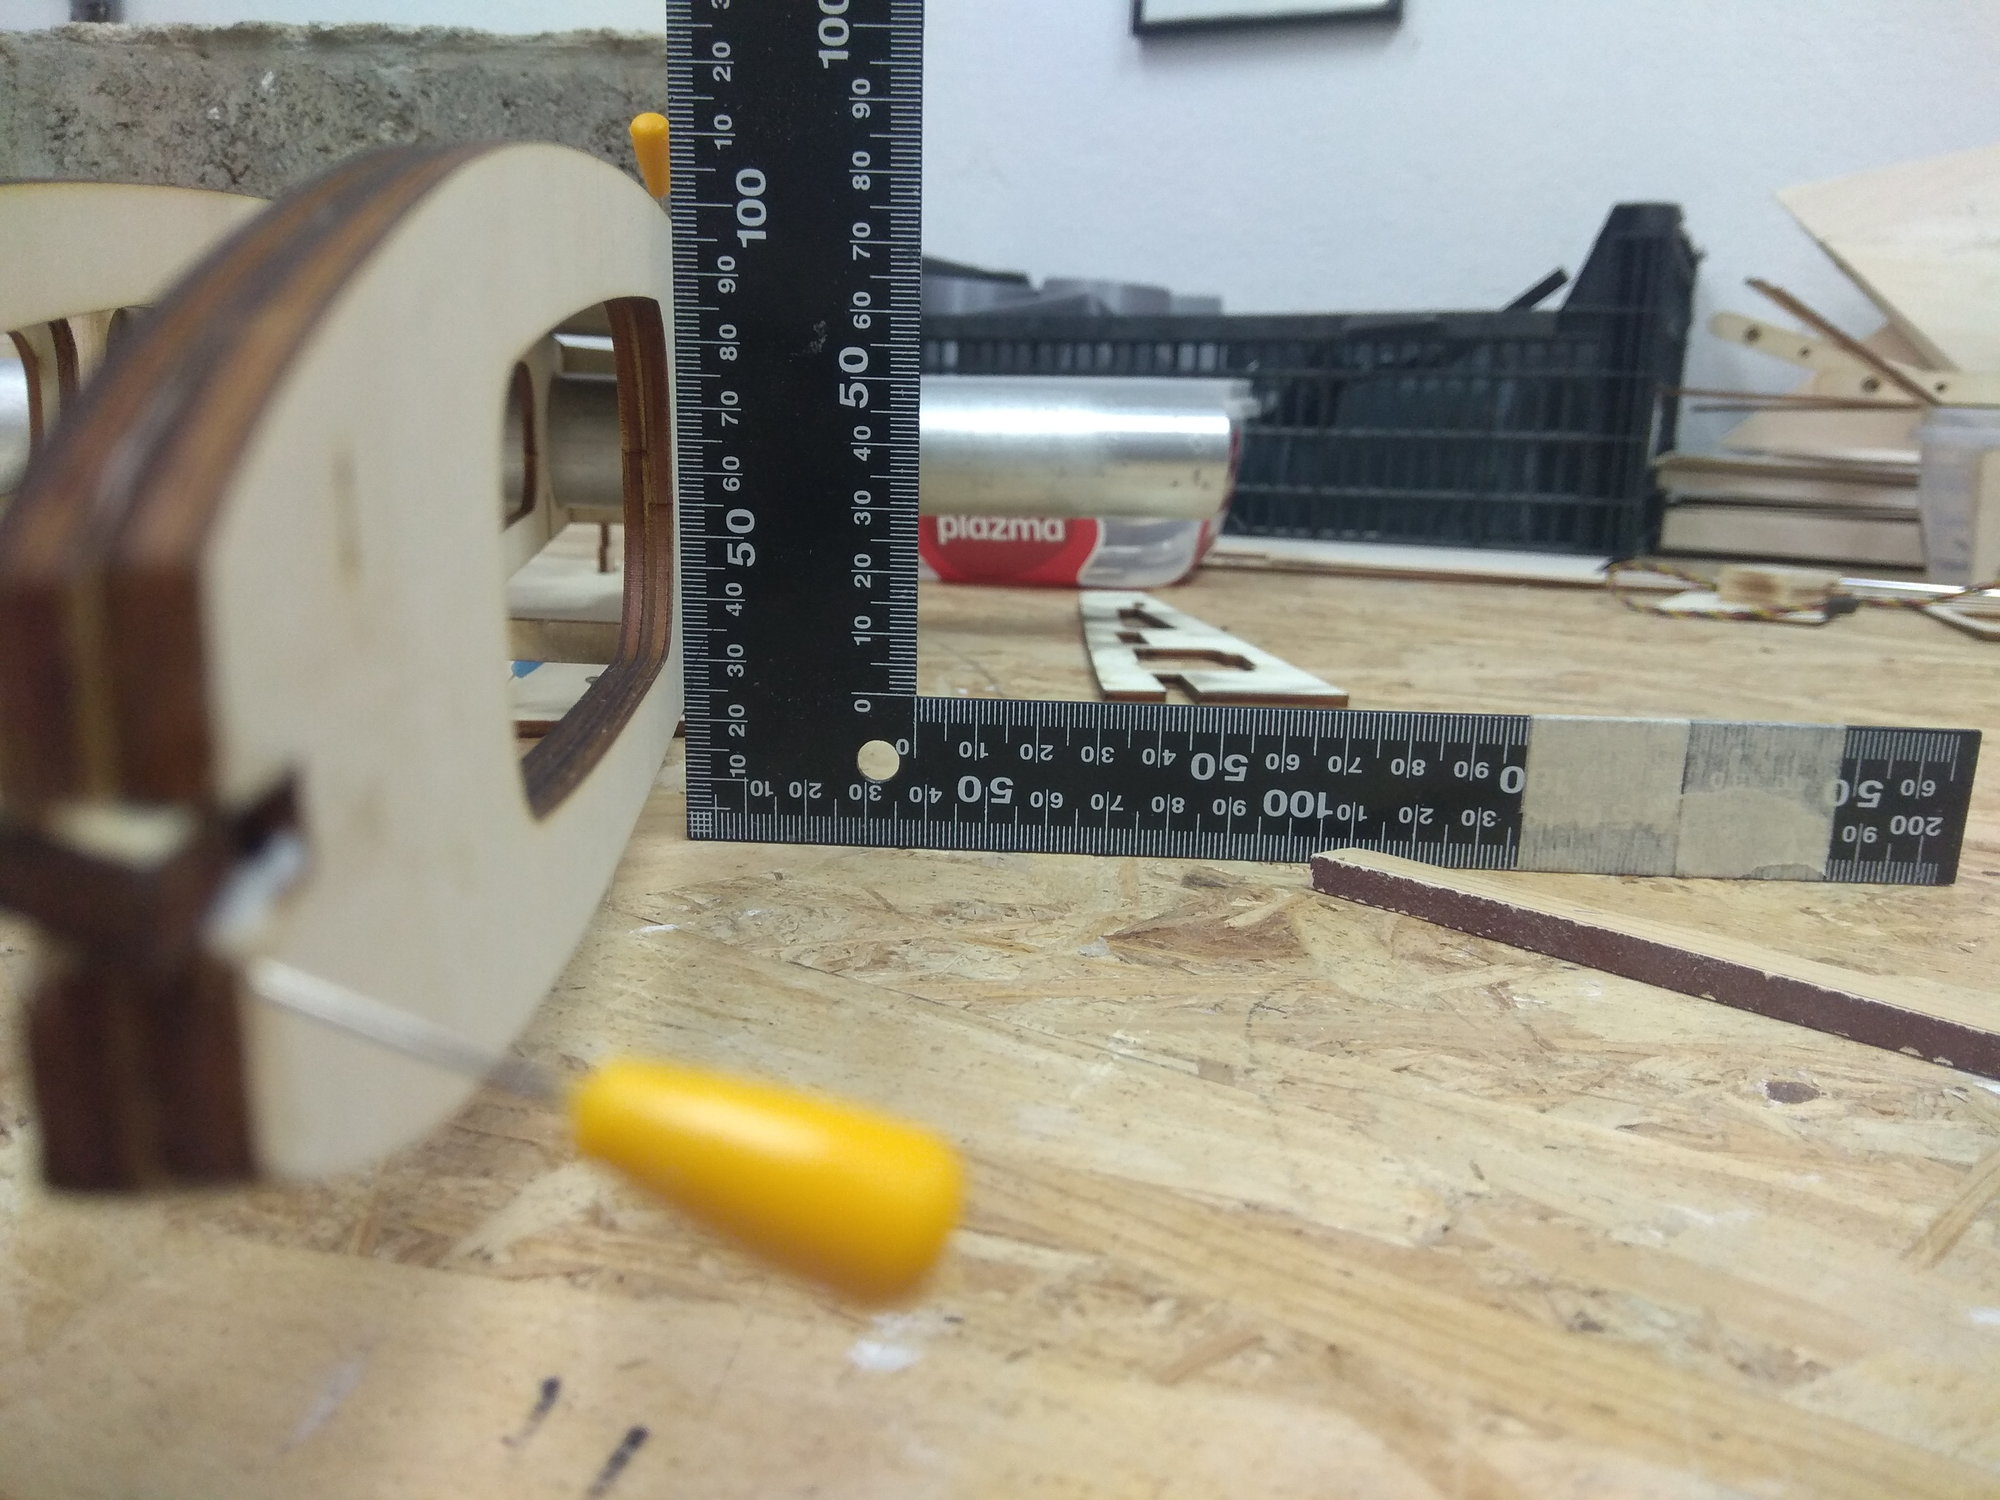
When making this F 86, it is important to note that until all the parts around the horizontal stabilizer and aluminum tubes of the vertical stabilizer are assembled, there is no gluing!!!
Then you need to think a little about what and how to stick, but it's definitely not complicated.
For the parts that determine the angle of the horizontal stabilizer, I used a pair of 12 mm aluminum tubes, just to be 100% sure that everything is OK.
And without them, it is not a problem to assemble that part of the hull, because the parts that make up the construction simply cannot be glued differently, since each part has its own groove!!!


Therefore, it only took a couple of hours to assemble and glue all the ribs of the rear part of the fuselage.
When making this F 86, it is important to note that until all the parts around the horizontal stabilizer and aluminum tubes of the vertical stabilizer are assembled, there is no gluing!!!
Then you need to think a little about what and how to stick, but it's definitely not complicated.
For the parts that determine the angle of the horizontal stabilizer, I used a pair of 12 mm aluminum tubes, just to be 100% sure that everything is OK.
And without them, it is not a problem to assemble that part of the hull, because the parts that make up the construction simply cannot be glued differently, since each part has its own groove!!!
The following users liked this post:
jcterrettaz (07-24-2022)
 07-24-2022, 02:02 AM
#5
Thread Starter
Hello Jim, I do not remove the black laser marks from the parts.
I have built a lot of models like that, some have flown more than 500 times and everything is in the best order.
In my opinion, the most important thing is to glue the parts with white (carpenter's) glue, rather than with CA. White glue is the only one I recommend during model making, it is thick and pours into all the cracks, makes nice transitions between parts and the joint is extremely strong.
07-24-2022, 09:09 AM
#6
Join Date: Feb 2007
Location: Lambton Shores,
ON, CANADA
Posts: 16
Likes: 0
Received 0 Likes
on
0 Posts
Hello Mirce, I am close to finishing my F-86 and I need a canopy , after contacting 
Alexander Carton who make make now tell me he not doing them and to contact you for information on where to get them. Please help Brad "Maddog" Metcalf
Alexander Carton who make make now tell me he not doing them and to contact you for information on where to get them. Please help Brad "Maddog" Metcalf

07-24-2022, 01:49 PM
#7
Thread Starter
Brad, I was also shocked ten days ago when Alexander told me that he didn't deliver a single canopy!!!!
But we found a company that professionally builds canopies on vacuum machine, the tools have been sent, so don't worry, the canopies will be able to be ordered again soon.
Sorry for this little hiatus, please send an email to: [email protected]
Martin will let you know as soon as the cabins arrive.
To console you, I don't have a canopy for the model I'm currently showing either...
07-24-2022, 01:58 PM
#8
Thread Starter
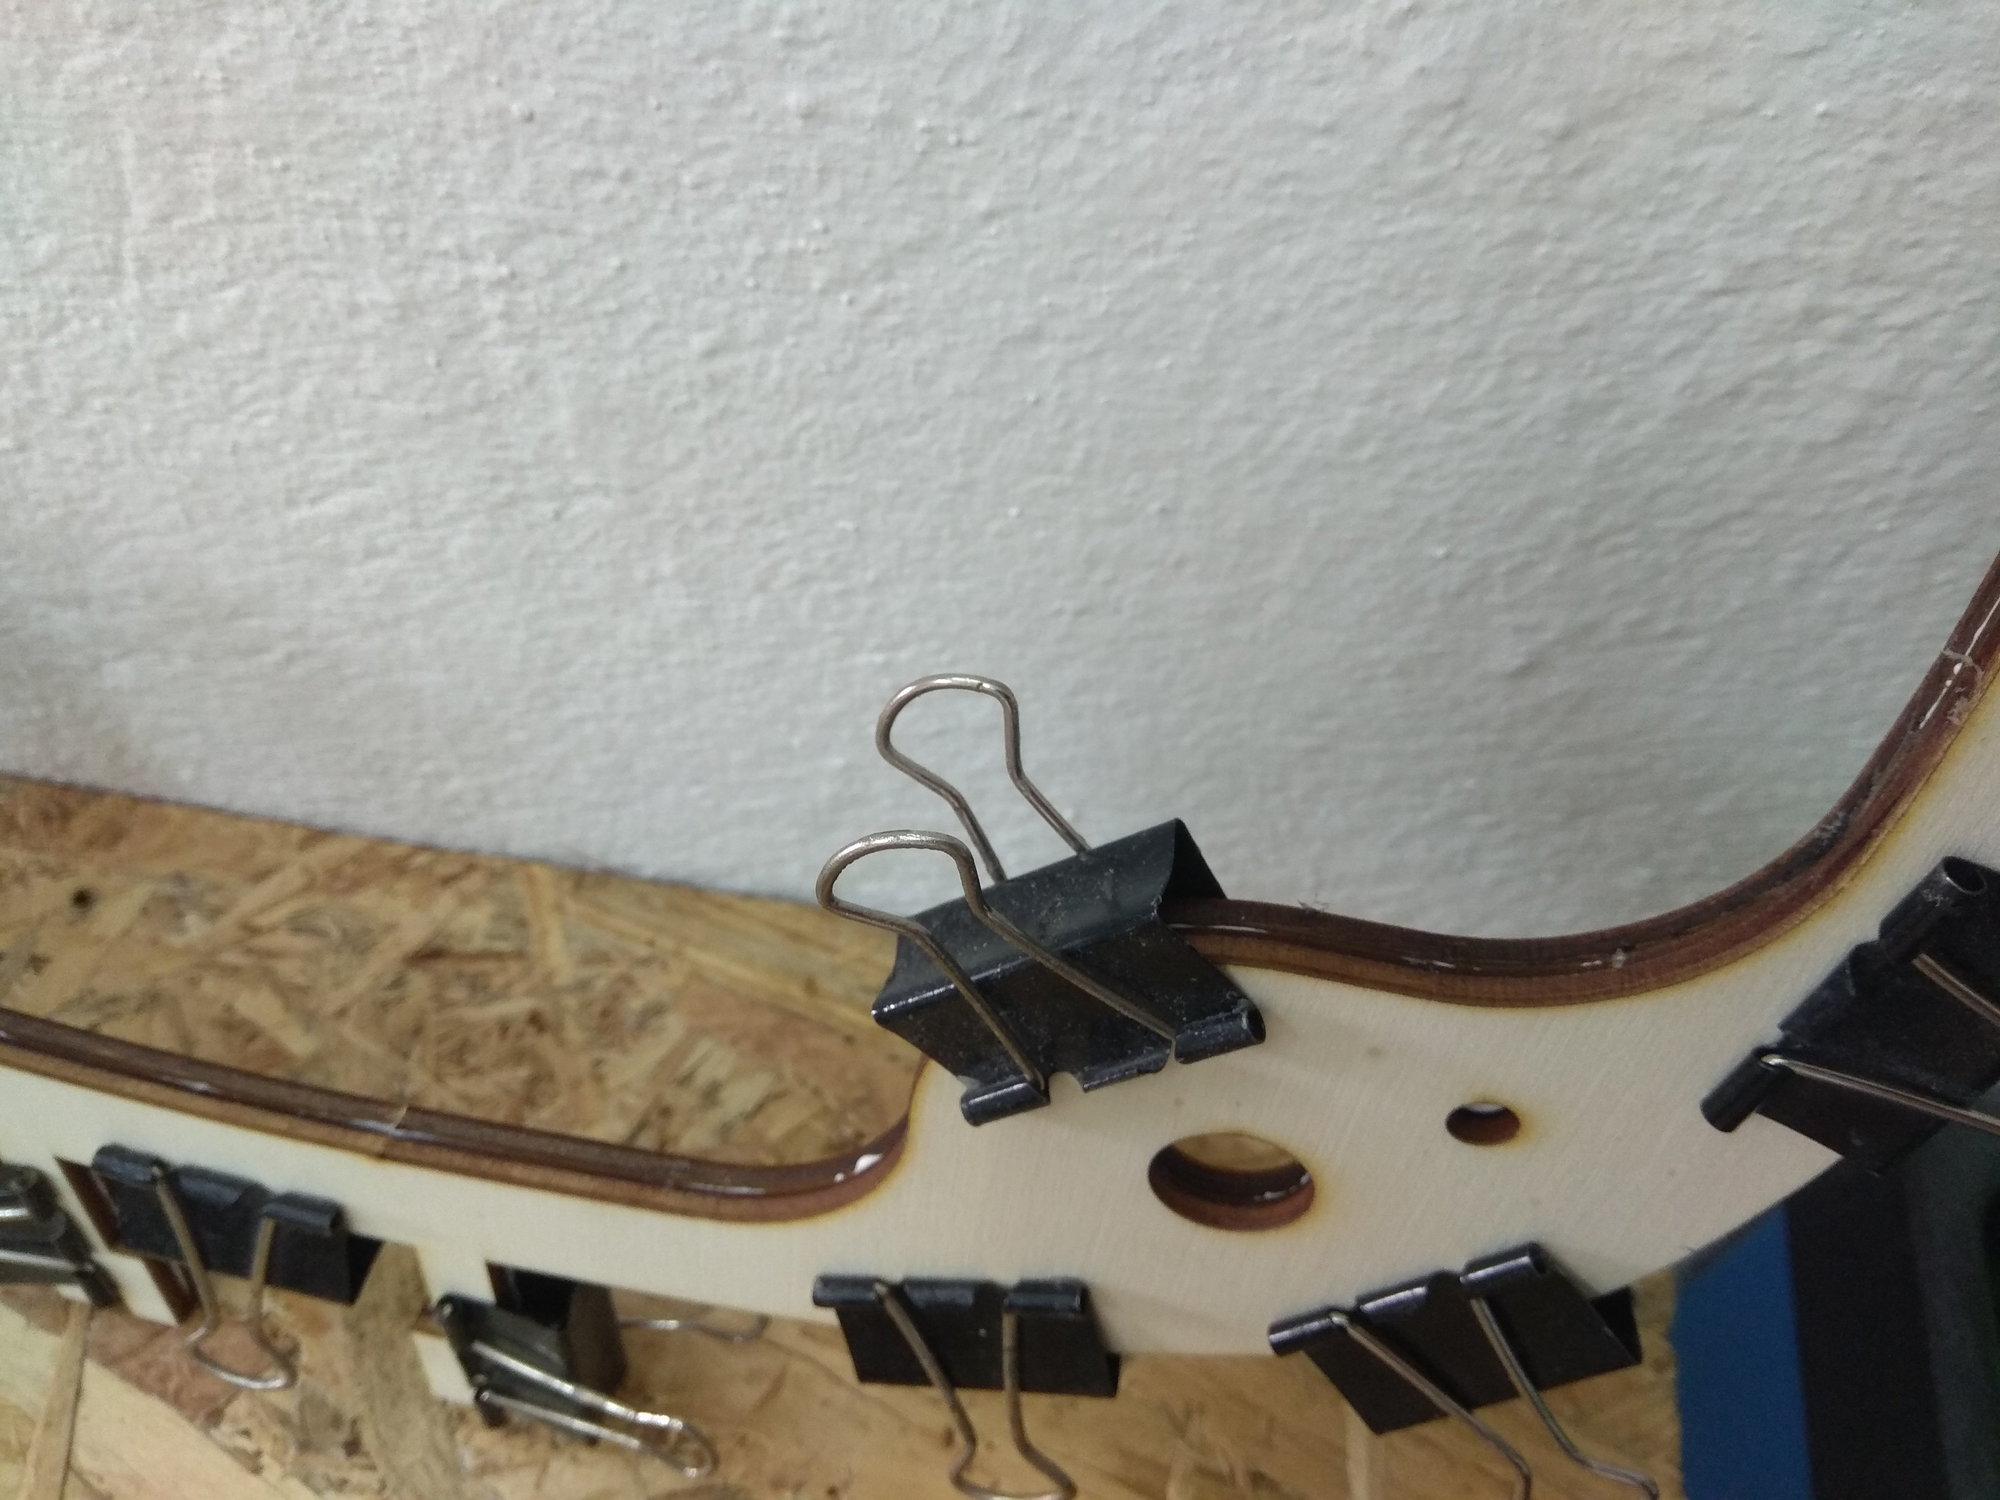
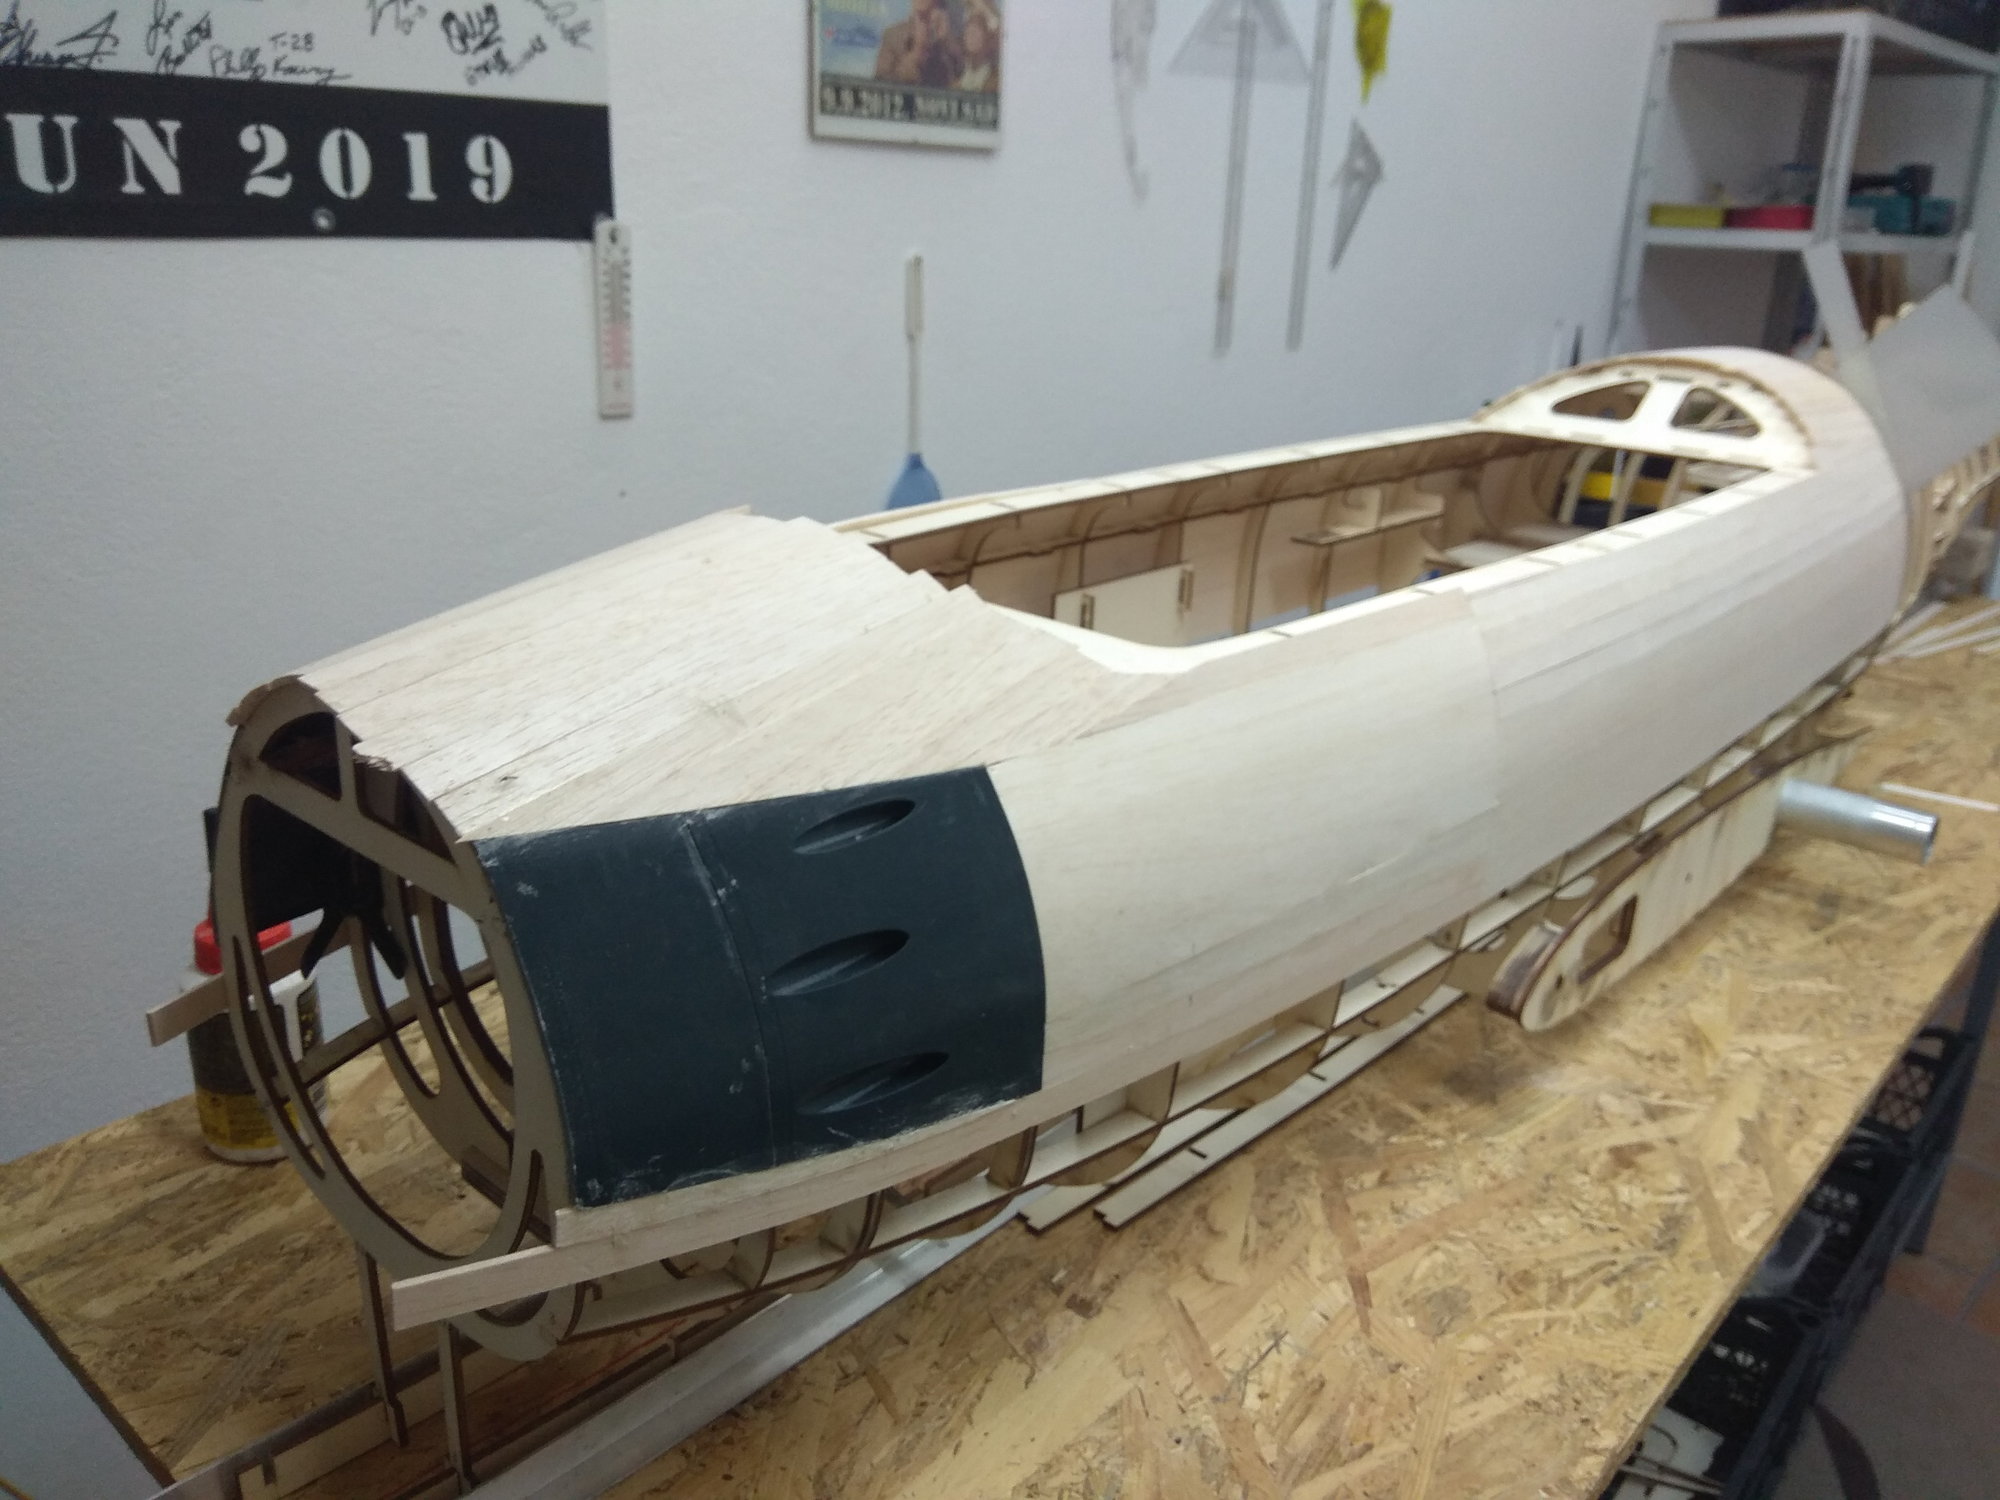
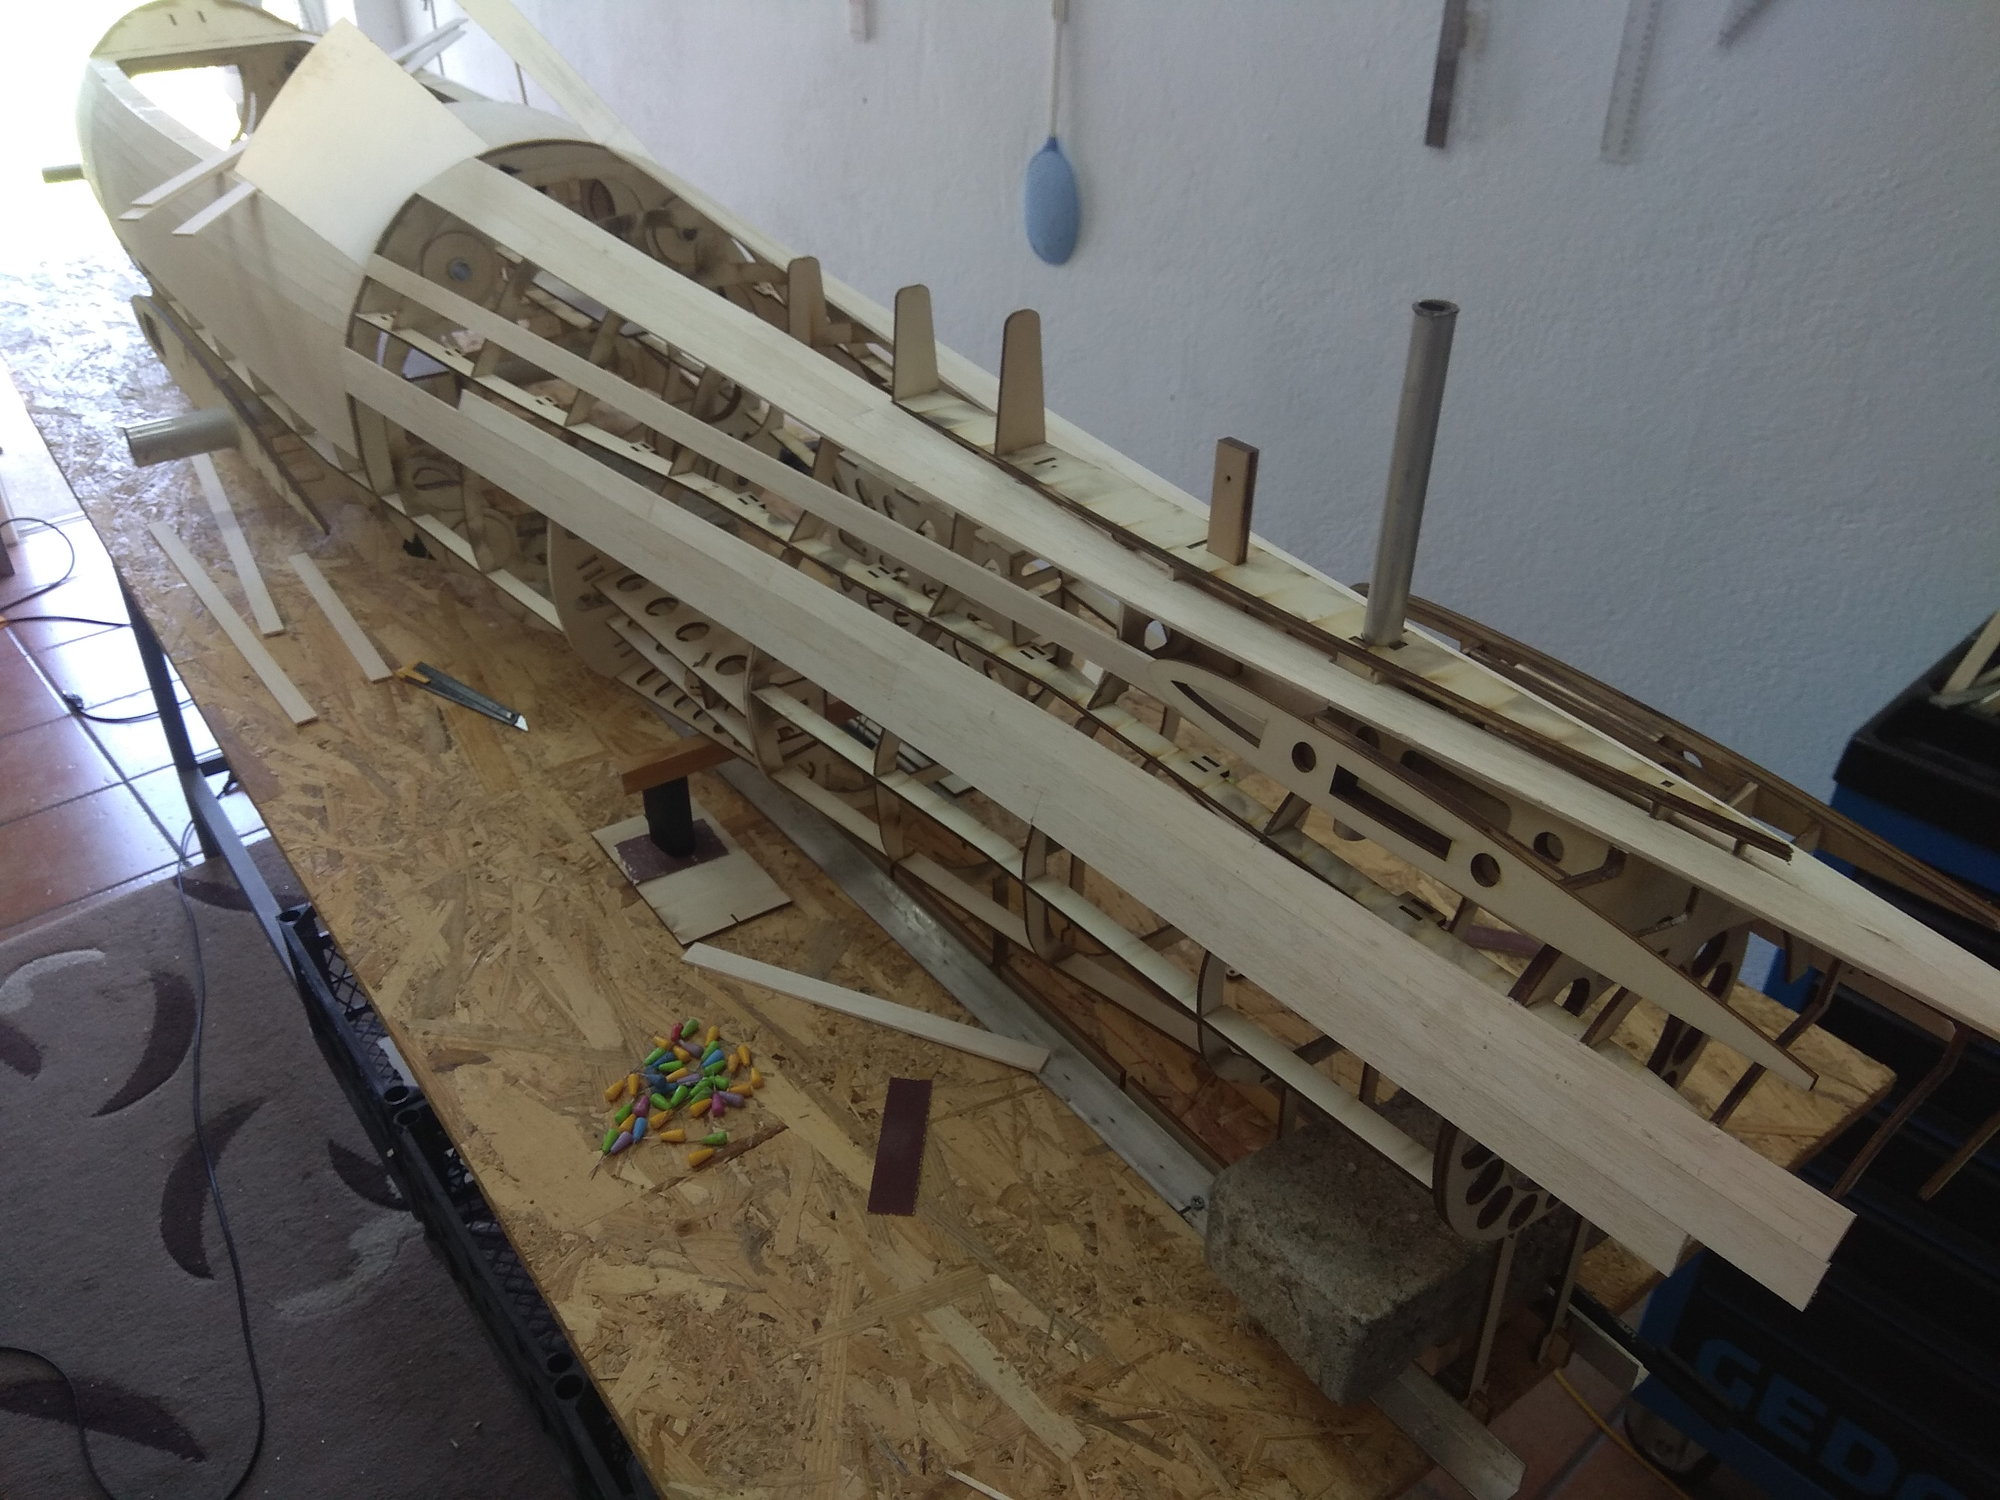
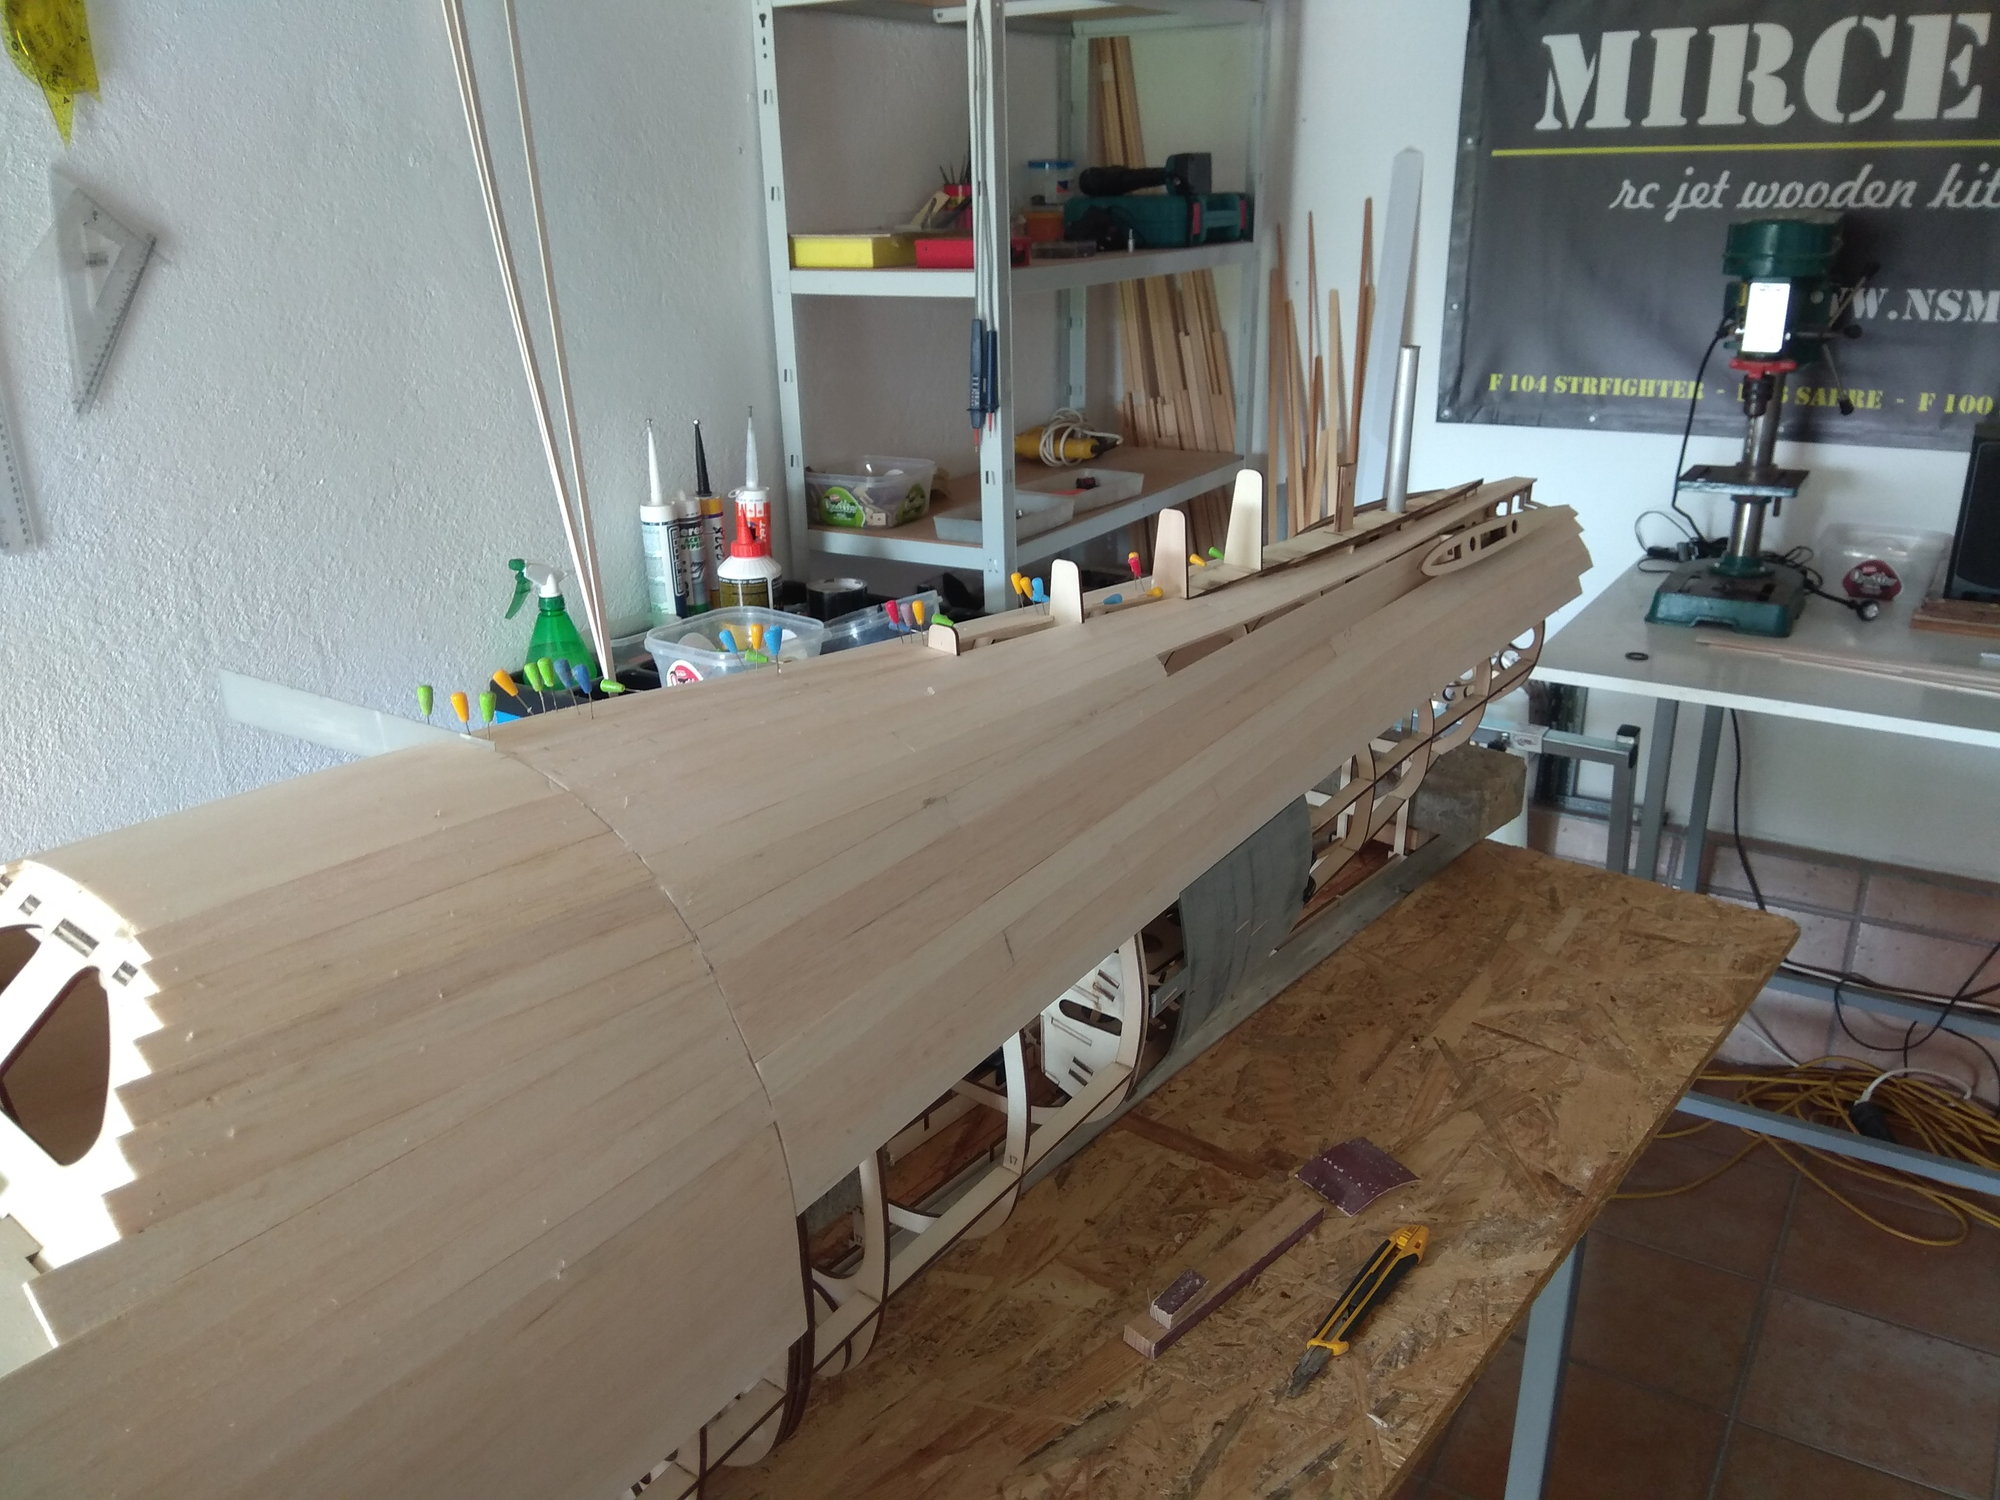
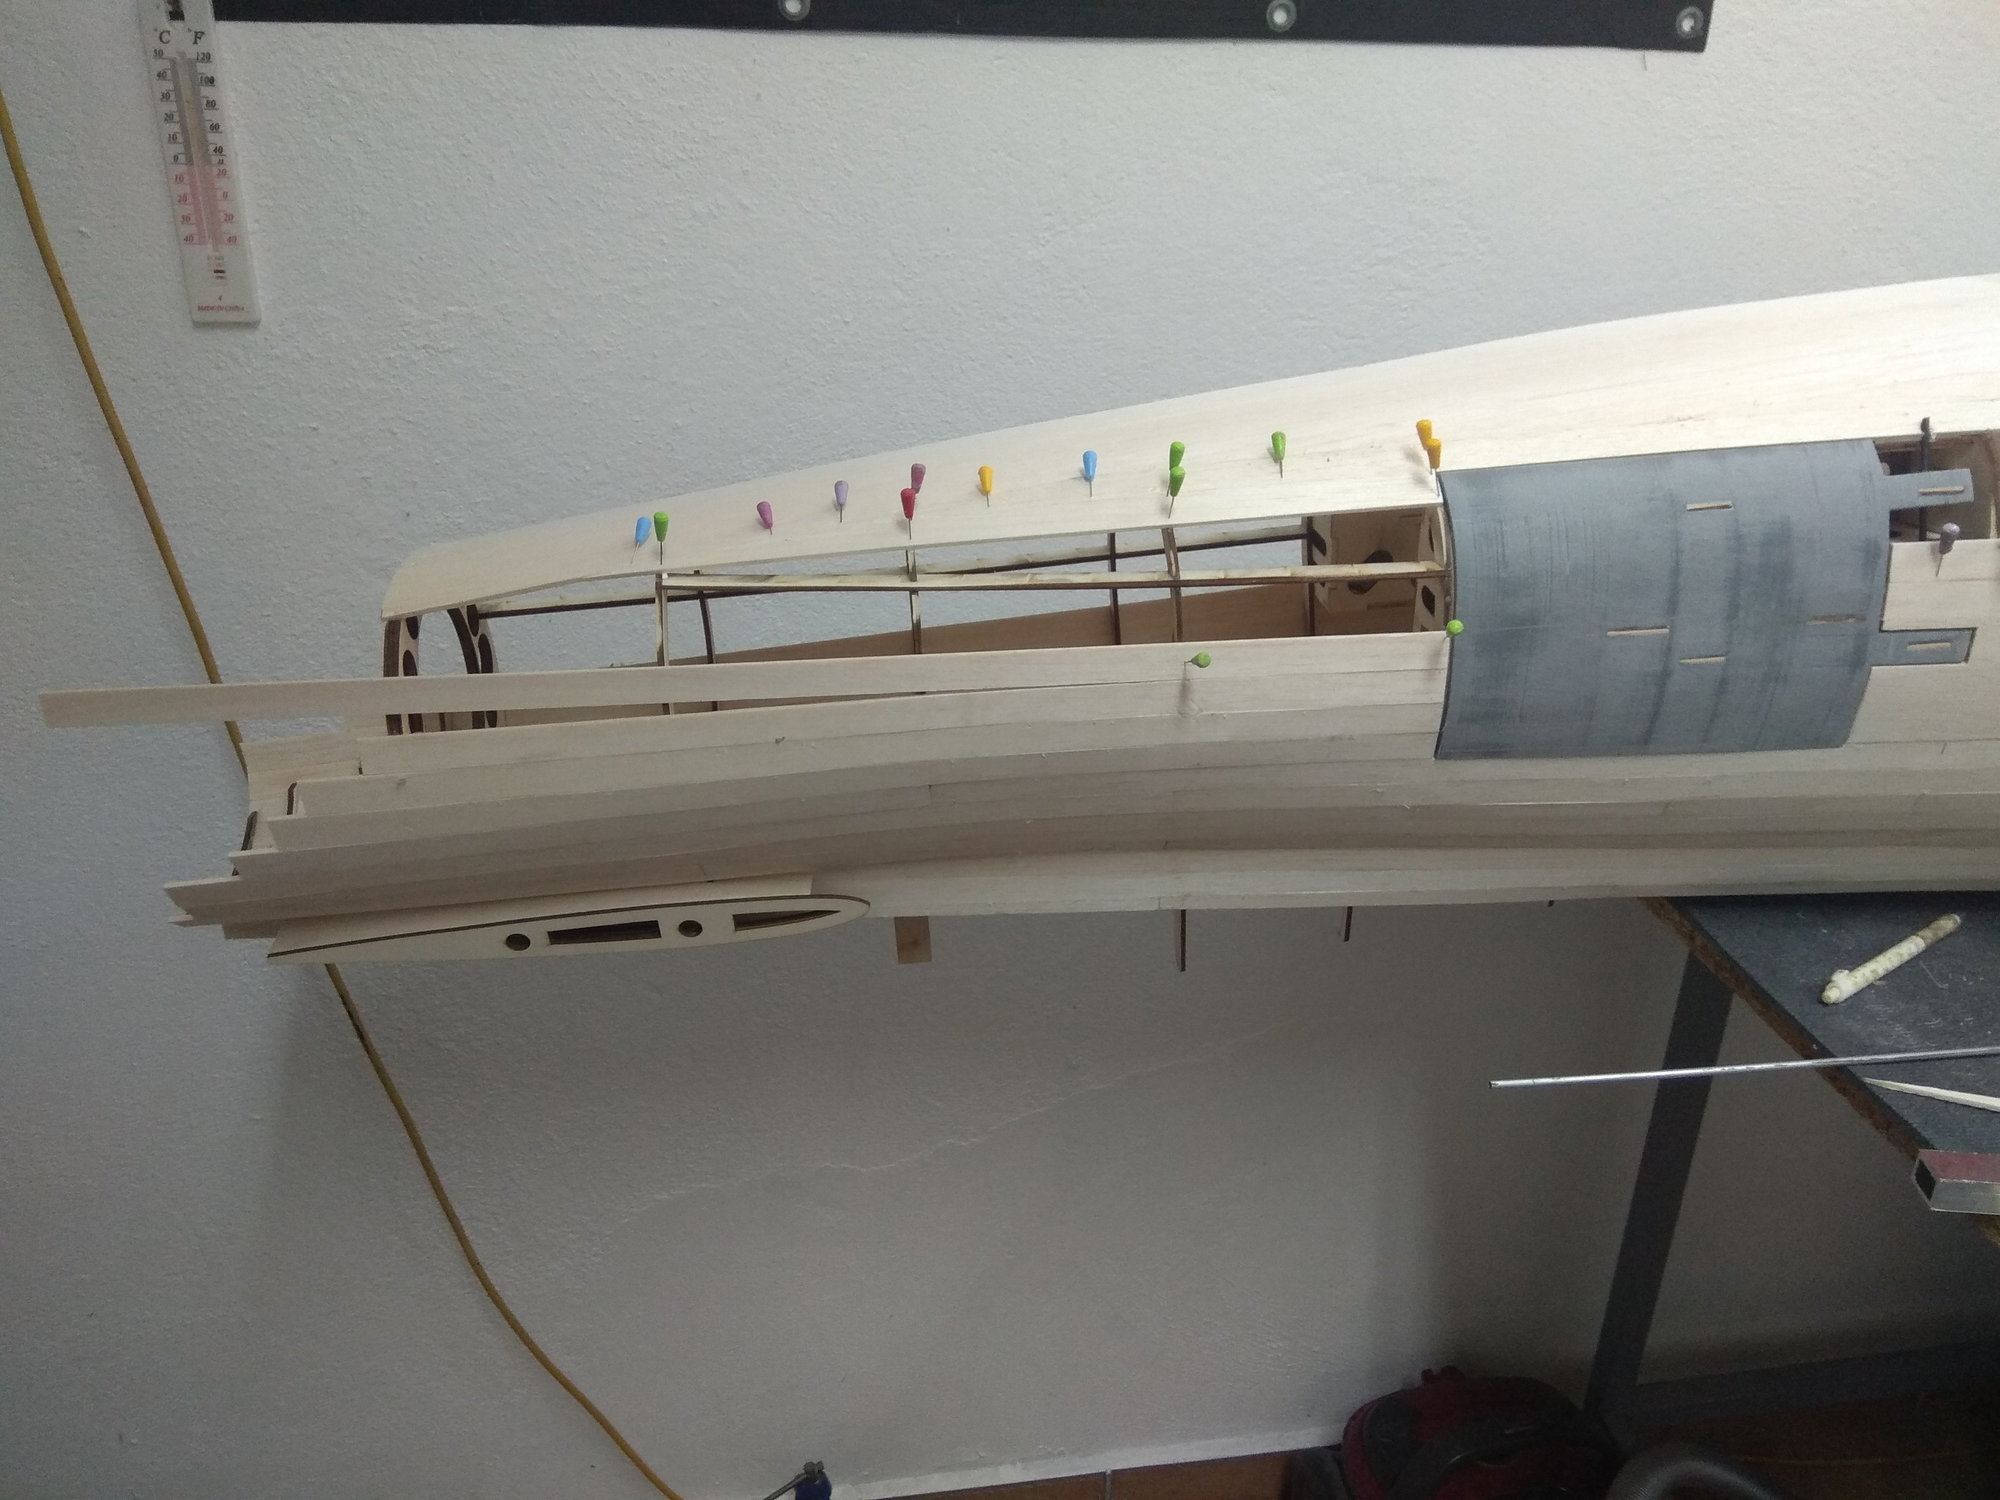
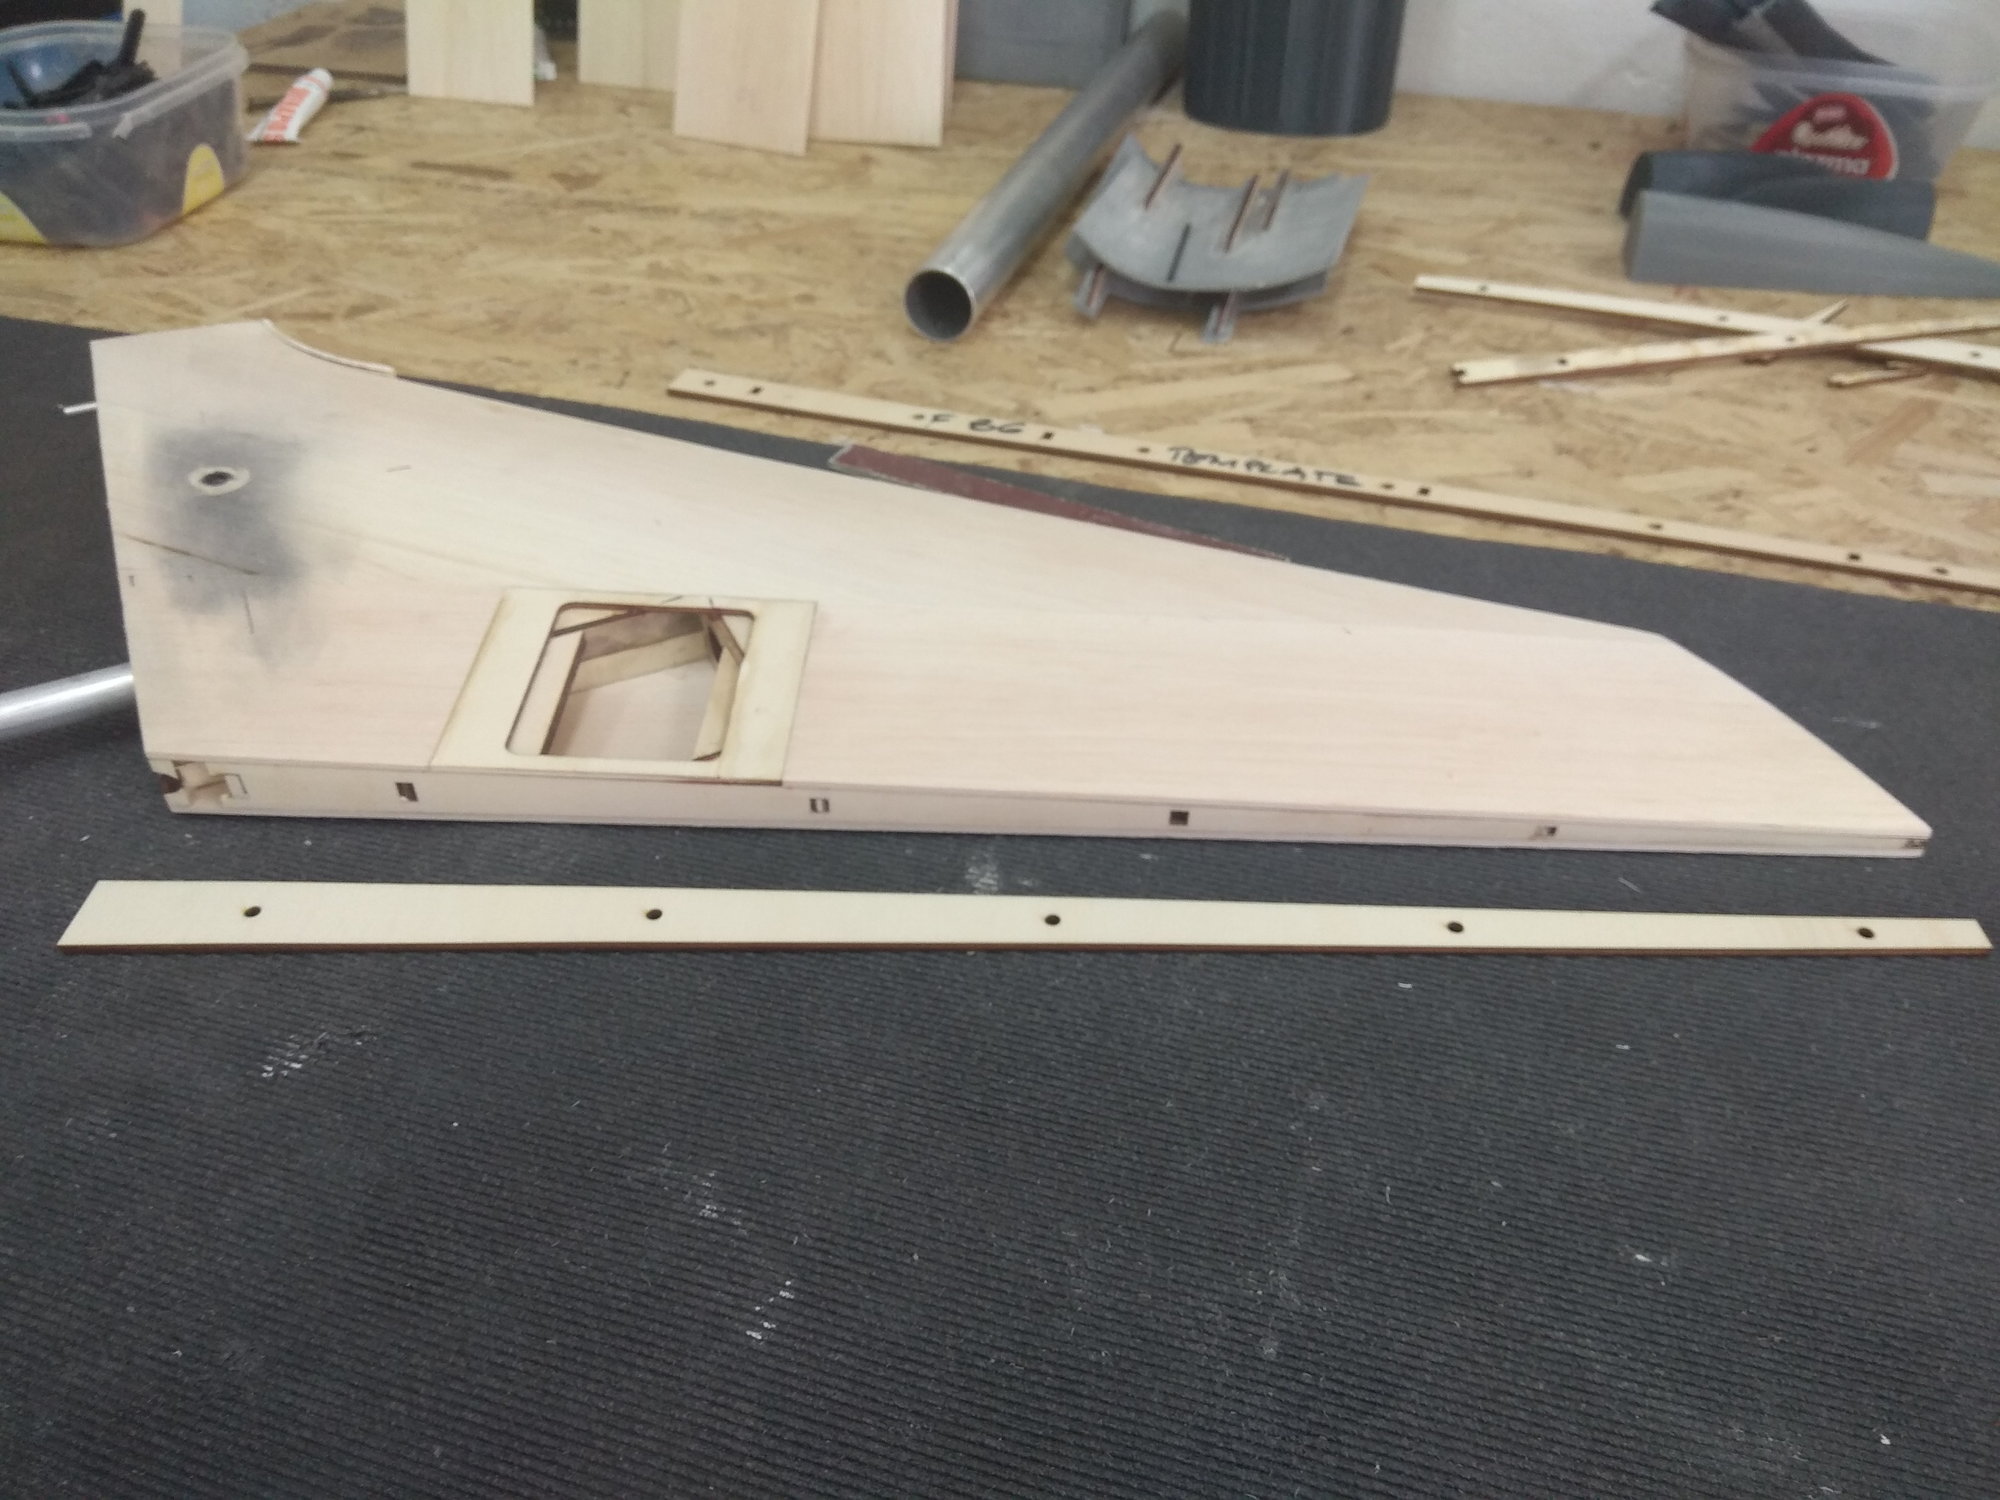
As always, I cut off the front two ribs first, because that's where the 3D printed nose will be come later.

The machine gun panels are also printed and these are first 3 D parts glued to the fuselage structure.
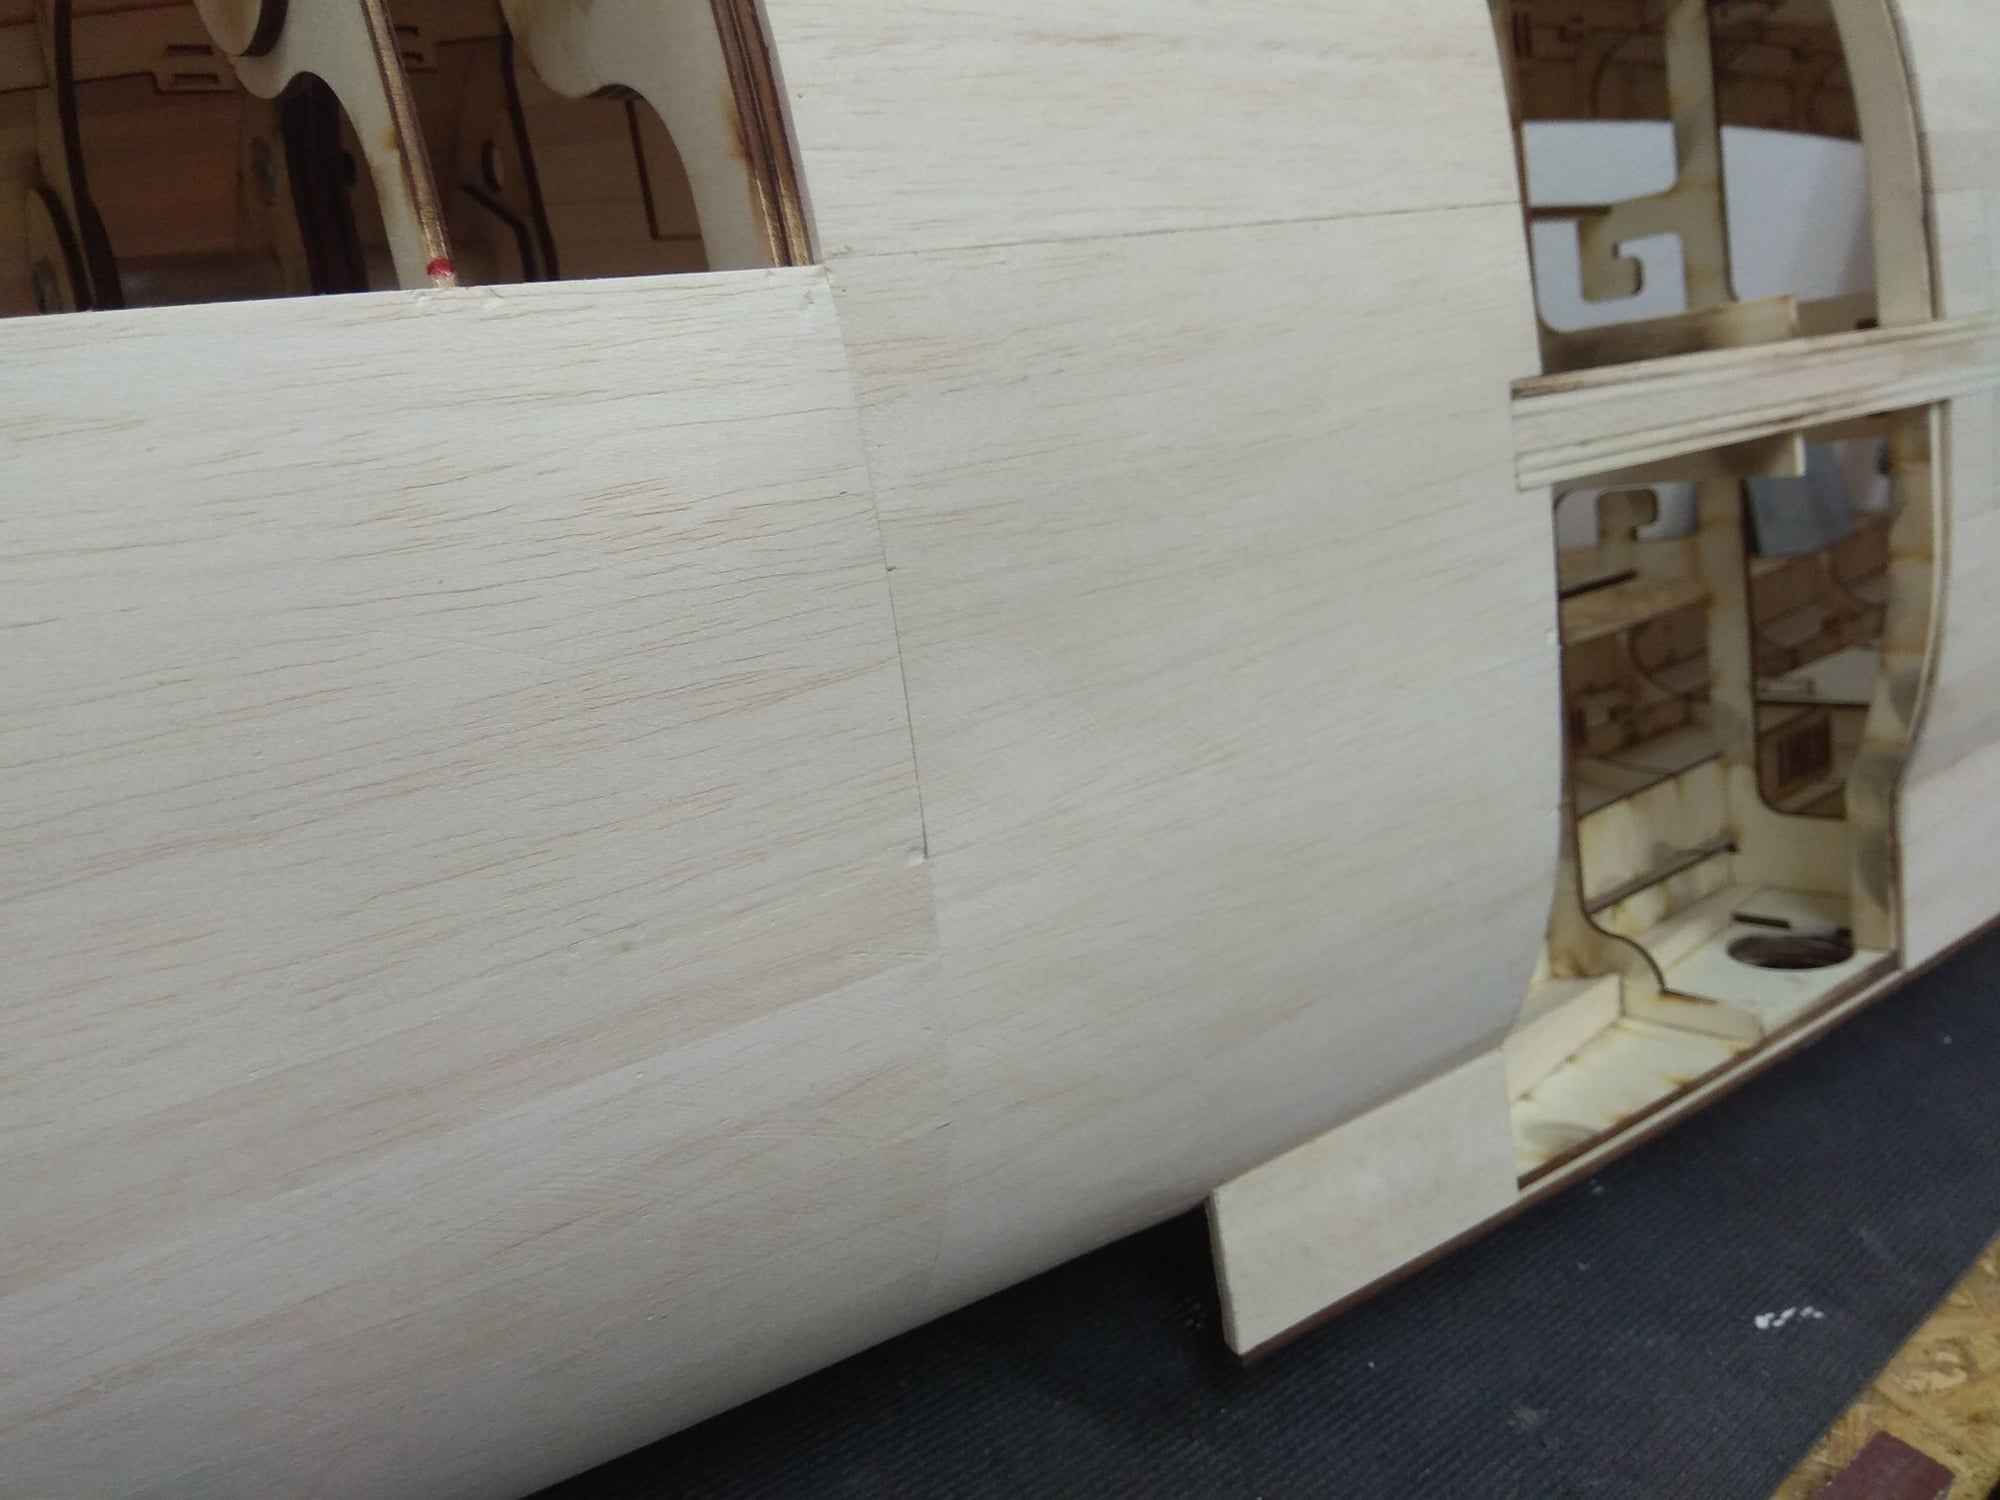
I always start planking with 3 mm balsa from the side where one almost entire plank is glued.
Then all the other slats go from it...

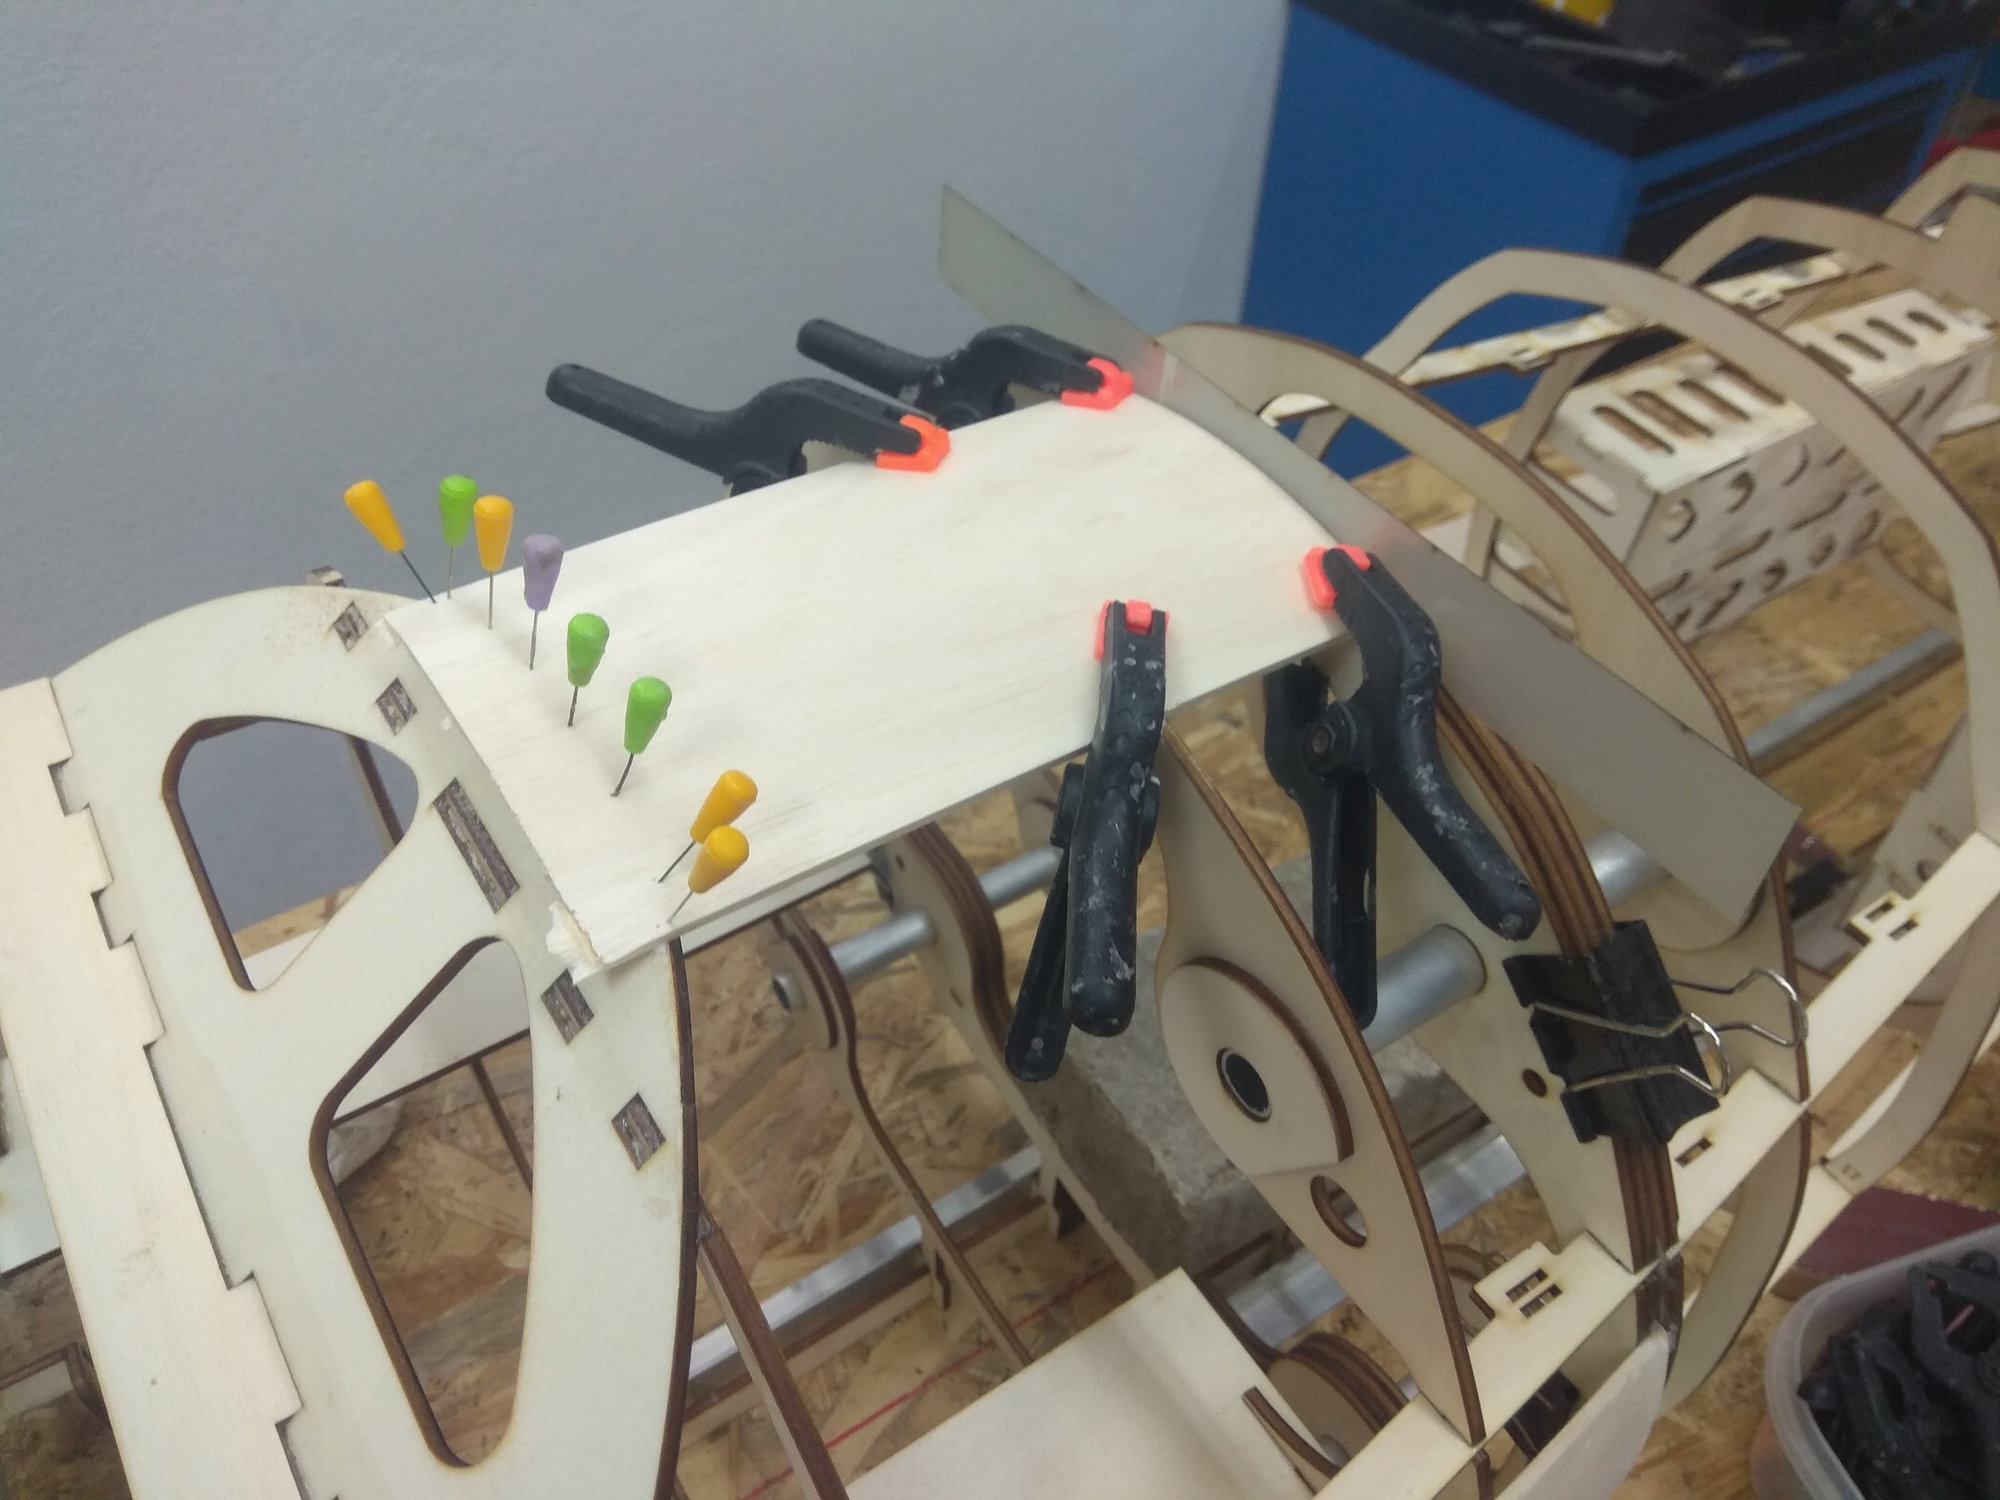

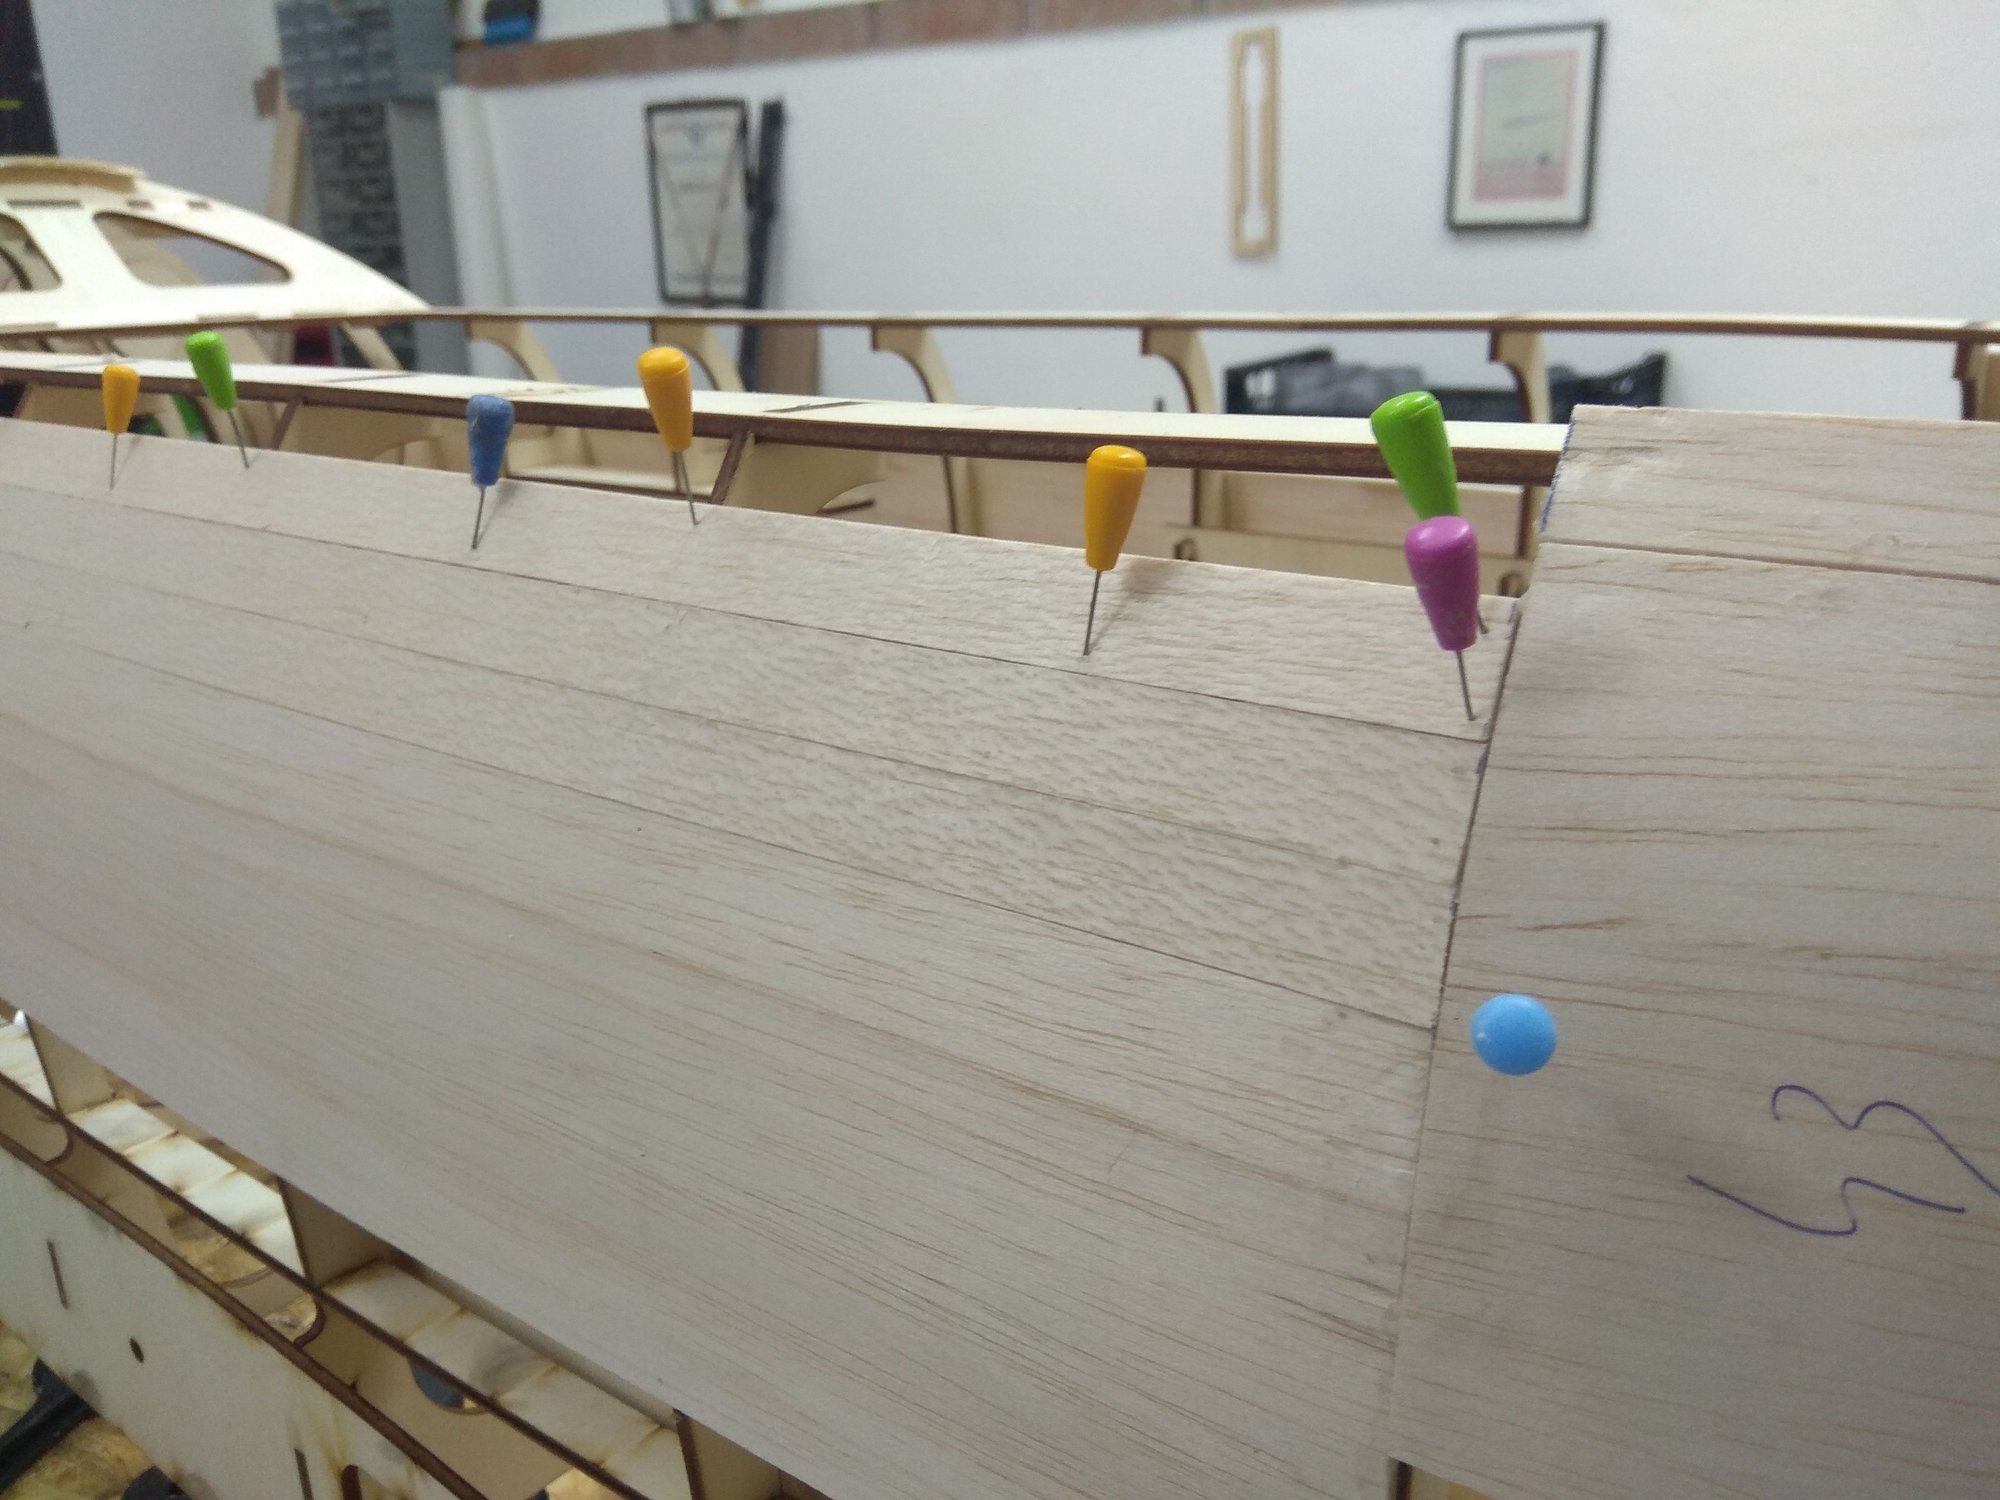

Between the front and back of the fuselage I use thin plastic, on which I rest the balsa slats. This gives me a nice and "sharp" connection between the two parts of the body.
All the slats are approximately 15mm wide, in some places larger pieces could be glued in, but I'm in no rush. When everything is sanded and polished, the shape of the fuselage will be perfectly round.
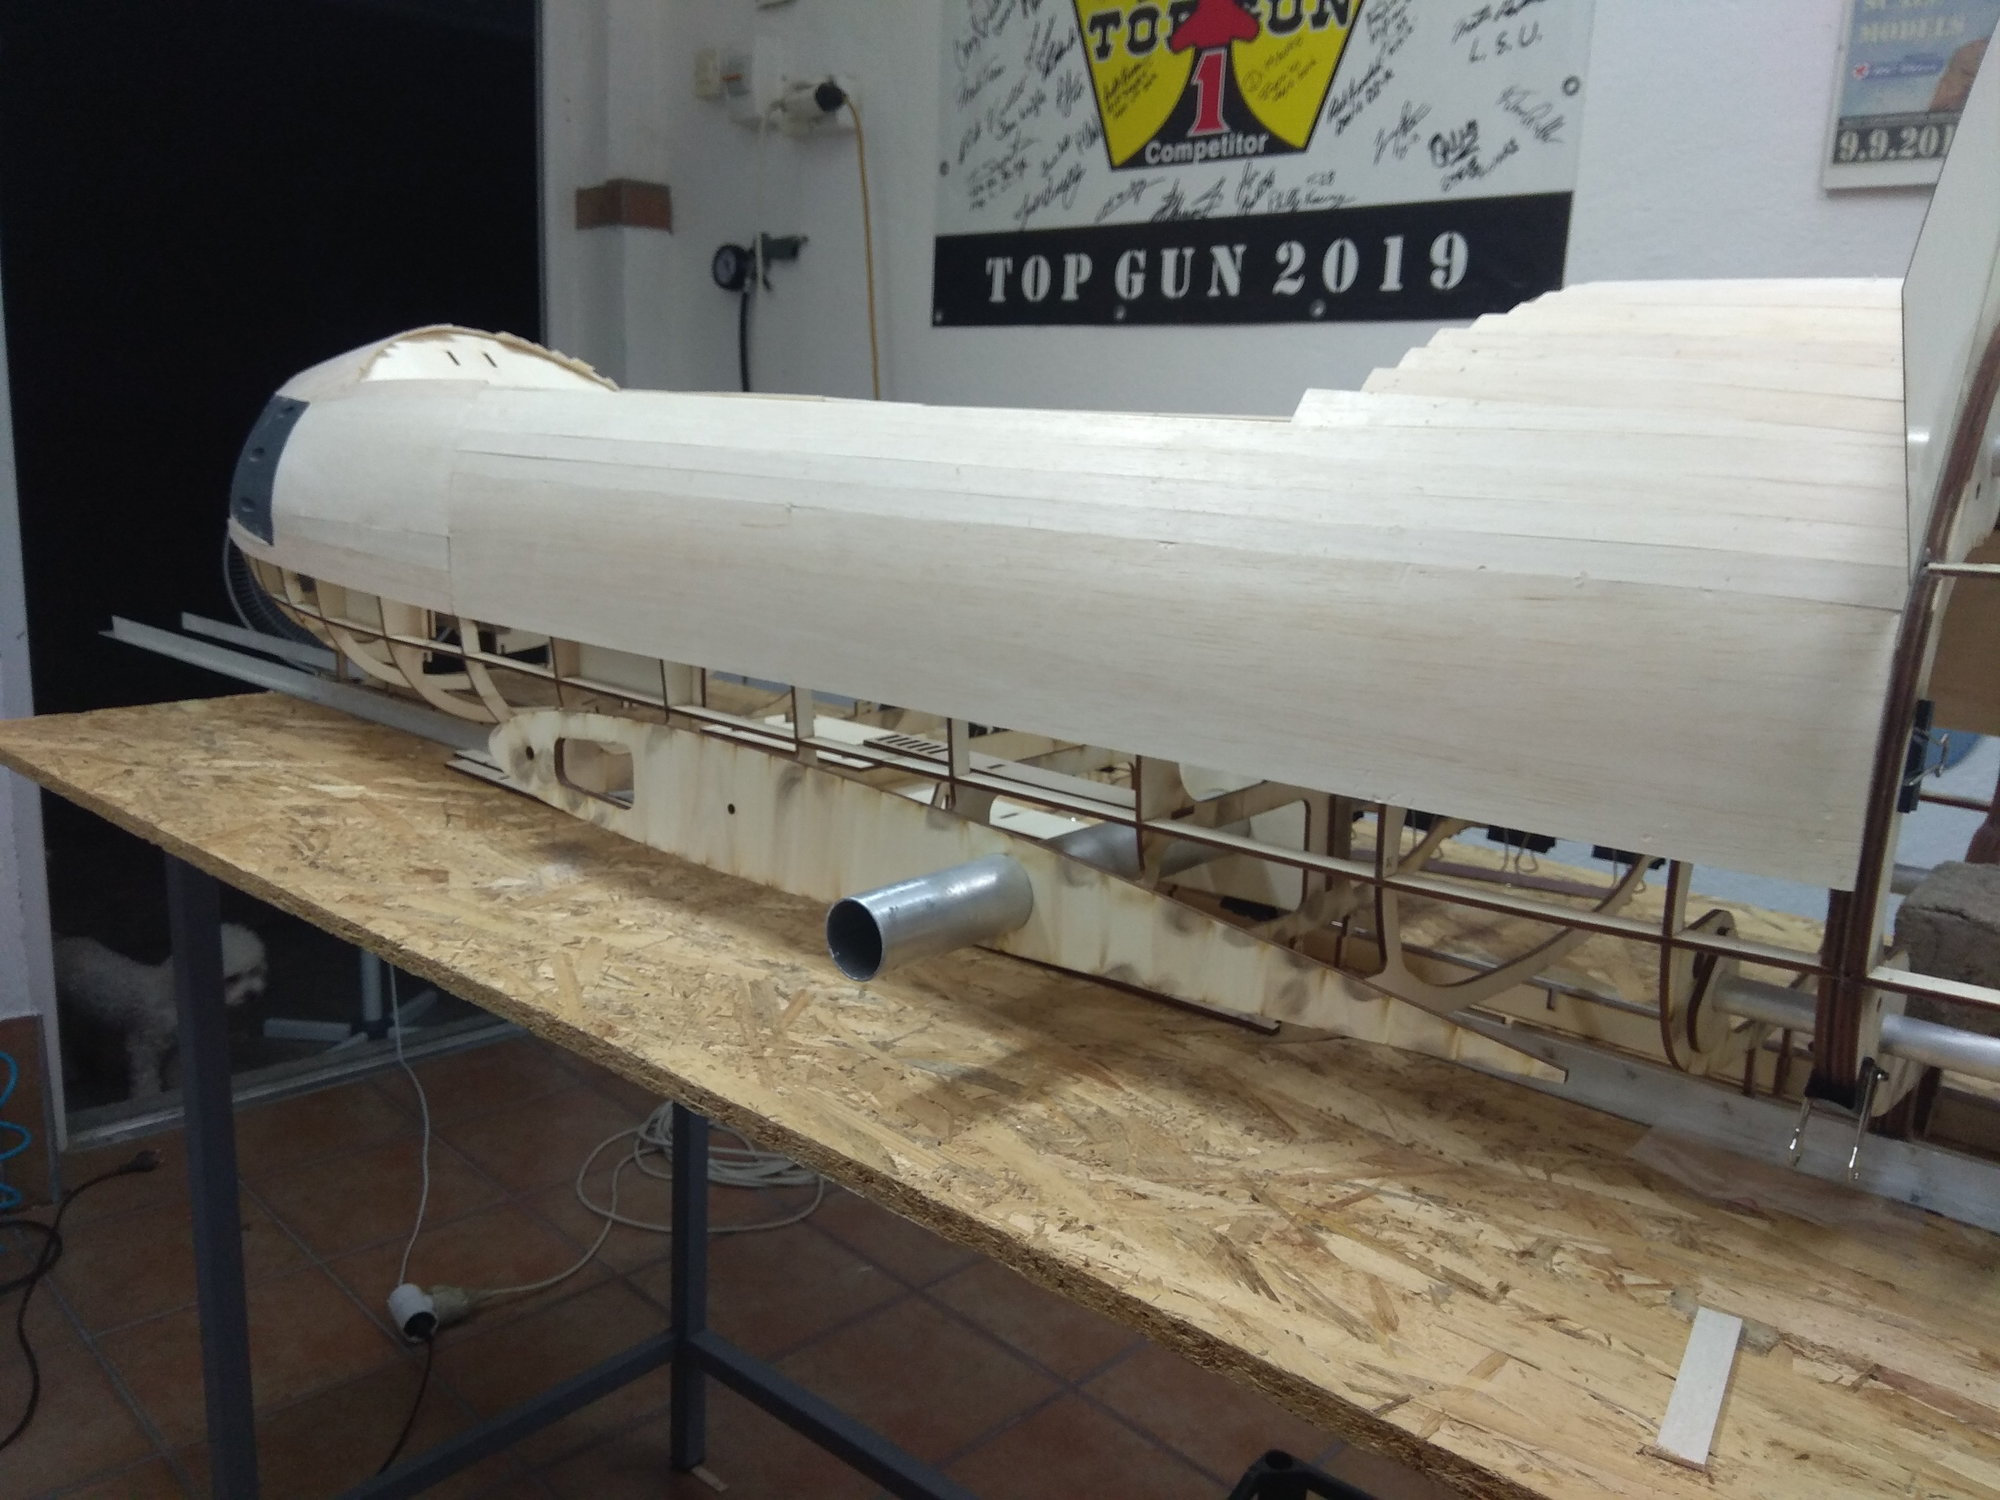
I will cut off the excess slats later, when I separate the front part of the hull from the worktop.
Now I continue with the work on the rear part.
The machine gun panels are also printed and these are first 3 D parts glued to the fuselage structure.
I always start planking with 3 mm balsa from the side where one almost entire plank is glued.
Then all the other slats go from it...
Between the front and back of the fuselage I use thin plastic, on which I rest the balsa slats. This gives me a nice and "sharp" connection between the two parts of the body.
All the slats are approximately 15mm wide, in some places larger pieces could be glued in, but I'm in no rush. When everything is sanded and polished, the shape of the fuselage will be perfectly round.
I will cut off the excess slats later, when I separate the front part of the hull from the worktop.
Now I continue with the work on the rear part.
The following users liked this post:
Halcyon66 (07-24-2022)
The following users liked this post:
Halcyon66 (07-24-2022)
07-29-2022, 01:40 PM
#11
Thread Starter
Jim, yes, he made a pair of cabins for the smaller F 86, but the problem arose with the larger cabins, because he couldn't get good quality.
In the meantime, the tools have arrived in the Czech Republic and I hope to have information about the cabins next week.
The next option is a company in the Netherlands where for now we will certainly make new tools for both our small and large F 100 Super Saber models.
Everything is under control, let's just see how we will coordinate the production. I'm sorry there's been this little hiccup with the cabins, but it'll all be sorted out soon.
Thanks Viper, here are new pictures...
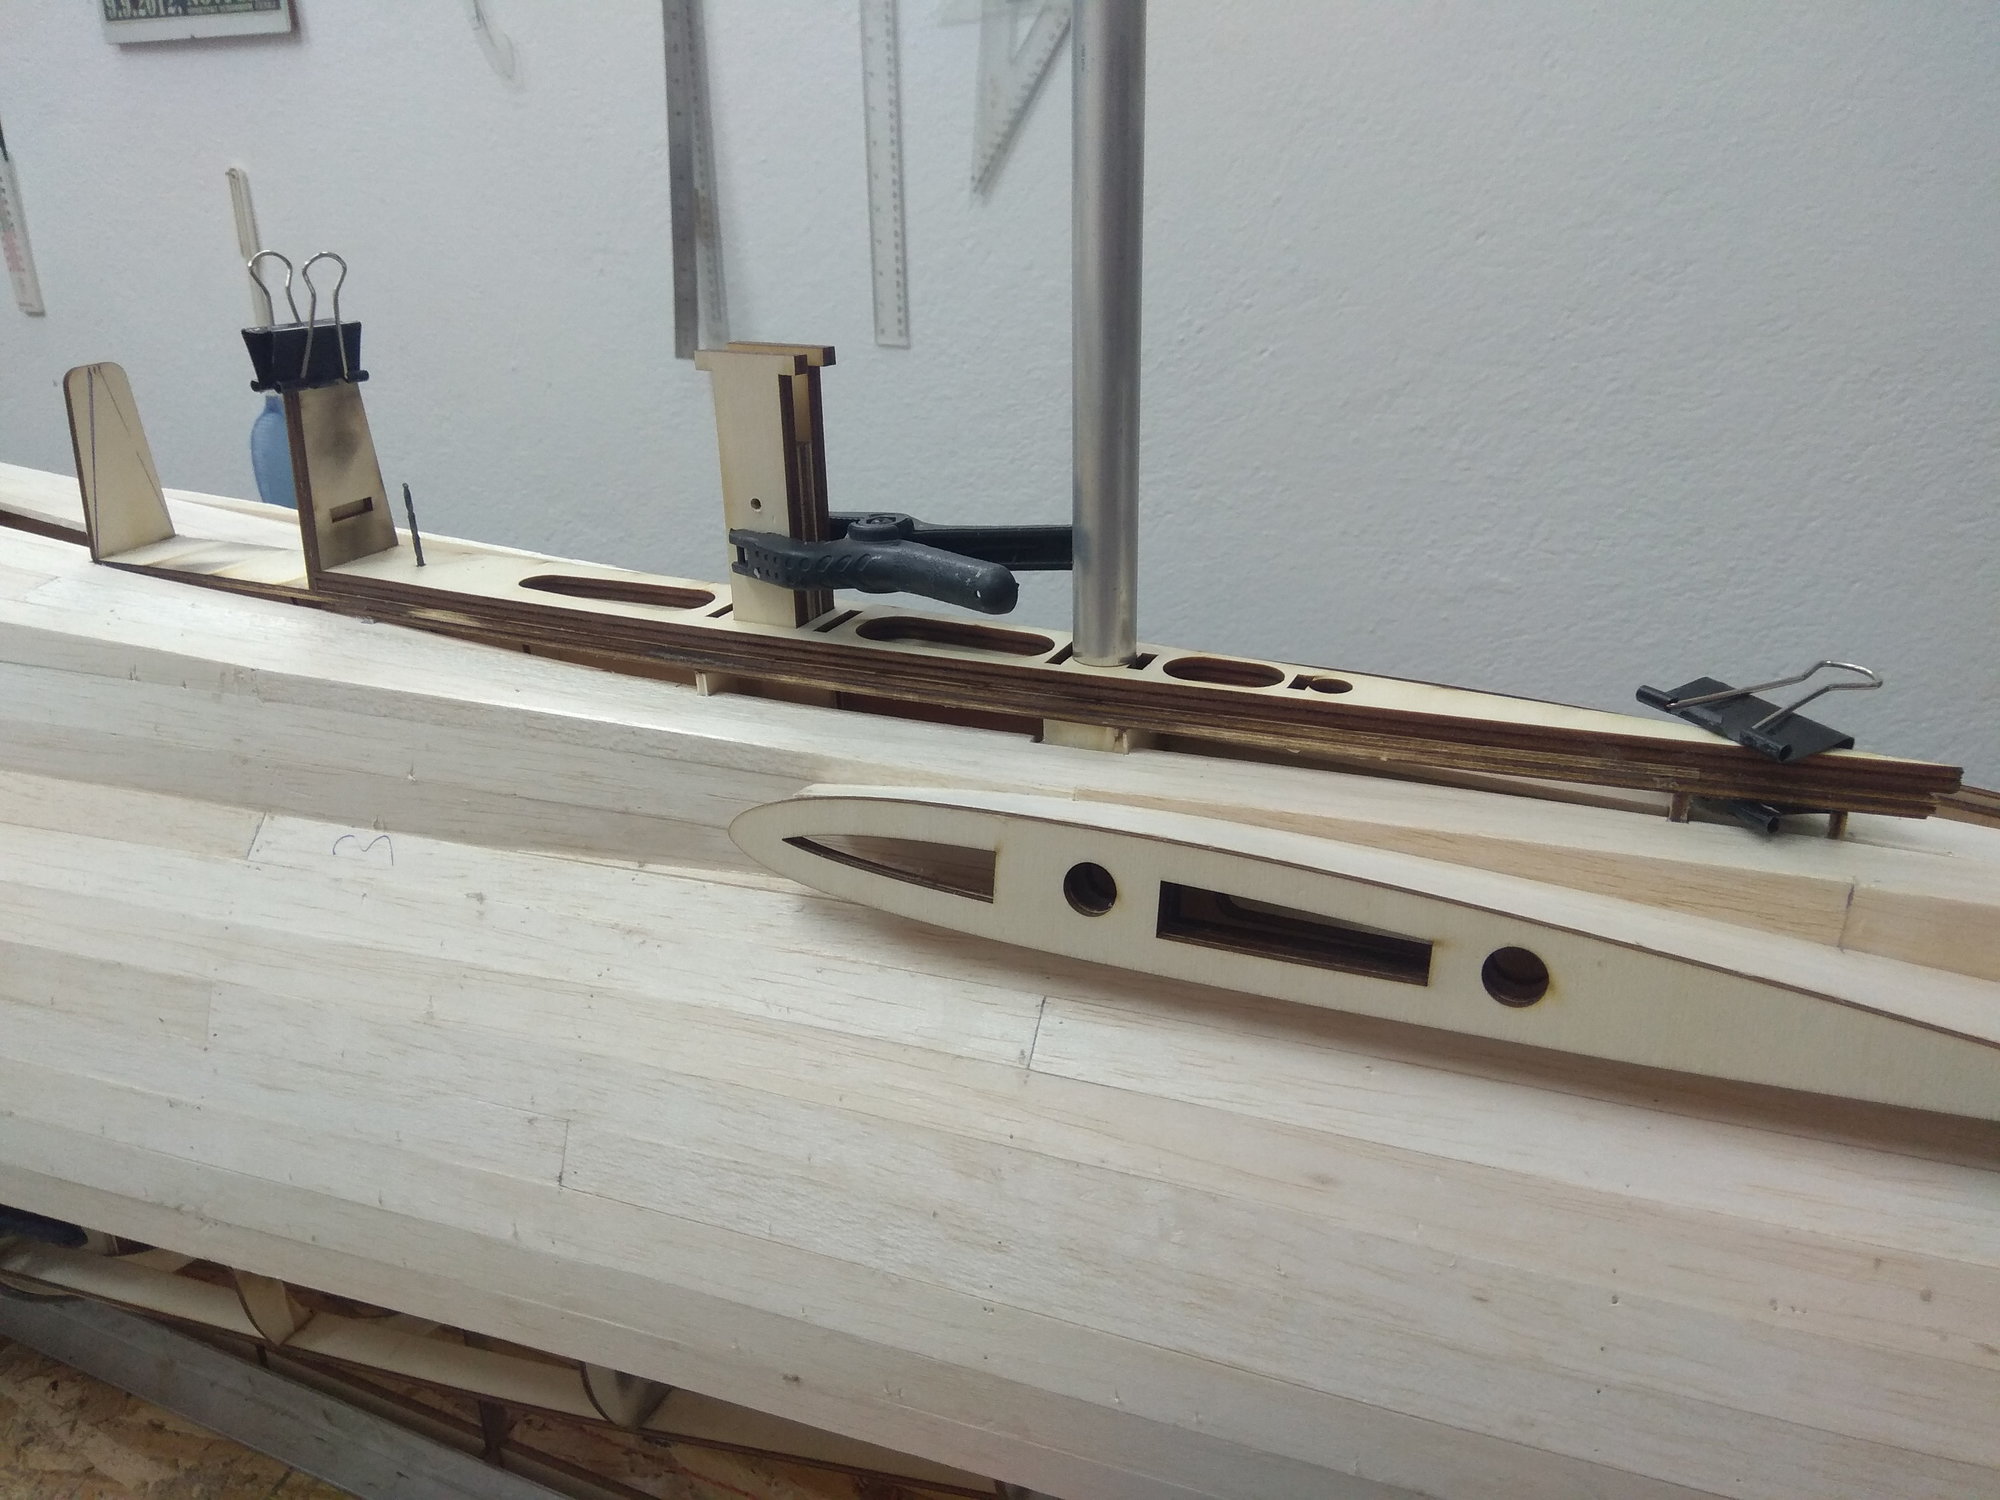
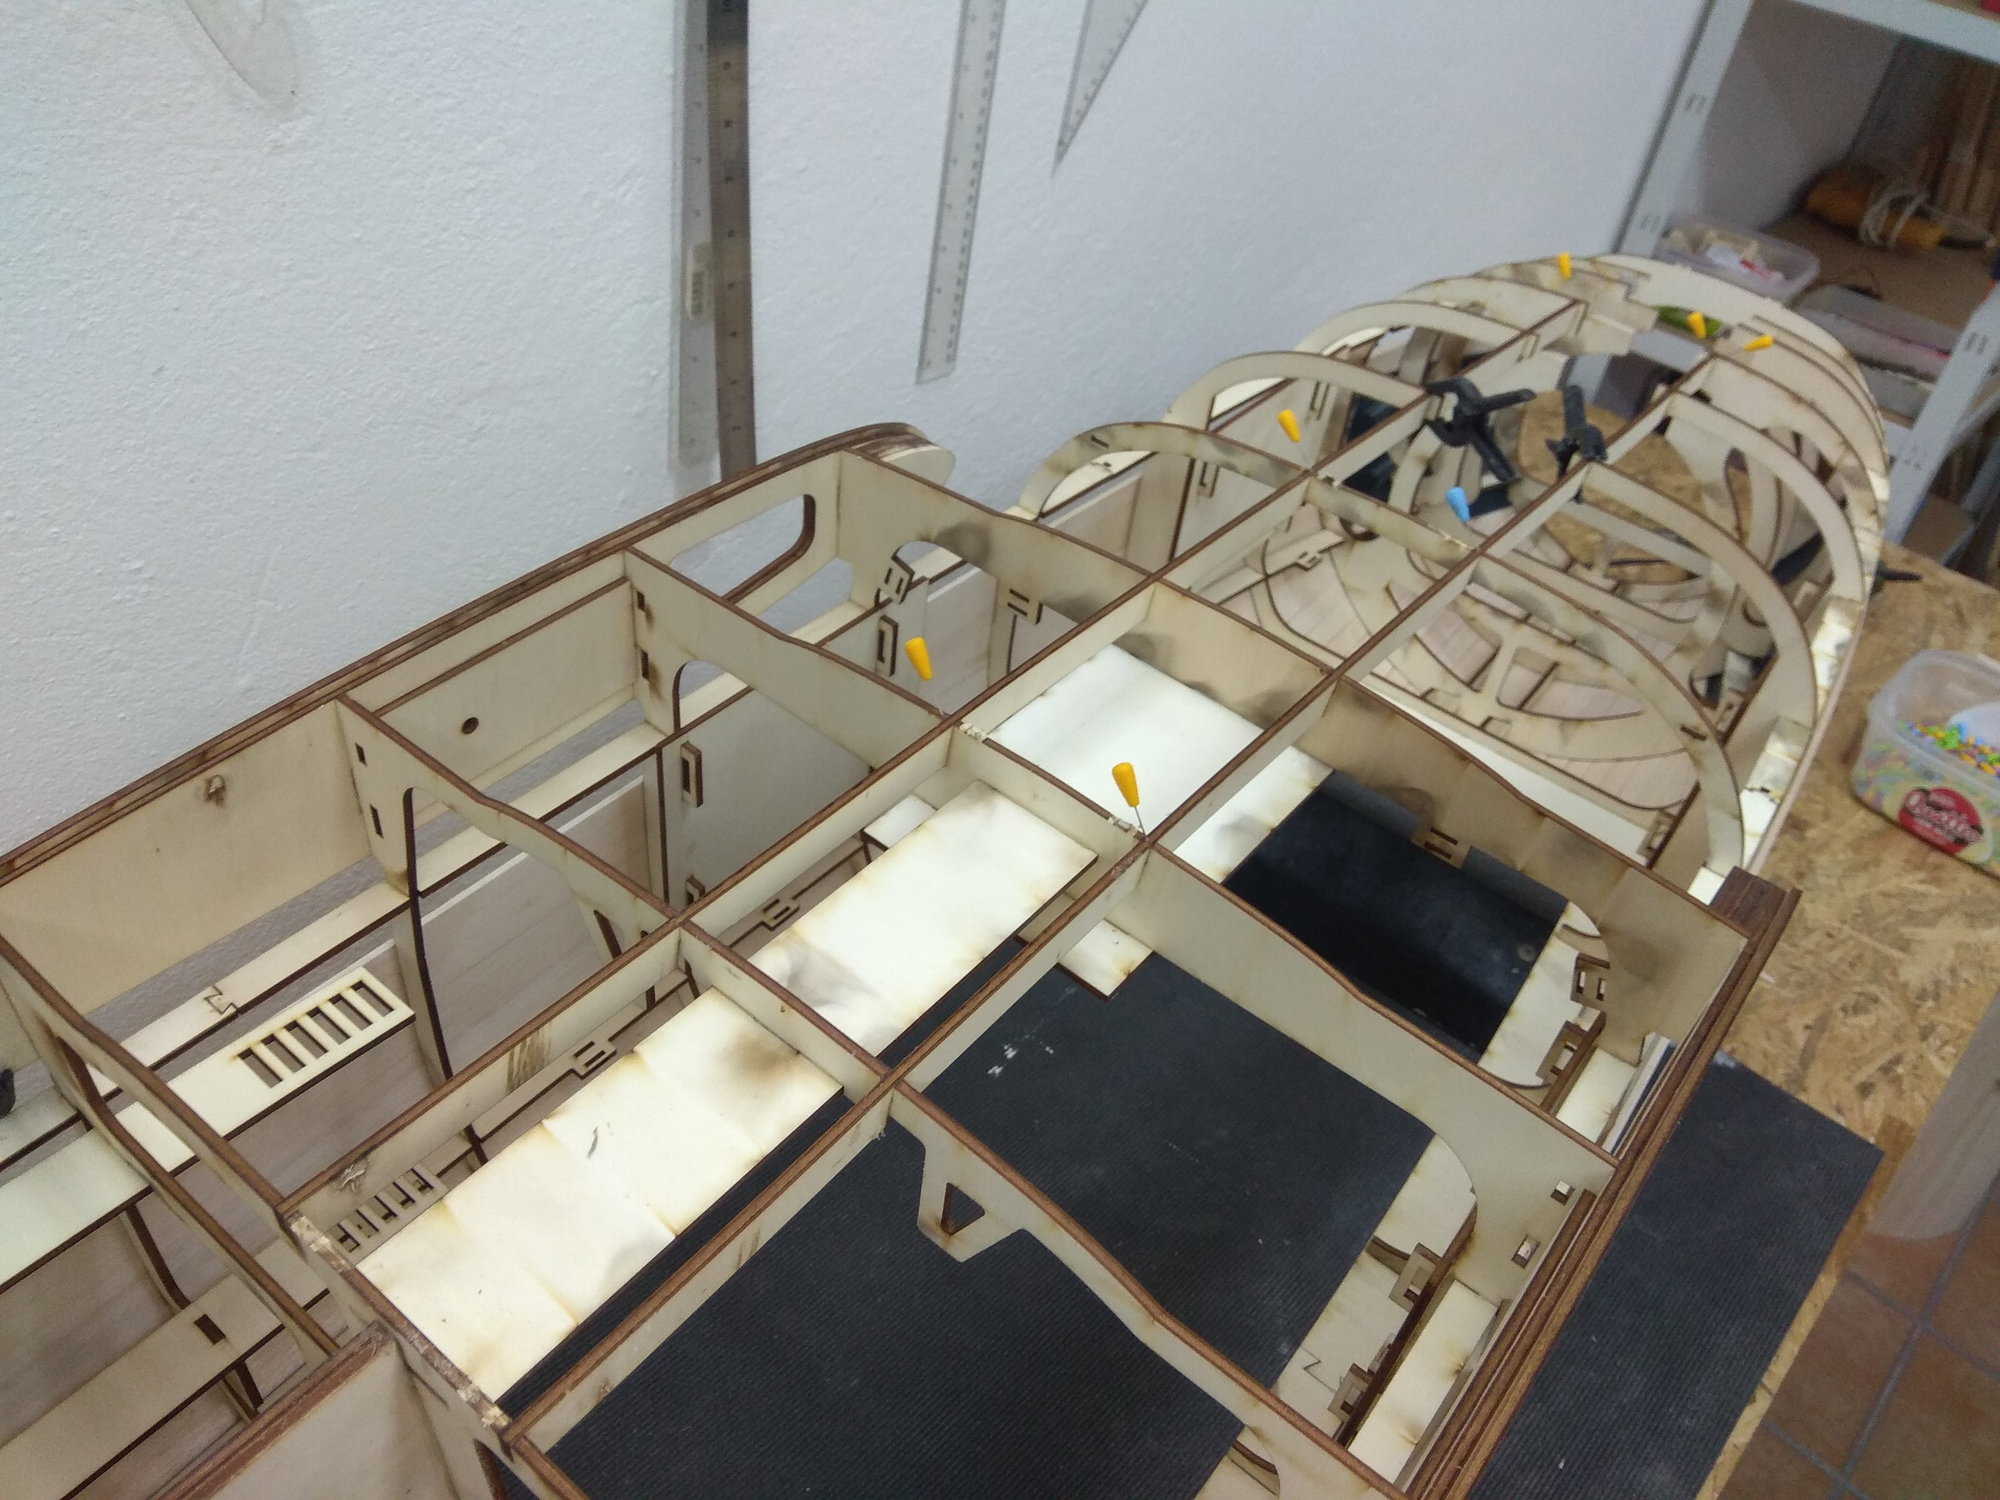
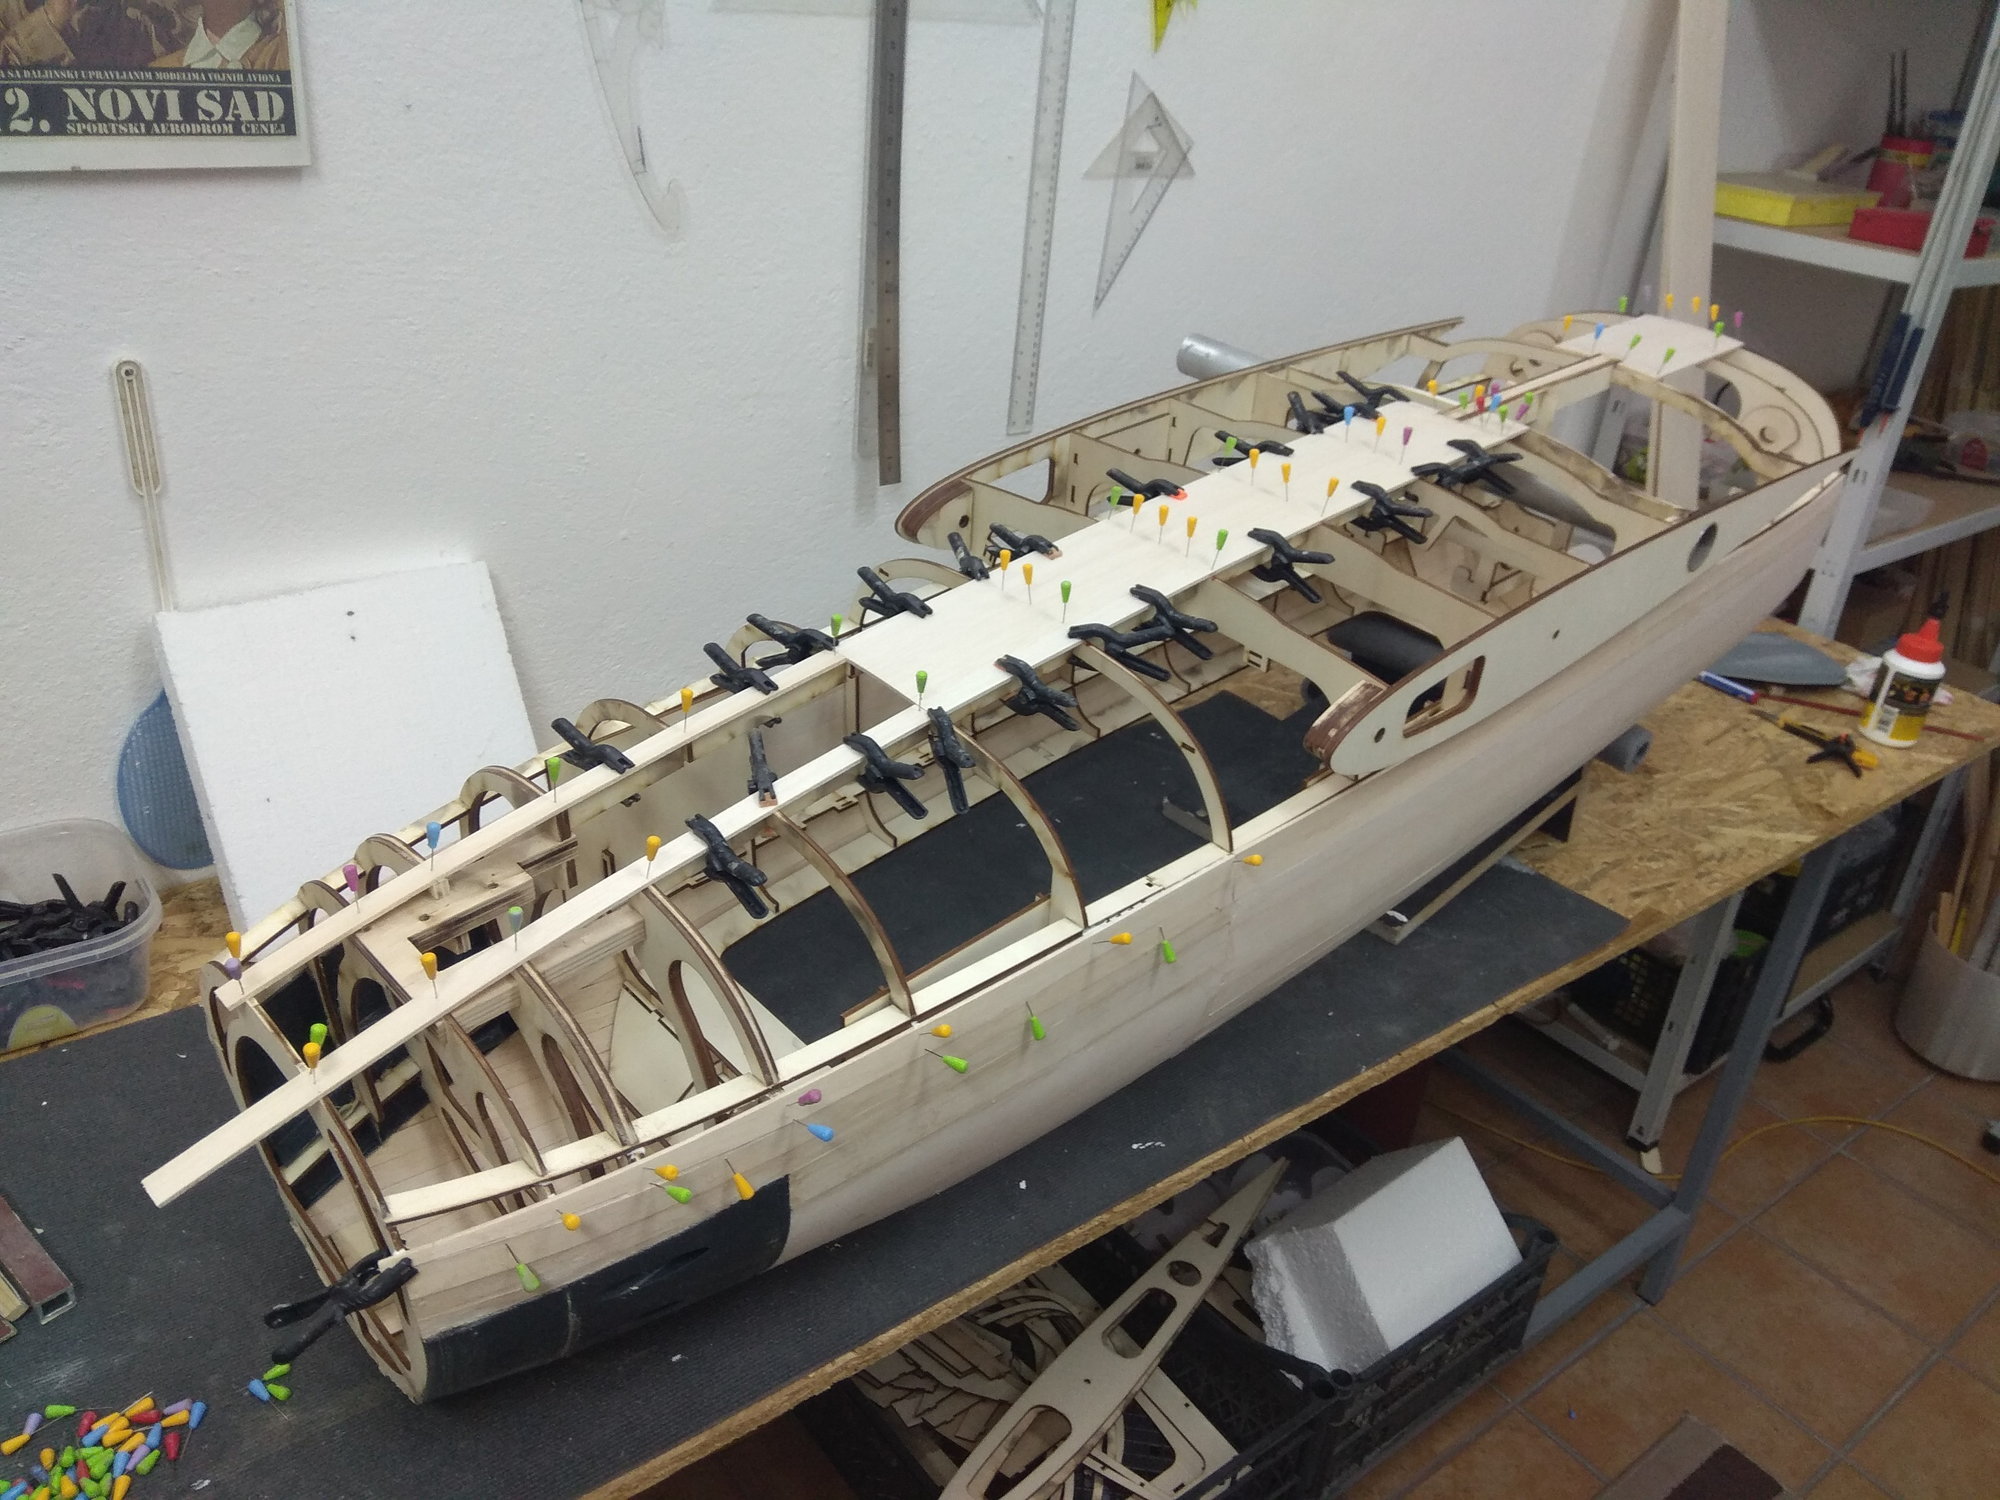
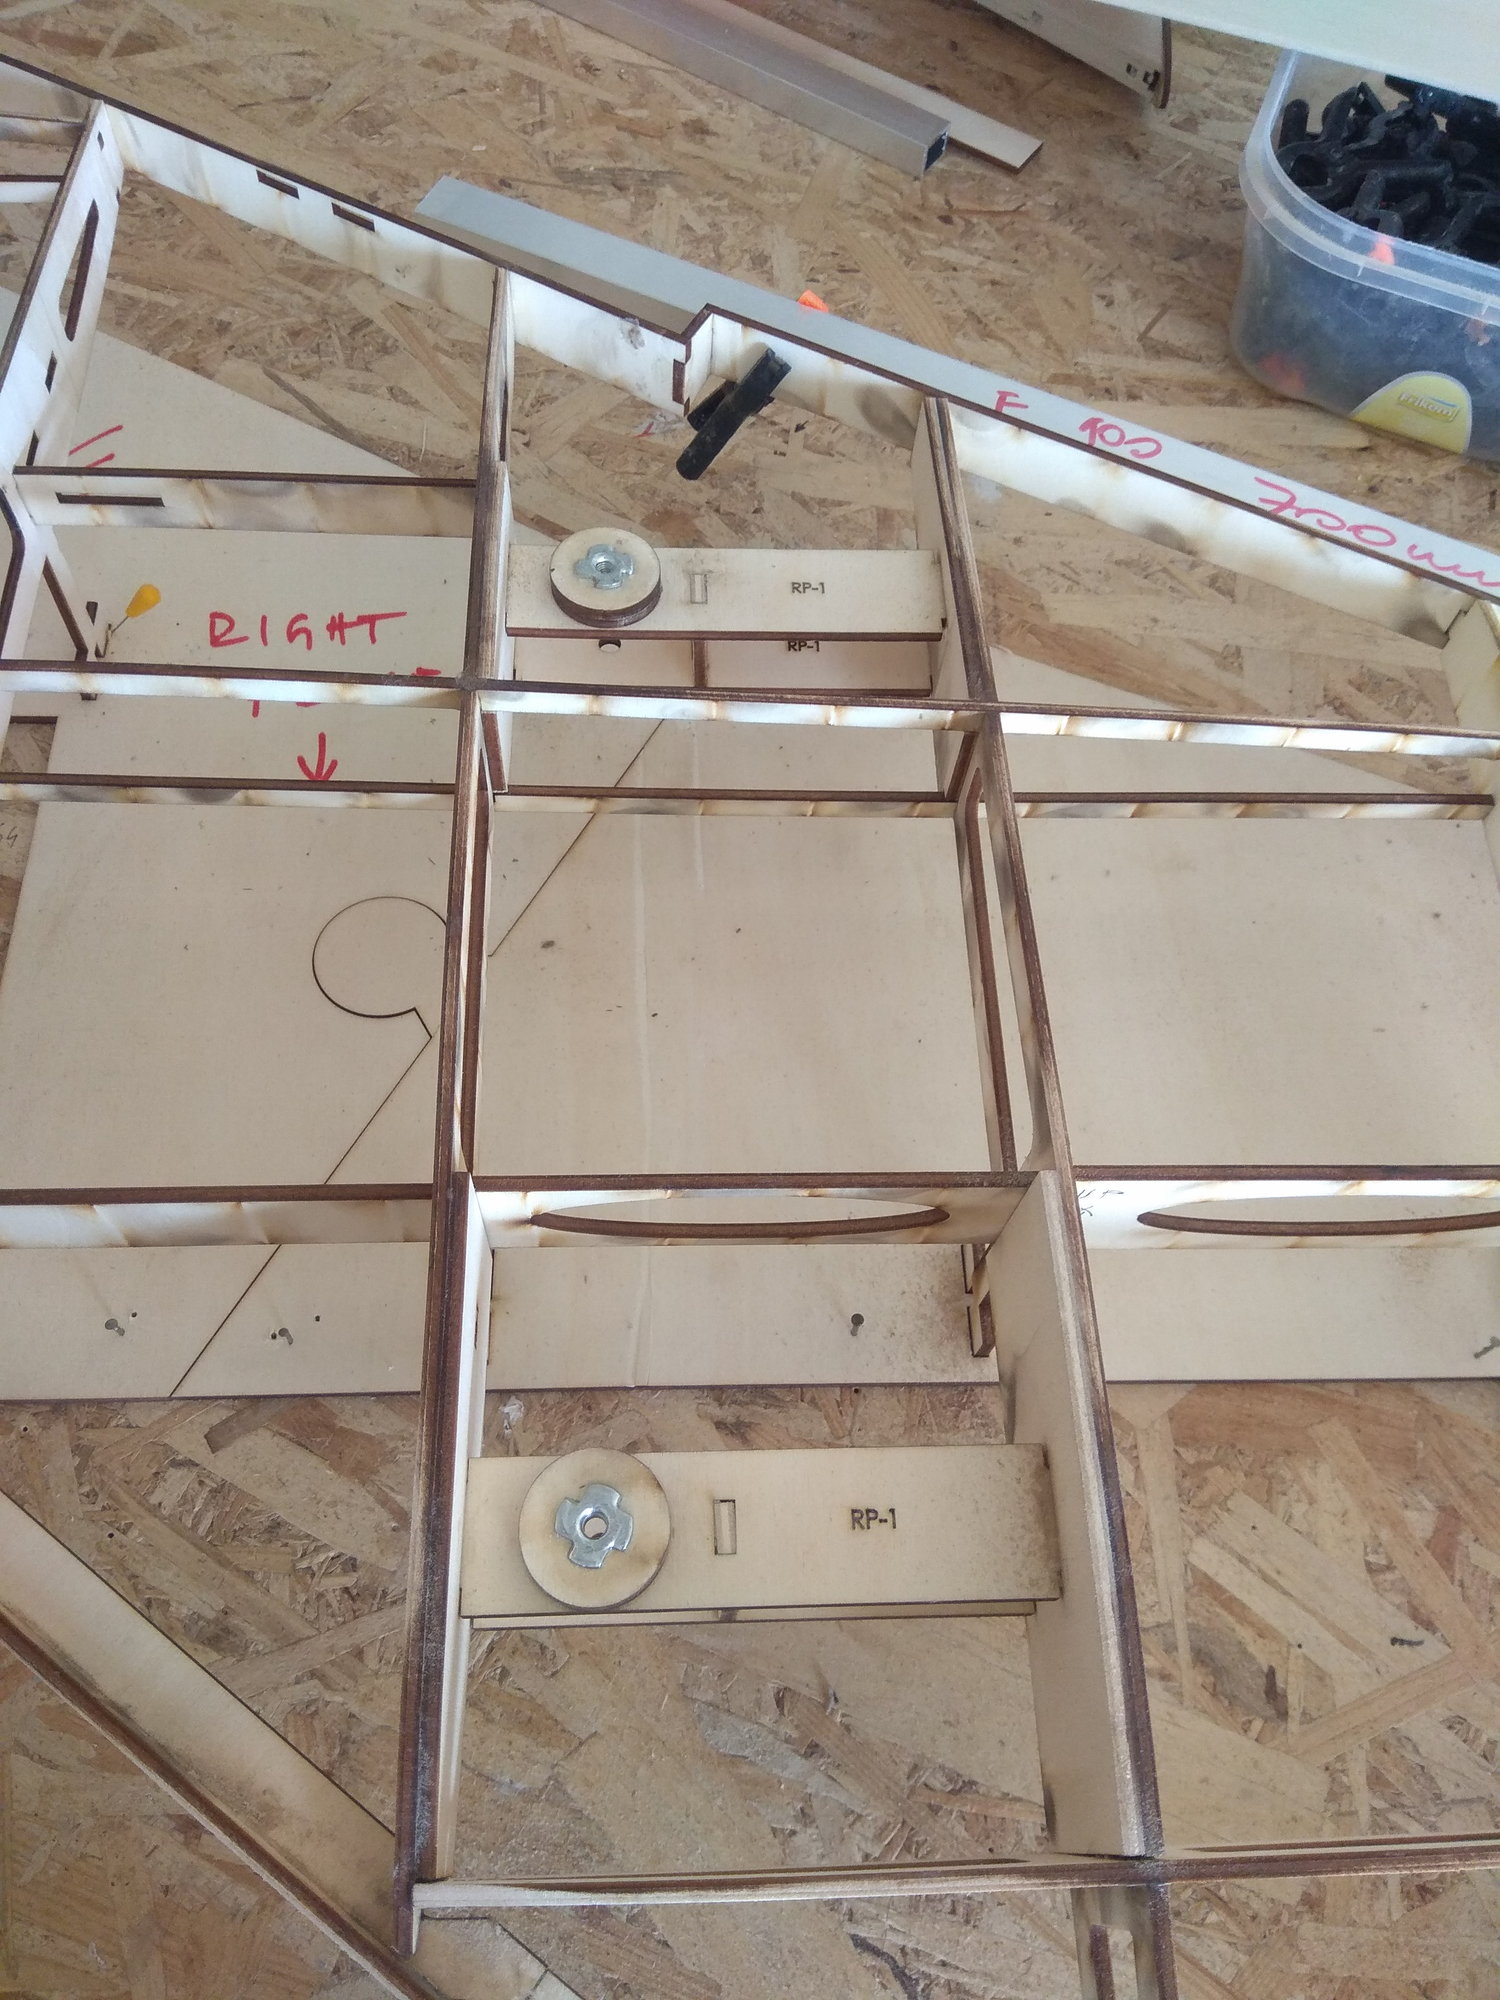
The top half of the rear fuselage part is almost complete. The transition of the fuselage shape from one to the other defines the placement of the first slats.
The first one is definitely the one that goes above the air brake.


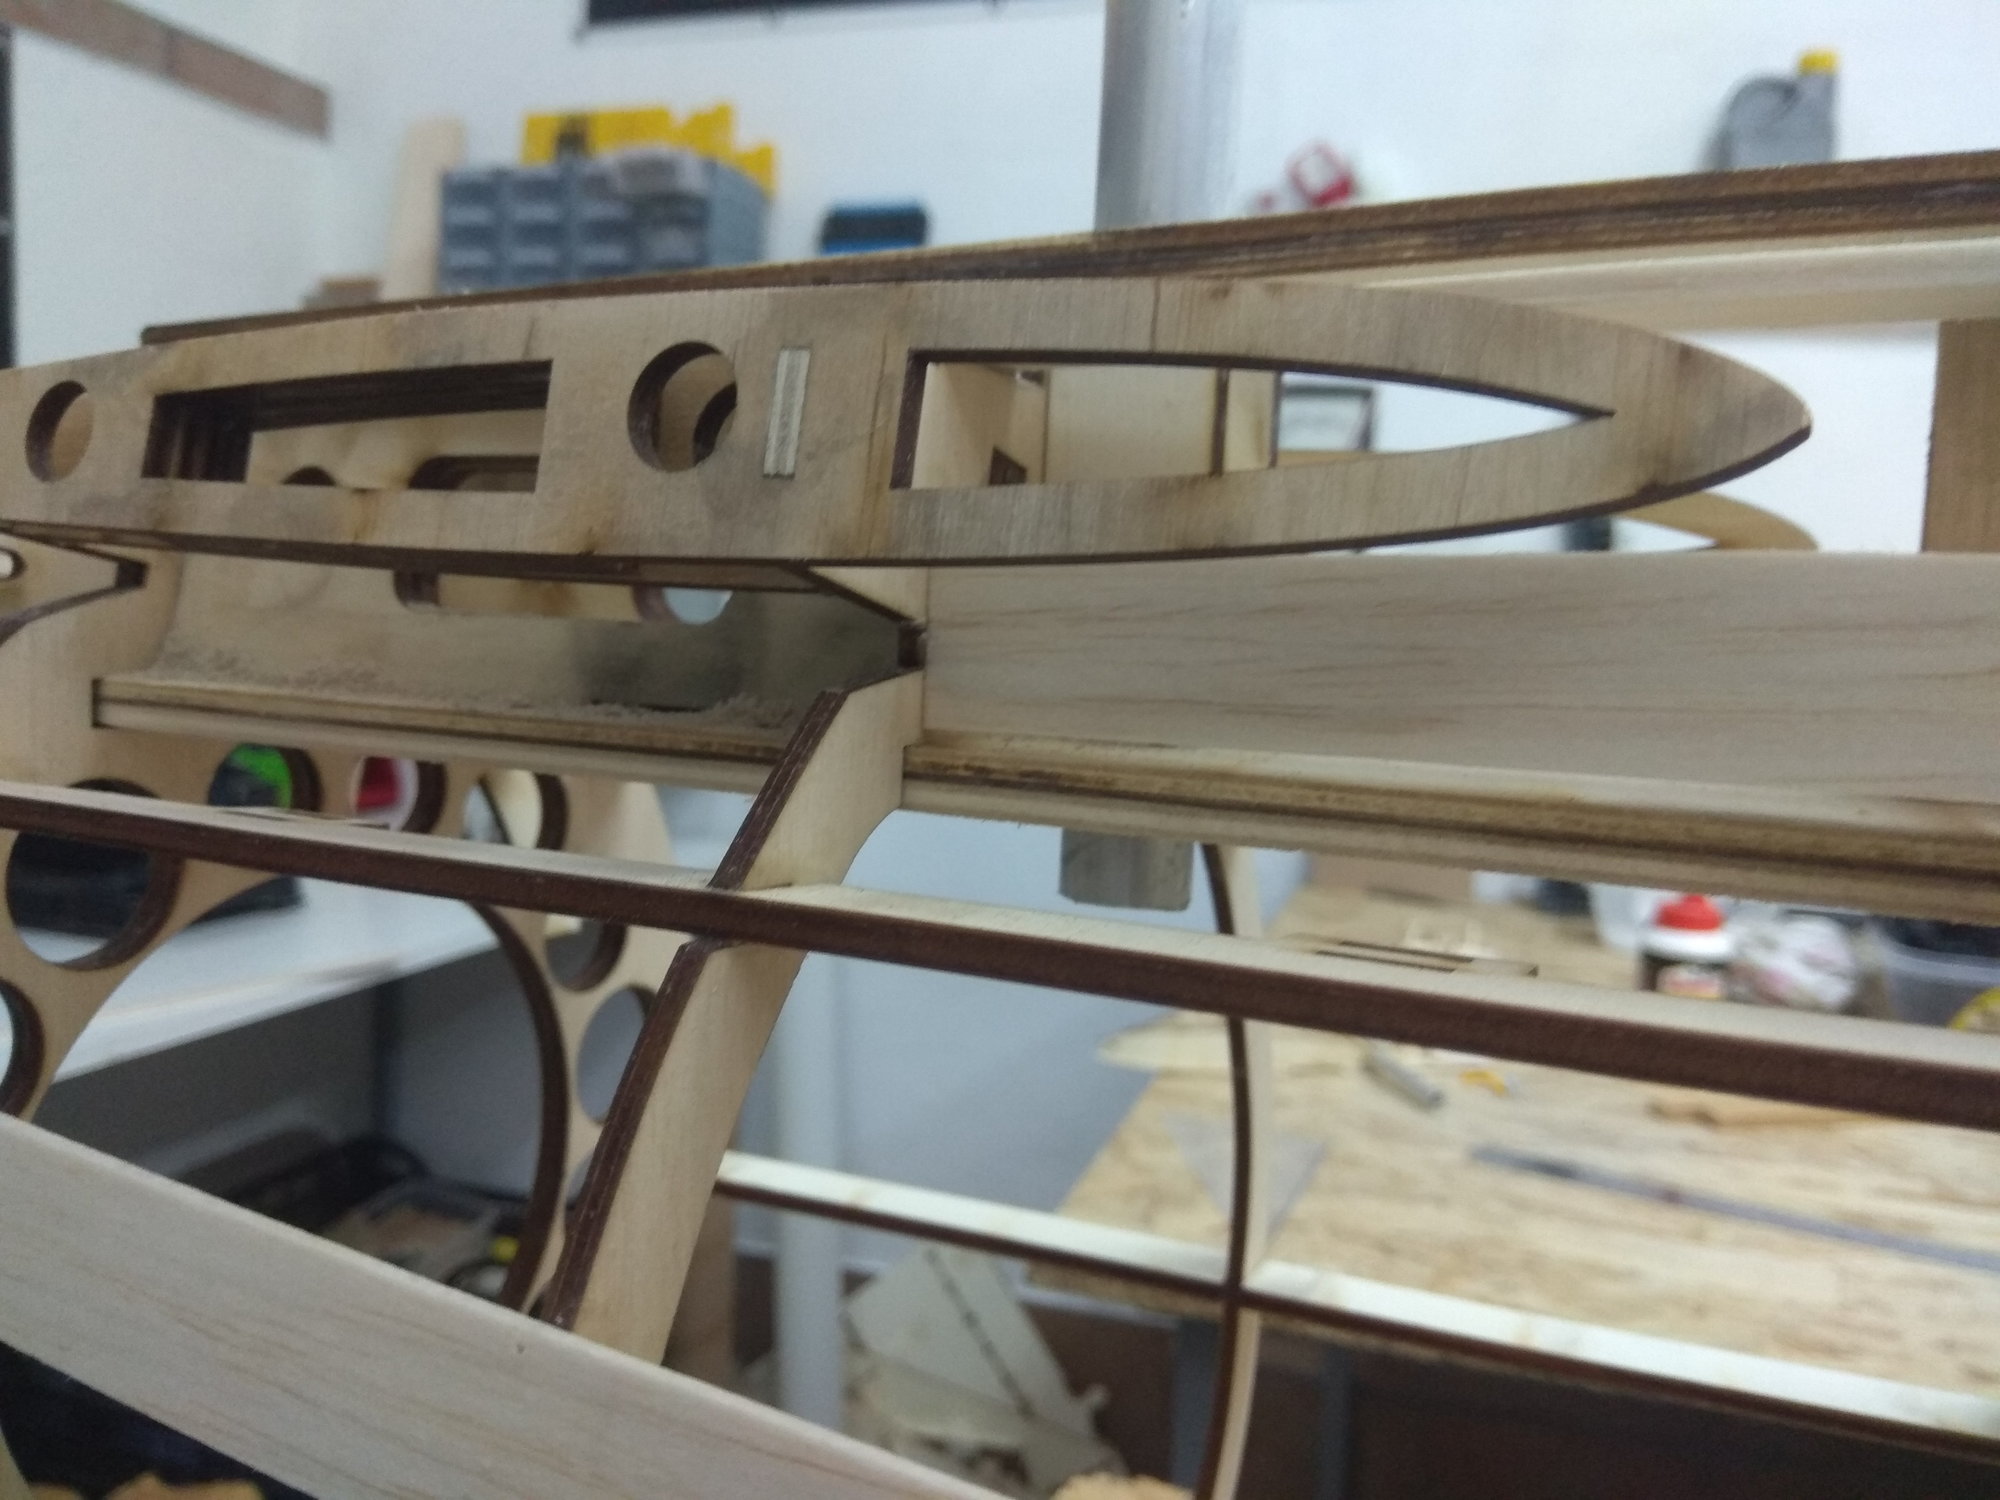
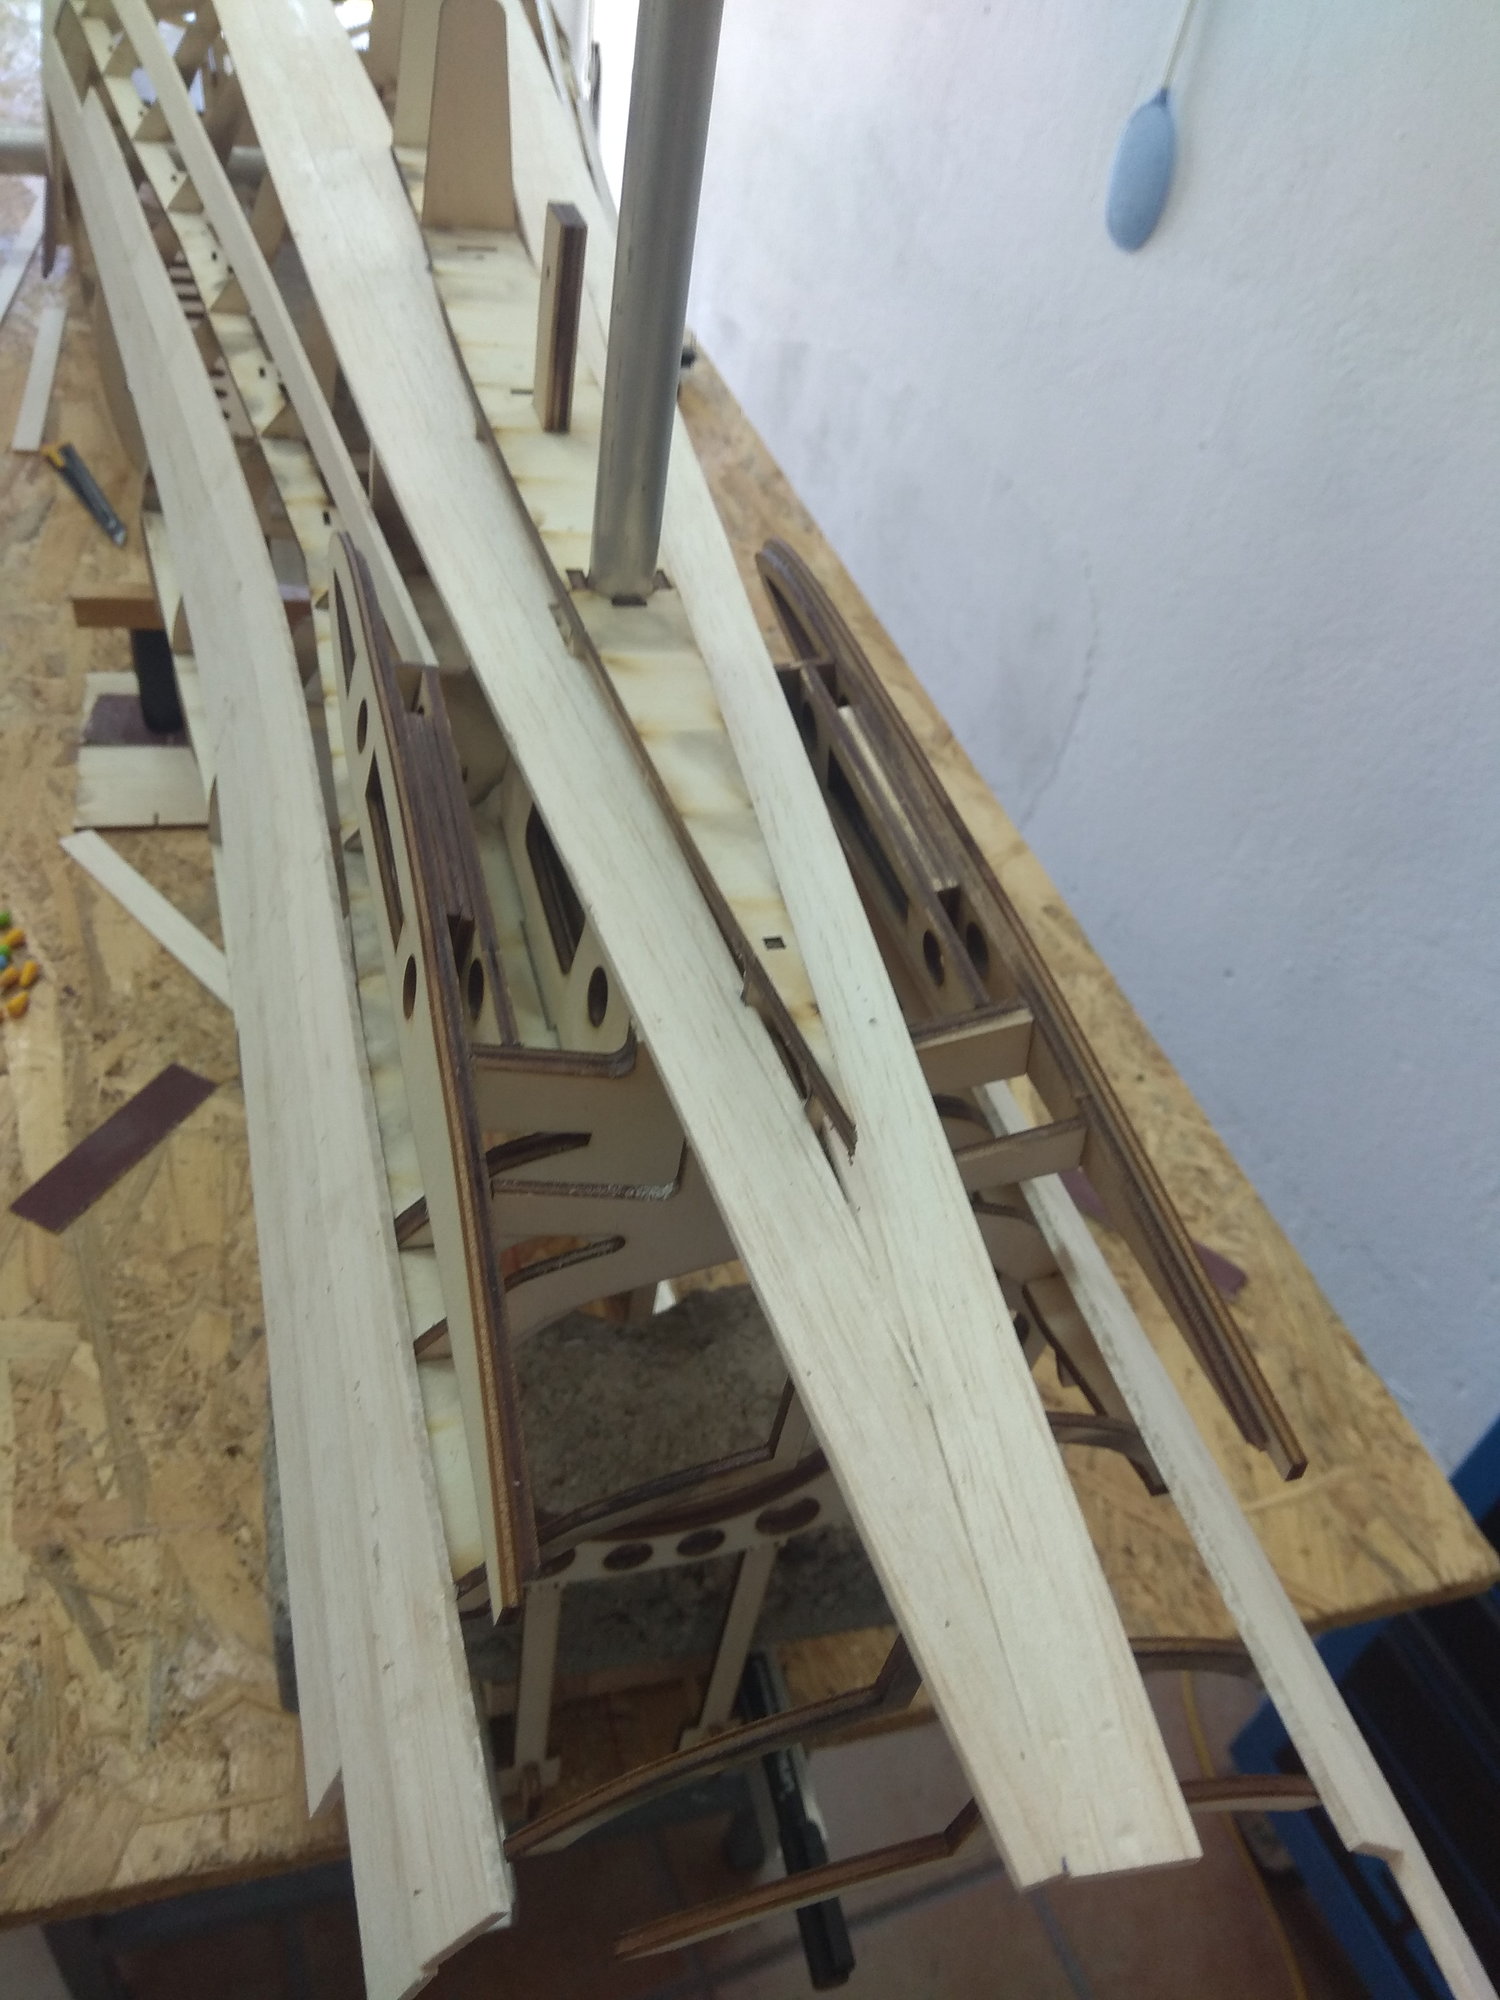
The brakes are printed on a 3D printer, the places through which the axle passes are reinforced with 3 mm hard aviation plywood.
On this model, I will not use two 3 mm screws, but a carbon rod will be inserted from the bottom.
More detailed pictures follow...


The fuselage is now strong enough to separate from the workbench, but I won't do that until I have the vertical stabilizer structure built. Vertical stabilizer will be removable.
It will be done this weekend.
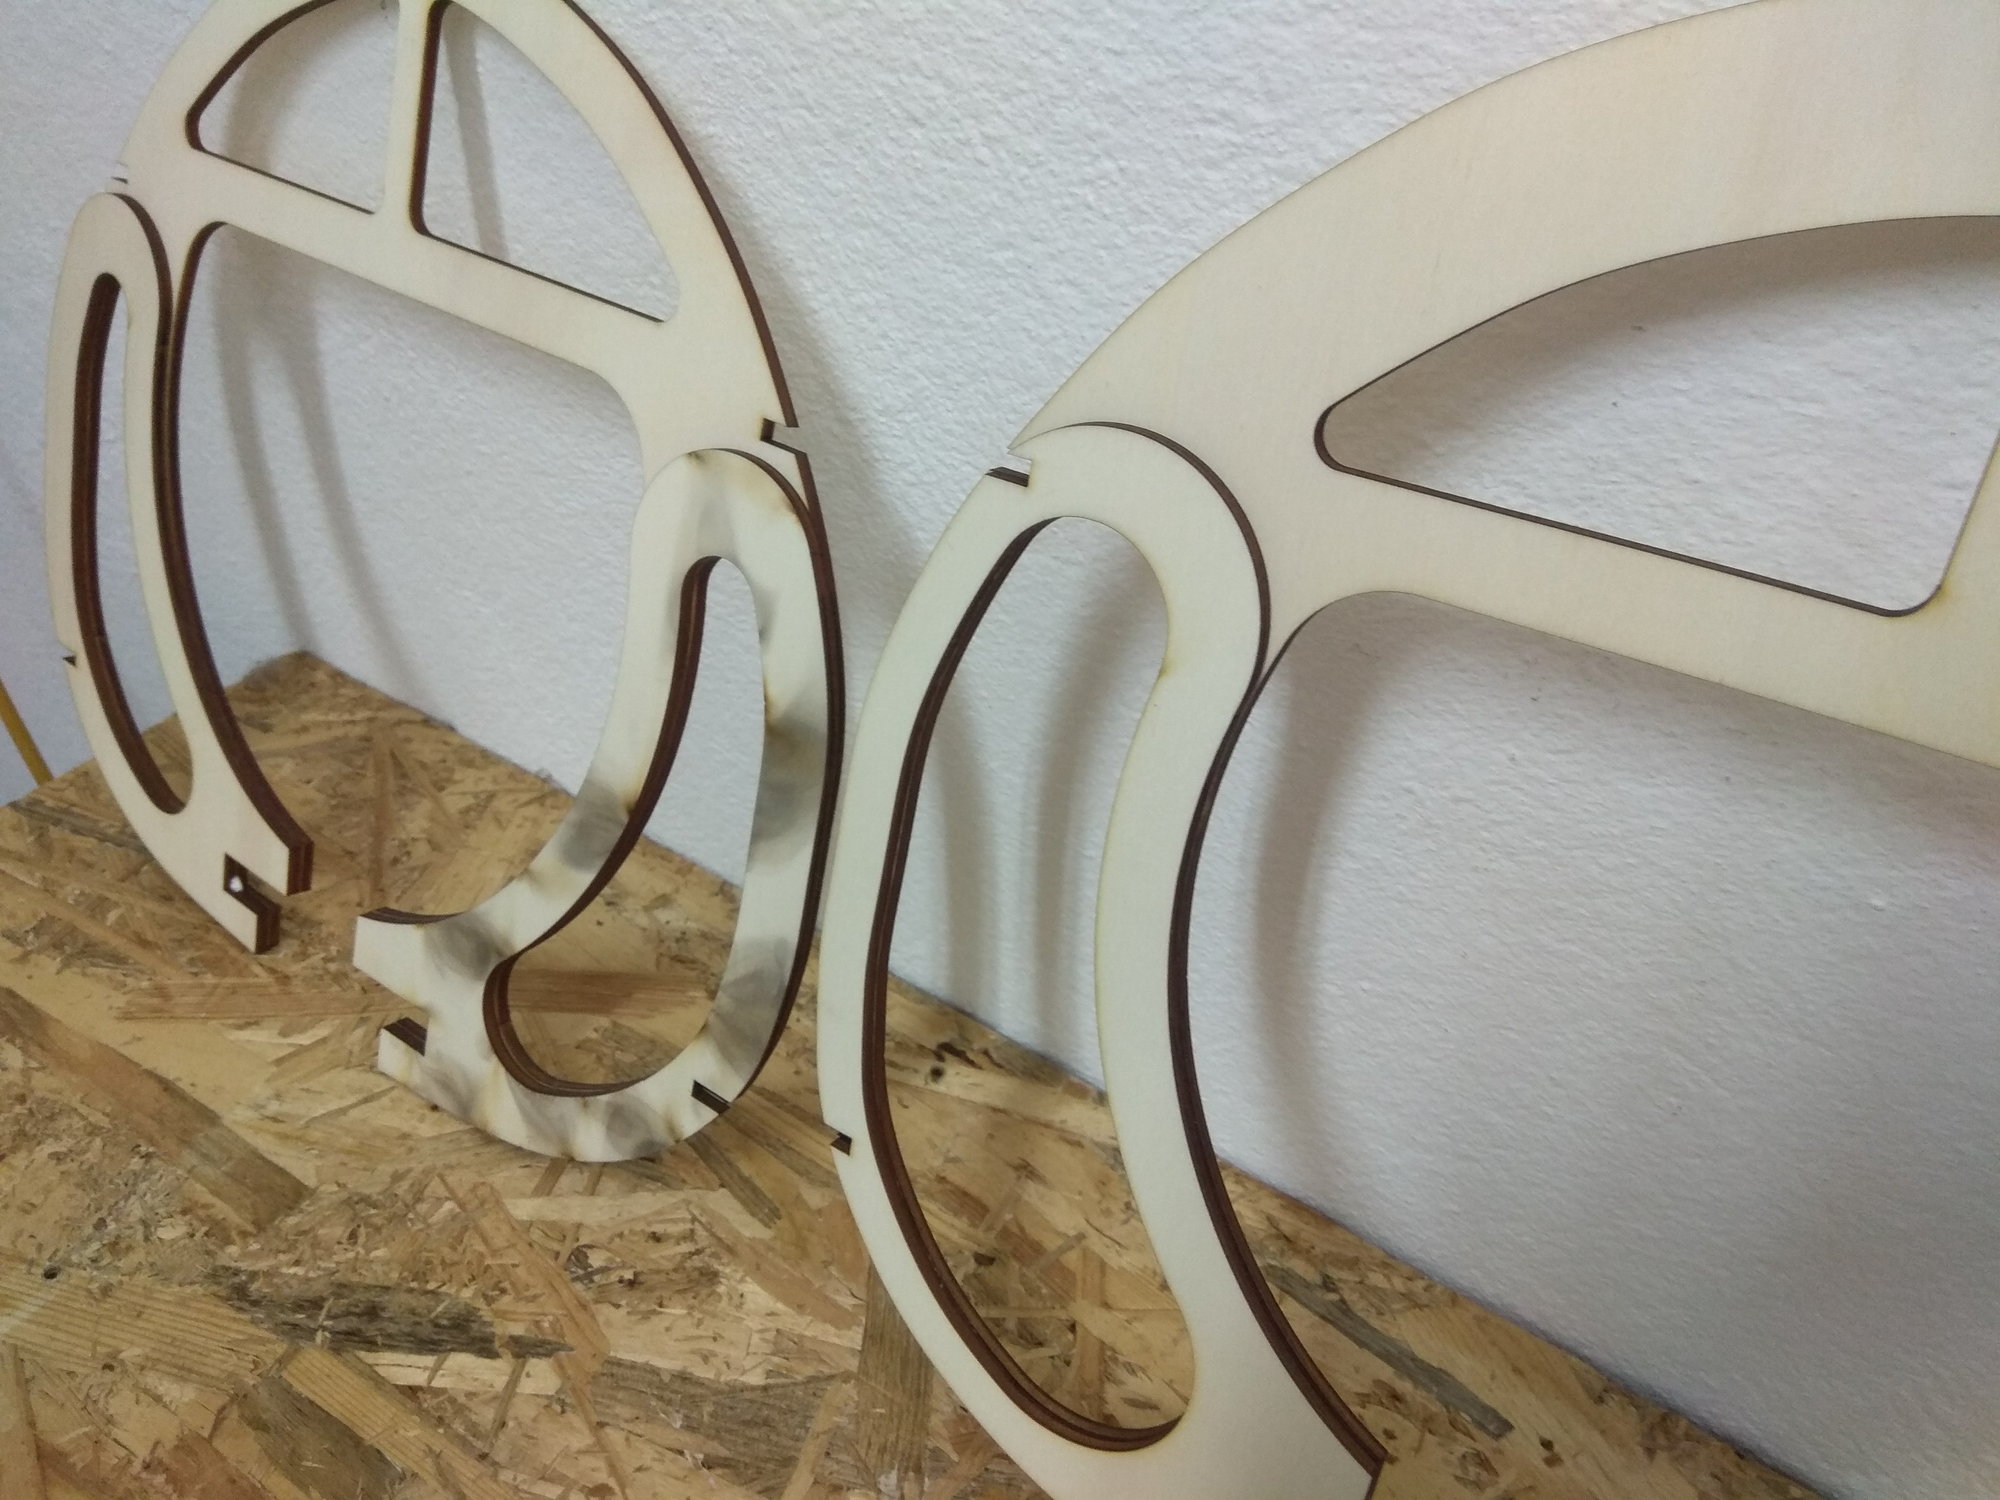
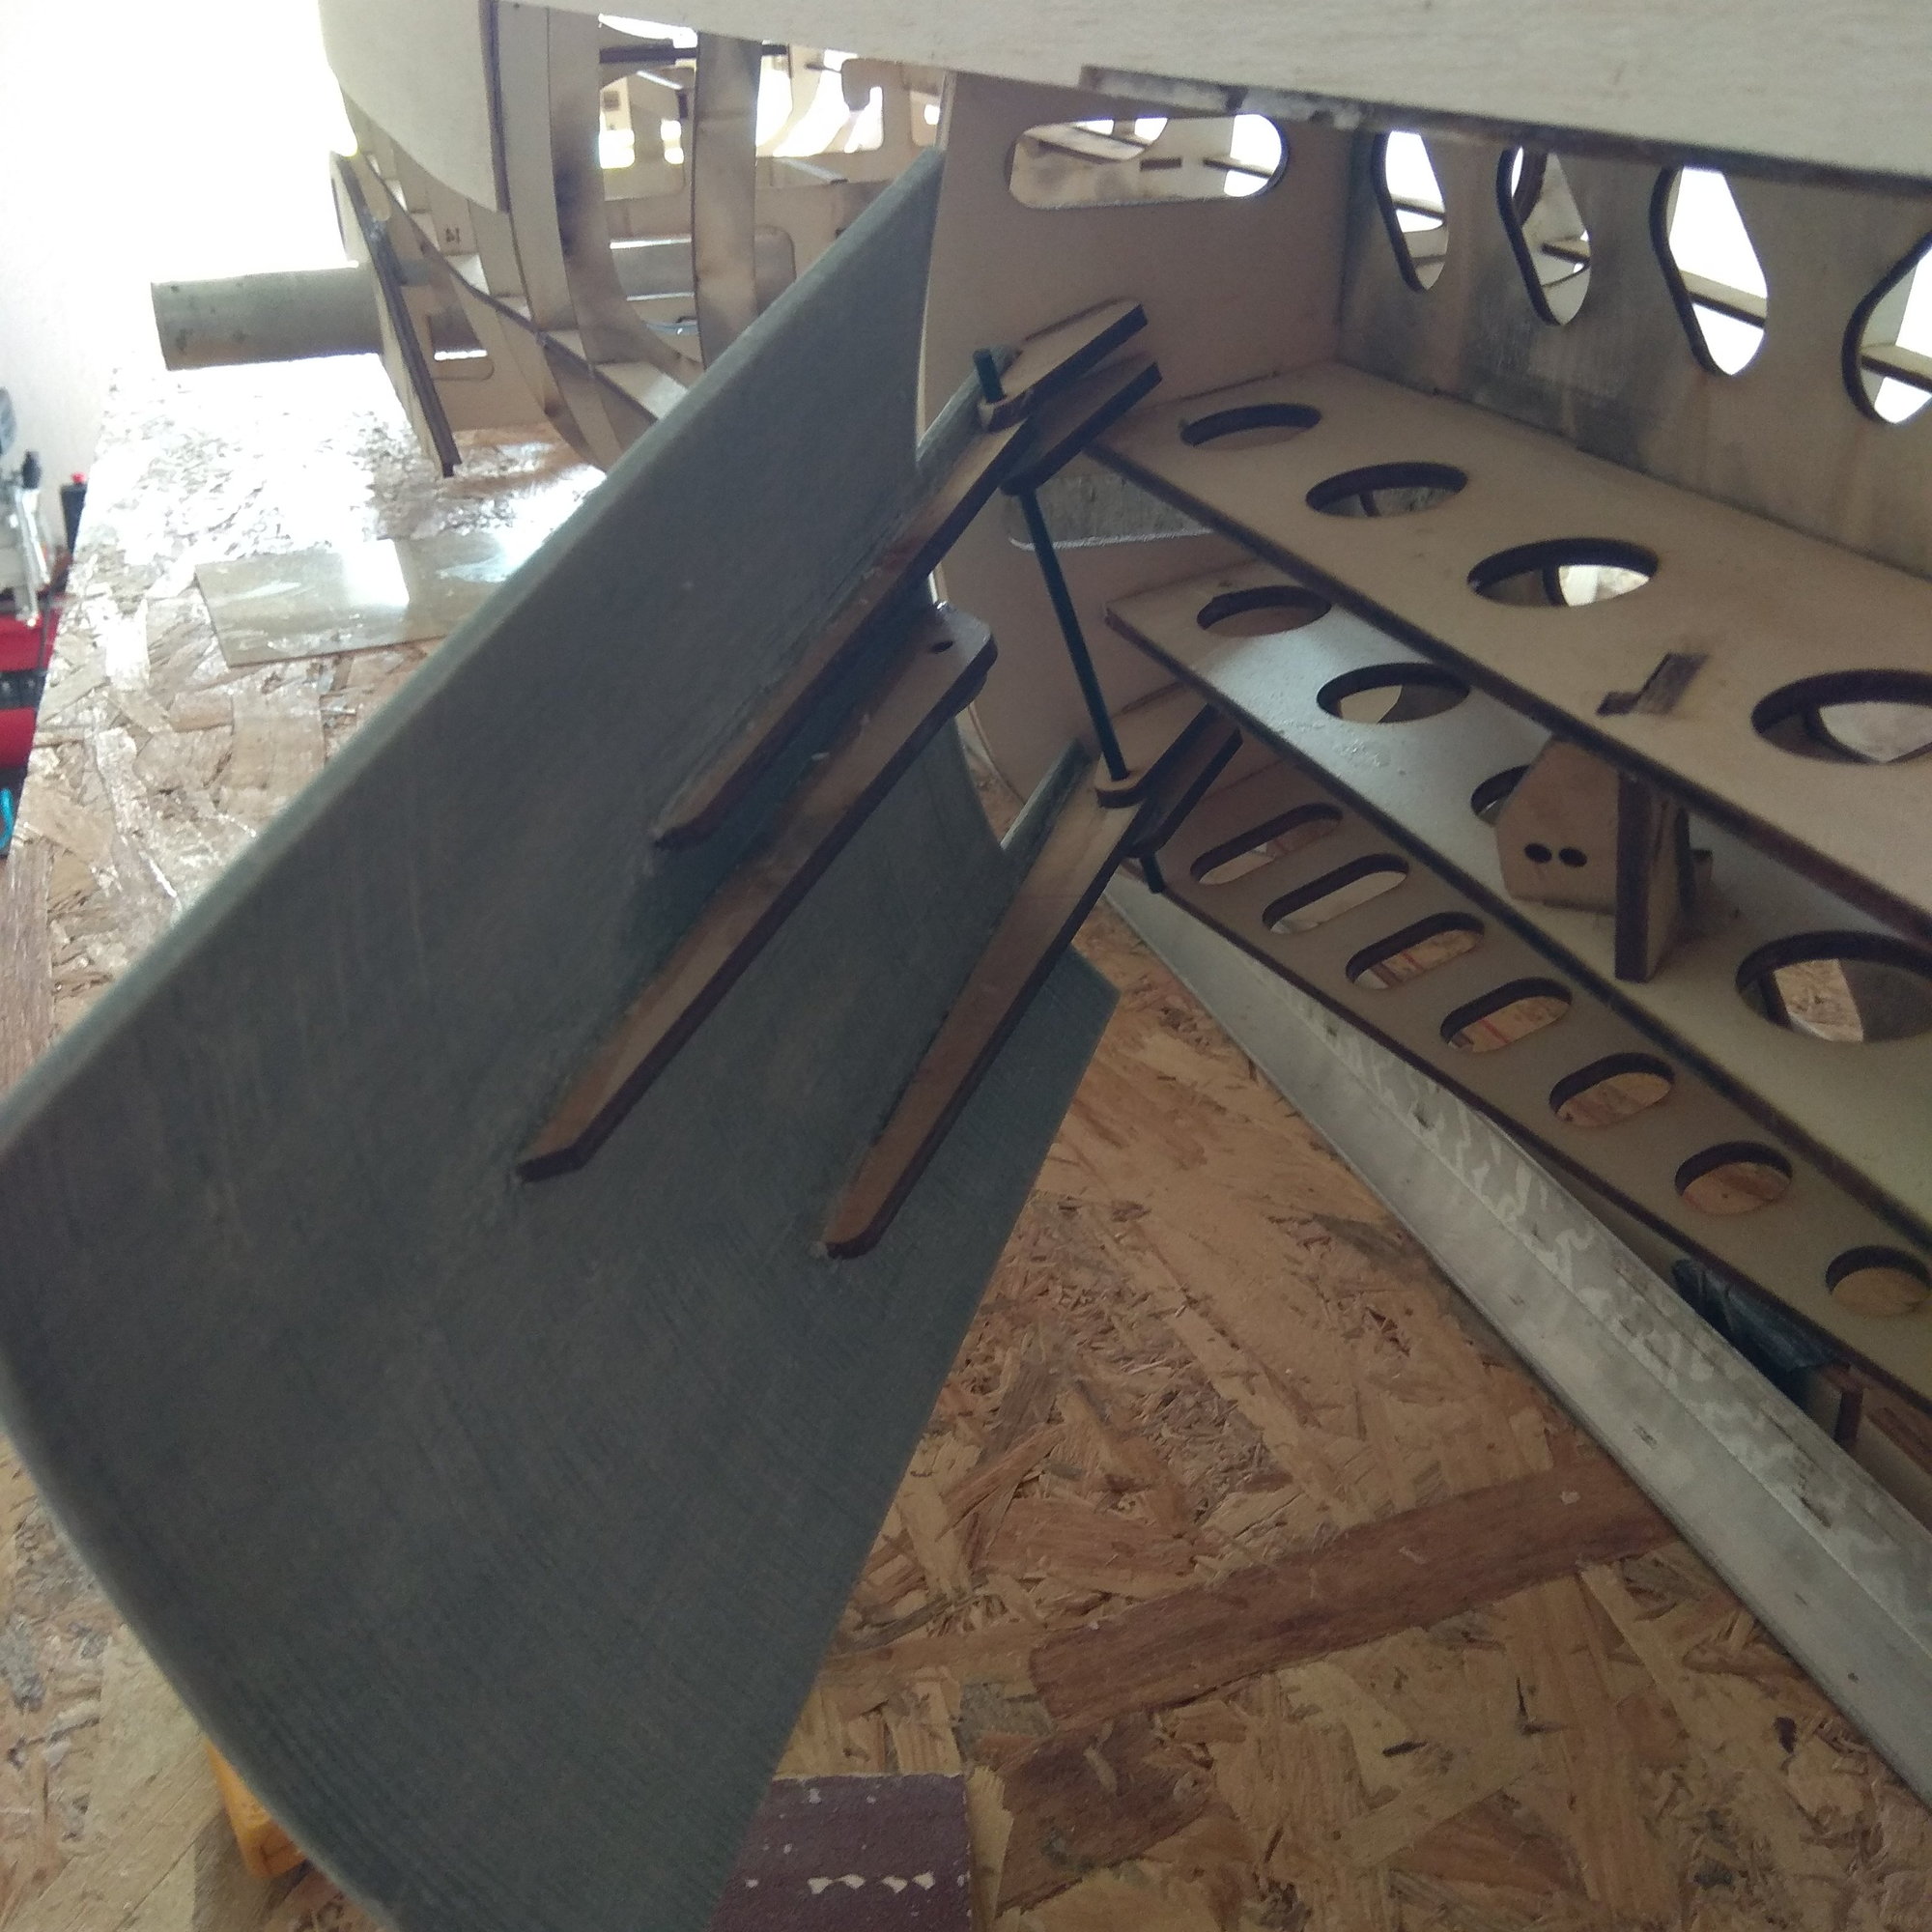
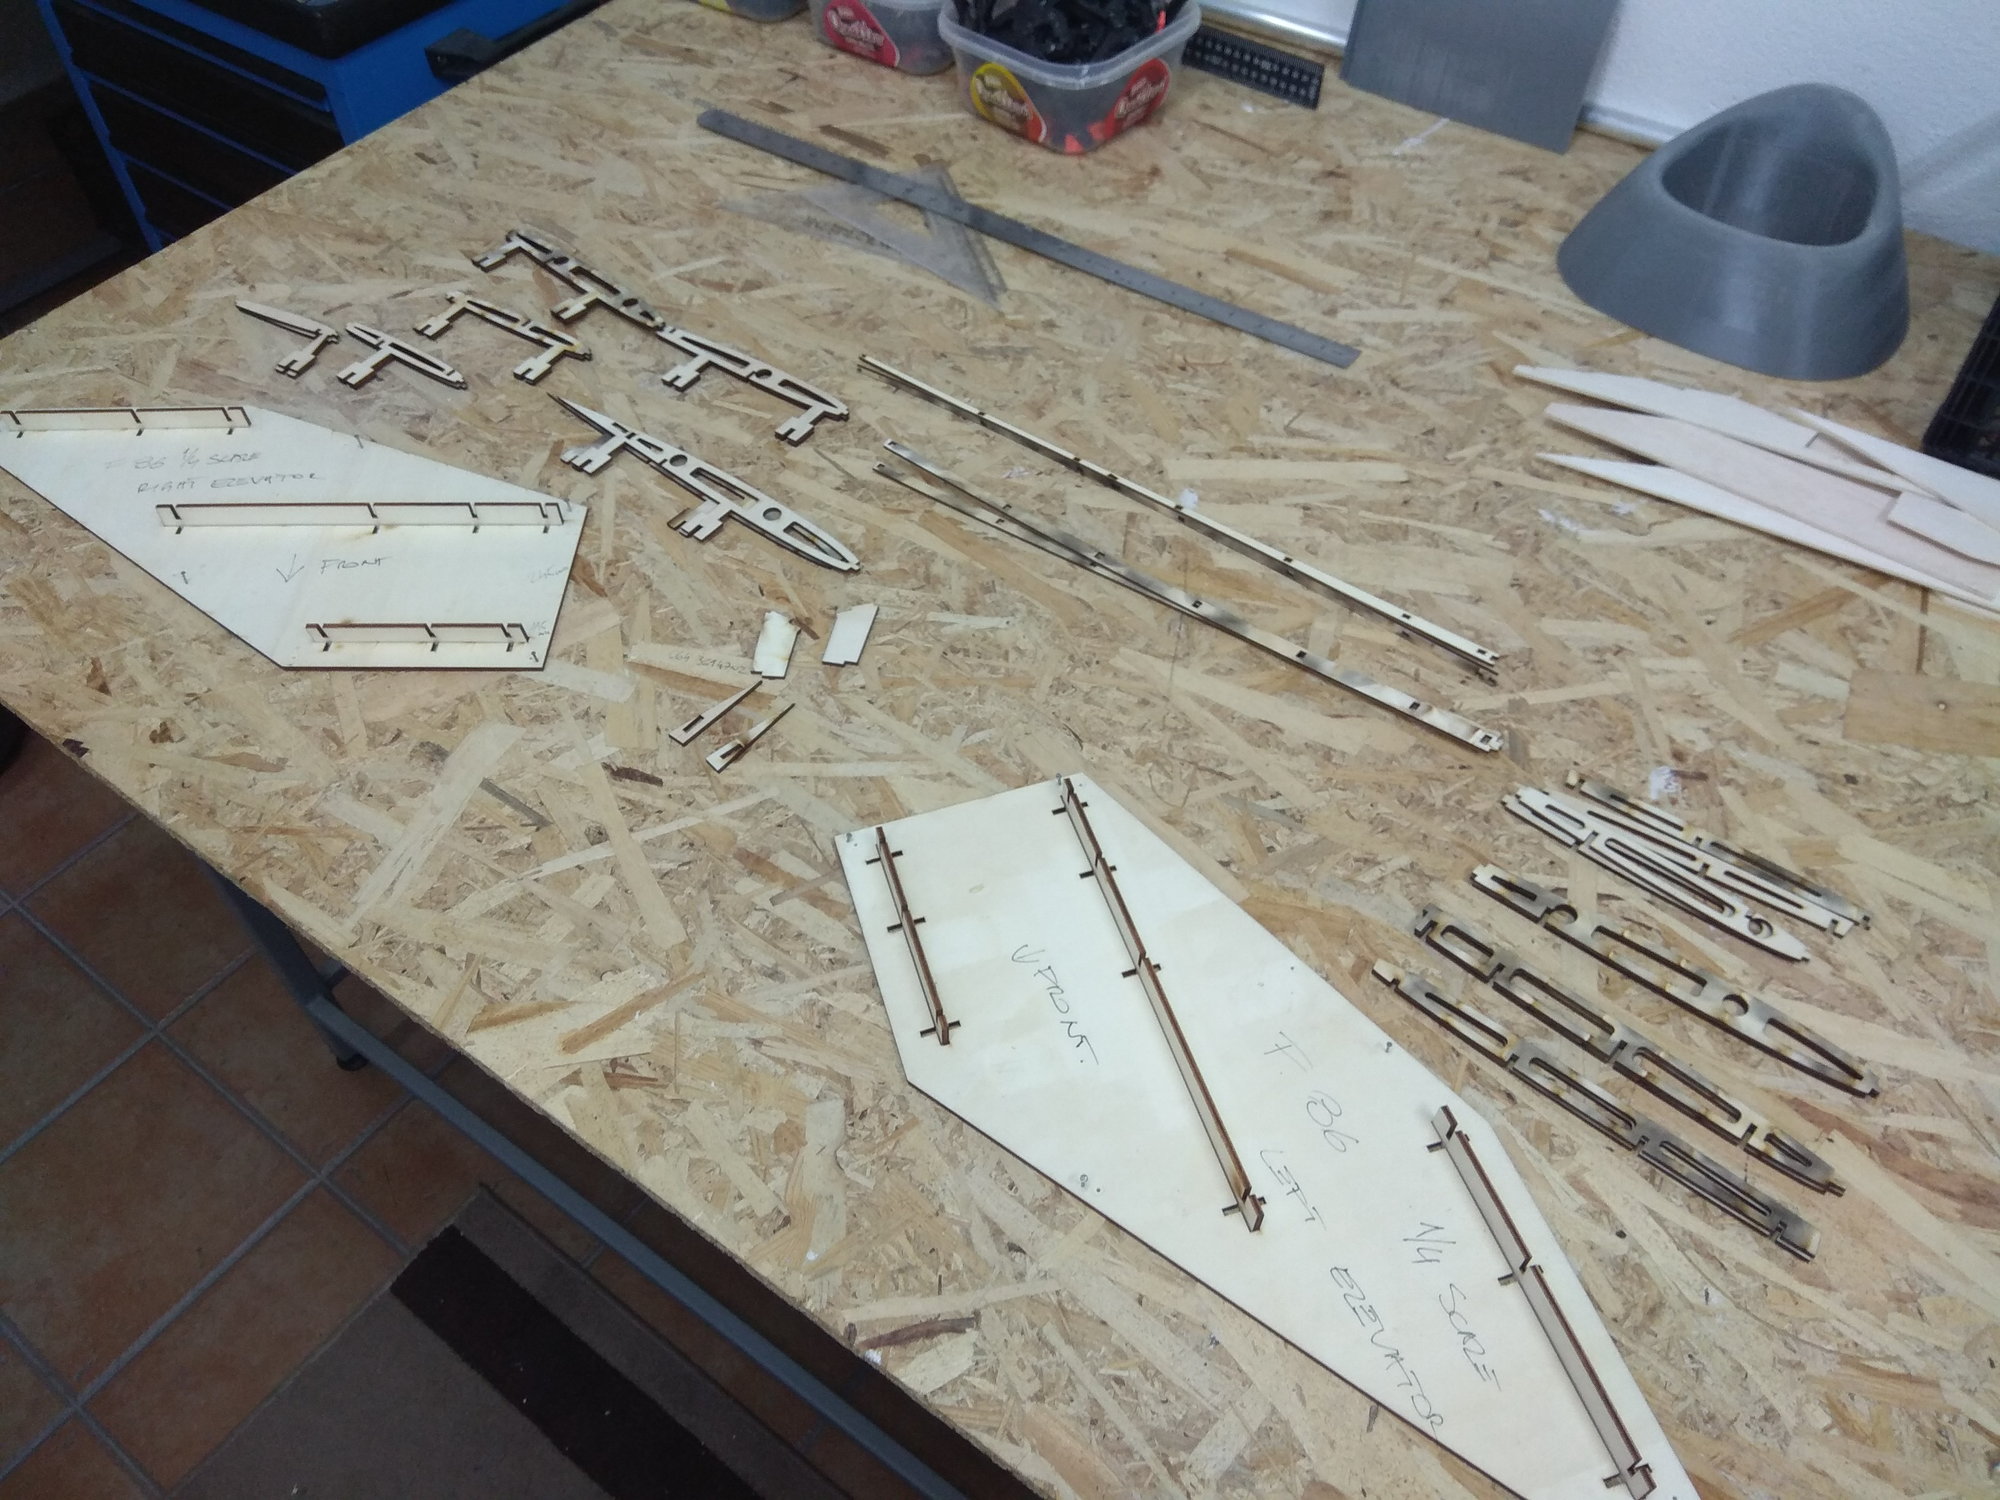
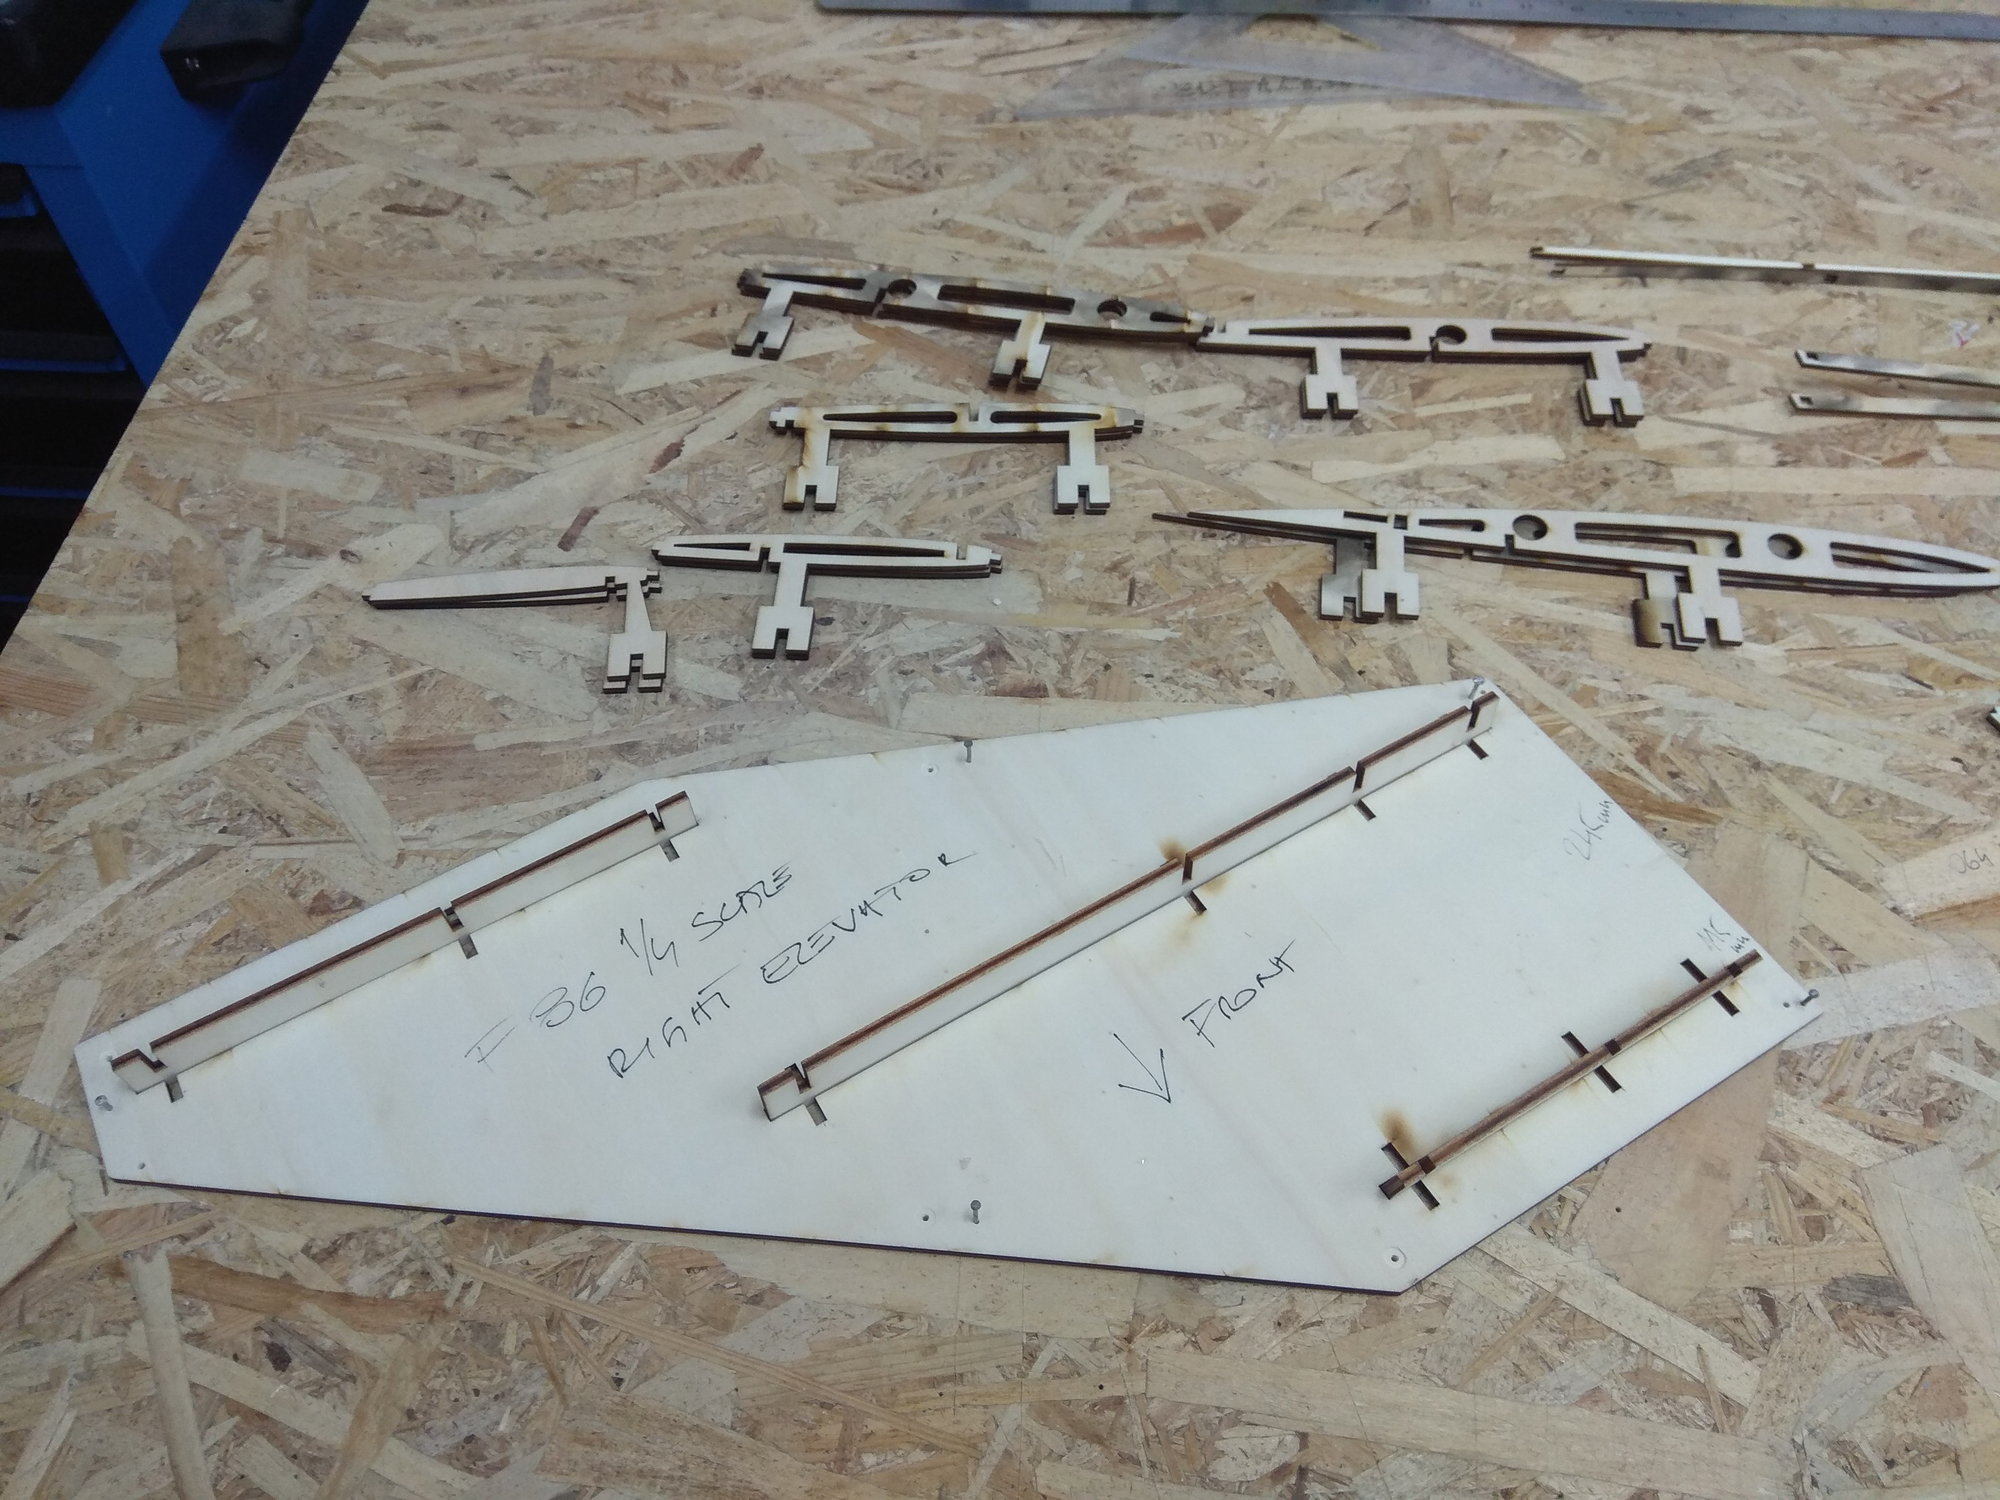
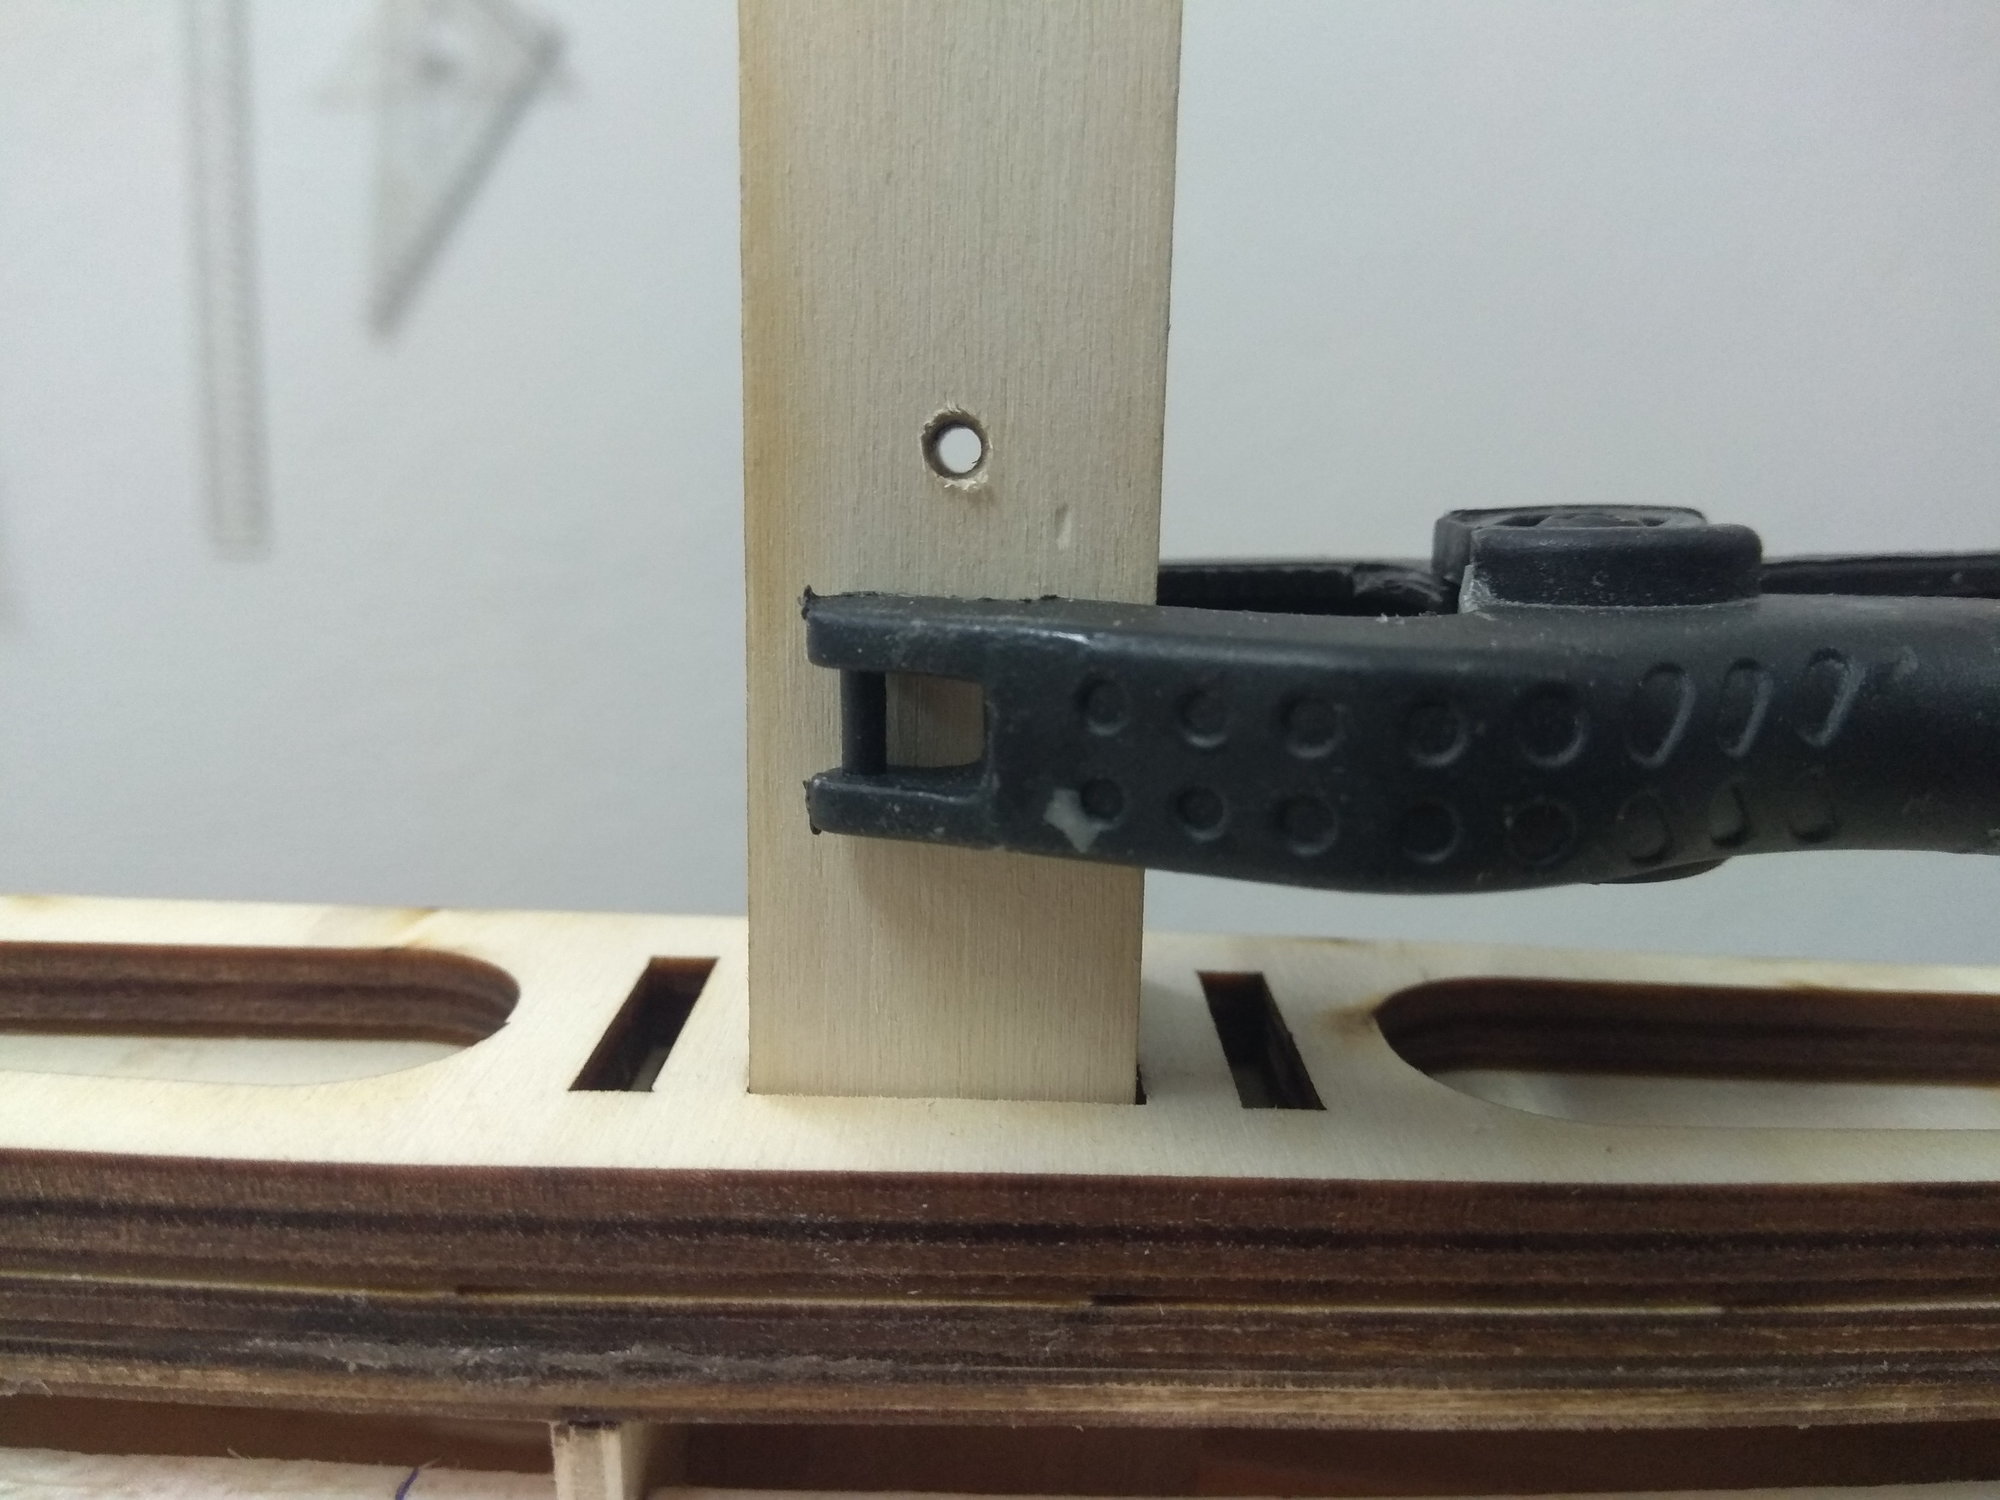
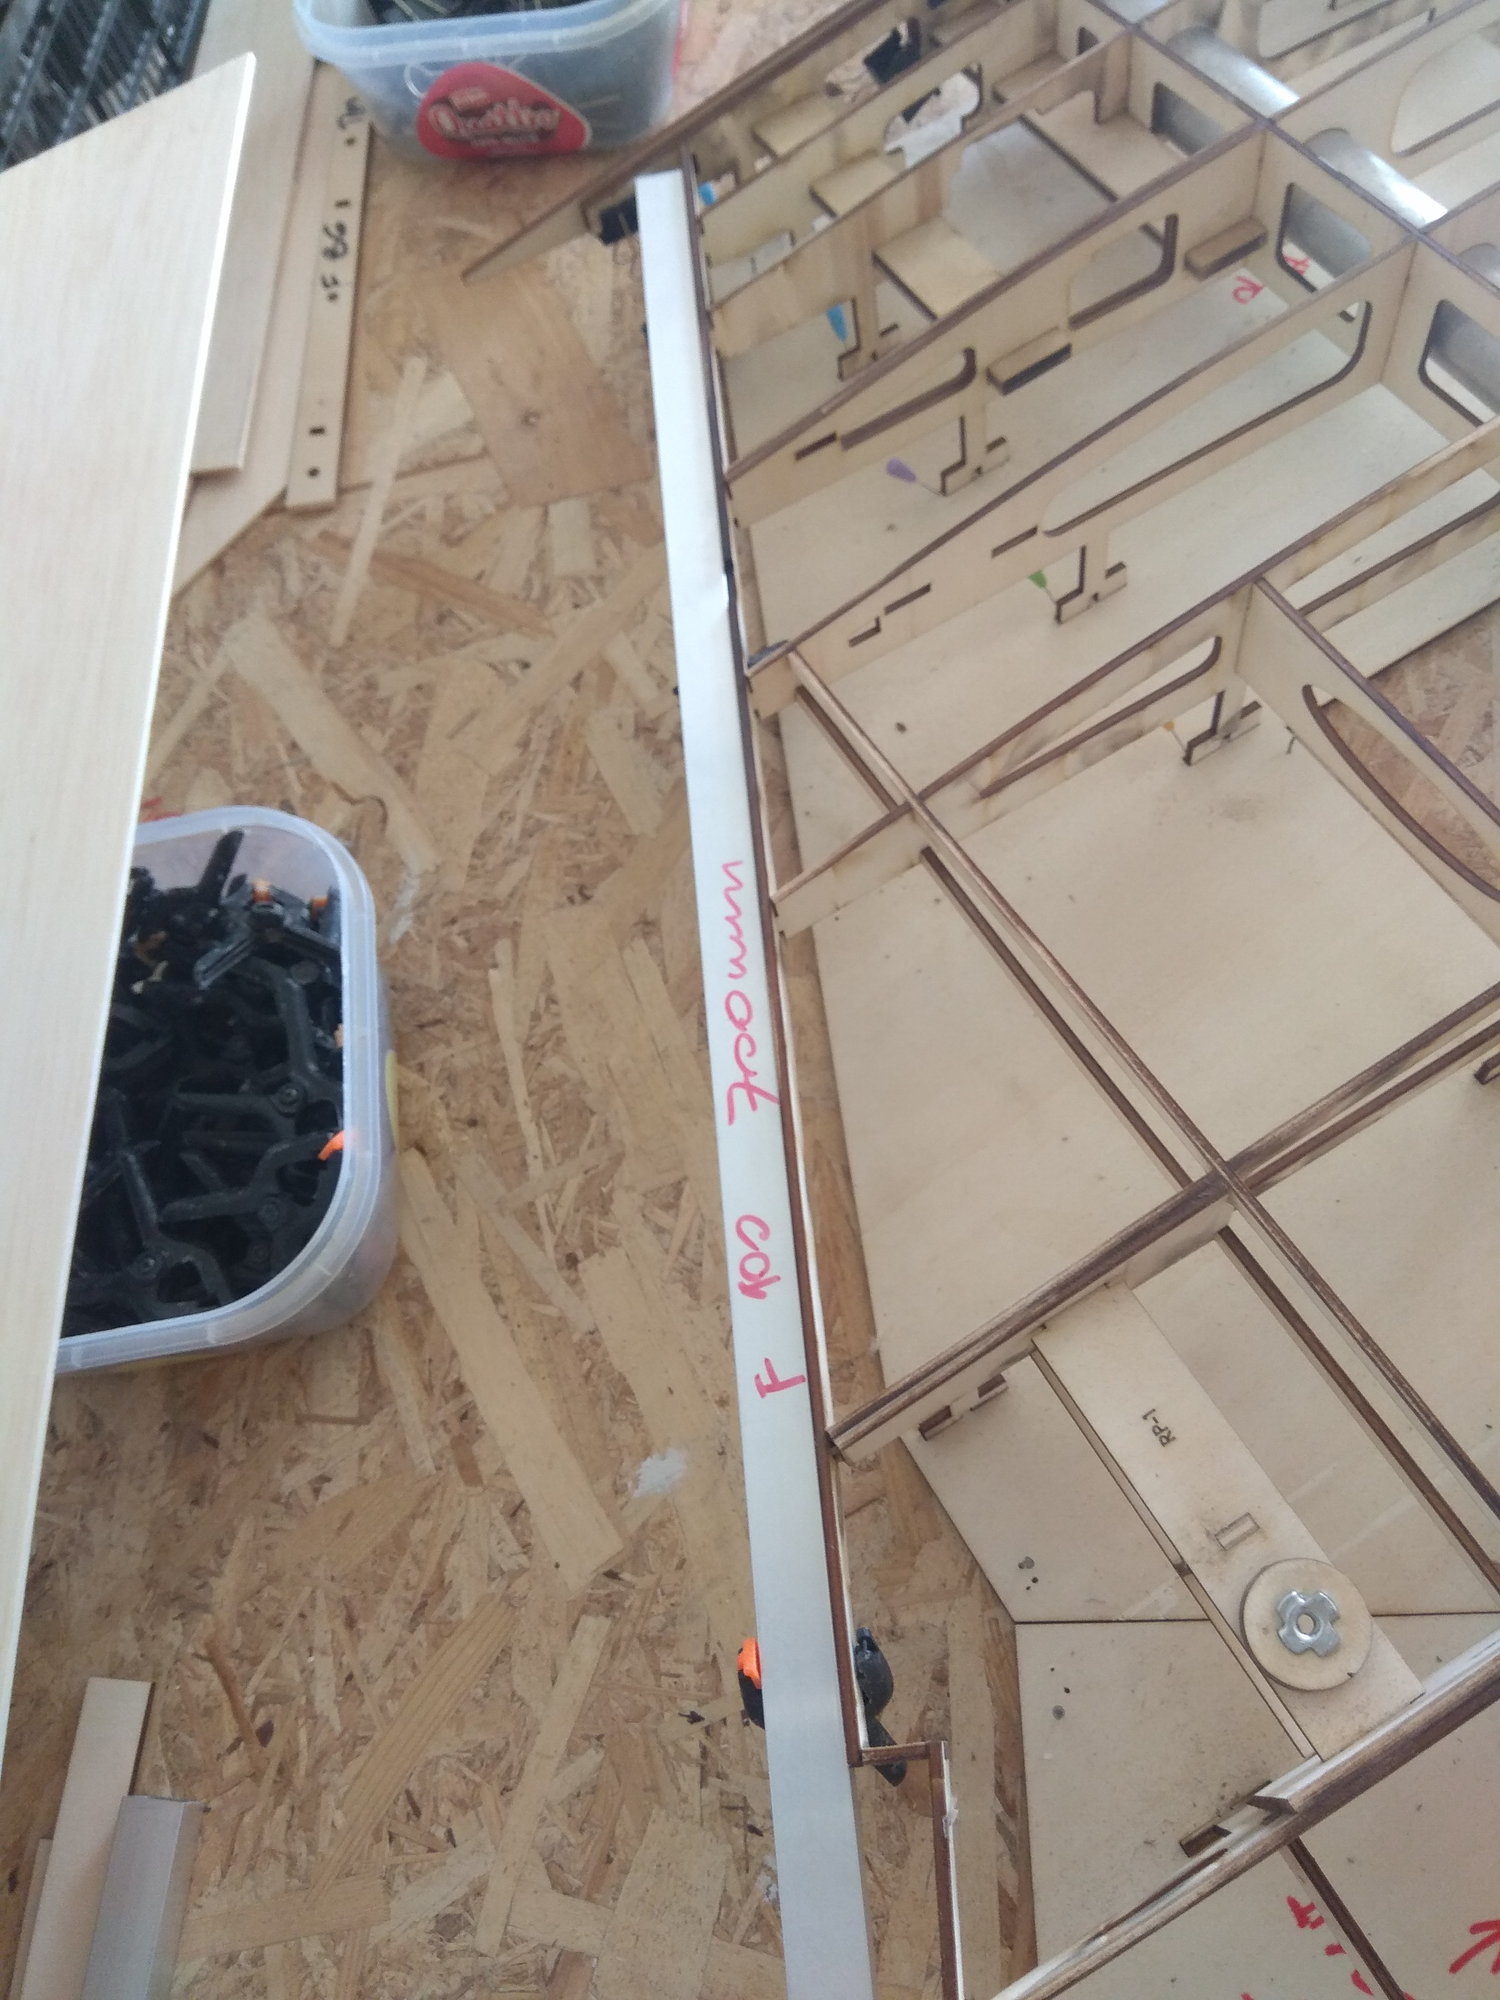
I also prepared the parts for the horizontal stabilizer.
They have template plates, the same as the wings, so that the ribs are placed in precisely defined grooves, which gives greater precision in construction.
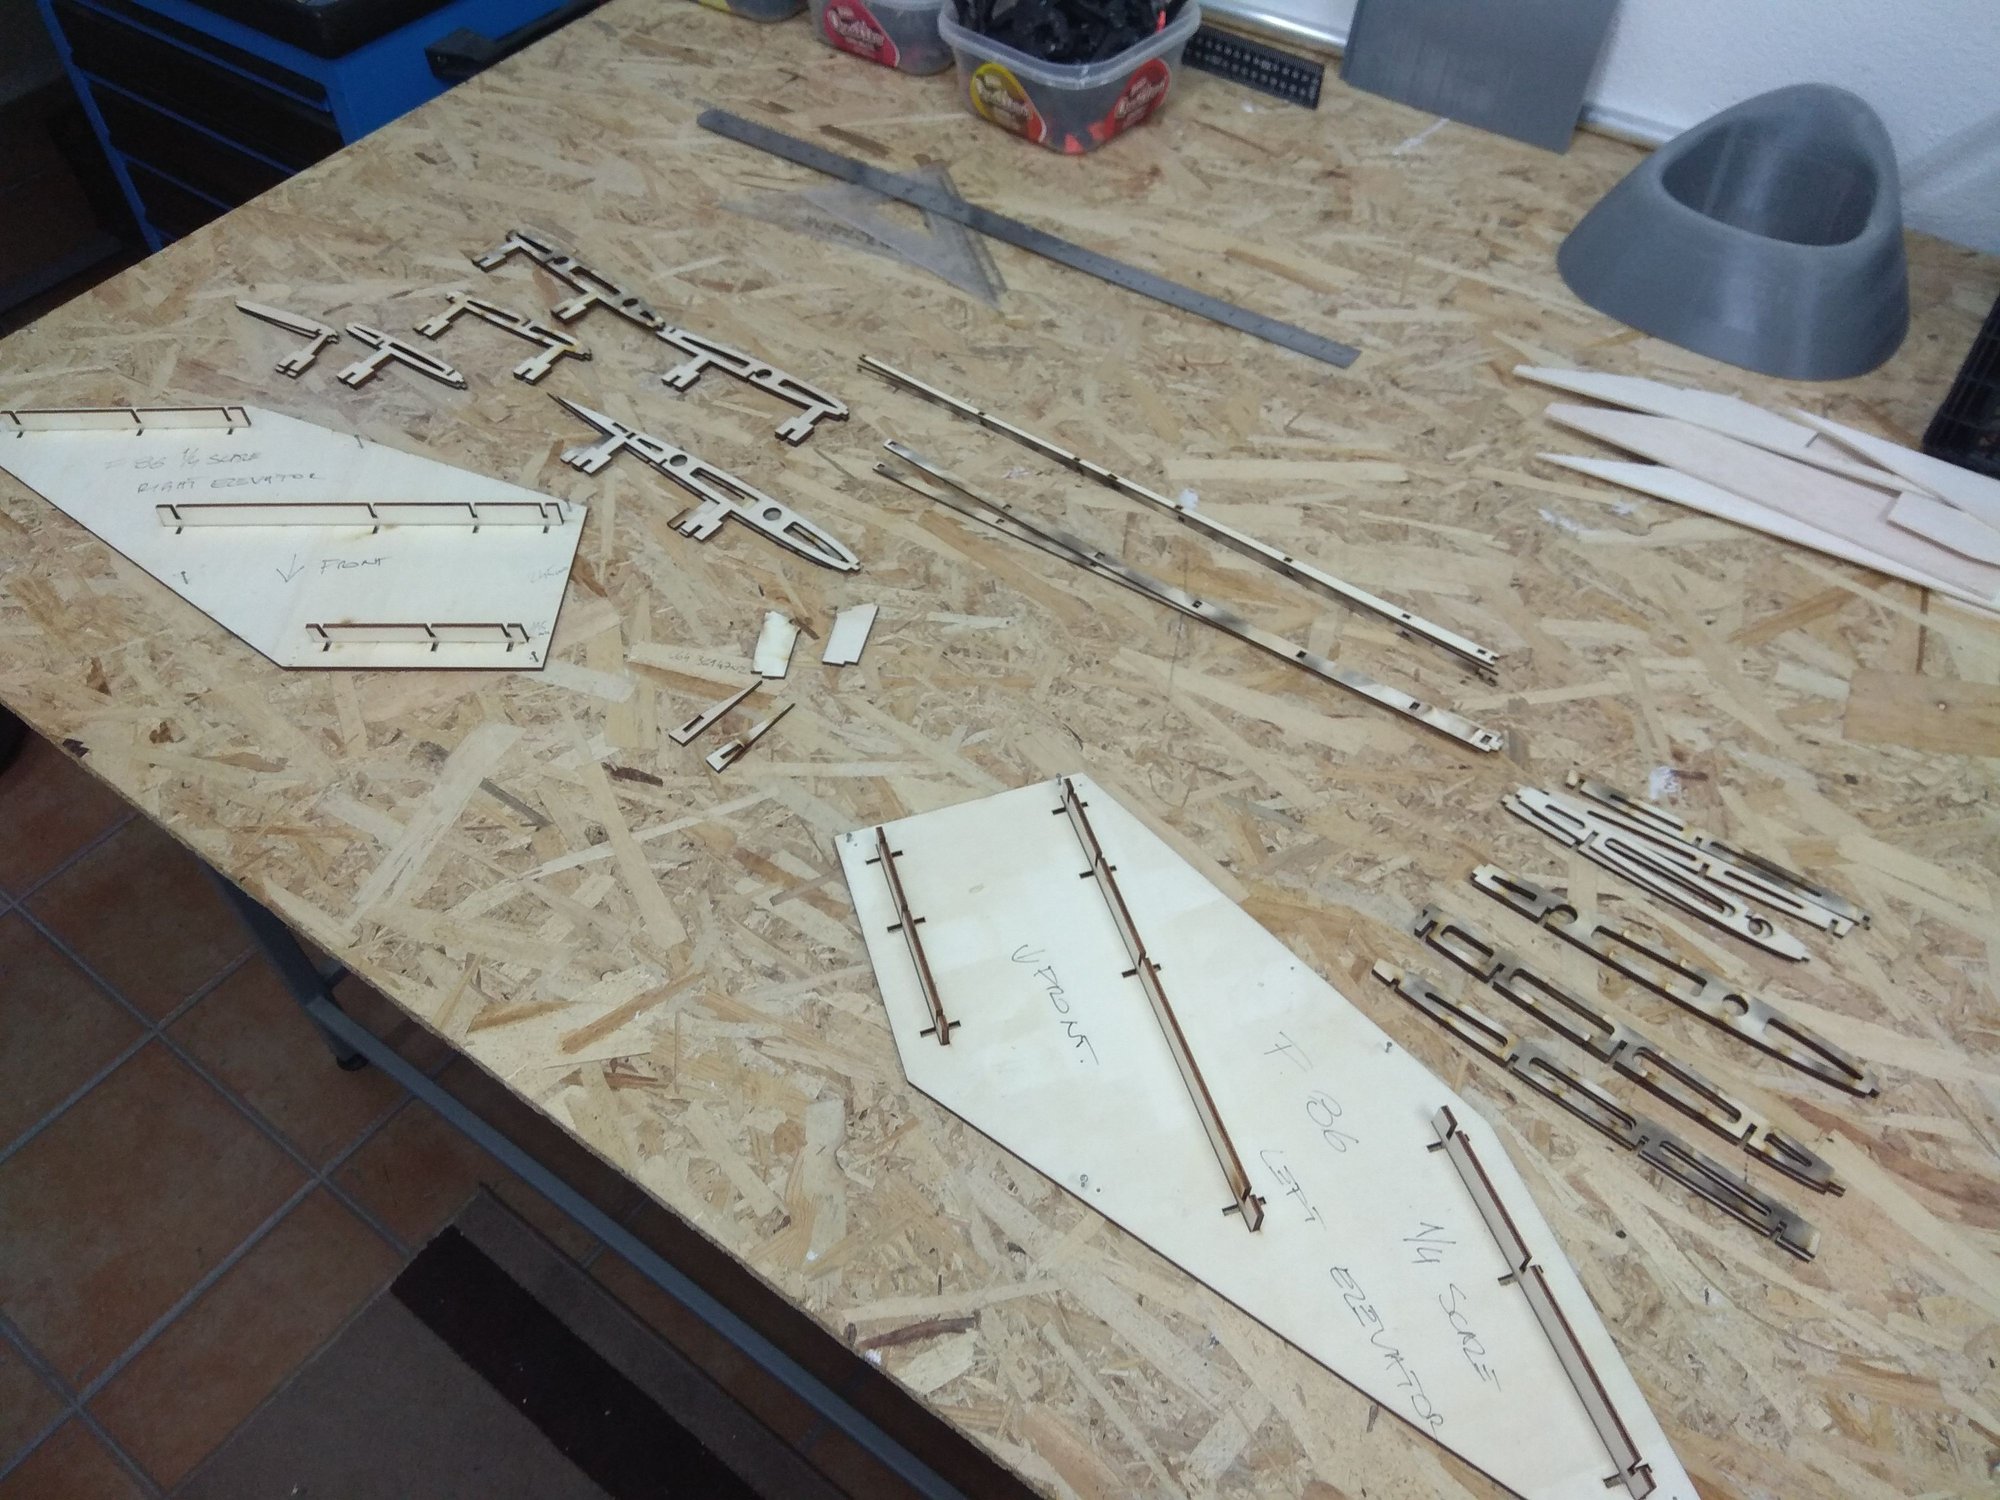

I hope they will be finished by Monday as well.
To be continued...
In the meantime, the tools have arrived in the Czech Republic and I hope to have information about the cabins next week.
The next option is a company in the Netherlands where for now we will certainly make new tools for both our small and large F 100 Super Saber models.
Everything is under control, let's just see how we will coordinate the production. I'm sorry there's been this little hiccup with the cabins, but it'll all be sorted out soon.
Thanks Viper, here are new pictures...
The top half of the rear fuselage part is almost complete. The transition of the fuselage shape from one to the other defines the placement of the first slats.
The first one is definitely the one that goes above the air brake.
The brakes are printed on a 3D printer, the places through which the axle passes are reinforced with 3 mm hard aviation plywood.
On this model, I will not use two 3 mm screws, but a carbon rod will be inserted from the bottom.
More detailed pictures follow...
The fuselage is now strong enough to separate from the workbench, but I won't do that until I have the vertical stabilizer structure built. Vertical stabilizer will be removable.
It will be done this weekend.
I also prepared the parts for the horizontal stabilizer.
They have template plates, the same as the wings, so that the ribs are placed in precisely defined grooves, which gives greater precision in construction.
I hope they will be finished by Monday as well.
To be continued...
The following users liked this post:
jcterrettaz (07-29-2022)
08-03-2022, 04:22 AM
#12
Thread Starter
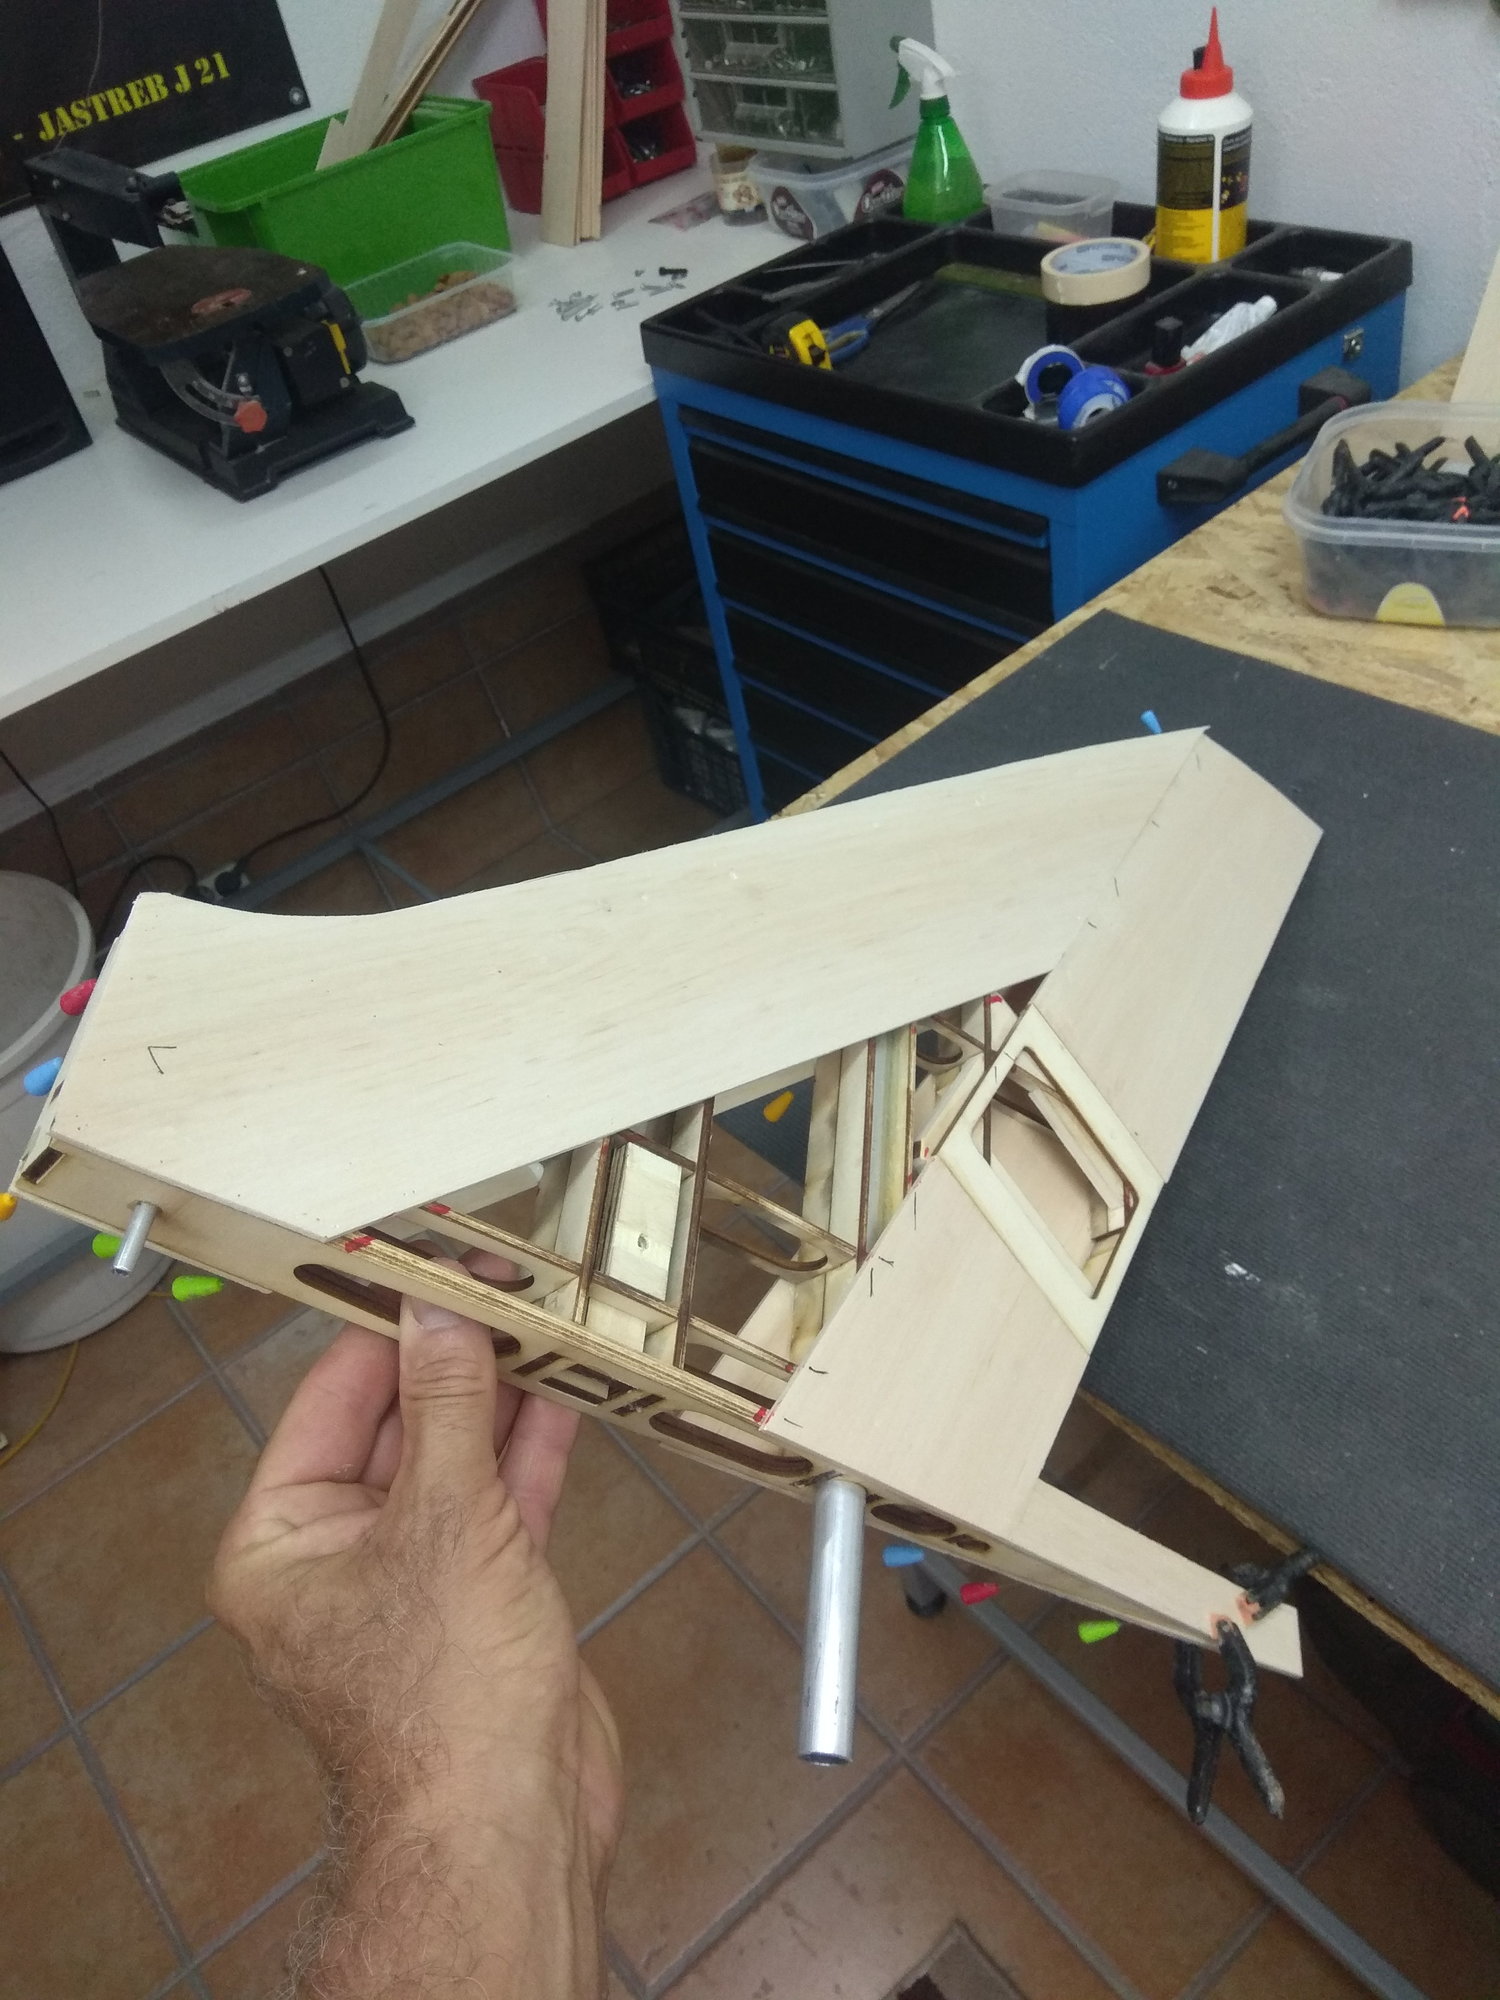
And as I said, the horizontal and vertical stabilizer will be ready by Monday.
OK, not quite finished, but enough that I could mount them on the fuselage and check how they fit.
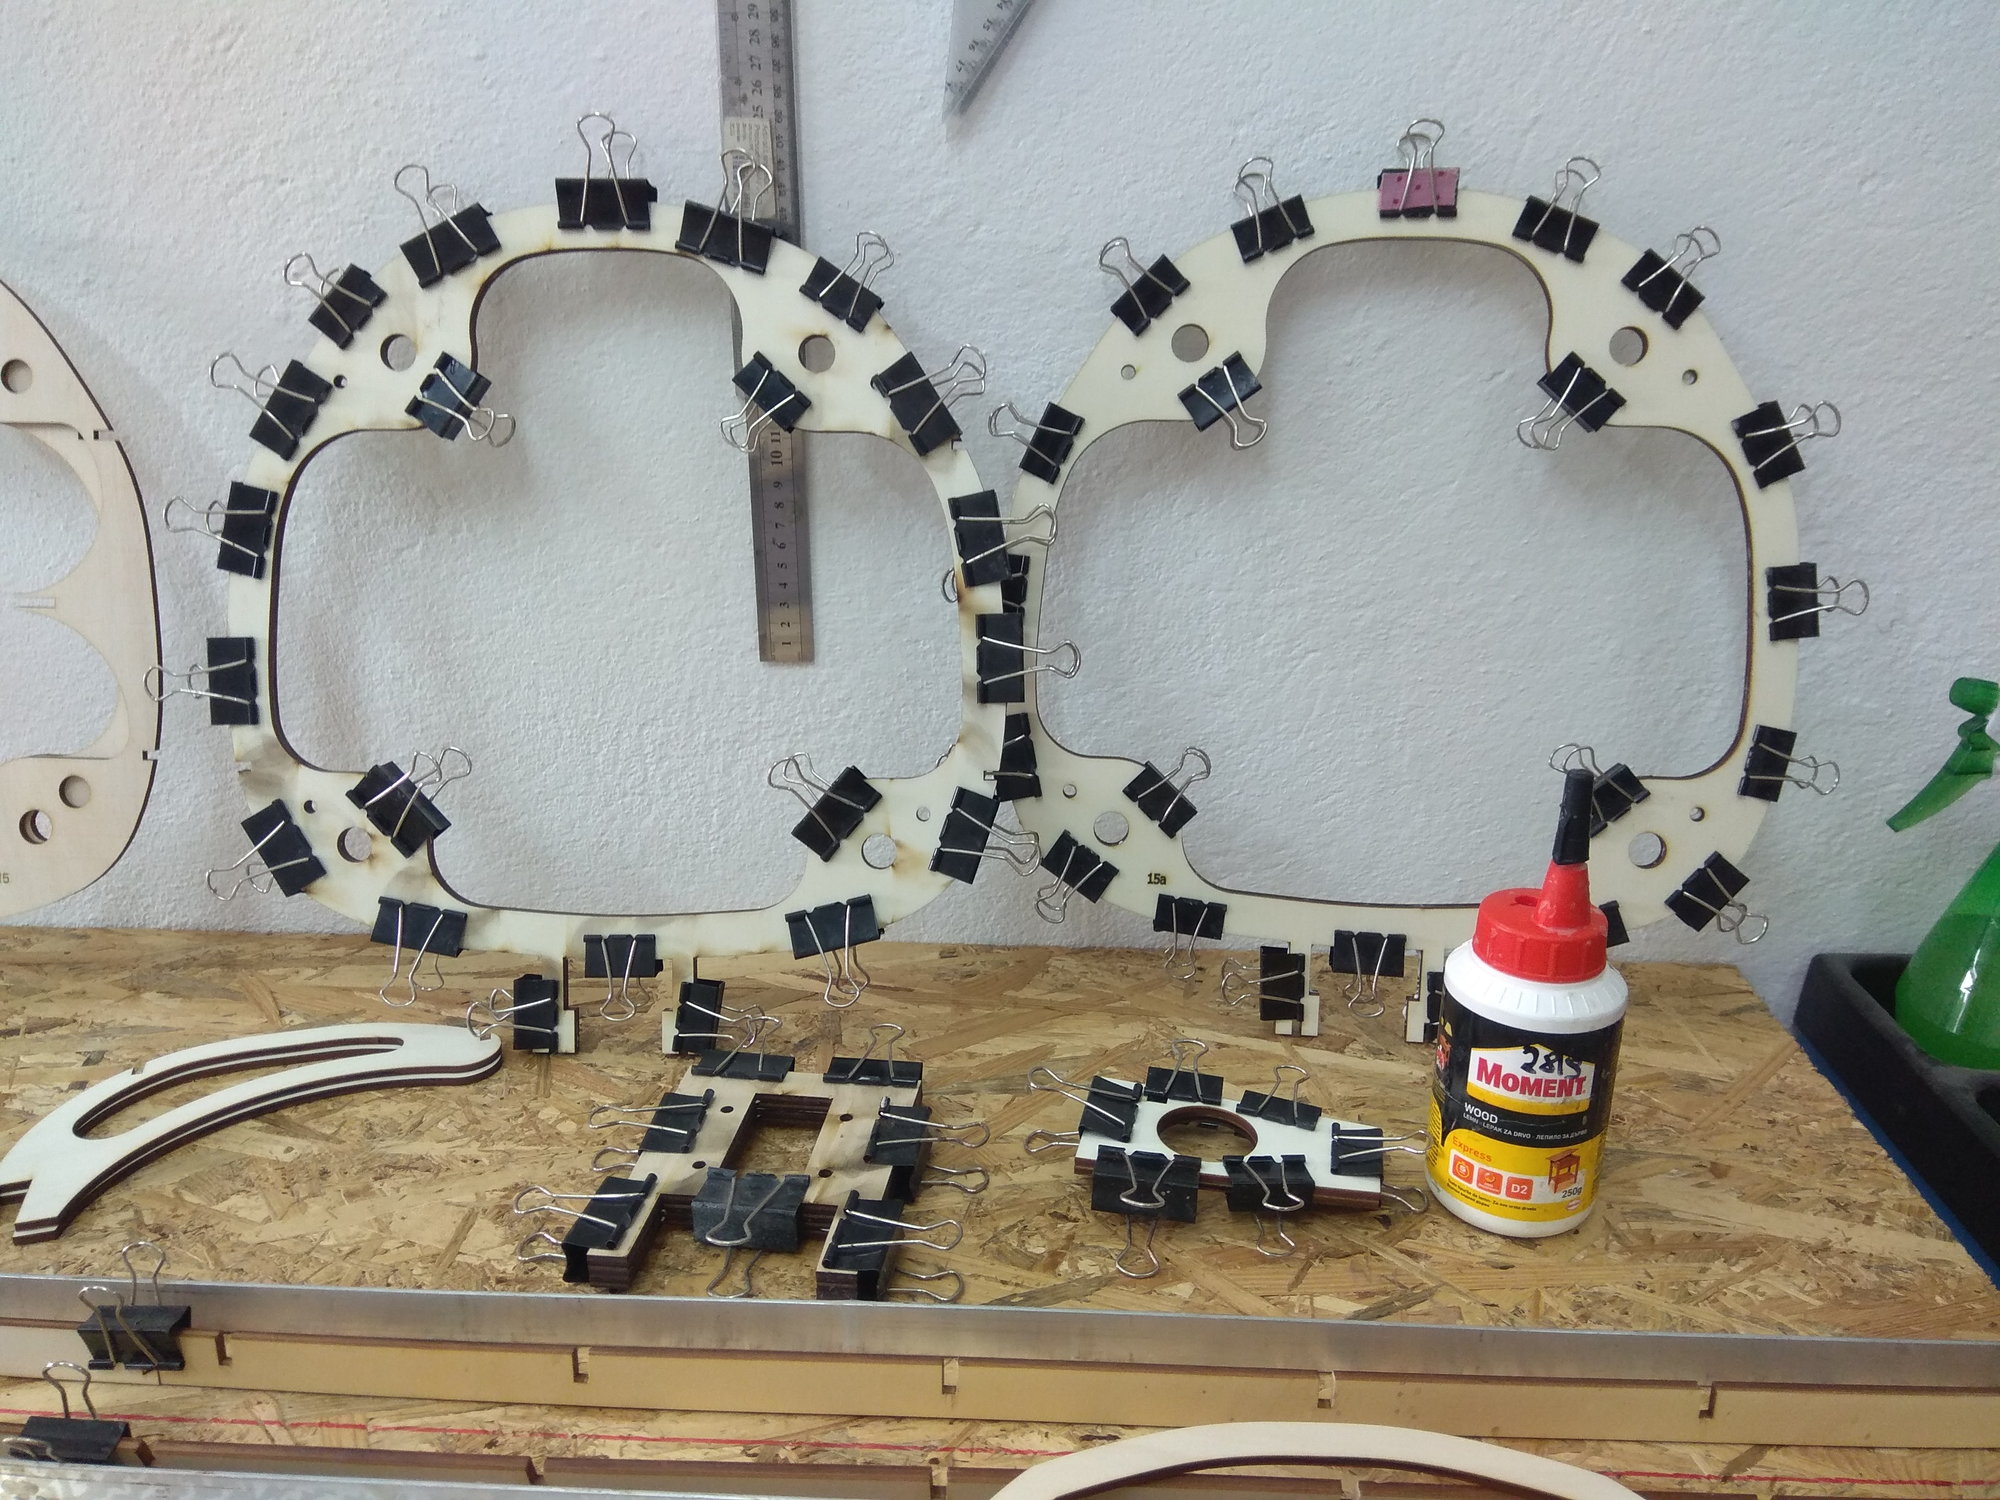
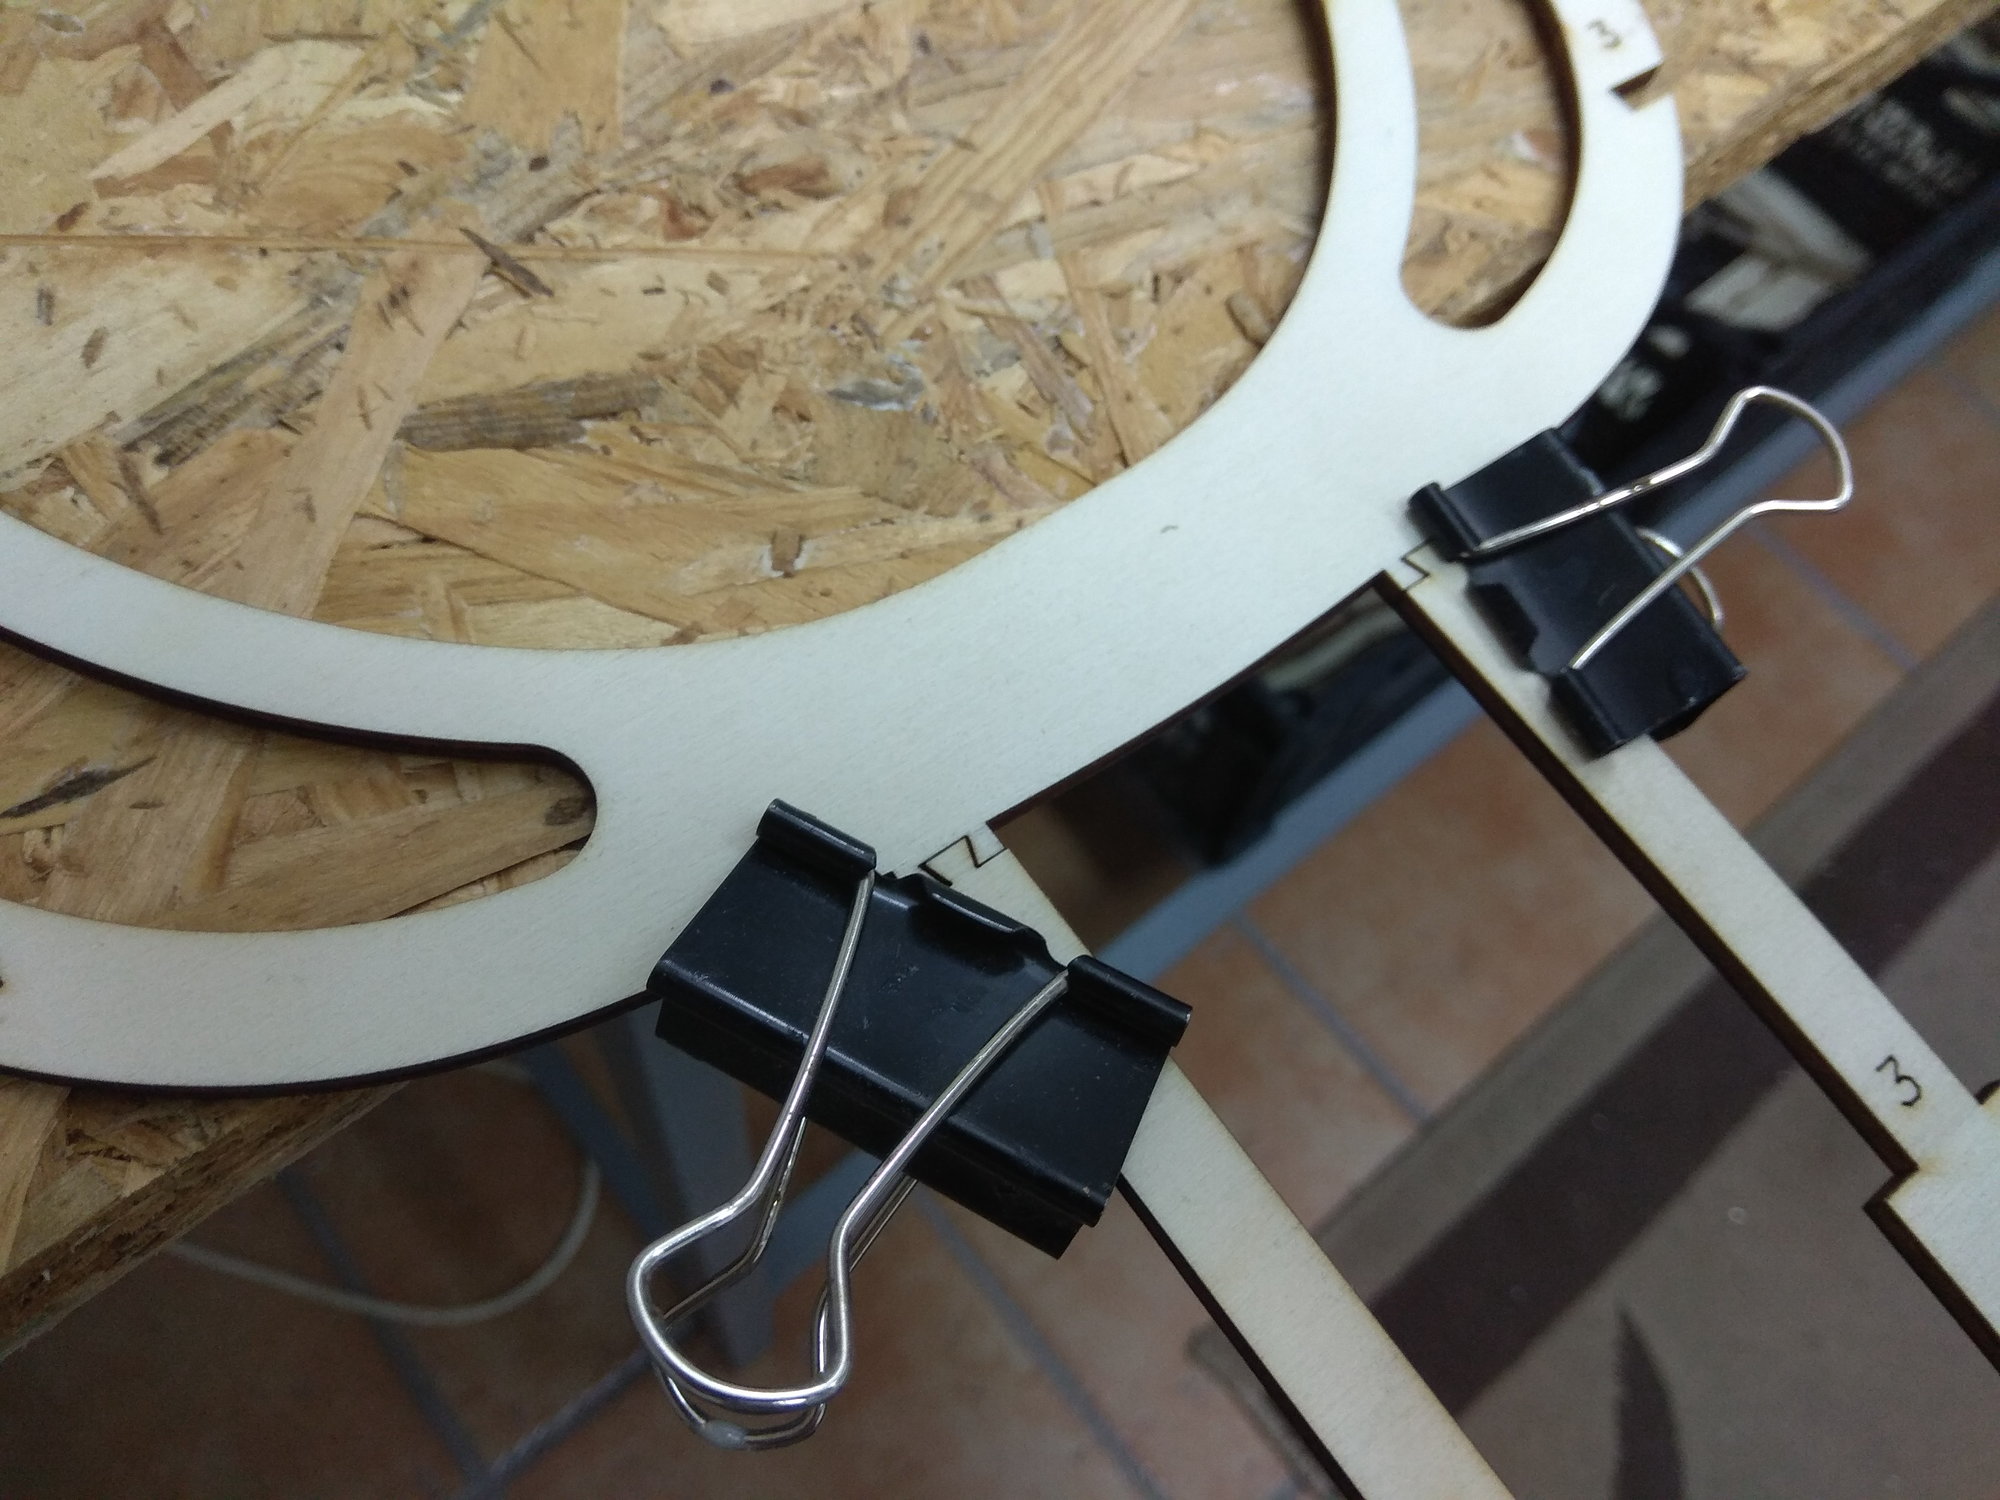
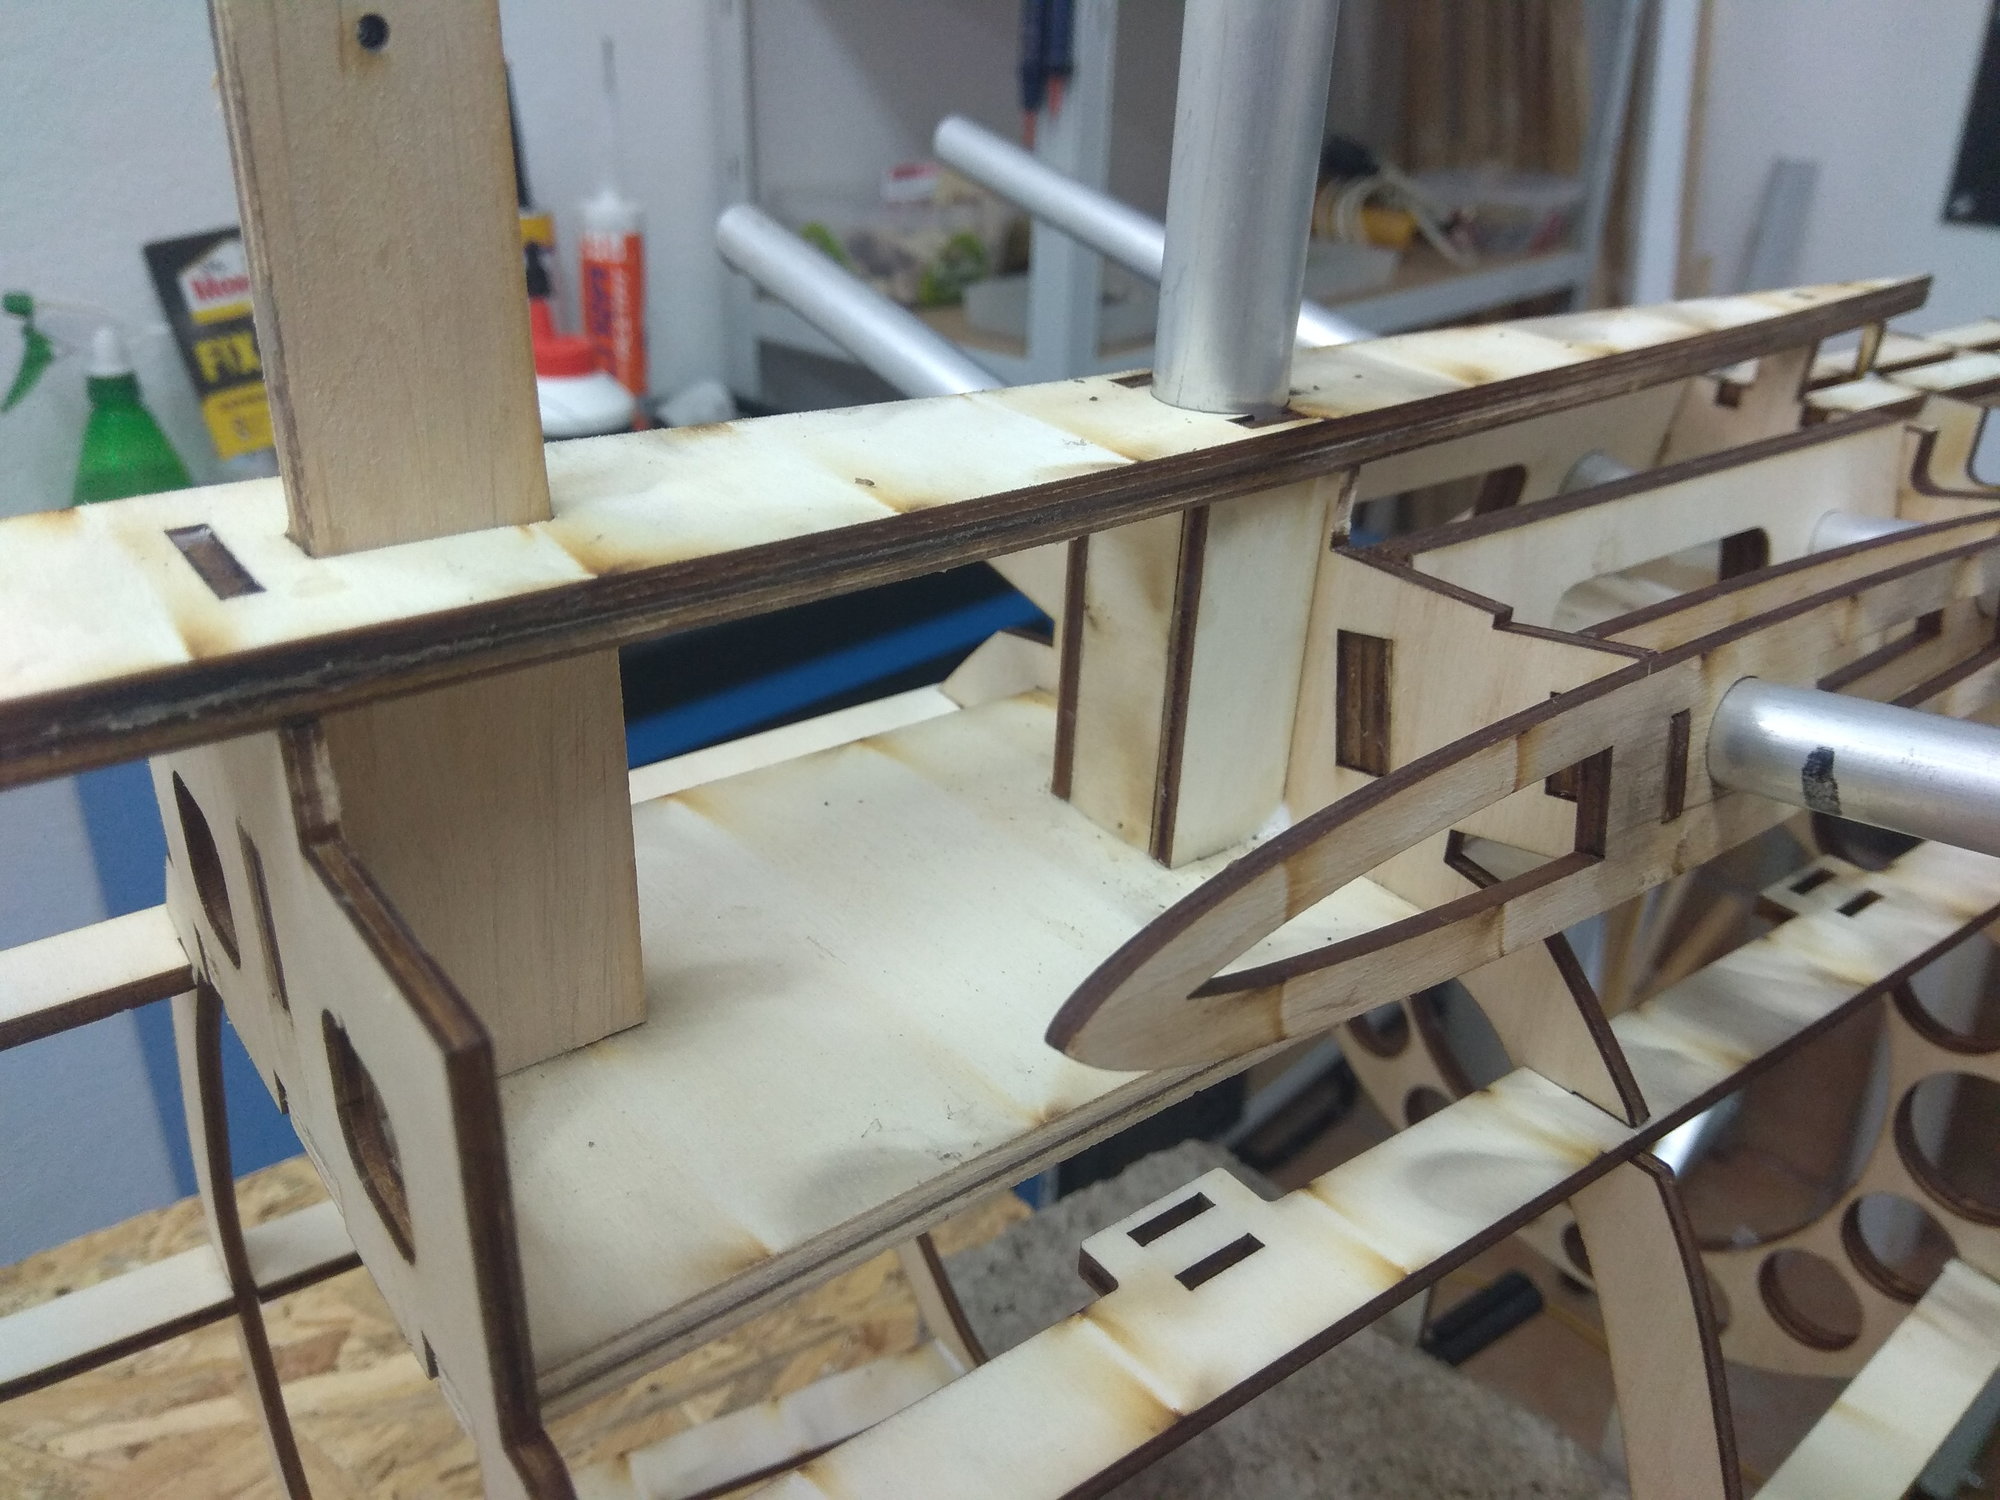
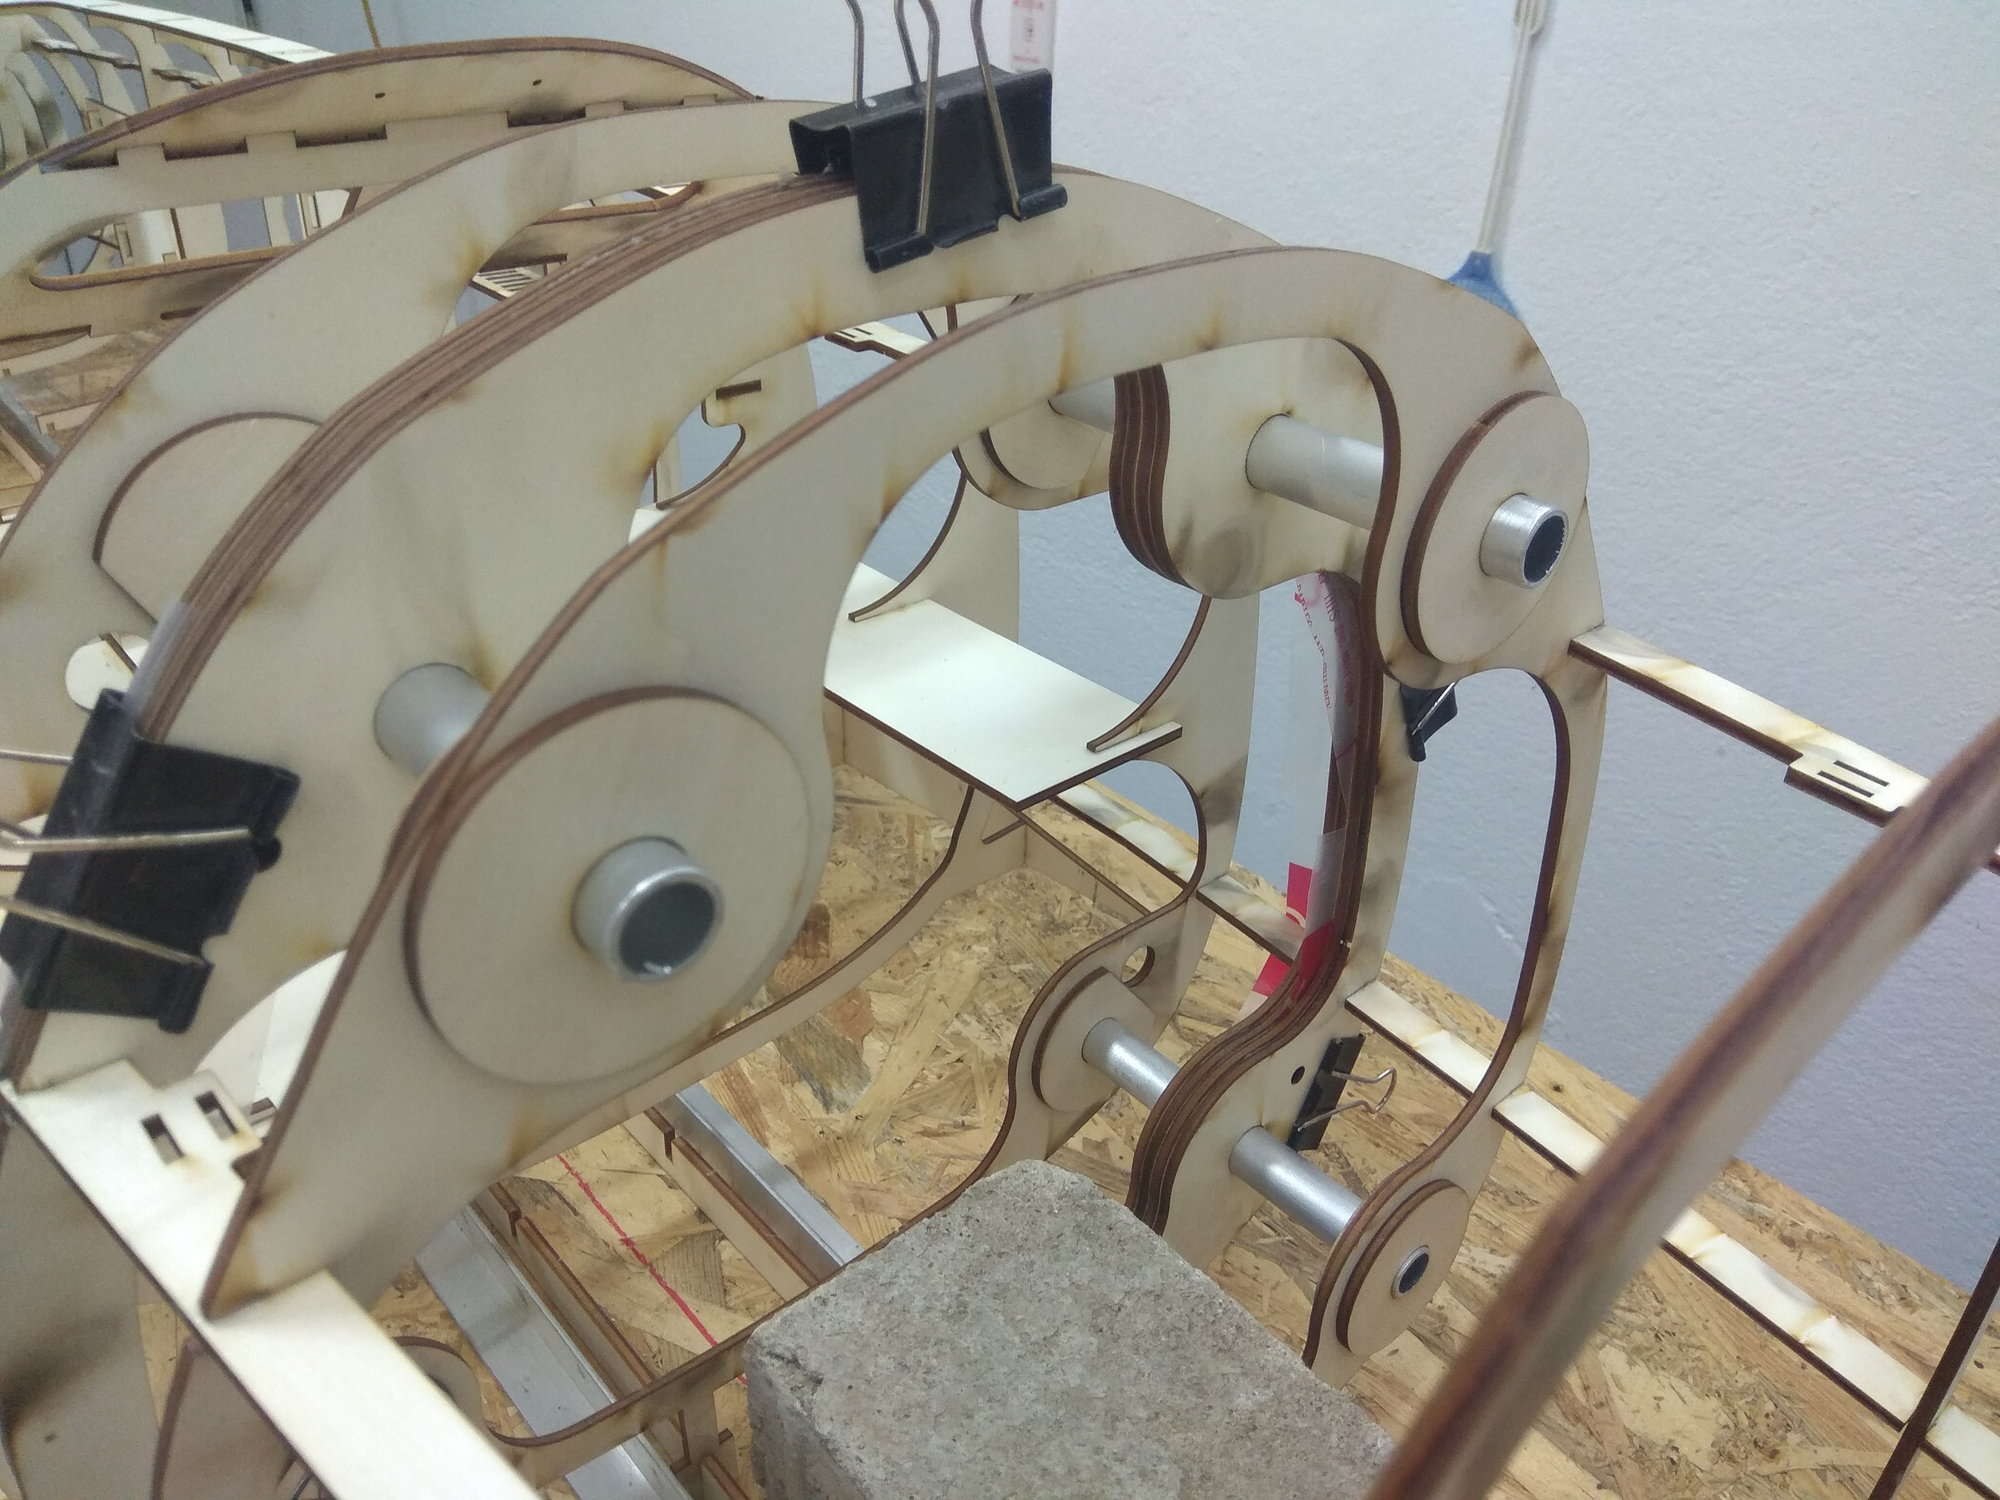
Horizontal stabilizers have their own template plates in which all the ribs are placed. With this, they stand stable and cannot move even a little.
Once the ribs were in place, I glued the three cross pieces to connect them.
Of course, during the gluing, the aluminum tubes were in their places.
When all of this is in place, there is no theoretical chance that the part will not be perfect.
After the glue on the cross ribs dried, I glued the parts where the leading edge and trailing edge will come later.
To make these two parts absolutely flat, I used carbon tubes.


I ended up gluing on a small rib that has a template to get the ninety degree angle right.
I don't remove the construction from the template until the upper side is covered with 3 mm balsa.
These days I was watching our model build, where the wing and horizontal stabilizer were removed from the template immediately after the parts were assembled.
I don't do it that way, because that way the structure, no matter how solid it is, can still bend.
The upper skin stiffens the entire assembly and only after that the part is removed from the template!!!
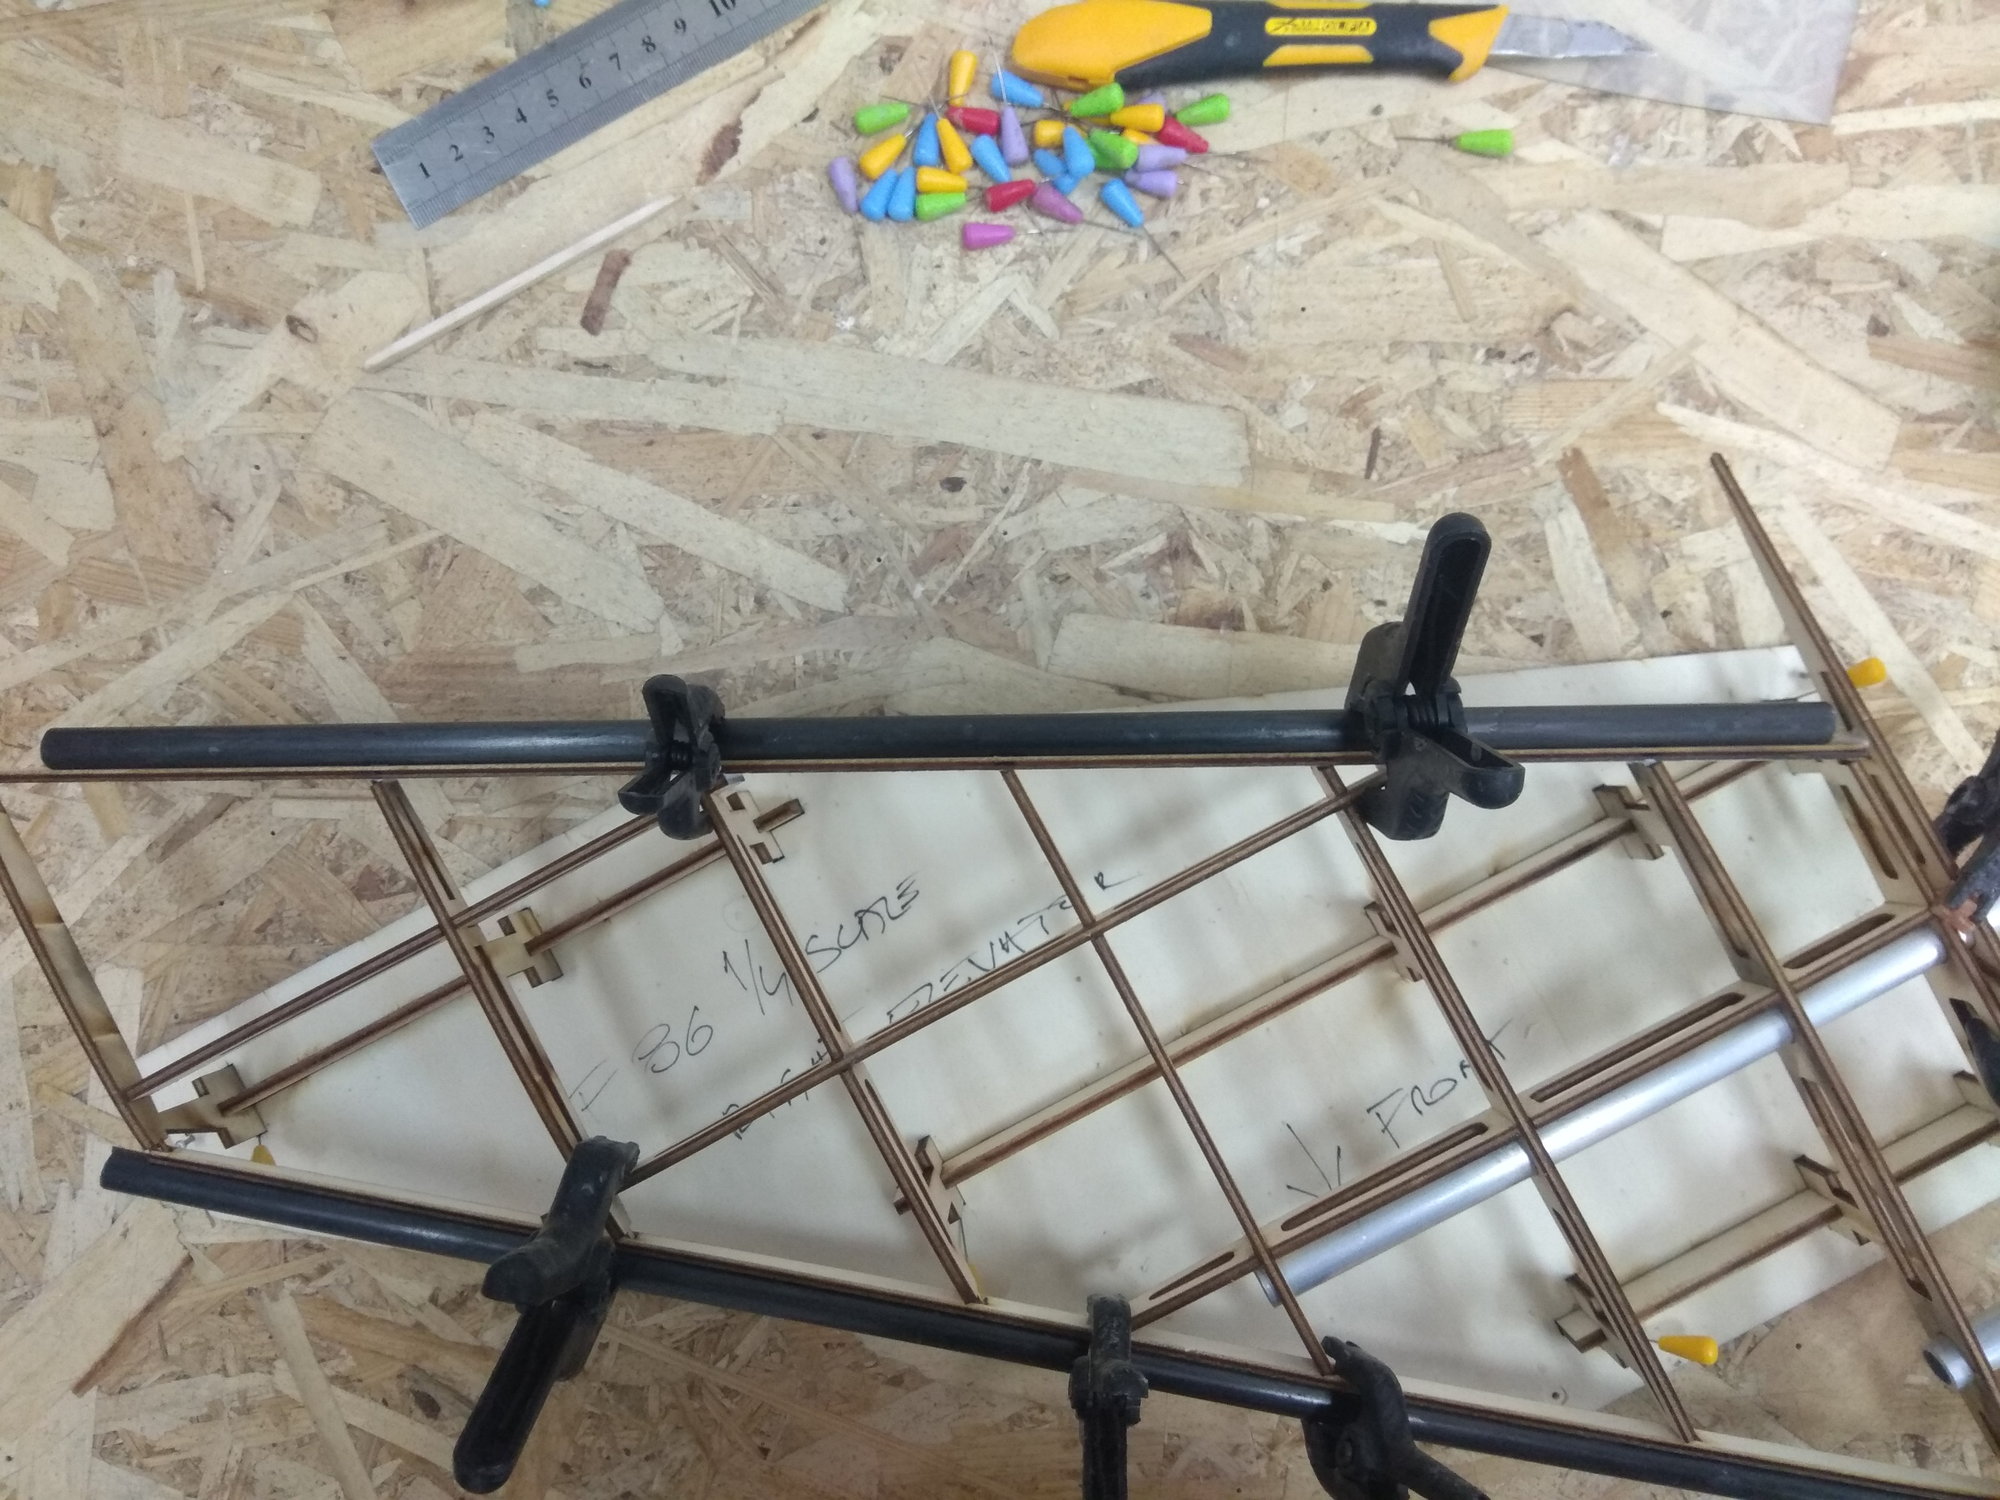
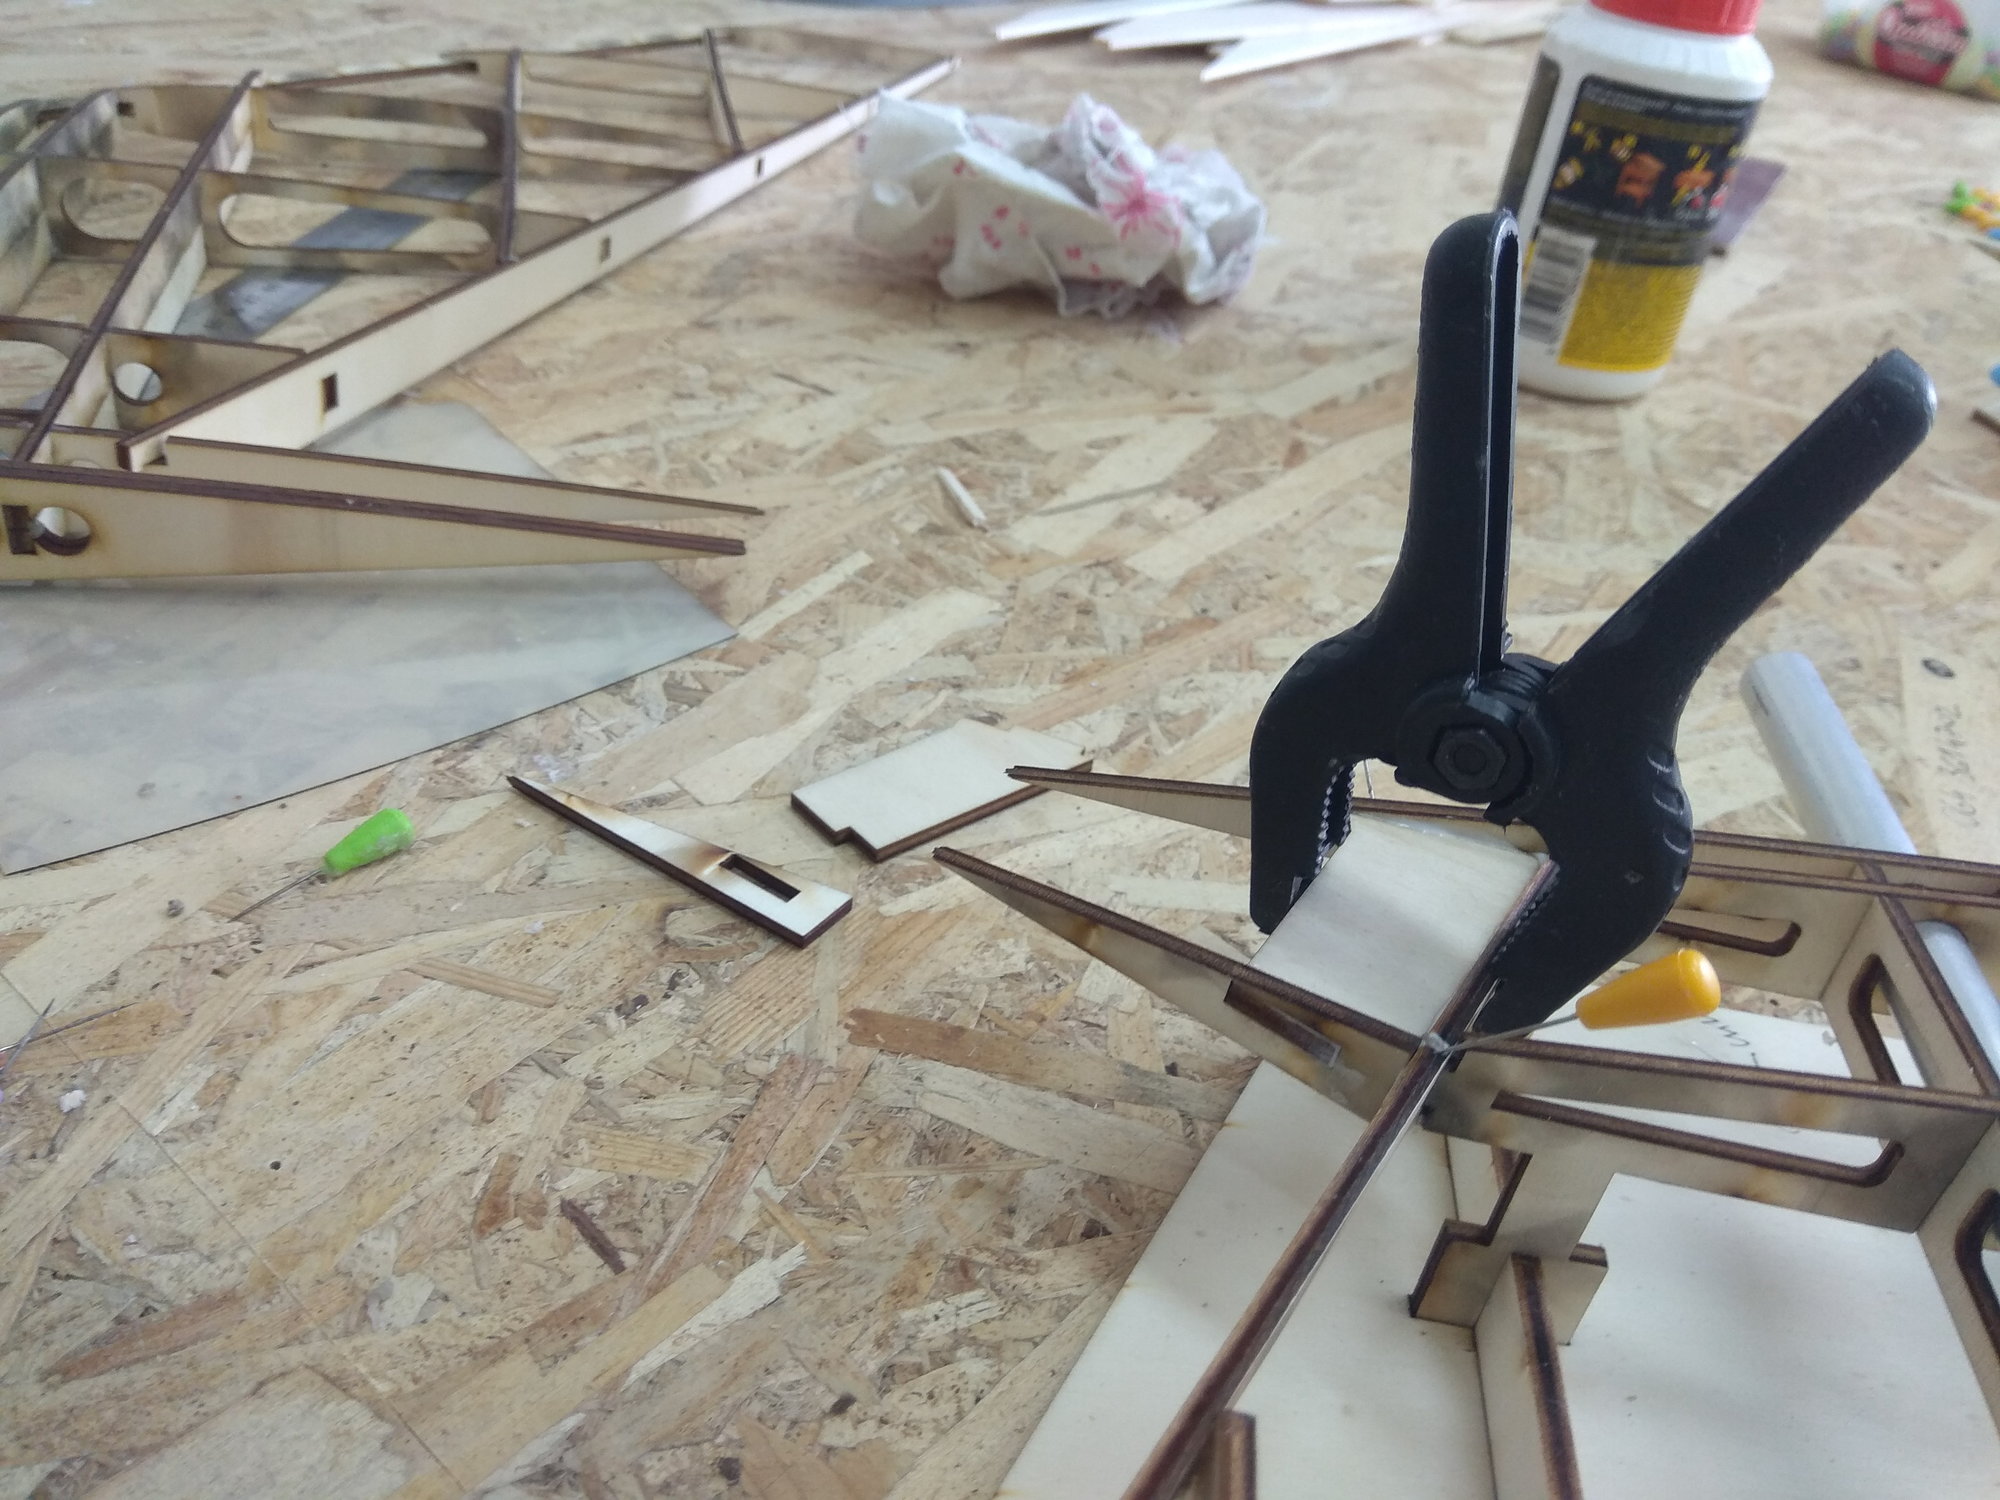
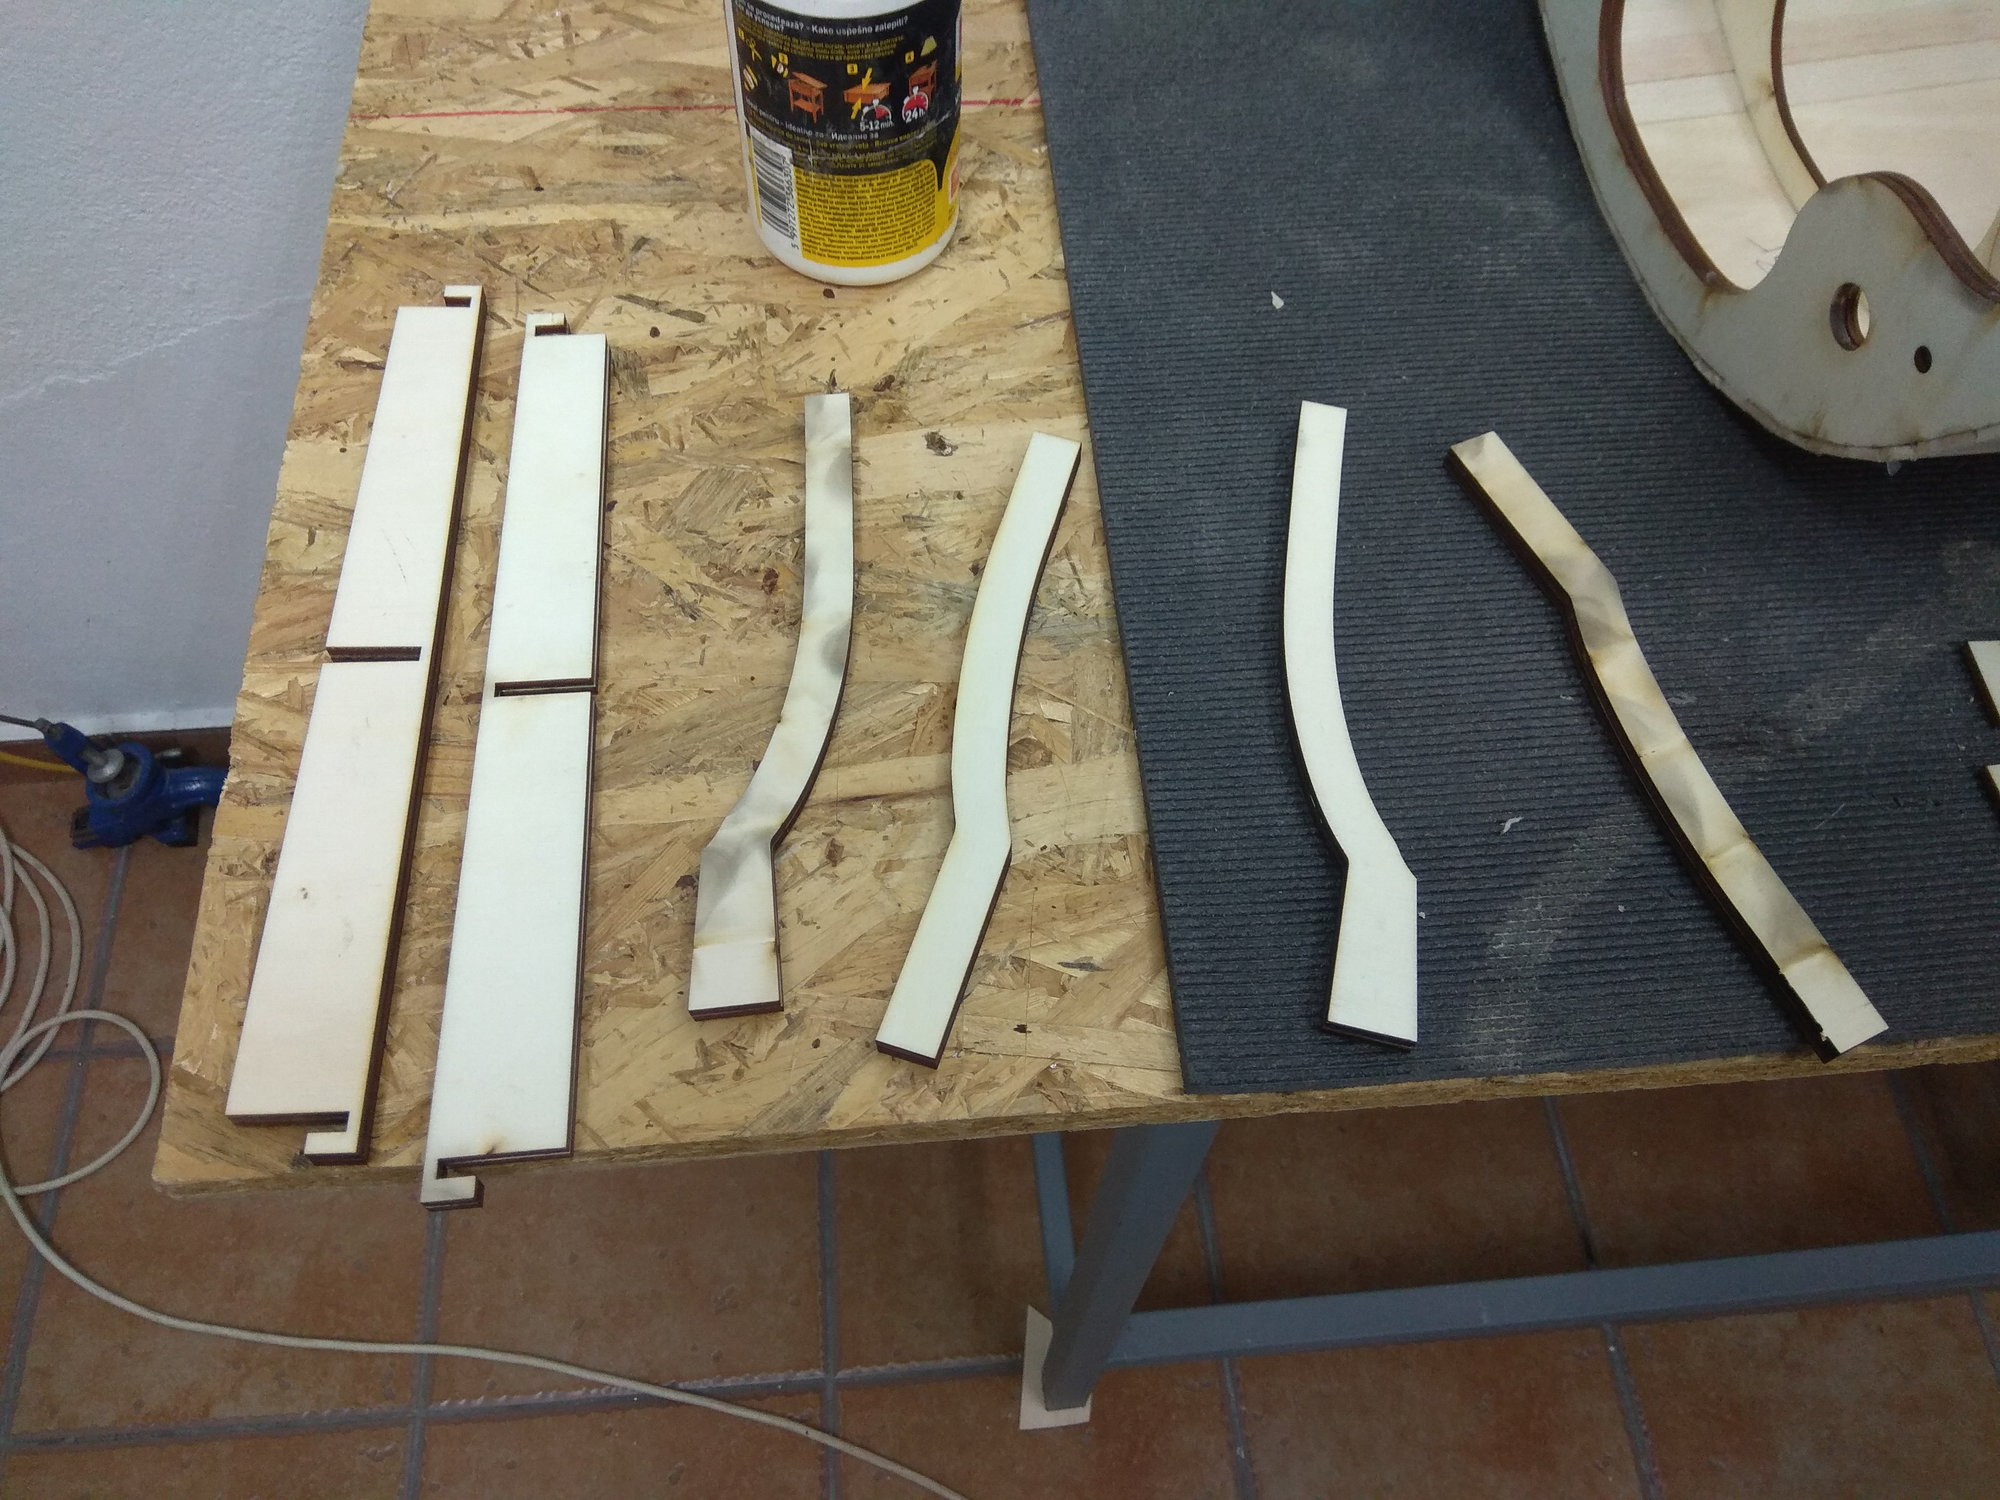
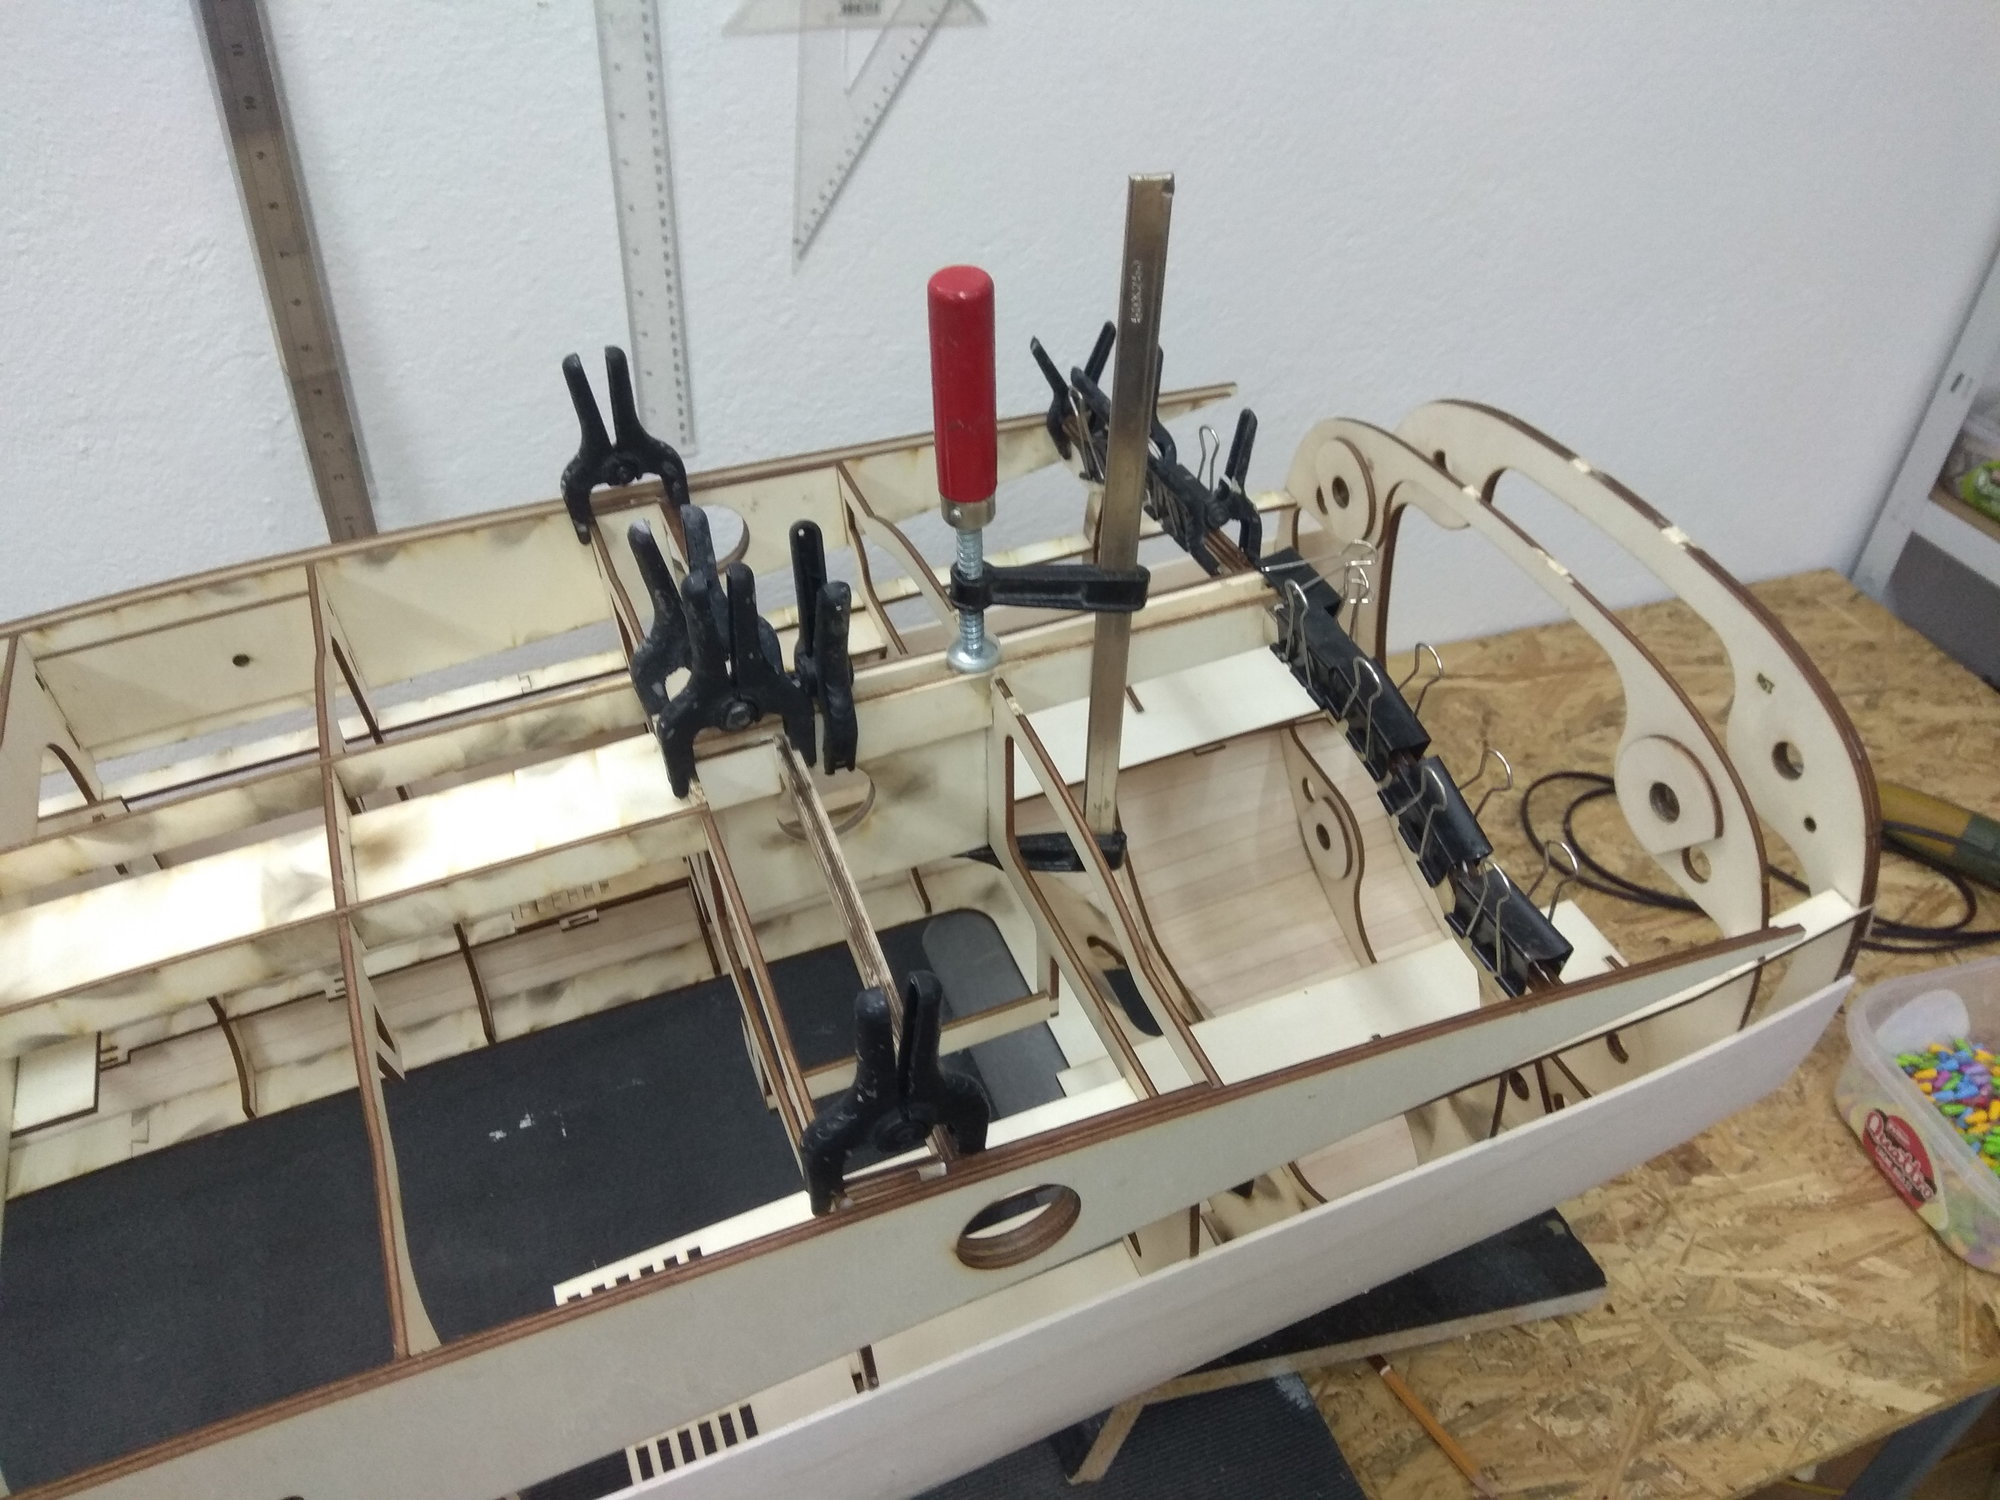
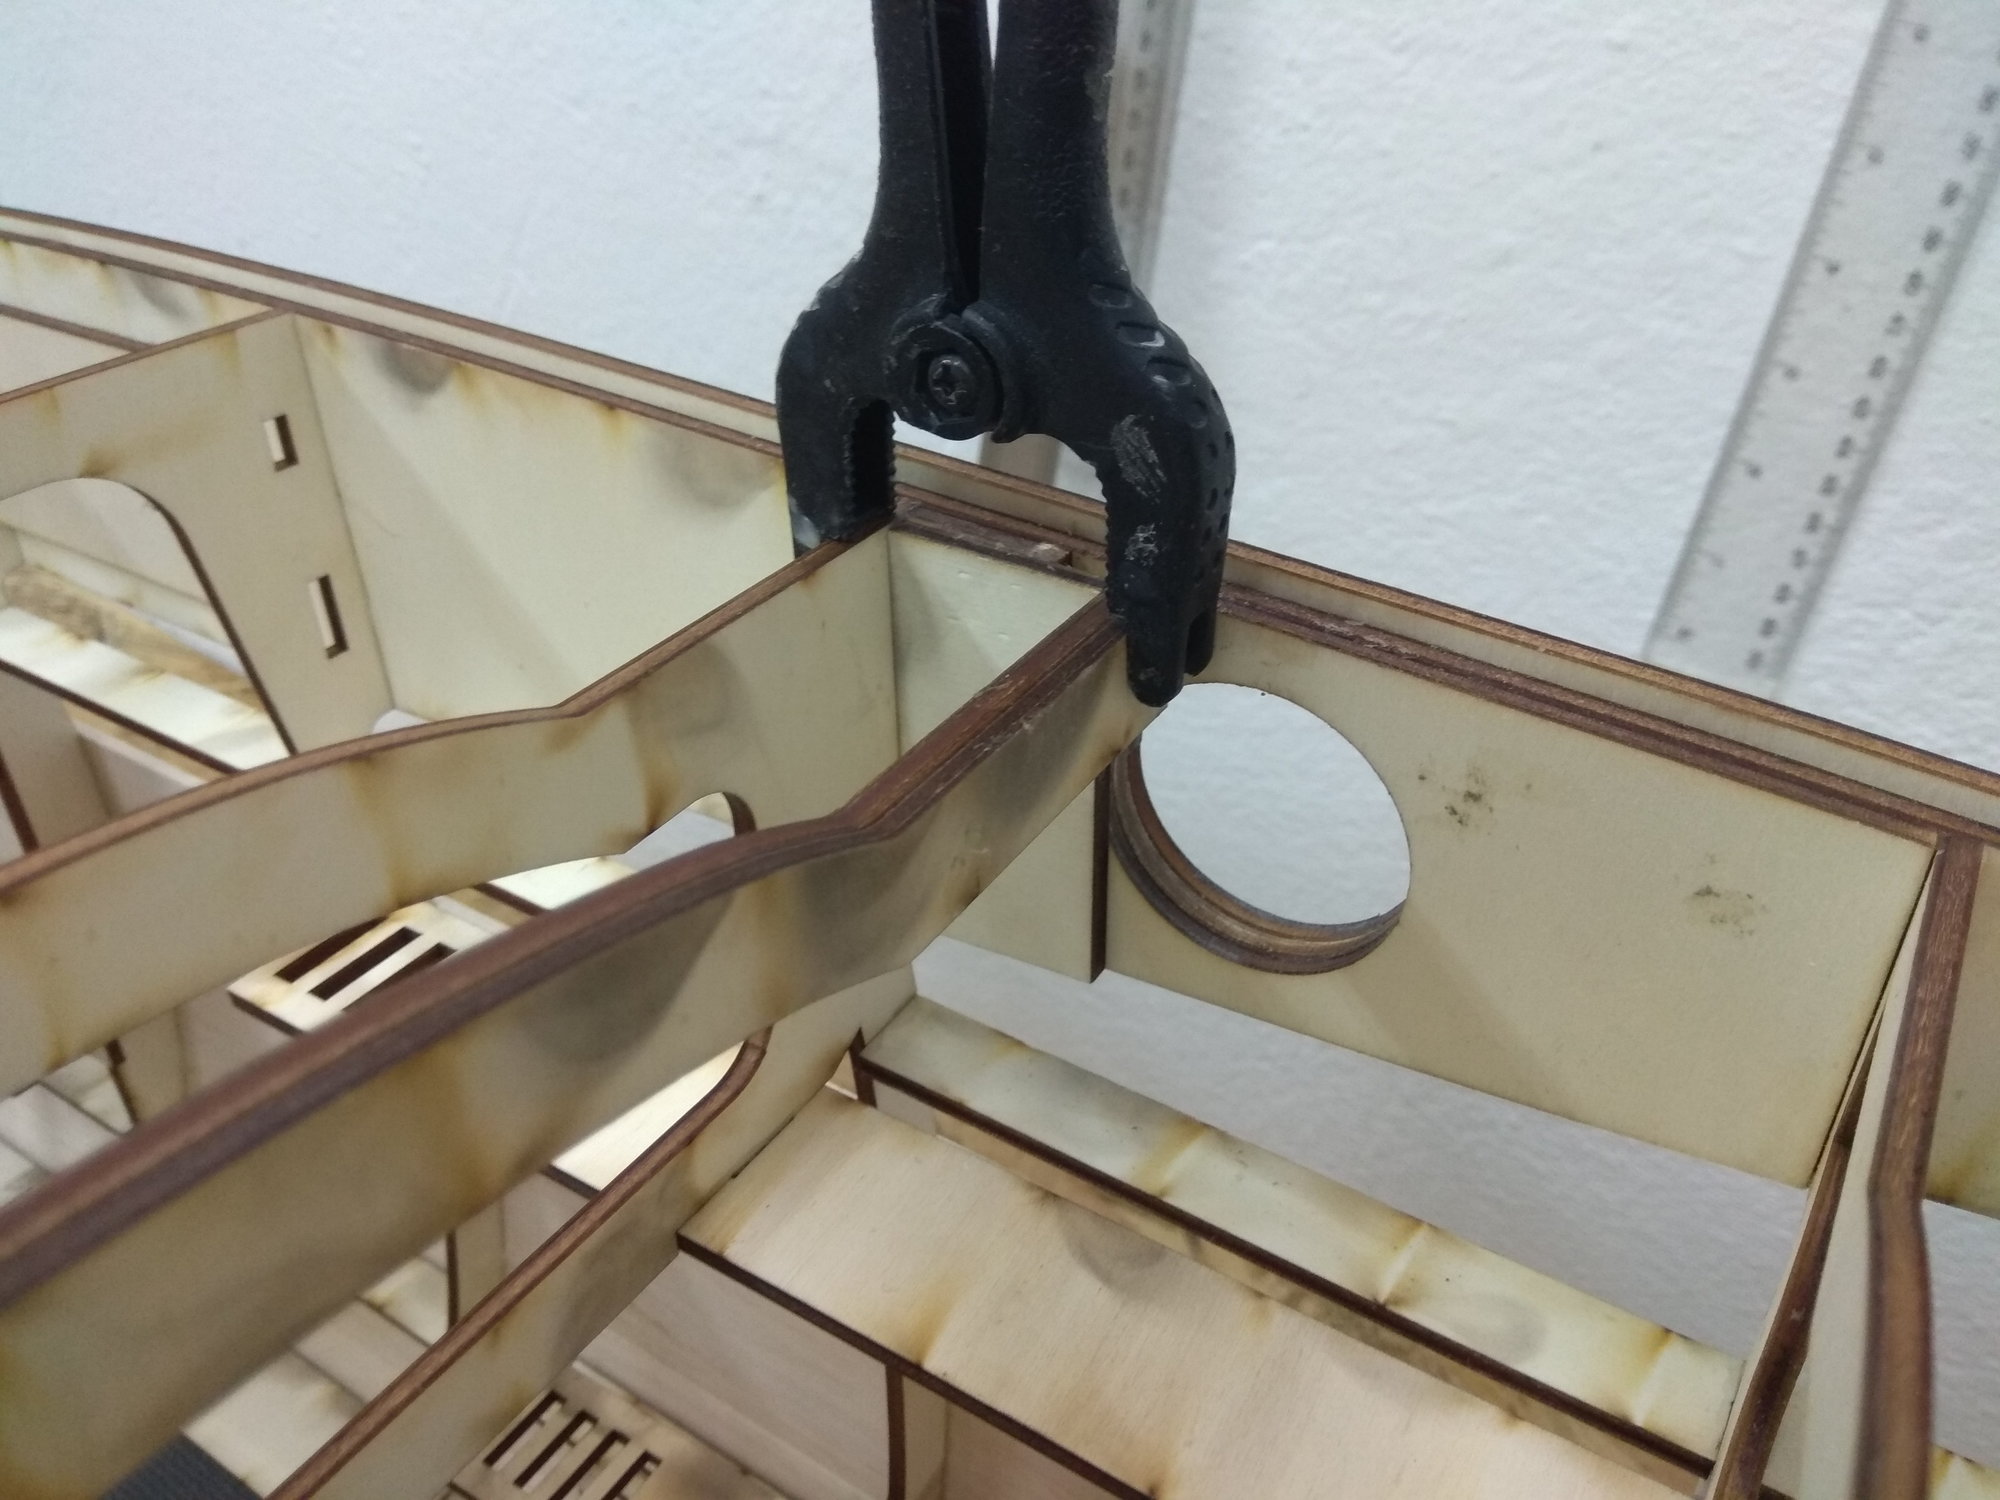
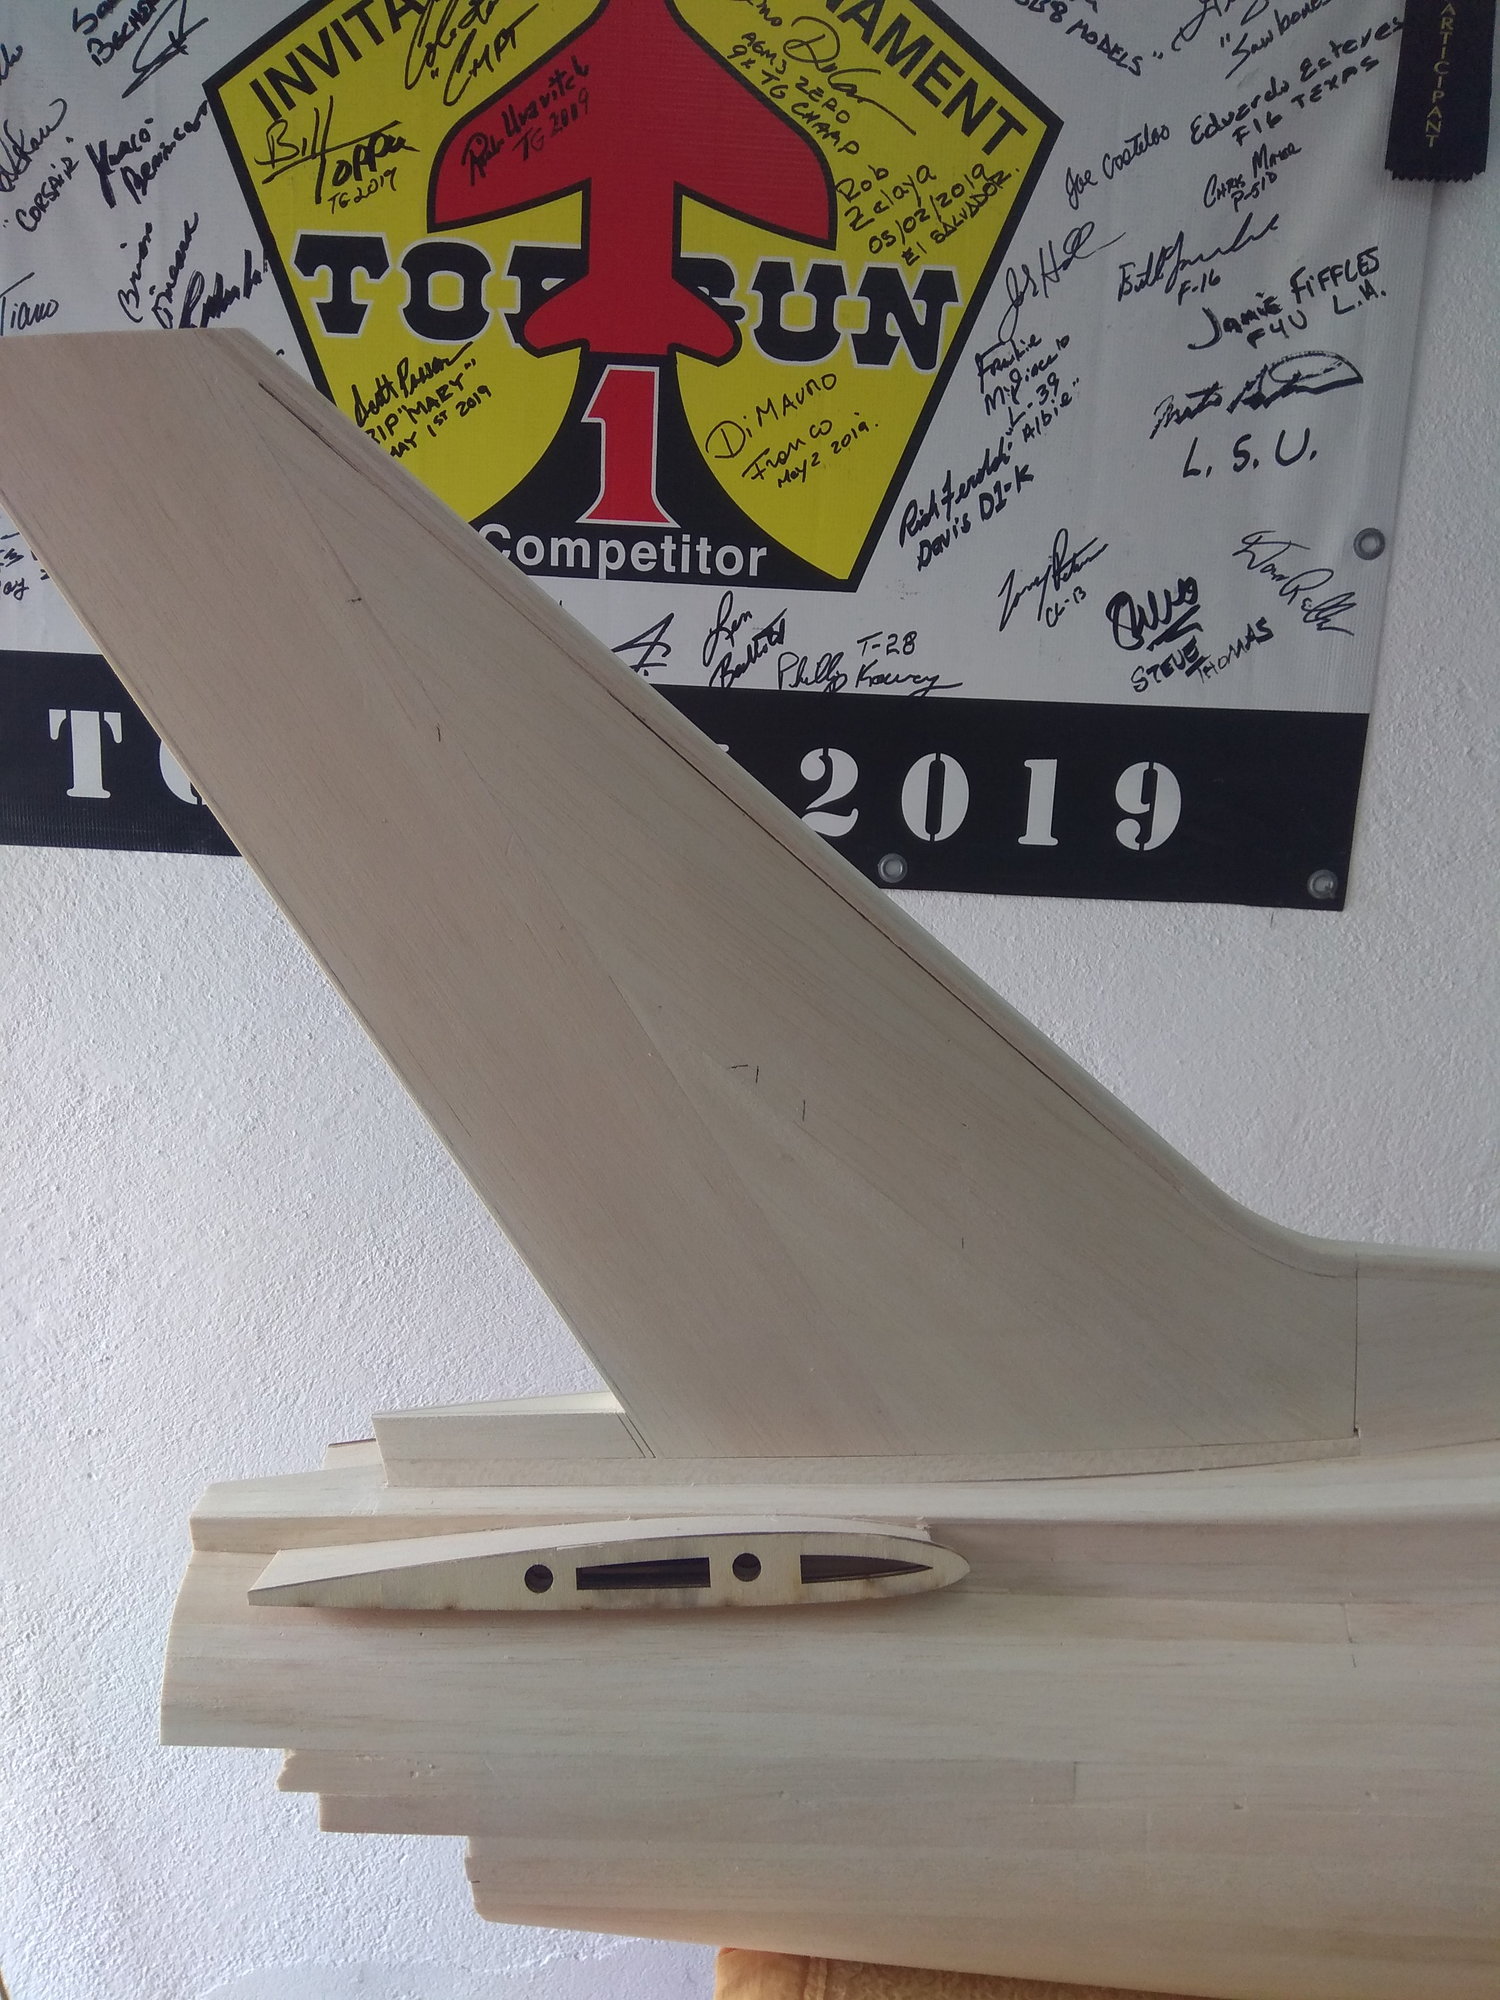
The rudder is removable and must be made on the model itself. There are a lot of parts that have to be glued at once, because there is no other way to fit everything.
First I put everything together, and then I glued everything with white glue.
I placed a wooden slat on the exit edge to get a flat surface.

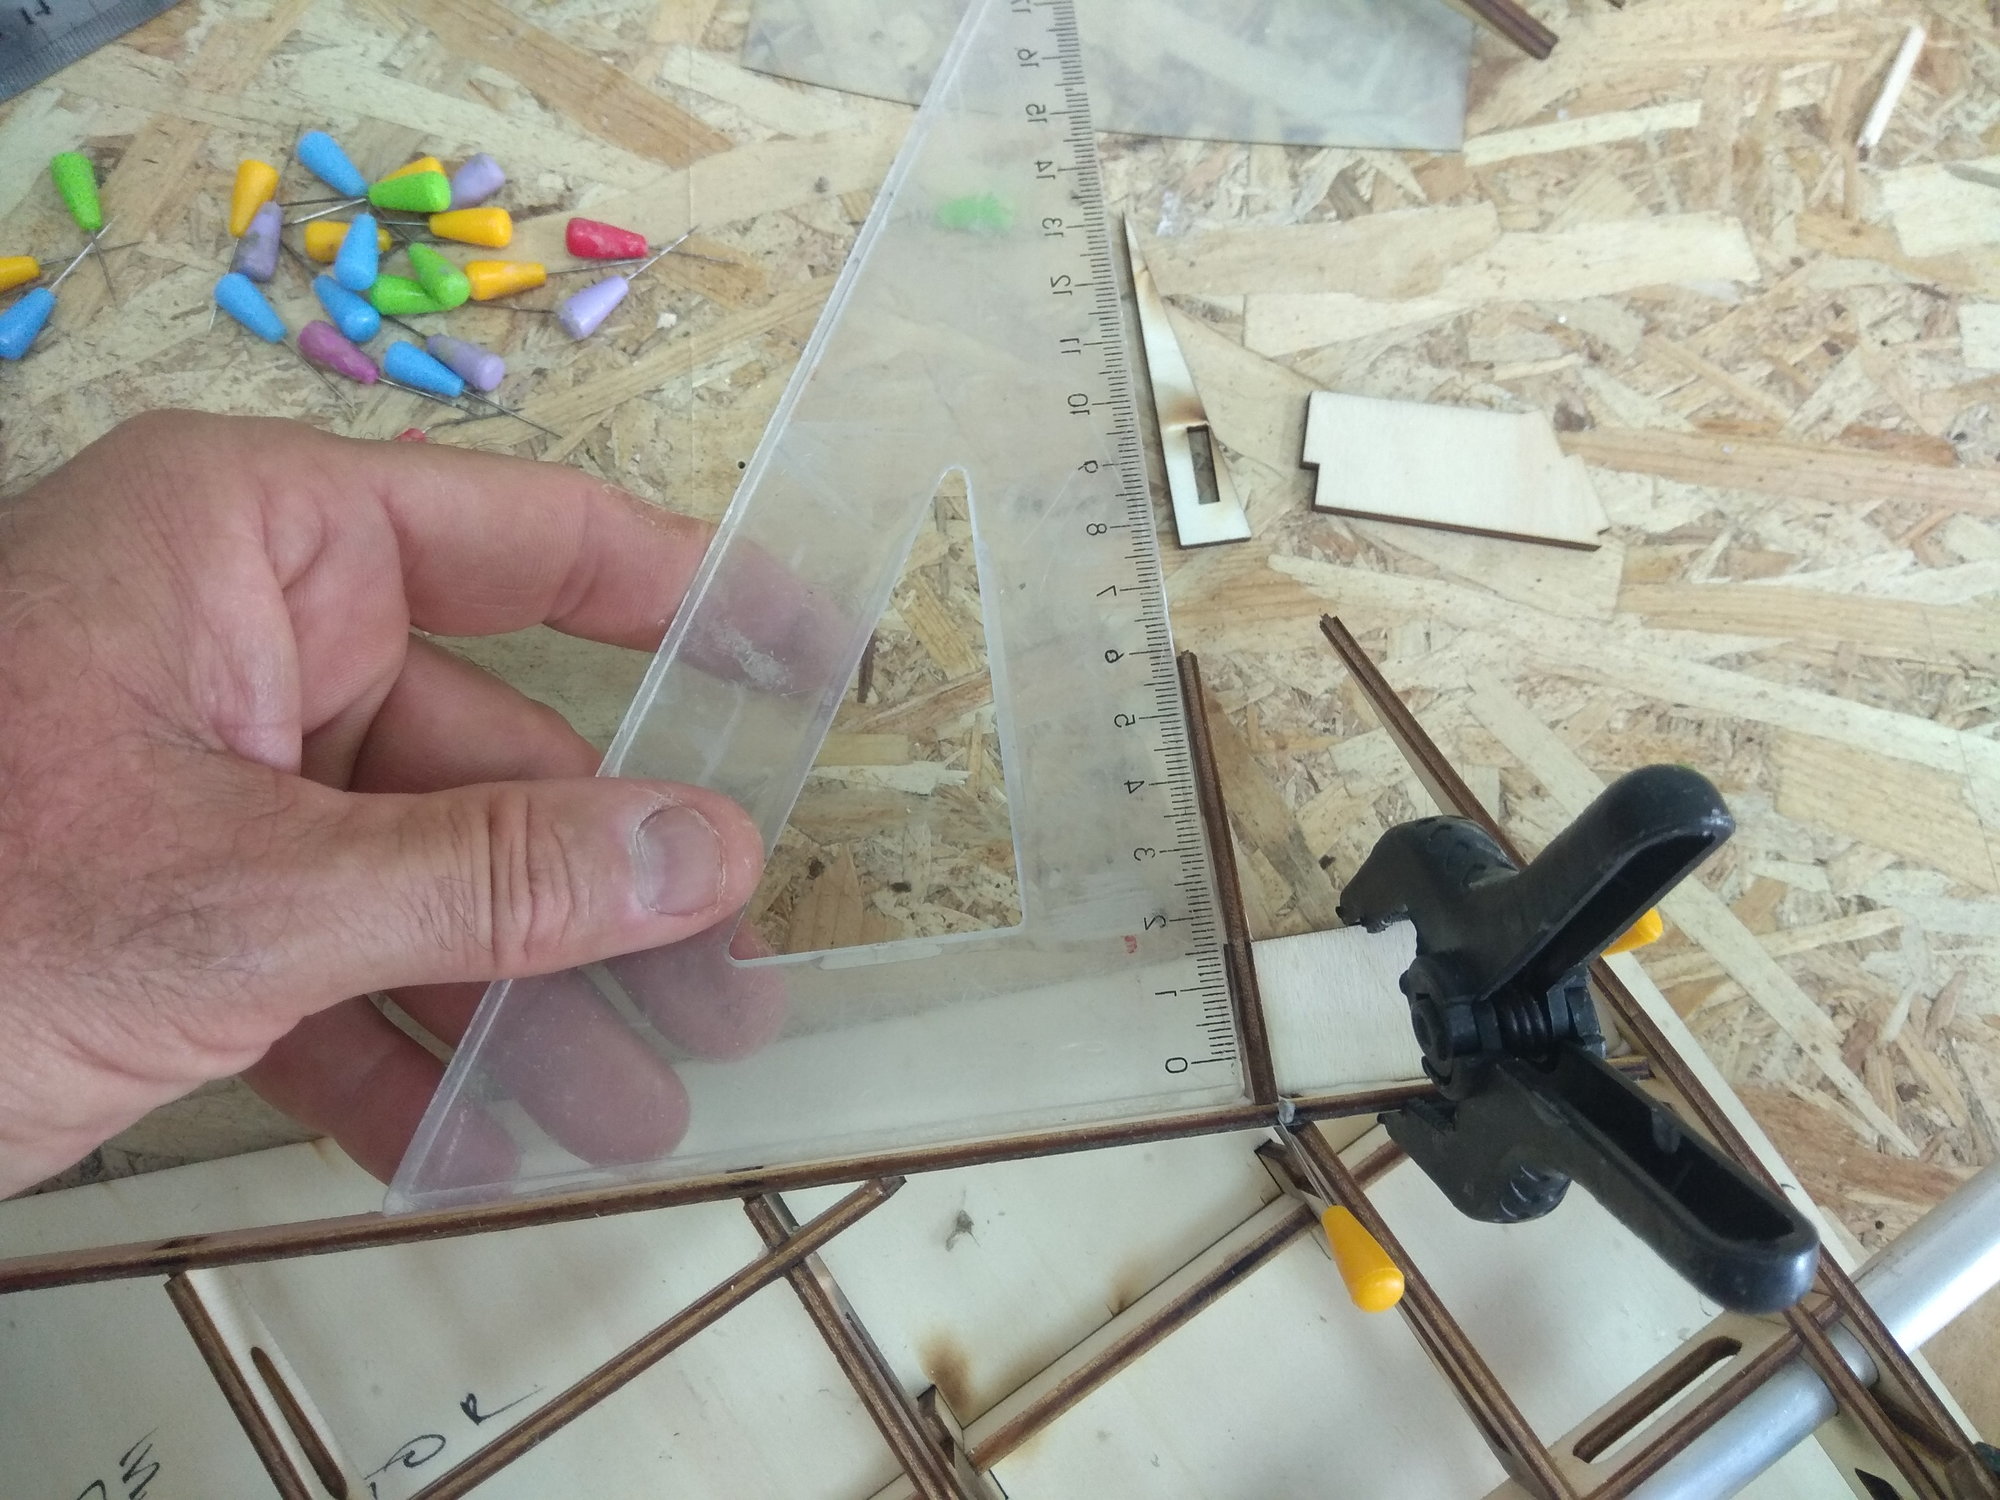
I checked at least ten times if the vertical was at ninety degrees to the hull and when I made sure that everything was as it should be, I went to sleep.
I do things like this in the evening, so that I don't fall into the temptation to "fix" something and cause a problem...
In the morning I separated the vertical stabilizer from the fuselage.
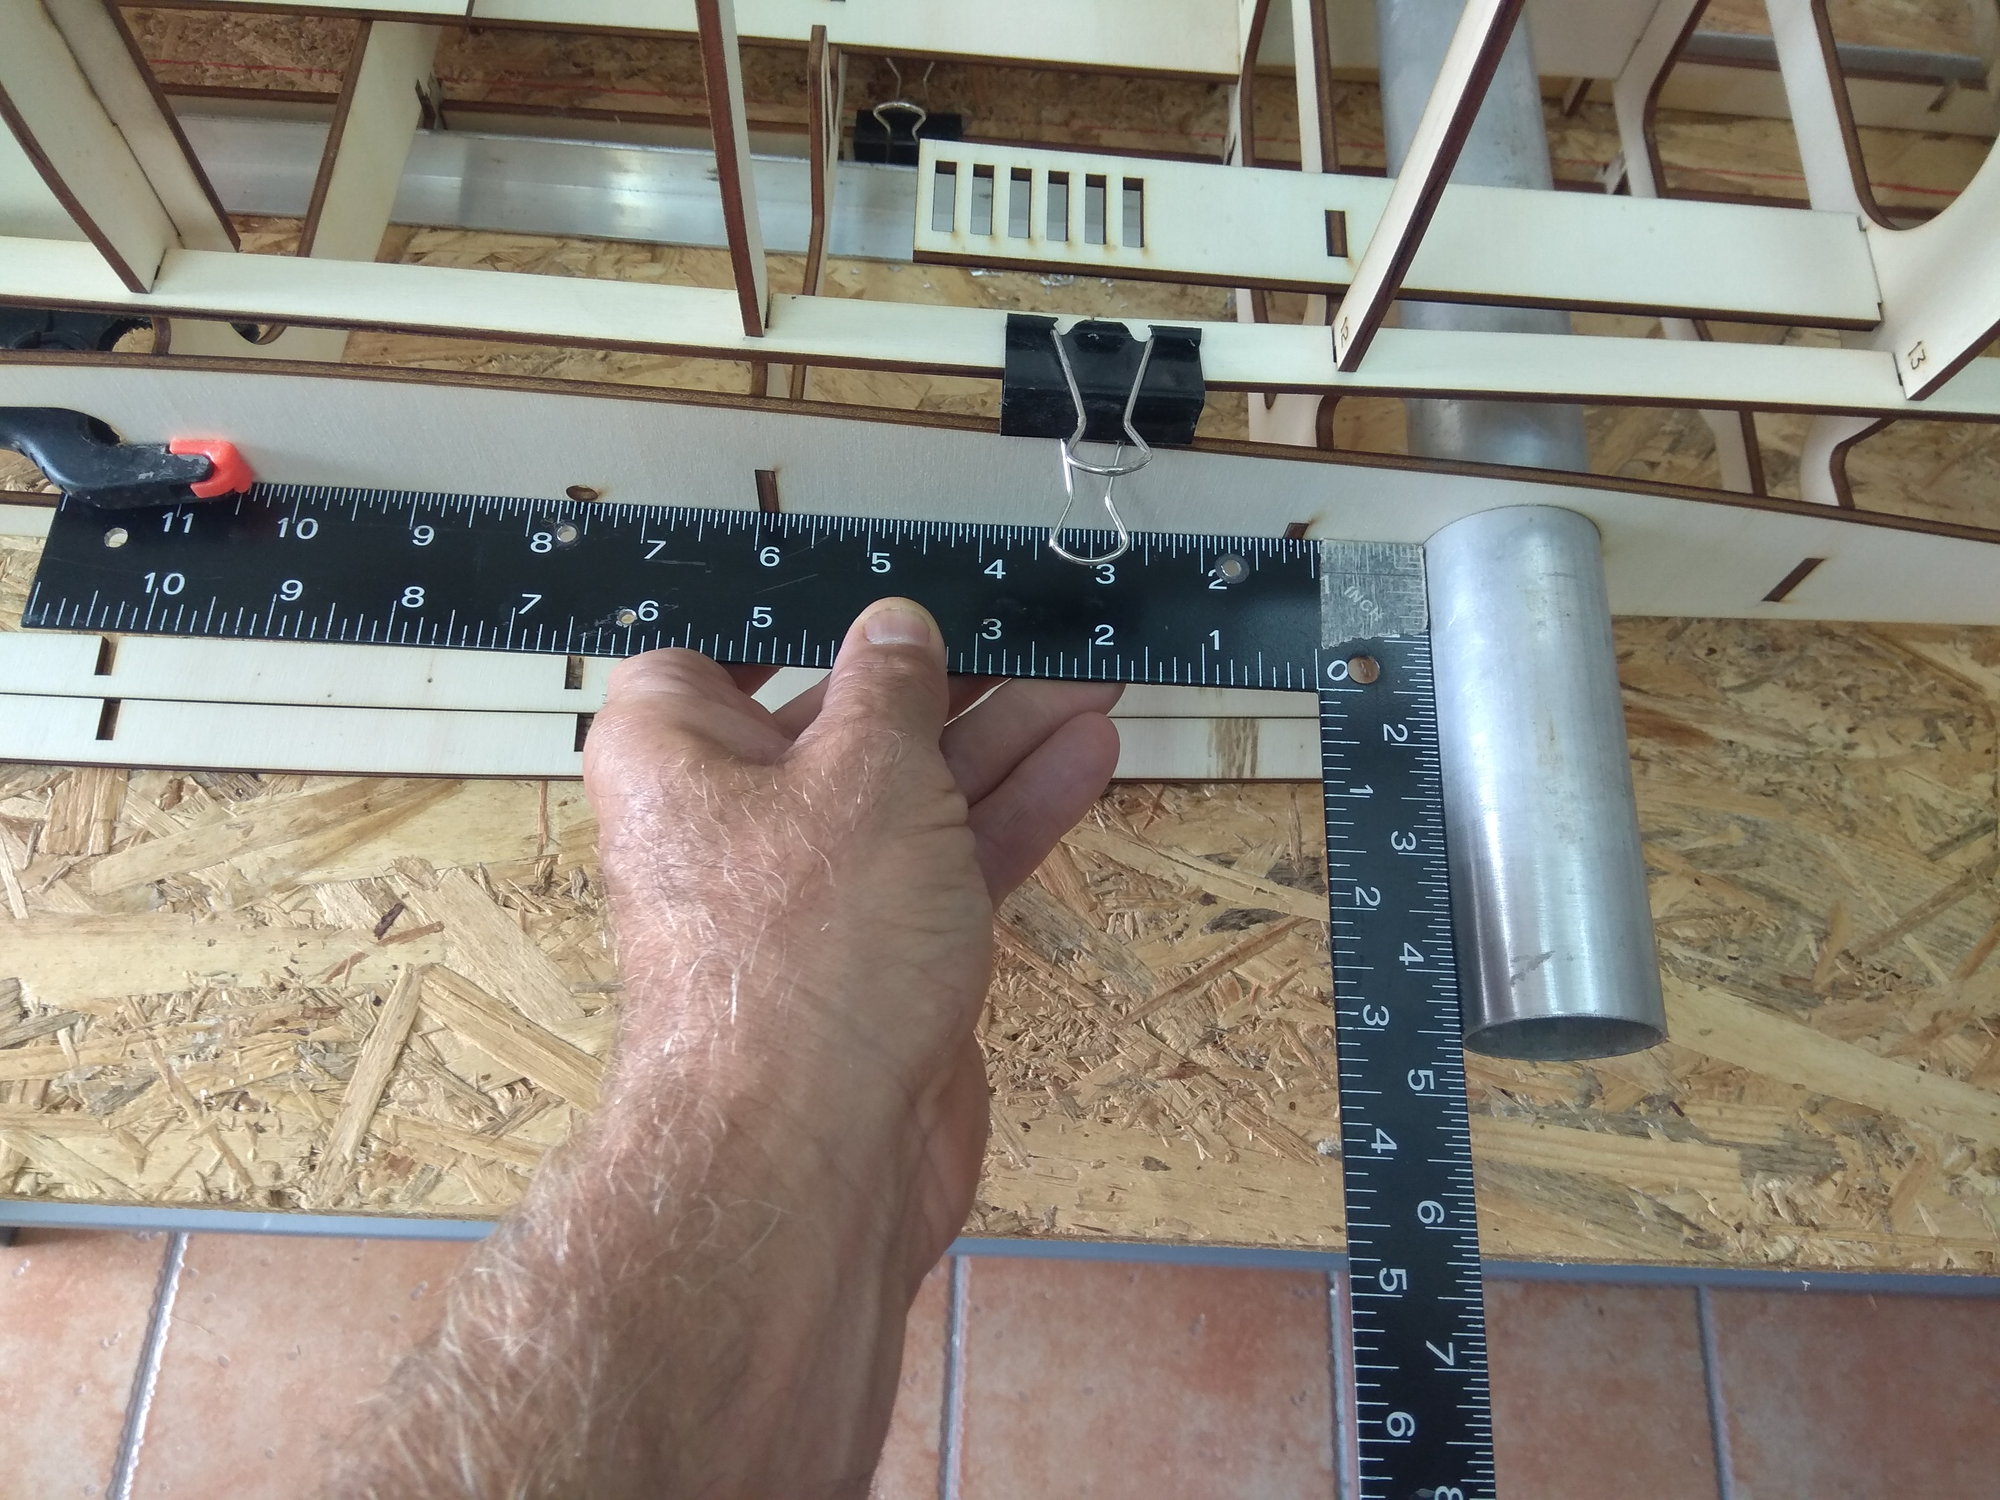
In the end, I put everything together, measured the distances and the difference from the end of one horizontal to the top of the vertical is 2 mm compared to the others.
I will easily adjust that when I start planking the rudder.
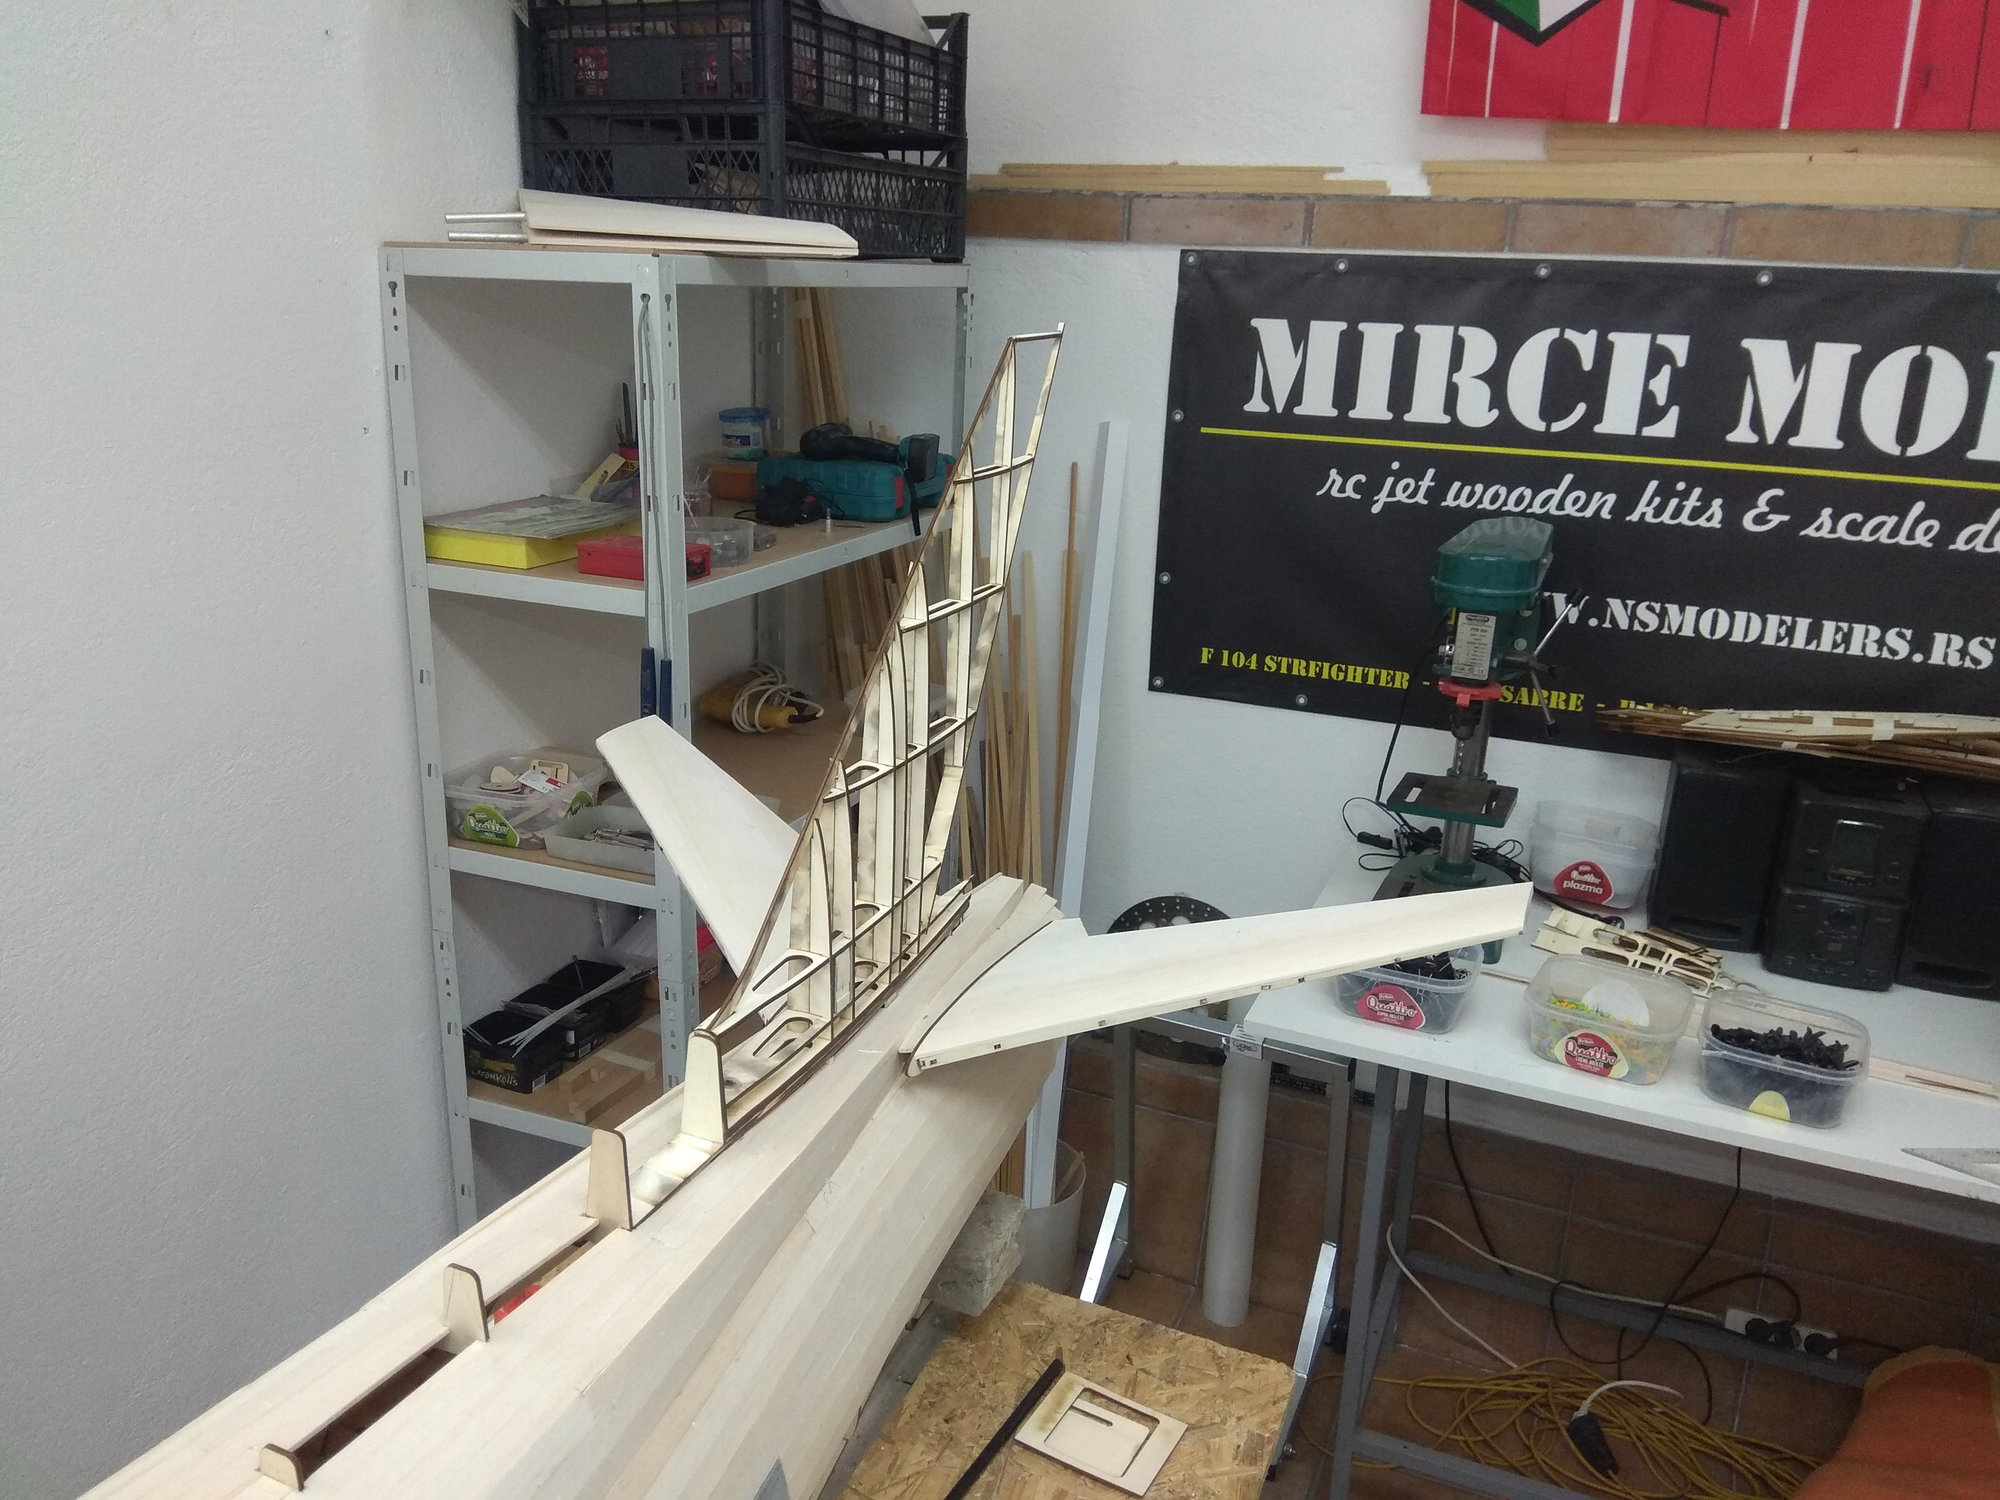
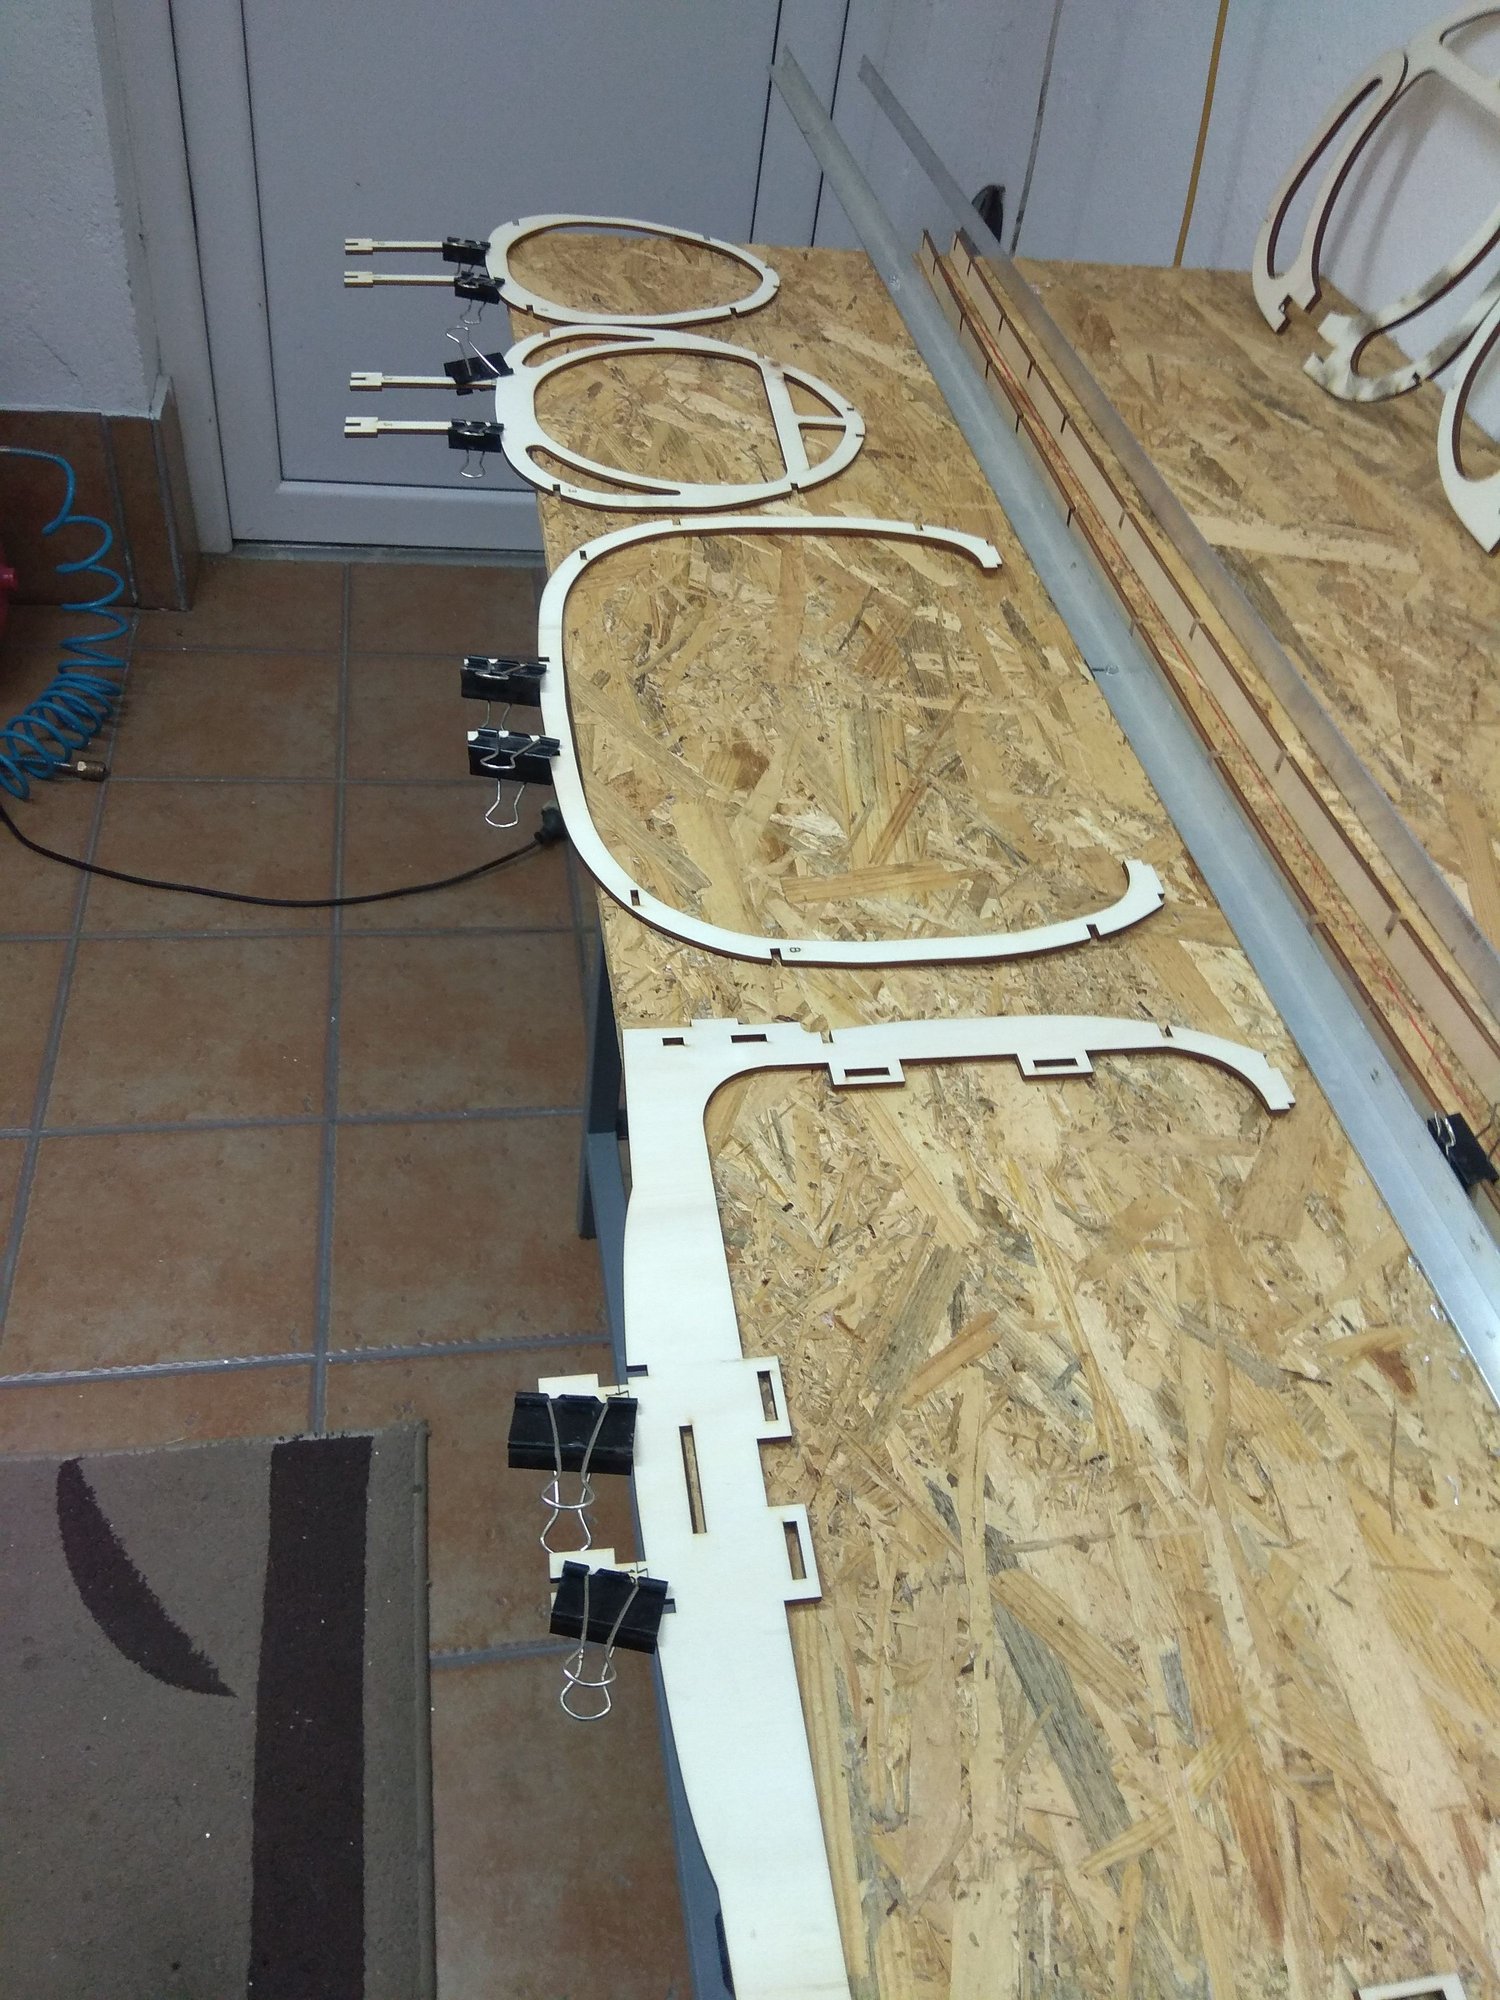
Tomorrow I will remove the fuselage from the template on the table, cut the "legs" and start planking the underside. The work on the tail surfaces continues, and in a day or two I will start the wings...
OK, not quite finished, but enough that I could mount them on the fuselage and check how they fit.
Horizontal stabilizers have their own template plates in which all the ribs are placed. With this, they stand stable and cannot move even a little.
Once the ribs were in place, I glued the three cross pieces to connect them.
Of course, during the gluing, the aluminum tubes were in their places.
When all of this is in place, there is no theoretical chance that the part will not be perfect.
After the glue on the cross ribs dried, I glued the parts where the leading edge and trailing edge will come later.
To make these two parts absolutely flat, I used carbon tubes.
I ended up gluing on a small rib that has a template to get the ninety degree angle right.
I don't remove the construction from the template until the upper side is covered with 3 mm balsa.
These days I was watching our model build, where the wing and horizontal stabilizer were removed from the template immediately after the parts were assembled.
I don't do it that way, because that way the structure, no matter how solid it is, can still bend.
The upper skin stiffens the entire assembly and only after that the part is removed from the template!!!
The rudder is removable and must be made on the model itself. There are a lot of parts that have to be glued at once, because there is no other way to fit everything.
First I put everything together, and then I glued everything with white glue.
I placed a wooden slat on the exit edge to get a flat surface.
I checked at least ten times if the vertical was at ninety degrees to the hull and when I made sure that everything was as it should be, I went to sleep.
I do things like this in the evening, so that I don't fall into the temptation to "fix" something and cause a problem...
In the morning I separated the vertical stabilizer from the fuselage.
In the end, I put everything together, measured the distances and the difference from the end of one horizontal to the top of the vertical is 2 mm compared to the others.
I will easily adjust that when I start planking the rudder.
Tomorrow I will remove the fuselage from the template on the table, cut the "legs" and start planking the underside. The work on the tail surfaces continues, and in a day or two I will start the wings...
The following 3 users liked this post by mirce:
08-12-2022, 12:33 AM
#13
Thread Starter
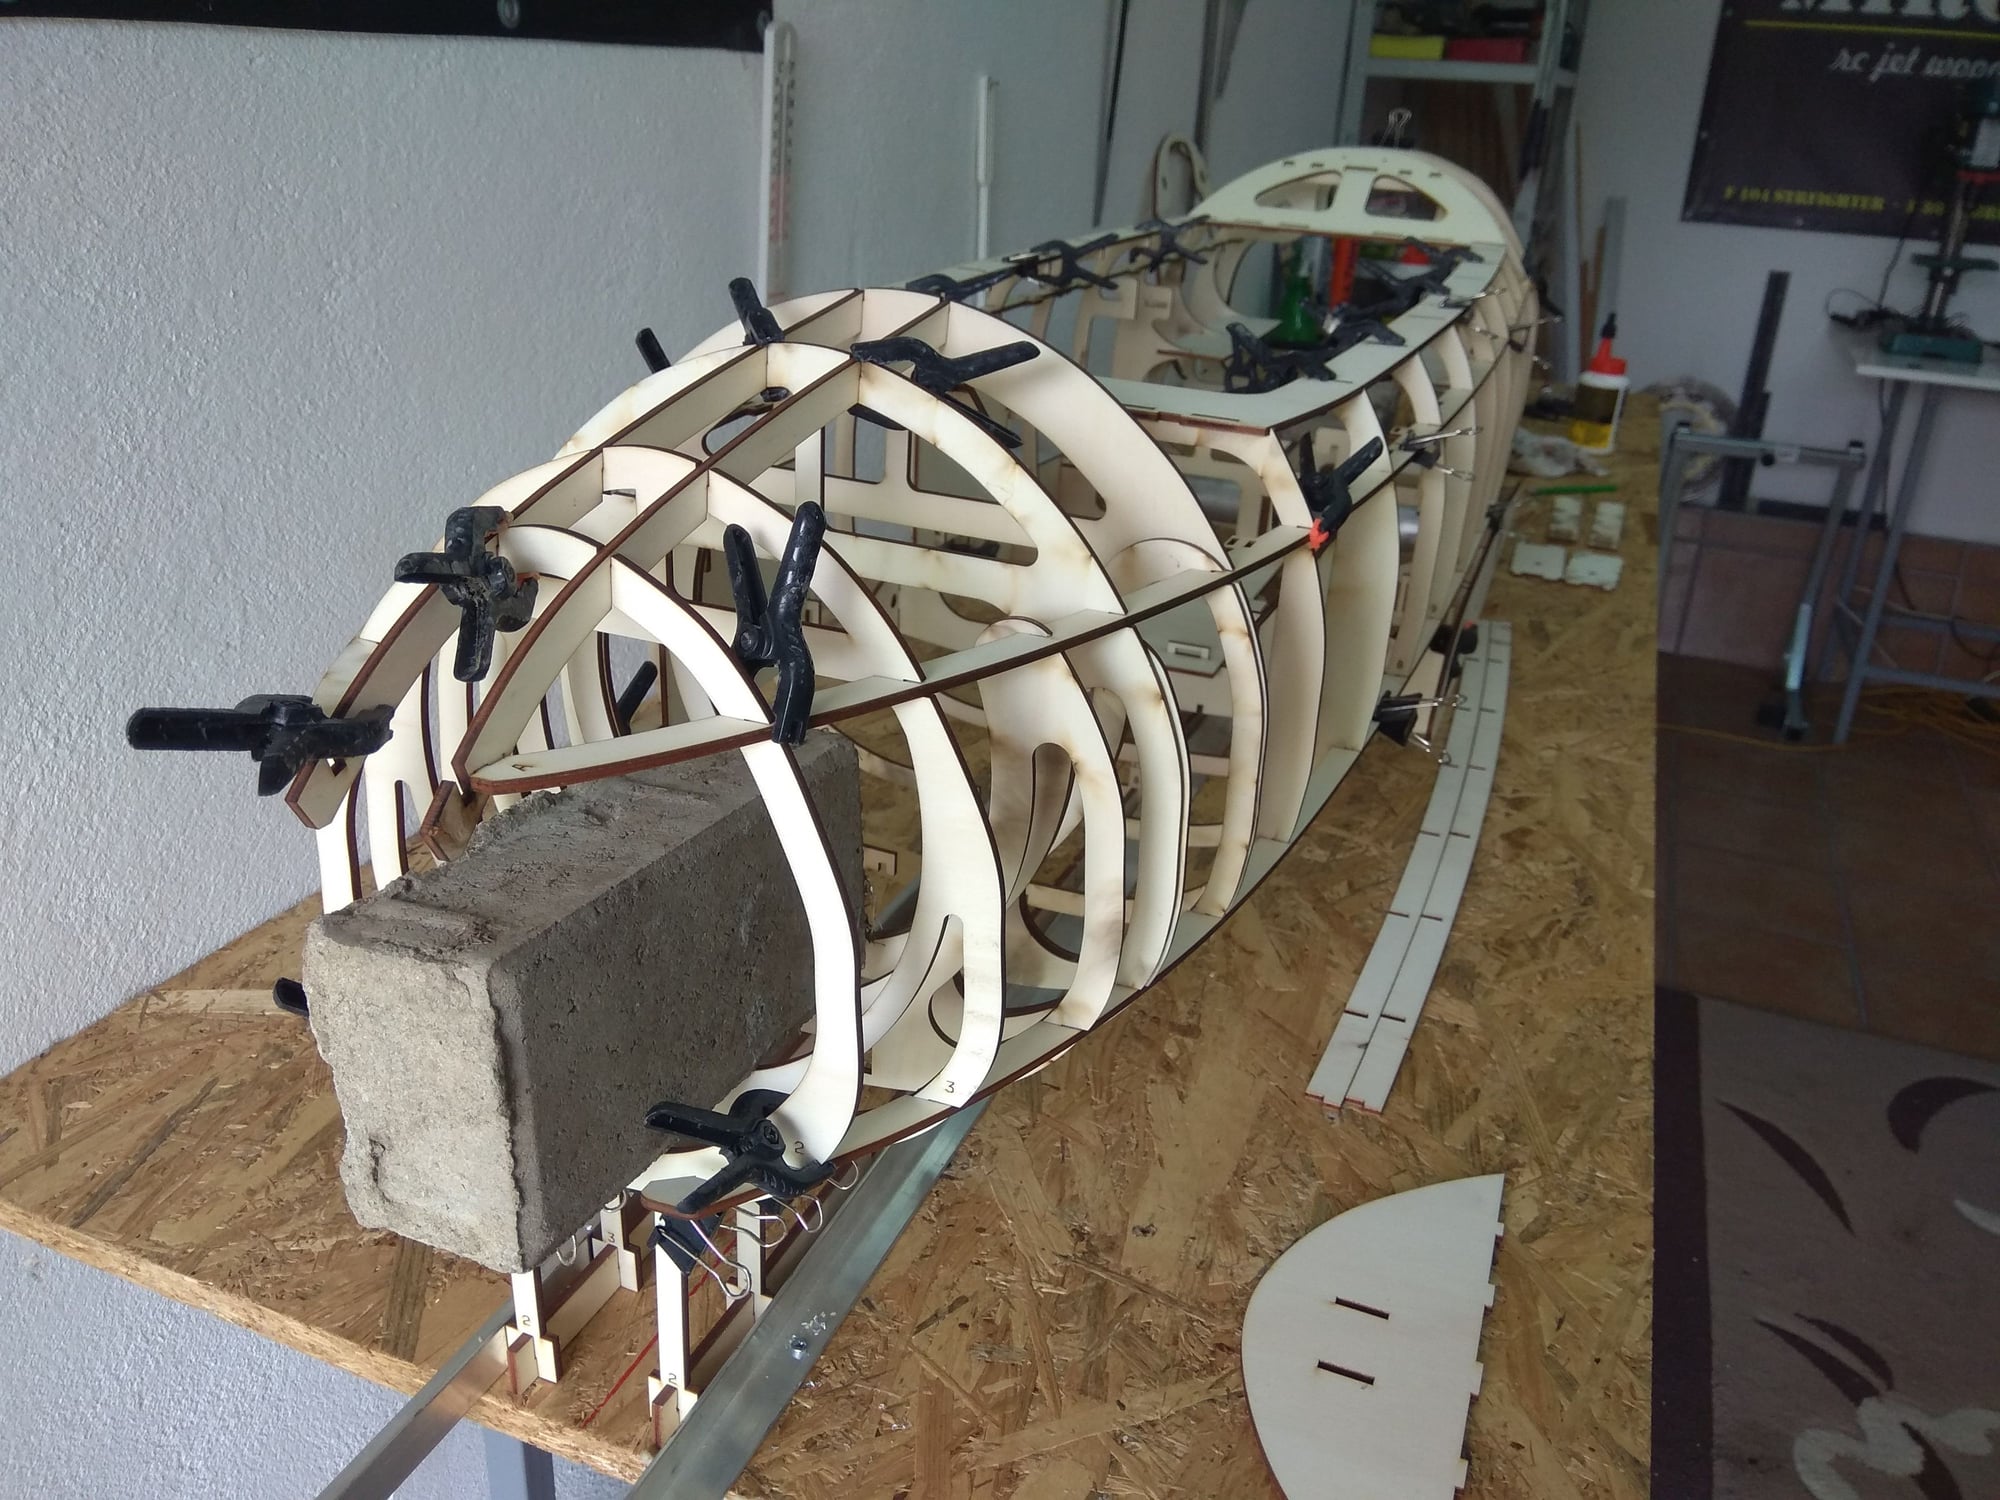
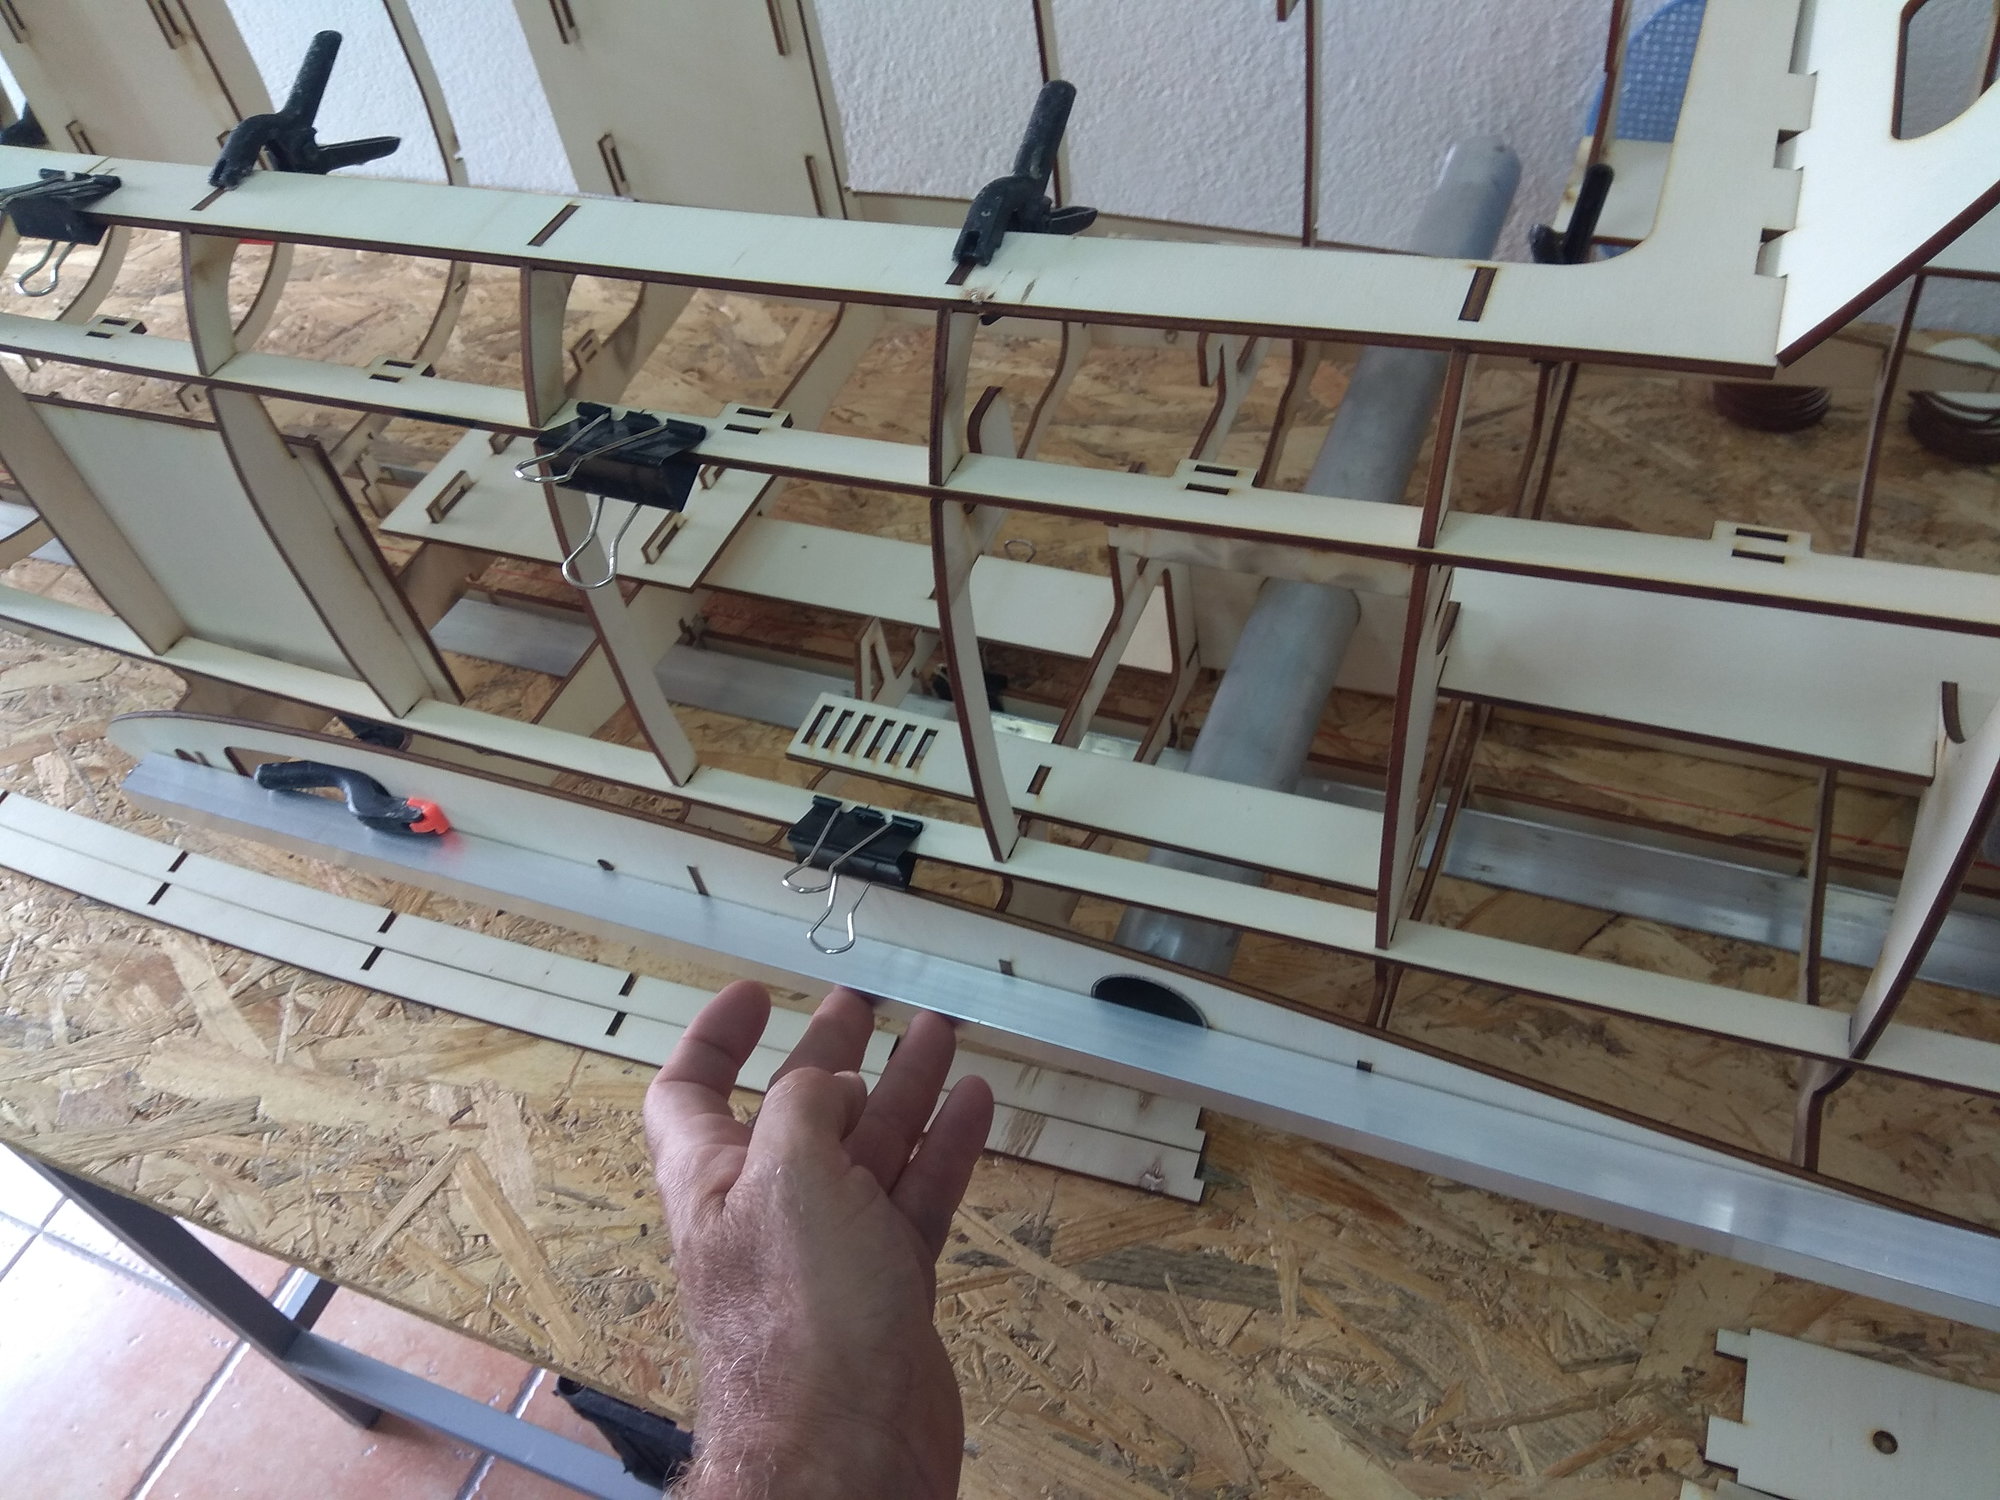
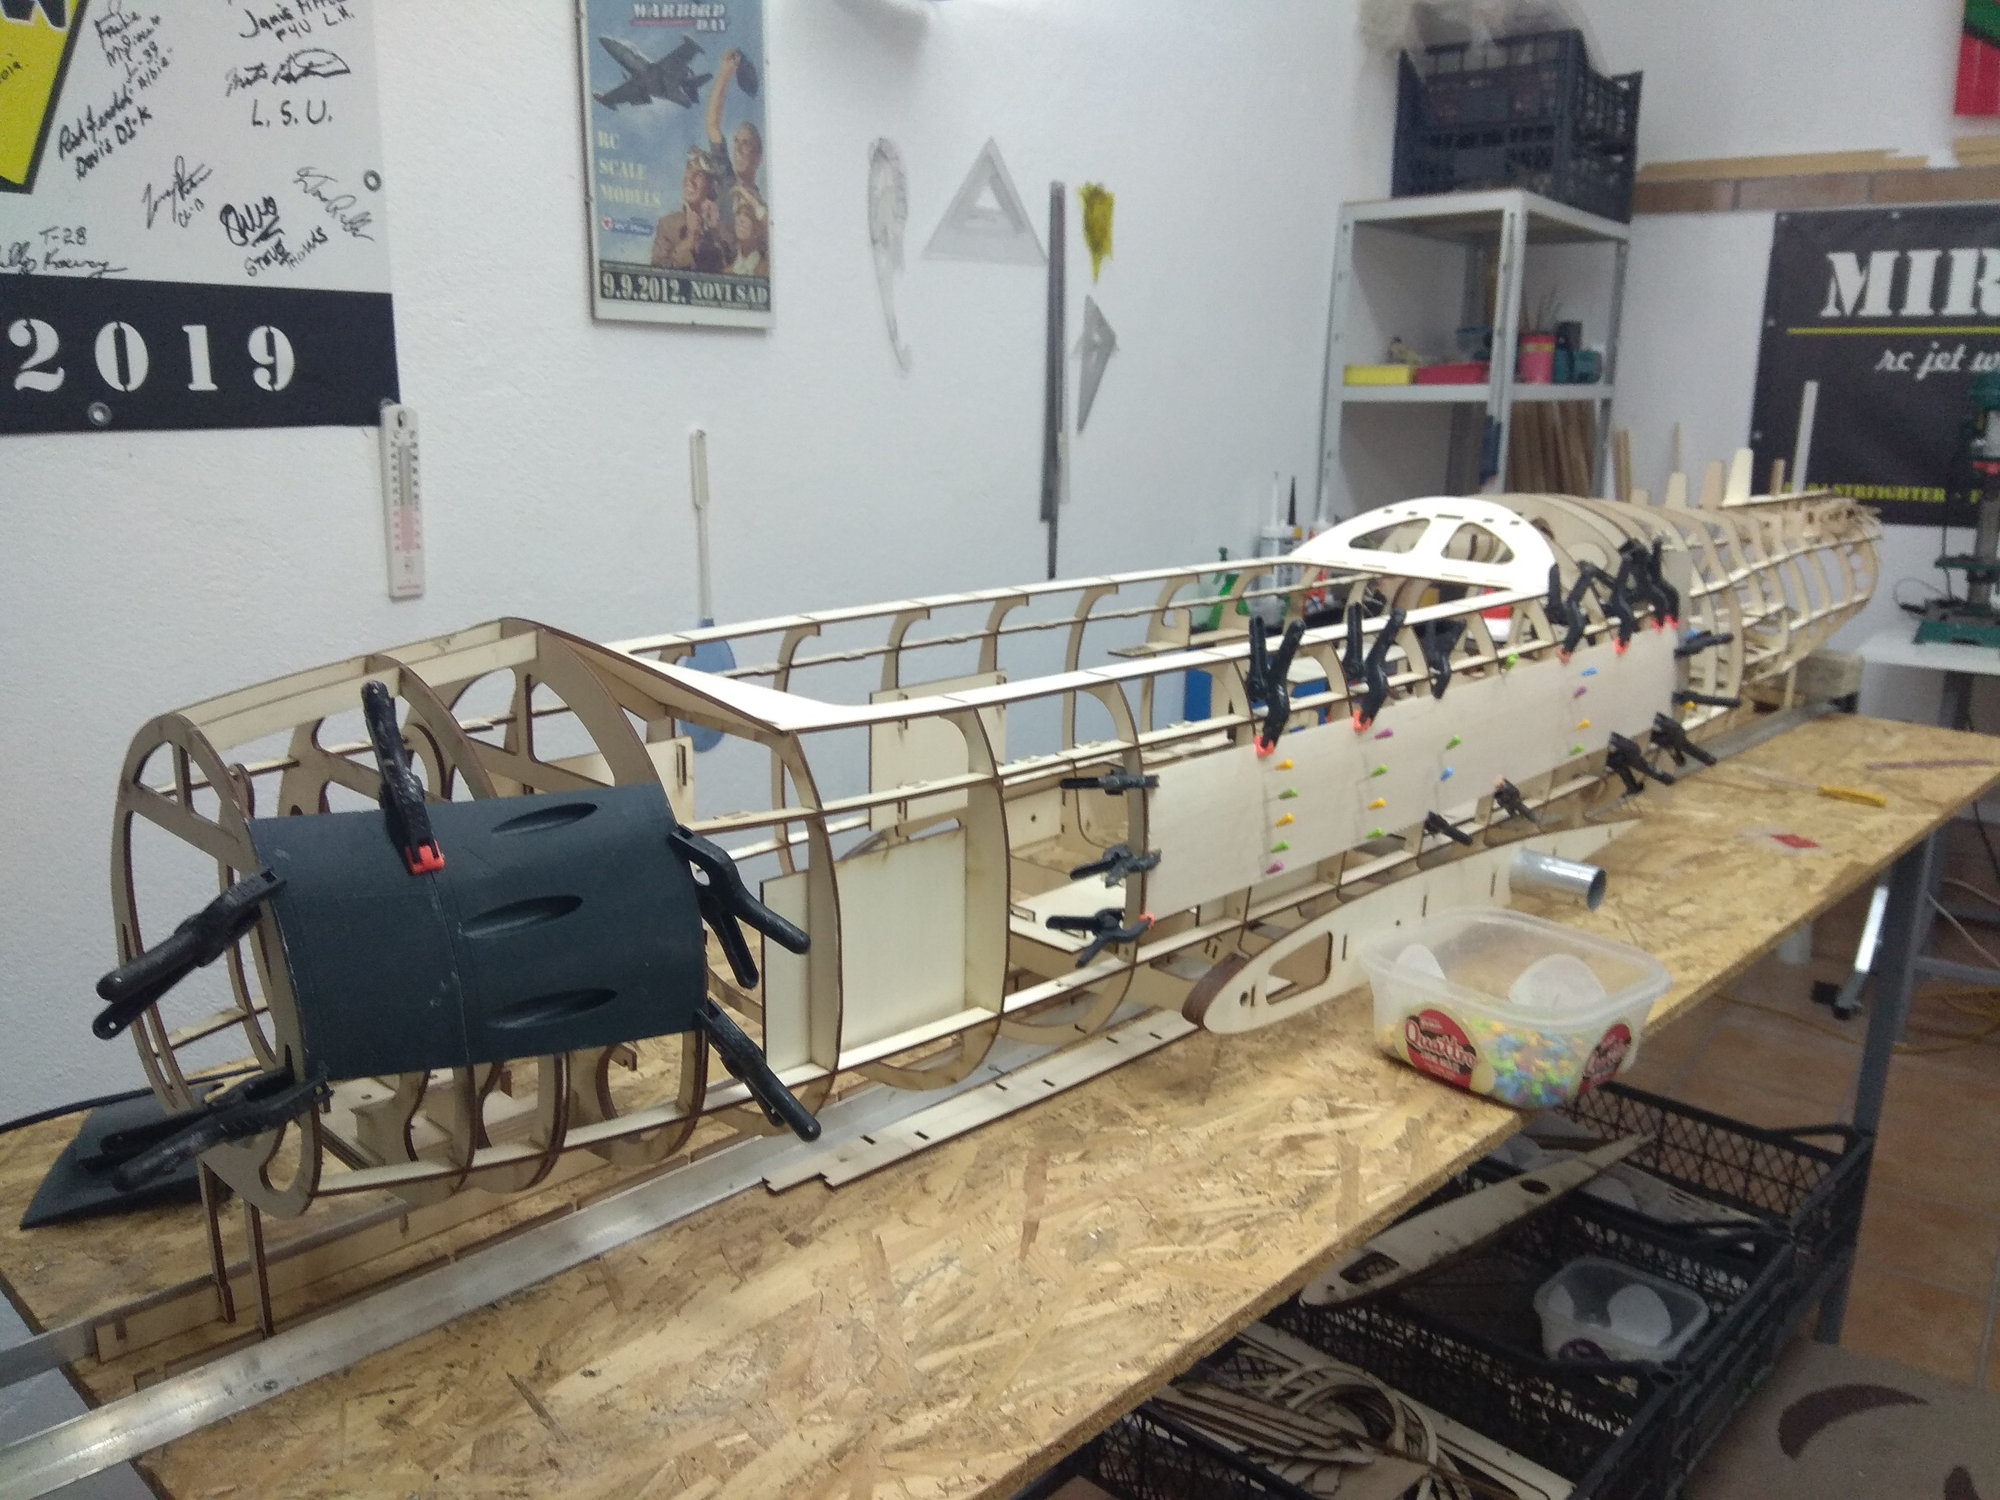
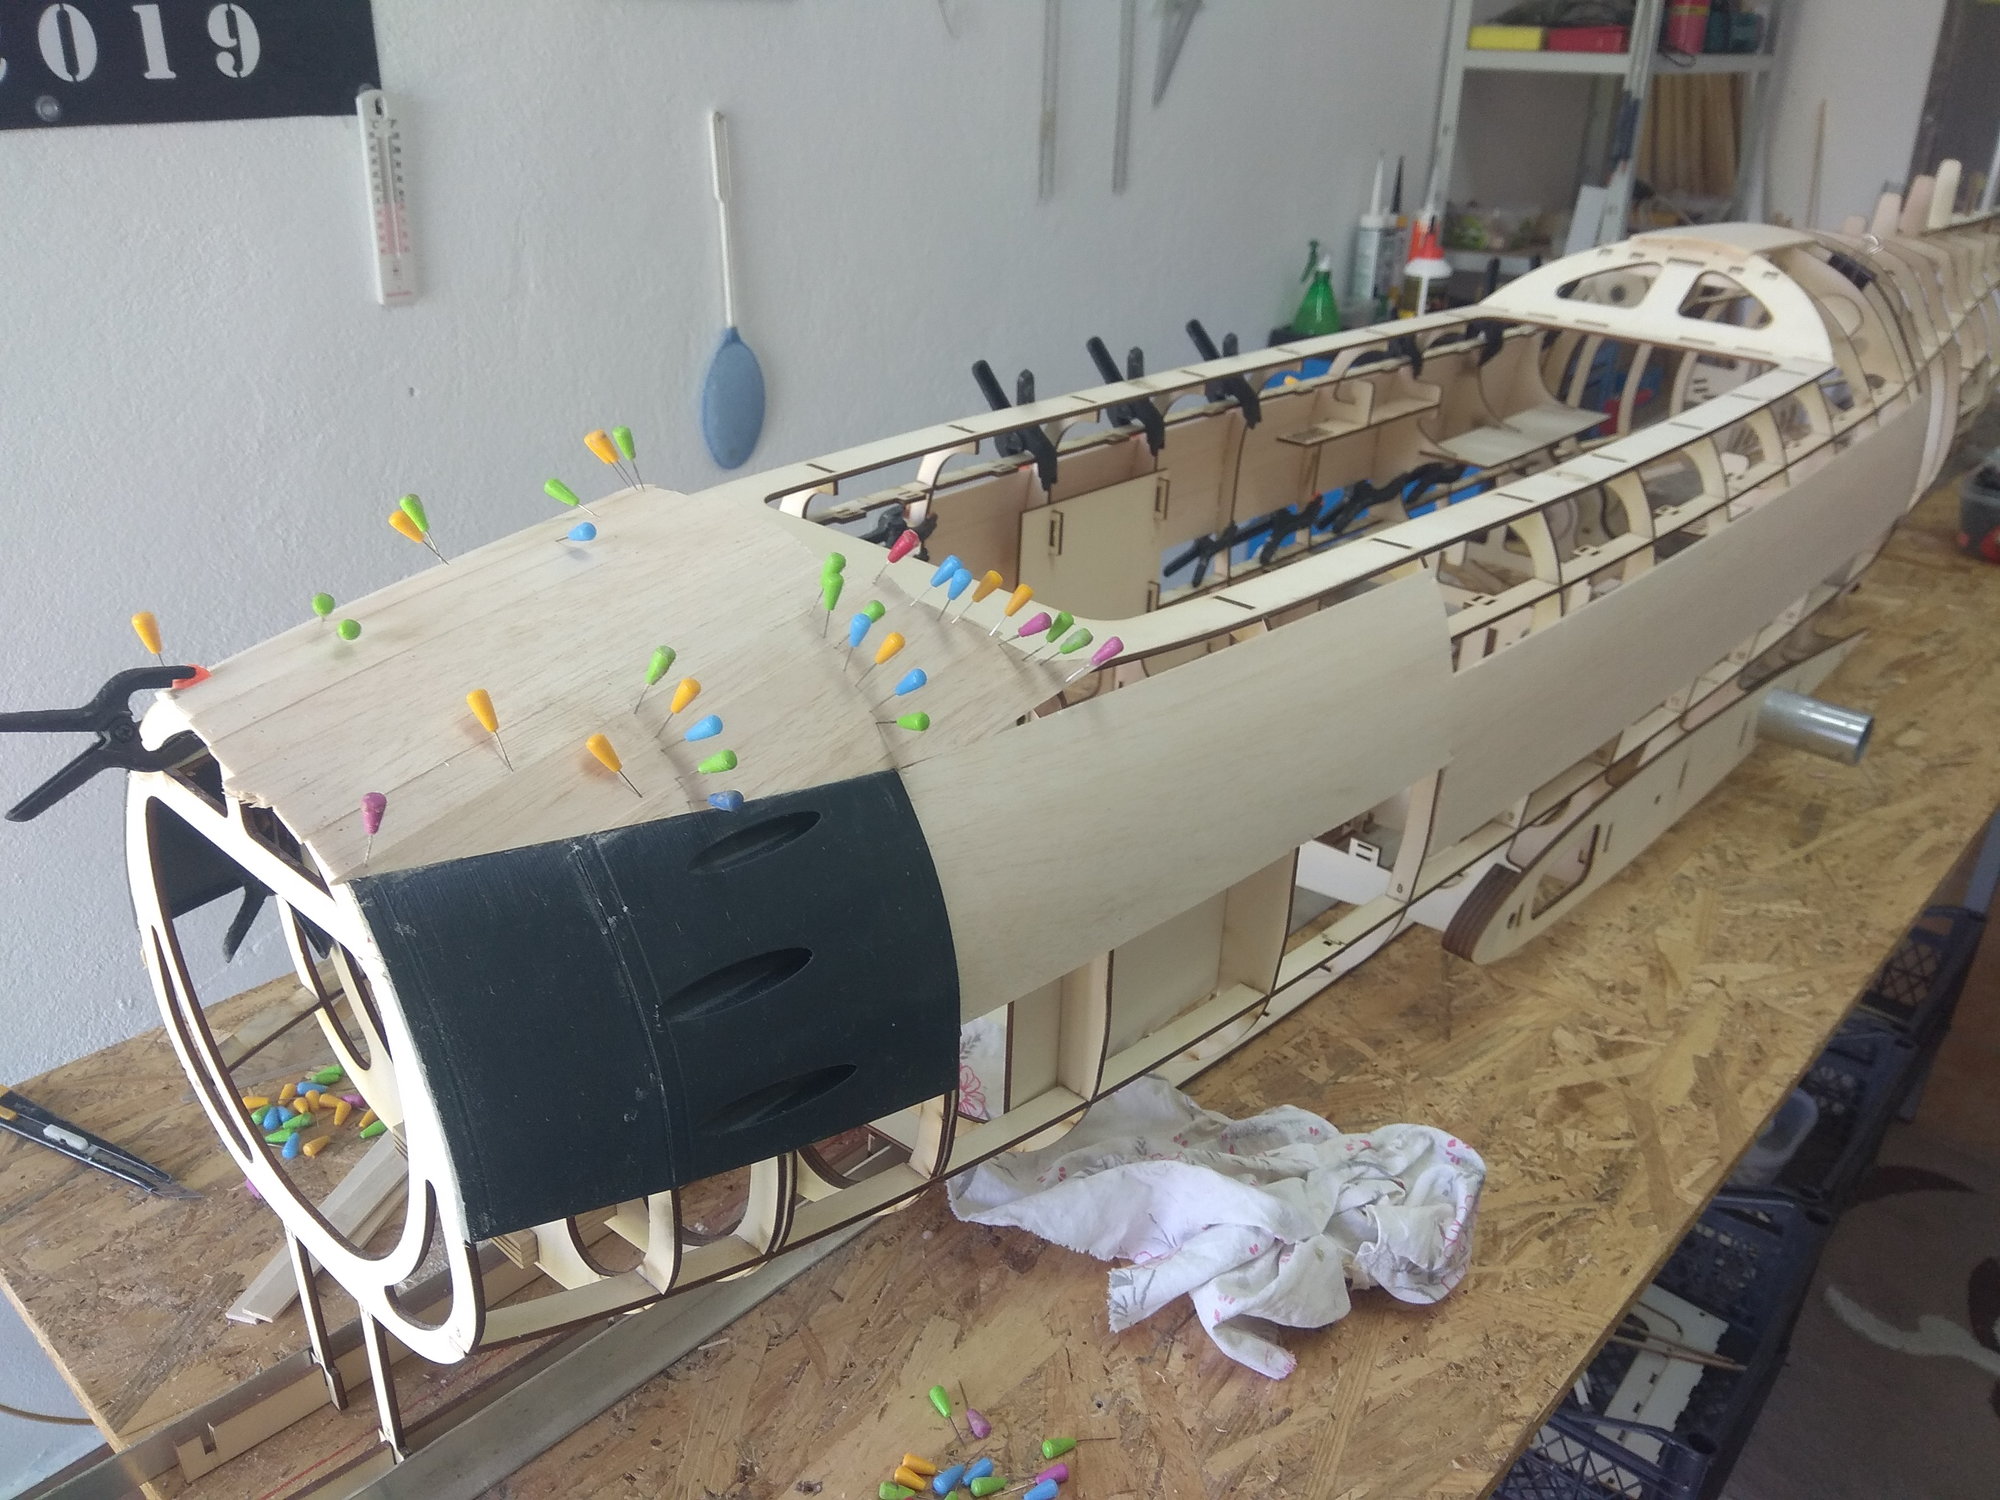
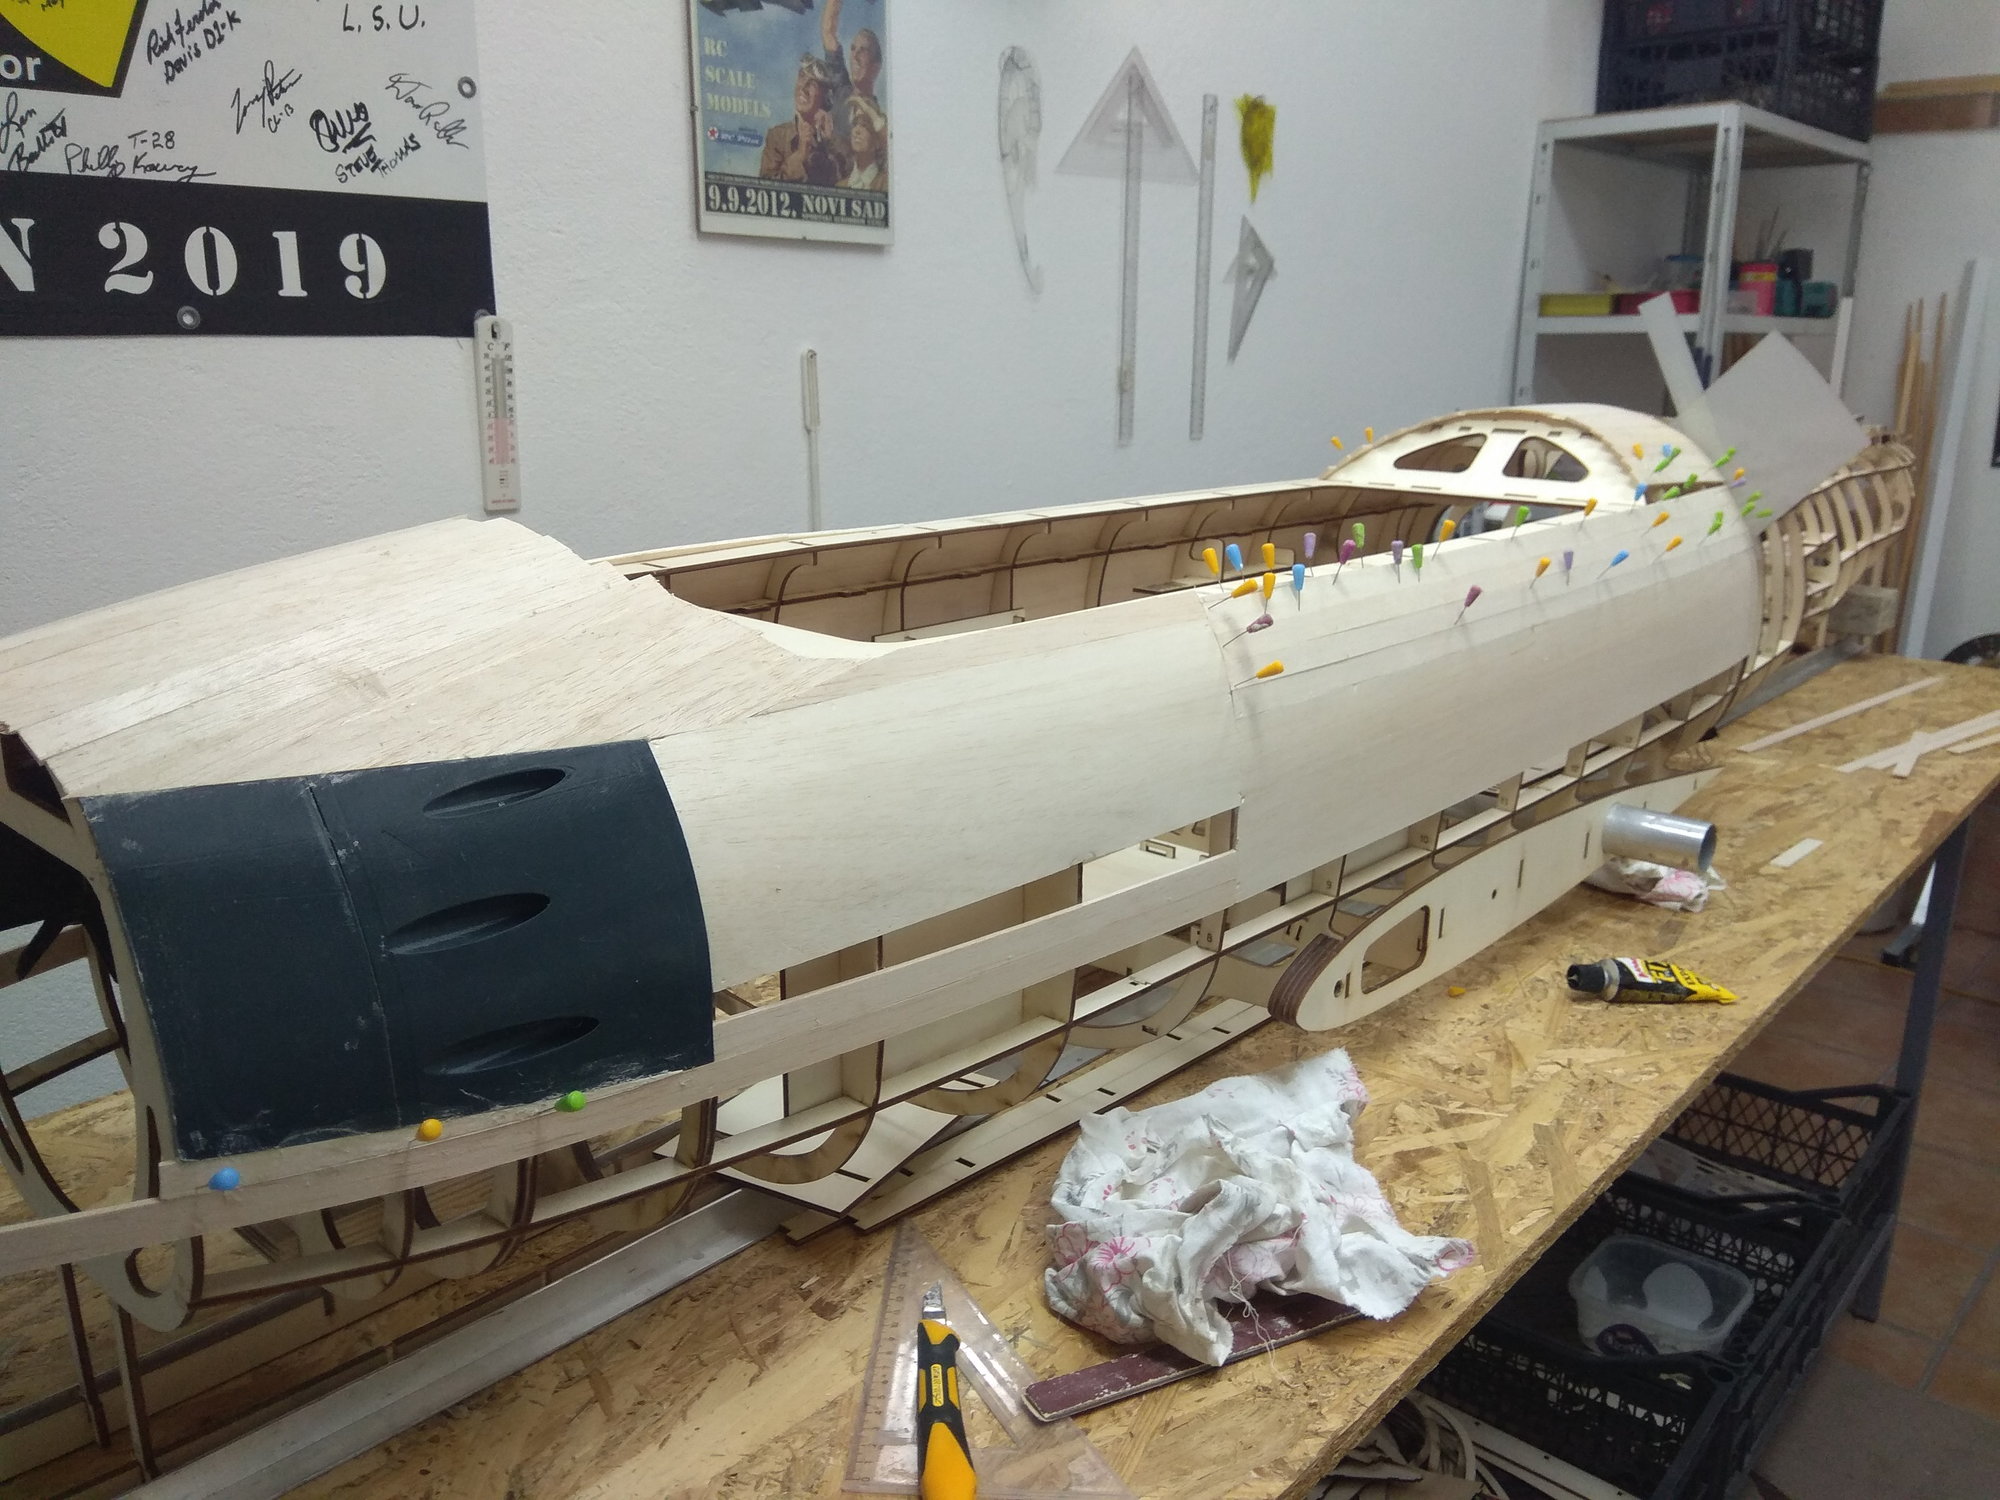
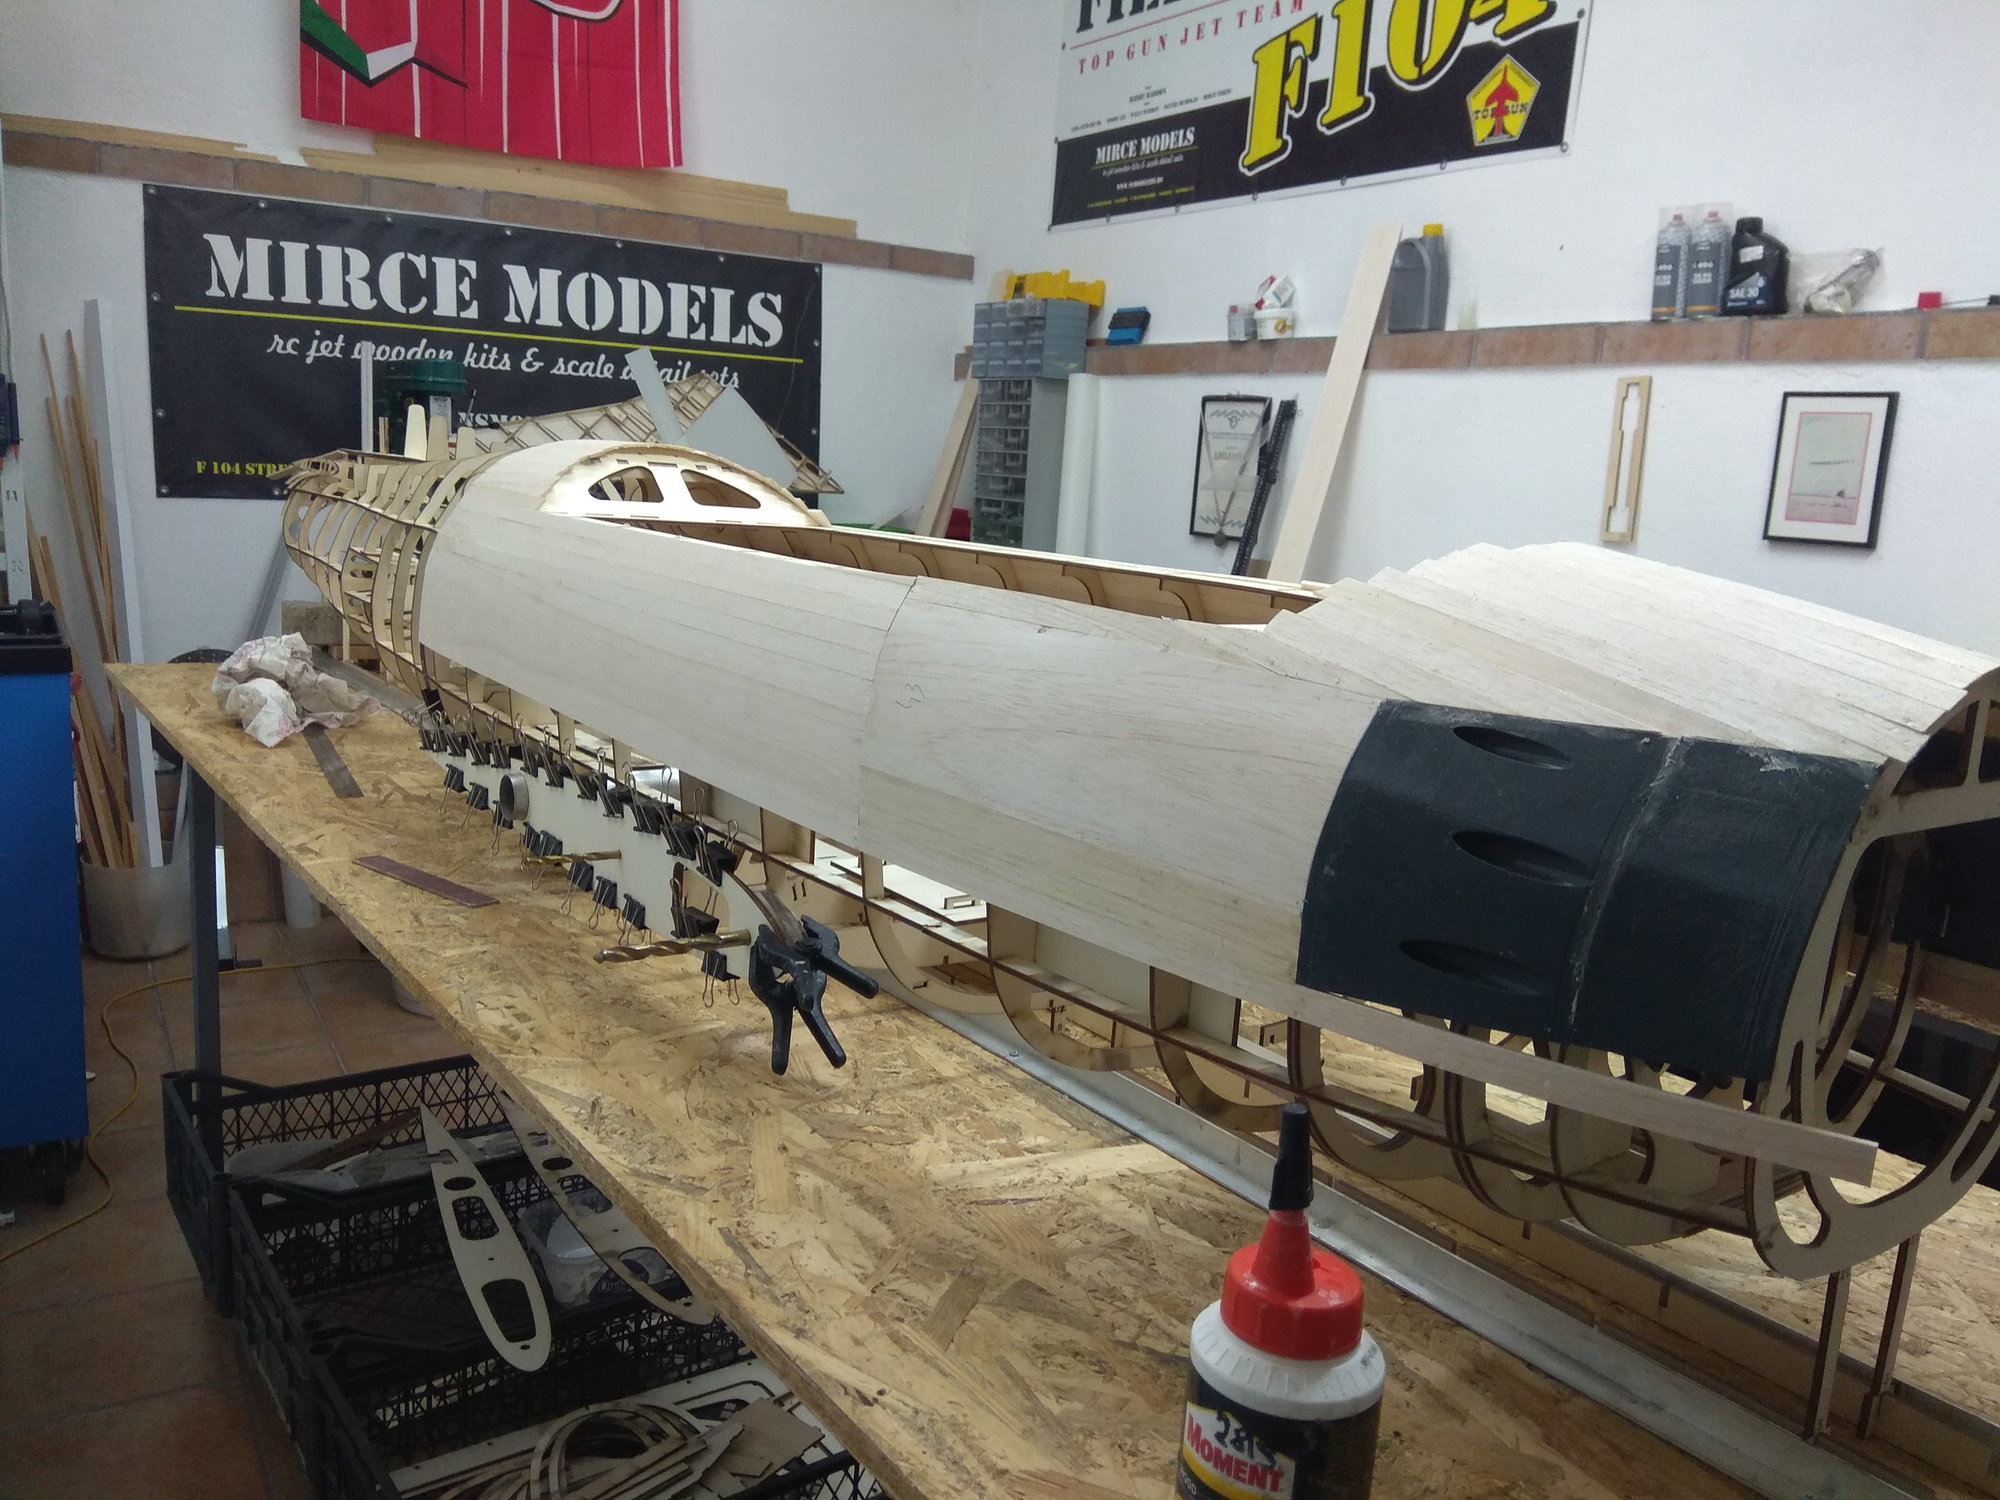
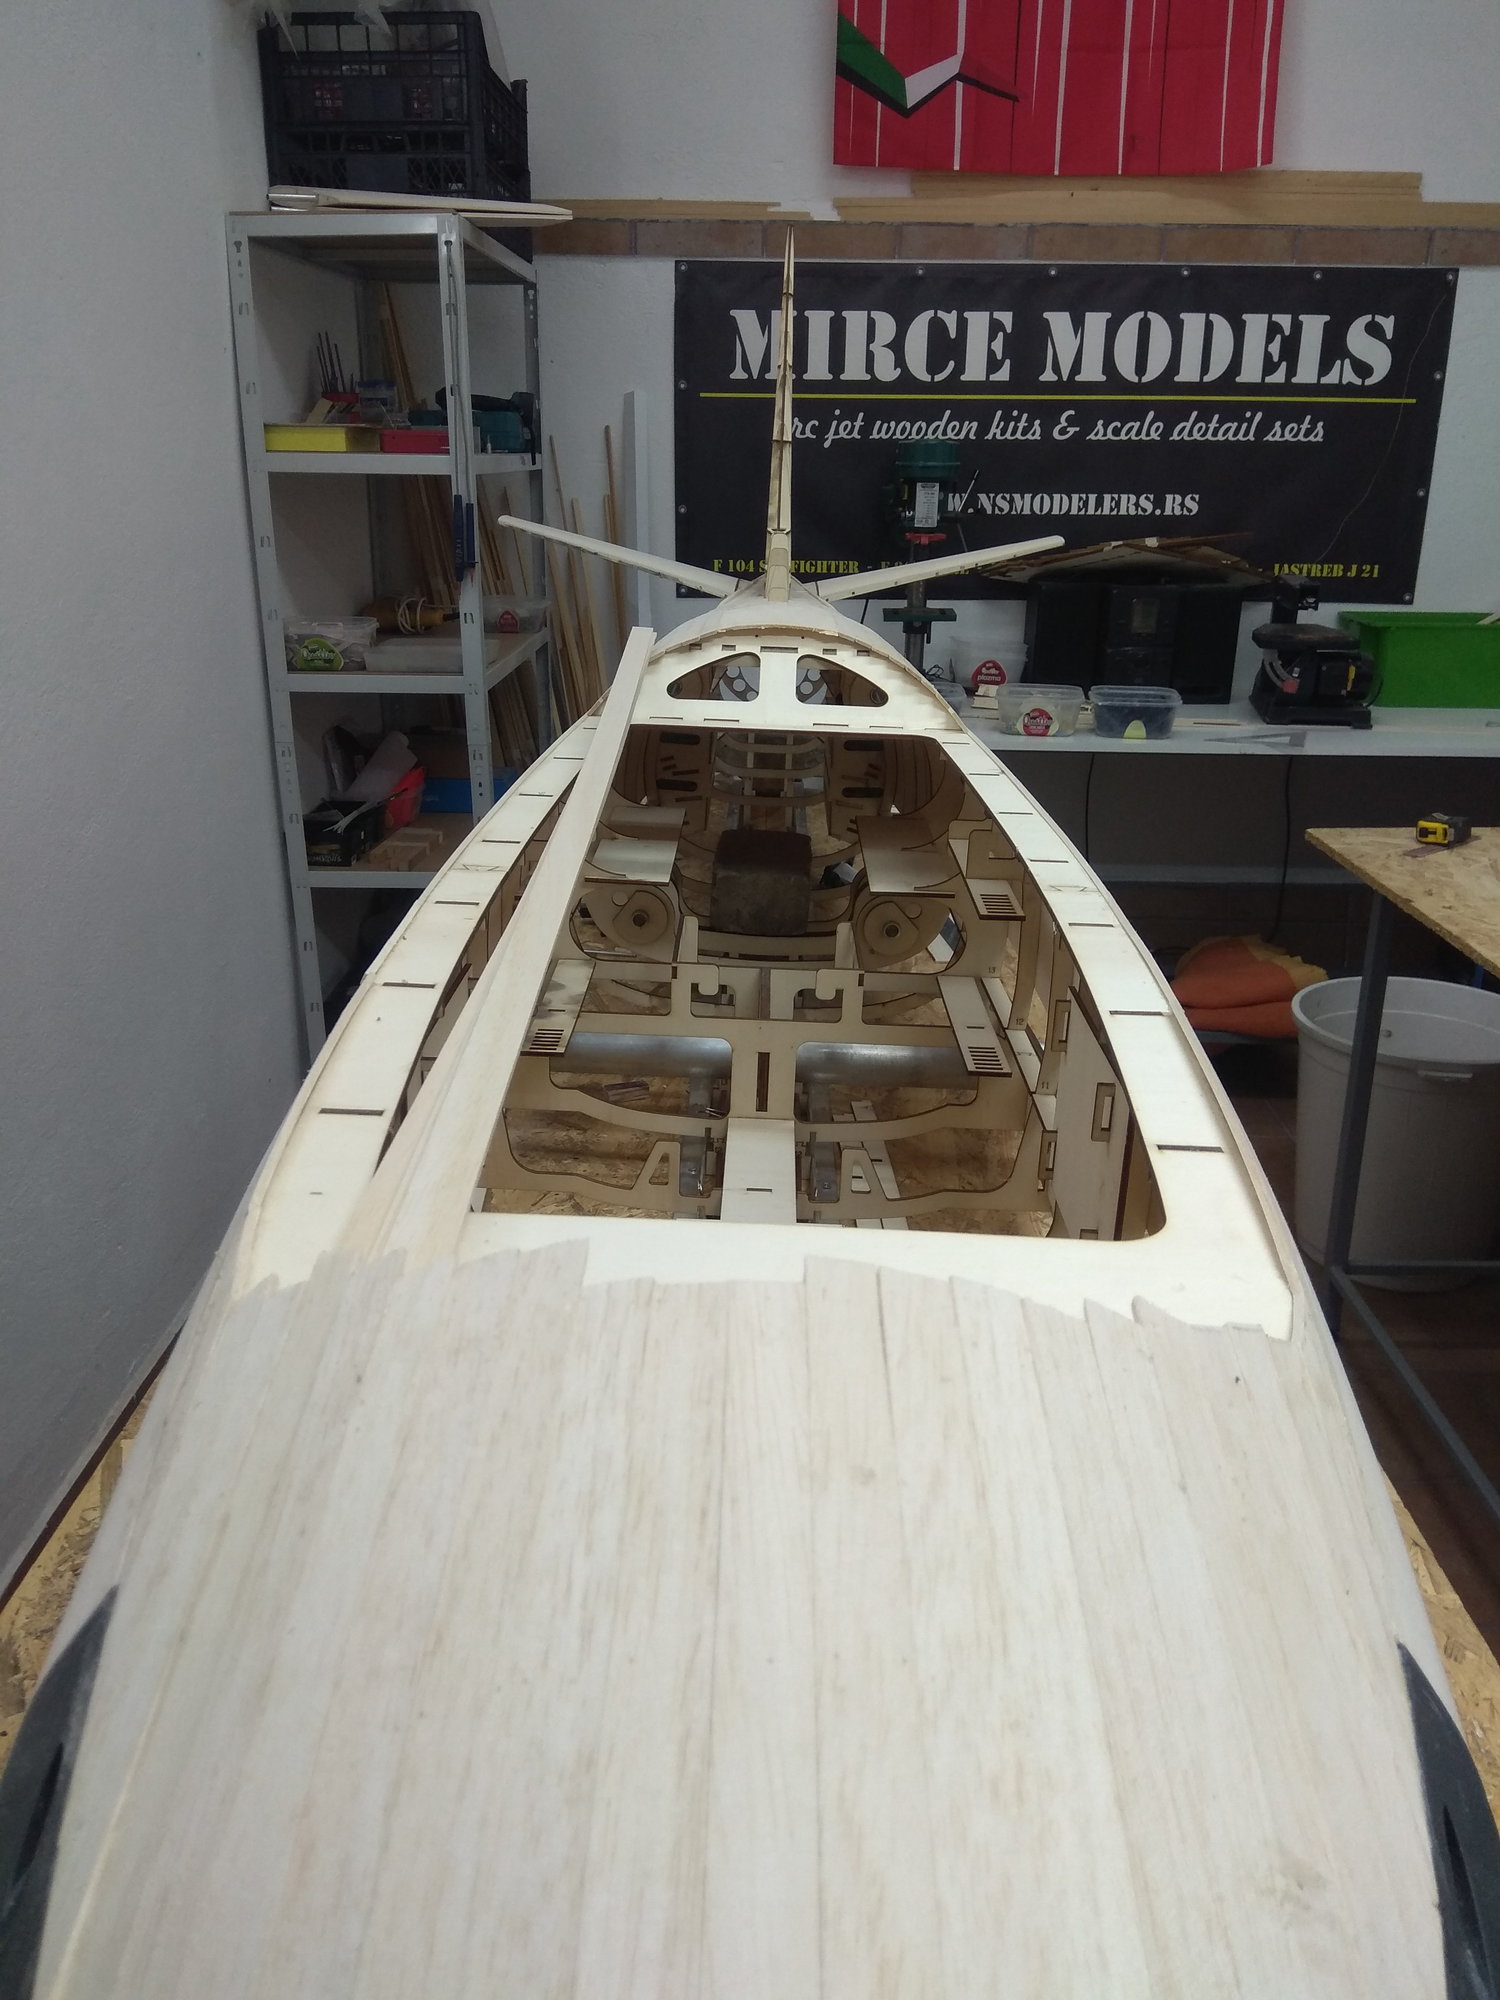
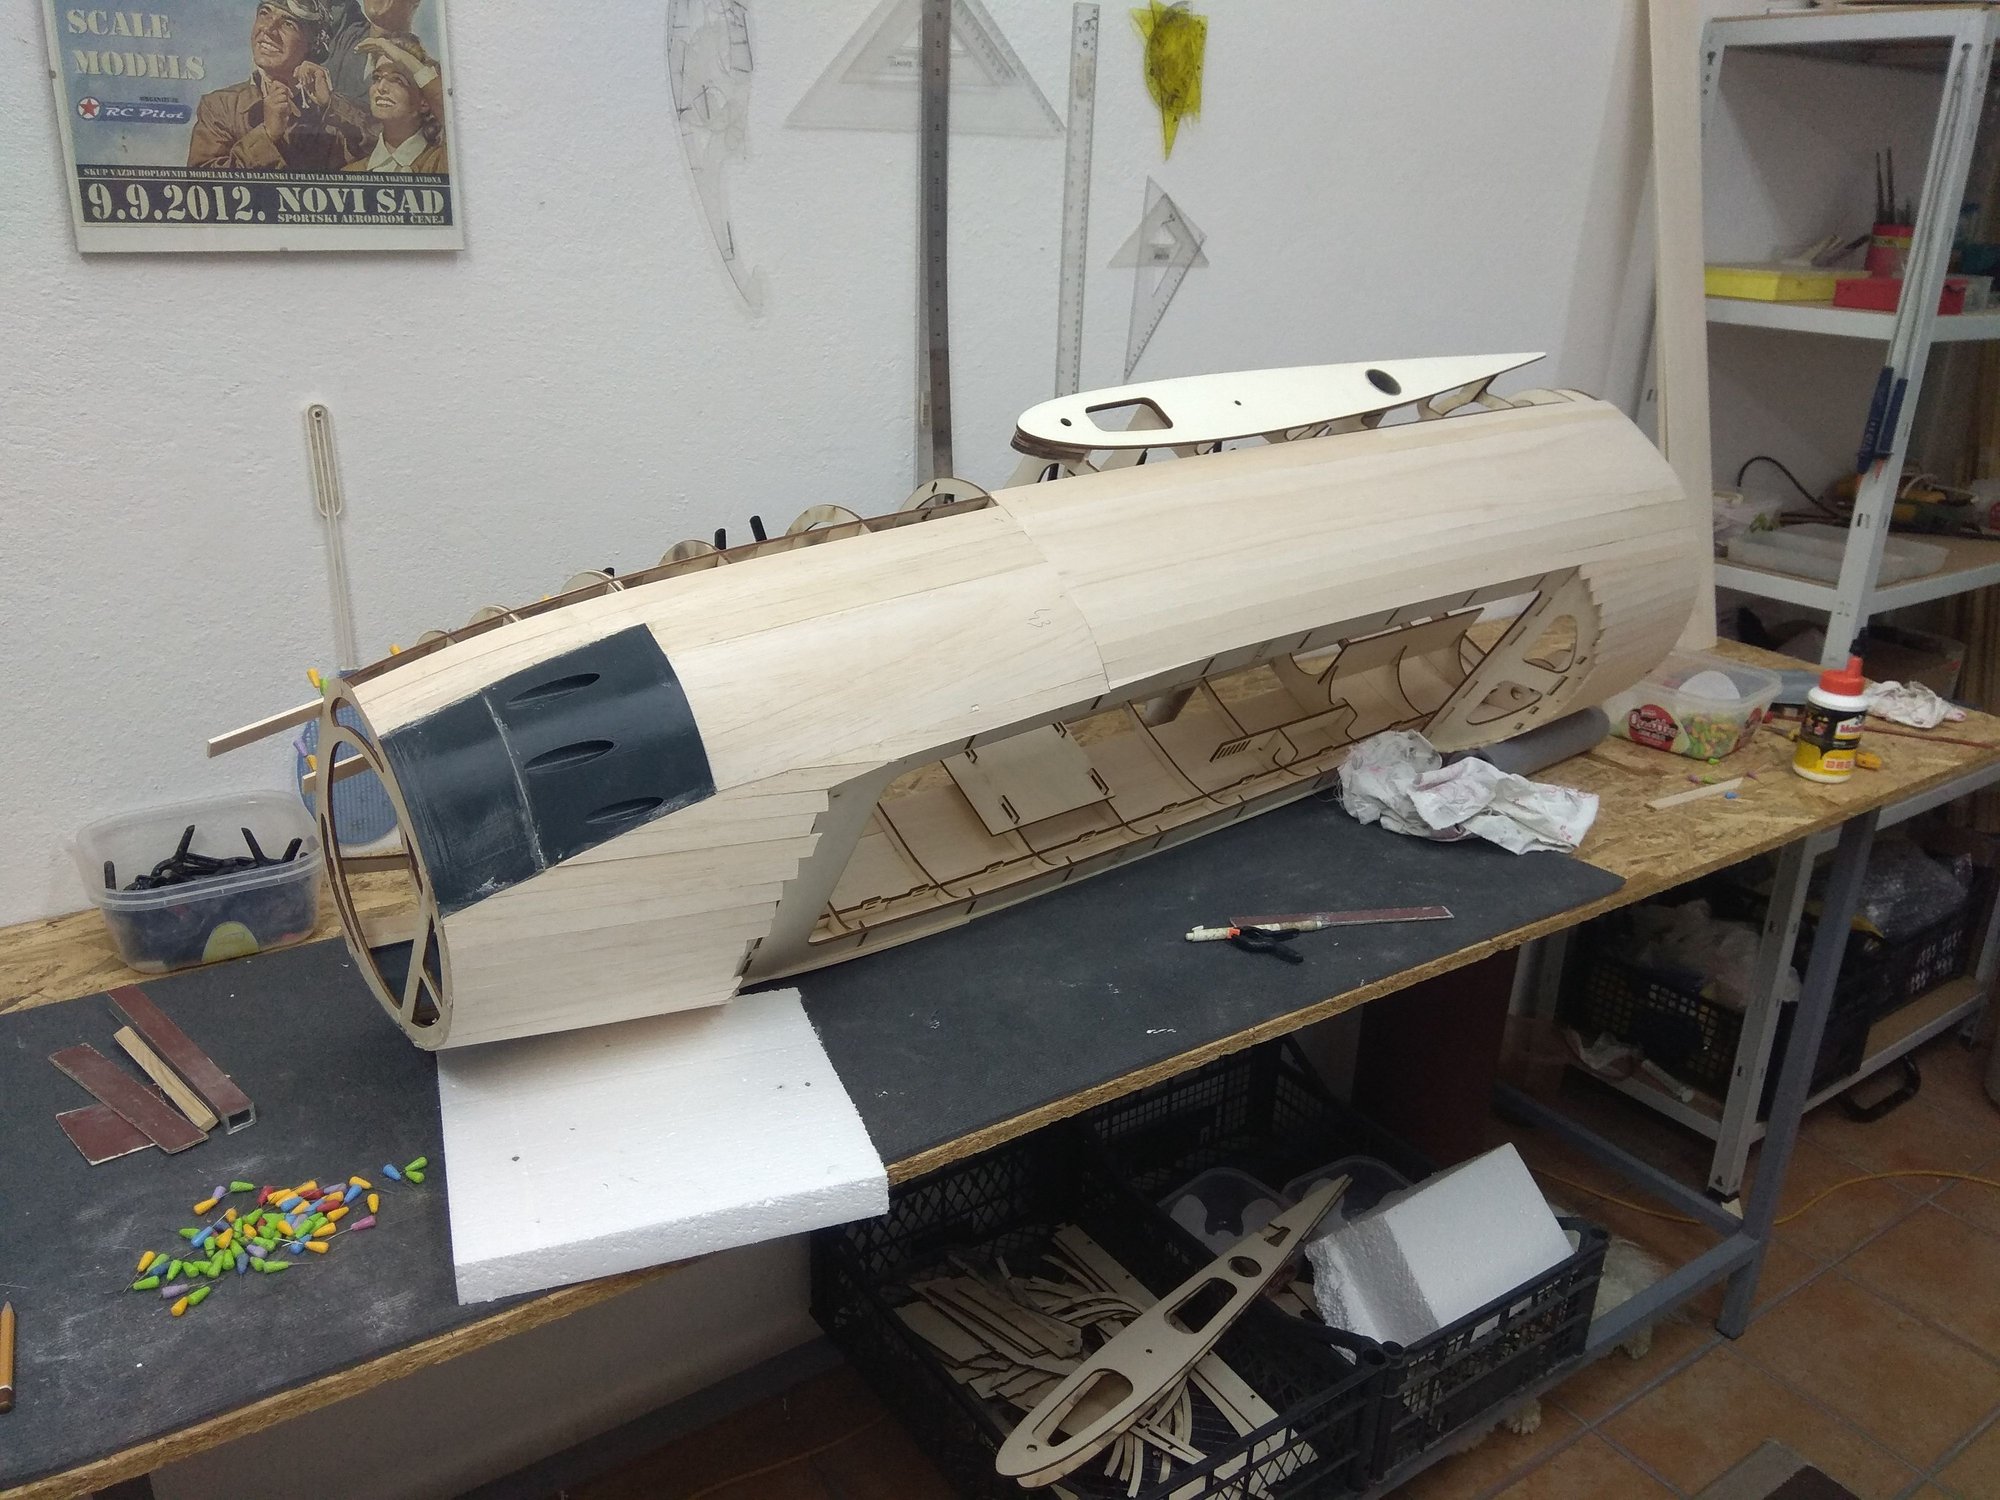
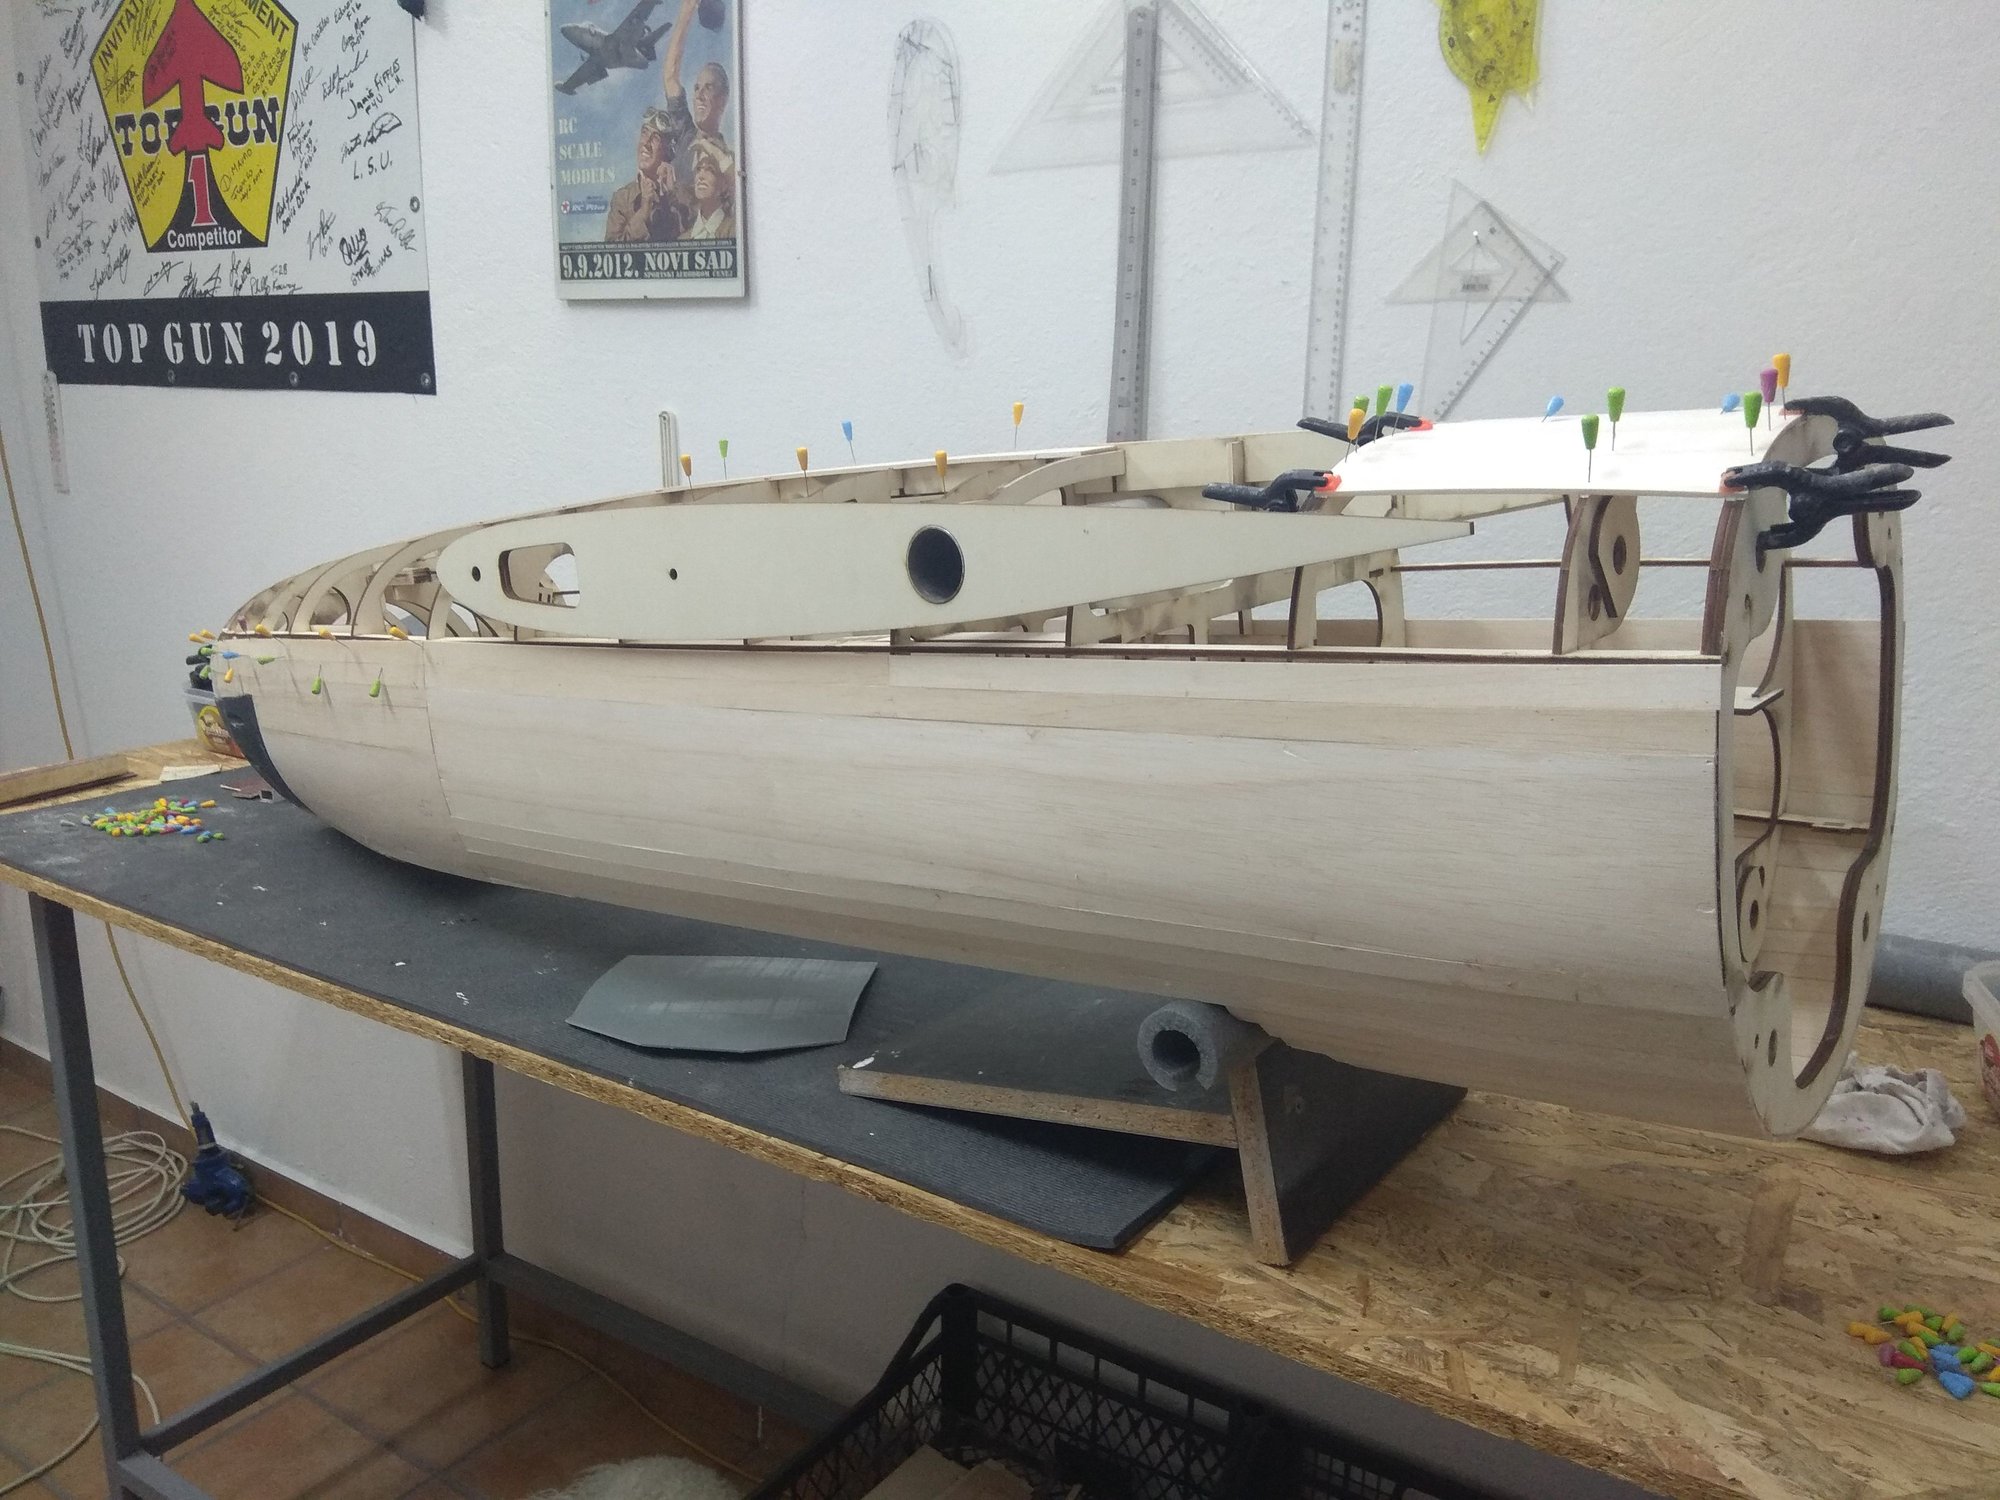
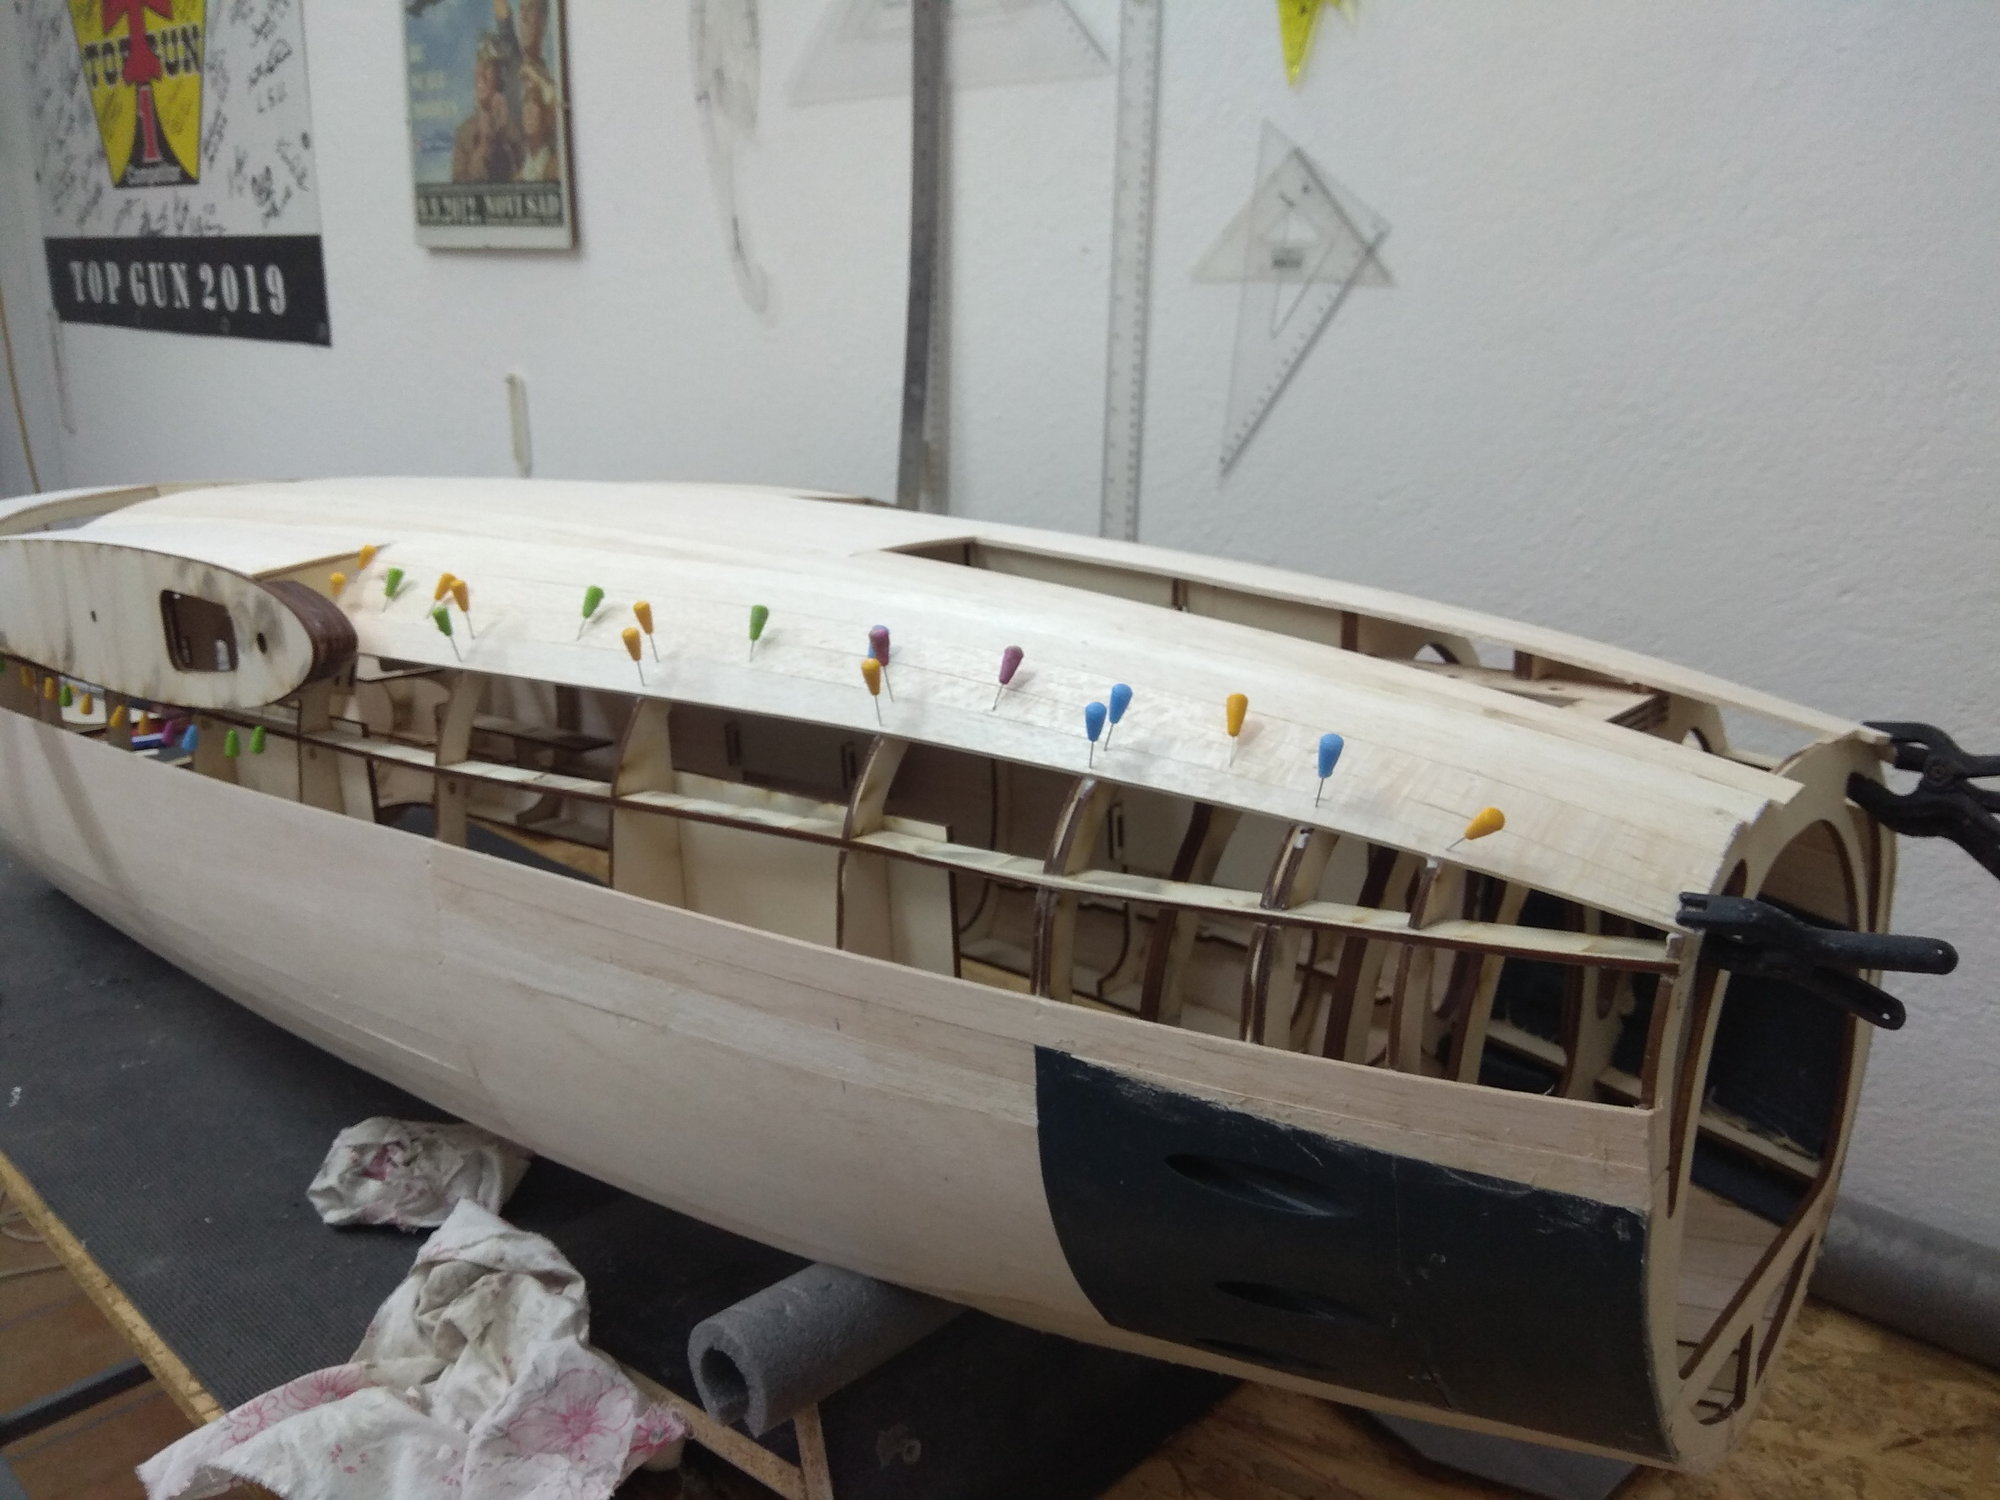
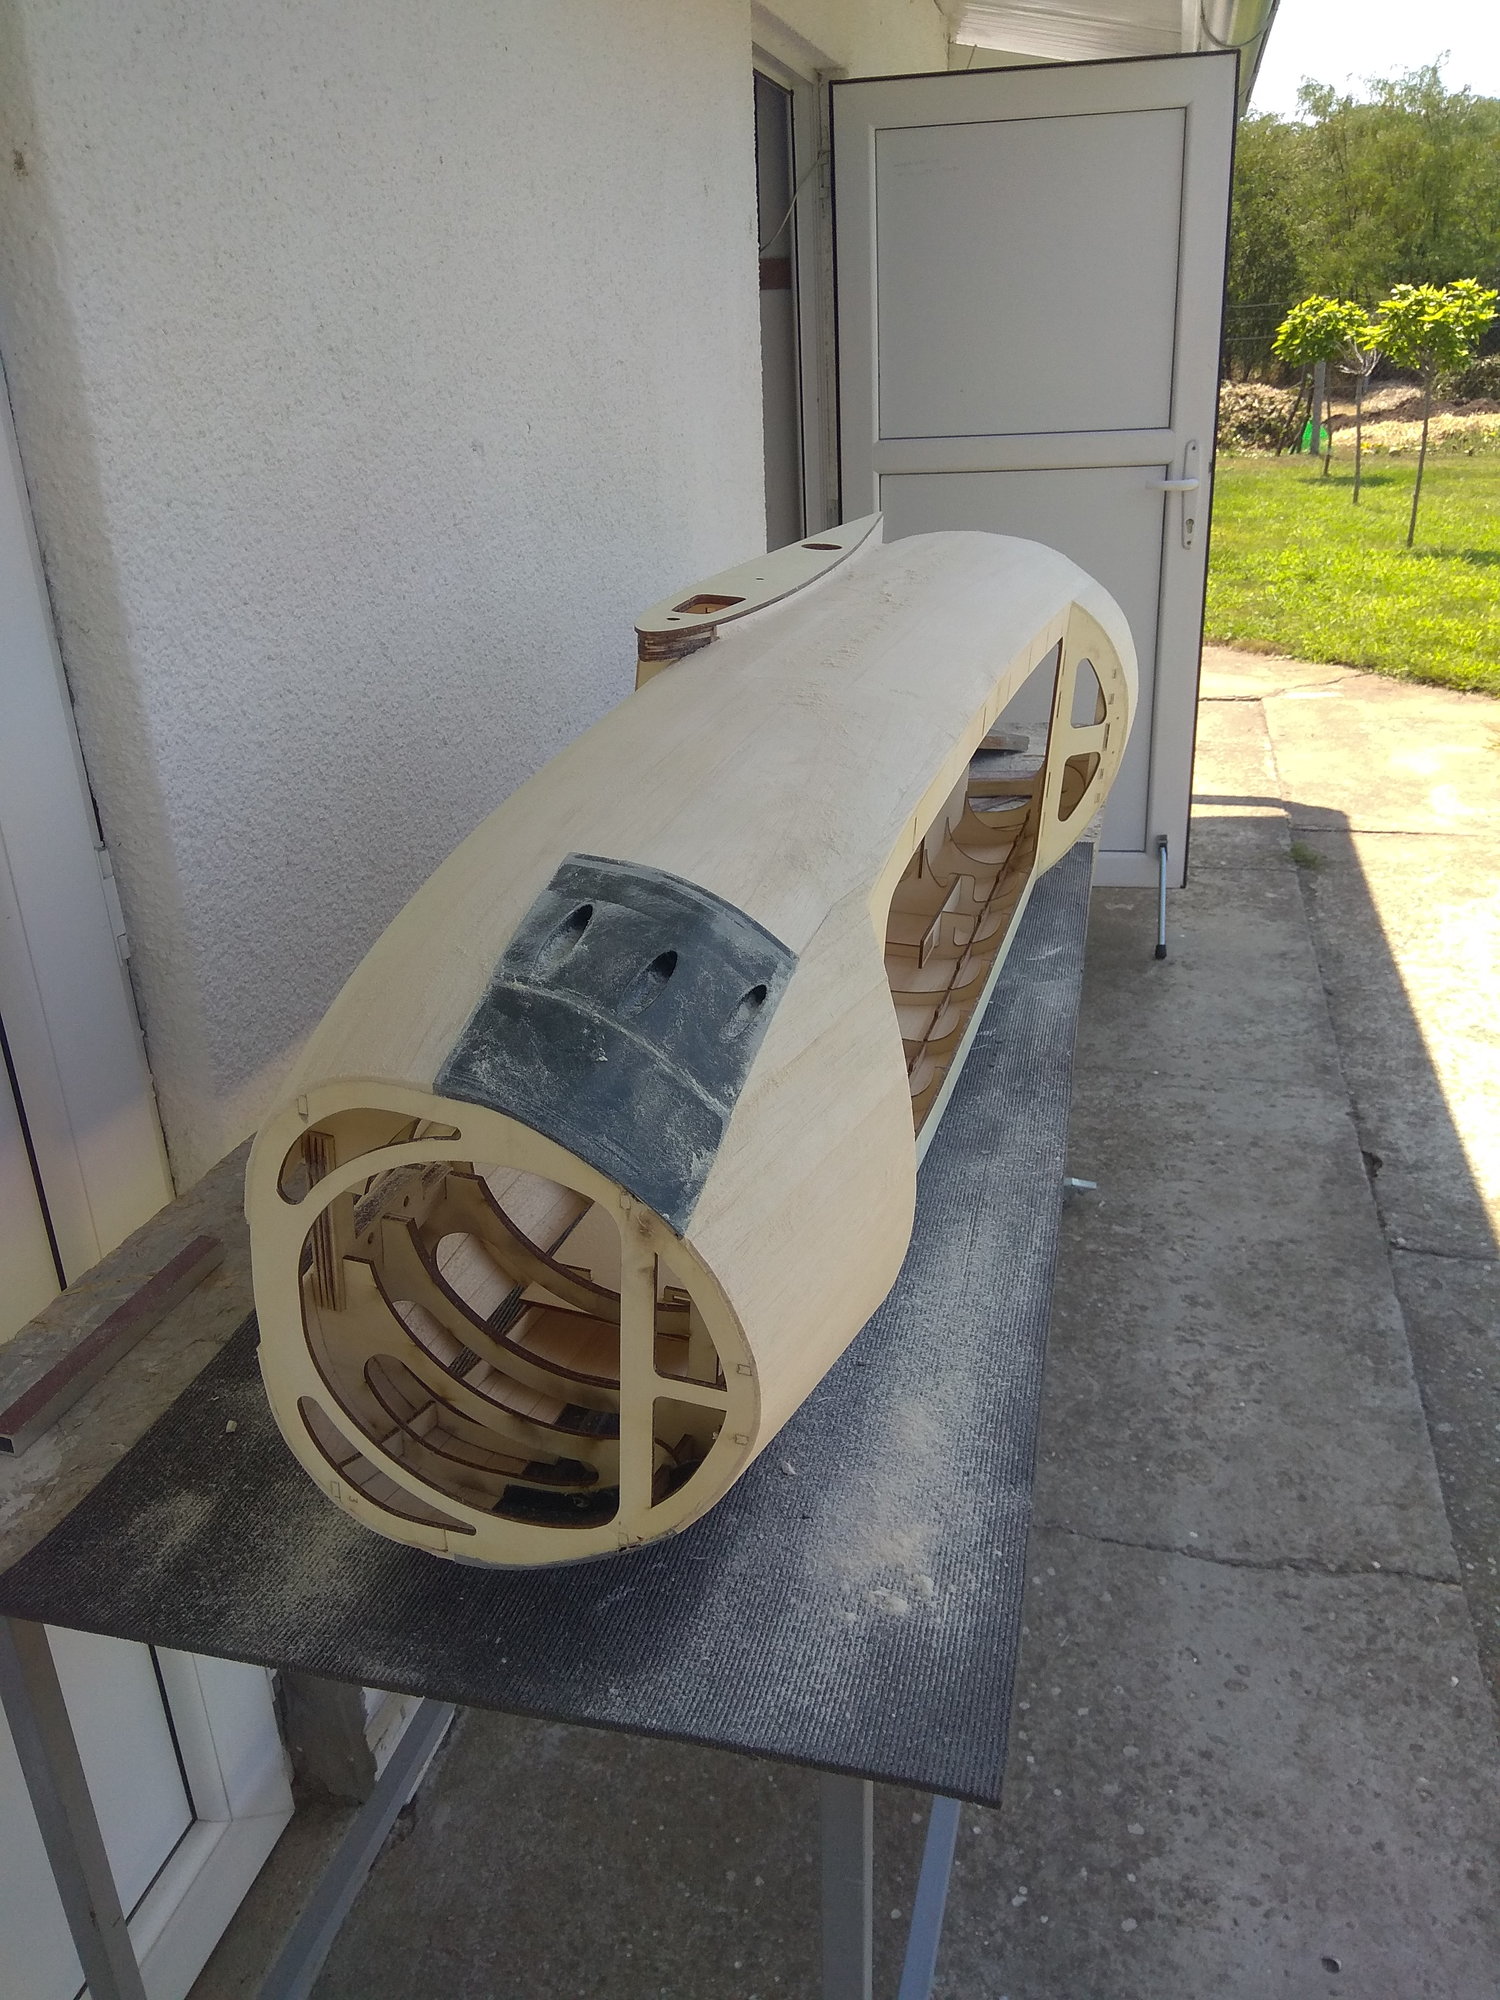
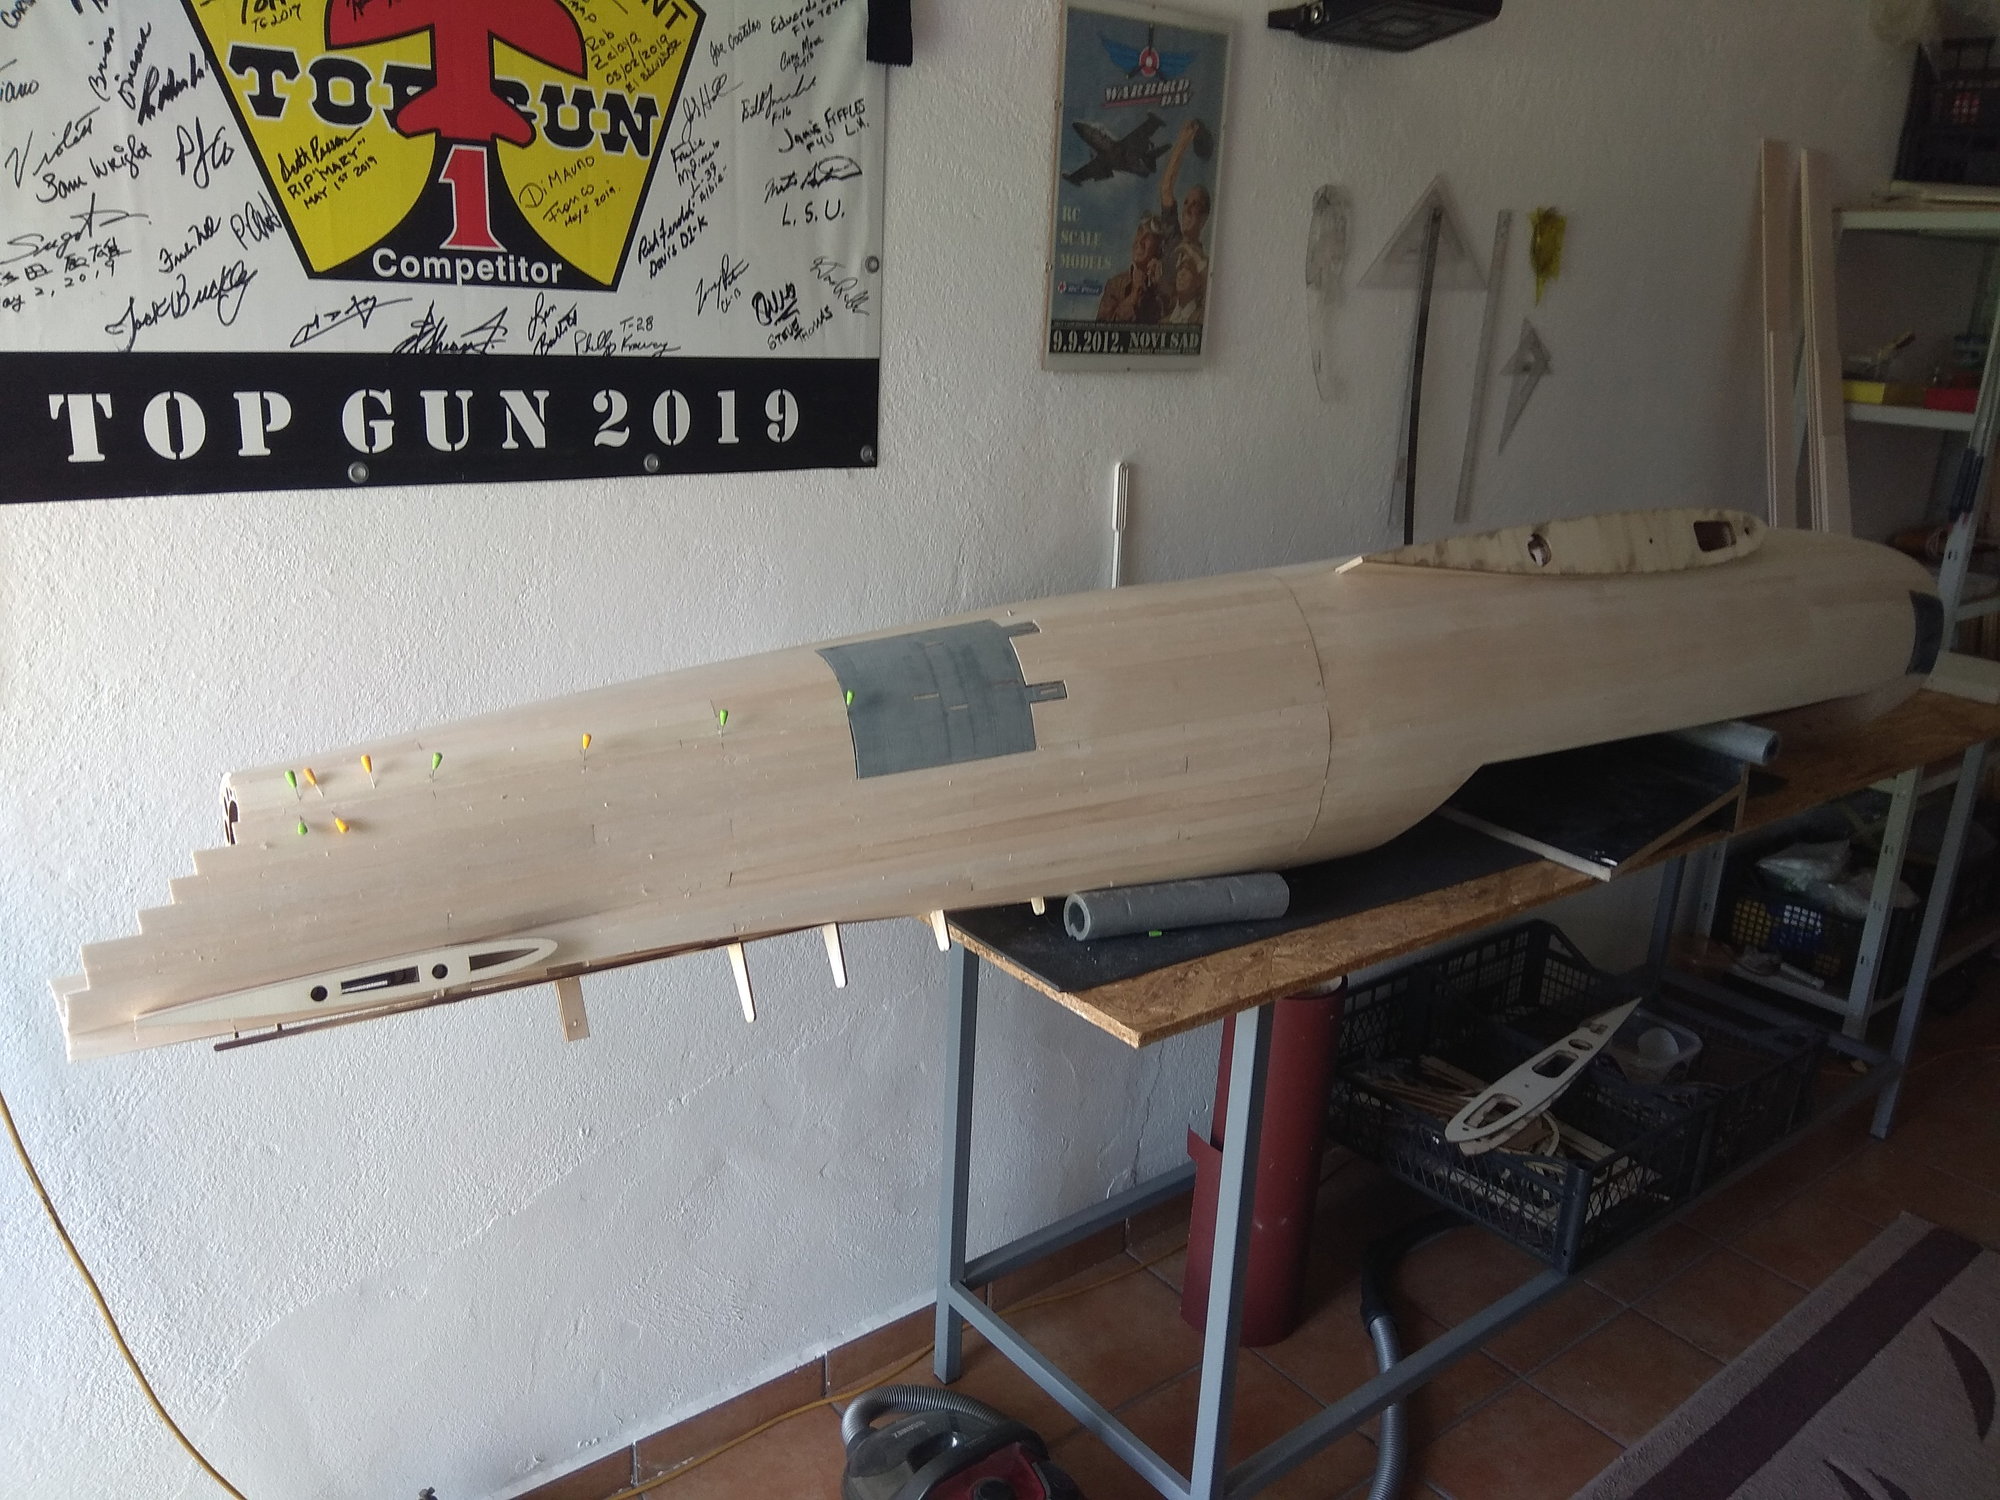
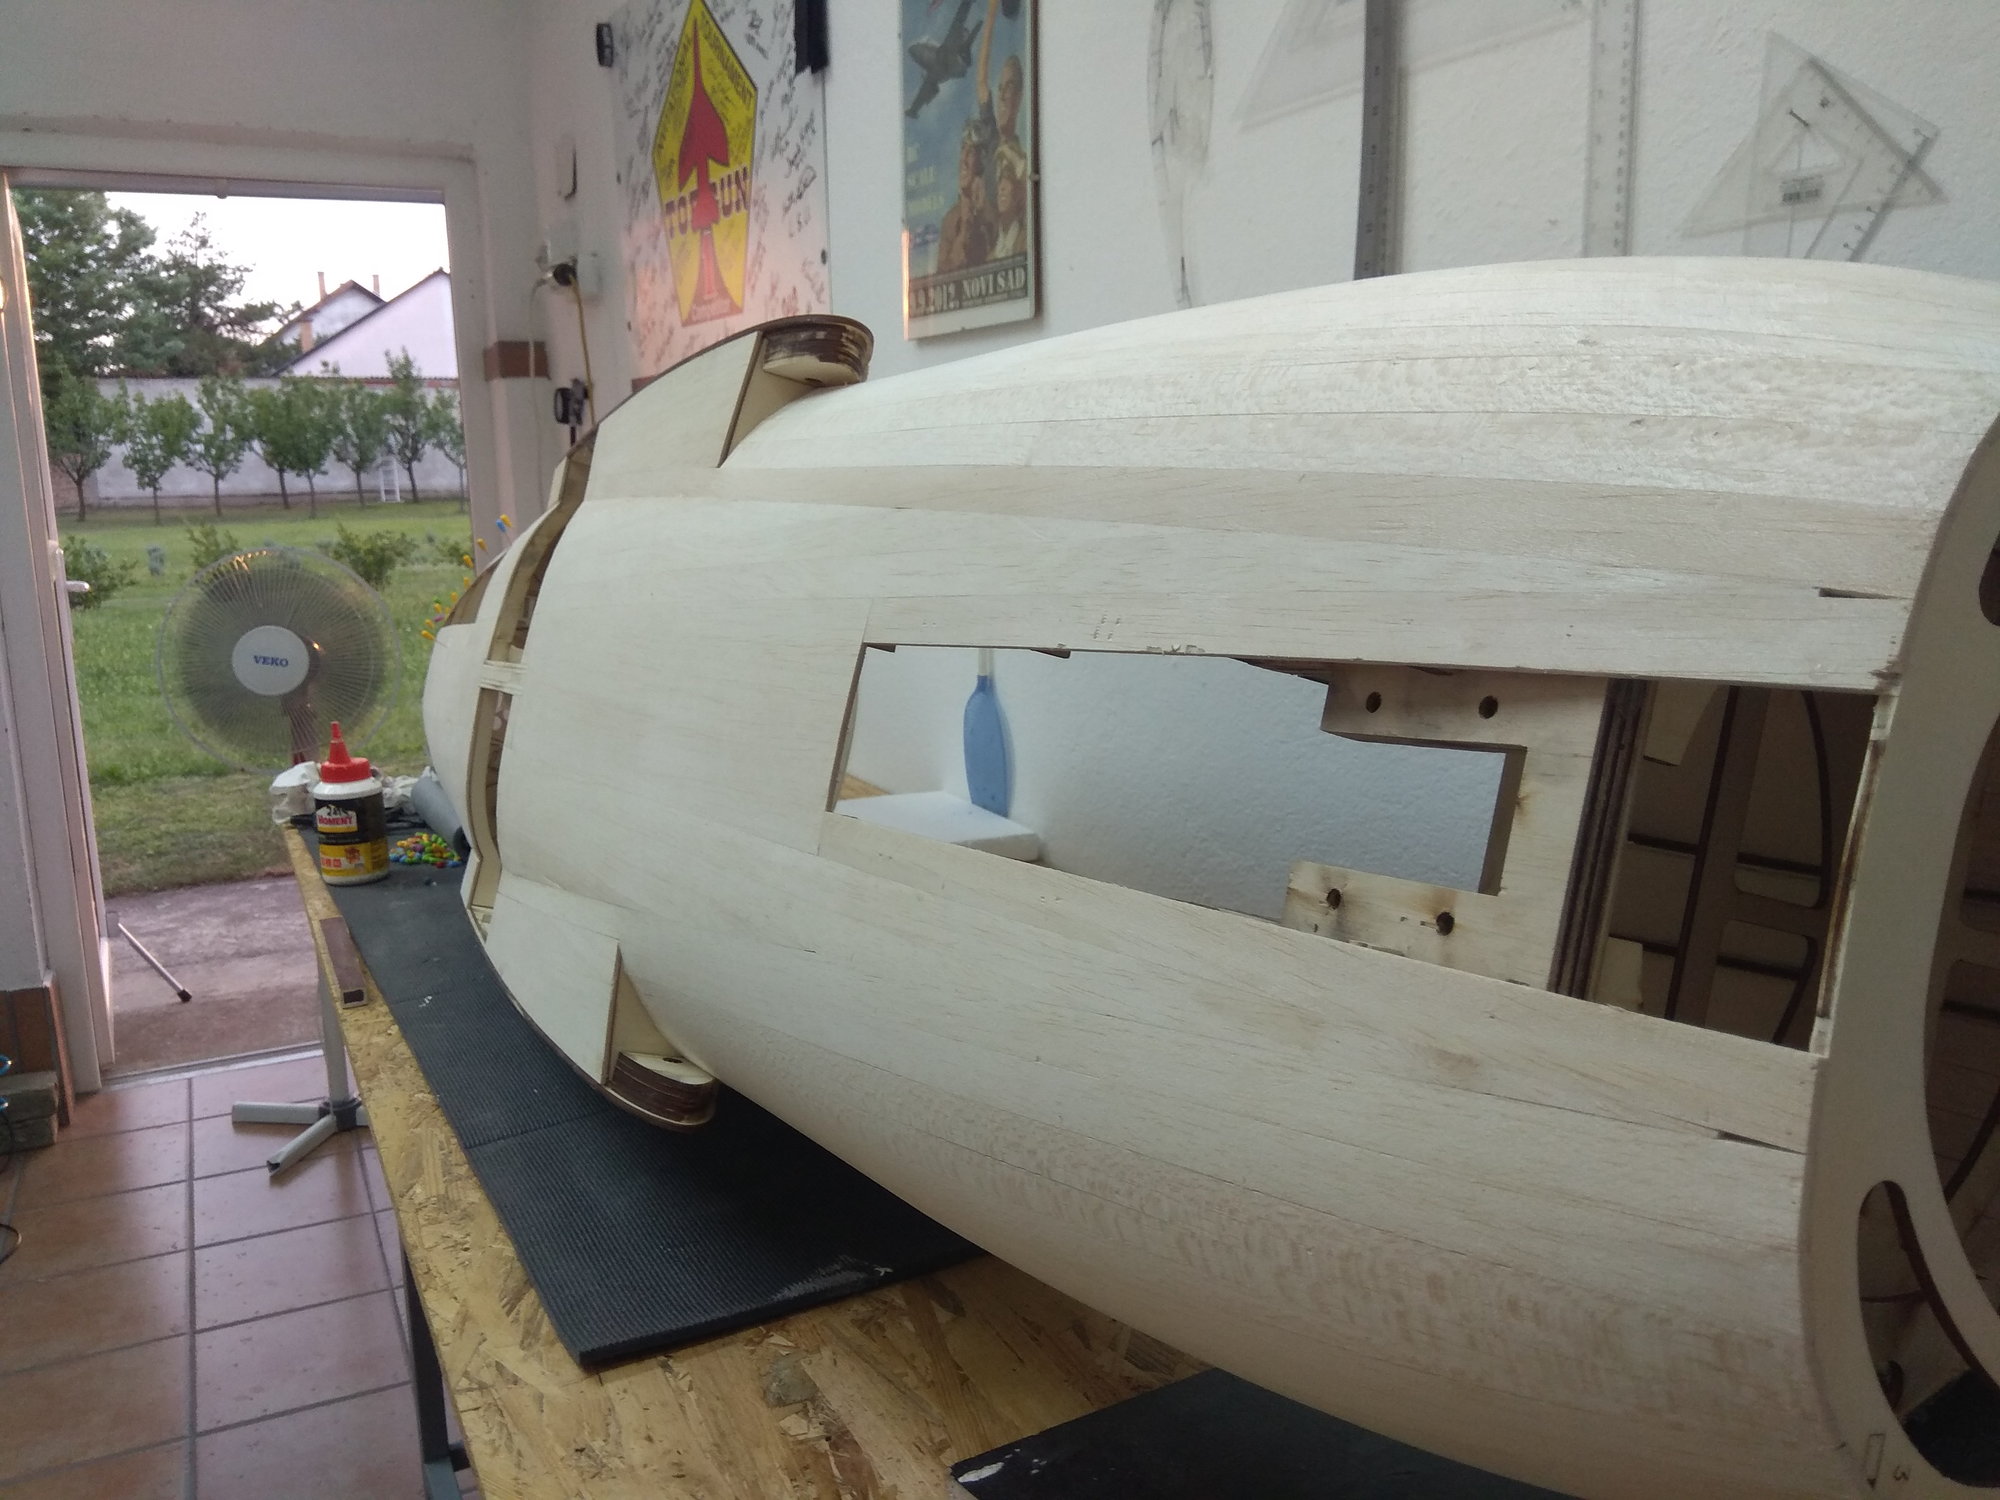
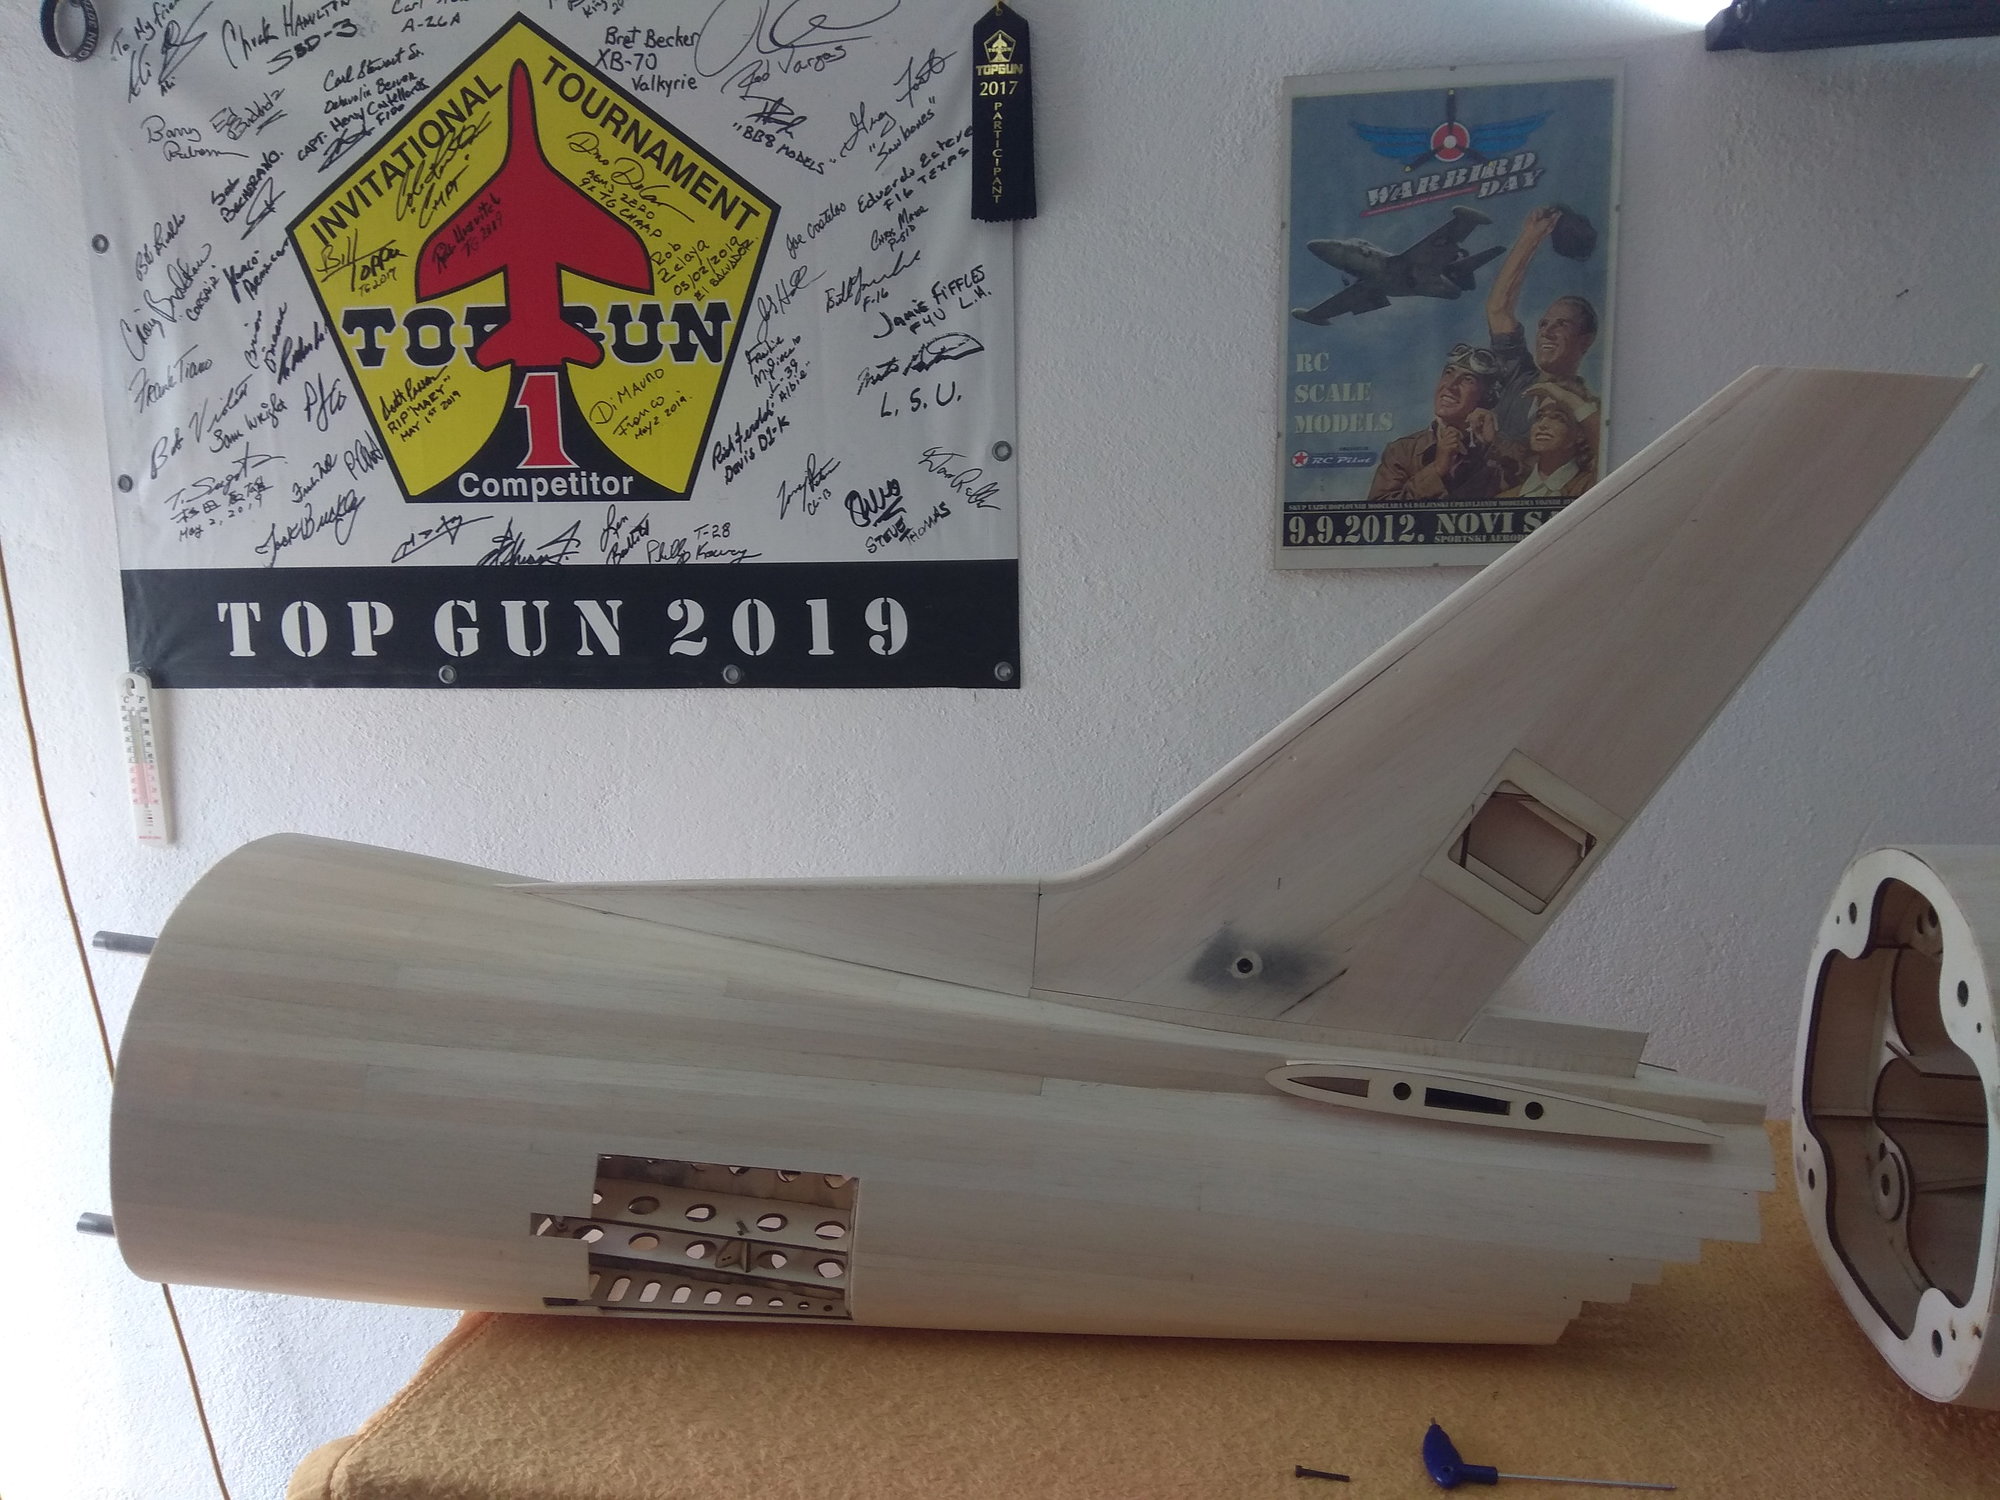
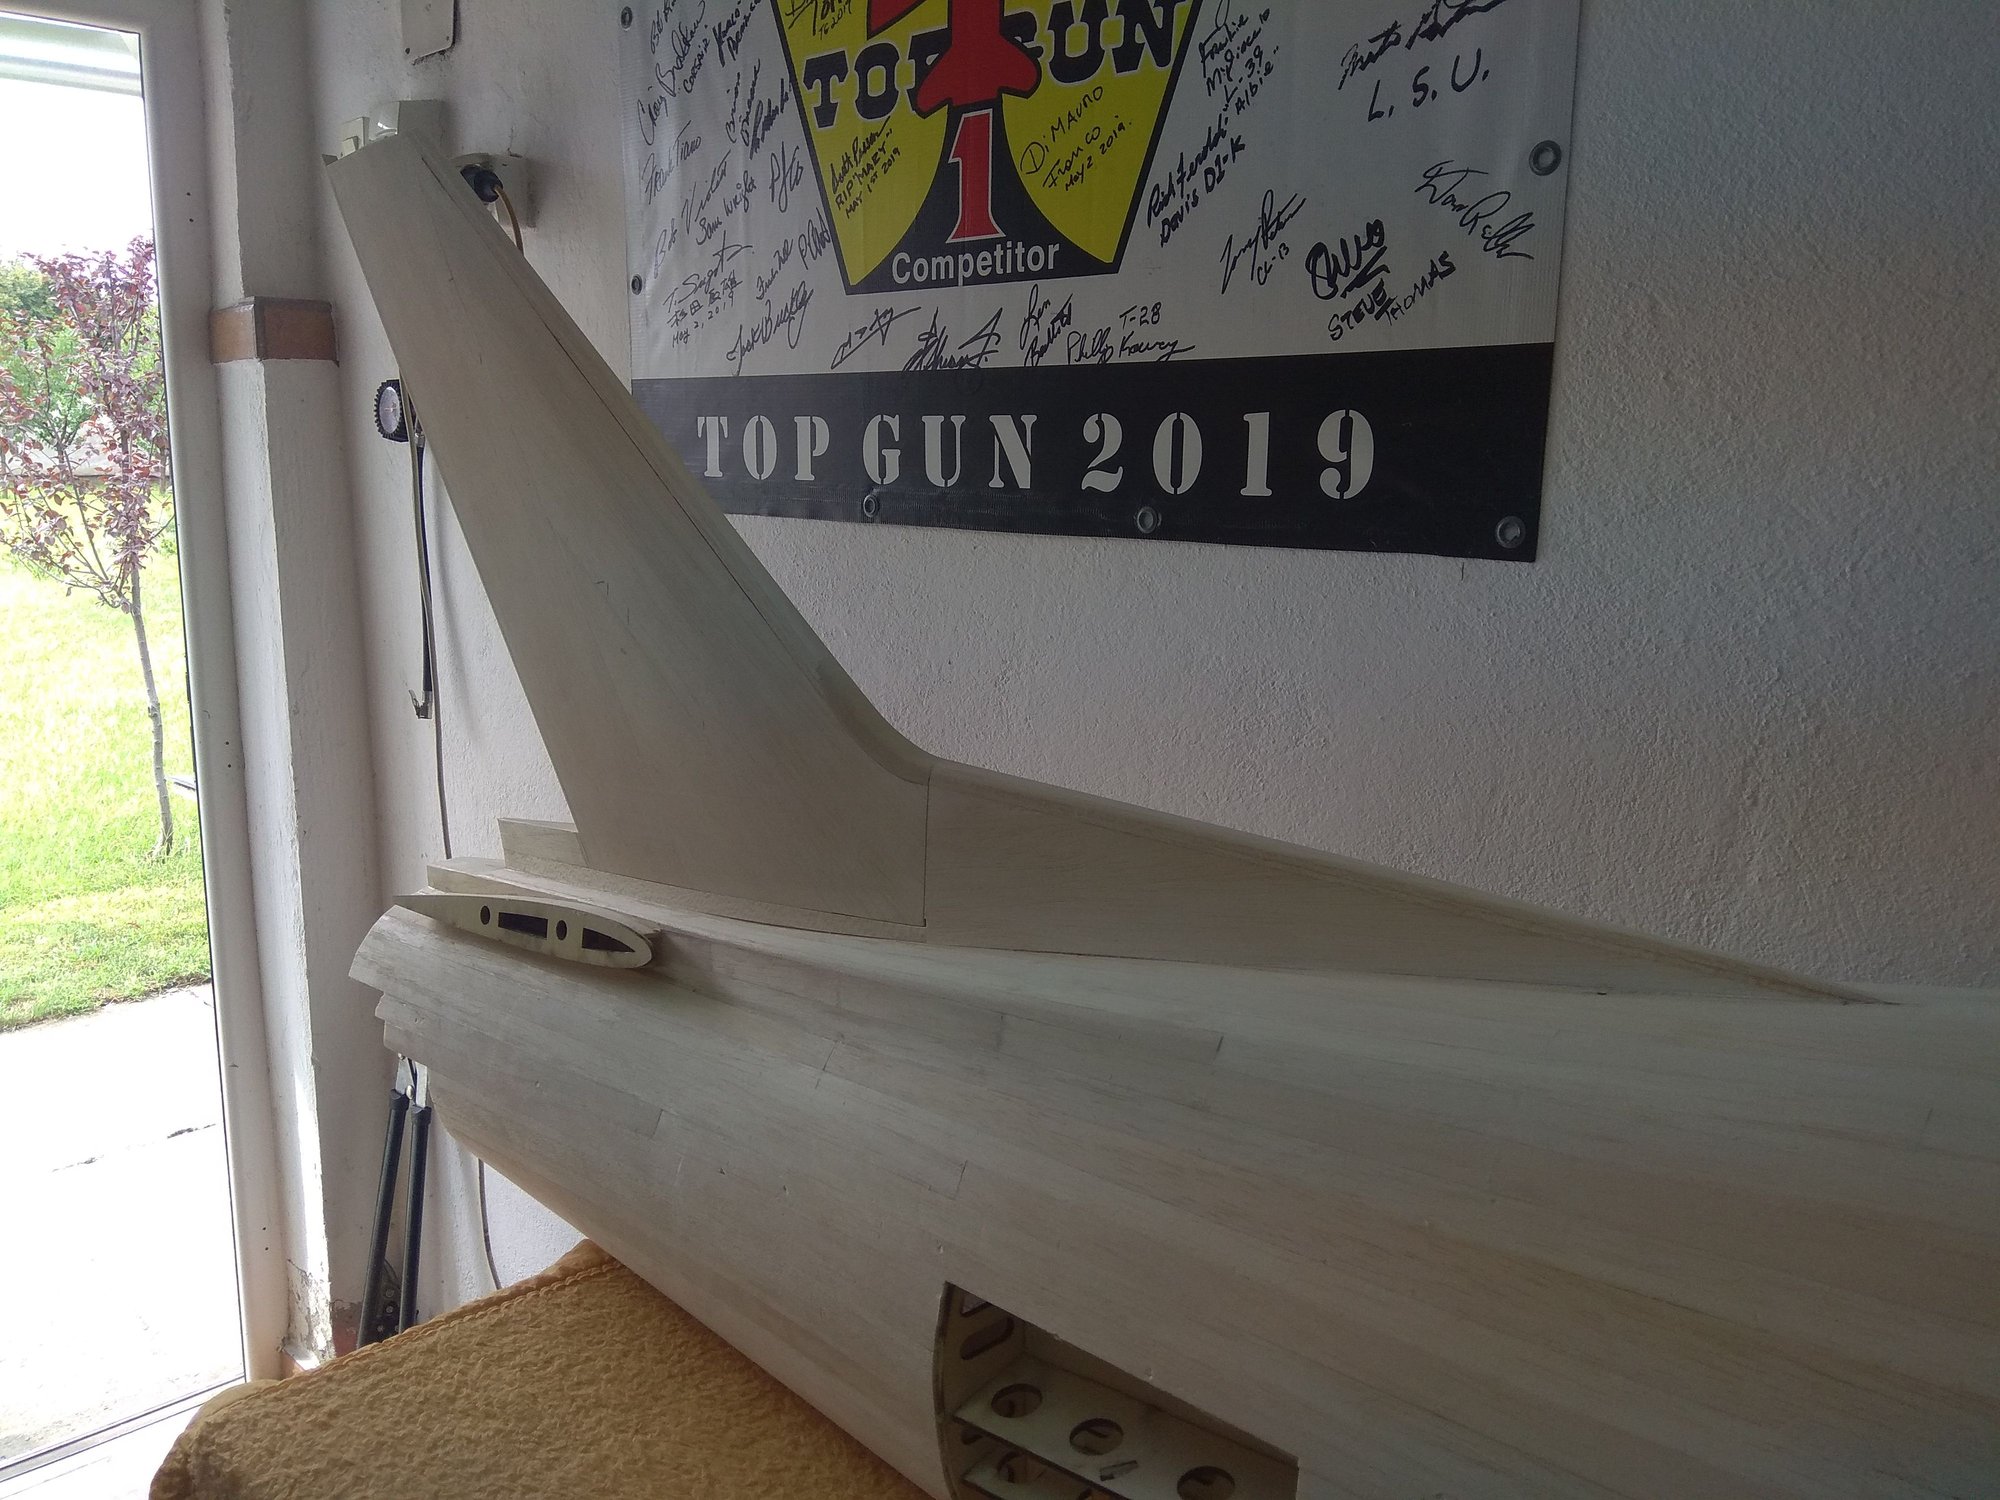
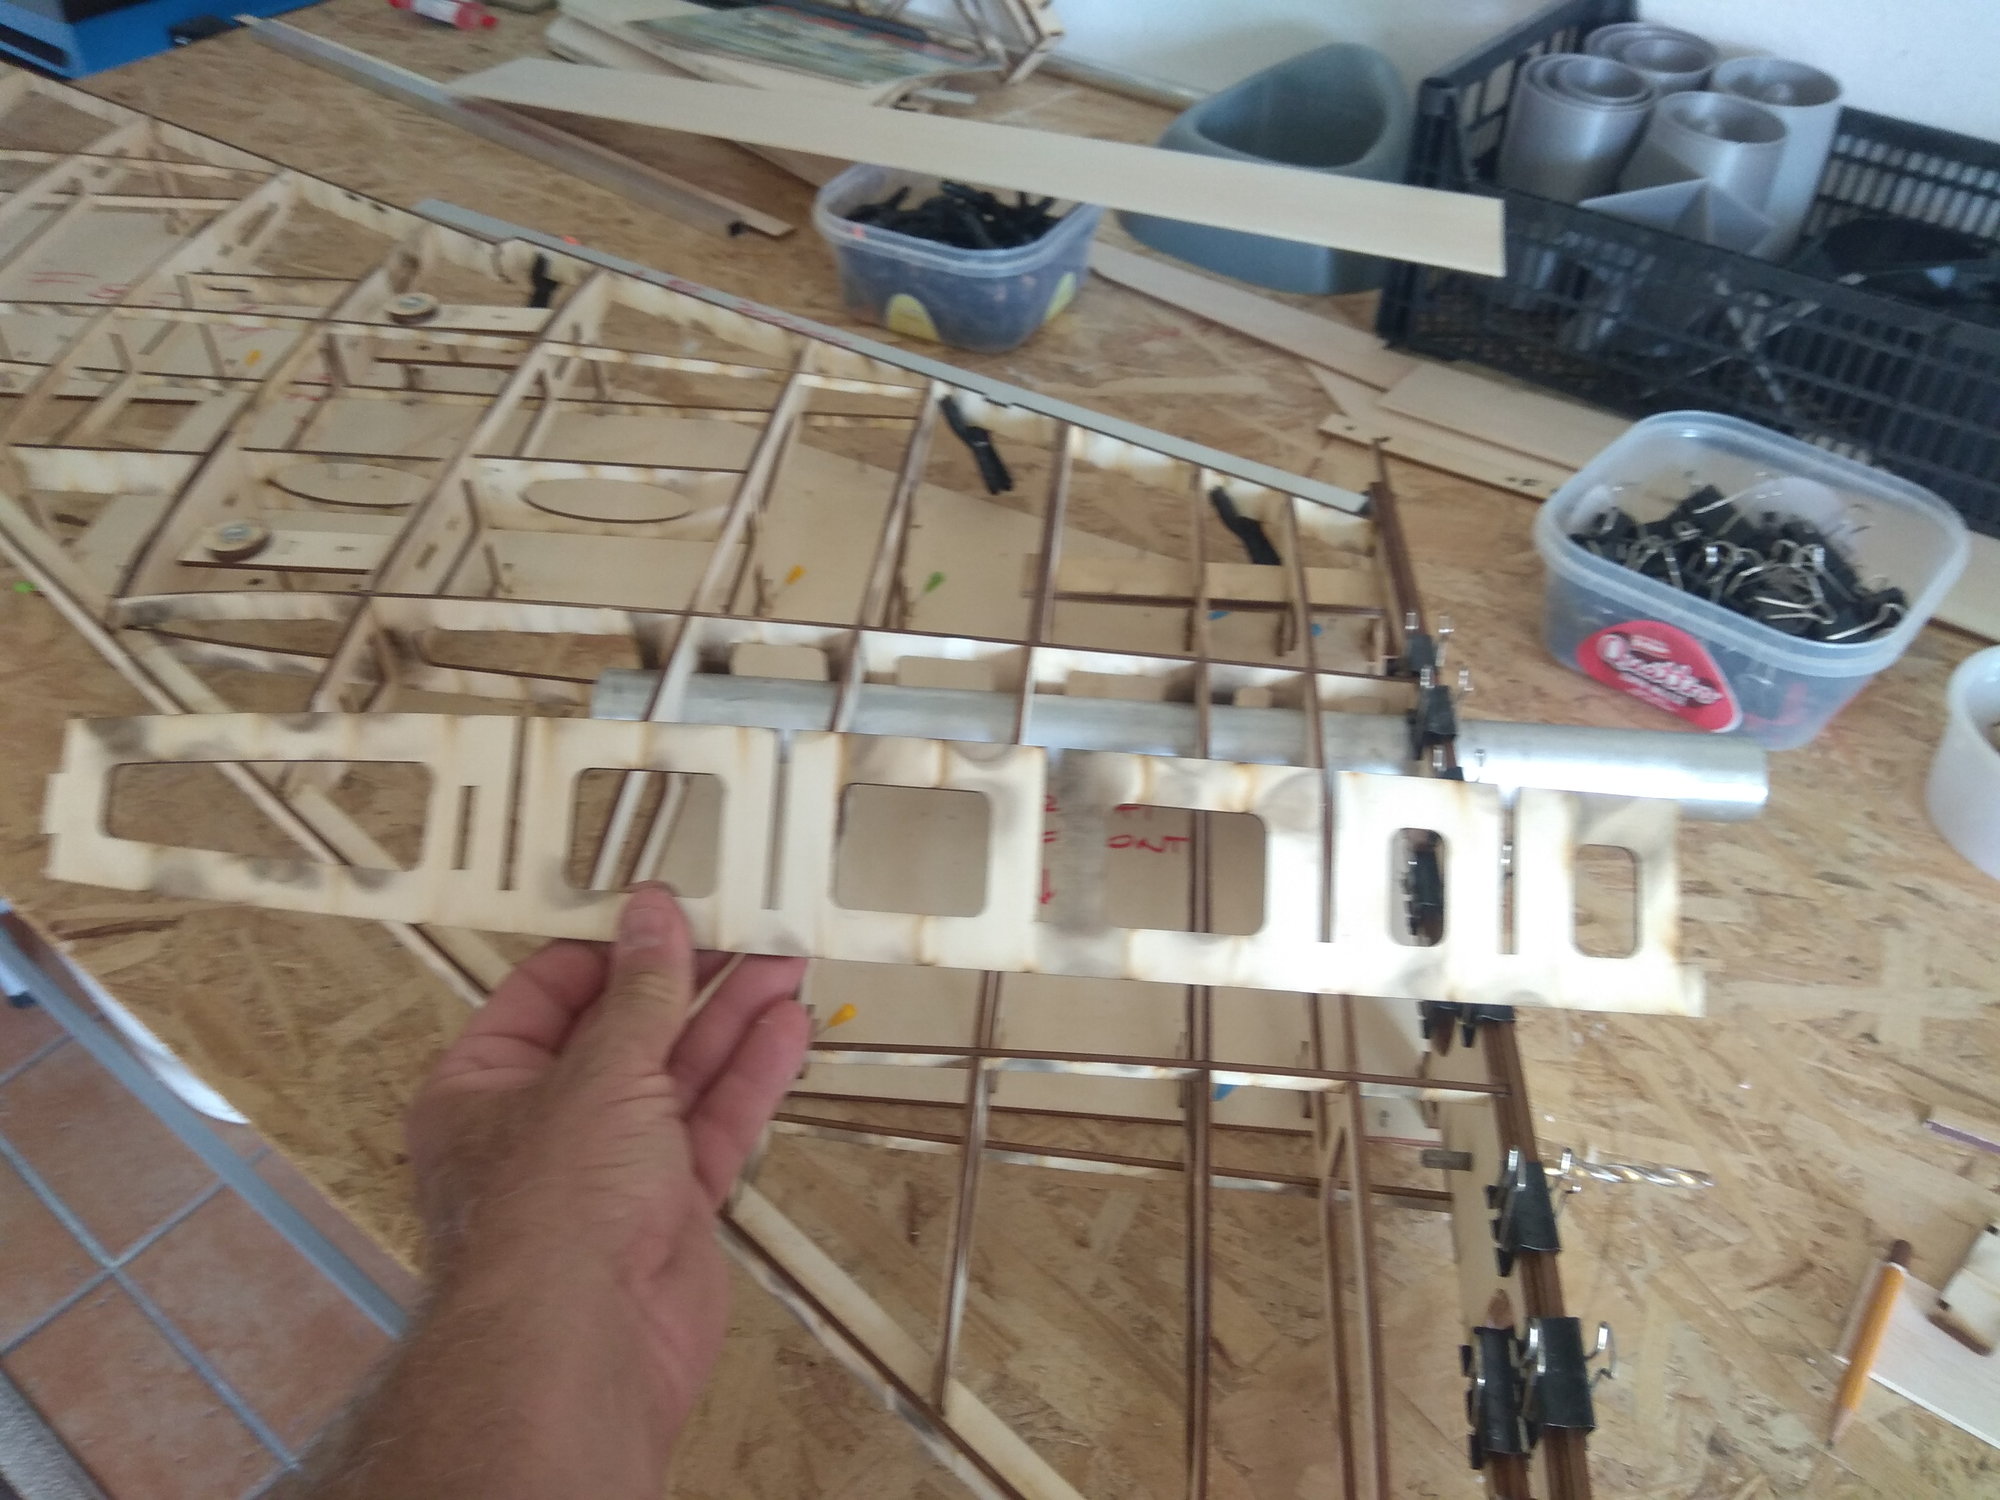
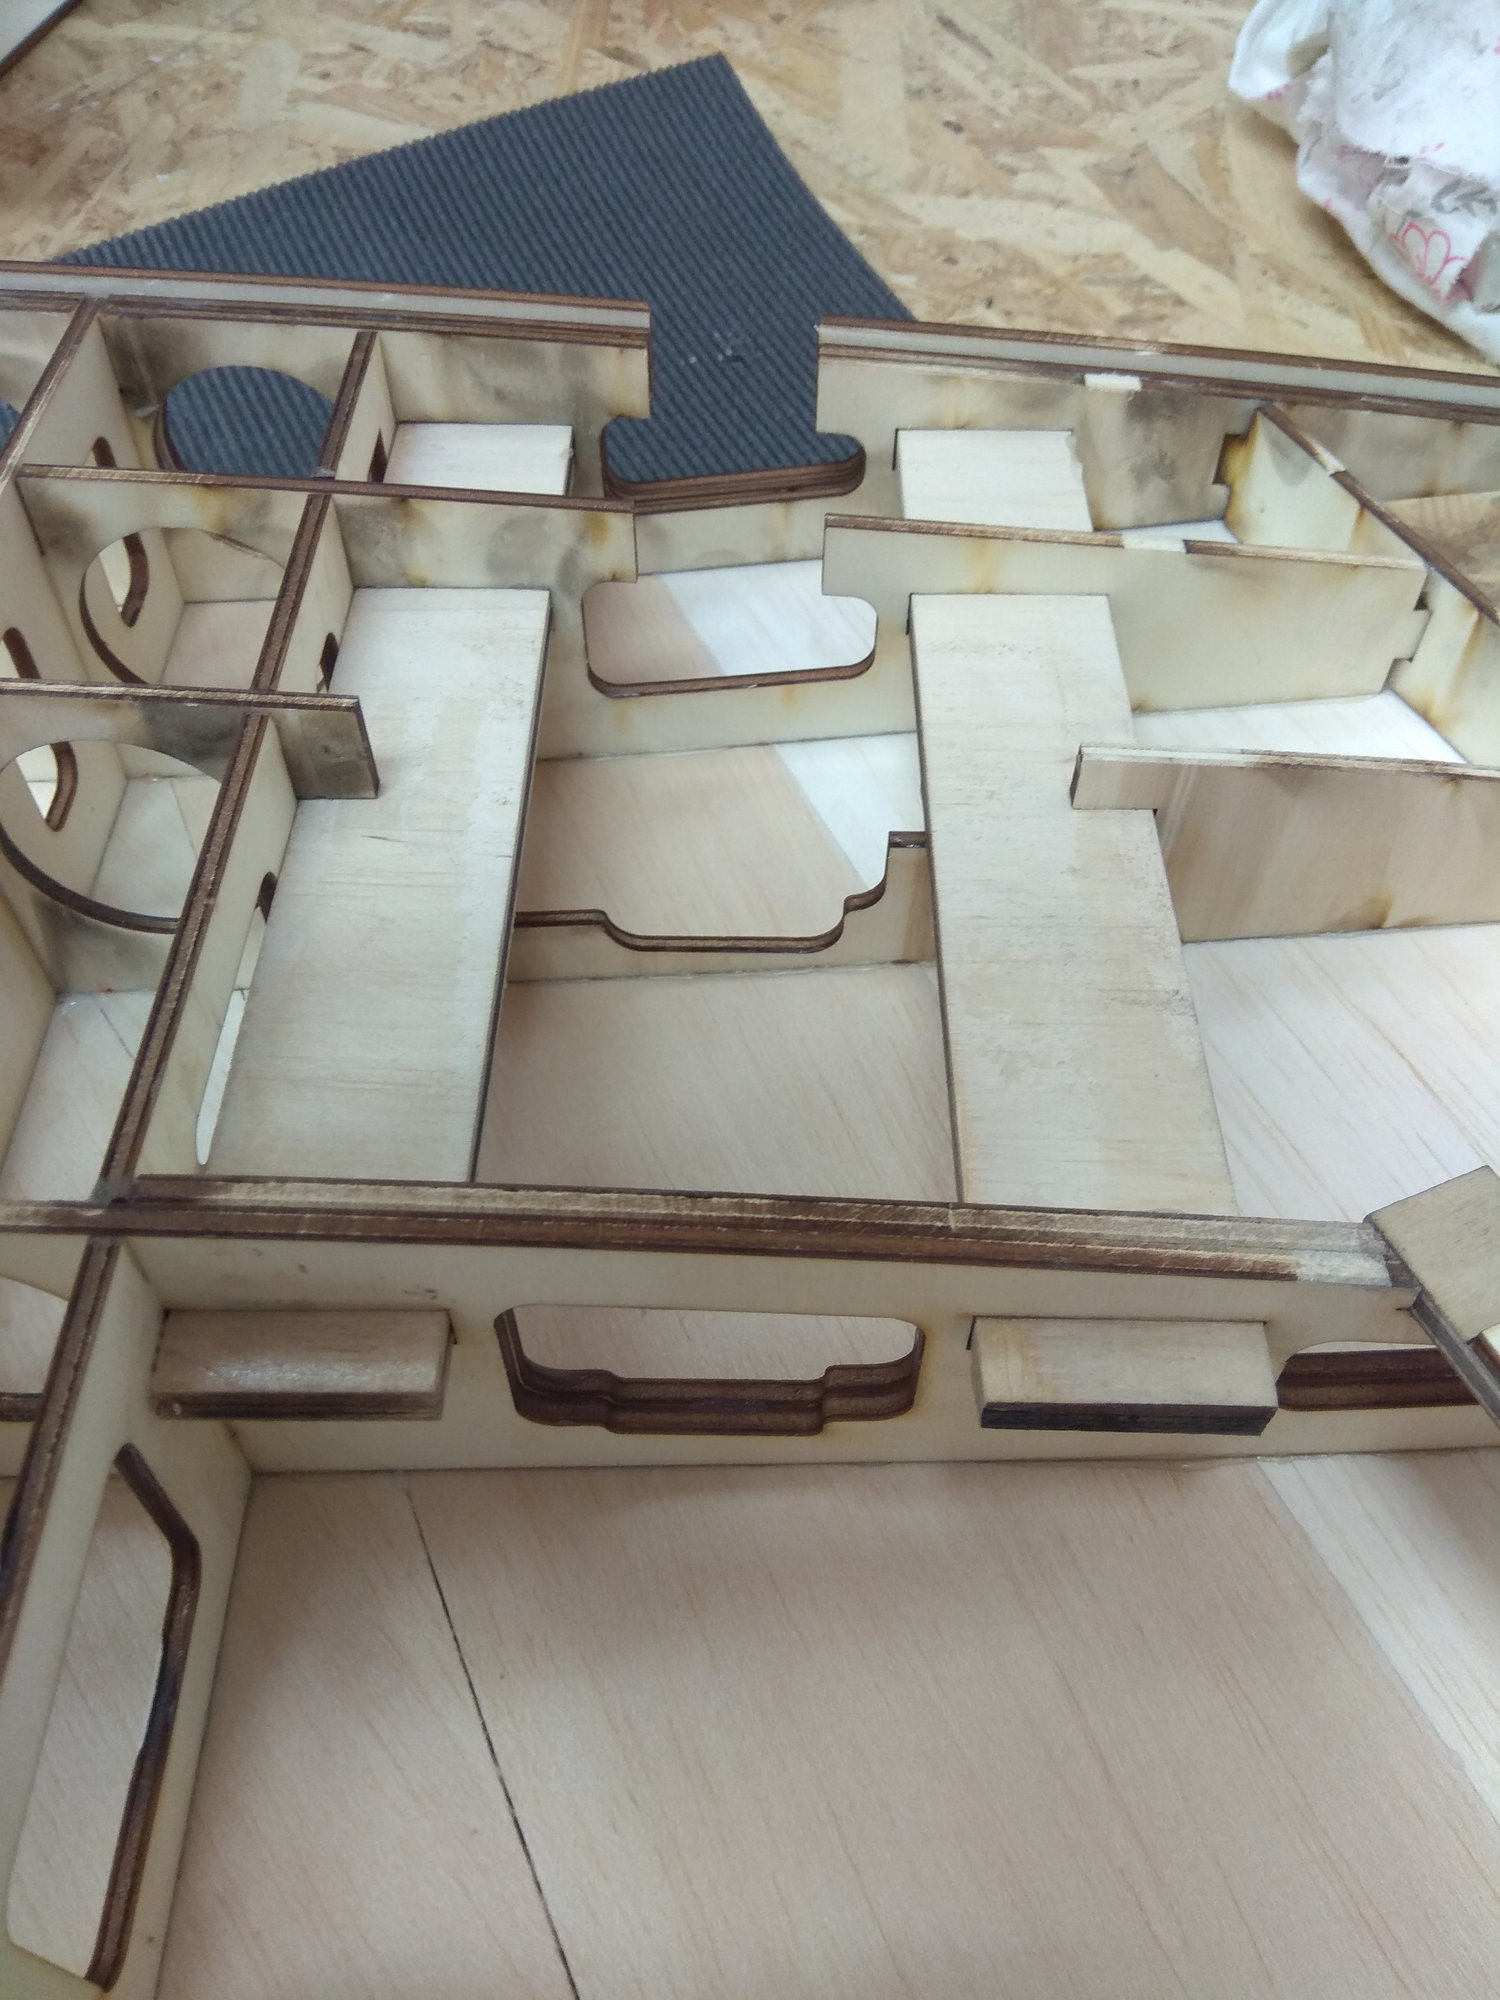
The first phase of building the fuselage is finished, the front and rear parts were separated from the workbench ten days ago.
The front part of the fuselage is then completely covered with 3 mm balsa.
The structure for the main gear covers was inserted.


The front part of the fuselage is then completely covered with 3 mm balsa.
The structure for the main gear covers was inserted.
08-12-2022, 12:34 AM
#14
Thread Starter
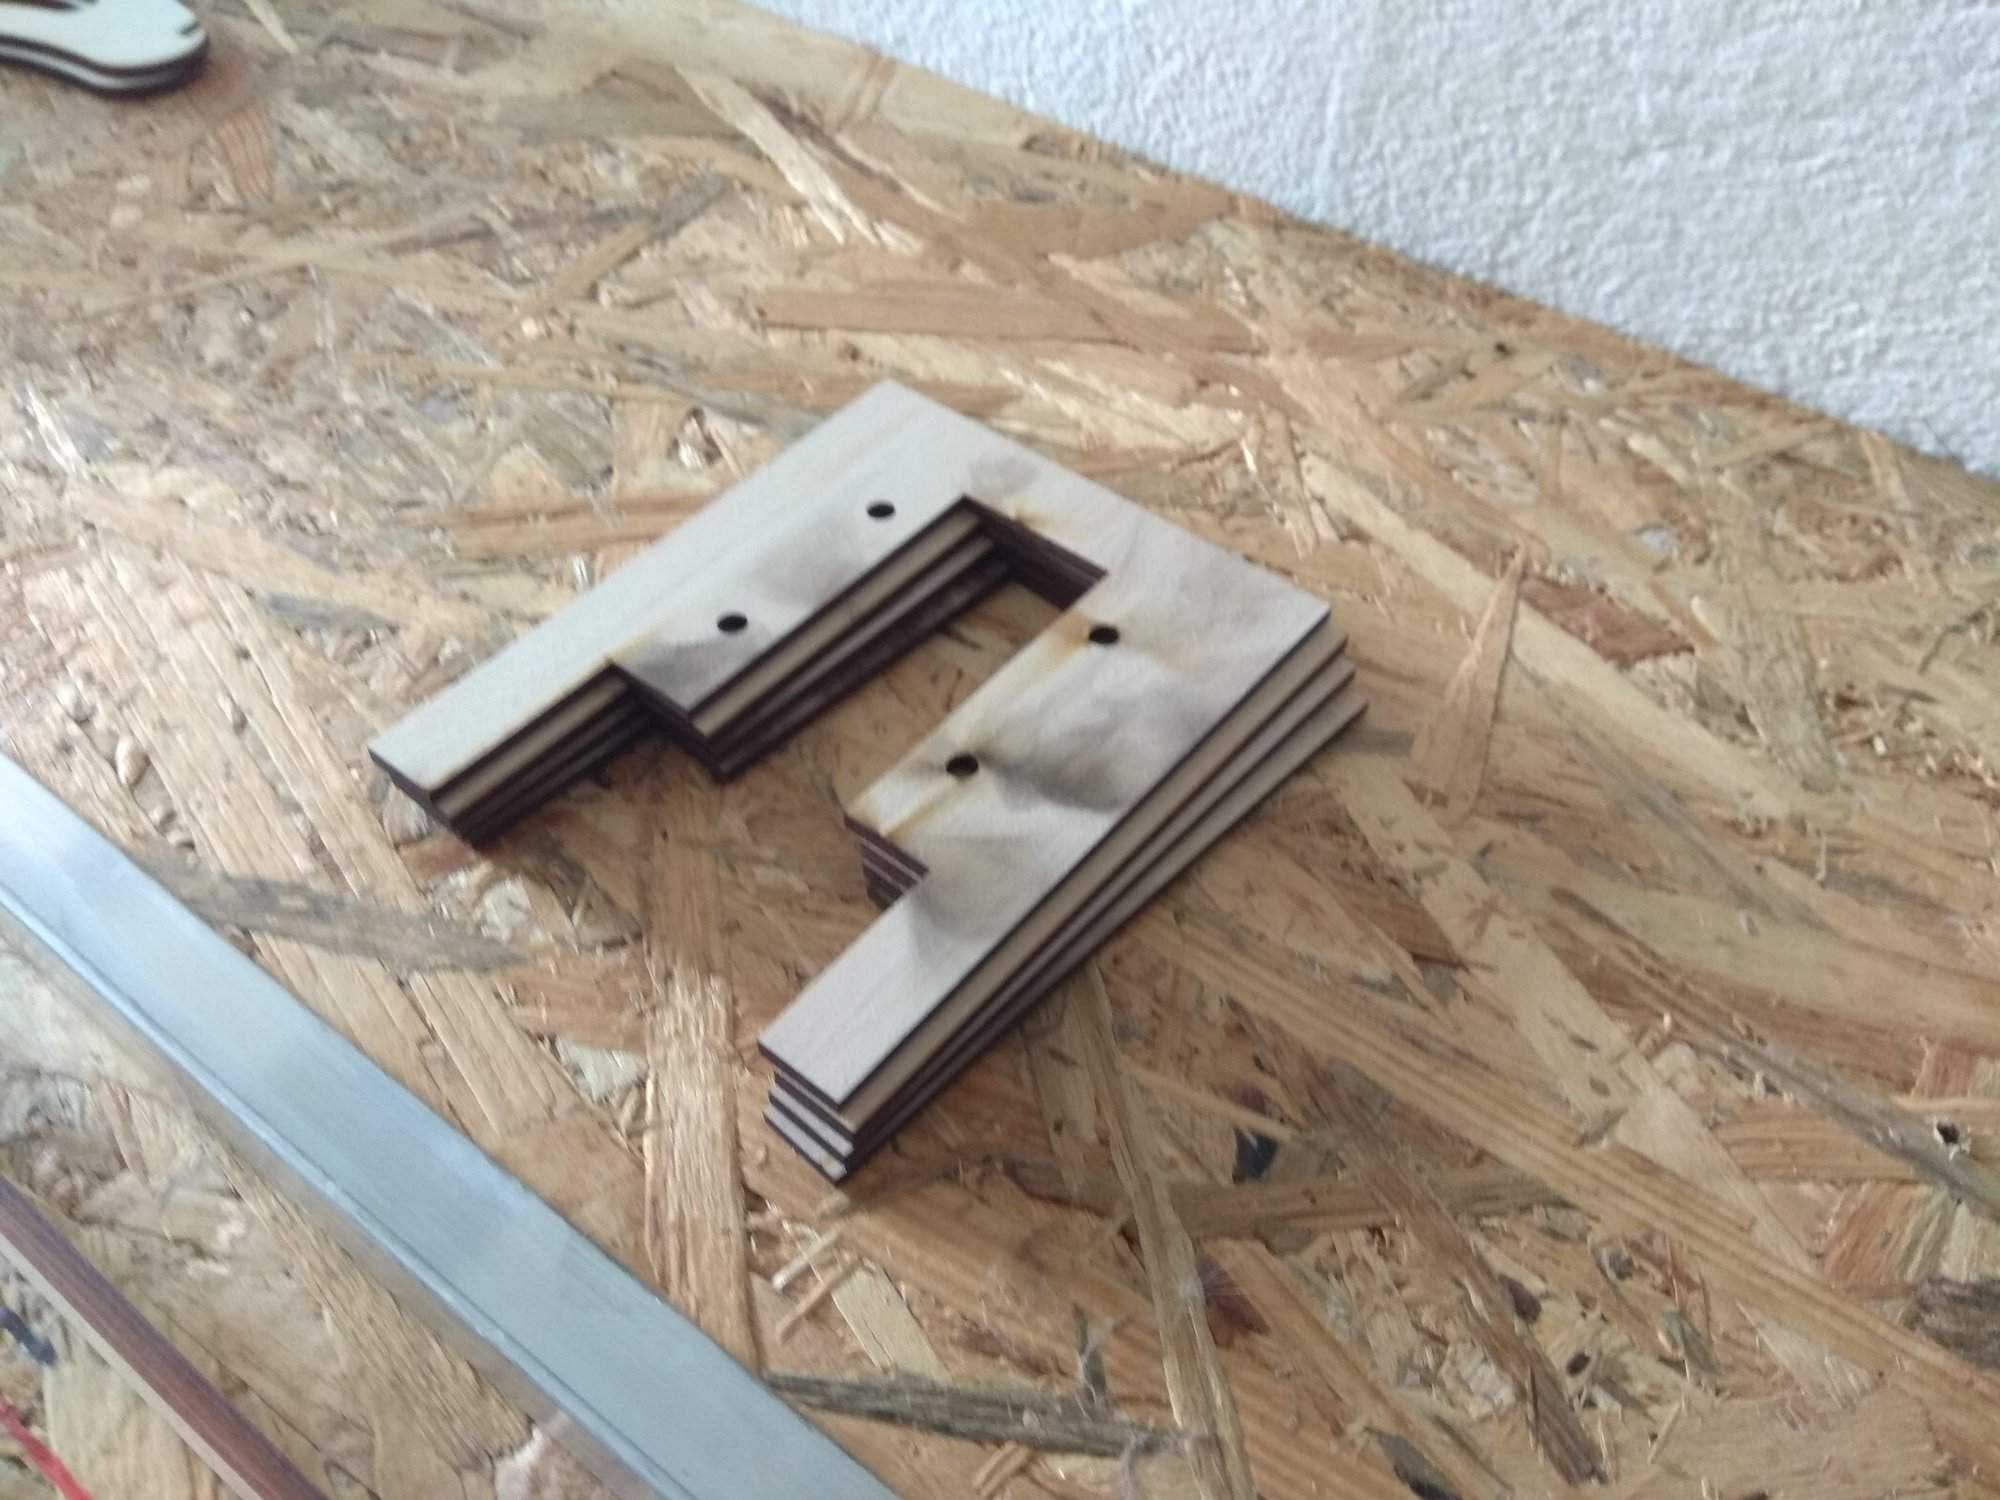
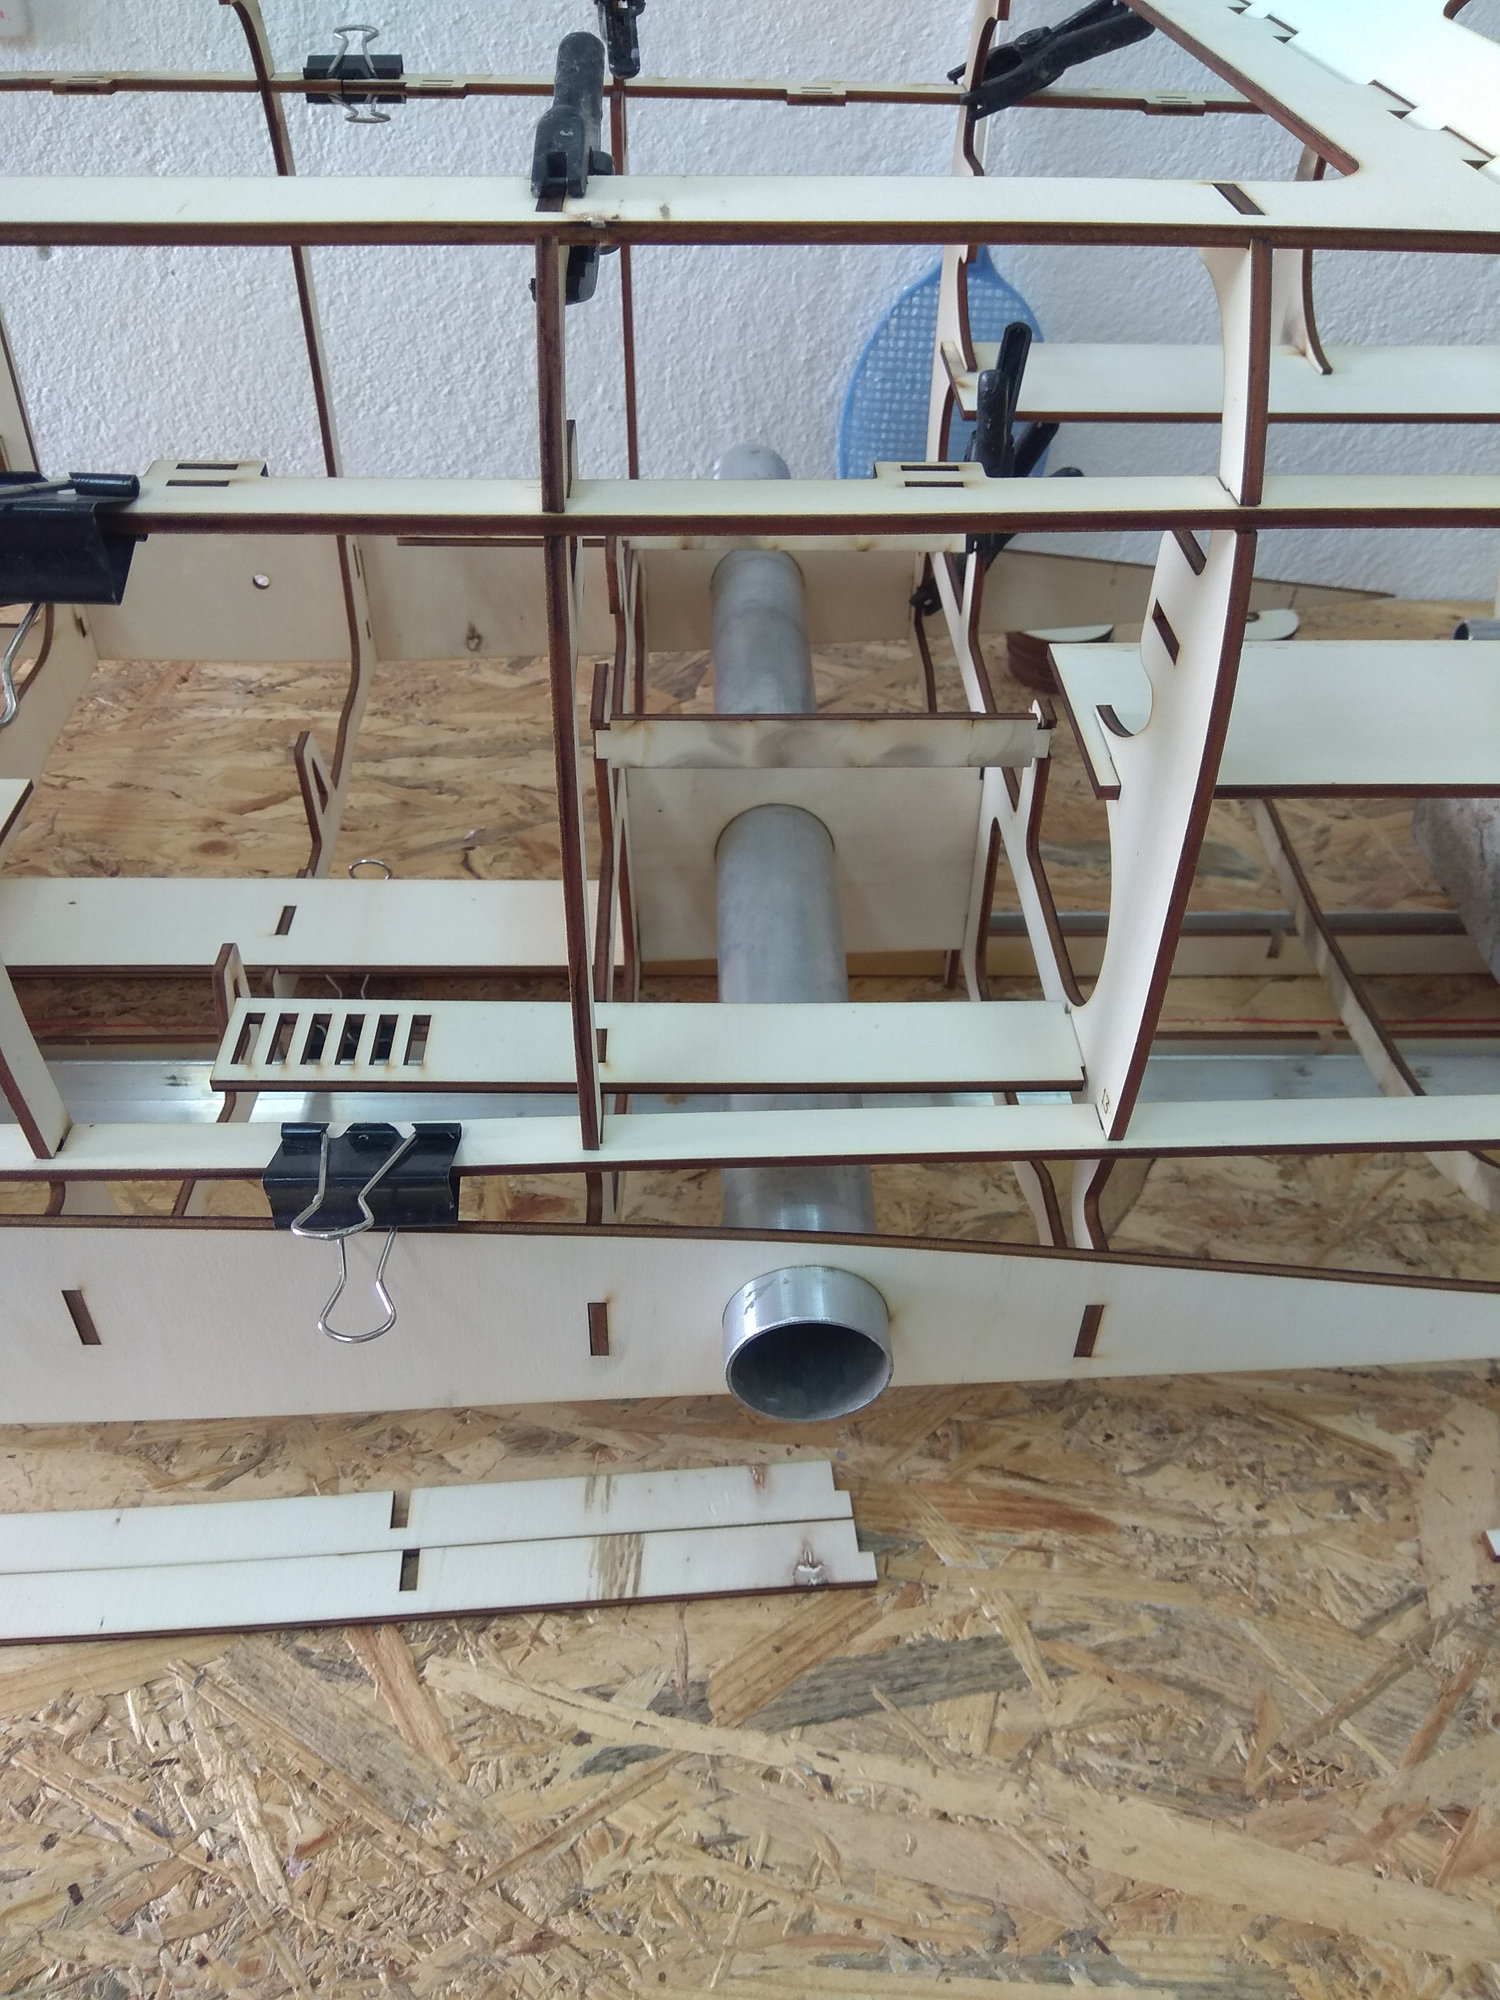
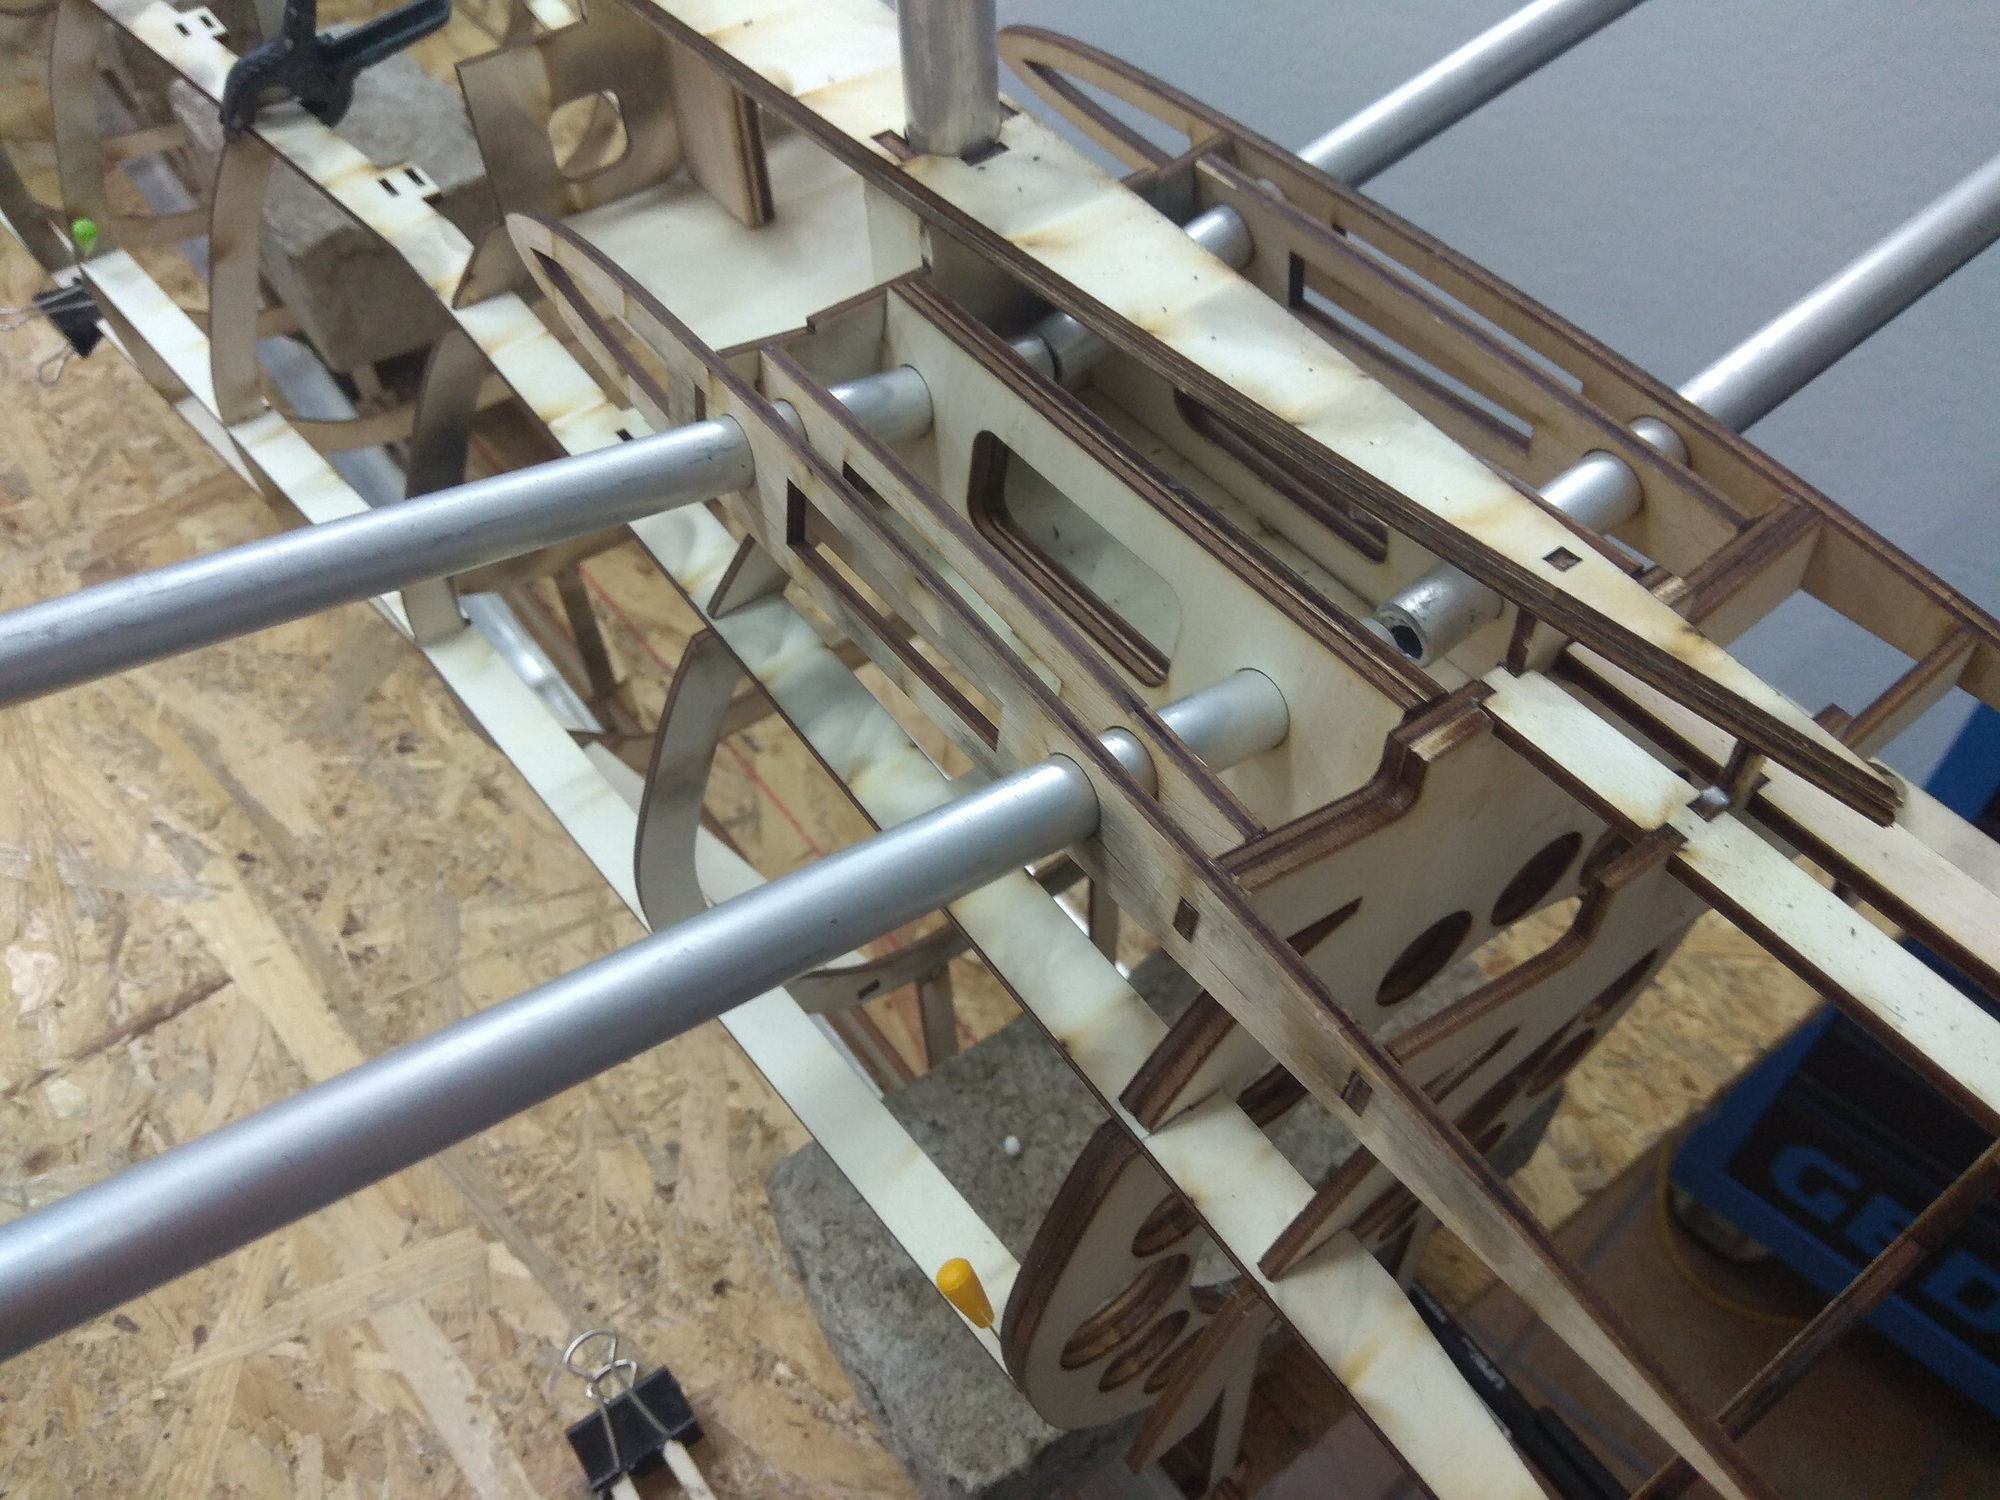
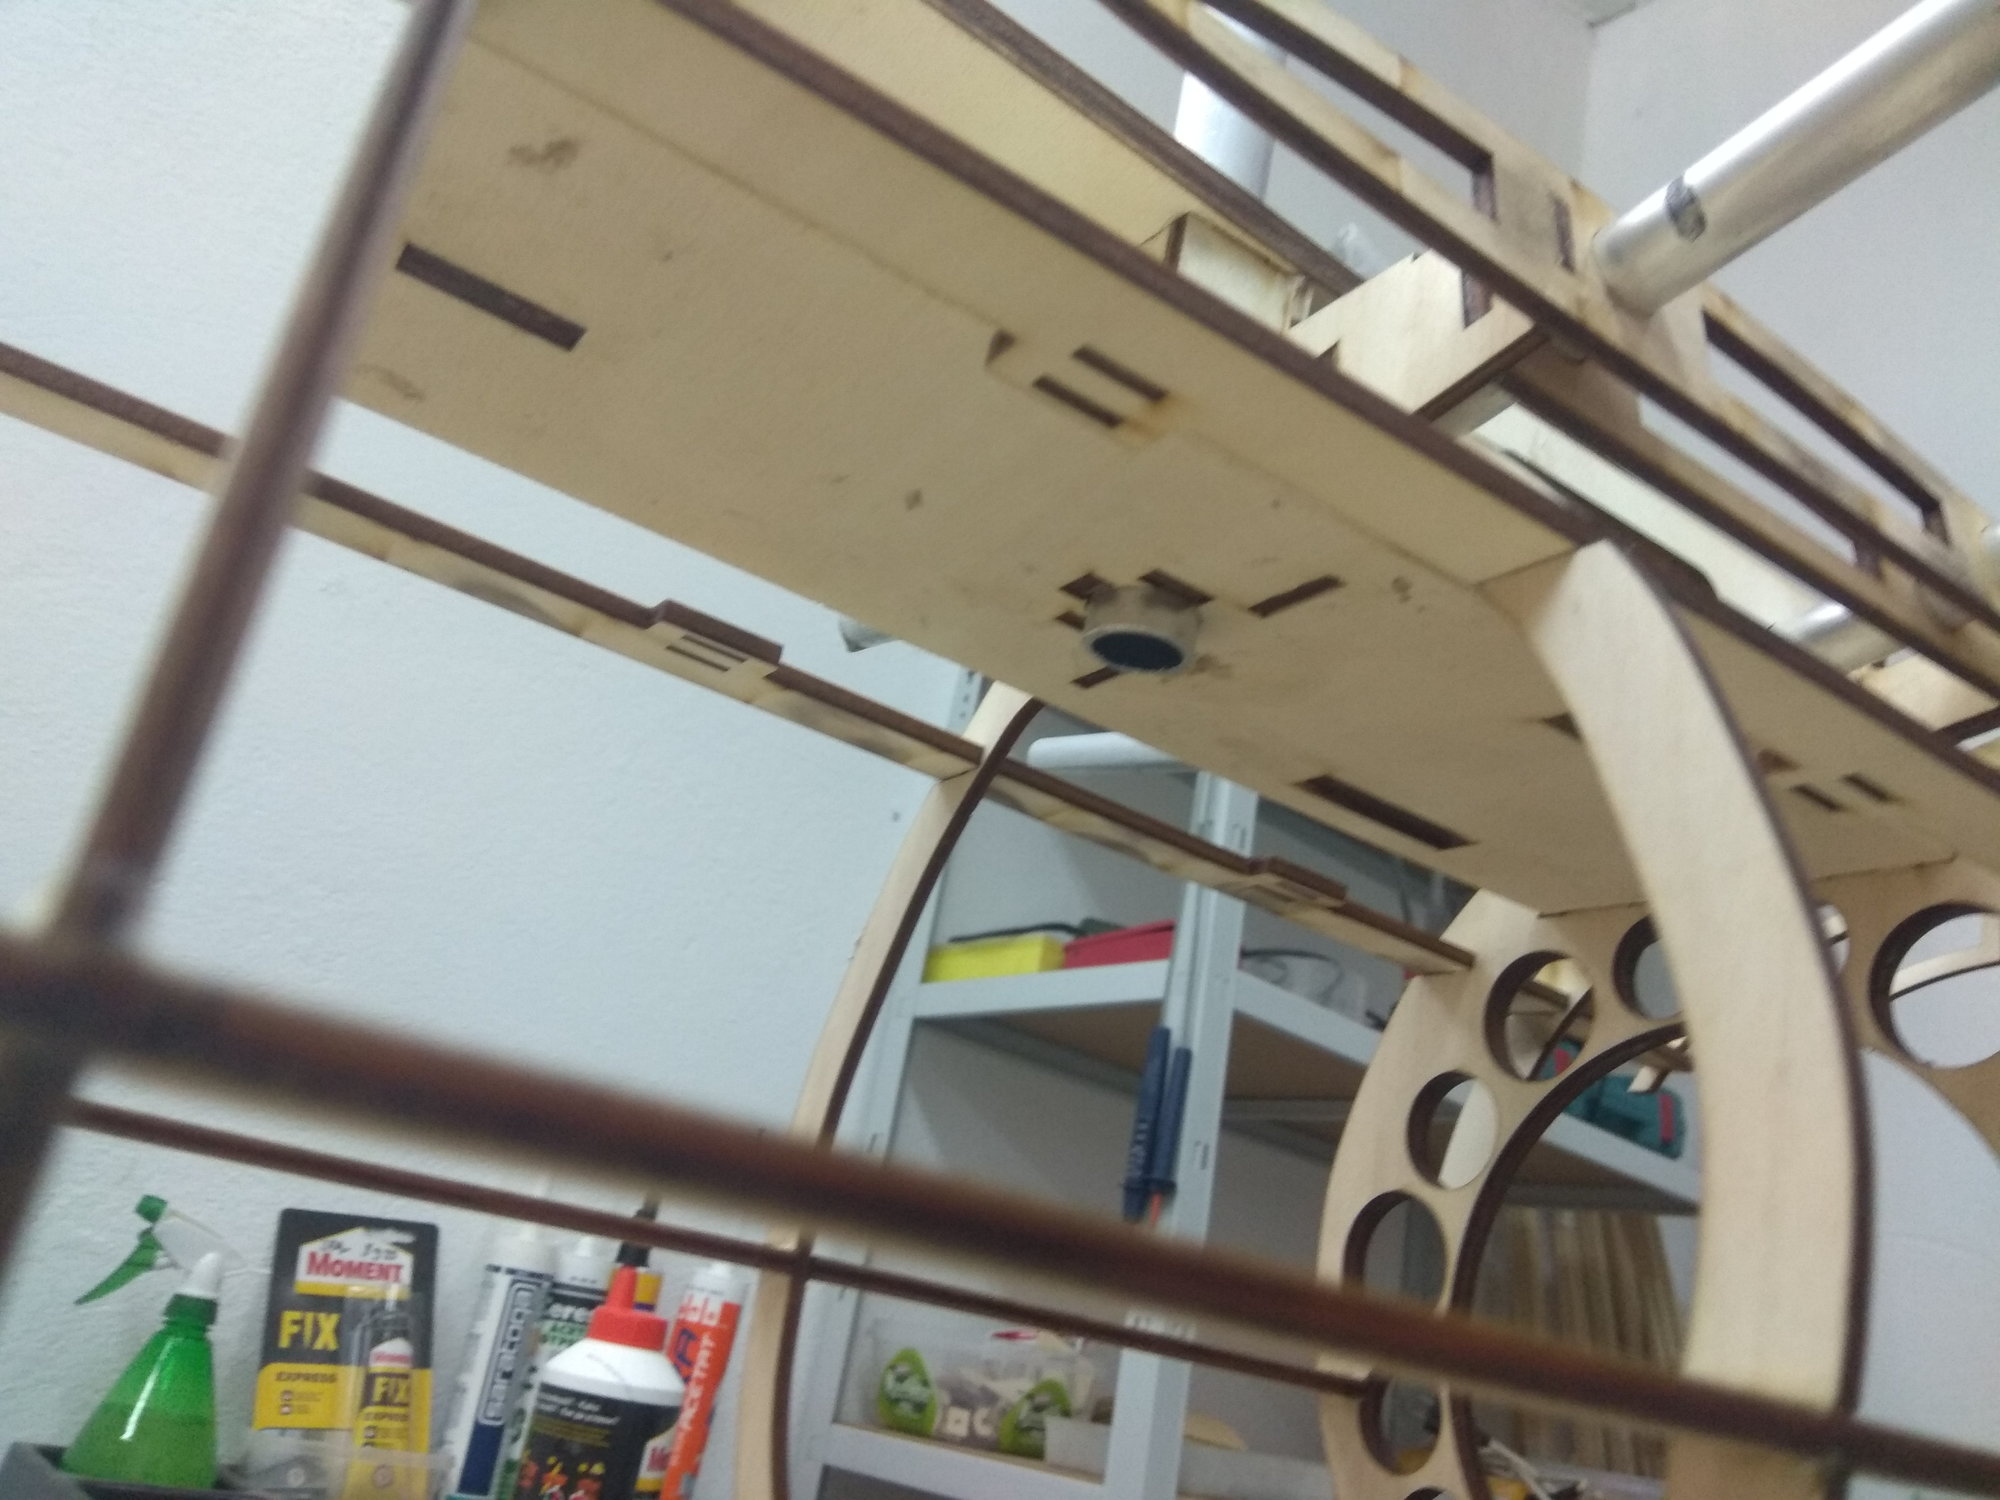
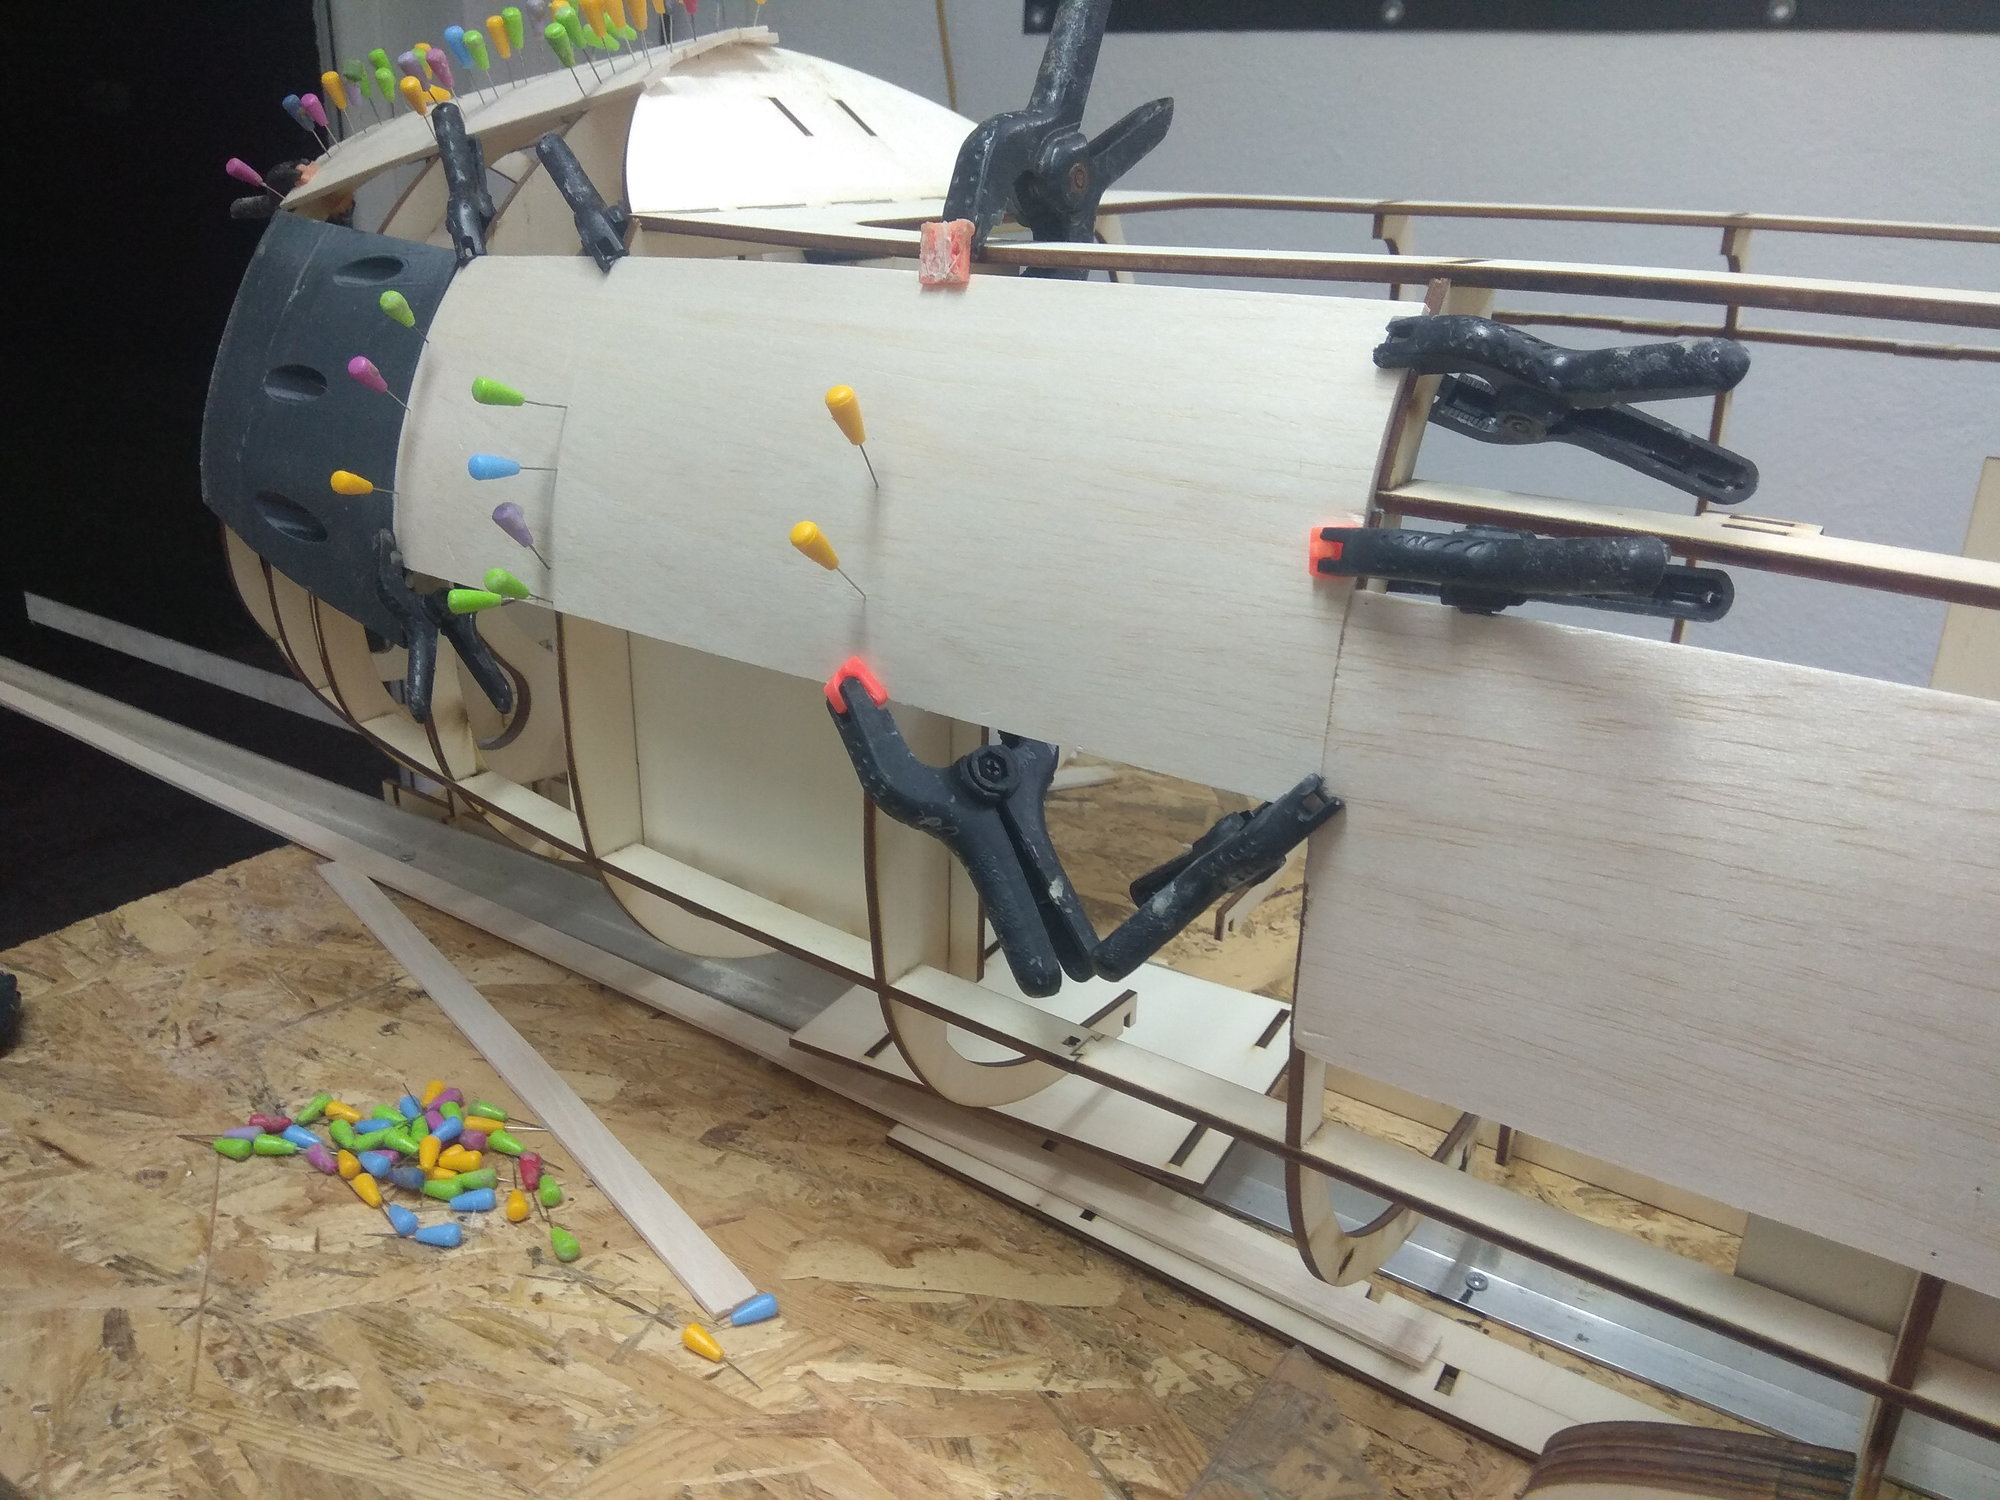
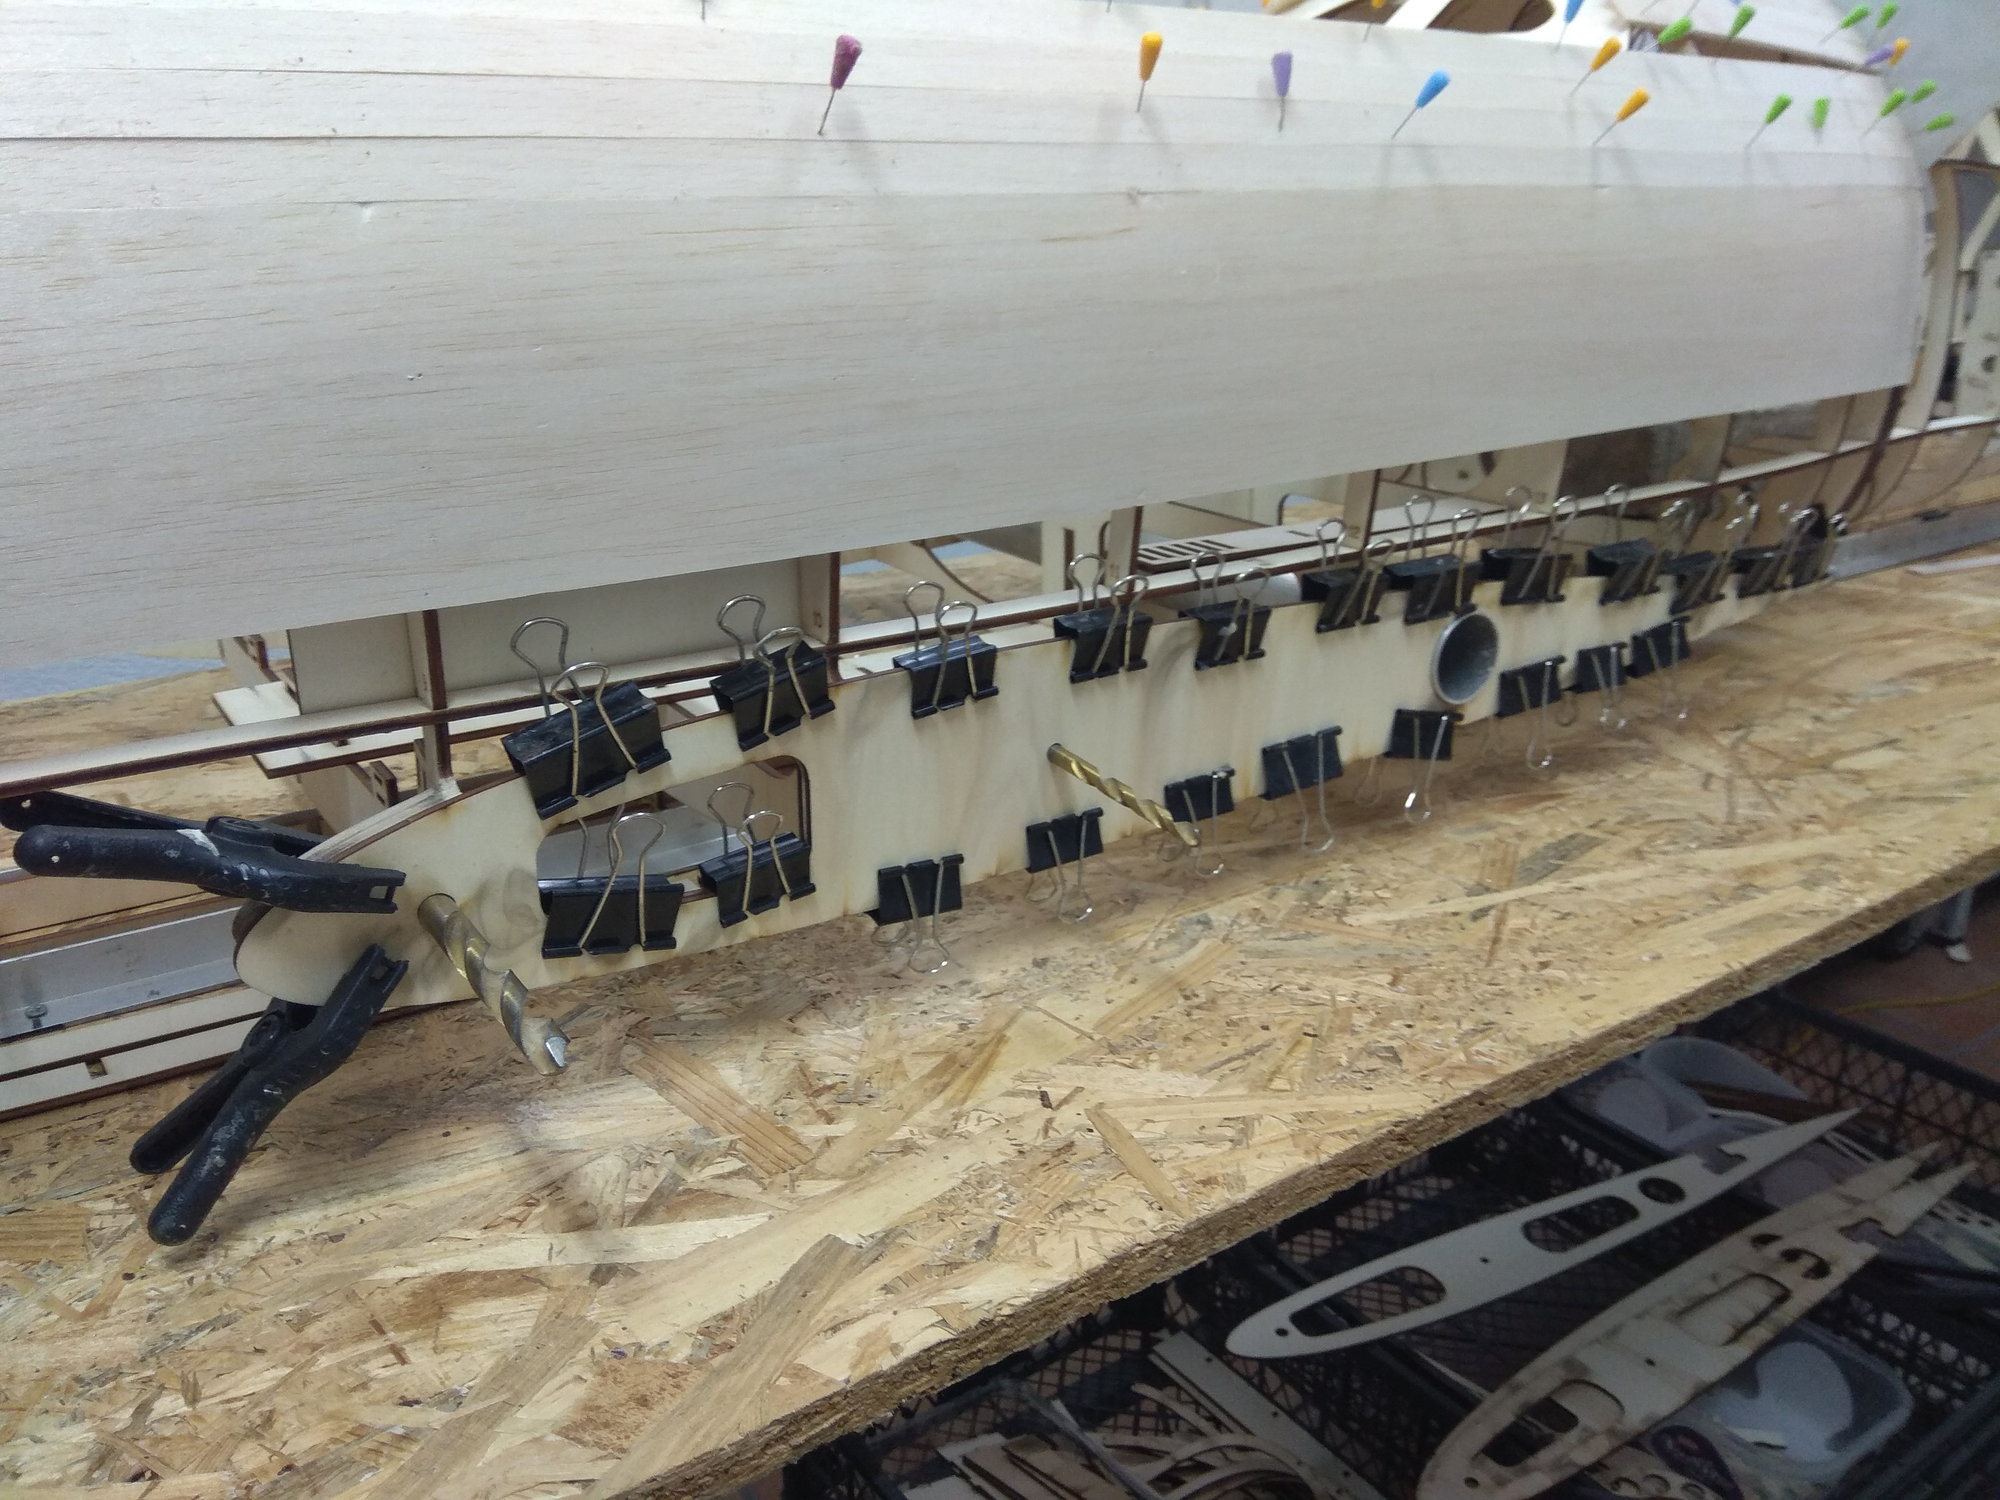
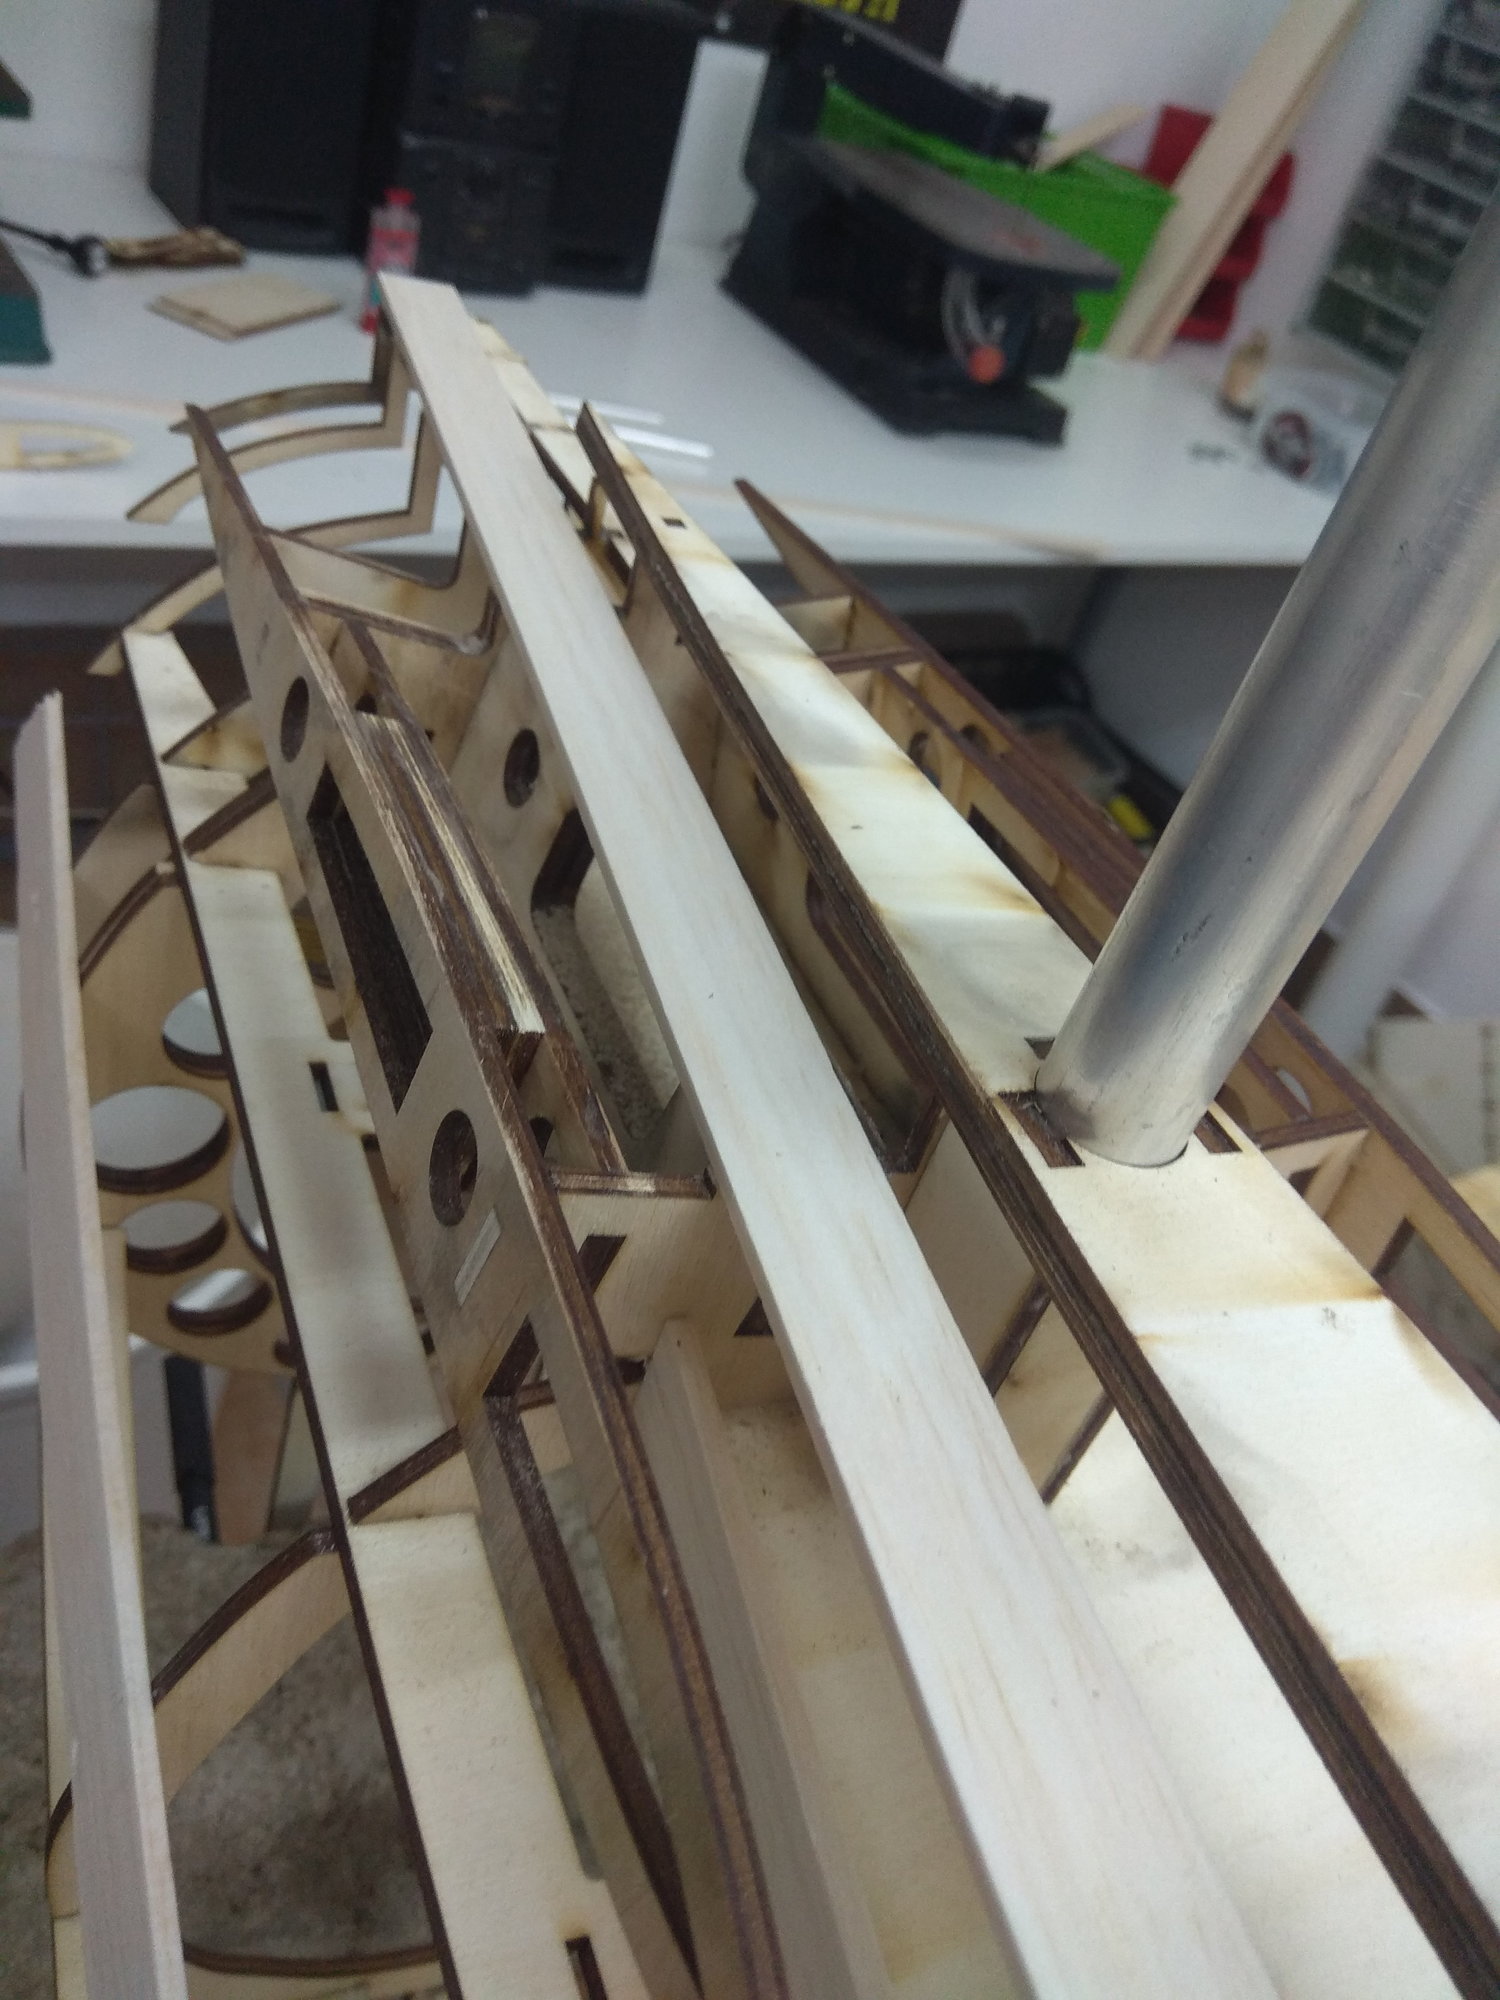
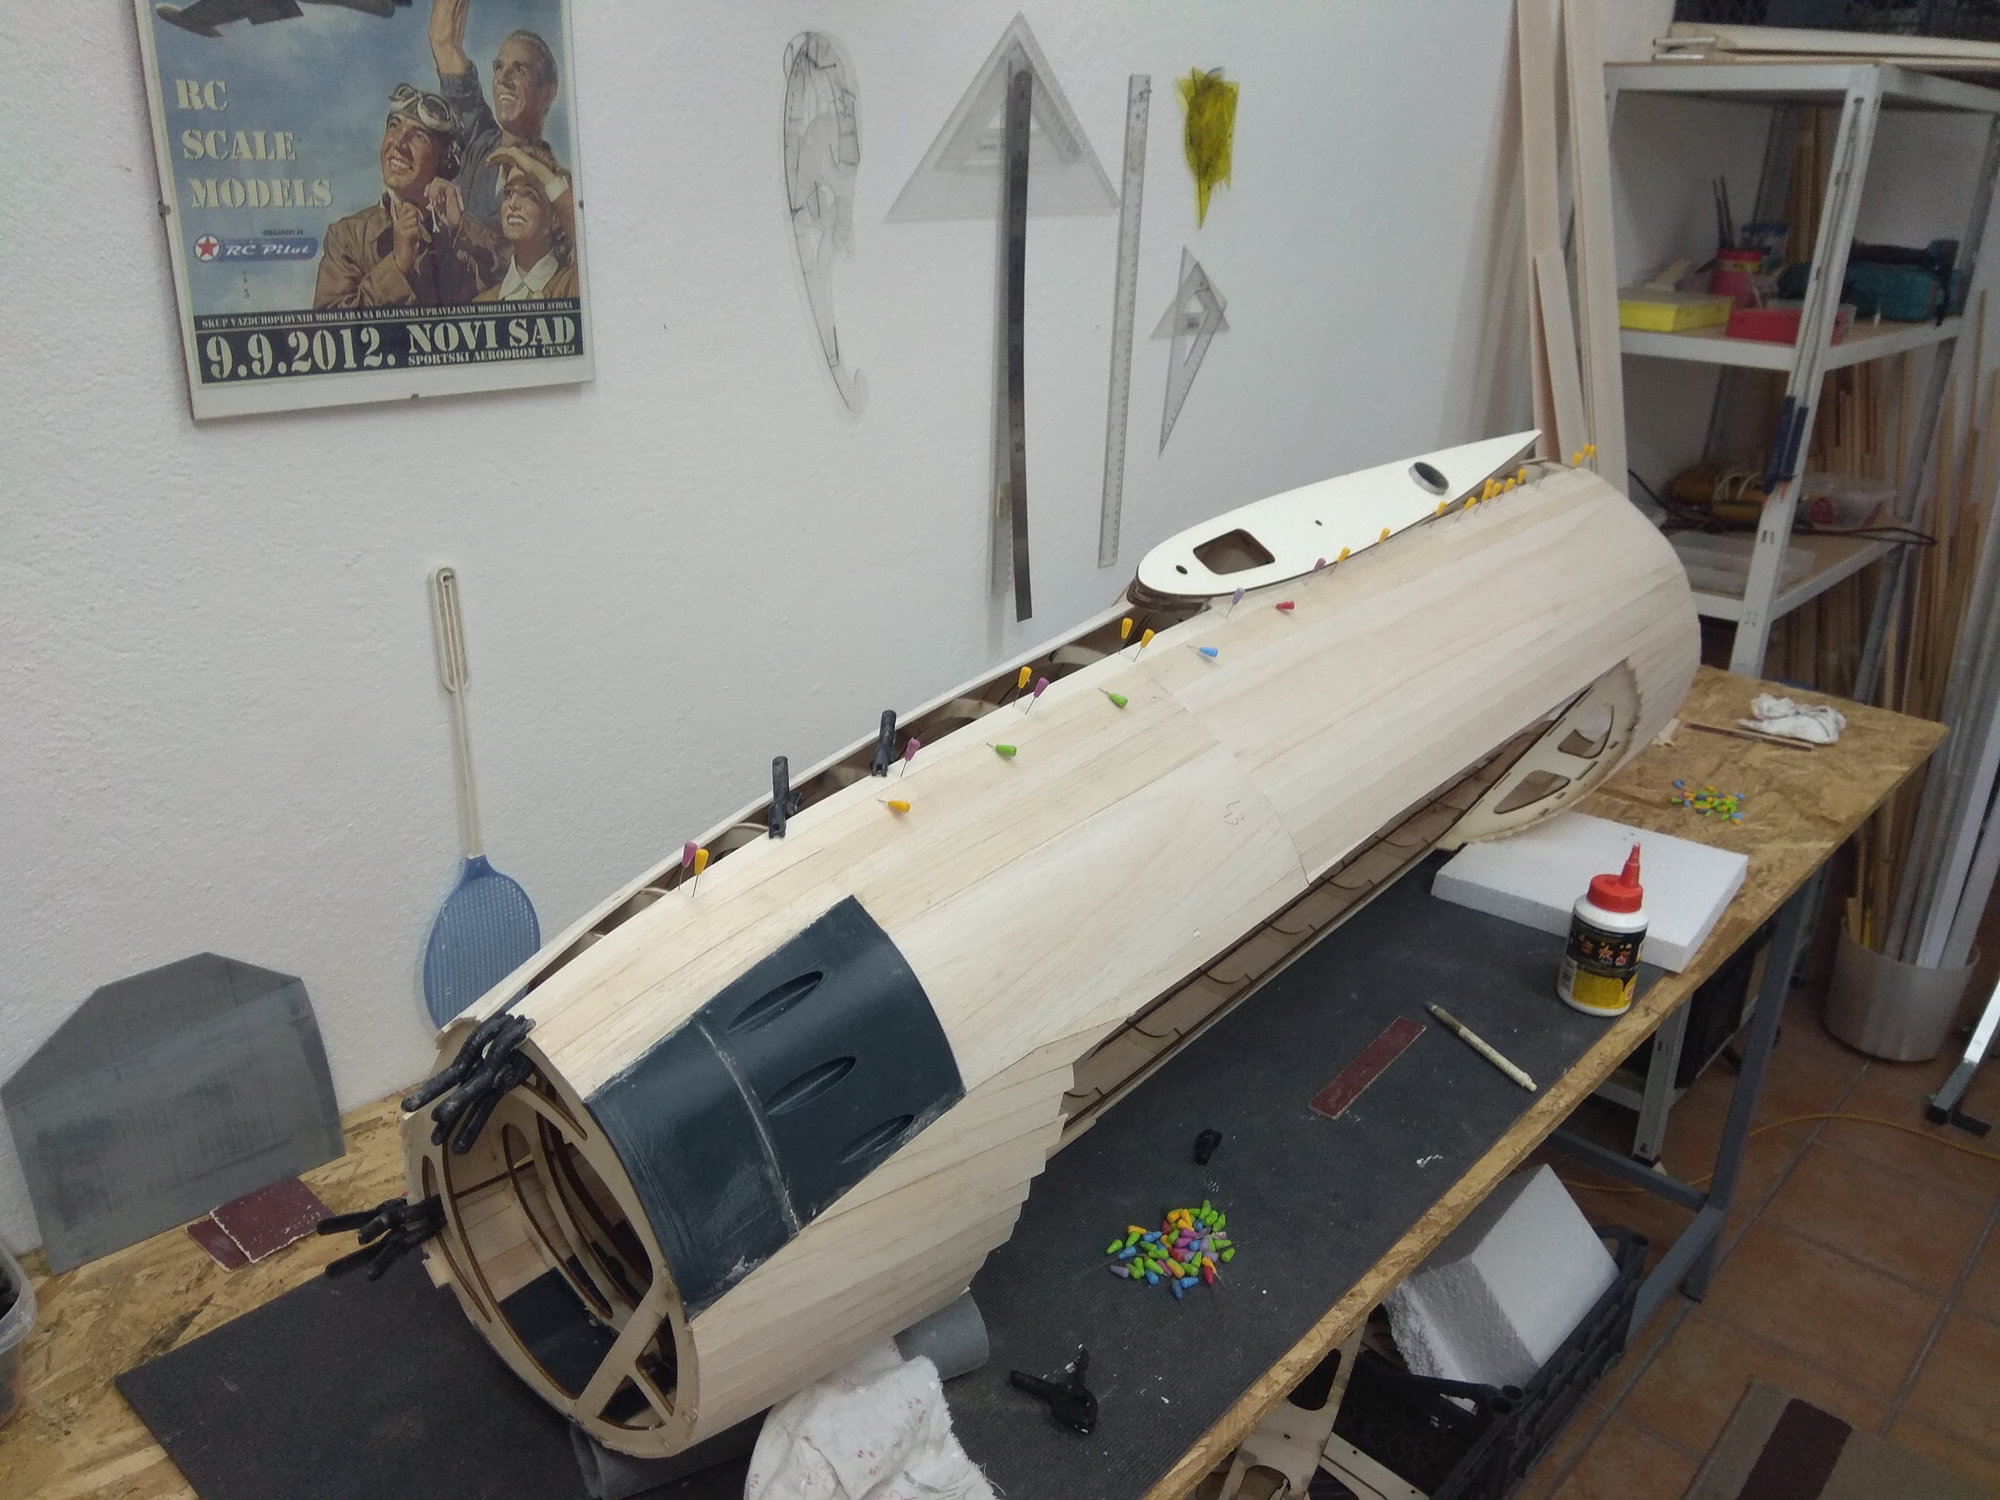
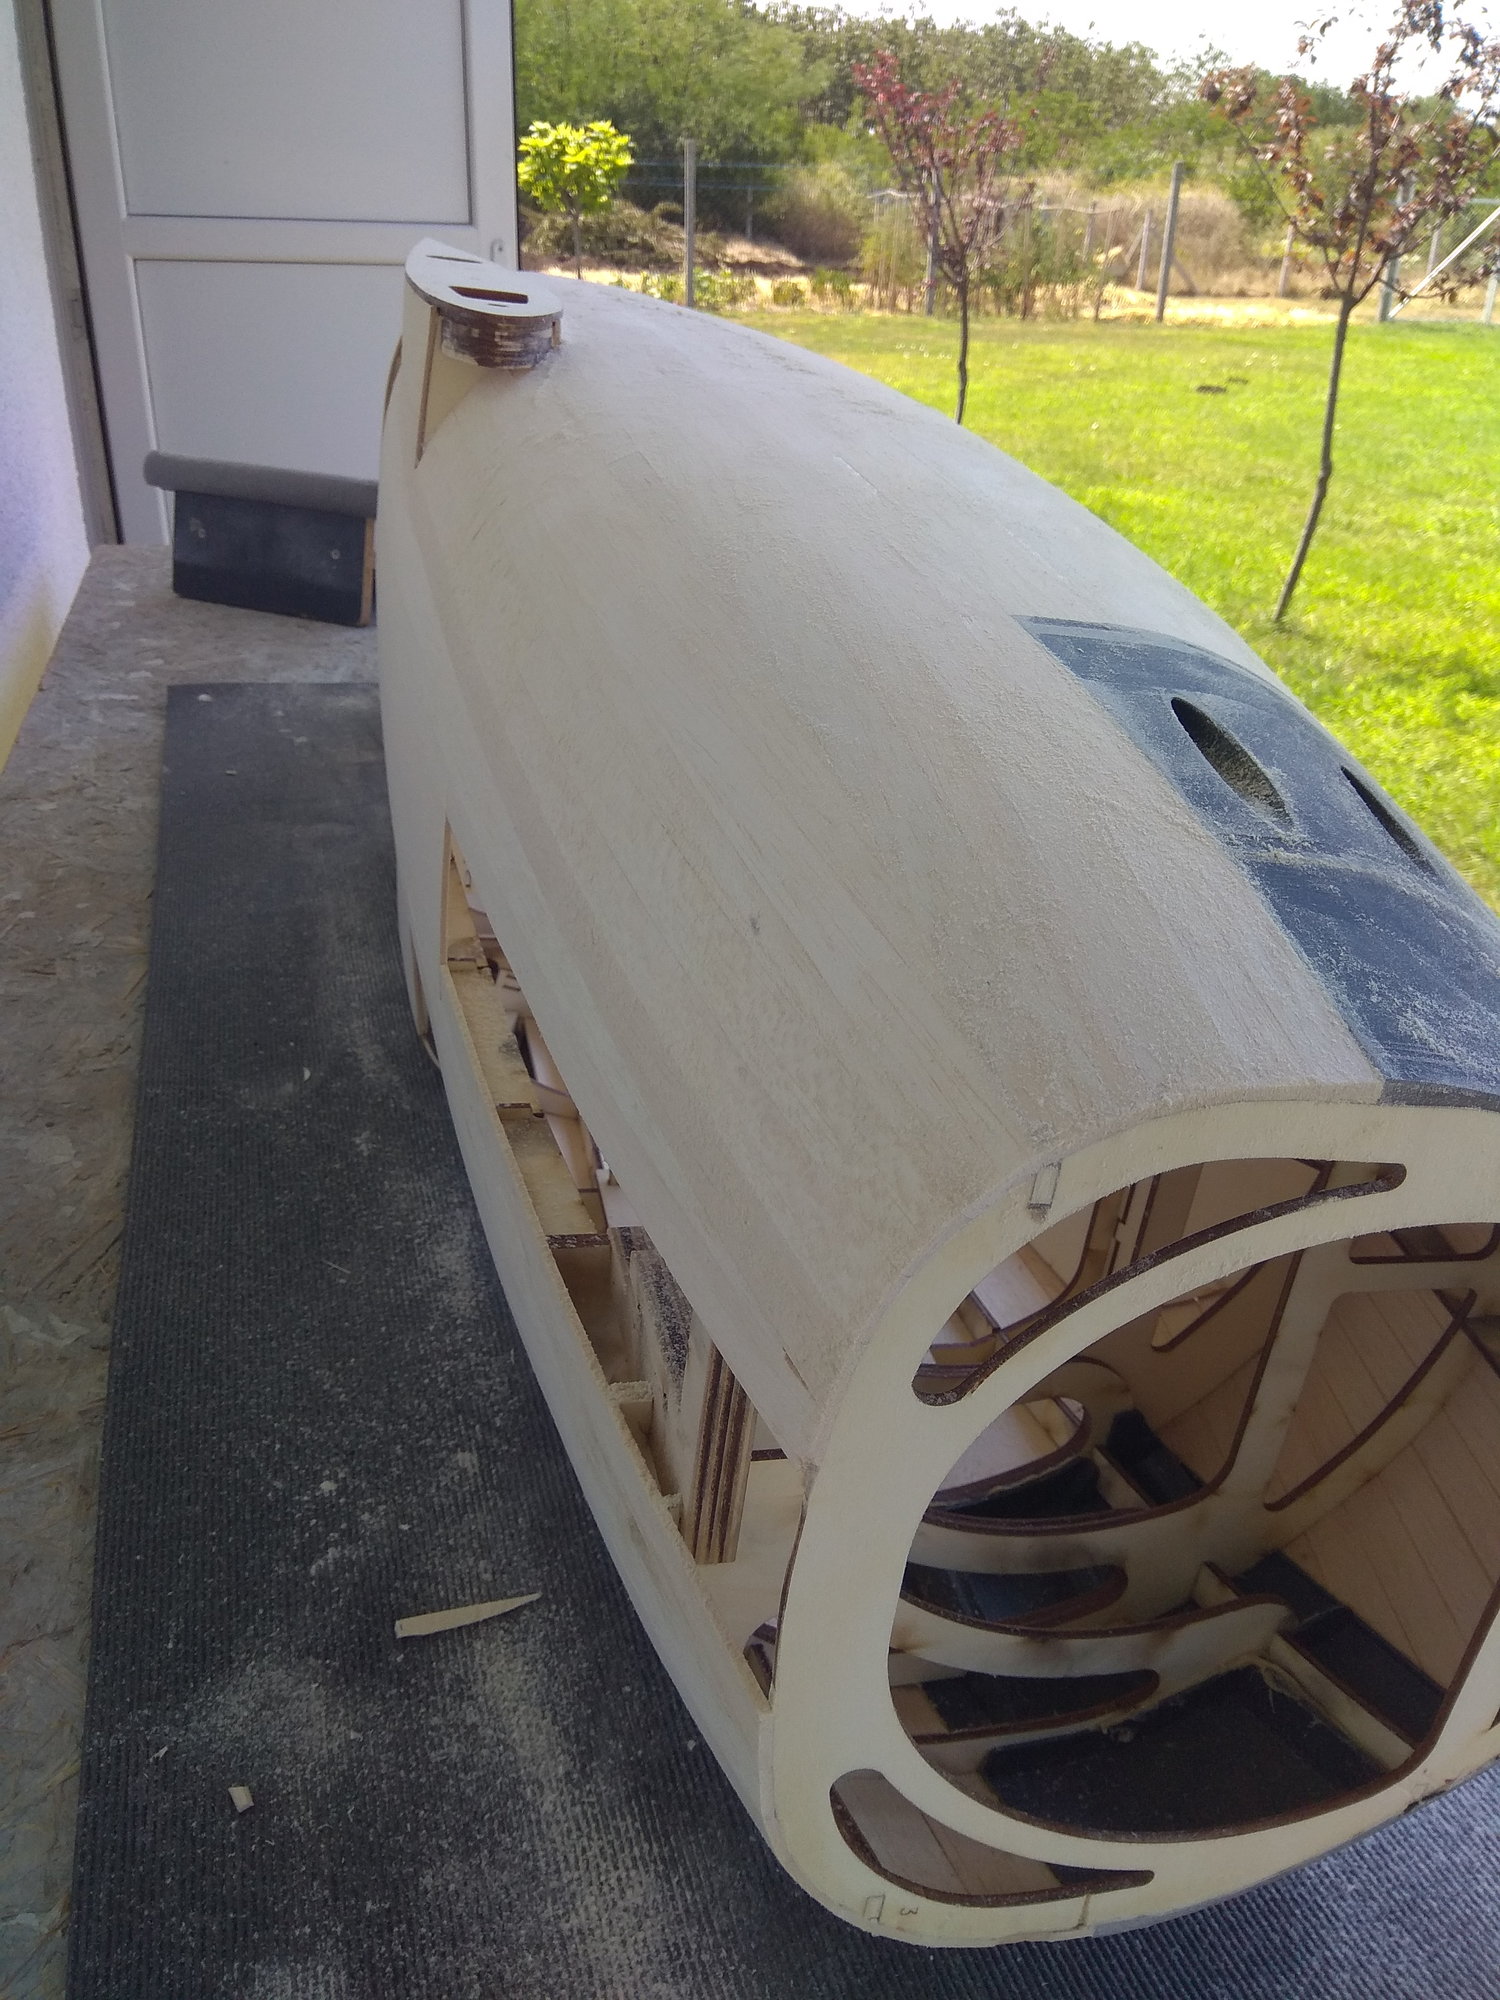
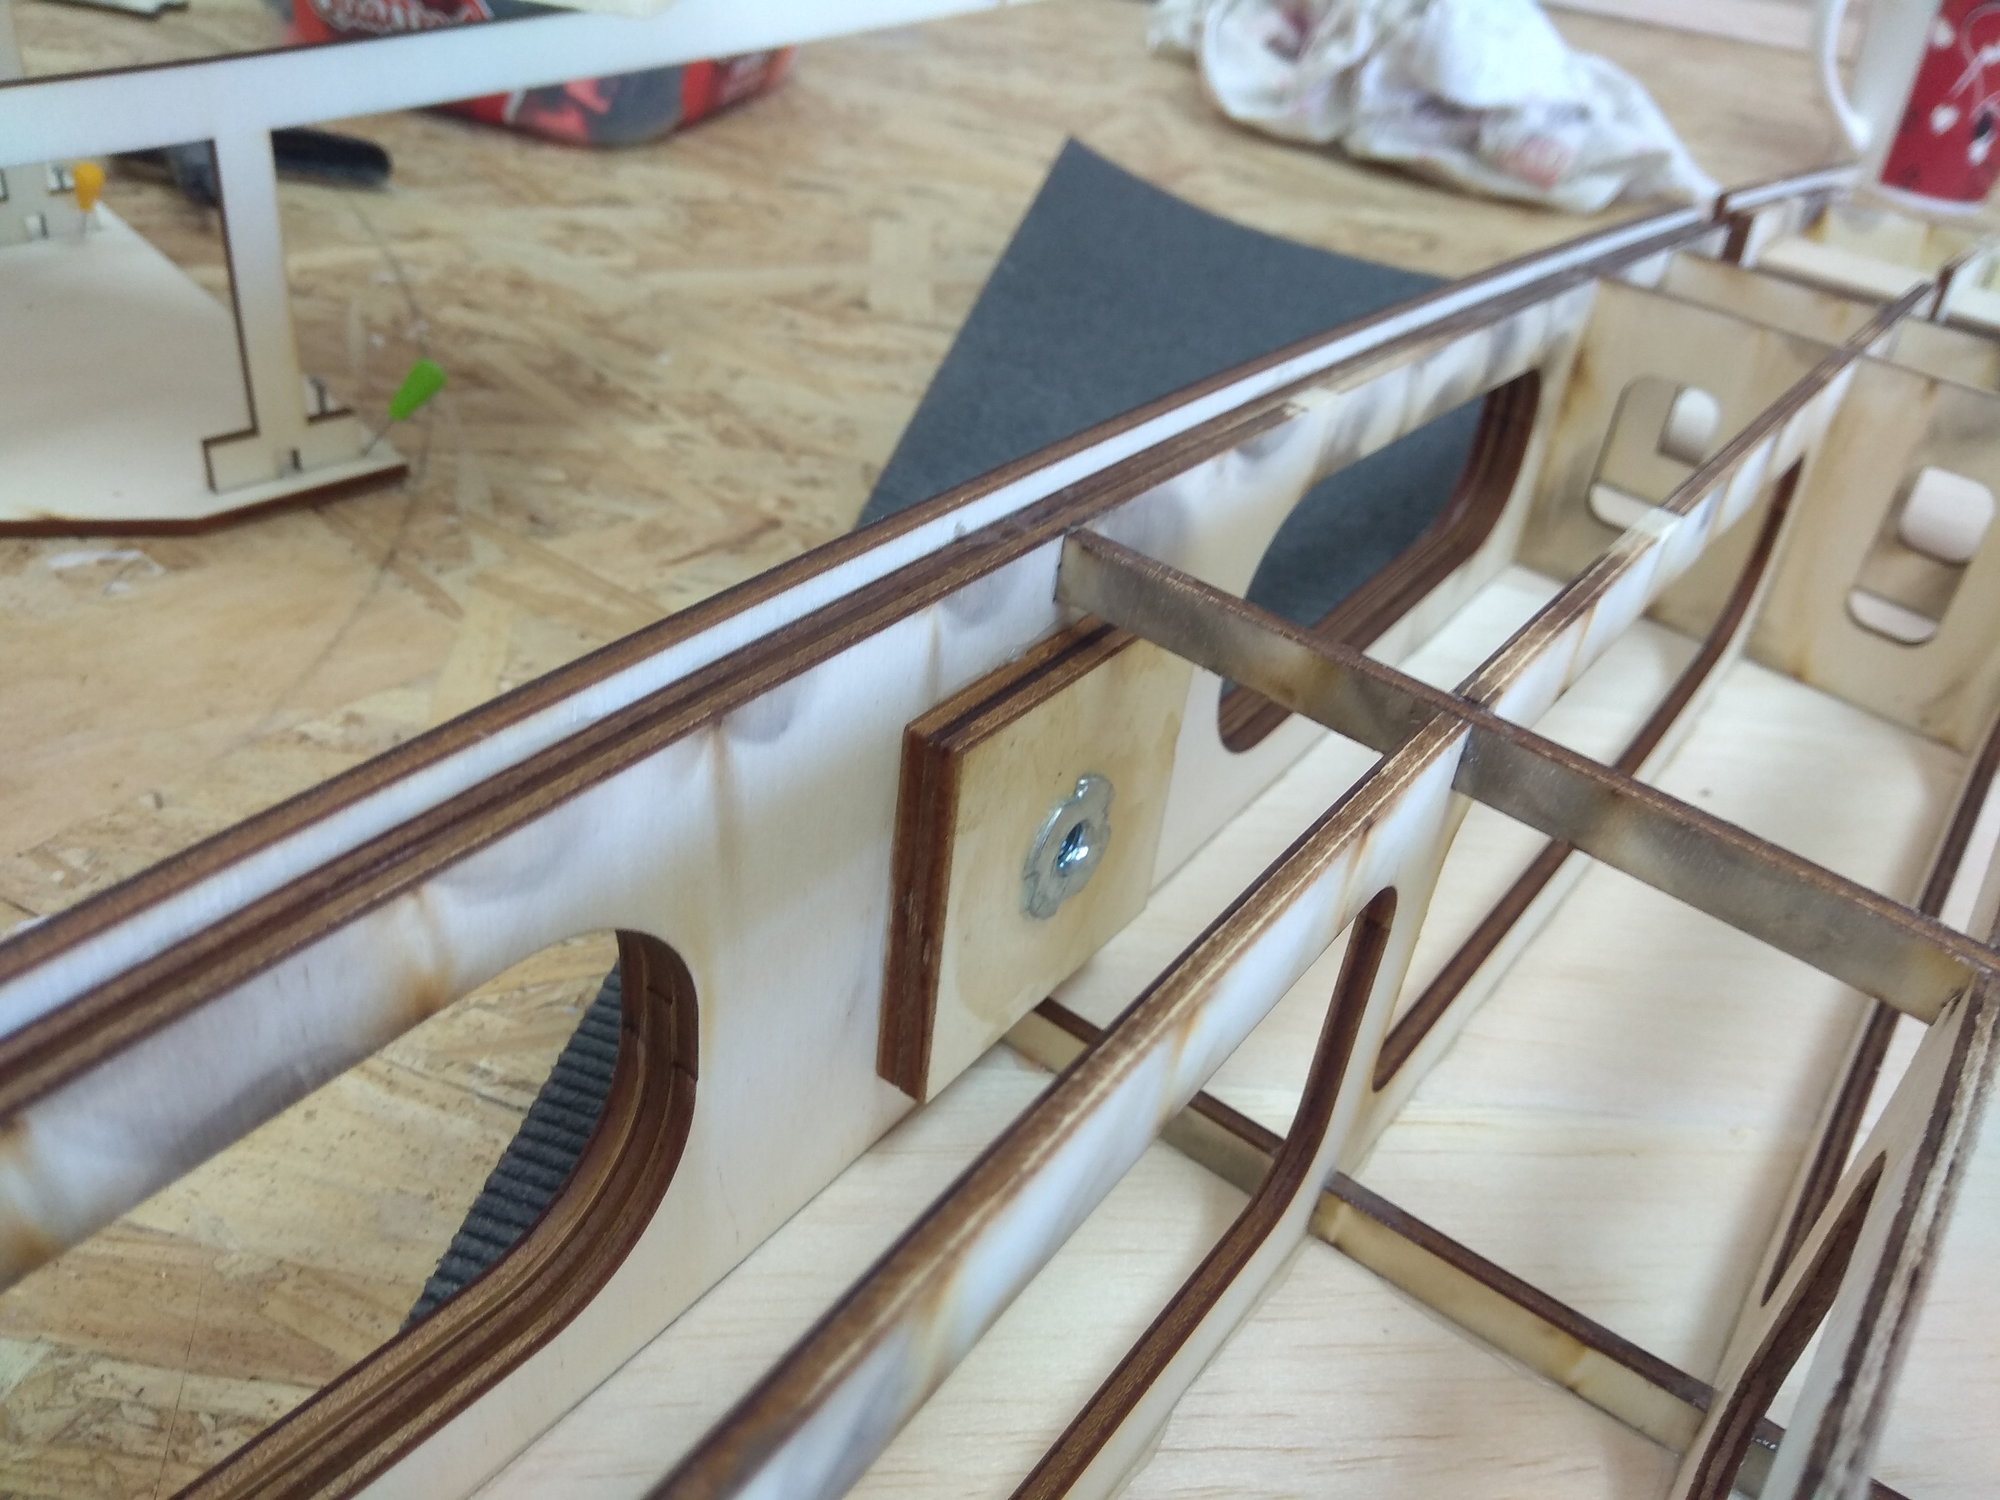
On the rear part of the fuselage, in order for it to fit nicely on the front, 16 mm tubes are glued, which serve as guides when assembling and strengthen the joint, as well as 4 pieces of the 6 mm nuts, which tighten the two parts.
After that I assembled both parts and the rear part of the fuselage was also planked.
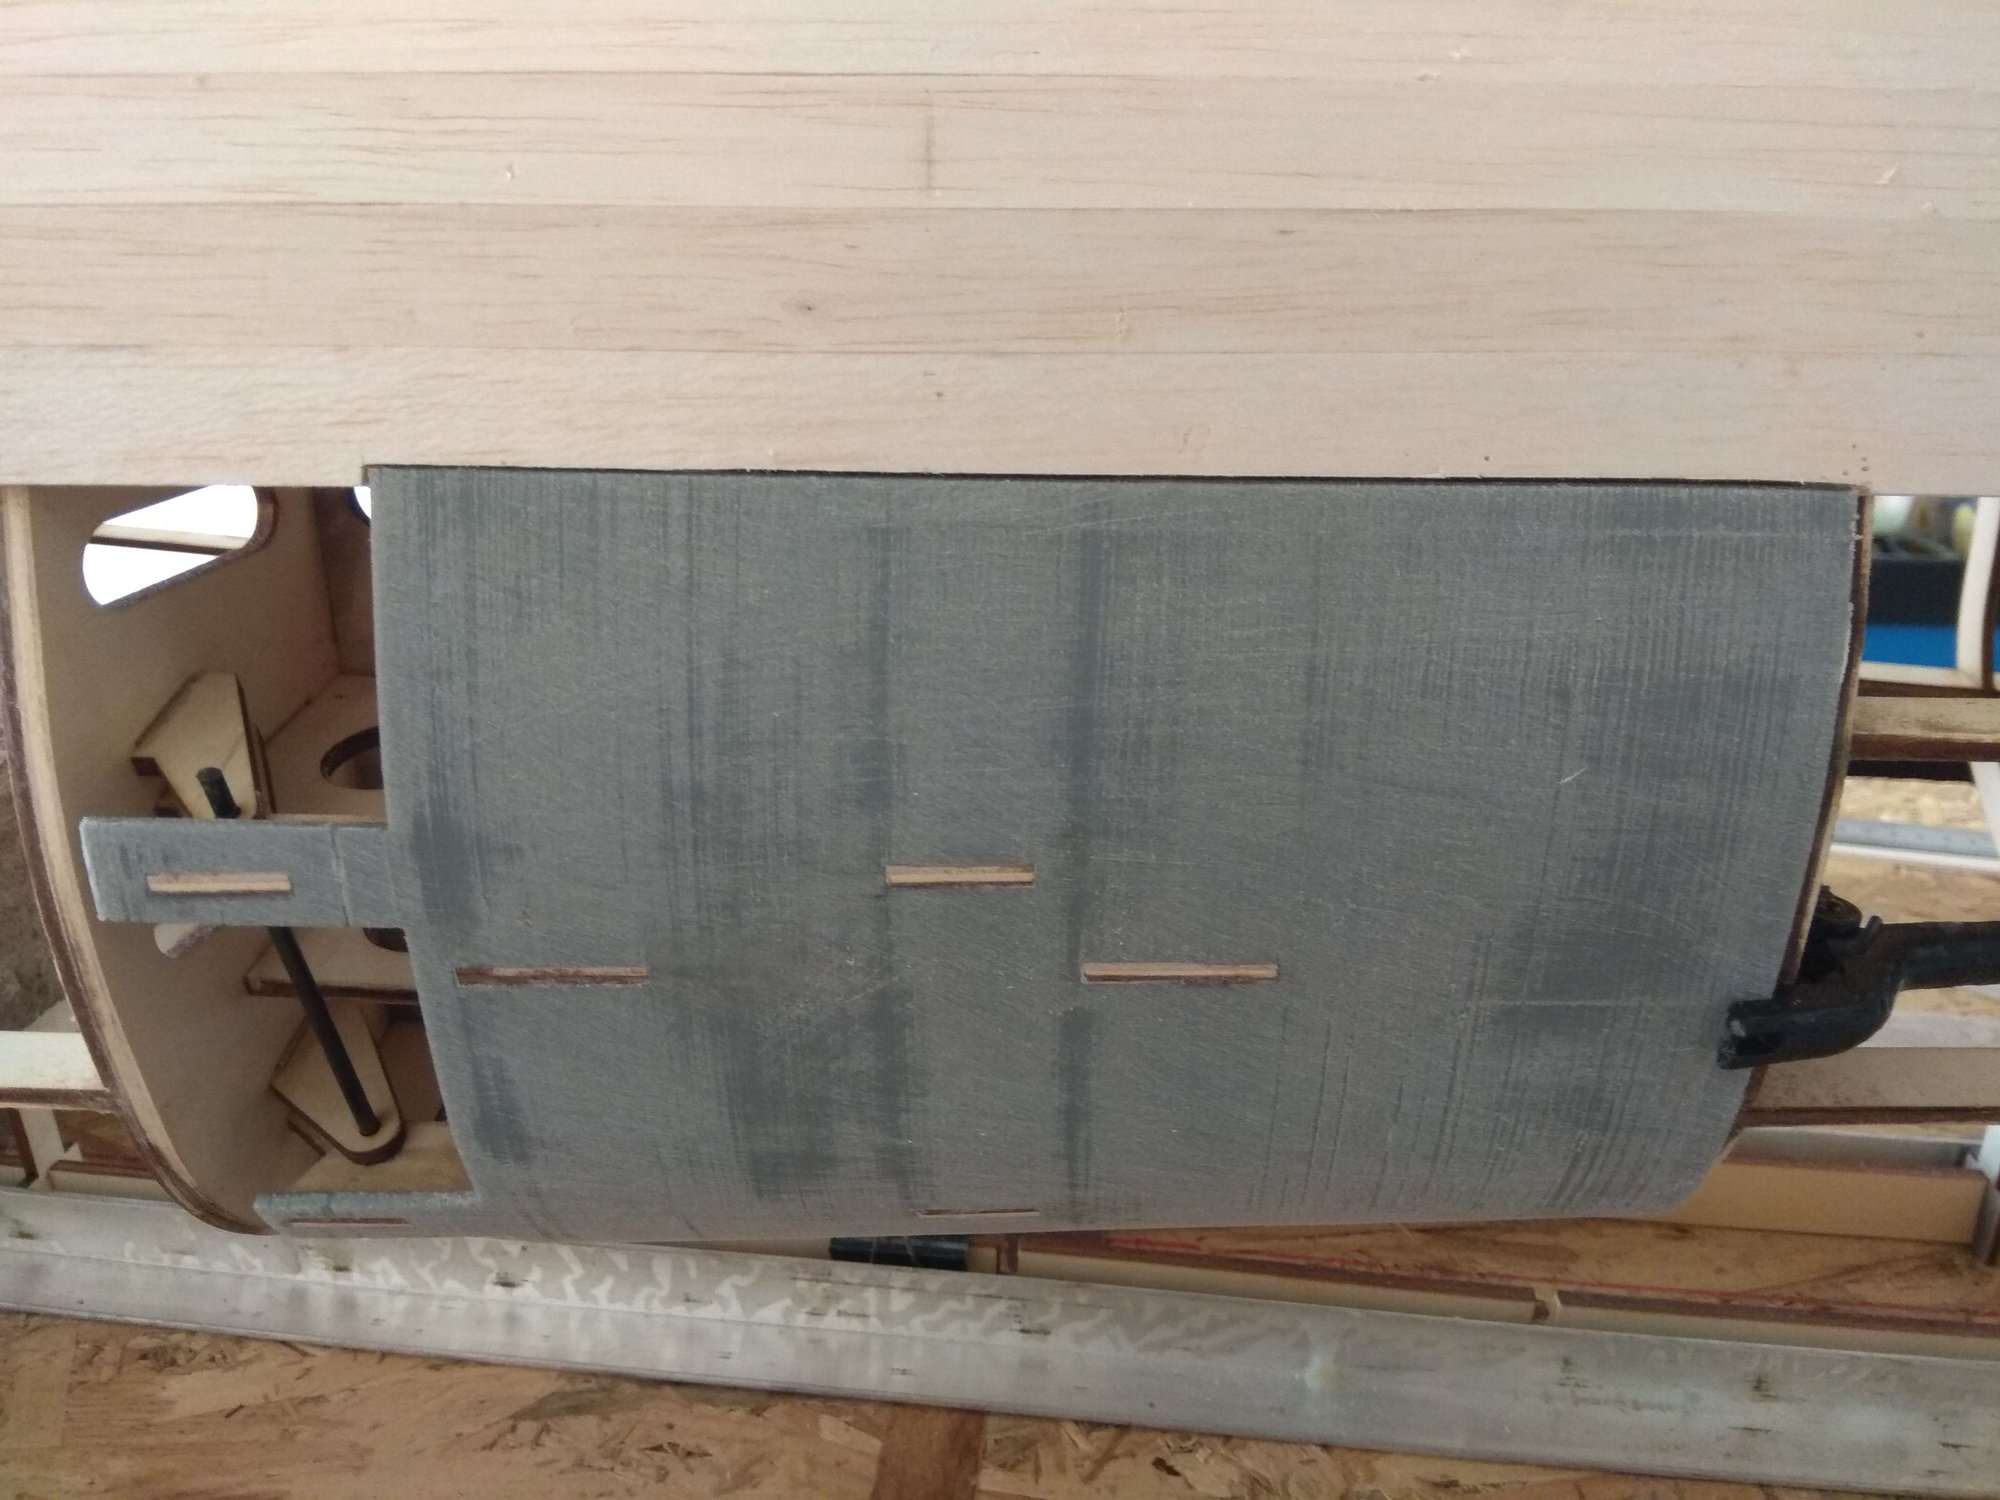
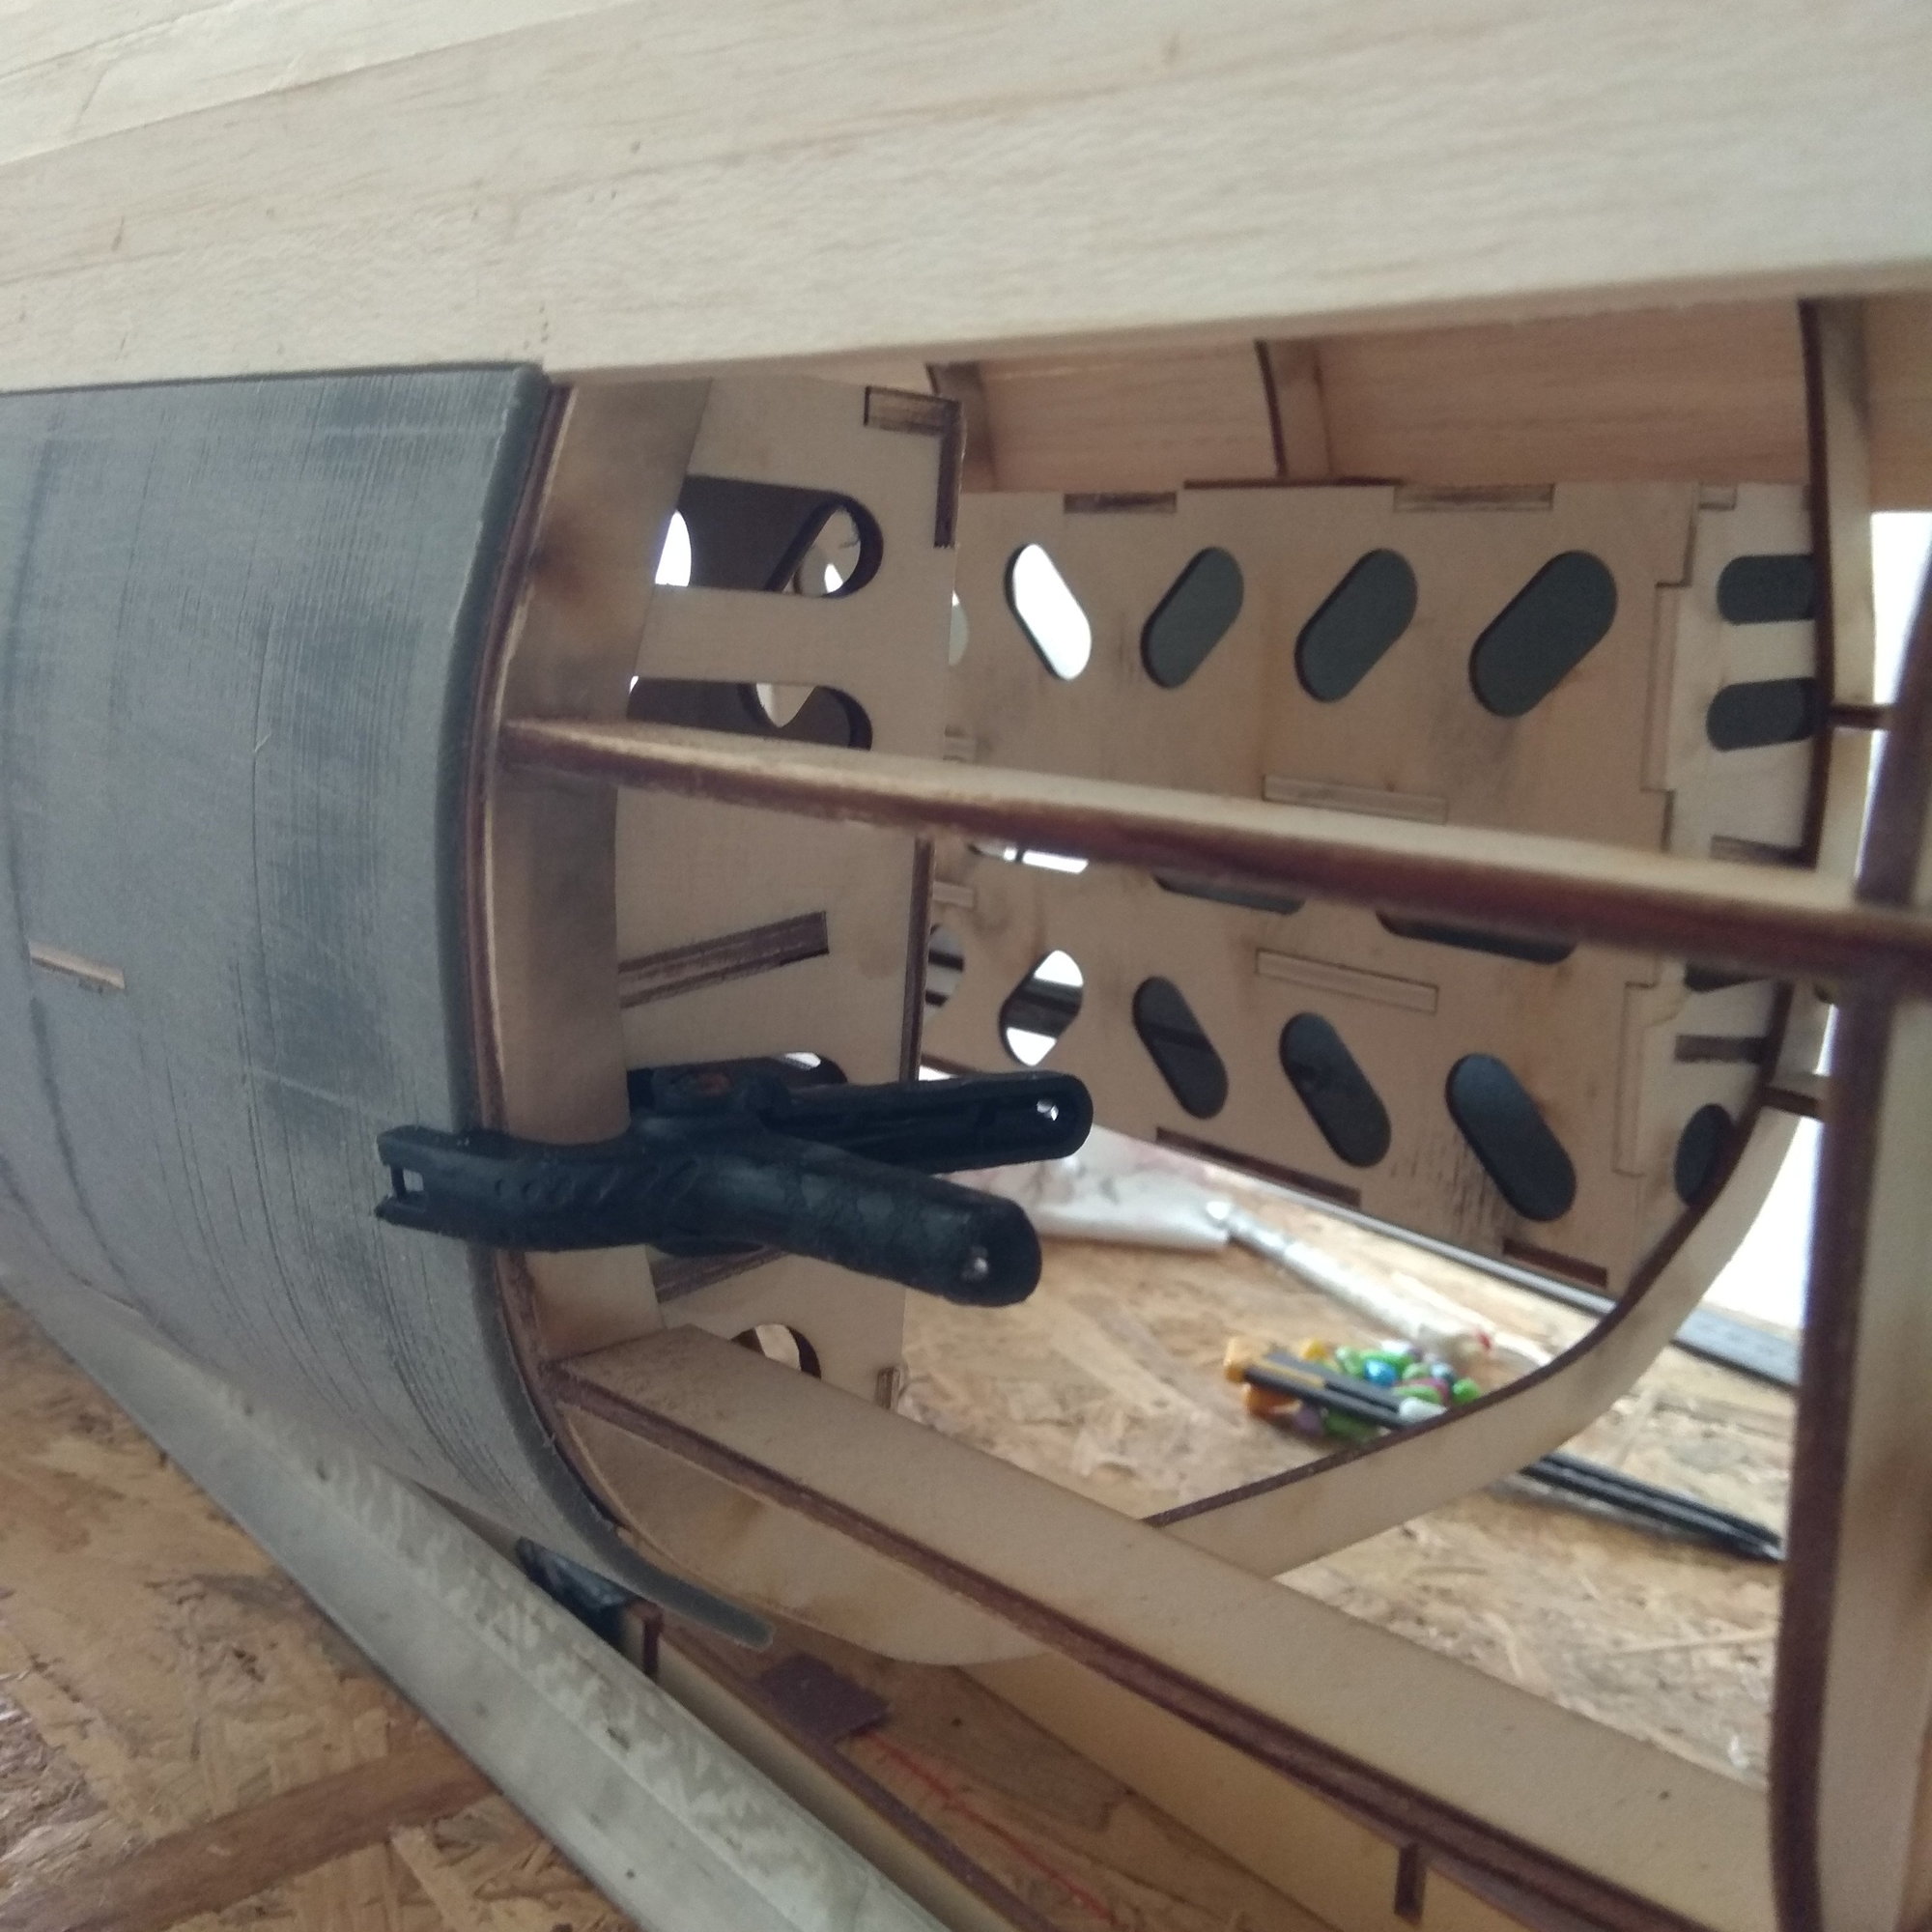
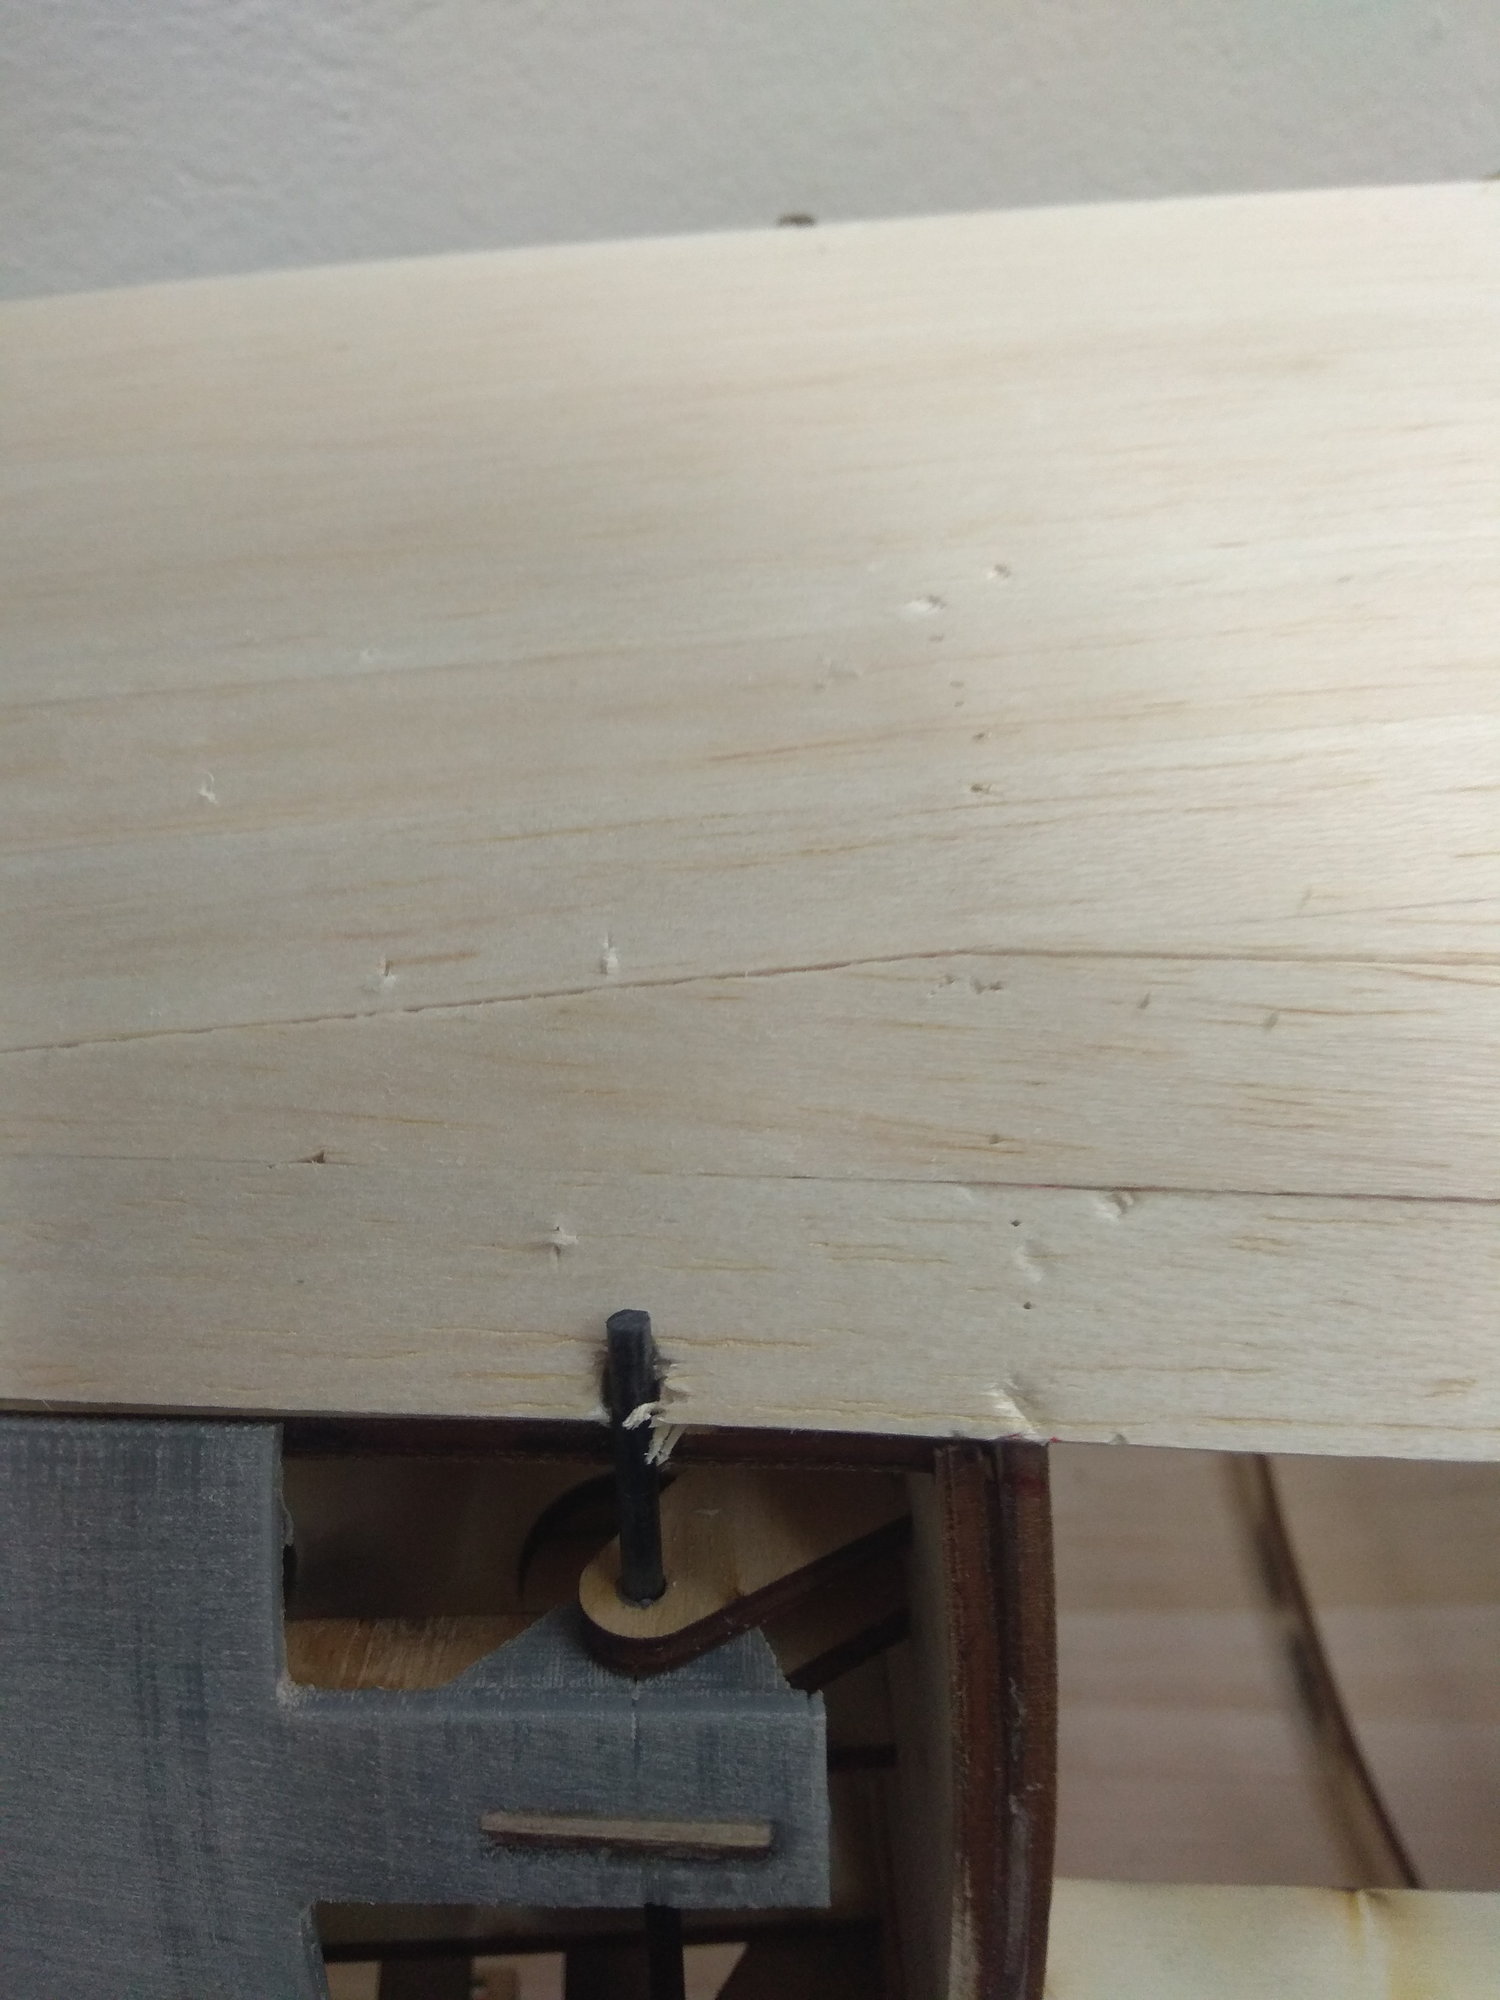
The first slats of balsa are glued above and below the air brakes box and they provide direction for all other slats.
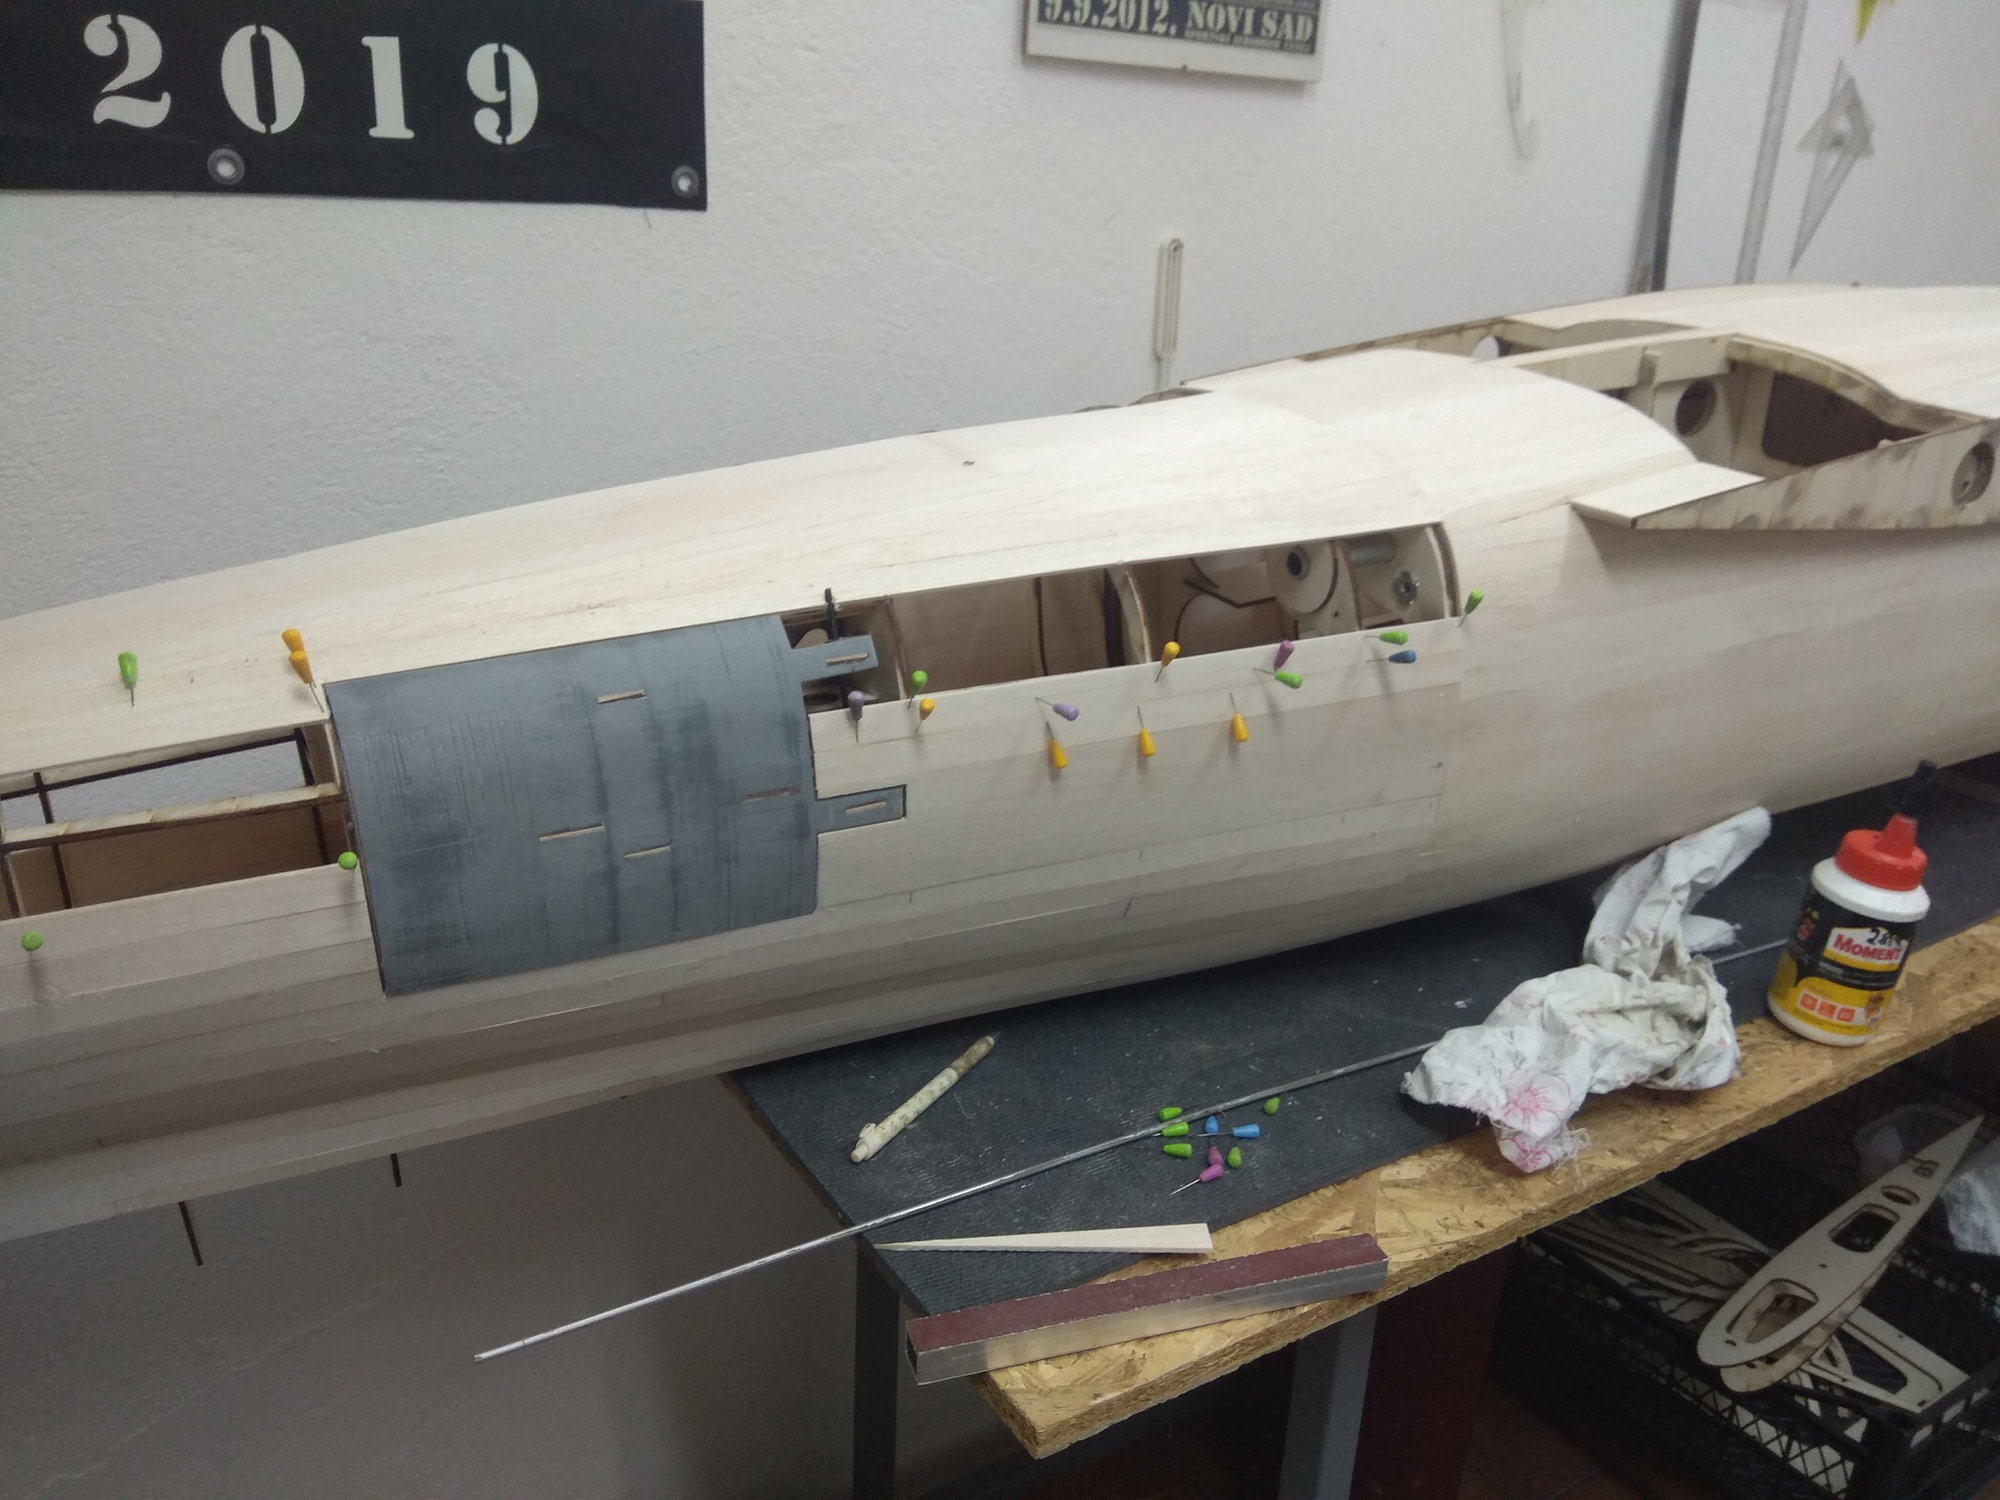
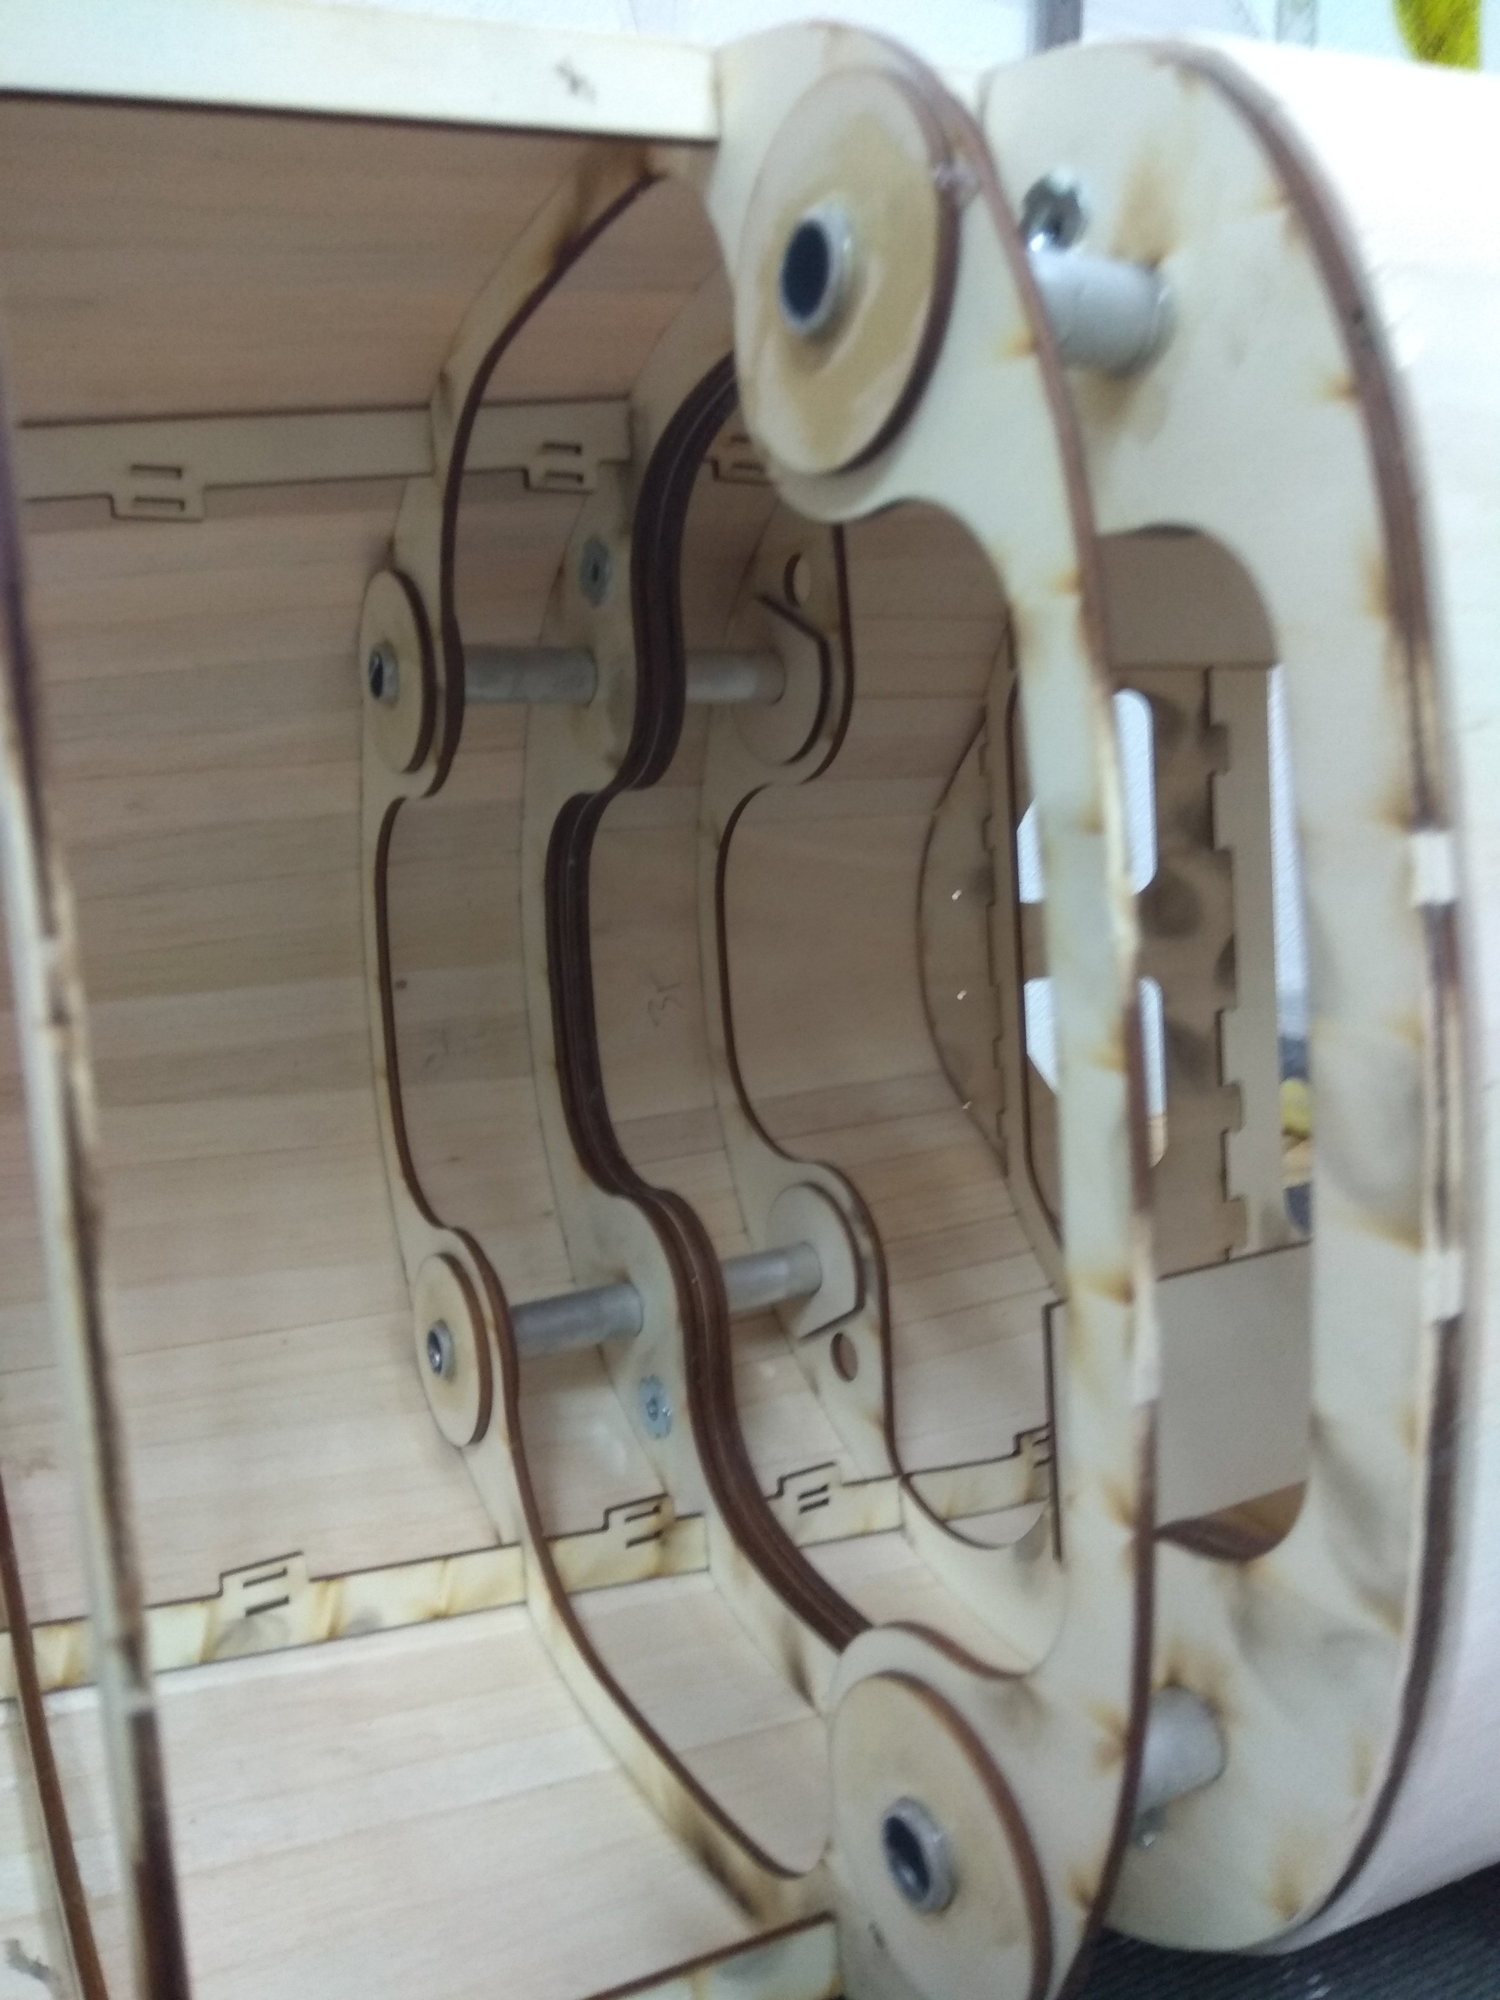
I also modified the fixing of the moving parts of the air brakes, where instead of two 3 mm screws, I inserted a carbon tube as an axle.
I had to insert a small aluminum tube from the bottom, a guide through which the pin is placed.
I was impatient, so despite the fact that everything was not finished, I sanded the fuselage for the first time...


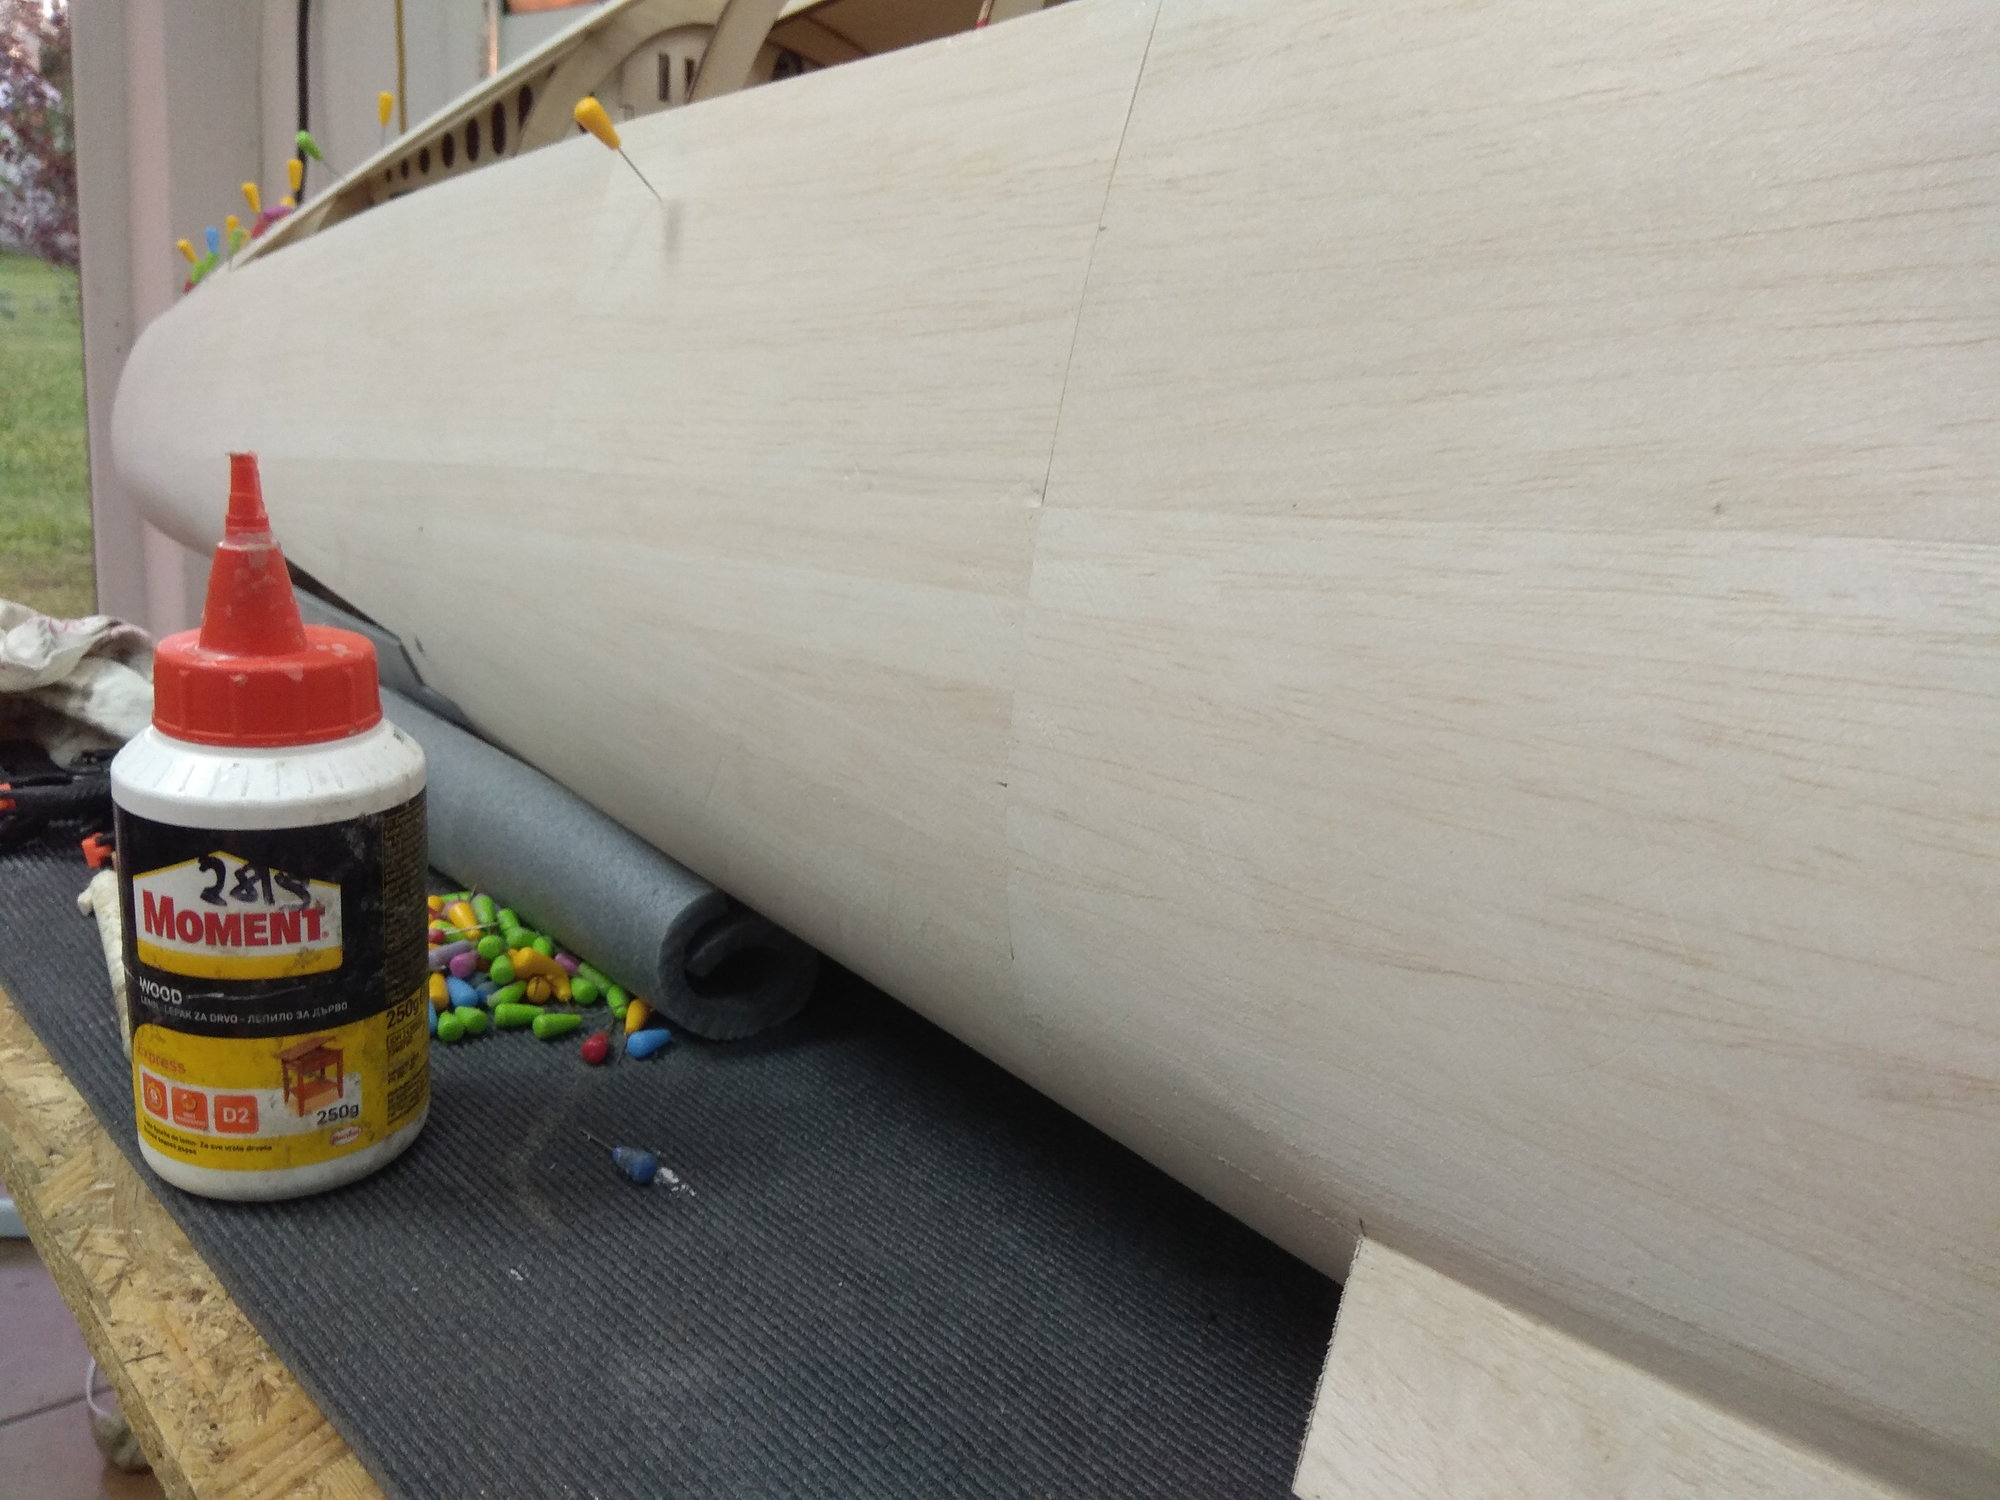

Then it was sent back to the "laboratory" and now everything is more or less finished.
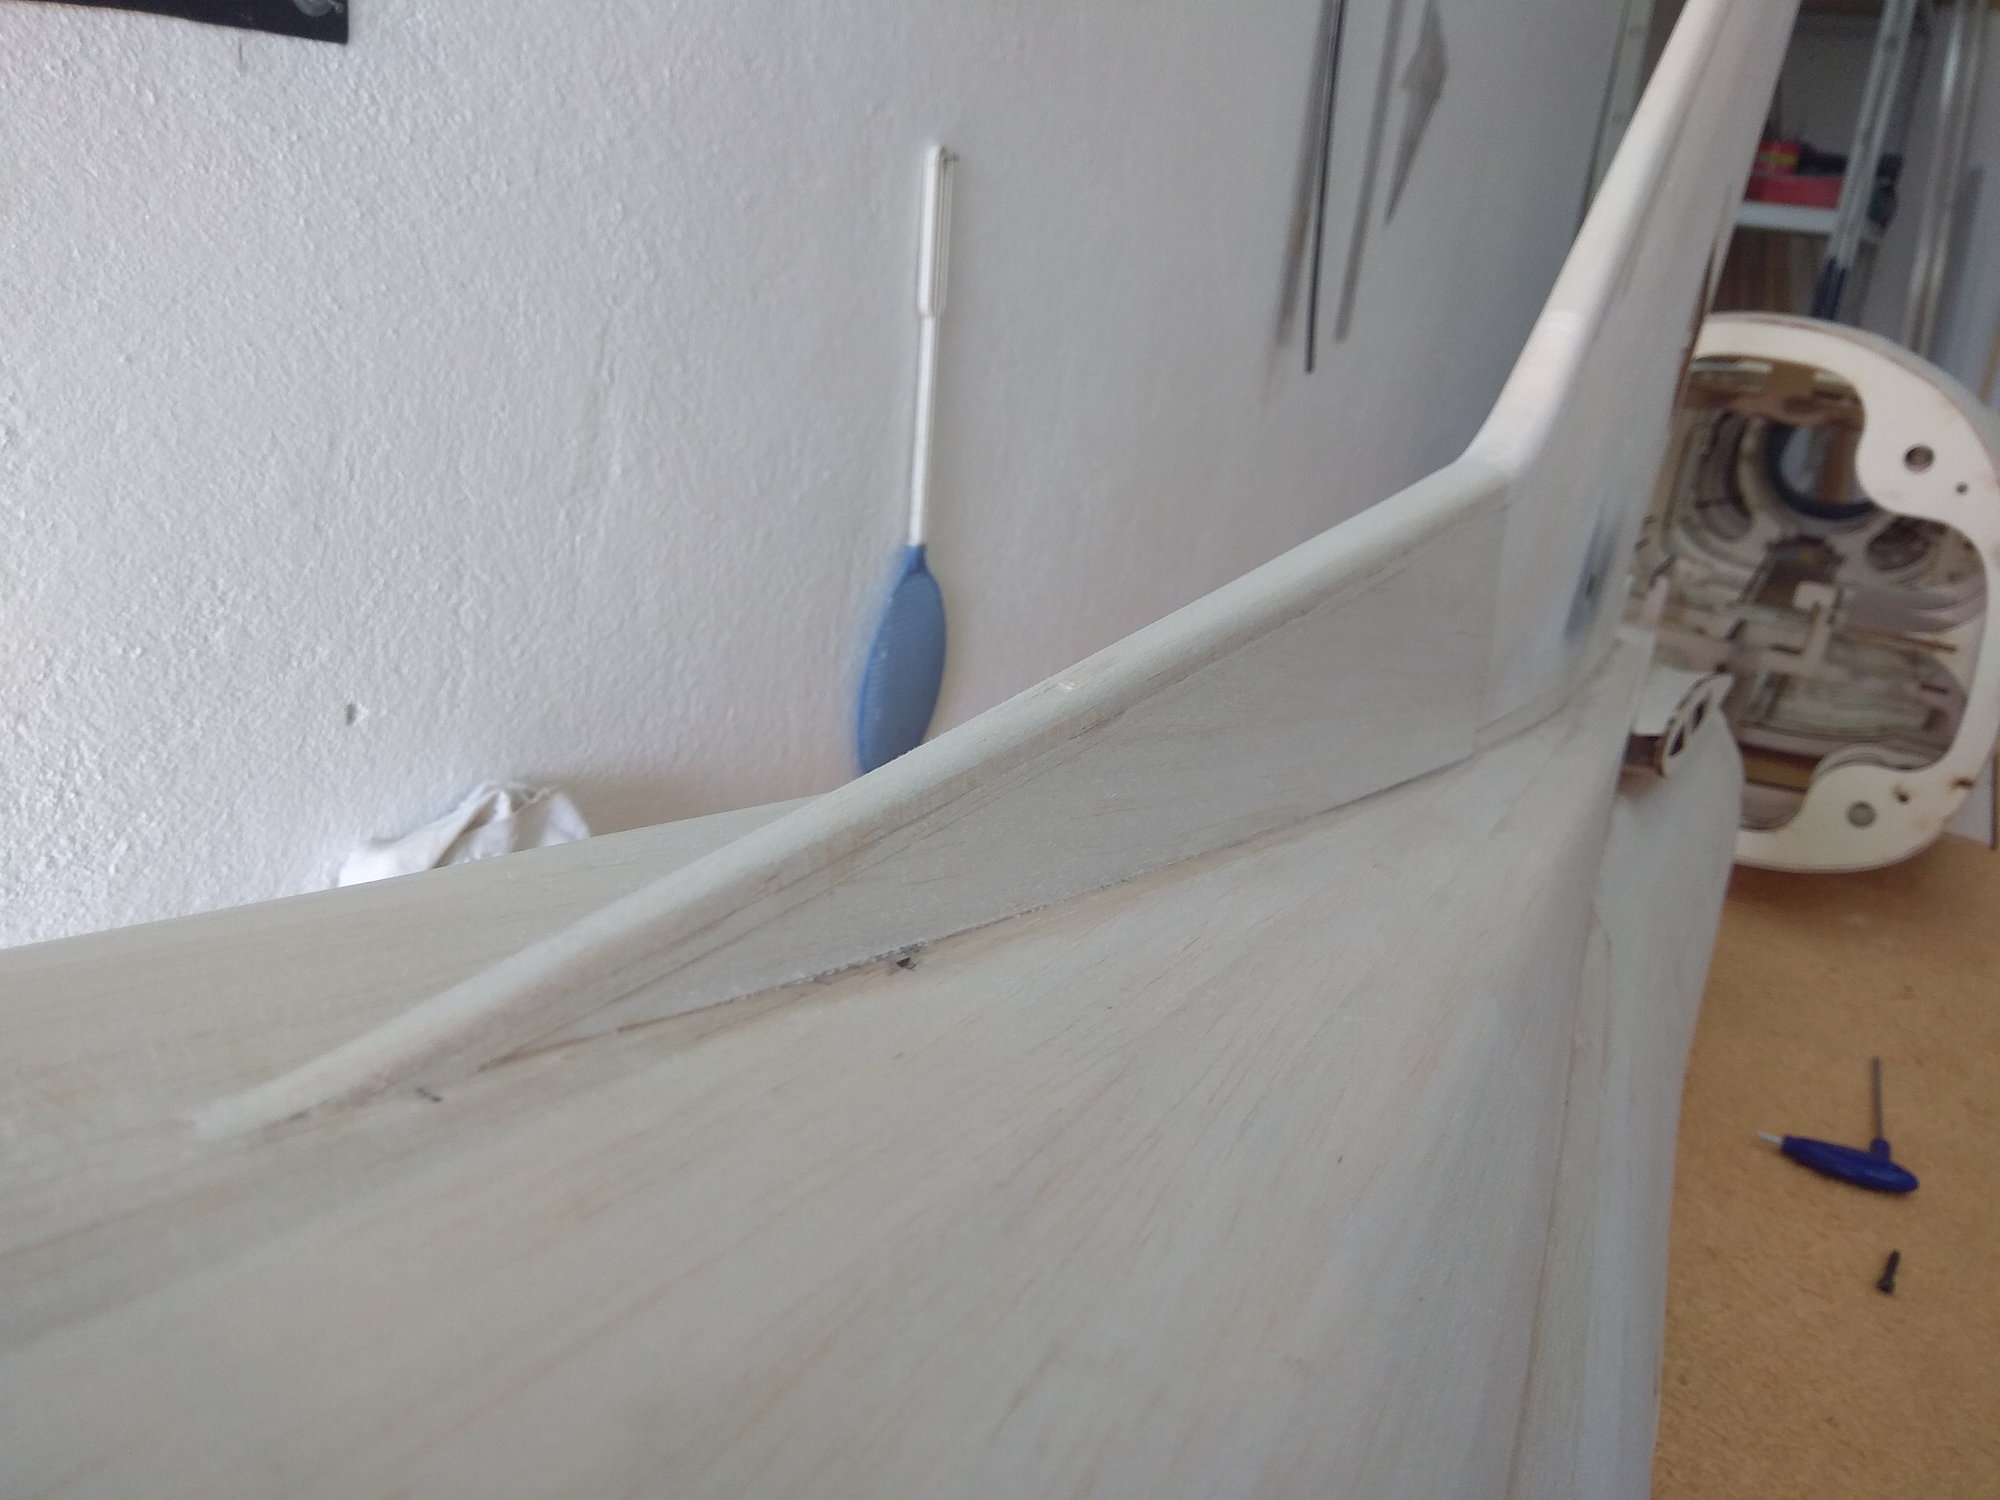
The next action on the fuselage is planking the vertical stabilizer and making the transition from it to the fuselage.
Next time wings...
After that I assembled both parts and the rear part of the fuselage was also planked.
The first slats of balsa are glued above and below the air brakes box and they provide direction for all other slats.
I also modified the fixing of the moving parts of the air brakes, where instead of two 3 mm screws, I inserted a carbon tube as an axle.
I had to insert a small aluminum tube from the bottom, a guide through which the pin is placed.
I was impatient, so despite the fact that everything was not finished, I sanded the fuselage for the first time...
Then it was sent back to the "laboratory" and now everything is more or less finished.
The next action on the fuselage is planking the vertical stabilizer and making the transition from it to the fuselage.
Next time wings...
03-07-2023, 02:35 AM
#16
Thread Starter
After a break of a couple of months, here we are back.
In the meantime, there was work in the workshop, one Jastreb J21 was made in 1:4 scale and currently a 1:5.3 scale F 104 Starfighter is being worked on.
This F 86 Saber was supposed to be the model I would fly in the 2023 season, but nothing has come of it.
Once completed, the Saber will be offered for sale, so here's your chance to order it if you like the build.
For more details send me an email: [email protected]
And now let's get back to the production, a lot has been done, so we need to "get in step" with the real situation from the workshop.
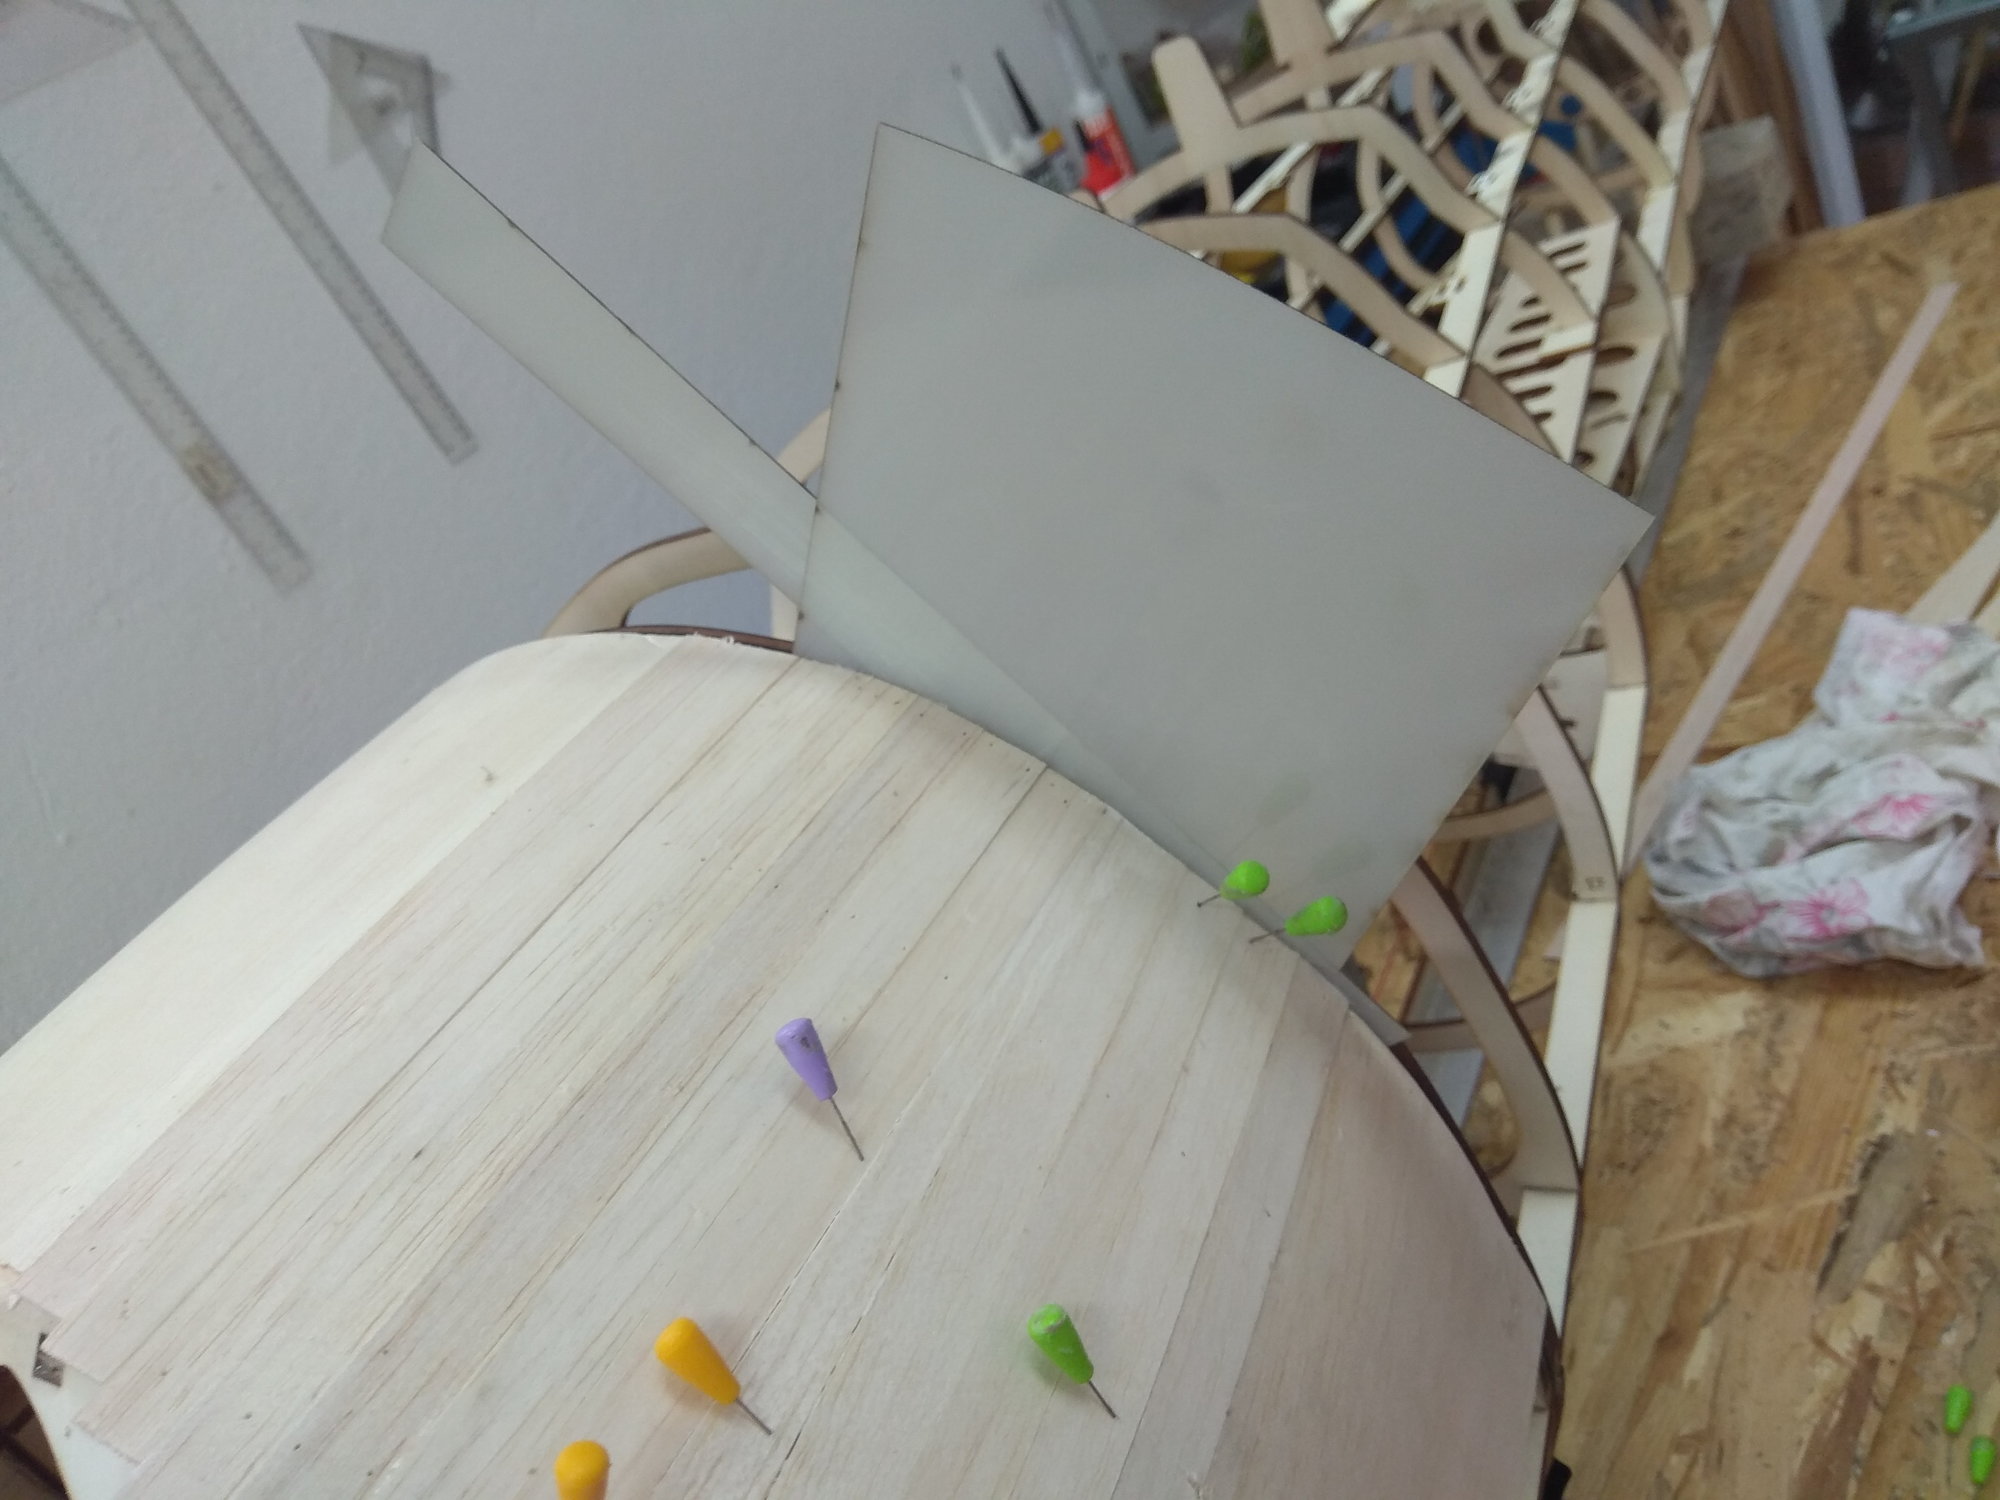
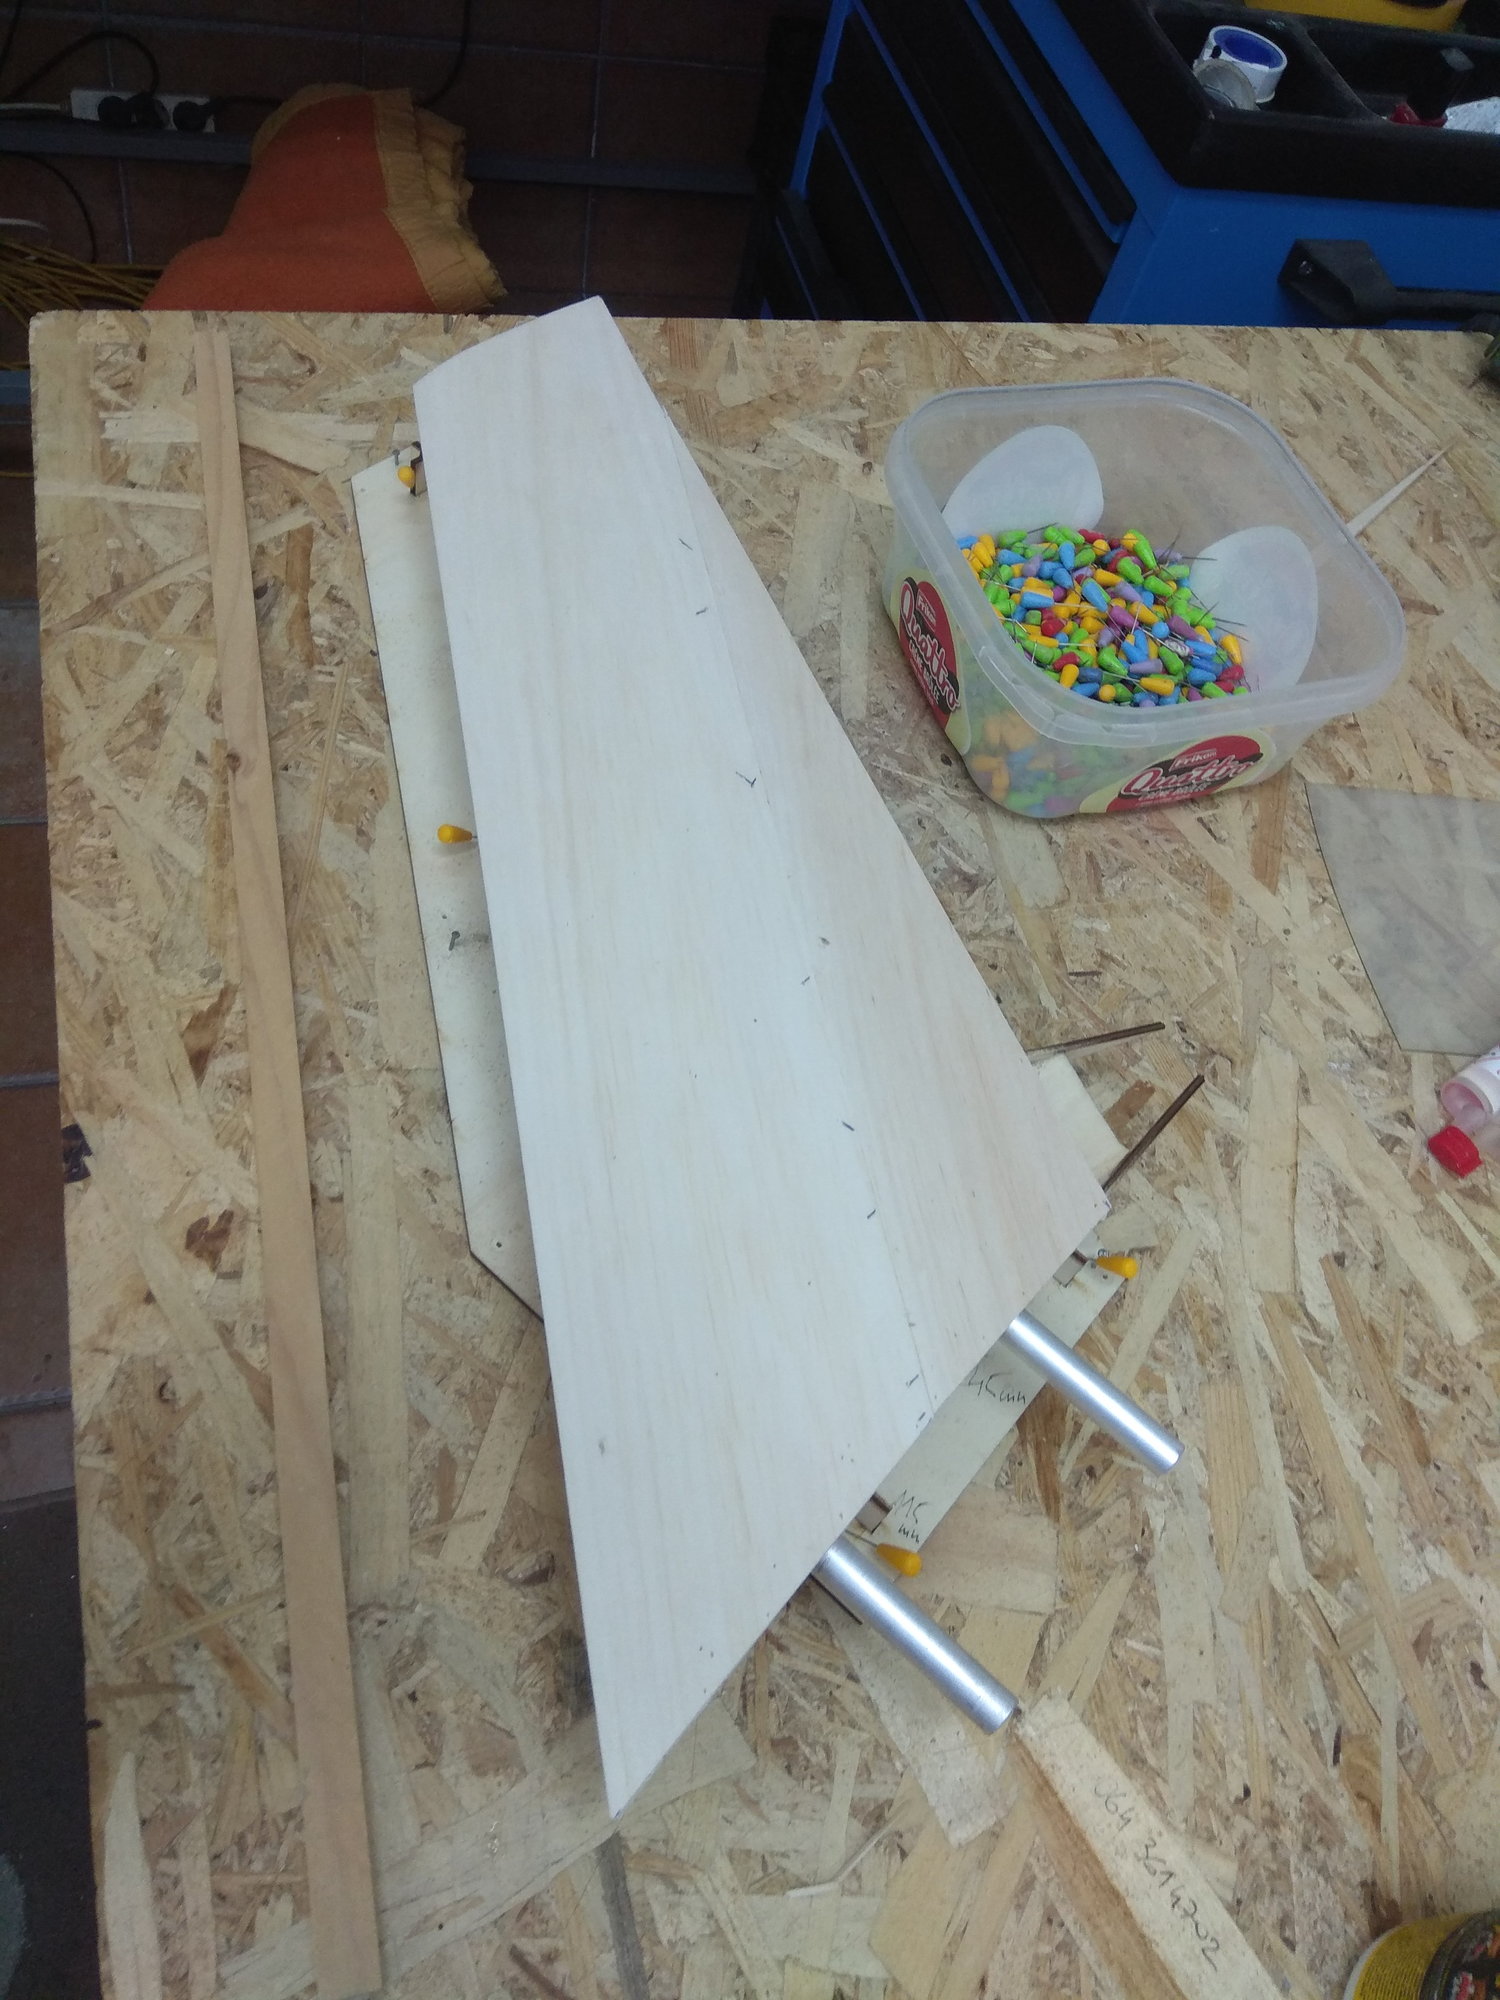
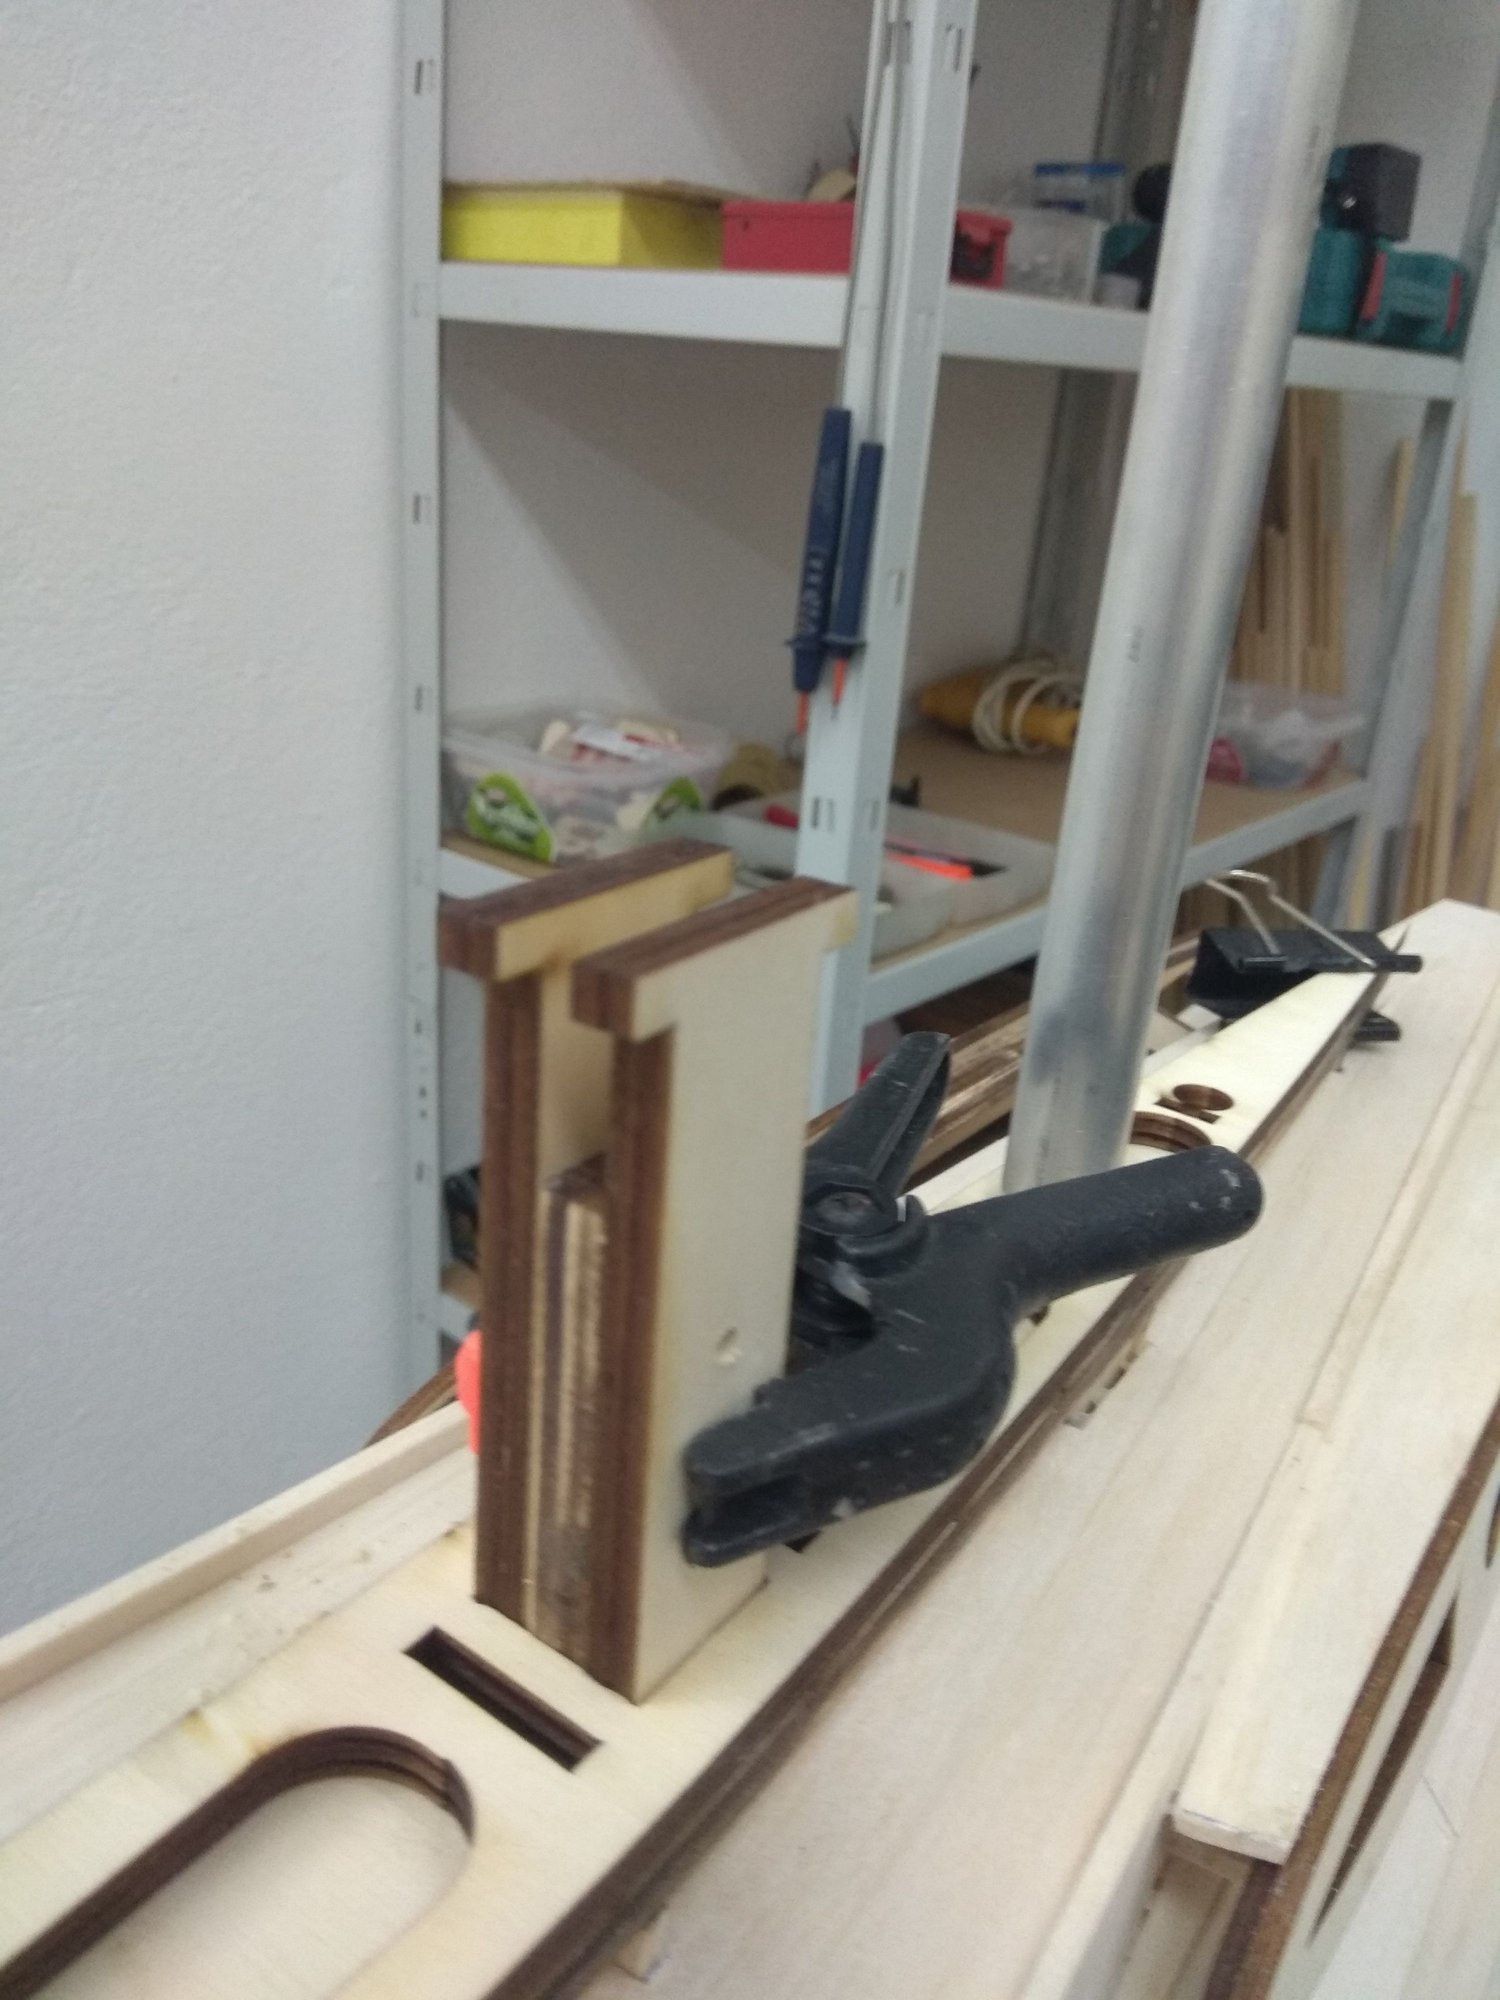
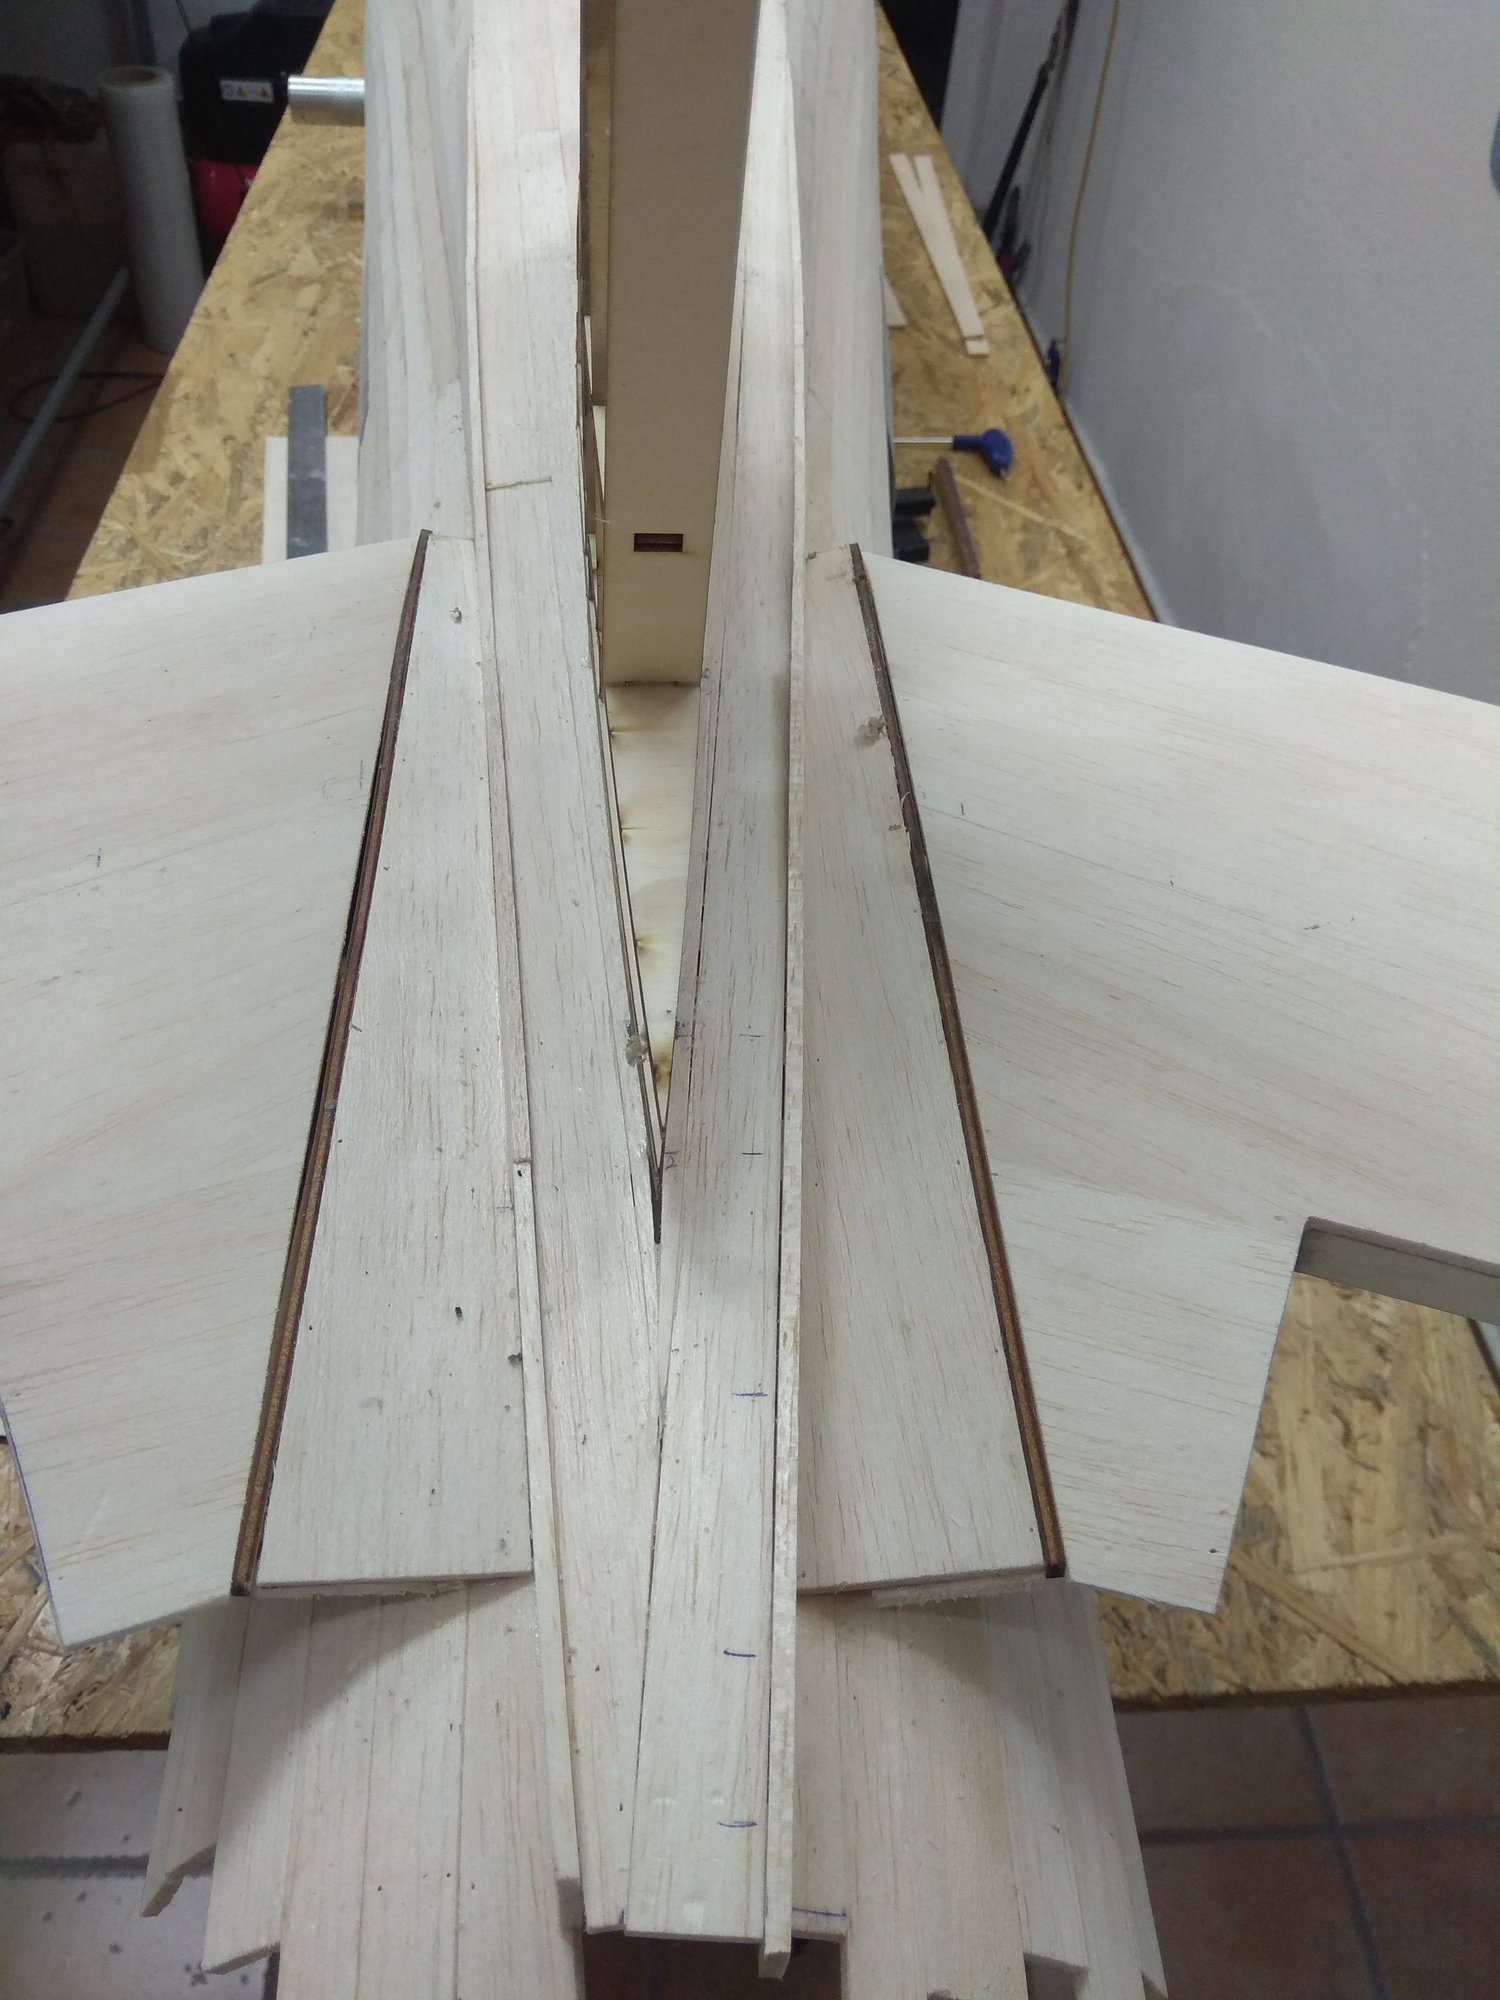
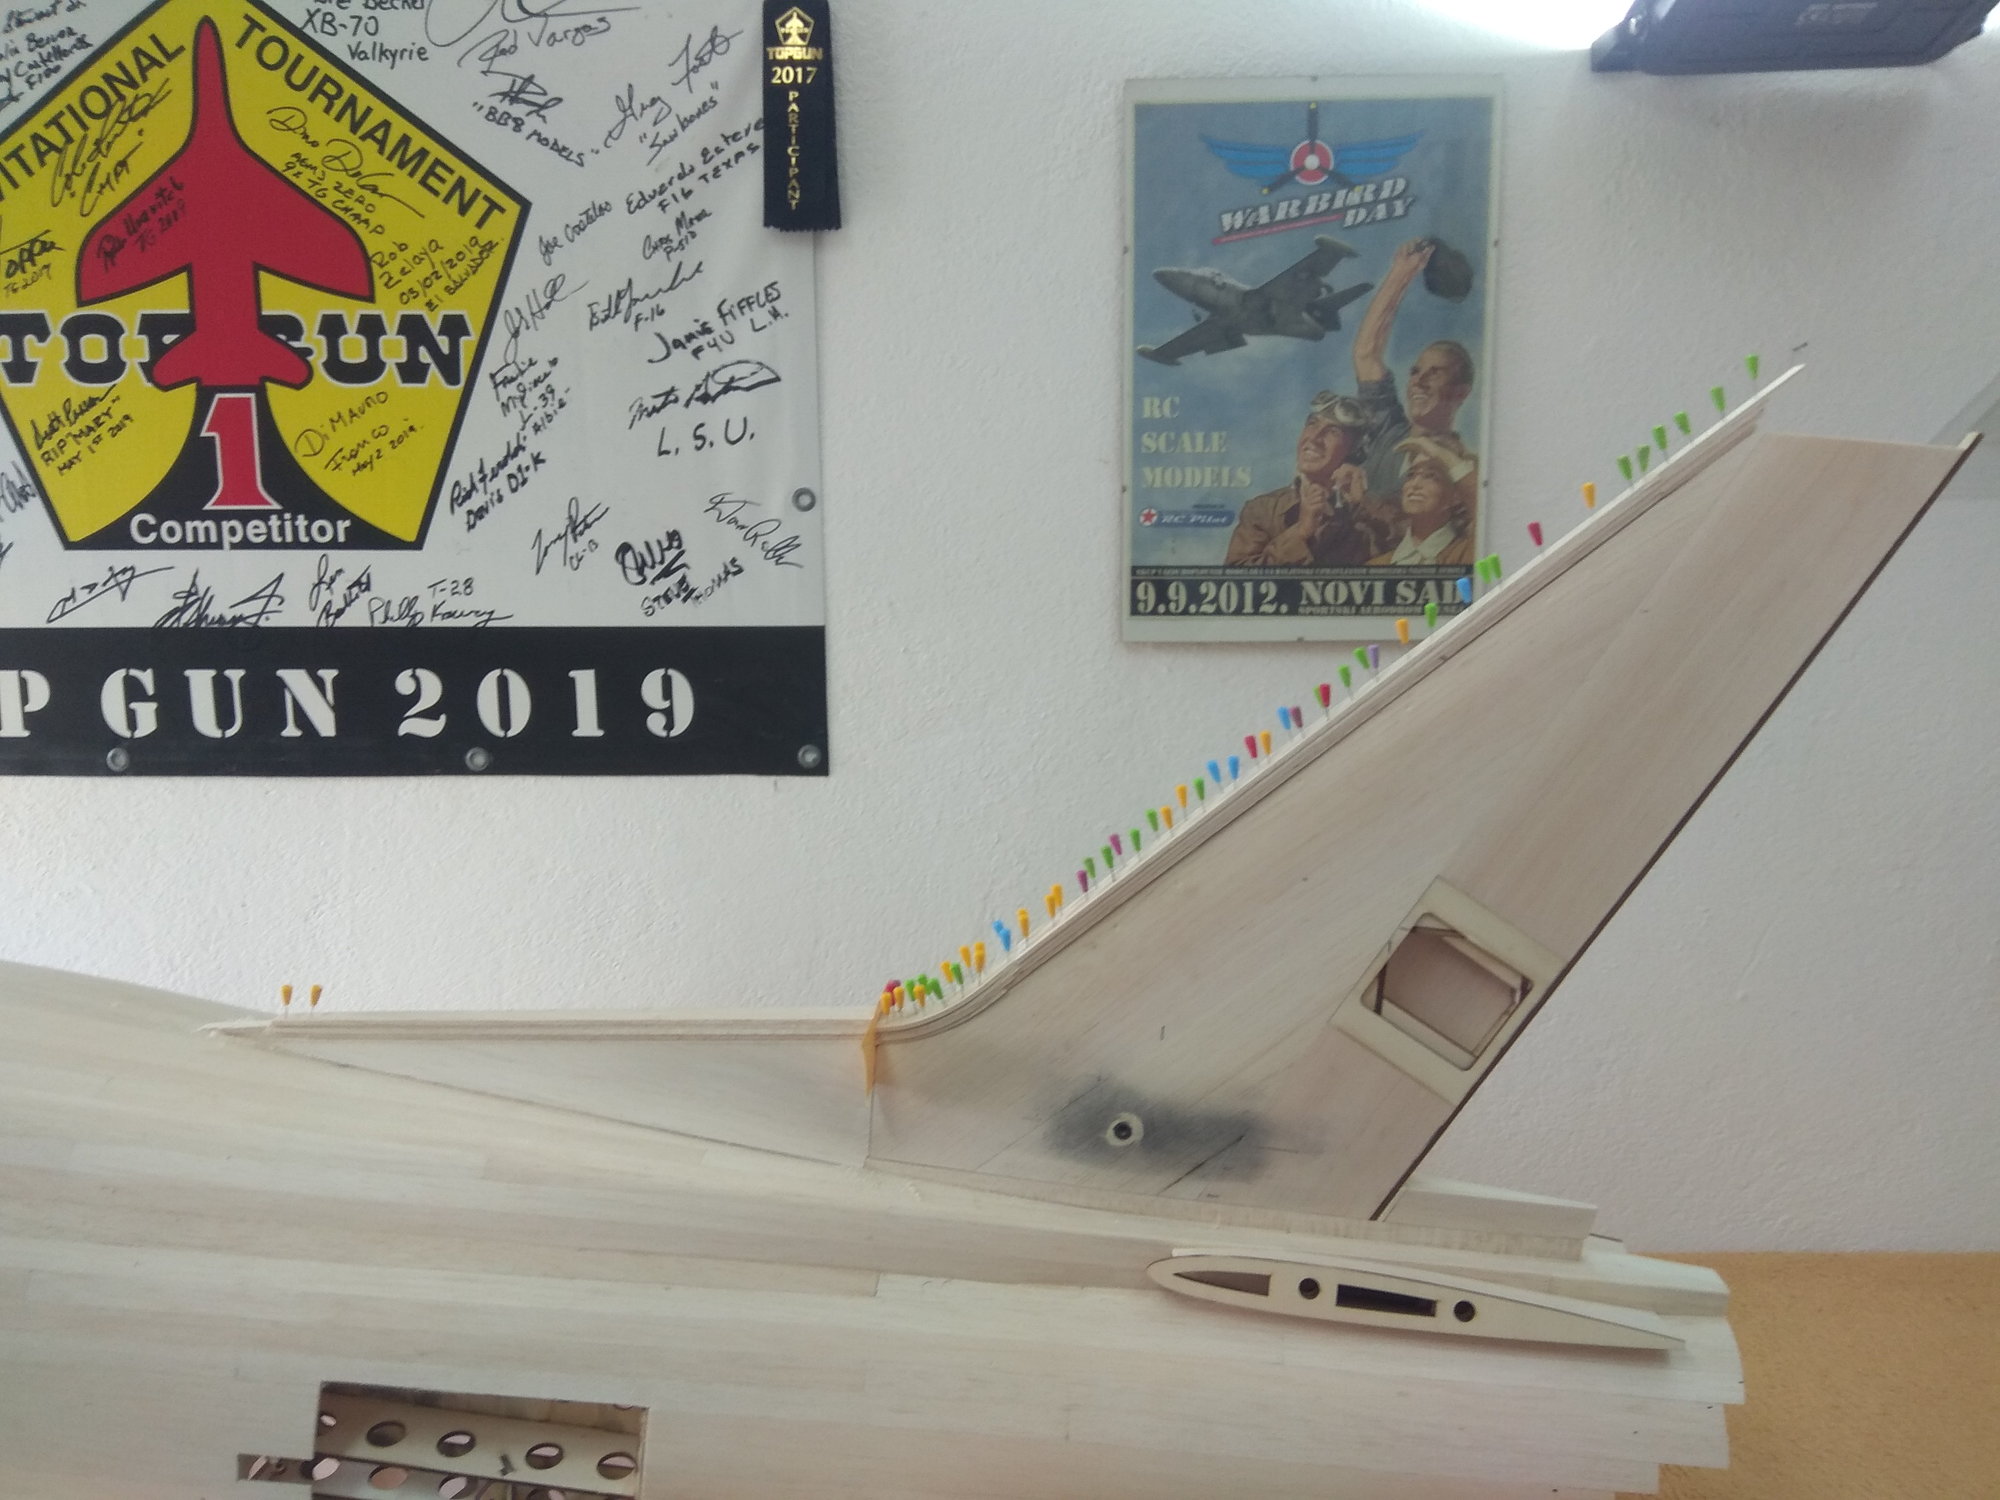
I'll start with the vertical stabilizer.
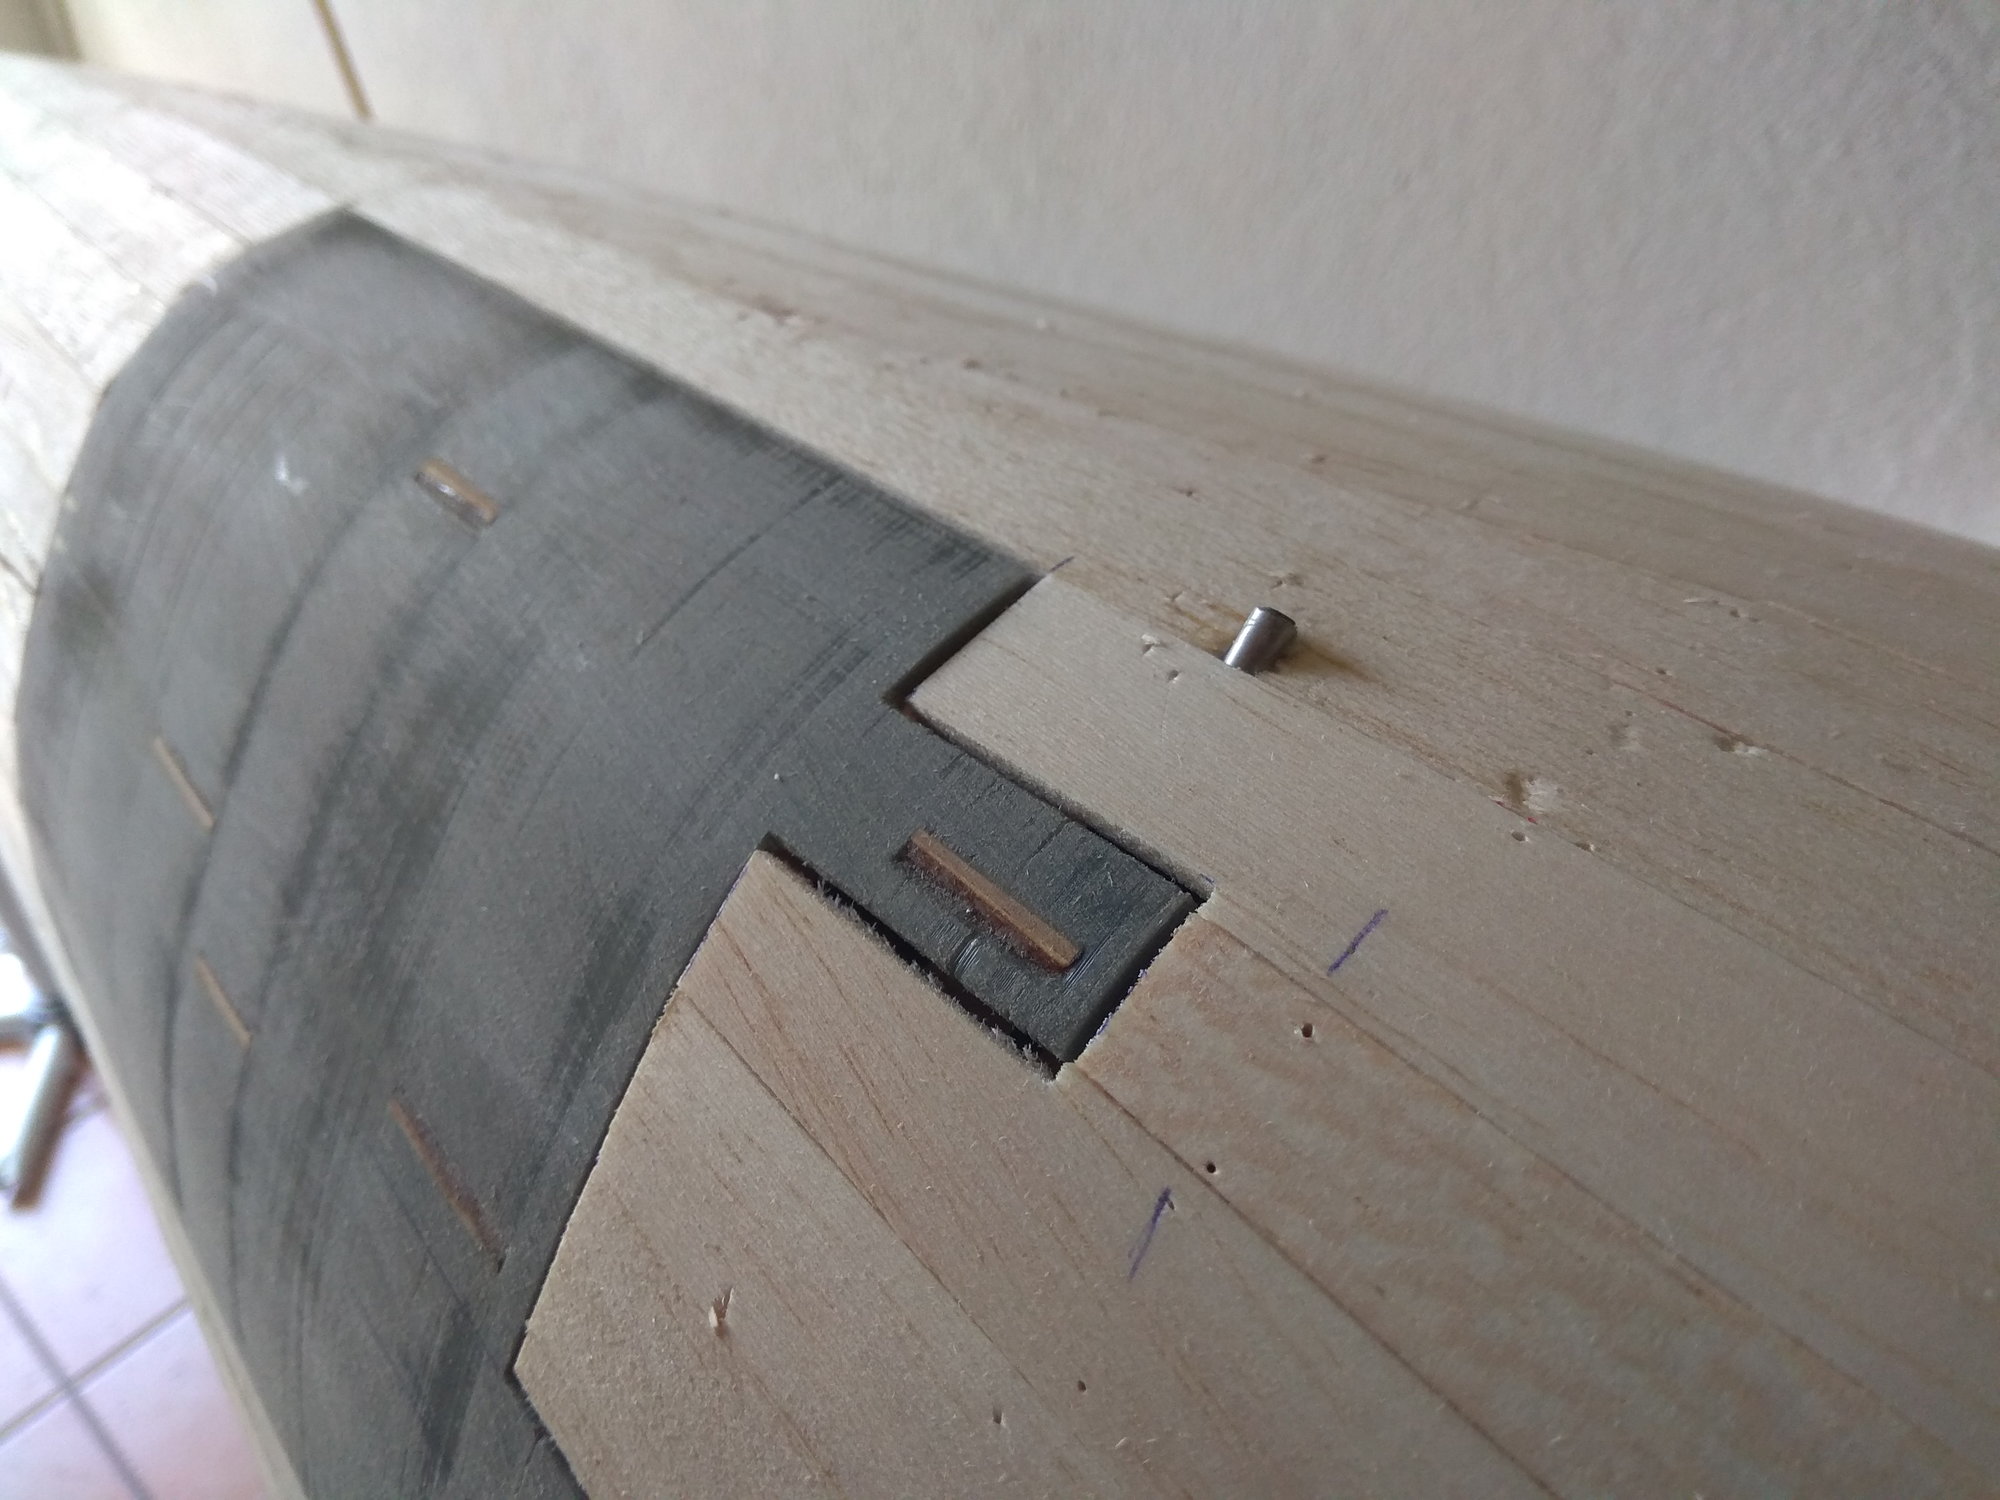
3 mm balsa sheets are glued on both sides.
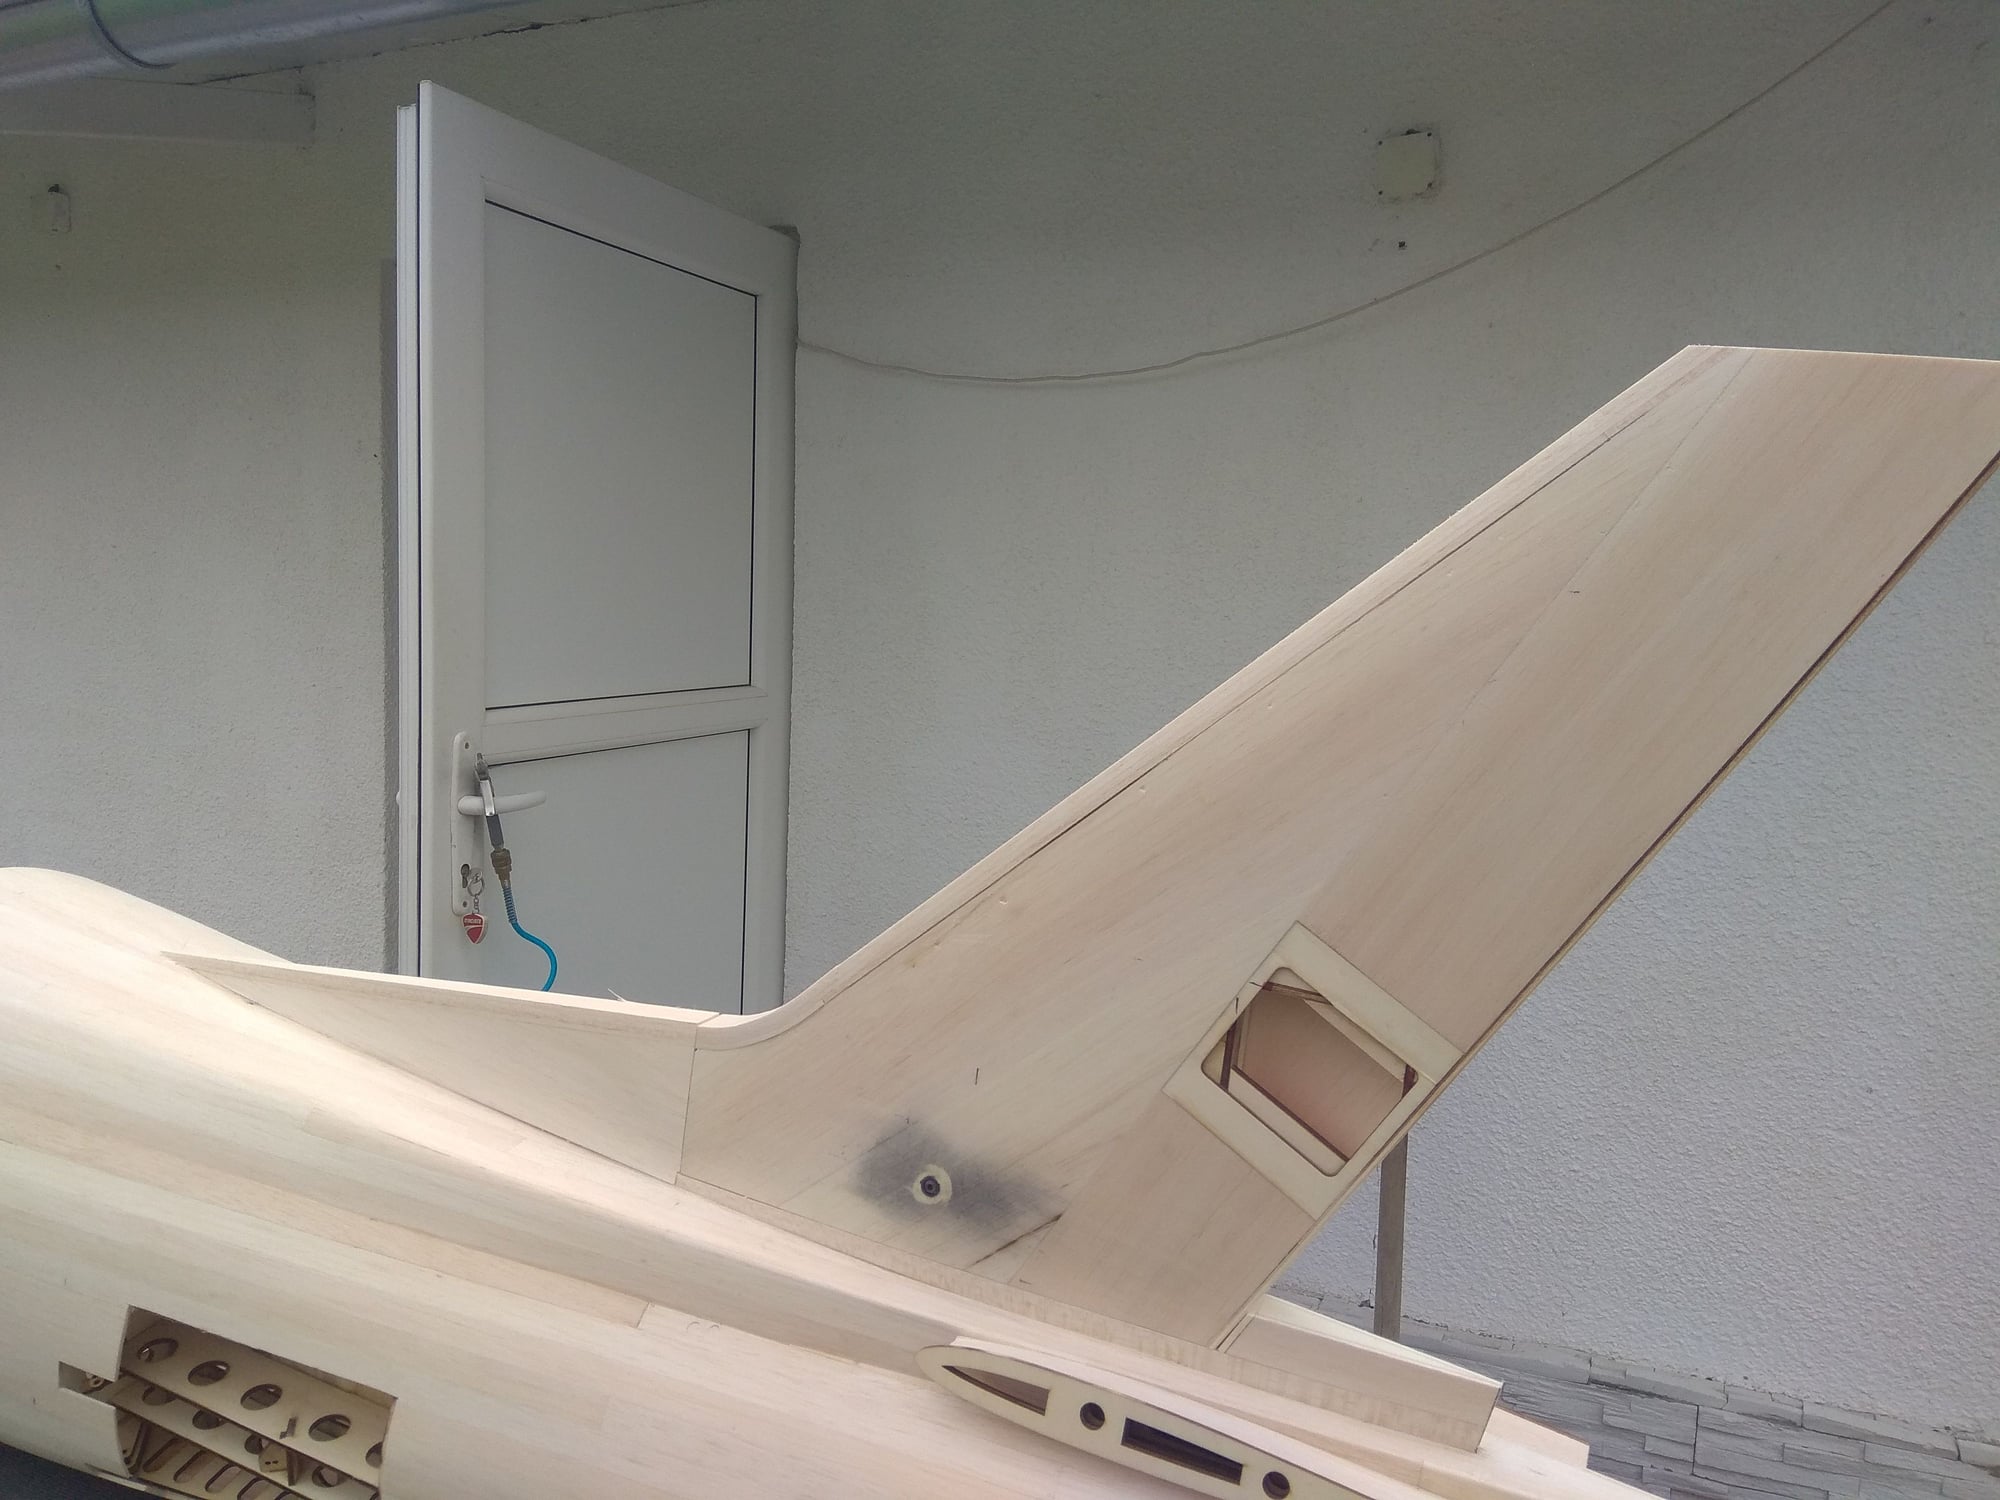
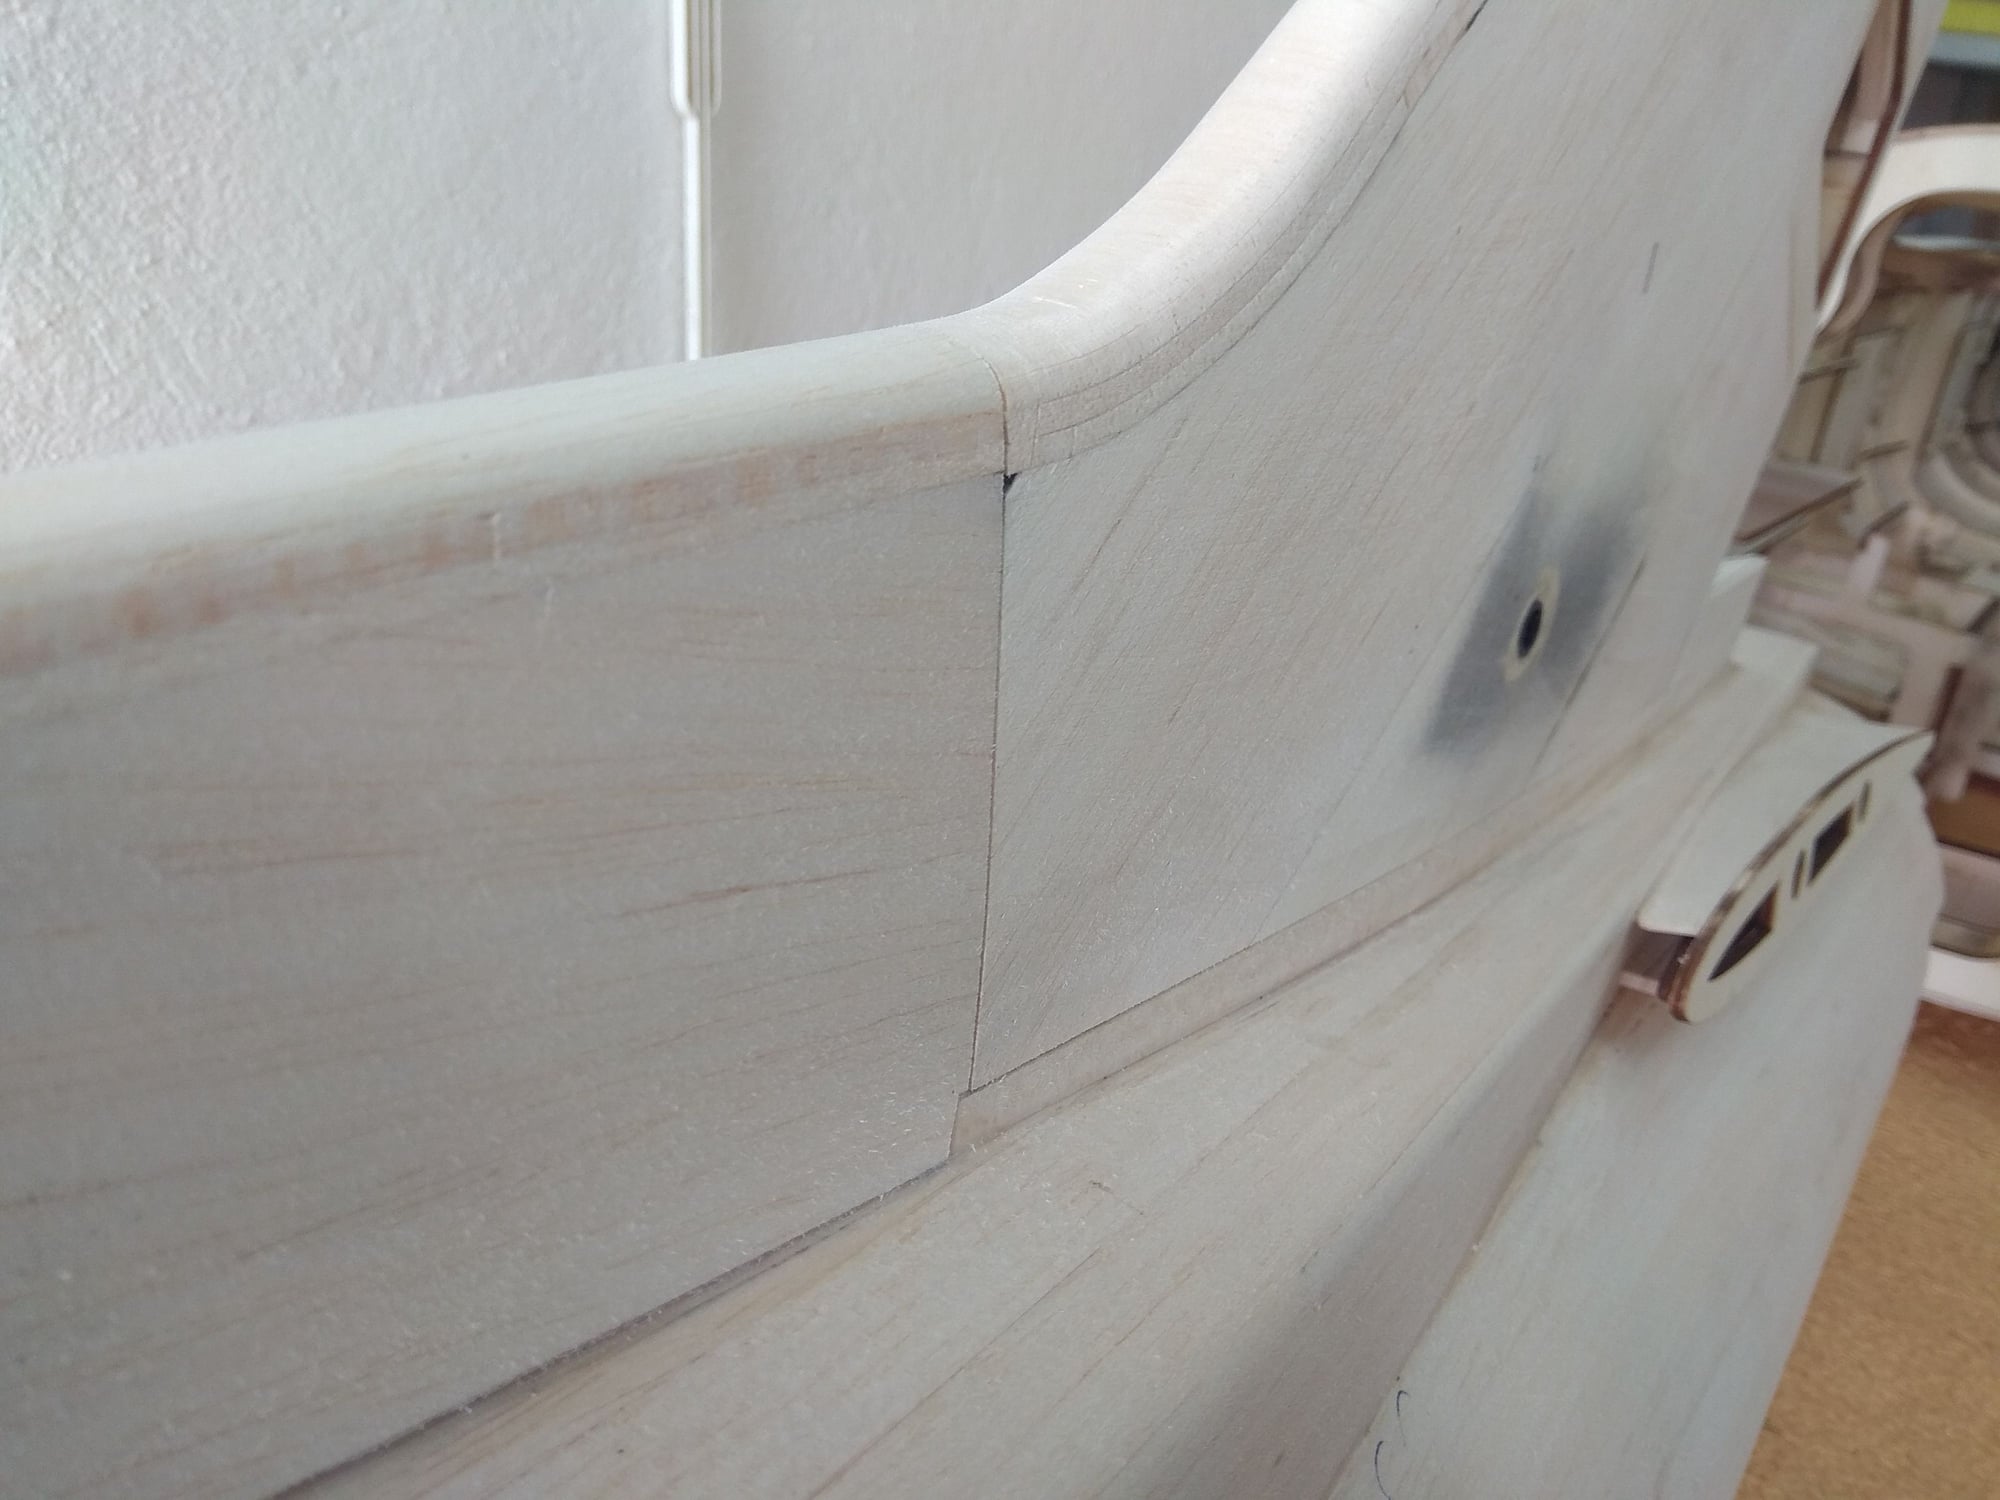
The lower rear part is cut off and glued separately to the fuselage.
This was done because of the angle between the fixed and moving parts of the vertical stabilizer. The movable part of the stabilizer cannot be placed on the fixed (immovable) part, or rather, the hinges cannot be glued if this is not done in this way.
When everything is in place, the immovable part fits exactly into the intended space on the fuselage.
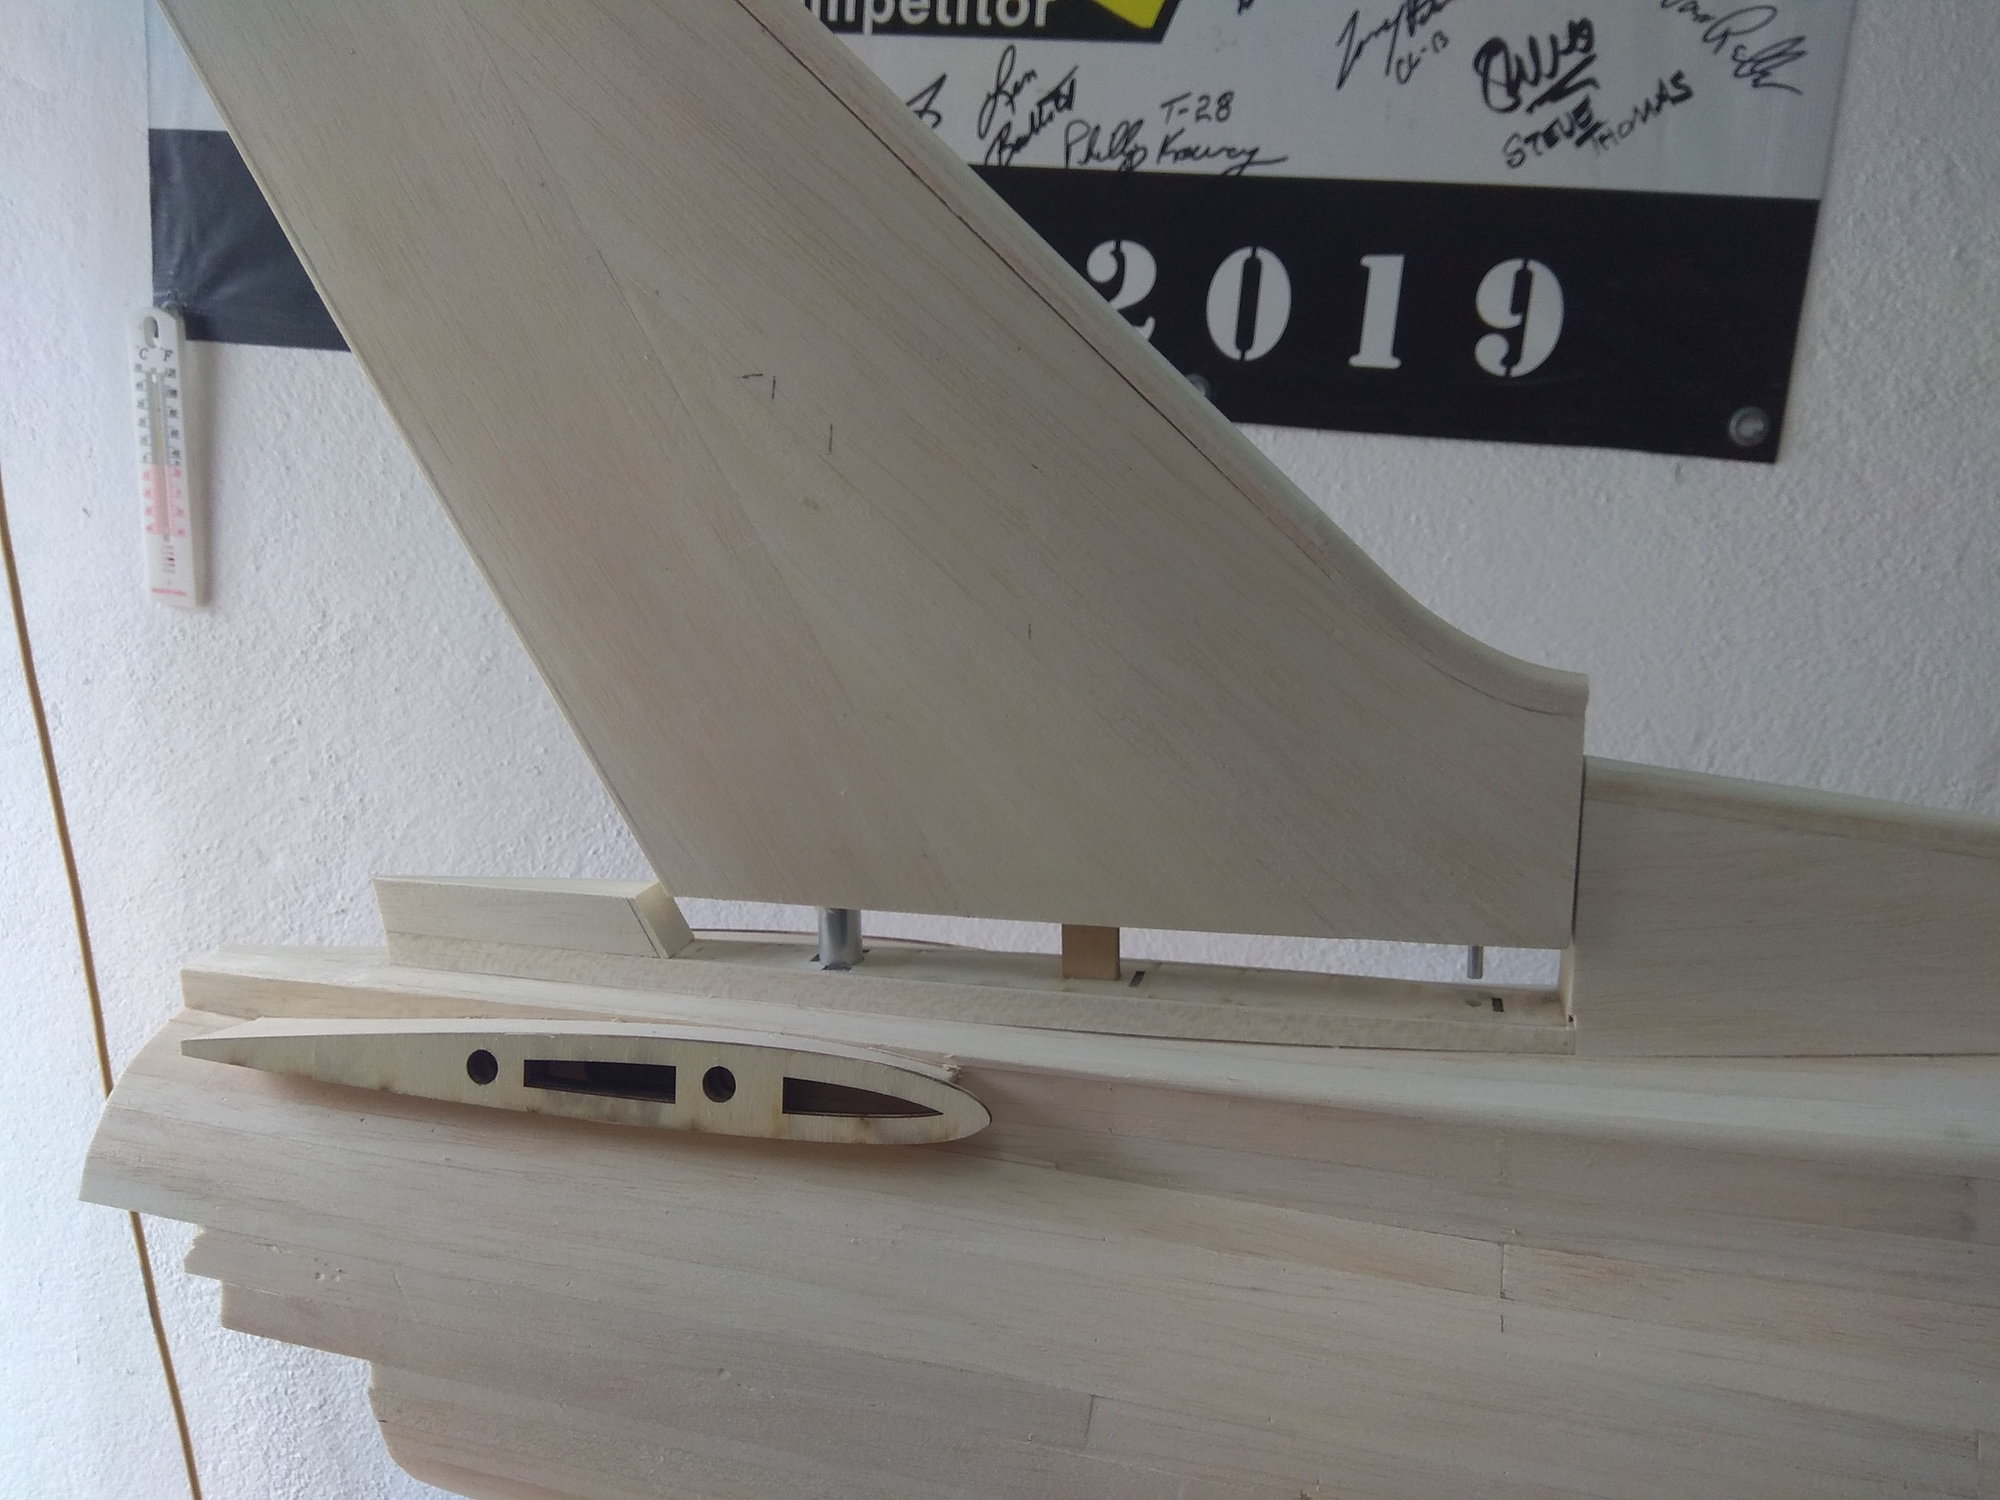
On the back side of the immovable part, plywood with precisely positioned openings for the hinges is glued.
The same plate will be glued to the moving part, so the centering of the opening is absolutely precise!!!

The leading edge is also made,
I do it by laminating a couple of layers of 3 mm balsa, which gives me the exact transition from the fuselage to the vertical stabilizer and makes it easier to make the curve in the lower part.

To be continued...
In the meantime, there was work in the workshop, one Jastreb J21 was made in 1:4 scale and currently a 1:5.3 scale F 104 Starfighter is being worked on.
This F 86 Saber was supposed to be the model I would fly in the 2023 season, but nothing has come of it.
Once completed, the Saber will be offered for sale, so here's your chance to order it if you like the build.
For more details send me an email: [email protected]
And now let's get back to the production, a lot has been done, so we need to "get in step" with the real situation from the workshop.
I'll start with the vertical stabilizer.
3 mm balsa sheets are glued on both sides.
The lower rear part is cut off and glued separately to the fuselage.
This was done because of the angle between the fixed and moving parts of the vertical stabilizer. The movable part of the stabilizer cannot be placed on the fixed (immovable) part, or rather, the hinges cannot be glued if this is not done in this way.
When everything is in place, the immovable part fits exactly into the intended space on the fuselage.
On the back side of the immovable part, plywood with precisely positioned openings for the hinges is glued.
The same plate will be glued to the moving part, so the centering of the opening is absolutely precise!!!
The leading edge is also made,
I do it by laminating a couple of layers of 3 mm balsa, which gives me the exact transition from the fuselage to the vertical stabilizer and makes it easier to make the curve in the lower part.
To be continued...
Last edited by mirce; 03-07-2023 at 02:40 AM.
The following users liked this post:
jcterrettaz (03-10-2023)
The following users liked this post:
jcterrettaz (03-10-2023)
03-11-2023, 12:25 PM
#18
Thread Starter
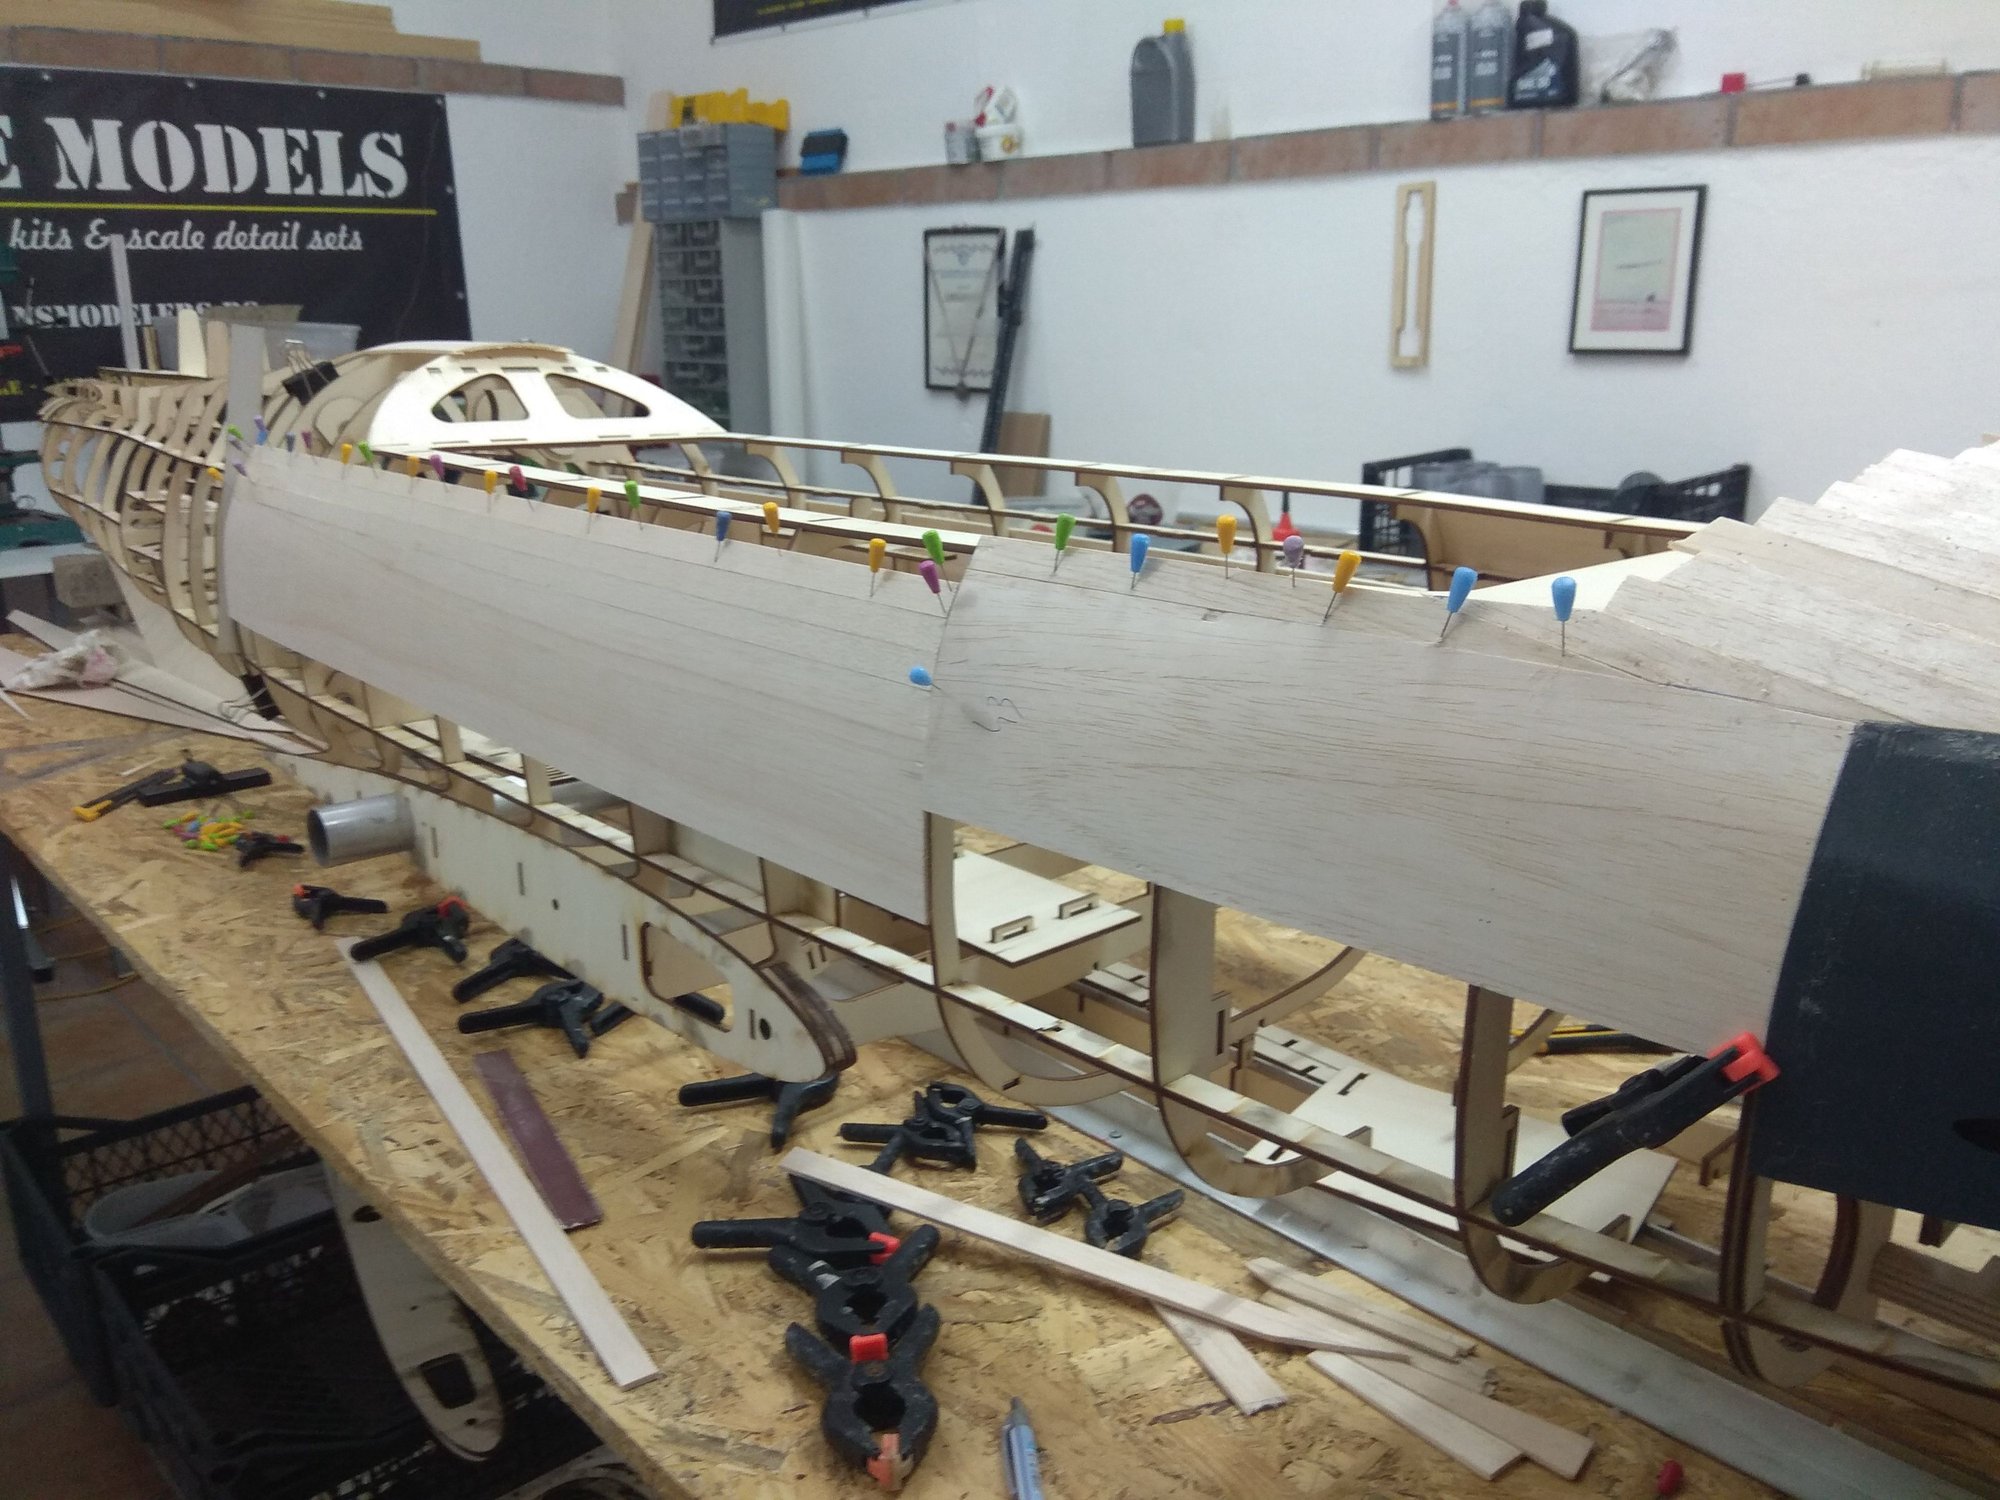
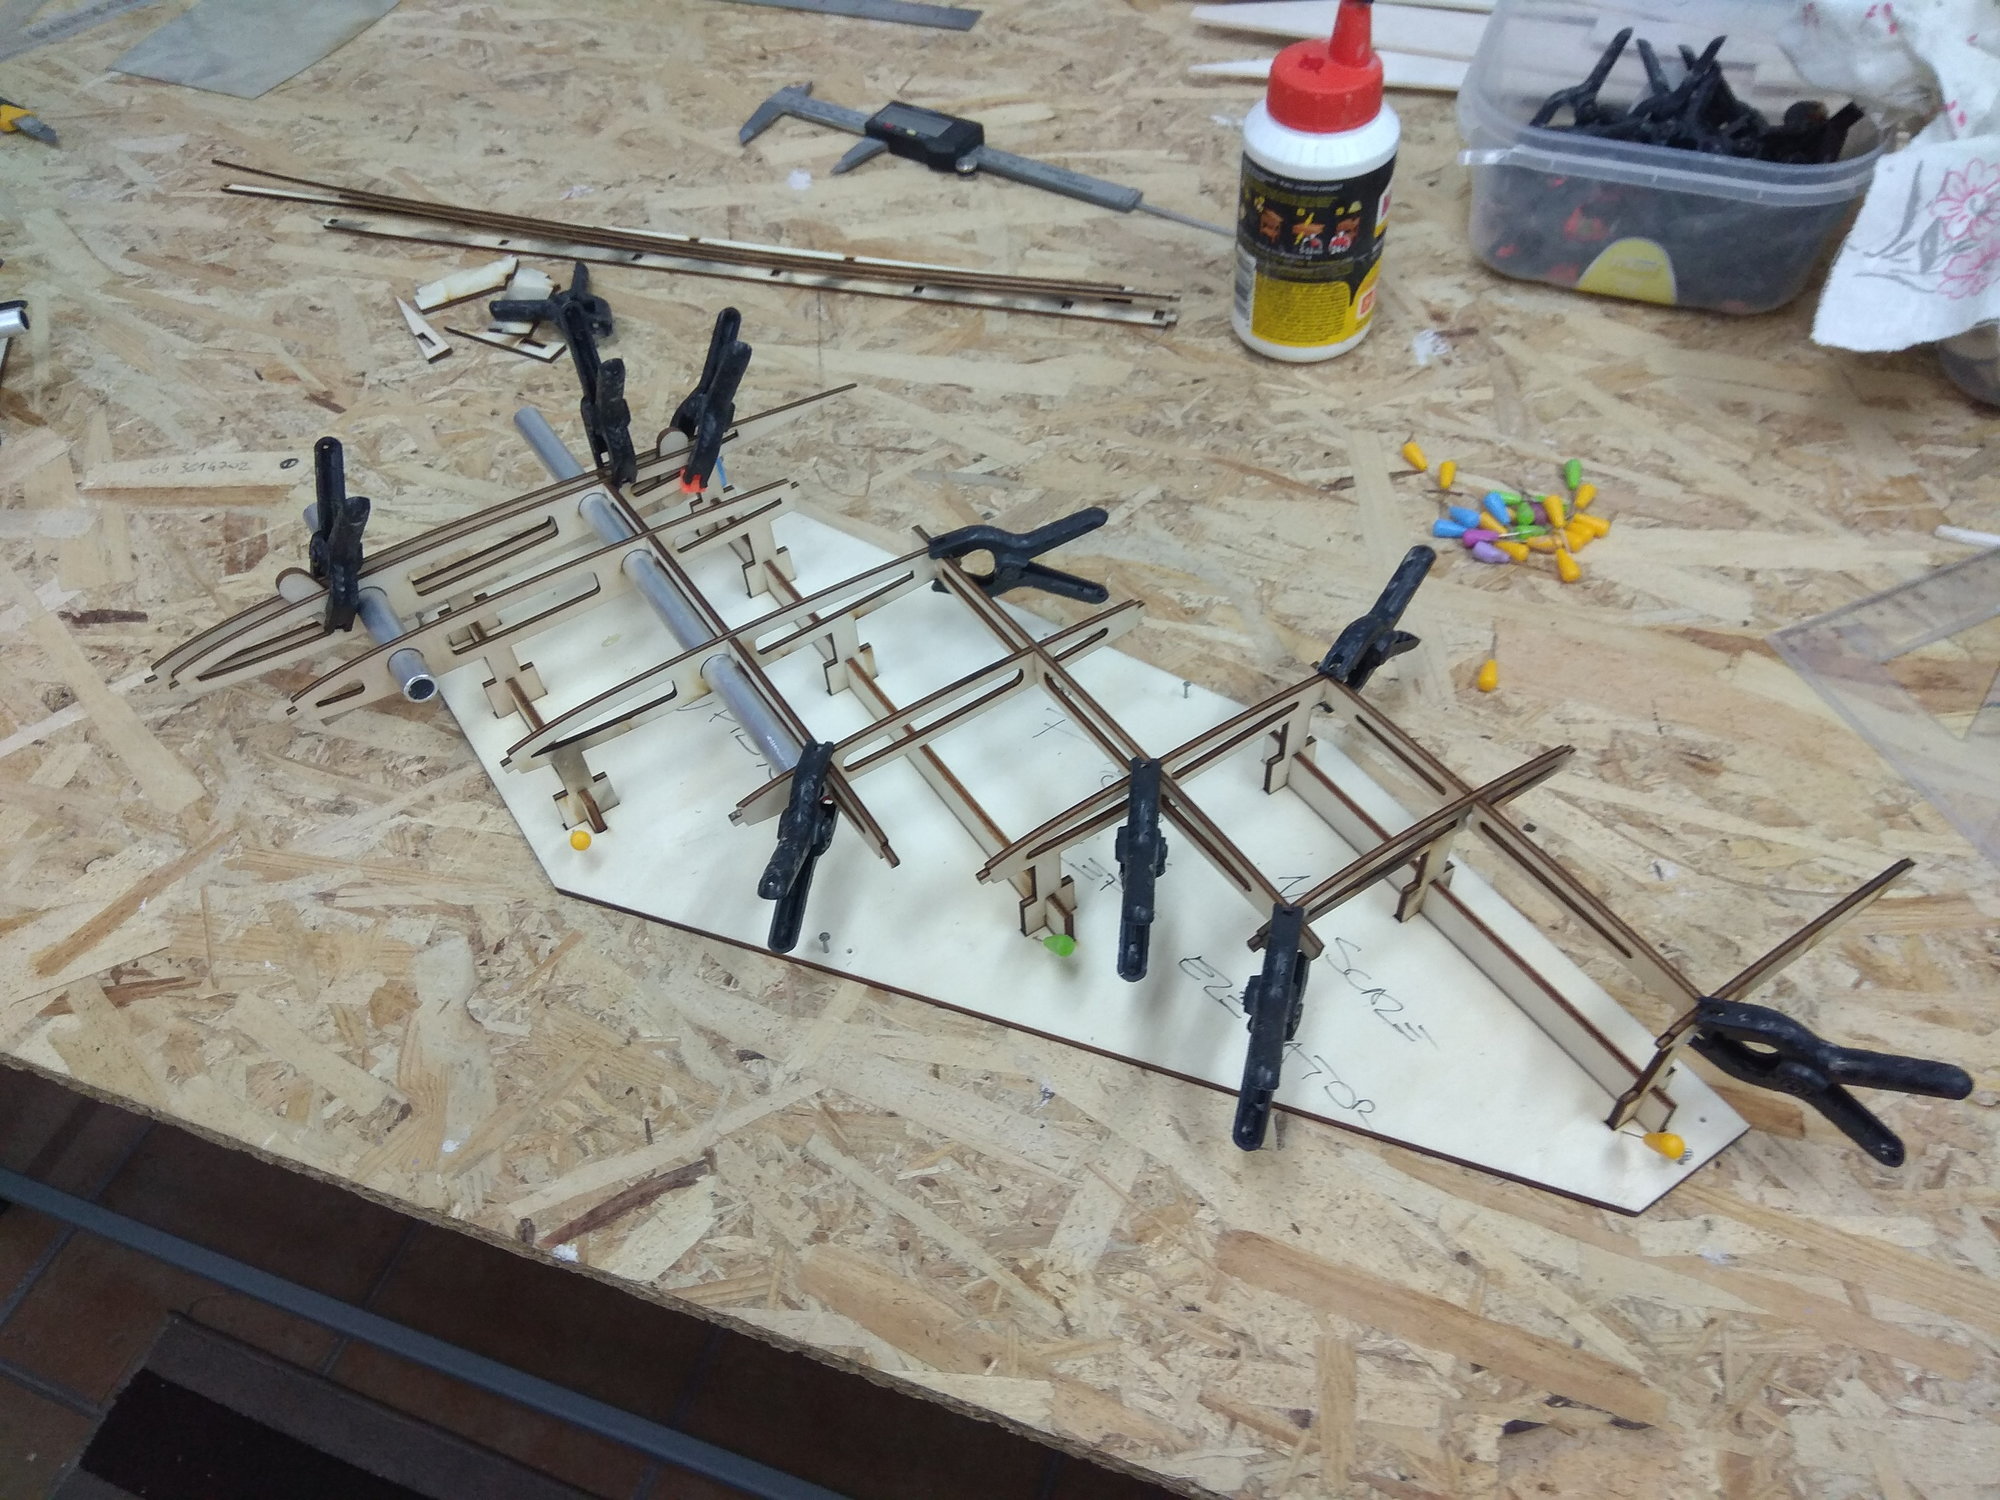
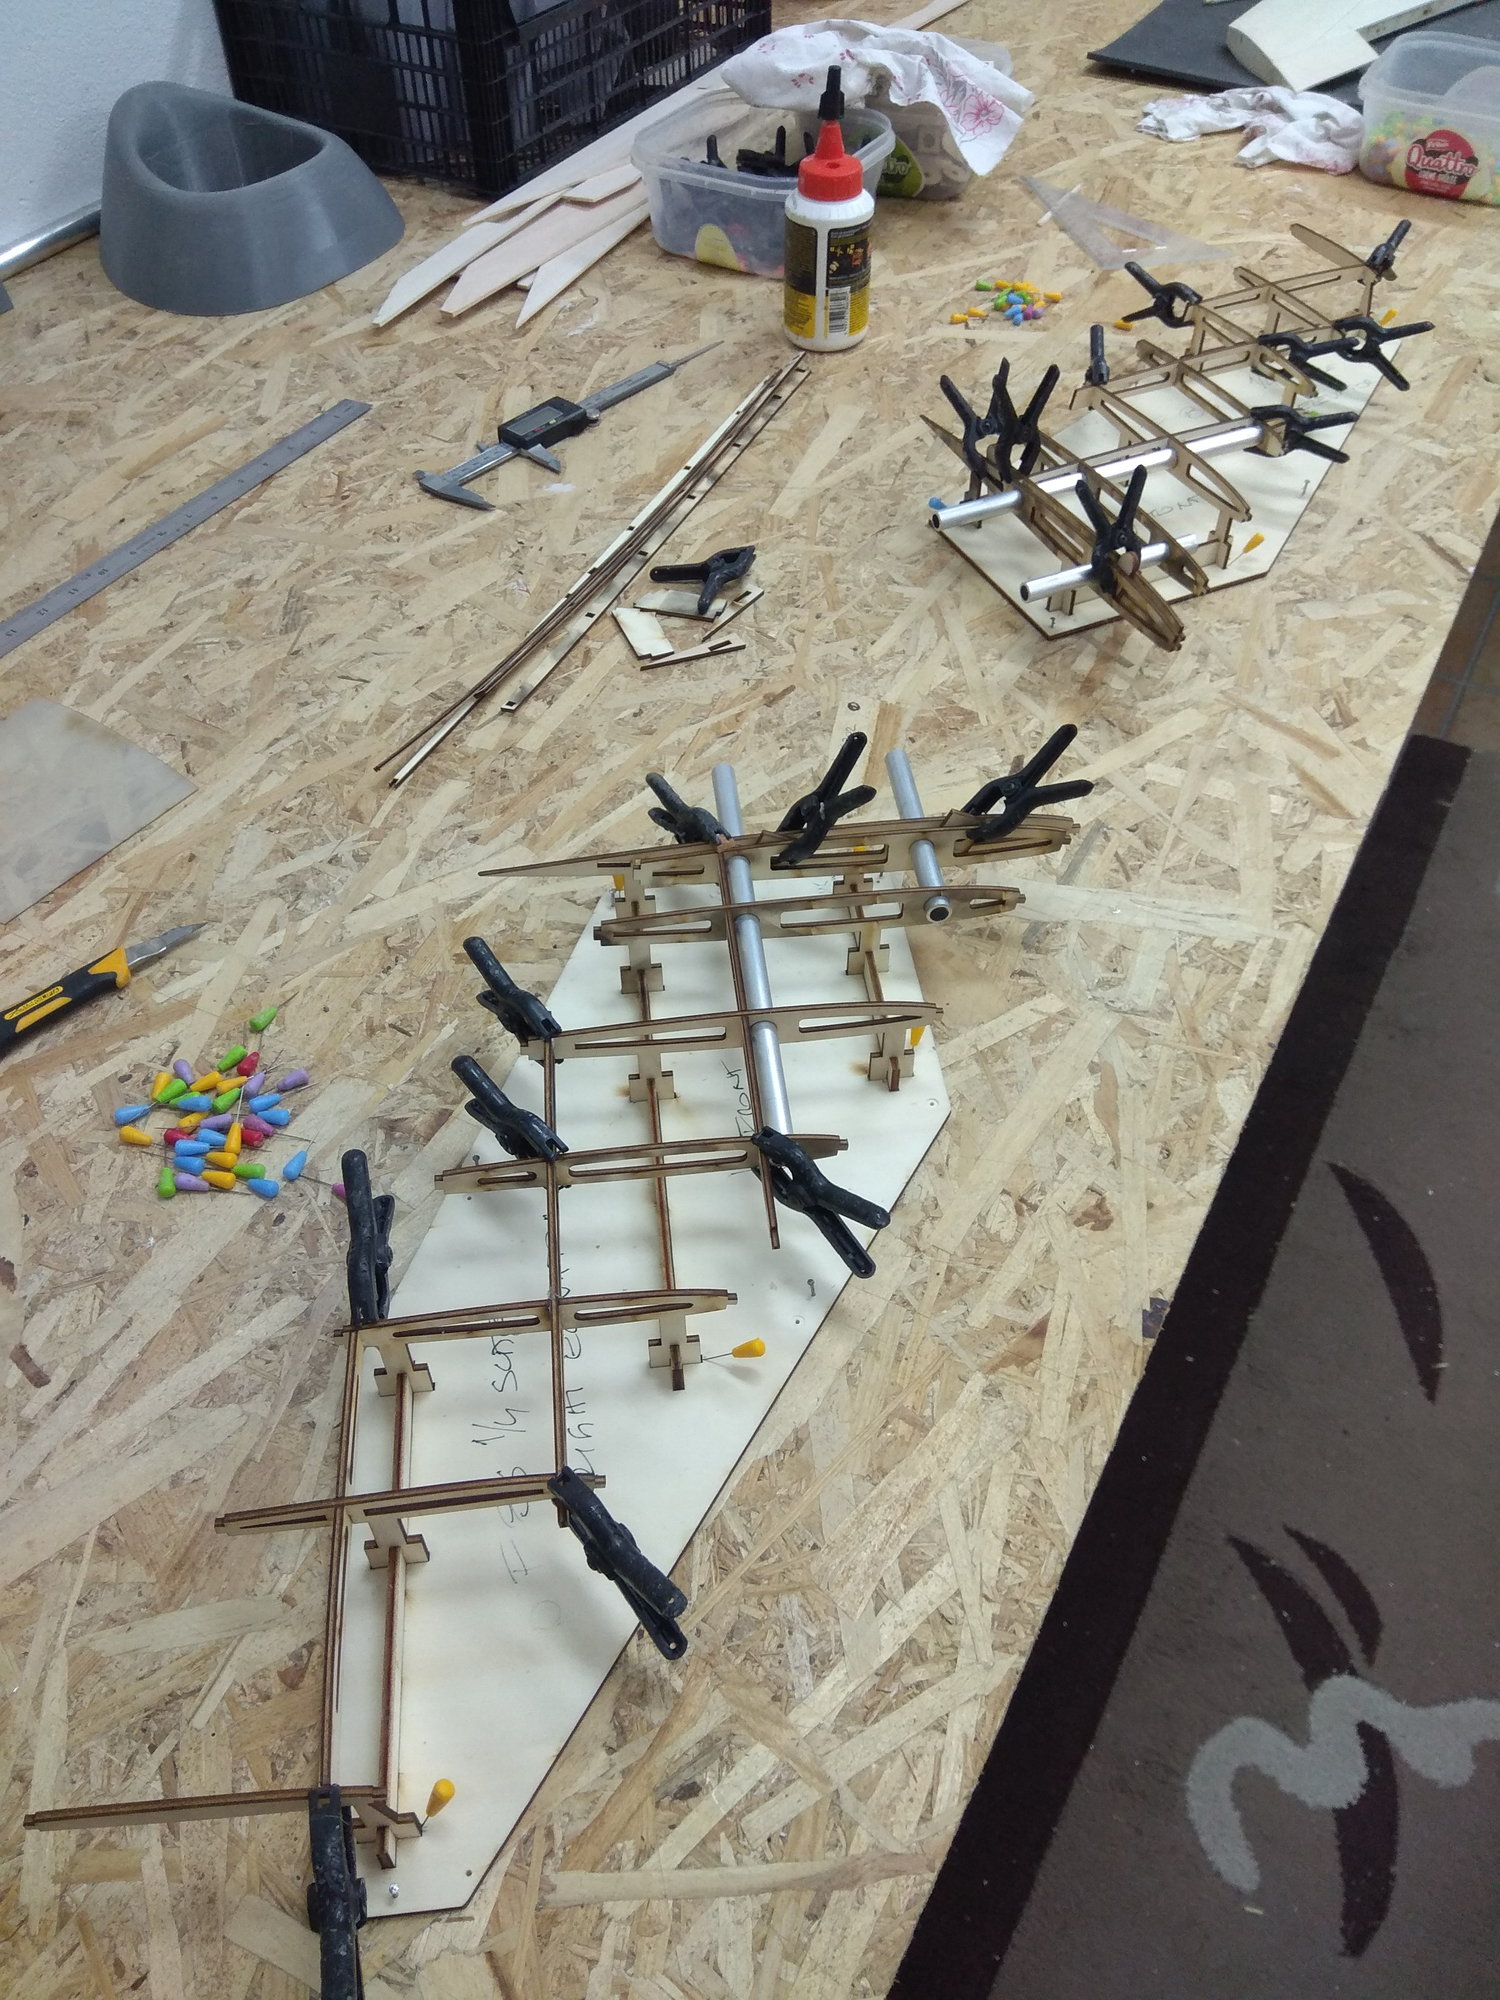
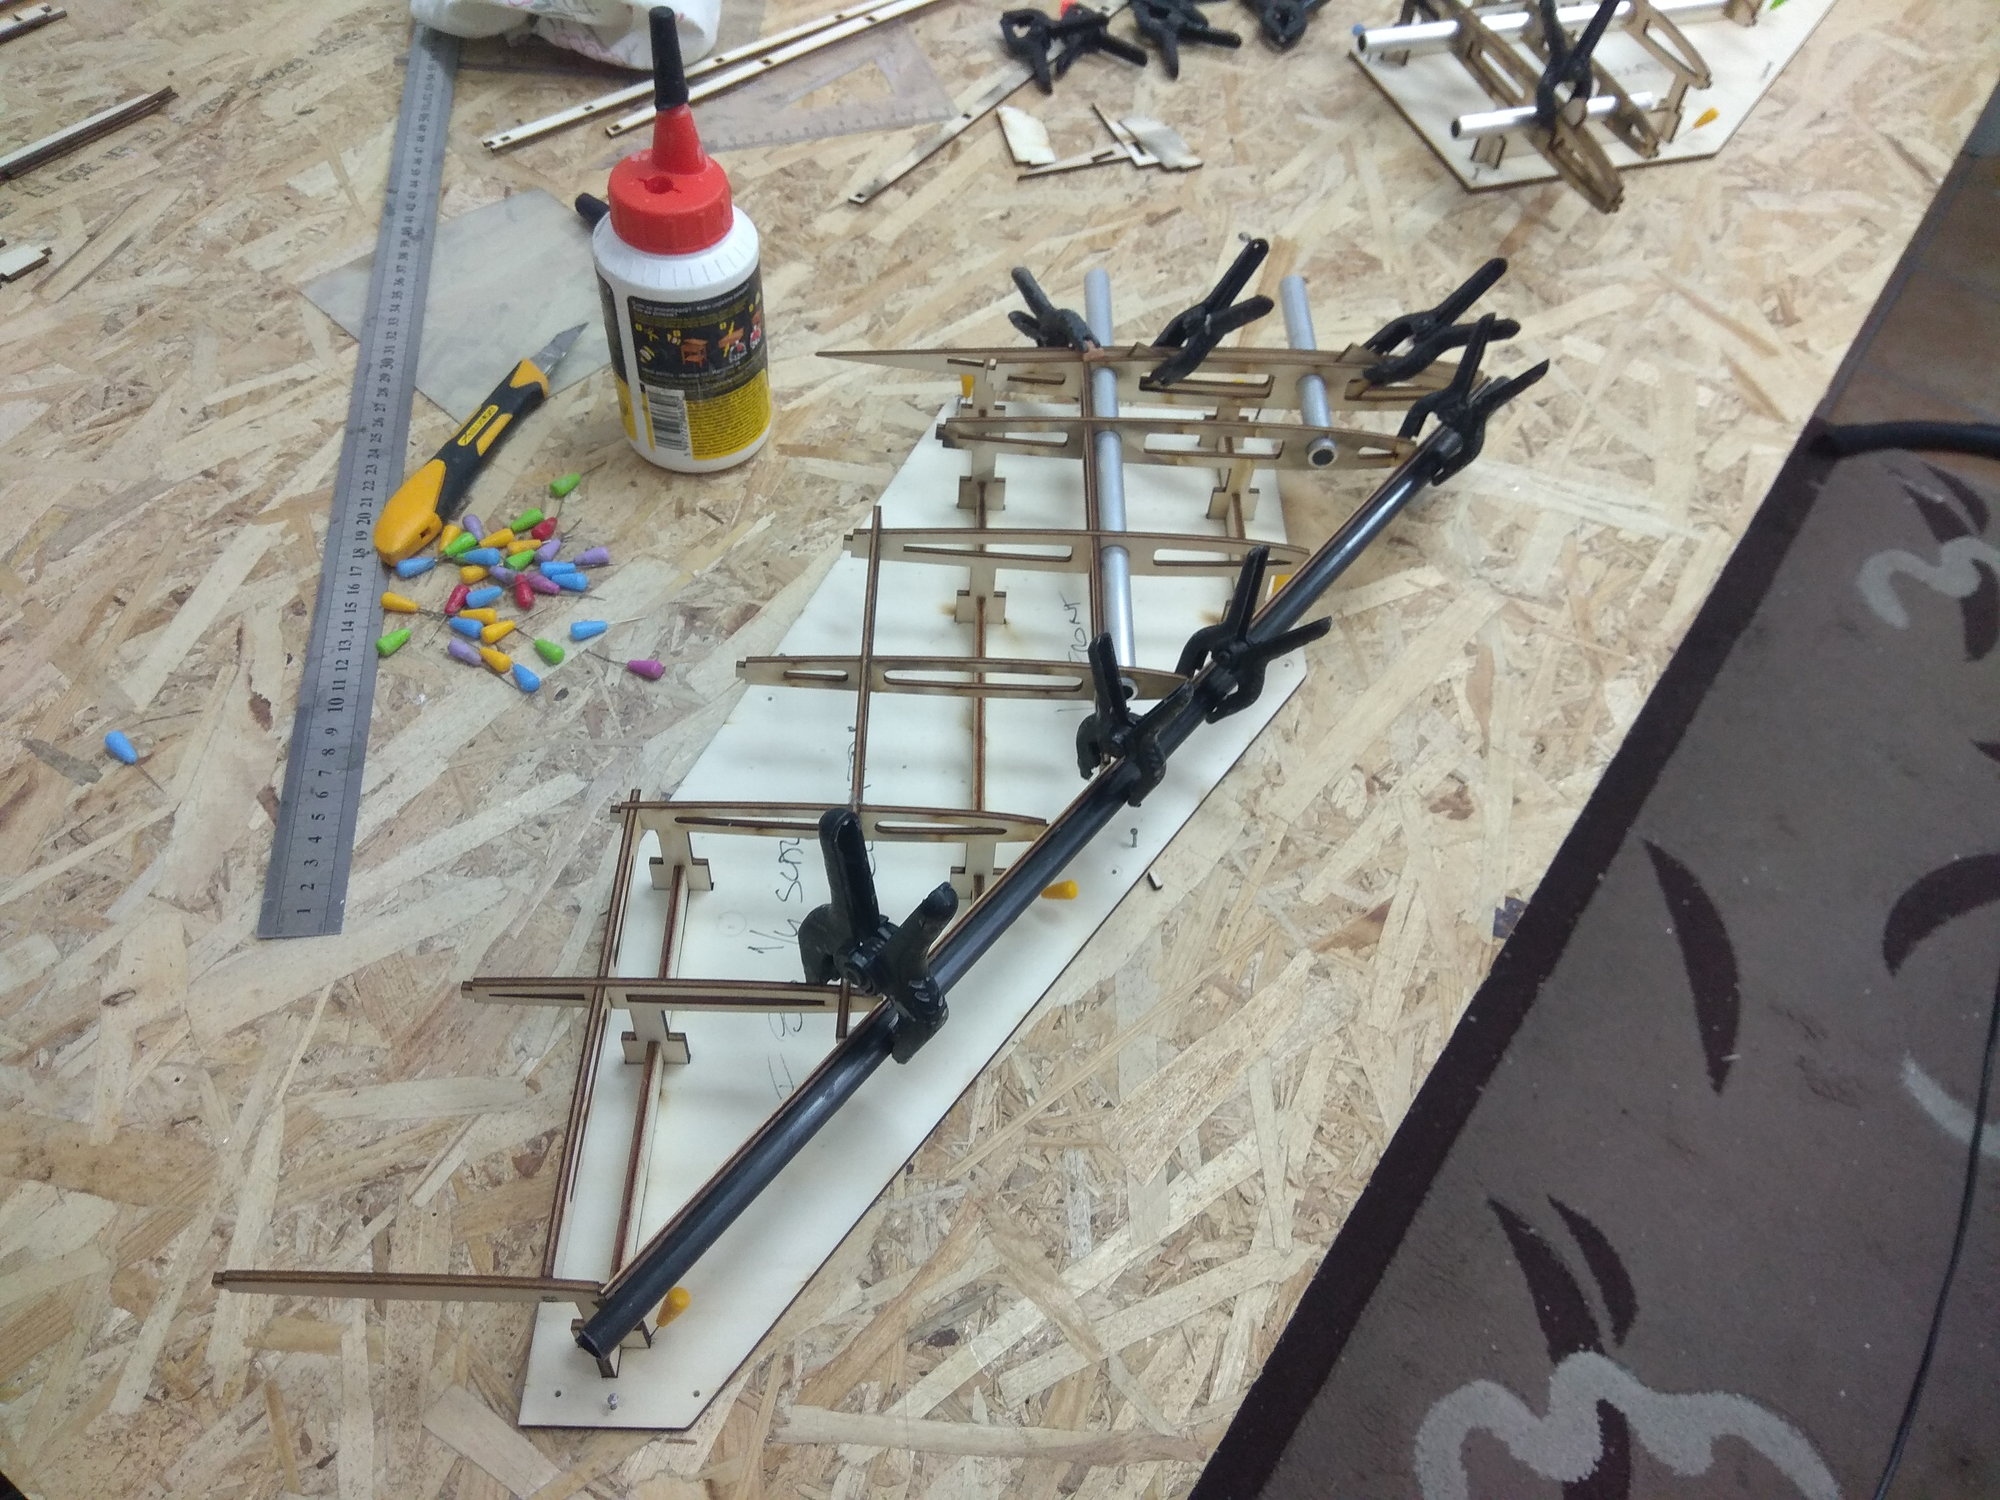
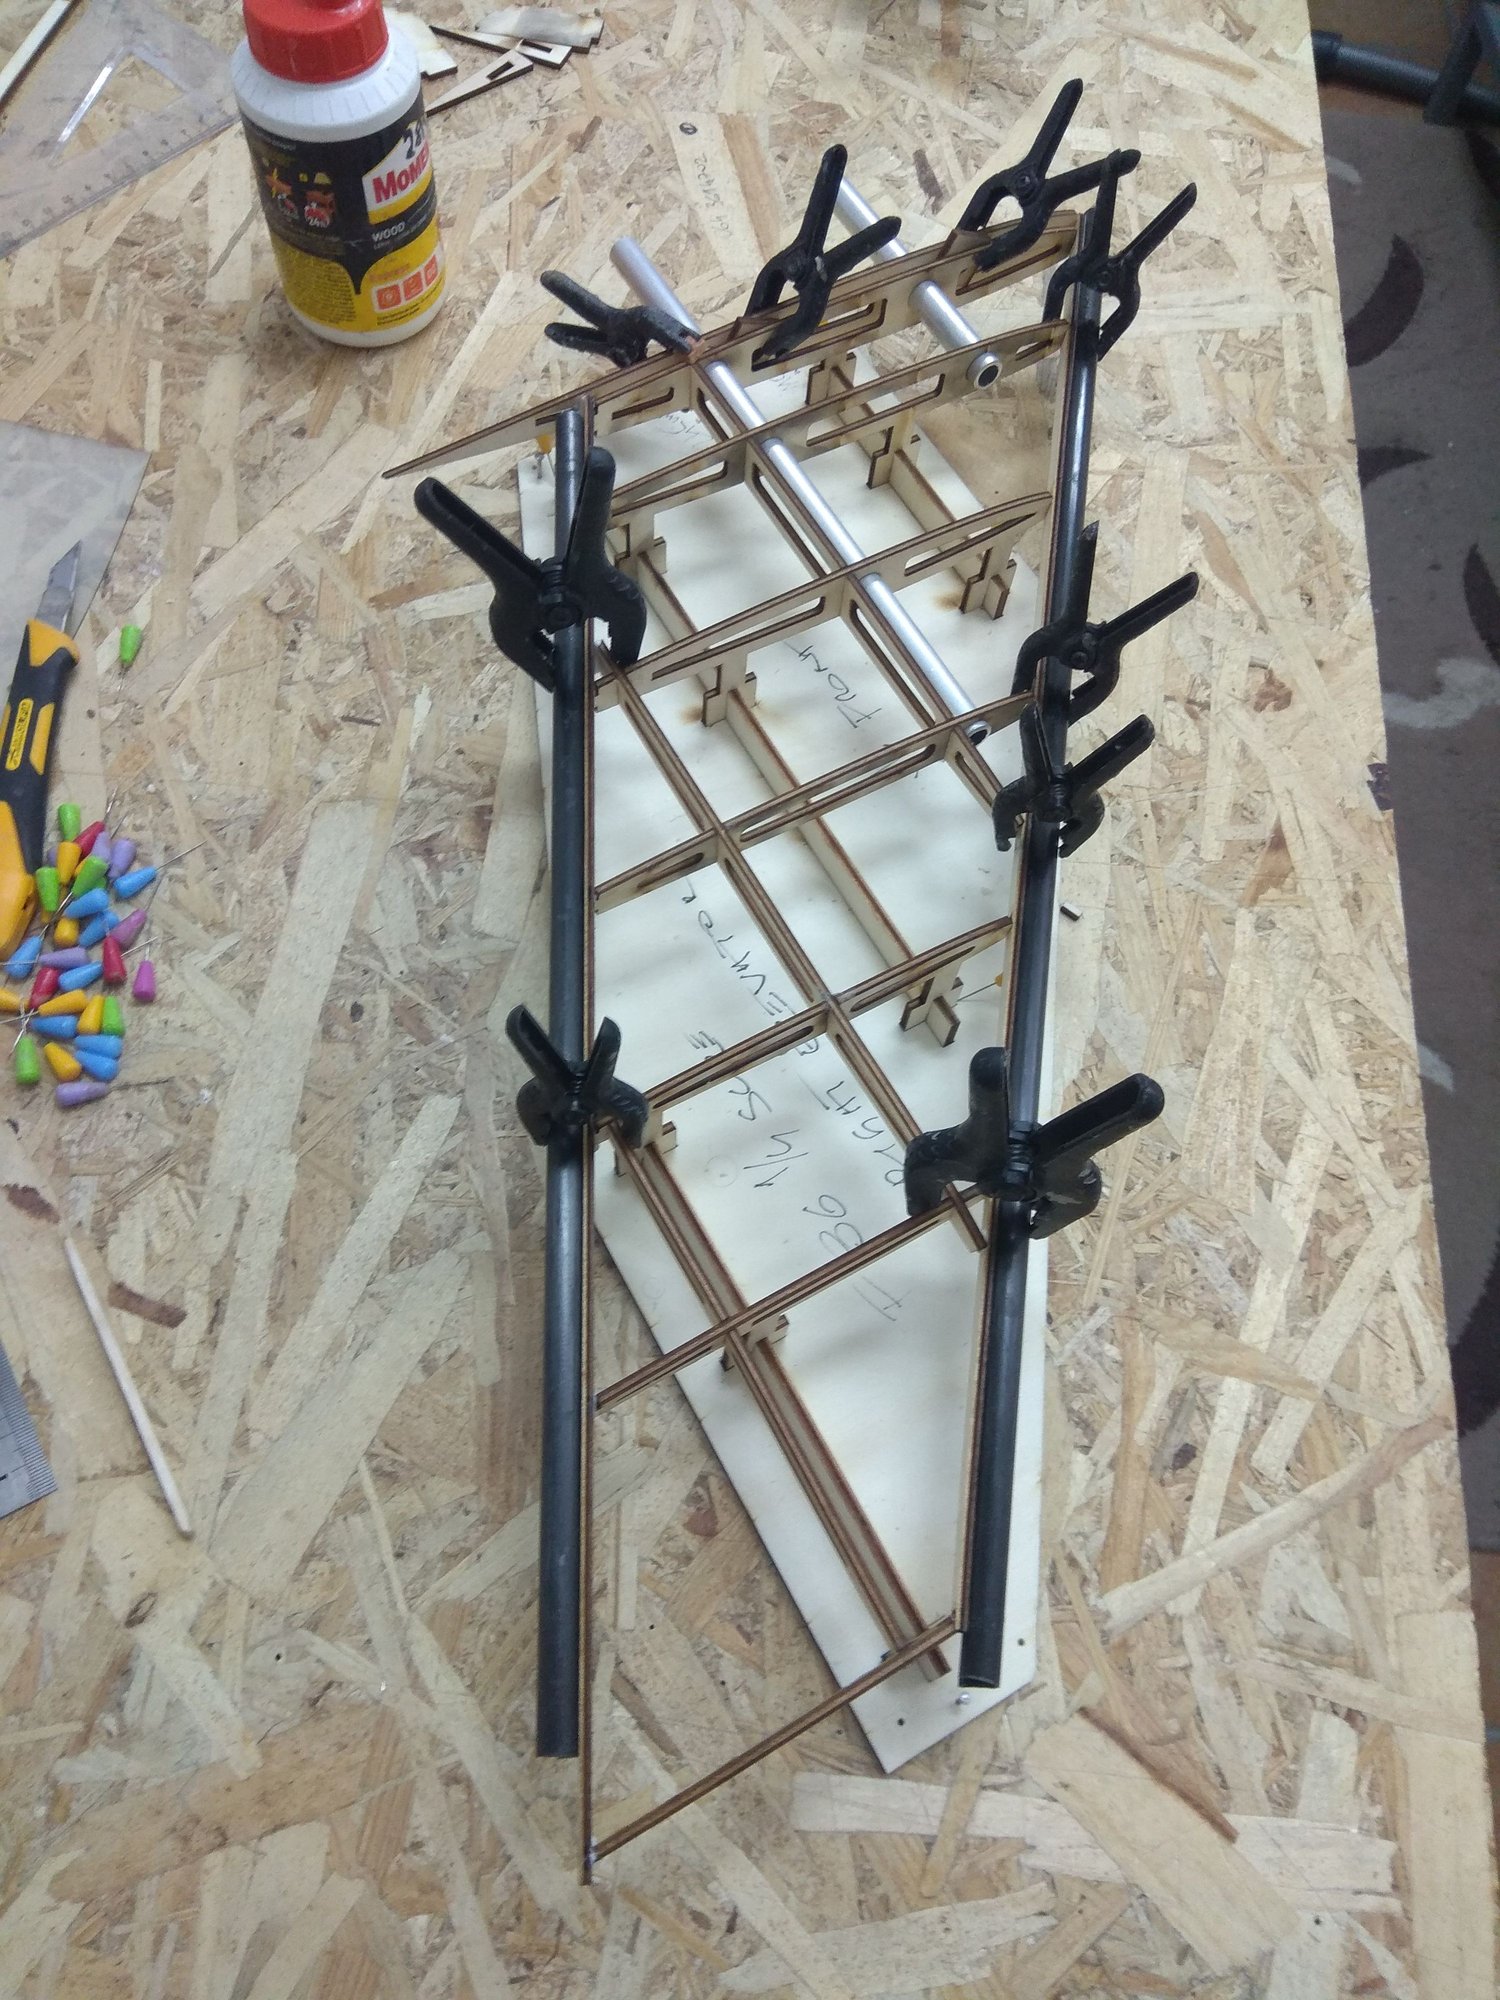
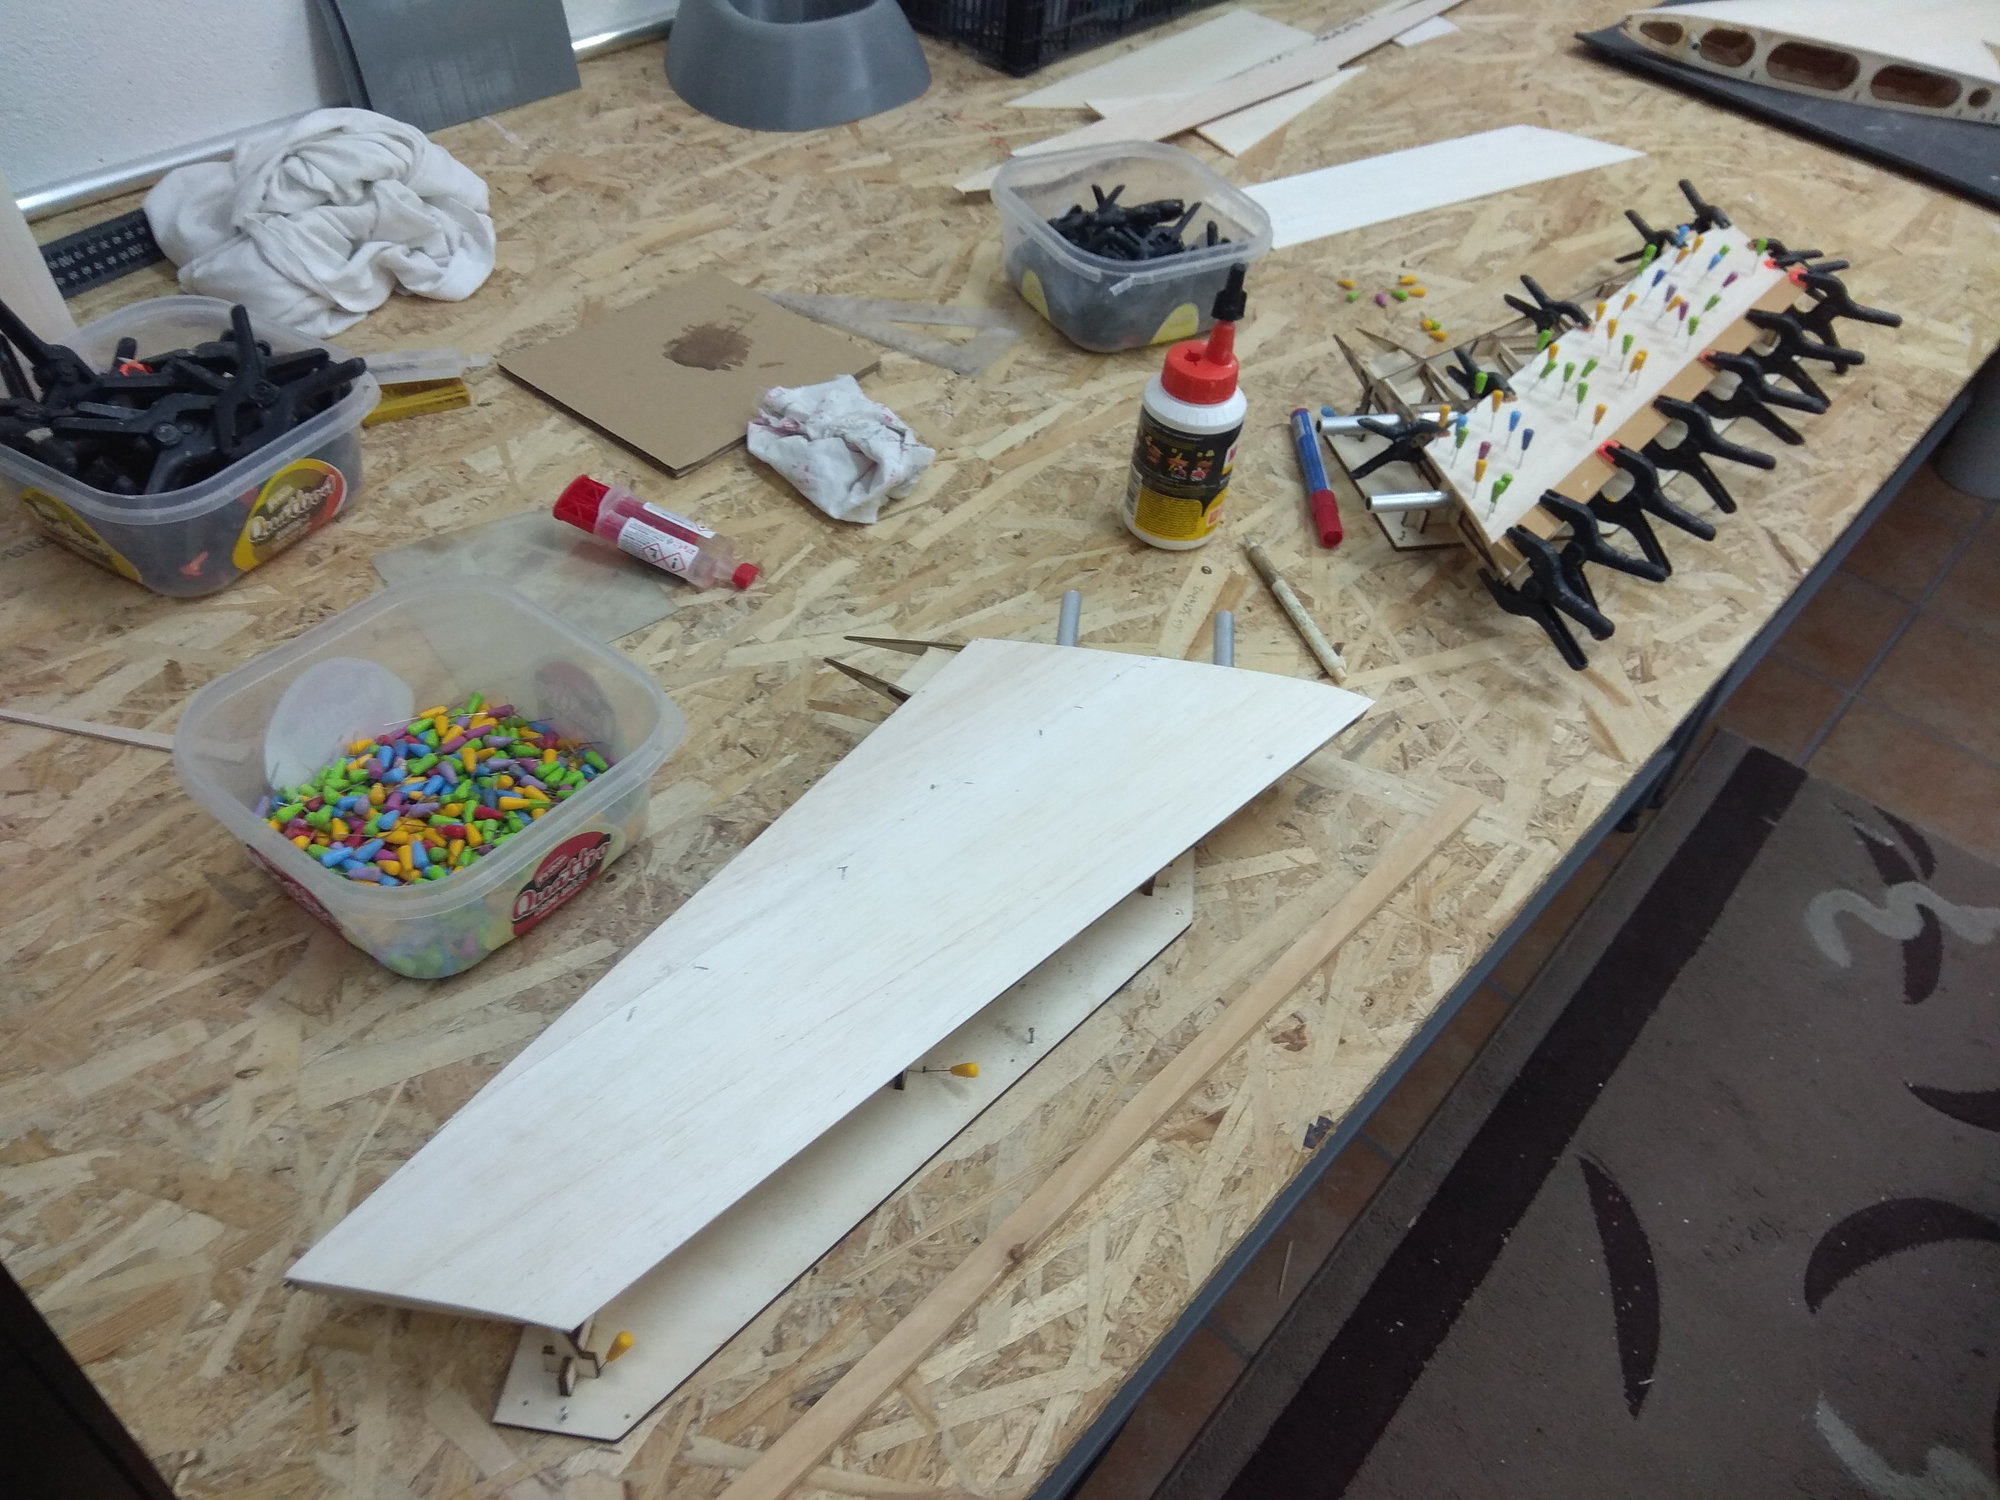
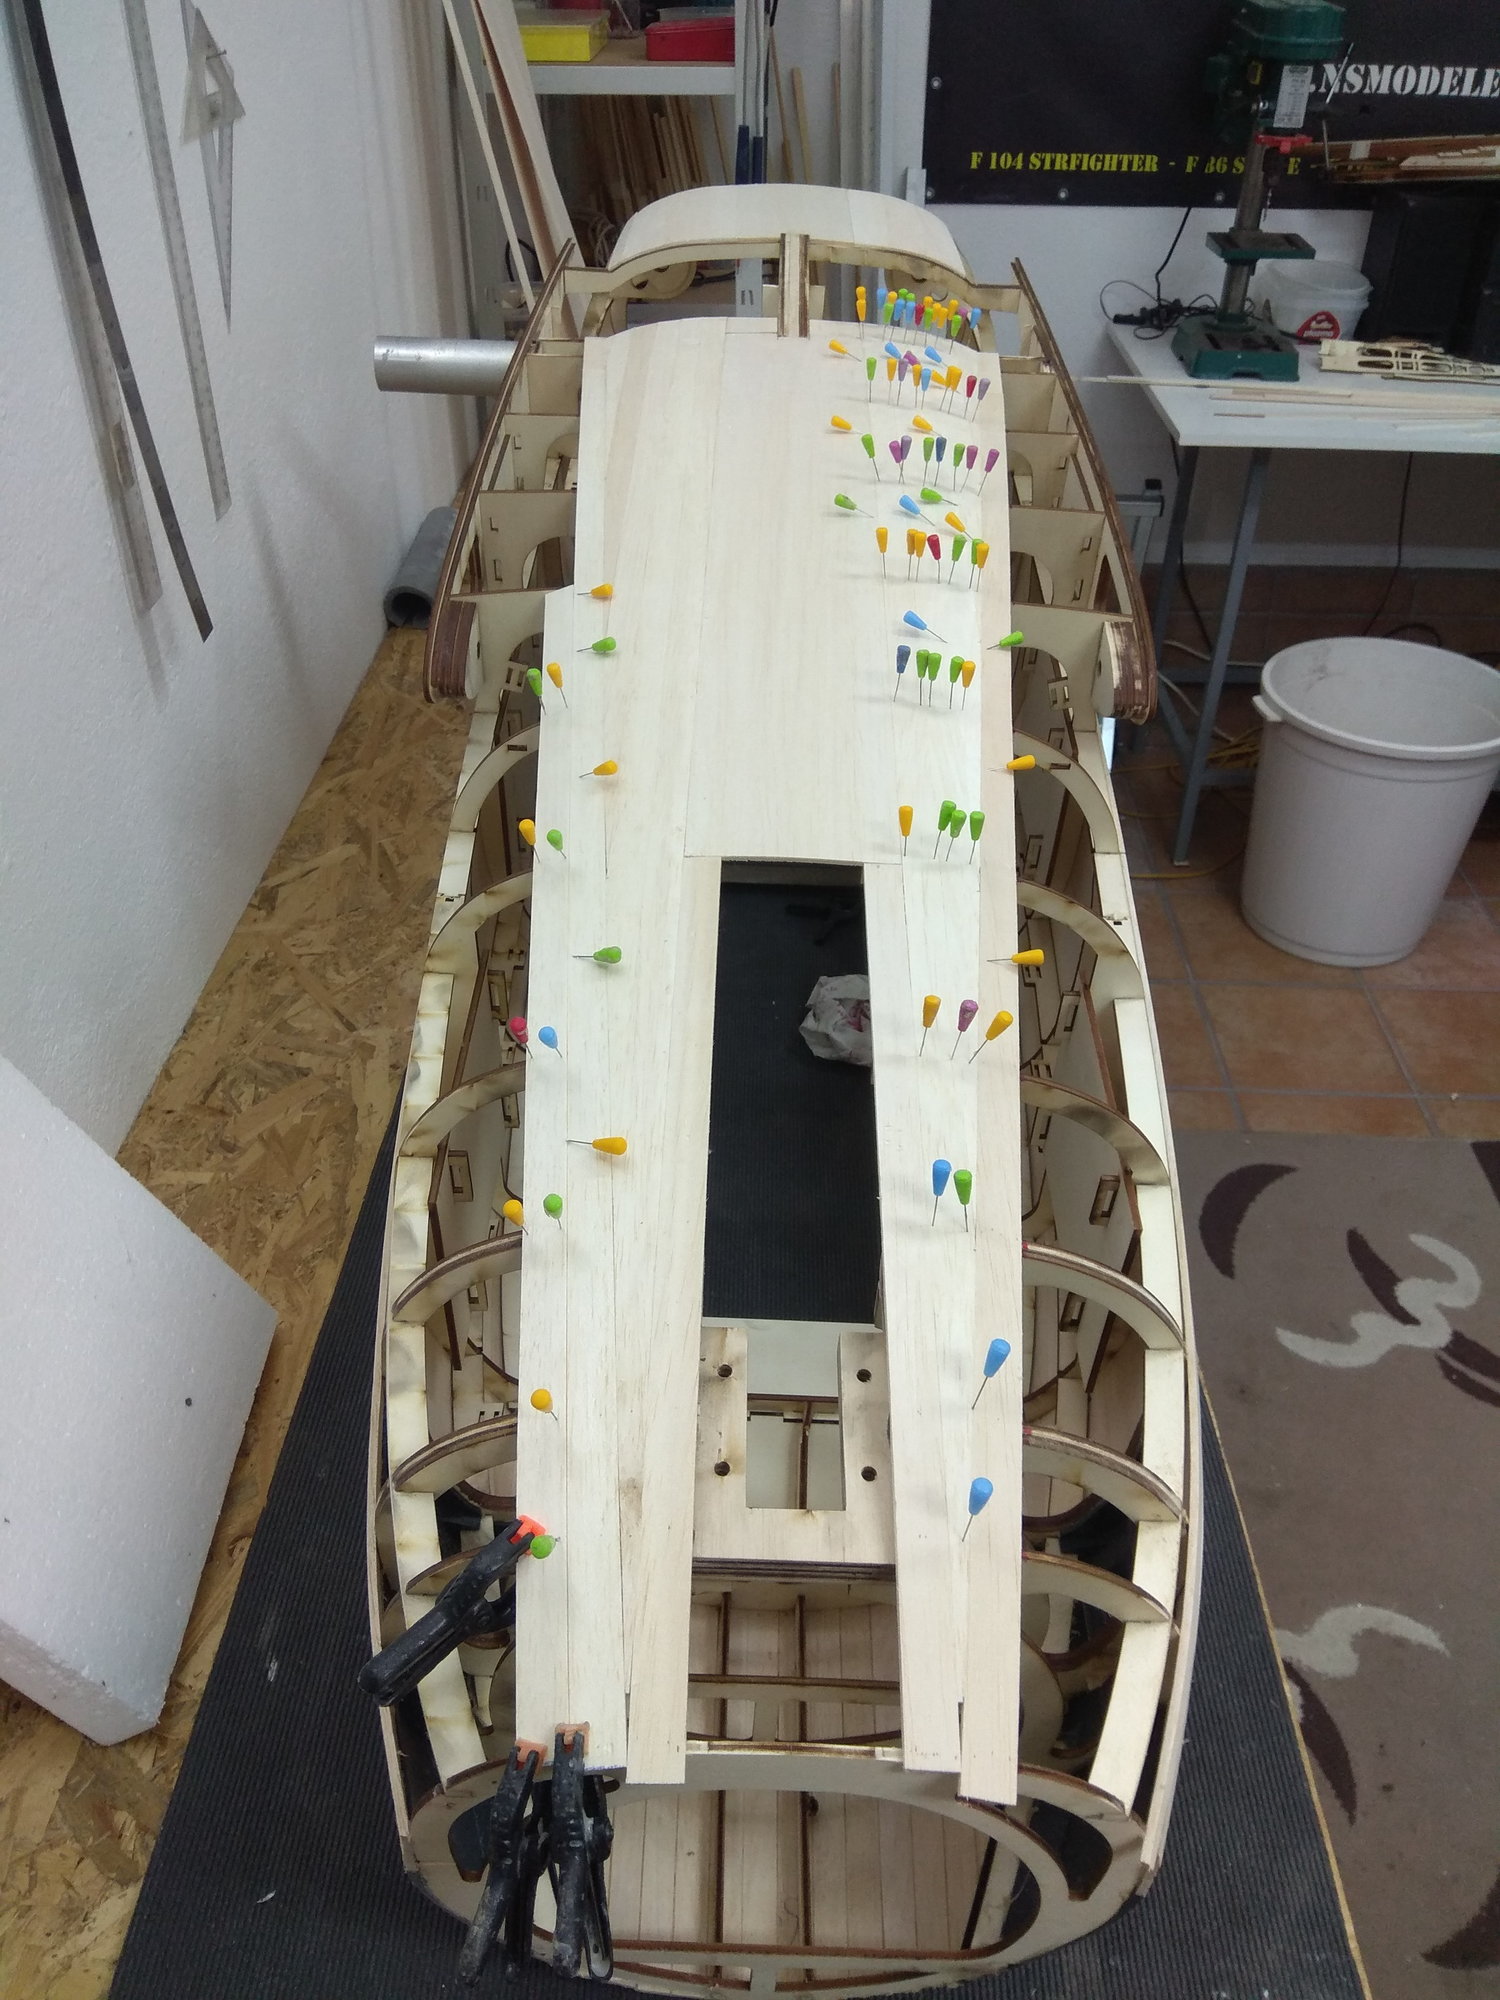
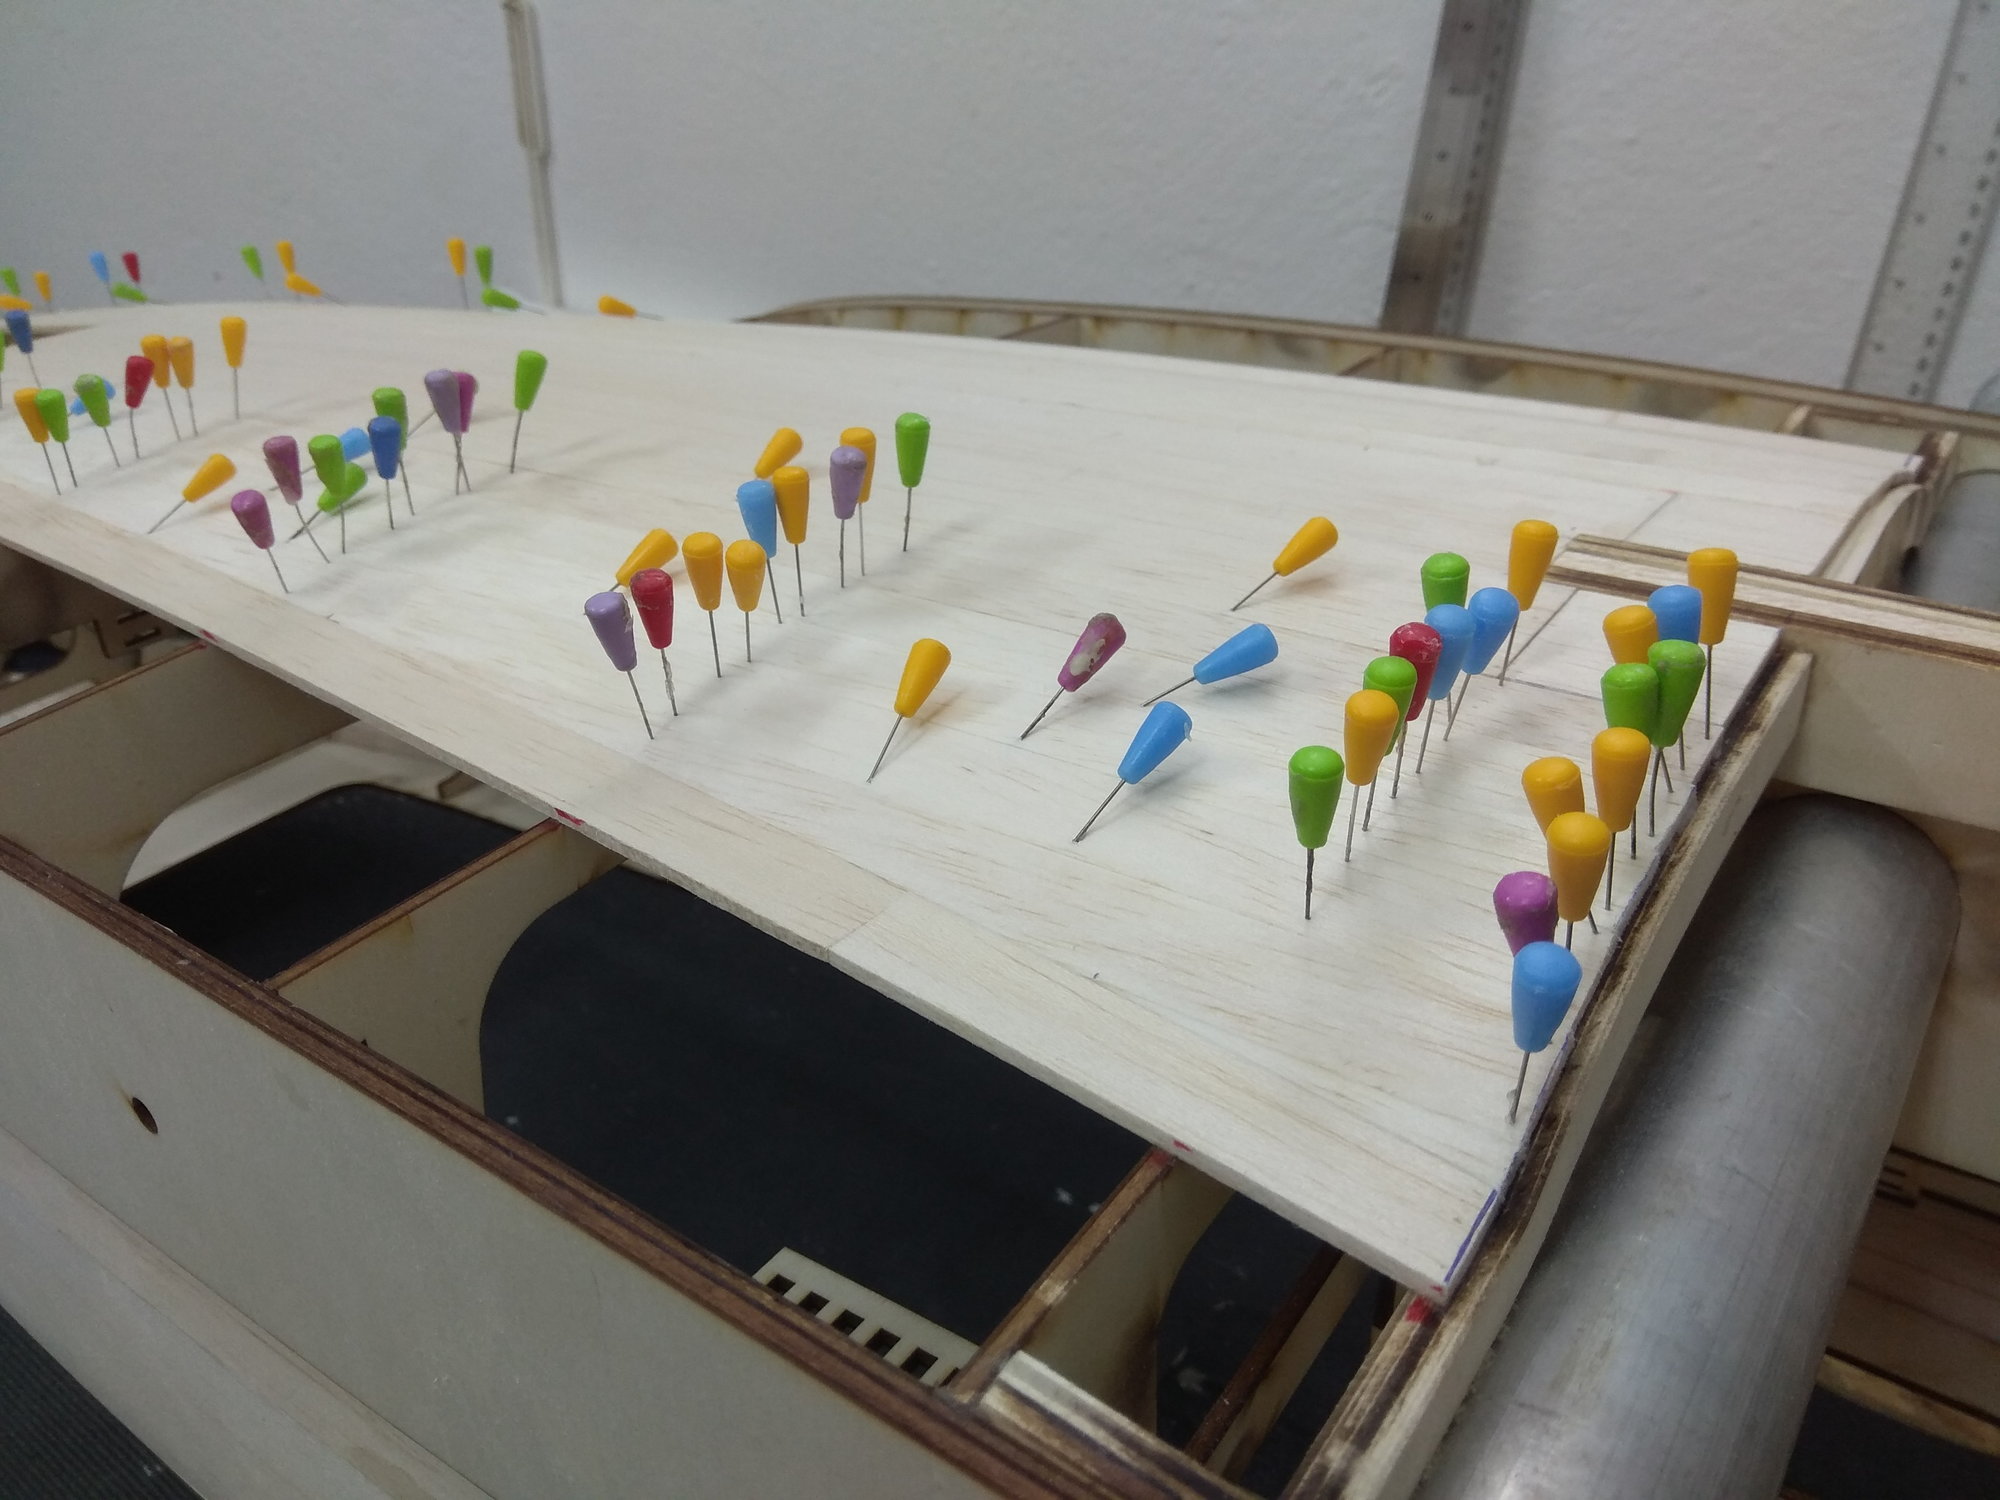
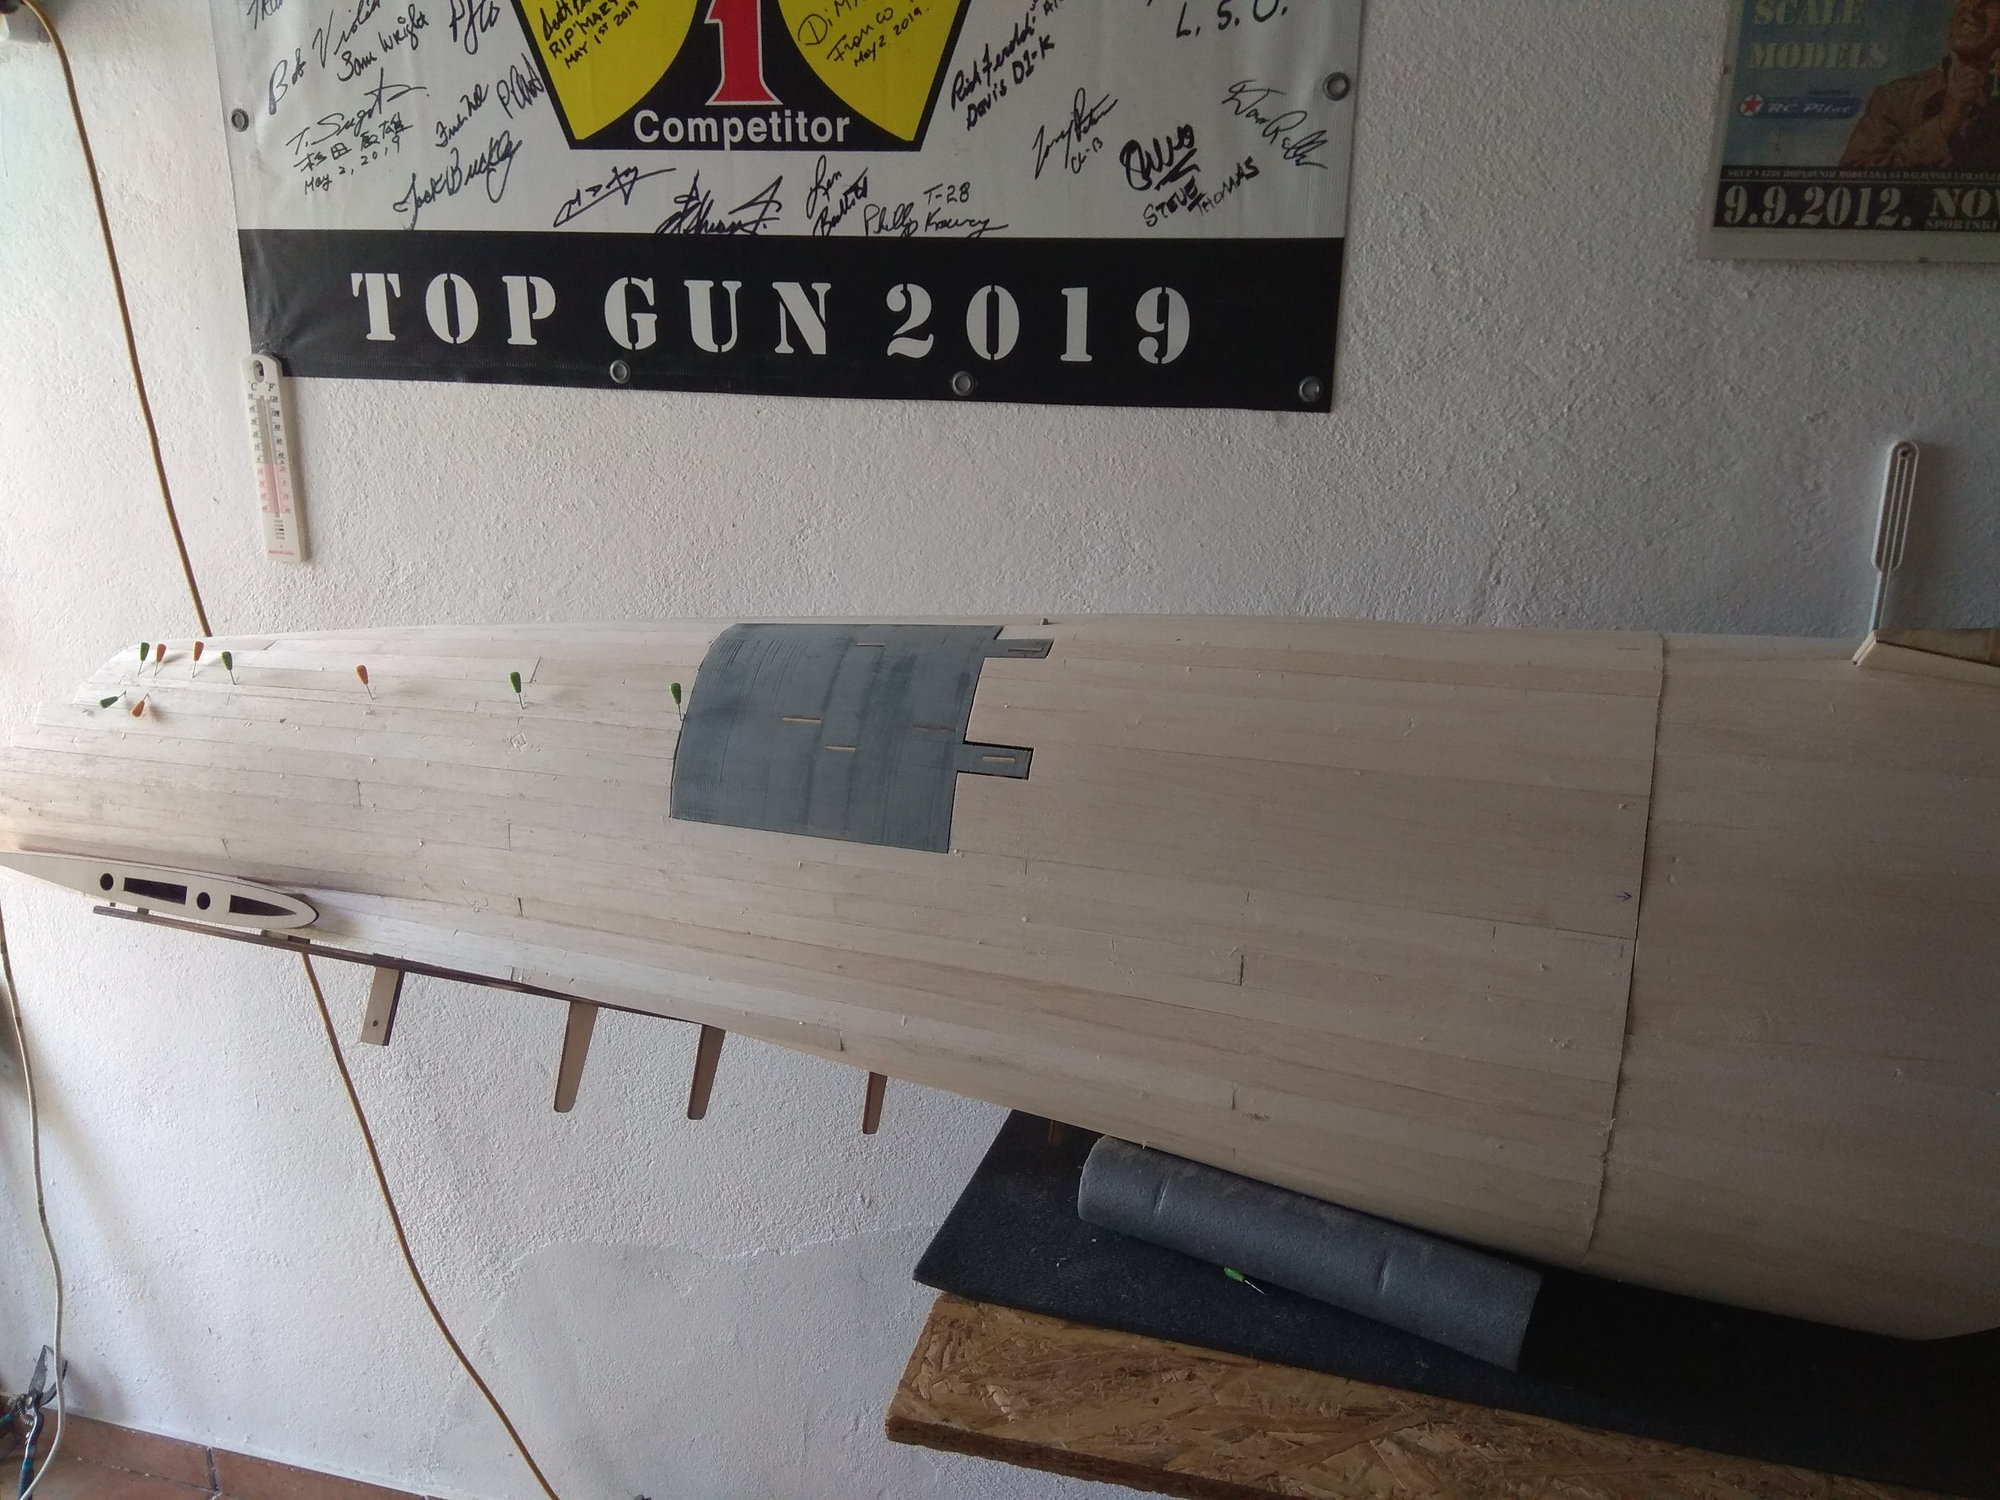
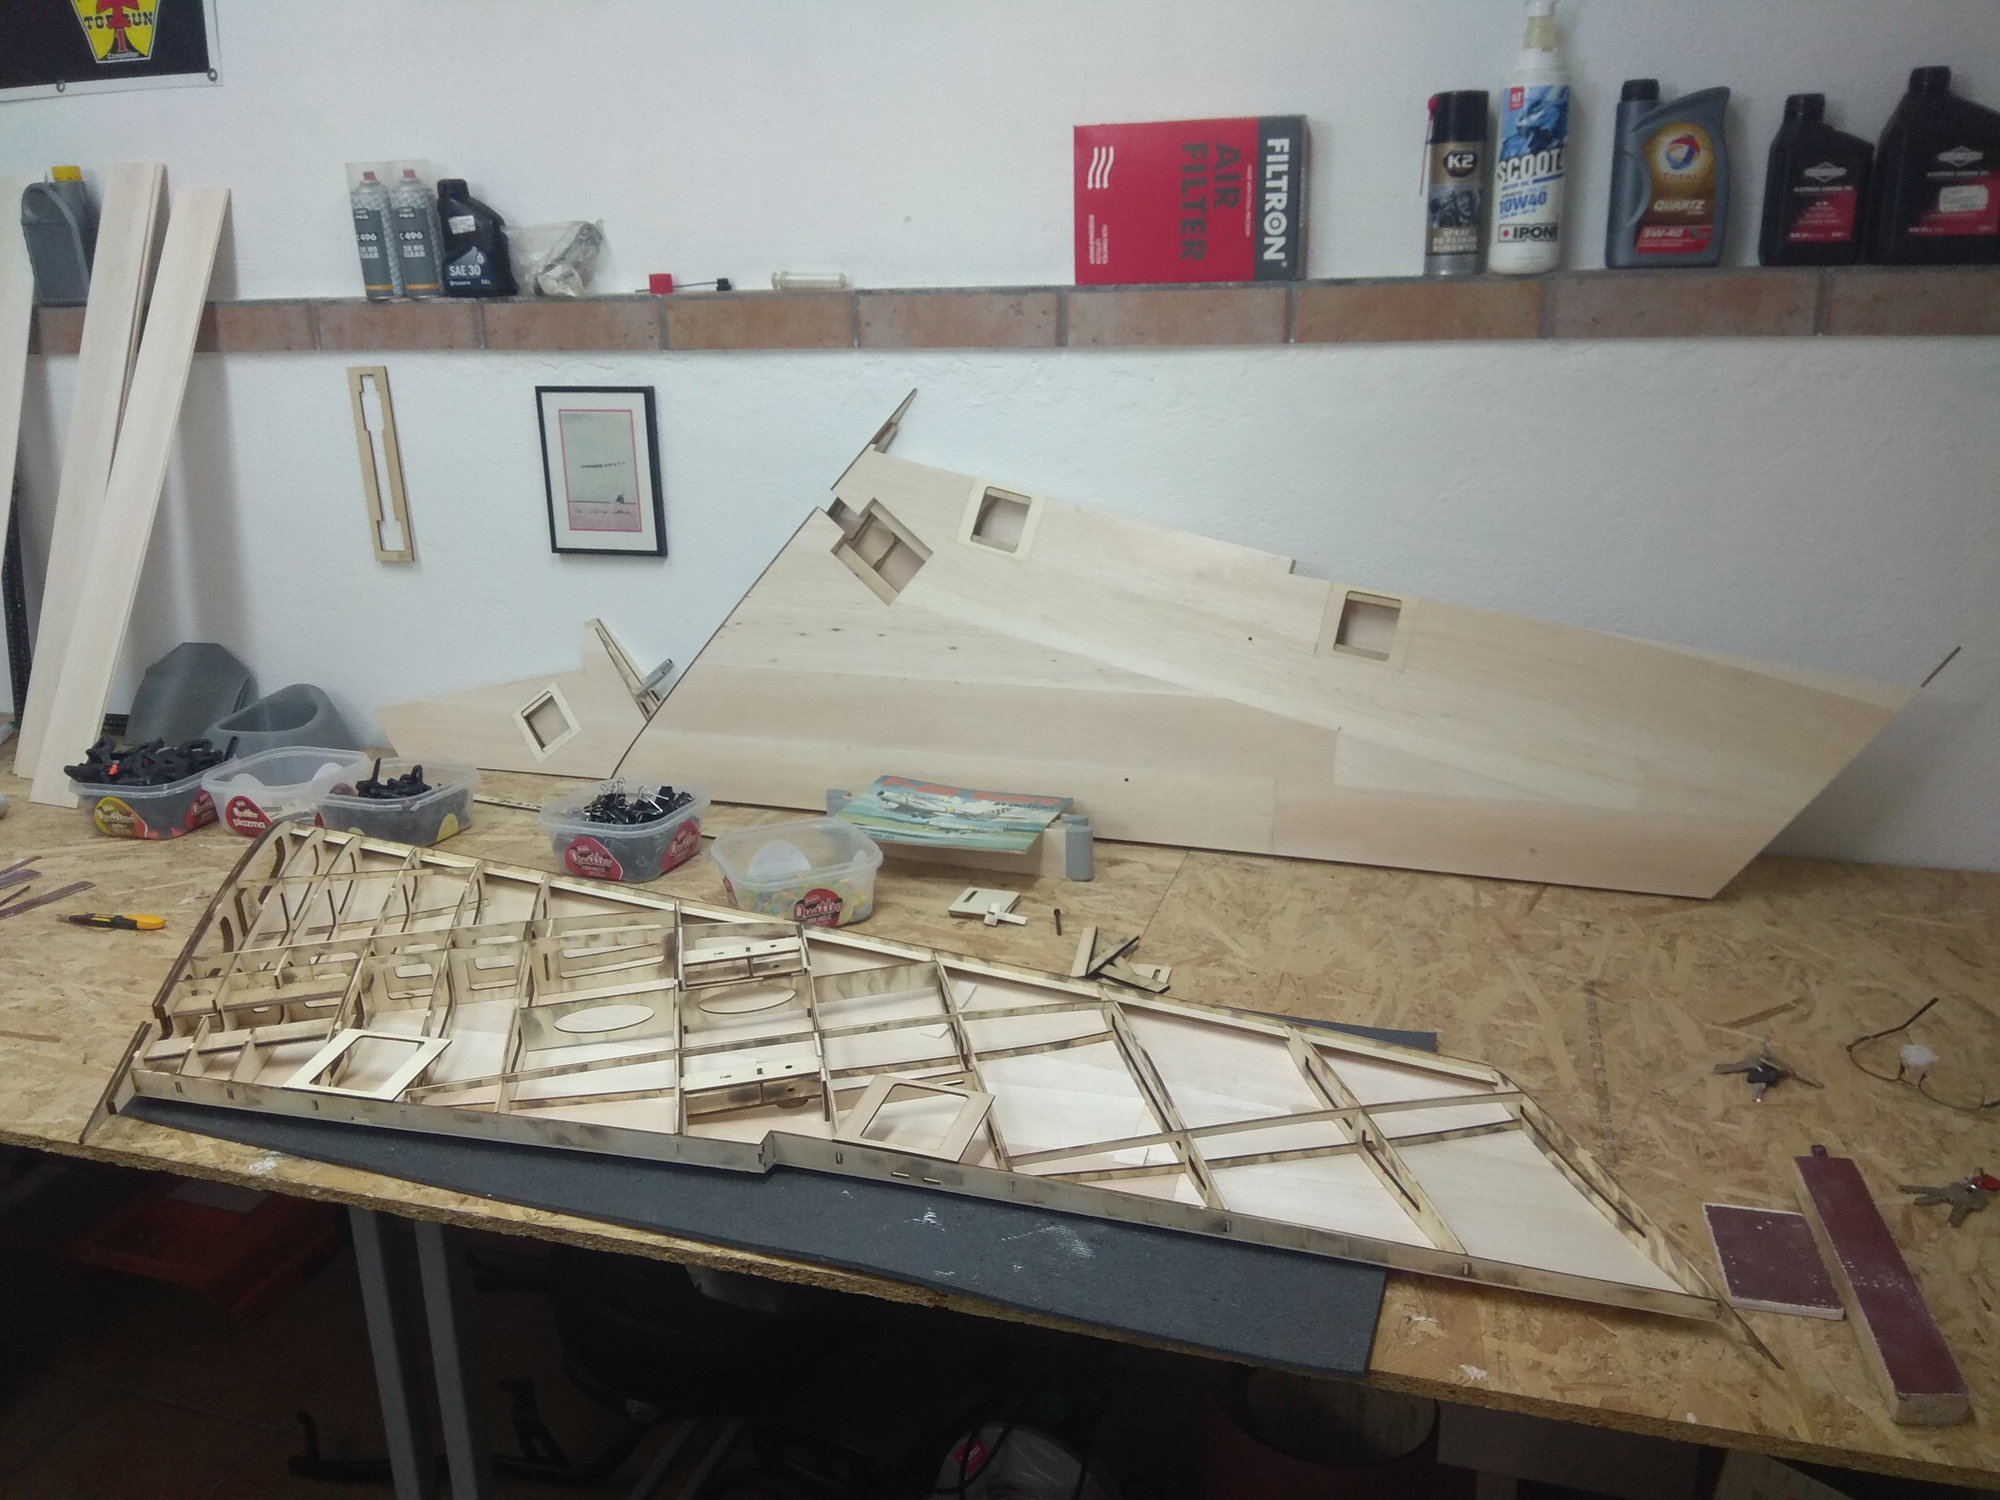
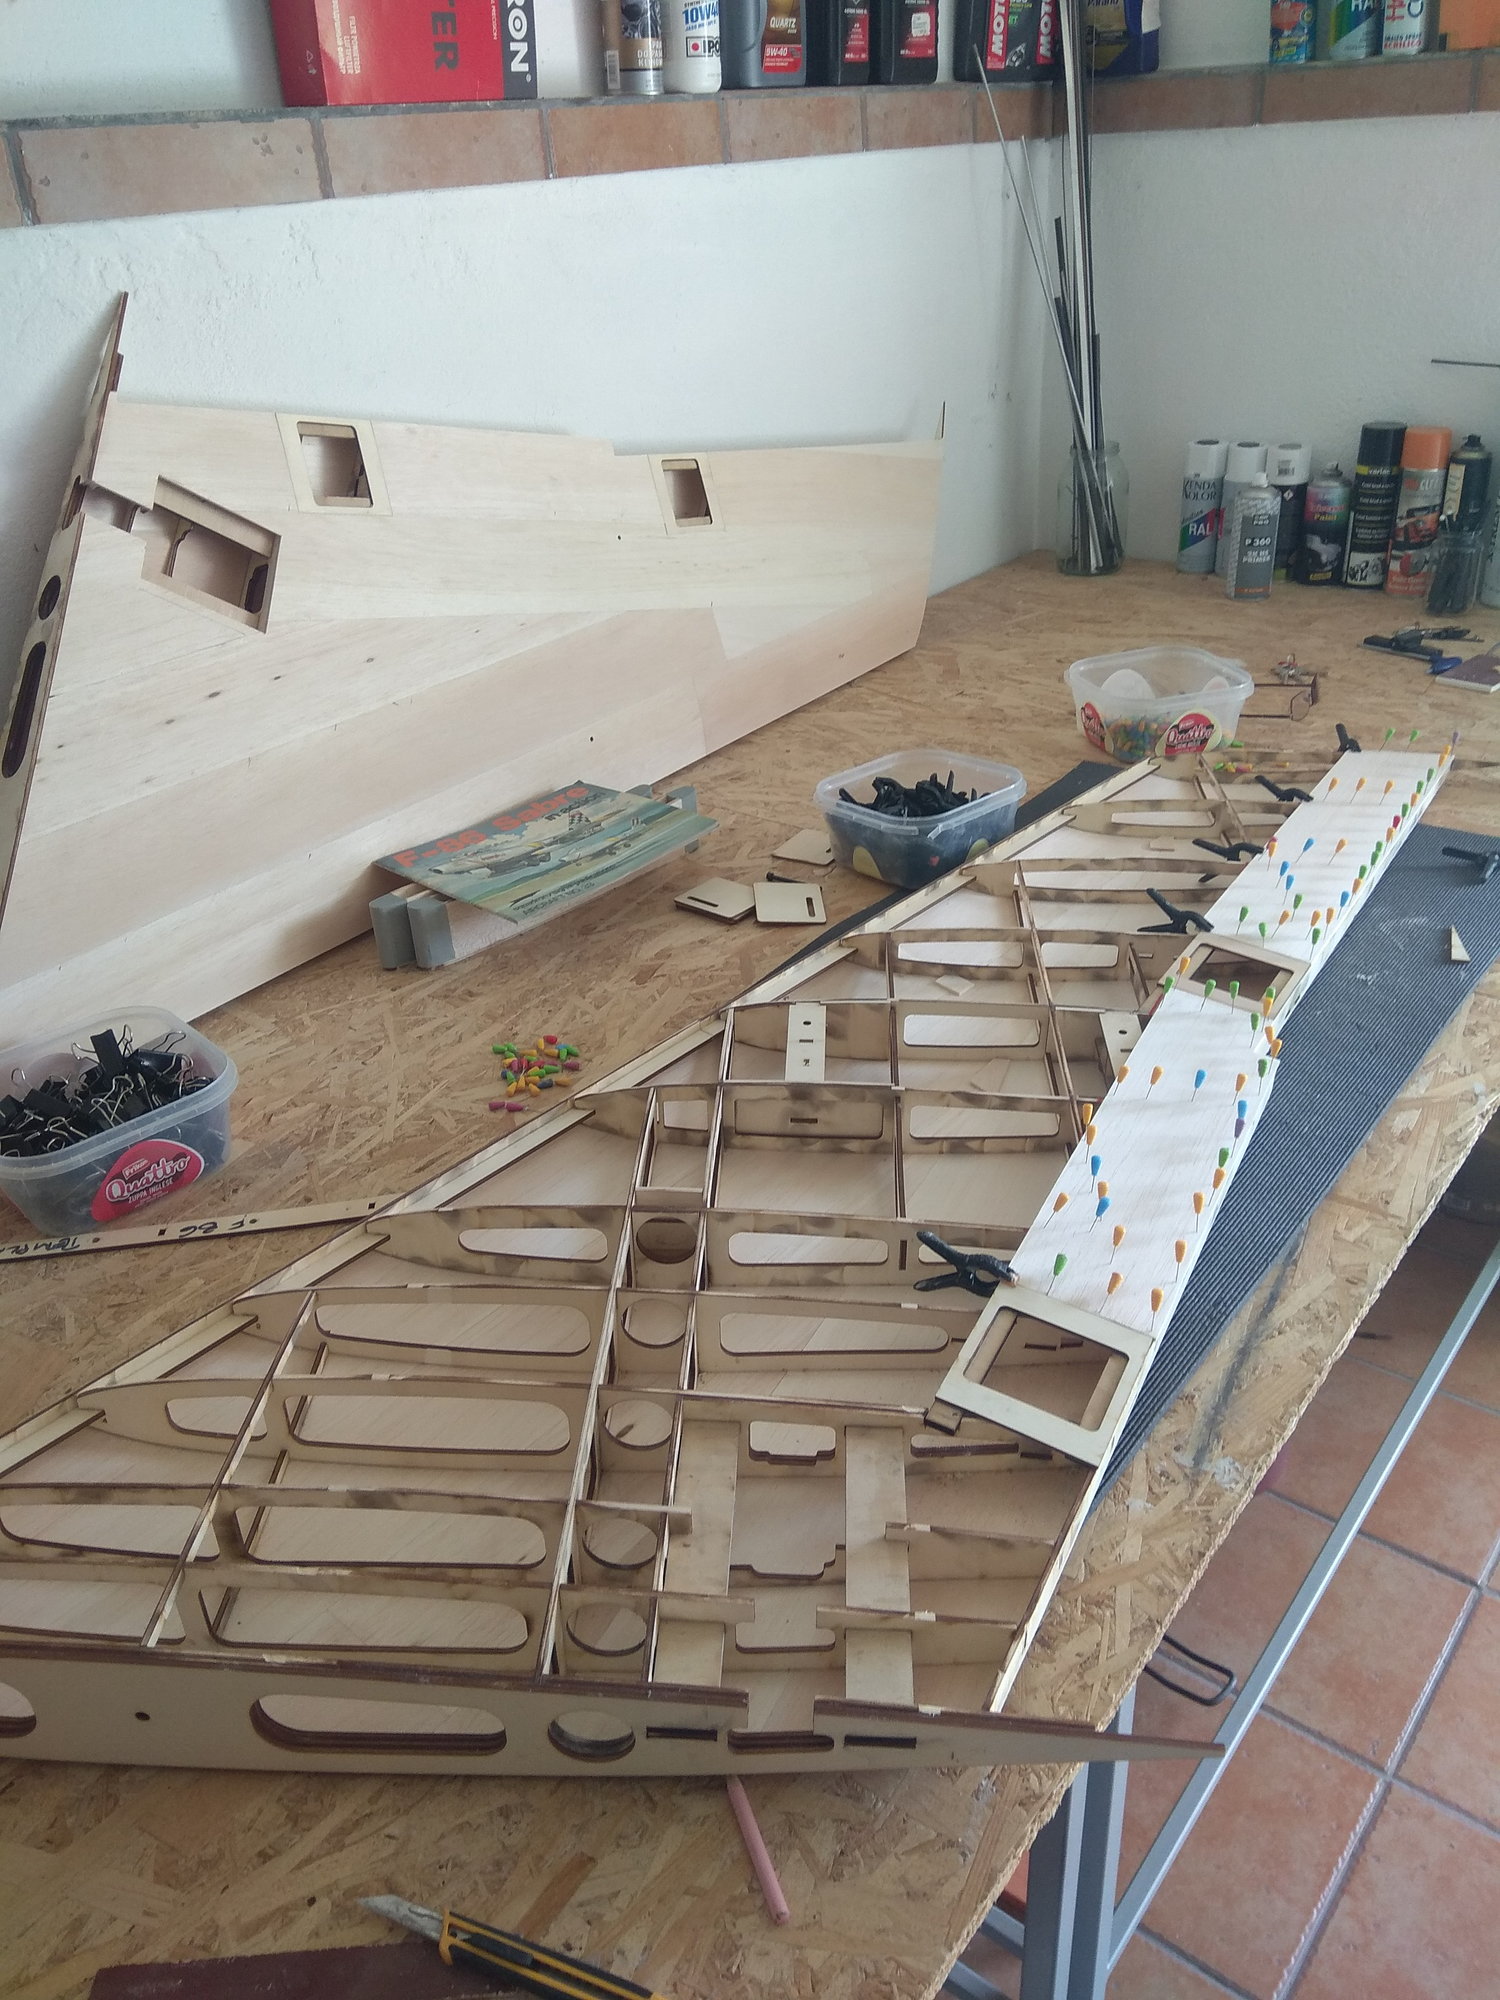
F 86 - 1:4 scale wing top side...
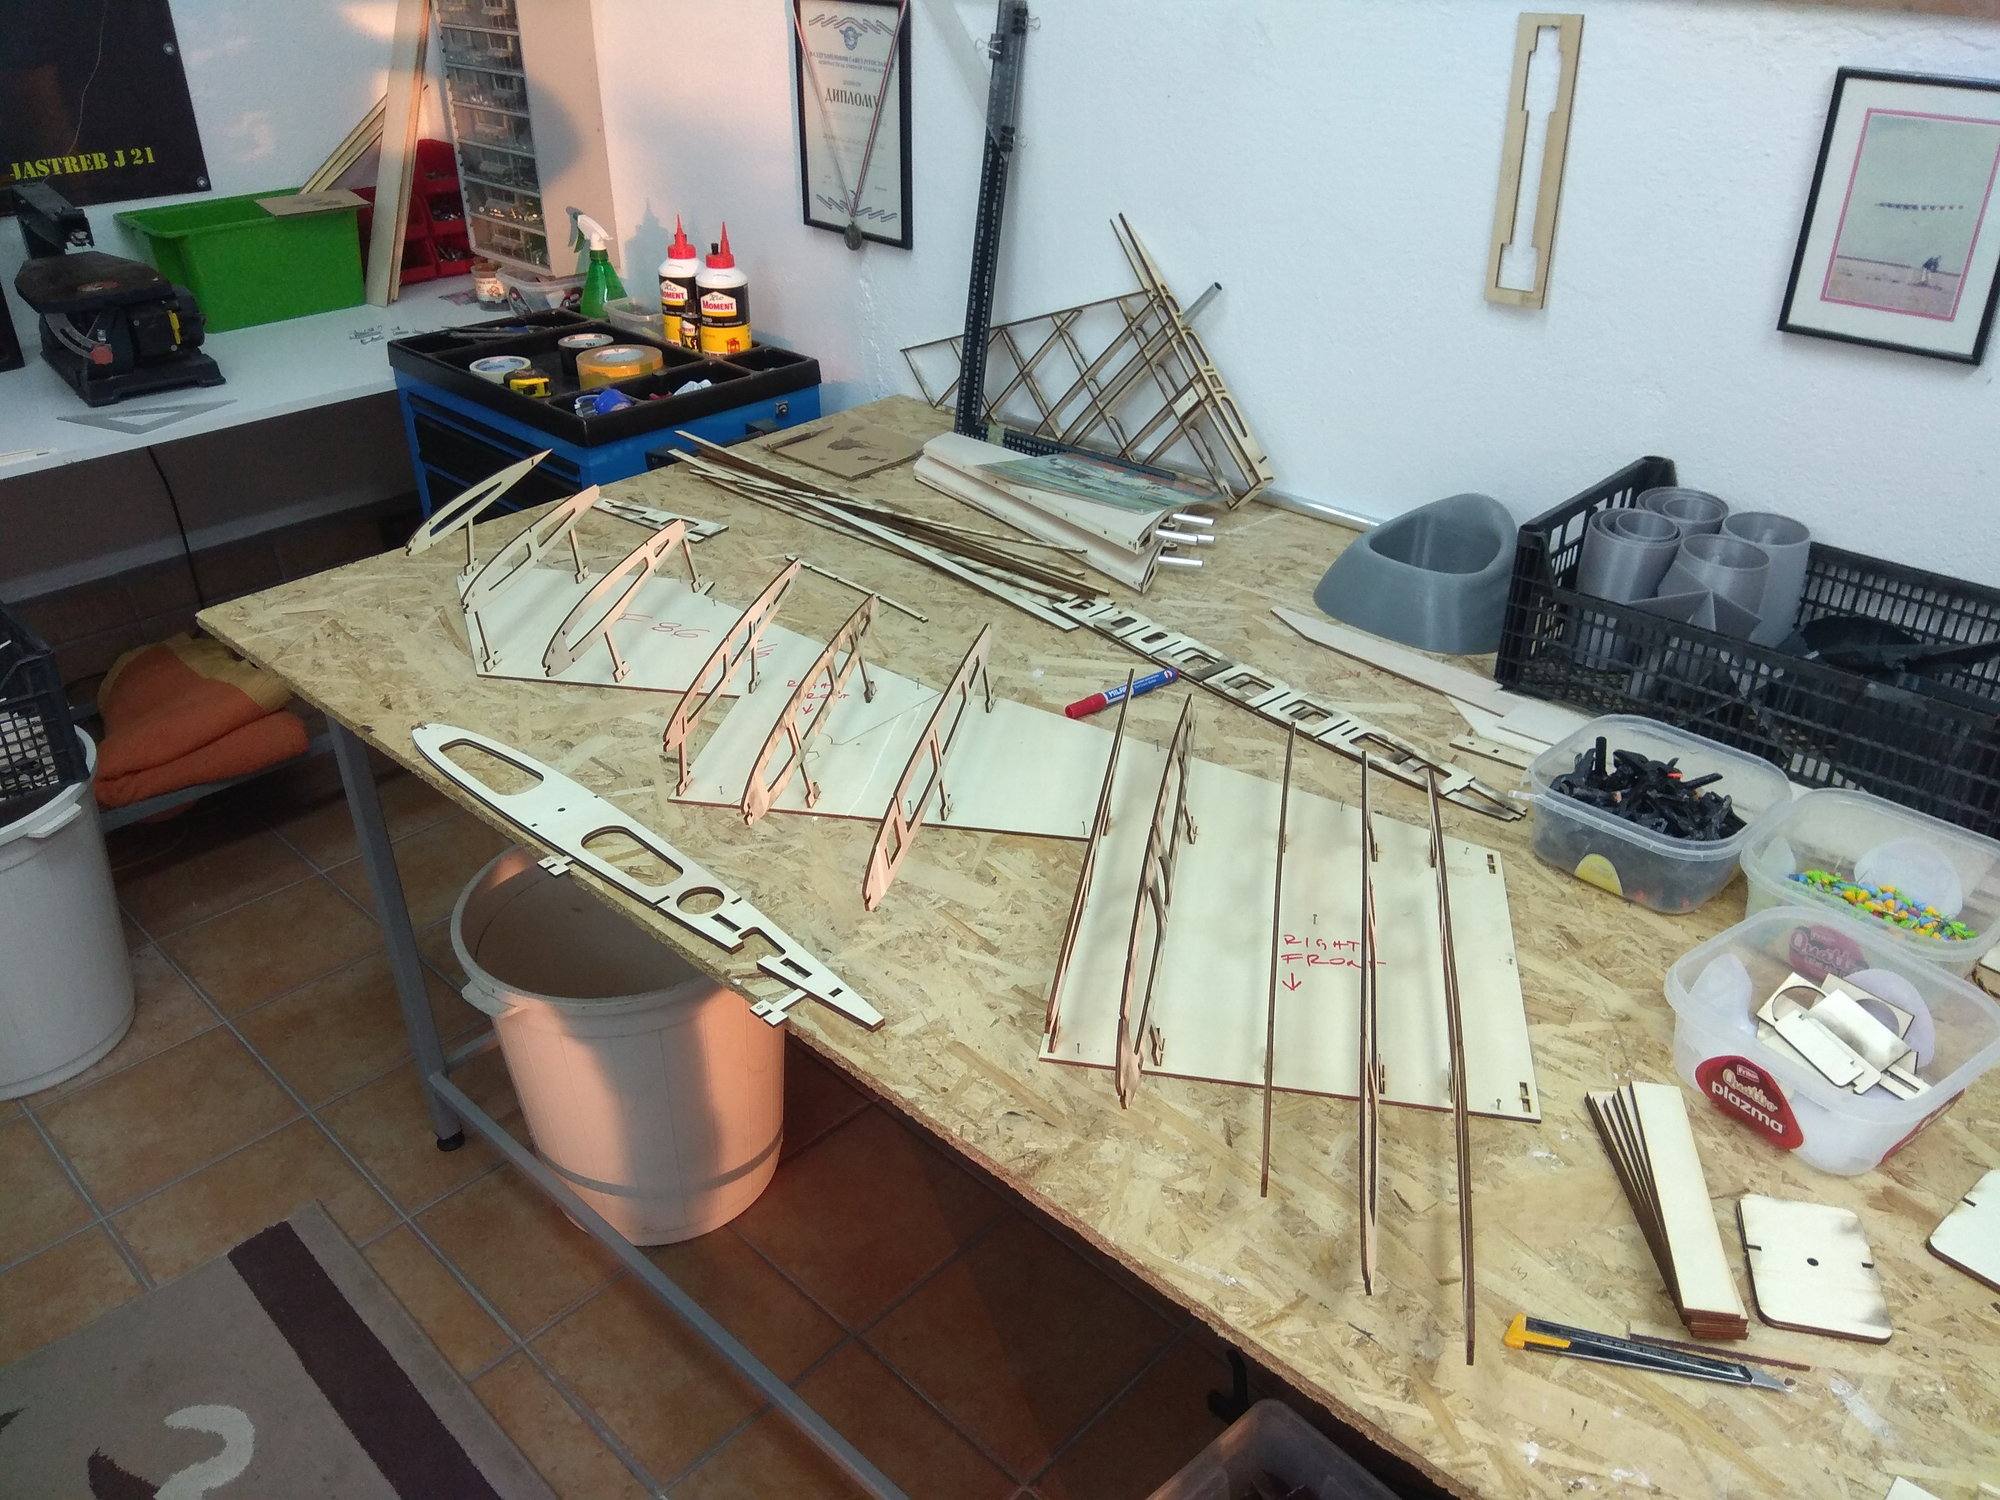
As with all "Mirce models" no plan is needed to make the wings, in the wooden kit you get a board template in which the wing ribs are placed.
I always suggest putting all the parts together without glue first. This gives insight into whether the parts fit together nicely and the sequence of stacking and gluing.
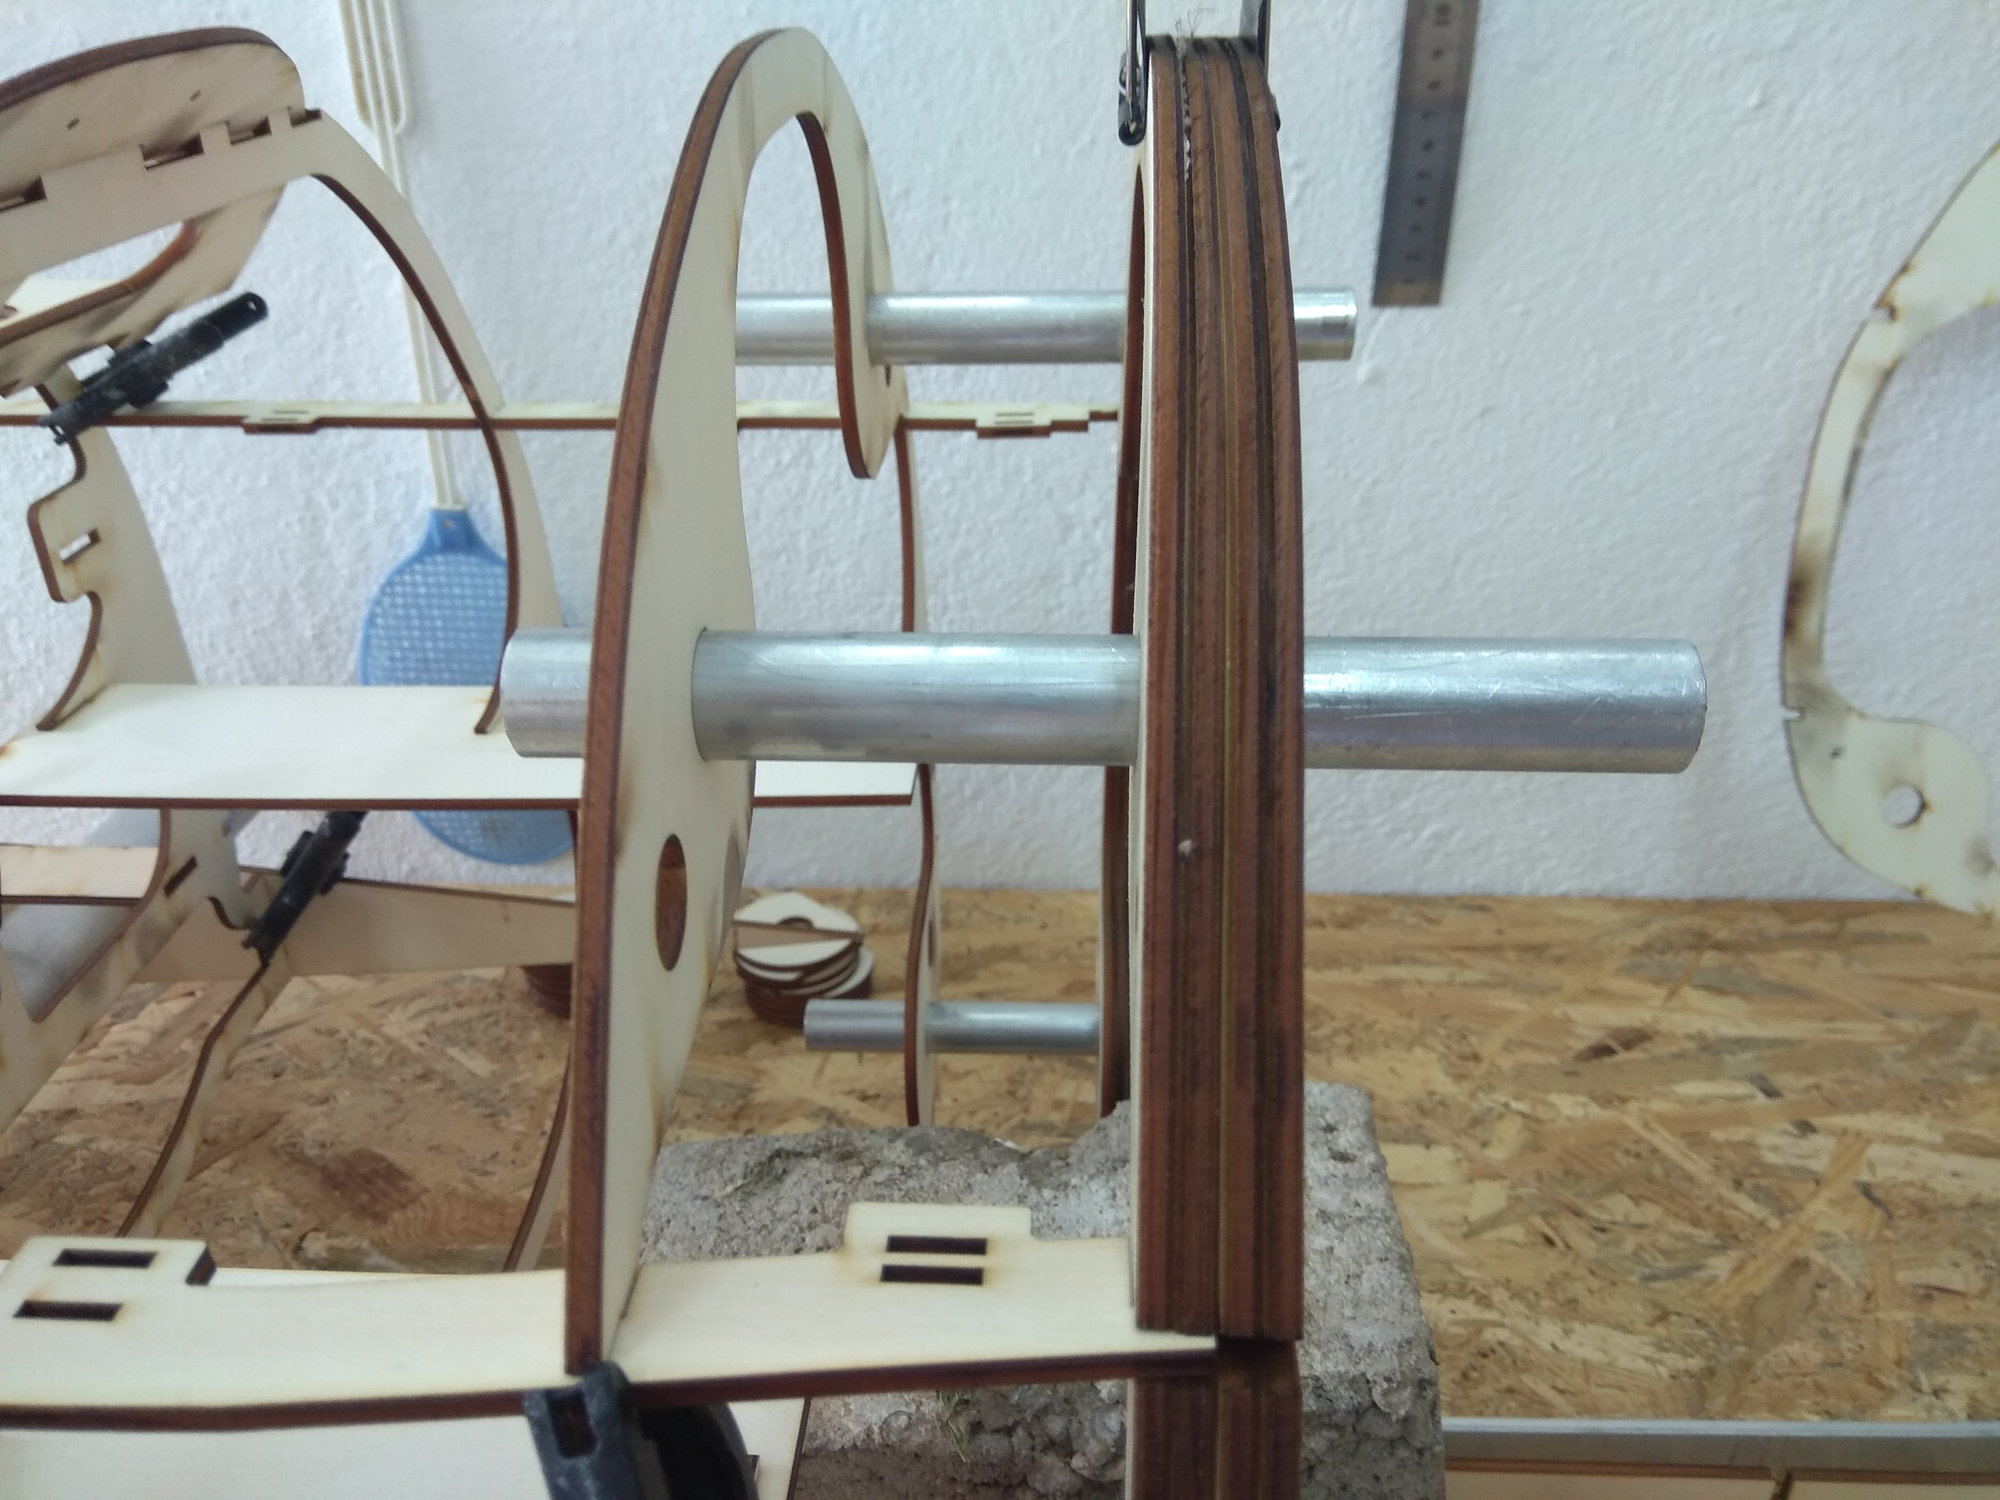
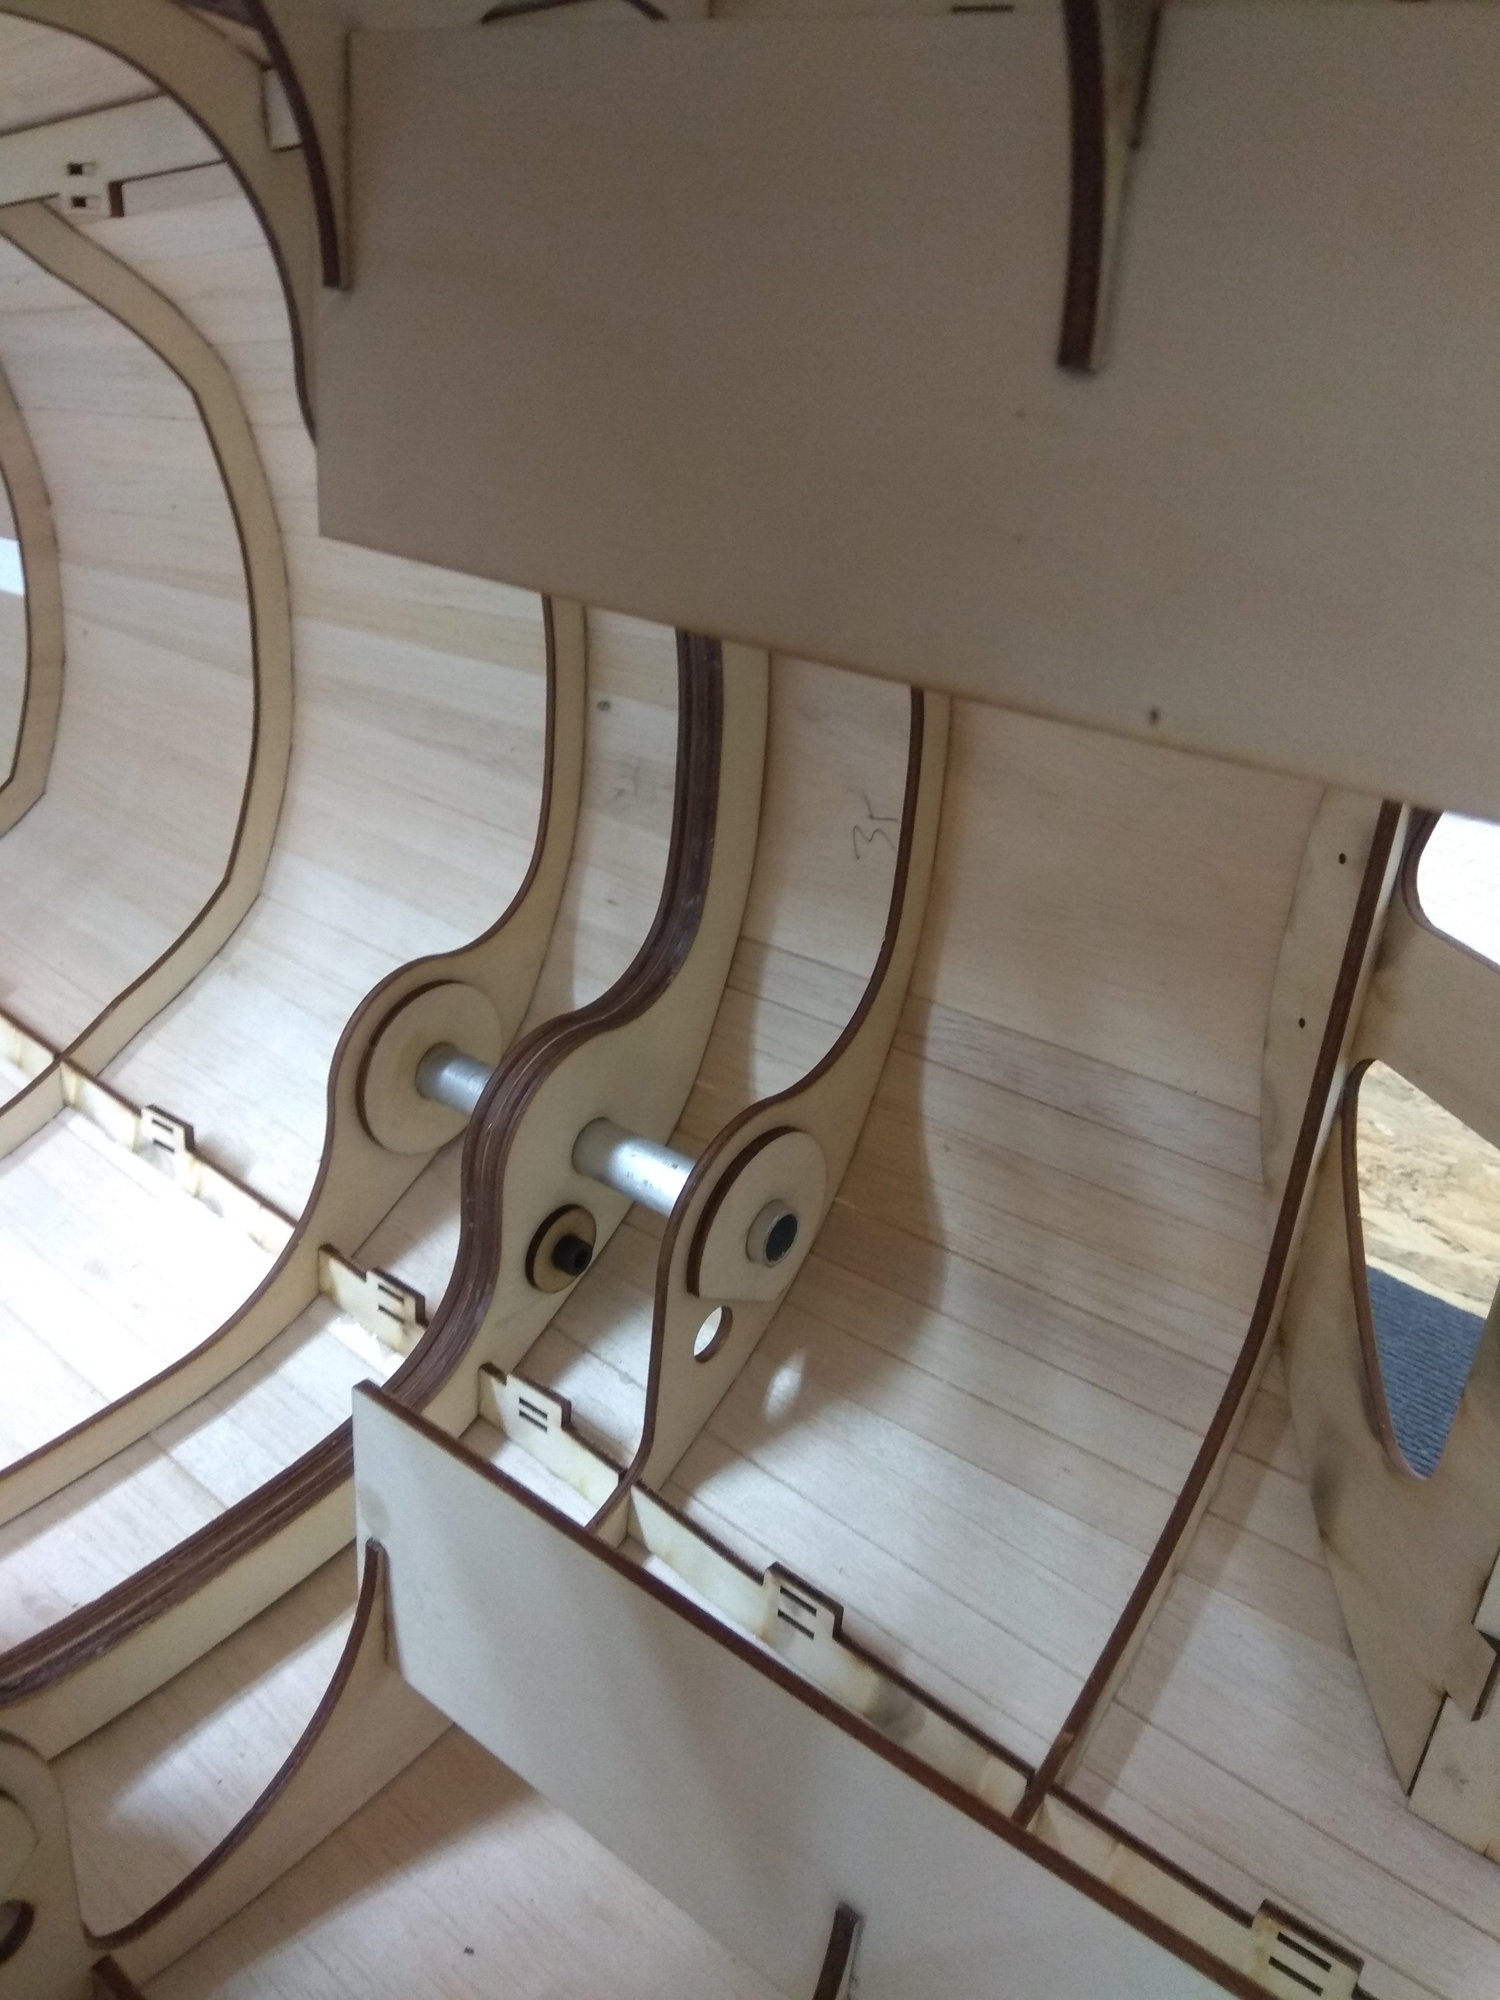
The aluminum bayonet must be installed during the construction of the wing!!!
I have a piece of pipe, so I use it instead of the bayonet, but don't make the wing without putting the bayonet through!!!
The bayonet goes through the first 6 ribs and by gluing the wing with the installed bayonet, you get 100% certainty that it will not get stuck anywhere.
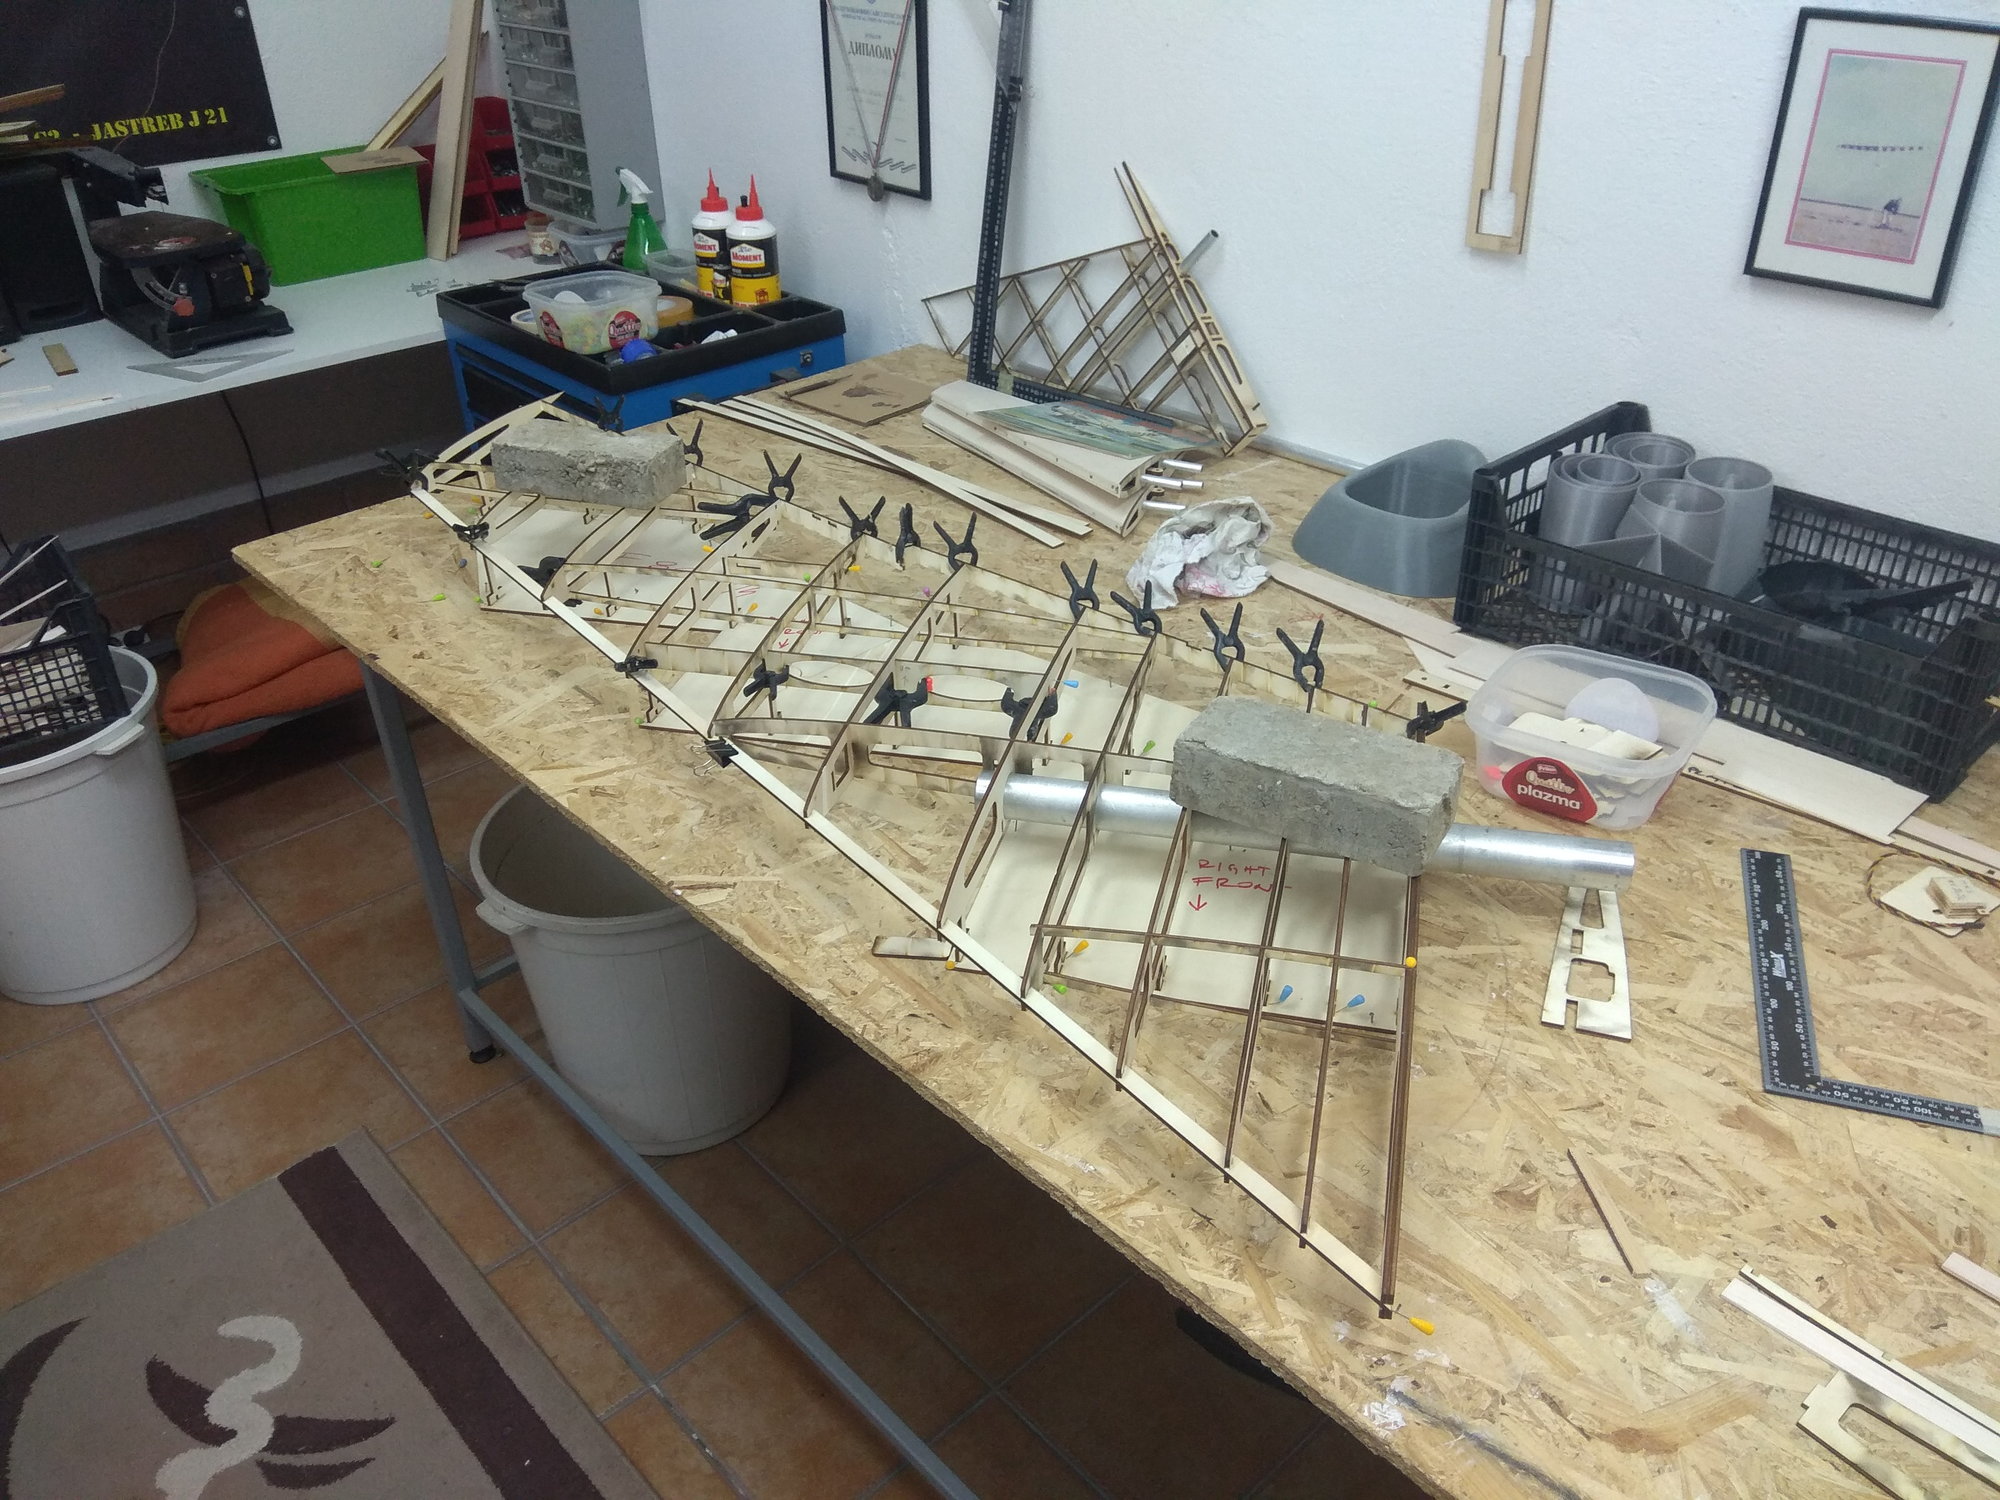
During the making of the wing, I glued two structures into which the front and rear pylon screws will be screwed.
Since the nuts will be inside the wing, I glued them with 5-minute epoxy two-component glue.

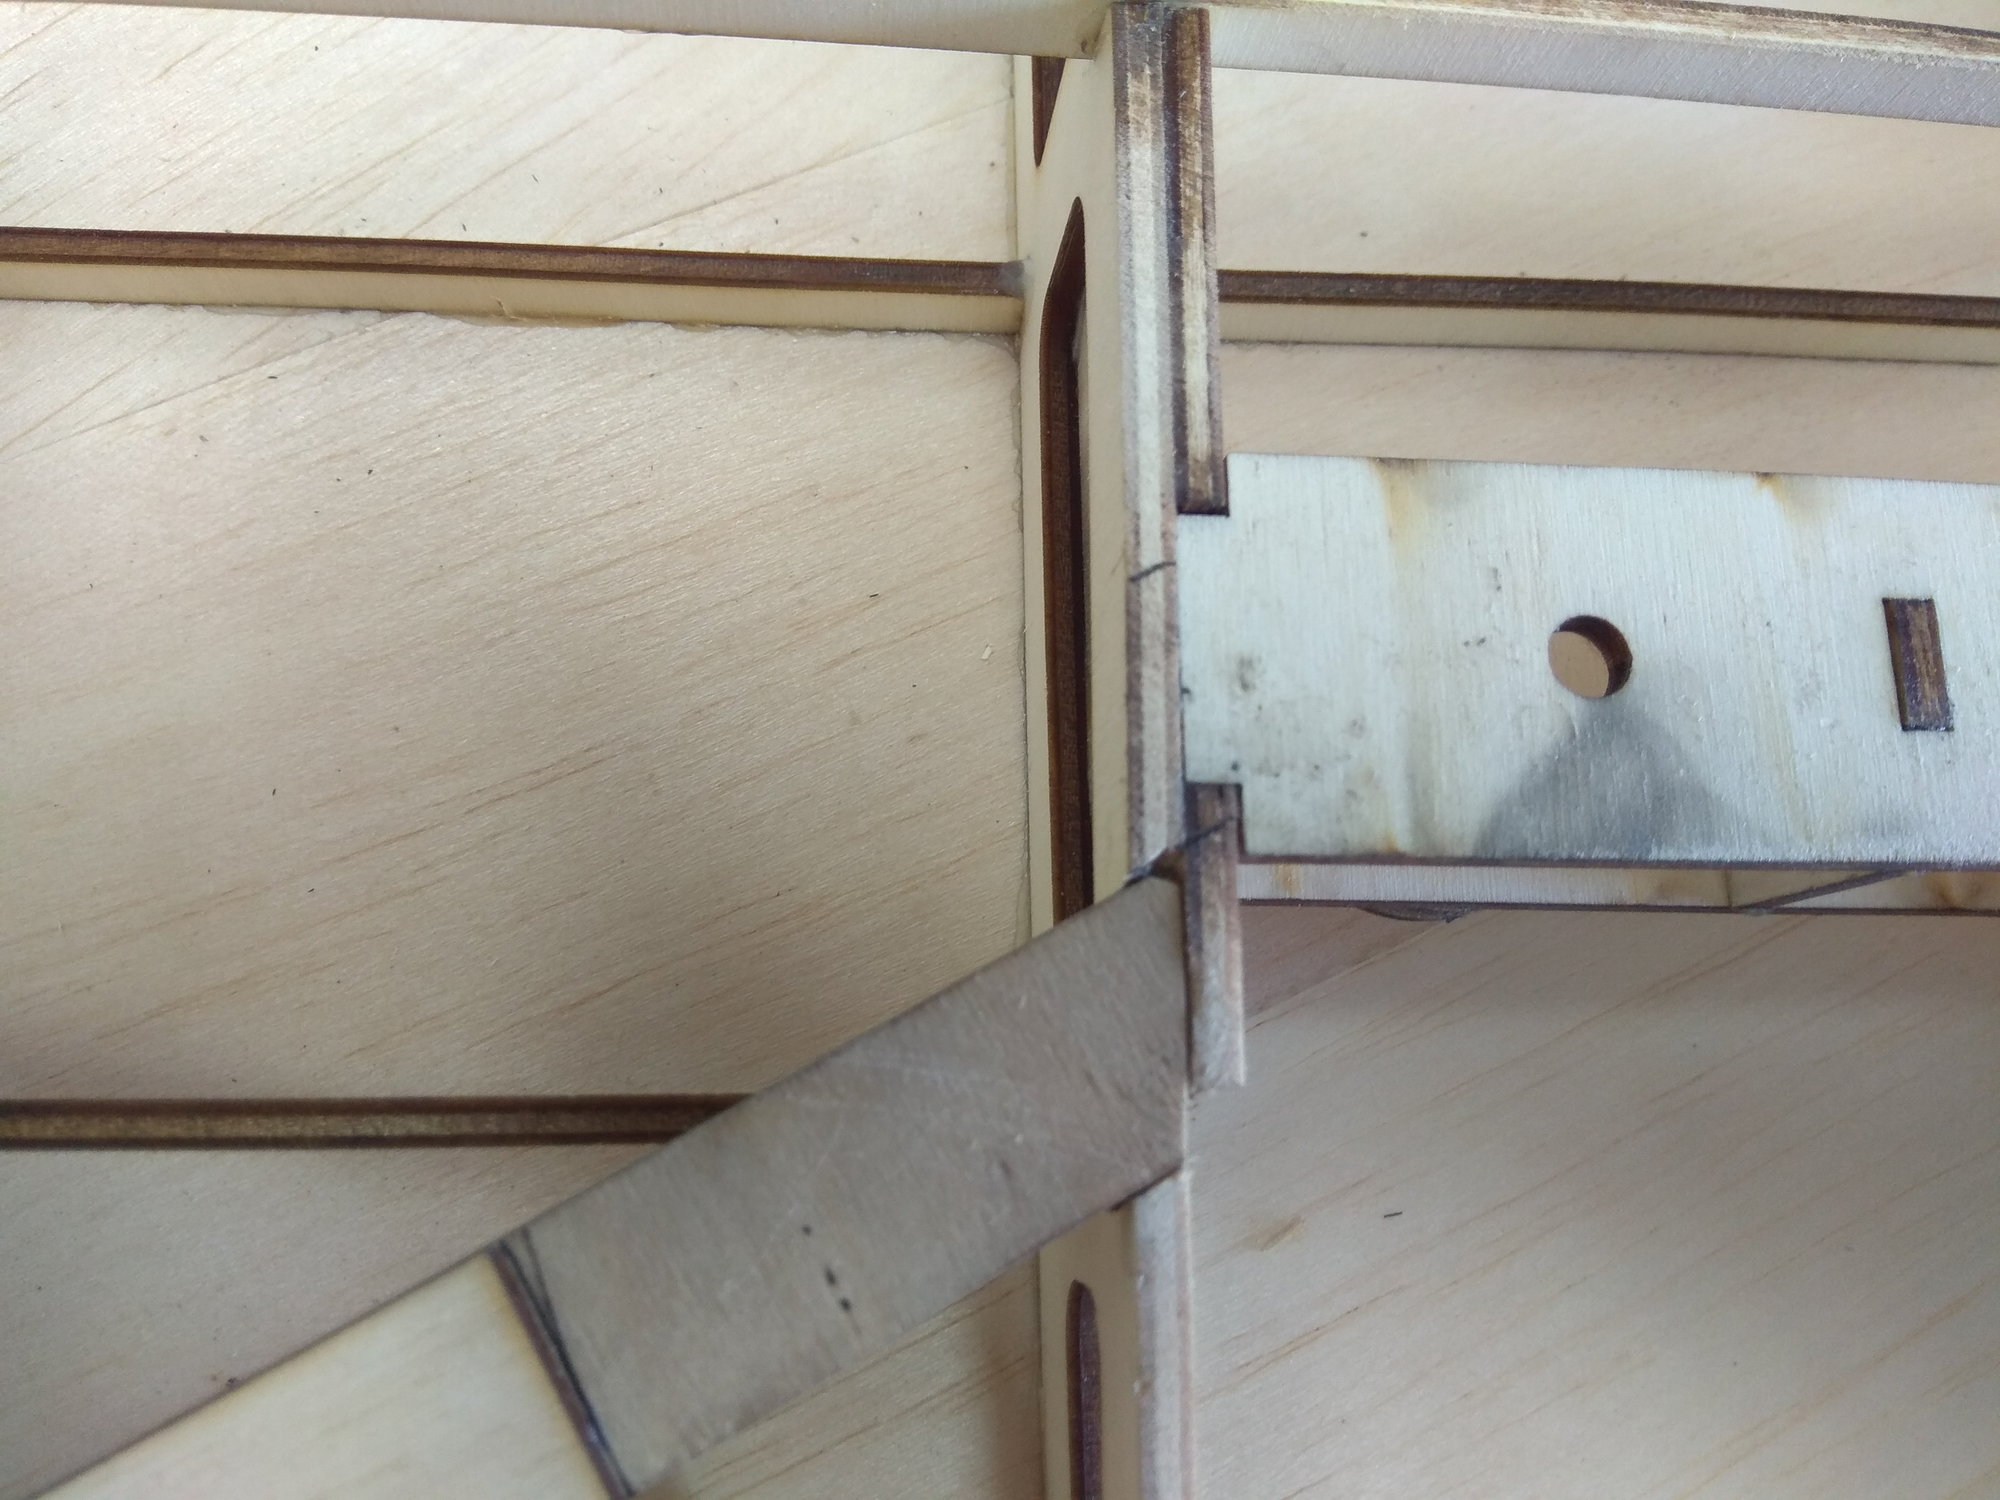
Next plates for landing gears and strengthening of the first rib.
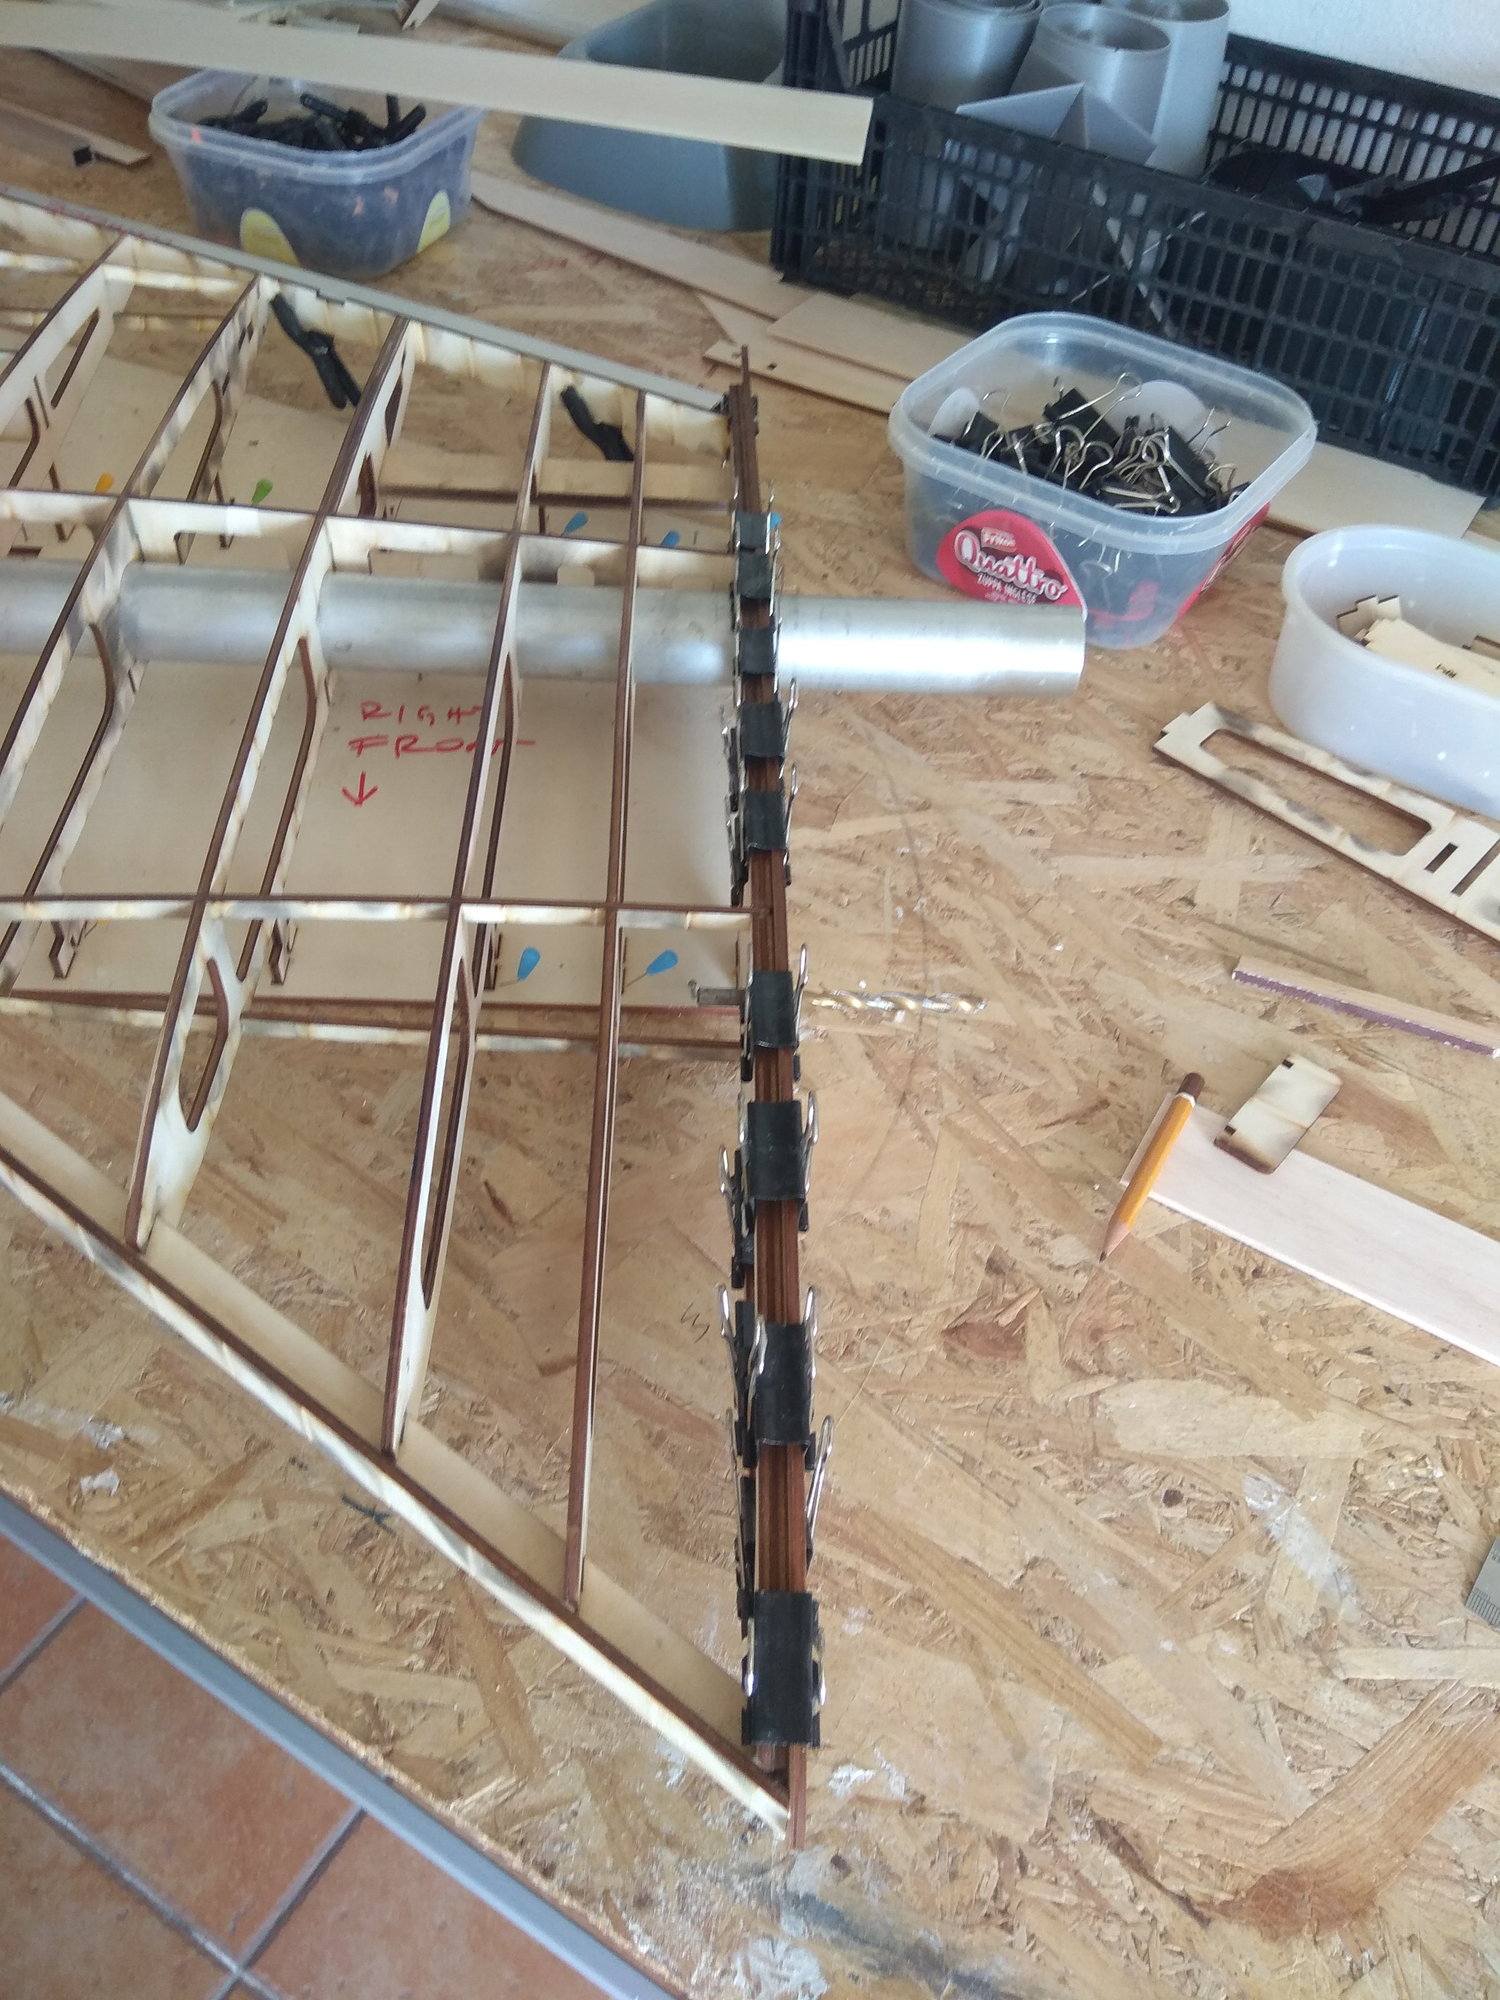
You can also see that I use aluminum tubes and wooden slats to keep all the edges straight.
The cross piece that connects the wing ribs and goes in front of the aluminum bayonet will be glued on when I do the underside.

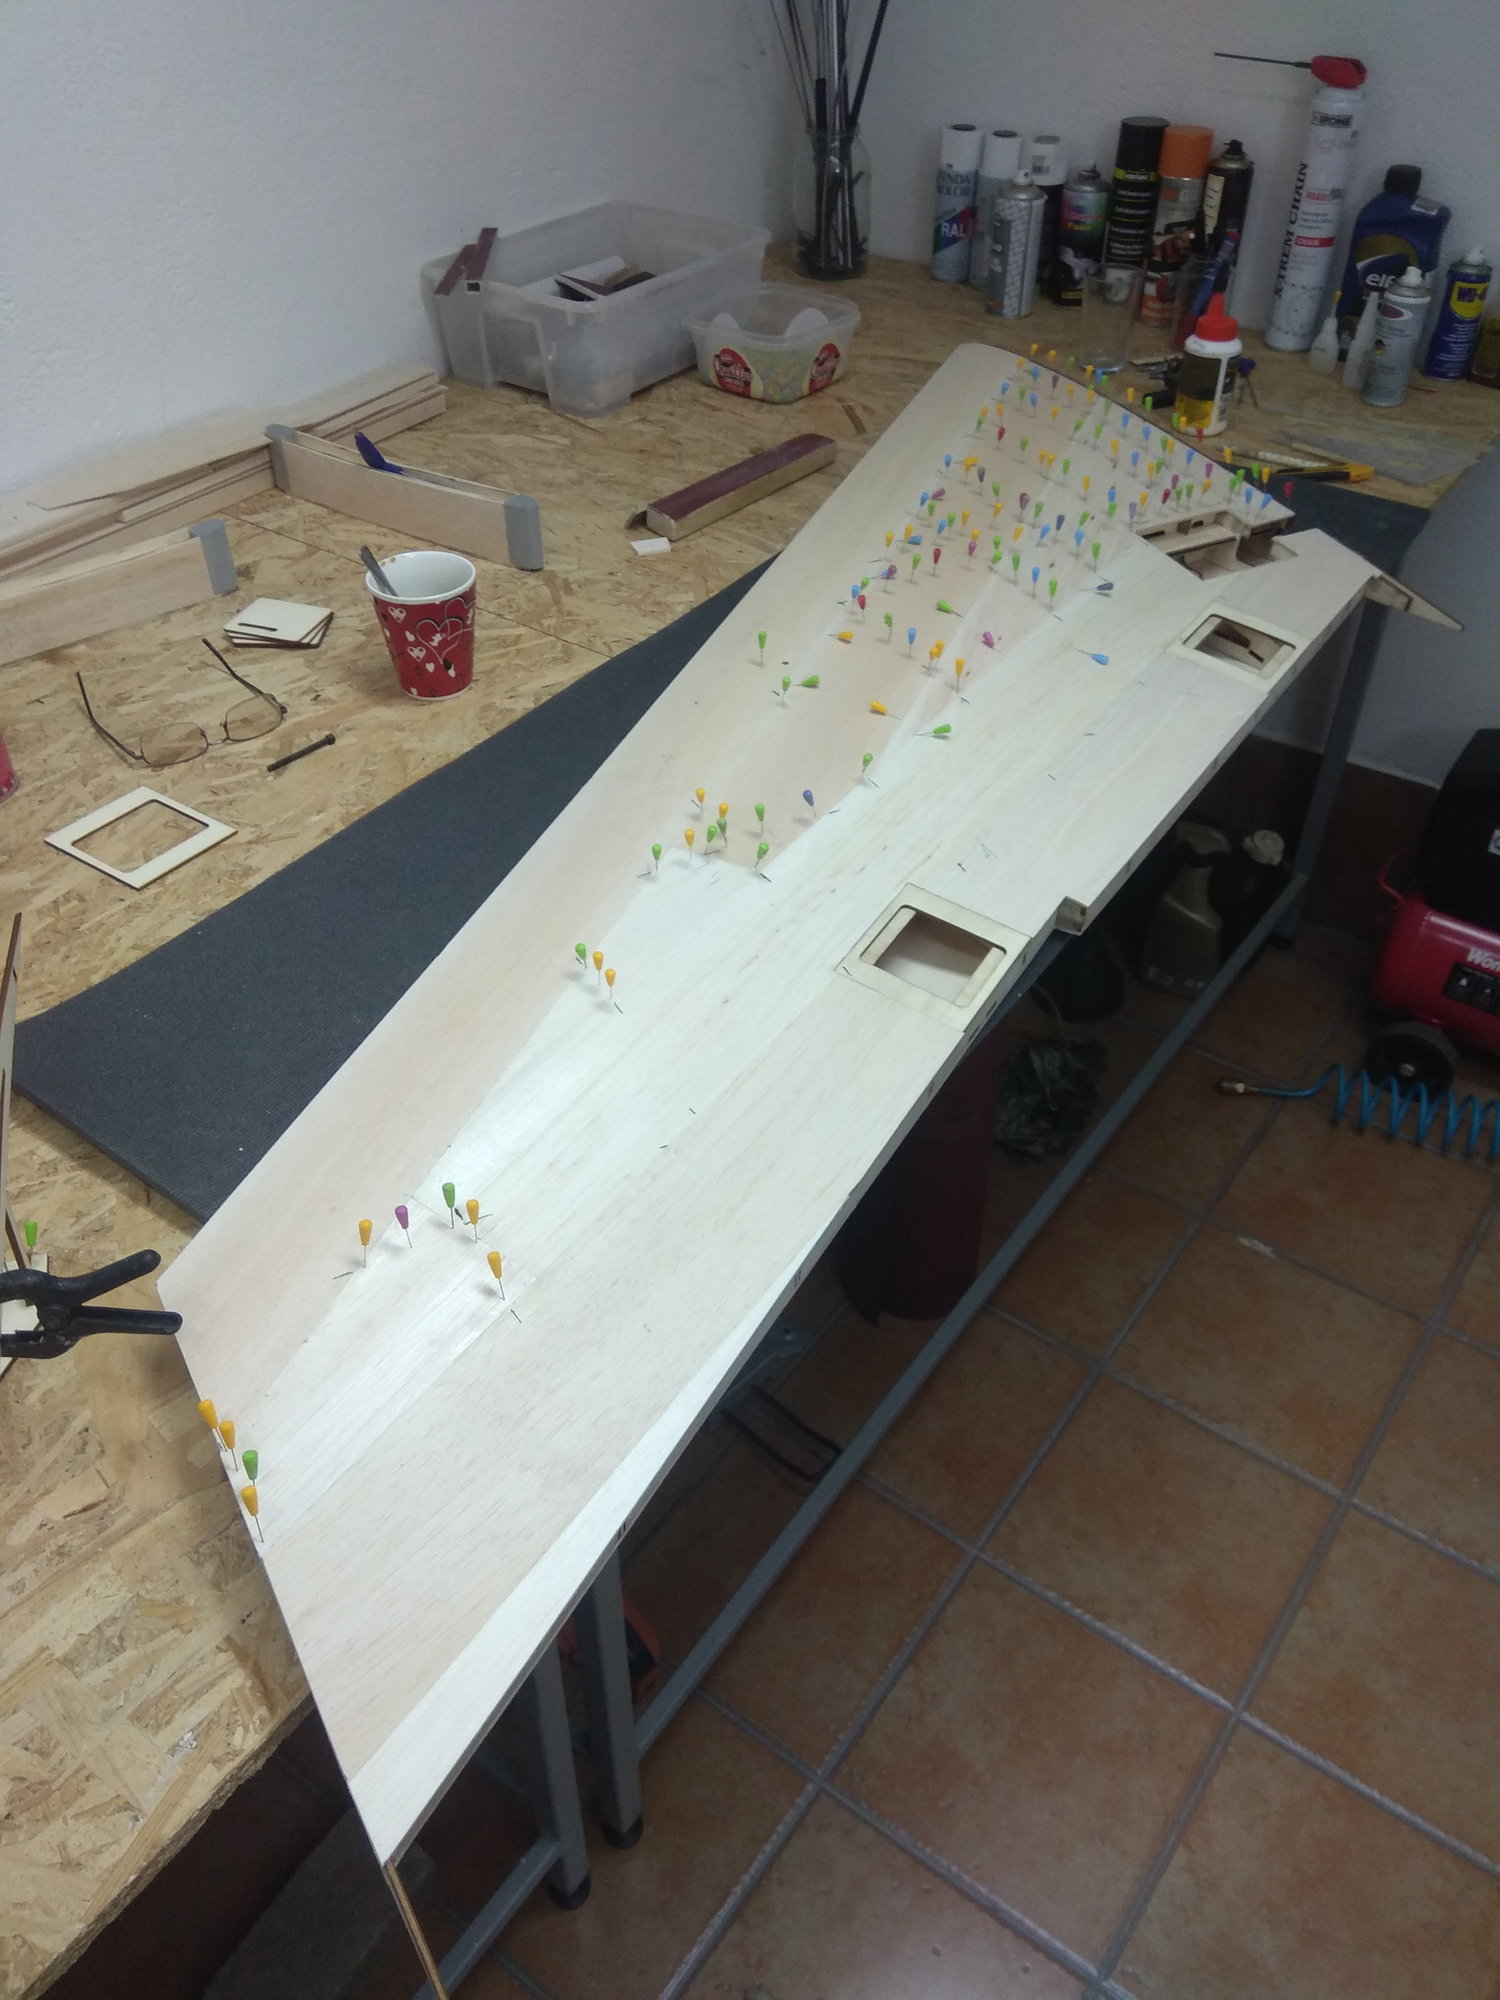
When all the ribs are in place, the glued cross pieces make the structure very strong, but I still don't take it out of the template, until the entire top of the wing is planked with 3 mm balsa!!!
With a long wooden slat, I squeeze the front side of the plank on the leading edge of the wing.

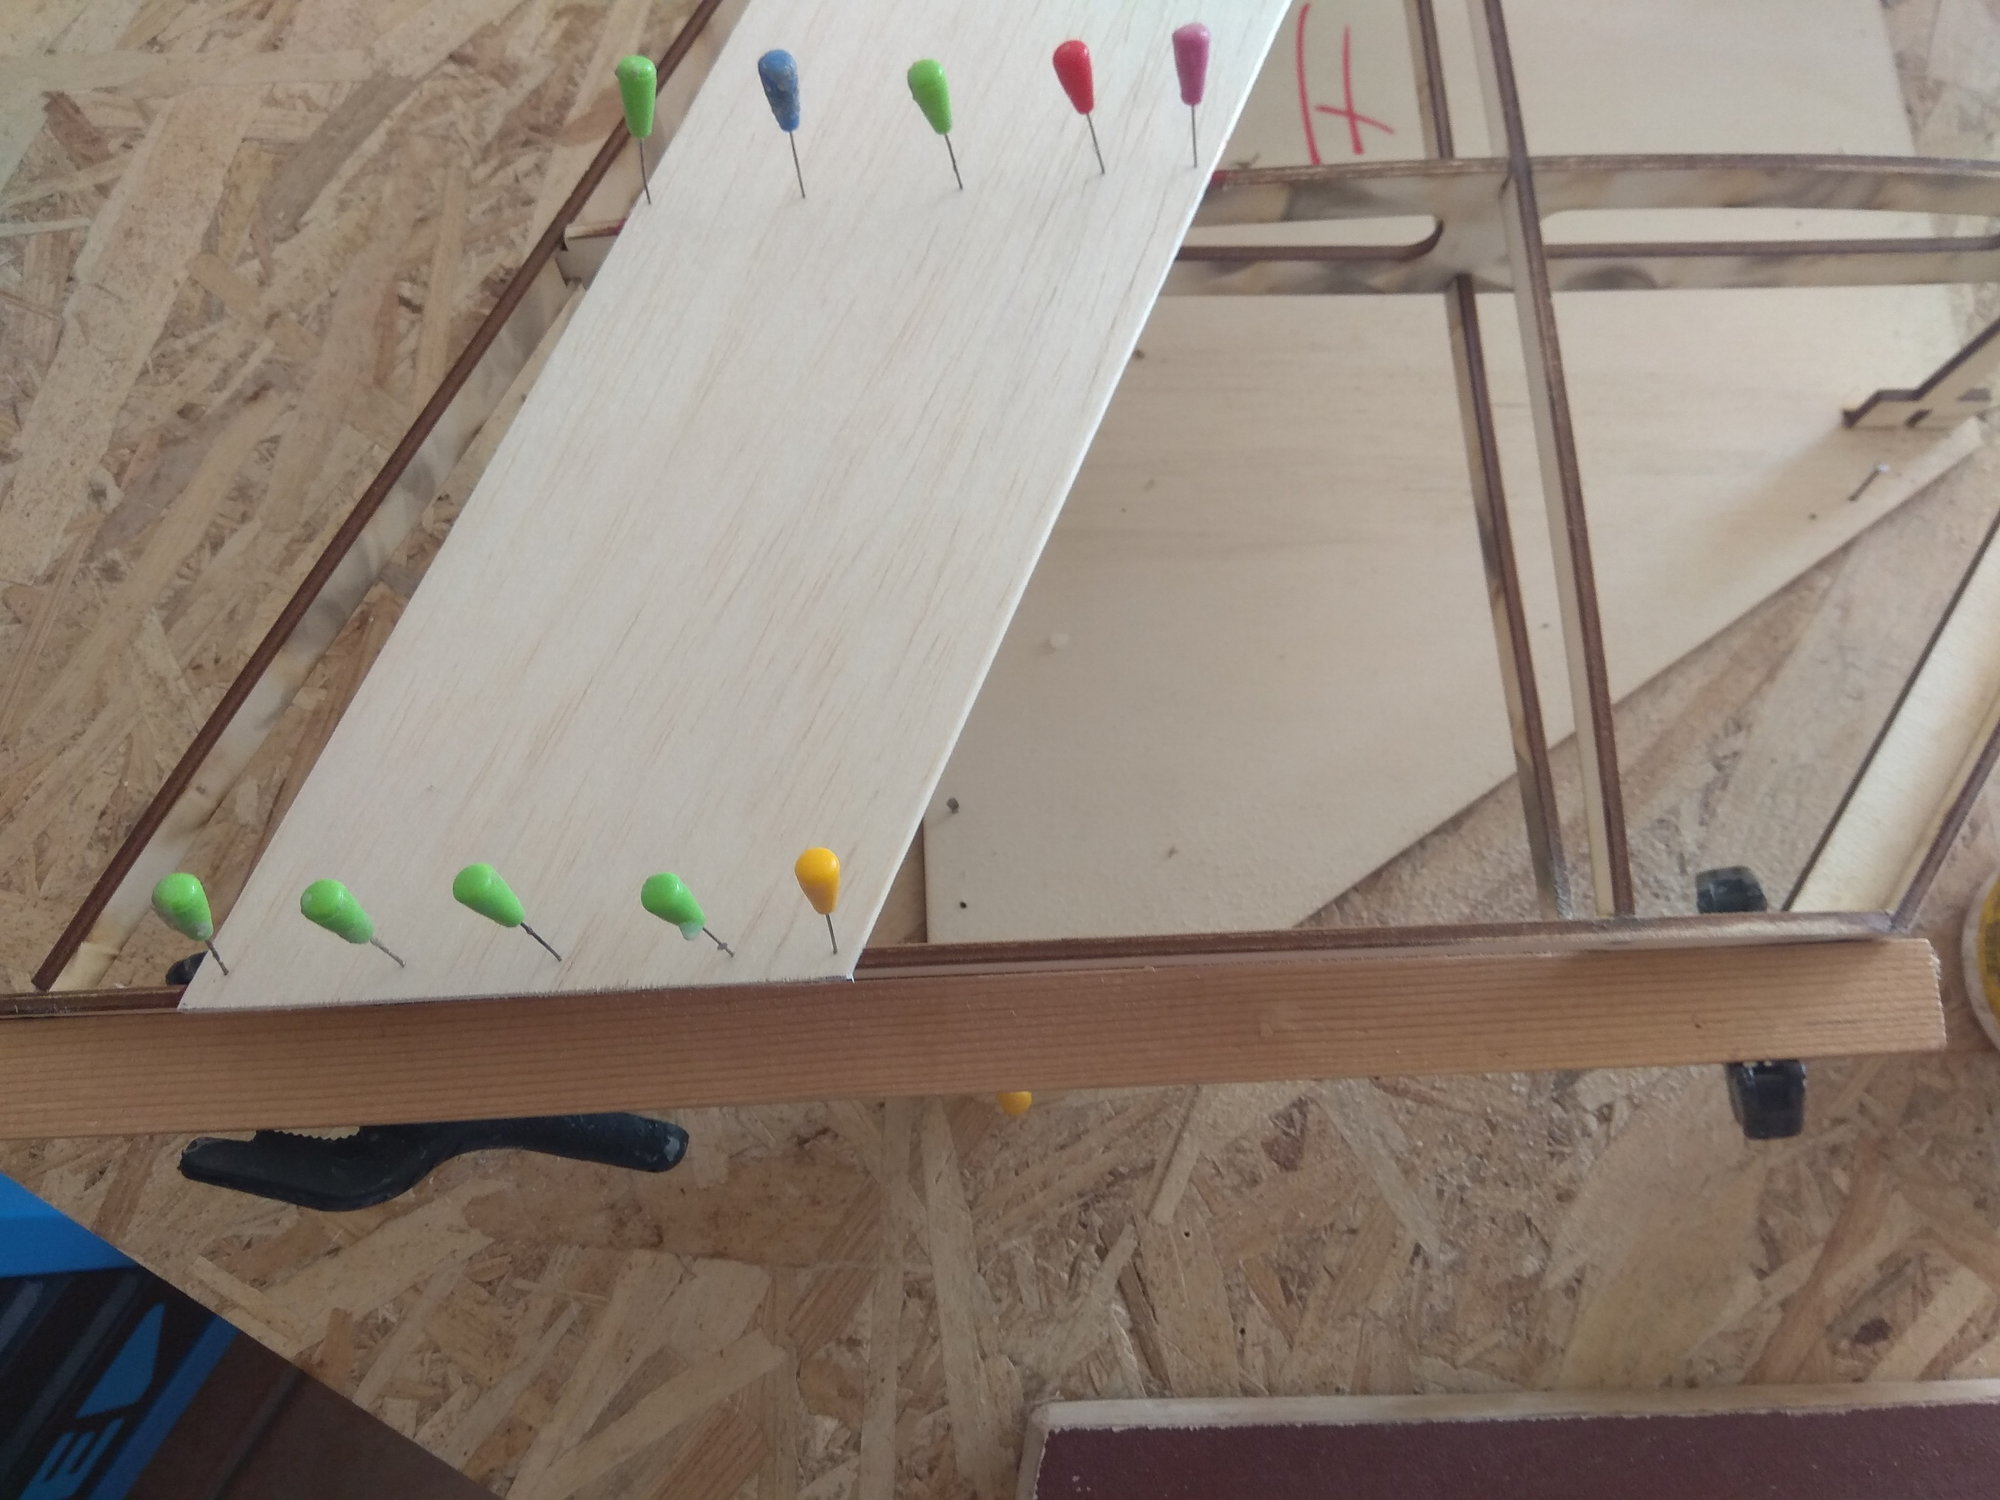
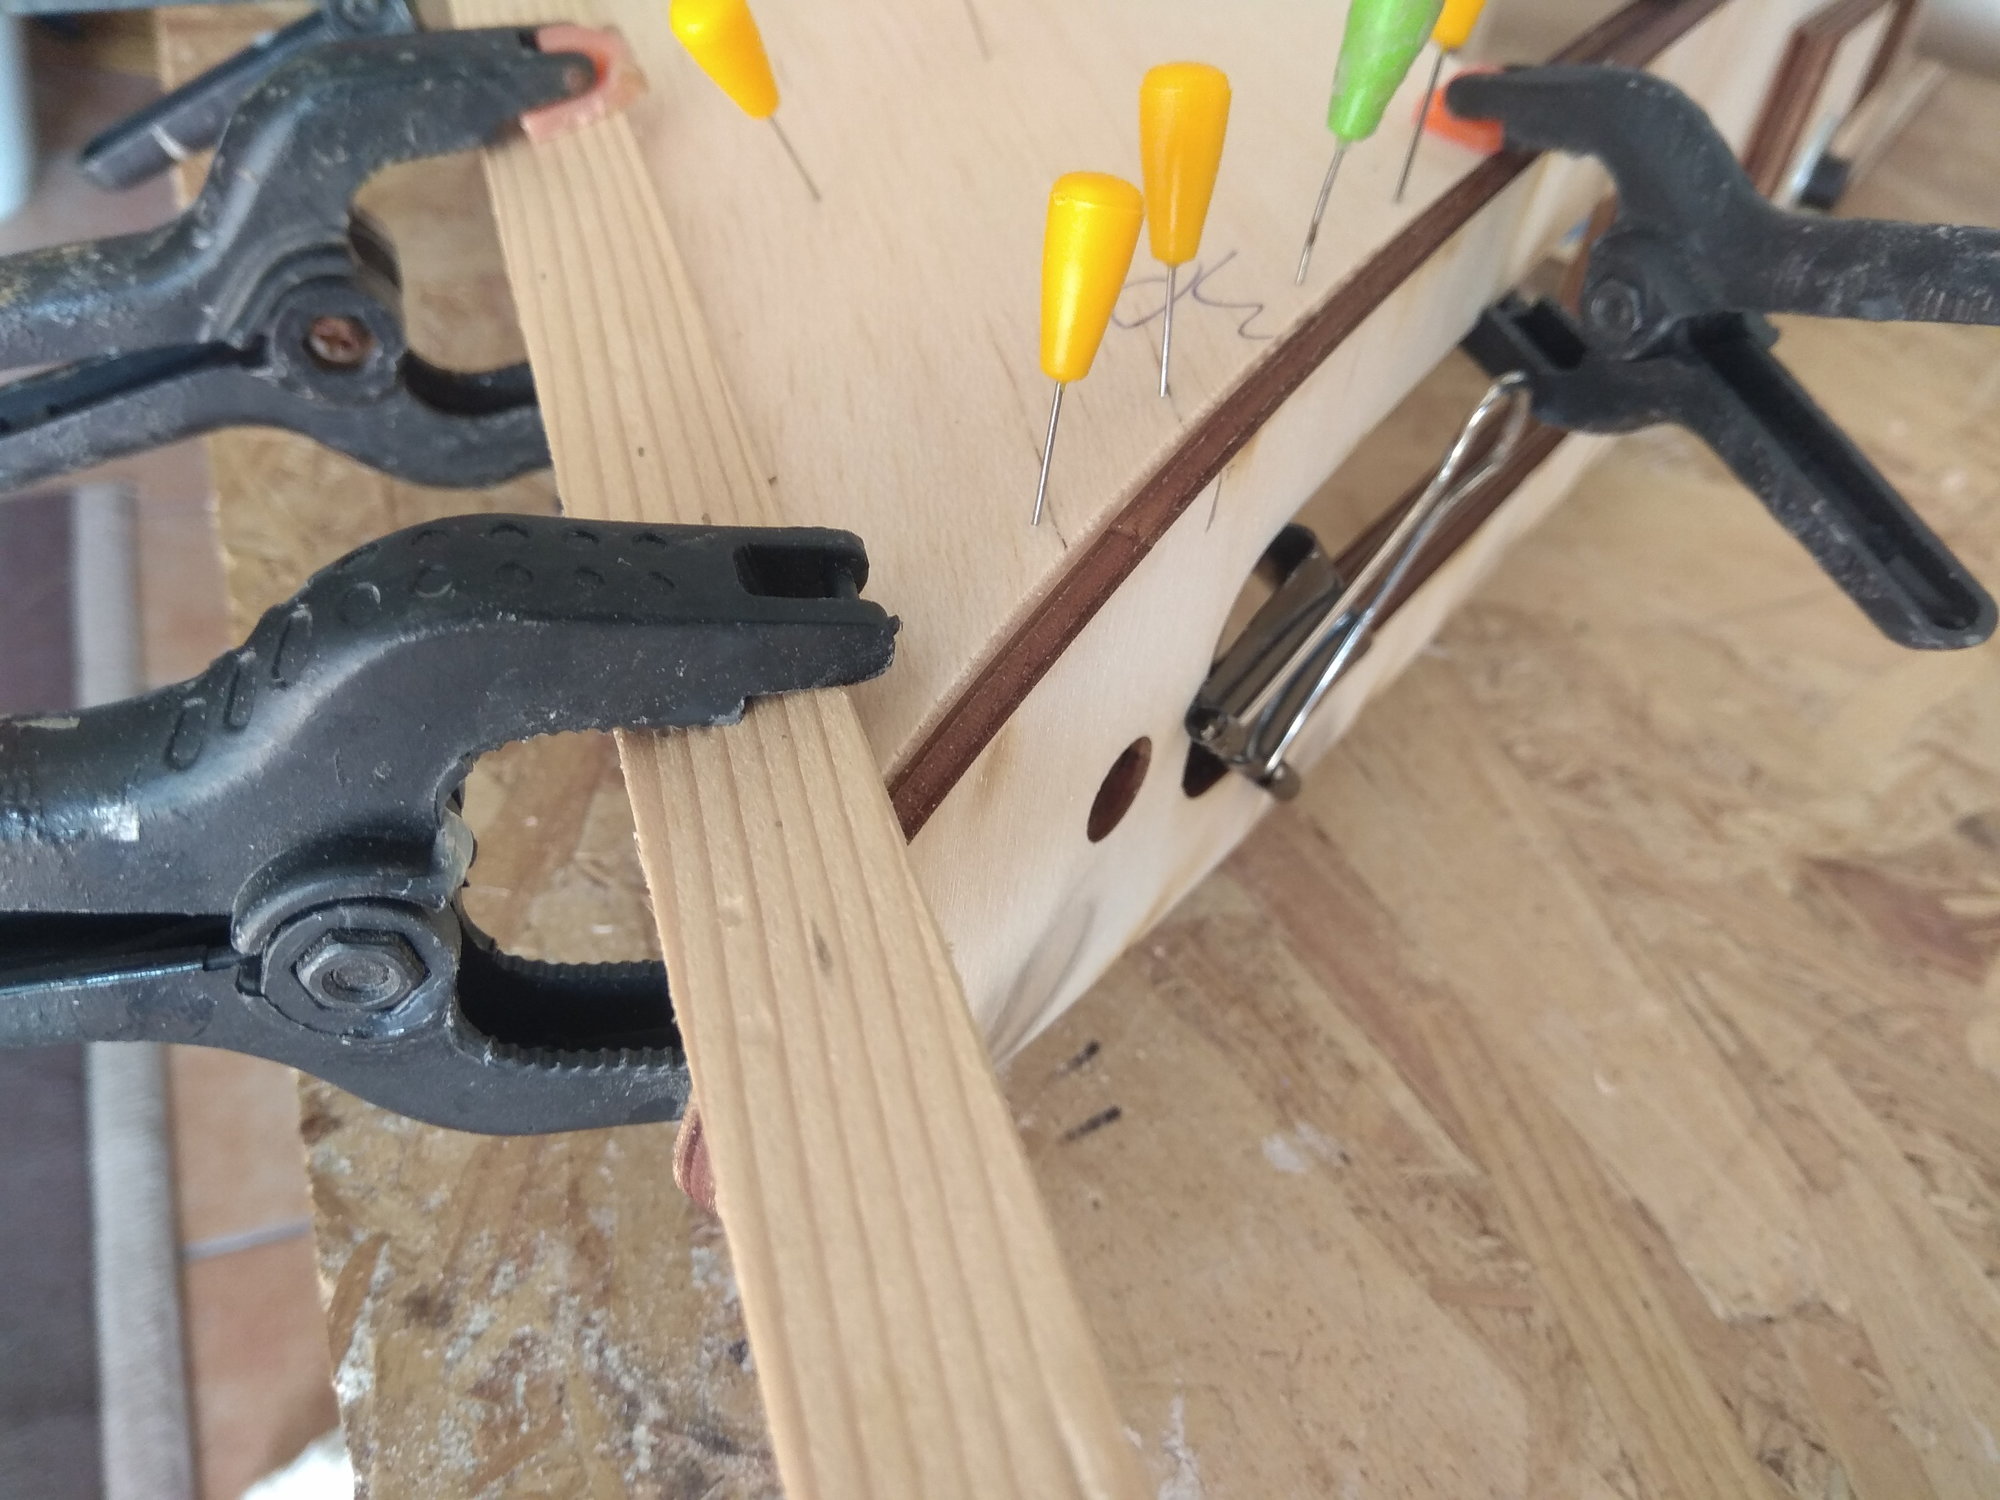
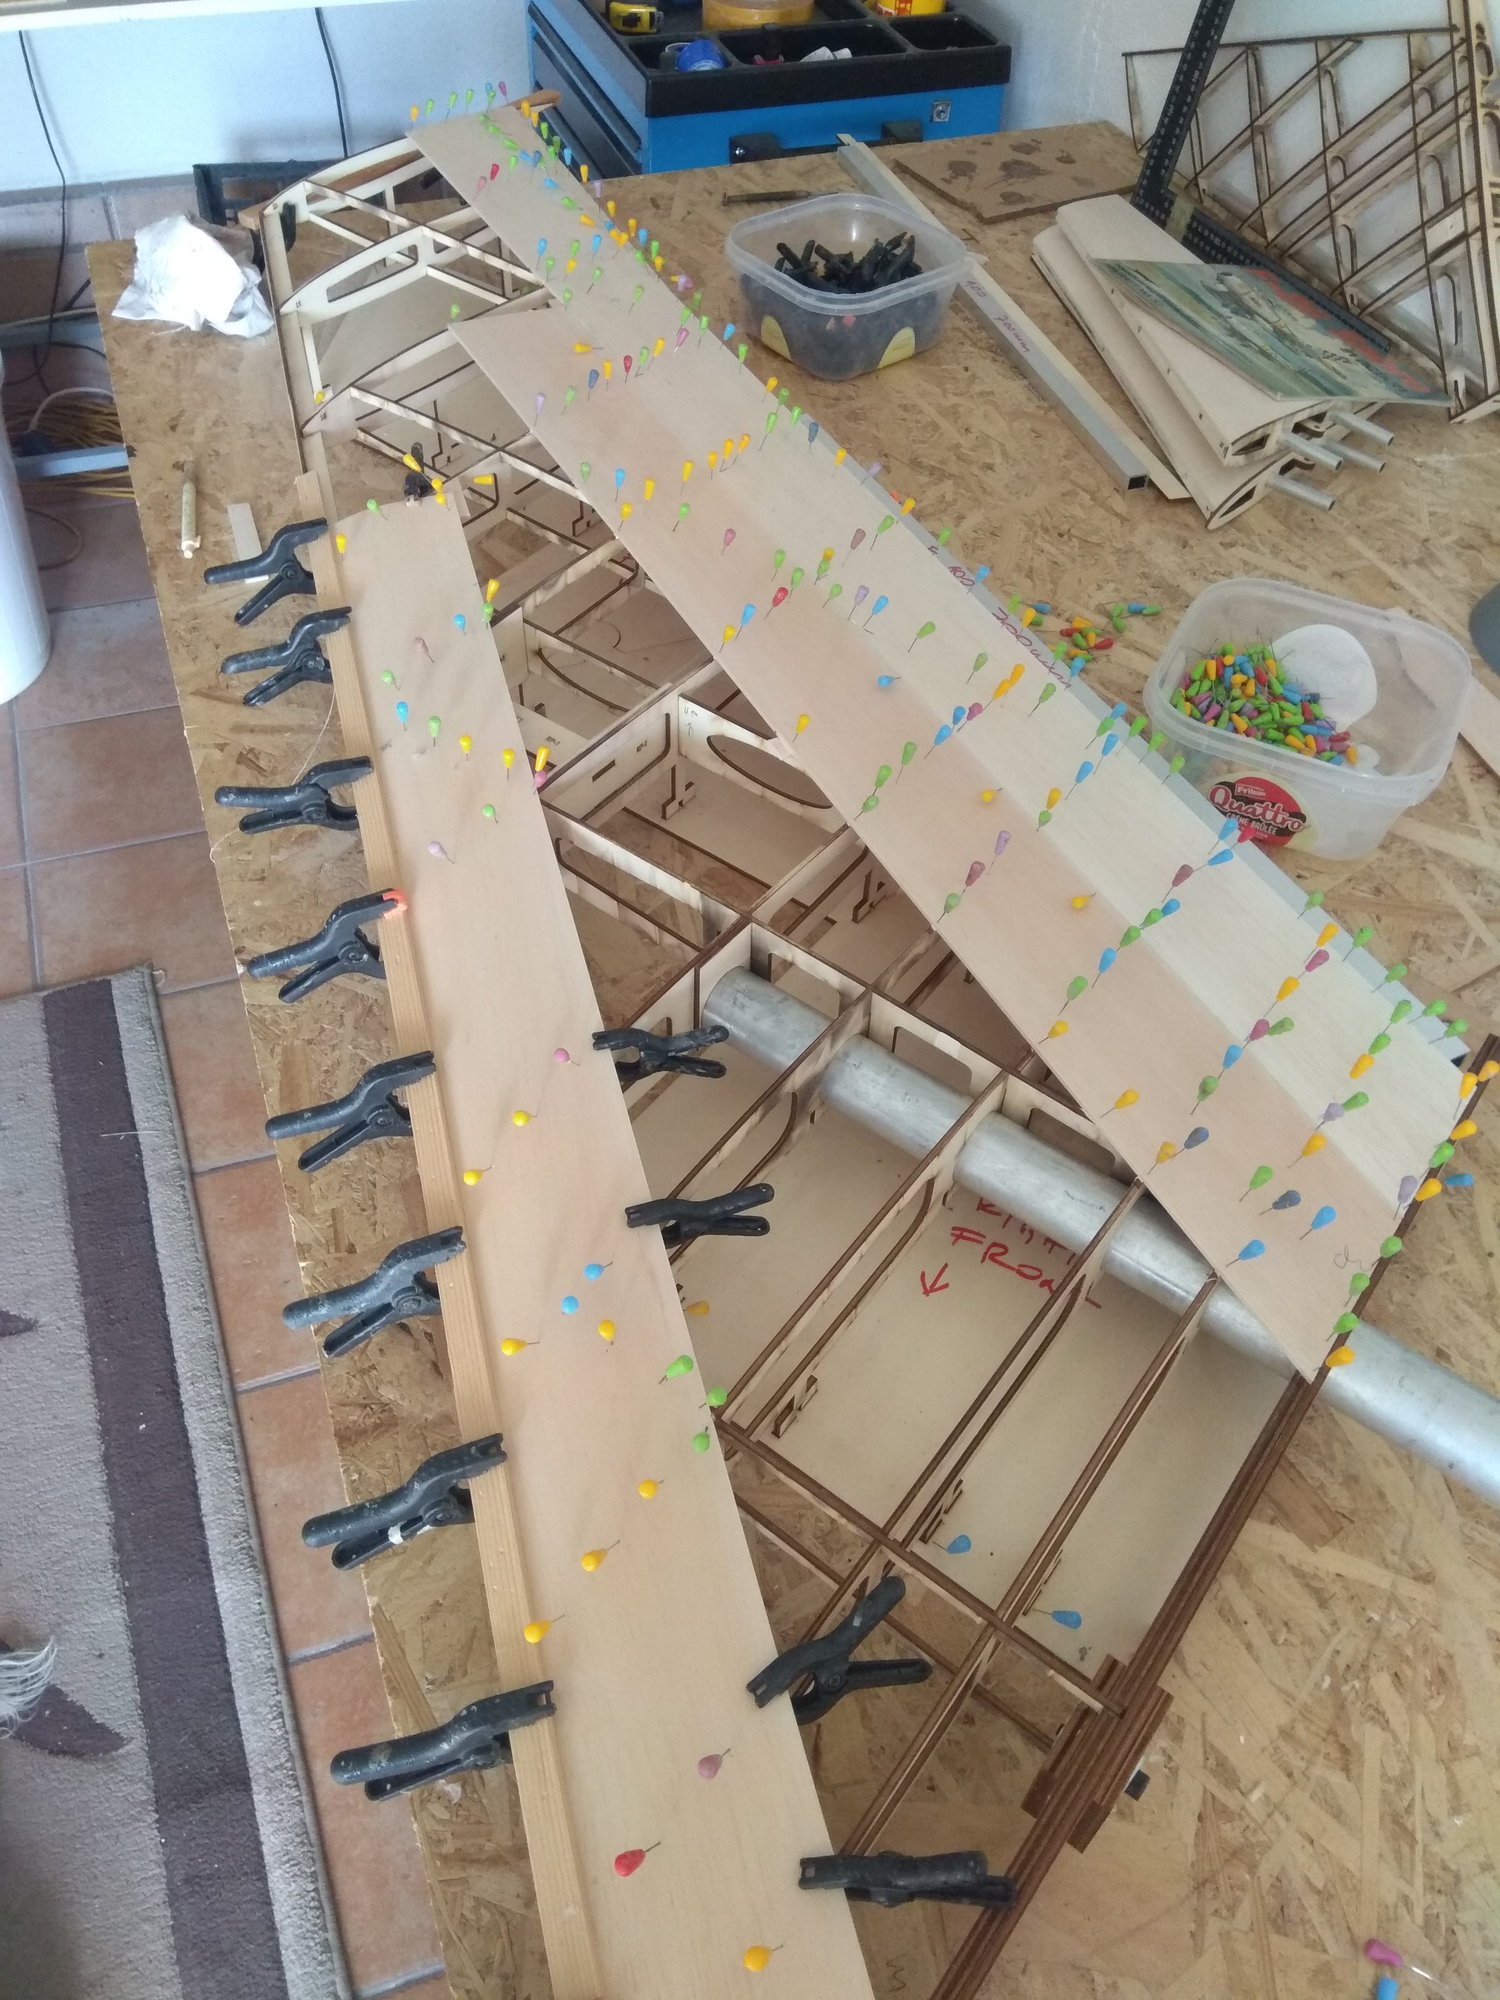


Someone assembles all the balsa and then glues them to the wing all at once, I don't do it that way, because the wing is big and by the time you apply all the glue it is half dry.
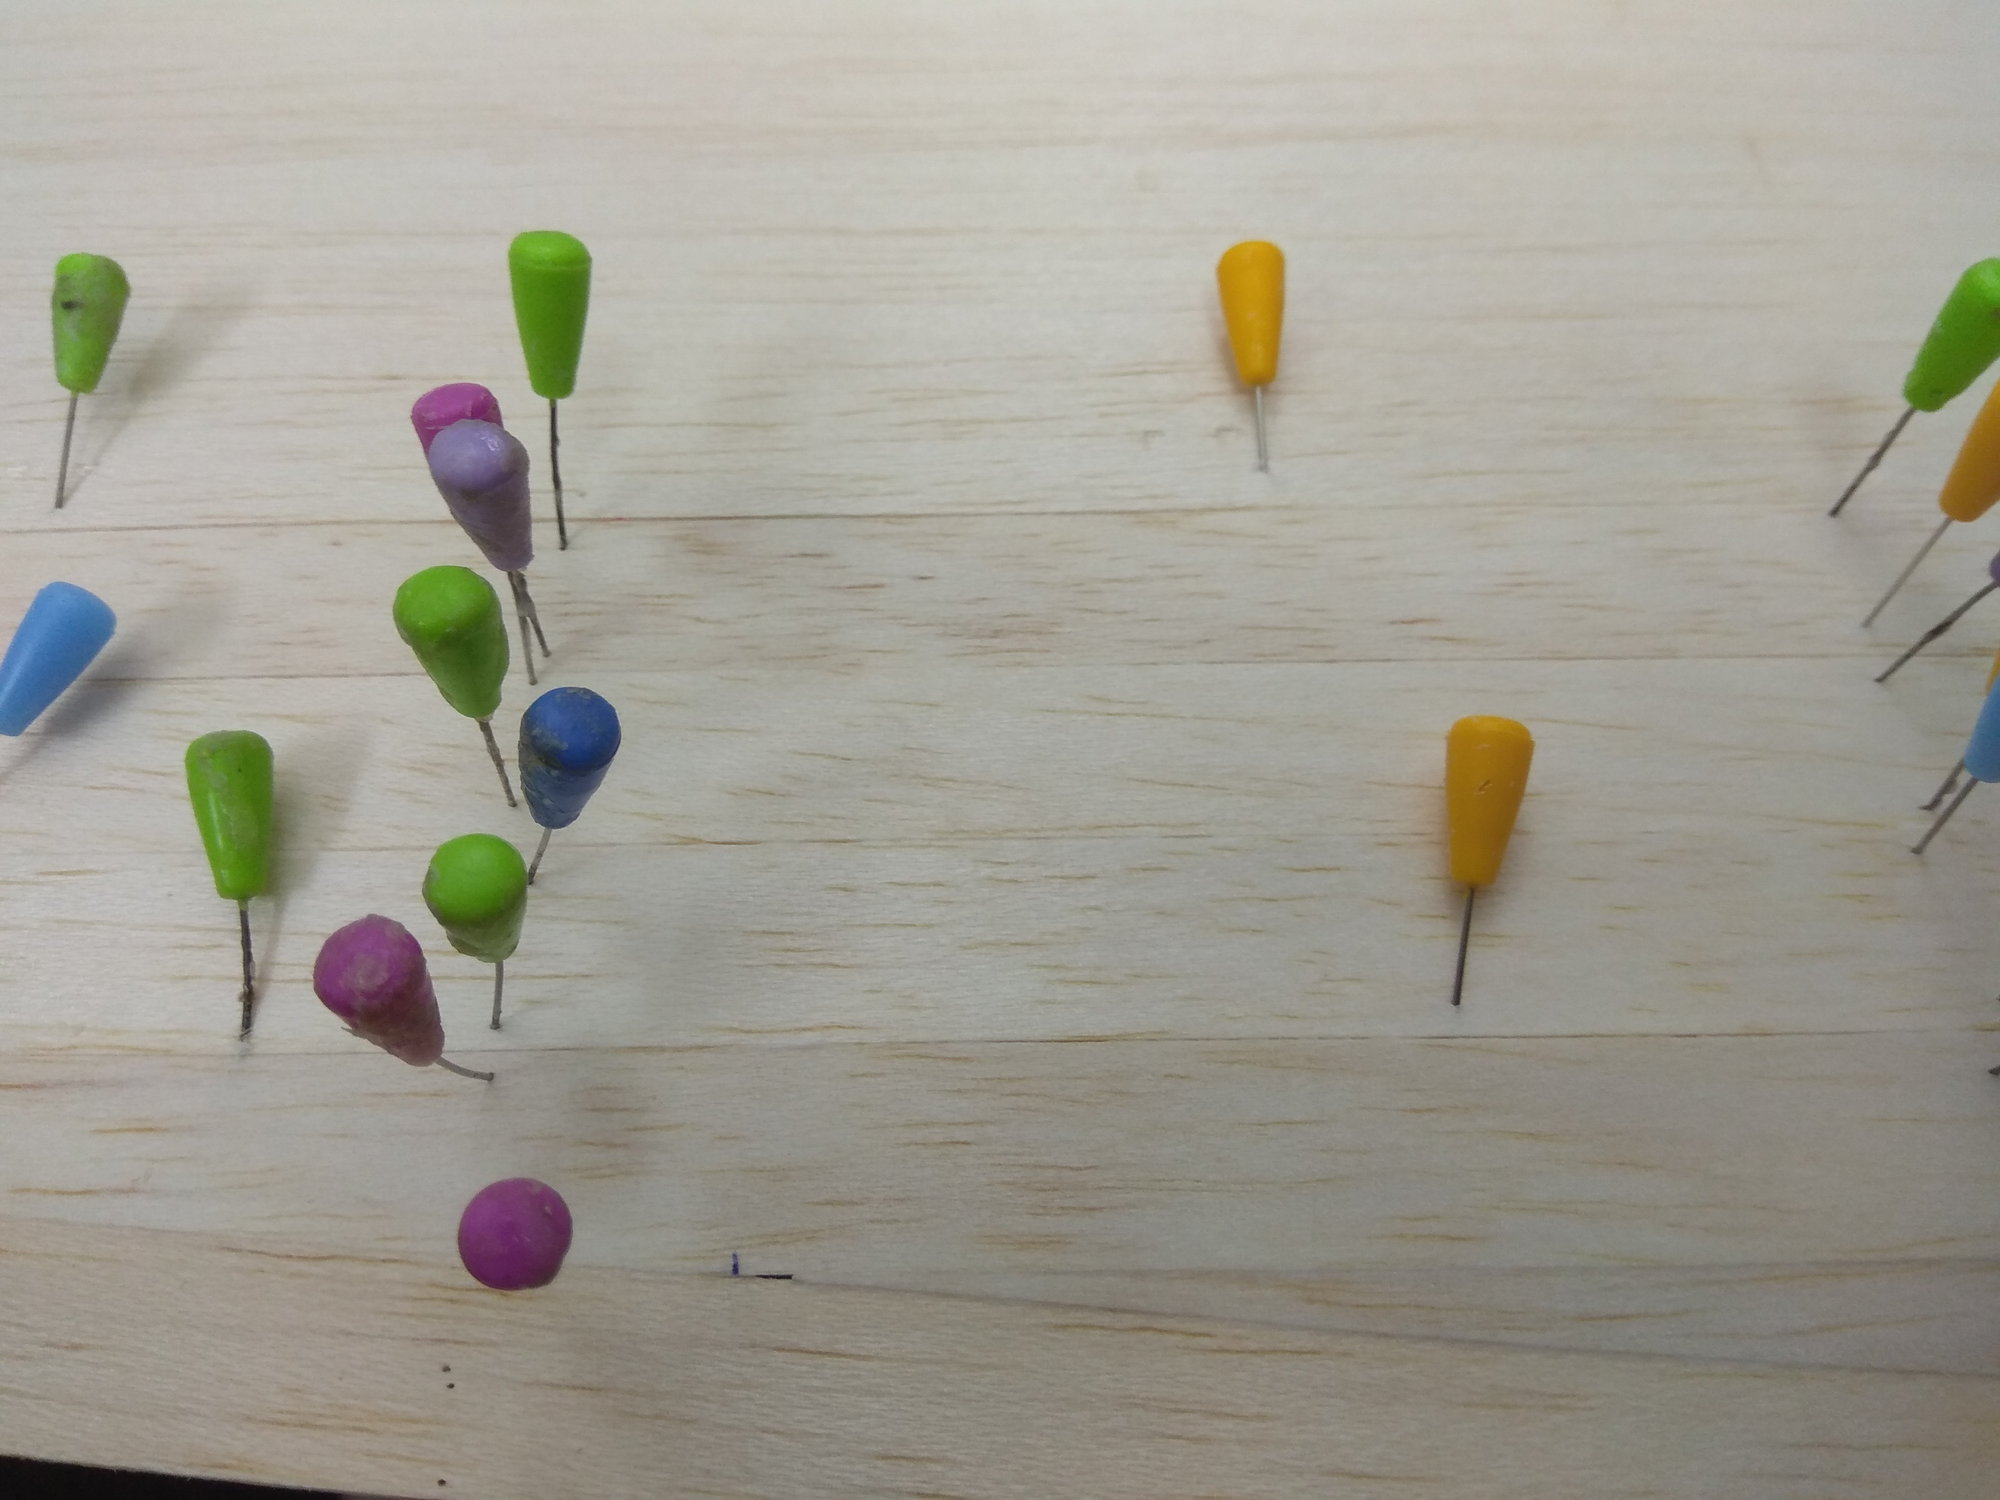
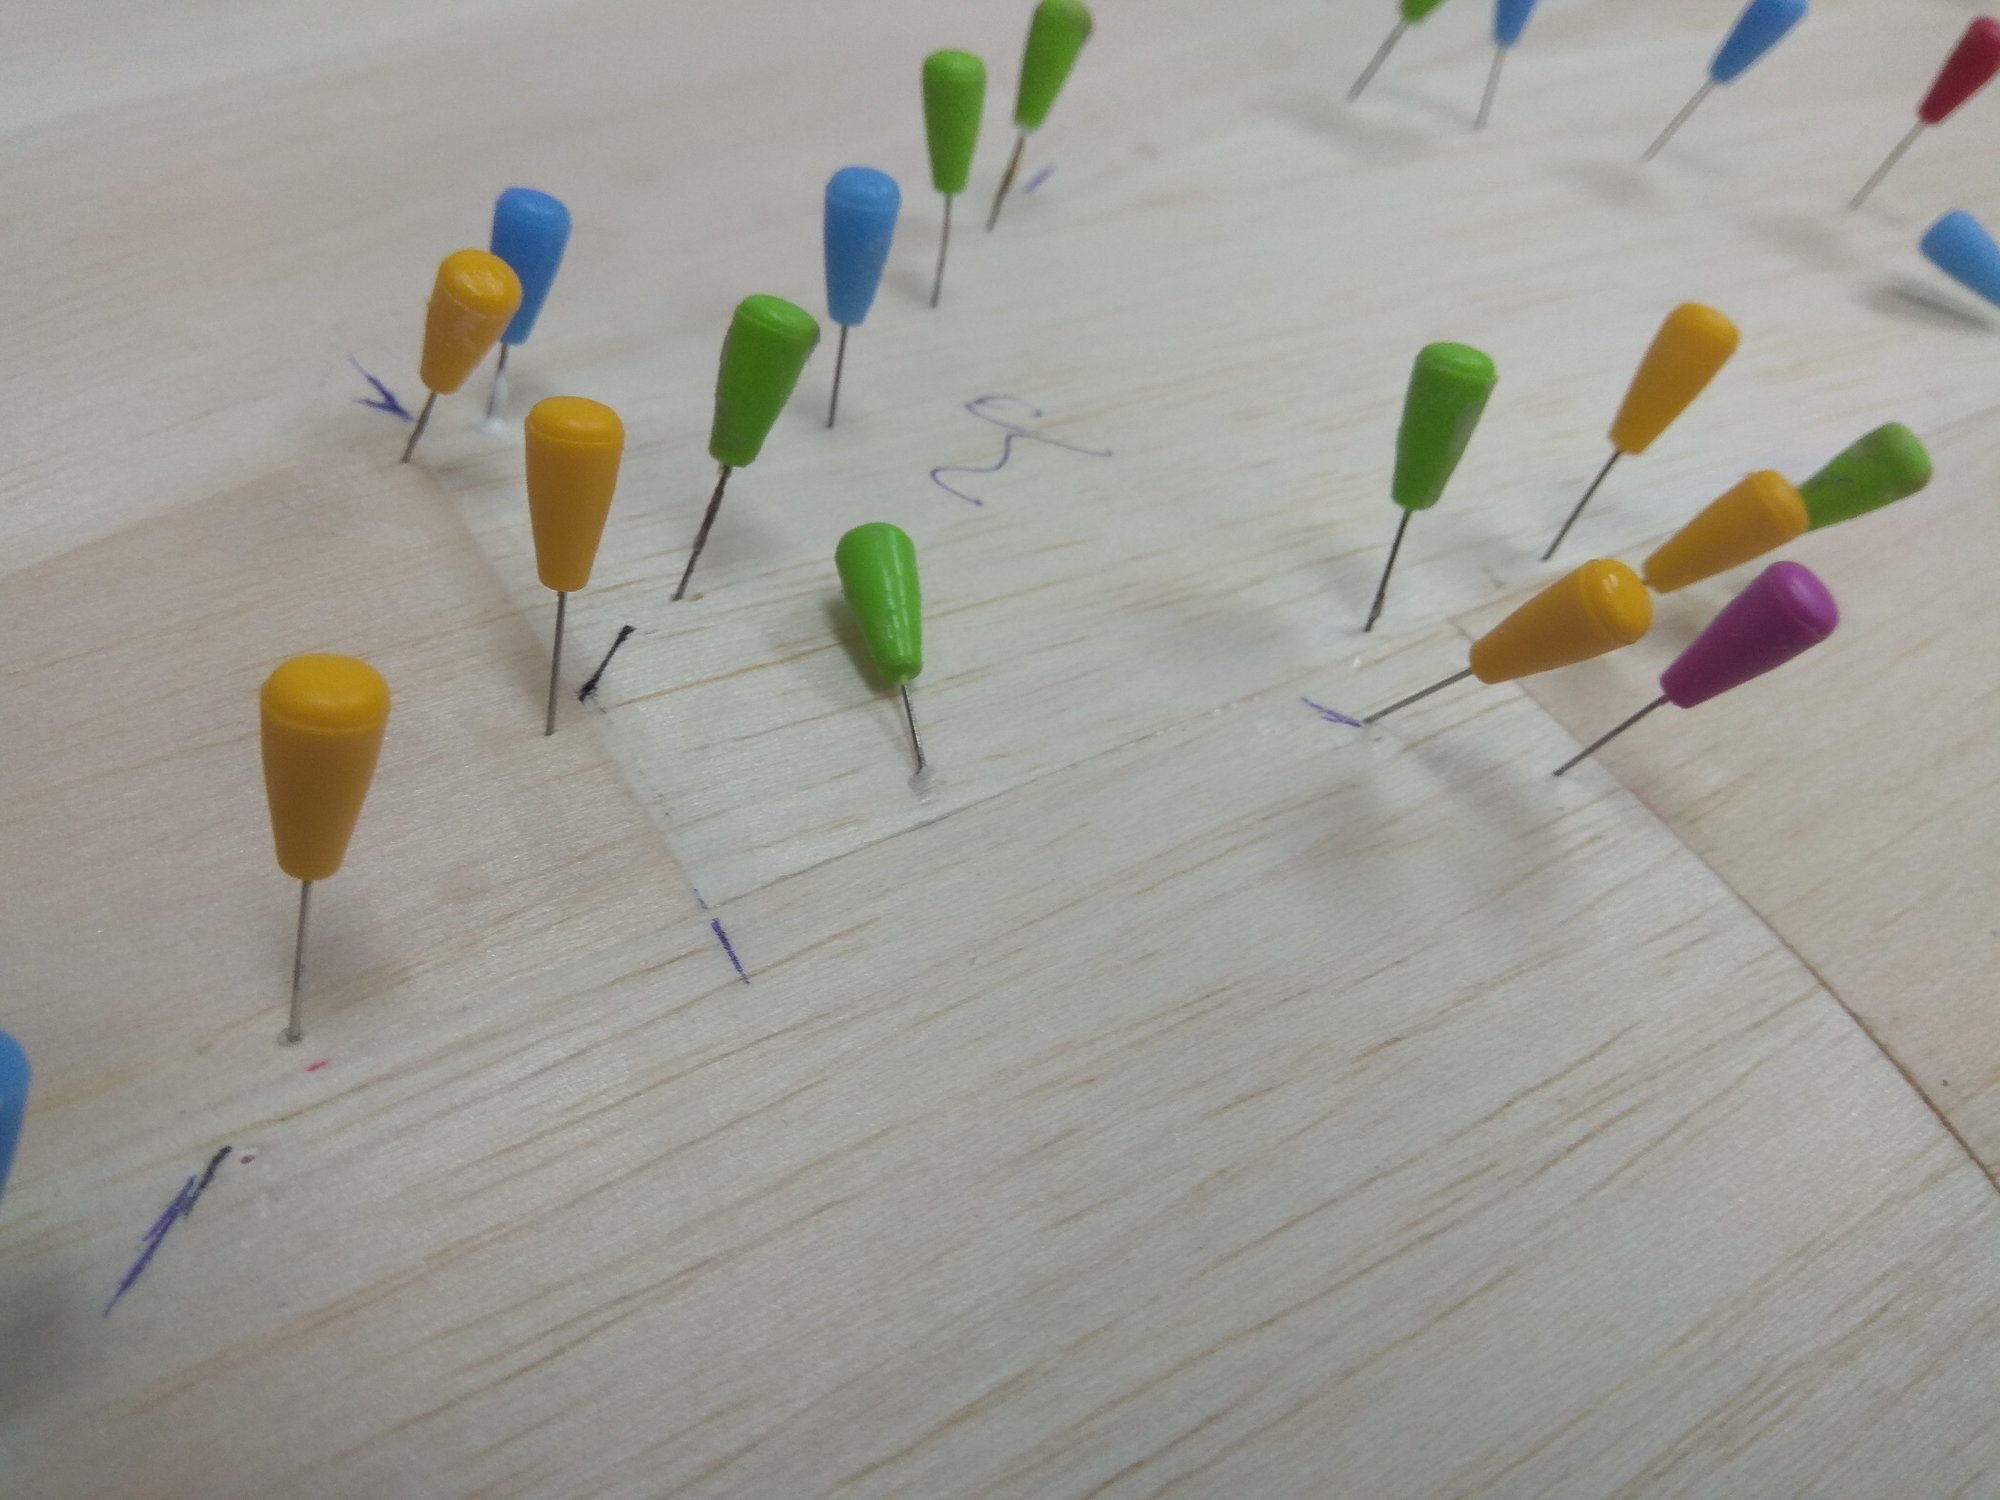
Besides, if you do it like that, you can't see where the ribs go, so you can't stick the pins.
I glue plank by plank, which means that I can assemble them perfectly and fix them on each rib during gluing.
If you work a couple of hours a day, you need two days to complete one wing...


Next time the underside.
As with all "Mirce models" no plan is needed to make the wings, in the wooden kit you get a board template in which the wing ribs are placed.
I always suggest putting all the parts together without glue first. This gives insight into whether the parts fit together nicely and the sequence of stacking and gluing.
The aluminum bayonet must be installed during the construction of the wing!!!
I have a piece of pipe, so I use it instead of the bayonet, but don't make the wing without putting the bayonet through!!!
The bayonet goes through the first 6 ribs and by gluing the wing with the installed bayonet, you get 100% certainty that it will not get stuck anywhere.
During the making of the wing, I glued two structures into which the front and rear pylon screws will be screwed.
Since the nuts will be inside the wing, I glued them with 5-minute epoxy two-component glue.
Next plates for landing gears and strengthening of the first rib.
You can also see that I use aluminum tubes and wooden slats to keep all the edges straight.
The cross piece that connects the wing ribs and goes in front of the aluminum bayonet will be glued on when I do the underside.
When all the ribs are in place, the glued cross pieces make the structure very strong, but I still don't take it out of the template, until the entire top of the wing is planked with 3 mm balsa!!!
With a long wooden slat, I squeeze the front side of the plank on the leading edge of the wing.
Someone assembles all the balsa and then glues them to the wing all at once, I don't do it that way, because the wing is big and by the time you apply all the glue it is half dry.
Besides, if you do it like that, you can't see where the ribs go, so you can't stick the pins.
I glue plank by plank, which means that I can assemble them perfectly and fix them on each rib during gluing.
If you work a couple of hours a day, you need two days to complete one wing...
Next time the underside.
The following users liked this post:
BadBill (03-13-2023)
03-20-2023, 01:36 PM
#19
Thread Starter
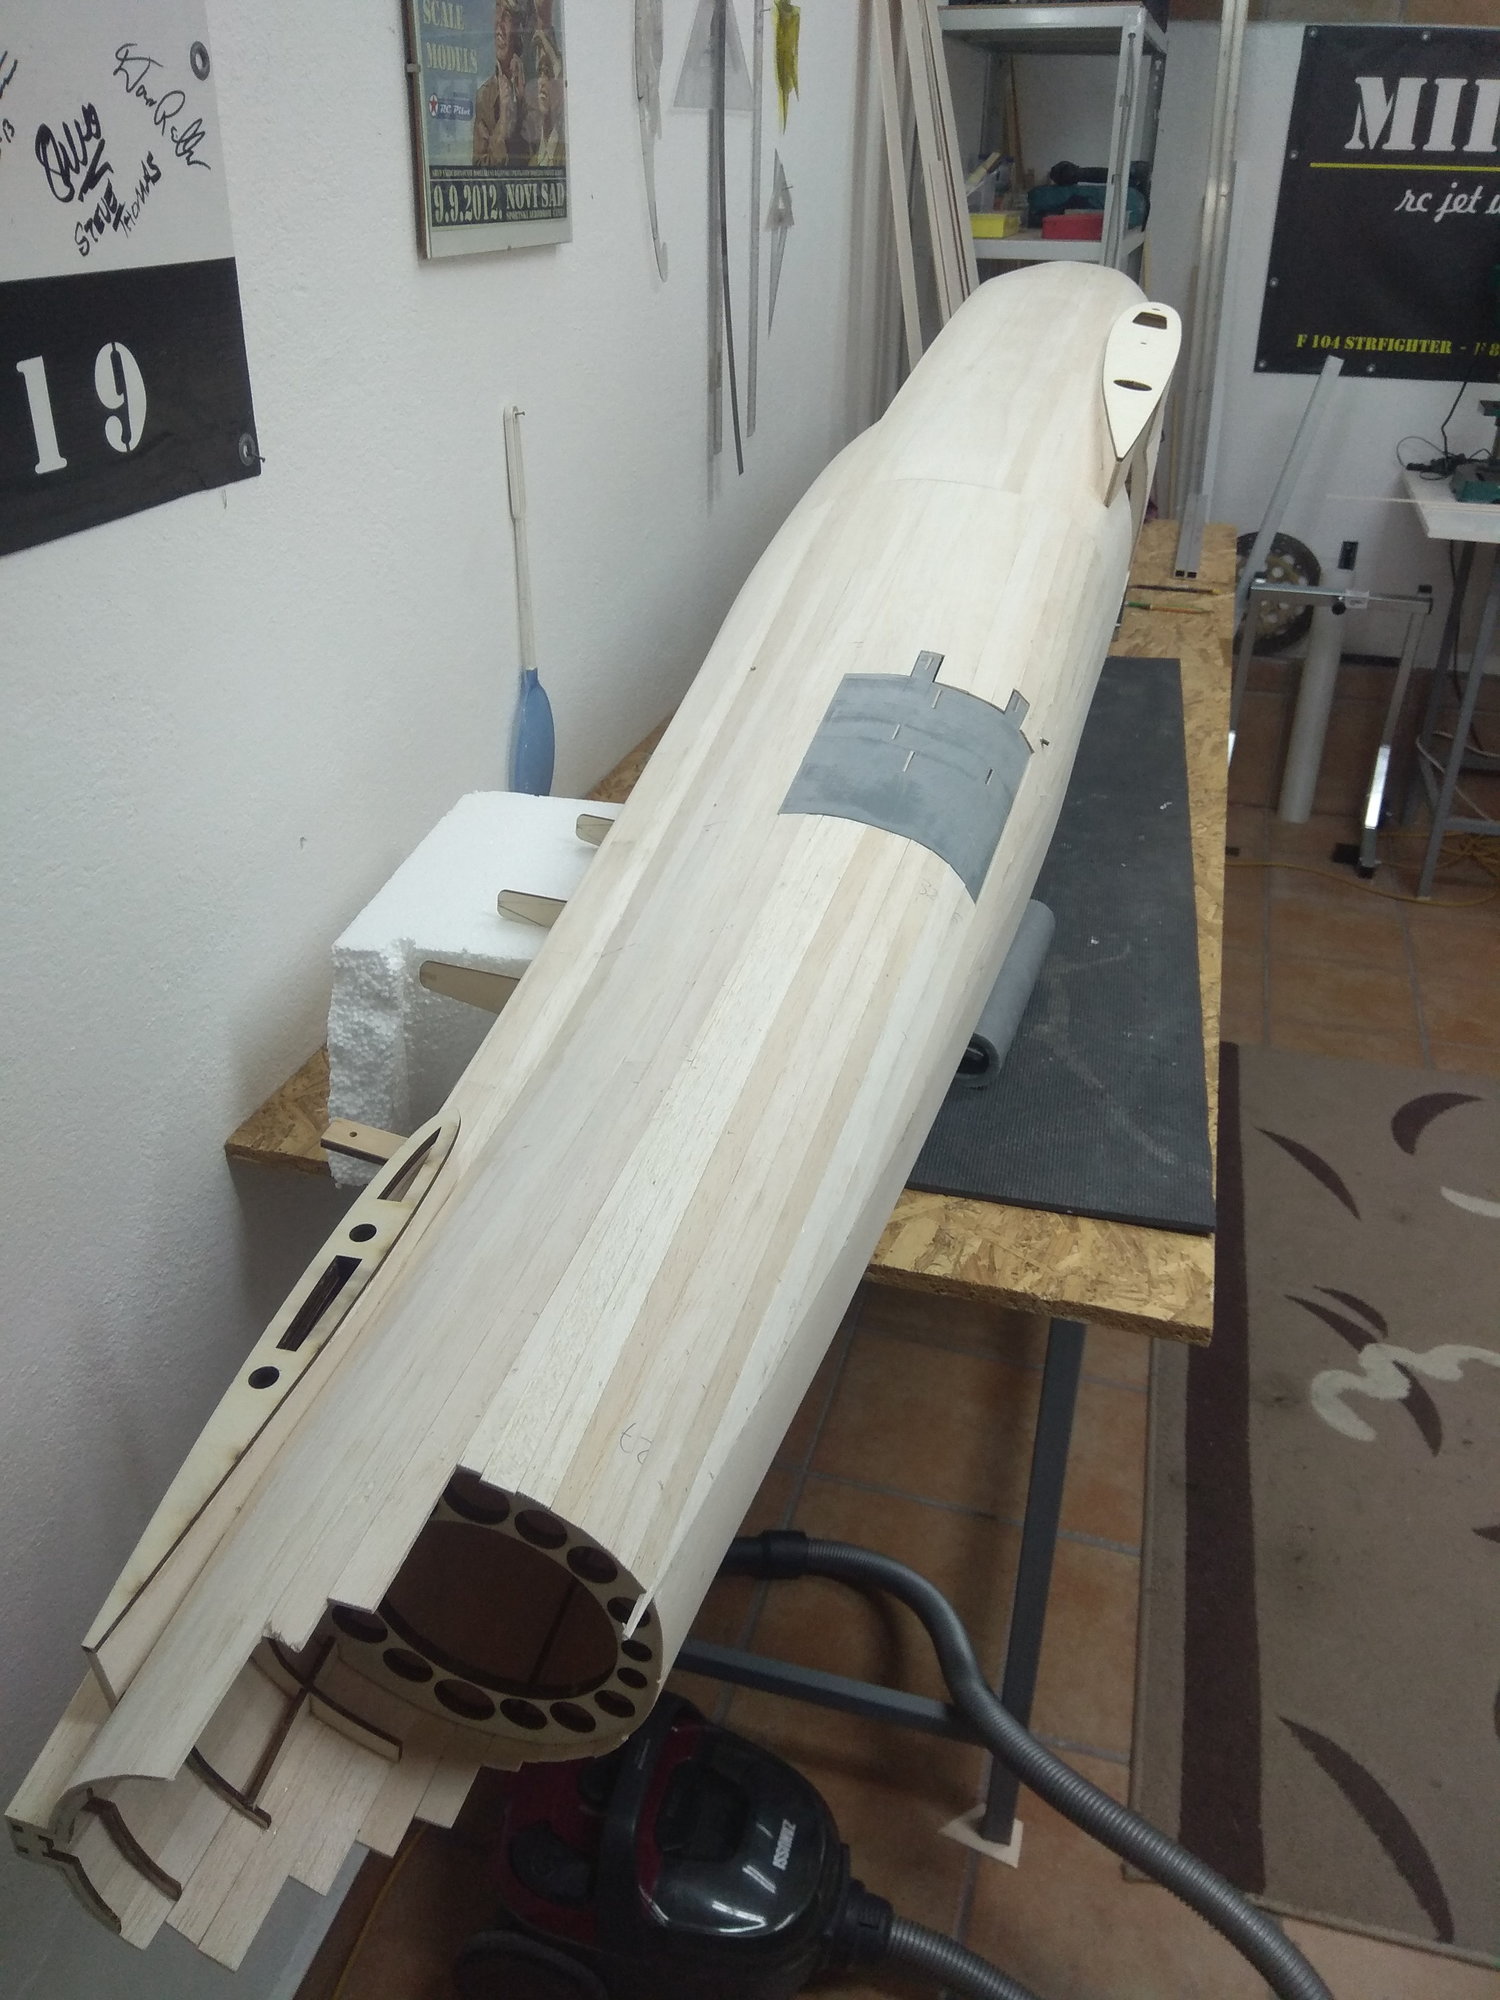
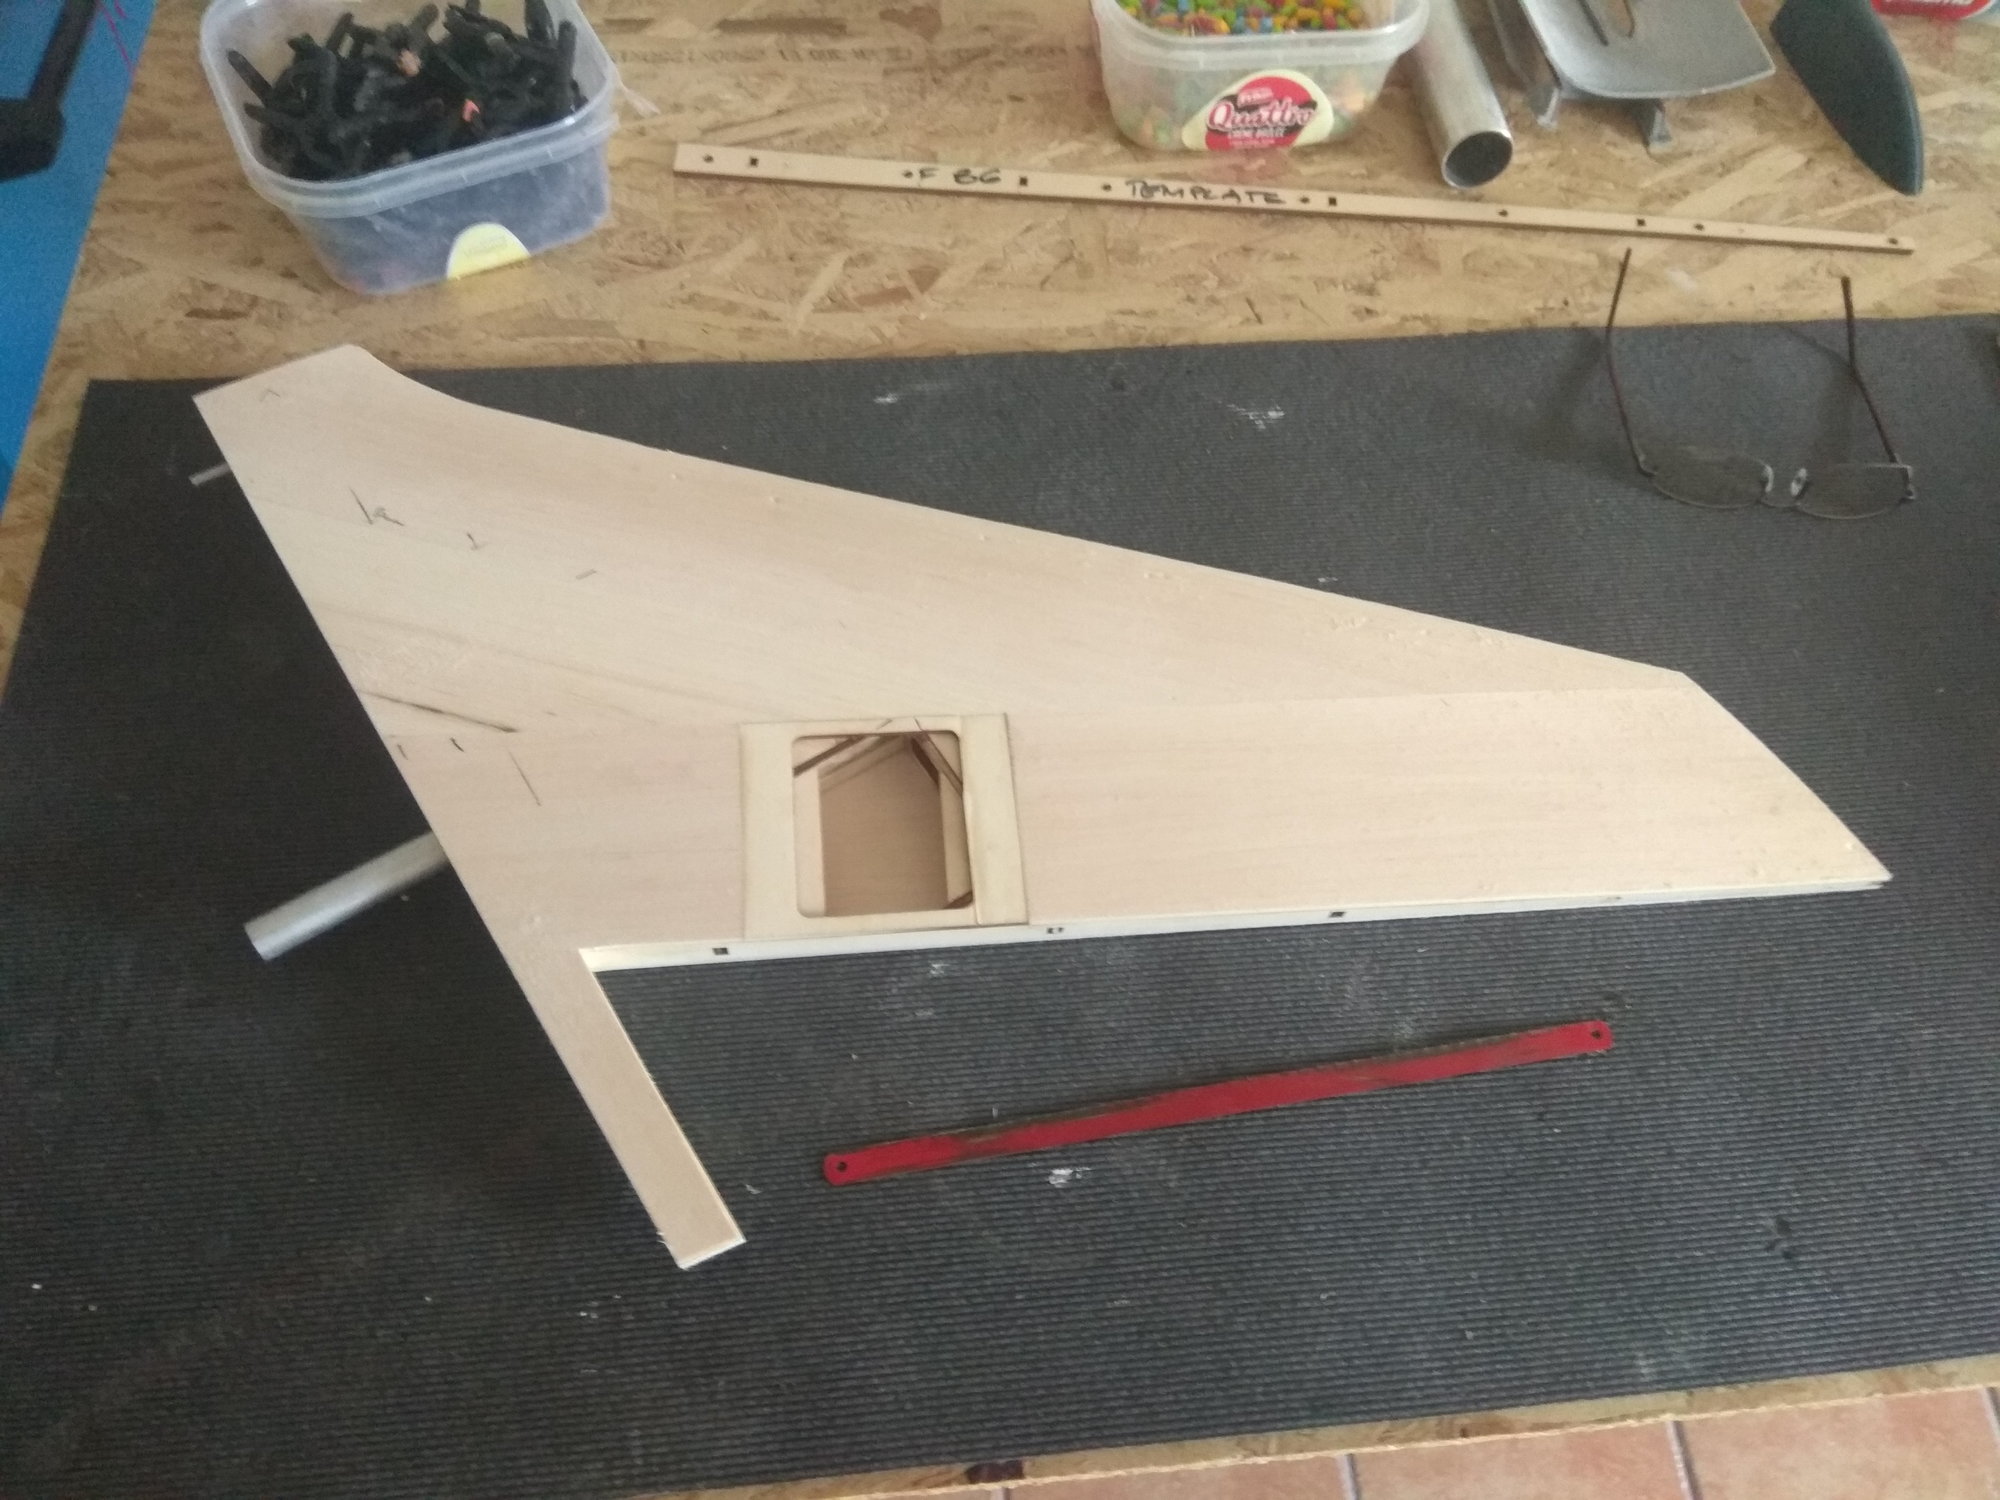
Wing bottom side.
With the top side completely coated with 3mm balsa, I separated the wing from the pattern board.
The wing is now very strong and cannot be twisted.
First I glued the part that goes in front of the aluminum tube and that connects the first seven ribs. This part was much easier to glue on the underside of the wing.
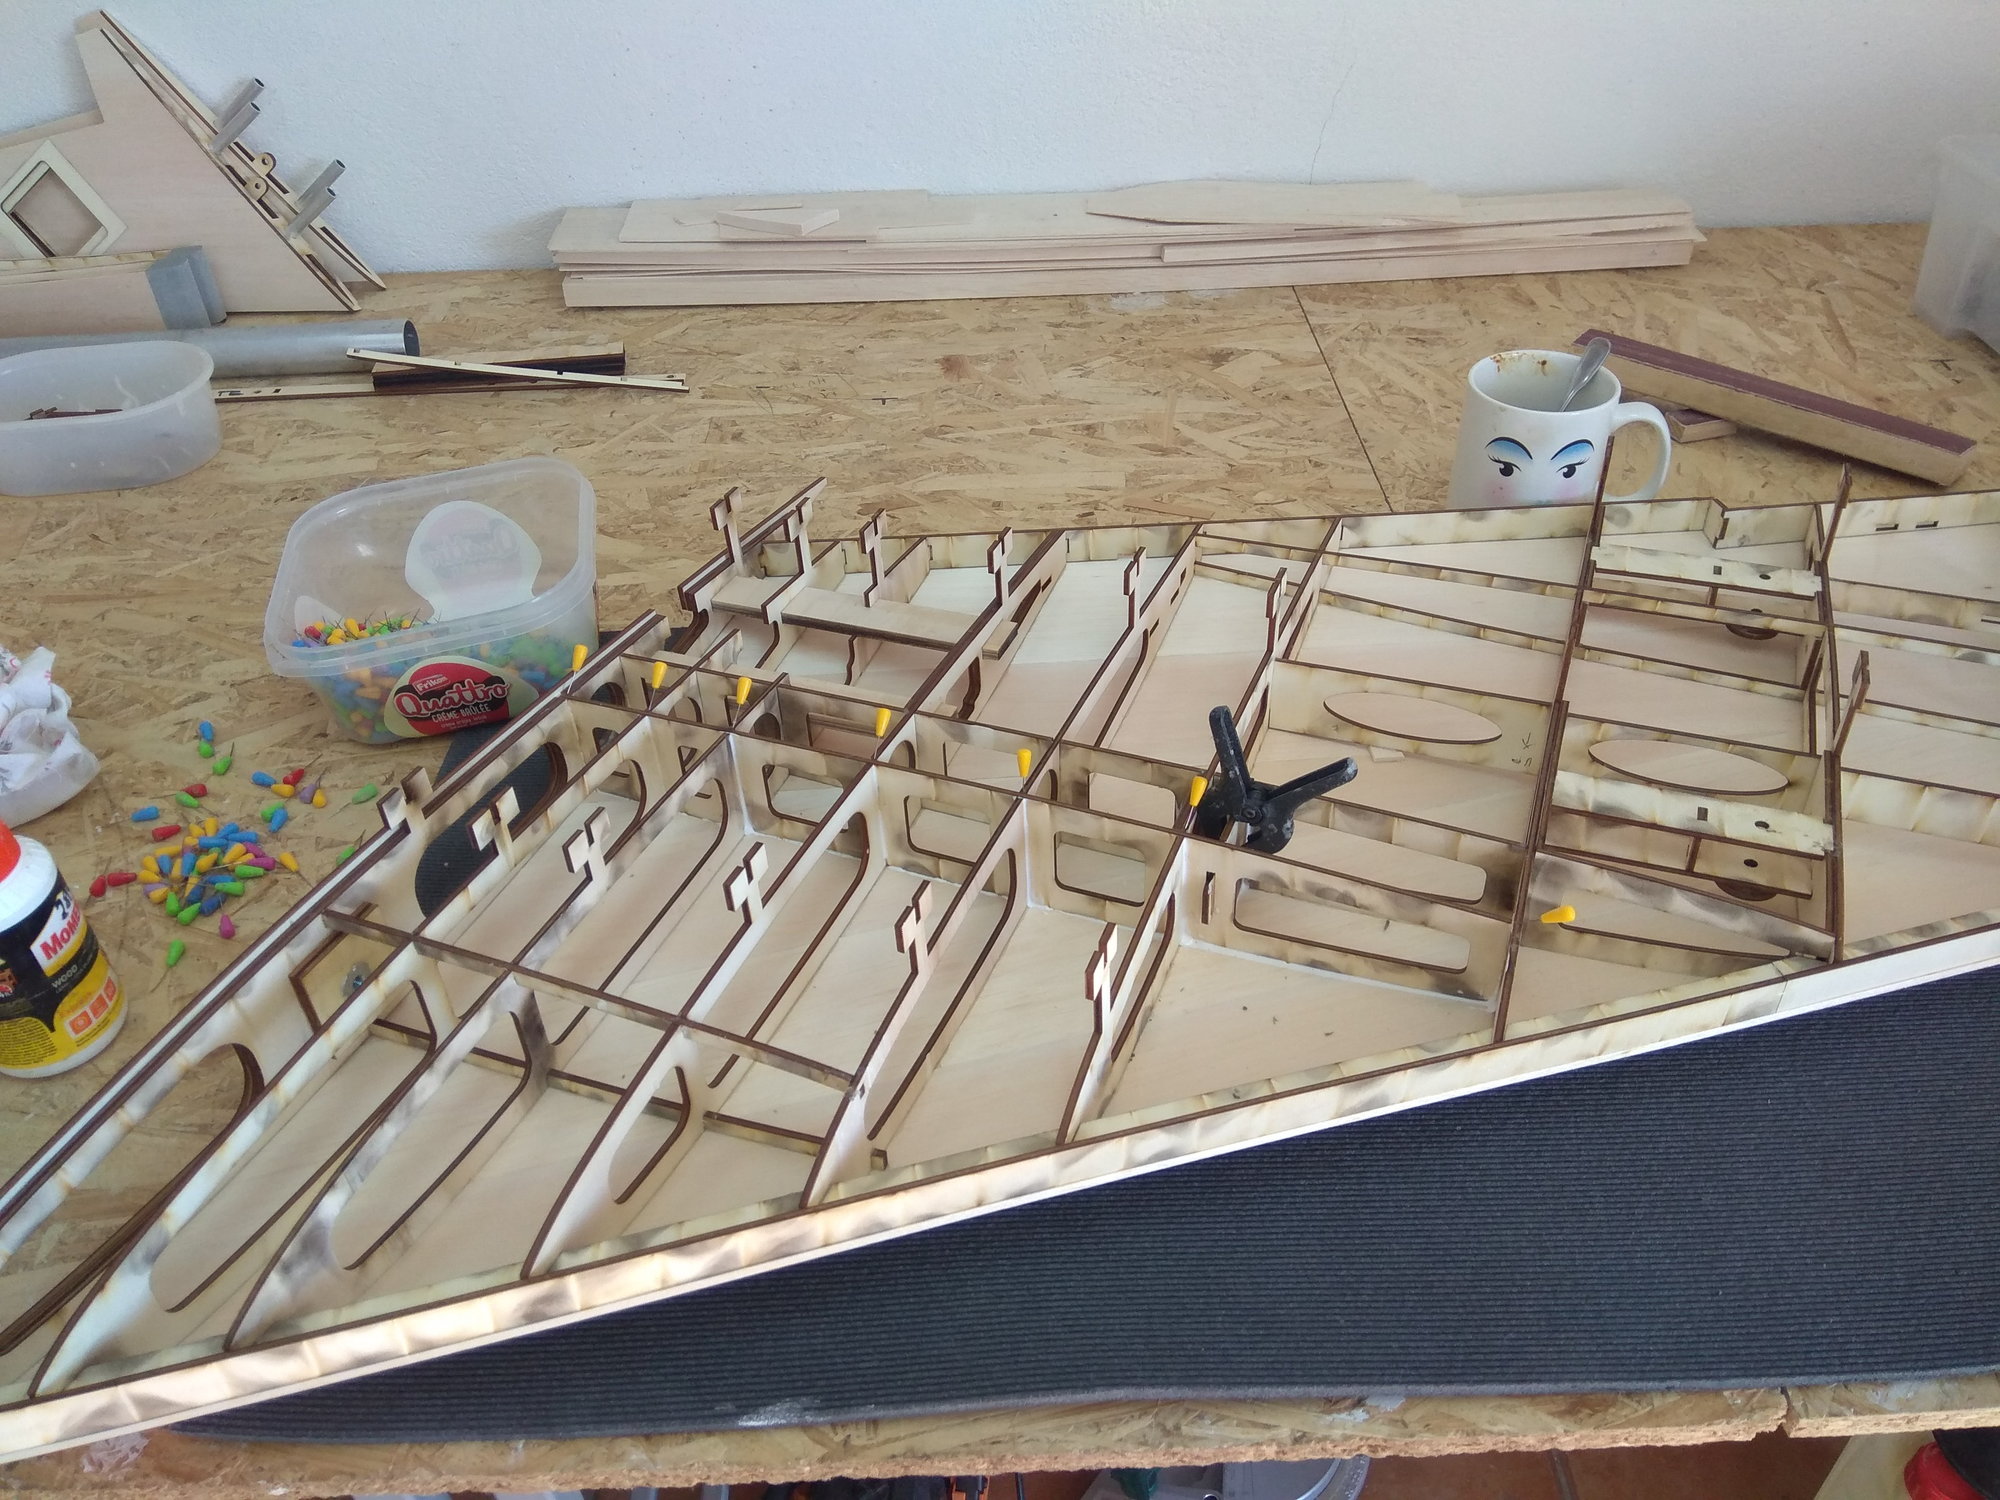
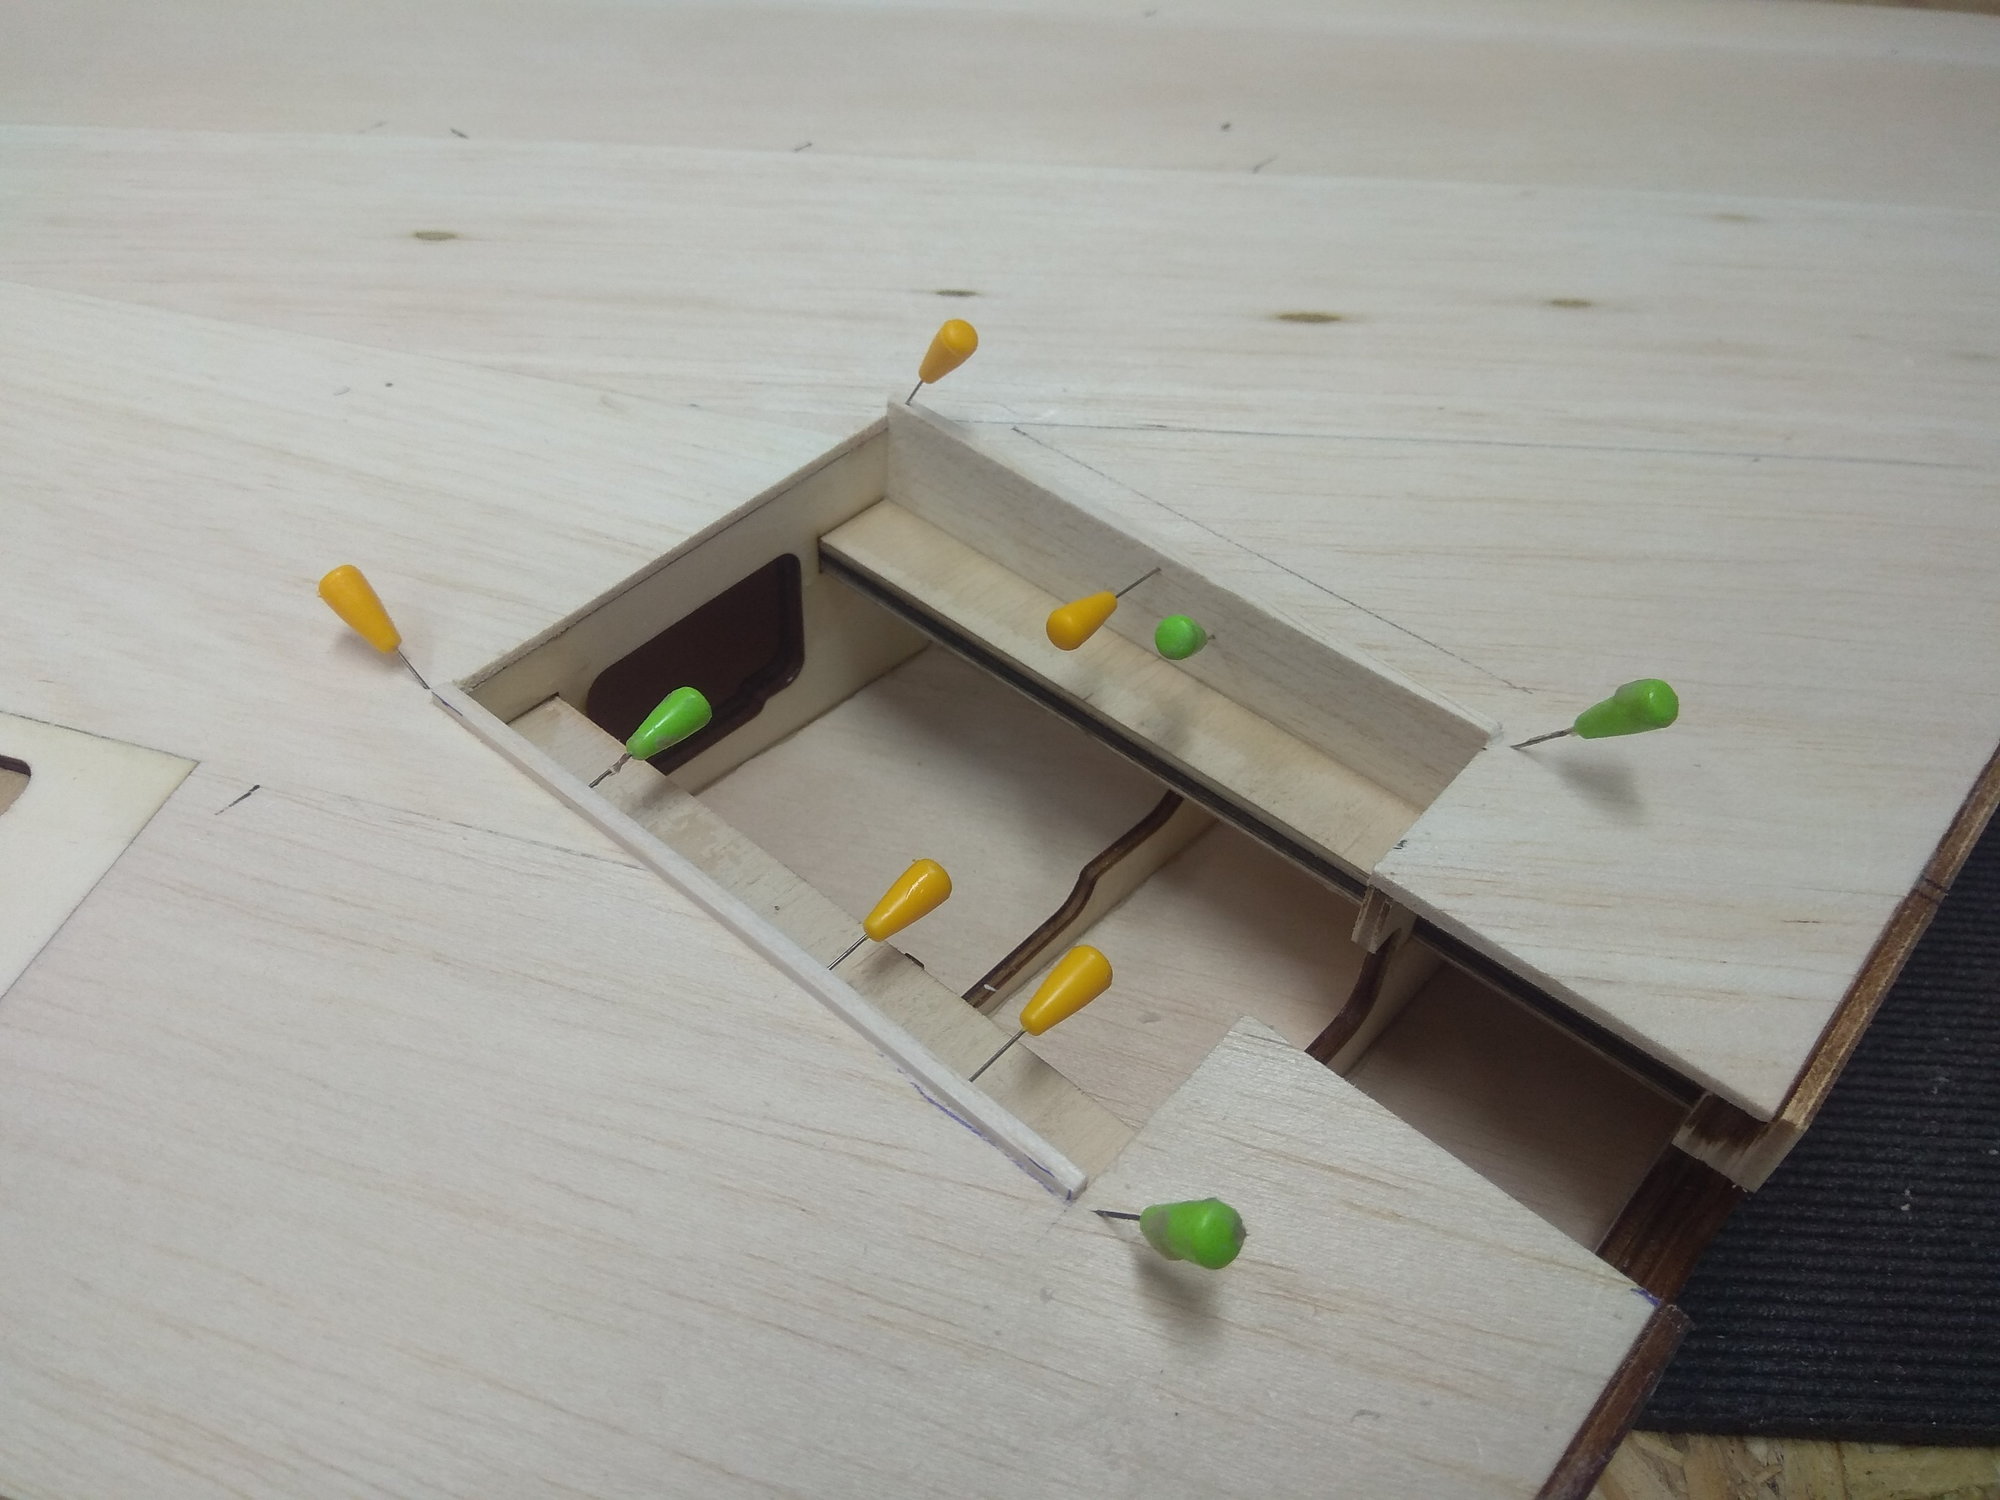
After cutting off the "legs" I installed the frames and covers for the flaps and aileron servos.
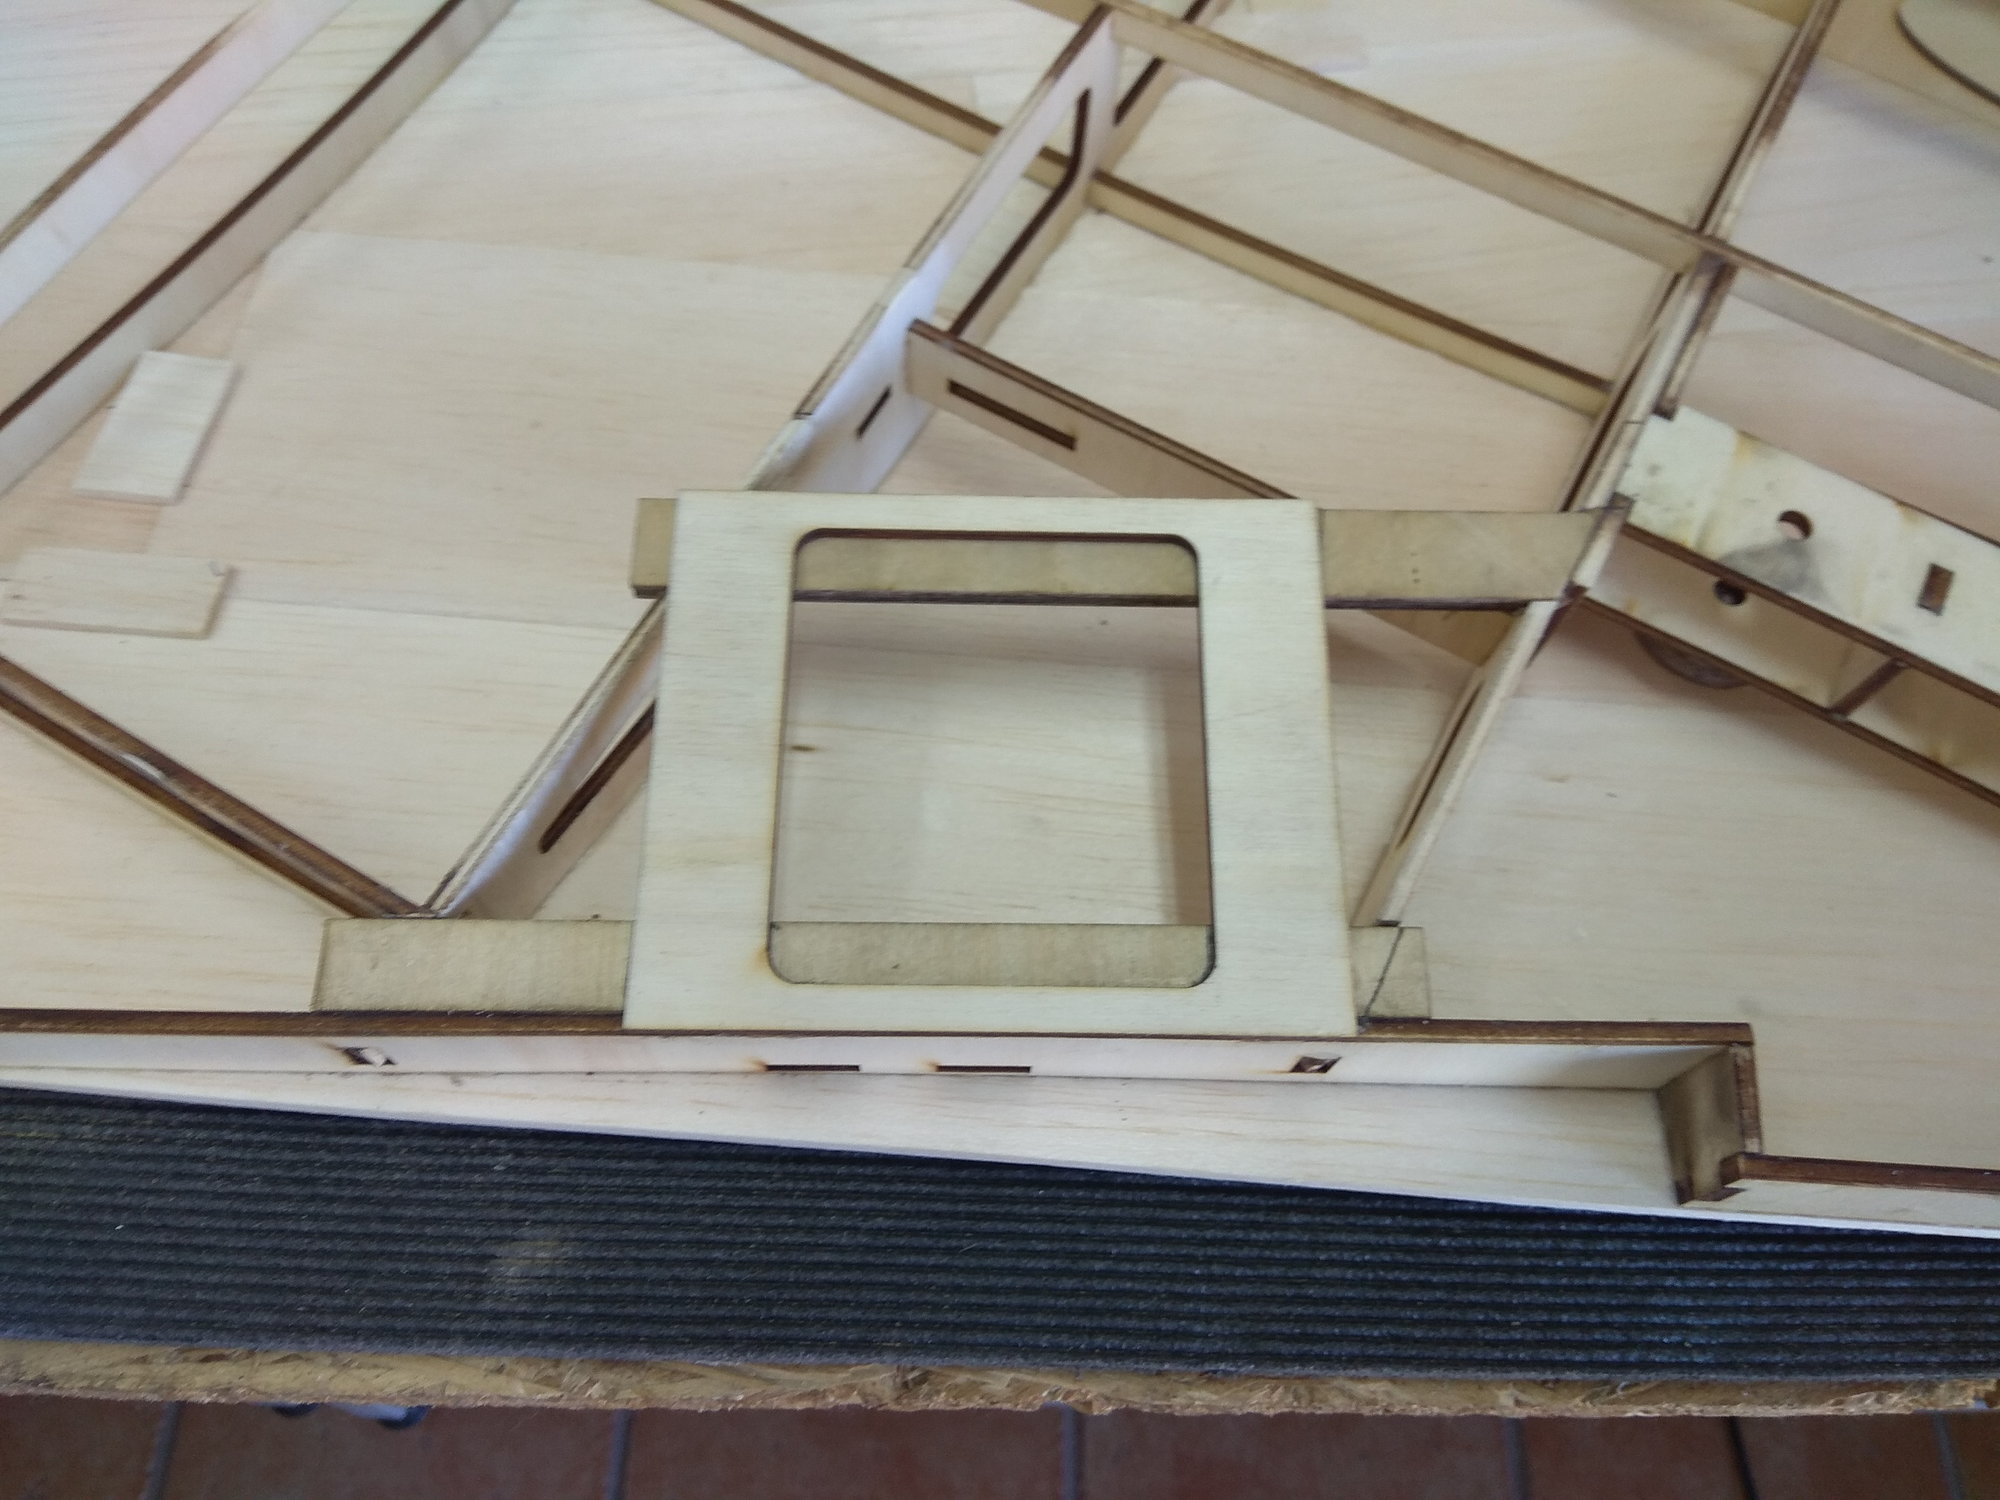
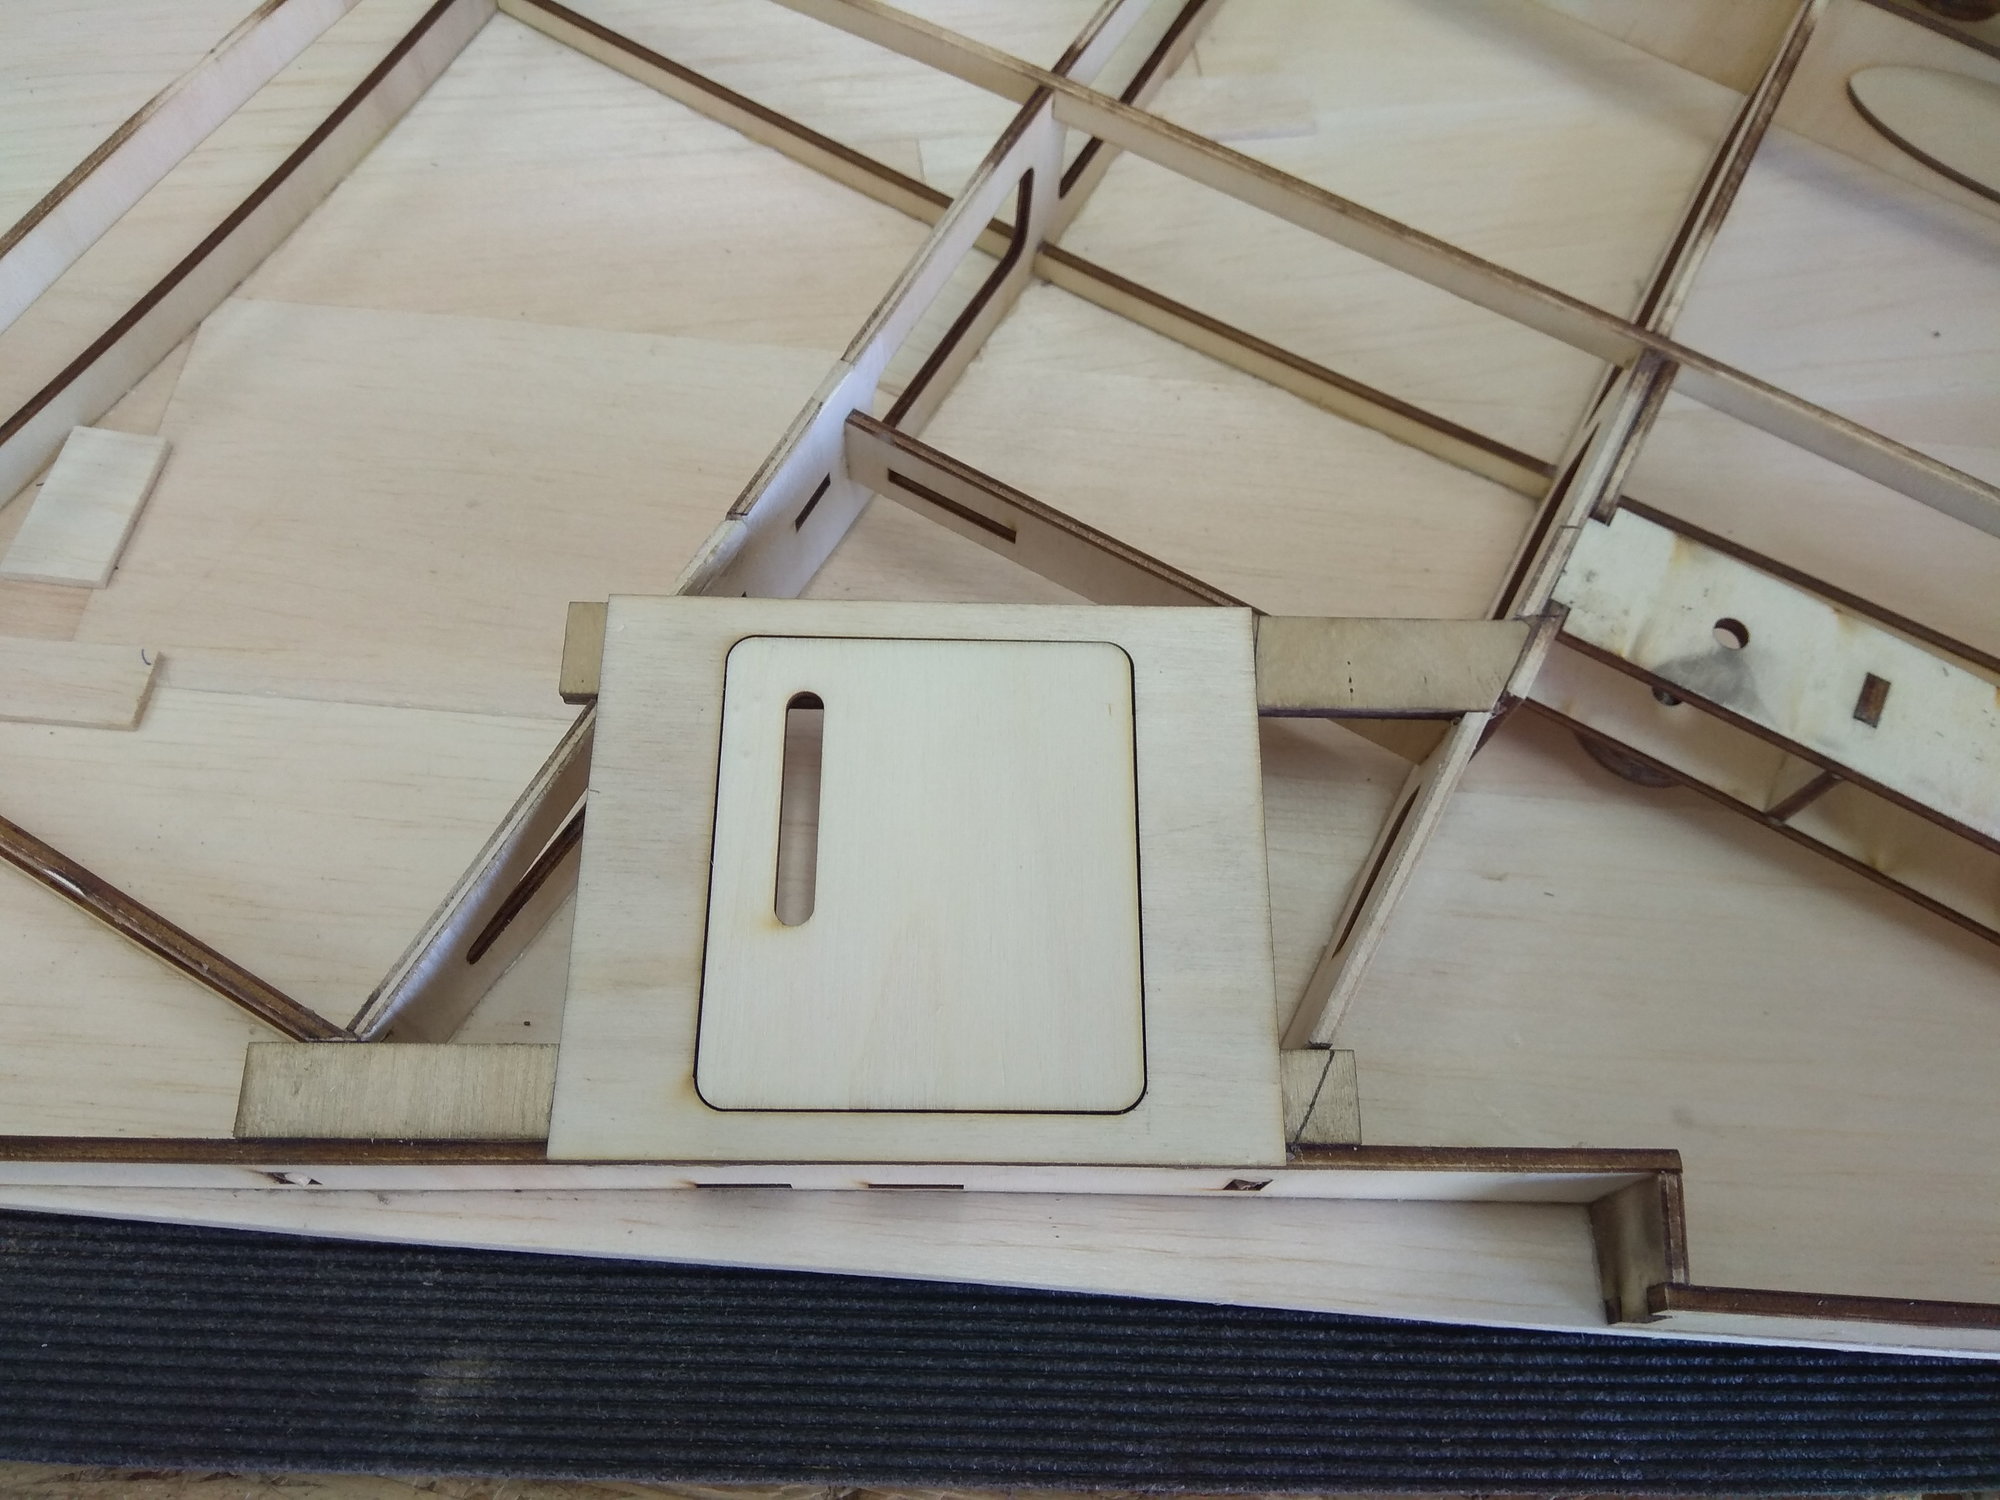
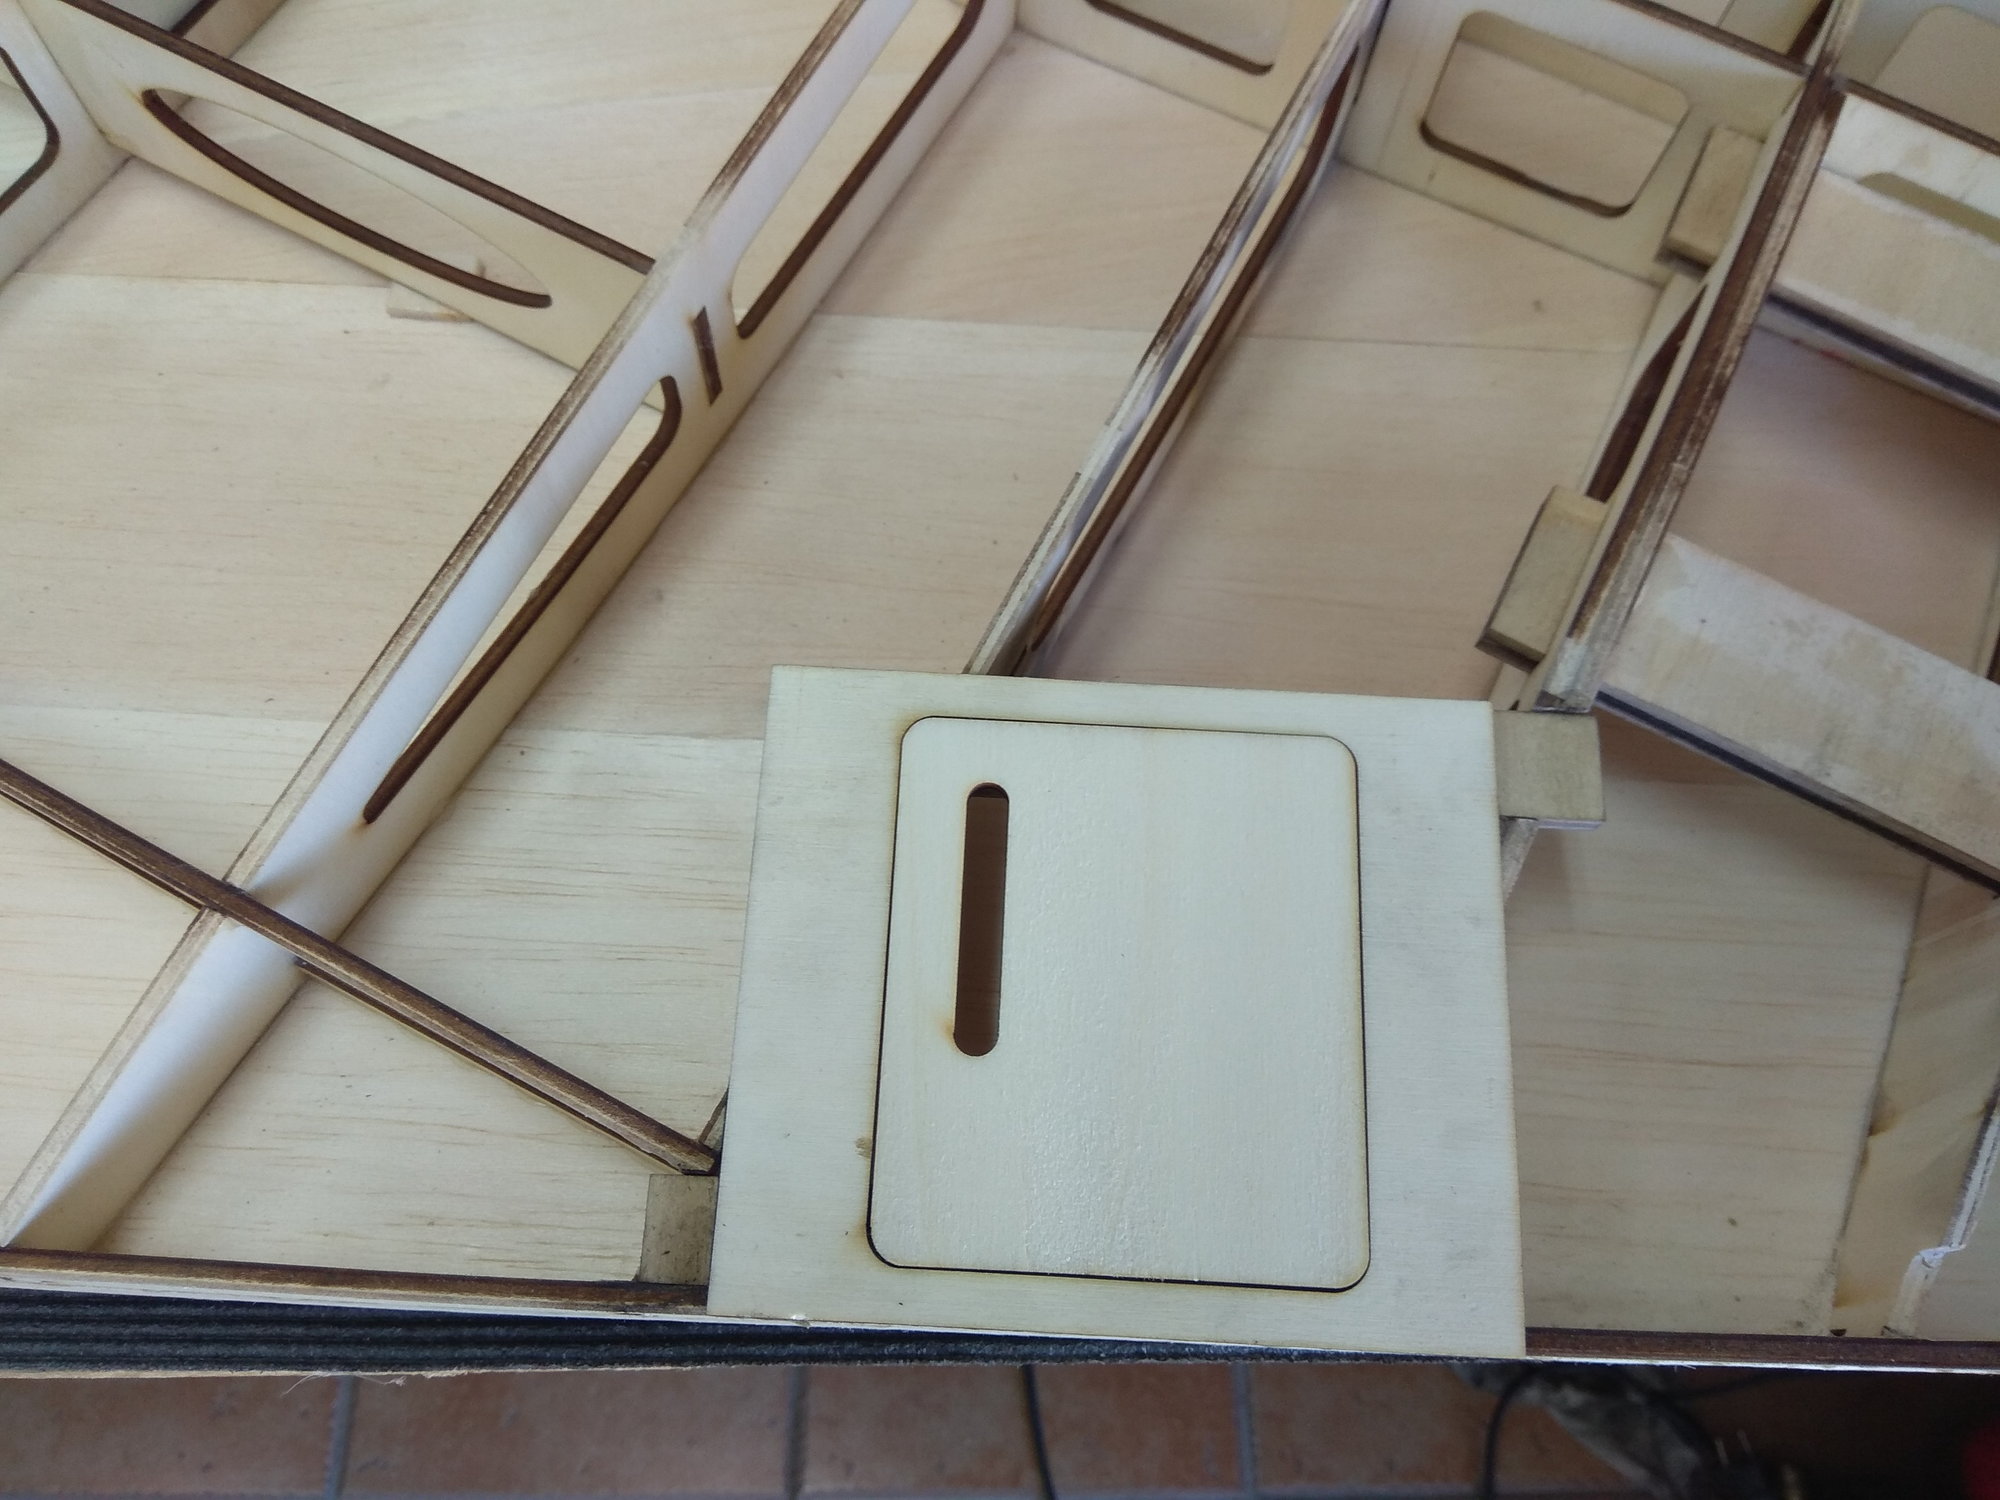
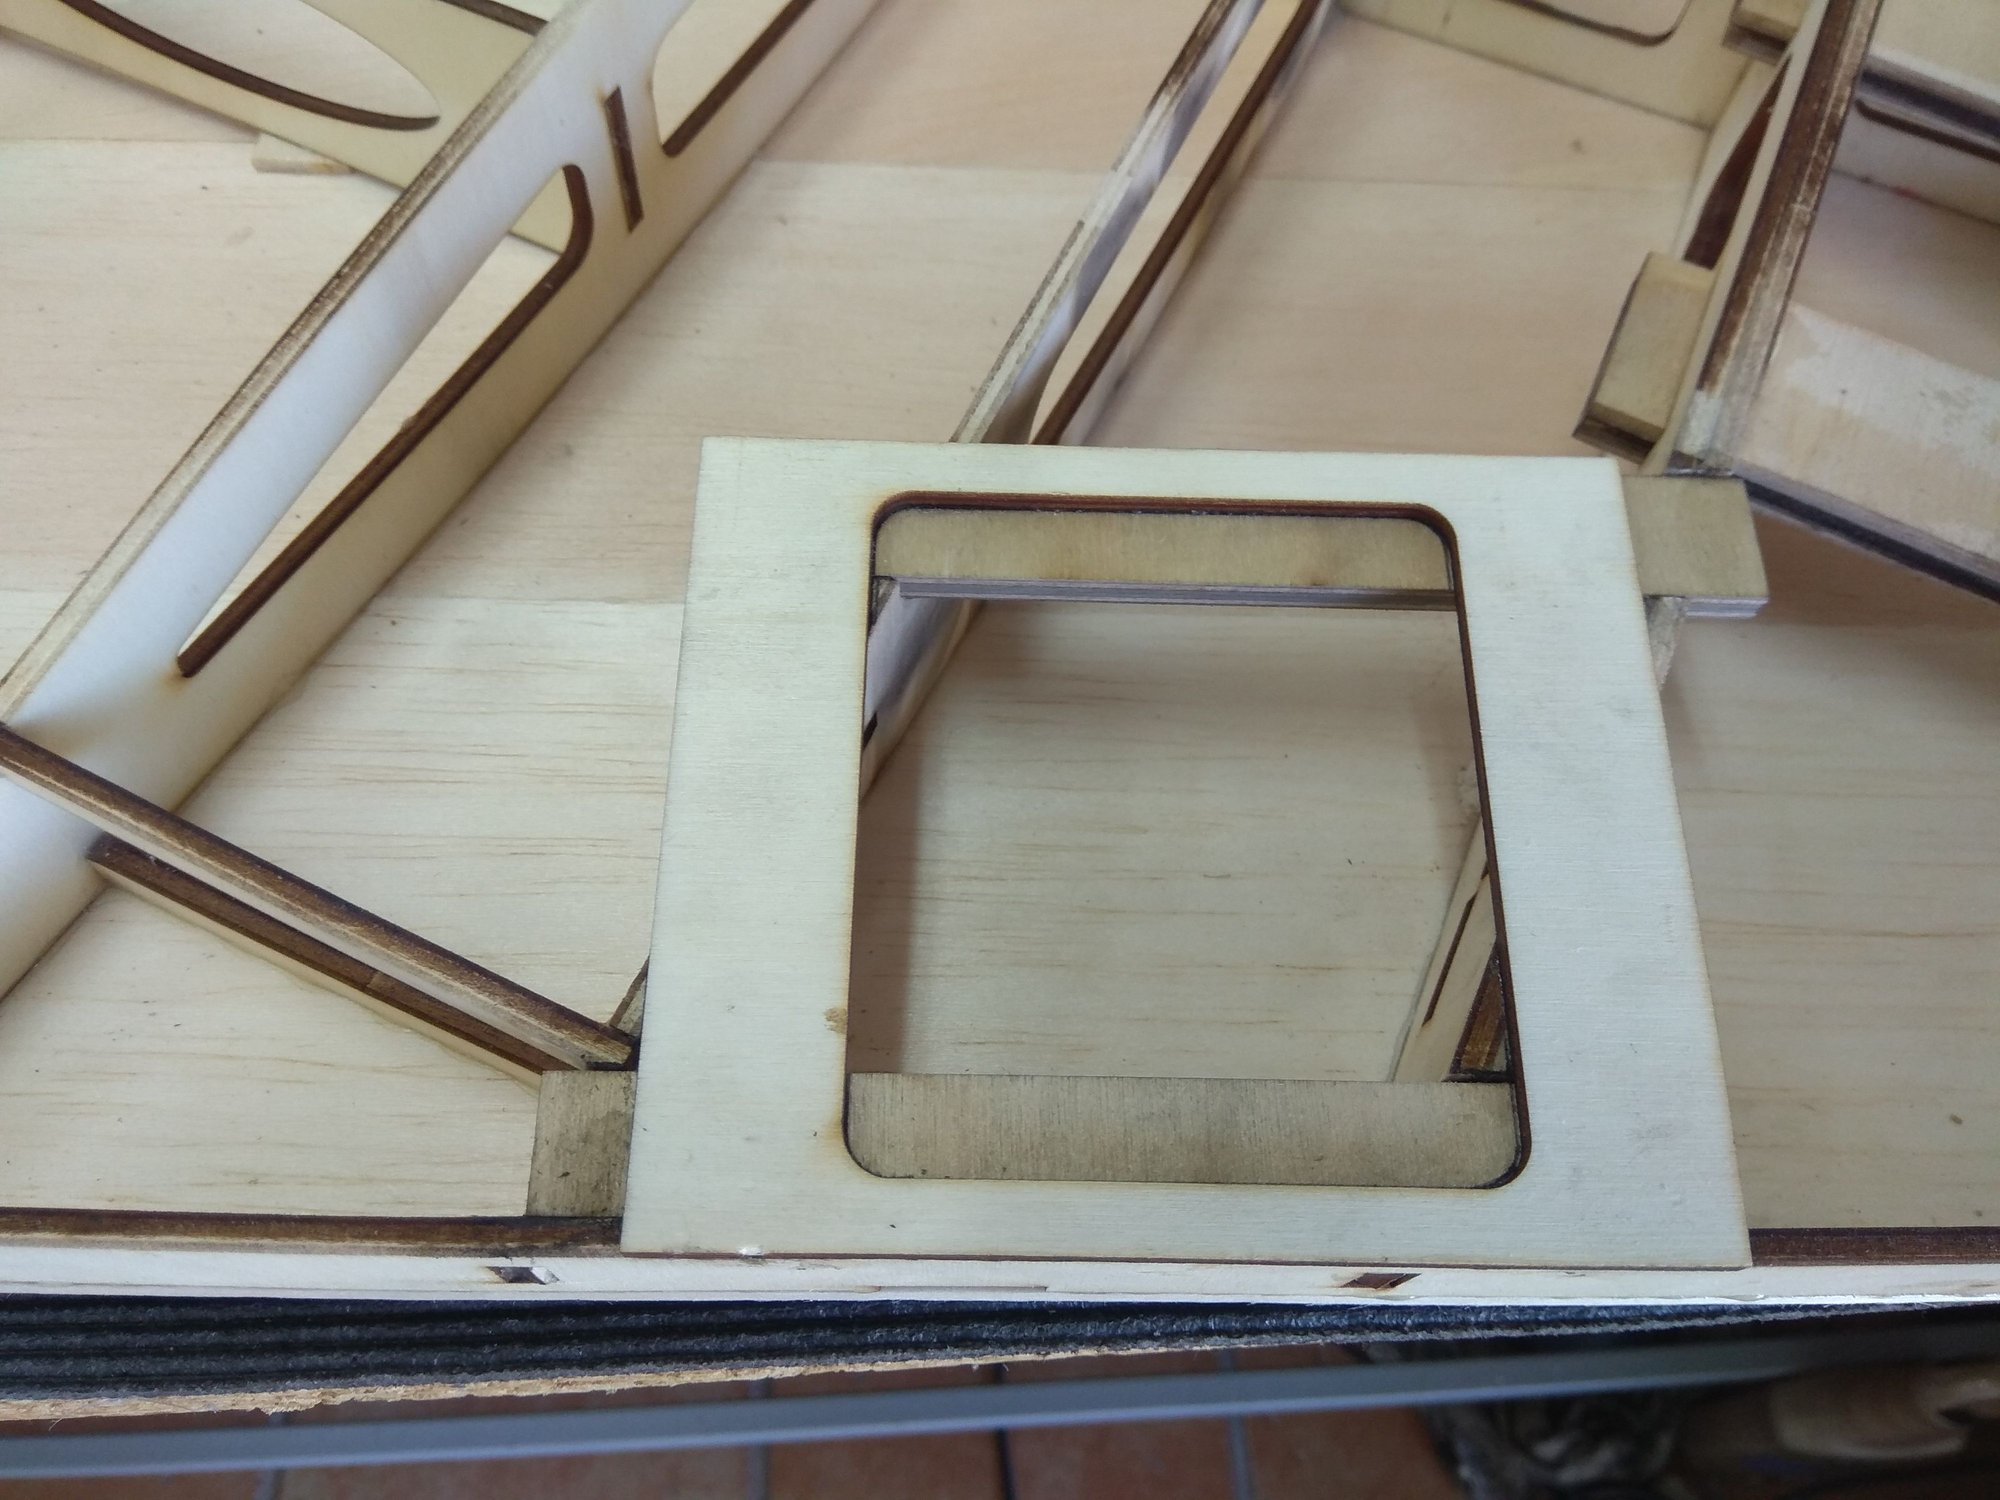
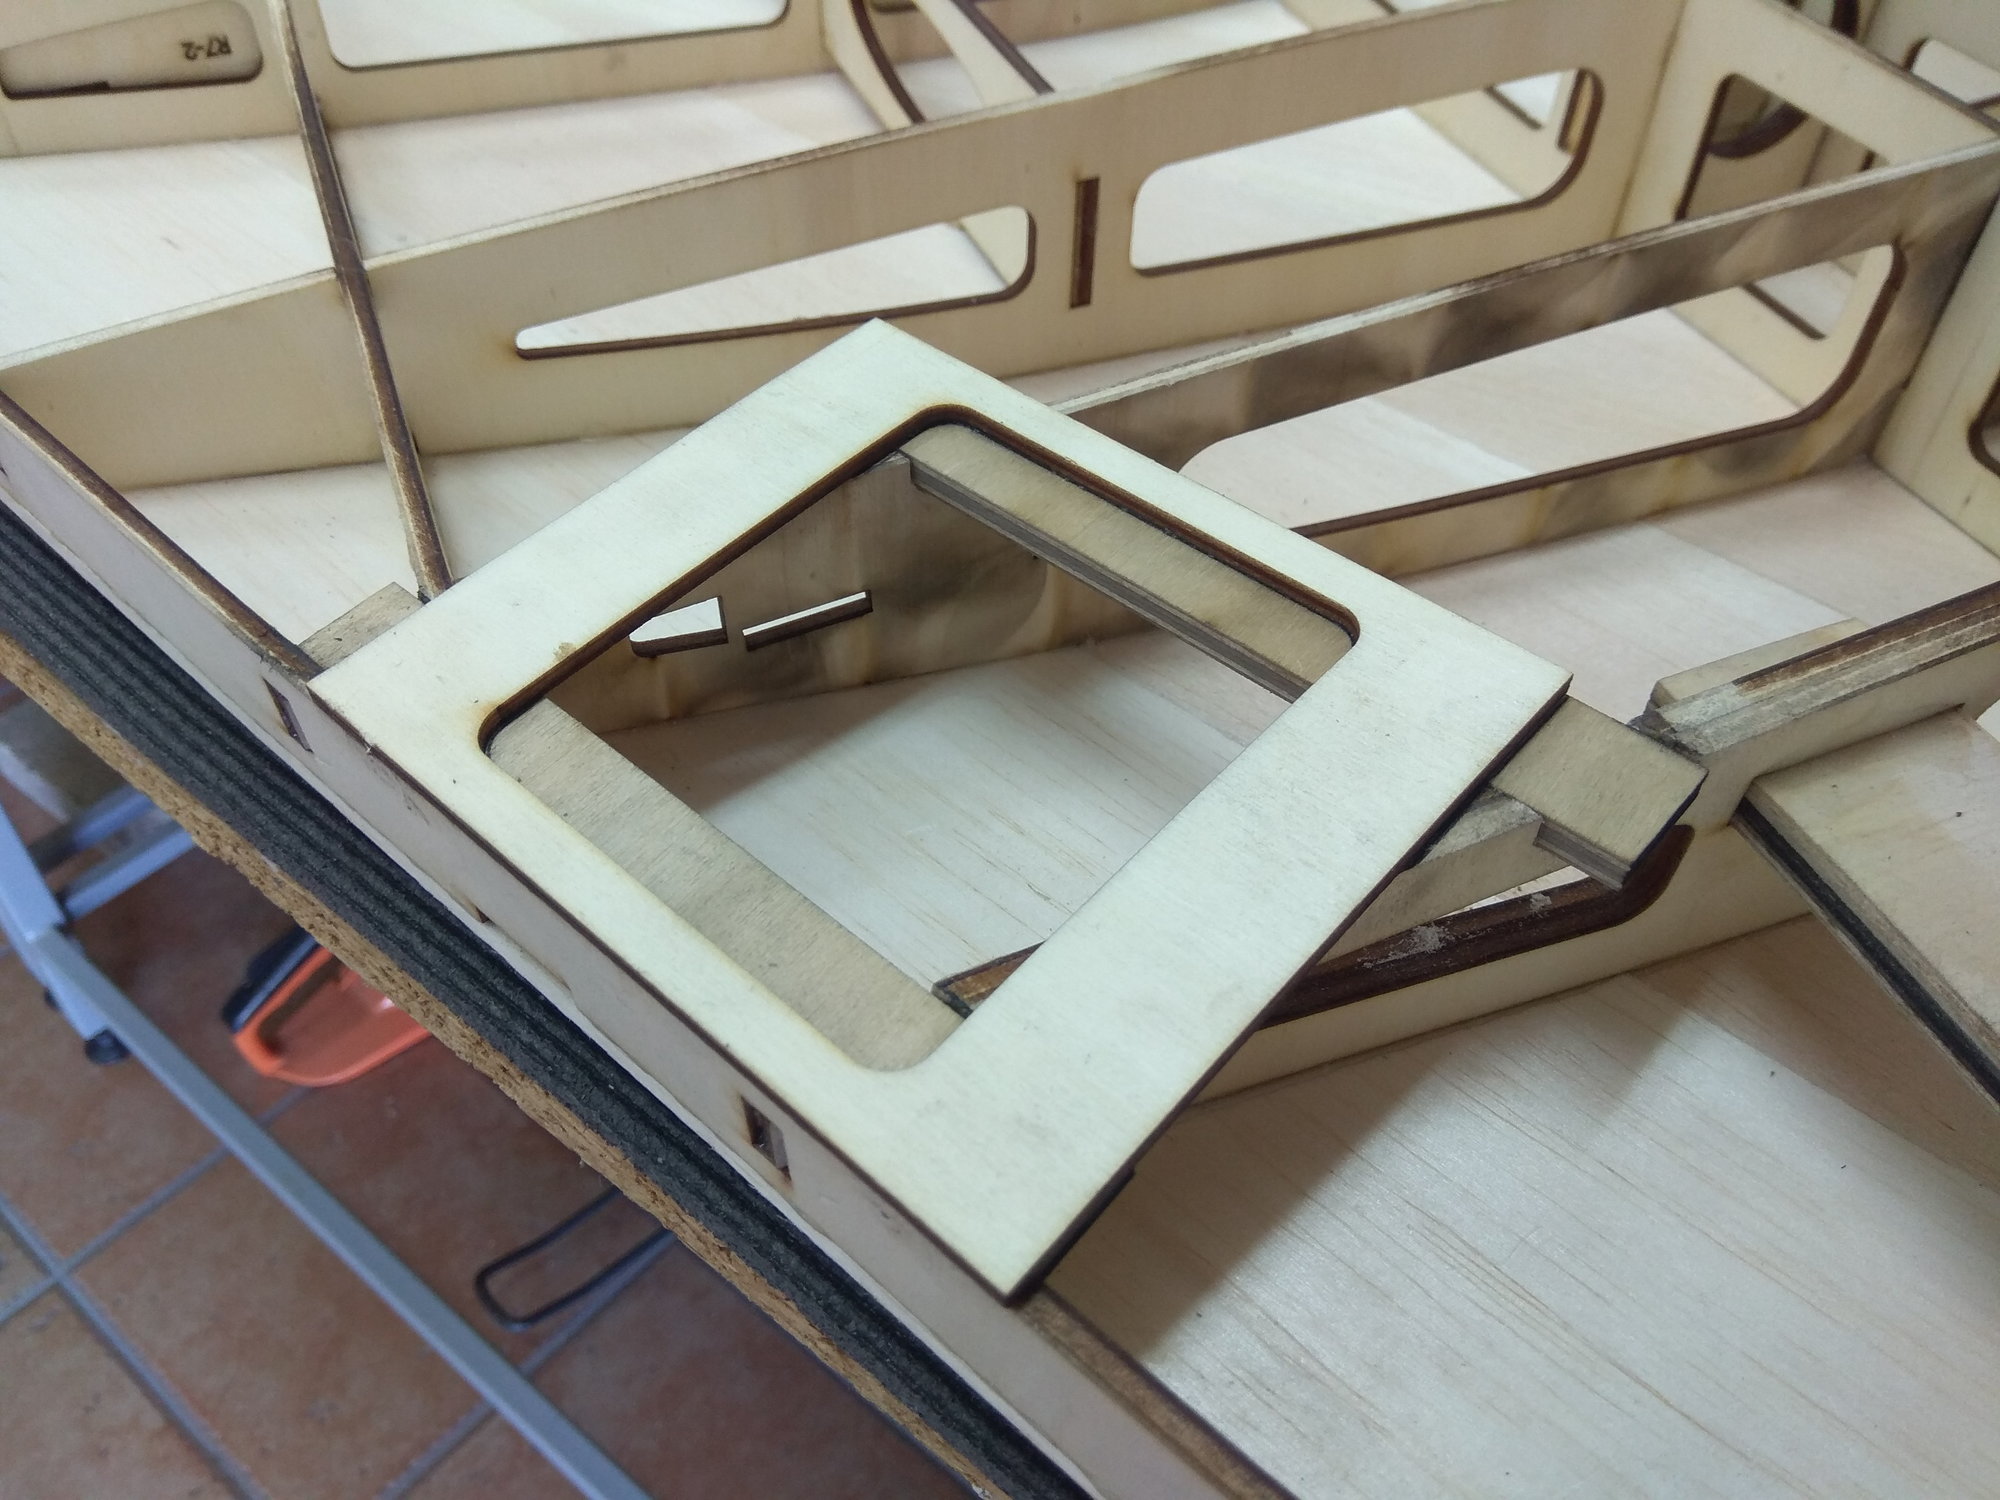

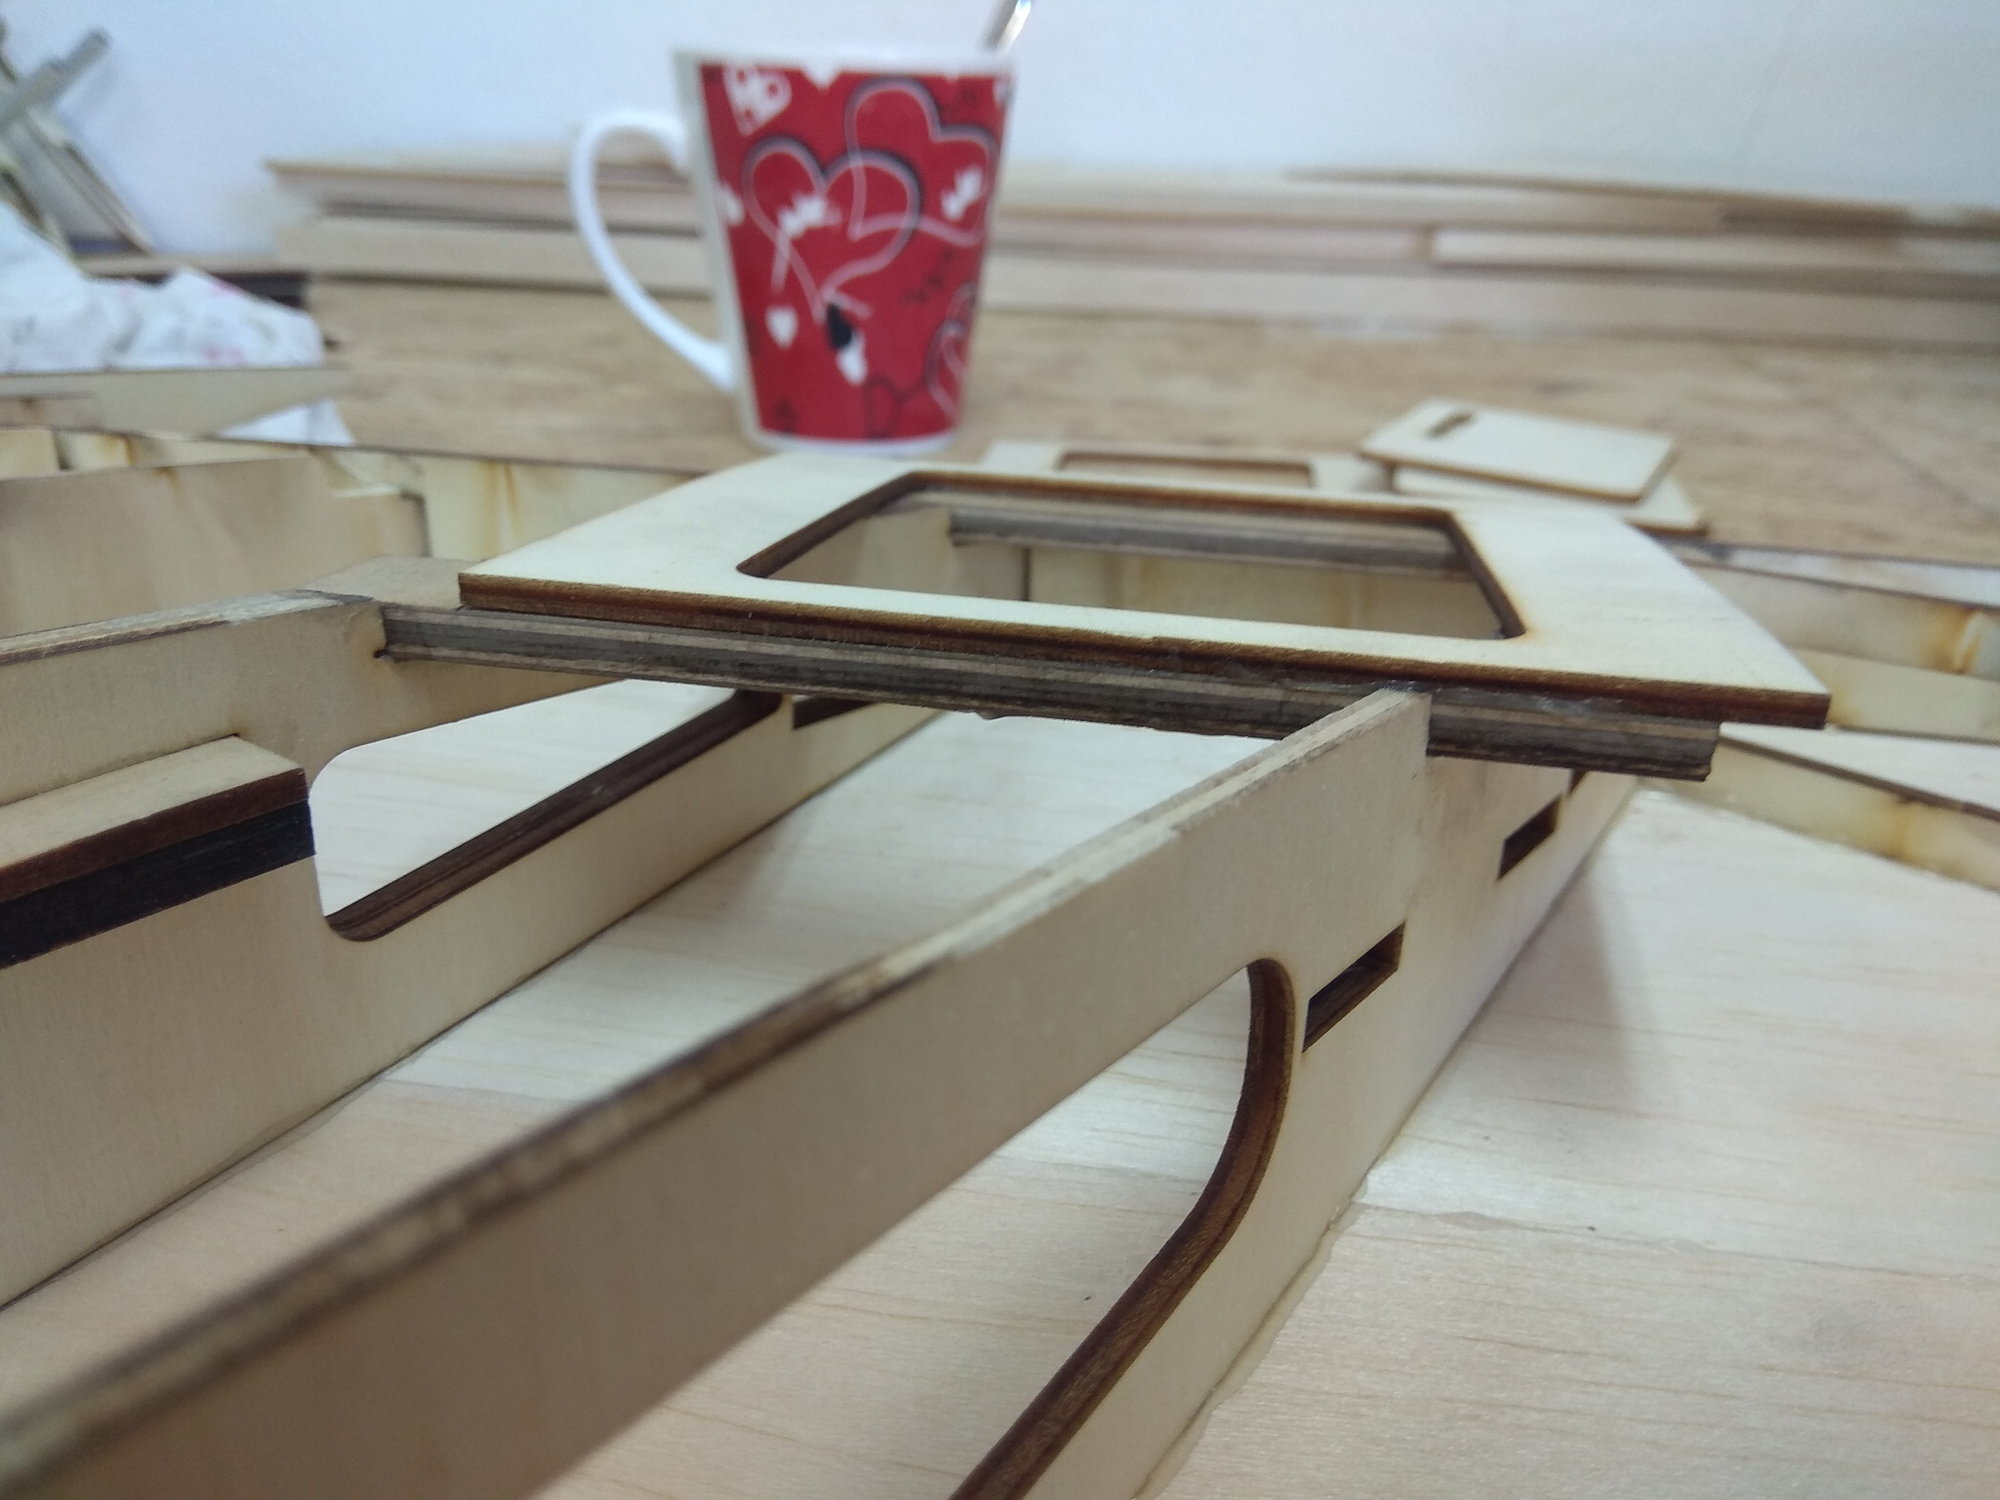
Details of the parts I installed before planking the top of the wing, the pylon supports, the landing gear plates, the plate with the nut to clamp the wing to the fuselage, I added another block of plywood where the end of the aluminum tube comes.
Finally, with 3 mm balsa, the bottom side is also planked.
With the top side completely coated with 3mm balsa, I separated the wing from the pattern board.
The wing is now very strong and cannot be twisted.
First I glued the part that goes in front of the aluminum tube and that connects the first seven ribs. This part was much easier to glue on the underside of the wing.
After cutting off the "legs" I installed the frames and covers for the flaps and aileron servos.
Details of the parts I installed before planking the top of the wing, the pylon supports, the landing gear plates, the plate with the nut to clamp the wing to the fuselage, I added another block of plywood where the end of the aluminum tube comes.
Finally, with 3 mm balsa, the bottom side is also planked.
The following 3 users liked this post by mirce:
