Help with Tamiya Panther requested, Ottawa, ON area
 07-11-2014, 04:44 PM
#1
Senior Member
Thread Starter

Join Date: Sep 2010
Location: Ottawa,
ON, CANADA
Posts: 141
Likes: 0
Received 0 Likes
on
0 Posts
Would really appreciate some help with a Tamiya Panther in the Ottawa area.
Please send me a PM if you might be able to assist.
Thanks,
Stephen
Please send me a PM if you might be able to assist.
Thanks,
Stephen
Last edited by Capt.Canuck; 07-11-2014 at 04:47 PM.
 07-13-2014, 03:46 AM
#3
Senior Member
Thread Starter
Join Date: Sep 2010
Location: Ottawa,
ON, CANADA
Posts: 141
Likes: 0
Received 0 Likes
on
0 Posts
There are several issues, but I have some custom upgrades to install, including a motor mount...and I'd like someone experienced to help me with it if possible.
07-13-2014, 08:45 AM
#4
I guess you really need someone to put hands on your tank then - without details its rather hard to offer anything constructive. There's plenty of guys on here who have heaps of experience with the Panther that could chime in if you gave more details of what you were planning to do.
07-13-2014, 09:23 AM
#5

I guess you really need someone to put hands on your tank then - without details its rather hard to offer anything constructive. There's plenty of guys on here who have heaps of experience with the Panther that could chime in if you gave more details of what you were planning to do.
If you need somene to actually do the work, that's a different question and you may get advice on where to send it.
Either way, somebody here can help if you pony up more info.
07-13-2014, 12:18 PM
#6
LOTS of Panther owners on here, I have one too but not all of us have done the same things to it so maybe we can help you on here or find the images in a build thread that would be of some assistance?
All ya gotta do is ask buddy!
Jeff
All ya gotta do is ask buddy!
Jeff
07-14-2014, 05:26 AM
#7
Senior Member
Thread Starter
Join Date: Sep 2010
Location: Ottawa,
ON, CANADA
Posts: 141
Likes: 0
Received 0 Likes
on
0 Posts
The backstory is that I purchased this Tamiya Panther as a factory assembled model a few years ago, from a dealer in Germany that was selling them at a pretty good discount.
It it is well put together but I don't really care for the camouflage pattern, and there were other issues that I wanted to address as well. For example, I thought there was too much play in the hatch, and that there was too much flex in the upper part of the hull. I contacted Darryl Turner with some ideas, and he made me some custom reinforcements for the upper hull (worked great), and a very thin brass sleeve that fit into the hole of the hatch cylinder (for lack of the proper term) which worked great excepting I broke the plastic and it needs to be reattached properly.
I then ordered several other upgrade parts based on reading what people here had done with their builds...but life got very busy and now they have been in a box for a few years and, having not built the kit myself, I think any upgrade work i try to undertake on my own will end poorly.
I am also missing a small brass screw in the turret mechanism that worked itself loose at some point.
Yes, realistically I'd like to find someone to work on it that knows these tanks inside and out, and enjoys what they do. Ideally someone nearby, but will ship if necessary.
My son is 9.5 yrs old now and enjoys our RC tanks (we have 2 HL as well) and I would like to get this Tamiya in top shape inside and out to share with him.
Really just want to get the work done right - and ideally a nice paint job at the same time.
Last edited by Capt.Canuck; 07-14-2014 at 05:30 AM.
07-14-2014, 07:07 AM
#8
Gotcha. I didn't even know they offered them prebuilt.
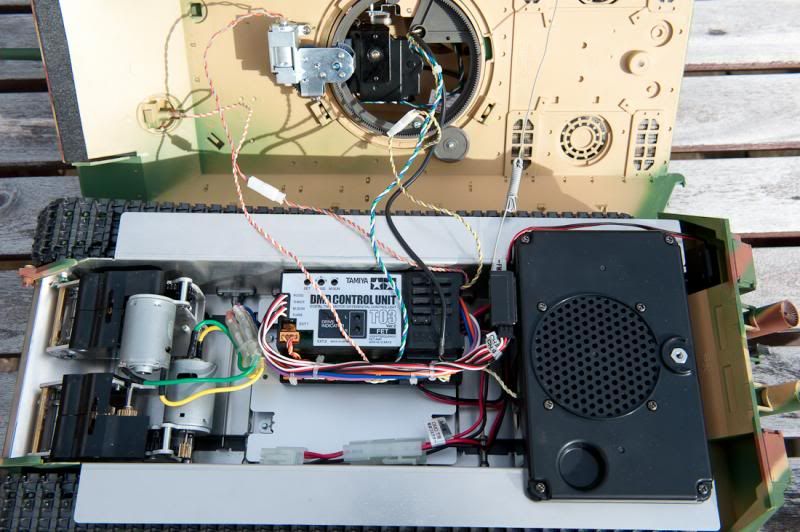
I know exactly what you mean regarding the hull play, I added strip styrene (see photos below) and could talk you through it but it seems like you don't feel confident in doing that yourself.
You may want to contact Airbrushler, he does custom airbrush camo work and is pretty handy with scratchbuilding as well, plus he's in your part of the world, so you wouldn't have to deal with customs when sending it to him.
In terms of the screw, you can buy replacement hardware bags, if you can identify what you need. The manual will tell you exactly what size it is and what bag it came from (if you don't have the manual, pdfs are readily available online). If you pinpoint the screw, someone here may have spares of it since Tamiya is usually generous with what they supply. If not you can get a bag through a few sources.
All that said, having a 9 year old with interest in the hobby, it may be time to push your skills and try this yourself. Especially if you're dealing with HLs. You can always pick up some cheap 1/35 or even 1/72 models to practice and learn with your son. My boys were handling airbrushes at around 7 or so, sitting down at the bench with a kid is a great father/son activity. Opens a lot of discussions regarding history, engineering, art, etc.
Here's a link to the beginning of the build the photos came from:
http://www.rcuniverse.com/forum/rc-t...-underway.html
Last edited by ausf; 07-14-2014 at 07:10 AM.
07-14-2014, 08:42 AM
#9
Yes, Jeff, much of Tamiya's RC line are available as pre-built kits, lacking just the battle units. They are finished according to the box art to a very high standard, but do not come with a battle unit or weathering, and for a 30-40% premium over an unbuilt kit. I believe they could be assembled in the Philippines.
Stephen, you could refer to this thread started by philipat who posed a lot of relevant questions and got good answers to them, so it is a good catch-all for Tamiya Panther issues: http://www.rcuniverse.com/forum/rc-t...questions.html
Personally I never felt the upper hull flex was an issue except when I was lifting it off to change a battery - but that doesn't affect performance. When you talk about hatch slop, do you mean the slop in the gun barrel in its mantlet, and that you broke the little plastic tab that links it to the recoil gearbox?
If you just want someone to fix your tank and could stand a summer road trip, Jersey Bob (thecommander) might be your man, now that he has started an RC Tank business and is also an ETO Armour rep.
07-14-2014, 10:58 AM
#10
Senior Member
Thread Starter
Join Date: Sep 2010
Location: Ottawa,
ON, CANADA
Posts: 141
Likes: 0
Received 0 Likes
on
0 Posts
Thanks guys, I'll take some photos and post them today or tomorrow for context.
Here is what the tank looked like a few years ago, before the Darryl Turner mods were done:

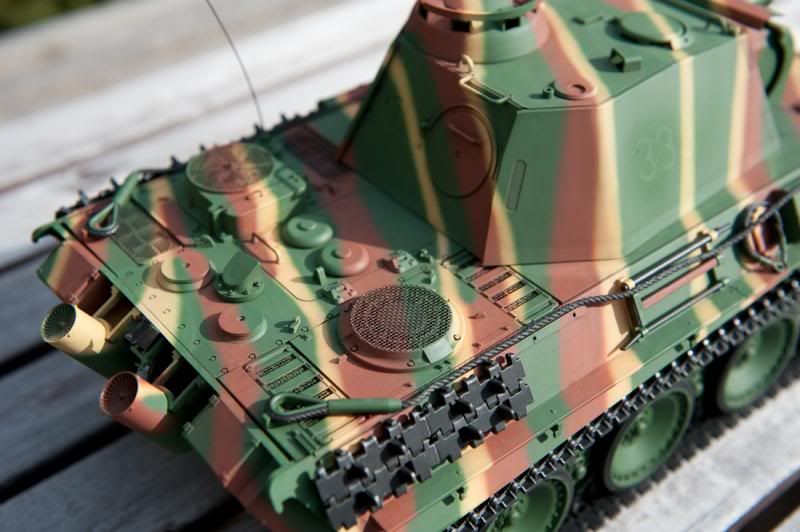
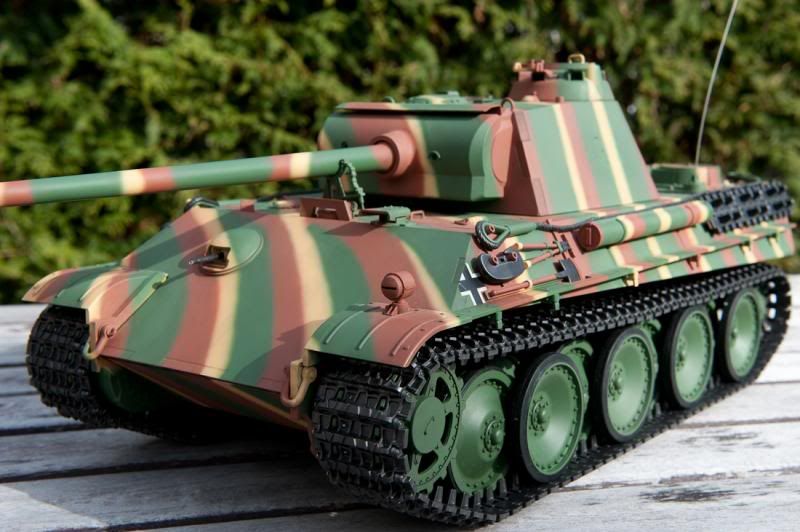
Here is what the tank looked like a few years ago, before the Darryl Turner mods were done:


 07-14-2014, 01:50 PM
#11


You should also try to contact Curtis over at Immortal Hobbies. He is actually pretty close to you and knows a lot about tanks. Airbrushler does some pretty damn good paint jobs too I must say 
07-14-2014, 05:10 PM
#12
Senior Member
Thread Starter
Join Date: Sep 2010
Location: Ottawa,
ON, CANADA
Posts: 141
Likes: 0
Received 0 Likes
on
0 Posts
Ok here are some up to date photos.
Good news is I found a parts kit on my Tamiya stuff so I was able to replace the missing screw...bad news is I can't find my hatch or the piece it attaches to the upper hull with.
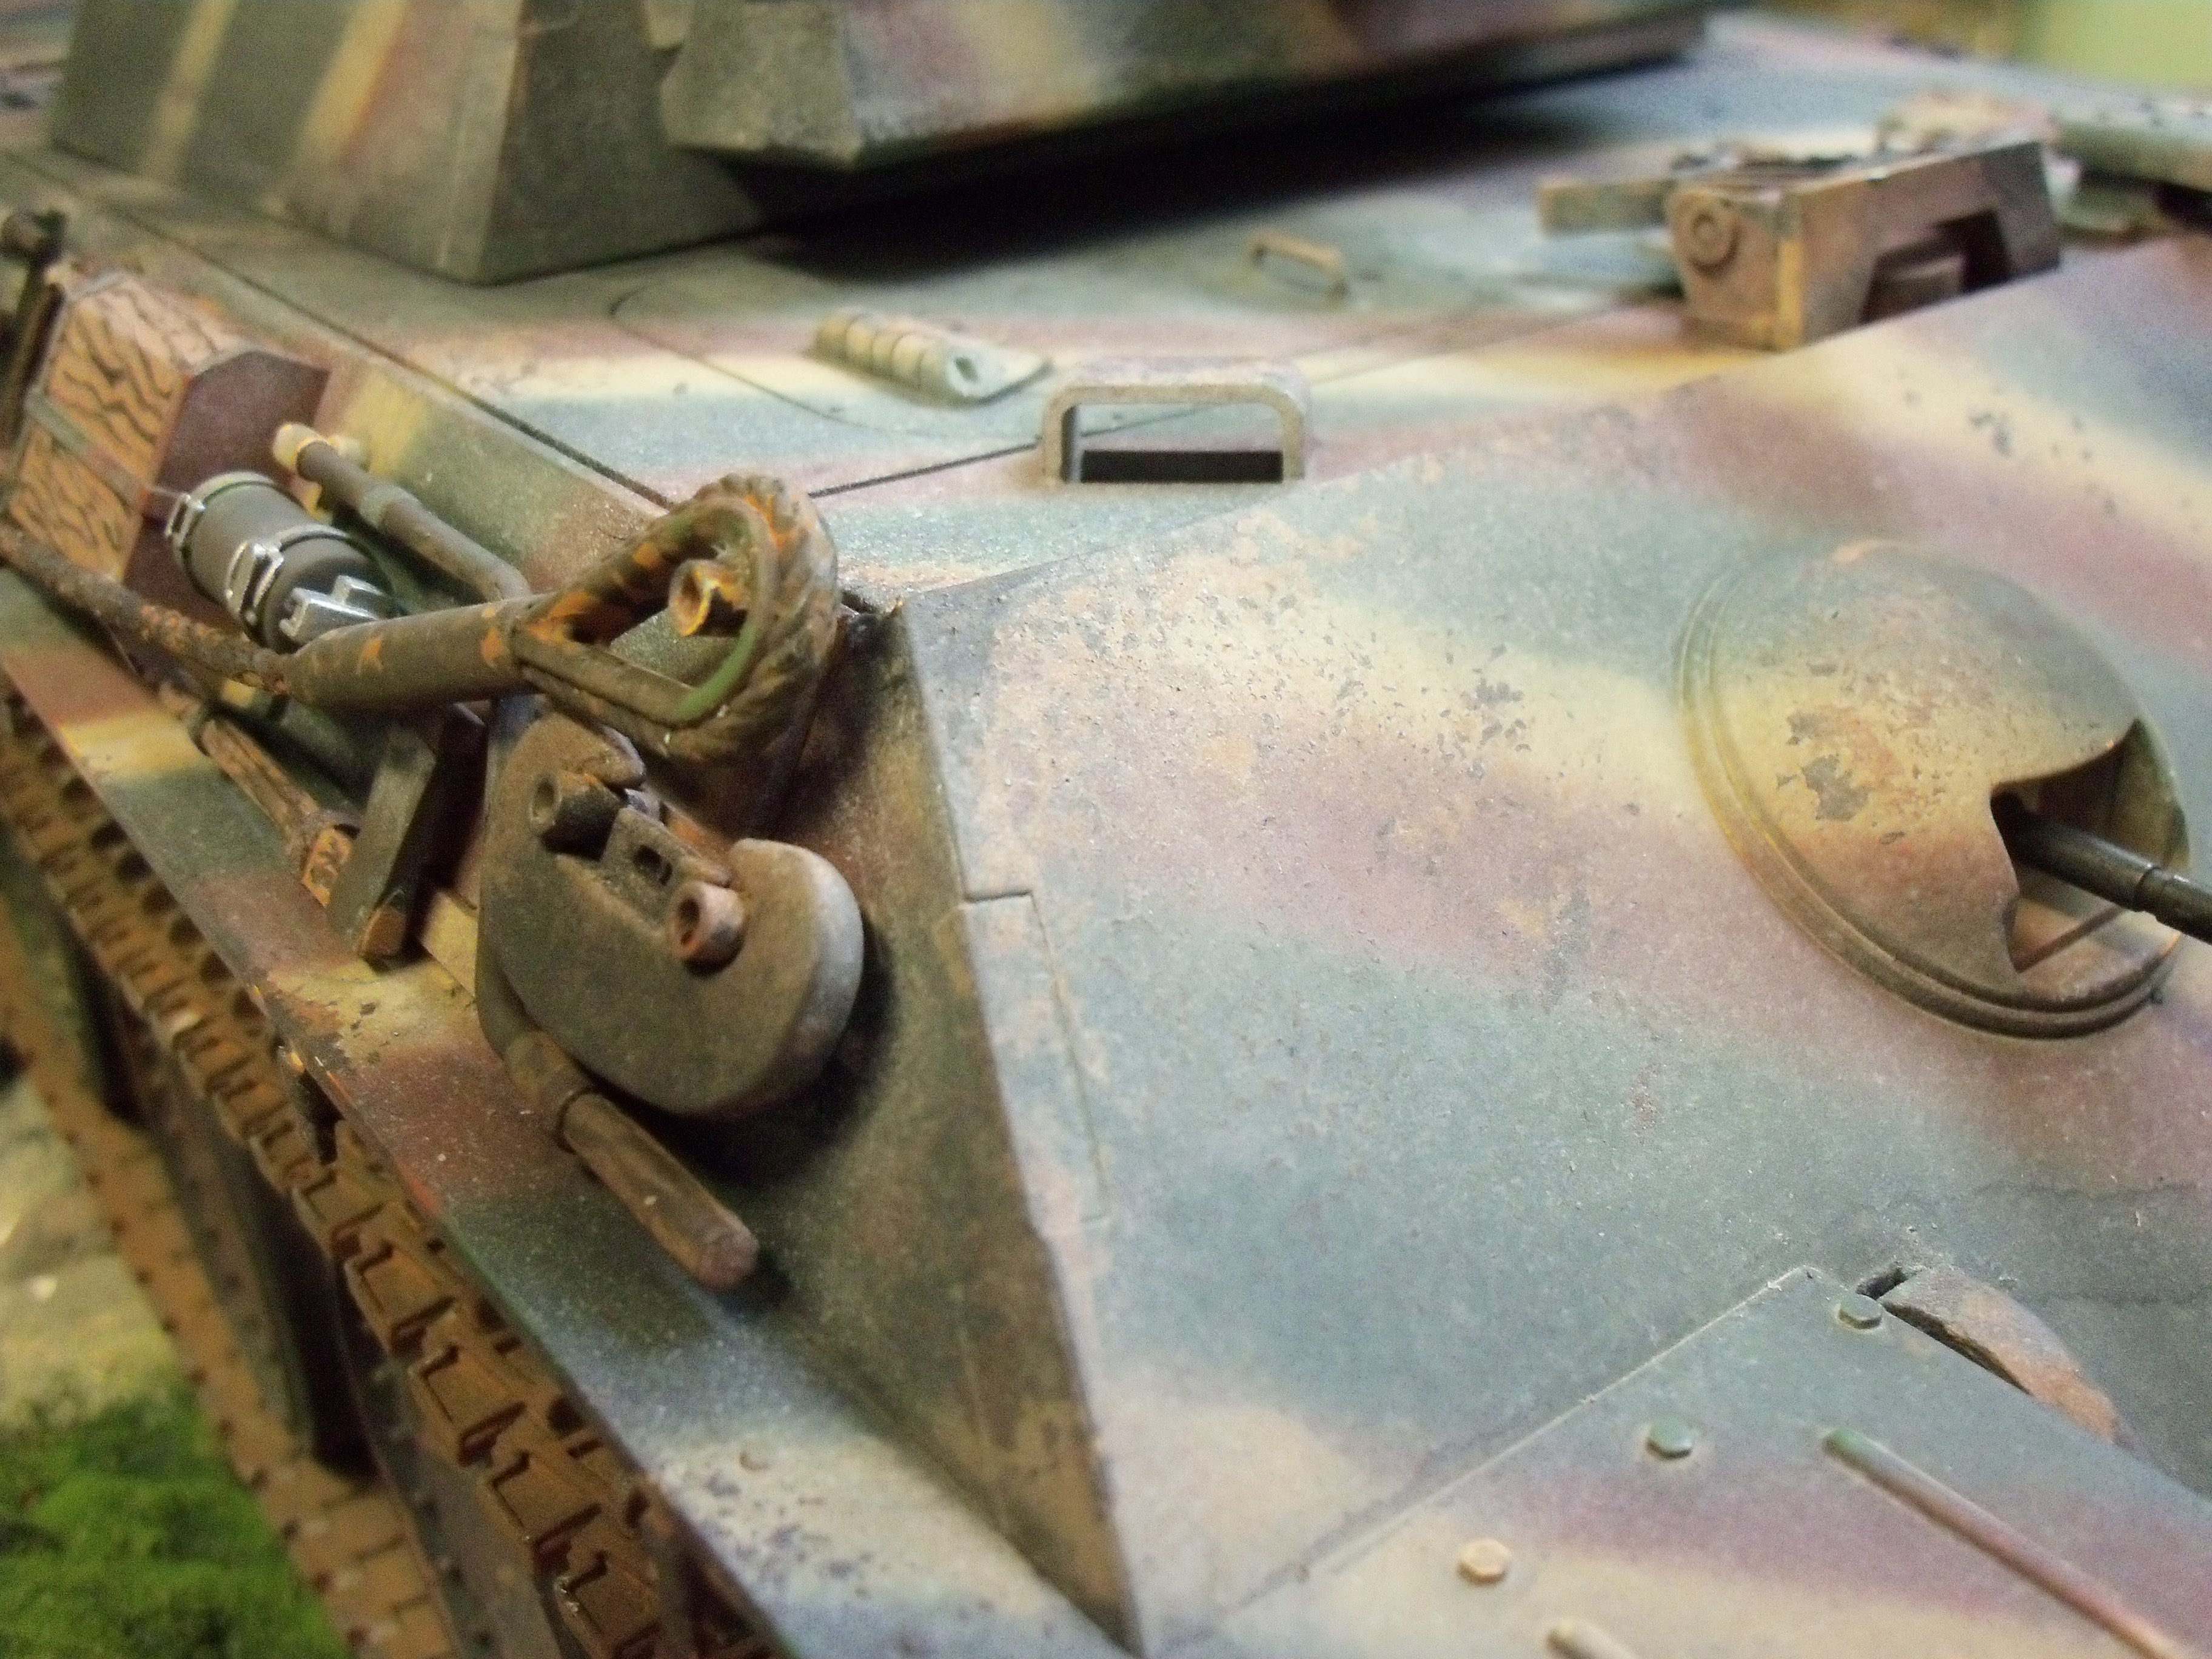
Here you can see the rigid clear plastic upper hull reinforcement pieces that Darryl Turner designed for me, glued on with (yellow label, name escapes me at the moment) glue.
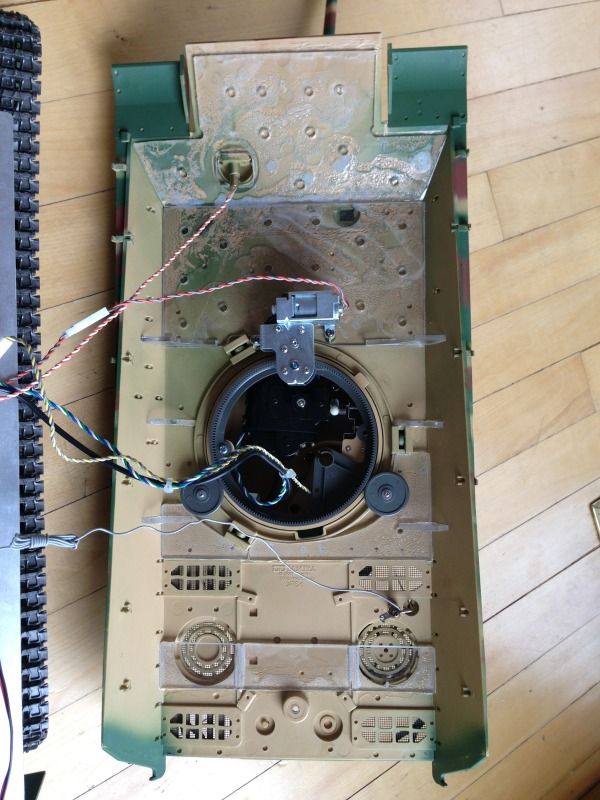
This is the aluminum sleeve Darryl made to take the slop out of the hatch so it wouldn't flop around when I had a tank commander figure in an open hatch:
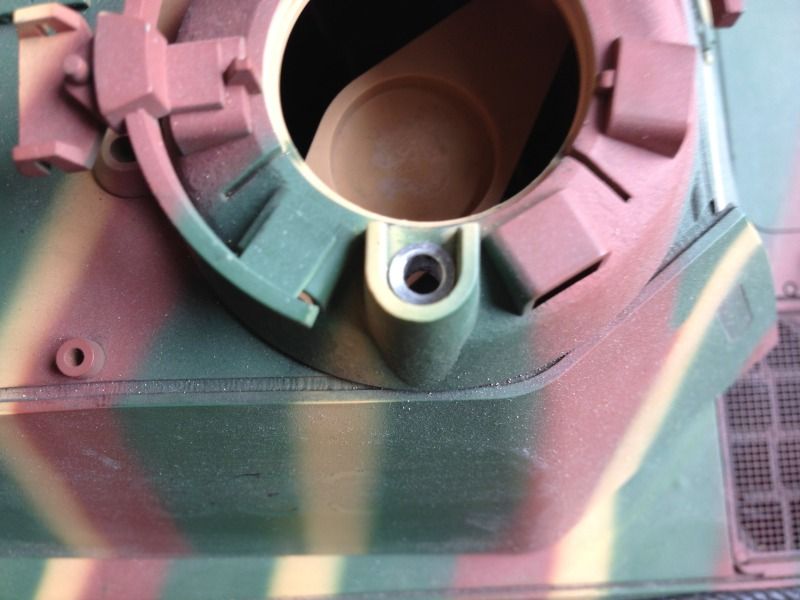
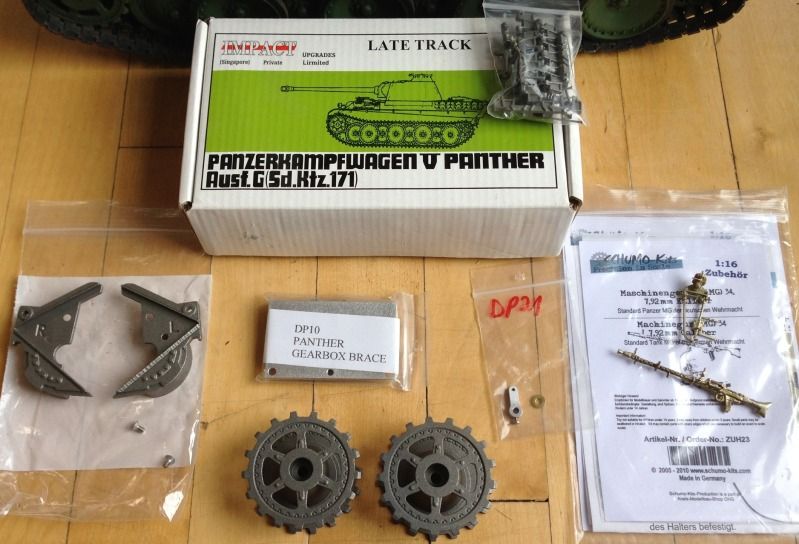
And these are the parts that need to go on:
Good news is I found a parts kit on my Tamiya stuff so I was able to replace the missing screw...bad news is I can't find my hatch or the piece it attaches to the upper hull with.
Here you can see the rigid clear plastic upper hull reinforcement pieces that Darryl Turner designed for me, glued on with (yellow label, name escapes me at the moment) glue.
This is the aluminum sleeve Darryl made to take the slop out of the hatch so it wouldn't flop around when I had a tank commander figure in an open hatch:
And these are the parts that need to go on:
Last edited by Capt.Canuck; 07-14-2014 at 05:15 PM.
07-14-2014, 05:17 PM
#13
Senior Member
Thread Starter
Join Date: Sep 2010
Location: Ottawa,
ON, CANADA
Posts: 141
Likes: 0
Received 0 Likes
on
0 Posts
I would definitely prefer to keep it in Canada if possible so I don't have to deal with border issues.
07-14-2014, 05:24 PM
#14
07-14-2014, 06:23 PM
#15


Thanks guys i appreciate the kind words
Stephen let me know i will work on your tank for you
07-15-2014, 06:43 AM
#17
Senior Member
Thread Starter
Join Date: Sep 2010
Location: Ottawa,
ON, CANADA
Posts: 141
Likes: 0
Received 0 Likes
on
0 Posts
LOL...OK guys, you've convinced me!
Greg and I were discussing it and we're going to keep the basic camo pattern, just weather it so it doesn't look so factory fresh...and perhaps do a light whitewash with a theme of winter '44, Battle of the Bulge.
Greg and I were discussing it and we're going to keep the basic camo pattern, just weather it so it doesn't look so factory fresh...and perhaps do a light whitewash with a theme of winter '44, Battle of the Bulge.
07-15-2014, 07:32 AM
#18
Whitewash is almost foolproof, as long as you have a gloss coat. The idea is it should be haphazard and rubbed off (I have ref pics of chalk scribbled whitewash), so the technique is to use thinned weak paint. As long as your original finish is sealed and you don't seal the WW until it's how you like it, you can do it over and over. It can be rain streaked, rubbed off by crew and rider movement, dirtied from underneath by road grime or splashing, etc.
Find some good ref pics online (doesn't have to be a Panther) and we can talk you through it.
As far as the rest, it's all straight forward, bolt on upgrades, again, we can help.
You can get buy the kit sprues separately to get the hatch. I have one that may be free in the future, for now I need it until I settle on my plans.
07-15-2014, 01:38 PM
#19
Give Curtis a call if you still need help. I'm sure he can help. Airbrushler would you mind posting your T34 or Jagdpanther so he can see? Those two you showed me were pretty darn impressive!
08-24-2014, 08:16 AM
#20
08-24-2014, 08:43 AM
#21
Stephen said it be ok to post some pics so far so here is what i got i left the camo the same Panther F painted over but the same striping added the weathering and redid the towcables still adding some details had to adjust the plastic to fit the hull onto the front and added the gearbox brace and metal tracks still things to do hope Stephen will like it when it's done