


Tamiya EZ8 build
 06-18-2015, 09:59 AM
#26

Thread Starter

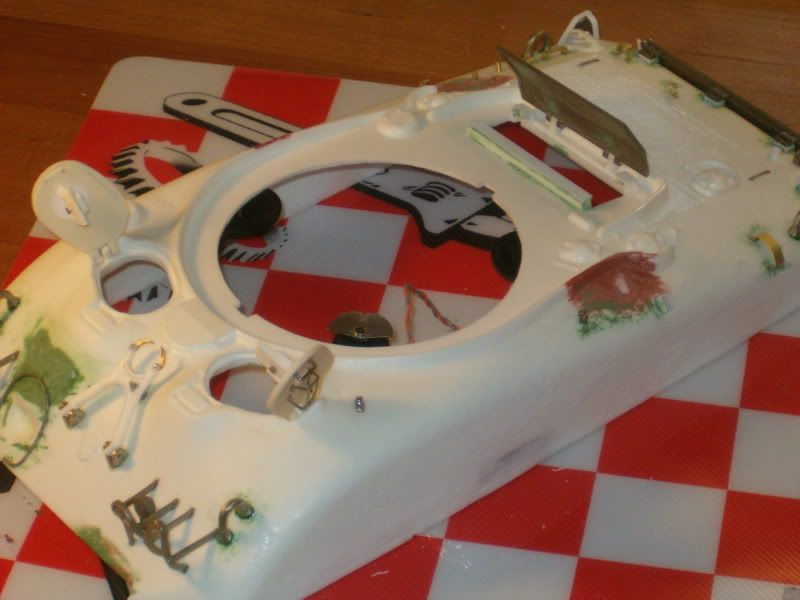
Zip tie the traverse mech? What is that for and where would you do that?
I haven't identified the slip gear on the rotation gear box, which one would it be that I would glue?
I haven't identified the slip gear on the rotation gear box, which one would it be that I would glue?
 06-18-2015, 08:20 PM
#27
Thread Starter
Ok so today I disassembled the turret and removed the gun and recoil mech. I got the Tamiya Apple mount installed and ran the Tamiya flash unit into the barrel and mounted my IR bulb inside the gunners sight. I don't like that kind of install, but it was pretty much the only way using the Tamiya flash unit. Again, I don't like the Tamiya components. I don't see that the huge flash unit is any better than the bright LED flash bulb that Dan provides with the BARC system and I can get his flash LED right behind the IR LED in the barrel of a 75 or 76 by grooving the flash LED on both sides and running the wires from the IR past it. See my M4a1 build http://www.rcuniverse.com/forum/rc-t...74-m4a1-2.htmlthread if you want to see that.
So, yes, doing a custom build I feel I have way more freedom and better options not using the Tamiya stuff. Sorry guys, Im not hater, I just have lots of other RC experience that makes me feel very restricted by the Tamiya components. I think the Tamiya flash unit is stupid personally when compared to the simple flash LED of the BARC painted orange. The flash can barely be seen unless you are looking into the barrel unless you pull the Tamiya flash tip out of the barrel which I wont do. So if my flash unit fails, Im going to pull the IR LED out of the gunners sight and run it up into the barrel. I much prefer to shoot from the barrel rather than next to it.
I started adding some details to the tank now that the guts are done. Basically its ready to battle and it does sound really good and performs nicely except for the turret glitch in that one spot. I have not figured out why, it doesn't seem to hang up on anything, I think it is just the weight of the turret combined with the angles of the rollers and the gear and the side pressure. I tested out the battle system shooting at my A1 and the system passed perfectly.
06-20-2015, 08:05 AM
#28
Senior Member

Join Date: Nov 2006
Location: Grande Prairie,
AB, CANADA
Posts: 8,976
Likes: 0
Received 4 Likes
on
4 Posts
I have super bright Orange LED's as well as white.
I agree with you 100%. The Super bright LEDs are better then the high intensity flash, and they are so much easier to install. Just the other day I had a high intensity flash installed in a customers tank, and I replaced it with the super bright LED with better final results.
I agree with you 100%. The Super bright LEDs are better then the high intensity flash, and they are so much easier to install. Just the other day I had a high intensity flash installed in a customers tank, and I replaced it with the super bright LED with better final results.
06-20-2015, 09:14 AM
#29
Nice Sherman by the way!!  I have been following this with MUCH interest.
I think on the 76MM muzzle brake exposing the Tamiya orange element INSIDE there and NOT extending it past the outlet will allow the owner to see the flash light up.
It's more a benefit for opposing players to see when you have fired if you do not possess a recoil mechanism, like the original M4 does not have with the 105MM gun.
I too will NEVER hang that thing out the end of the barrel no matter WHAT rules exist.
Jeff
I have been following this with MUCH interest.I think on the 76MM muzzle brake exposing the Tamiya orange element INSIDE there and NOT extending it past the outlet will allow the owner to see the flash light up.
It's more a benefit for opposing players to see when you have fired if you do not possess a recoil mechanism, like the original M4 does not have with the 105MM gun.
I too will NEVER hang that thing out the end of the barrel no matter WHAT rules exist.
Jeff
06-20-2015, 10:46 AM
#30

1 - Zip ties for the rotation unit http://www.sead.us/technology2.html
2 - Slipper clutch gear - where to glue or replace it.
Good luck!
06-20-2015, 09:25 PM
#31
Thread Starter
Neat, so where did that blue non slipping gear come from?
I have really thought somebody should make a really good aftermarket rotation gear box for the Tamiya gears and motor.
Dan, are you saying you can put a flash LED on Tamiya instead of the stock flash unit? How would that connect up?
And as far as the stock Tamiya flash in the muzzle brake, I agree, the only time it is worth using and having protrude from the barrel.
I noticed today that when my barrel recoils the Tamiya flash works its way back into the barrel and disappears due to the thick bullbus section of the flash wire inside the turret acting like an anchor.
06-22-2015, 09:50 AM
#33
The blue gears are off of a Tamiya mfg. gearbox kit (I'm fairly sure that's the kit, if not, can someone please help out?). I've bought some from Fry's Electronics stores (here in California) in the past. You should get 3 or 4 blue gears from each kit. Of course, gluing the clutch gear works fine too...i.e. if you keep the glue out of the gear teeth.
As to the elevation unit, I don't install any blue gears or glue the clutch gear on an elevation unit. The first gear (on the drive shaft) on the elevation unit is fit on a "D" shaped shaft. Blue gears or glued clutches immediately strip or break the gear the first time you hit the stop point. Result is stripped gear (where it fits on the shaft), which in turn will give mushy elevation movement that degrades to floppy over time. I find it best to simply pop $15 bucks every 3 years or so for a new elevation unit.
As to the elevation unit, I don't install any blue gears or glue the clutch gear on an elevation unit. The first gear (on the drive shaft) on the elevation unit is fit on a "D" shaped shaft. Blue gears or glued clutches immediately strip or break the gear the first time you hit the stop point. Result is stripped gear (where it fits on the shaft), which in turn will give mushy elevation movement that degrades to floppy over time. I find it best to simply pop $15 bucks every 3 years or so for a new elevation unit.
Last edited by Jeff489; 06-22-2015 at 09:57 AM.
06-27-2015, 09:21 PM
#34
Thread Starter
Hah, I have one of those dual motor gear box sets here with the blue gears in it. Found it in my cabinet last night! how coincidental.
Been working on the details of my M4a3E8.
Got the ETO metal barrel travel lock installed and its hull catch.
Also installed all the hex bolts on the engine deck. Lots of .090 hex screws, about 25 bucks worth.
I soldered pins to the rear tail light covers and drilled holes into the hull to make them more sturdy than just super glued into the stock slots in the hull.
Last, if you look into the ring of the loaders hatch, you will see a bent brass rod. I drilled two holes through the hatch ring into the top of the turret, one on each side, and installed pins to hold the hatch to the turret without glueing it because if I have to work on the internals of the turret, I will need to get a finger into that hole without breaking off my hatches etc.
Its coming along slowly.
I also started adding the urethane details to the turret after all these years. (ive had it sitting on the tank for about 5 or 6 years now)
06-28-2015, 02:10 AM
#35
That travel lock is wrong for anything other than a 105mm Sherman - the 75 and 76mm locks were shorter and mounted further up the glacis
http://the.shadock.free.fr/sherman_m...m_turrets.html
(I made that mistake on my first Easy 8 as well )
http://the.shadock.free.fr/sherman_m...m_turrets.html
(I made that mistake on my first Easy 8 as well
)
06-28-2015, 05:28 AM
#36
E_P_T is correct... but don't despair! Nick has the resin piece that is needed and most of the metal parts can STILL be used with it.
It's been awhile but I believe I made mine functional using both materials, resin and white metal.
http://www.rcuniverse.com/forum/rc-t...man-build.html
Jeff
It's been awhile but I believe I made mine functional using both materials, resin and white metal.
http://www.rcuniverse.com/forum/rc-t...man-build.html
Jeff
06-28-2015, 07:13 AM
#37
Thread Starter
I thought the 76 looked shorter but the minutia site says this
"76mm Shermans were equipped with the same gun travel lock as used on 105mm units. This was "taller" than the one used on 75mm tanks. Many surviving Shermans have been upgraded with a single piece locking arm, but the less stable WW II configuration consisted of two "fingers.""
here http://the.shadock.free.fr/sherman_m.../m4a3_76w.html half way down the page with two pictures that do look shorter than the eto one. I have one of nicks lying around on my bench left over from my A175 build.
Damn, I hate it when things like this happen. After reviewing photos from the site its clear is statement is opposite reality.
06-28-2015, 07:43 AM
#38
At least there's no paint on and changing is not an issue right now.
HTH
Jeff
06-28-2015, 08:01 AM
#39
07-02-2015, 08:55 PM
#40
Thread Starter
I the new barrel lock installed. Nicks casting and the base hinges from ETO.


I also got a lot of work done on the rear deck, hinges installed on the grate. I cut them out of a HL hull
I also painted my turret, finally. Feels good after sitting on the tank being white for 5 or 6 years. Its Testors OD 34087 which is really a post WWII color and Im not happy with it, its kinda ok until you spray clear over it and it gets much darker. I am trying to match the various testors colors and there isn't really any good match to WWII OD which is lighter and greener than the 34087 color they sell. I am going to continue to test colors, I have a really old Pactra bottle of OD wich is darn near perfect but its seriously 30 years old and still good, but a finite supply.
07-03-2015, 01:17 PM
#41
LET me be the first to say...

Jeff
Jeff
07-03-2015, 01:30 PM
#42
I found with my E8 that leaving it in the sun for a few hours, along with some dirt accumulation, has faded the paint and lightened the shade of OD quite noticeably. I'll try to remember to do some comparison pictures over the weekend for you.
07-03-2015, 06:32 PM
#43
Thread Starter
Ok so after trying all the Testors brand green and drab paints, today I tried Tamiya brand paints. None of them are close to WWII OD either.
So, I began to mix, which I loath. I tried several different combinations and what I found I liked and looked most like WWII US FS 33070 was what we have here now on my E8 turret.
I was using a chopped HL Sherman hull to test colors on
Rembering that shades of paint mixtures vary with lot and batch, and even our current tan Humvees at the armory vary from a light sand to a darker tan based on color batch. (fresh paint jobs not faded vehicles)
I came up with 60 percent Forest Green and 40 Percent Field Drab, both Testors colors. The color almost matched perfectly on the HL Sherman after I clear coated with dull coat. (keep in mind the HL Sherman has lots of black shading and overspray, I used raw un weathered spots to compare against)
Its too light and too green. Im just going back to the testors, its close, and according to Steve Zaloga testors 34087 is a shade too light for WWII armor. So... anh I will repaint it back. I should have never messed with it. I suppose maybe wheeled vehicles were maybe painted different OD then Armor, because this is fairly close to the restored color sold today for WWII Jeeps and such.
Last edited by RichJohnson; 07-03-2015 at 09:39 PM.
07-04-2015, 07:45 AM
#44
I see what you mean and let me tell you, THAT color has been the debate for many of years from many of modelers on what to use for WWII US vehicles. Now I am not saying there's only one right color or that another color is wrong but I do agree that I could NOT find a good Tamiya color to use straight out of the container. They do have some interesting Aircraft colors out now and may of them are closer to what we need.
My FIRST Sherman I painted with the FS 34087 (1911) because it said "Olive Drab" on the label and what was discussed in many forums. I found it looking TOO MUCH like a REAL OLIVE for martinis and hated it. The local tank club suggested FS 34079 (1910) "Dark Green" and I was finally satisfied. Now there are many variations to a green used, whether it's for post WWII, KOREA... brand new, what climate it was used in or even it's age. Or even in British use, I think the bottom line is the naked eye and what they all say is true... beauty is in the eye of the beholder.") Whatever makes you happy.
Whatever makes you happy. 
Jeff
My FIRST Sherman I painted with the FS 34087 (1911) because it said "Olive Drab" on the label and what was discussed in many forums. I found it looking TOO MUCH like a REAL OLIVE for martinis and hated it. The local tank club suggested FS 34079 (1910) "Dark Green" and I was finally satisfied. Now there are many variations to a green used, whether it's for post WWII, KOREA... brand new, what climate it was used in or even it's age. Or even in British use, I think the bottom line is the naked eye and what they all say is true... beauty is in the eye of the beholder.
Whatever makes you happy. Jeff
07-04-2015, 08:46 AM
#45
Thread Starter
Aah, I love the smell of Testors in the morning....
Ok here the article Steve wrote on OD, http://www.militarymodelling.com/new...ive-drab/4536/
HE basically says US Armor was dark dark OD and that Tamiya OD is closest out of the bottle.
While Testors 34087 is lighter fresh sprayed, it darkens severly once sprayed with clear for decaling, and changes shade drastically, as he even states in his article about real paint becoming gloss.
I did some research and found out that the US Army relabeled WWII OD 33070 in the 80s. Back then it was OD 319 or something.
All I can say is the color most used on restored WWII Jeeps and Dodges etc is very close within shades of that color I mixed, but yeah, it don't look right on a tank.
So... I repainted the gal this morning with Testors OD 34087, and it will get a coat of clear this afternoon and look just like the M4A1 I did. I will be happy with that I suppose.
Color is in the eye of the builder and painter and after all, I have to be happy with it. And I might leave it semi glossy and weather from there since they were probably using semi gloss by that time this tank would have been built.
07-04-2015, 09:15 AM
#46
If you think the color isn't quite dark enough you might try a promodeller (maybe called Flory now) dark earth wash before you flat coat. It tends to darken the shade a bit when used on flat paints.
But you're right that paint is largely in the eye of the beholder. You have a good eye, Rich, and you do good work, so trust your instincts. If it looks right to you, it is.
But you're right that paint is largely in the eye of the beholder. You have a good eye, Rich, and you do good work, so trust your instincts. If it looks right to you, it is.
07-04-2015, 08:27 PM
#47
Thread Starter
Darn it, I think my Tamiya flash unit is dieing. Today, it got to flashing every other time and now it only flashes once in a while. The TO MF are new and I haven't run it that much. Kinda a bummer. Another reason Im not a fan of the Tamiya brand since I have heard they burn out.
Im not going to bother sending them back for a warranty. I will likely pull the flash bulb out and put the IR bulb up there. Just pisses me off that's all. This tank isn't even done and the died.
Im not going to bother sending them back for a warranty. I will likely pull the flash bulb out and put the IR bulb up there. Just pisses me off that's all. This tank isn't even done and the died.
07-11-2015, 09:06 PM
#48
Thread Starter
Ok so more thoughts on the travel lock, here goes.
I emailed the guy that runs the Sherman minutia site and he replied back to me that the travel lock for the 76mm equipped tanks is exactly the same as the 105 howitzer tanks, it is just mounted higher up on the mantle.
I really don't get this. He swears by his research but yet some photos the travel lock looks tall, others it looks shorter, usually when its taken straight on.
This photo from the Minutia site sure looks like its shorter than the 105 travel lock. But it also looks a tad taller than the plastic one I have from Nick.
I don't quite know what to make of this discrepancy. I really would like to measure one for myself if I could find one, and that had not been modified post war or anything. The one at the LA museum appears to have a fabricated travel lock on it from the pics I took.
07-15-2015, 05:50 AM
#49
Thread Starter
I corrected the Tamiya transmission cover. Im still surprised that Tamiya would leave the tow shacle beams off the nose. Even Henglong got that mostly right.
Any way, the thicker beams are styrene and the thinner one is brass stock with a piece of brass strip soldered across it.
All of the parts have been cut into the hull for rigidity and strength.
And yes, I know one side is slightly narrower than the other. After hours of work making it, Im not taking it apart. Some how I got my measurement off a smidge. I can live with it for now.
07-15-2015, 05:58 AM
#50
Looks good!
No matter how hard I tried, my attempts kept falling off the hull with the mildest contact so I gave up and pushed on to finished the project. NEXT time I will re-invent the wheel and have it reinforced with a plate behind the nose piece.
Jeff
No matter how hard I tried, my attempts kept falling off the hull with the mildest contact so I gave up and pushed on to finished the project. NEXT time I will re-invent the wheel and have it reinforced with a plate behind the nose piece.
Jeff