


DGS resin Firefly kit
 06-02-2016, 12:39 PM
#1

Thread Starter
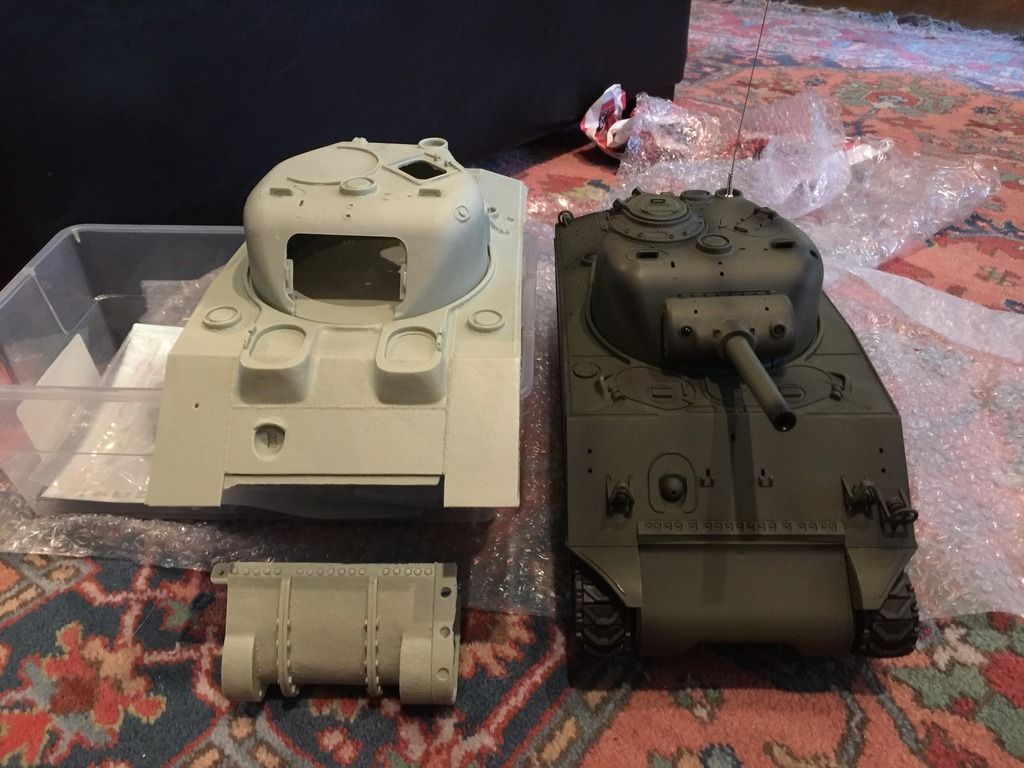
There are a few posts already about this kit, I thought I would add my 2 cents worth on it too :thumbup:
Nice packaging and quick shipment. Parts are nice and pretty clean from the start.
I have just started to assemble and thought I would post a few pics of the process. And I hope to get some help from you guys in the future as I am sure I will need it :haha:
This is my first resin kit. Pretty darn cool!!!! Thinking of getting the mato barrel and keeping the airsoft?


 06-02-2016, 02:37 PM
#2
My Feedback: (1)
Join Date: May 2009
Location: Pearl City, HI
Posts: 372
Likes: 0
Received 0 Likes
on
0 Posts
Hi Mark. I was confused by the "plugged barrel" note that was sent out, and thought that I had to drill out aluminum from the center. Not sure how to do that, I ordered the Mato 17-pdr barrel just in case. It turned out that the center of the barrel was plugged only with resin, and I managed to bore that out by filing "teeth" onto the end of a 5/32" brass tube. I chucked that in an electric screwdriver, and bored it out easily.
Anyway, as to the Mato barrel. If you have seen the one Tamiya used to make, this is almost dimensionally an exact copy. The extension at the rear is about 1/2" longer, and there is also a smaller 5/8" extension on the rear of that which plugs into the Heng Long recoil housing. Be advised that the larger-diameter part hits the inner mantlet before the smaller part can go go all the way into the recoil unit. And, on recoil, (if you left it partially inserted that way) it would "unplug" itself from the recoil unit. You can carefully drill out the pivoting parts of the inner mantlet for clearance and then it ought to work just fine.
You rarely see the Tamiya ones for sale anymore, so this is a welcome availability. I'll save mine for a future Achilles build. -Mike
Last edited by sassgrunt; 06-02-2016 at 02:42 PM.
06-02-2016, 04:52 PM
#3
Nice fit on the parts.
 06-02-2016, 06:23 PM
#5
Join Date: Jun 2007
Location: London, ON, CANADA
Posts: 166
Likes: 0
Received 0 Likes
on
0 Posts
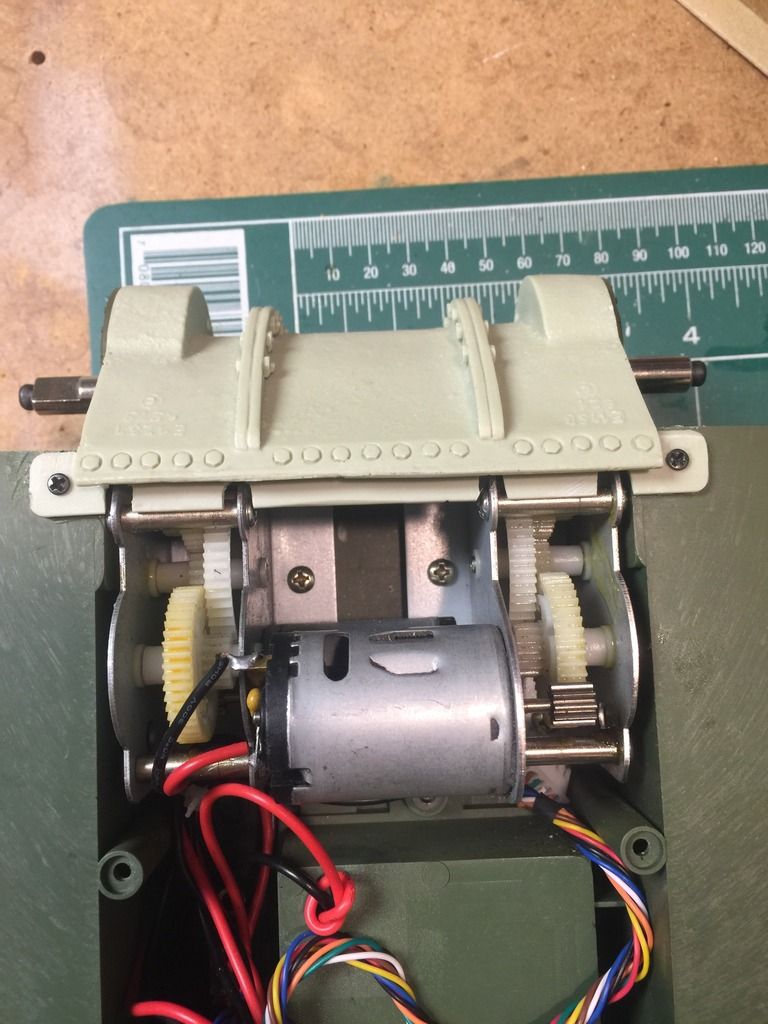
Hello Markocaster. I have this conversion kit too! I am very impressed with it! I always wanted a 1/16 Firefly. A quick question for you, how did you modify the HL M4A3 hull to accept the upper hill and 3 piece transmission housing. In the instructions, they say to cut down the forward edge of the metal gear box housings, how did you do it? You also modified the opening for the drive shaft, did this mean adjusting the position of the gear boxes?
Thanks in advance, looking forward to seeing the completed build
Thanks in advance, looking forward to seeing the completed build
06-02-2016, 06:58 PM
#6
Thread Starter
Hi Mark. I was confused by the "plugged barrel" note that was sent out, and thought that I had to drill out aluminum from the center. Not sure how to do that, I ordered the Mato 17-pdr barrel just in case. It turned out that the center of the barrel was plugged only with resin, and I managed to bore that out by filing "teeth" onto the end of a 5/32" brass tube. I chucked that in an electric screwdriver, and bored it out easily.
Anyway, as to the Mato barrel. If you have seen the one Tamiya used to make, this is almost dimensionally an exact copy. The extension at the rear is about 1/2" longer, and there is also a smaller 5/8" extension on the rear of that which plugs into the Heng Long recoil housing. Be advised that the larger-diameter part hits the inner mantlet before the smaller part can go go all the way into the recoil unit. And, on recoil, (if you left it partially inserted that way) it would "unplug" itself from the recoil unit. You can carefully drill out the pivoting parts of the inner mantlet for clearance and then it ought to work just fine.
You rarely see the Tamiya ones for sale anymore, so this is a welcome availability. I'll save mine for a future Achilles build. -Mike
Anyway, as to the Mato barrel. If you have seen the one Tamiya used to make, this is almost dimensionally an exact copy. The extension at the rear is about 1/2" longer, and there is also a smaller 5/8" extension on the rear of that which plugs into the Heng Long recoil housing. Be advised that the larger-diameter part hits the inner mantlet before the smaller part can go go all the way into the recoil unit. And, on recoil, (if you left it partially inserted that way) it would "unplug" itself from the recoil unit. You can carefully drill out the pivoting parts of the inner mantlet for clearance and then it ought to work just fine.
You rarely see the Tamiya ones for sale anymore, so this is a welcome availability. I'll save mine for a future Achilles build. -Mike
Thanks for the reply. And the info on the Mato barrel. I don't battle the tanks , so I thought I would leave this one stock but add the mato barrel so it could still shoot bb's. So your info is great and I may ask a question or two when I get to that

Are you "stretching the hull on yours? I'm not that brave, gonna leave it all stock.
Thanks for your great "review" so far very helpful , especially since this is my first resin kit.
Can you use any primer on resin or should I go for something specific?
Have a great night !!
Mark
06-02-2016, 07:02 PM
#7
Thread Starter
Hello Markocaster. I have this conversion kit too! I am very impressed with it! I always wanted a 1/16 Firefly. A quick question for you, how did you modify the HL M4A3 hull to accept the upper hill and 3 piece transmission housing. In the instructions, they say to cut down the forward edge of the metal gear box housings, how did you do it? You also modified the opening for the drive shaft, did this mean adjusting the position of the gear boxes?
Thanks in advance, looking forward to seeing the completed build
Thanks in advance, looking forward to seeing the completed build
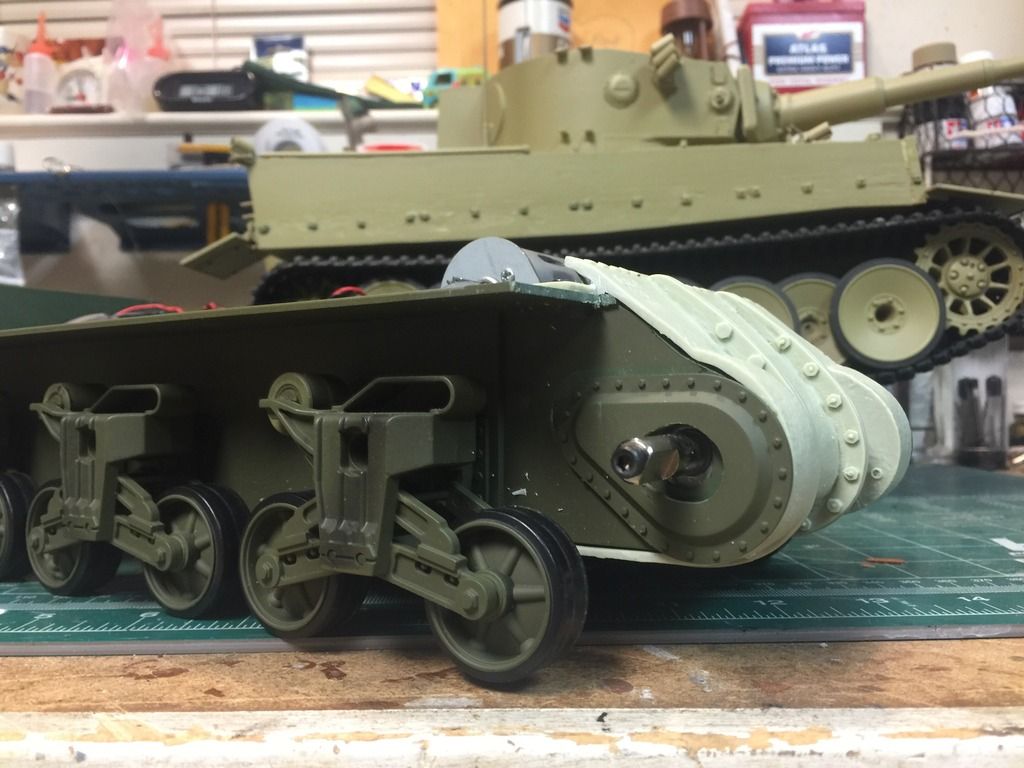
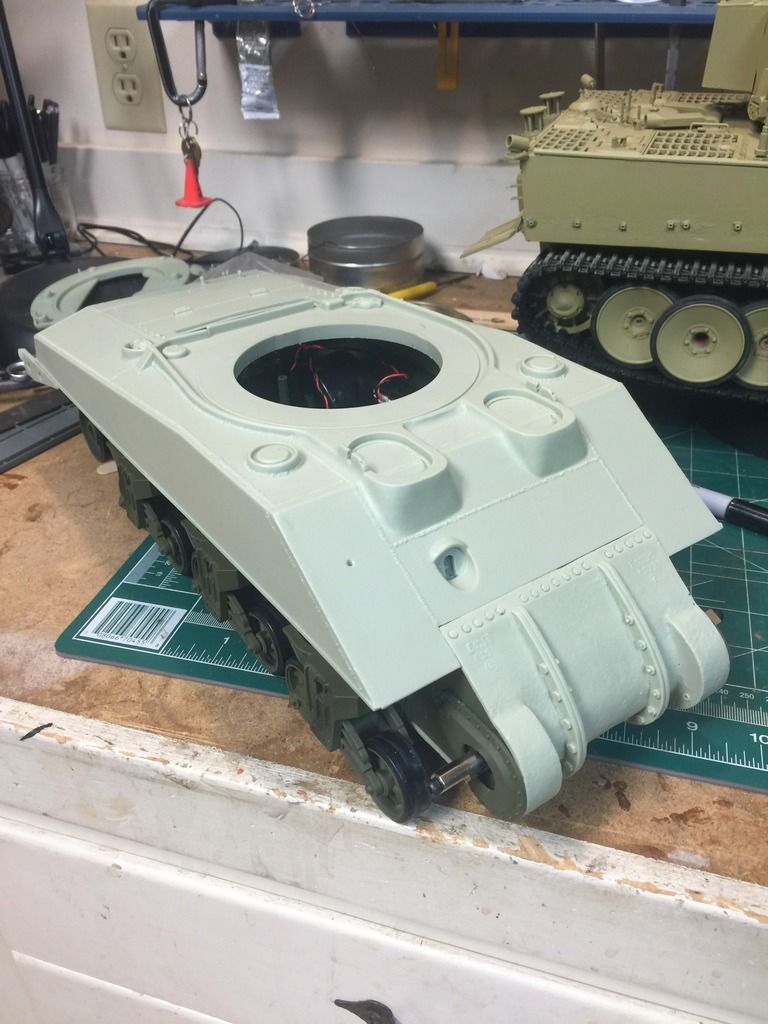
The rest of the hull is stock. I didn't move the gear boxes, just made the hole bigger as per the manufactures website. I am really enjoying so far.
Post your build
06-02-2016, 07:41 PM
#9
Thread Starter
06-03-2016, 12:21 AM
#10
My Feedback: (1)
Join Date: May 2009
Location: Pearl City, HI
Posts: 372
Likes: 0
Received 0 Likes
on
0 Posts
Hey Mark. It's funny you should ask about stretching the hull. Initially, I wasn't planning to do this; as I just wanted a simply (for once) build. But, after seeing how great Frank's extended hull turned out; now I'm considering doing it on mine. I gotta admit, though - Frank makes it all look so easy, that it seems like an incentive to get in WAY over my head!
I have to say that I am really impressed with the quality of the kit, and will anxiously await whatever he decides to produce next!
I have to say that I am really impressed with the quality of the kit, and will anxiously await whatever he decides to produce next!
06-03-2016, 02:21 AM
#11
Keep up with the pictures guys!
I'd like to start on mine someday too with all this Firefly talk.
Jeff
I'd like to start on mine someday too with all this Firefly talk.
Jeff
06-03-2016, 06:21 AM
#12
Thread Starter
Hey Mark. It's funny you should ask about stretching the hull. Initially, I wasn't planning to do this; as I just wanted a simply (for once) build. But, after seeing how great Frank's extended hull turned out; now I'm considering doing it on mine. I gotta admit, though - Frank makes it all look so easy, that it seems like an incentive to get in WAY over my head!
I have to say that I am really impressed with the quality of the kit, and will anxiously await whatever he decides to produce next!
I have to say that I am really impressed with the quality of the kit, and will anxiously await whatever he decides to produce next!
i hope he DGS make other kits , having fun with this one.
I have a question , where are you putting the smoker tubes, they are higher up I think as the instructions tell you to remove them and fill holes?
06-03-2016, 11:31 AM
#13
My Feedback: (1)
Join Date: May 2009
Location: Pearl City, HI
Posts: 372
Likes: 0
Received 0 Likes
on
0 Posts
I am not planning on using the smoker at all on mine. I hear that they're just more trouble than they're worth in the long run.
And, Frank posted some photos of how he stretched it on another forum: https://www.rctankwarfare.co.uk/foru...p?f=23&t=20164
And, Frank posted some photos of how he stretched it on another forum: https://www.rctankwarfare.co.uk/foru...p?f=23&t=20164
Last edited by sassgrunt; 06-03-2016 at 11:33 AM. Reason: spelling
06-03-2016, 12:52 PM
#14
Thread Starter
I am not planning on using the smoker at all on mine. I hear that they're just more trouble than they're worth in the long run.
And, Frank posted some photos of how he stretched it on another forum: https://www.rctankwarfare.co.uk/foru...p?f=23&t=20164
And, Frank posted some photos of how he stretched it on another forum: https://www.rctankwarfare.co.uk/foru...p?f=23&t=20164

 06-13-2016, 04:56 AM
#17
Looks good so far!!!
06-13-2016, 08:41 PM
#18
My Feedback: (1)
Join Date: May 2009
Location: Pearl City, HI
Posts: 372
Likes: 0
Received 0 Likes
on
0 Posts
On my kit, I have been trying very hard to make all of the hatches operate. Using a pin vise and a 0.025" drill, I have drilled out all the necessary holes. Then, I have been cutting small straight pins and inserting them from each side of the hatch hinge. I've been using a toothpick and a drop of super glue under the head of the pin before pushing it all the way into place. I was able to successfully do this on the two hull hatches and the square loader's hatch
But, no matter how careful I was, I could not make the commander's hatch work without breaking.the two hatch halves right where they met the hinge area. Initially, I just glued the hatch doors into place, since they didn't really NEED to open because the Heng Long elevation motor was under there. But then I looked at Frank's build again, and saw where he relocated the elevation gear so that he could open the split hatch. (I gotta quit doing that - every time I think I'm happy with how the build is going; I see how nice his looks, and change direction again)!
Anyway, I ordered a Mato metal split hatch from Mato Mart and got it in the mal today. It is really, really nice and I am very happy with it. It is just a little larger in diameter than the stock resin hatch, and I had to cut away the bullet splash ring on top of the turret to get it to fit.
Sorry for rambling on. I just wanted to let you all know how nice I think this metal hatch is. Would be a great part to use on the prototype Super Pershing, (subsequent ones used the oval loader's hatch), or any other early Sherman that needs the split hatch.
06-13-2016, 09:53 PM
#19
Thread Starter
Mike I had a heck of a time with the hatches also. The driver and the once machine gunners hatch do work but are wonky at best , the sides blew out when I pin viced it , I used copper wire , super glue and it's good enough. I need them to open as that's how I access the screws I use to hold the hull top onto the bottom. My commanders hatch is very wonky. It works but just
May have to look into the mato one
May have to look into the mato one
06-13-2016, 10:46 PM
#20
My Feedback: (1)
Join Date: May 2009
Location: Pearl City, HI
Posts: 372
Likes: 0
Received 0 Likes
on
0 Posts
Here is a link to the one I got. For the price, I think it is an excellent replacement. I also have a set of adjustable Mato idlers on order from Forgebear. I am going to try using them to get the tension right with the Mato metal tracks with extended end connectors.
http://www.matomart.com/prodview.php?p=2867
http://www.matomart.com/prodview.php?p=2867
06-14-2016, 06:40 AM
#21

Sorry you are having issues with the hatches guys. The way I do it is drill the holes get the hatch fitted roughly and then hit it with hot air and GENTLY form it into the correct position. Some guys use hot water to soften it too. The Mato hatch is a dream though. I have it on my wifey's Desert pink 42 Sherman I am building.
06-14-2016, 09:27 AM
#23
Thread Starter
06-15-2016, 11:59 AM
#25
Not seeing the pic?