


Heng Long M41 "Modernization" build.
 04-29-2018, 10:21 AM
#1
Ok a few weeks ago I posted a thread "What to build next?" and it seems the overwhelming concusses given the option I put forth was to do a theoretical M41 modernization build. So this is the start of the build, what I plan to do and some of the why will follow. The goal of the build will be to add "off the shelf" type upgrades to an M41 to theoretical make it more lethal on the modern stage against threats it was never intended to meet head to head by giving it the ability to see better, hit harder, hit faster and take a bit more punch all while maintaining its proven speed and maneuverability.
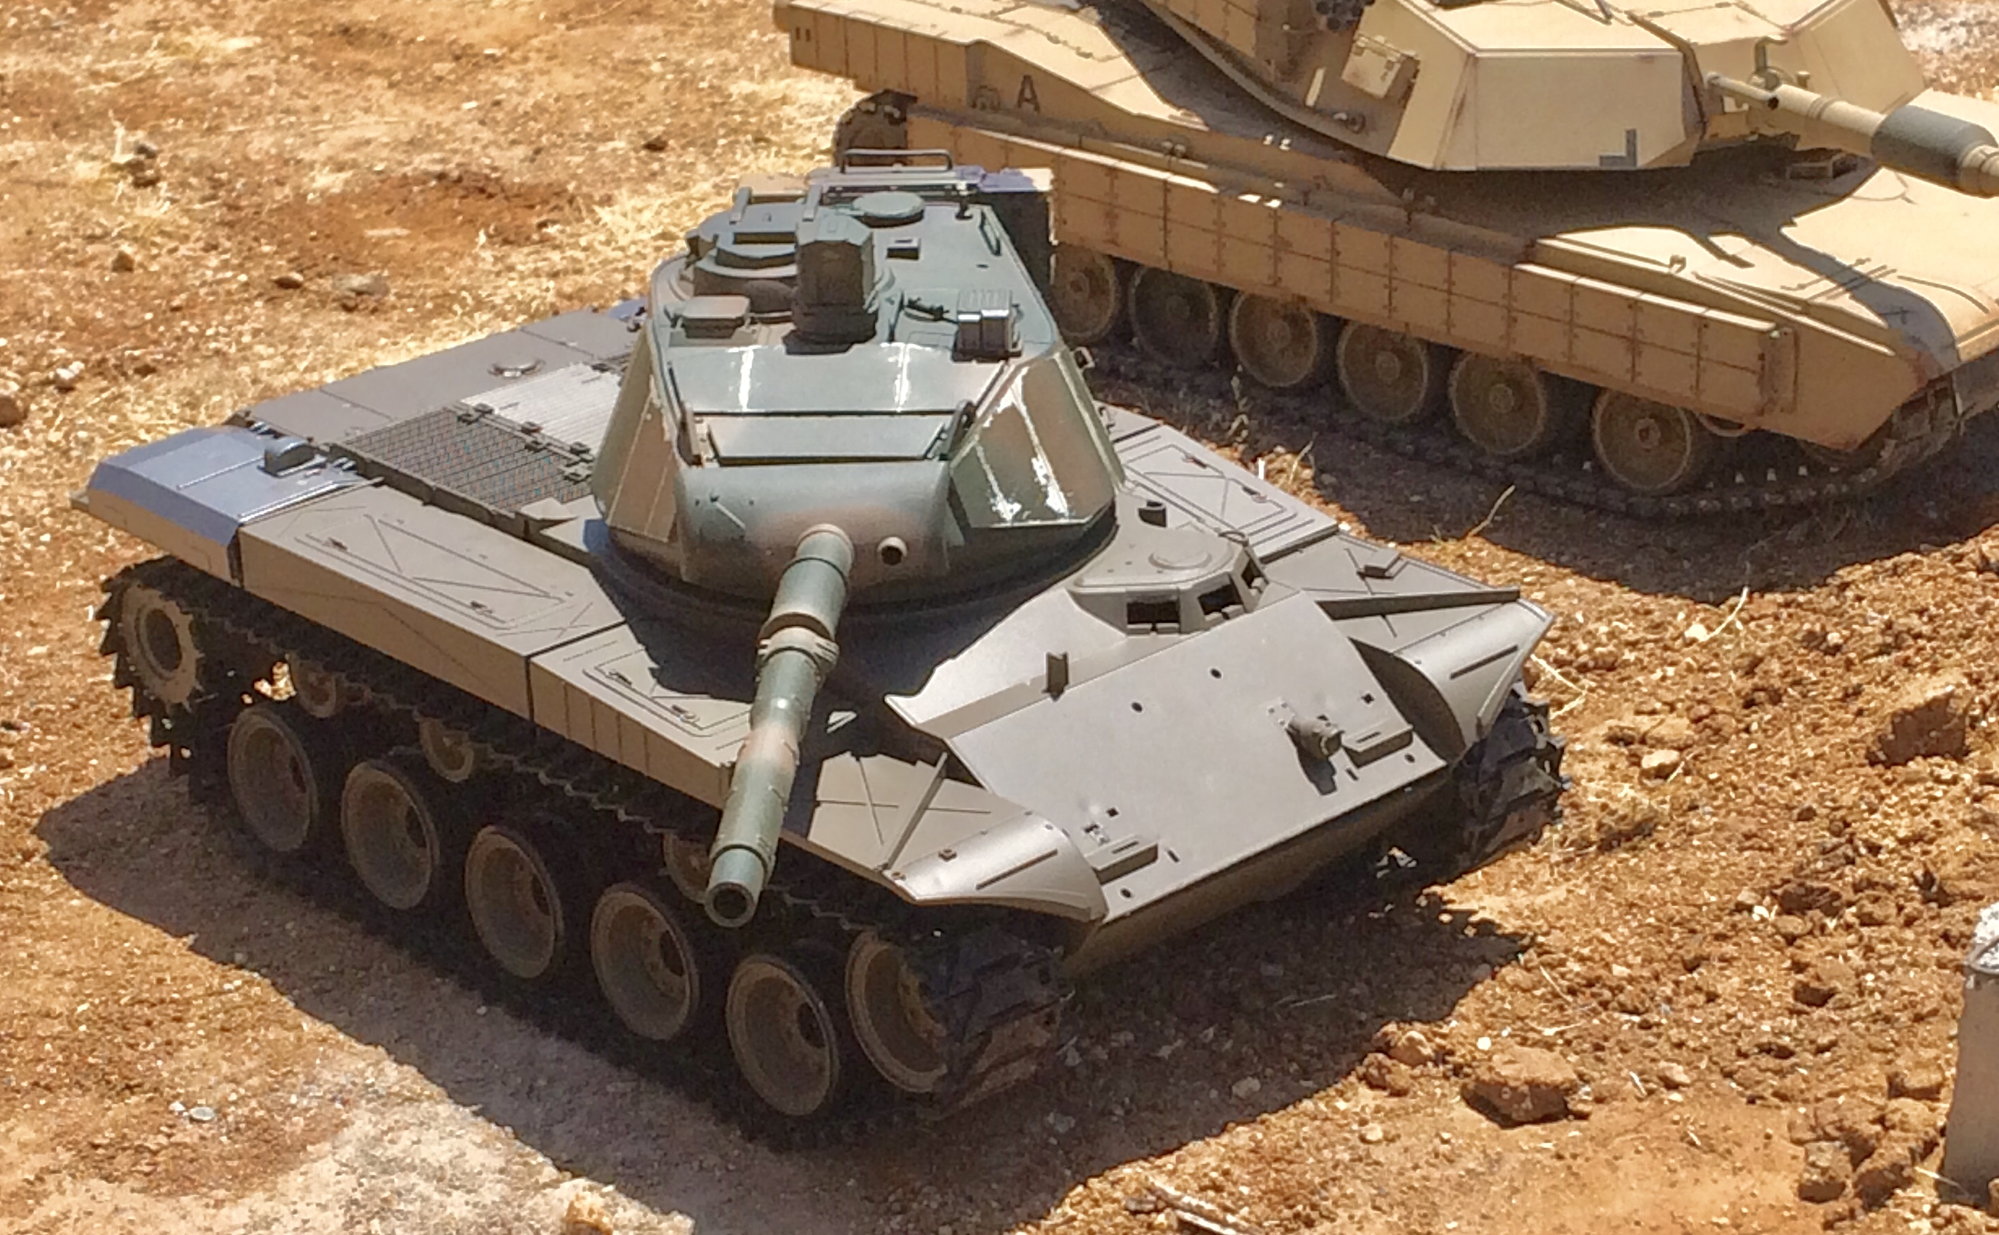
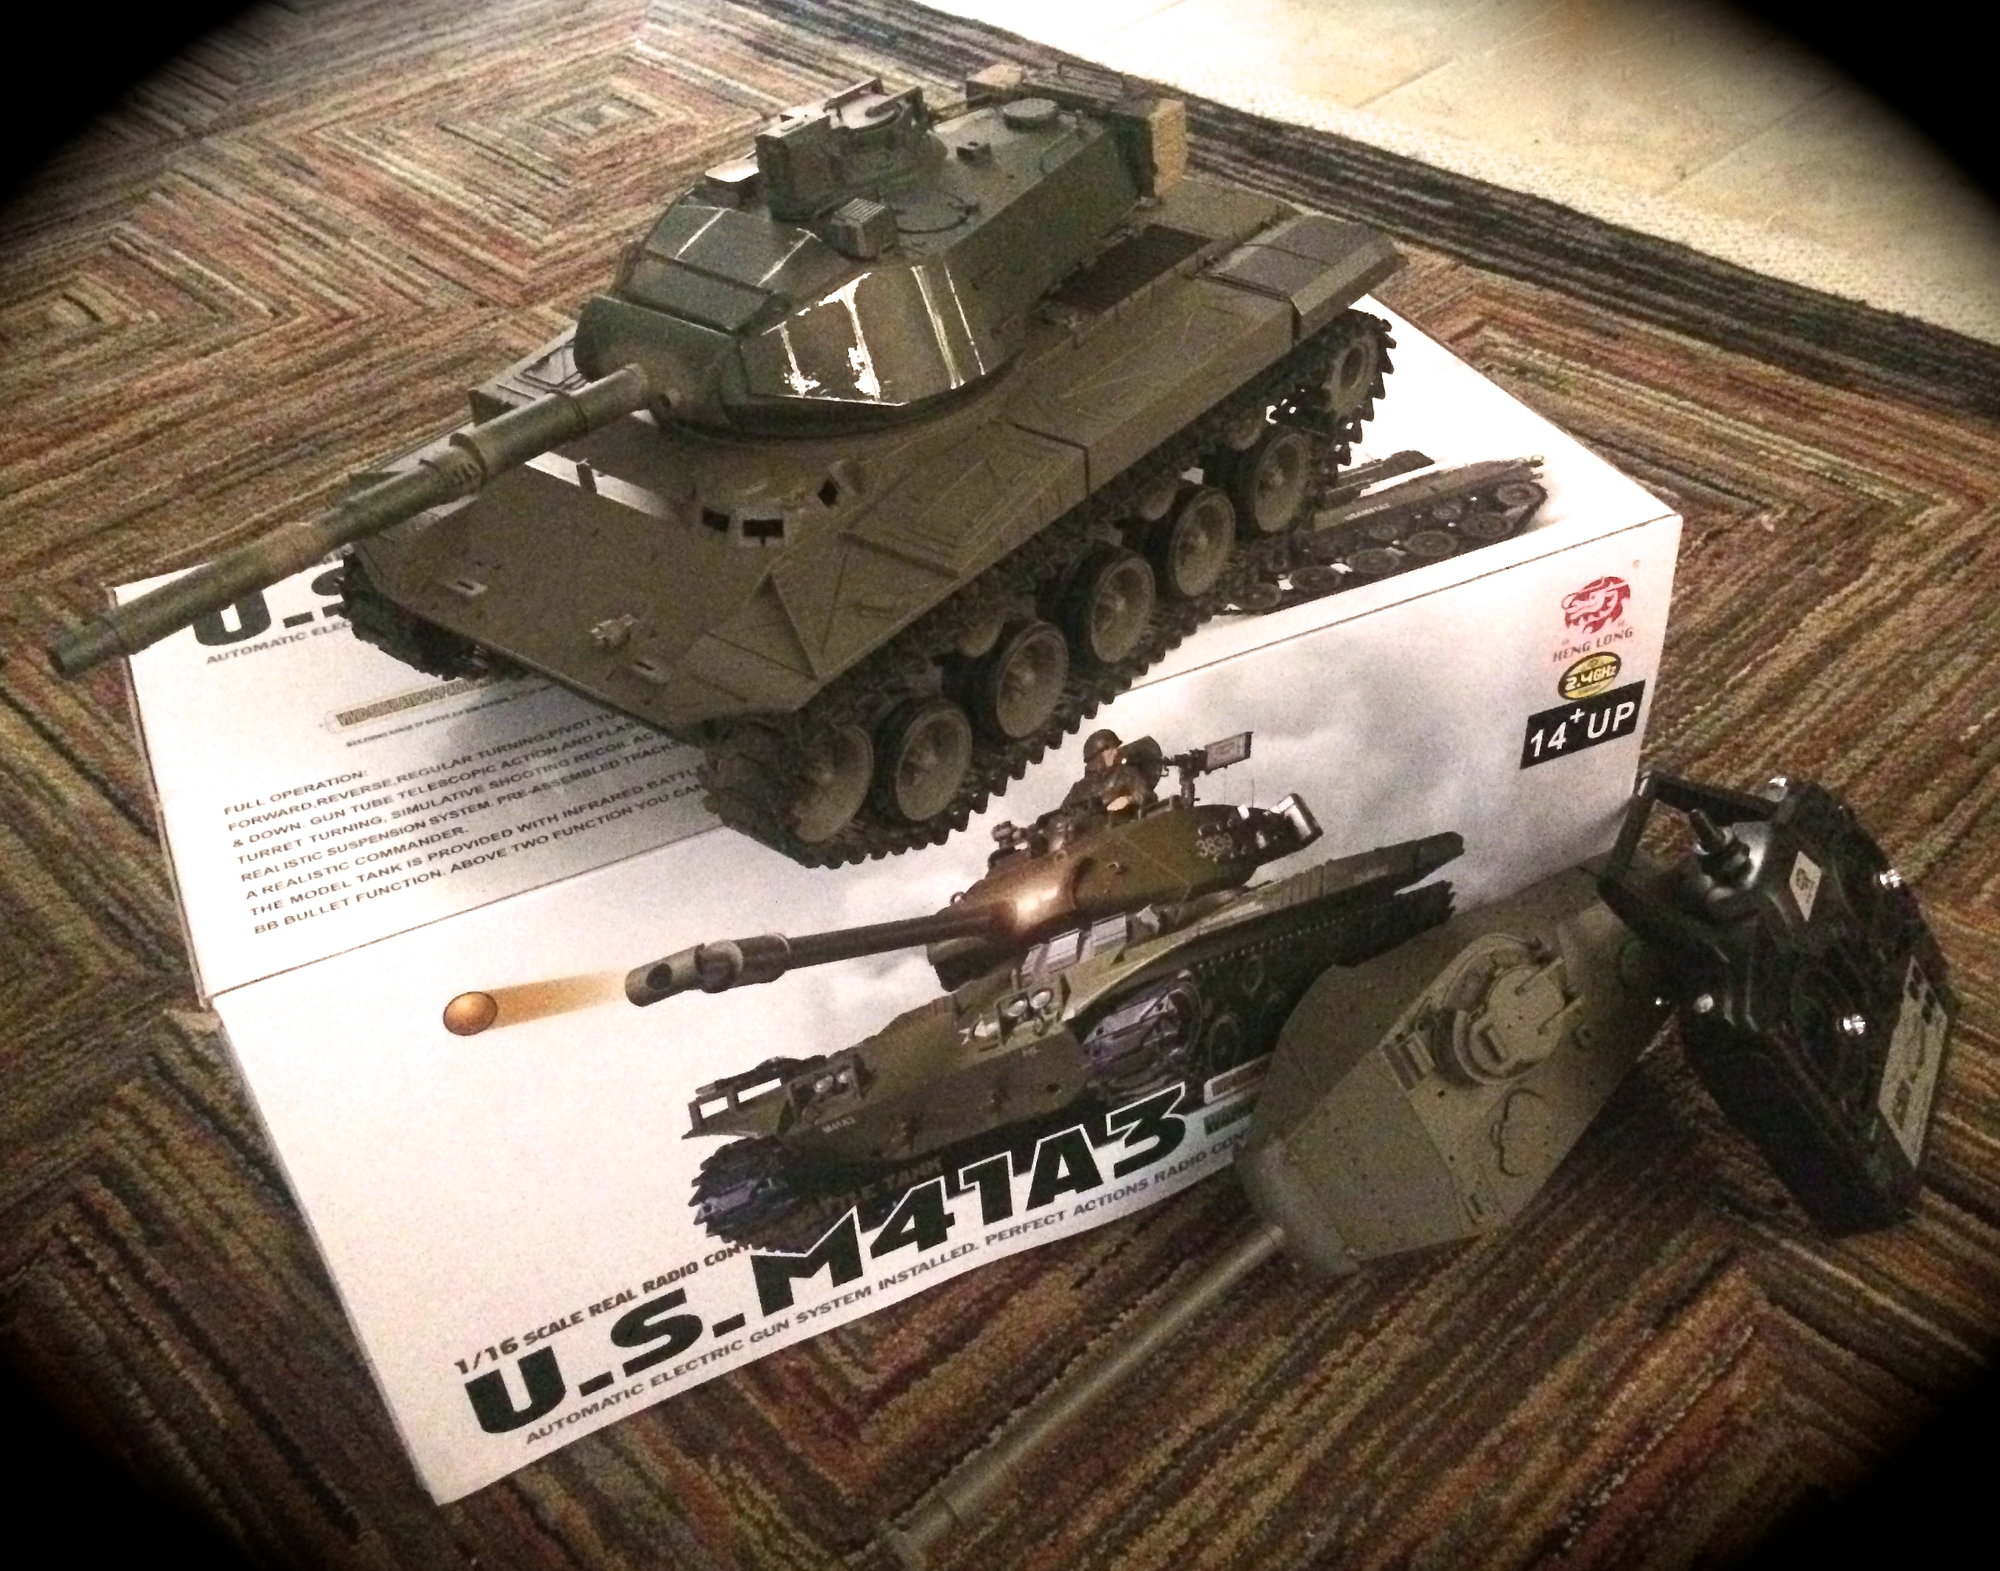
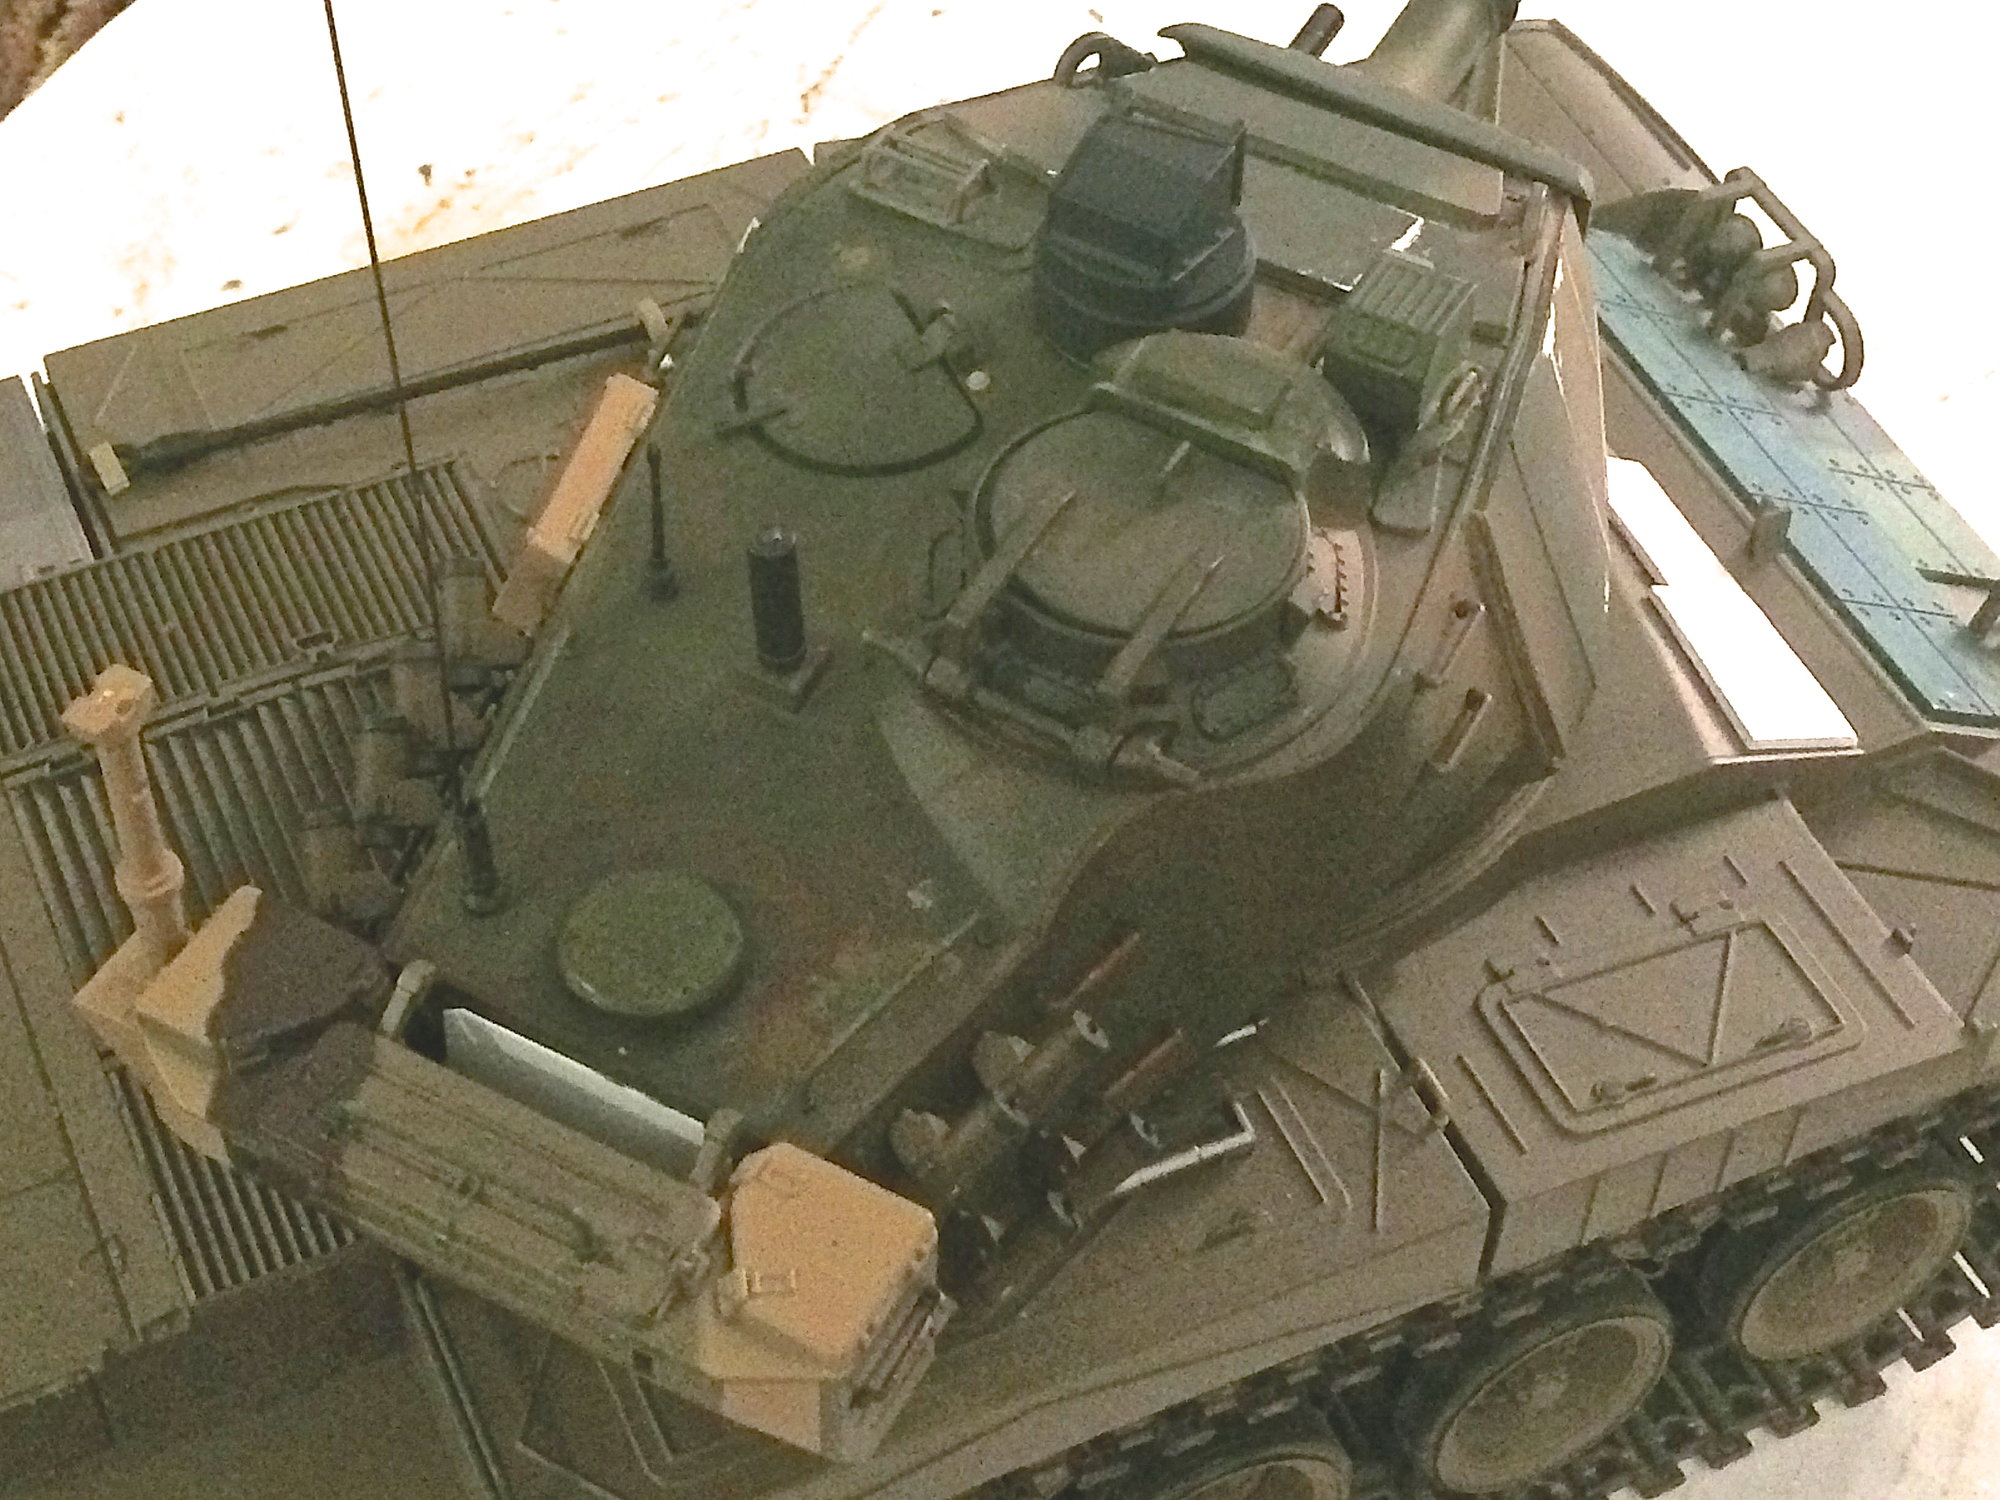
So lets get started with a few photos. These are of a new fresh, just in Heng Long M41 that has already had its turret removed and the mock up turret installed. The hull is bare of accessory parts as those will mostly be replaced with different parts and will not be being used in this build.


So lets get started with a few photos. These are of a new fresh, just in Heng Long M41 that has already had its turret removed and the mock up turret installed. The hull is bare of accessory parts as those will mostly be replaced with different parts and will not be being used in this build.
Last edited by Fsttanks; 04-29-2018 at 10:48 AM.
 04-29-2018, 02:19 PM
#2

Join Date: Nov 2010
Location: HamiltonWaikato, NEW ZEALAND
Posts: 937
Likes: 0
Received 78 Likes
on
55 Posts
Hi Fsttanks
Interesting, is that a 105mm?
Presumably thats a Thermal imaging sight mounted in the centre turret fwd of the hatches? Looks like it will obstruct the loaders hatch slightly? Internally it might obstruct gun depression?
NBC pack replacing the turret stowage box?
Mal
Interesting, is that a 105mm?
Presumably thats a Thermal imaging sight mounted in the centre turret fwd of the hatches? Looks like it will obstruct the loaders hatch slightly? Internally it might obstruct gun depression?
NBC pack replacing the turret stowage box?
Mal
04-29-2018, 03:57 PM
#3
Hi Fsttanks
Interesting, is that a 105mm?
Presumably thats a Thermal imaging sight mounted in the centre turret fwd of the hatches? Looks like it will obstruct the loaders hatch slightly? Internally it might obstruct gun depression?
NBC pack replacing the turret stowage box?
Mal
Interesting, is that a 105mm?
Presumably thats a Thermal imaging sight mounted in the centre turret fwd of the hatches? Looks like it will obstruct the loaders hatch slightly? Internally it might obstruct gun depression?
NBC pack replacing the turret stowage box?
Mal
Keep in mind this is the rough turret layout and as the project progresses the layout will be tweaked here and there.
Thanks for the questions.
Last edited by Fsttanks; 04-29-2018 at 04:10 PM.
04-29-2018, 07:34 PM
#4
Join Date: Nov 2010
Location: HamiltonWaikato, NEW ZEALAND
Posts: 937
Likes: 0
Received 78 Likes
on
55 Posts
Hi Fsttanks
The main gun is a 105mm (Rheinmetall smooth bore as used on the Striker mobile gun carrier). - Ok
Center sight is a CITS from a Challenger 2 the small sight next to it is the new gunners sight I built. - Ok
The loaders hatch is not obstructed by either sight and can open past the 110 degree point and has a stop mounted to the turret to ensure it does not open further. Ok - a 70 dgree obstruction, loaders hatch open 180 degrees normally.
Both sights being digital they would have a very small foot print inside the tank and definitely not enough to interfere with any internal workings. - Not sure thats always true - https://www.thinkdefence.co.uk/2012/...hallenger-lep/ - various sights discussed have fairly large foot print.
M41 basket was removed and replaced with one from a T90 that allow for more storage and larger mounting surfaces for additional kit. - That sounds like a real upgrade, not a 'What If', compatability could be a prob?
The NBC systems blister cover is mounted under the rear part of turret and not visible in the pictures shown. - Ok, mistook the odd new shape for an NBC pack.
Mal
04-29-2018, 10:04 PM
#5
Mal,
The CITS housing is from a Callenger 2 not that this tank would be using the CITS system of a Callenger 2. It just happened to be the one I had in my parts bin. When it comes to interior space the turret will be seeing a large number of old bulky items removed. Also keep in mind that the turret of the M41 has a larger internal area than tanks like the T-90 / T-80 and these tanks use fairly good thermal gunsight systems along with housing a much larger gun (125mm). I am confident having spent a fair amount of time climbing in and out of an M41 that a digital system would have plenty of room. It may not be as capable as an Abrams or Leopard 2 system, but could easily match or surpass that of the T-90 or T-80. The new sighting system matched to the new gun capable of defeating T-72 and maybe T90 armor would be a huge improvement toward evening the odds in see-shoot-hit first and thus increasing survivable.
This is a for fun theoretical build. In reality it would almost be cheaper to just buy/lease a slightly used Leopard 2 or Abrams.
Thanks for the questions and comments it makes for some extra fun during this build.
Last edited by Fsttanks; 04-30-2018 at 10:47 AM.
04-30-2018, 10:38 AM
#6
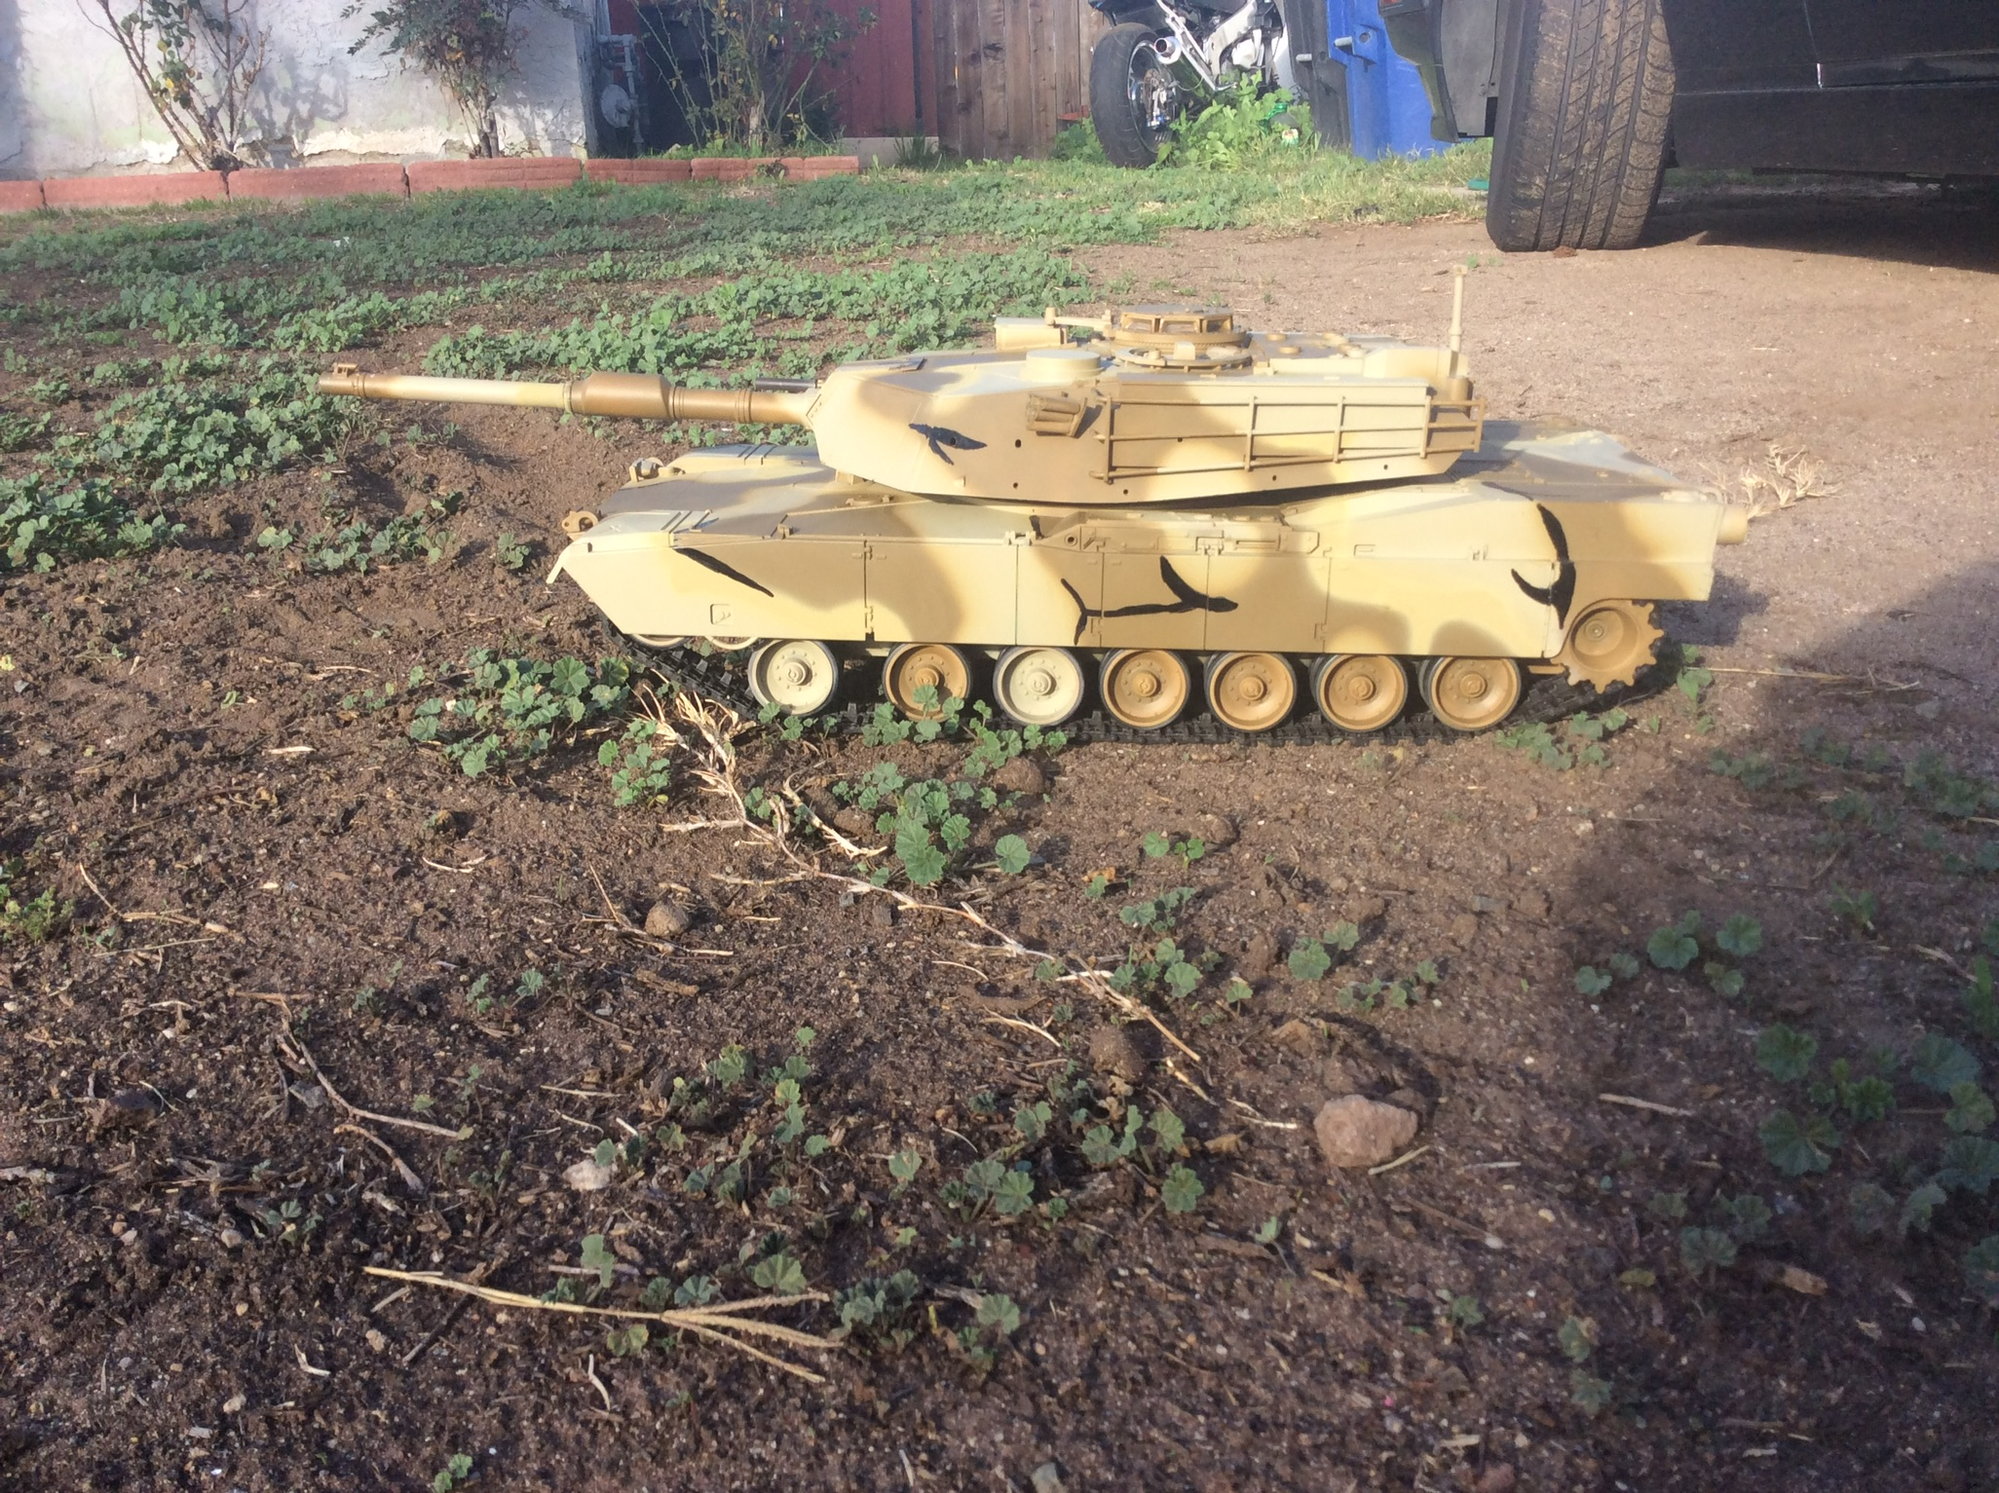
Since I am still waiting on parts for the turret I moved to starting work on the forward hull and replaced the tracks and sprockets with ones left over from one of my Abrams.
First the track. The track/sprocket modification was super simple by just installing the Abrams sprocket and adjusting the track lengths down by 15 links. Tested it outside in dirt and sand for a full 5000mah battery charge (40min) and had no issues. On a side note because the Abrams sprocket has a larger diameter this changed the final drive ratio a bit and there was an increase in toped end speed over the factory sprocket. Can't wait to see what happen when the red motors and higher voltage battery is installed.
This track modification opens the door to using aftermarket metal tracks like the DKLM Abrams tracks with their rubber pads that have proven to be excellent in durability and grip performance on my Abrams. In the real world Abrams tracks would not work so simply on the M41, but since the Heng Long M41 is so out of scale why not use them in this modernization build.
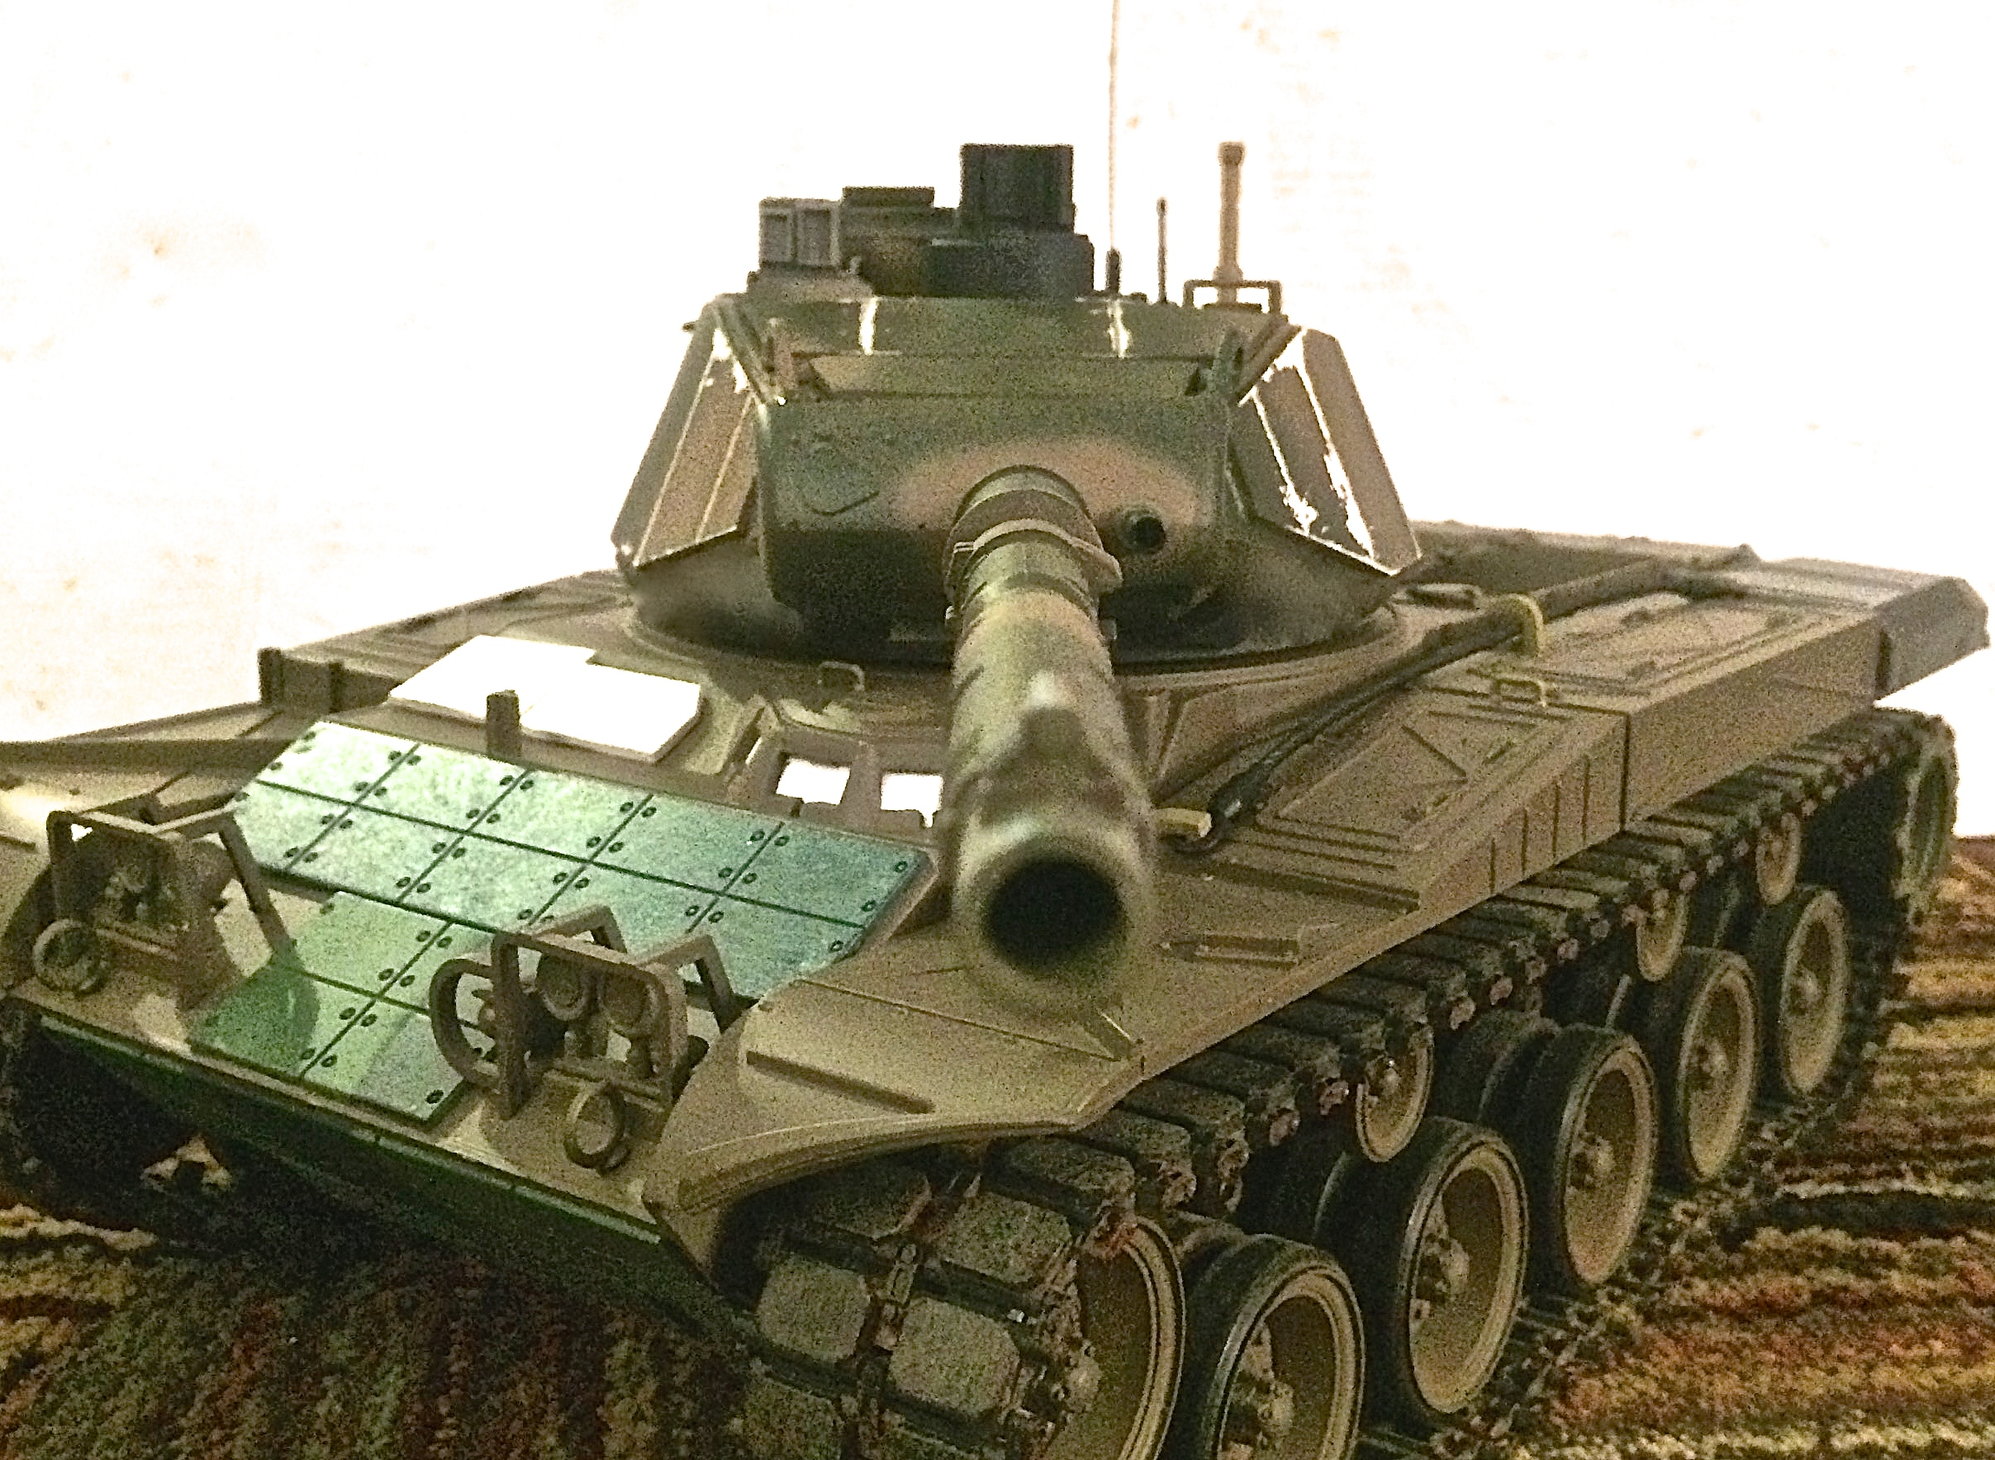
The frontal hull had its simulated "ceramic tile" up armor installed. This was not they way I prototyped prior on my test M41 hull, but I liked it so went with it at the spur of the moment as it would be an easier and cheaper way to do the tiles if this was a real world modernization. I did ended up using the factory lights as they kept more of a bulky look vs the lights I had intended to use.
I also removed the right side exhaust/muffler and will be using this space as a storage location. I found a good number of photos showing that this muffler had been removed and the exhausted rerouted to just a left muffler. As I understand it this was common in a number diesel conversion. The kit shown on the right side where the muffler would be is not their final position and were place there as space fillers for the photos.
Here are the photos of all the above. Your constructive comments,input and questions are welcome.
First the track. The track/sprocket modification was super simple by just installing the Abrams sprocket and adjusting the track lengths down by 15 links. Tested it outside in dirt and sand for a full 5000mah battery charge (40min) and had no issues. On a side note because the Abrams sprocket has a larger diameter this changed the final drive ratio a bit and there was an increase in toped end speed over the factory sprocket. Can't wait to see what happen when the red motors and higher voltage battery is installed.
This track modification opens the door to using aftermarket metal tracks like the DKLM Abrams tracks with their rubber pads that have proven to be excellent in durability and grip performance on my Abrams. In the real world Abrams tracks would not work so simply on the M41, but since the Heng Long M41 is so out of scale why not use them in this modernization build.
The frontal hull had its simulated "ceramic tile" up armor installed. This was not they way I prototyped prior on my test M41 hull, but I liked it so went with it at the spur of the moment as it would be an easier and cheaper way to do the tiles if this was a real world modernization. I did ended up using the factory lights as they kept more of a bulky look vs the lights I had intended to use.
I also removed the right side exhaust/muffler and will be using this space as a storage location. I found a good number of photos showing that this muffler had been removed and the exhausted rerouted to just a left muffler. As I understand it this was common in a number diesel conversion. The kit shown on the right side where the muffler would be is not their final position and were place there as space fillers for the photos.
Here are the photos of all the above. Your constructive comments,input and questions are welcome.
Last edited by Fsttanks; 04-30-2018 at 10:51 AM.
04-30-2018, 12:36 PM
#7
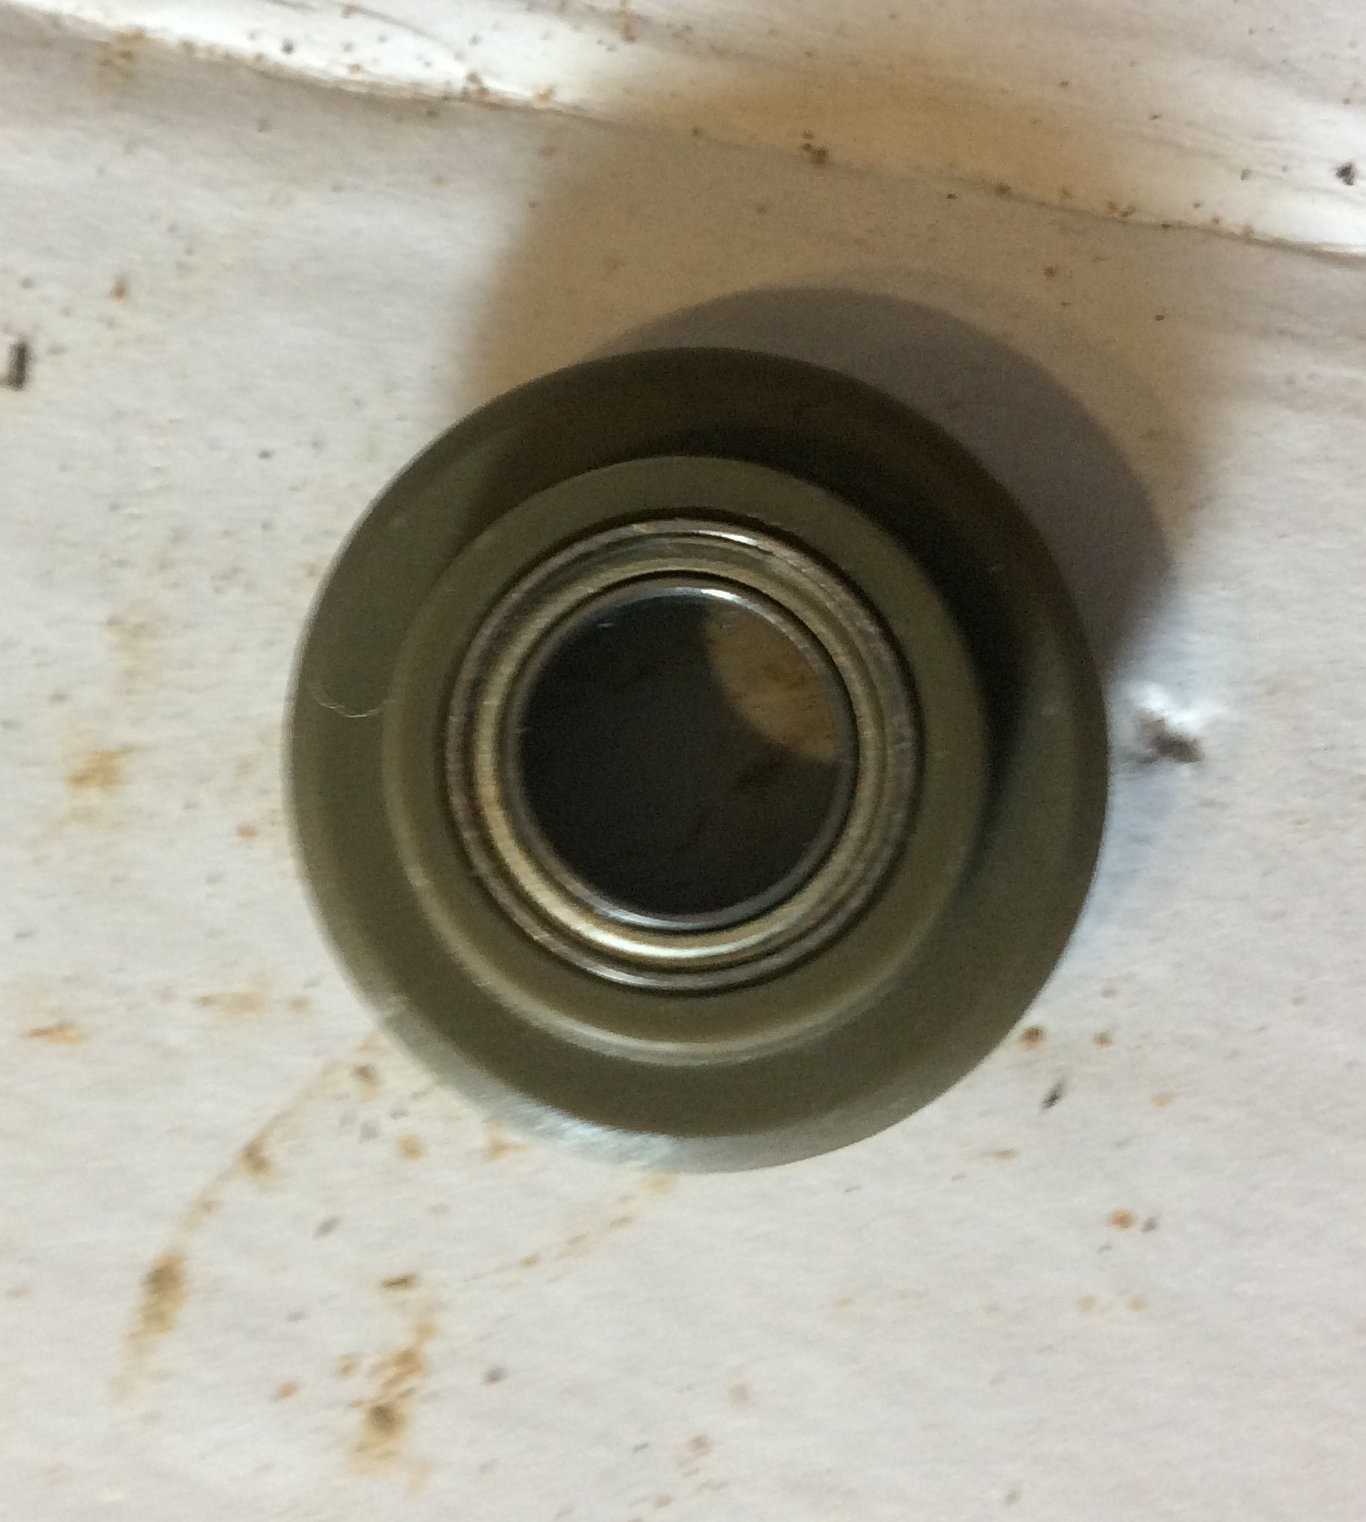
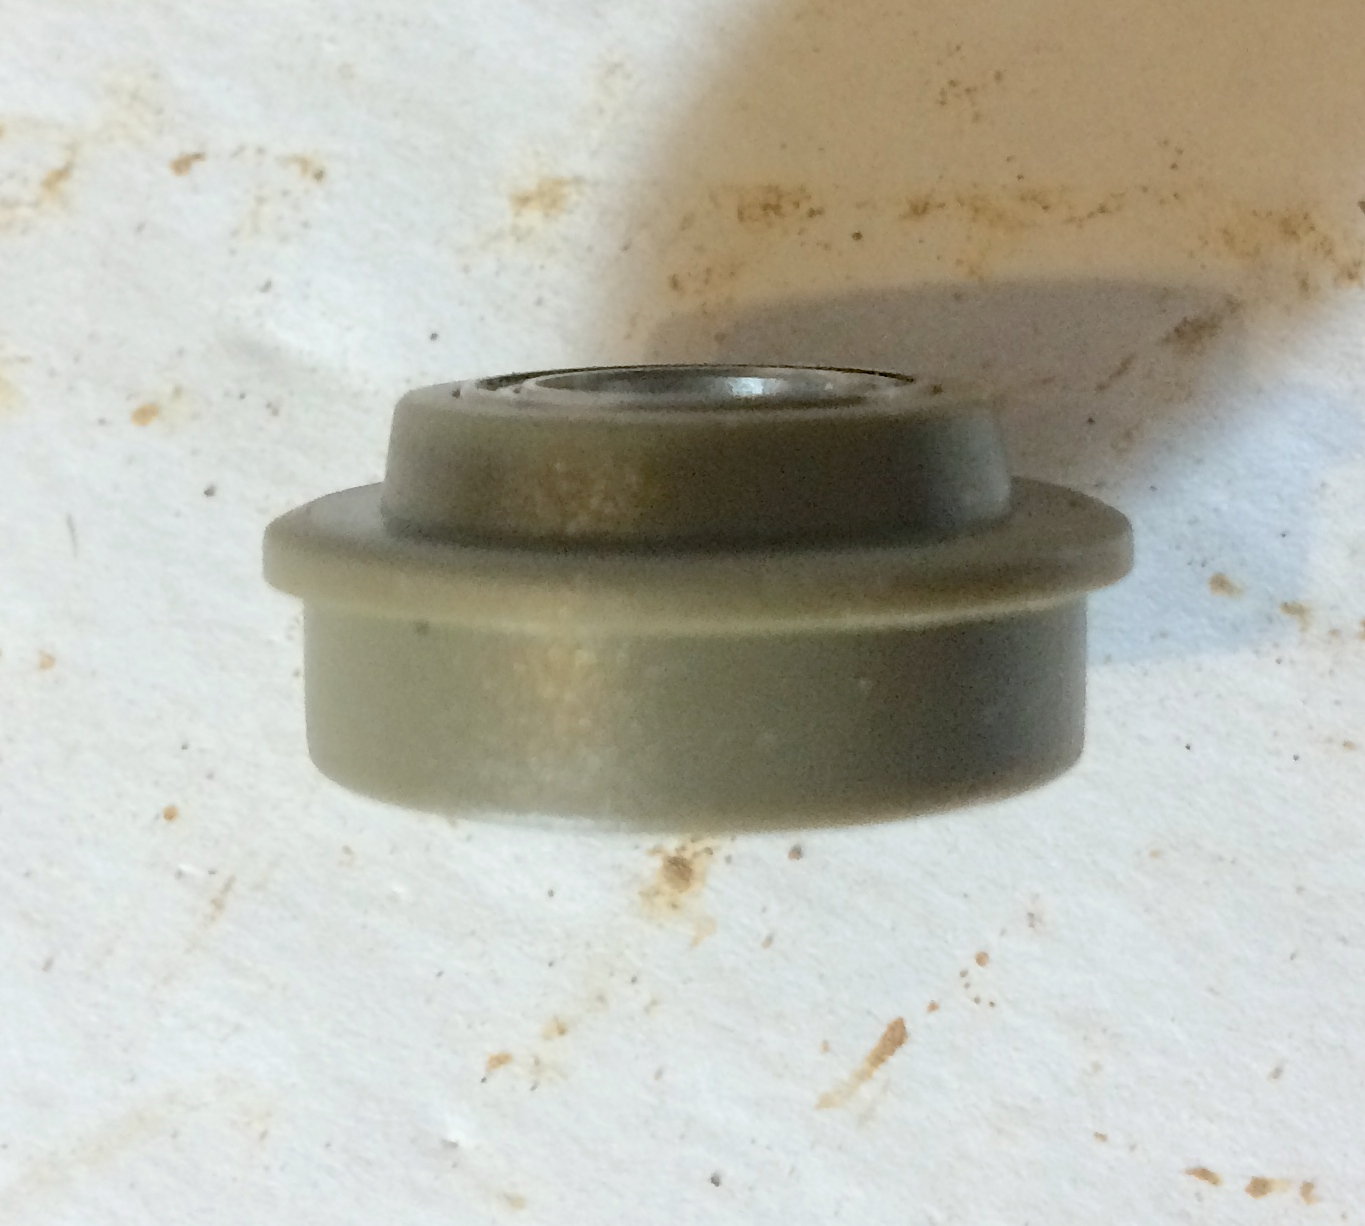
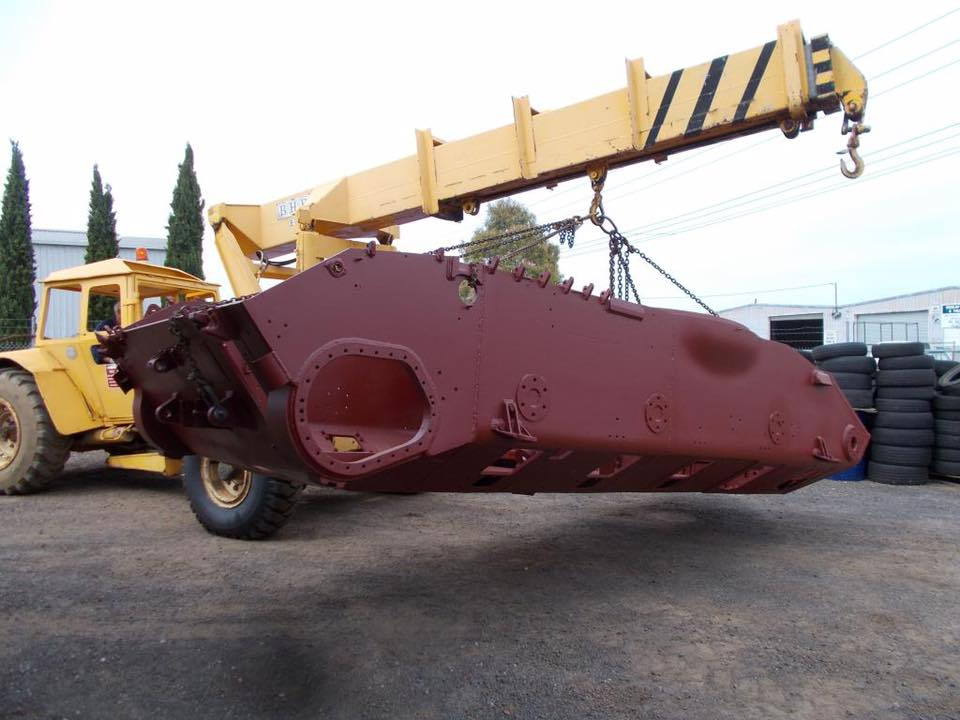
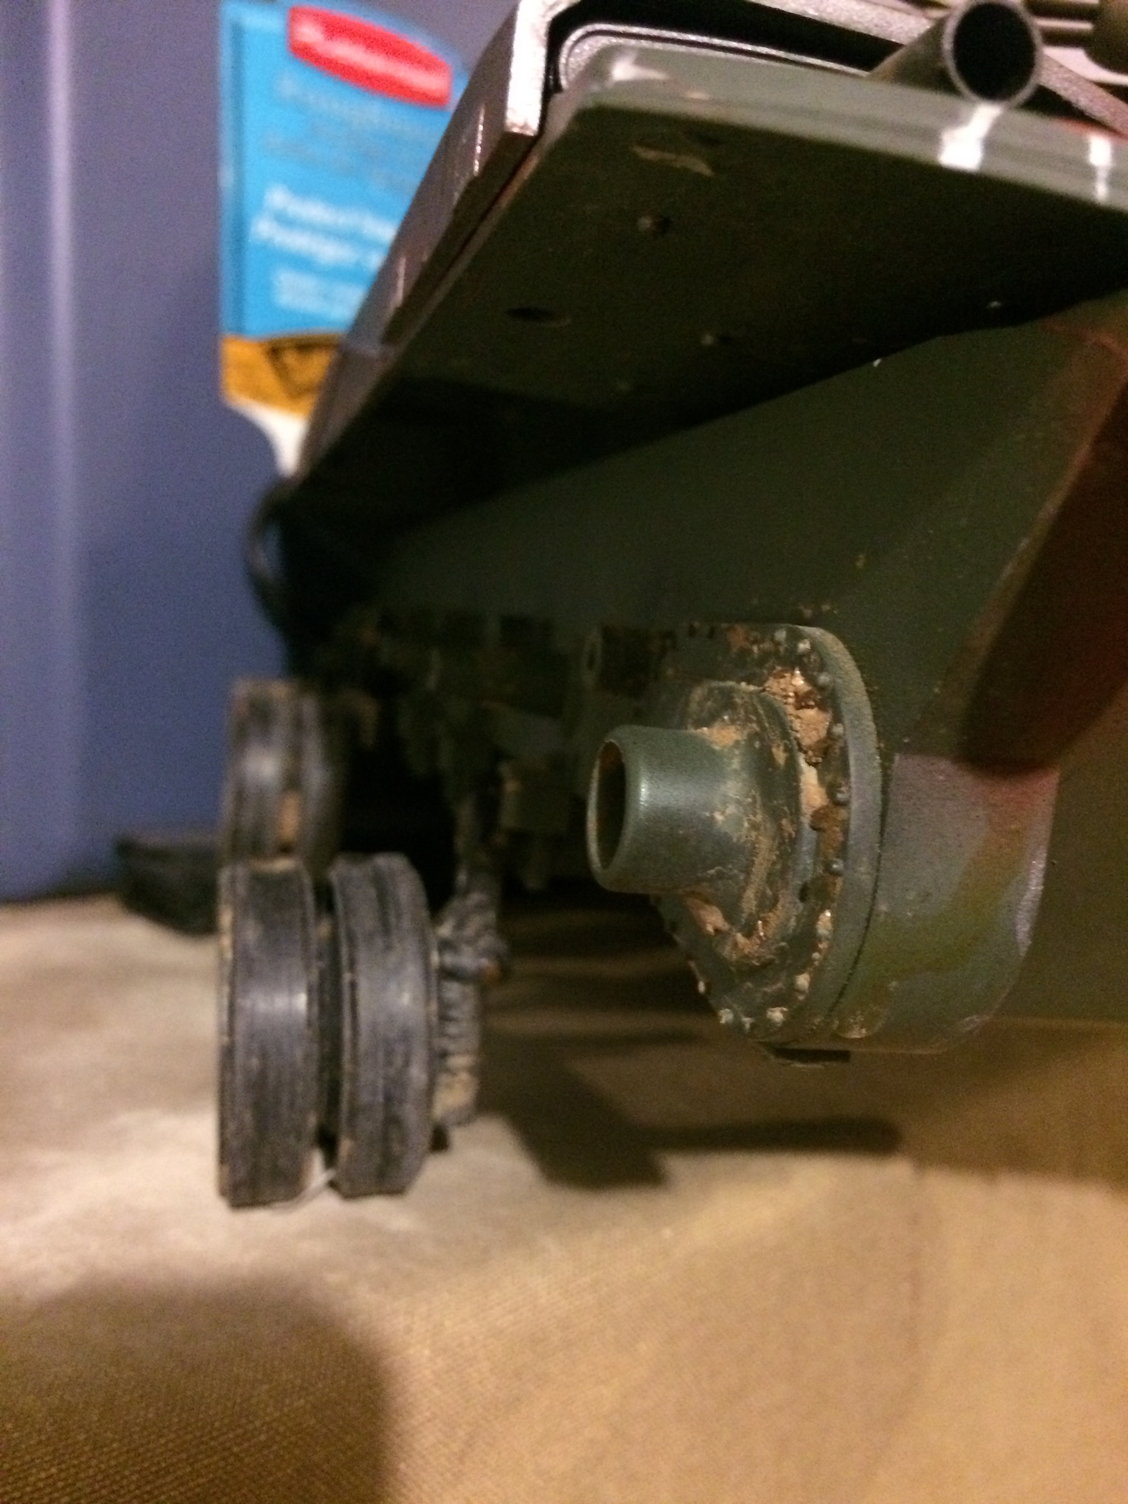
Forget this little info nugget in the above post. I have a few Heng Long T-90 hull drive axel bearing support sets. Just by chance these supports sit nicely on the outer hull of the M41 and fit cleanly with the factory sprocket and even better with the Abrams sprocket. All I needed to do is rough up the contact surfaces and epoxy the axel bearing supports in place. Works perfect and is an unseen part. Once painted the epoxy if seen will look like a single piece forged part.
On an off topic note the T-90 hull drive axel bearing supports also work on the Heng Long Abrams. On the Abrams they sit perfectly in the drive axle hull opening ( tan hull photo shown below ).
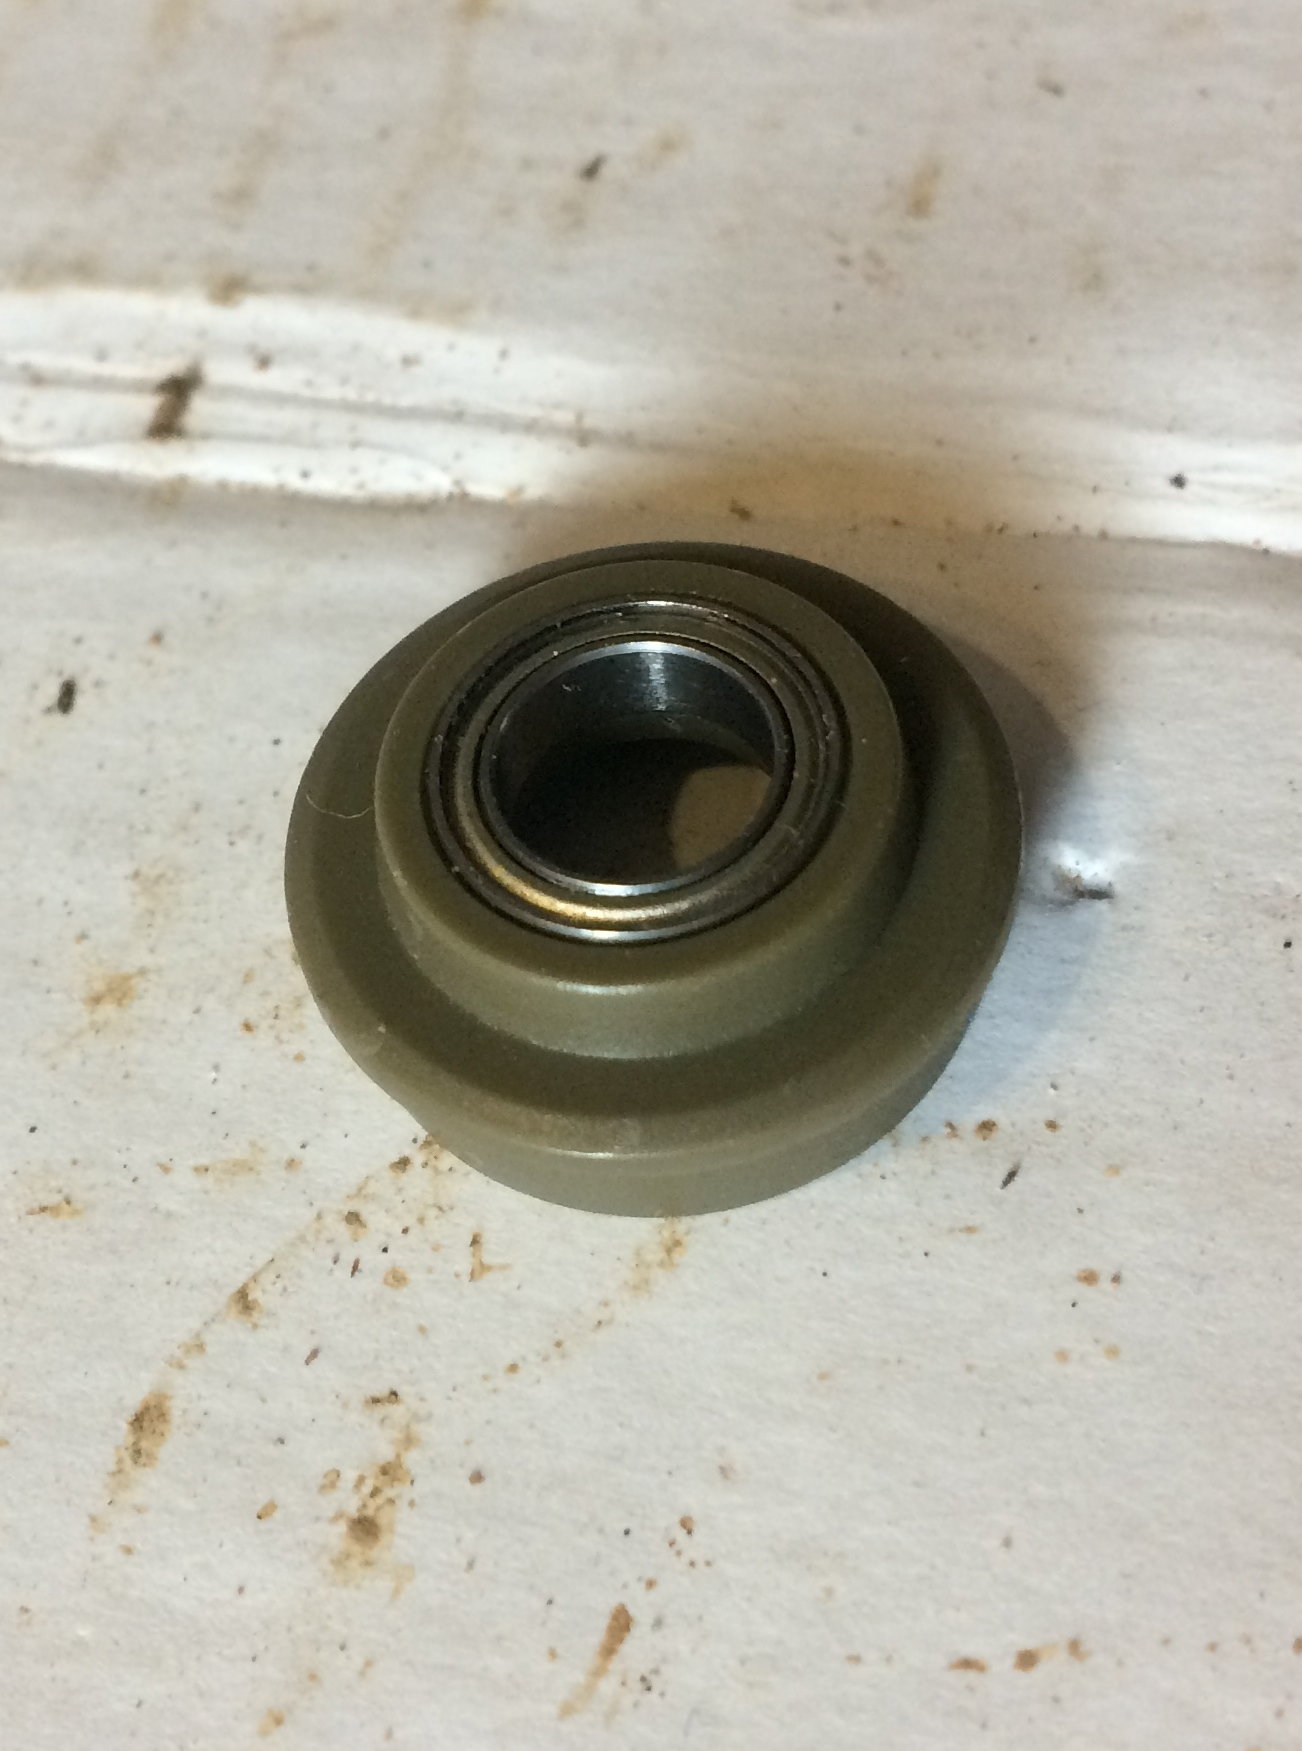
Above HL T-90 drive axle support bearing set
Above HL T-90 drive axle support bearing set
Above HL T-90 drive axle support bearing set
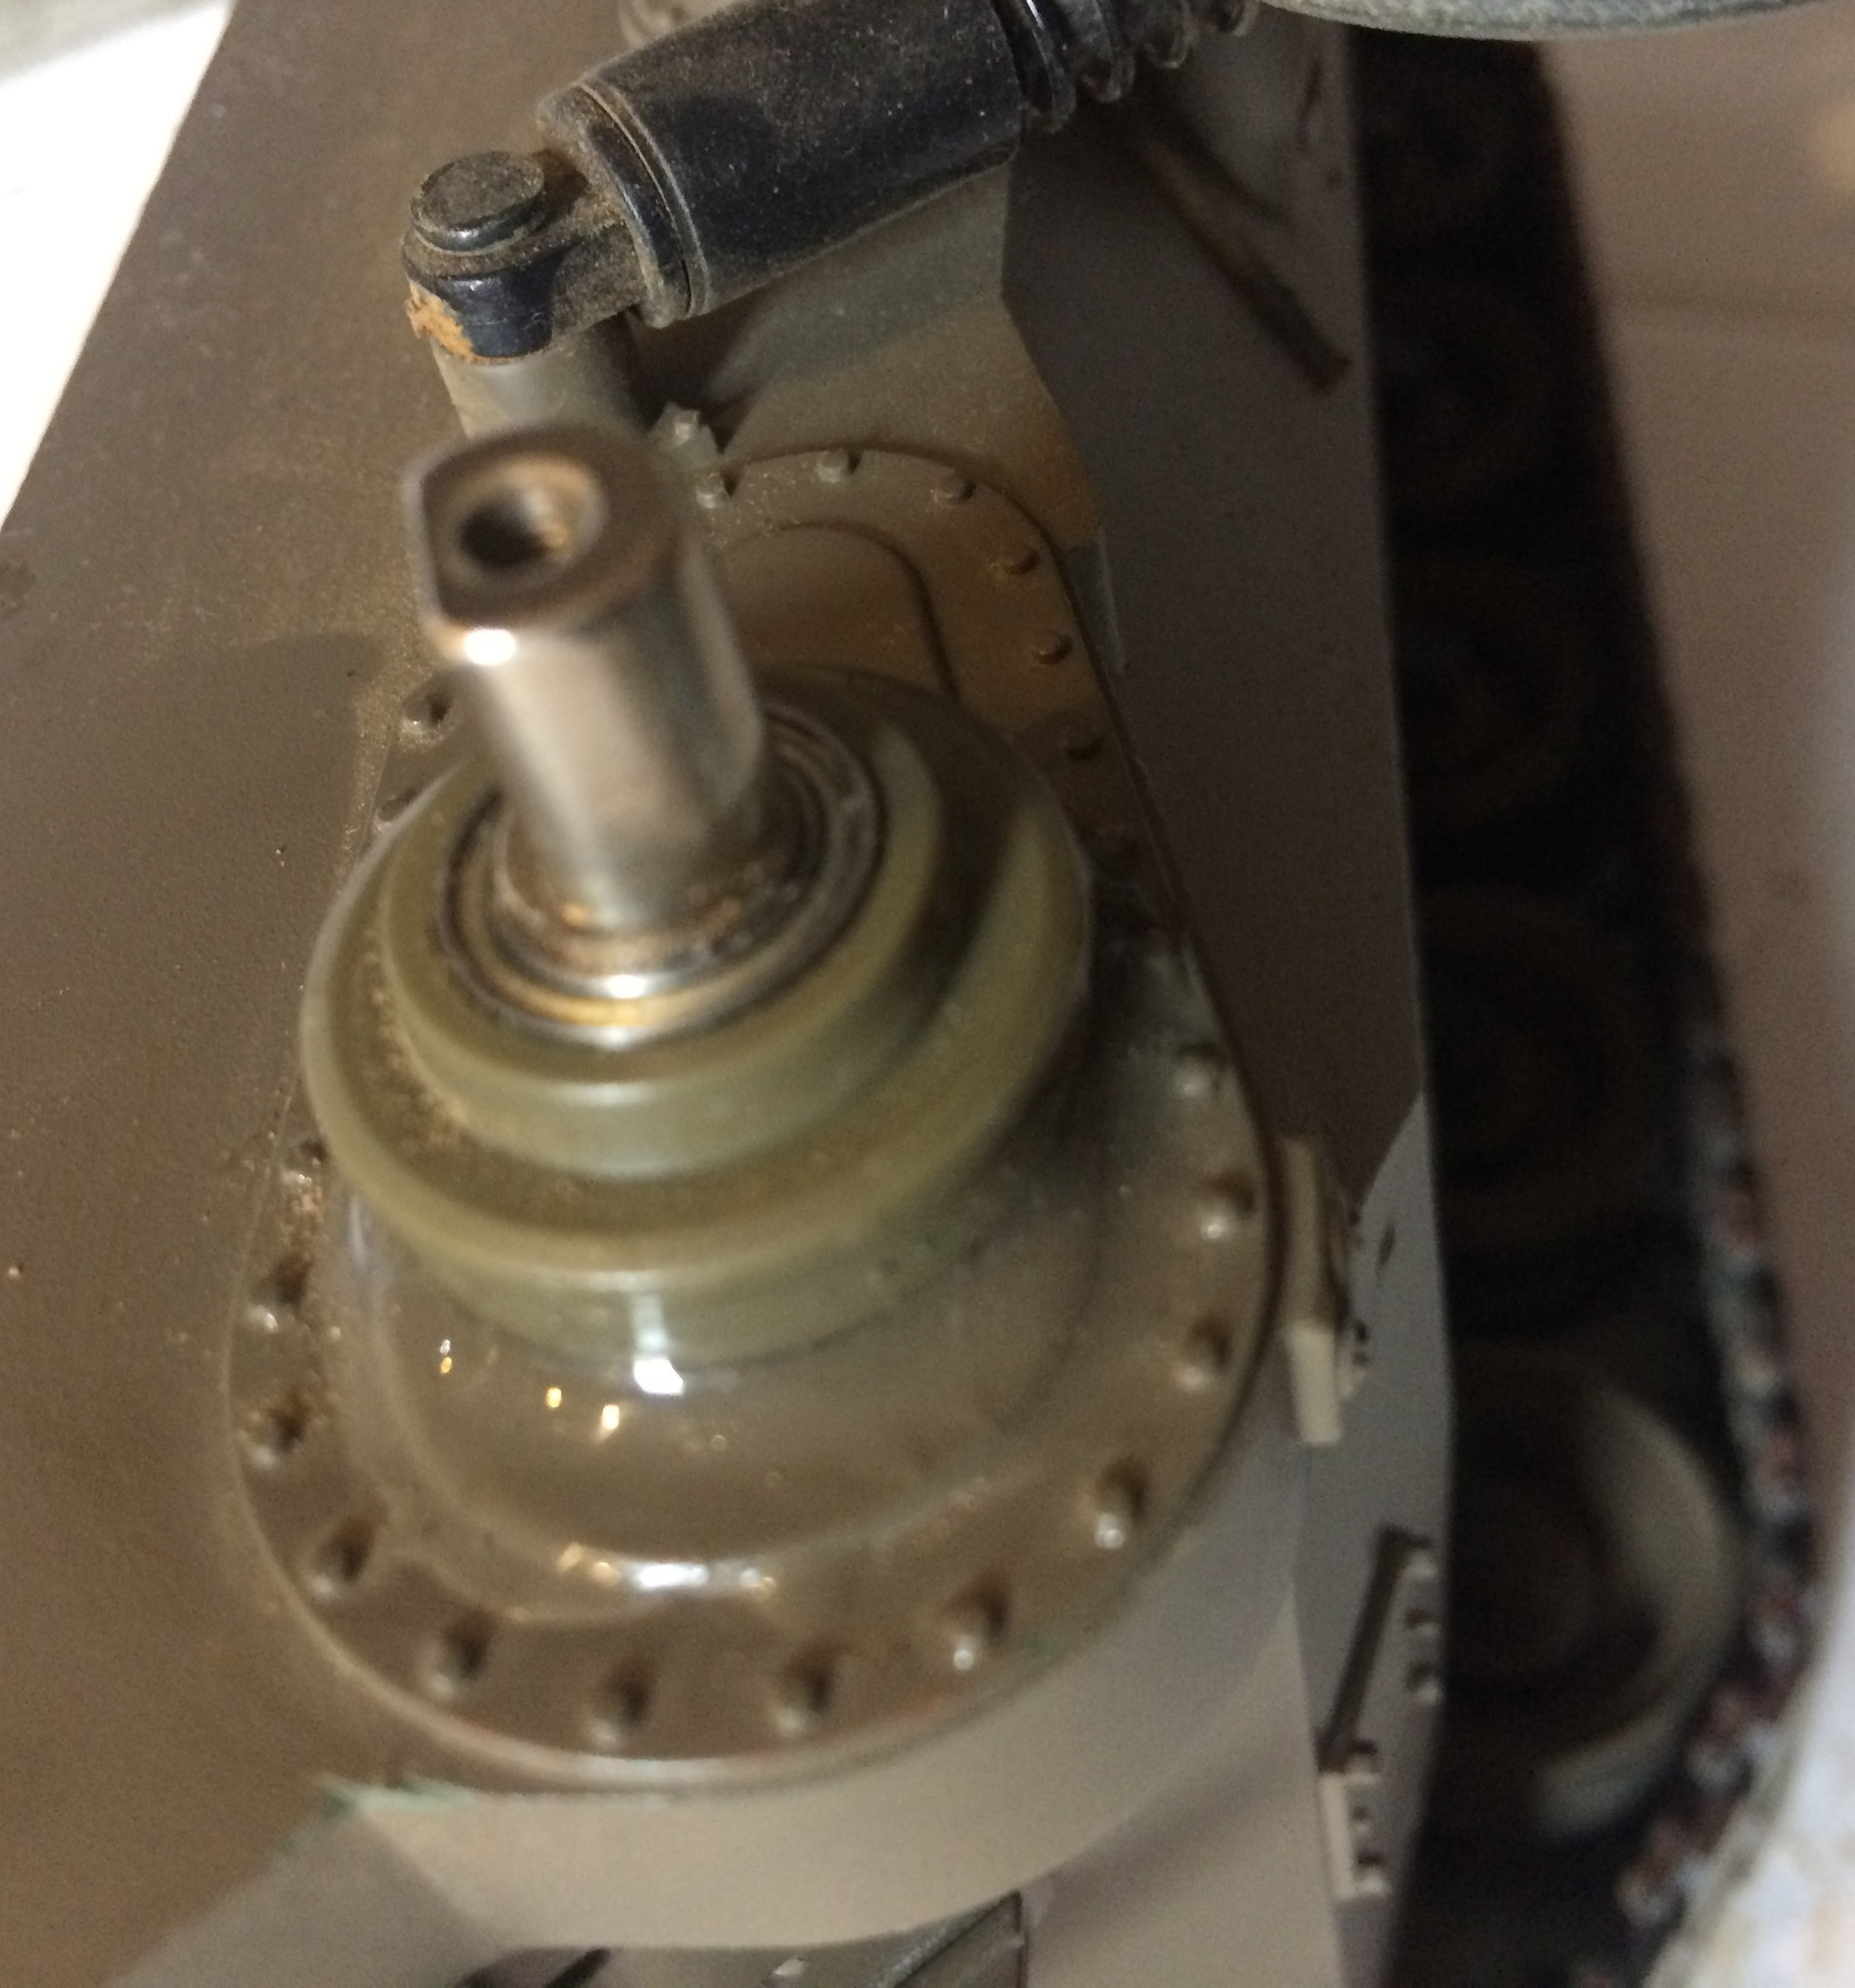
T-90 support bearing on M41 hull.
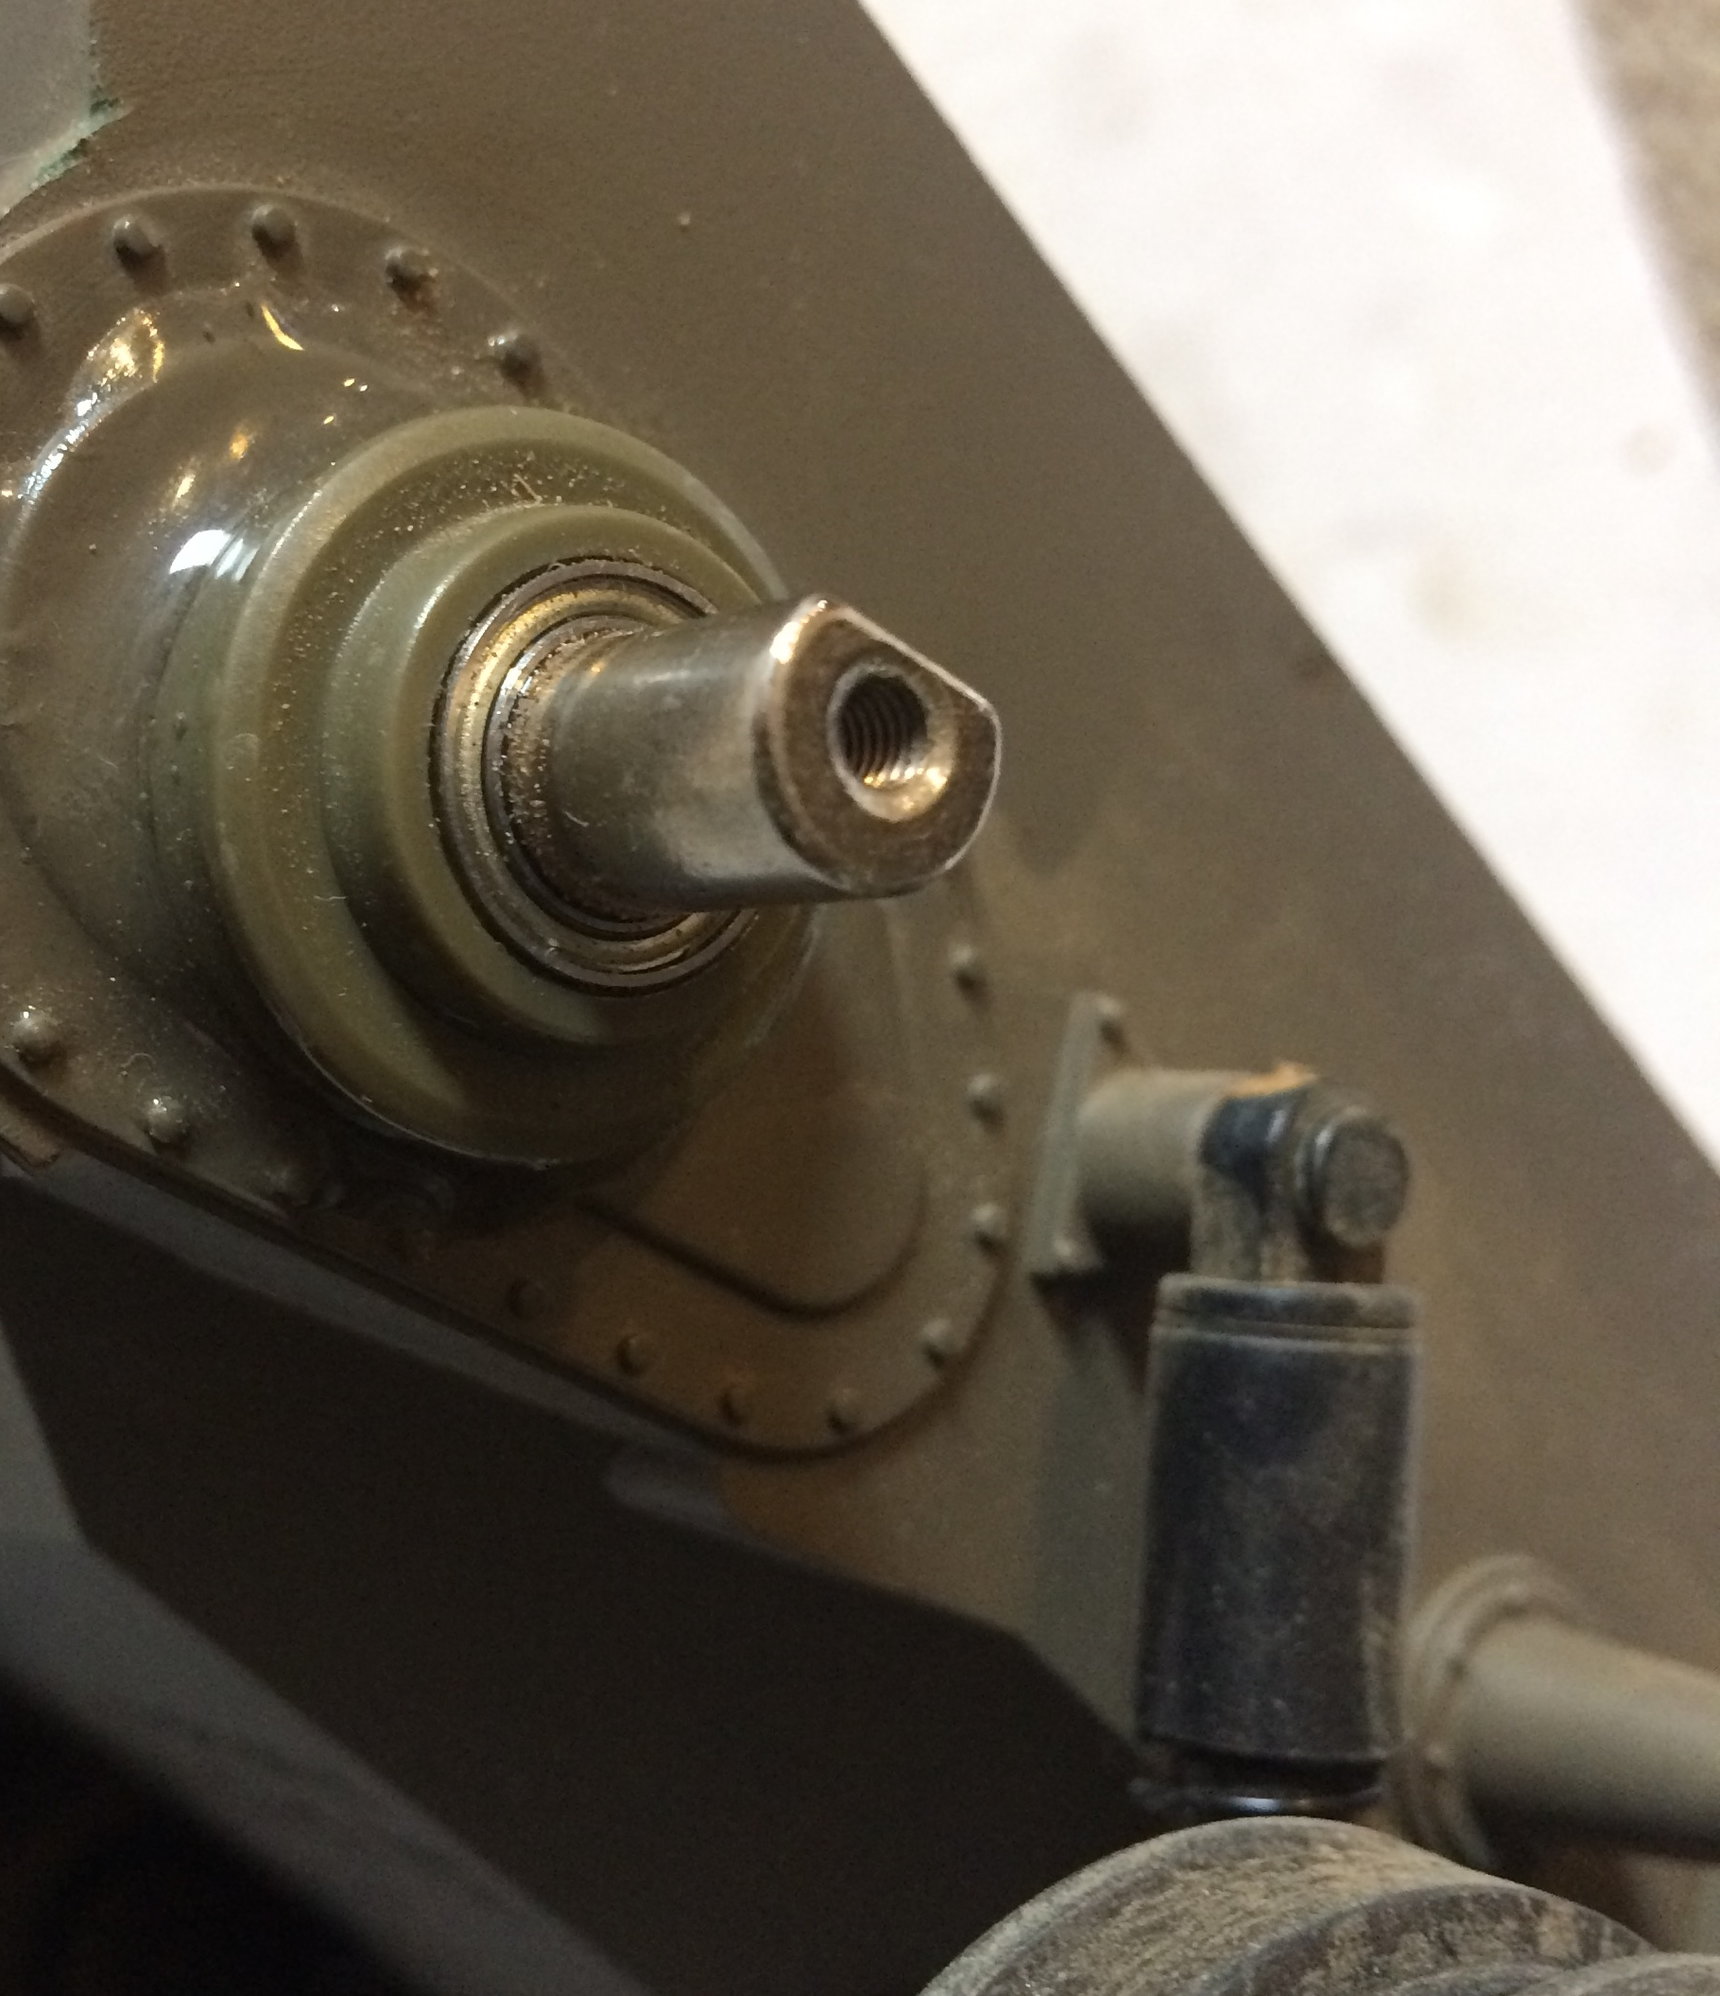
T-90 support bearing on M41 hull.
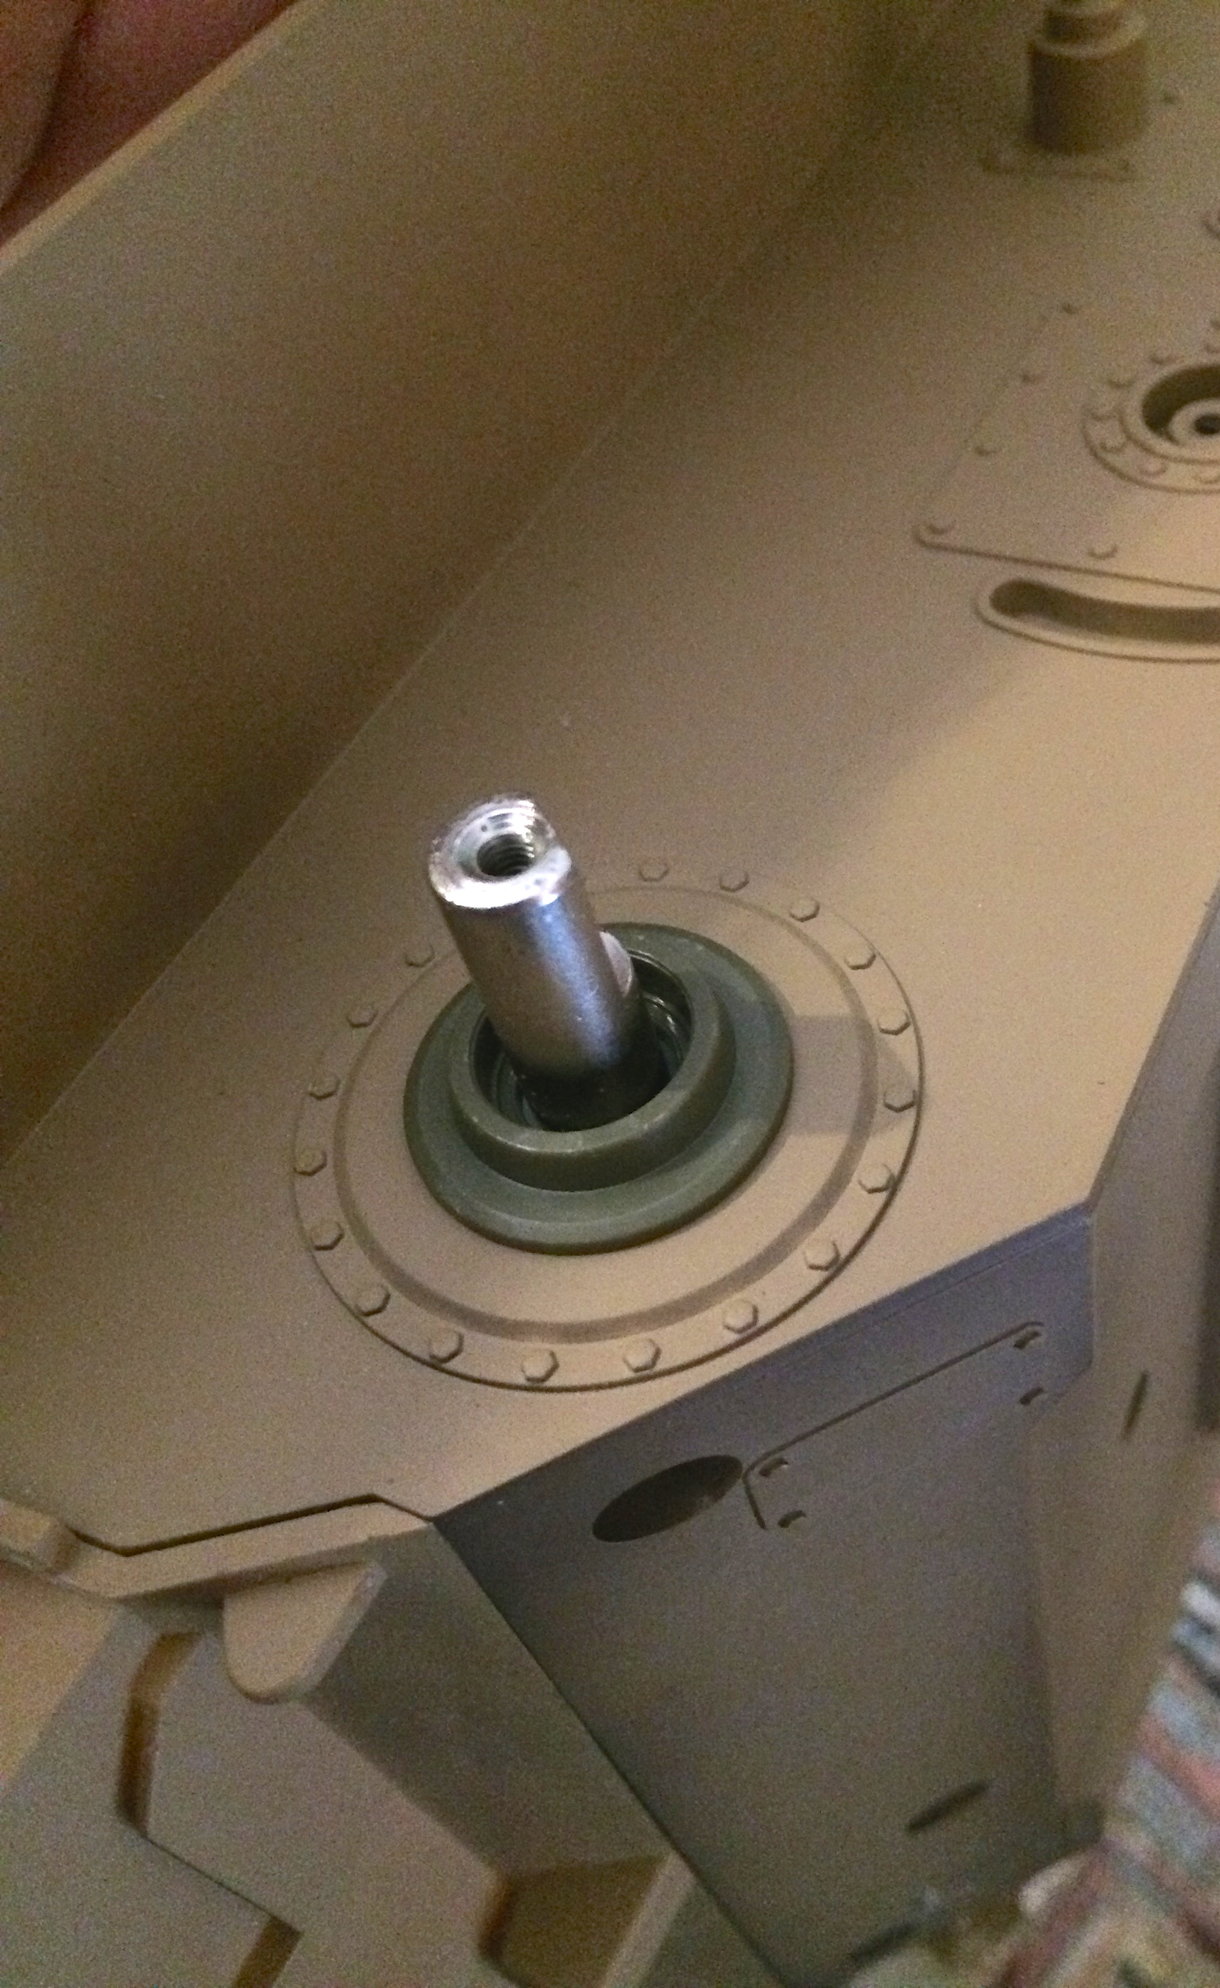
Above T-90 support bearing set installed in Abrams hull. Perfect fit!!!
On an off topic note the T-90 hull drive axel bearing supports also work on the Heng Long Abrams. On the Abrams they sit perfectly in the drive axle hull opening ( tan hull photo shown below ).
Above HL T-90 drive axle support bearing set
Above HL T-90 drive axle support bearing set
Above HL T-90 drive axle support bearing set
T-90 support bearing on M41 hull.
T-90 support bearing on M41 hull.
Above T-90 support bearing set installed in Abrams hull. Perfect fit!!!
Last edited by Fsttanks; 04-30-2018 at 07:17 PM.
05-01-2018, 09:42 AM
#8
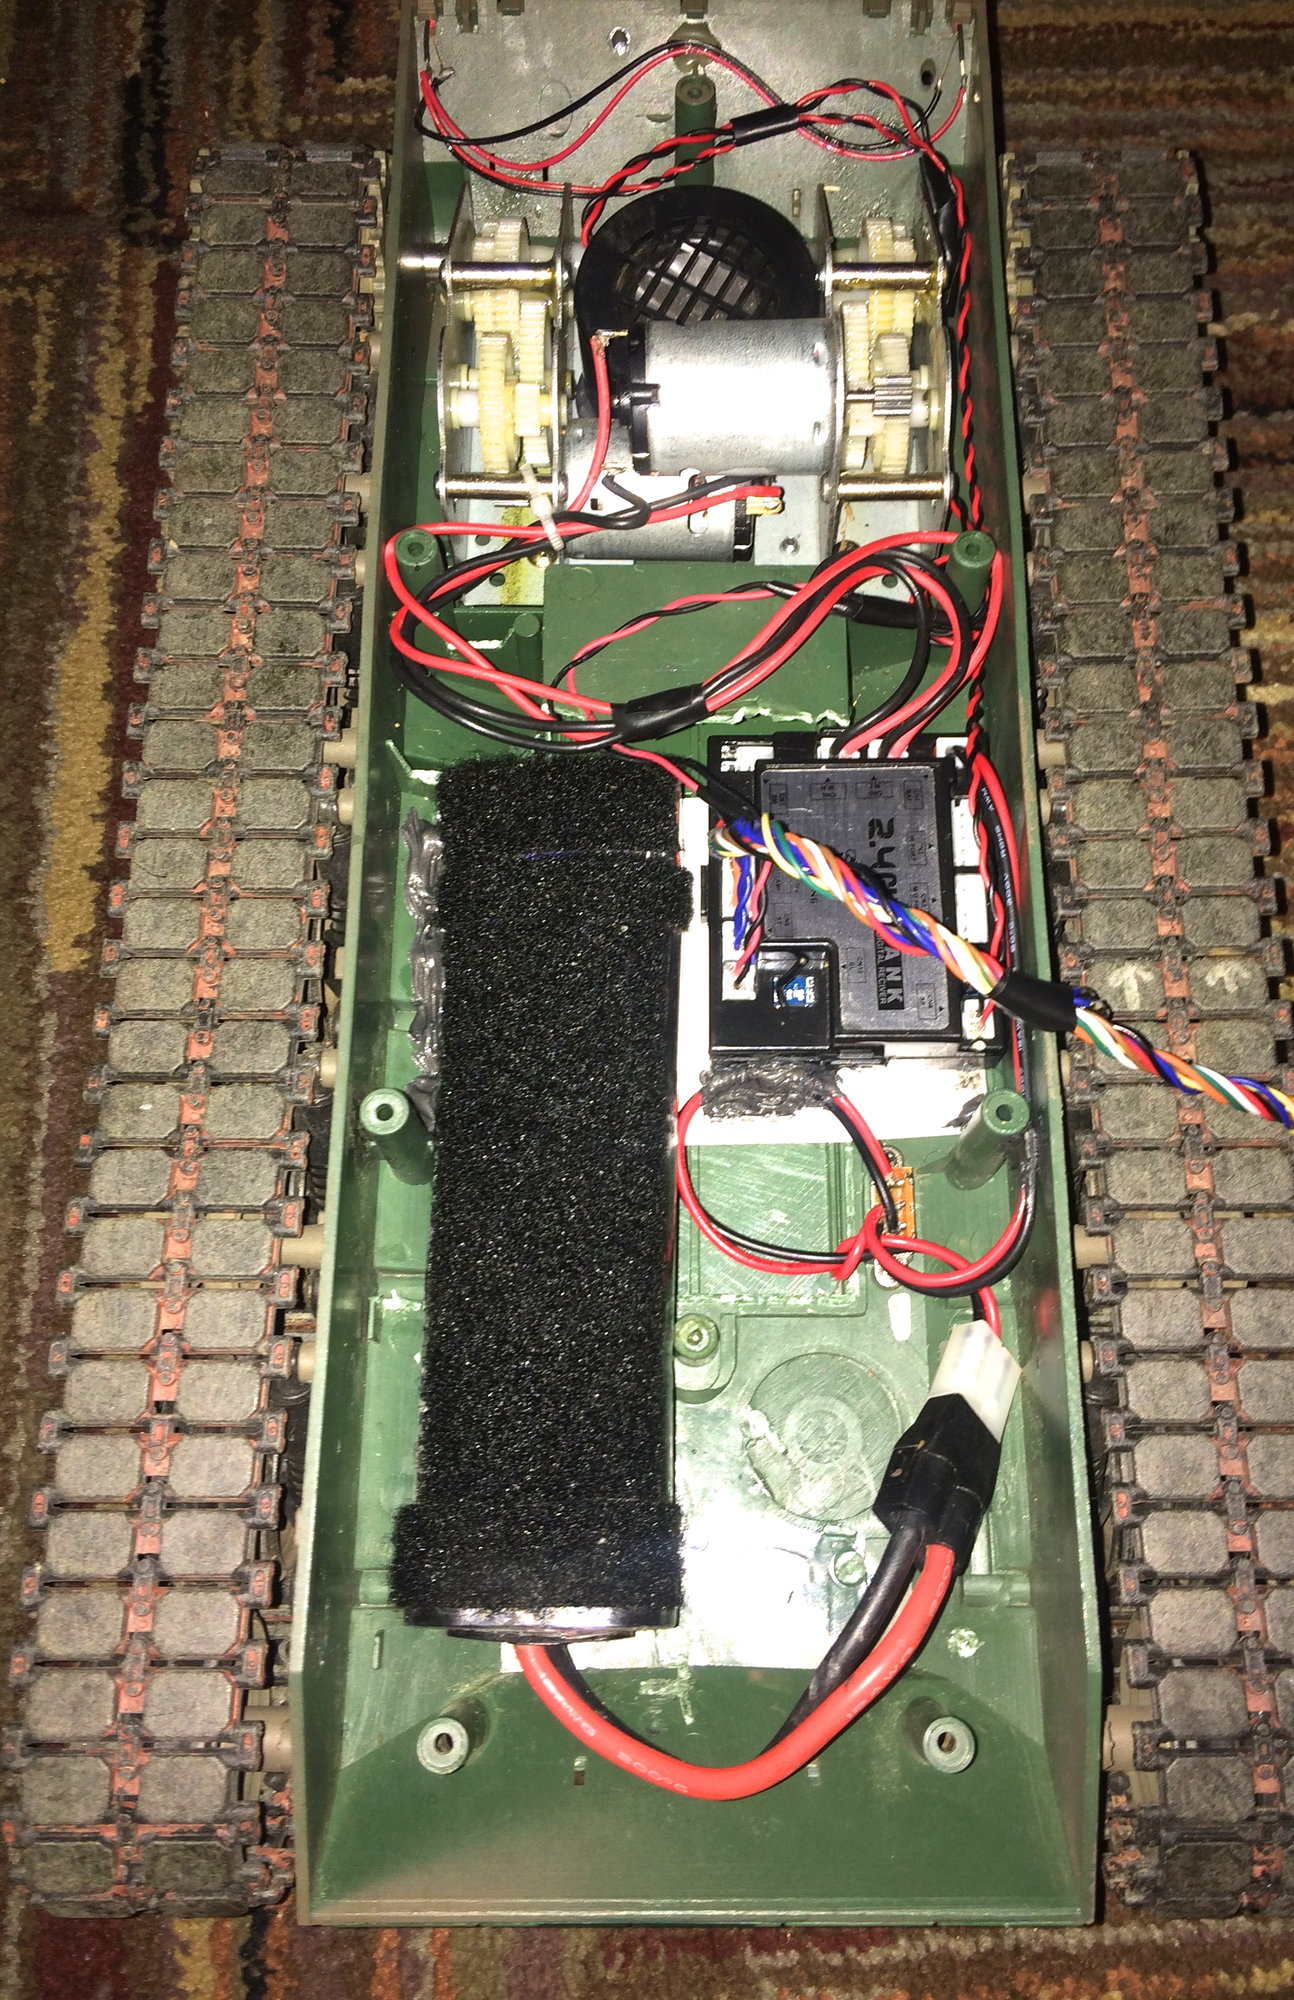
This morning I had time to start to make room on the inside of the M41for the larger battery, relocations of the receiver and follow on electronics to come at a later time. I should have the receiver reinstall later today and will update the photos. Updated photos as of 05/02/18.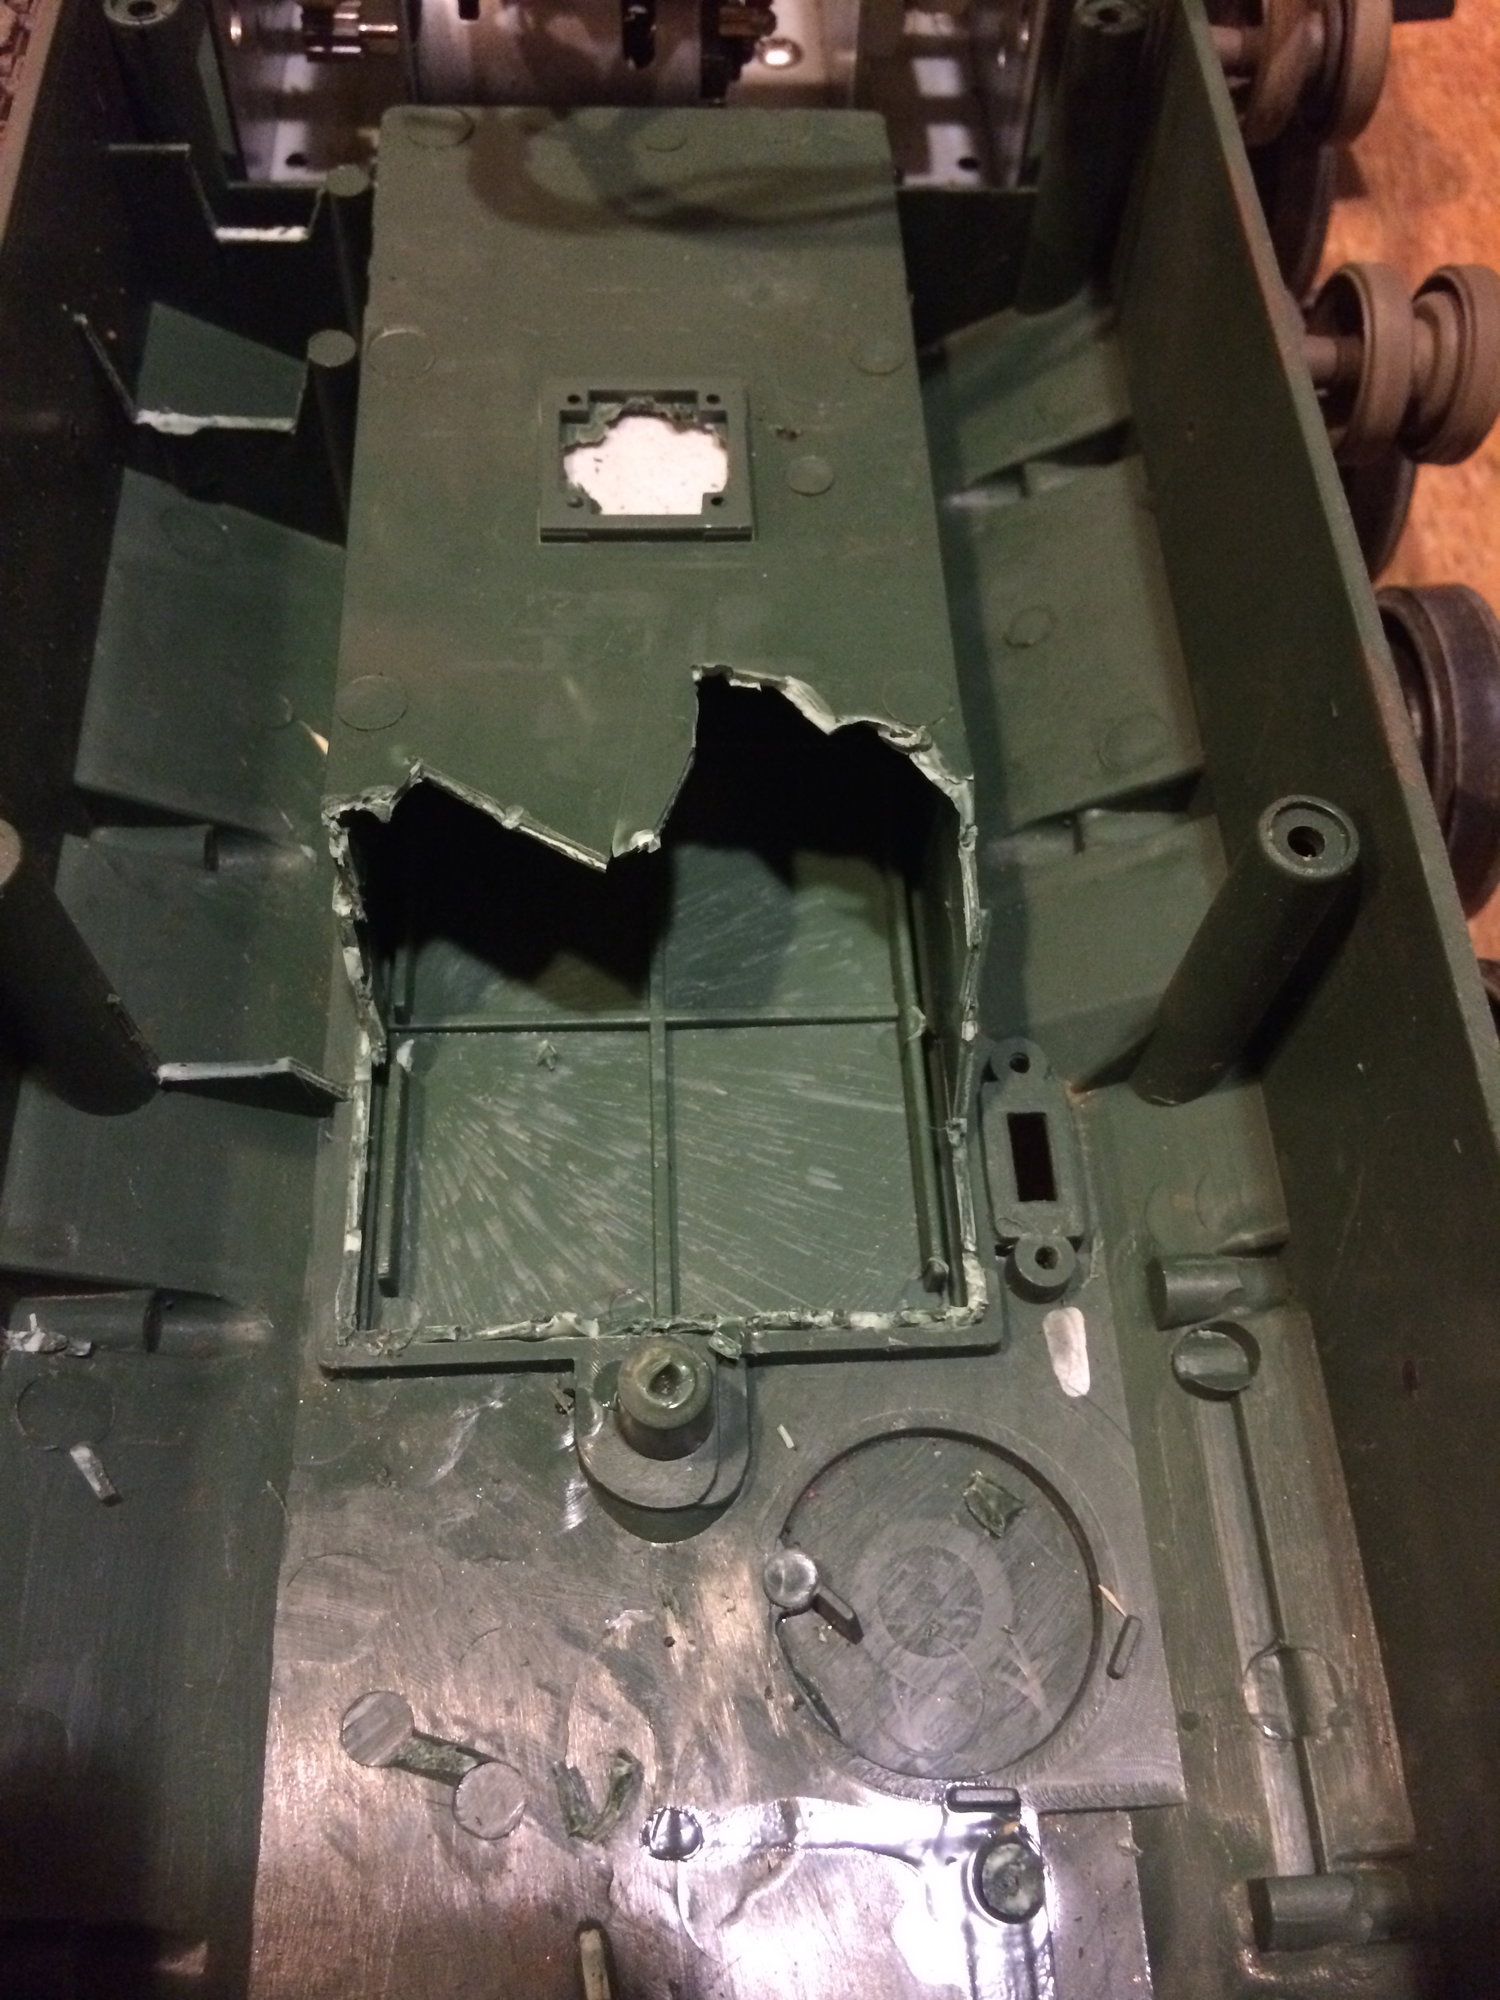
Last edited by Fsttanks; 05-01-2018 at 11:11 PM.
05-01-2018, 02:26 PM
#9
Join Date: Nov 2010
Location: HamiltonWaikato, NEW ZEALAND
Posts: 937
Likes: 0
Received 78 Likes
on
55 Posts

Hi Fsttank
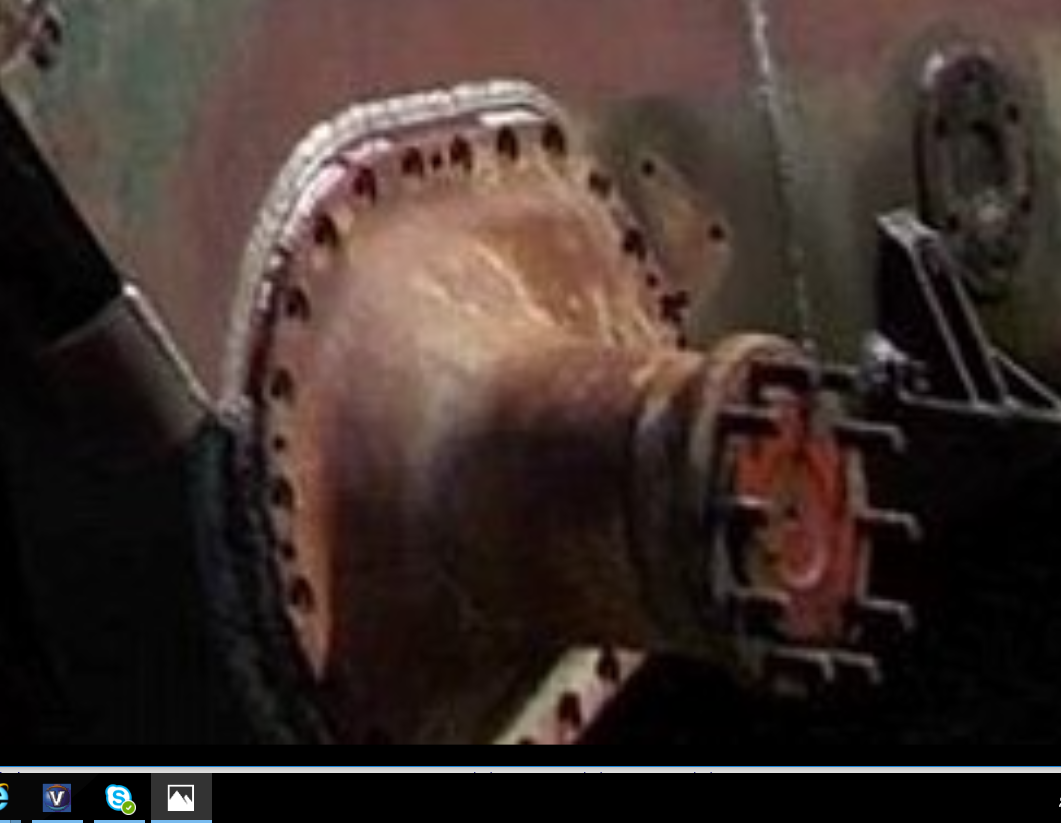
Interesting what you've done with the sprocket support shaft, I'm doing similar, but trying to keep closer to the actual, based on the photo's above. HL's final drive covers are way out of shape, not that that's too unexpected. Started out with Tamiya M4 final drive covers, but they're smaller & more expensive, currently waiting on bearings to arrive - 8X16X5 (ID, OD, W) - before I can do much more.
Mal
05-01-2018, 04:03 PM
#10
Hi Fsttank
Interesting what you've done with the sprocket support shaft, I'm doing similar, but trying to keep closer to the actual, based on the photo's above. HL's final drive covers are way out of shape, not that that's too unexpected. Started out with Tamiya M4 final drive covers, but they're smaller & more expensive, currently waiting on bearings to arrive - 8X16X5 (ID, OD, W) - before I can do much more.
Mal
Here is a photo of the final drive covers from the older HL M41. Might be easier for you to just hunt down an older hull vs building up the covers.

Last edited by Fsttanks; 05-01-2018 at 04:17 PM.
05-02-2018, 09:50 AM
#11

I like that Stinray turret conversion, that was seriously cool.
this and your other thread look like it will shape up to be a nice modern comperable tank. Think about some of the south american shermans that now have a super high velocity 60mm which is a very good AT gun.
Taking an old tank and add on reactive armor and a very modern gun and targeting system and you have a survivable tank that can still kick ass.
GD I think it is, has an M60A3 SEP modernization program for friendly allies as that tank is still a mainstay many places in this world.
05-02-2018, 10:17 AM
#12
I like that Stinray turret conversion, that was seriously cool.
this and your other thread look like it will shape up to be a nice modern comperable tank. Think about some of the south american shermans that now have a super high velocity 60mm which is a very good AT gun.
Taking an old tank and add on reactive armor and a very modern gun and targeting system and you have a survivable tank that can still kick ass.
GD I think it is, has an M60A3 SEP modernization program for friendly allies as that tank is still a mainstay many places in this world.
this and your other thread look like it will shape up to be a nice modern comperable tank. Think about some of the south american shermans that now have a super high velocity 60mm which is a very good AT gun.
Taking an old tank and add on reactive armor and a very modern gun and targeting system and you have a survivable tank that can still kick ass.
GD I think it is, has an M60A3 SEP modernization program for friendly allies as that tank is still a mainstay many places in this world.
Those old Shermans warm the heart knowing they are still in service.
The a reasonably priced R/C M60 would be my dream tank to do a modernization build on. Turkey and Israel have done some amazing upgrades to their M60s that I would try to scratch build and I hate scratch build these days (with my eye going south and the time it takes).
05-02-2018, 10:32 AM
#13
To answer a few PMs. Yes that is an 8.4v battery in the photos and yes it does NOT burn out the electronics. I run them is all my HL tanks and they really bring things to life. It does mean one has to relocate the battery hence the removal of the battery box. Though this is not necessary on some of the more modern tank designs. Yes I did remove the smoke unit as I have no need for toy train like smoke and find it a needless waist of space. Spaces now used as seen for the speaker.
Simply adding the 8.4v battery to this tank and being matched with the larger Abrams sprocket while still running the sub standard factory silver motors, the M41 is conservatively 30% faster, far more responsive and with the added plus of a higher turret rotation speed.
Simply adding the 8.4v battery to this tank and being matched with the larger Abrams sprocket while still running the sub standard factory silver motors, the M41 is conservatively 30% faster, far more responsive and with the added plus of a higher turret rotation speed.
05-02-2018, 10:38 AM
#14
You should dump those 280 motors and go to the red motors. They are so much better. I put tamiya motors in all my shermans because red ones dont fit.
im crossing my fingers that i saved enough money for the dklm okmo m60a3.
im crossing my fingers that i saved enough money for the dklm okmo m60a3.
05-02-2018, 12:21 PM
#15
 the stock running gear is fine for testing and tuning so no big rush.
The DKLM M60 looks good, but a bit on the pricy side for me to be willing to chop, cut, melt, drill and do a host of other things too. I kinda set a top $$ for that kind of fun a bit lower just incase I mess up, which we all know happens when we don't want it to. LOL
05-04-2018, 05:51 AM
#16
Fsttanks were did you get your Ceramic Tile Armor from .
Thanks
Jimmy
Thanks
Jimmy
05-04-2018, 09:36 AM
#17
They are "kit bashed" parts. The base part is an ERA panel off the turret section of a Heng Long ZTZ 99A. They come one piece that is 5 "bricks" long and 2 "bricks" wide and about .25" in height (~ 4.5"x1"x.25", sorry don't have the metric measurements on hand). I found them in bulk while working on another project at: Aliexpress.com (Chinese spin on Amazon). If memory serves they were something like $1 each. I bought 30 of them at the time and it cost me about $45 in total delivered. I am about to order some more as I have used them on a number of other non tank modeling projects as "texture" pieces.
The ones shown on this build to simulate "Ceramic" armor tiles have been cut down to make them thinner by removing the .25" height and cut into smaller panels to fit as needed. They are still a little rough on this build and I have some final per paint work to do yet. If you look in "My Gallery" and the general Tank Gallery above you will see them on two of my other tanks being used as ERA (tan Abrams and tan Challenger 2).
Hope this answers your question. If not and you would like more details just shoot me a PM.
Last edited by Fsttanks; 05-04-2018 at 09:38 AM.
05-04-2018, 04:39 PM
#18
A little stalled right now on moving forward as some needed parts are behind schedule arriving. So not wanting to sit still I am working up some paint scheme options and looking for constructive input. I will be using ModelMaster paints.
1. U.S. Armor Sand as base, with Olive Drab camo swaths, broken Black outline highlights.
2. U.S. Armor Sand as base, with Dark Earth camo swaths, broken Black and Sandbag Tan outline highlights
3. U.S Marine Corp Green as base, with Olive Drab and Black camo swaths, broken Dark Earth outline highlights.
Thoughts?
Last edited by Fsttanks; 05-04-2018 at 04:41 PM.
05-04-2018, 11:59 PM
#19
A little stalled right now on moving forward as some needed parts are behind schedule arriving. So not wanting to sit still I am working up some paint scheme options and looking for constructive input. I will be using ModelMaster paints.
1. U.S. Armor Sand as base, with Olive Drab camo swaths, broken Black outline highlights.
2. U.S. Armor Sand as base, with Dark Earth camo swaths, broken Black and Sandbag Tan outline highlights
3. U.S Marine Corp Green as base, with Olive Drab and Black camo swaths, broken Dark Earth outline highlights.
Thoughts?
1. U.S. Armor Sand as base, with Olive Drab camo swaths, broken Black outline highlights.
2. U.S. Armor Sand as base, with Dark Earth camo swaths, broken Black and Sandbag Tan outline highlights
3. U.S Marine Corp Green as base, with Olive Drab and Black camo swaths, broken Dark Earth outline highlights.
Thoughts?
05-05-2018, 08:40 AM
#20
Thank you for reminding me of this detail, I did not make it clear at the start of this build.
Last edited by Fsttanks; 05-05-2018 at 09:07 AM.
 05-09-2018, 11:05 AM
#22
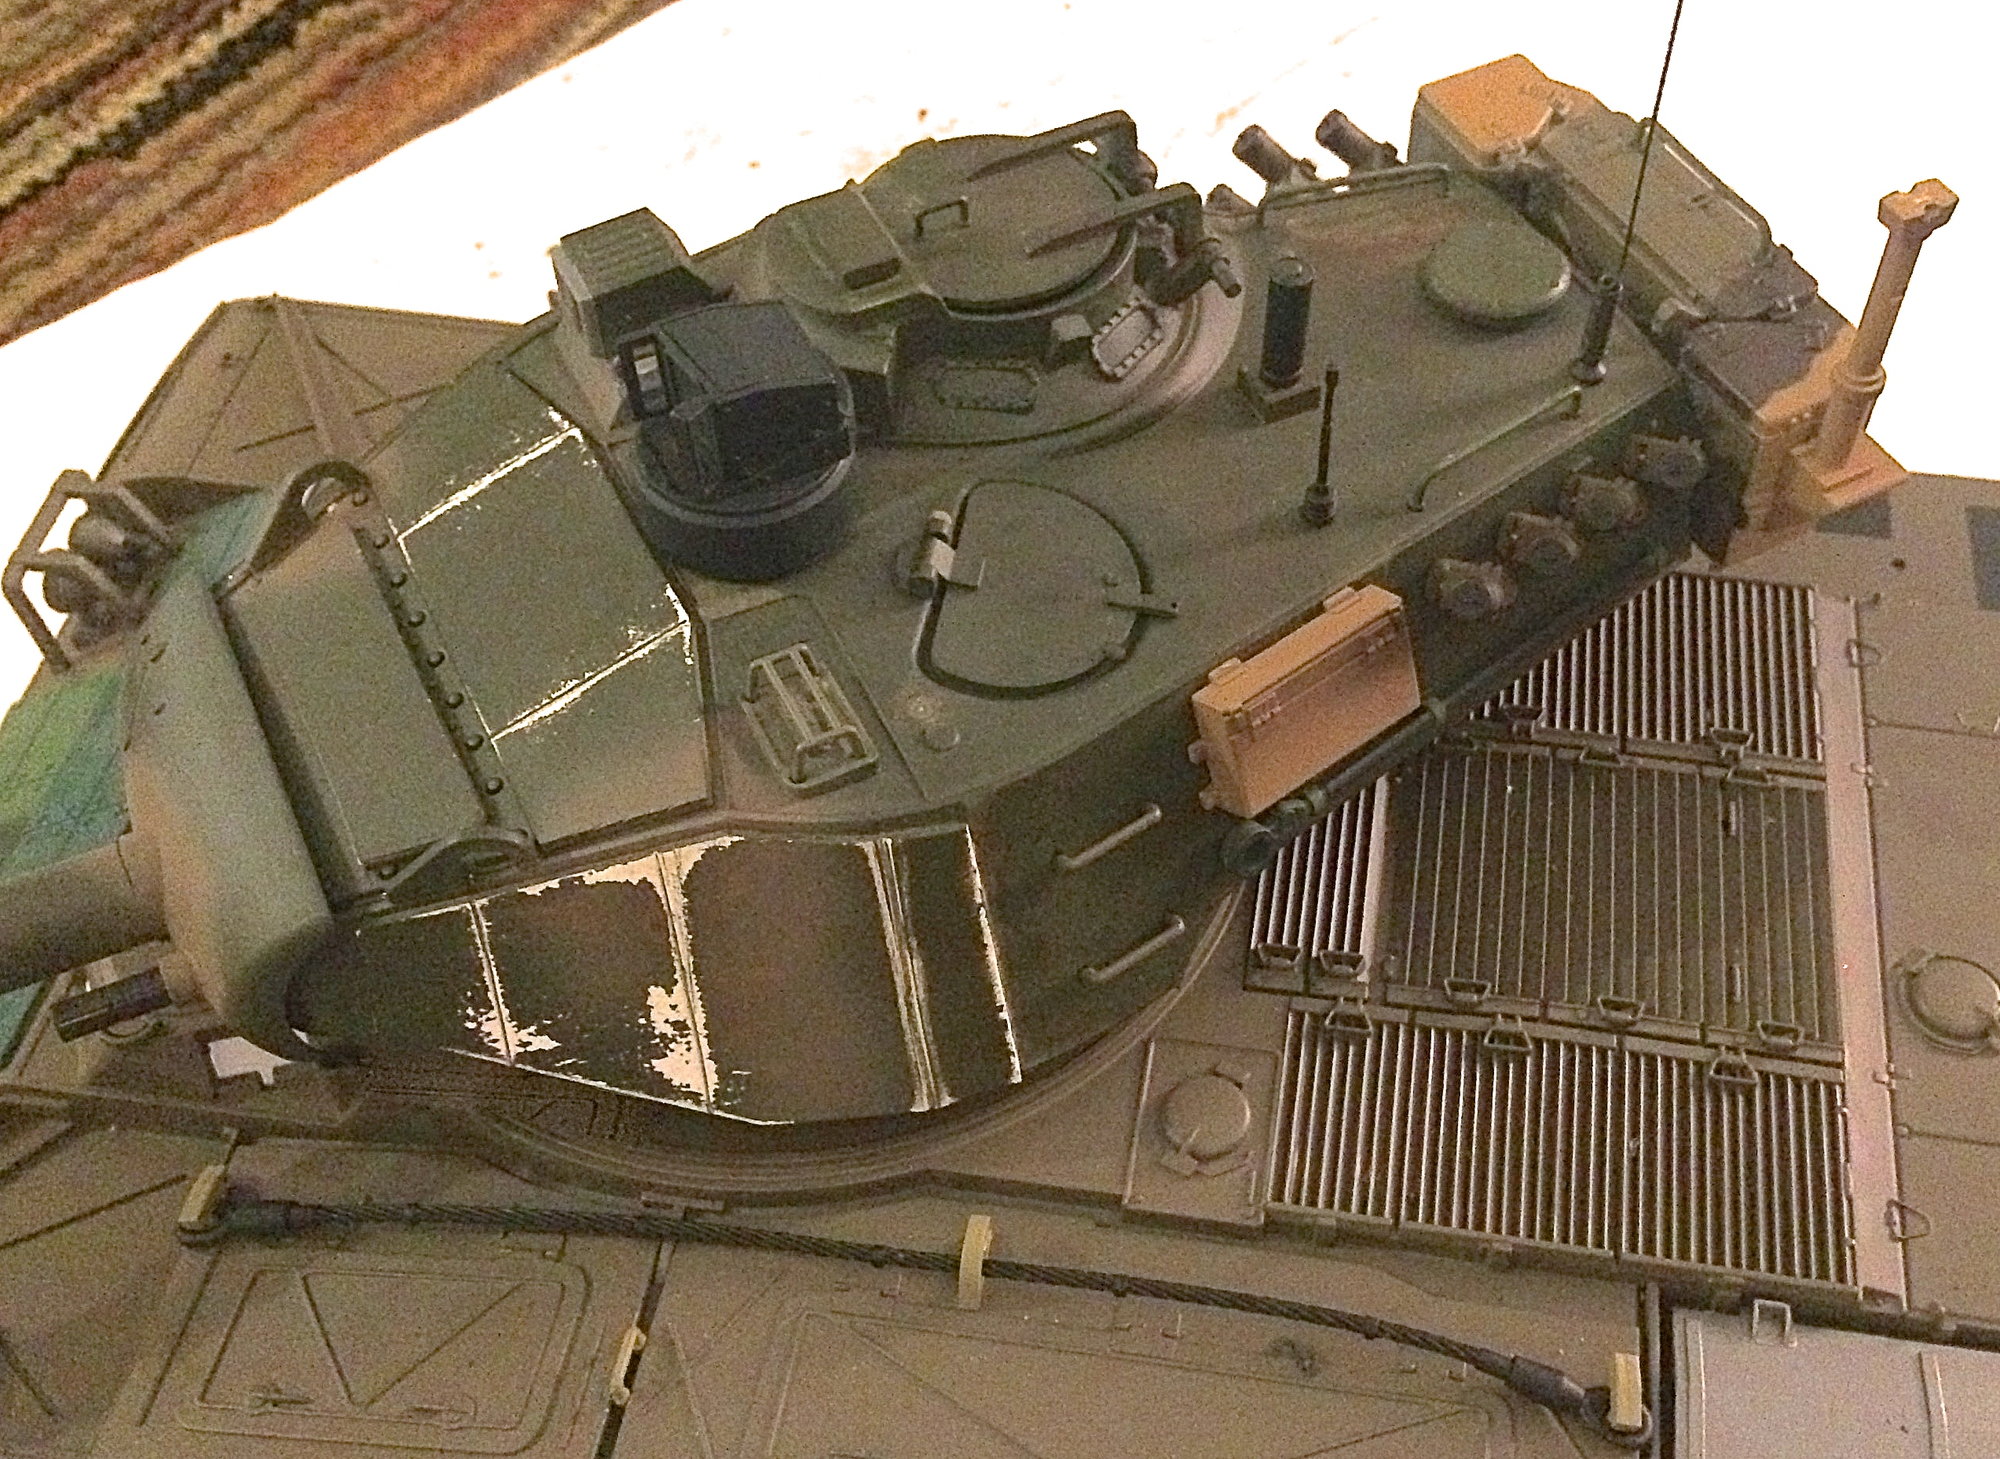
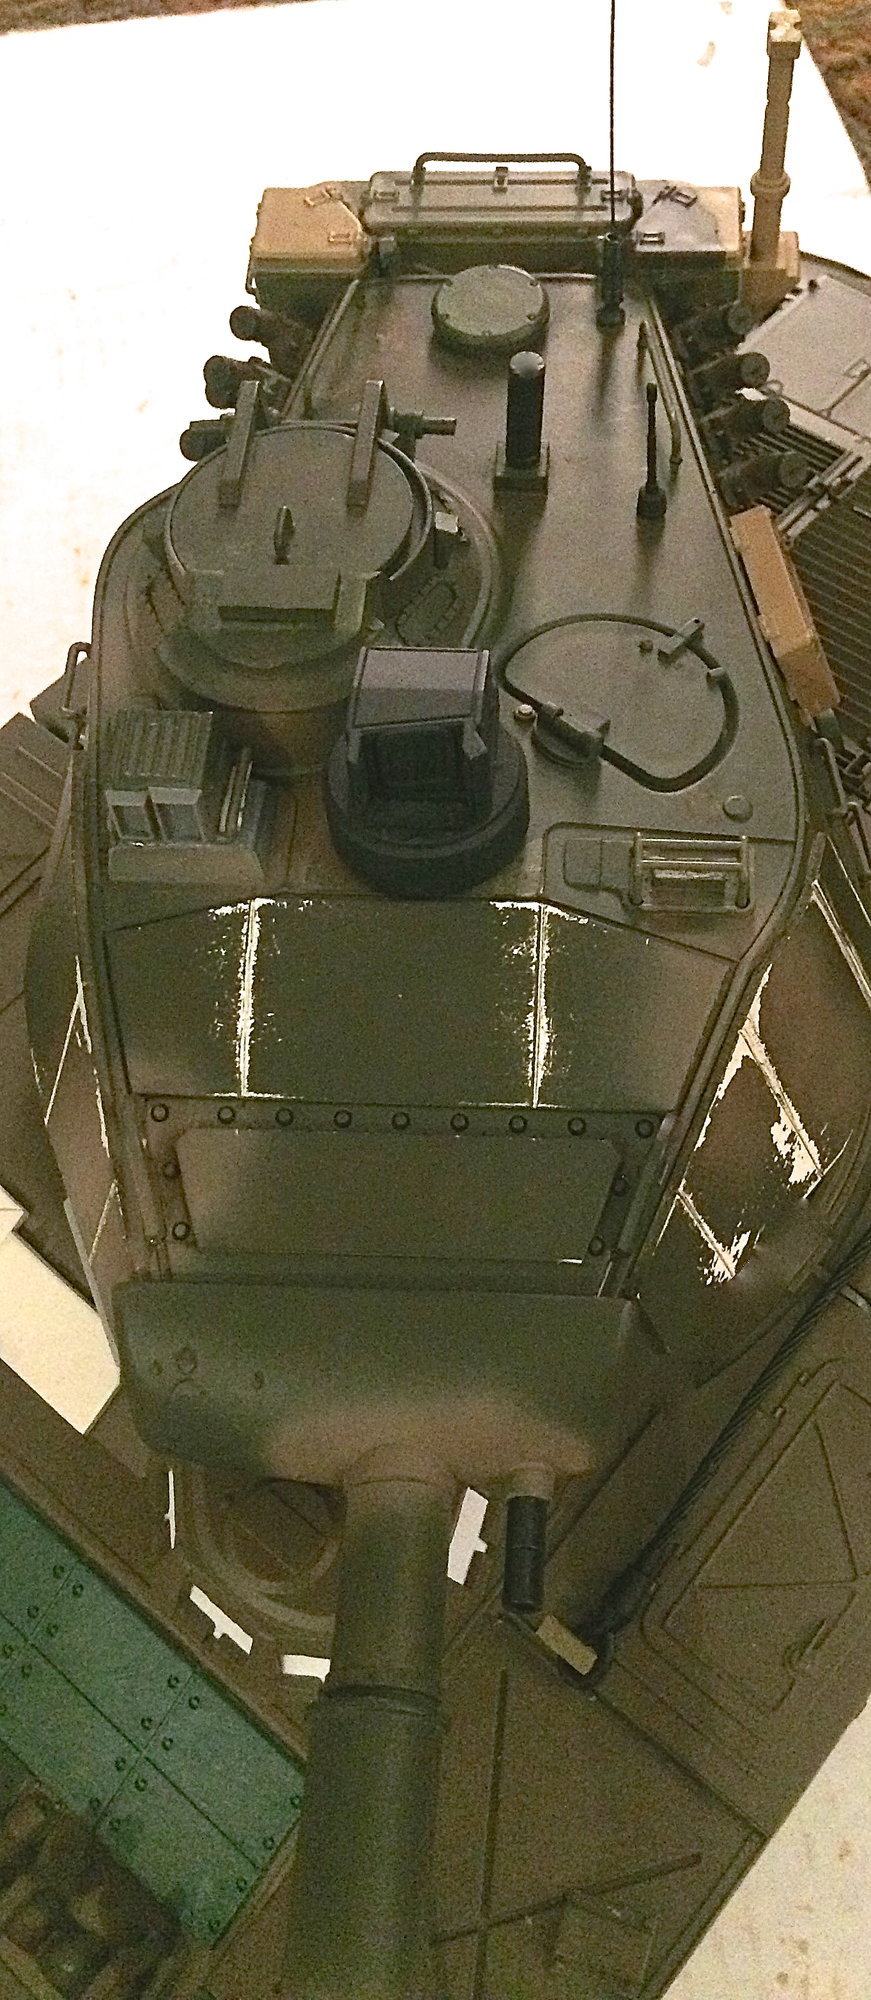
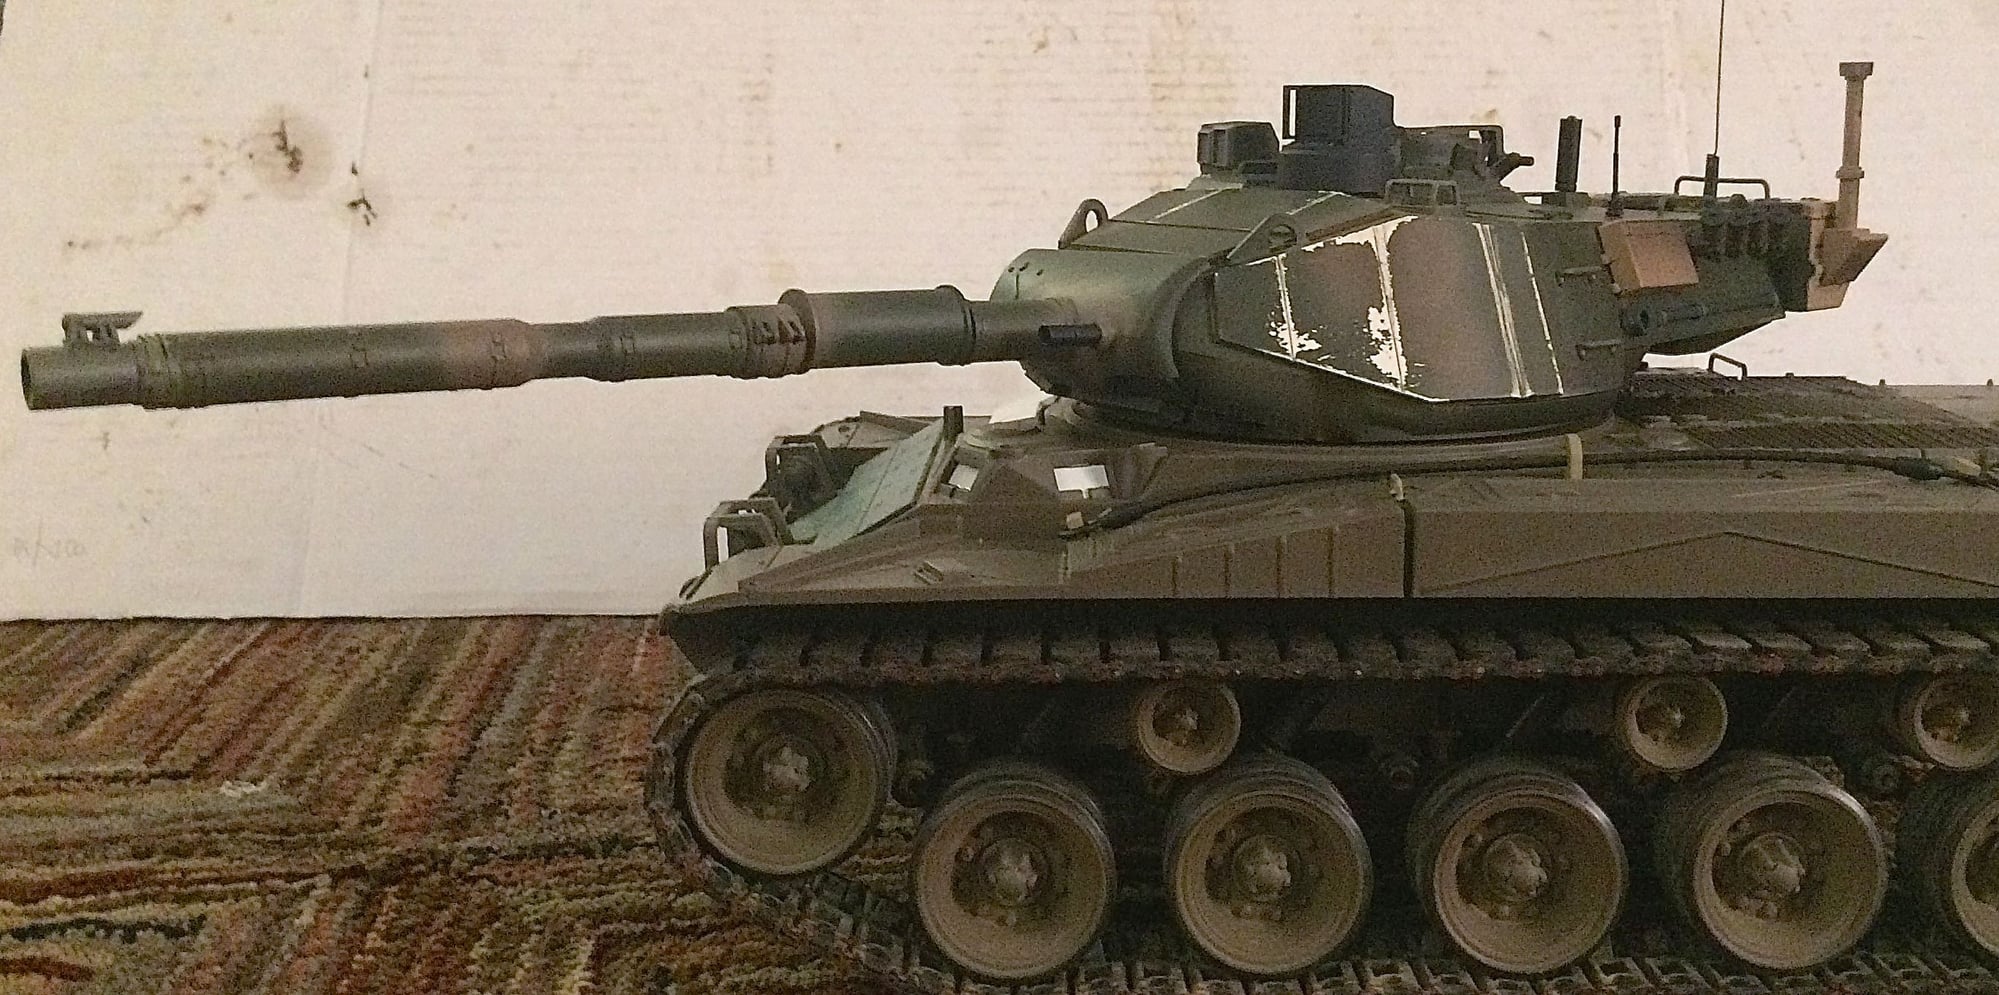
Finally received the accessory parts for the turret from overseas and had some time to start installing and test fitting. PLEASE NOTE this is still rough and needs final finishing work and paint.
Turret got its smoke launchers (might add a few more?), new CITS, new muzzle end for the 105 and I relocated the gunners DTS from the left over to the right. I did install a CROWS type system I build up, but the turret of the Heng Long M41 is so out of scale that I did not care too much for the way it looked. Tried three different location two of which if this was a real install would have caused issues with clearances and safety. The third had no issues on the tank, but the CROWS larger size made it seem to sit higher than the stock M2, though it actually sits lower. If you would like to see photos of the CROWS on the turret I can add some as I am open to constructive feed back to use it or not.
Testing is still proceeding with the Abrams sprocket and track ( as seen in photos) and to date it has been running flawless. Going to keep it as part of the upgrade (yes, I know it would not physically fit on real M41) since it works so well and adds a more modern, tougher and heavier look to the lower hull.
Here are some photo as the turret is currently. There are a few areas on the lower turret glances that are blurred out as the "add-on" part is still being "tweaked". Sorry the photo quality is a little low this time.
As always your constructive input and questions are welcome.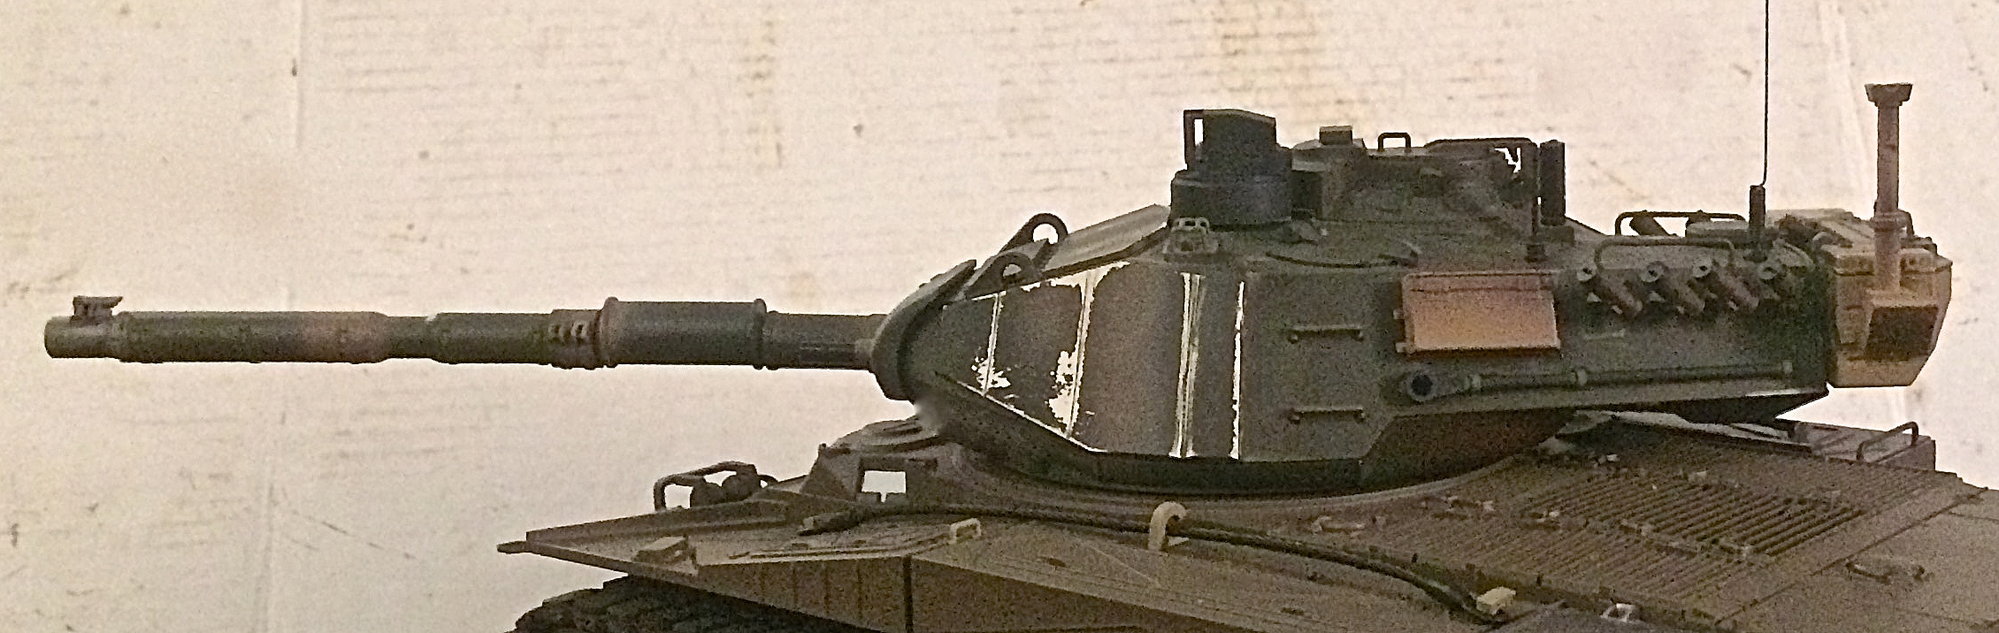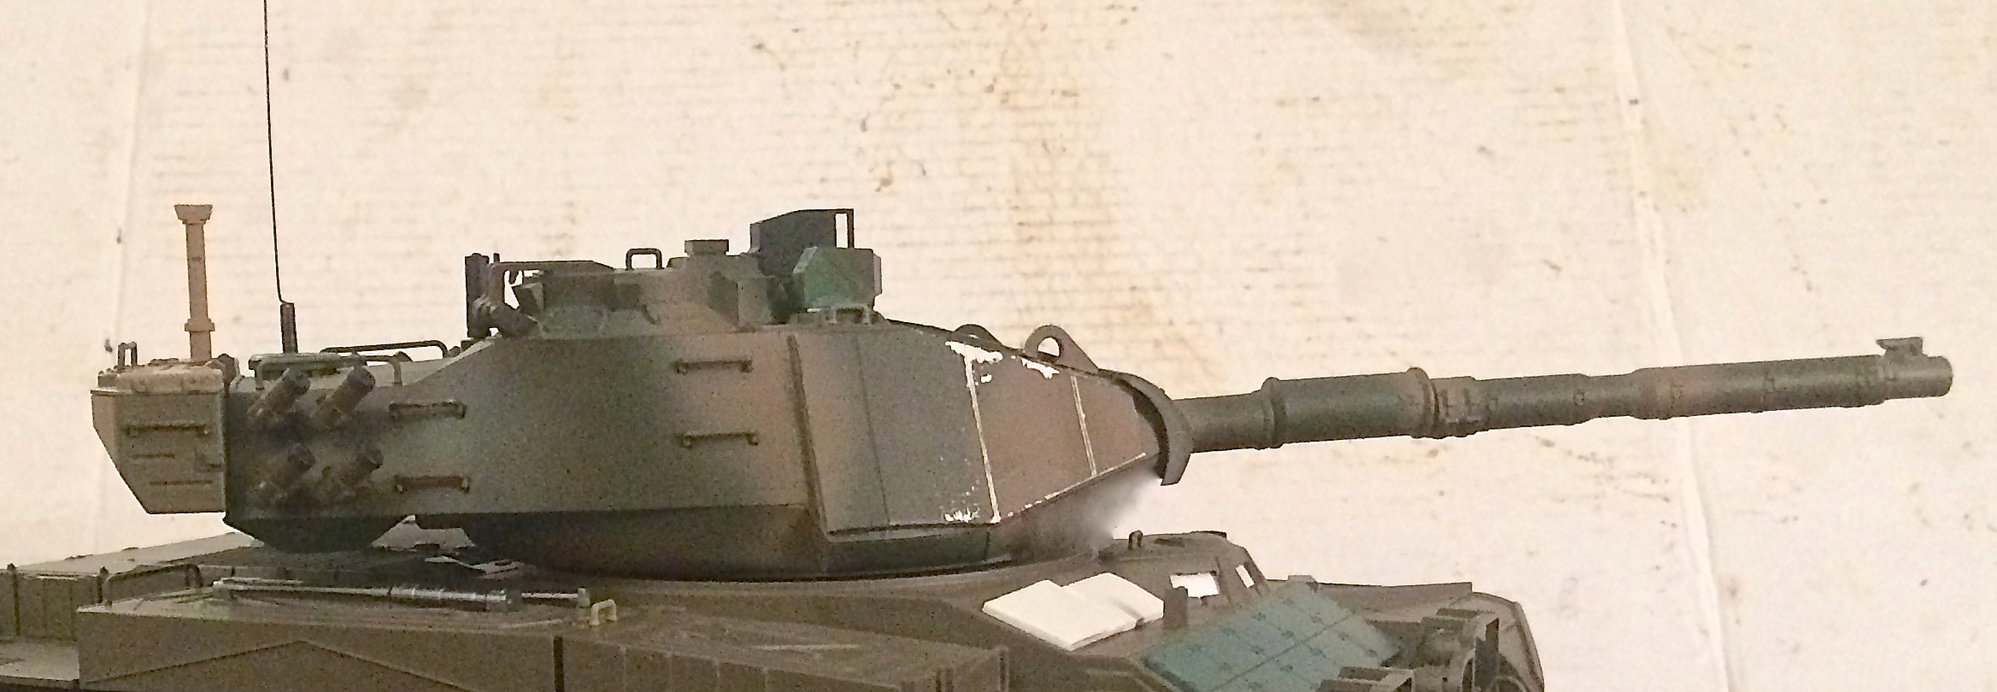
Last edited by Fsttanks; 05-09-2018 at 11:12 AM.
05-09-2018, 02:19 PM
#23
Join Date: Nov 2010
Location: HamiltonWaikato, NEW ZEALAND
Posts: 937
Likes: 0
Received 78 Likes
on
55 Posts
Hi Fsttanks
Looks pretty good. A correctly sized turret ventilator cap is available from Shapeways if you want to go there - the HL is 20mm, correct size is 30mm odd diameter.
What's your plans for fixing the drivers visors?
Some of the stuff I've done on one of mine - Project 2 - M41A1 AVRNZE Cont'd -
Mal
Looks pretty good. A correctly sized turret ventilator cap is available from Shapeways if you want to go there - the HL is 20mm, correct size is 30mm odd diameter.
What's your plans for fixing the drivers visors?
Some of the stuff I've done on one of mine - Project 2 - M41A1 AVRNZE Cont'd -
Mal
05-09-2018, 04:13 PM
#24
Hi Fsttanks
Looks pretty good. A correctly sized turret ventilator cap is available from Shapeways if you want to go there - the HL is 20mm, correct size is 30mm odd diameter.
What's your plans for fixing the drivers visors?
Some of the stuff I've done on one of mine - Project 2 - M41A1 AVRNZE Cont'd -
Mal
Looks pretty good. A correctly sized turret ventilator cap is available from Shapeways if you want to go there - the HL is 20mm, correct size is 30mm odd diameter.
What's your plans for fixing the drivers visors?
Some of the stuff I've done on one of mine - Project 2 - M41A1 AVRNZE Cont'd -
Mal
Saw some of your older M41 threads and you have done some amazing work on your tanks.
05-10-2018, 06:22 AM
#25
That is looking really cool. This project is a really neat idea for updating an old tank that is still around.
You know, there are still m50s and m51s in south America that could benefit from a refit program.....hmmm......
You know, there are still m50s and m51s in south America that could benefit from a refit program.....hmmm......