


First Builds!
 01-19-2020, 01:41 PM
#1
Member
Thread Starter

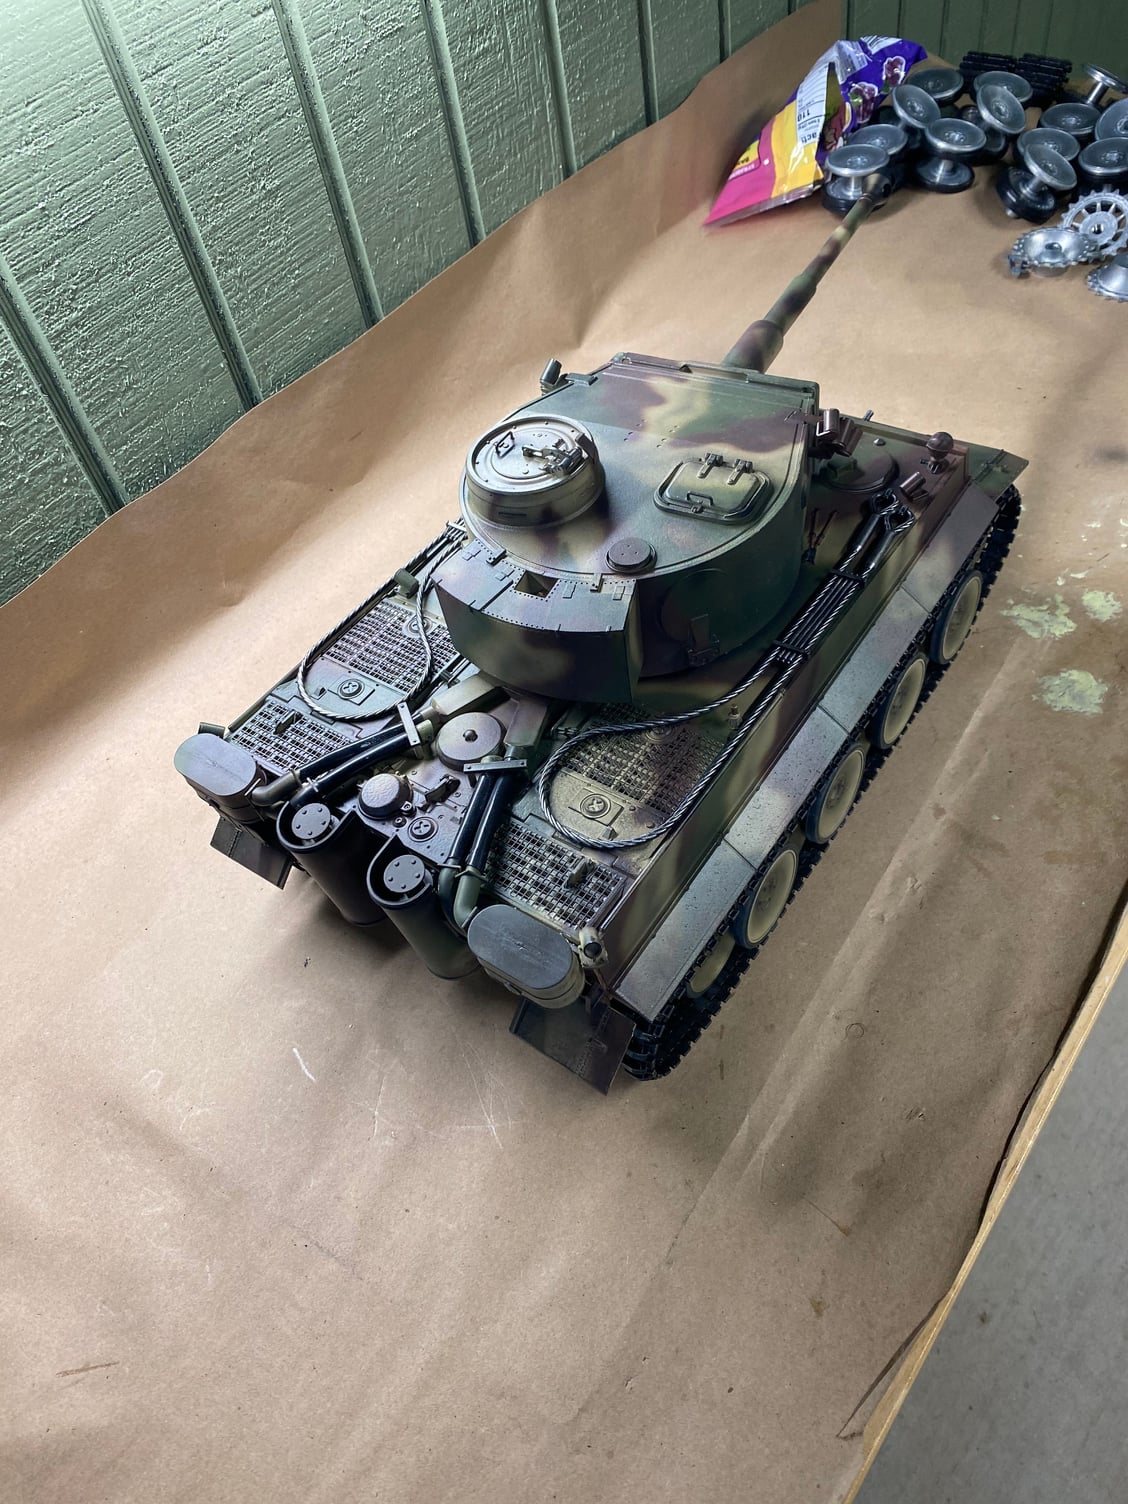
I just finished my Taigen Metal Tiger I Early kit. Please be gentle I’m new to this stuff lol. I used Mission Model acrylic airbrush paint. Early Dunkelgelb, Olivegrun and the Rotbraun with more brown than red in it. I was having a lot of trouble keeping the turret ring in contact with the gearbox, so I cut a piece of 12/2 Romex sheathing and put around the turret to keep it in place, seems to work although kind of ghetto. MFU is the newest Taigen 2.4ghz with steel gearbox.
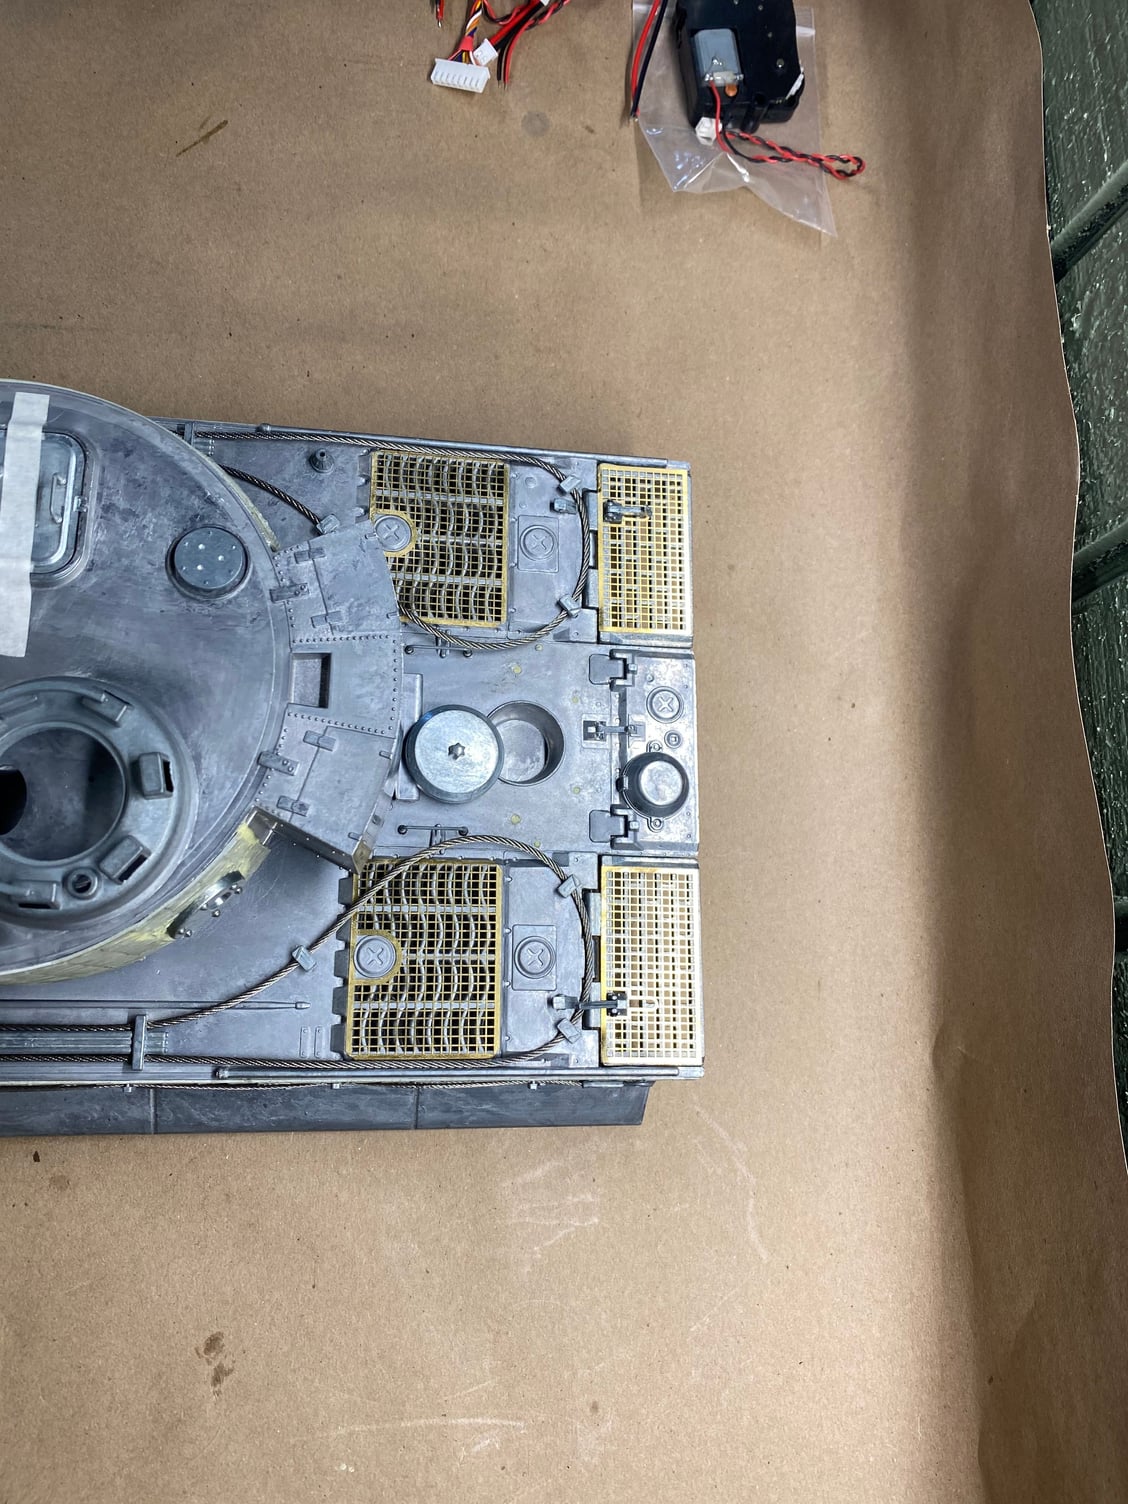
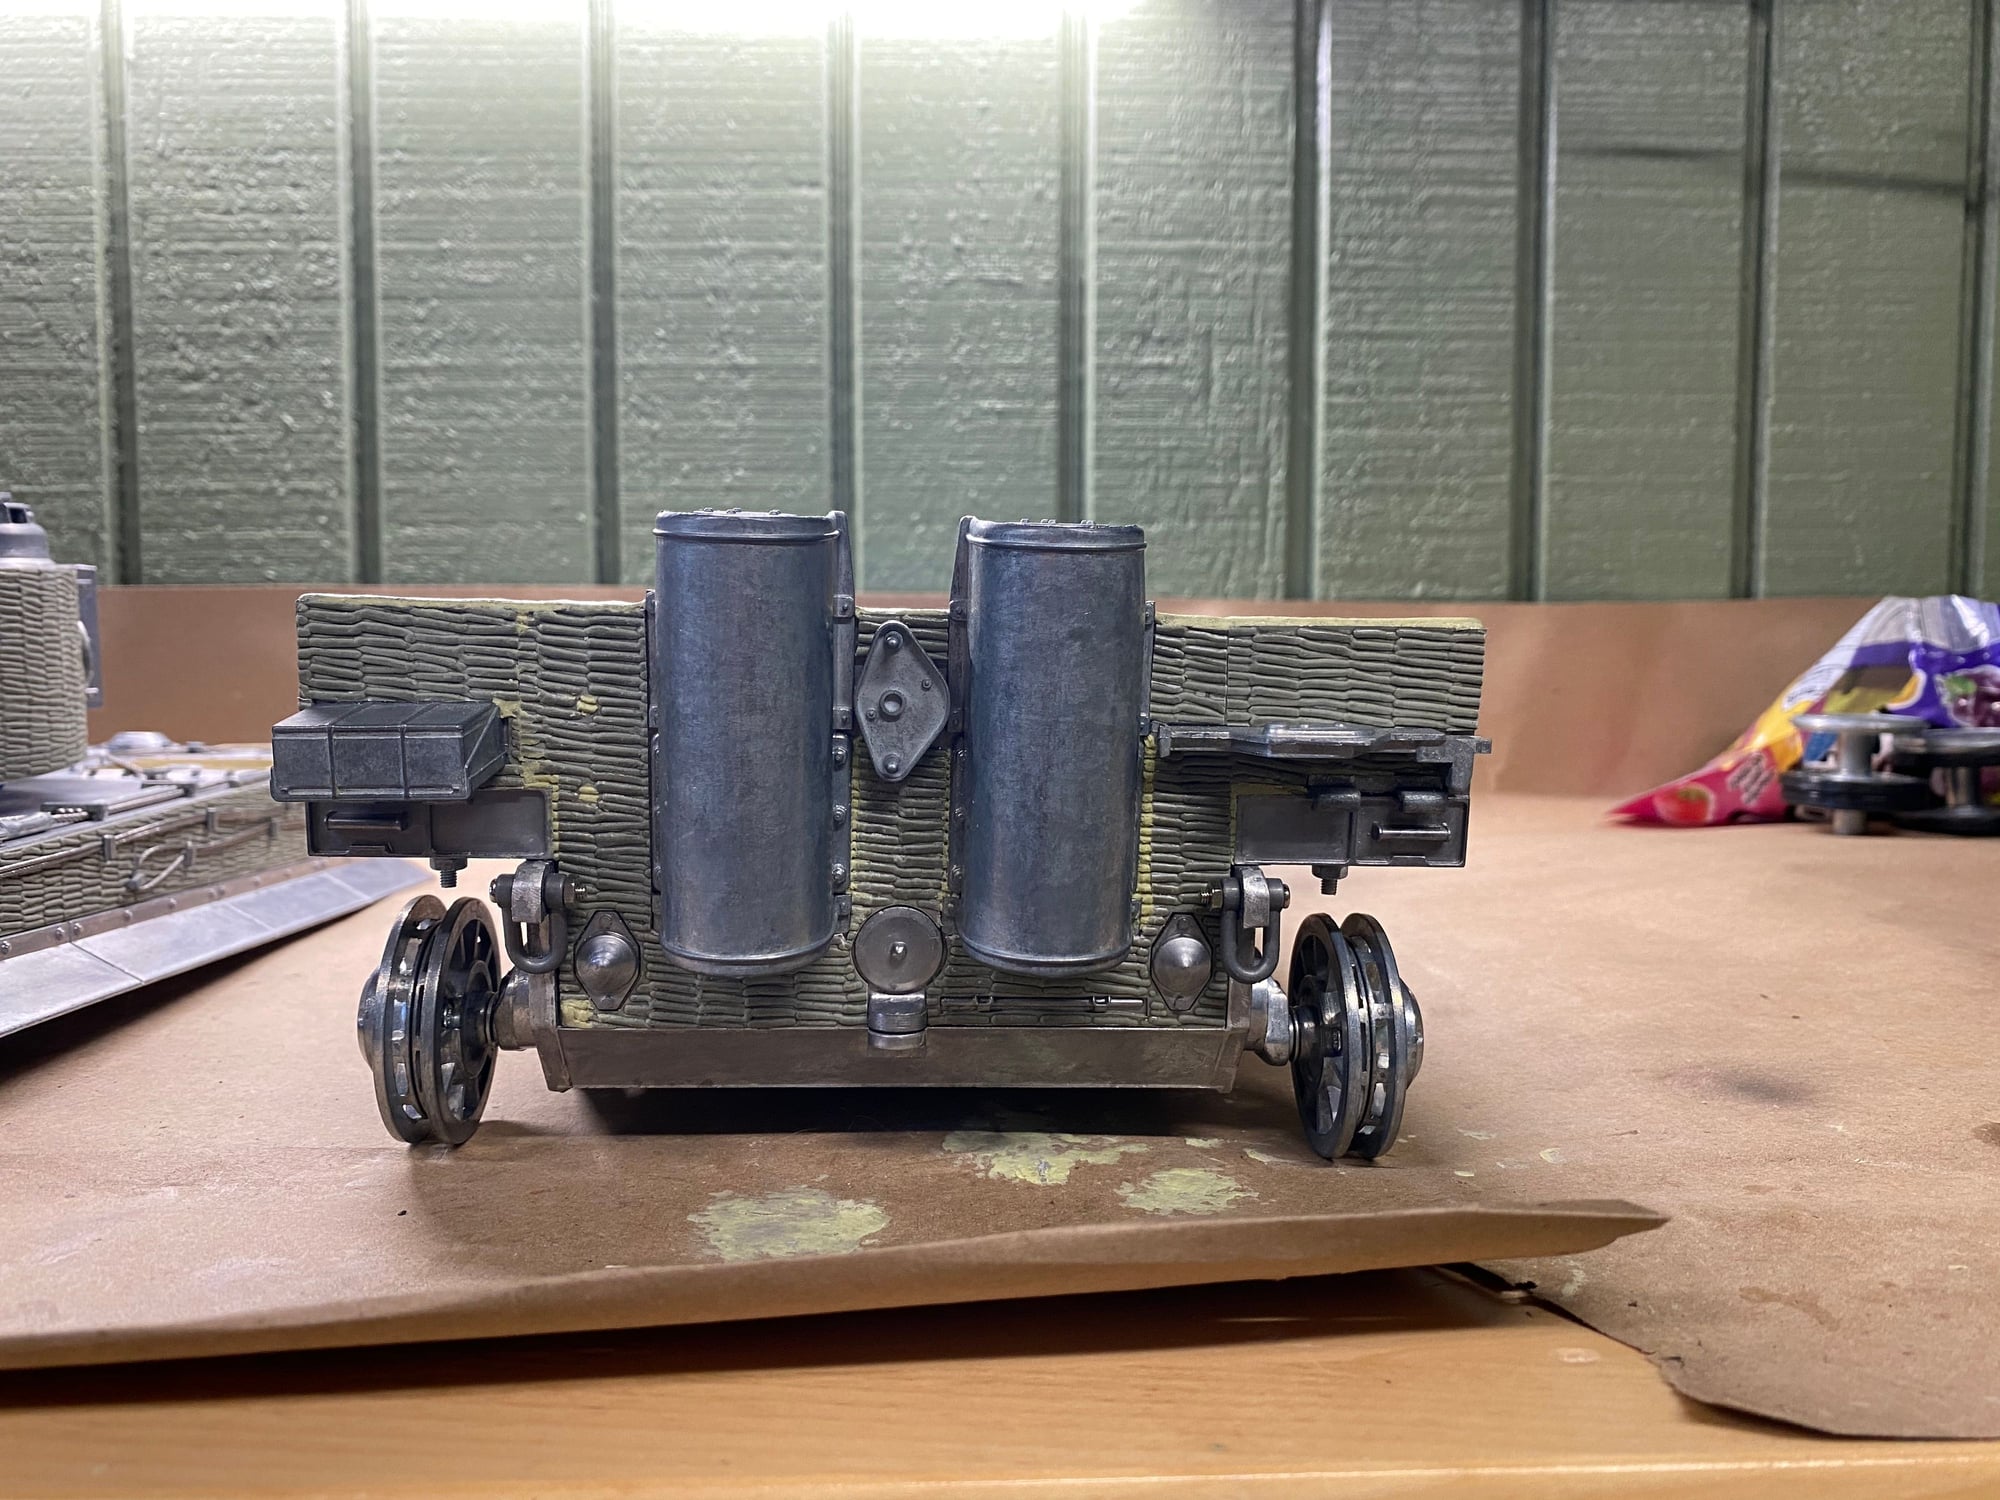
Next in Queue is a Mato Tiger I and gearbox. Taigen MFU. The turret wiring kit is similar to Taigen, but I can only get limited functionality. As of right now it only fires and rotates. Gearboxes are the “new” Mato branded ones. Big mistake here, the boxes rattle terribly and it appears the part that holds the final drive in on the right side was drilled incorrectly and has quite a bit of play. The turret elevation unit immediately took a dump as soon as it was plugged in. Mato electronics are definitely a dumpster fire and I believe if I rewire the turret using a Taigen 360 degree rotation kit I can get full functionality. I also used a Taigen zimmerit kit with Milliput to fill where the dimensions didn’t meet correctly. Taigen photo etched grills fit pretty well and the MG42 and mount that came with my Panther kit works on the late cupola from Mato. Have some small stuff coming from Licmas-Tank like barbed wire and some individual crew weapons.thinking of doing this one a bi tone Rotbraun and late war Dunkelgelb stripe. I also removed the dreaded Feifel air cleaner after fighting with it every time I try to take the upper hull off the Taigen. Kind of a mid war Tiger I guess, lol. I’ll post more pics when it’s finished and I start the Panther and Metal Origins Puma, that ought to be interesting! Thanks for reading my novel and any tips for future builds is much appreciated. Last note, if anyone knows of an aftermarket gearbox system that works with the Mato please let me know and possible an elevation gearbox that works properly.
Apparently I can’t post pictures yet. More to follow in the future.

The following users liked this post:
Artemis2020 (01-20-2020)
01-21-2020, 10:55 AM
#3
Member
Thread Starter
Thanks for the info. I do have one Elmod for my Puma kit from Metal Origins, maybe once I get that put together and figured out I’ll look into upgrading


The following users liked this post:
Tanker1966 (01-22-2020)
01-21-2020, 01:06 PM
#5
Nice. Did you do the zimmerit on the Mato one, or is it molded into the casting?
01-21-2020, 02:35 PM
#7
It looks good. What paint colors / camo theme are you going for?
01-21-2020, 02:52 PM
#8
Member
Thread Starter
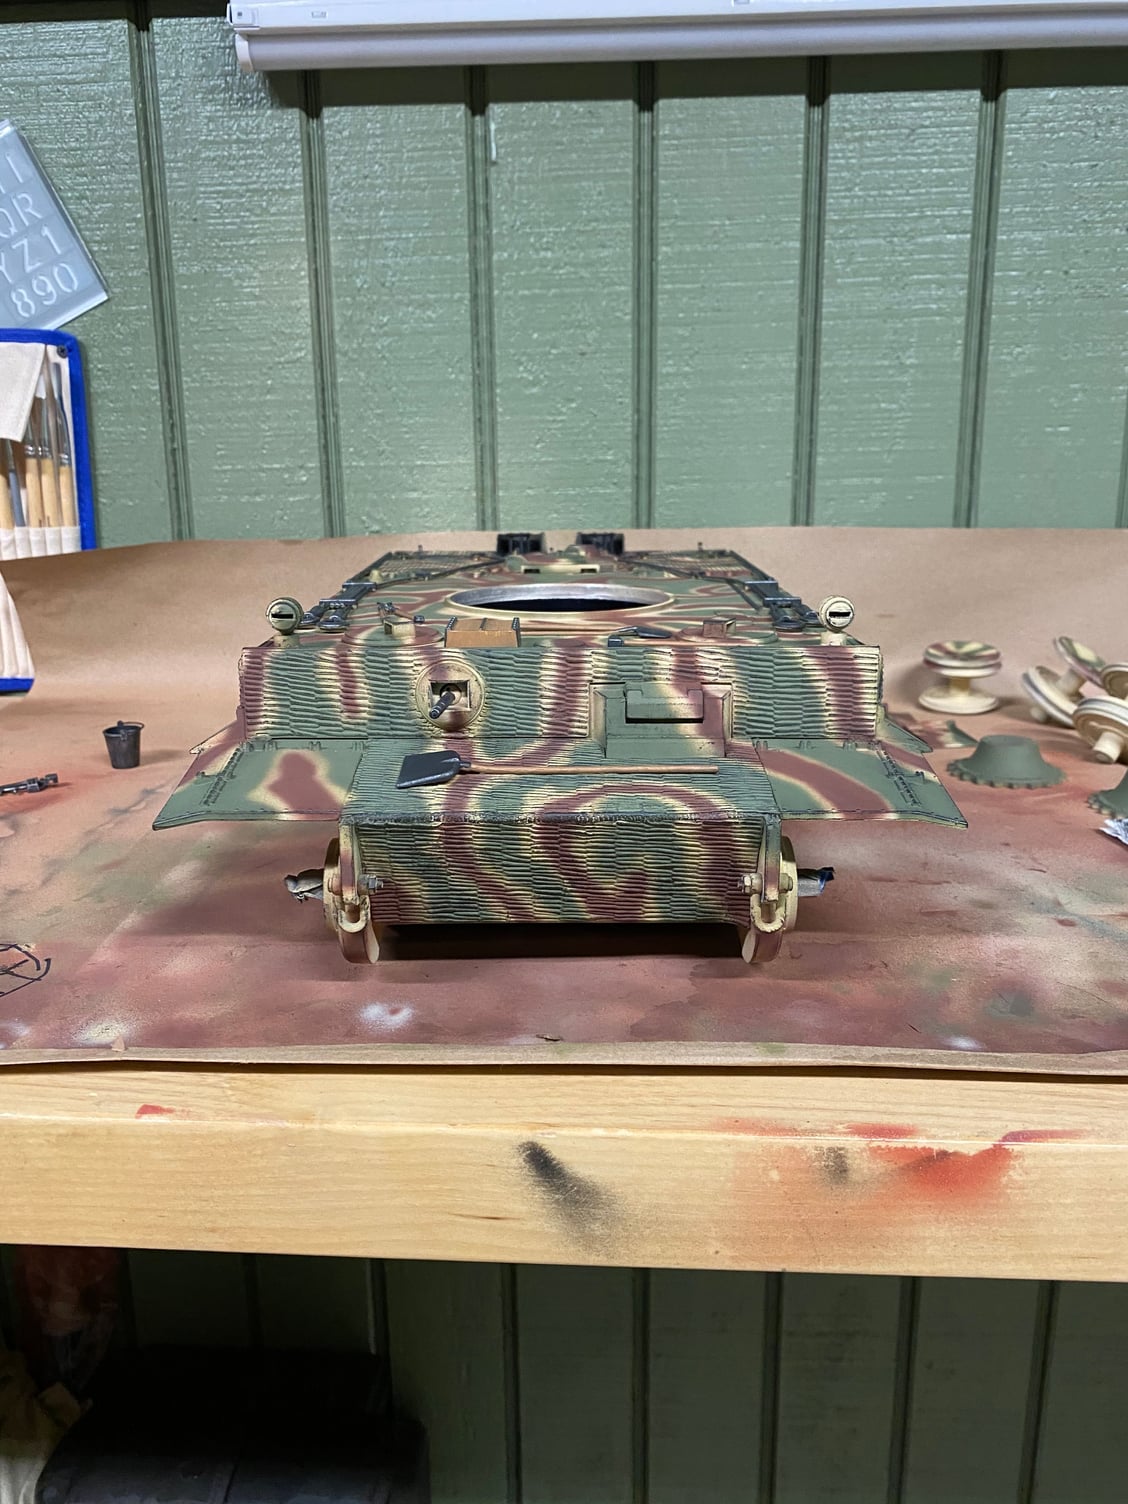
I was going to do a two color Dunkelgelb and Rotbraun, but I’m going with a three color to include olivegrun. I’ll post some pics probably tomorrow when I finish the camo and start on the weathering stuff.
01-22-2020, 08:58 AM
#9
Nice builds Artemis2020!!!
The following users liked this post:
Artemis2020 (01-22-2020)

The following users liked this post:
Artemis2020 (01-23-2020)
01-24-2020, 04:23 AM
#11

Of course I shall be gentle,
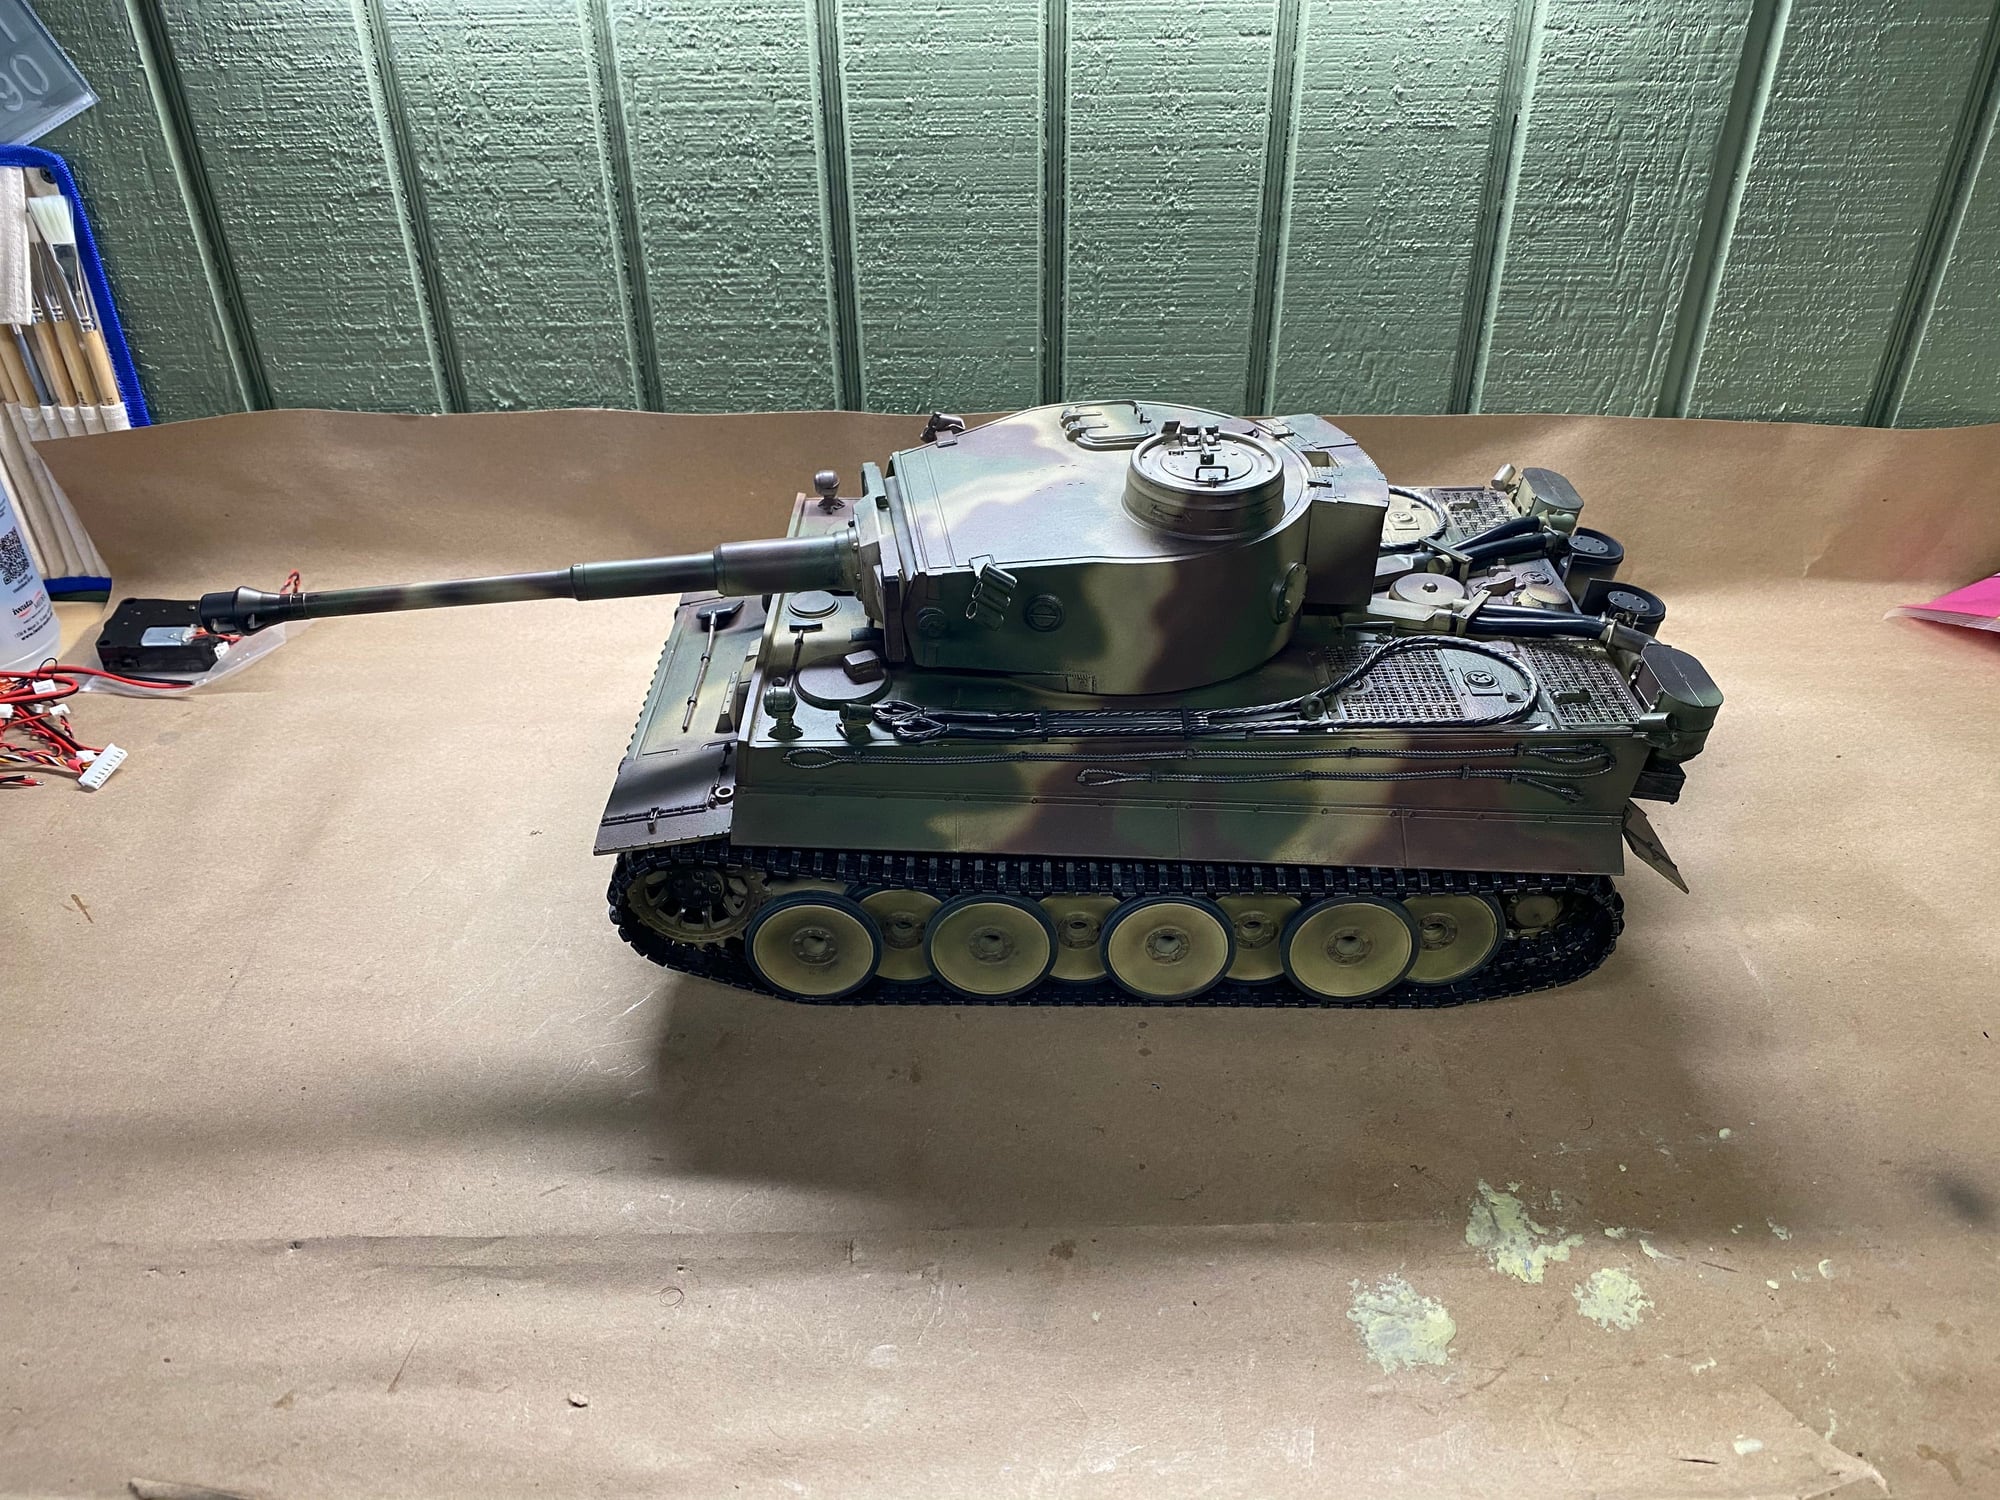
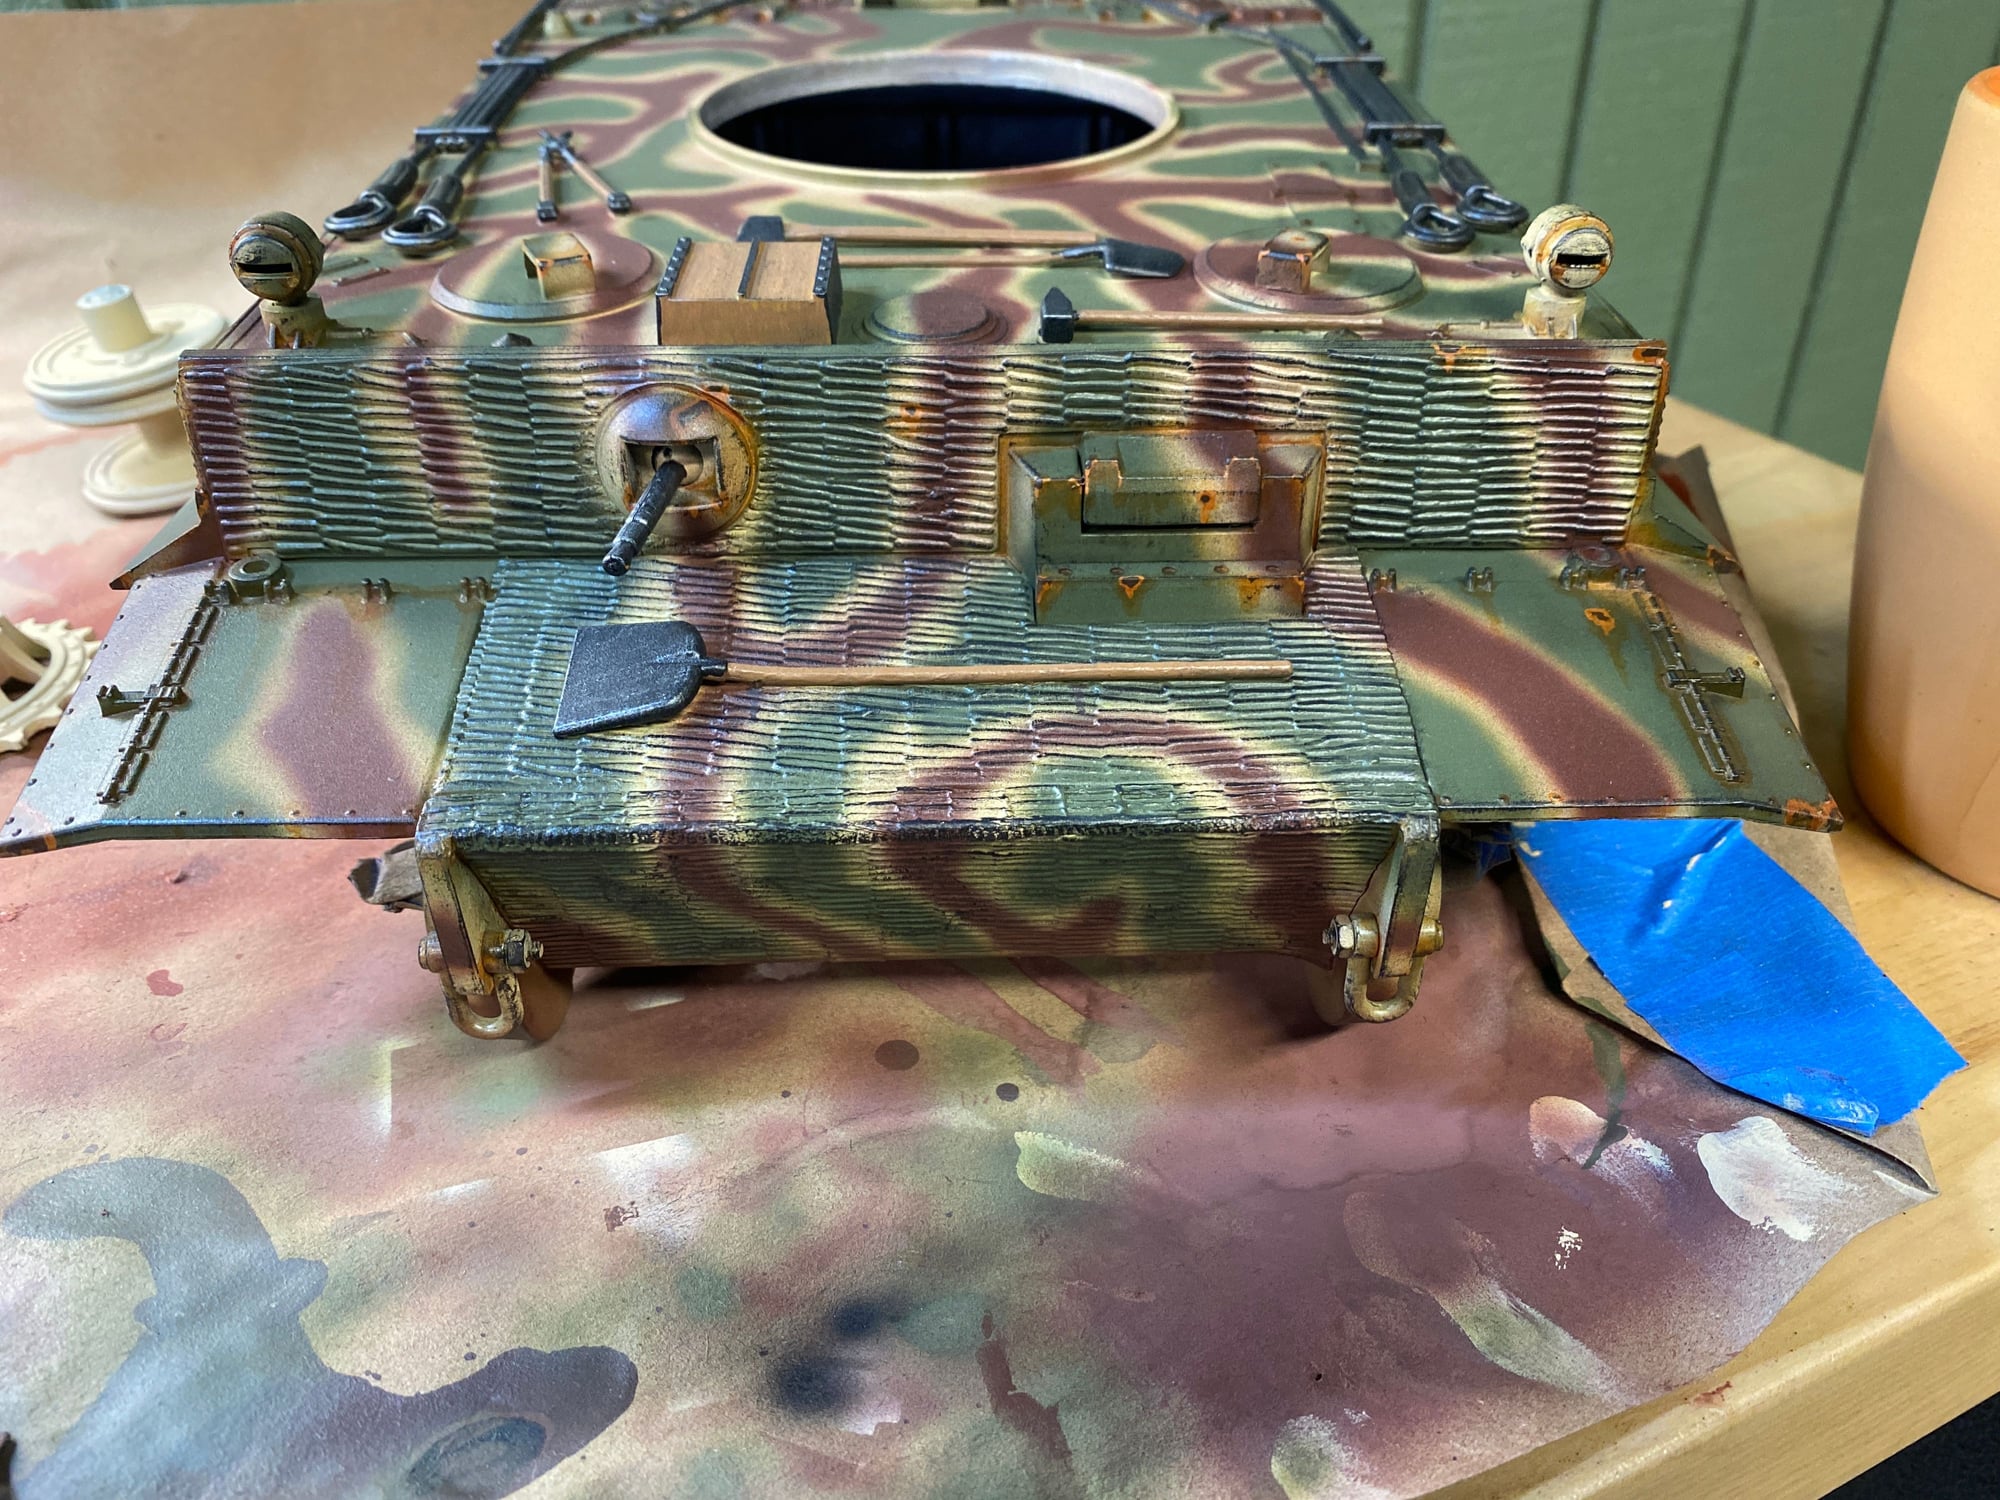
The Tiger 1 only had one Spare Aerial holder and it was mounted along the Right side of the Engine bay (Looking from the back of the Tank to the front)
Tamiya got it right but Heng Long, Taigen and Torro continue to mistakenly fit two, With one opposite the other on each side of the engine bay,
The Tiger 1 Befehlstiger (Command Tank) did have two spare Aerial holders but the second was mounted obliquely on the rear panel of the Tank.
It is an easy fix, Place a sharp Exacto blade under one end and carefully slice along the length of the moulding ,
It should peel off with very little effort.
The following users liked this post:
Artemis2020 (01-24-2020)
01-24-2020, 01:46 PM
#12
Member
Thread Starter
Thanks for the tip. I’m definitely not a tank historian, although I do have an affinity for them. I’m assuming the component your talking about is the rod that runs along the edge of the hull towards the rear of the tank? I think I’m just going to have to run with it, this pot Metal is eating up all my files and tools lol
01-24-2020, 02:03 PM
#13
Trust me as you purchase more Tanks (Oh yes you will) so your toolbox will expand,
Indeed as it gets bigger so your pocket book will get ever smaller.
The constabulary wont tell you but this hobby is more addictive than crack cocaine,
.Seriously a large part of the hobby is research,
There are lots of websites as well as plenty of books that will drag you ever deeper into the sinkhole that is RC Tanking..
The following users liked this post:
Artemis2020 (01-24-2020)
01-24-2020, 02:09 PM
#14
Member
Thread Starter
So far I’m really loving it. I wish there were more parts retailers/manufacturers in the US, though. Nothing like paying 40 bucks to ship a handful of small parts from Germany or the UK. If we could convince IMEX to carry the whole Heng Long accessory lineup that would def be a step in the right direction!
01-24-2020, 02:55 PM
#15
A couple of points that you might not know,
If you are buying from a dealer who is in the European Union they are obliged by law to charge 19% VAT (Value Added Tax ) As you are Resident in the USA this does not apply to you so whenever you order product from a EU Based Dealer you must remind the dealer that you are not eligible for the tax,
The 19% saving will cover most of your postal charges,
Secondly, Most Heng Long parts are interchangeable with Taigen Parts (NOT ELECTRICAL!!!) Indeed Taigen Gearboxes are the usual upgrade for Heng Long Tanks.
Check with Erik at IMEX or ask us here at the Forum if you are unsure.

The following users liked this post:
Artemis2020 (01-26-2020)
01-26-2020, 07:48 PM
#17
Member
Thread Starter
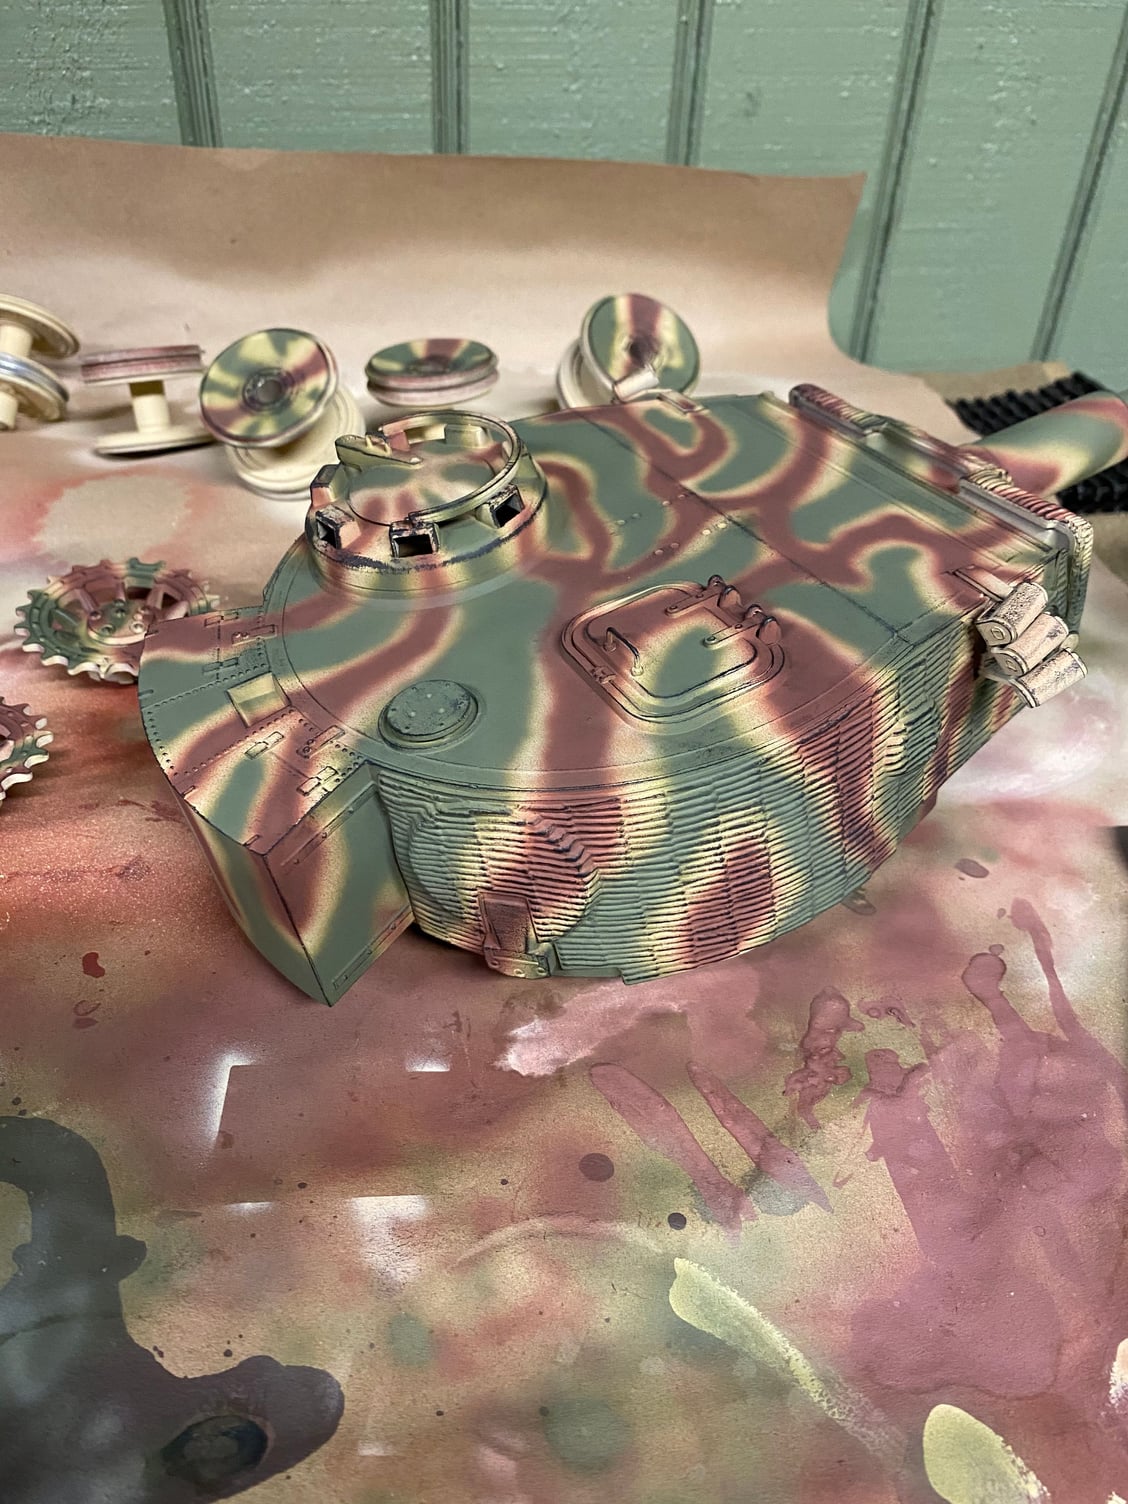
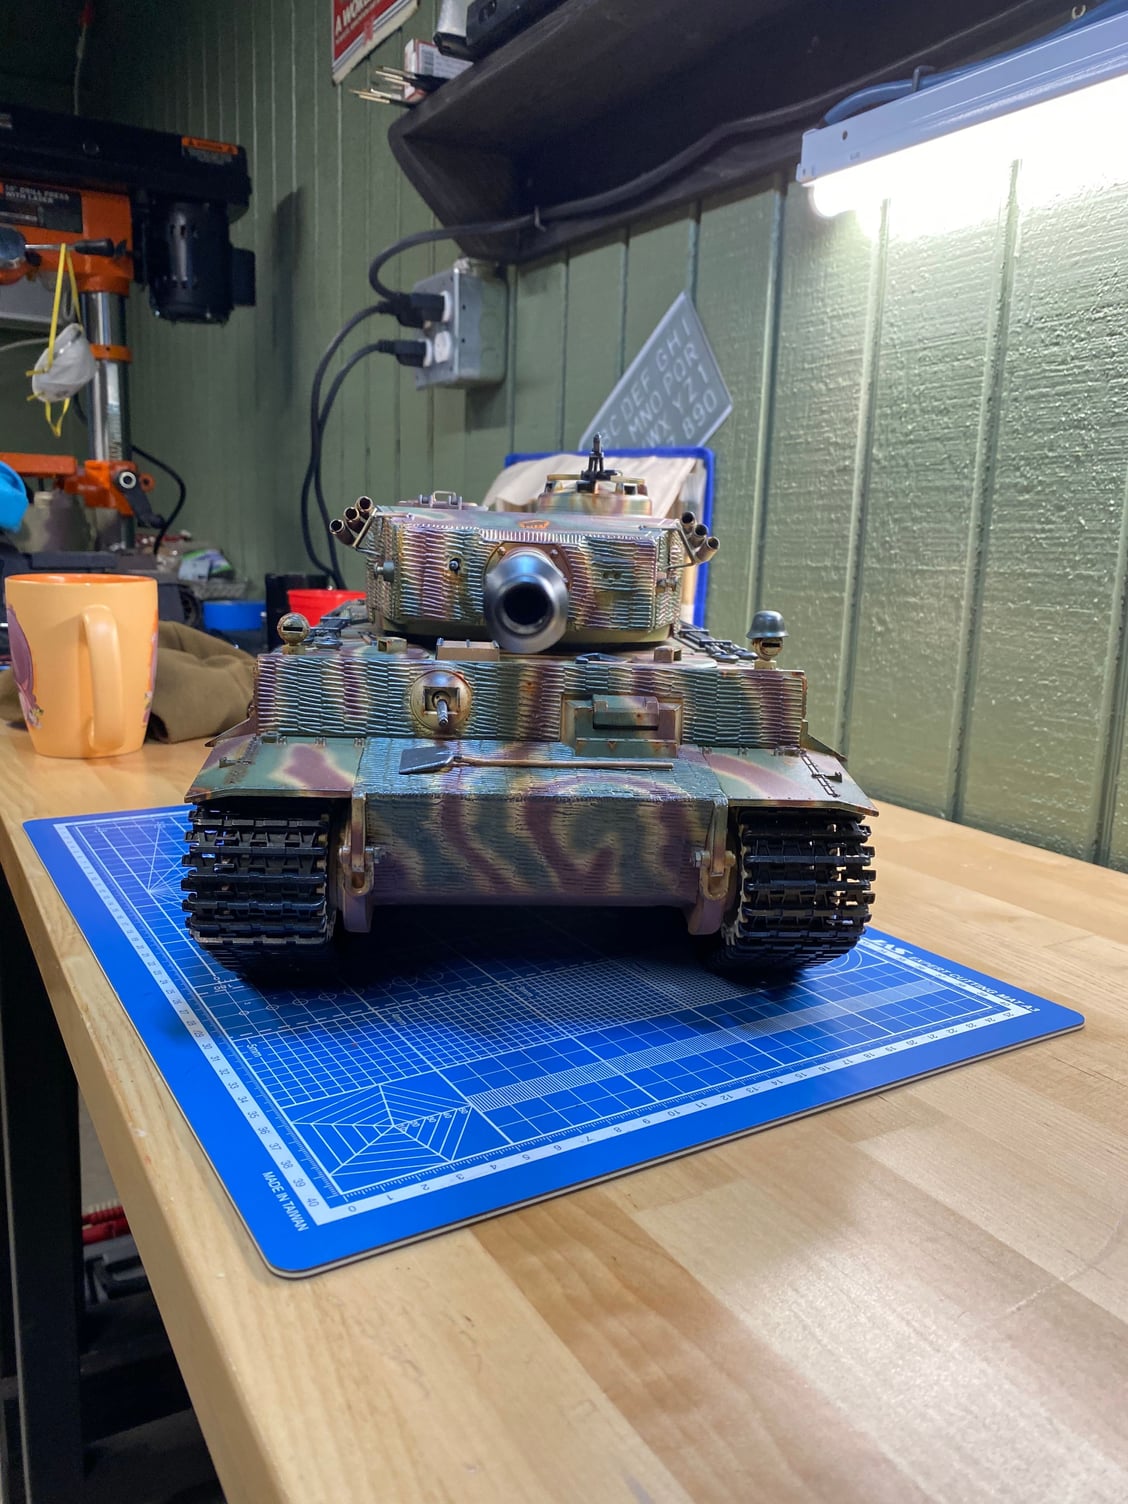
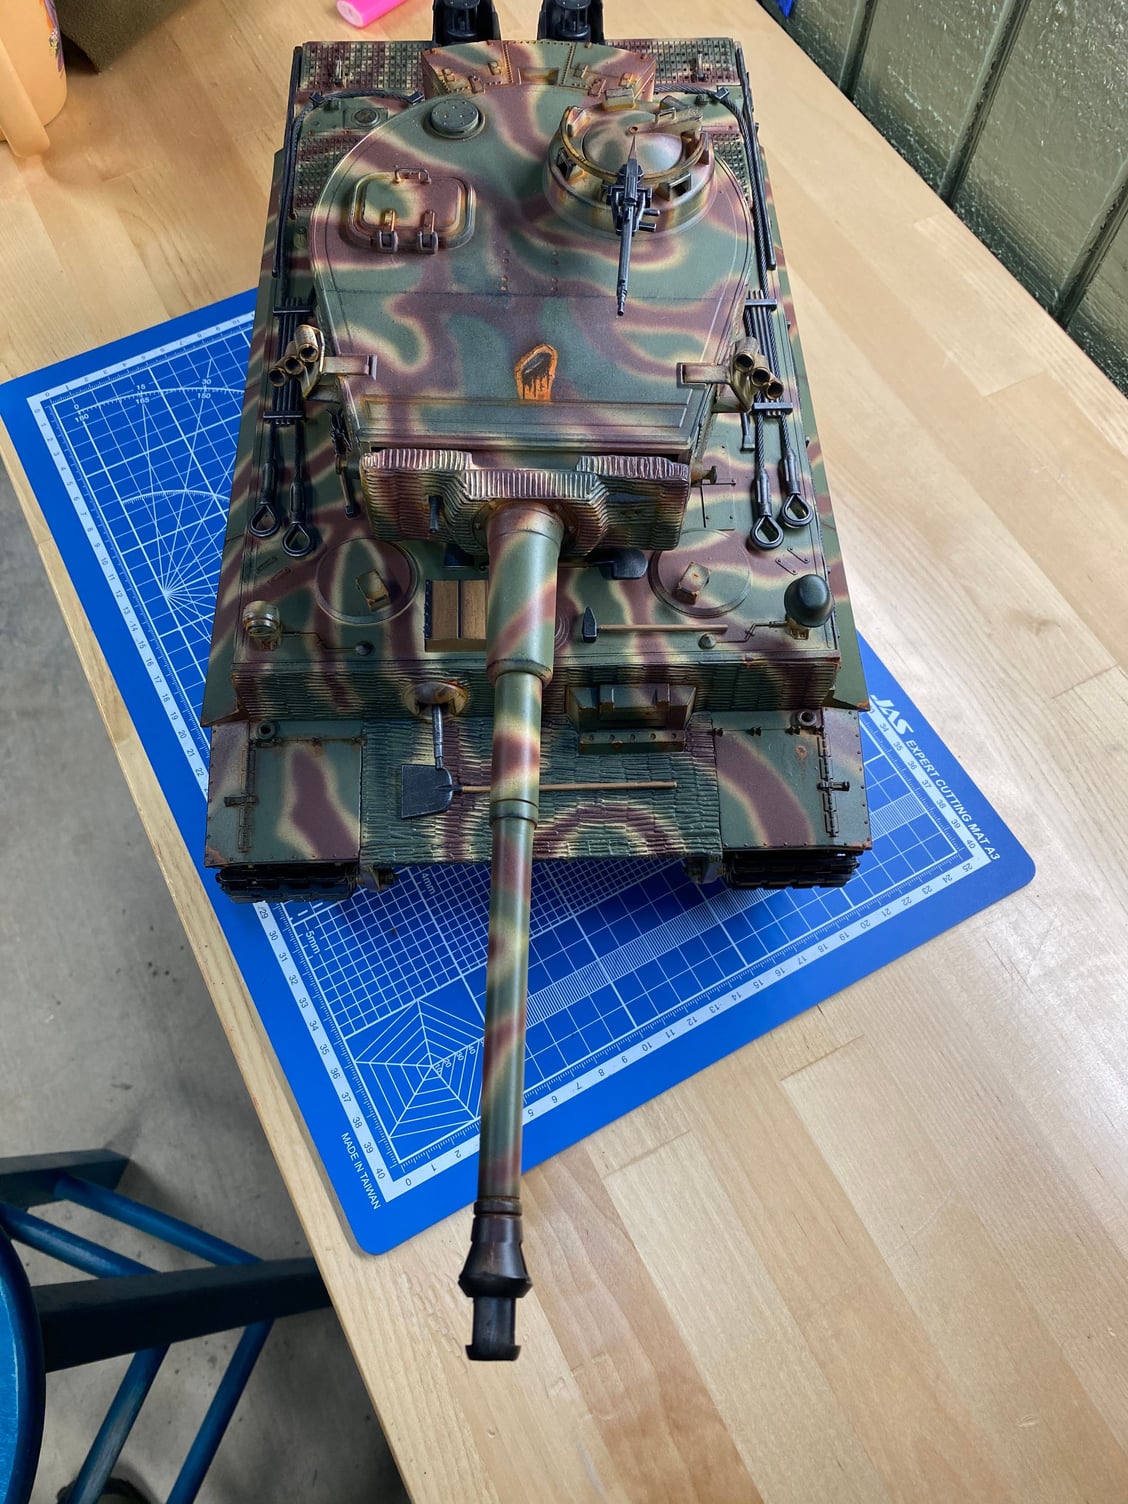
Here are some more pictures of the Mato, just about done I think. Not a huge fan of how it turned out, not the greatest with the airbrush, but it’ll do!


The following users liked this post:
Artemis2020 (01-27-2020)
The following users liked this post:
Artemis2020 (01-27-2020)
01-27-2020, 09:36 AM
#20
Looks great to me!!! I see a little over spray spatter? Is that what you are referring to when you say it could look better? On real vehicles this could occur so not a big deal. If you want a sharper line thin your paint to 60/40 thinner/paint and shoot at a lower pressure maybe 10-15 psi. Still looks good to me though.
The following users liked this post:
Artemis2020 (01-27-2020)
01-27-2020, 10:35 AM
#21
Member
Thread Starter
Yes that’s one of my biggest complaints, thanks for the tip, I’m definitely going to use that technique next time to make cleaner lines. The only experience I have with an airbrush is using cerakote, but everything takes time and trial. Thanks for the kind words everyone, I really do appreciate it!
01-27-2020, 11:34 AM
#22
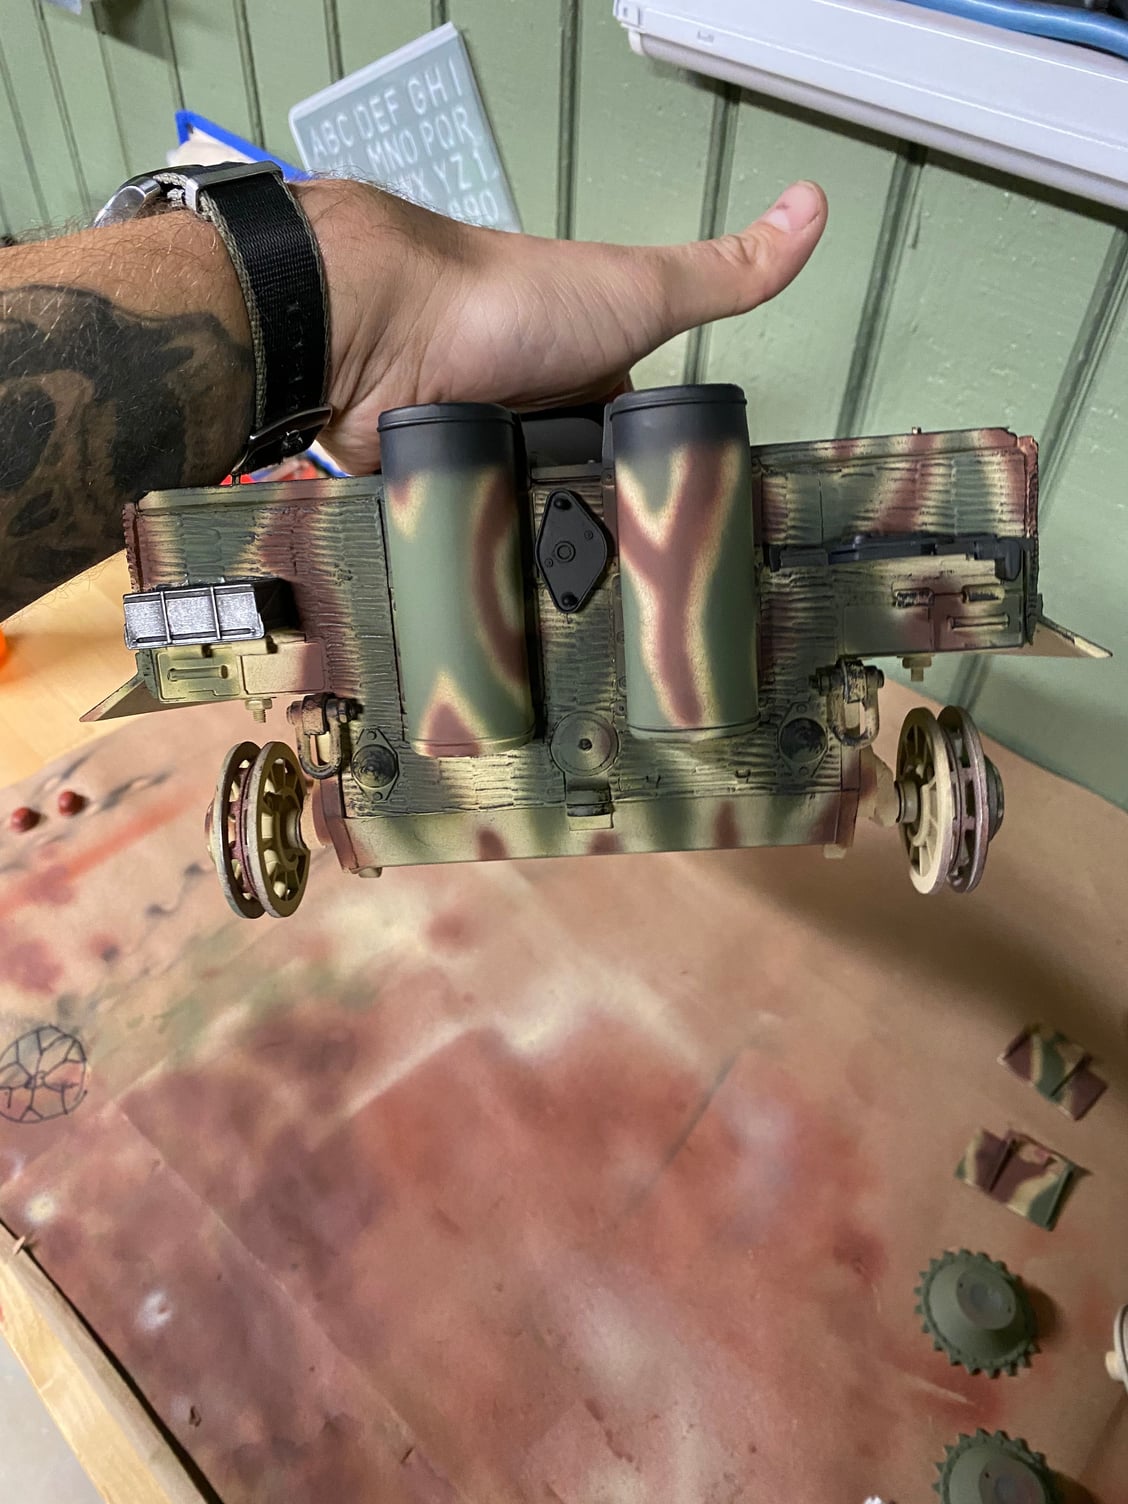
The camo pattern you did is cool. It looks good and should hide the tank well.
The following users liked this post:
Artemis2020 (01-28-2020)
01-30-2020, 02:55 PM
#23
Member
Thread Starter
Ok so these should be the last pictures I post on this thread lol. I’m giving up on waiting for these parts to come in from Germany. It’s pretty sad that I’ve sent foot lockers back to the states from Iraq and Afghanistan that didn’t take this long to make it. Anywho, rant over, here’s the final product minus turret spare tracks and holders and barbed wire. I hope you enjoy it!
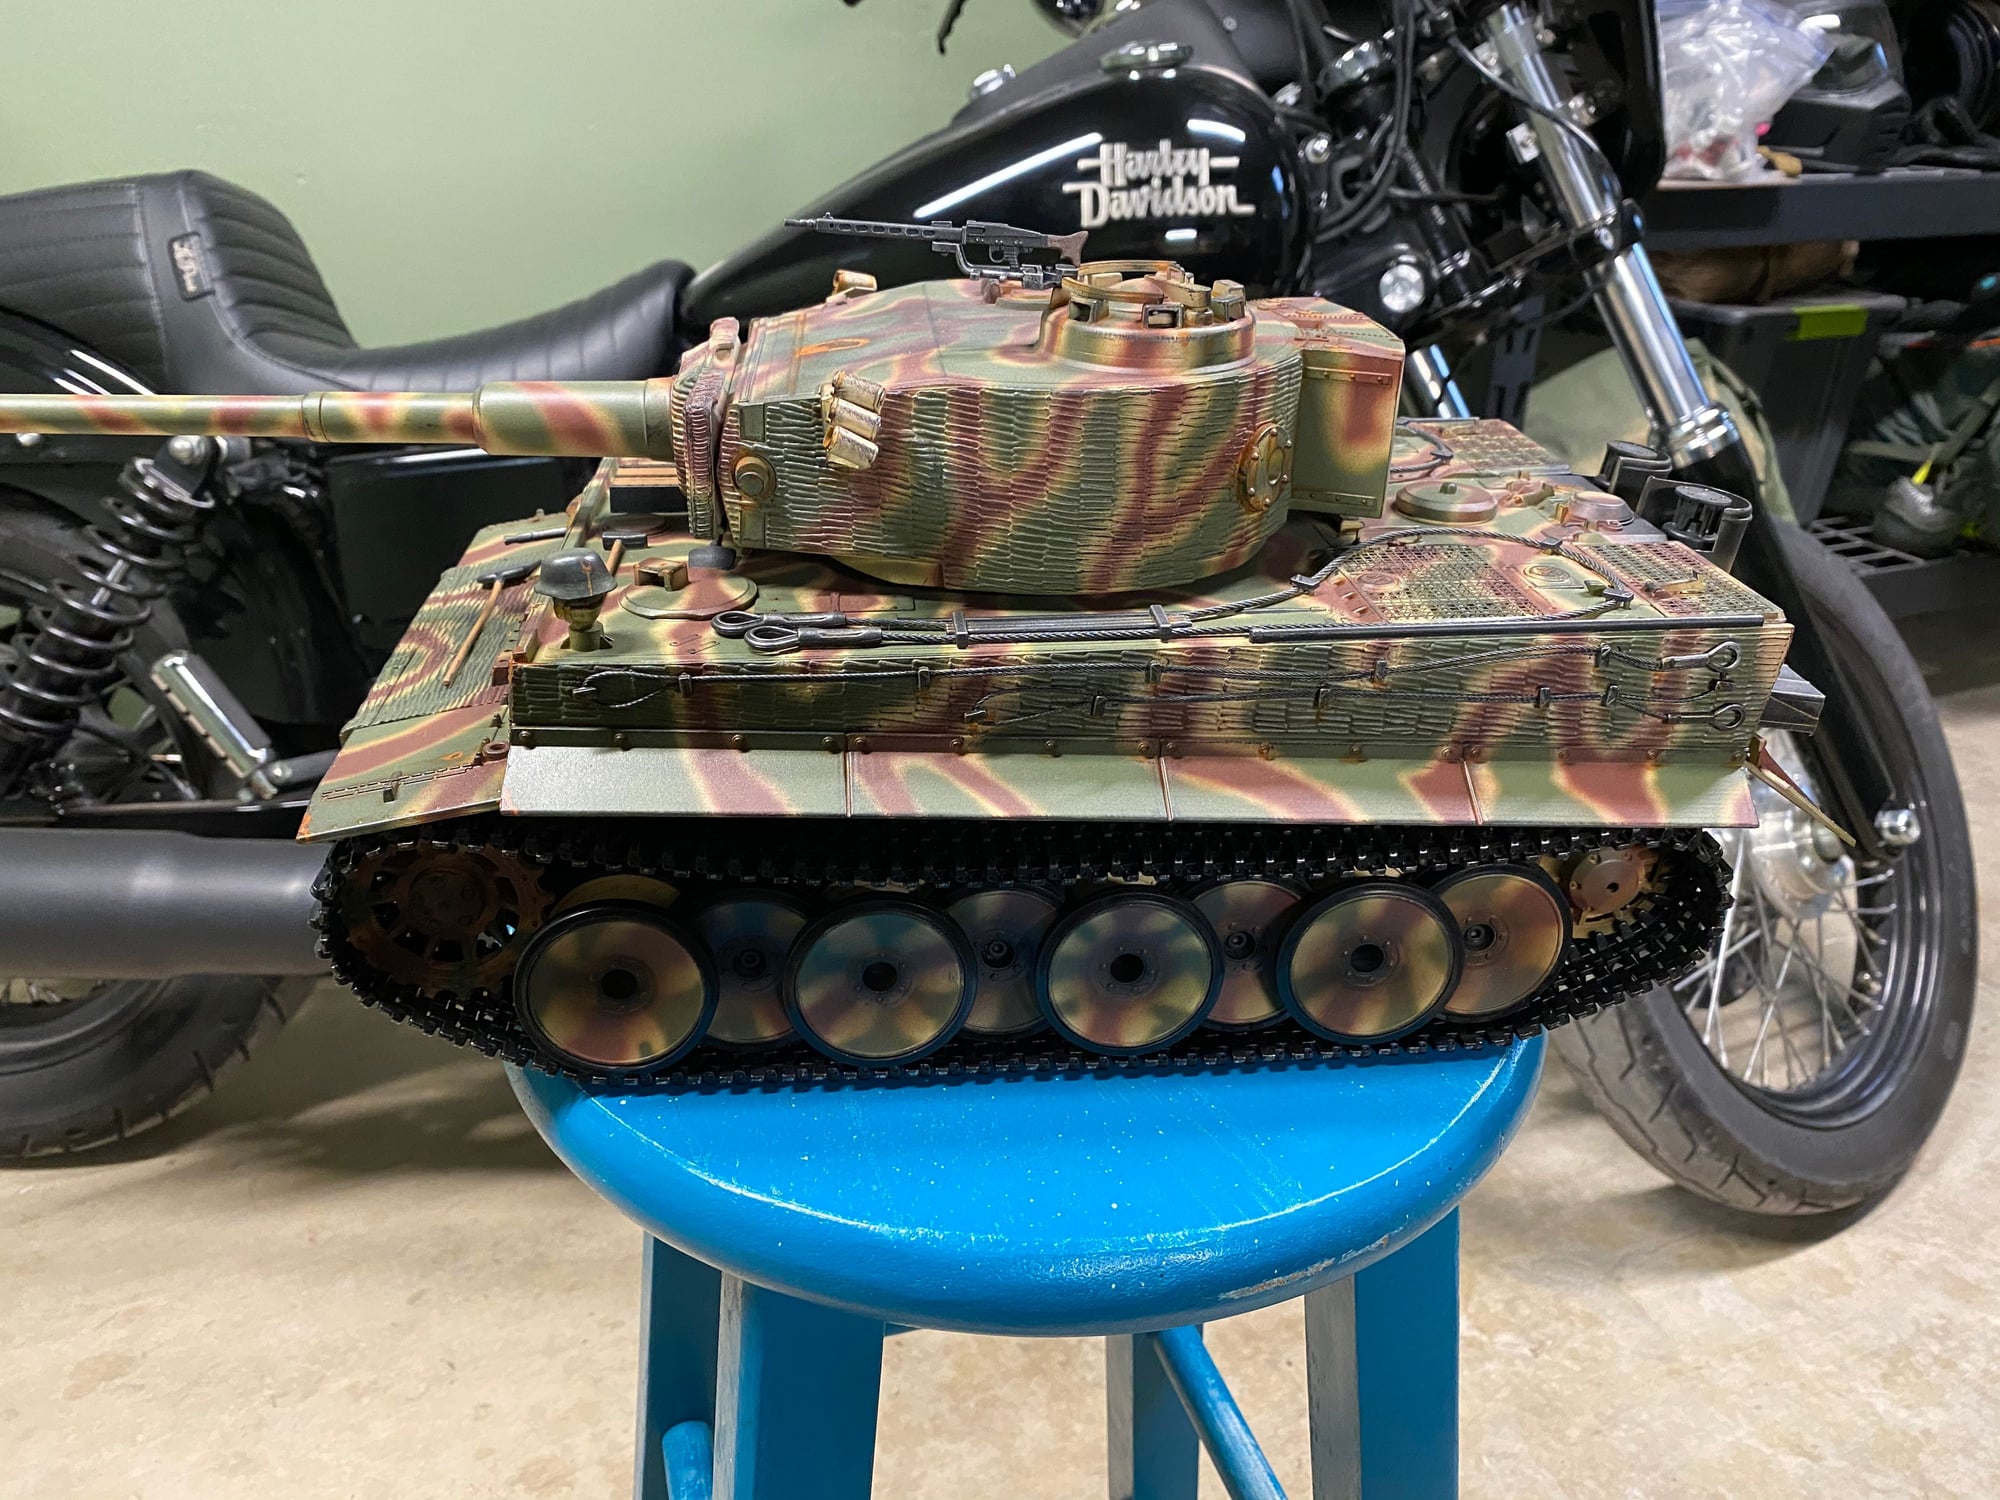
Last edited by Artemis2020; 01-30-2020 at 03:06 PM.
The following users liked this post:
Artemis2020 (01-31-2020)
01-31-2020, 01:45 PM
#25
Looks great!!!
The following users liked this post:
Artemis2020 (01-31-2020)
