


3D Printed T-26
 04-17-2022, 02:55 PM
#1

Thread Starter
This is going to be a long term project as I have joined the ranks of those with a 3D printer. I was going to start with the T-35, but the T-26 is much more manageable for a first 3D printed tank IMO. I've been ordering parts to do the build, but in the meantime I've been printing the parts.
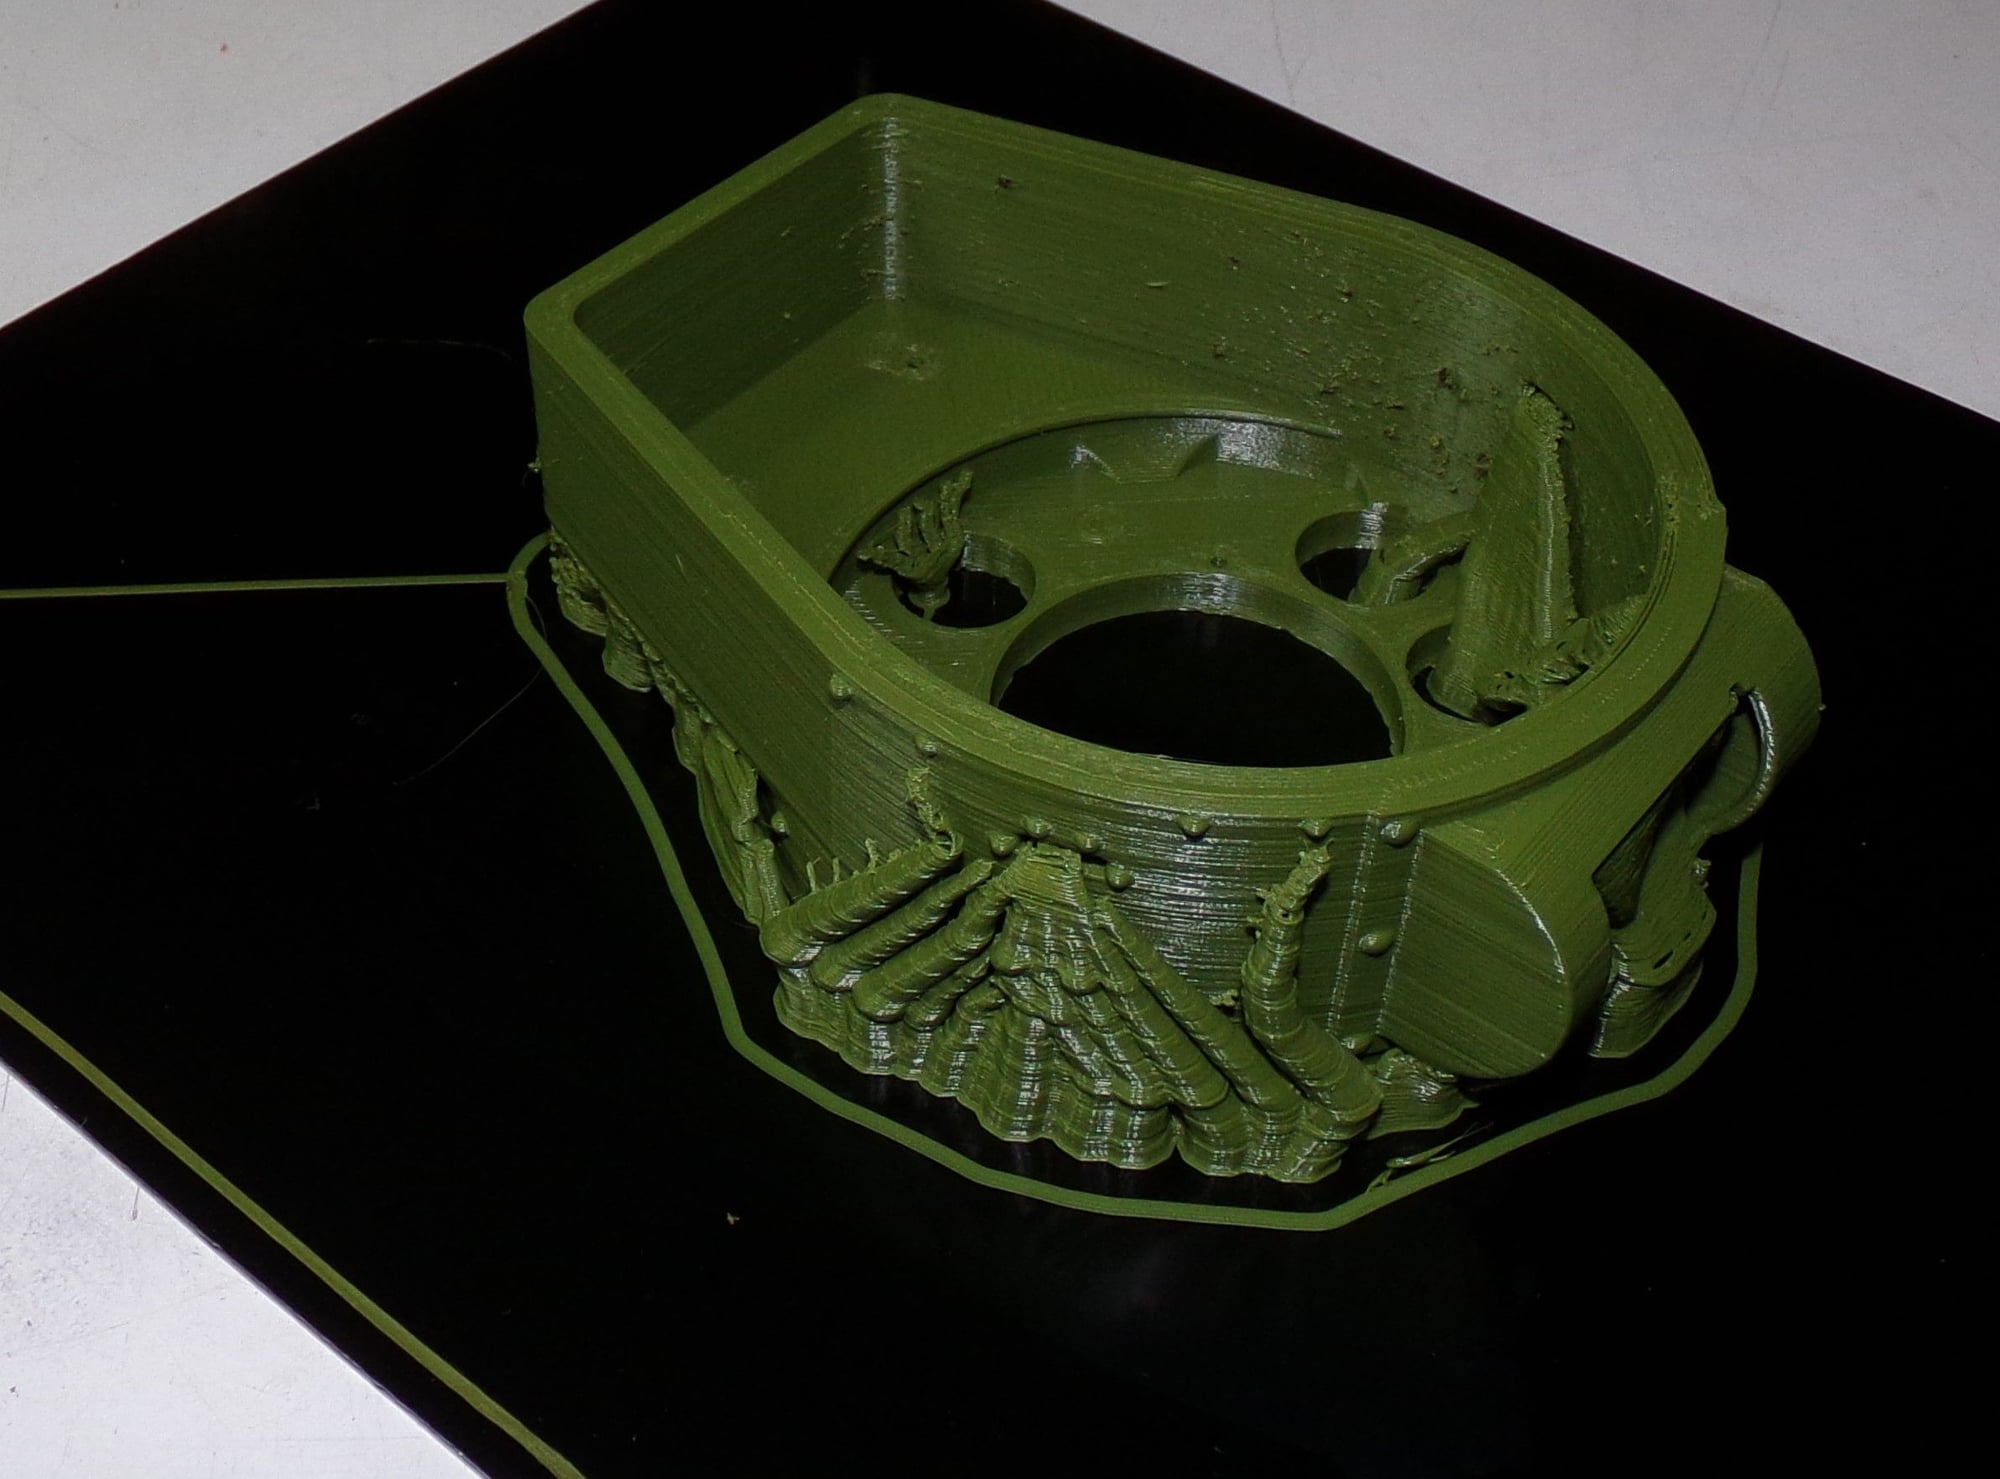
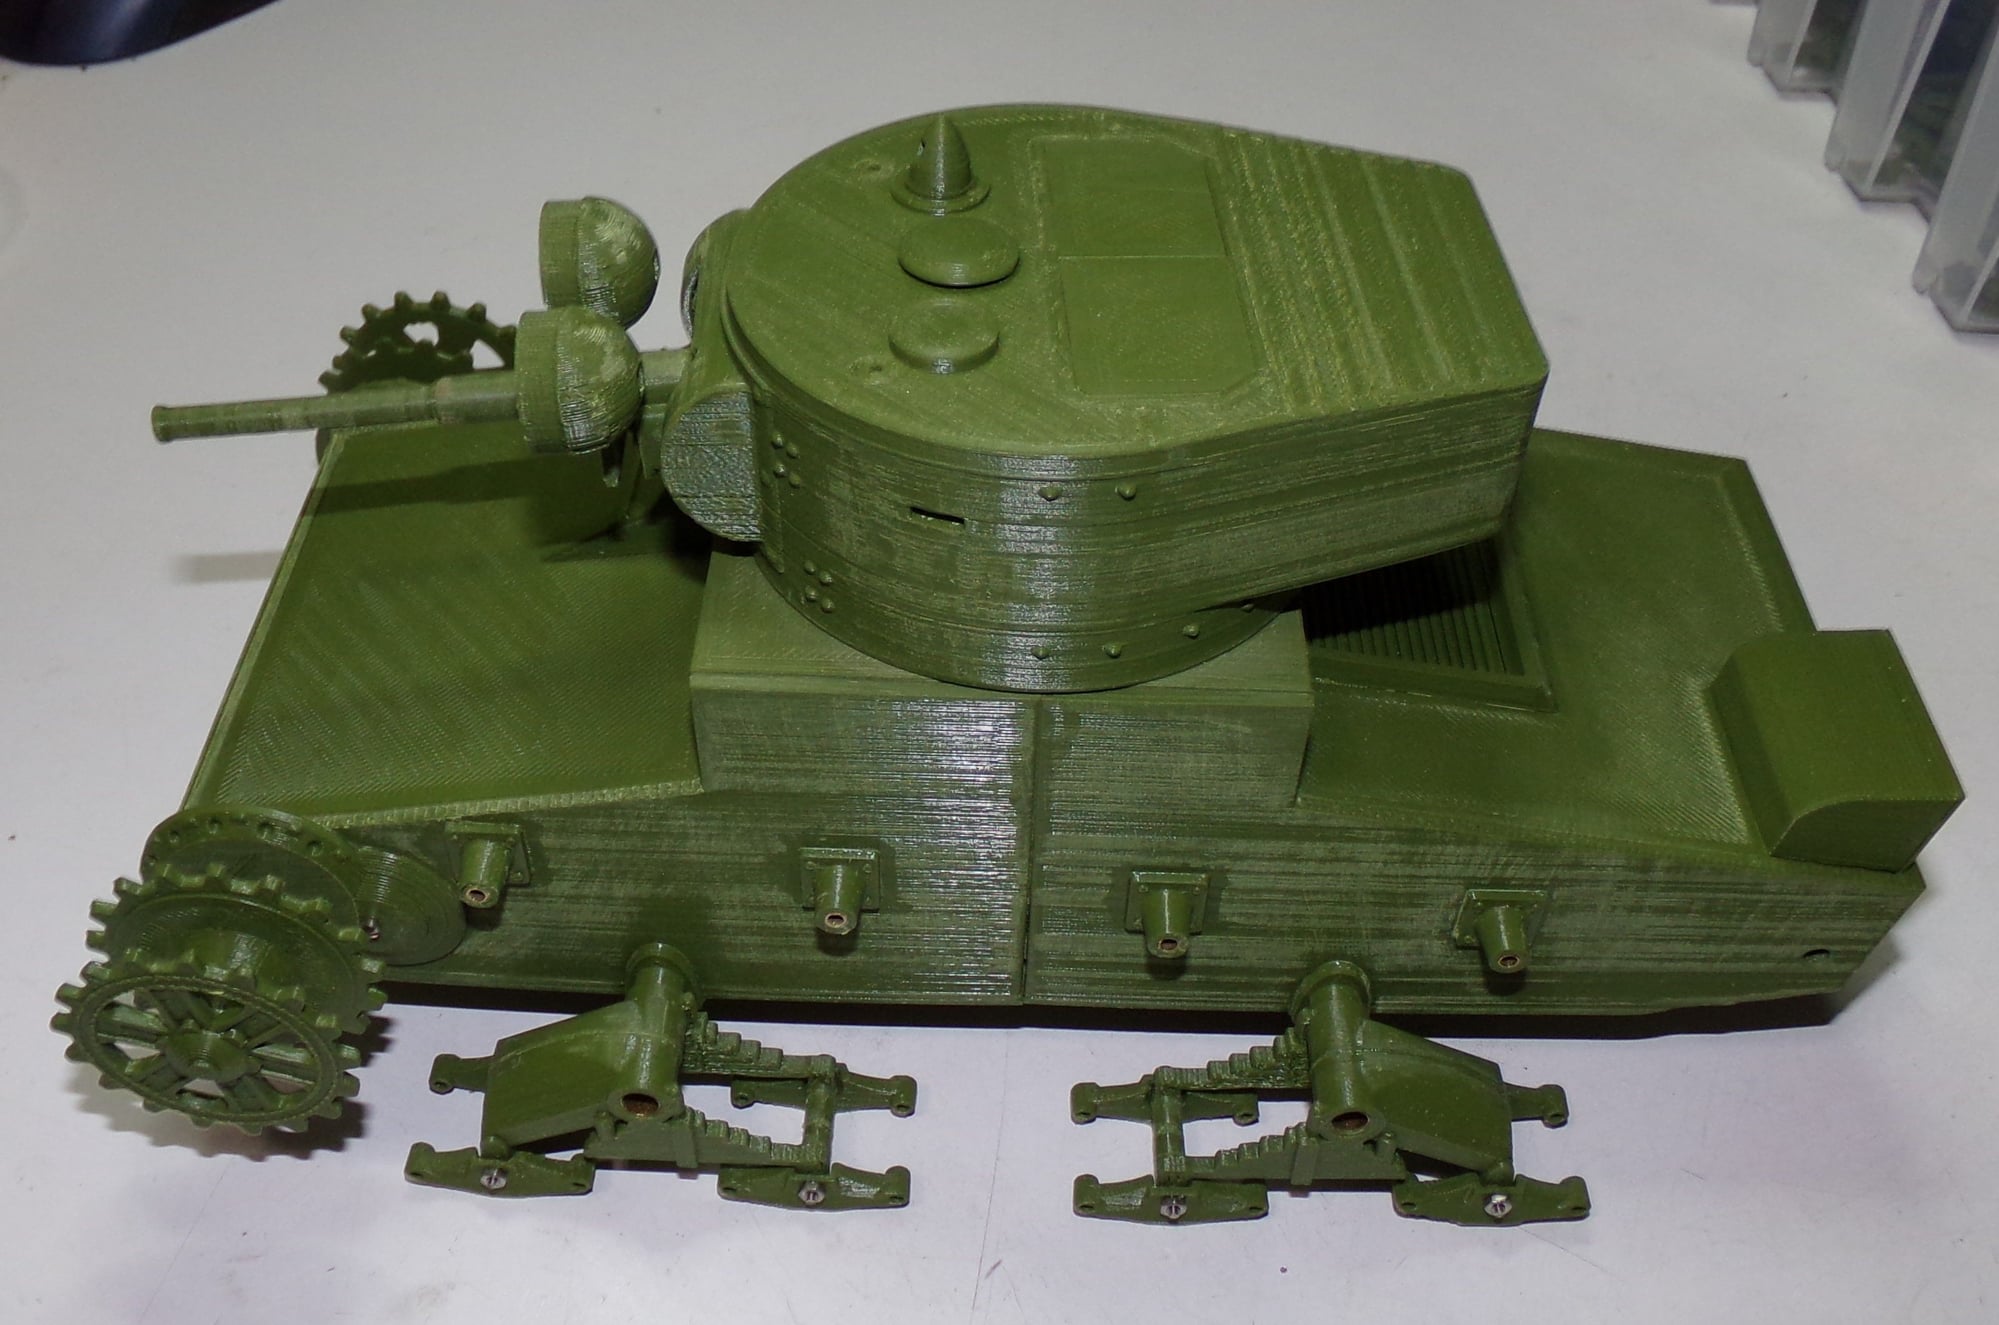
Been practicing with Polymaker ASA Army Green filament by printing the sprockets, road wheels, and the suspension. Finally confident enough in the ASA that I printed the turret and it came out great with no warping on my first attempt.
Right after cooling still sitting on the build plate:
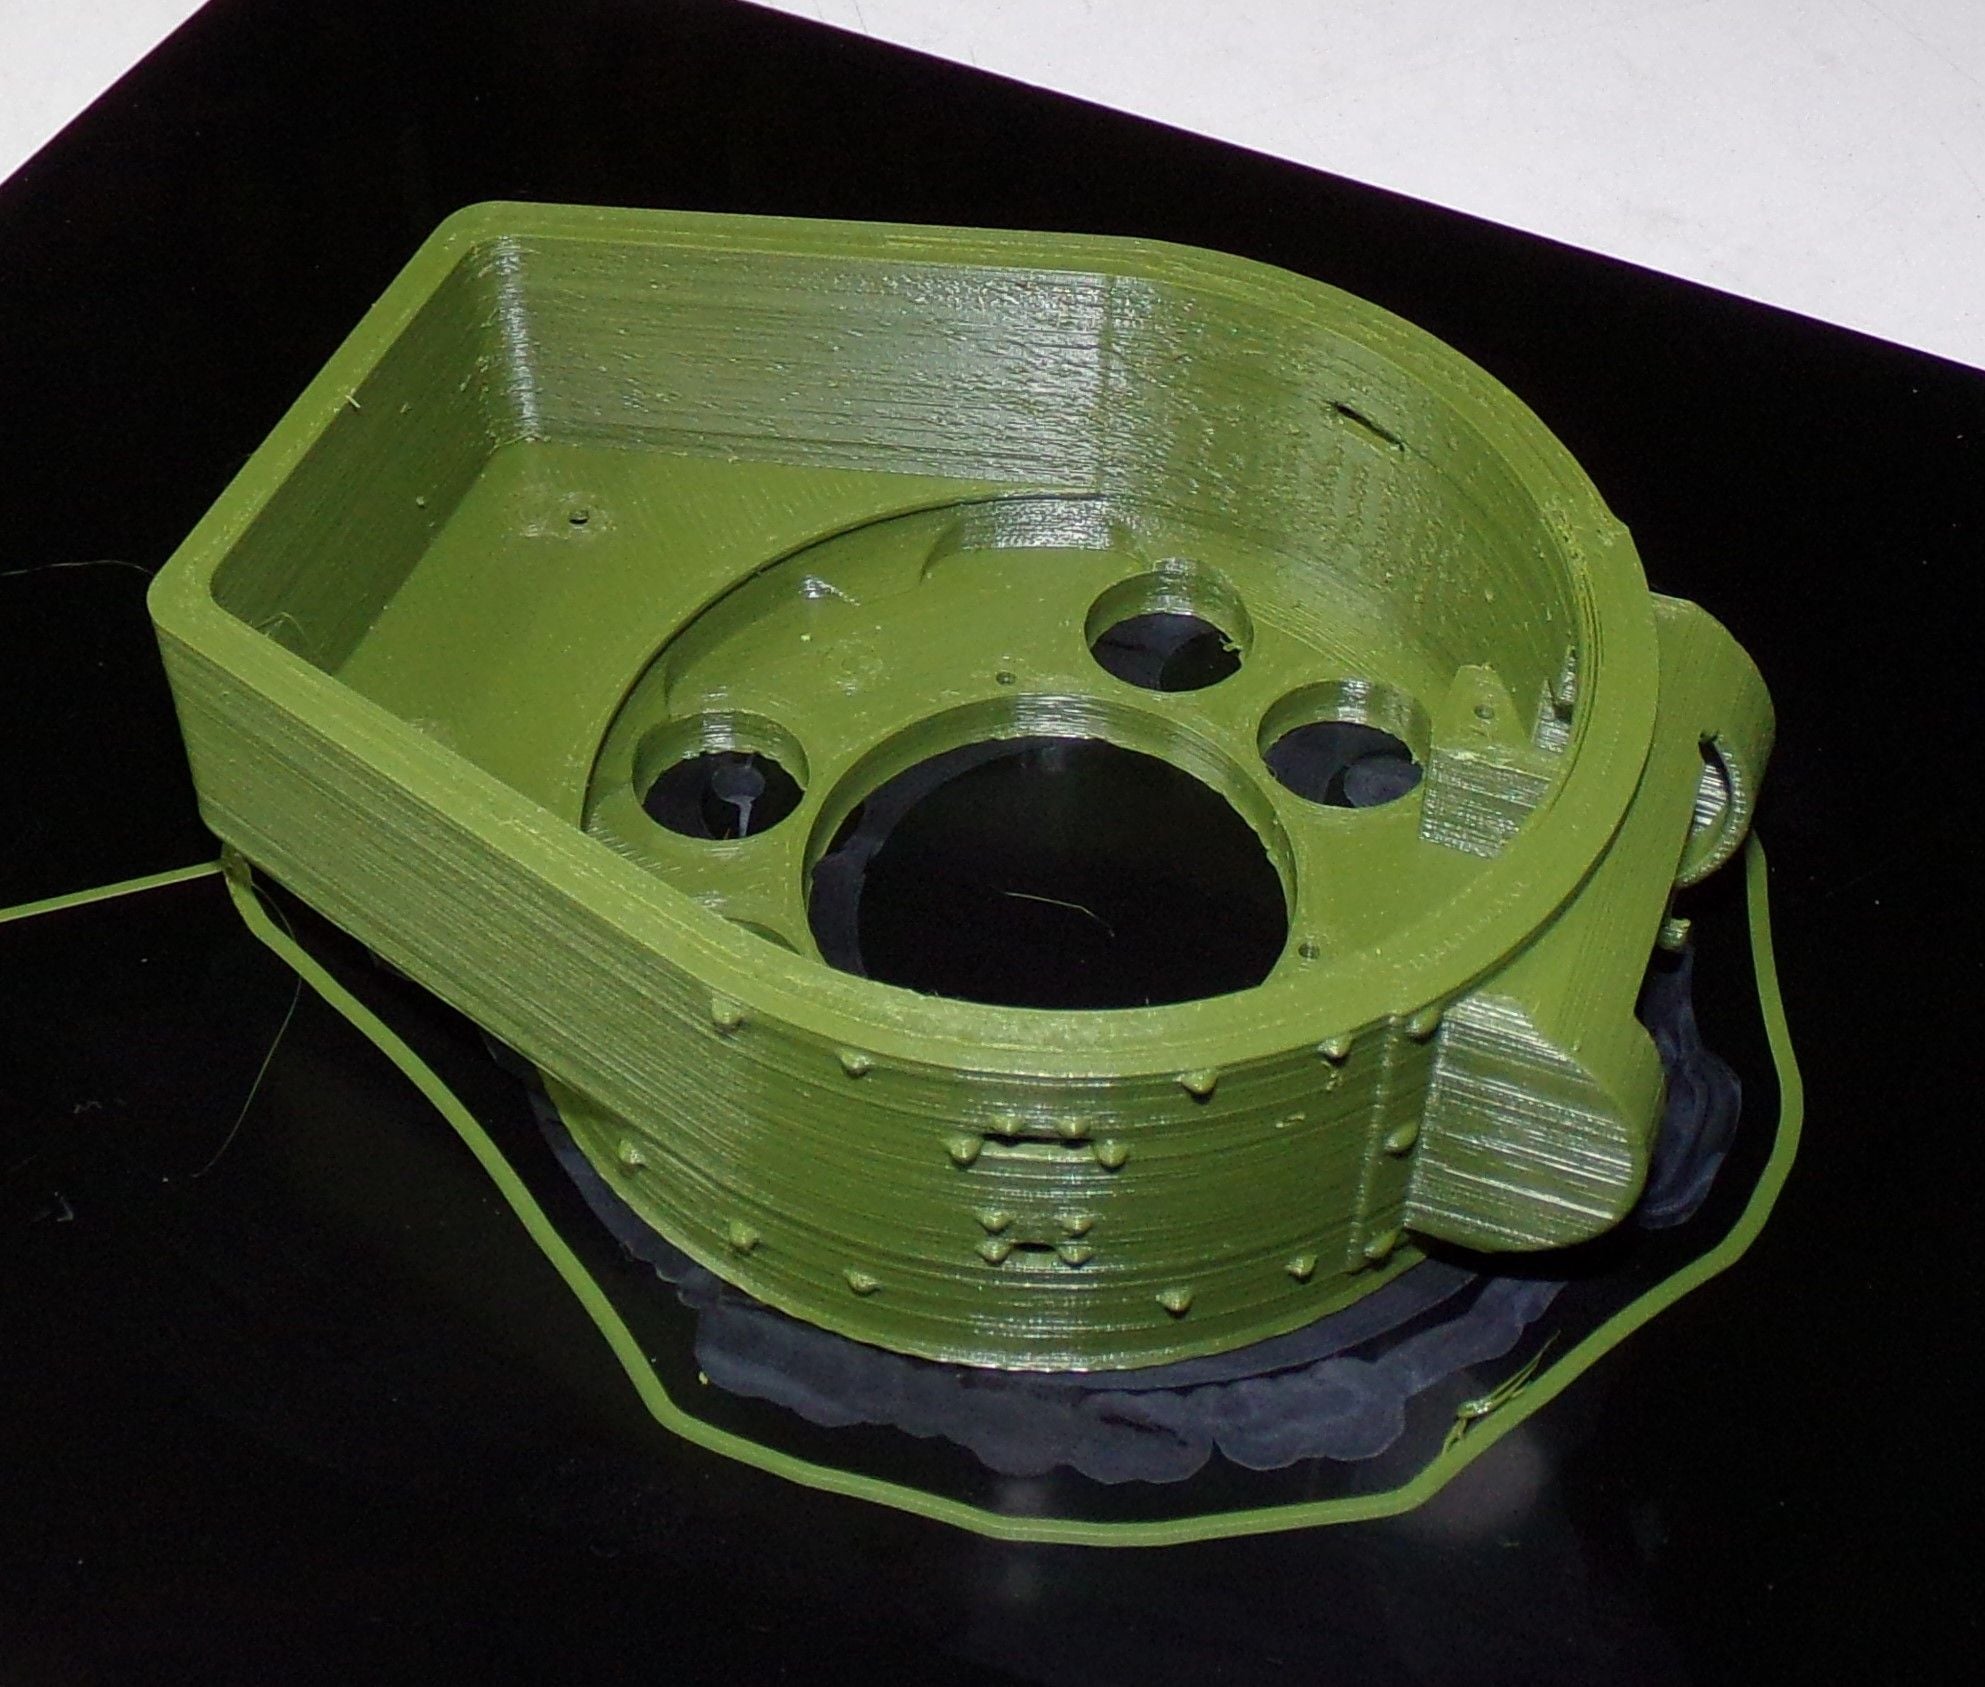
Tree supports.

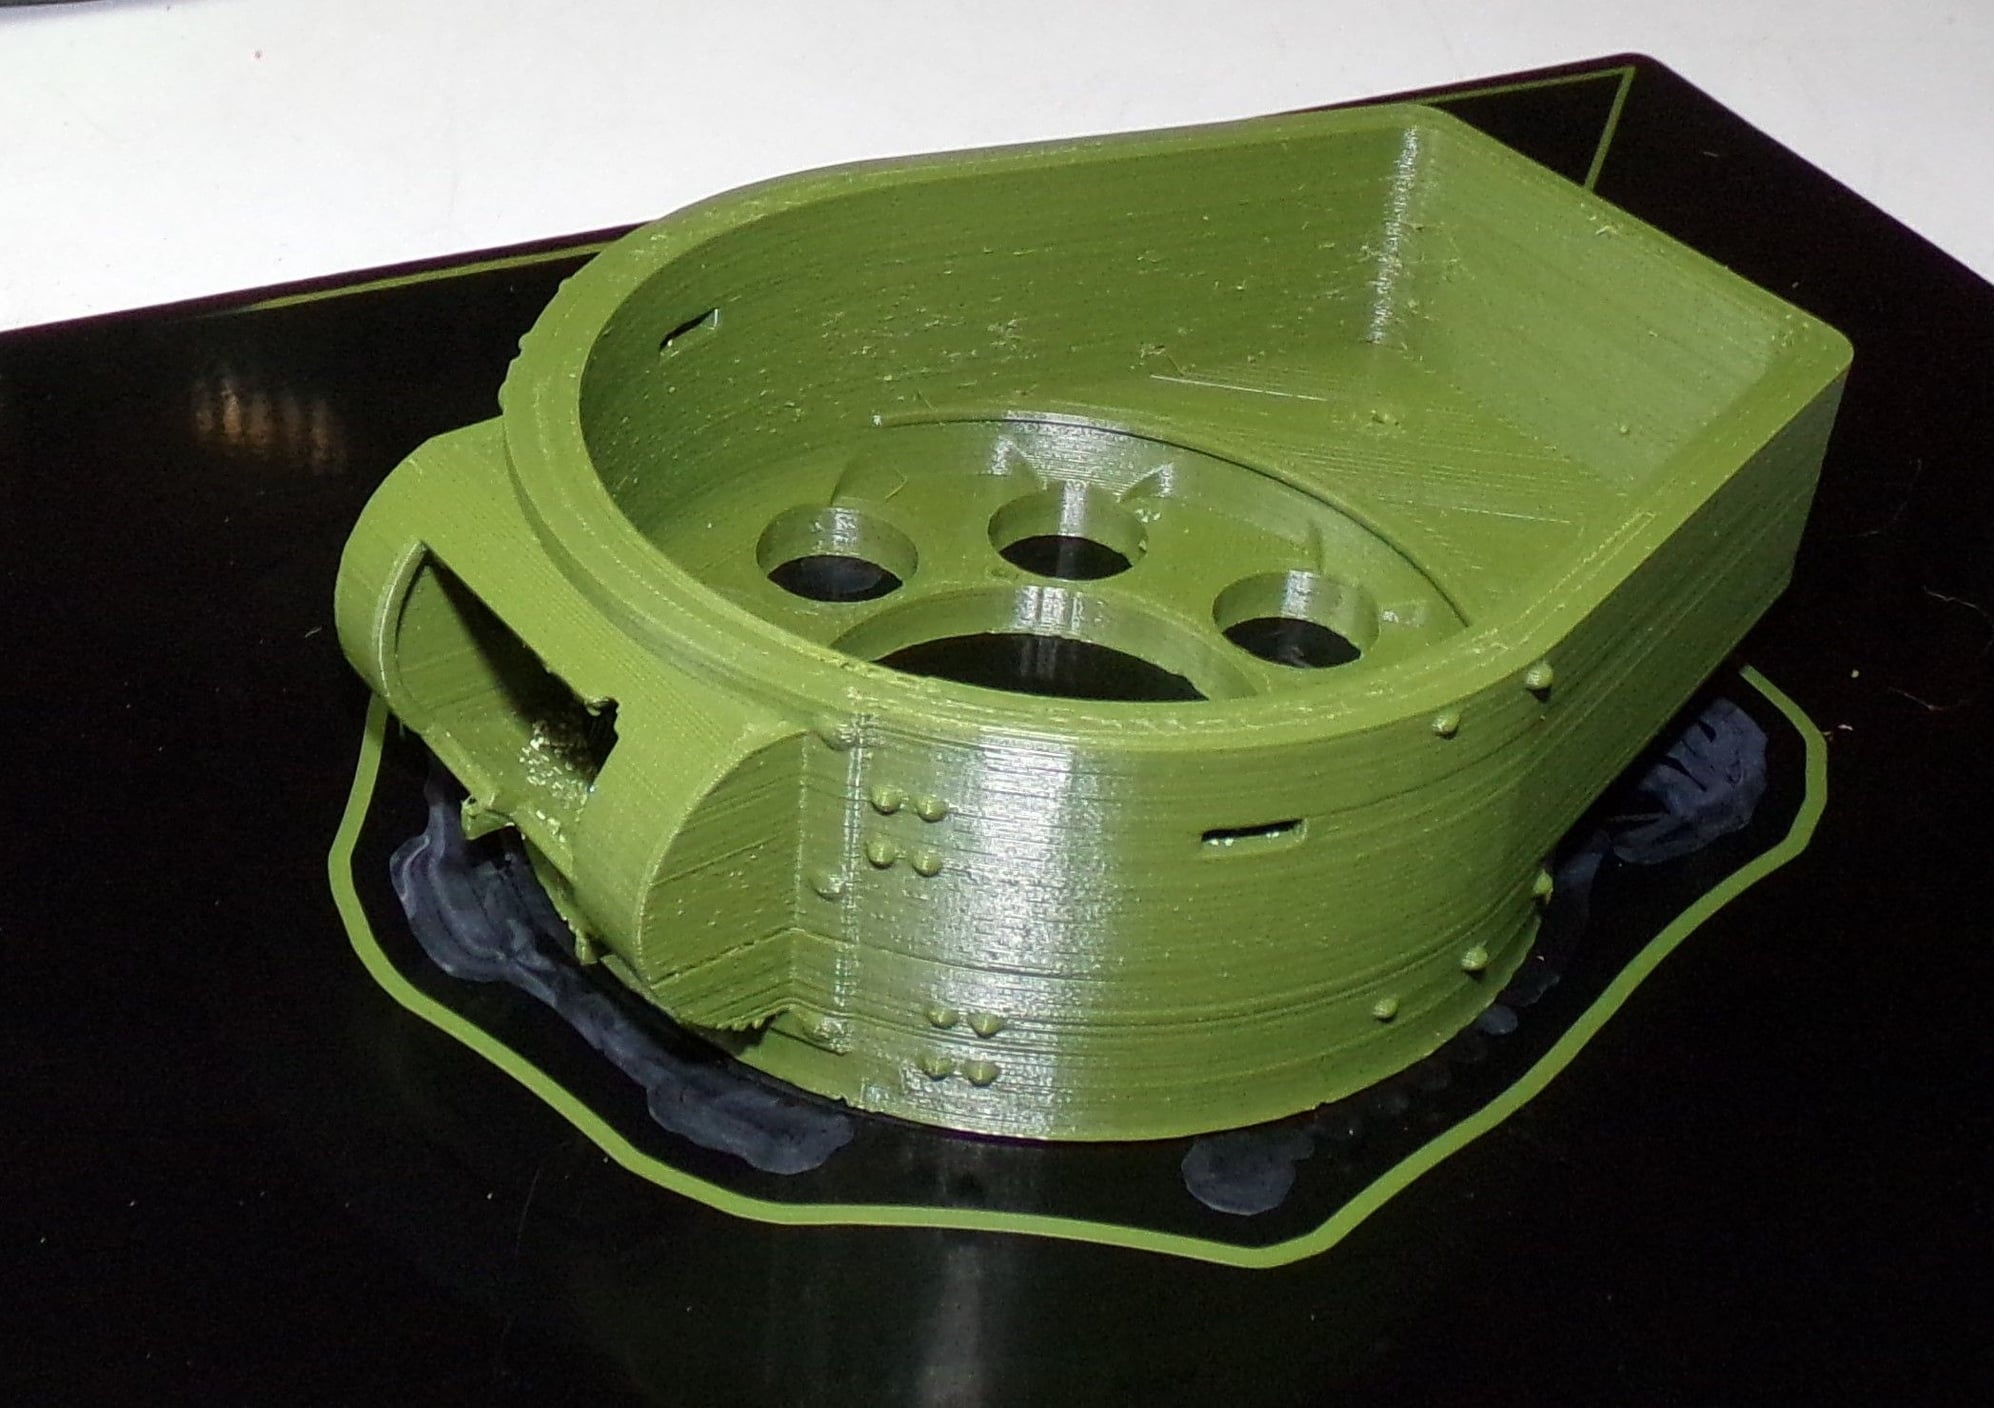
Tree supports removed.
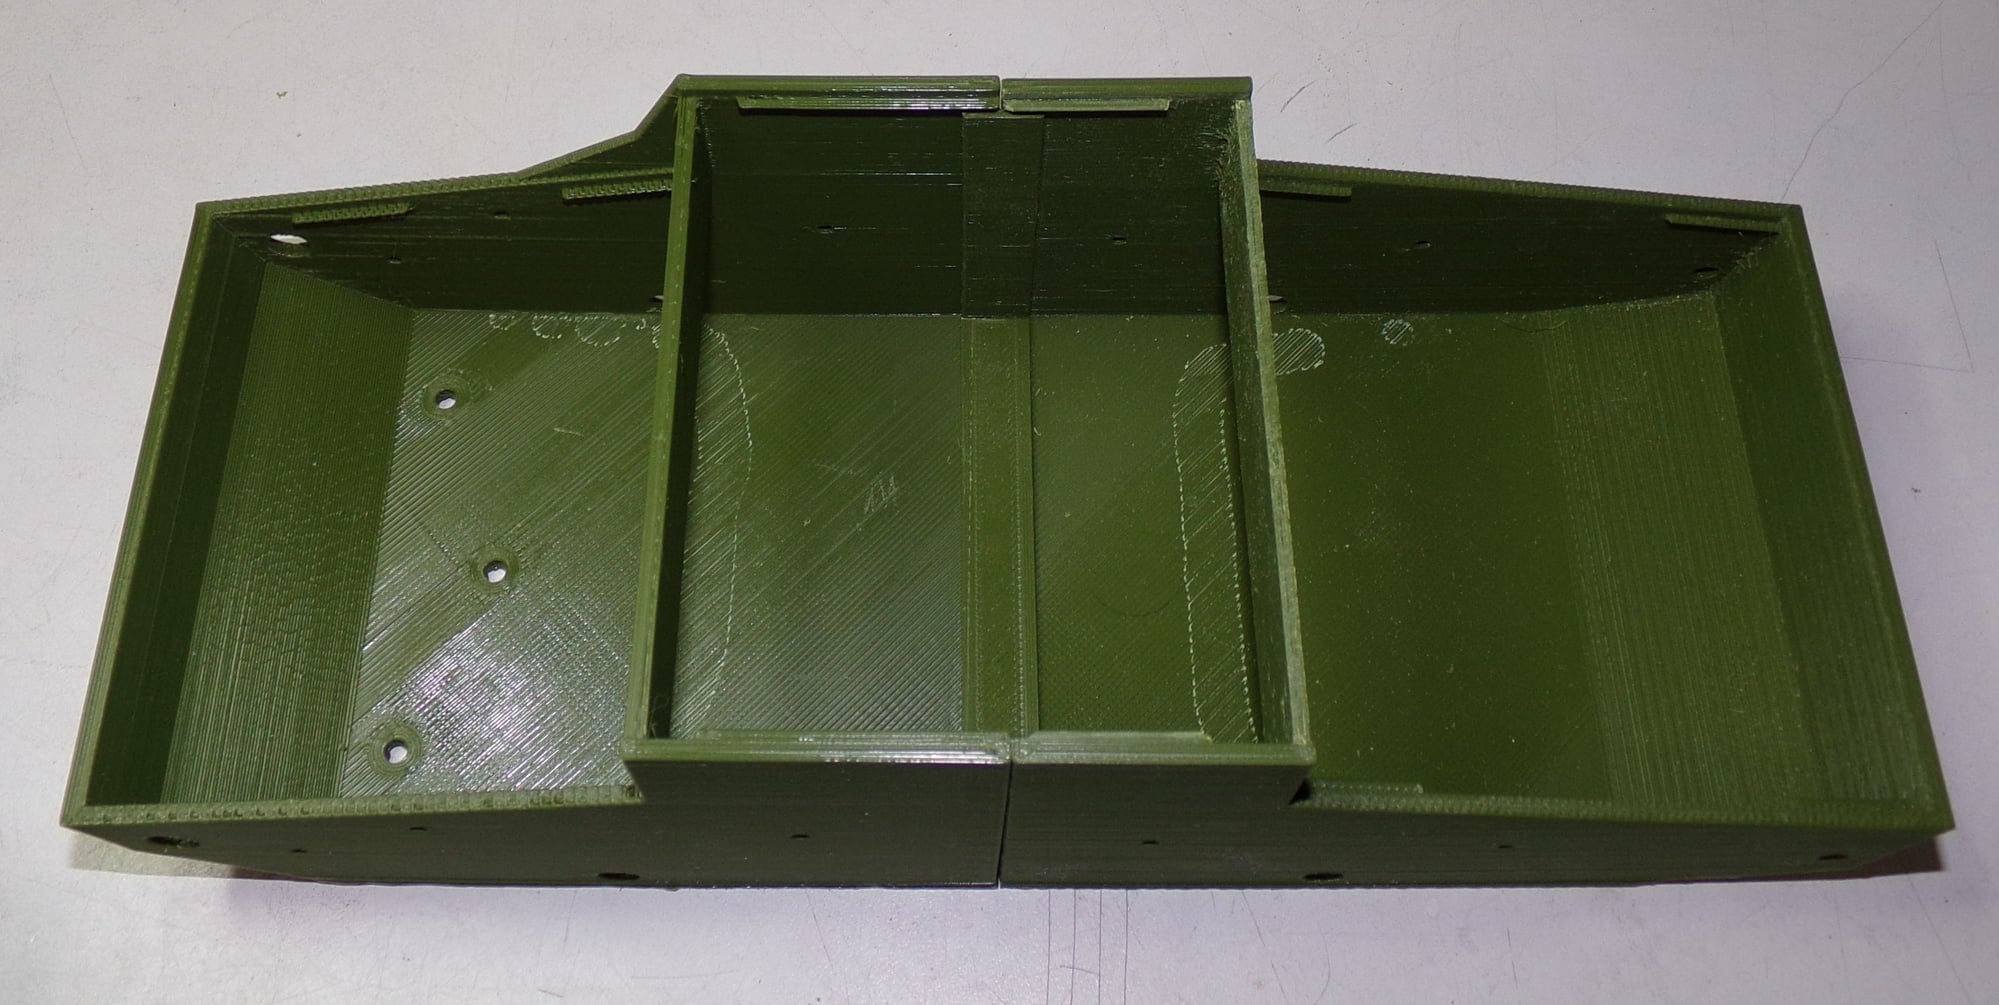
Got the lower hull printed. Now that was a chore. First print I tried to do both at the same time since it's split in two and the full hull wouldn't fit on my build plate. The build plate shifted at some point so that print was ruined. Then I printed the back by itself which took 13hrs to print as I should've changed the layer height, but ended up printing at .02 which is why it took forever. Then I printed the front. It finished and it looked pretty good until I tried to mate the two pieces. Sometime in the night I ended up with a layer shift and it skewed the entire top where the turret goes. I thought I could work around it, but finally decided to scrap it and reprint. On my third attempt at the front hull the ASA shrank so bad in the middle of the print that it pulled the build plate off the magnets holding it. Basically it warped it like a U. Frustrated as hell at that point I said....OK...print it again. I changed the orientation of the part, put a brim on it to keep it from warping, and increased the layer height some.
Success! The two halves ween't mated yet, but being ASA any ABS glue will work on them. The funky lines on the inside are the remnants of the tree supports.
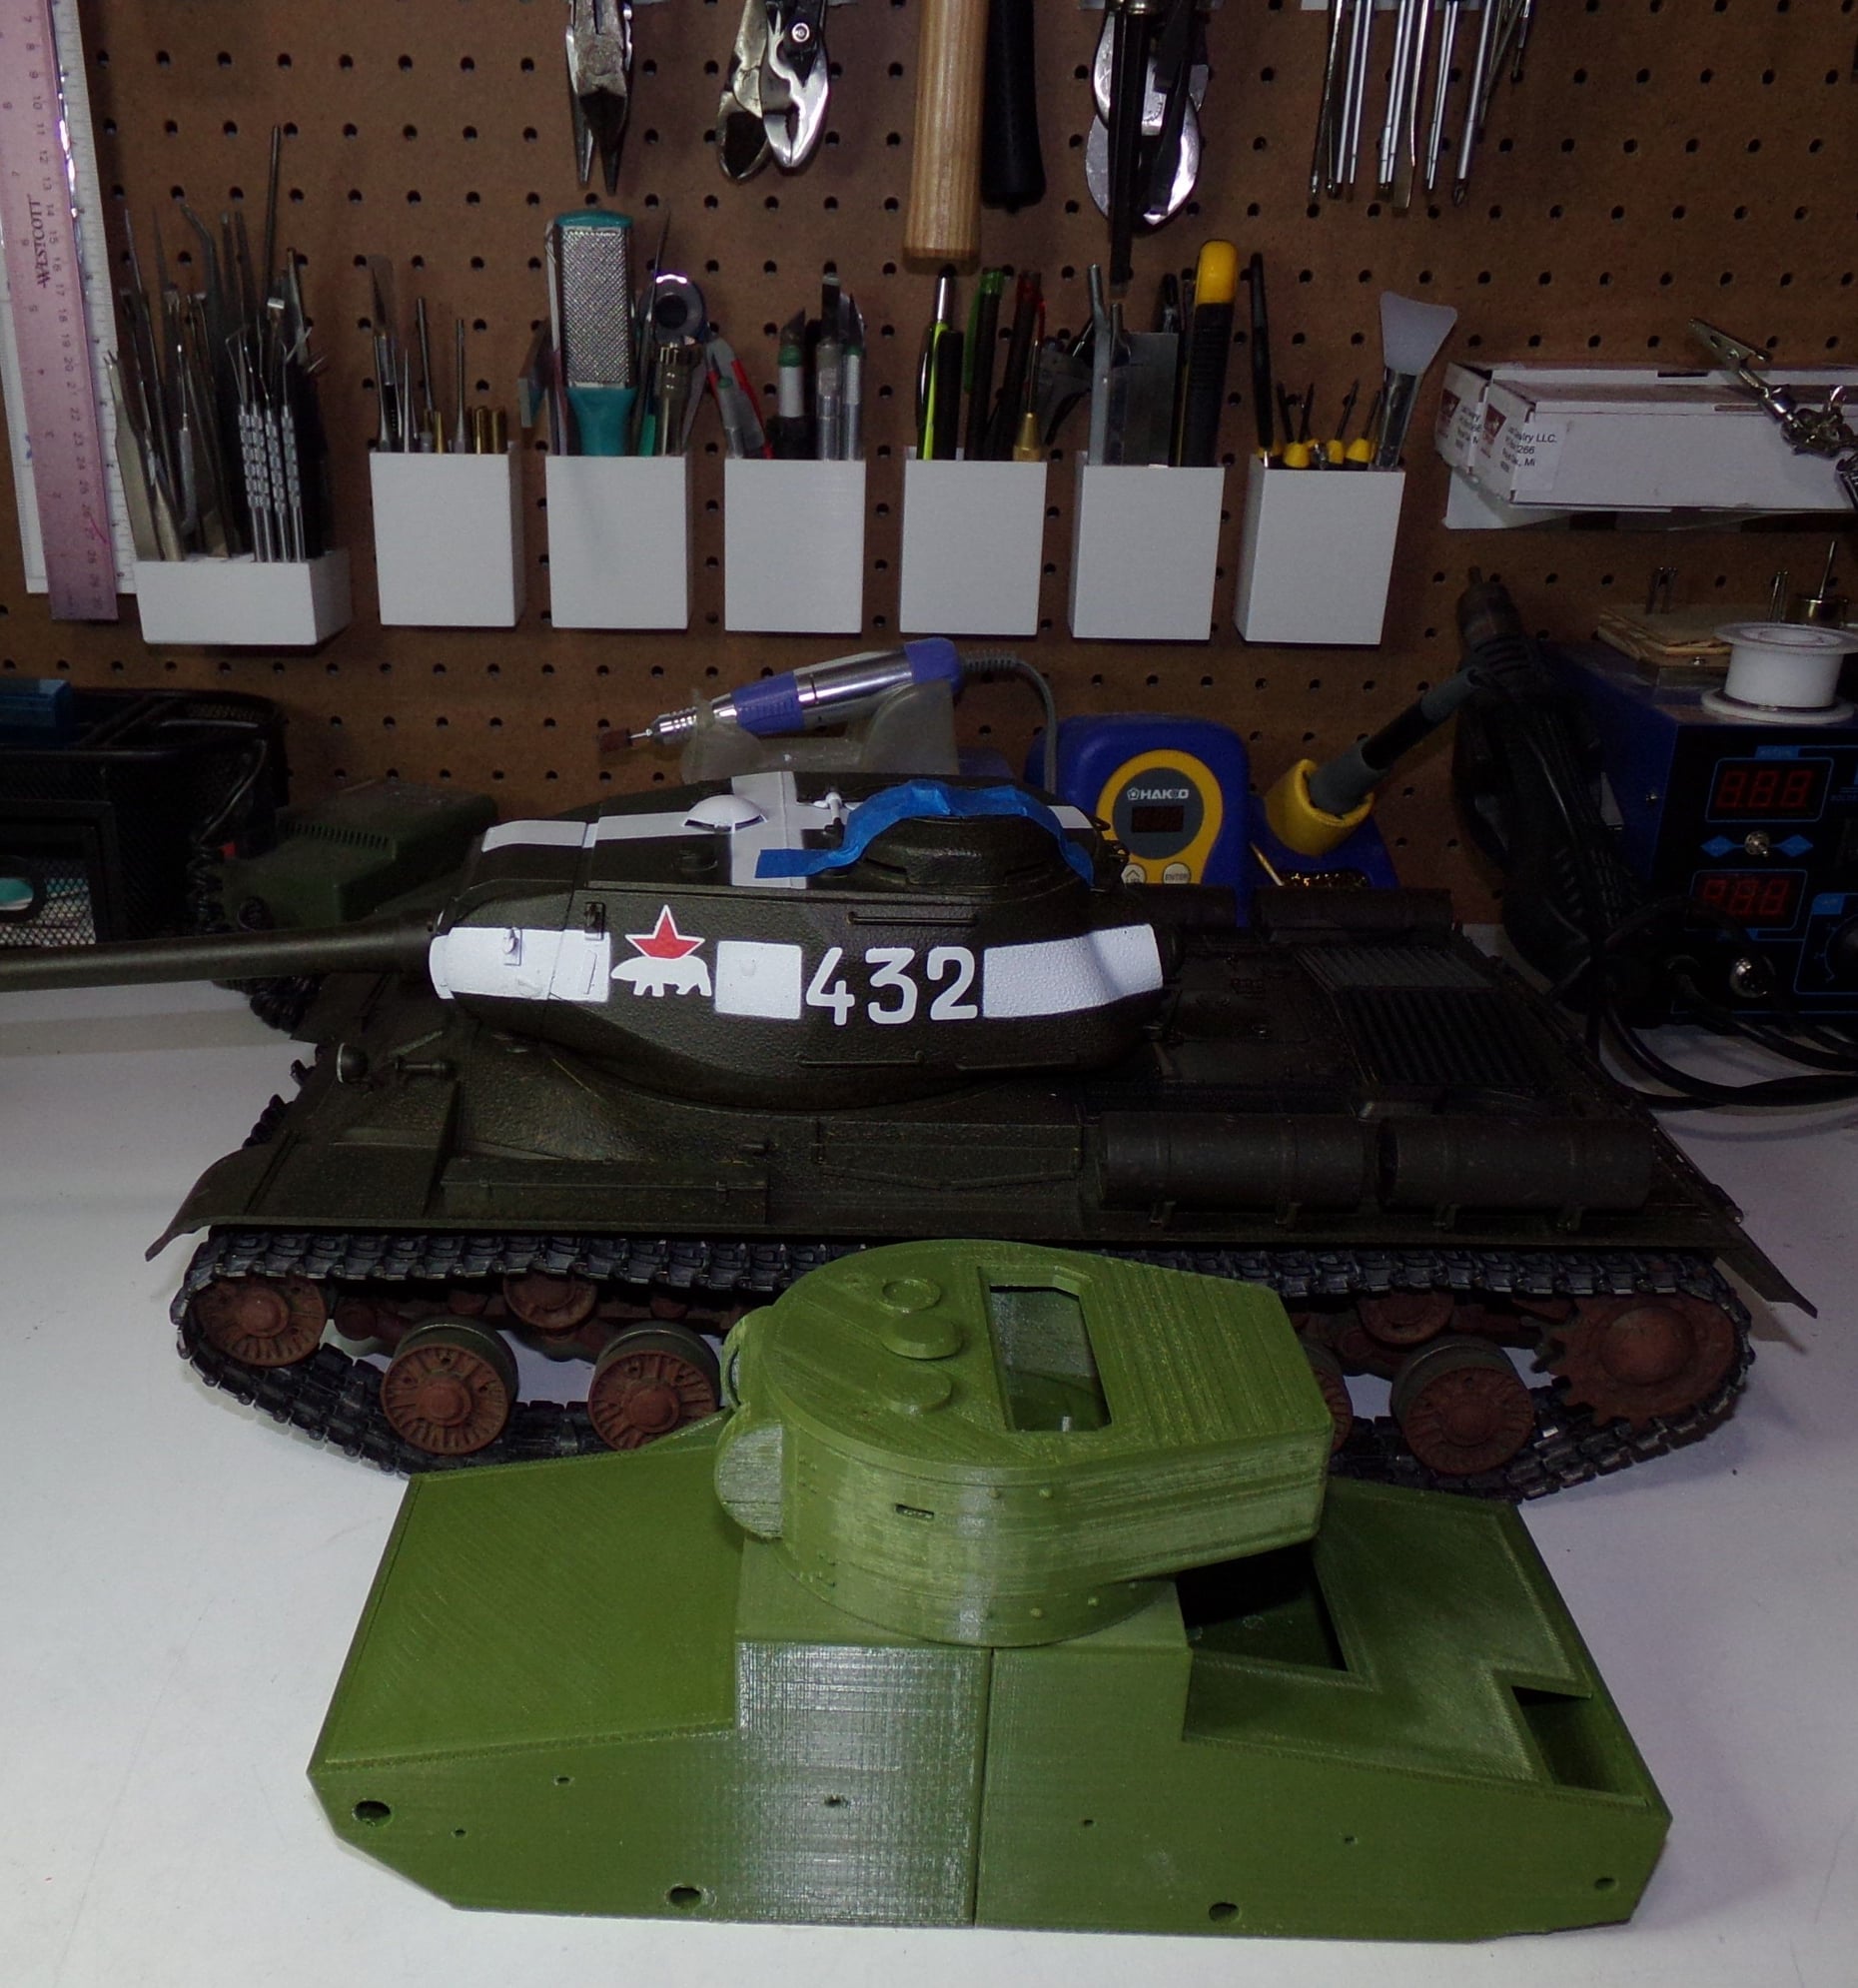
Printed the large deck pieces and did a dry fit of everything. The deck pieces are intentionally longer than needed I think as I had to sand quite a bit off the edges to get them to fit. Shown next to my IS-2 which I've been putting a new recoil mechanism in while I'm waiting for parts and prints for the T26. Just got the bolts to finish the IS-7 matlet so it may get some love today. You can see all my 3D printed organizers on the pegboard I practiced with before attempting a tank. There's more of them off camera. I actually freed up a lot of space for more stuff on the board by printing more compact holders for stuff.

Also got the turret gear printed and fitted.

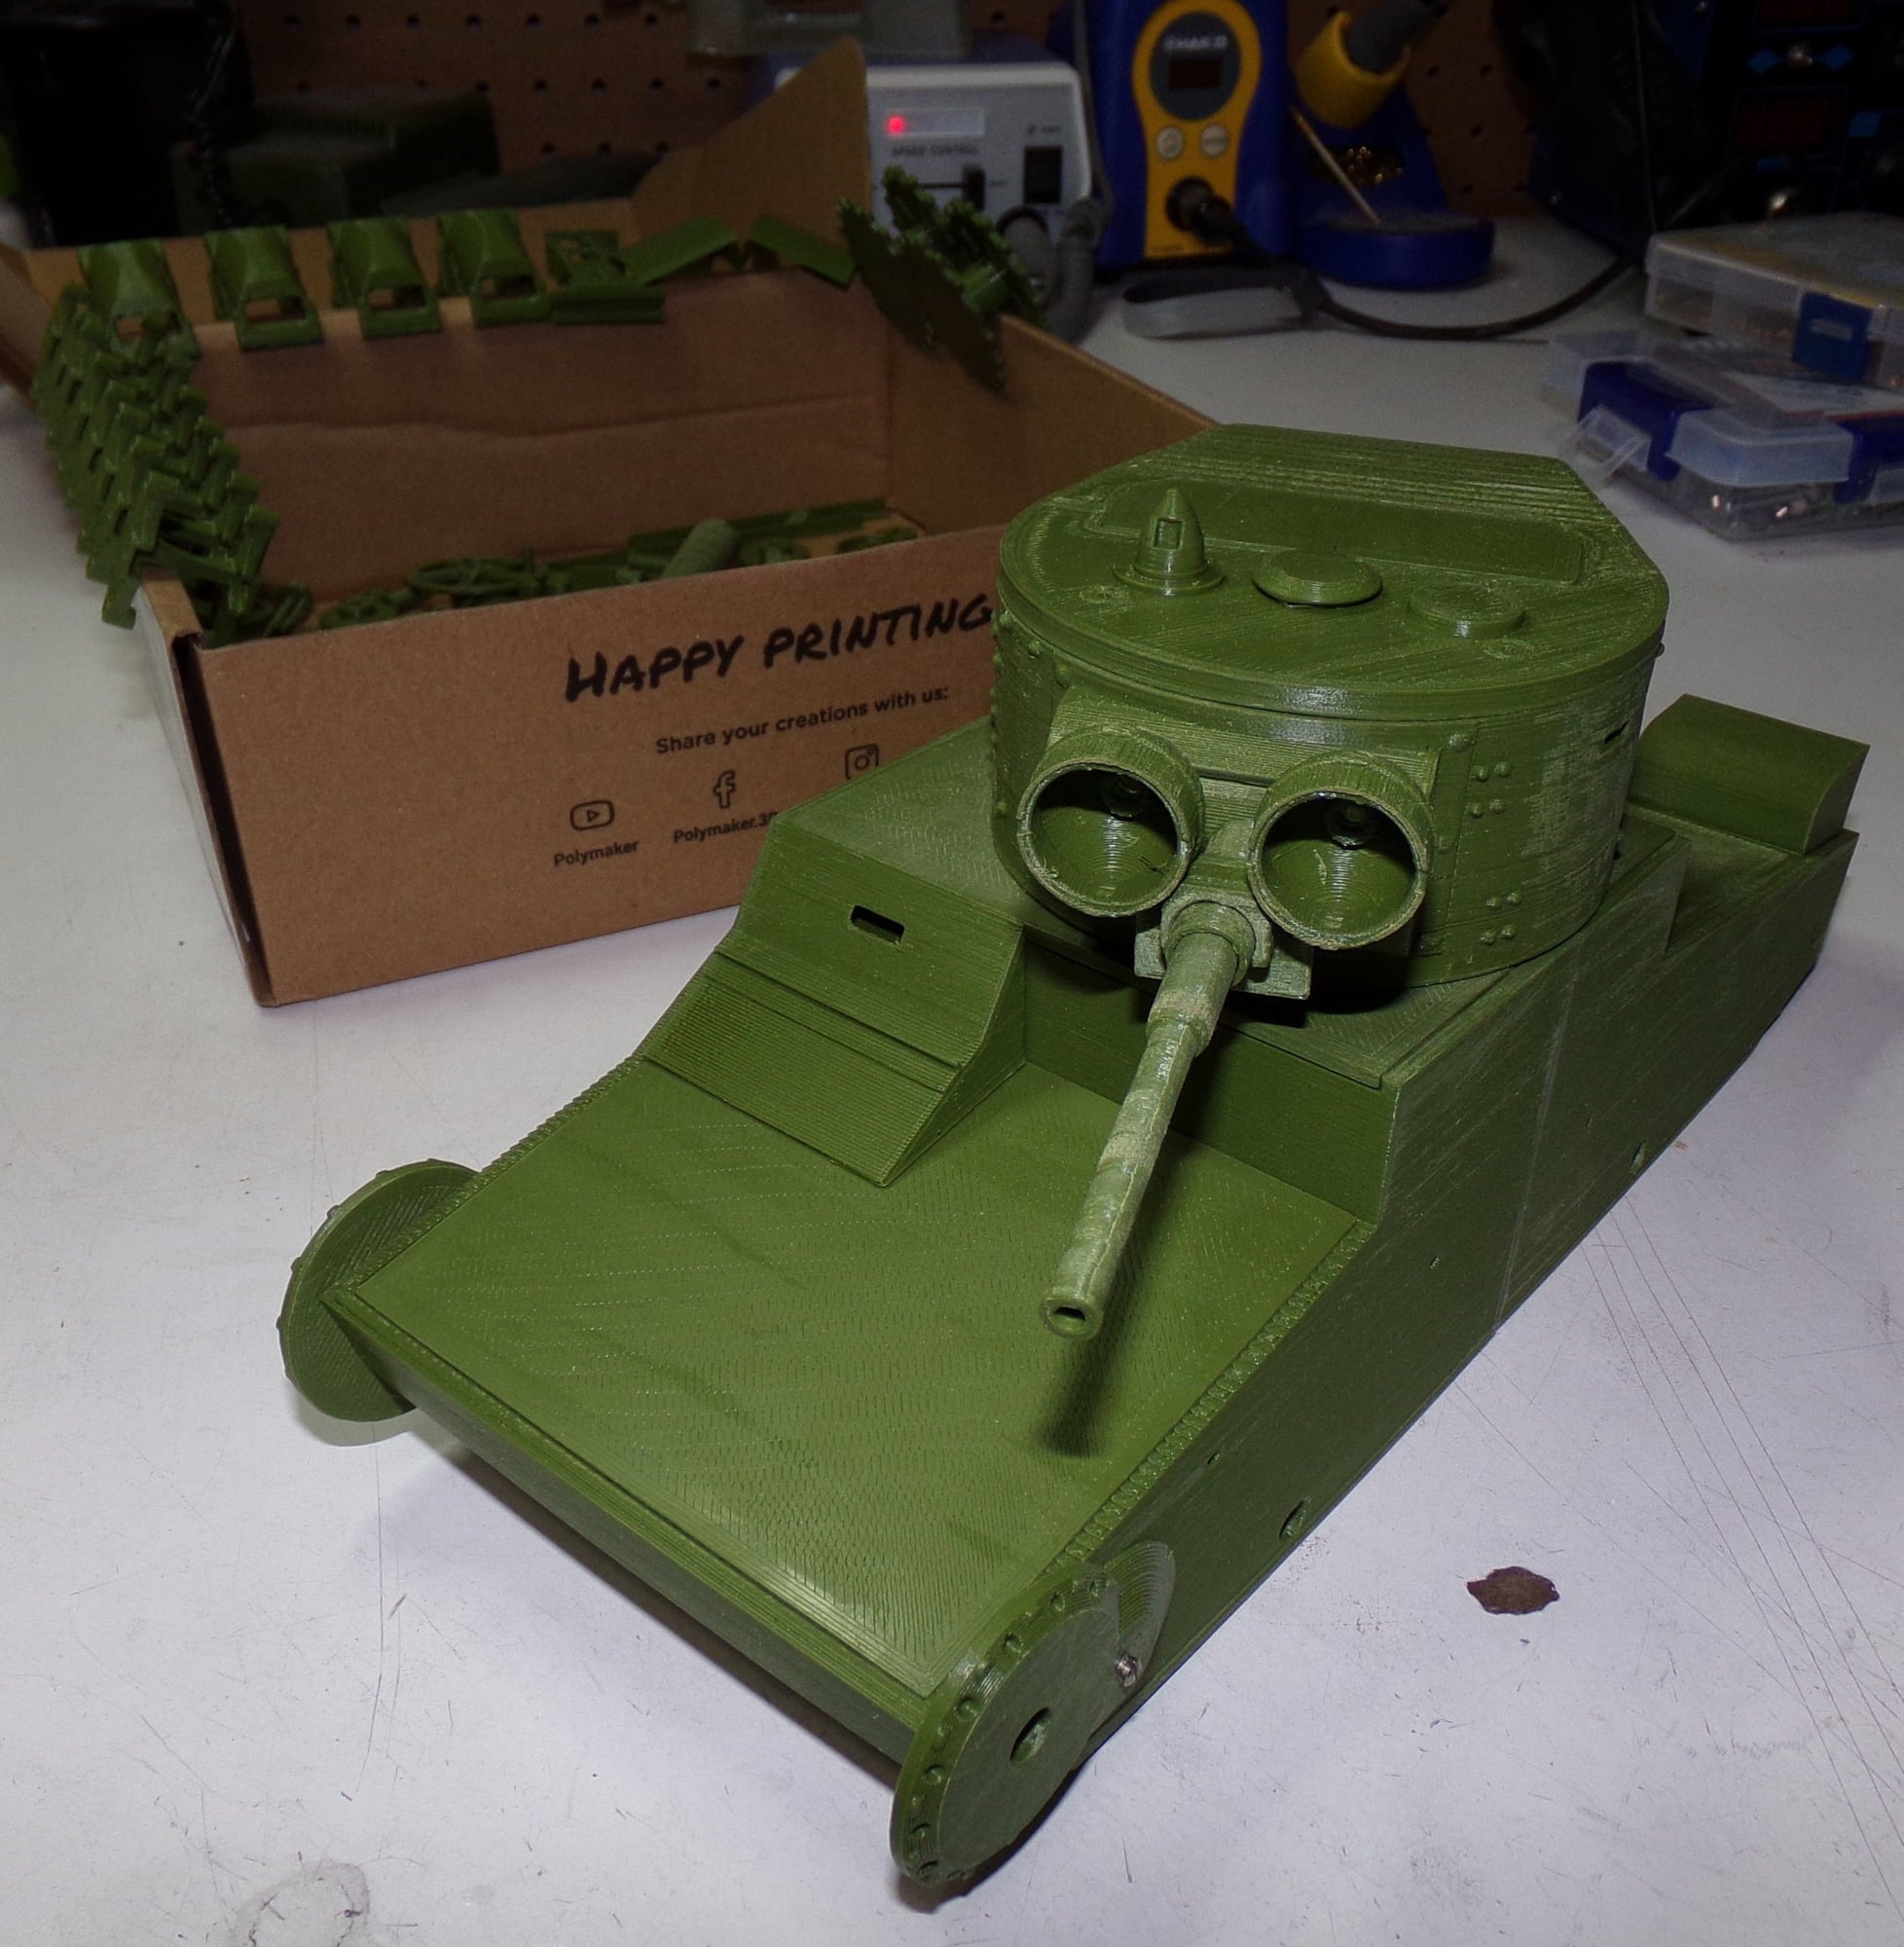
Got a little more printing done and some more fitting work. It's starting to look like a tank.
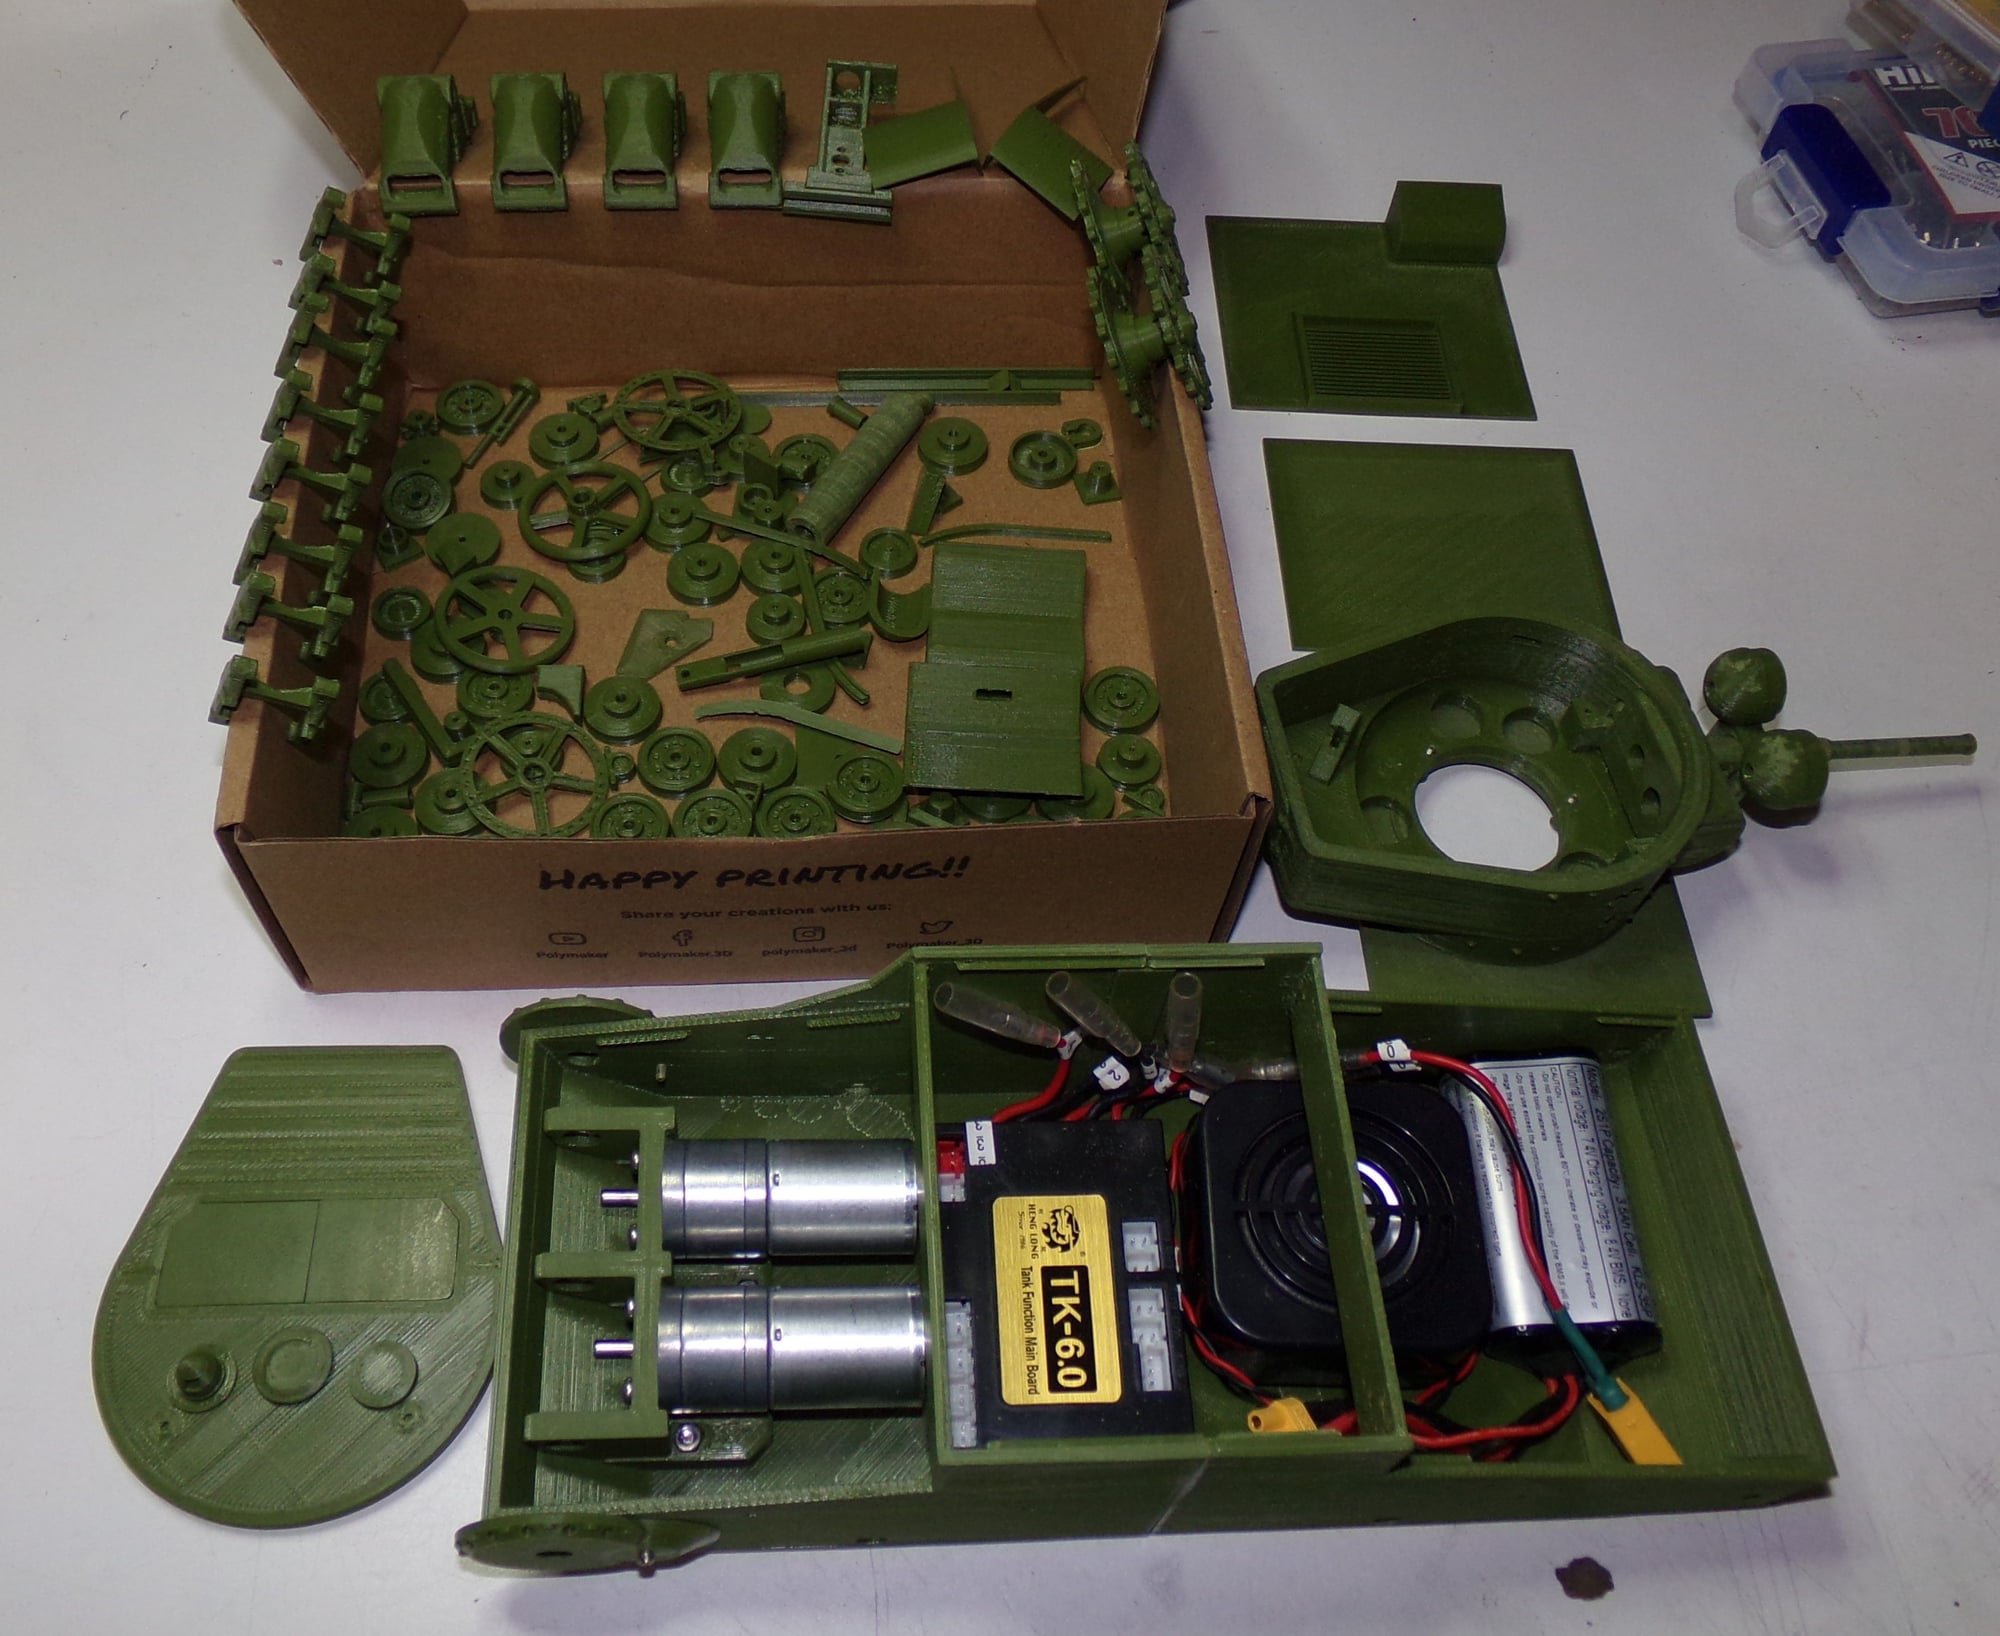
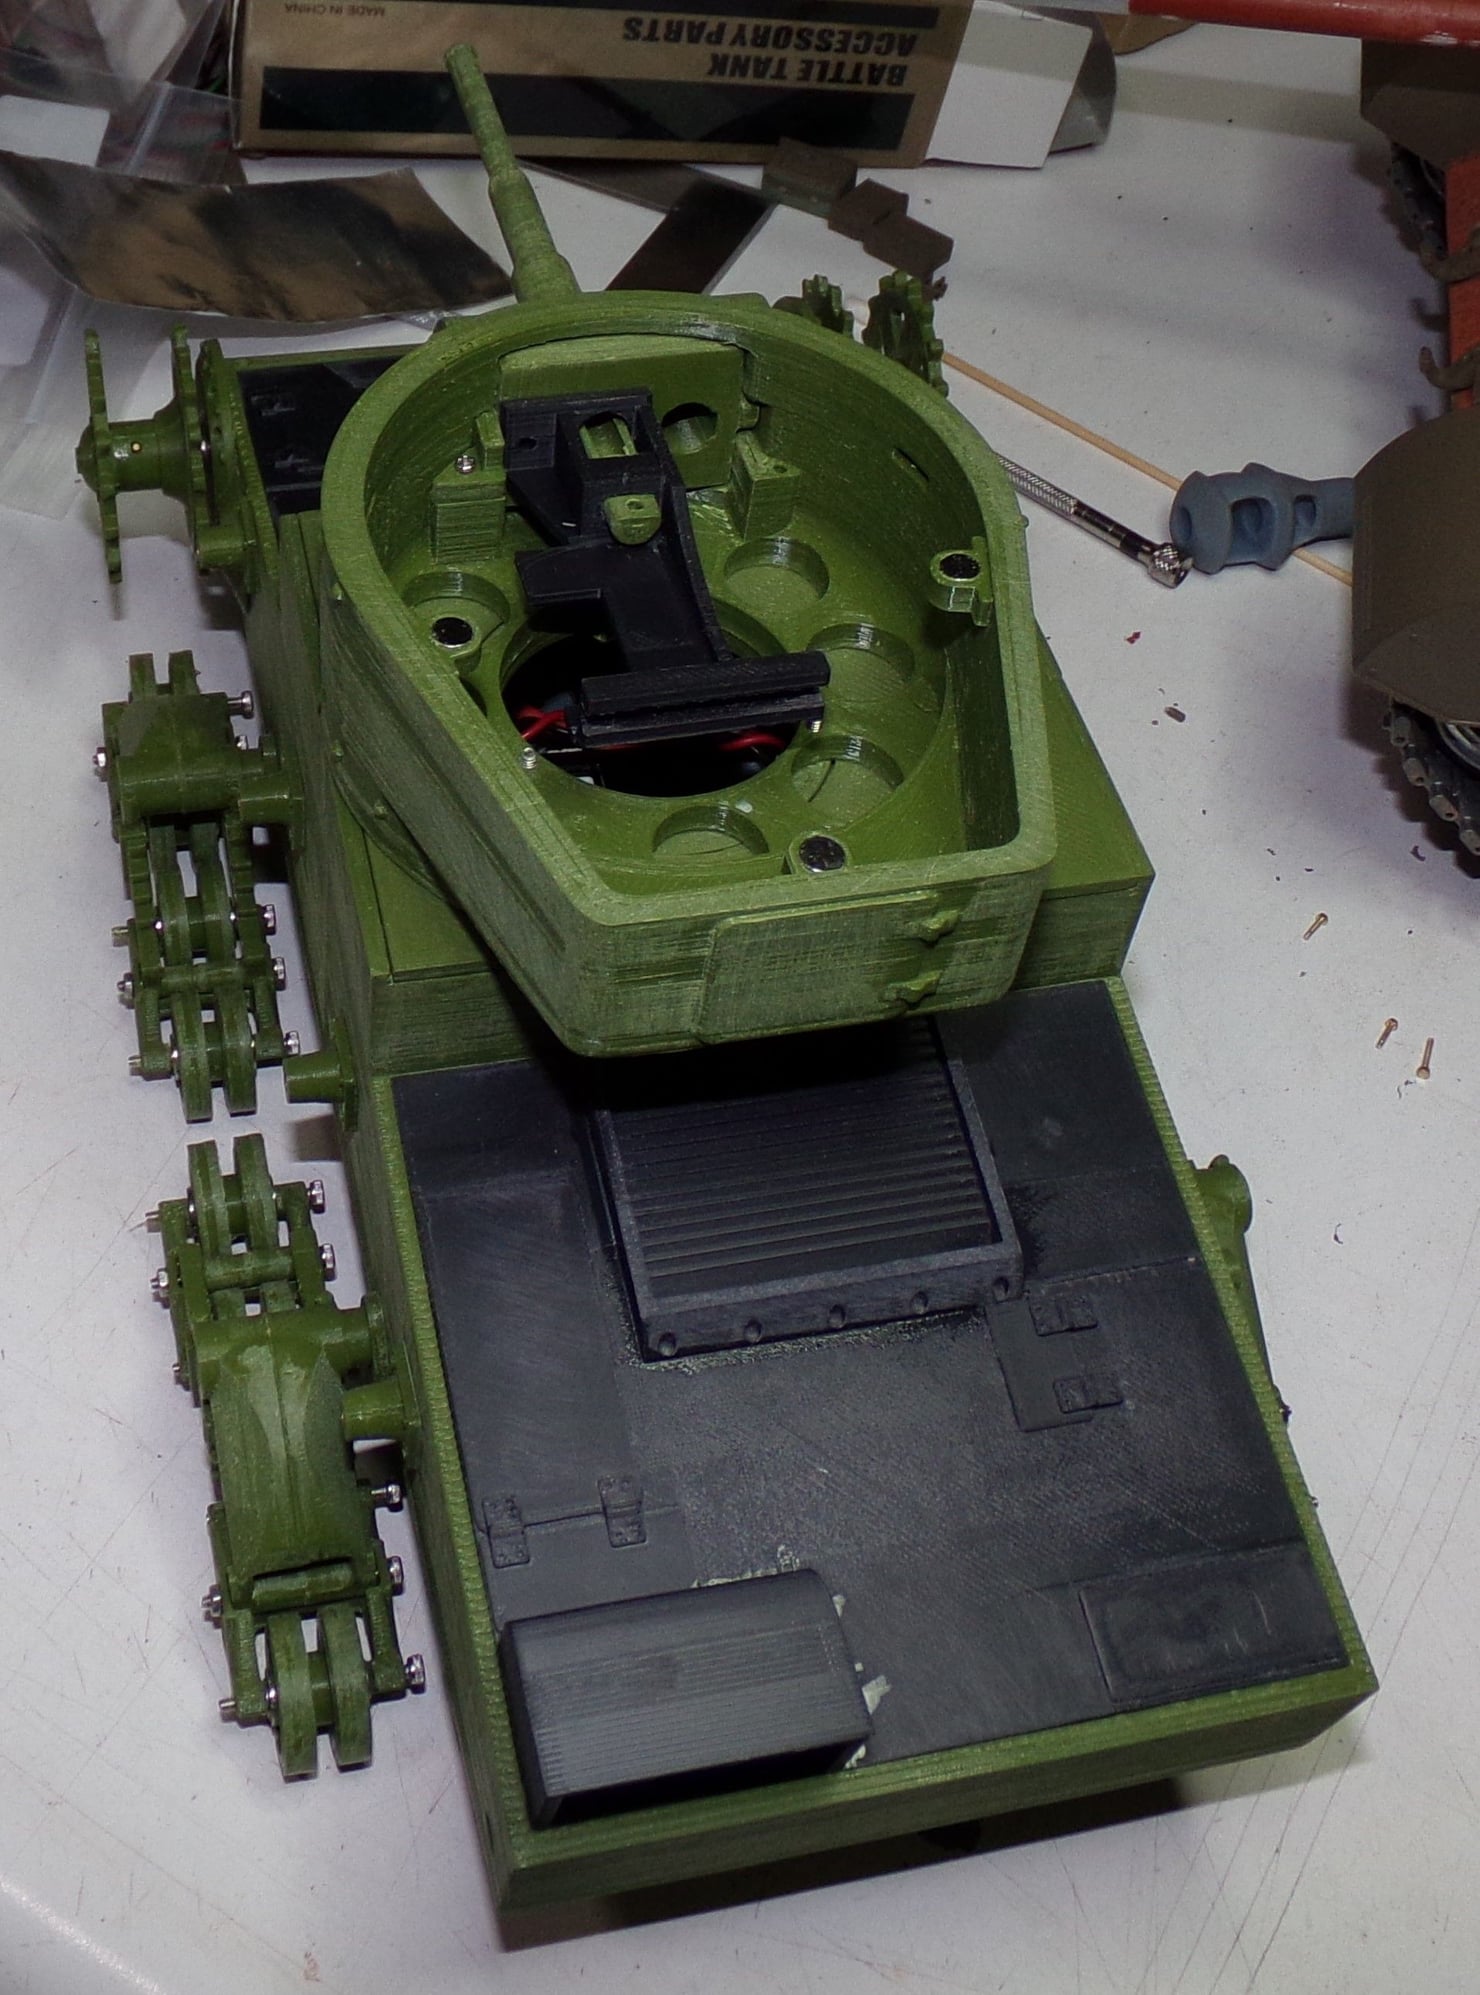
All the parts printed so far and a quick mock up of the inside. Actually quite roomy. Still have one last tray of parts printing. The only printing after that will be if any parts break in assembly.
Been doing a few things here and there on this build. Got all the bearings installed in the transmission, fitted the sprockets to the shafts/test fit them, mounted the return roller mounts/cut brass tube for them, did a bunch of barrel/elevation fitting, and installed the bogie mounts. Still can't finish the transmissions as I'm waiting for the gears from China as I couldn't find the right ones for a decent price in the US. The recoil and traverse motors are arriving next week.
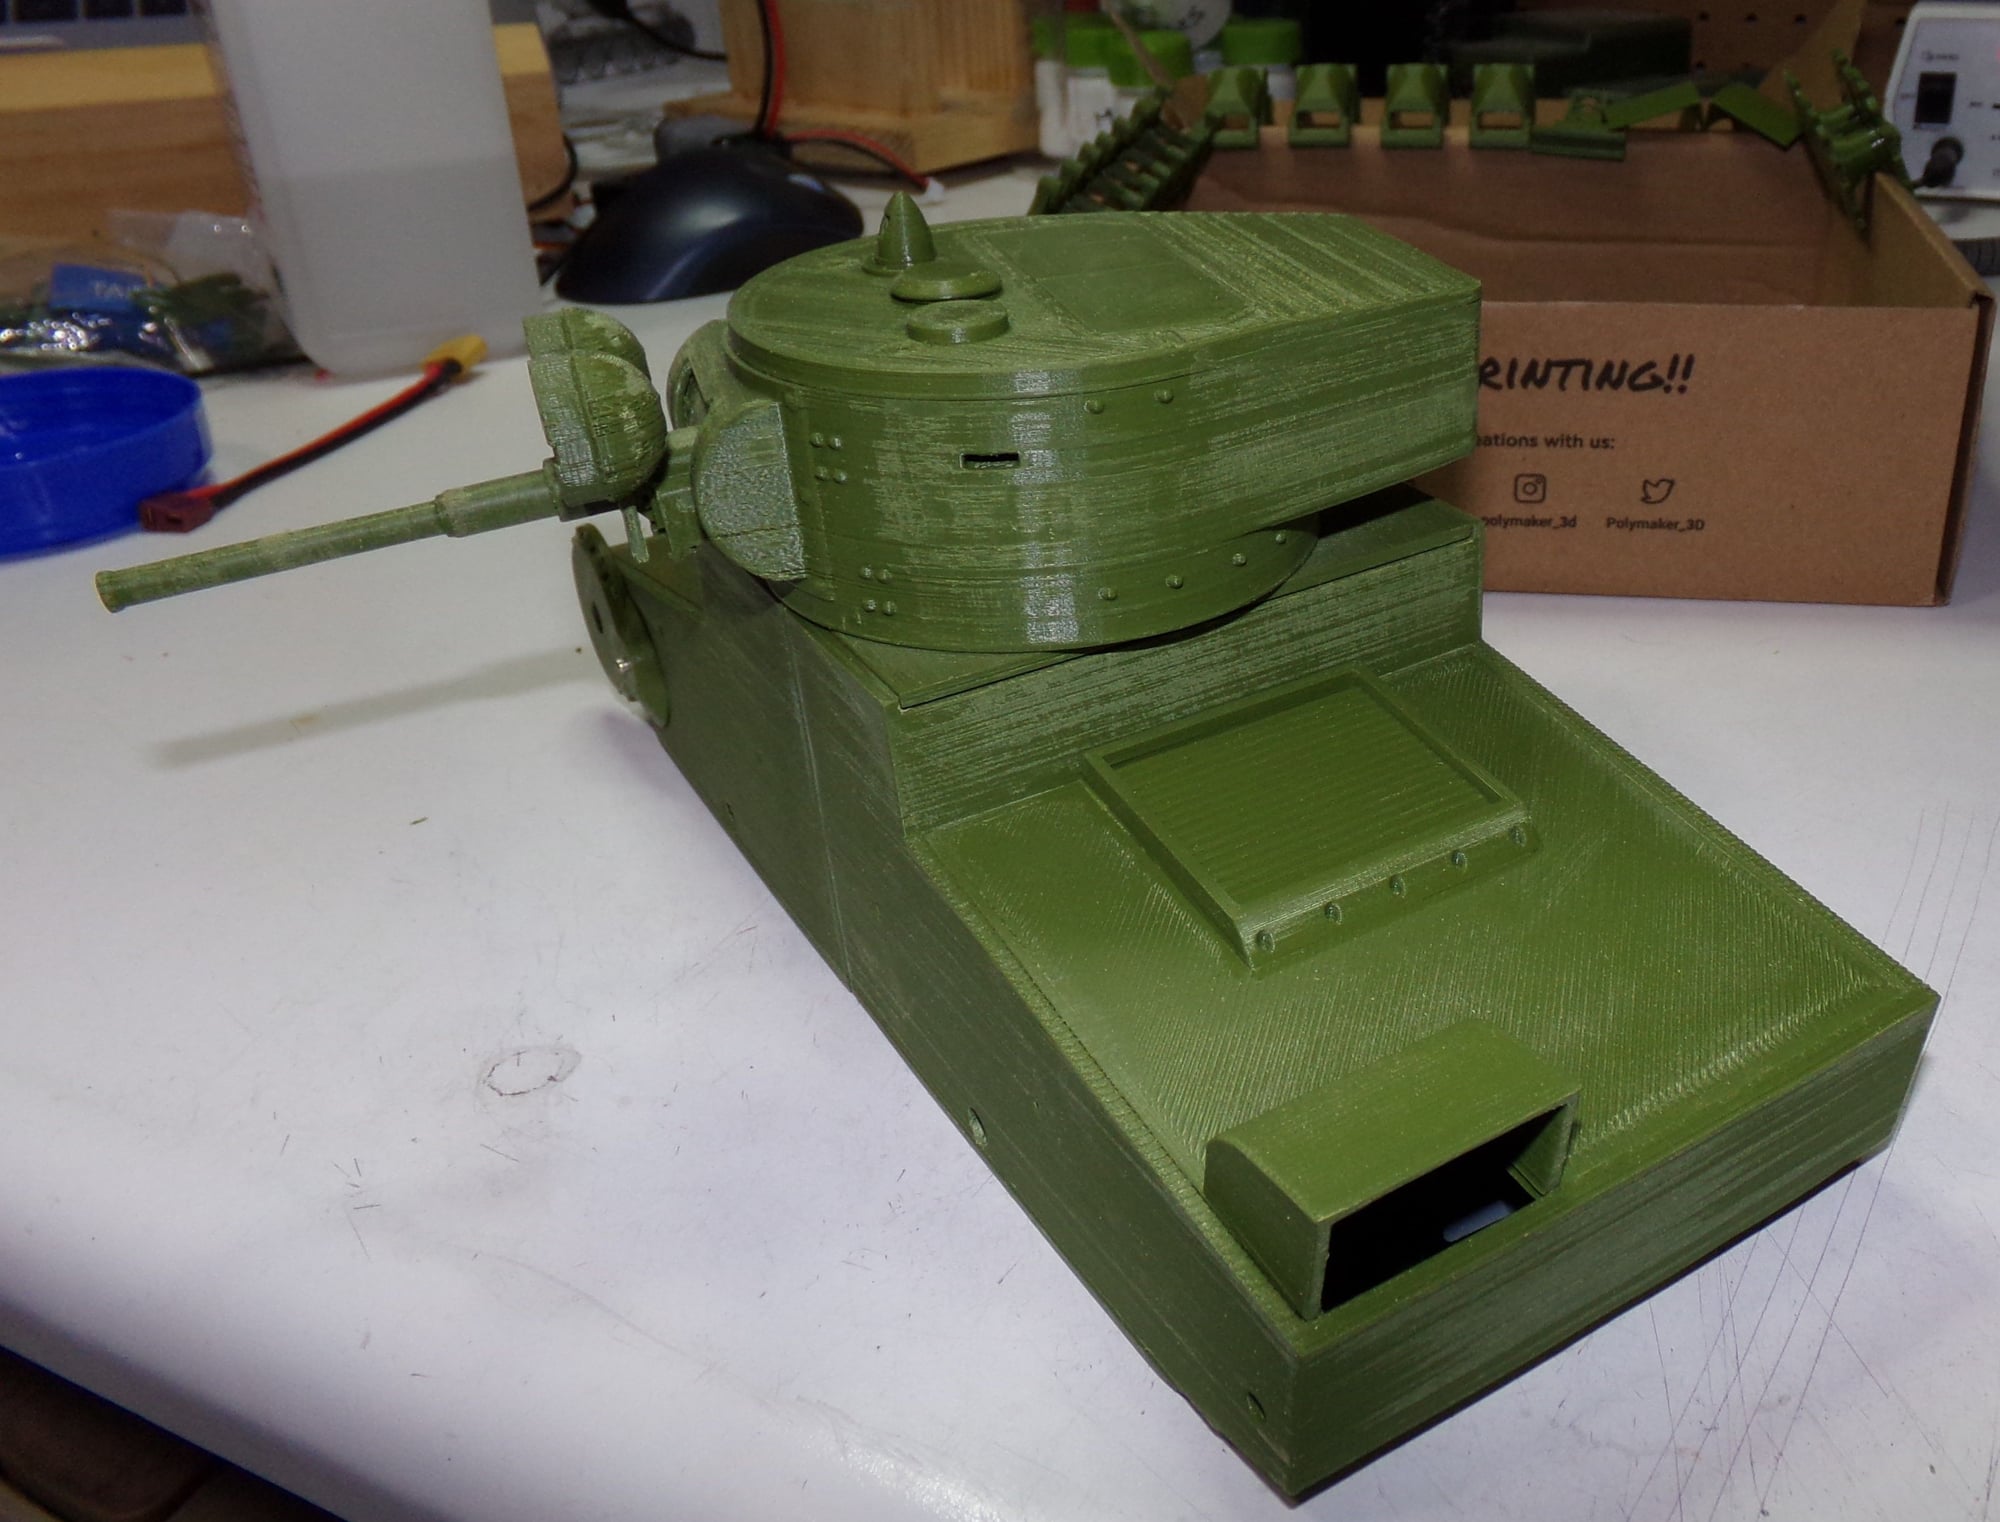
Still lots of sanding and finishing work to do. Been looking for a cheap way to do all the rivet detail. Found some rivets I may be able to 3D print. Here's how she sits at the moment.
Been spreading the bench time around to a bunch of different tanks. I worked on the Tamiya Sherman I bought years ago and got it fully functional again. Still want to do some more detail work on that one. I repaired/improved my SU-152 recoil that I roasted after stabbing the barrel into the dirt at our battle day (updated posted earlier). Installed the TK-40 from the SU-152 in my Taigen IS-2 as the SU got the newer TK-50. I gutted it's turret and installed a "Clark type" servo recoil that I printed myself. Only thing that tank is now lacking is an apple mount to be battle worthy. There are tons of little mods to all of those tanks also. Need to fix my T-72 recoil that mysteriously stopped working at the battle day...and the list goes on an on...
Been practicing with Polymaker ASA Army Green filament by printing the sprockets, road wheels, and the suspension. Finally confident enough in the ASA that I printed the turret and it came out great with no warping on my first attempt.
Right after cooling still sitting on the build plate:
Tree supports.
Tree supports removed.
Got the lower hull printed. Now that was a chore. First print I tried to do both at the same time since it's split in two and the full hull wouldn't fit on my build plate. The build plate shifted at some point so that print was ruined. Then I printed the back by itself which took 13hrs to print as I should've changed the layer height, but ended up printing at .02 which is why it took forever. Then I printed the front. It finished and it looked pretty good until I tried to mate the two pieces. Sometime in the night I ended up with a layer shift and it skewed the entire top where the turret goes. I thought I could work around it, but finally decided to scrap it and reprint. On my third attempt at the front hull the ASA shrank so bad in the middle of the print that it pulled the build plate off the magnets holding it. Basically it warped it like a U. Frustrated as hell at that point I said....OK...print it again. I changed the orientation of the part, put a brim on it to keep it from warping, and increased the layer height some.
Success! The two halves ween't mated yet, but being ASA any ABS glue will work on them. The funky lines on the inside are the remnants of the tree supports.
Printed the large deck pieces and did a dry fit of everything. The deck pieces are intentionally longer than needed I think as I had to sand quite a bit off the edges to get them to fit. Shown next to my IS-2 which I've been putting a new recoil mechanism in while I'm waiting for parts and prints for the T26. Just got the bolts to finish the IS-7 matlet so it may get some love today. You can see all my 3D printed organizers on the pegboard I practiced with before attempting a tank. There's more of them off camera. I actually freed up a lot of space for more stuff on the board by printing more compact holders for stuff.
Also got the turret gear printed and fitted.
Got a little more printing done and some more fitting work. It's starting to look like a tank.
All the parts printed so far and a quick mock up of the inside. Actually quite roomy. Still have one last tray of parts printing. The only printing after that will be if any parts break in assembly.
Been doing a few things here and there on this build. Got all the bearings installed in the transmission, fitted the sprockets to the shafts/test fit them, mounted the return roller mounts/cut brass tube for them, did a bunch of barrel/elevation fitting, and installed the bogie mounts. Still can't finish the transmissions as I'm waiting for the gears from China as I couldn't find the right ones for a decent price in the US. The recoil and traverse motors are arriving next week.
Still lots of sanding and finishing work to do. Been looking for a cheap way to do all the rivet detail. Found some rivets I may be able to 3D print. Here's how she sits at the moment.
Been spreading the bench time around to a bunch of different tanks. I worked on the Tamiya Sherman I bought years ago and got it fully functional again. Still want to do some more detail work on that one. I repaired/improved my SU-152 recoil that I roasted after stabbing the barrel into the dirt at our battle day (updated posted earlier). Installed the TK-40 from the SU-152 in my Taigen IS-2 as the SU got the newer TK-50. I gutted it's turret and installed a "Clark type" servo recoil that I printed myself. Only thing that tank is now lacking is an apple mount to be battle worthy. There are tons of little mods to all of those tanks also. Need to fix my T-72 recoil that mysteriously stopped working at the battle day...and the list goes on an on...

The following users liked this post:
MAUS45 (04-20-2022)
04-17-2022, 03:36 PM
#2
What layer height did you slice that at, what size nozzle, head and bed temps? I'll be honest it looks a bit rough, doing some tweaks to your slicer settings could vastly improve the print quality, which will also help with strength.
04-17-2022, 03:52 PM
#3
Thread Starter
The tank got printed in ASA because I wasn't going to deal with melting panels like on my SU-152 printed in PLA from Armoured Models.
Last edited by tankme; 04-17-2022 at 03:57 PM.
03-03-2023, 02:34 PM
#5
Thread Starter
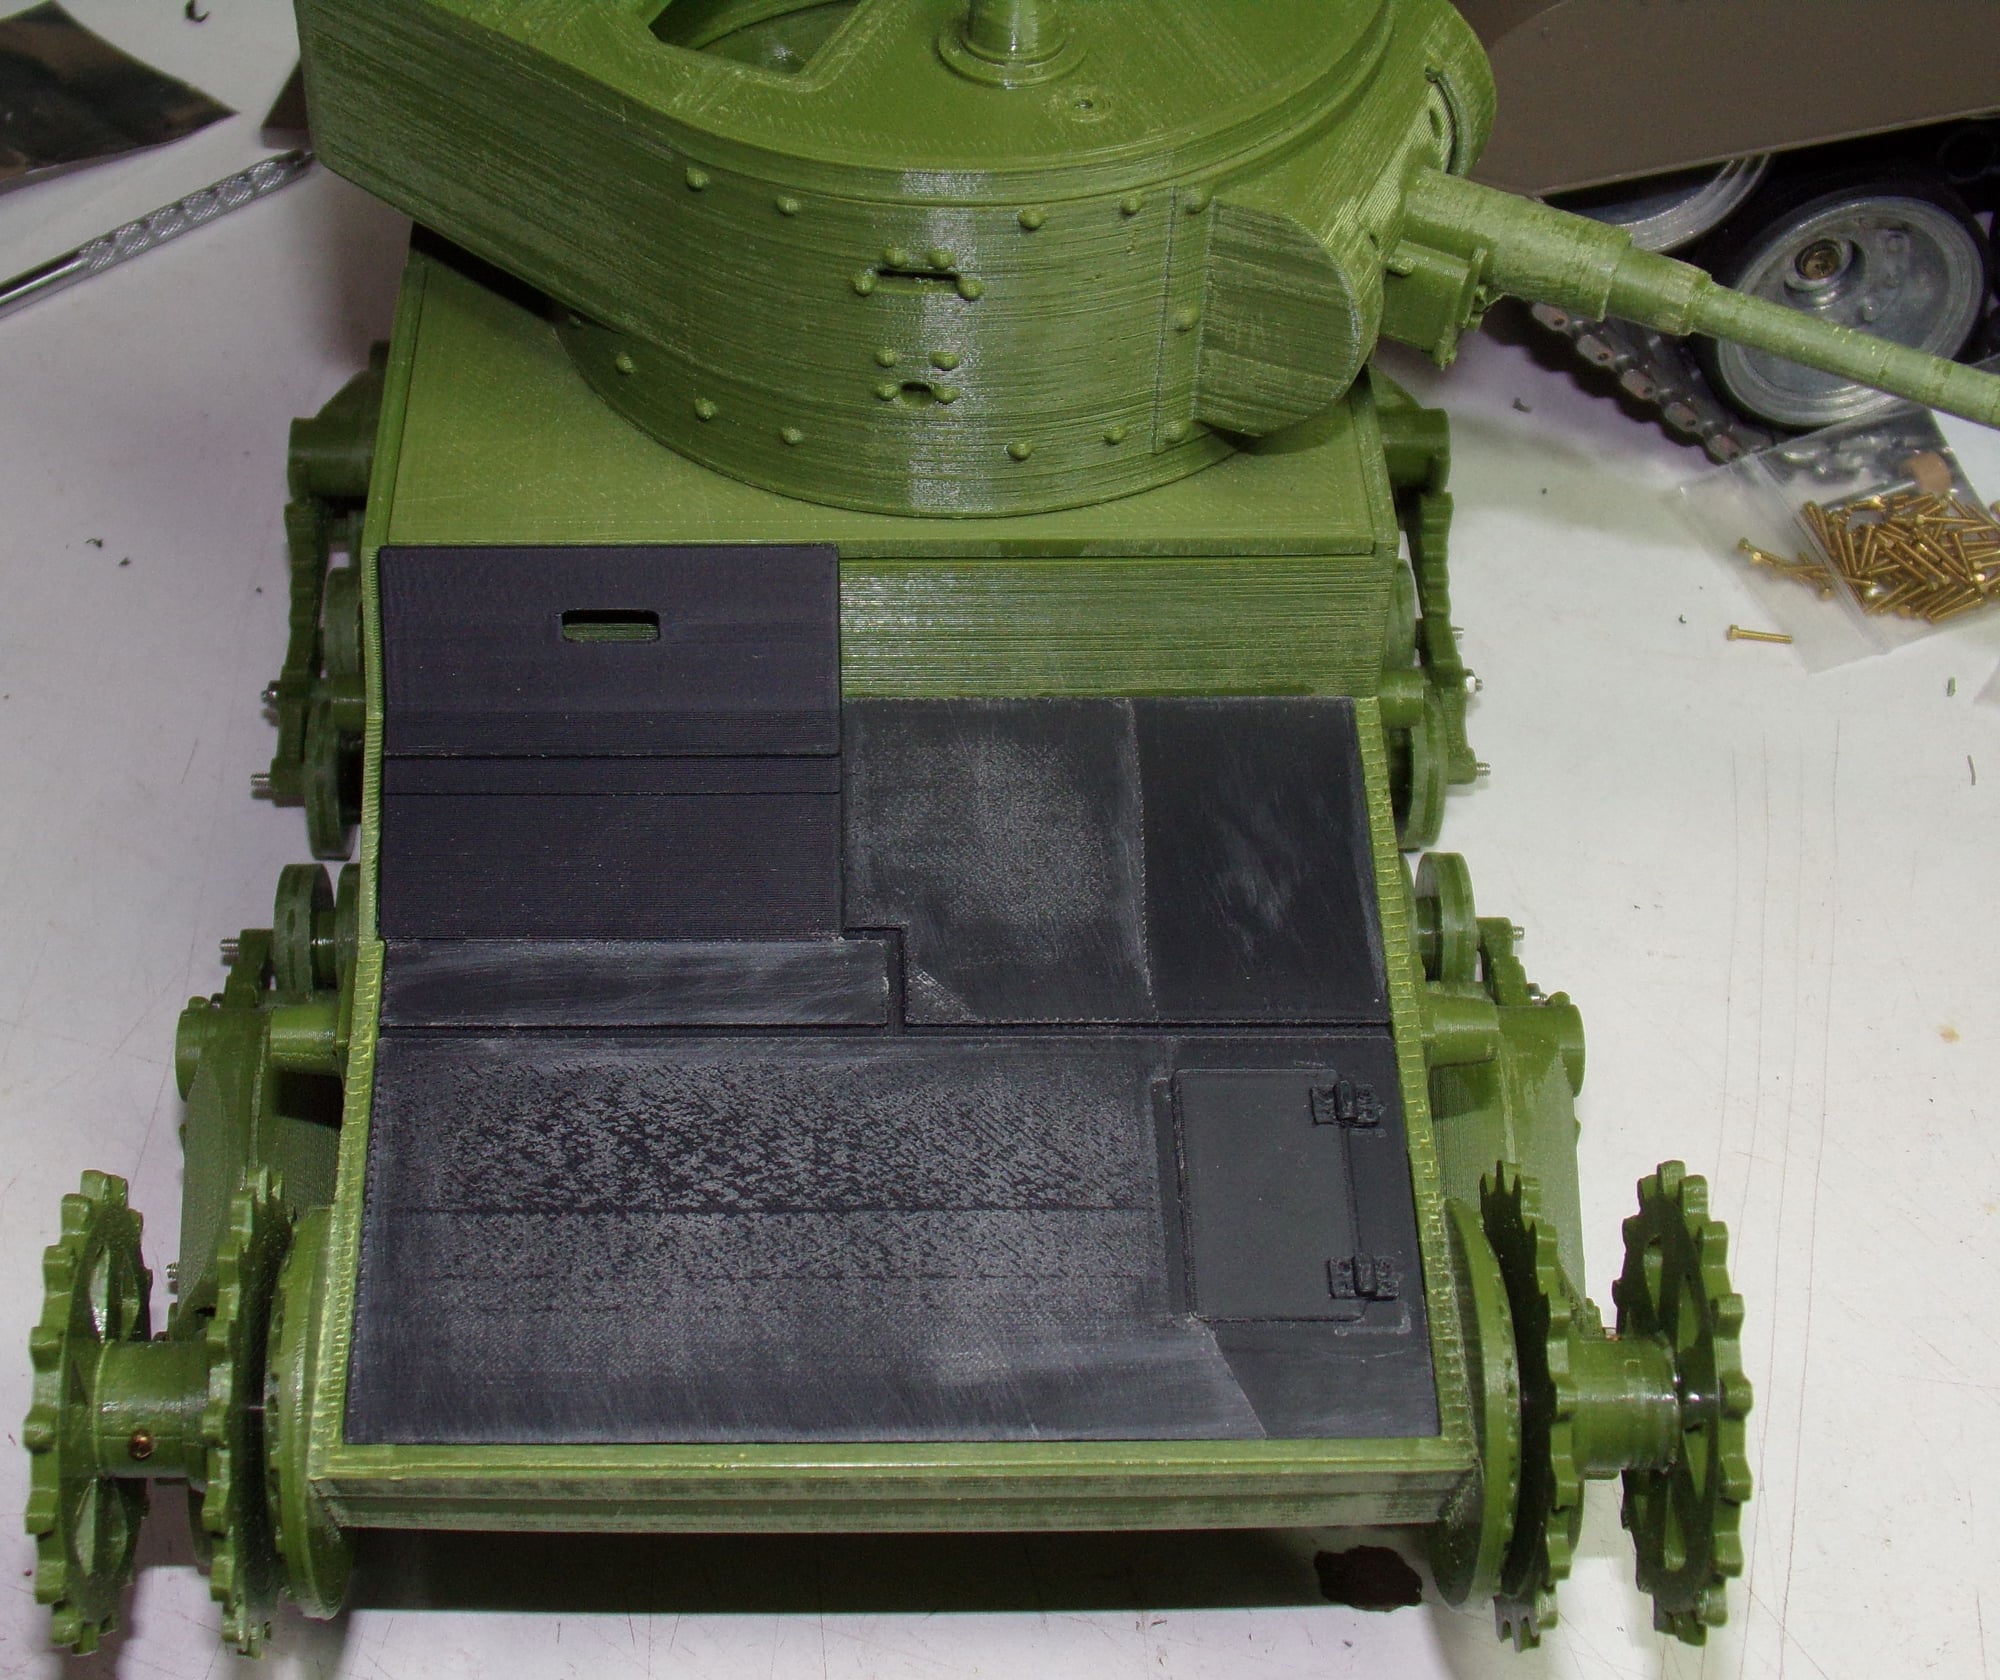
I haven't updated this thread in quite some time, but there was a lot of drilling and fitting involved to get to this point. I printed a bunch of extra magnet mounts so I was able to magnetize the front plate, the rear deck, the turret top, and the turret deck for easy maintenance. I was able to test run the motors off the control board and everything seemed to work fine.

The road wheels all have bearing installed in them (two per wheel). What a PITA that was. I still need to pull each one off and remove a bit of "elefant's foot" off the inside of each wheel from the printing process. These were printed on my old 3D printer and the Bambu Labs printer wouldn't do this, but I'm not going to reprint them at this point as it was so much work to get the bearings in the wheels. I just can't help the fact that I won't build a tank with plastic on metal rubbing. Most of the ready made 3D tank STLs don't account for bearings on the road wheels. I could reprint the whole tank on the Bambu at this point, but this was a learning experience. Most of the layer lines will be covered by body filler once the tank enters the finishing phase.

And our friend Herman from down under sent me his unused PZ3 tracks for the project. So thanks to him for that. 8)
Derek
The road wheels all have bearing installed in them (two per wheel). What a PITA that was. I still need to pull each one off and remove a bit of "elefant's foot" off the inside of each wheel from the printing process. These were printed on my old 3D printer and the Bambu Labs printer wouldn't do this, but I'm not going to reprint them at this point as it was so much work to get the bearings in the wheels. I just can't help the fact that I won't build a tank with plastic on metal rubbing. Most of the ready made 3D tank STLs don't account for bearings on the road wheels. I could reprint the whole tank on the Bambu at this point, but this was a learning experience. Most of the layer lines will be covered by body filler once the tank enters the finishing phase.
And our friend Herman from down under sent me his unused PZ3 tracks for the project. So thanks to him for that. 8)
Derek
The following users liked this post:
rb67mustang (08-13-2023)
08-13-2023, 07:46 AM
#6
Derek, I'm not familiar with Russian tanks, so I did a quick search. I think it looks very good and you're going to have a tank that most haven't seen in RC Tank Battle. I still haven't taken the plunge into the world of 3DP. When and if I do, I hope my 1st project comes out as good as your T26.
For a long time, I've been upgrading a 21st Century M5 Stuart. I got stalled when I was about to rework the road wheels to use ball bearings. I have a Harbor Freight Metal machining lathe that I will make counter bores on each side of the road wheels to insert the bearings. Then come the guild wheels and finally the idler wheels.
It takes time to get our builds finished especially since our real world lives take center stage and our hobbies 2nd place when and if we have the time. I know your T26 will look great when it's completely finished.
08-13-2023, 02:18 PM
#7
Thread Starter
I reprinted the front and rear deck on my new printer and they came out better this time. I also got all the wheel bearings installed. As soon as I get the rear idler sorted, I can add the tracks to it. This little guy has been languishing in my tank stash for quite some time. One day...one day it will get it's due. 
The following users liked this post:
rb67mustang (08-13-2023)
