


Meister Scale P 47 - step by step
 11-04-2011, 07:50 AM
#26

Hello Mirce. You are a man after my own heart. An all wood Meister P-47 builder.
Here is a picture of our all wood Meister taking off ay this years Monster Planes.She is covered with aluminum foil, and looks better with each year of aging. Hope it gives you some more inspiration.
I am subscribed and will be following with interest. Thanks for sharing your build with us.
Here is a link to our build. It may help, hope so.
http://www.rcuniverse.com/forum/m_88..._1/key_/tm.htm

 11-04-2011, 08:18 AM
#28

Thread Starter
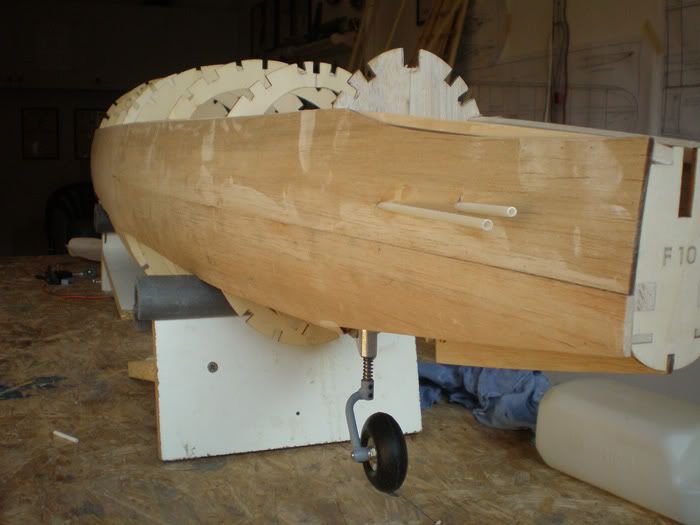
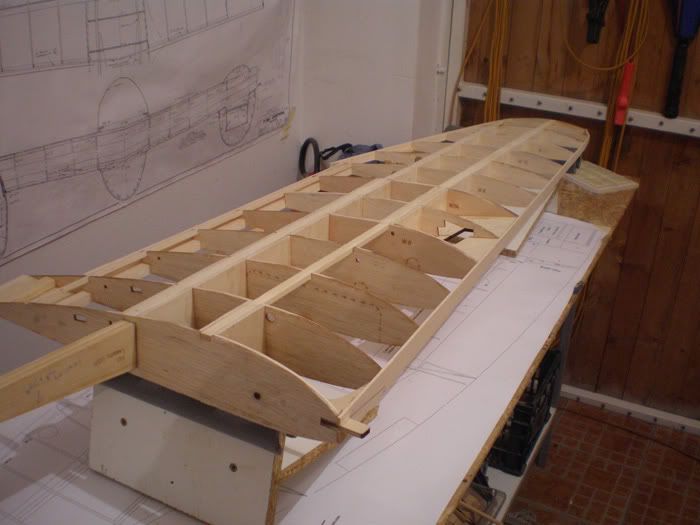
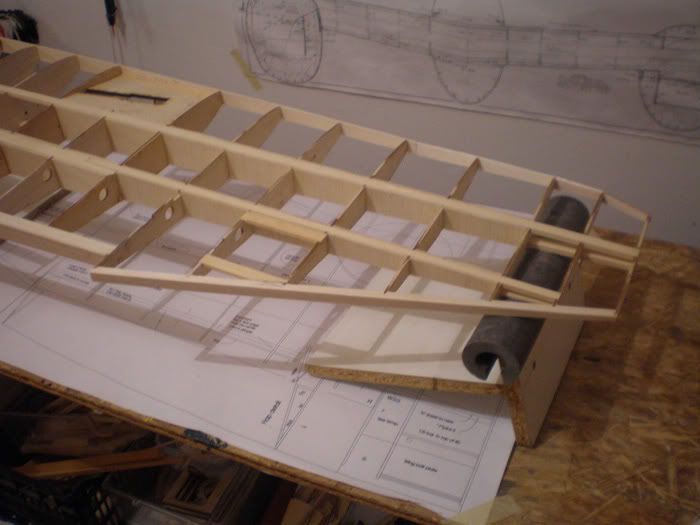
Thanks all for kind words...
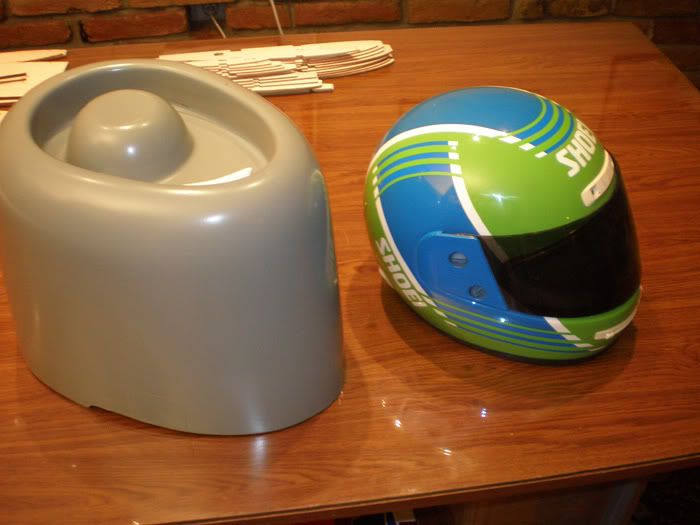
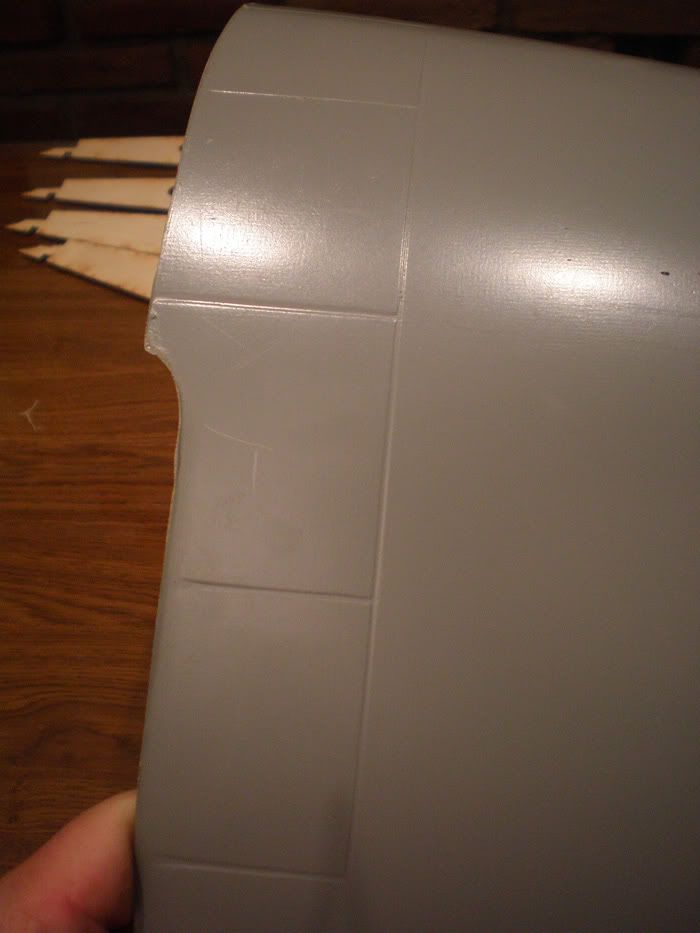
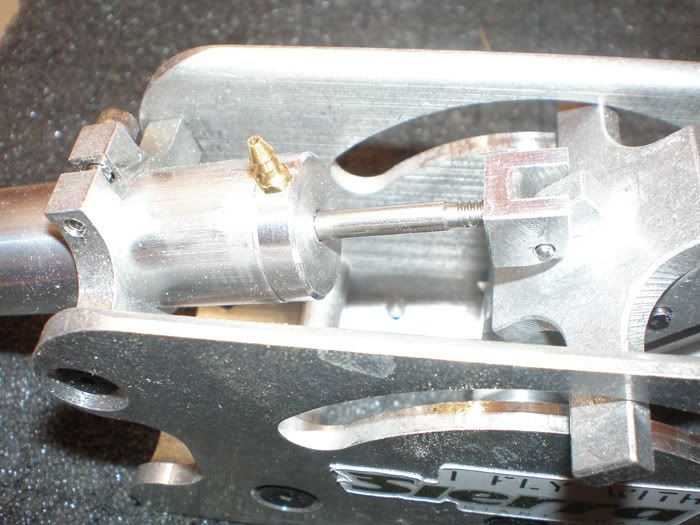
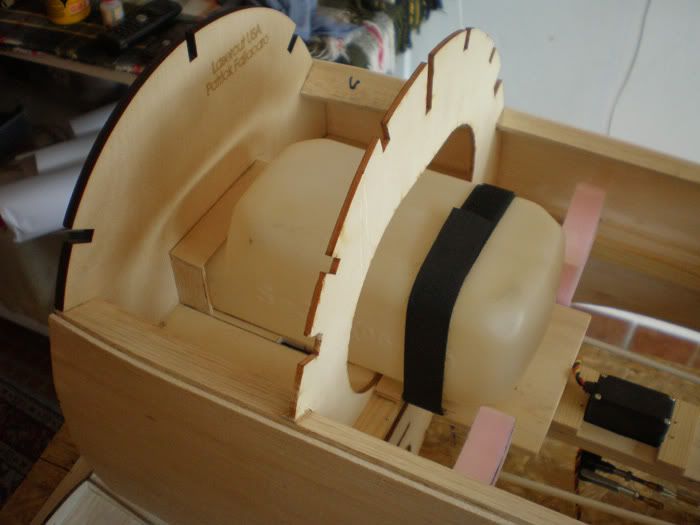
Mid October I get other box from Dino, with cowl, cockpit and Siera tail wheel. Cowl is soooooooo huge and very strong...
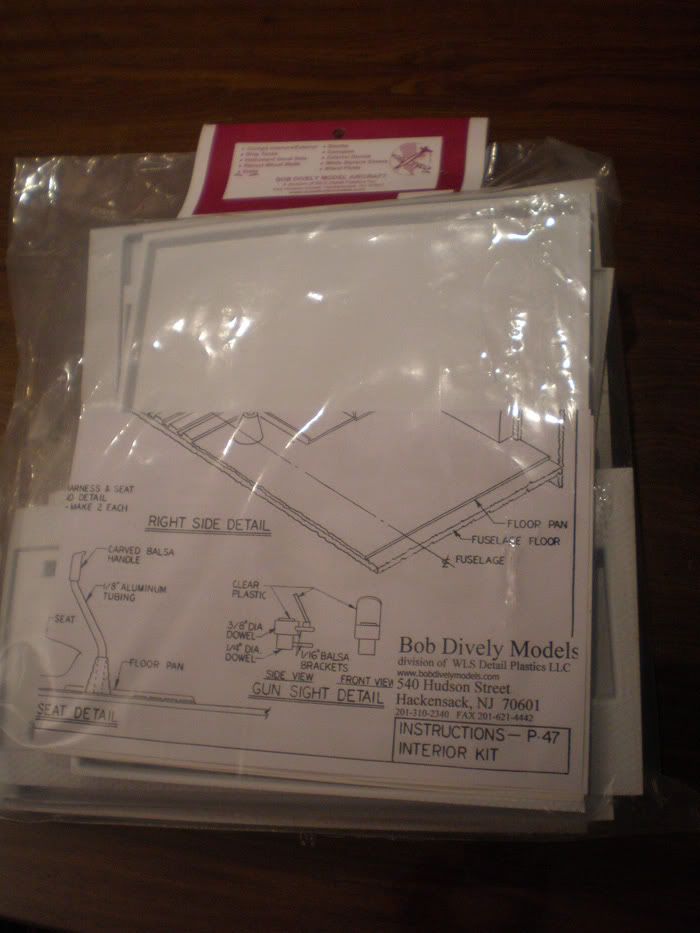
Cockpit is from Bob Dively Model Aircraft...
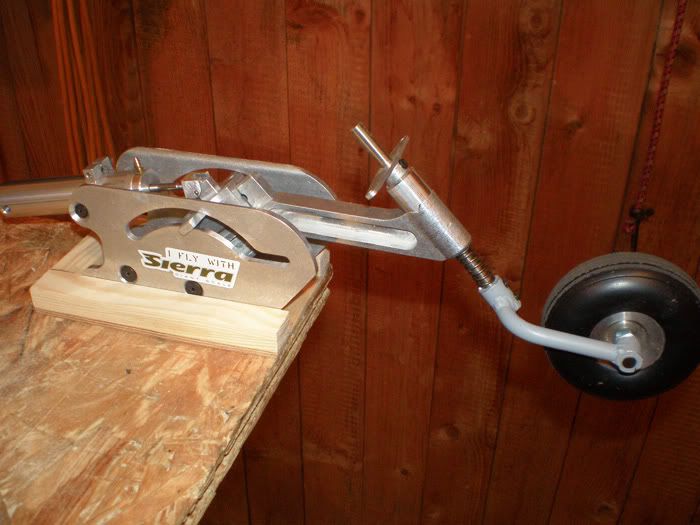
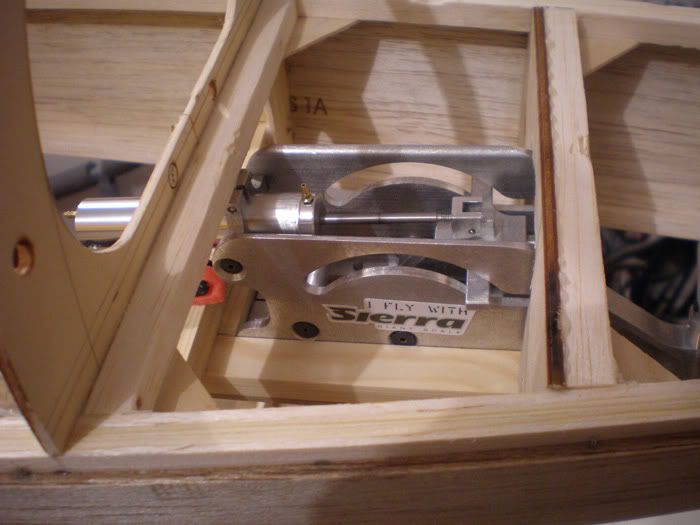
Siera made piece of art with tail wheel...
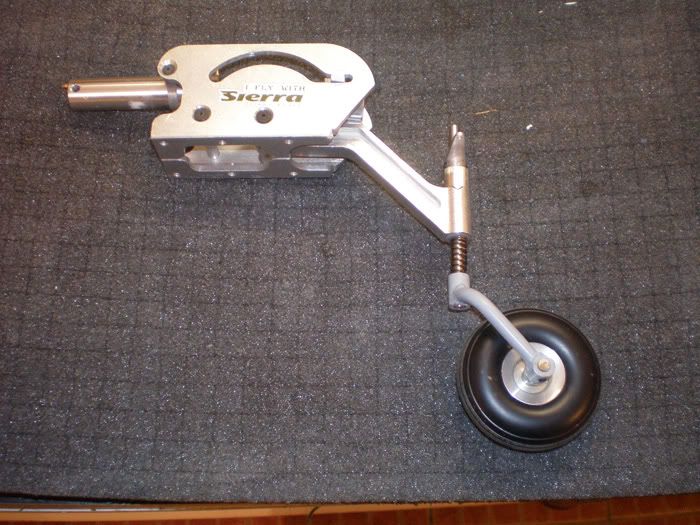
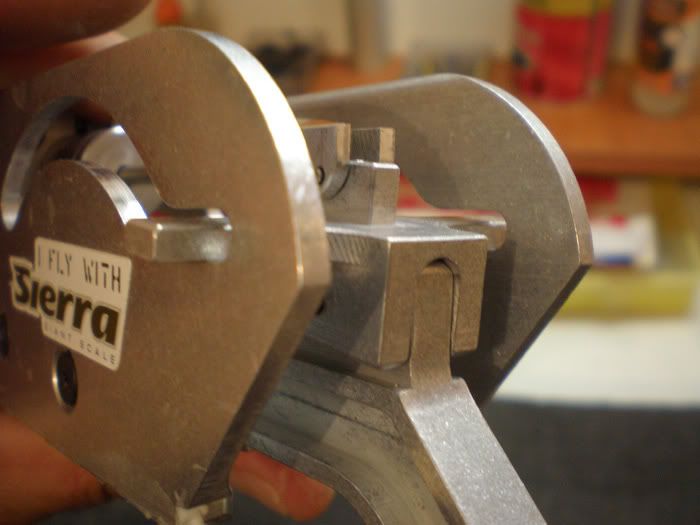
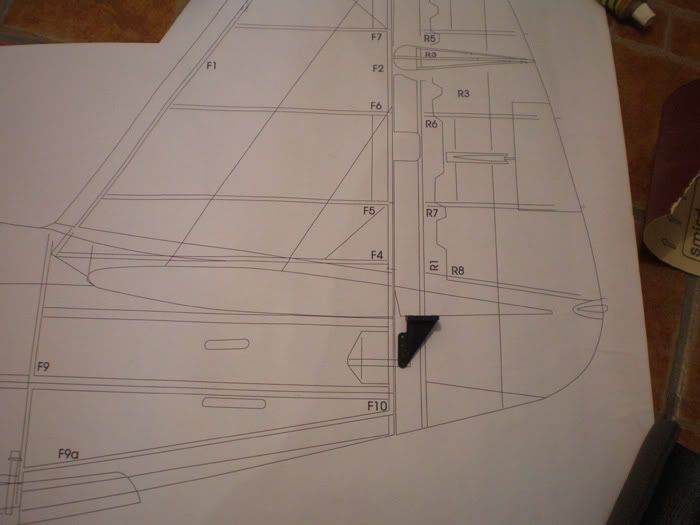
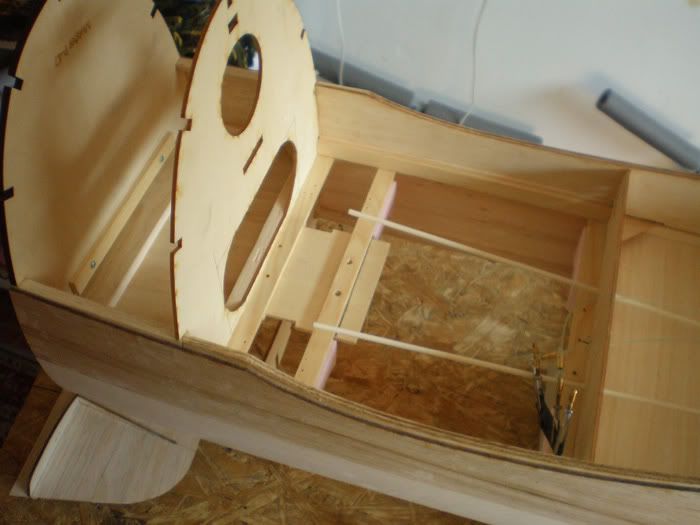
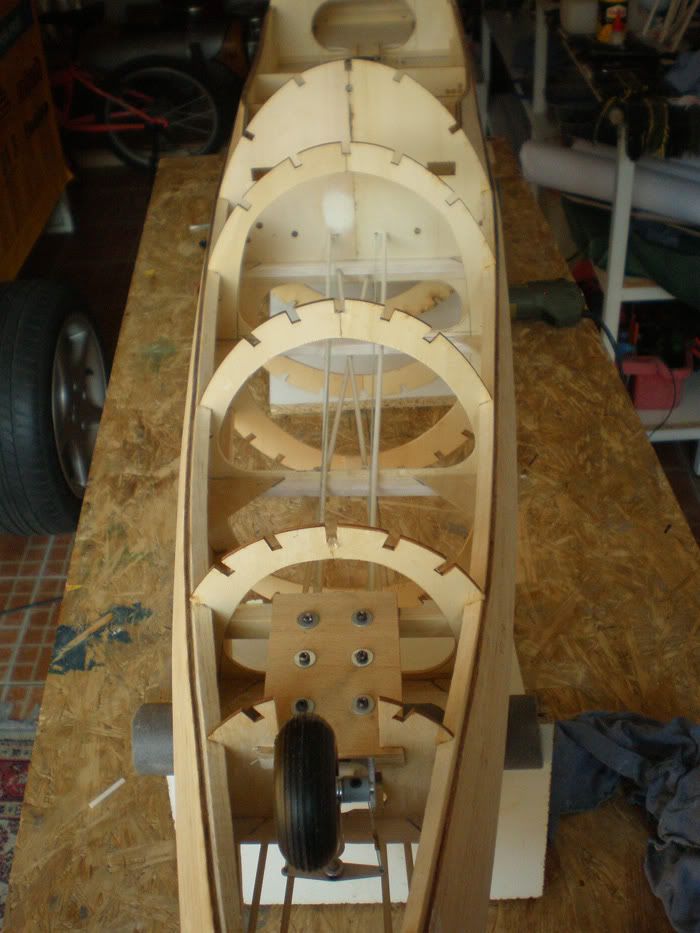
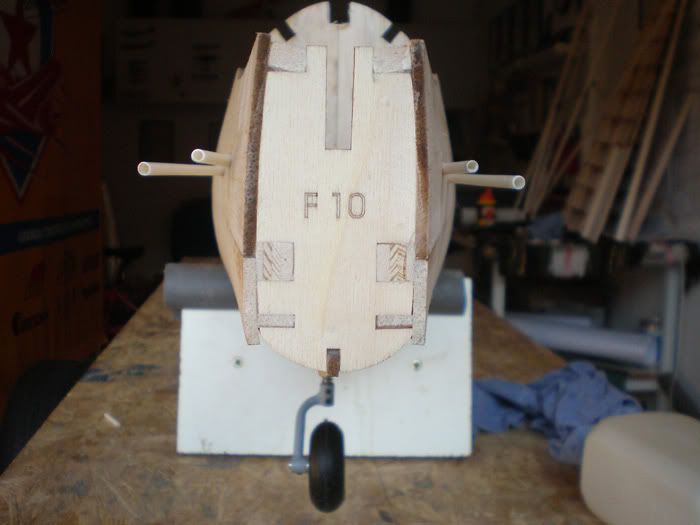
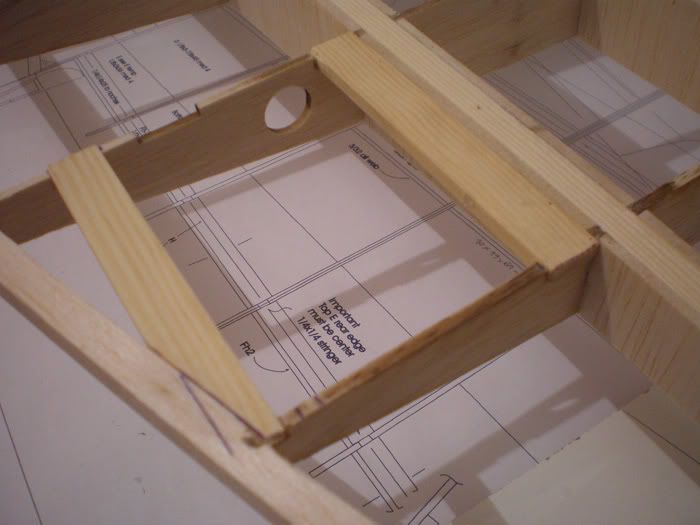
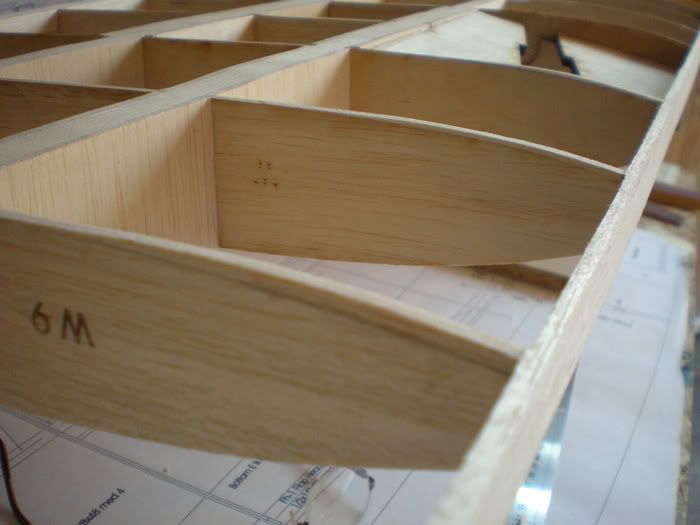
Next step was to install tail wheel. On plan was nothing to show how to install this part, so I first made wooden plate for tail wheel and made space in two ribs for that plate...
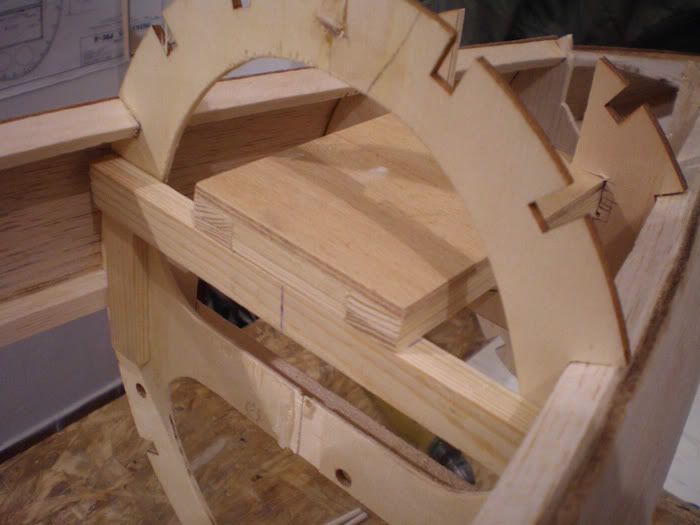
When all was OK I glued plate in ribs...
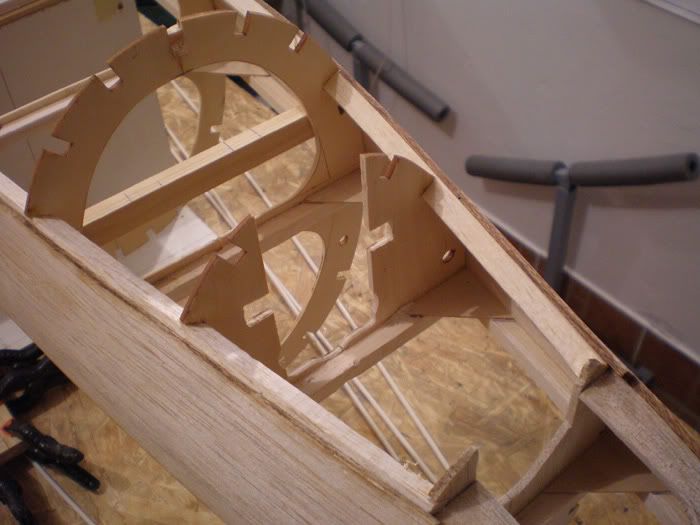
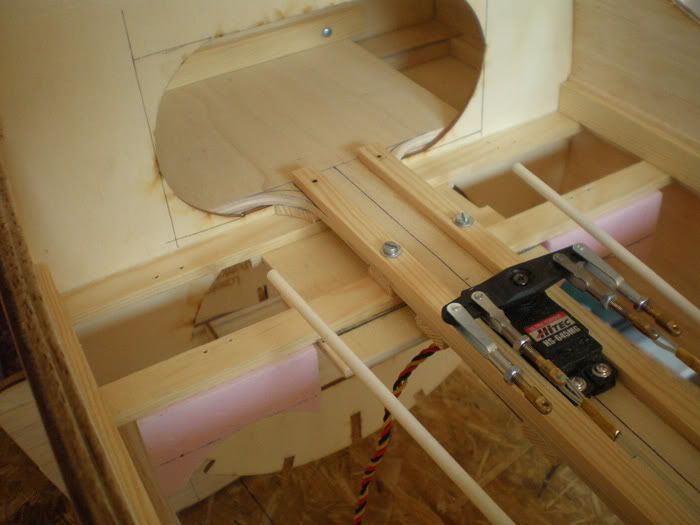
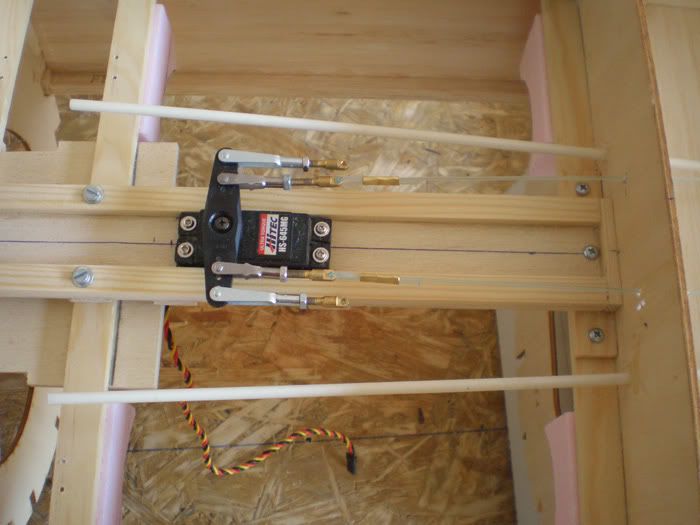
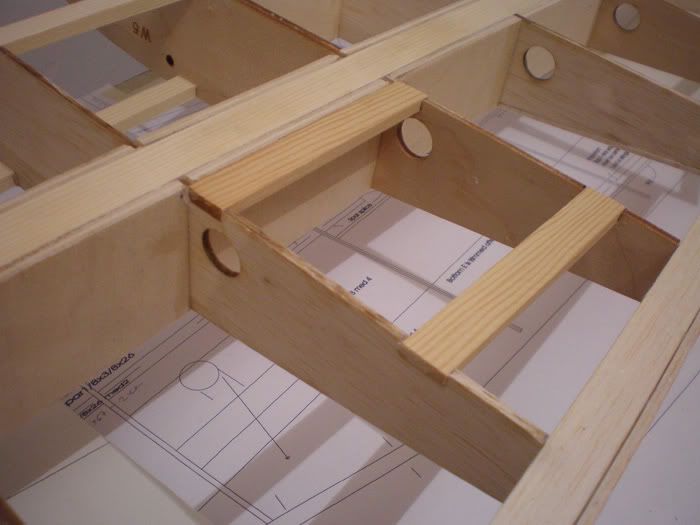
My decision is to put all parts as front as possible, So I glued two transverse slats on which I position servos for elevators. In the middle you can see plate for tank support...
Left and right are places for two air tanks...

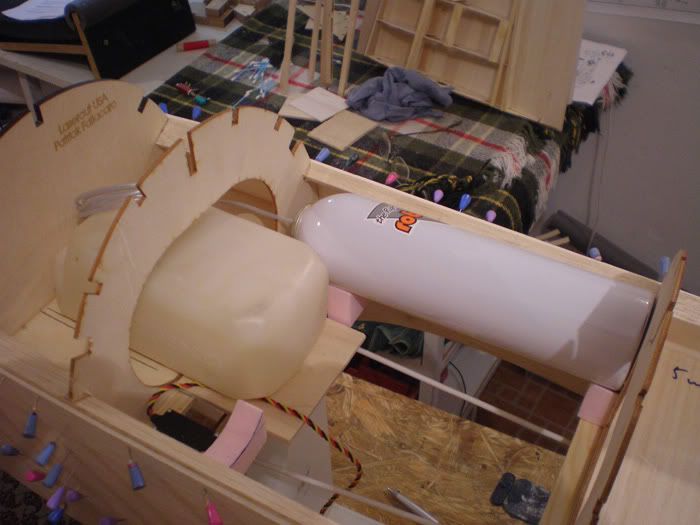
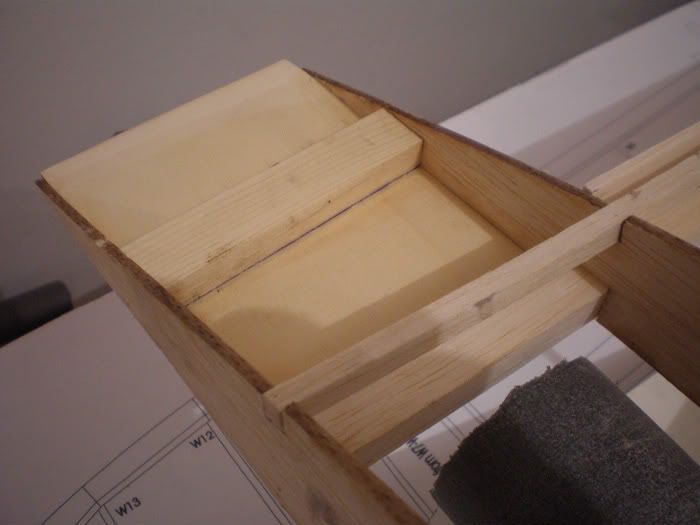
For gas tank I made support on the fire wall and tank will be fix with two velcro tapes...
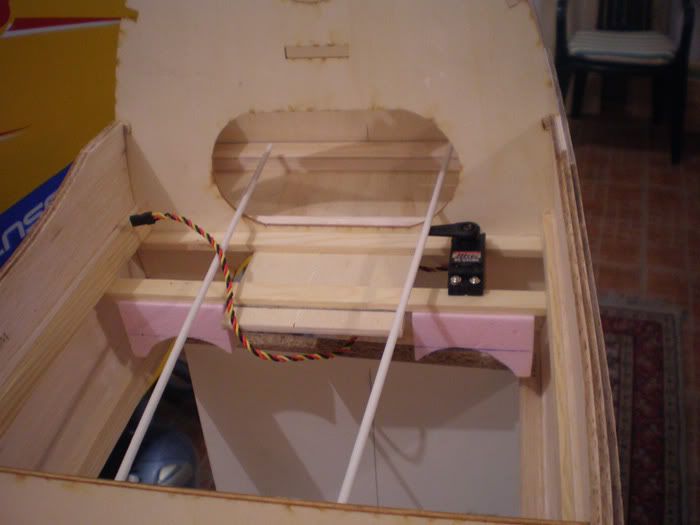
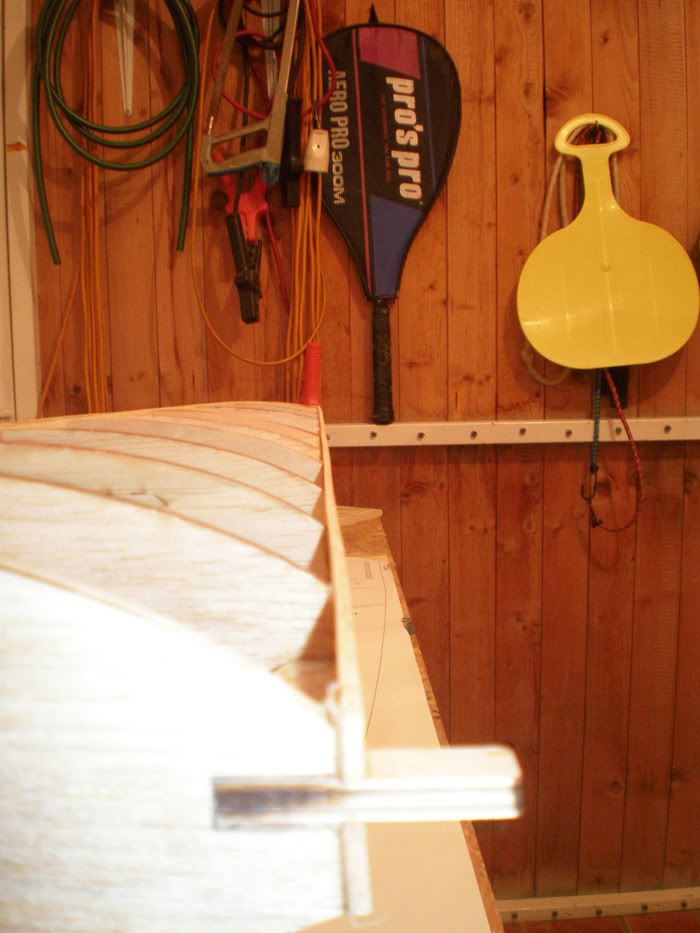
Servos for elevator will be connect with elevators with 2 mm steel wires. This wires will slide trough 3mm inside diameter plastic tube. That system I have on my Ziroli Hellcat and work great.
Very important is to take care about direction of plastic tubes, because if have any curves steel wire will not slide freely...
For positioning plastic tubes I must find where they will come out from the fuselage...

Servos are almost 6 cm lower than holes on the back of the fuselage... When I put plastic tubes in the fuselage, I saw that better will be if left servo move right elevator and visa versa...
http://i1089.photobucket.com/albums/...rzic/6-100.jpg
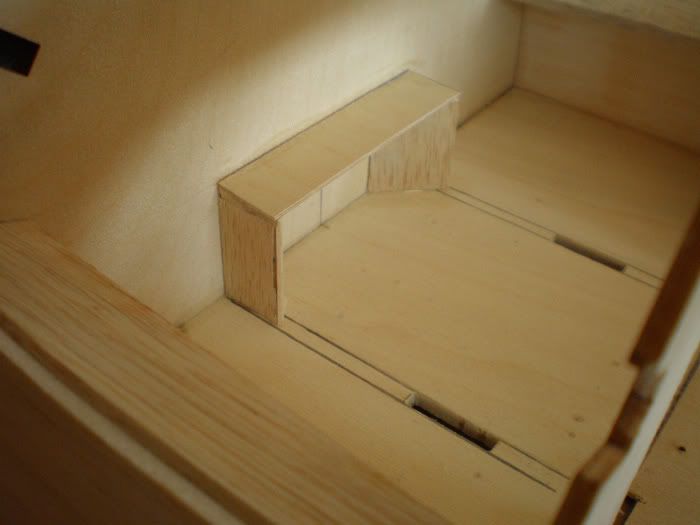
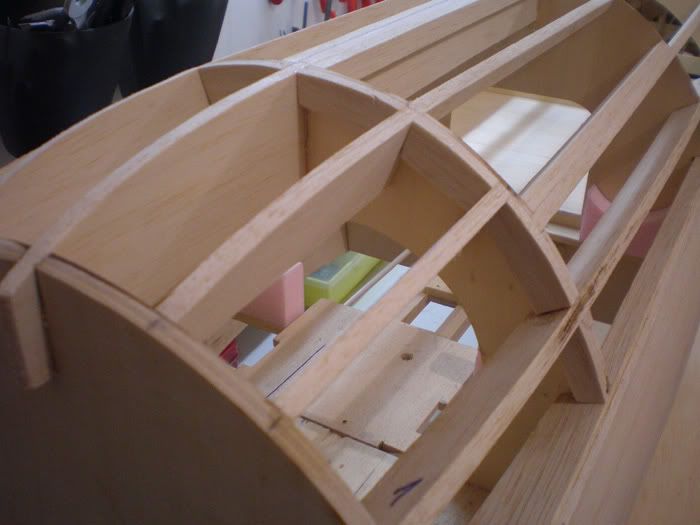
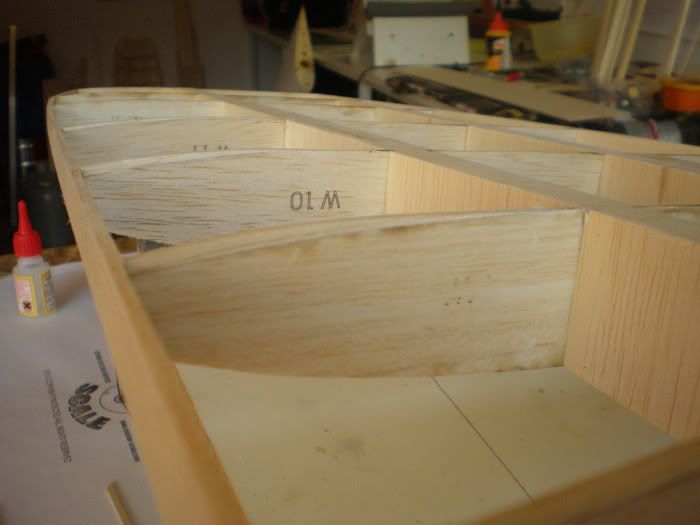
I glued cockpit floor...
Next was to glued front and rear upper balsa plates...
In this stage of building is easy to put parts in fuselage, but I must think how will I service or change parts when cover all upper part of fuselage.
Because that I made wooden plate which will carry rudder servo and batteries.
As we can see, front part of that plate come in wooden slot on fire wall and rear side will be bolted...
After that I install servo for ruder and connect it with tail wheel. Same servo will drive tail wheel and rudder...
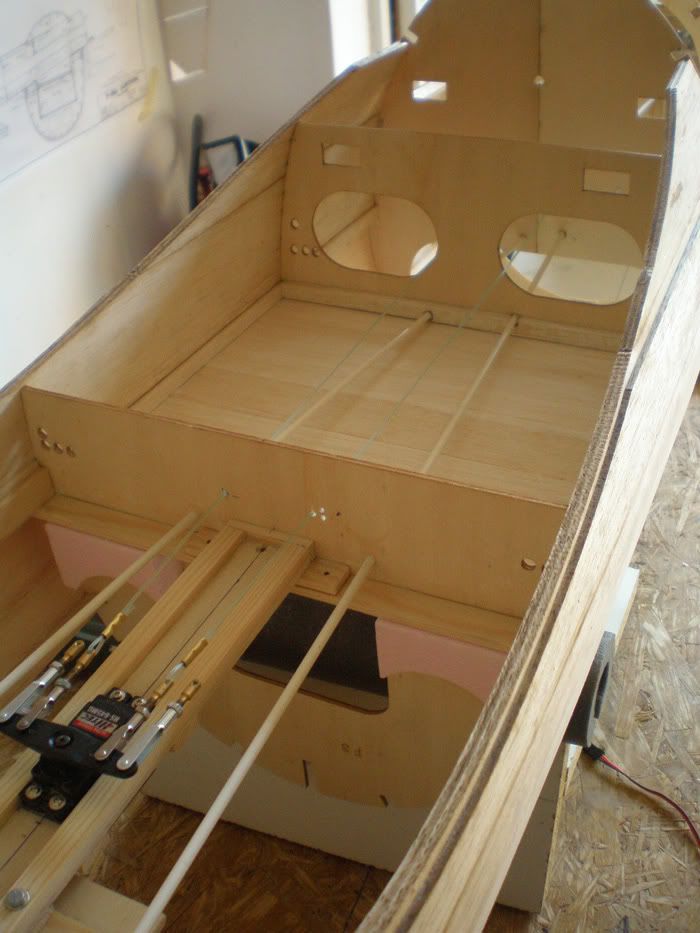
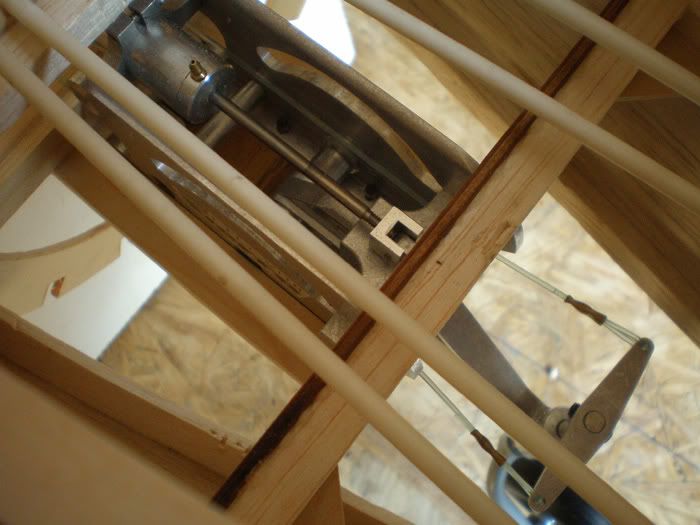

Direction for lines from servo to tail wheel is very good.
For rudder I plan to use pull - pull system. First part of wires go straight, but after that I must glued plastic tubes for guiding wires...
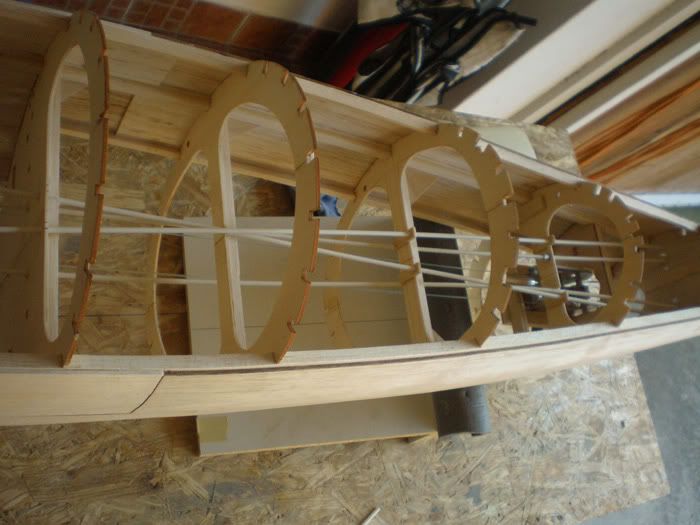
Next was to add air lines, and after that I will be able to cower upper part of fuselage.
To be continued...
Regards
Mirce
Mid October I get other box from Dino, with cowl, cockpit and Siera tail wheel. Cowl is soooooooo huge and very strong...
Cockpit is from Bob Dively Model Aircraft...
Siera made piece of art with tail wheel...
Next step was to install tail wheel. On plan was nothing to show how to install this part, so I first made wooden plate for tail wheel and made space in two ribs for that plate...
When all was OK I glued plate in ribs...
My decision is to put all parts as front as possible, So I glued two transverse slats on which I position servos for elevators. In the middle you can see plate for tank support...
Left and right are places for two air tanks...
For gas tank I made support on the fire wall and tank will be fix with two velcro tapes...
Servos for elevator will be connect with elevators with 2 mm steel wires. This wires will slide trough 3mm inside diameter plastic tube. That system I have on my Ziroli Hellcat and work great.
Very important is to take care about direction of plastic tubes, because if have any curves steel wire will not slide freely...
For positioning plastic tubes I must find where they will come out from the fuselage...
Servos are almost 6 cm lower than holes on the back of the fuselage... When I put plastic tubes in the fuselage, I saw that better will be if left servo move right elevator and visa versa...
http://i1089.photobucket.com/albums/...rzic/6-100.jpg
I glued cockpit floor...
Next was to glued front and rear upper balsa plates...
In this stage of building is easy to put parts in fuselage, but I must think how will I service or change parts when cover all upper part of fuselage.
Because that I made wooden plate which will carry rudder servo and batteries.
As we can see, front part of that plate come in wooden slot on fire wall and rear side will be bolted...
After that I install servo for ruder and connect it with tail wheel. Same servo will drive tail wheel and rudder...
Direction for lines from servo to tail wheel is very good.
For rudder I plan to use pull - pull system. First part of wires go straight, but after that I must glued plastic tubes for guiding wires...
Next was to add air lines, and after that I will be able to cower upper part of fuselage.
To be continued...
Regards
Mirce
11-04-2011, 08:31 AM
#31
I recommend you keep her as light as possible in the rear. Move as much forward as you can, and trim all the unnecessary wood out you can. We have all the servos mounted above the wing, driving cables, and very hear the CG, and she still is 50lbs with the ballast we needed.
11-04-2011, 08:49 AM
#32
Thread Starter
Wayne, time diference is 6 hours. When here is 15 hour, on Florida is 9 AM.
Other thing is Novi Sad is in Serbia. Yugoslavia does not exist for many years. Broke up on its own republic, which are now all separate state. Serbia is one of them...
Dino, all I show here in my posts I made in last three weeks. One - two more posts and I will be in "present tense"...
I must be sincere, this P 47 is very easy for build. Plans could be more detailed, but everybody who made some kit model will have no problem to made this Thunderbolt.
My opinion is, this Meister is easy to build than Ziroli models. I made two Ziroli Hellcats and F9F Panther. I like Ziroli, but Meister I love every day more and more...
All the best from Novi Sad
Mirce
11-04-2011, 09:00 AM
#34

My Feedback: (73)
Thanks Mirce. Its nice to hear that you are enjoying Jim's way of designing. We removed information from the old plans that are included in the manual.
The old plans were cluttered and confused others. We try to do our best. I will look over the old pland and see if I can add some more info in the future.
Thanks for your honesty.
The old plans were cluttered and confused others. We try to do our best. I will look over the old pland and see if I can add some more info in the future.
Thanks for your honesty.
 11-04-2011, 03:46 PM
#40

Ive seen some of his work guys, he's the real deal!!!
Casey
Casey
ORIGINAL: ram3500-RCU
Yea. Looks like he may have done this before.
ORIGINAL: Icemanjr92
Mirce,
Are you sure you never built a Meister?? I am so impressed with how fast you are moving along. Great stuff here!!
Mirce,
Are you sure you never built a Meister?? I am so impressed with how fast you are moving along. Great stuff here!!
11-04-2011, 09:44 PM
#41
Join Date: Dec 2005
Location: Victoria,
MN
Posts: 3,934
Likes: 0
Received 0 Likes
on
0 Posts
wow... impressive...
Could you also include what type of glue you used in the different areas...
Example.. The siding... what type did you use to join up the flat balsa?
Wood glue? Superglue? ect?
Thank you...
Ever since I saw this plane in a MAN review....I liked it...
Could you also include what type of glue you used in the different areas...
Example.. The siding... what type did you use to join up the flat balsa?
Wood glue? Superglue? ect?
Thank you...
Ever since I saw this plane in a MAN review....I liked it...
11-05-2011, 12:58 AM
#42
Thread Starter
In a less than two day 937 visits on this topic... WOW, that just show how much is Meister Scale P 47 popular model.
Thanks all for nice comments...
I have opportunity to personally meet, on my three Top Gun visits, some of the modelers who have left comments on this topic. Dino, Wayne D, Gary M are just some of them...
I read every day here in War bird and war plane part of RCU posts. I feel that many of you know personally also...
I was enjoyed reading Gary (Ram 3500 RCM) topic about his P 47 buildings, and now use opportuniti to sad much regret the loss of Corser...
I read about Vease Zero project and my friend use same color scheme for his Zero...
Shame I'm 6000 miles from you guys...
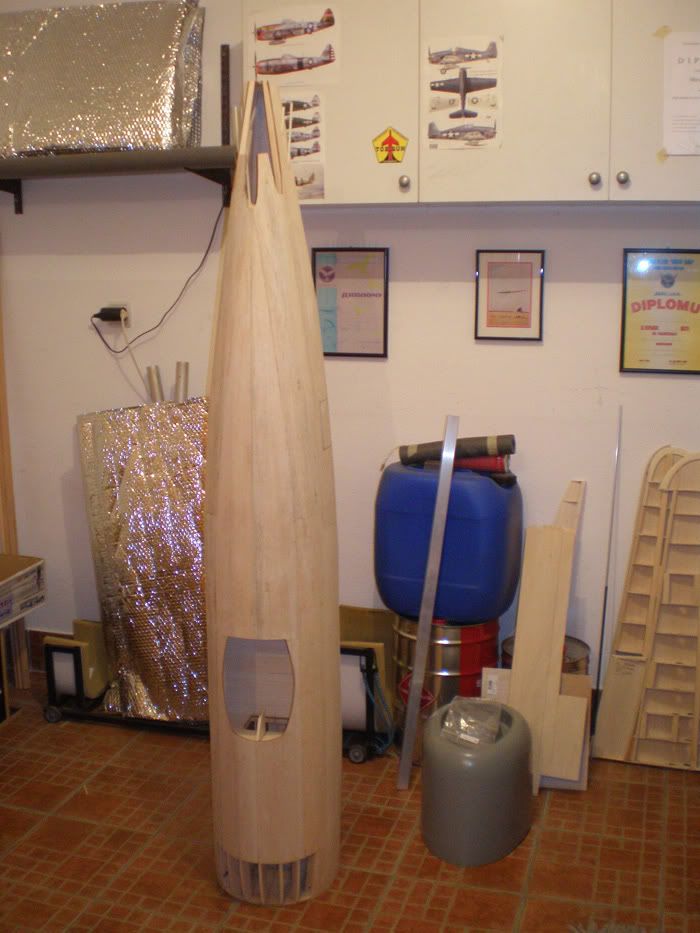
And for end look this photo:
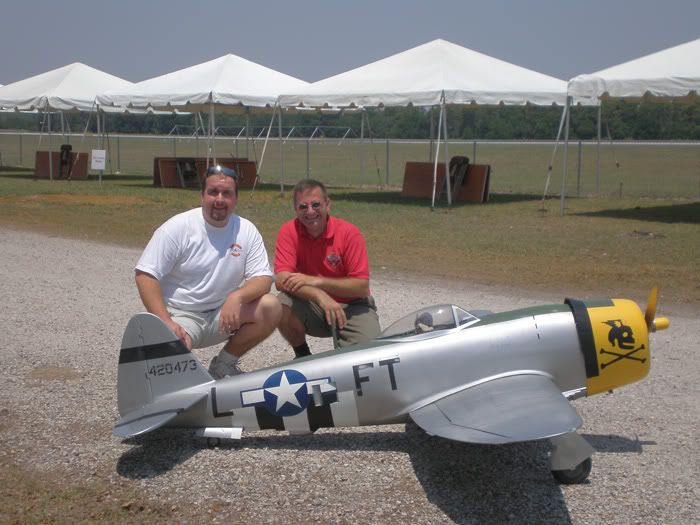
That was my first model I photos on my first Top Gun visit 2007... Yes, PJ's Thunderbolt (now it belong to Scott Prossen).
Maybe it was destiny?
Regards
Mirce
Thanks all for nice comments...
I have opportunity to personally meet, on my three Top Gun visits, some of the modelers who have left comments on this topic. Dino, Wayne D, Gary M are just some of them...
I read every day here in War bird and war plane part of RCU posts. I feel that many of you know personally also...
I was enjoyed reading Gary (Ram 3500 RCM) topic about his P 47 buildings, and now use opportuniti to sad much regret the loss of Corser...
I read about Vease Zero project and my friend use same color scheme for his Zero...
Shame I'm 6000 miles from you guys...
And for end look this photo:
That was my first model I photos on my first Top Gun visit 2007... Yes, PJ's Thunderbolt (now it belong to Scott Prossen).
Maybe it was destiny?
Regards
Mirce
11-05-2011, 04:09 AM
#43
Yes here she is today, still flying strong! I put about 35 flights on here this spring/summer with a Moki 150 up front. What a ball and she hauls the mail too. A real testament to the Meister 47 and PJ's building skills.
Mirce, you got a real good one going there. Looking forward to the rest of the build. Thanks for taking the time to post and comment all the way through the build. It will really help a few buddies of mine that are going to build one soon. Looking forward to your next Lakeland Florida visit!!!
All the best,
Scott
11-05-2011, 09:25 AM
#44

Join Date: Feb 2003
Location: swanley, UNITED KINGDOM
Posts: 955
Likes: 0
Received 0 Likes
on
0 Posts
Here's my renovated bolt. Its old scheme can be seen on the Meister site. This model was flown on the UK show circuit for 10 years and I can't wait to get it in the air again!
Your build looks of a very good standard. Will obviously be another great addition to the Meister bolt family!
Gregg
Your build looks of a very good standard. Will obviously be another great addition to the Meister bolt family!
Gregg
11-05-2011, 11:24 AM
#45
Thread Starter
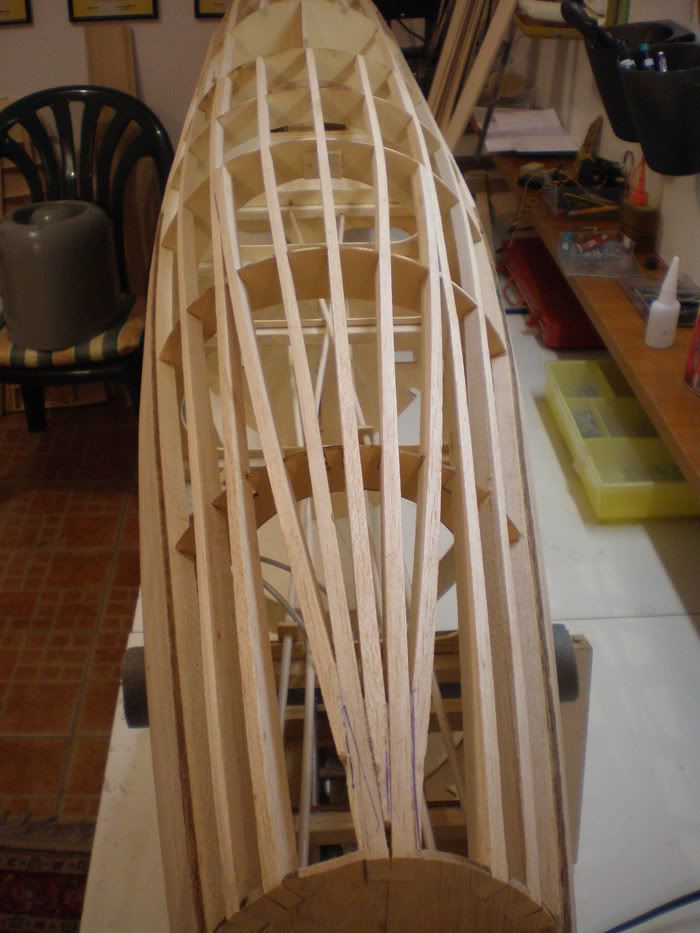
Let's continue with the development of P 47...
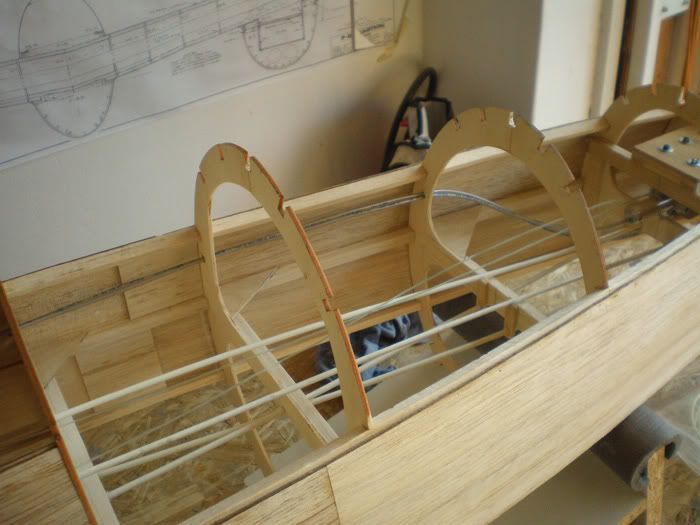
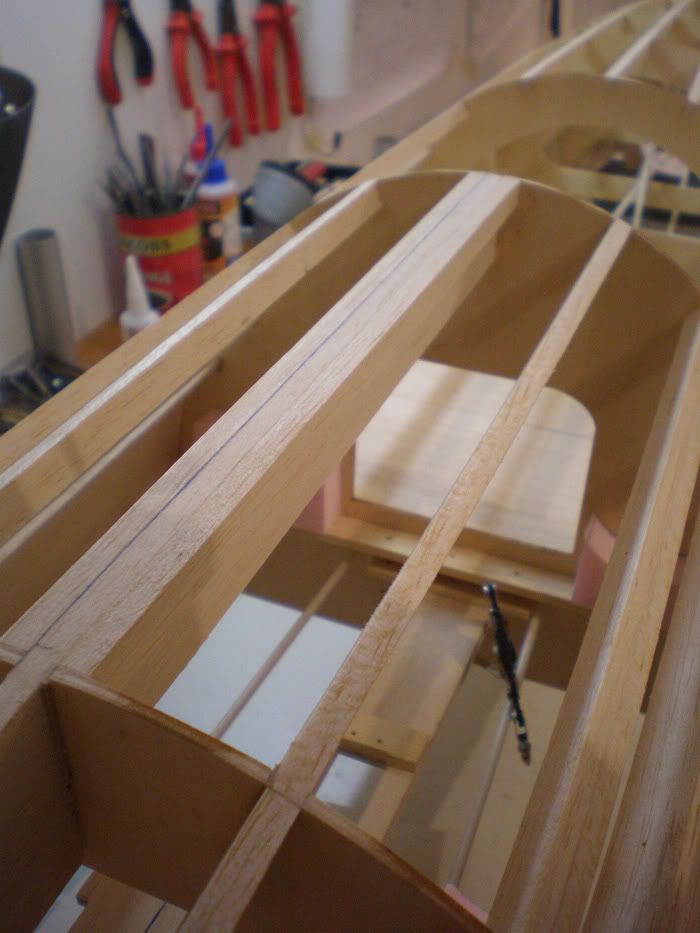
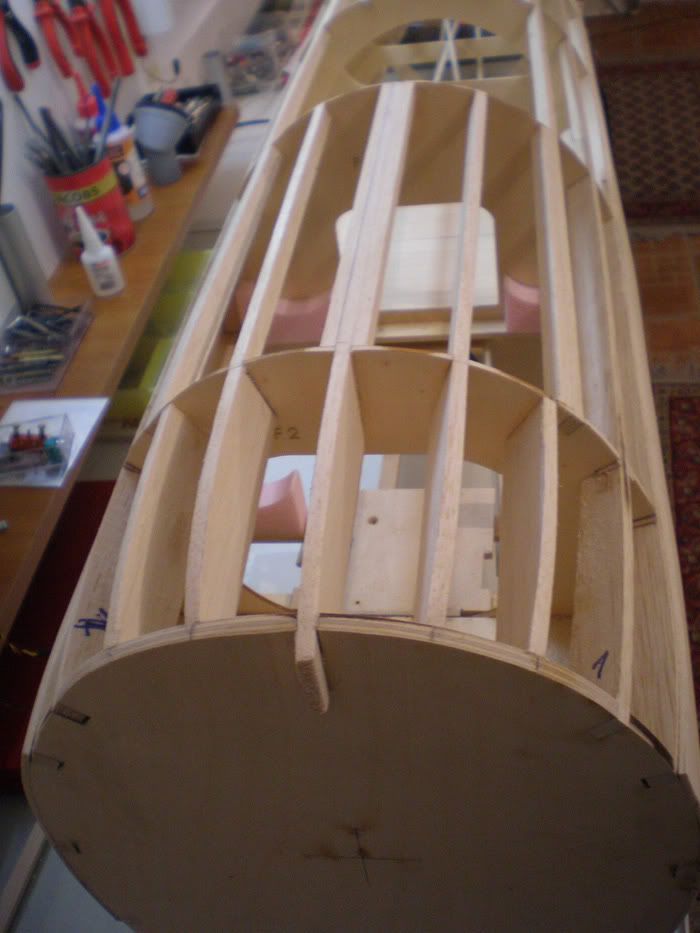
I forgot to put this two photos:
That is how look exit of plastic tubes on rear part of fuselage. Upper are for rudder and lower will be for elevators.
After that, everything was ready for planking upper fuselage surface.
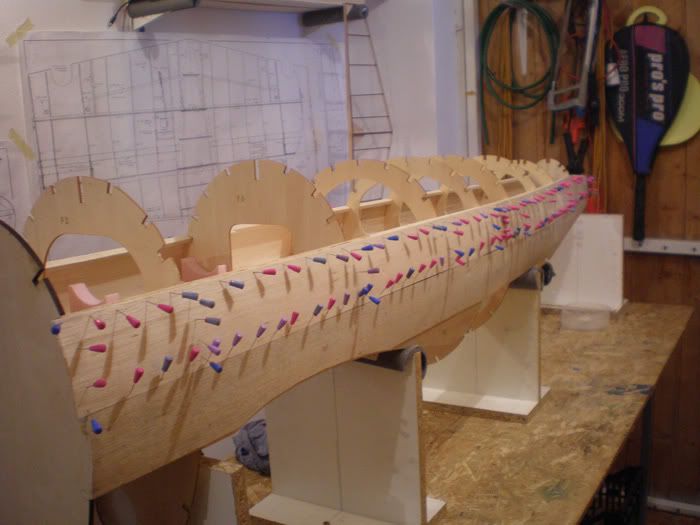
I made balsa sticks and put it on ribs. For gluing I use Henkel Moment white glue (carpenter glue).
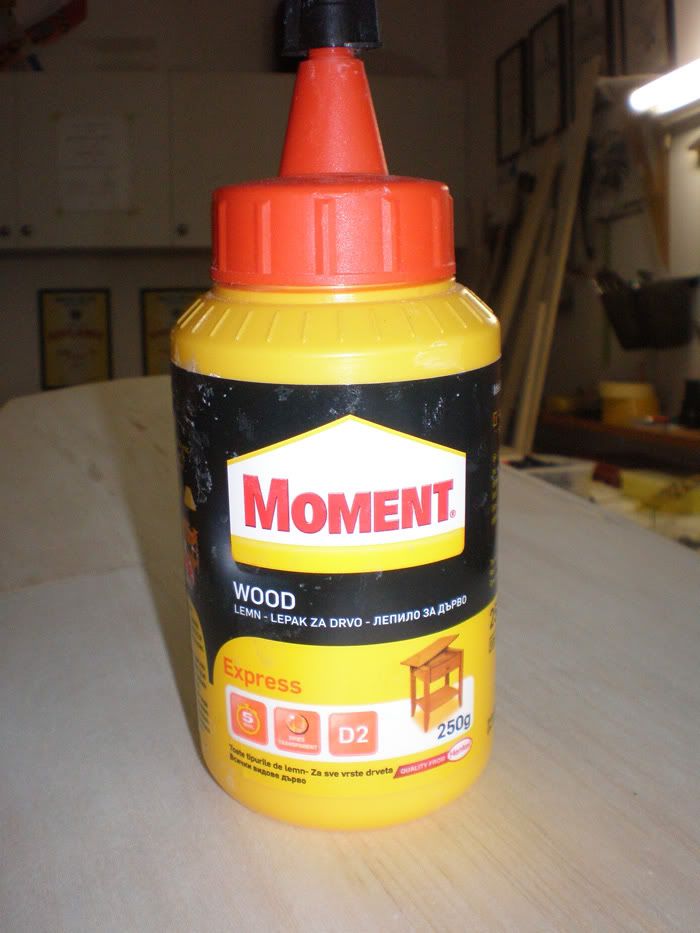
Kochj ask what type of glue I use in P 47 project till now? All wooden parts what you can see is glued with that glue. This glue is good because it quickly bonded wood (20 minute) and after 24 hours it is like stone.
Of course it is just for wood and that glue is much stronger than superglue, need time for dry, but...
For metal parts or wood - metal connection I use two component epoxy glue...
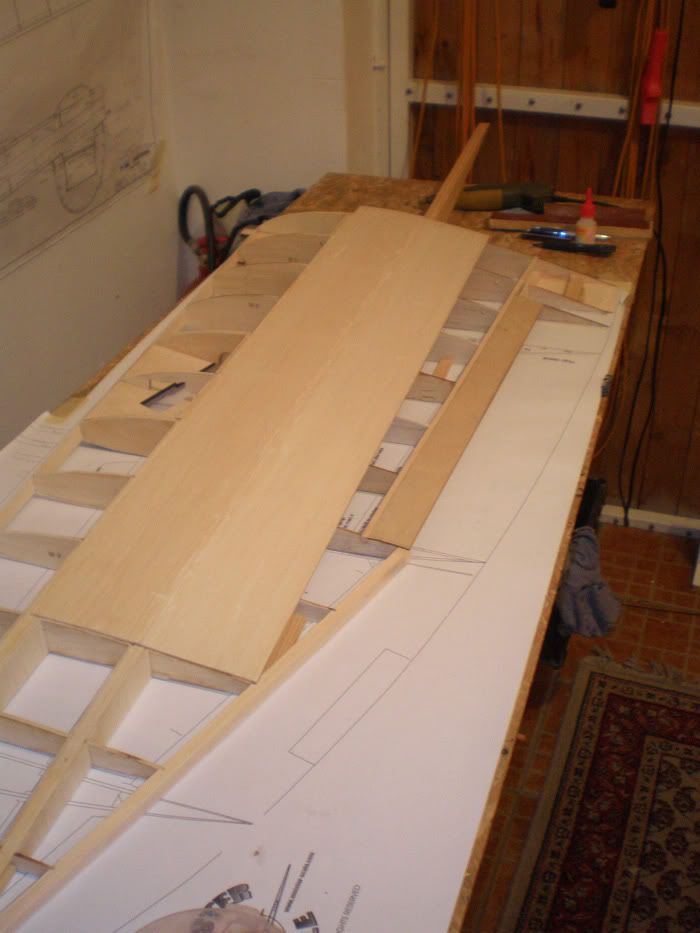
So, I add balsa sticks...

I add few extra stick...
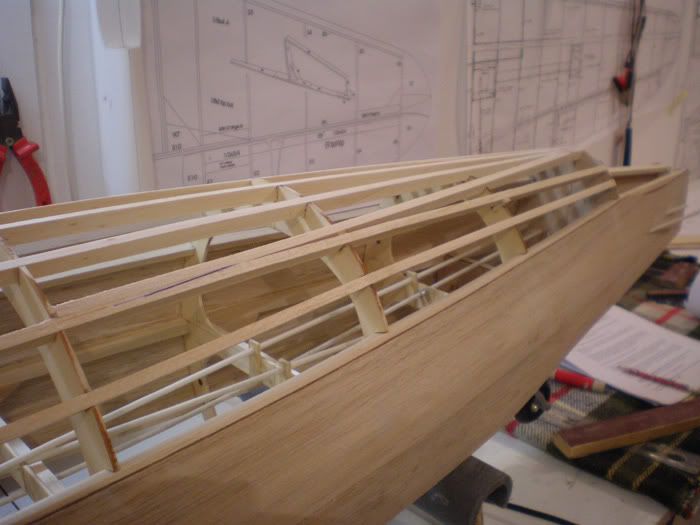
On some place I add one more piece of balsa stick for bigger glue area for balsa plates...
In front of the fuselage I made four more balsa pieces...
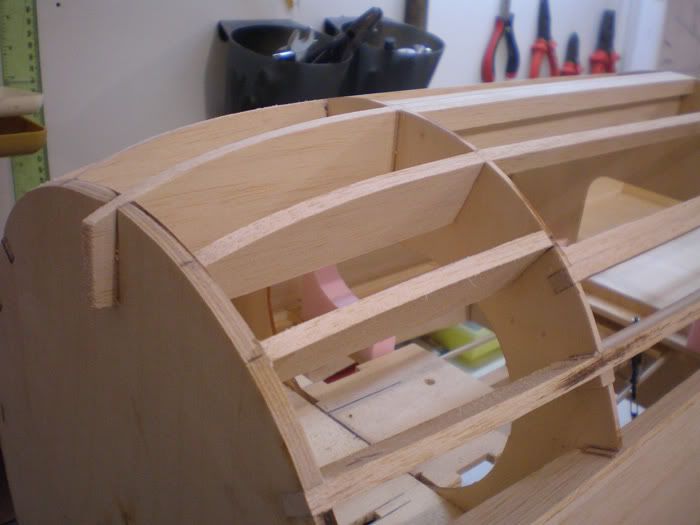

I round front part to be same as pieces which get in short kit.
On the second rib I add few more balsa pieces, for same reason, to made bigger area for gluing front balsa plates...
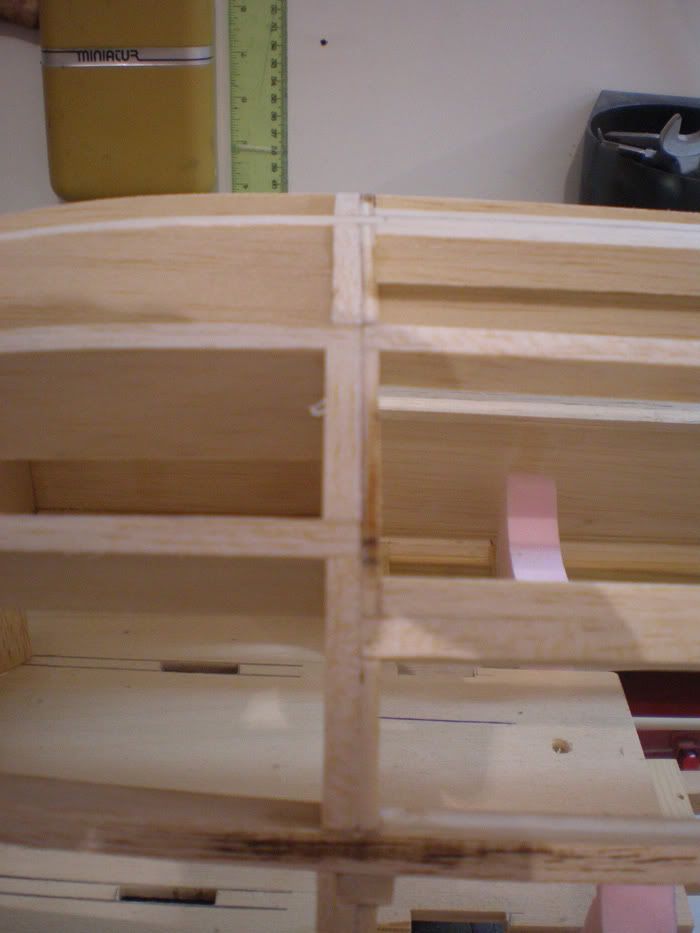
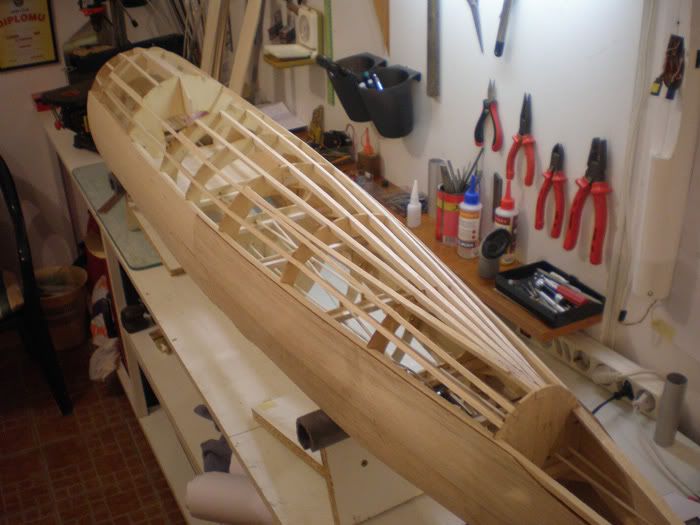
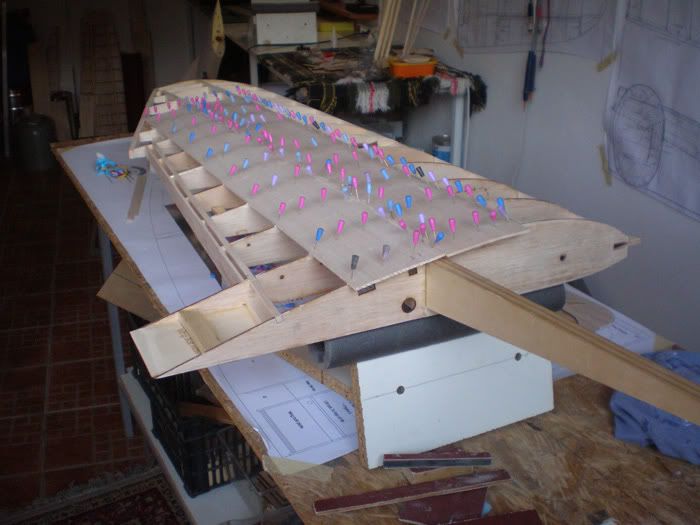
When all that was finish, I dry send all upper fuselage surface and start to glue balsa plates...
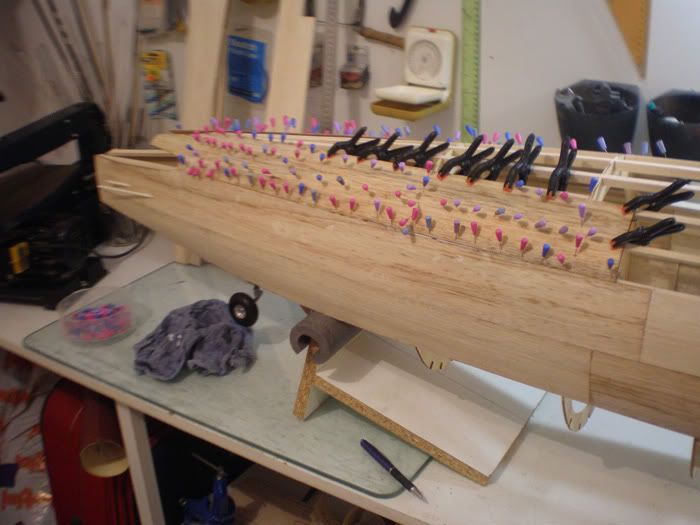
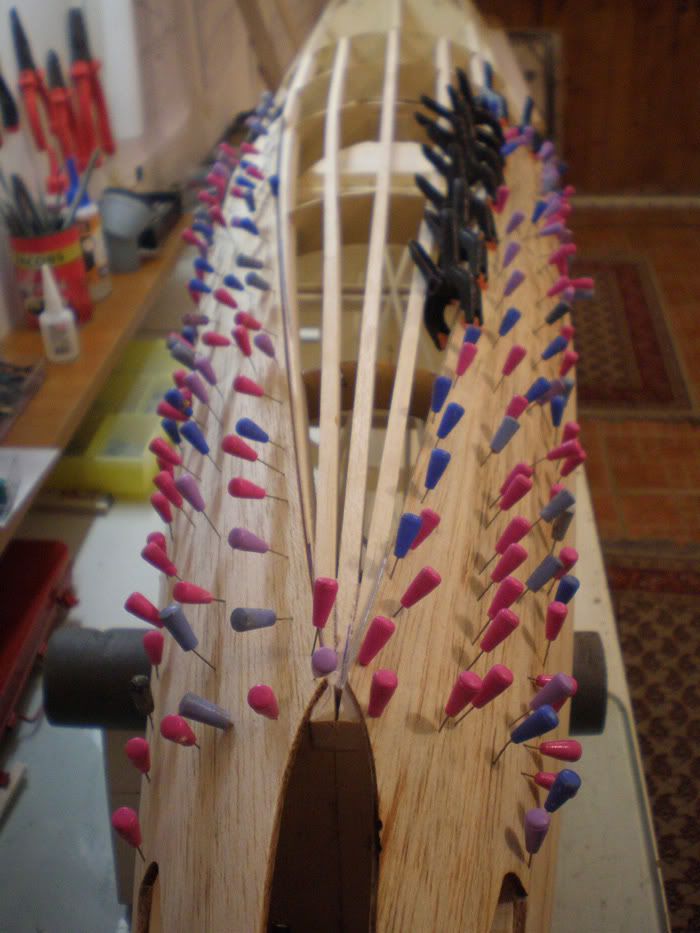
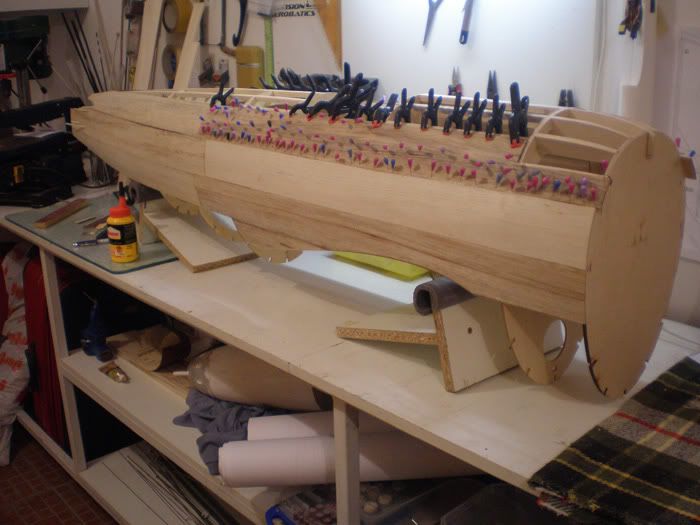
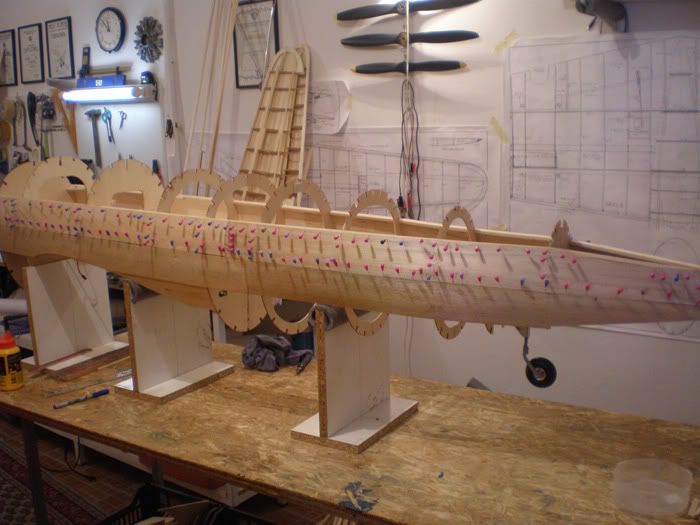
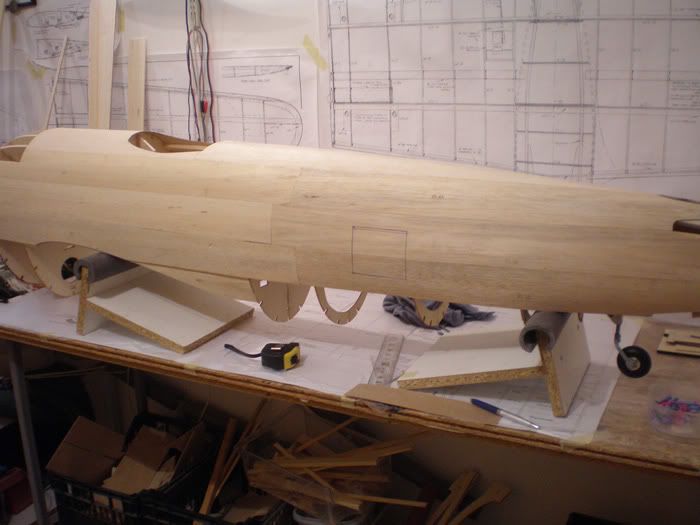
All plates was first put in hot water, which soft it, and after I glue it on ribs and sticks. Finally fuselage came in this phase...
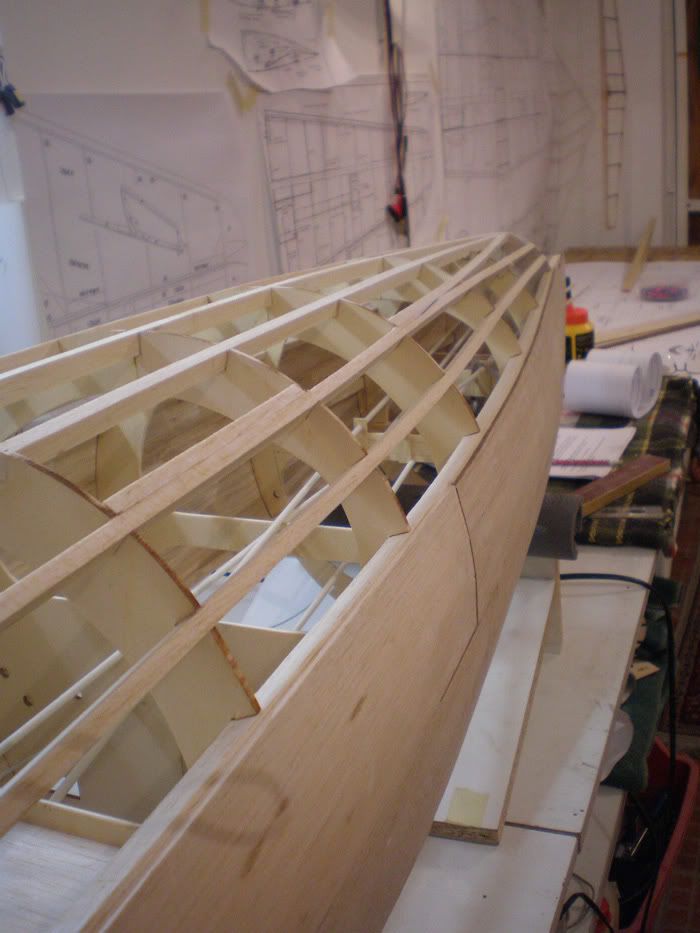
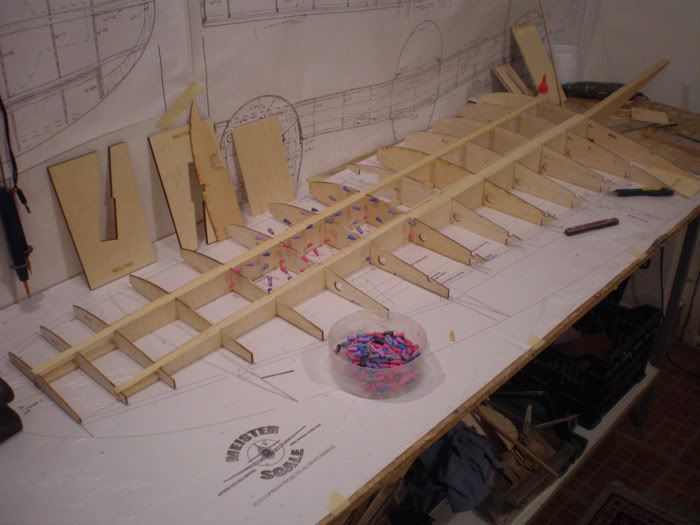
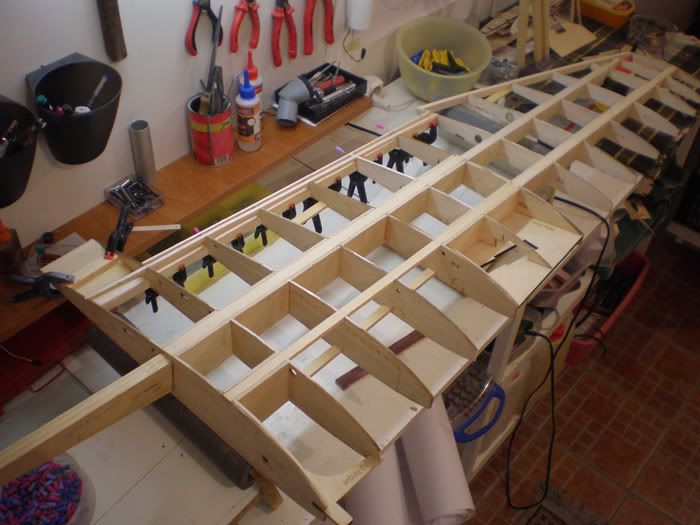
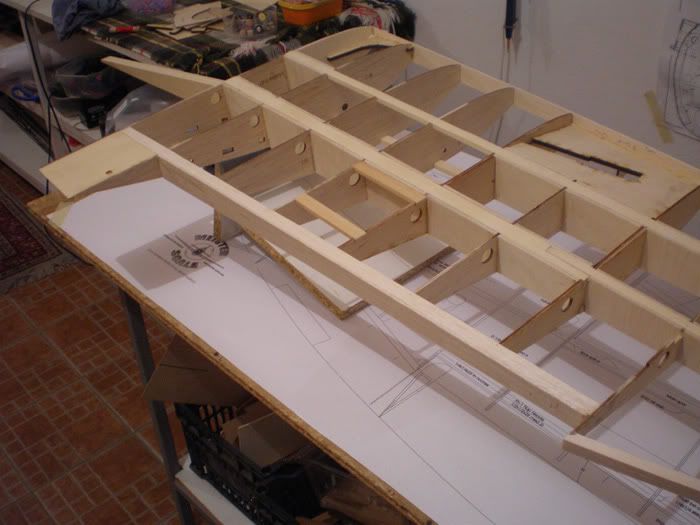
In the meantime, I start working on wing...

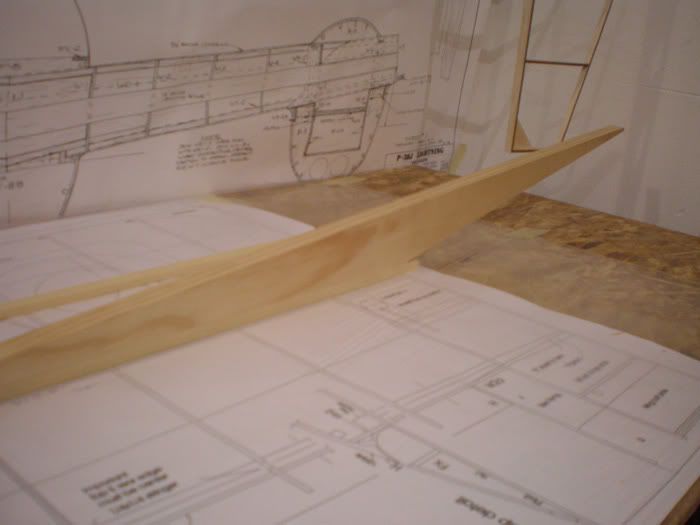
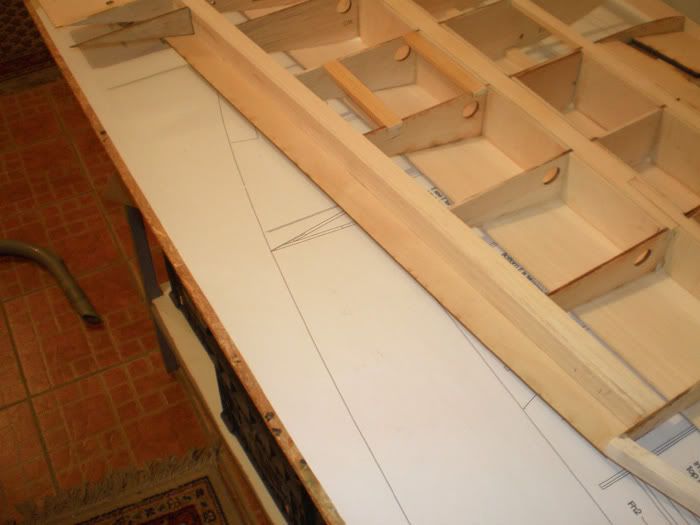
Wing is big and when I start looking in a plan I saw that spars are from balsa... I change that, and from my friend order fir spars...
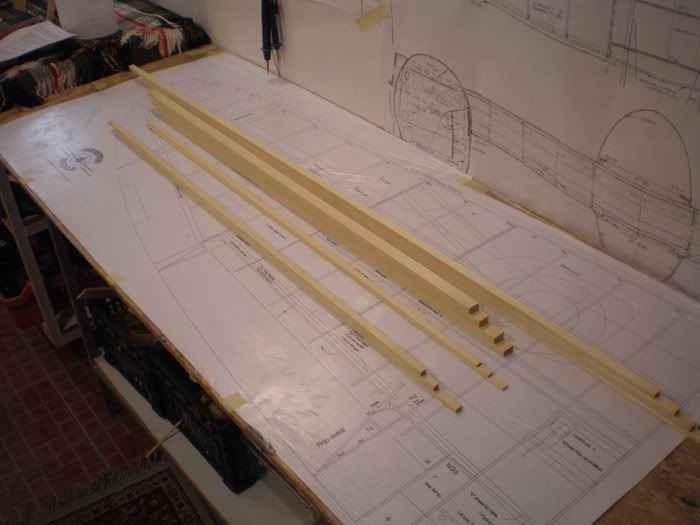
I will made one piece wing, so first step was to made bottom spars and glue wooden joiners on it.
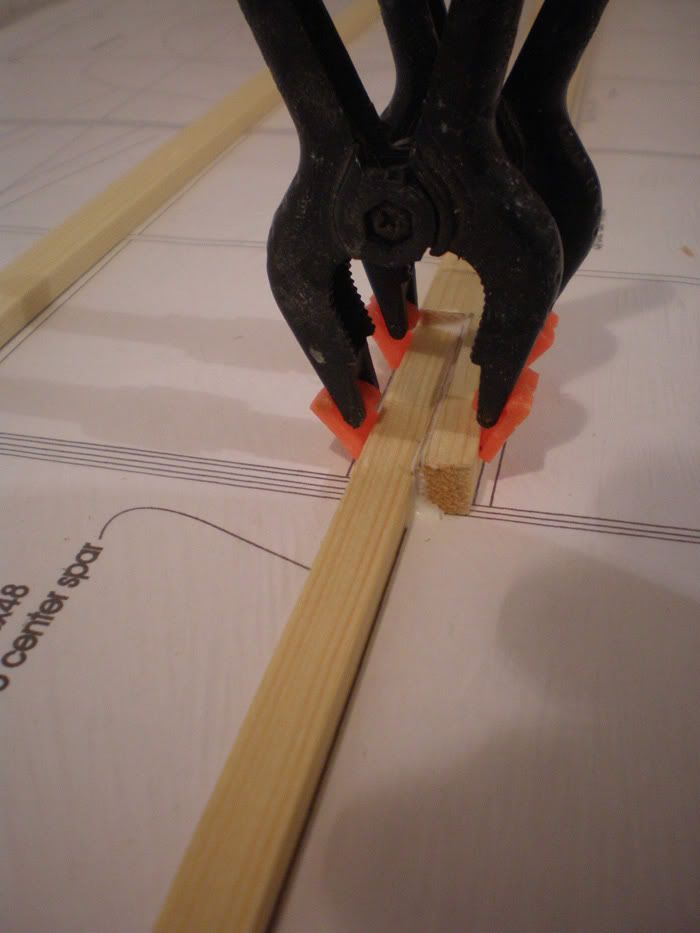
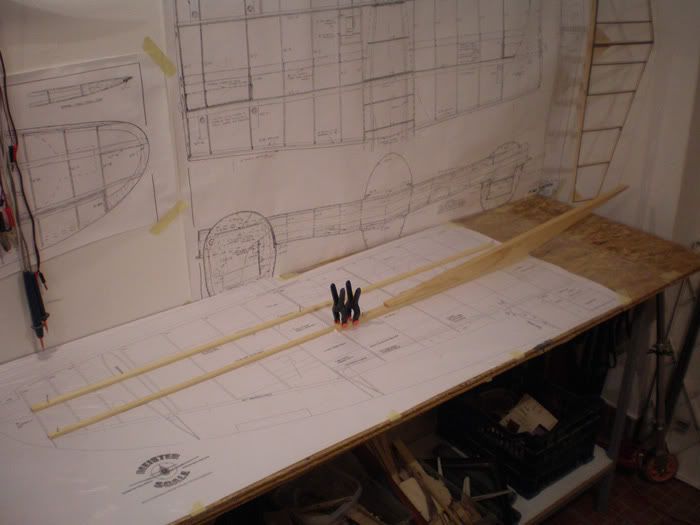
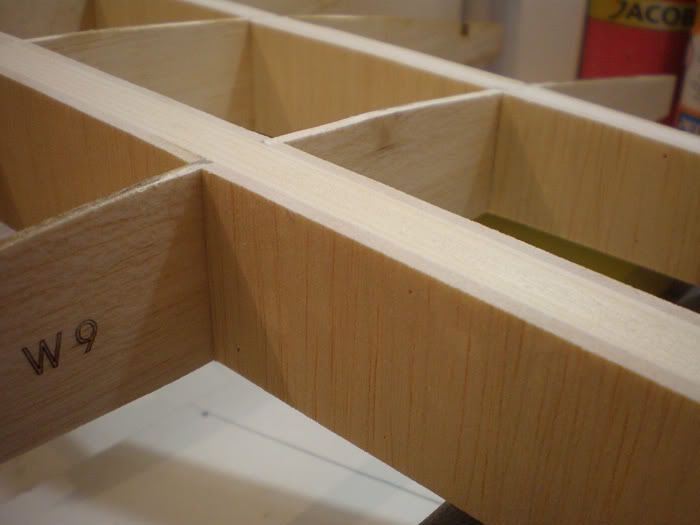
Then I prepared all ribs and glued it on spars...


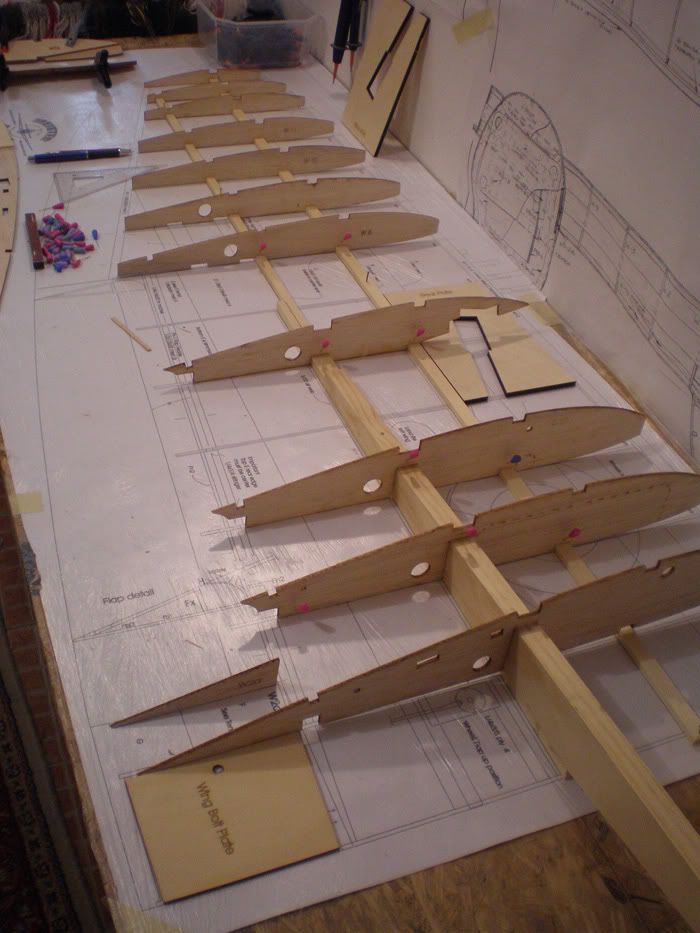
In this stage I made mistake and glue on ply ribs 7 & 5 extra ply ribs. Mistake is, right now I just need to glue extra rib on rib 7, not on 5...
On rib 1 I made extra ply for made it stronger in front.
To be continued...
Regards
Mirce
I forgot to put this two photos:
That is how look exit of plastic tubes on rear part of fuselage. Upper are for rudder and lower will be for elevators.
After that, everything was ready for planking upper fuselage surface.
I made balsa sticks and put it on ribs. For gluing I use Henkel Moment white glue (carpenter glue).
Kochj ask what type of glue I use in P 47 project till now? All wooden parts what you can see is glued with that glue. This glue is good because it quickly bonded wood (20 minute) and after 24 hours it is like stone.
Of course it is just for wood and that glue is much stronger than superglue, need time for dry, but...
For metal parts or wood - metal connection I use two component epoxy glue...
So, I add balsa sticks...
I add few extra stick...
On some place I add one more piece of balsa stick for bigger glue area for balsa plates...
In front of the fuselage I made four more balsa pieces...
I round front part to be same as pieces which get in short kit.
On the second rib I add few more balsa pieces, for same reason, to made bigger area for gluing front balsa plates...
When all that was finish, I dry send all upper fuselage surface and start to glue balsa plates...
All plates was first put in hot water, which soft it, and after I glue it on ribs and sticks. Finally fuselage came in this phase...
In the meantime, I start working on wing...
Wing is big and when I start looking in a plan I saw that spars are from balsa... I change that, and from my friend order fir spars...
I will made one piece wing, so first step was to made bottom spars and glue wooden joiners on it.
Then I prepared all ribs and glued it on spars...
In this stage I made mistake and glue on ply ribs 7 & 5 extra ply ribs. Mistake is, right now I just need to glue extra rib on rib 7, not on 5...
On rib 1 I made extra ply for made it stronger in front.
To be continued...
Regards
Mirce
11-05-2011, 12:03 PM
#46
Very enjoyable to watch Mirce. You do a wonderful job of documenting your steps. Thank you.
Yes, this plane has been around for a long time, and has a large following of builders, owners, and pilots. I can't imagine anyone having one not falling in love with it.
Yes, this plane has been around for a long time, and has a large following of builders, owners, and pilots. I can't imagine anyone having one not falling in love with it.
11-05-2011, 01:22 PM
#47
My National Balsa order shipped Wednesday. This tread is making me anxious. Im glad to see you old schooling it with wood glue! I love this stuff.
11-06-2011, 12:34 PM
#48
Thread Starter
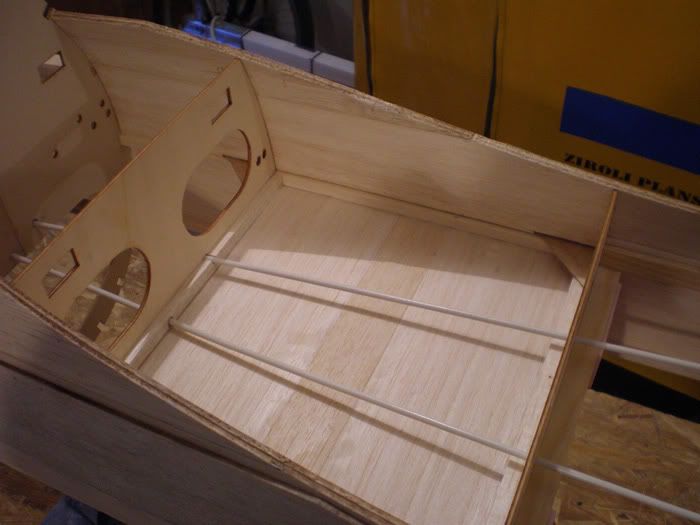
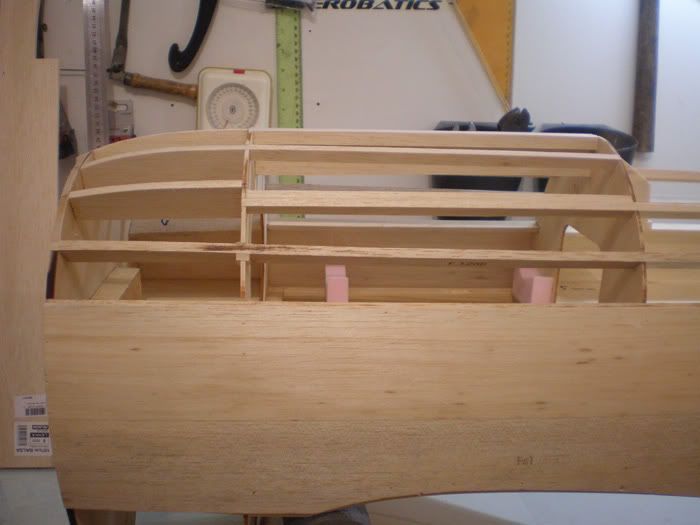
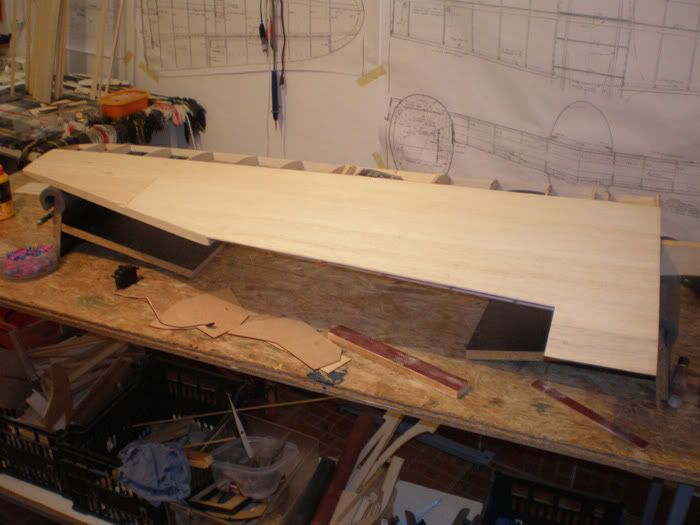
When all ribs are glued I add upper spars and made boxes between upper and lower spar.
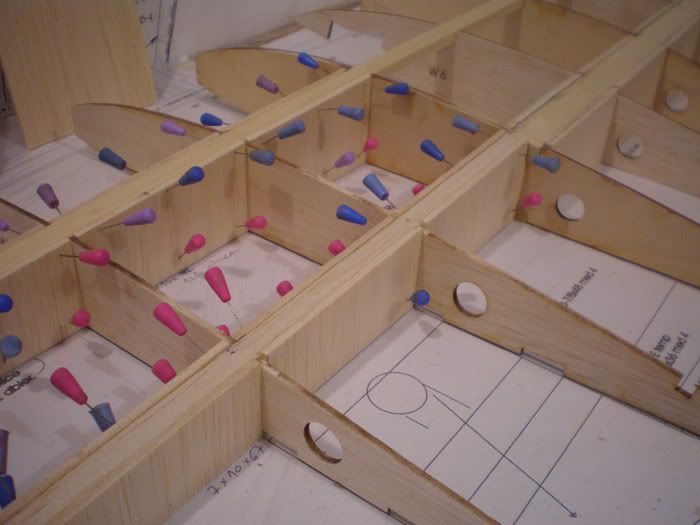
From first to seventh rib I connect spars with light ply (in front and rear spar area) and after that, almost to end of wing, I connect spars with 3 mm balsa.
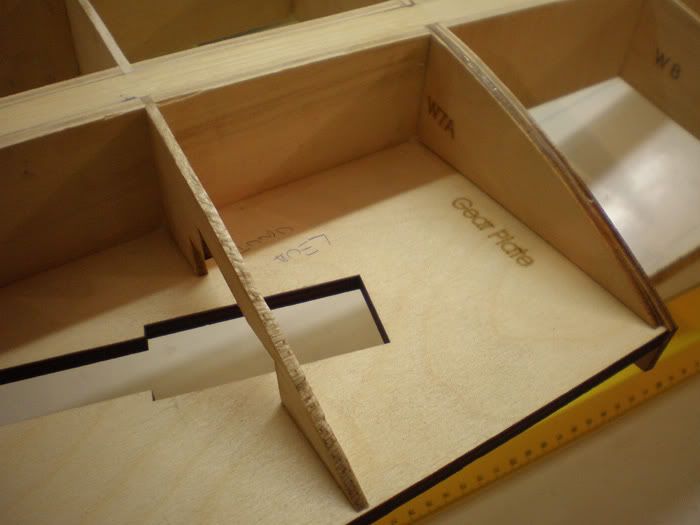
Than I glued landing gear plate and start working on leading and trailing edge.
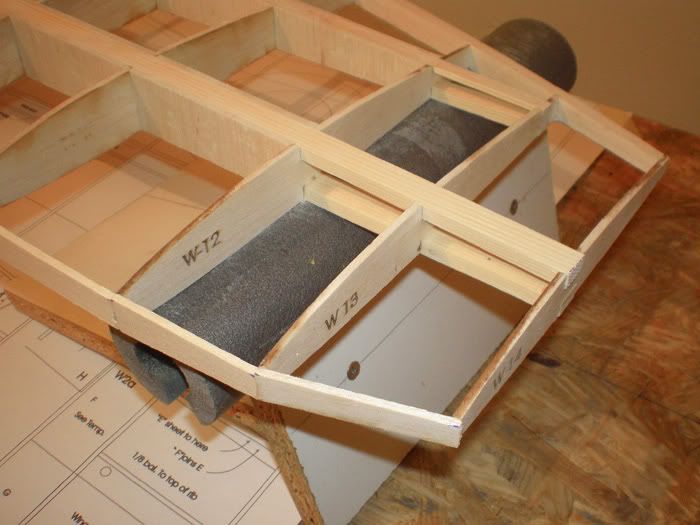
In this stage I glued wooden cross-beams in which will be later weird plates with servos from flaps and ailerons. I moved plates more to the middle of the control surfaces...
I add hard wood plate through which will come screw of wing.
In phase prepare wing for planking upper surface, I must add here and there few thin balsa tapes. It was glued with superglue...
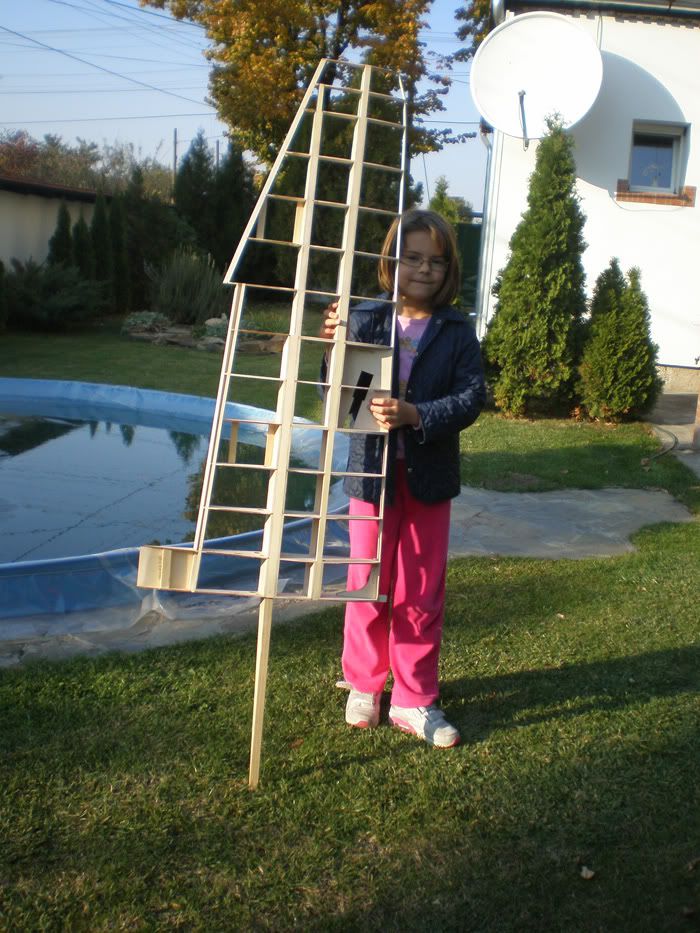
My little assistant show how big is ona half of this P 47 wing...
Next step was start planking upper wing half surfaces. For that I use 3 mm balsa plates. First plates are glued between spars ..
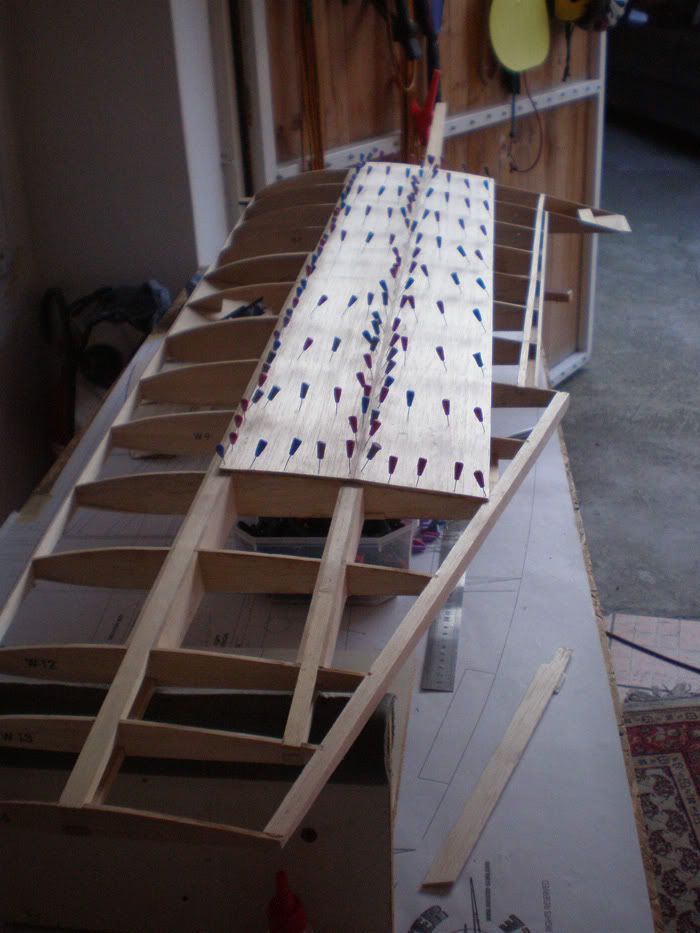
In flaps area I add 1 mm play...
After that I add all balsa plates on the rear part of the wing...
Next time landing gear installation...
Best regards
Mirce
From first to seventh rib I connect spars with light ply (in front and rear spar area) and after that, almost to end of wing, I connect spars with 3 mm balsa.
Than I glued landing gear plate and start working on leading and trailing edge.
In this stage I glued wooden cross-beams in which will be later weird plates with servos from flaps and ailerons. I moved plates more to the middle of the control surfaces...
I add hard wood plate through which will come screw of wing.
In phase prepare wing for planking upper surface, I must add here and there few thin balsa tapes. It was glued with superglue...
My little assistant show how big is ona half of this P 47 wing...
Next step was start planking upper wing half surfaces. For that I use 3 mm balsa plates. First plates are glued between spars ..
In flaps area I add 1 mm play...
After that I add all balsa plates on the rear part of the wing...
Next time landing gear installation...
Best regards
Mirce