


Meister FW190A Build with FG Fuse
 11-19-2013, 09:20 PM
#51

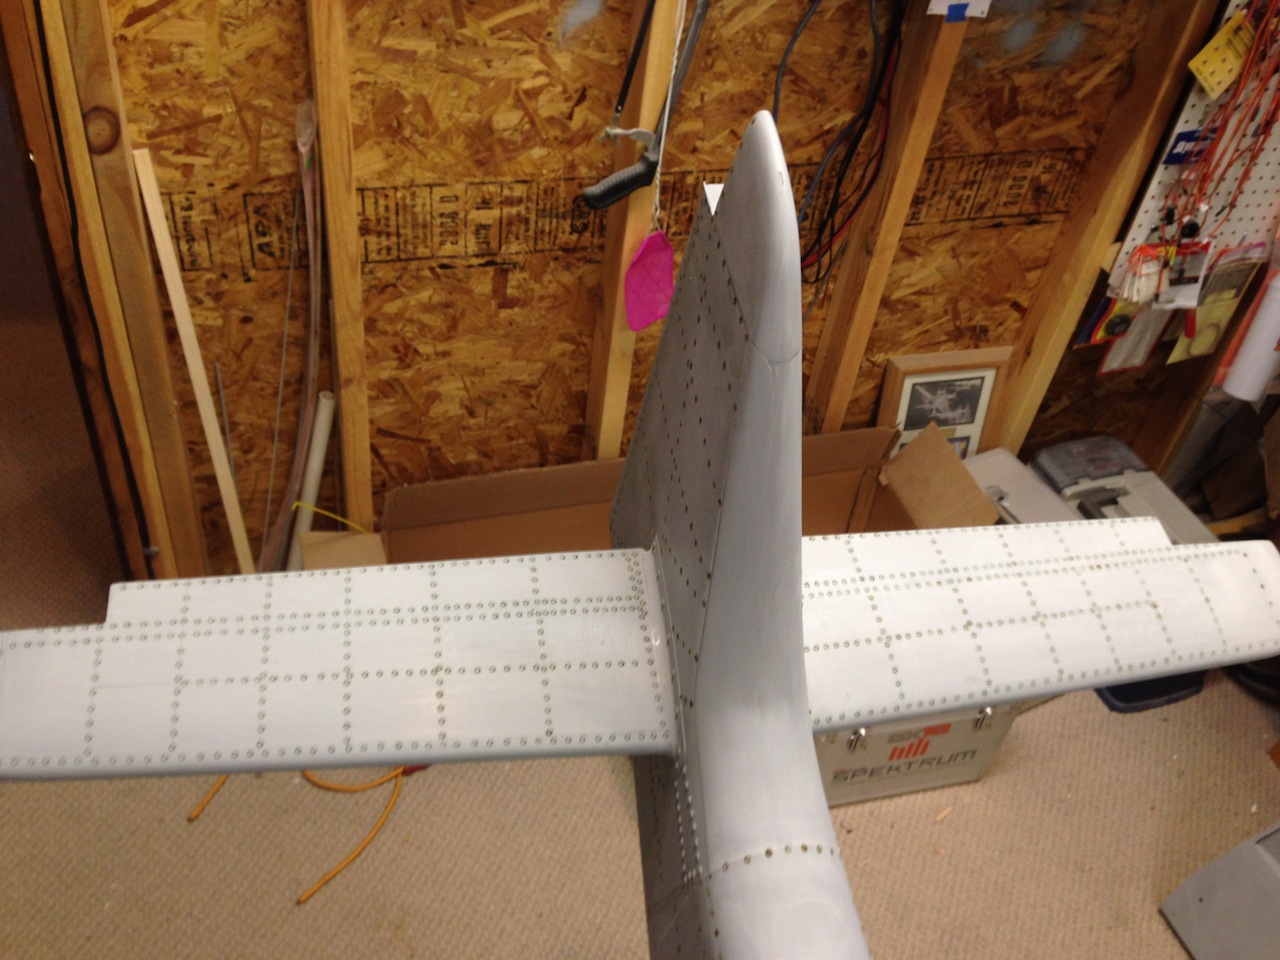
After 4 hours of drying time, I backed the four set up screws since the Hysol was still at a point of flexible, careful to not interrupt the setup. I did check for any movement of the tail just to make sure. I let it dry overnight and then I tackled the seam…which was a chore! The Fuse is well built and this joint is very thick. I am not a big fan of just throwing Bondo on an airframe since it has the nature to crack over time. So, I took my time and I once I got it down to fairly close to a good seem, there were some areas that did need some filling. I used 30 min. Epoxy with a good mix of micro-balloons on these fill lines instead of Bondo, a good tip I learned from my buddy Pedro Sanchez. After letting it dry completely, I took it down to a good final finish point, then used some Bondo as a "feathering tool" rather than a filling tool. By the time I sanded everything on this joint to ready for the first coat of Primer, there was very little Pink Bondo color…almost paper thin which is acceptable.
IMO, waaaaaaayyyy too much Bondo is used on builds, especially around fairings and joints like these.
As you can see, I lost some of the molded in panel lines around this joint. When will start to prep for final sanding and finishing, I will just apply Panel Line Tape where the lines were lost and shoot Primer layers as I do on the Wings and Stab to create the panel lines.
 11-21-2013, 07:04 AM
#53
Solartex is done on the Rudder and Elevators. Used Airpower CF Control Horns for the Rudder and Elevators I got from dreamworksrc.com I went ahead and dressed up the surfaces with pinking tape too. Added the trim tabs using G-10 material, careful to keep them at "neutral position" on the trailing edges. I sized these based on what Pro-Mark sent me for nomenclature and how they appear in the documentation books.


11-22-2013, 07:51 AM
#54
Itching to get into some detail work, I added some scale appearance to the Stab saddle. Also worked on the gun hood and cowl. The cowl is really stout as far as strength and the way it attaches to the fuse…(5) 6/32 screws and blocked Blind nuts (easy access to out these in)…SIMPLE!
Going with the 1/8" brass tube and soldering tool method. Most all of the rivets on the 190 are flush and since I am dealing with a FG fuse, this makes the most sense. I have learned that, though they do not appear very substantial when using the soldering tool, these remain VERY visible during the finishing process. I know full well I have my work cut out for me on the rest of the fuse to get this FG airframe riveted.
Besides the rivets, added 1/64 ply to create scale looking gun hood latches and also access panel latches for the cowl. Then covered the 1/64 ply with Flite Metal.
11-23-2013, 05:33 AM
#55
Here is the color scheme I have decided on…the A-6 No. 5. I have seen the black and white checkered cowl and Black Cat No. 11 but never the No. 5 with the Black Eagle wing on the fuse side like that. Ordered all the nomenclature from Pro-Mark since they already have the 1/4 Scale markings for this bird.

11-24-2013, 04:47 AM
#56
Rivets!!! Big difference between riveting a FG Fuse and a built up surface. Need to be very patient! I didn't post any of my primer, sanding and surface prep pics but the rivets are going on now after quite a bit of surface prep. I wet sanded all of the FG parts and Fuse with 320 and 400 grit sp. Shot two coats of Primer, then wet sanded again with the 400. Added panel lines where I lost them on the rear and forward Fuse seam and heavy primer'd in several coats over the chart tape that makes up the lines. Sanded one more time and this is my base for being able to do the rivets now.
Pretty much all of the scale hatches are in the mold of the FG Fuse which is AWESOME! As stated before, so are the main panel lines. Just added a few around the Gun Hood and that was it.


Pretty much all of the scale hatches are in the mold of the FG Fuse which is AWESOME! As stated before, so are the main panel lines. Just added a few around the Gun Hood and that was it.
11-24-2013, 06:51 PM
#57
Man, once you get into the detail part of the bird…you feel like you are just getting started! I am thinking of all sorts of things I "need" to do now. Heading to wing rivets next. Received my final "bling" box from Dino a few days ago. Tank release, Under wing pod and the drop tank. Don't know when in the world I will get to those but I do want to get them on this airframe at some point. Will focus on getting this finished up and RTF, then go to drop tank (maybe) 
11-25-2013, 07:13 PM
#58
Man, I am seeing rivets in my sleep now. My wife asked me how many there were and I told her, "I would be afraid to count and know that number!" I worked with two different resources for the rivet layouts on the wings and fuse…but again, this isn't going to Scale Masters or even TopGun for that matter. Well, maybe TopGun 


11-28-2013, 05:18 PM
#60
Started to do some painting on the gun hood, canopy frame and cowl. Used the Dively Liquid Masking Film on the canopy glass to prep for painting around the framework. Notice the Aluminum paint on the cowl in the last picture. I shot the gun hood prior to the base camp color and will shoot the whole fuse and wings with this. Saw this technique used on several warbirds at our last WMWA Dino DiGiorgio Memorial Rally and was VERY impressed with the results. After shooting your scheme colors, you use 000 steel wool and rub down to this coating and man, it looks sooooo good…metal showing through, looking nice and worn out paint from battle and weather. I used Automotive Paint from Advance Auto Parts, Nissan Silver Aluminum.
I went with Model Masters Acrylic Paint on this project and will be using my airbrush system to get the job done.


I went with Model Masters Acrylic Paint on this project and will be using my airbrush system to get the job done.
11-29-2013, 07:41 AM
#62

RX,
Been following your build. Nice work. You are going to have one fine ship when you are finished. Looking forward to watching your progress.
Can you tell me how you did your rivets?
John
Been following your build. Nice work. You are going to have one fine ship when you are finished. Looking forward to watching your progress.
Can you tell me how you did your rivets?
John
11-29-2013, 10:37 AM
#63
Thanks guys! I need some cheering on now as I am in the middle of finish work!!! 
John, I used a Weller "wand" type soldering iron…went cheap except one thing that I didn't realize, there are 3 LED lights in the handle that shined onto the tip which really helped me out!!! Glad they were there because it helped me stay on my pencil lines, able to see them better.
I used some 1/8" Brass tubing for the rivet making end. But I had to use one more larger brass sleeve to make it tight enough for the soldering wand end. Slid the 1/8" brass tube in, bent it to almost 90 degrees to be easier to see things and there you have it. Now, one word of caution, keep this 1/8 brass tube and it's sleeve(s) as short as you can because you do not want to loose too much heat, especially if you are working with a FG Fuse. I cut my first one too long because I thought I could just trim it as time went on and keep going. NOPE! Just keep it as short as you can and temp up.
About every 30 or so rivets, I cleaned out the inside brass tube with my Exacto knife and used 150 grit sand paper on a stir stick to keep the outside of the brass tube clean. When you first start, use your Exacto knife to "sharpen" the inside of the tube a bit, which will reduce the wall thickness of the brass and make it sharper.
Here is a pic of what I used. I think I ended up making 4 tips during this process. Hope this helps.
Rex
11-29-2013, 05:05 PM
#64
My Feedback: (5)

Join Date: Mar 2002
Location: Laurel Hill, FL
Posts: 178
Likes: 0
Received 0 Likes
on
0 Posts
Rex,
I just finished reading this thread and I have never seen such quality work done in such a short period of time. I only wish I could work at the speed you do! Fantastic build! Thanks for posting.
David
I just finished reading this thread and I have never seen such quality work done in such a short period of time. I only wish I could work at the speed you do! Fantastic build! Thanks for posting.
David
11-30-2013, 05:20 AM
#65
David,
Thank you for the encouragement! I had a goal and that was to get this bird in primer by an event I was CD for that I do jointly with Dino DiGiorgio and several warbird buddies each year. The past 6 years I have been mainly a jet guy and they have been bugging me to do a warbird. I started this hobby in warbirds several years ago and go the jet bug…got trampled on by the industry junk that tends to go along with this hobby (do their R&D at your own expense) and burned out BIG TIME! I ordered this kit and Fuse in February (I think). This past April, Dino delivered the FG Fuse via TopGun to me, got the Wing and Tail kit around late May…sat till my travel was winding down, knowing I had some quality time coming up I could invest in my shop. The pace has been good and I am not having to try and remember where I left off…LOL! I gave this build two full uninterrupted weeks, 8-10 hours a day and man…it's amazing what you can do in 14 days on one of these. I'm an empty nester now AND I have a wonderful wife that knows I love this hobby...so that made it a whole lot easier")
I'm getting it to the point of full on camp pattern now and plan to have it ready to install all the electronics by Dec. 15. RTF by Christmas break. That's my goal anyway
Rex
Thank you for the encouragement! I had a goal and that was to get this bird in primer by an event I was CD for that I do jointly with Dino DiGiorgio and several warbird buddies each year. The past 6 years I have been mainly a jet guy and they have been bugging me to do a warbird. I started this hobby in warbirds several years ago and go the jet bug…got trampled on by the industry junk that tends to go along with this hobby (do their R&D at your own expense) and burned out BIG TIME! I ordered this kit and Fuse in February (I think). This past April, Dino delivered the FG Fuse via TopGun to me, got the Wing and Tail kit around late May…sat till my travel was winding down, knowing I had some quality time coming up I could invest in my shop. The pace has been good and I am not having to try and remember where I left off…LOL! I gave this build two full uninterrupted weeks, 8-10 hours a day and man…it's amazing what you can do in 14 days on one of these. I'm an empty nester now AND I have a wonderful wife that knows I love this hobby...so that made it a whole lot easier
I'm getting it to the point of full on camp pattern now and plan to have it ready to install all the electronics by Dec. 15. RTF by Christmas break. That's my goal anyway
Rex
11-30-2013, 05:46 AM
#66
My Feedback: (5)
Join Date: Mar 2002
Location: Laurel Hill, FL
Posts: 178
Likes: 0
Received 0 Likes
on
0 Posts
Its amazing Rex. I'm an empty nester as well but still working full time +. I have Dino's Zero with the fiberglass fuse that is just about to go on to the building board, all the parts are in hand except the engine and I am about to make that purchase here shortly. I have been home recovering from surgery and unable to do any shop time but for the past week or so have been reading everything I can find and your thread was one of those. It was a great help. It looks now like retirement is in my future within the next few months and that will give me more time but then there will be a break while the wife and I pack up and move to Florida. In the meantime, I will get as much done as possible. I was real glad to see Dino has a glass fuse for the 190, its not posted on his website, but I will now put it on my list for construction behind the Zero. Thanks again for the tips!
David
David
Last edited by dmheil; 11-30-2013 at 06:13 AM.
11-30-2013, 06:05 AM
#67
David,
Hope you heal up and recover well!
PJ Ash is in the middle of a Zero Build with the FG Fuse…wings are sheeted and he is heading into the tail feathers now. Just saw it posted on FaceBook under the Meister Page Dino has. He is also writing a build manual for it too. Spoke with PJ yesterday and he was just finishing up the Former installs in the FG Fuse. Yes, the 190 Fuse is fairly new and requires a different wing build than the full kit. Terry Farmer was the first guinea pig to get the new wing built and fitted to the FG fuse. The only issue was moving the Gear to a scale location rather than wide as I addressed before.
Good luck on your Zero build!
Rex
Last edited by rbxbear44; 11-30-2013 at 06:09 PM.
12-01-2013, 05:33 AM
#68
Got a lot of painting done and it is starting to look like a Focke Wulf!!! The cowl was A BUNCH of work but well worth it for me. I am very happy with how it came out. This was my first stab at a checkered cowl. Really thankful for Pedro Sanchez' help on how to mark out the squares on this project. The Dively Liquid Masking stuff worked really well too. I first sprayed the yellow under the cowl, then sprayed white as my base (since I didn't dare want to cover the black base with White). Let it dry for a full 24 hours, then did two coats of Liquid Masking. Let dry over night. Then drew out the squares using a wood jig and ballpoint pen…the wood jig was set up with drilled holes for the pen at the correct height intervals and I simply ran the wood jig around the cowl as it sat on it's nose!!! Thanks Pedro!!!
Once I got the vertical lines done (since they are somewhat compound curved), the horizontal line breaks were pretty easy to map out.
Was able to base coat the fuse with the camo colors. I know it looks a bit "plain" but these colors are just the base…the weathering will transform the base coats BIG TIME!
12-02-2013, 04:50 AM
#69
Moving along nicely…man, I never thought I could get this painted using an airbrush!!! But actually it is working quite nicely and I am really enjoying this part of the build, I made some "stupids" while trying to "spot up" the camo scheme and had to run to the hobby store and get some more of the Base blue/green ("Hellbrau") color to cover it back up again…LOL…looked like a very goofy spotted animal rather than a FW 190A-6!!!
But, got it back to where I wanted it before I headed into the weathering and darkening of the panel lines and rivets.
Shot the wing bottoms with the "Hellbrau" color too. Next will be the wing tops in camo while waiting for the fuse to dry overnight before I start putting the markings on!
I just had to take a peek at how this Aluminum undercoating was going to work so I did some "steel wool work" on the Gun Hood to see what this could look like. I used 0000 Steel Wool at first and was not getting far enough into the top coat so I went to the 000 Steel Wool and BAM! There it was! This is what I want it to look like, using less black on the panel lines and rivets and more of the worn and weathered look. in my opinion, too much "dirt and grime" look on the panel lines and rivets "over weather" these birds too often…I am guilty as charged of this on a few of my Jet assemblies too. I'll still darken them out some but not make them look like they are packed out with grime!
12-03-2013, 01:21 PM
#71
Thanks Ian. This has been a great build for sure. Throttling back a bit this week as I head into some travel soon. I did manage to get the "eagle wing" airbrushed onto the fuse, darkening and blending the base color around the artwork first. I had to do this one freehand…well, with painters tape (with the edge sealing) I am very happy with the way it came out. I may try to get the tops of the wings camo'd out and set everything aside for a week or so and just let things dry good before attacking the markings.
Man, I am just thinking of how much is really left to do after the painting is done…re-assembly, re-install of servos, glue in all the hinges, run air lines, finish the servo extension runs, fuel tank plumbing, bolt the engine back on and set the throttle linkage back up….WOW!


I am very happy with the way it came out. I may try to get the tops of the wings camo'd out and set everything aside for a week or so and just let things dry good before attacking the markings.Man, I am just thinking of how much is really left to do after the painting is done…re-assembly, re-install of servos, glue in all the hinges, run air lines, finish the servo extension runs, fuel tank plumbing, bolt the engine back on and set the throttle linkage back up….WOW!
12-07-2013, 07:22 PM
#72
Got some markings done today, using Pro-Mark stencils. I do like using this Acrylic Paint with these stencils for sure. With the airbrush and just the right amount of air pressure, I can move along pretty quick.
I did get the tops of the wings done before I hot the road on travel so they are ready to load the servo's back in, re-install the gear and run the air lines.


I did get the tops of the wings done before I hot the road on travel so they are ready to load the servo's back in, re-install the gear and run the air lines.
 12-07-2013, 07:36 PM
#74
Thanks! There was plenty of room to get the servos in there and use the pre-fab servo hatches and frames Dino sells. It does put some weight towards the tail but I'm not too worried about it. Right now, I am looking at about 7 lbs of weight for the nose anyway.
