


Ziroli 92" p-47 build thread
 09-04-2019, 07:26 AM
#226

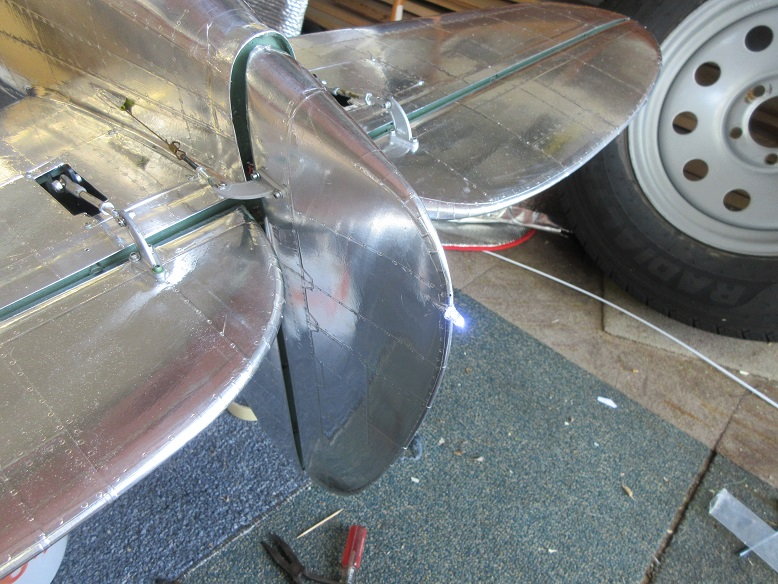
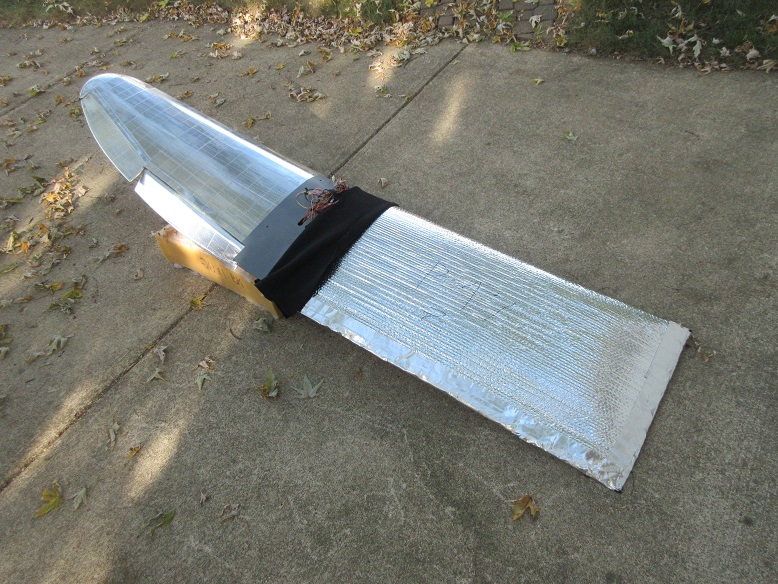
White nav light.
I forgot to allow for the nav light wires when building the rudder but a long 3/16" drill bit worked well. Some outside Sullivan tubing for wire guides and a little CA did the 'trick'.
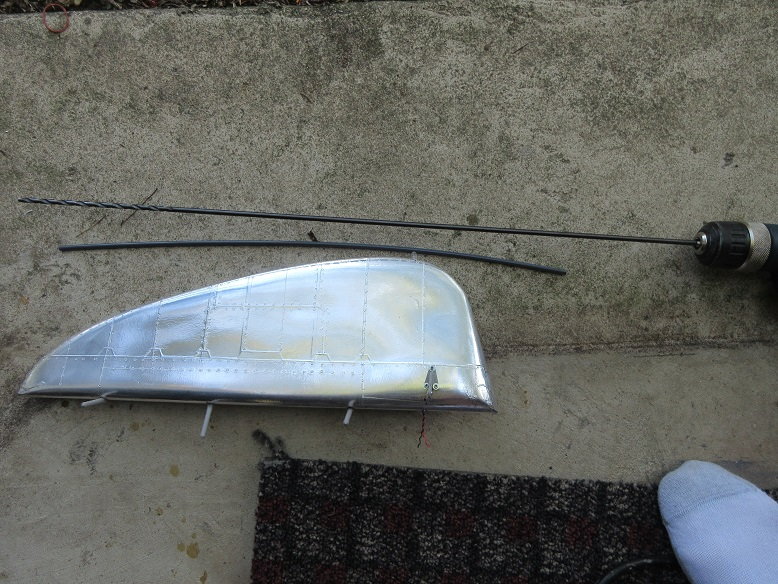
Since they are smaller, I used some of my railroad connectors. Robart pocket hinges made it easy for the nav install.
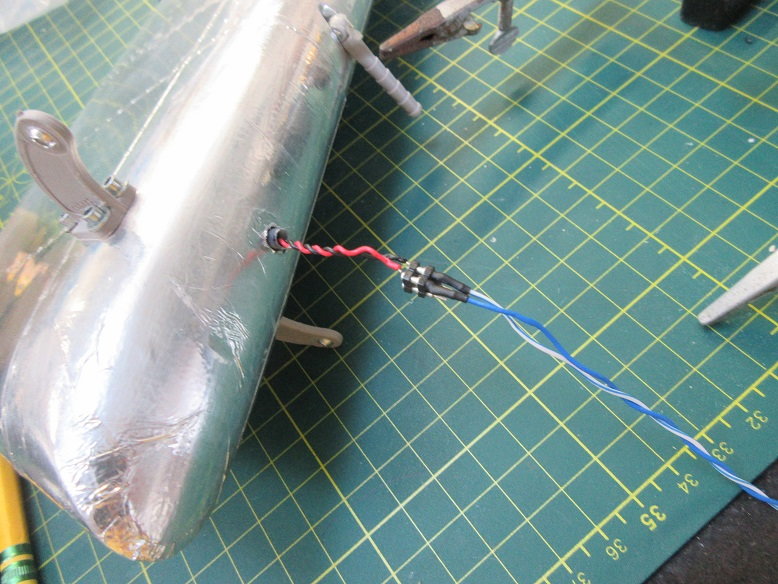
Two white lights came off this extension. Will try to run the spare LED into the cockpit for instruments.
I forgot to allow for the nav light wires when building the rudder but a long 3/16" drill bit worked well. Some outside Sullivan tubing for wire guides and a little CA did the 'trick'.
Since they are smaller, I used some of my railroad connectors. Robart pocket hinges made it easy for the nav install.
Two white lights came off this extension. Will try to run the spare LED into the cockpit for instruments.


 09-04-2019, 11:44 AM
#228
Thanks, flyerinokc
===========
Bummer. Thought I had stars-n-stripes in stock but the shelf was bare.
Just ordered from Major decal. Water transfer. They only take checks/MO so it'll be a few weeks.
Major Decals - Industrial Etching, Inc. / Northeast Screen Graphics - Manufacturers of Fine Etched and Silk Screen Printed Products

 09-05-2019, 07:53 AM
#232
In my book, you get more 'points' for painting them.
========
Stuff:
Doors back onl
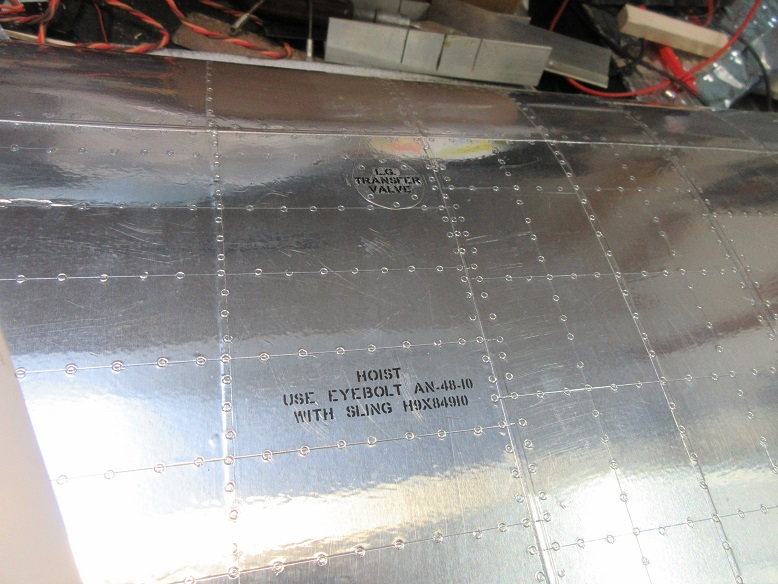
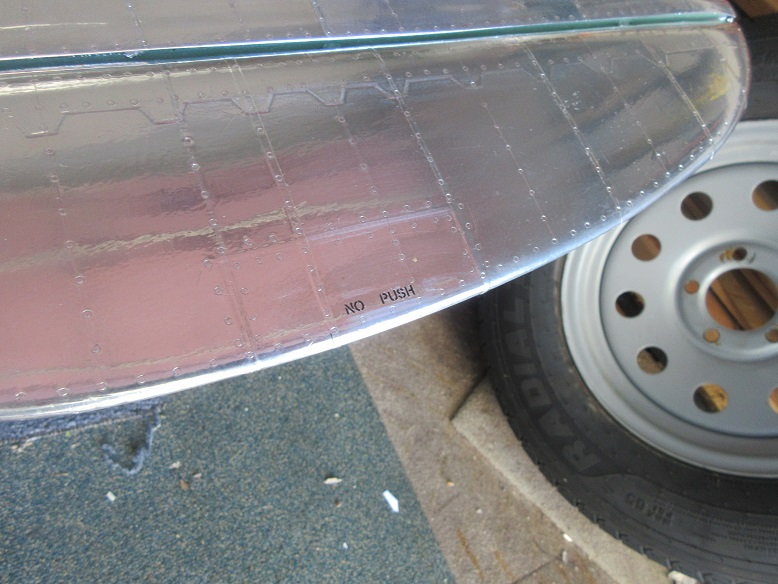
Adding nomenclature.
Using Promark 'dry rub ons'.
Comes with extra sheet indicating where nomenclature is located on the plane.
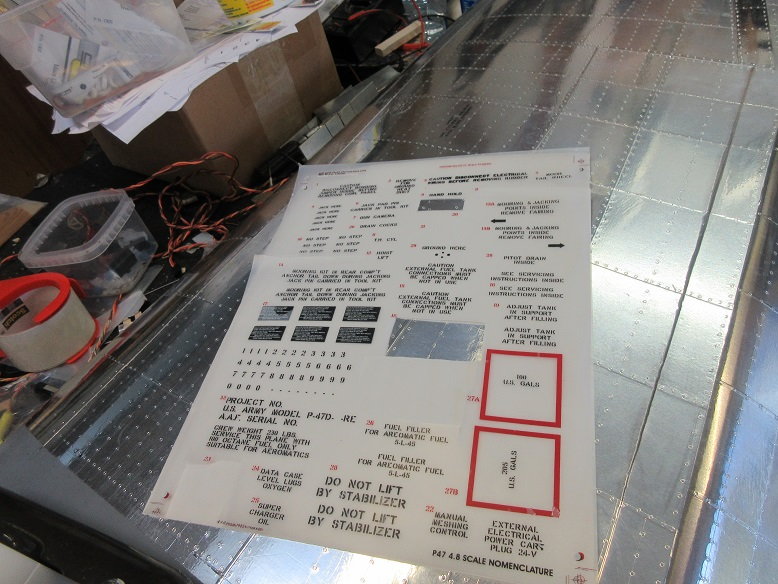
I always tape them so I can put the 'rub on' back in its exact position, in case I don't thoroughly get the lettering attached to the plane's surface.
I use my heat gun to activate the 'rub on' and then use a 'stump applicator' and/or popsicle stick to rub the nomenclature to the surface.
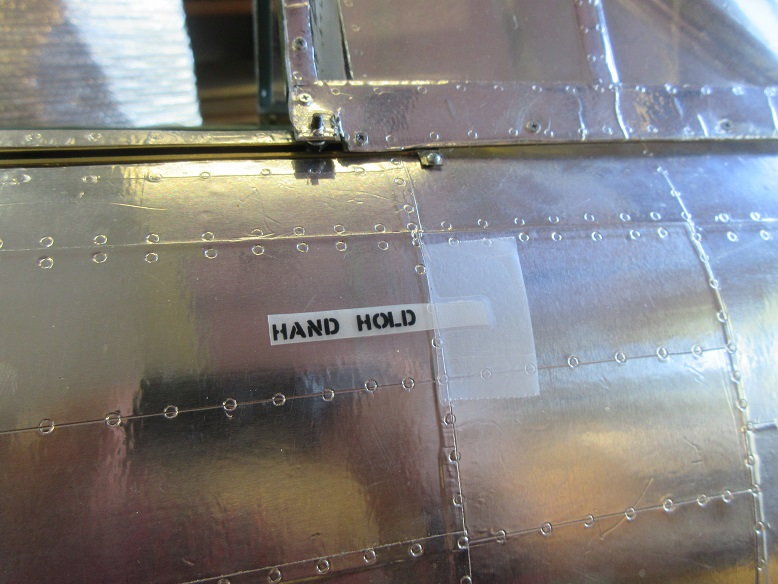
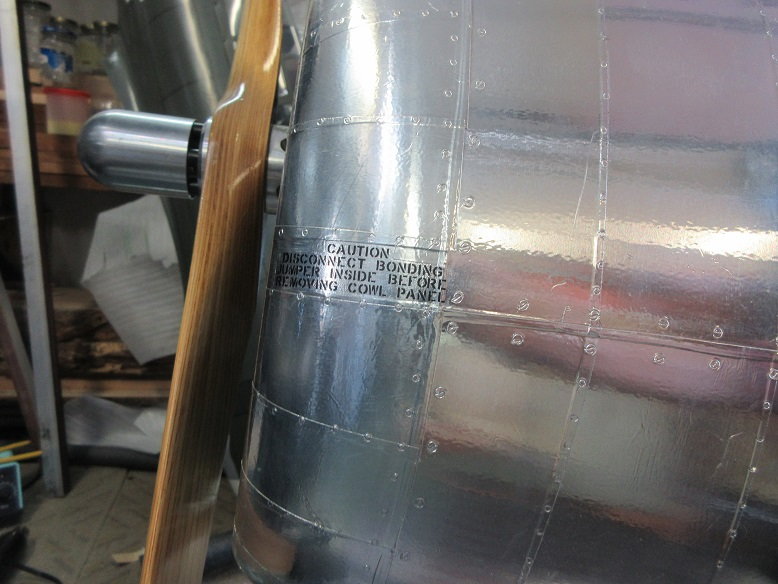
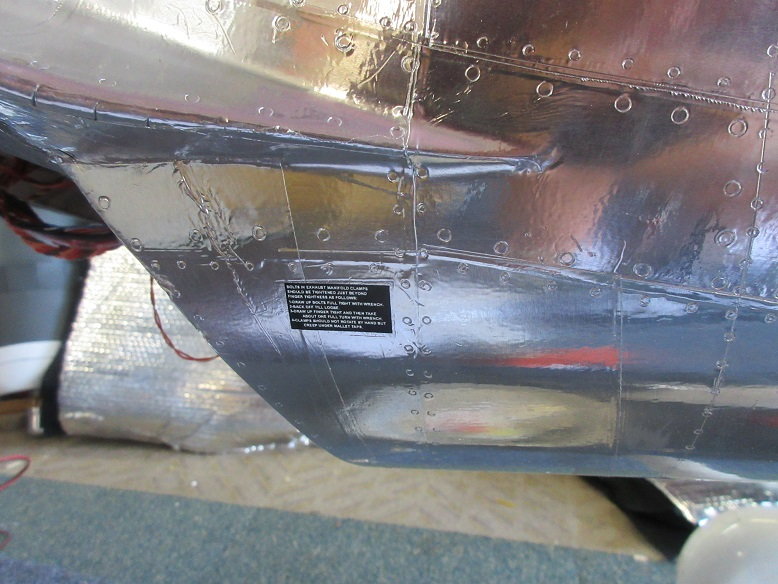
Five nomenclatures in this picture.
========
Stuff:
Doors back onl
Adding nomenclature.
Using Promark 'dry rub ons'.
Comes with extra sheet indicating where nomenclature is located on the plane.
I always tape them so I can put the 'rub on' back in its exact position, in case I don't thoroughly get the lettering attached to the plane's surface.
I use my heat gun to activate the 'rub on' and then use a 'stump applicator' and/or popsicle stick to rub the nomenclature to the surface.
Five nomenclatures in this picture.
09-05-2019, 12:05 PM
#233
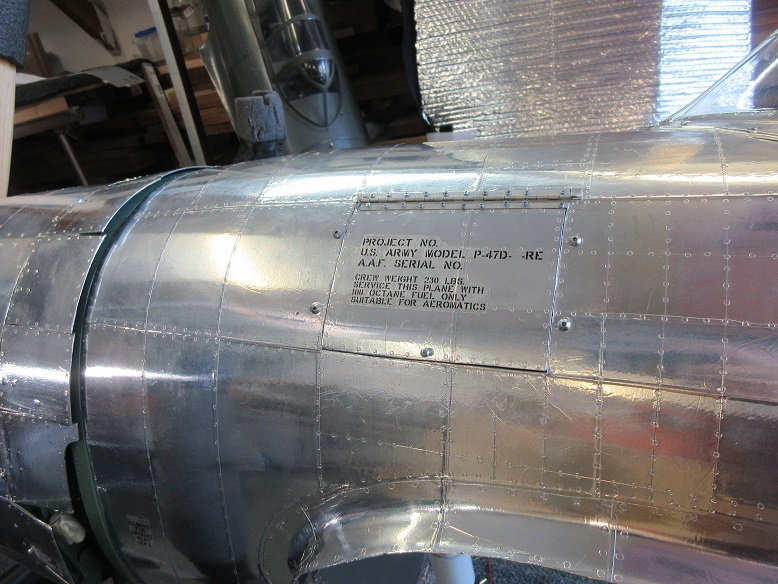
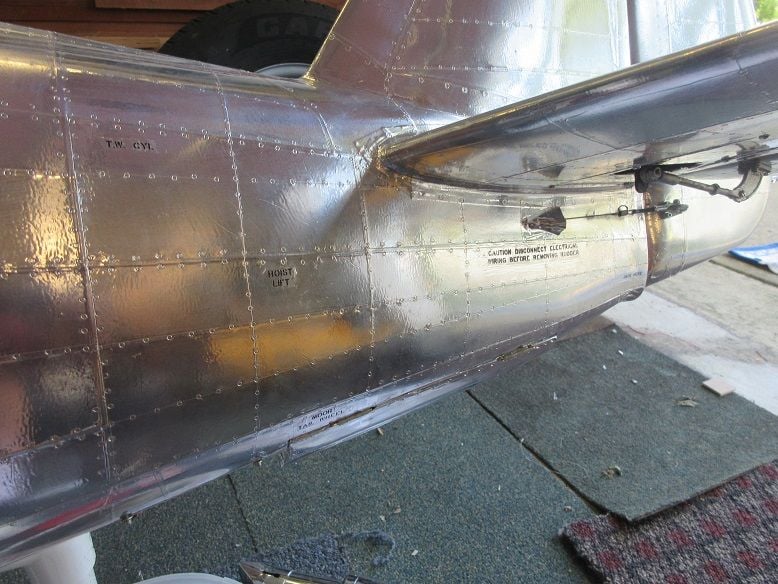
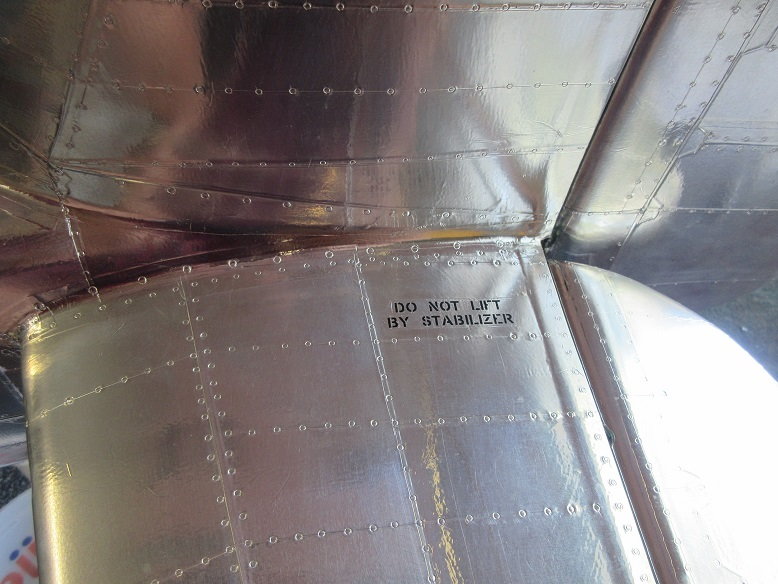
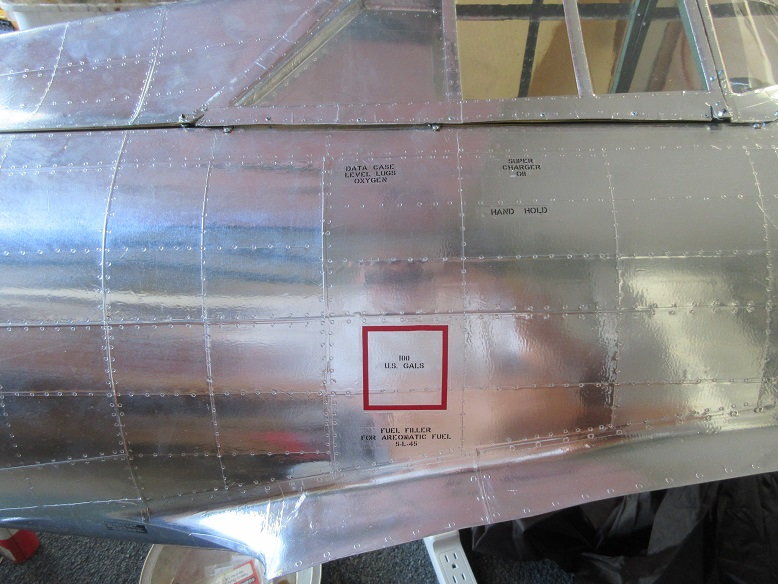
Nomenclature (cont)
Did the other side of the fuse. I remember the maker of these said it's best to use them soon after they are made. The sheets I have are several years old and some of the red square stuck to the under liner sheet. I'll just have it as 'weathering'.

Did the other side of the fuse. I remember the maker of these said it's best to use them soon after they are made. The sheets I have are several years old and some of the red square stuck to the under liner sheet. I'll just have it as 'weathering'.
09-08-2019, 06:55 AM
#234
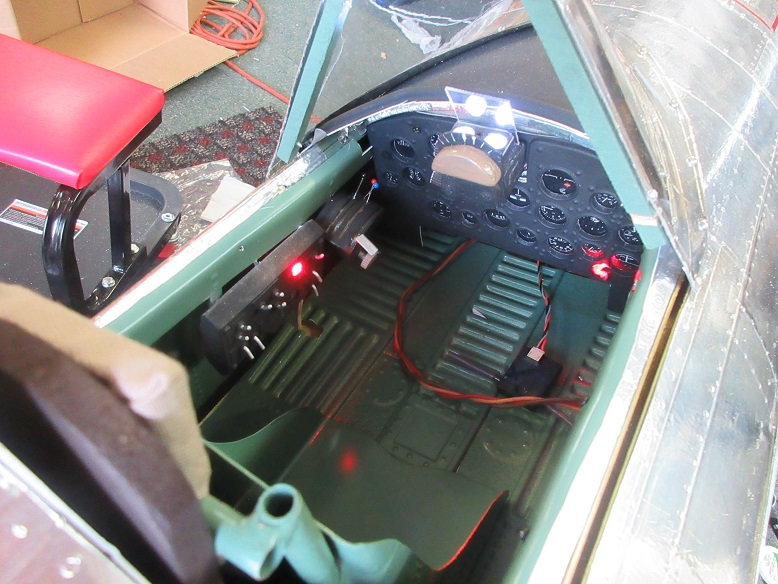
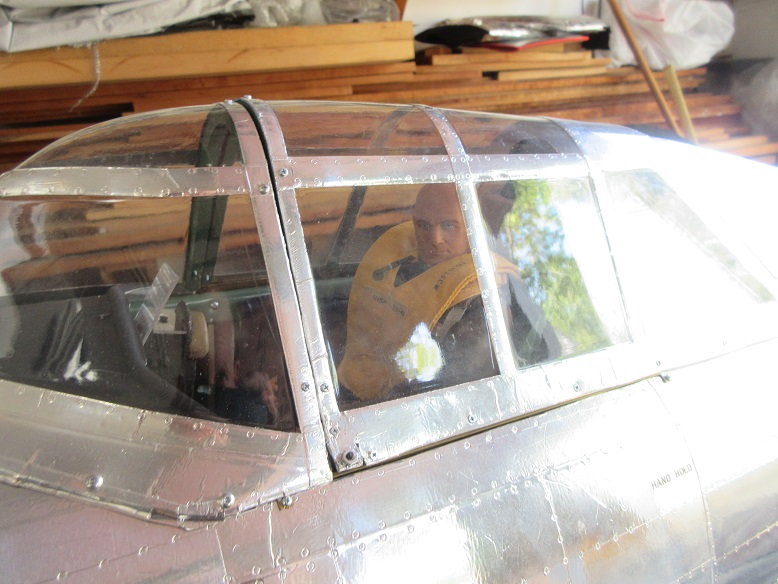
Cockpit kit from D-balsa (cont)
Got a few things done.
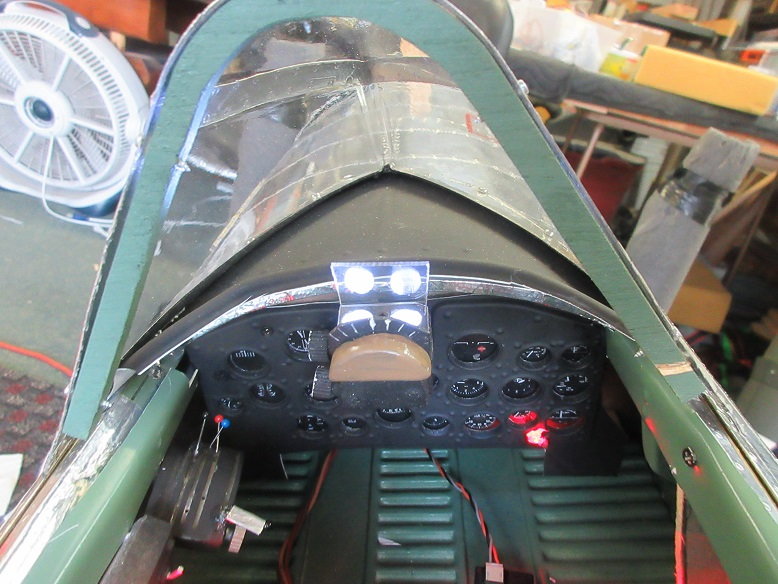
I find using my sanding belt is easiest for removing the back of the plastic on the front console. The edges melt and then I pop them out.
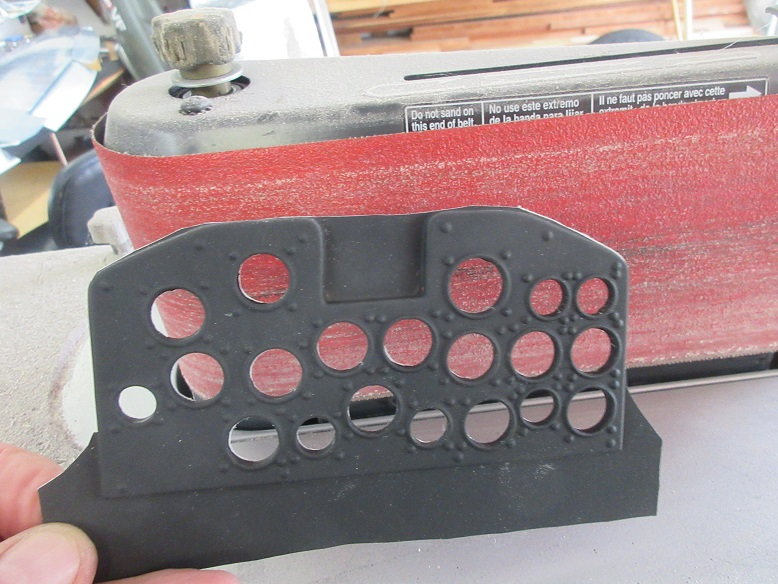
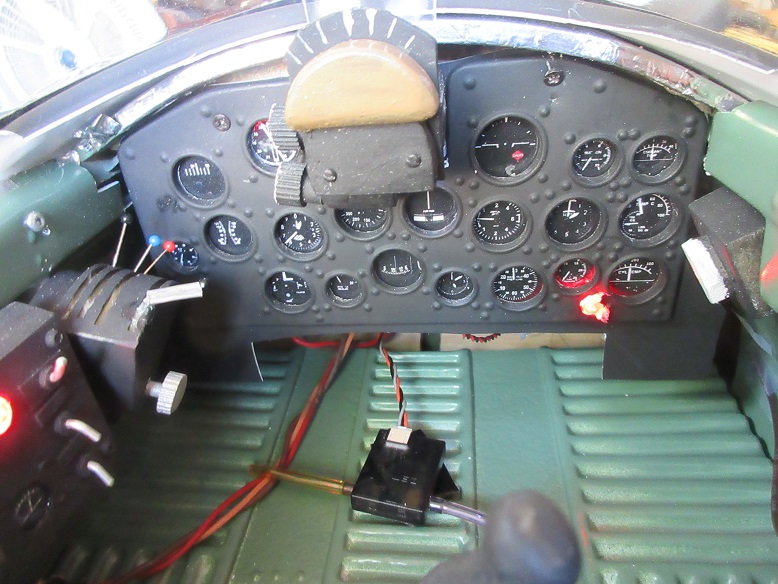
Printed and sealed gauges glued to console with caulk.
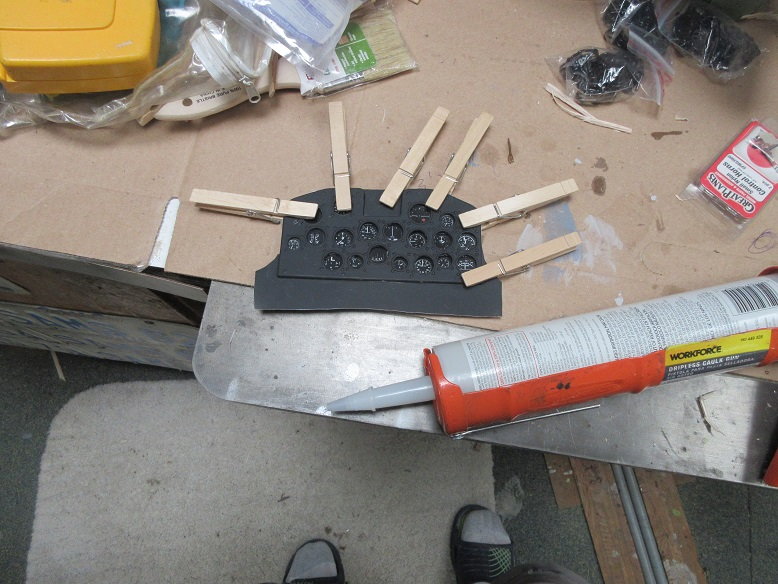
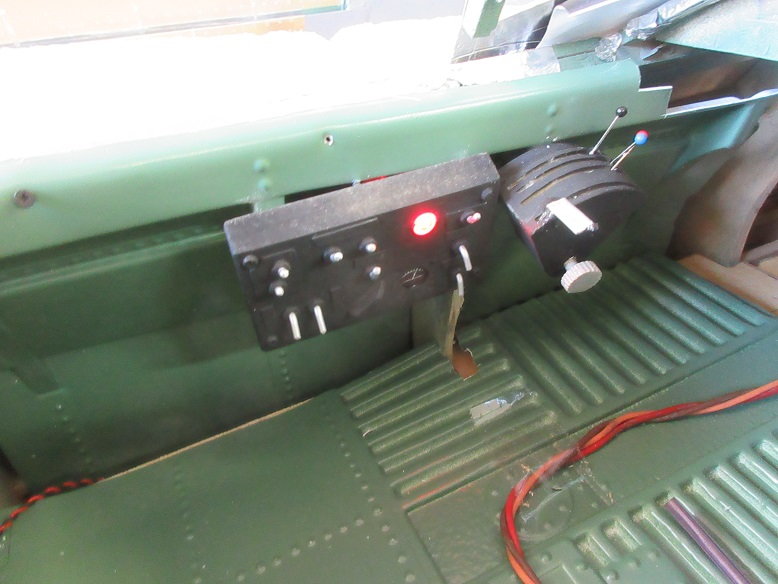
Got the throttle quad and left electrical control panel installed. Screwed them to the side panel from the back side.
Throttle quad:
Drilled small holes in the slots and CA'ed some straight pins in the holes.
Drilled an 1/8" diameter hole for the dial.
Electrical panel:
Drilled 1/16" holes where all the toggle recesses are and installed some aluminum wire in the 10 holes after bending them 45 degrees.
Also used extra LED's from the nav lights and installed one in the electrical side panel.
Got a few things done.
I find using my sanding belt is easiest for removing the back of the plastic on the front console. The edges melt and then I pop them out.
Printed and sealed gauges glued to console with caulk.
Got the throttle quad and left electrical control panel installed. Screwed them to the side panel from the back side.
Throttle quad:
Drilled small holes in the slots and CA'ed some straight pins in the holes.
Drilled an 1/8" diameter hole for the dial.
Electrical panel:
Drilled 1/16" holes where all the toggle recesses are and installed some aluminum wire in the 10 holes after bending them 45 degrees.
Also used extra LED's from the nav lights and installed one in the electrical side panel.
Last edited by samparfitt; 09-08-2019 at 07:01 AM.


 09-11-2019, 04:42 AM
#240
Larry,
Major decals: Very thin and won't hide the rivet detail. I like the water transfer (WT) ones. No credit cards, takes a little longer as they wait until your check clears.
At the bottom of the web is the price listings along with a form to fill out and mail to them.
Major Decals - Industrial Etching, Inc. / Northeast Screen Graphics - Manufacturers of Fine Etched and Silk Screen Printed Products
=====
flyerinokc,
cool video.
Last edited by samparfitt; 09-11-2019 at 04:45 AM.
 09-24-2019, 07:16 AM
#242
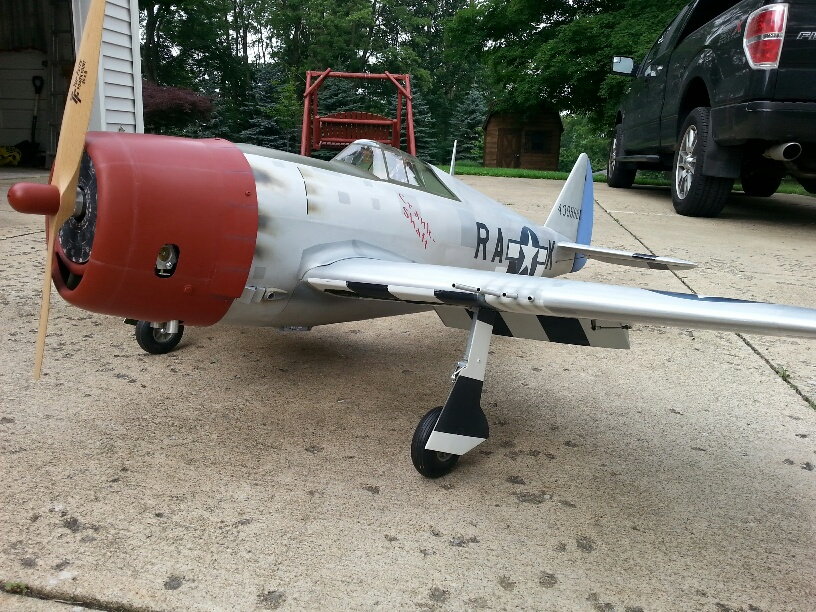
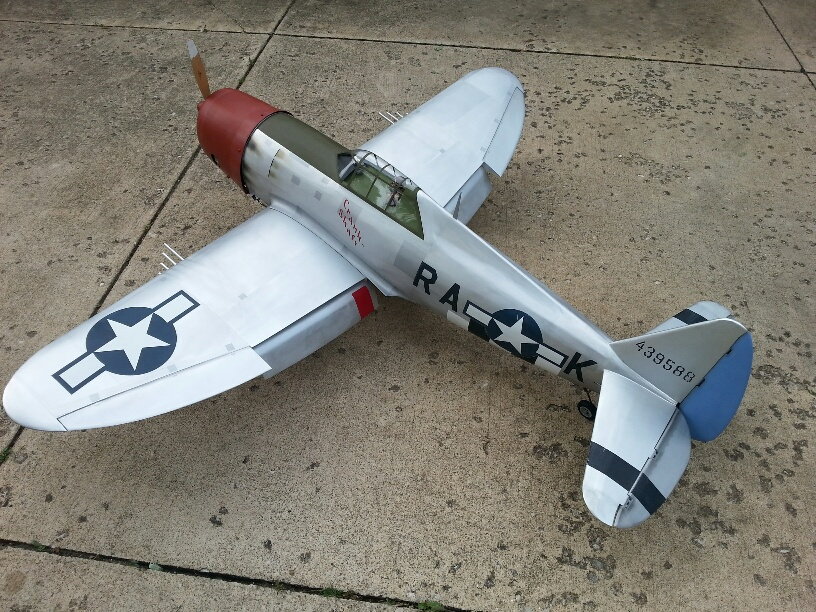
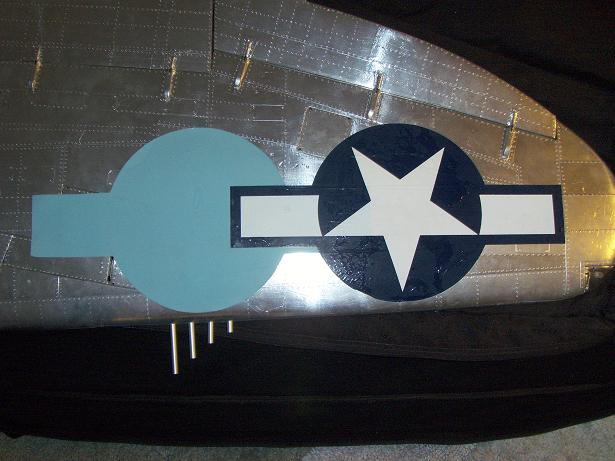
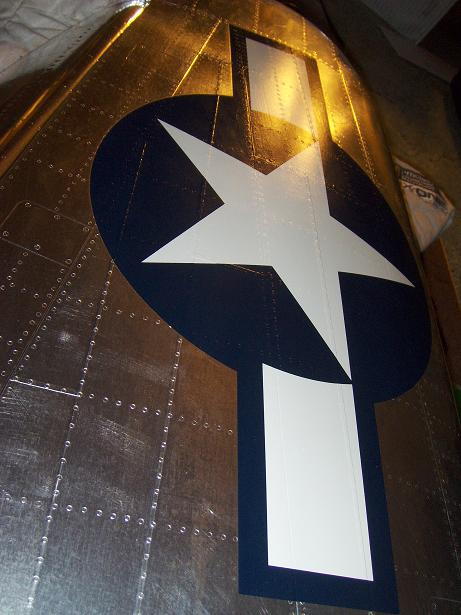
Decals applied.
The champ water transfer decals came in.
A nice thing about these is there are no clear coat over the whole sheet so no need to exactly cut around the edge of the decal. I'm thinking these are 2 part epoxy type paint decals since they are so large and do not tear. I left them in warm water for 60 seconds and slid them into place. Wet paper towel used to remove bubbles, then a dry one to, continue, remove bubbles and, finally, a folded tissue to remove all remaining water and bubbles, working from the center. out.
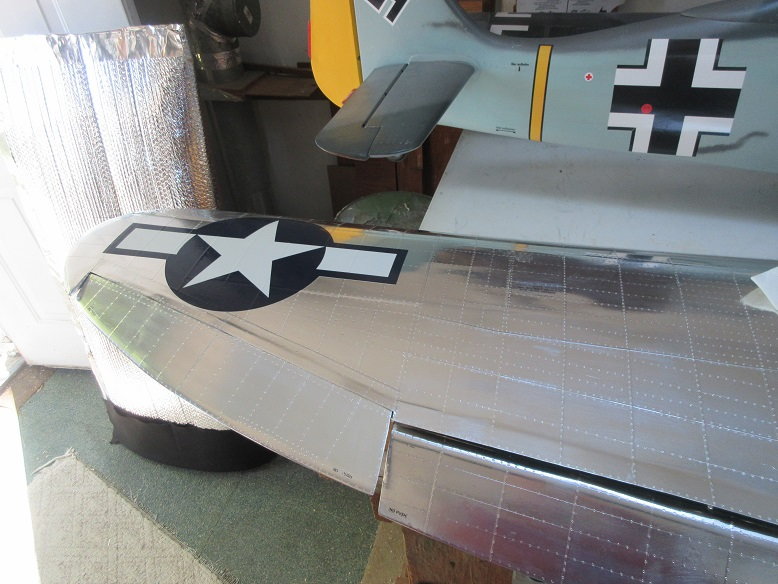
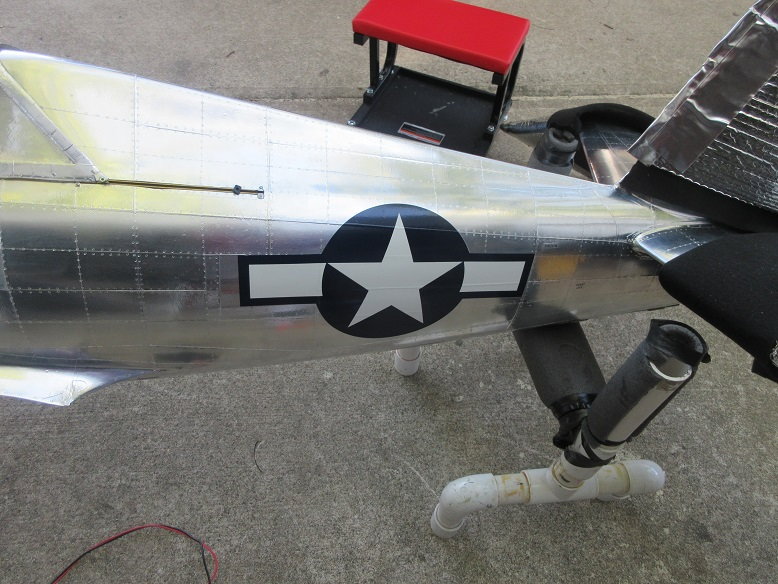
Also, since they are extremely thin, they show all the rivet and panel line detail and no worries about paint bleeding through all those rivets!
The champ water transfer decals came in.
A nice thing about these is there are no clear coat over the whole sheet so no need to exactly cut around the edge of the decal. I'm thinking these are 2 part epoxy type paint decals since they are so large and do not tear. I left them in warm water for 60 seconds and slid them into place. Wet paper towel used to remove bubbles, then a dry one to, continue, remove bubbles and, finally, a folded tissue to remove all remaining water and bubbles, working from the center. out.
Also, since they are extremely thin, they show all the rivet and panel line detail and no worries about paint bleeding through all those rivets!
Last edited by samparfitt; 09-24-2019 at 07:19 AM.
 07-18-2021, 06:42 AM
#246
When all else fails, read the instructions even though that's hard for us to do!
Normally I use UP's air valves but I have 3 of Jomar's electronic 'air valves'.
Being a cheap SOB, I wanted to use Jomar's since I had them.
They work great but every time I turned on the receiver the gear would try to go into the UP position and then back to the DOWN position (following how the transmitter toggle was set).
When setting up the Jomar, I remember it taking awhile to get everything to work correctly save the mentioned problem.
Well I was determined to fix it after flying it for 'only' a few years!
I thought just reversing the gear and door air hoses would fix it; nada.
After about an hour I decided to read the instructions.
Found that reversing the switch for whether the gear is normally stored in the 'down' or 'up' position fixed the whole problem!
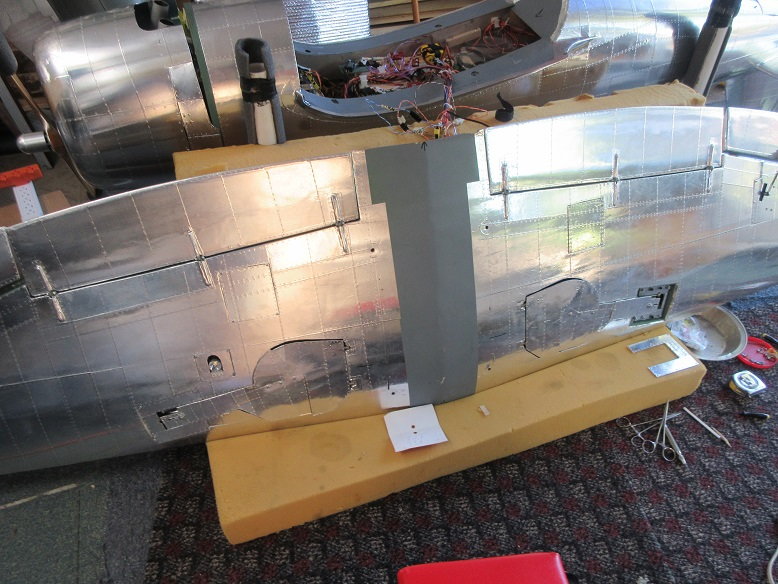
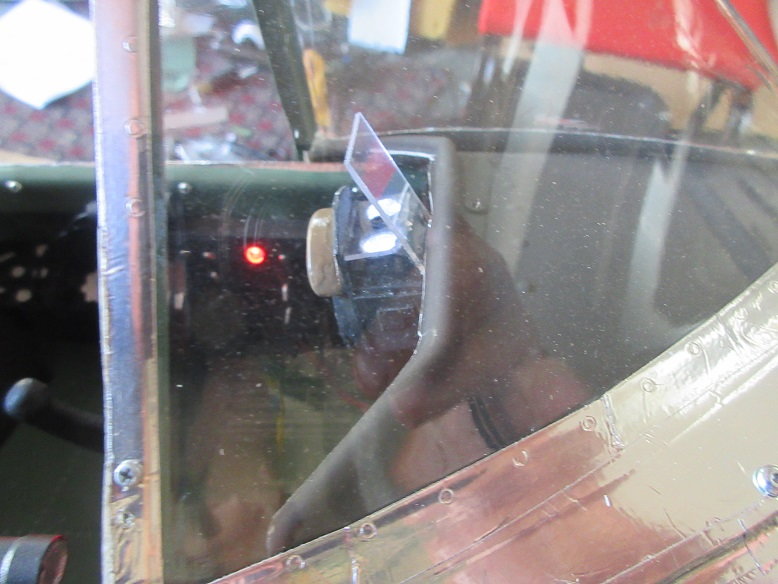
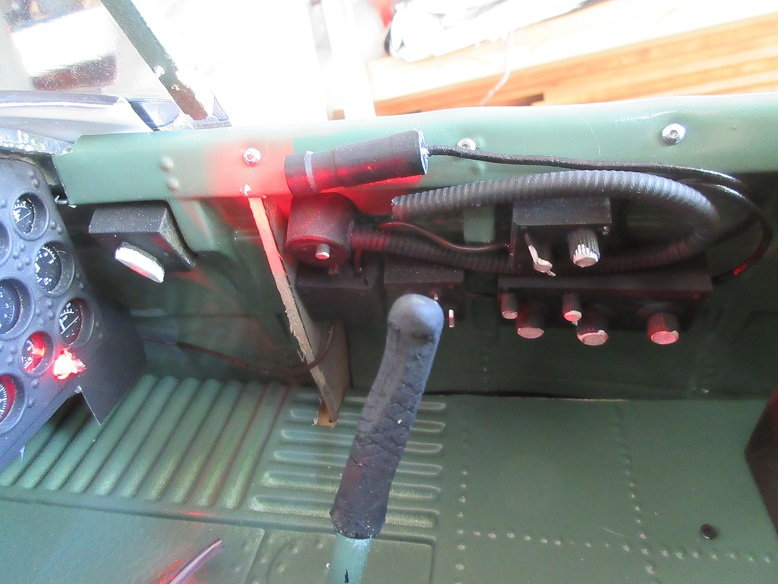
The Jomar 'air valve' (yellow box) requires two servos and two robart air valves.
The contact switch is to turn on the landing light.

Instructions help!
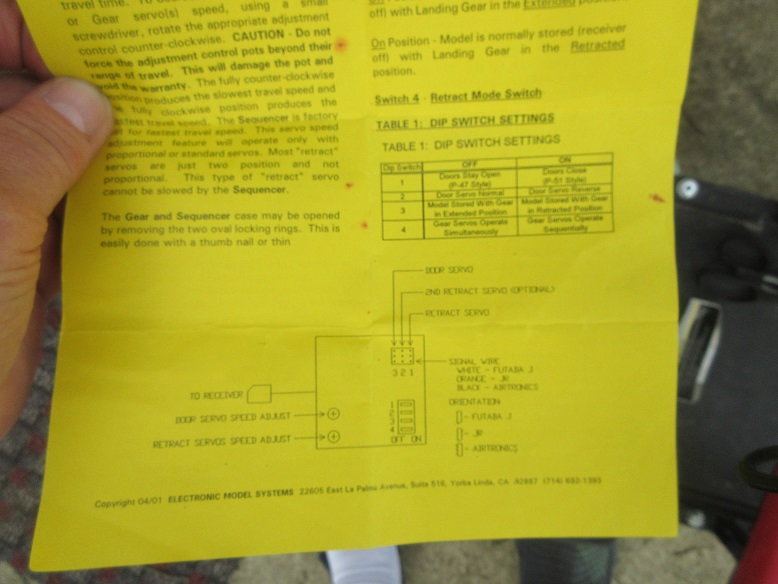
The 3rd switch down needed adjusting.

All better!
Also had to insure the landing light rotated and lighted on the 'down' position.
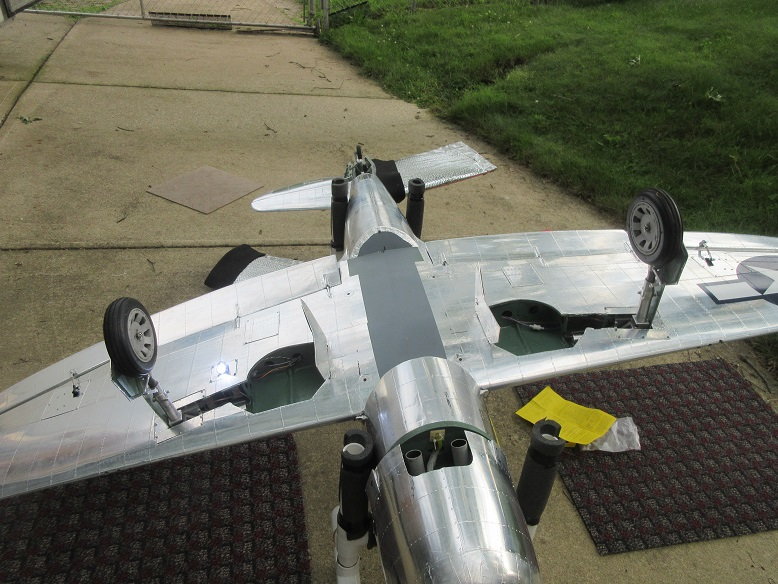
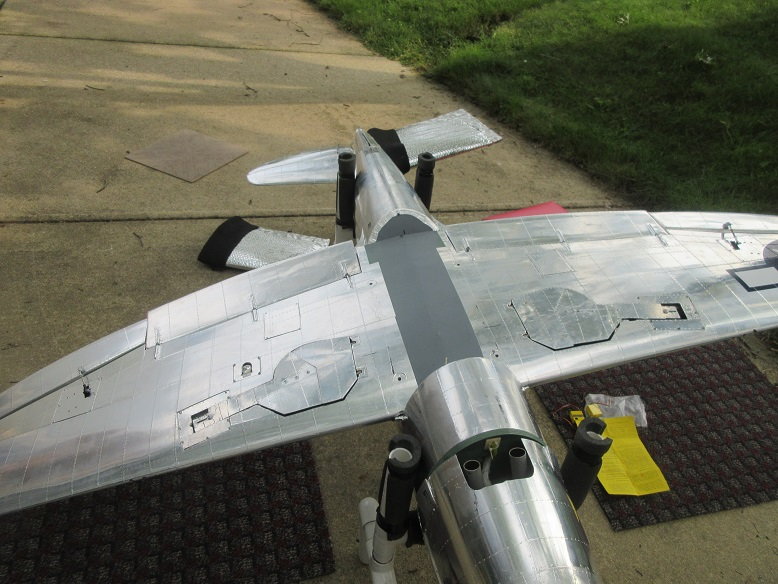
Normally I use UP's air valves but I have 3 of Jomar's electronic 'air valves'.
Being a cheap SOB, I wanted to use Jomar's since I had them.
They work great but every time I turned on the receiver the gear would try to go into the UP position and then back to the DOWN position (following how the transmitter toggle was set).
When setting up the Jomar, I remember it taking awhile to get everything to work correctly save the mentioned problem.
Well I was determined to fix it after flying it for 'only' a few years!
I thought just reversing the gear and door air hoses would fix it; nada.
After about an hour I decided to read the instructions.
Found that reversing the switch for whether the gear is normally stored in the 'down' or 'up' position fixed the whole problem!
The Jomar 'air valve' (yellow box) requires two servos and two robart air valves.
The contact switch is to turn on the landing light.
Instructions help!
The 3rd switch down needed adjusting.
All better!
Also had to insure the landing light rotated and lighted on the 'down' position.
Last edited by samparfitt; 07-18-2021 at 06:45 AM.
07-18-2021, 08:43 AM
#249

My Feedback: (2)
Join Date: Feb 2008
Location: Fullerton, CA
Posts: 101
Likes: 0
Received 0 Likes
on
0 Posts
I was struggling with my landing light on my smaller P-47, this unit made it so easy. He also offers it in a combo with Nav lights.
Landing light controller
Landing light controller with nav lights
Landing light controller
Landing light controller with nav lights
01-05-2023, 02:41 AM
#250
Hi Sam,
happy-new year to you and your family.
i will restart soon the construction of the P47 ziroli.
And I will mount the same landing gear. (Sierra).
i notice nothing is designed for this one on the plan.
could you please explain or show me how you did the implementation?
thank you for your help.
fcs from Paris.