New CARF P-51D Project
 10-16-2020, 04:07 PM
#226


It was pretty awesome for sure. I’ll have to post video of that ride. We buzzed the field at Kalispell MT at over 300knts and hangar roof top level! This Corsair is one of about 4 privately owned and modified with a back seat, this one was an F4U-5NL.
After we landed Scott the pilot said we’re going put gas in it so we taxied right up to the airport fuel station while folding the wings. He got out, popped the cap in front of the wind shield and started fueling it up! It was funny to me because I though he meant back at the hangar a truck would come over there or something.
After we landed Scott the pilot said we’re going put gas in it so we taxied right up to the airport fuel station while folding the wings. He got out, popped the cap in front of the wind shield and started fueling it up! It was funny to me because I though he meant back at the hangar a truck would come over there or something.
 10-18-2020, 05:56 PM
#227
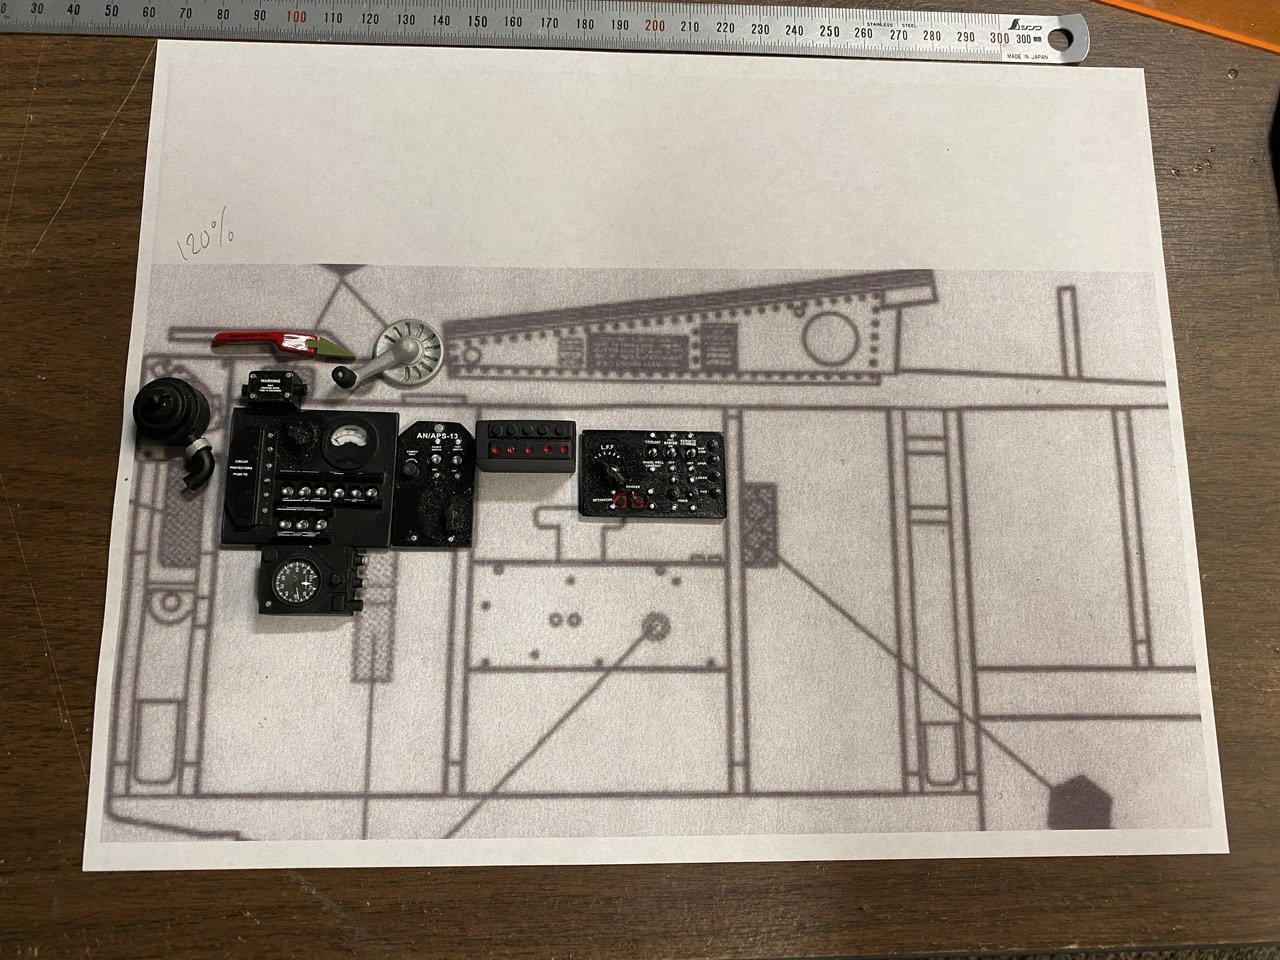
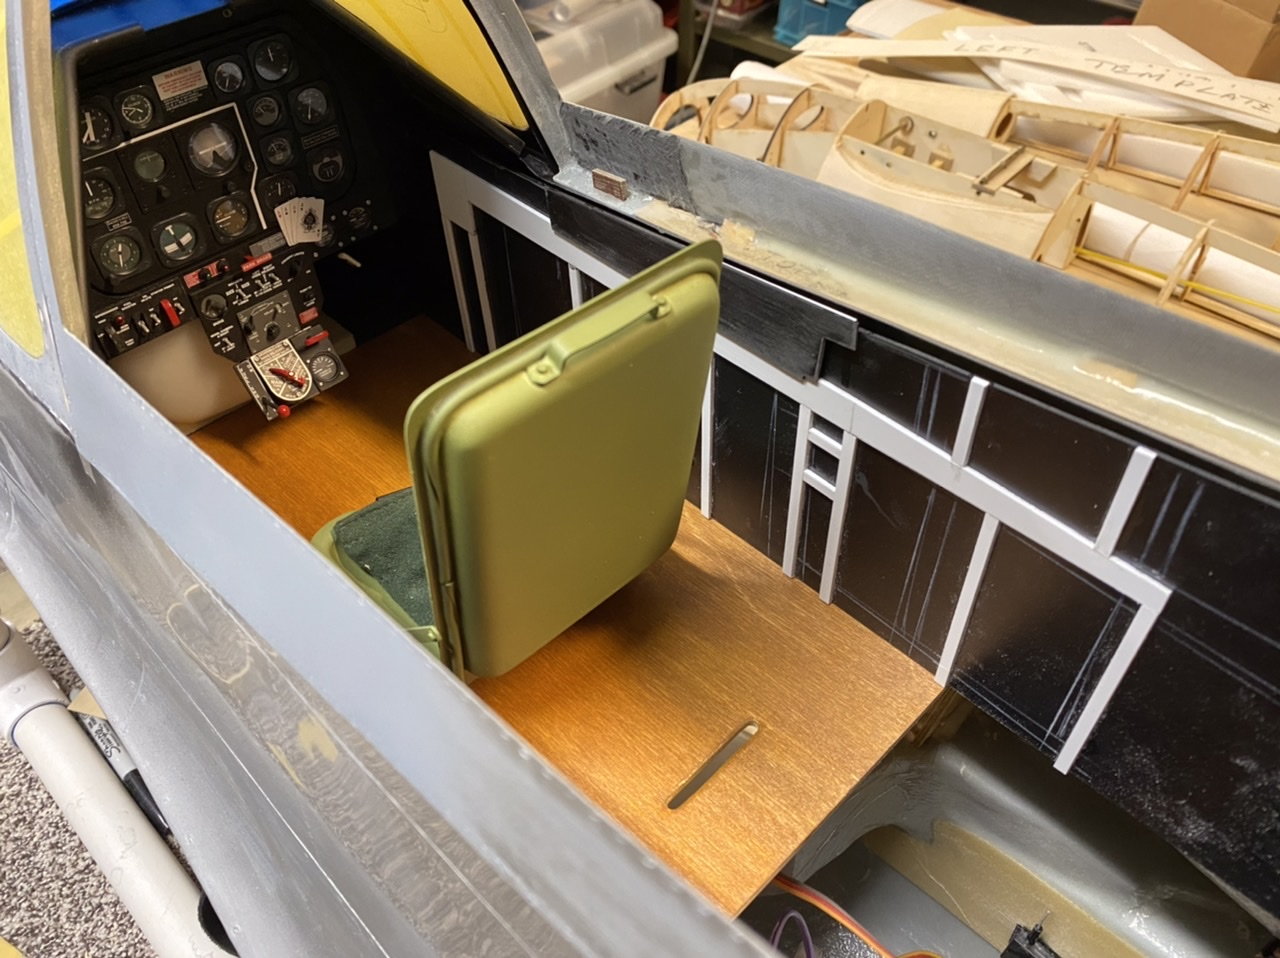
The cockpit so far, not as much progress as I wanted but some good solutions thus far. I moved the instrument panel back so it wasn’t so far forward and hidden. The panel is laid out and I’ll copy this over to the left panel next.
The cowl is pretty floppy even with 4 screws and a pin so I opted to add stiffening instead of hardware. Now it’s very solid and still simple.
Iphone photos are coming up rotated, not sure why...

The cowl is pretty floppy even with 4 screws and a pin so I opted to add stiffening instead of hardware. Now it’s very solid and still simple.
Iphone photos are coming up rotated, not sure why...
Last edited by Chris Nicastro; 10-18-2020 at 05:59 PM.
11-01-2020, 01:47 AM
#228
Some progress on the cockpit...
Made the armor plate behind the seat and the seat rails. Added detail to the side panels and prepared for primer.
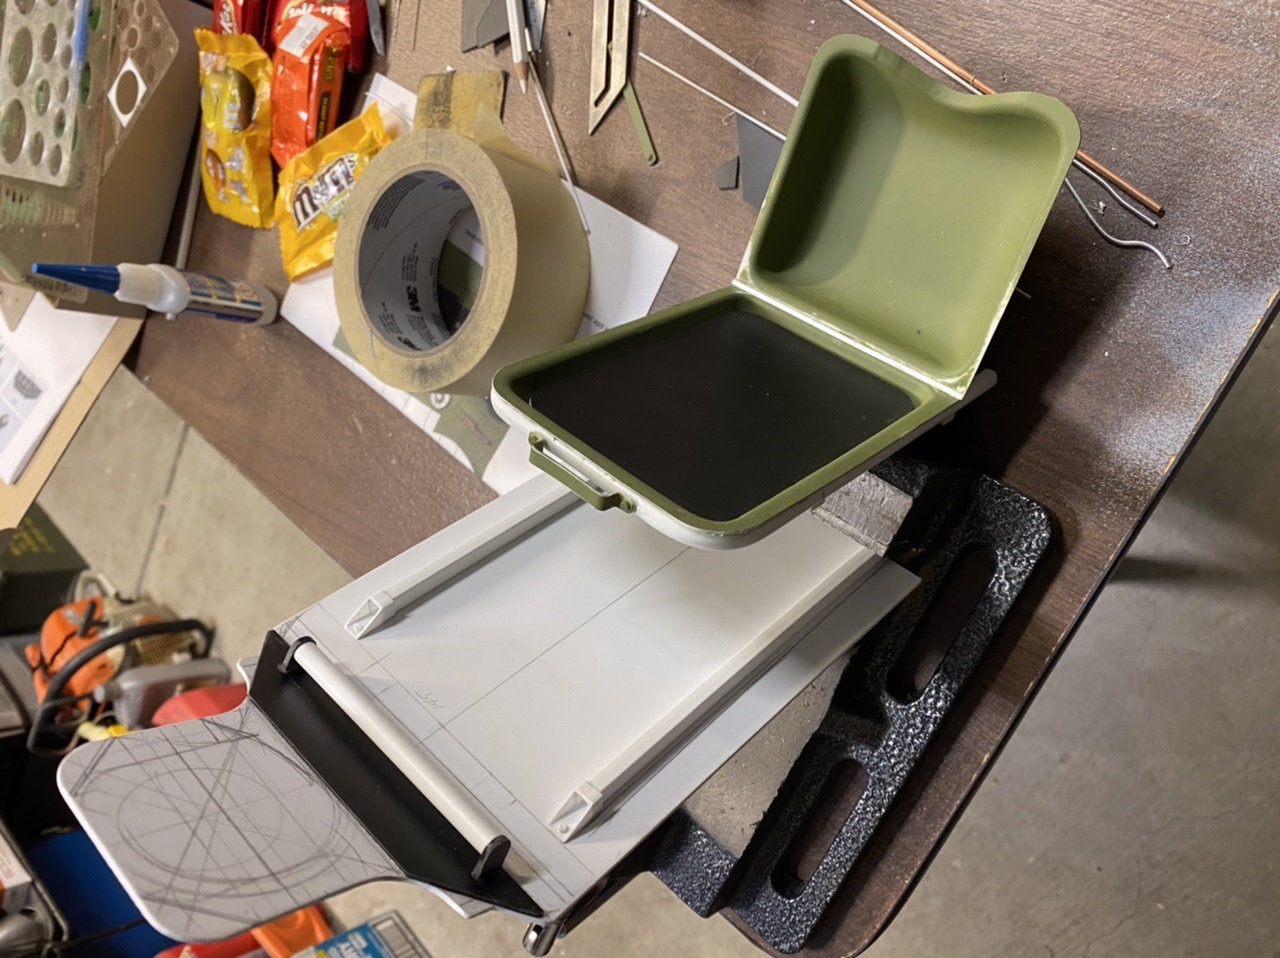
The biggest deal is the swap to the Powerbox Champion. I think this will be much better and the display will be concealed by the canopy frame when completed because the radio box and battery detail will be attached to it.
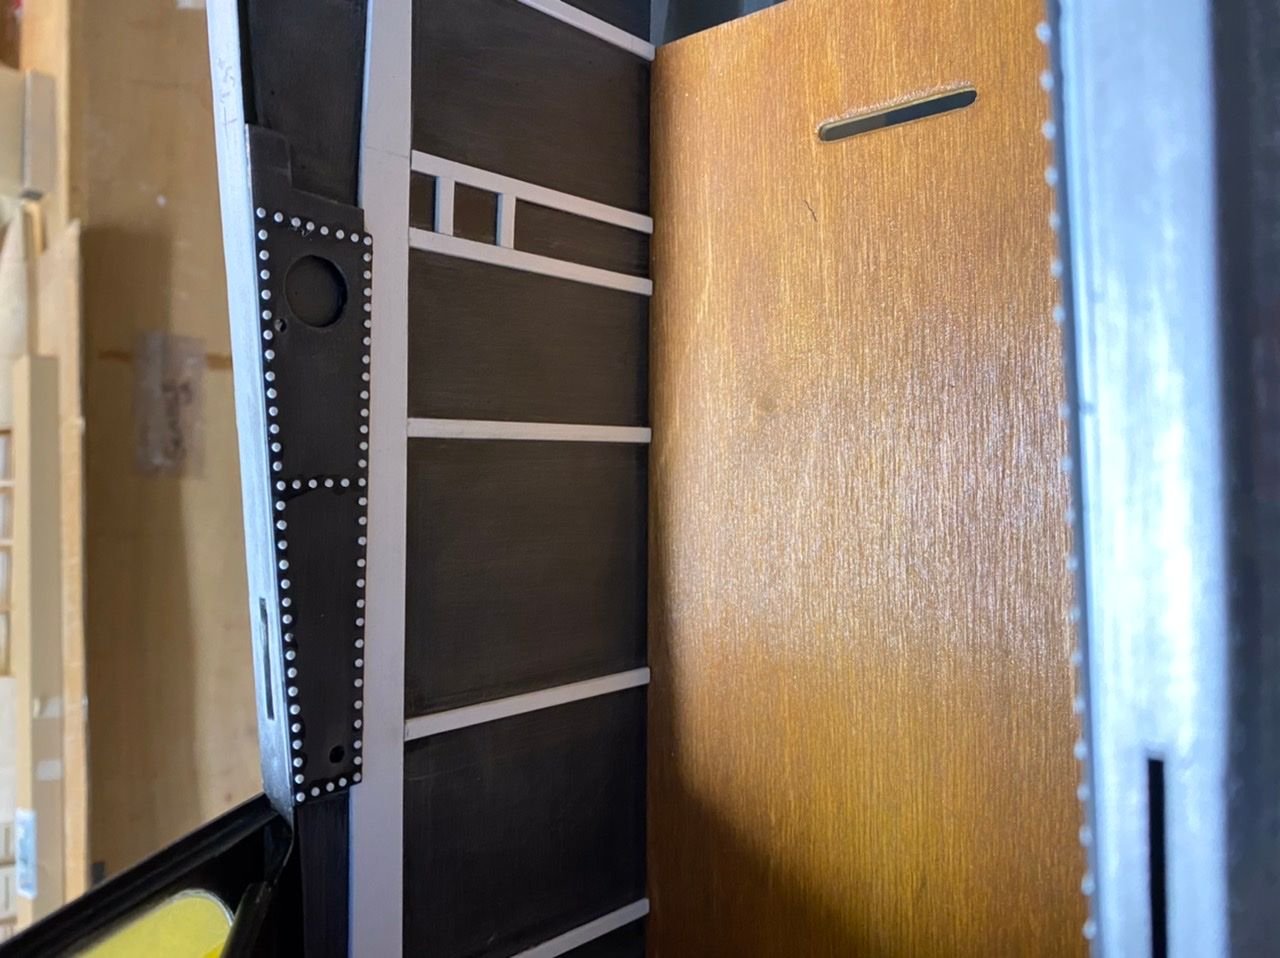
Made the armor plate behind the seat and the seat rails. Added detail to the side panels and prepared for primer.
The biggest deal is the swap to the Powerbox Champion. I think this will be much better and the display will be concealed by the canopy frame when completed because the radio box and battery detail will be attached to it.

The following users liked this post:
Chris Nicastro (11-01-2020)
11-01-2020, 10:30 PM
#230
Another shot of the seat in the cockpit...
This is taking up more time than I wanted but the proportions are tough to define because of the model. I made the seat work ok and the whole seat and armor plate will be screwed into the floor with 4 screws.

This is taking up more time than I wanted but the proportions are tough to define because of the model. I made the seat work ok and the whole seat and armor plate will be screwed into the floor with 4 screws.
08-08-2021, 09:33 PM
#231
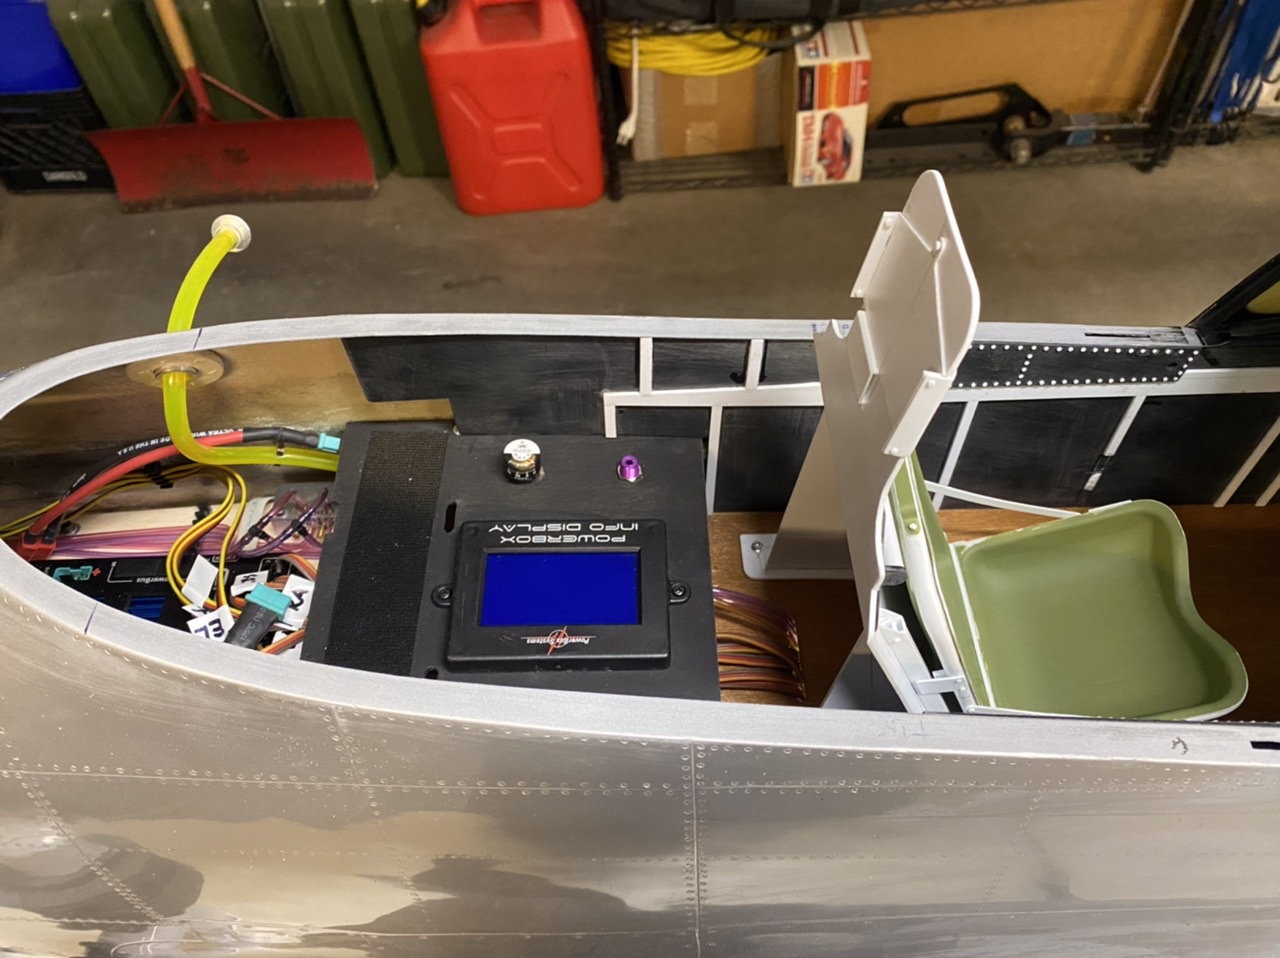
Been working on the Mustang and it’s ready to start the engine now. The radio system has been set up and the plane has been assembled to check everything so the initial set up is ok.
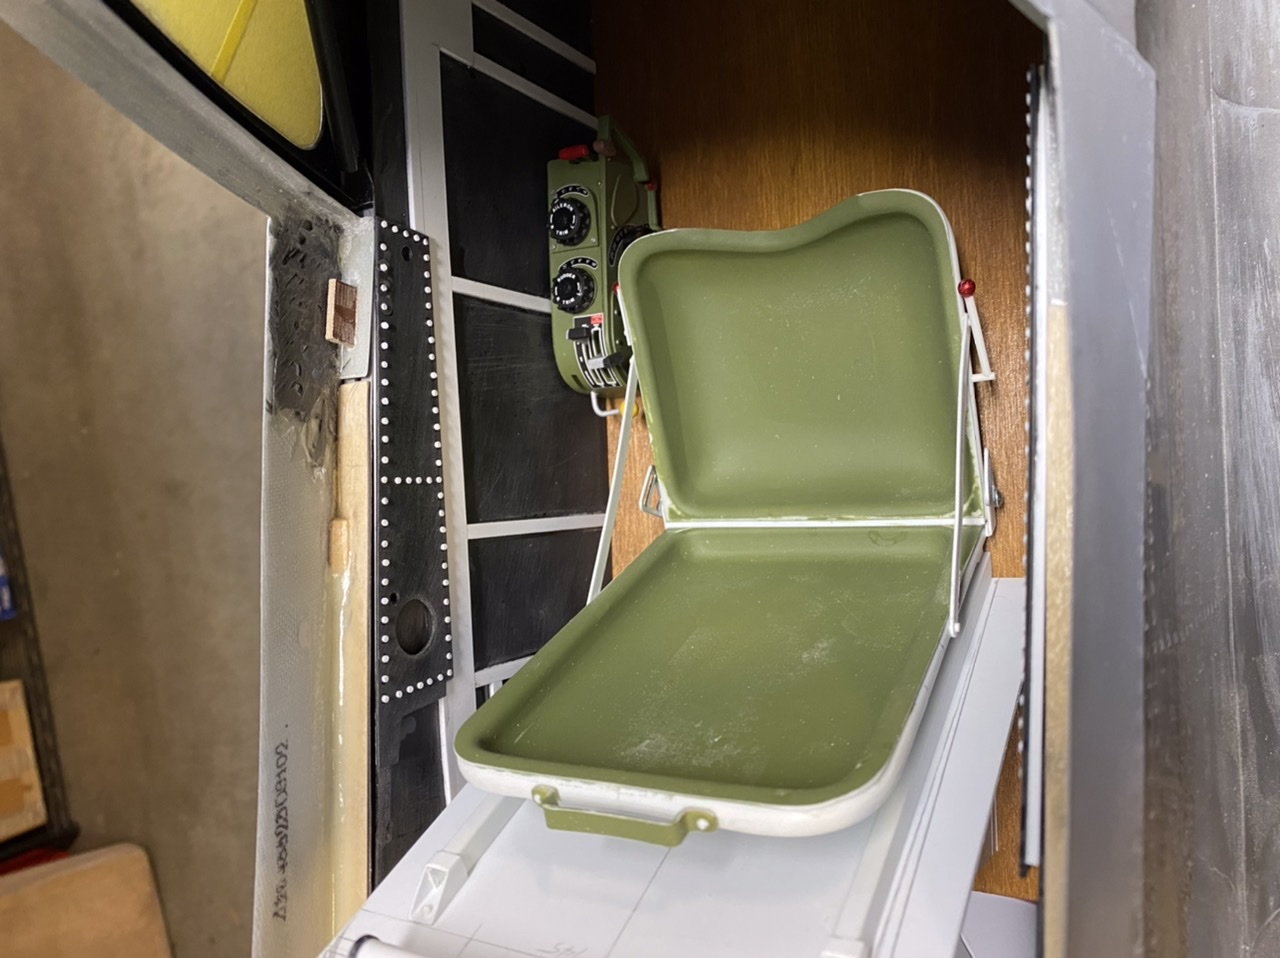
Just a few photos to show the rear radio build. It’s very close to done now so it need paint very soon.
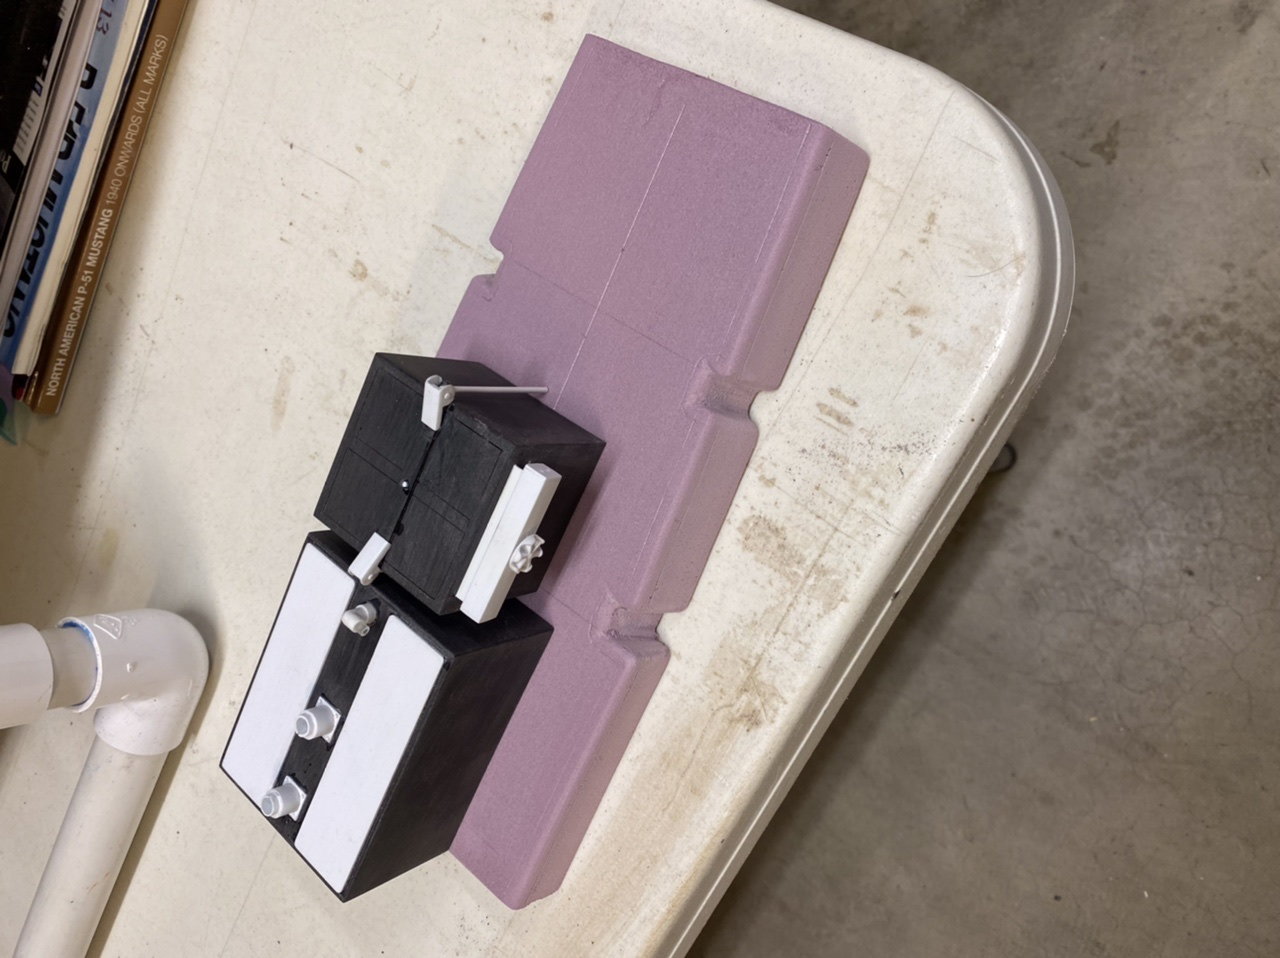
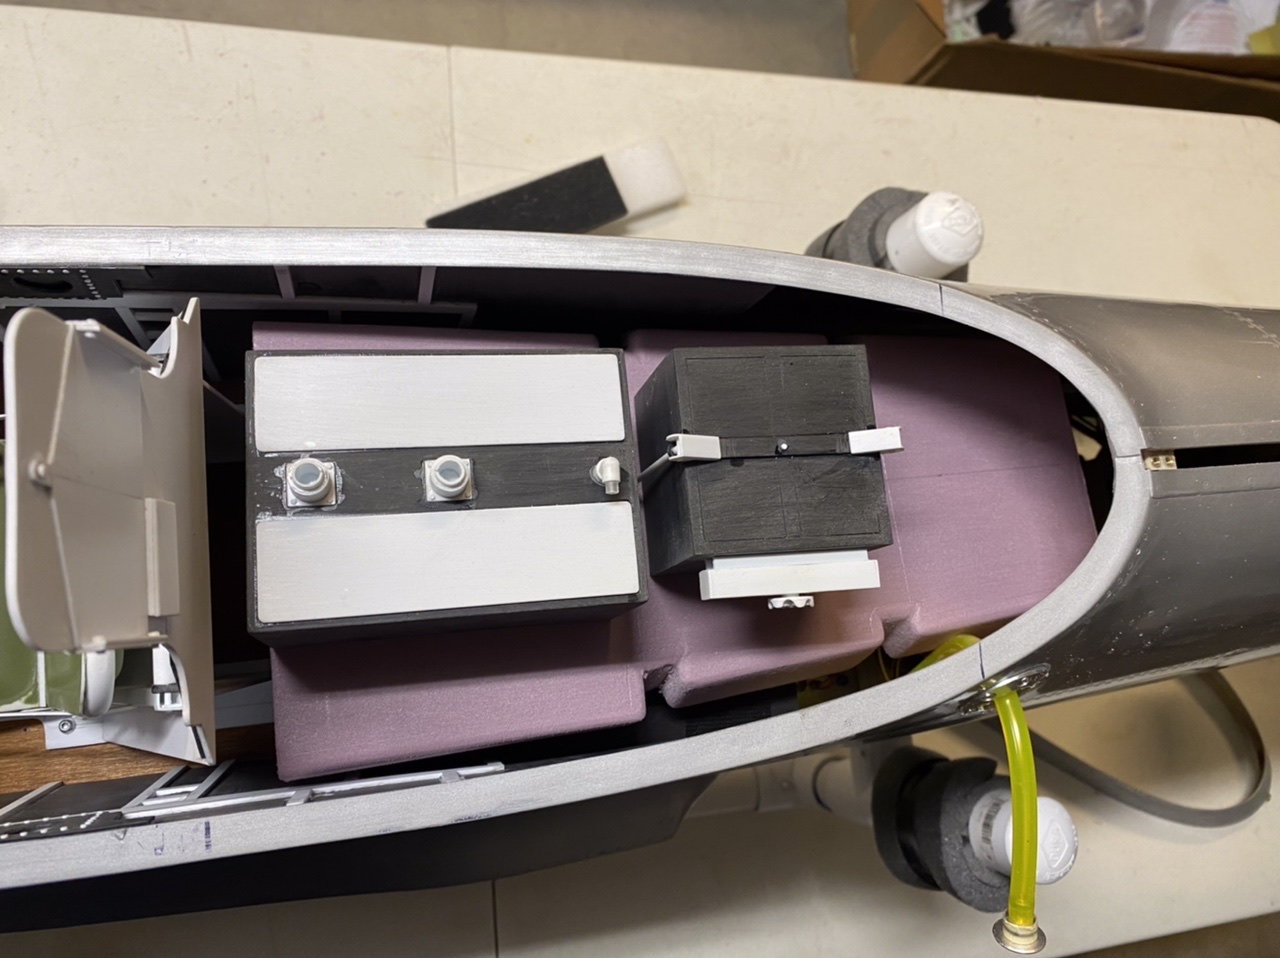
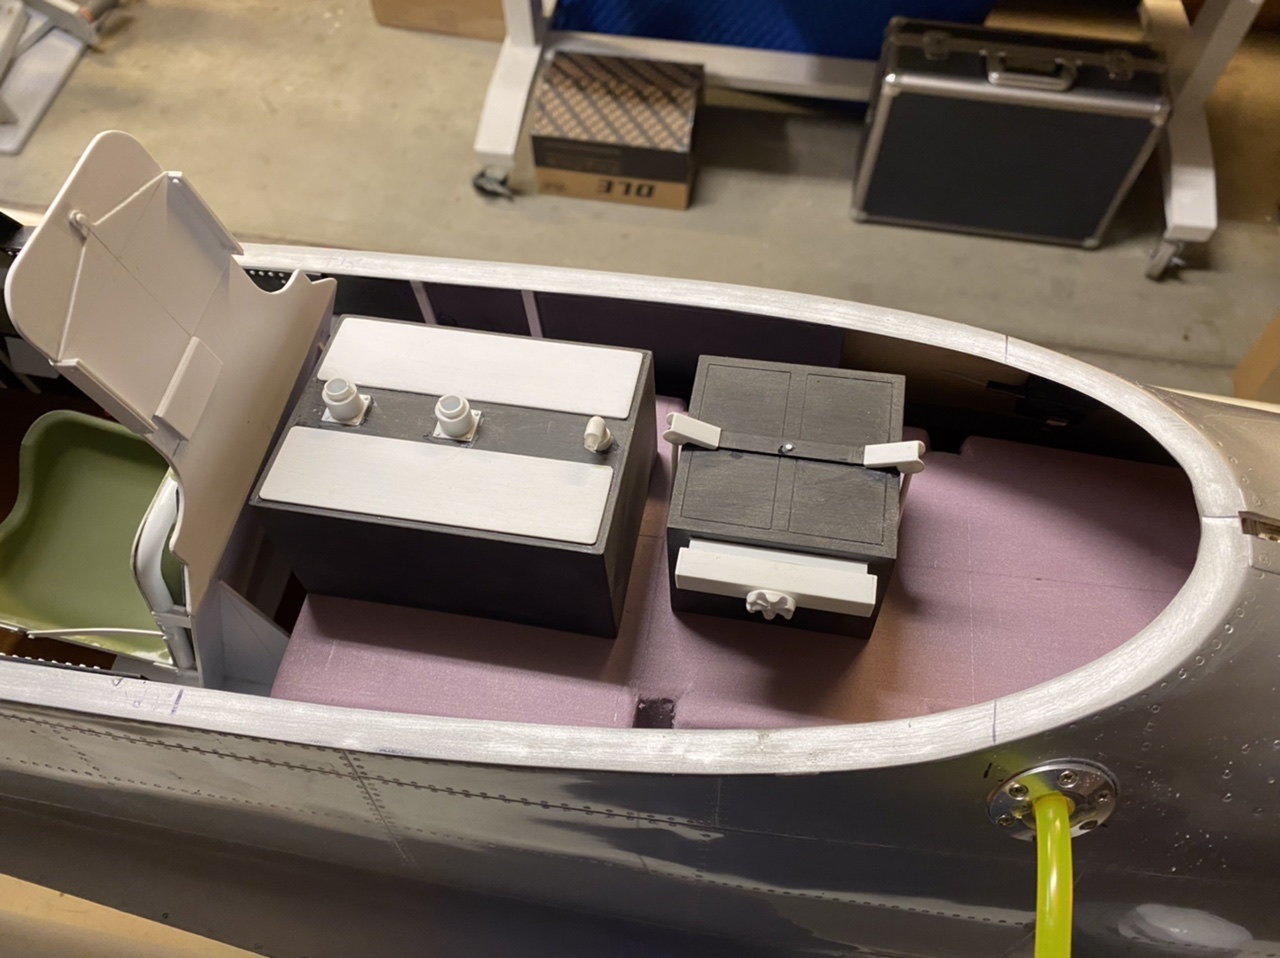
The radio parts behind the armor plate are scratch built from styrene sheet. The pink foam is a mold and I laid up a simple epoxy fiberglass and carbon fuel cell shape. It’s going to be cut short and I’m thinking it will be attached to the canopy frame so it come off.
Just a few photos to show the rear radio build. It’s very close to done now so it need paint very soon.
The radio parts behind the armor plate are scratch built from styrene sheet. The pink foam is a mold and I laid up a simple epoxy fiberglass and carbon fuel cell shape. It’s going to be cut short and I’m thinking it will be attached to the canopy frame so it come off.

The following users liked this post:
Chris Nicastro (08-09-2021)
The following users liked this post:
Chris Nicastro (08-09-2021)

 08-22-2021, 03:25 PM
#237
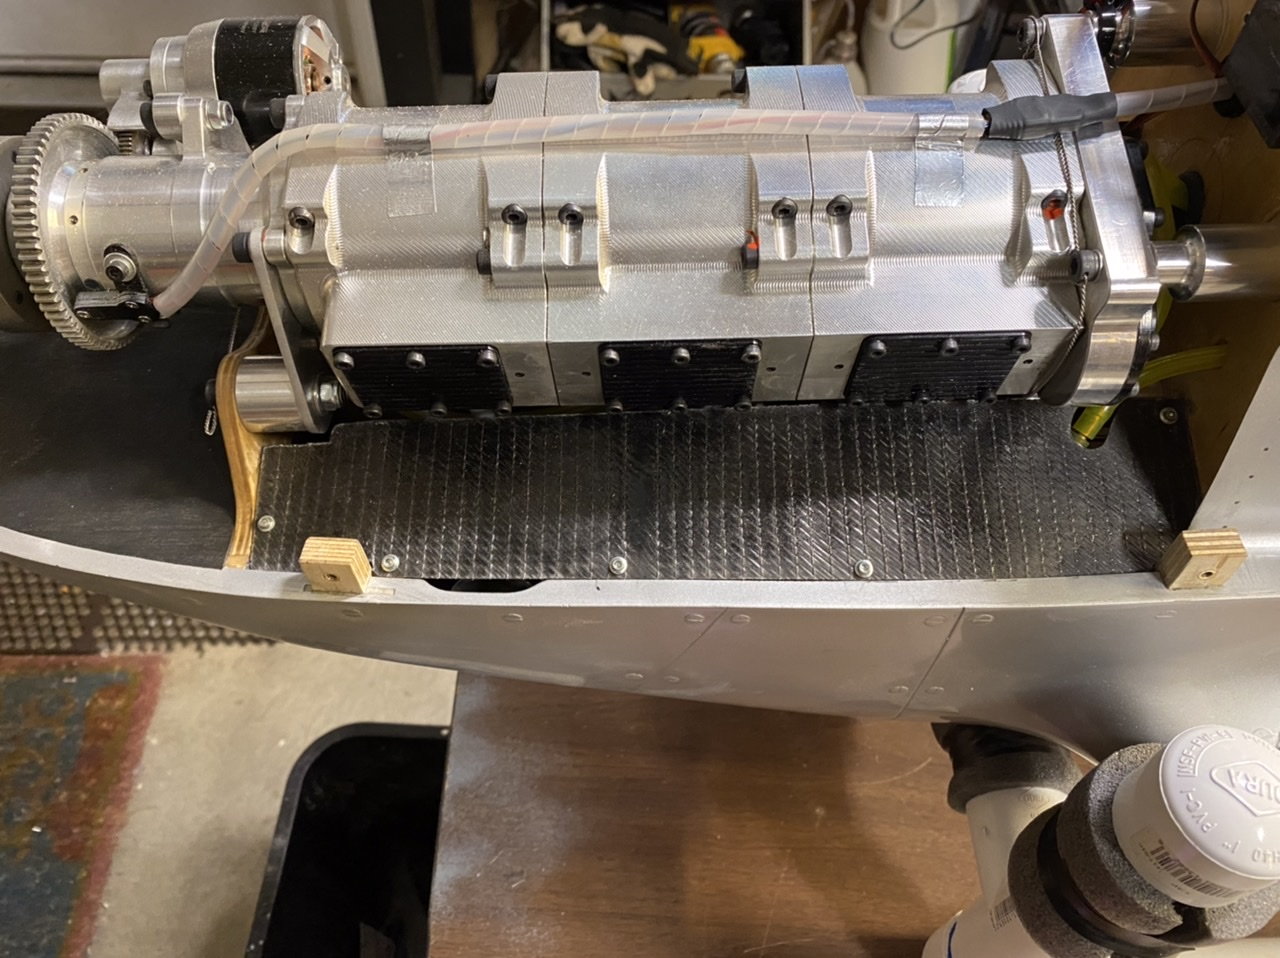
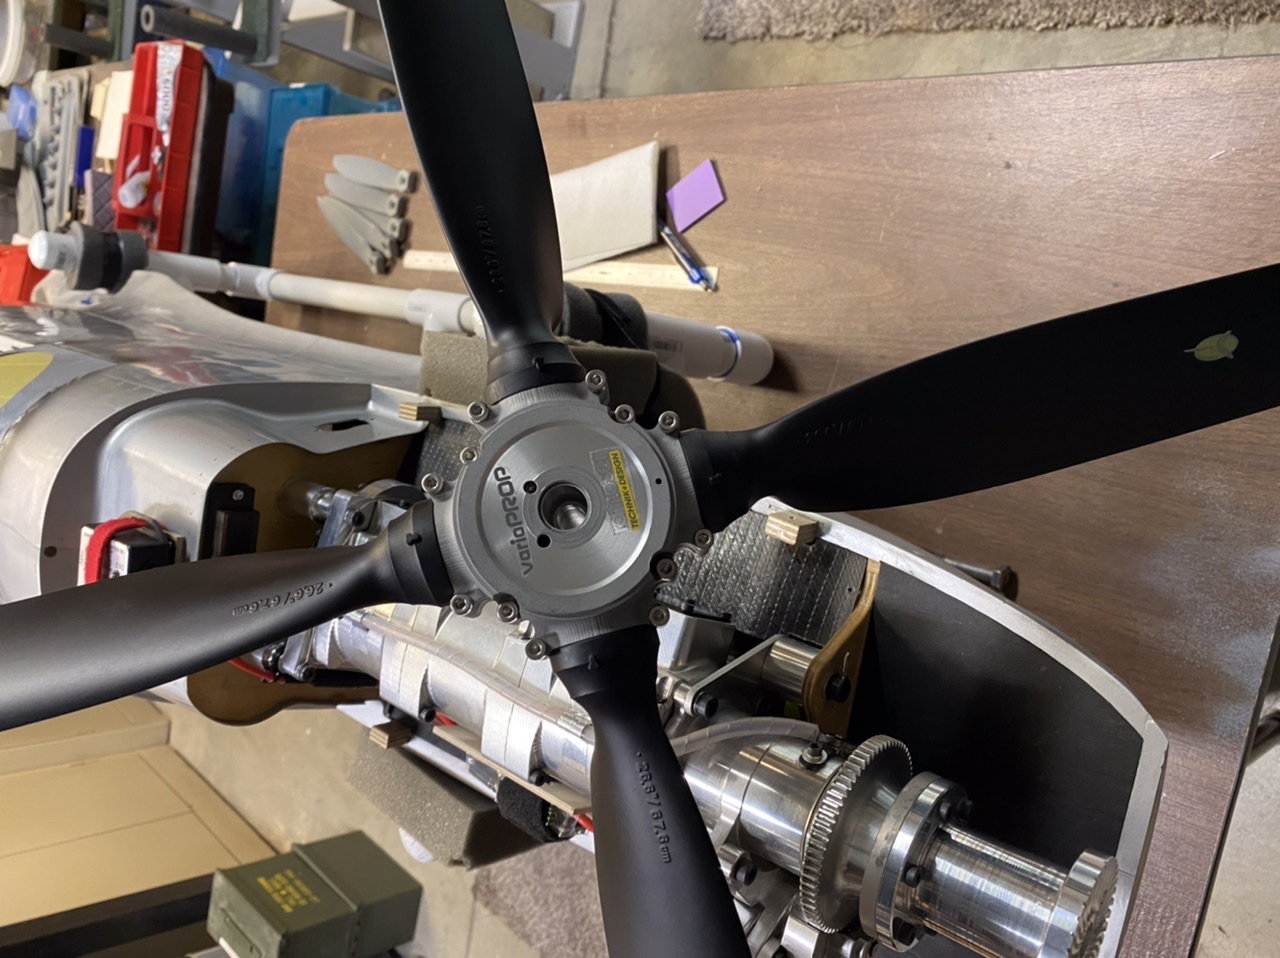
Started the engine today! Wow it was easy. Fueled it up, choke on, it sputtered, choke off, hit the starter and pop there it goes! This engine sat for 4 years since it arrived new. I did rotate the carbs but never touched the needles. After it ran for a little bit I adjusted the H needles 1 hour lean and the difference was immediate. The engine sounds amazing in person and there’s very little vibration. I’ll put more run time on the engine and monitor the temps and cooling but we are now very close to flying! Now to finish a few details and get the CG dialed in. On order is a Vario prop 26.6 x 4 blade so I’m looking forward to seeing that then cutting the spinner.
I’ll post a short video when I get the file converted.
I’ll post a short video when I get the file converted.
08-26-2021, 07:31 PM
#241
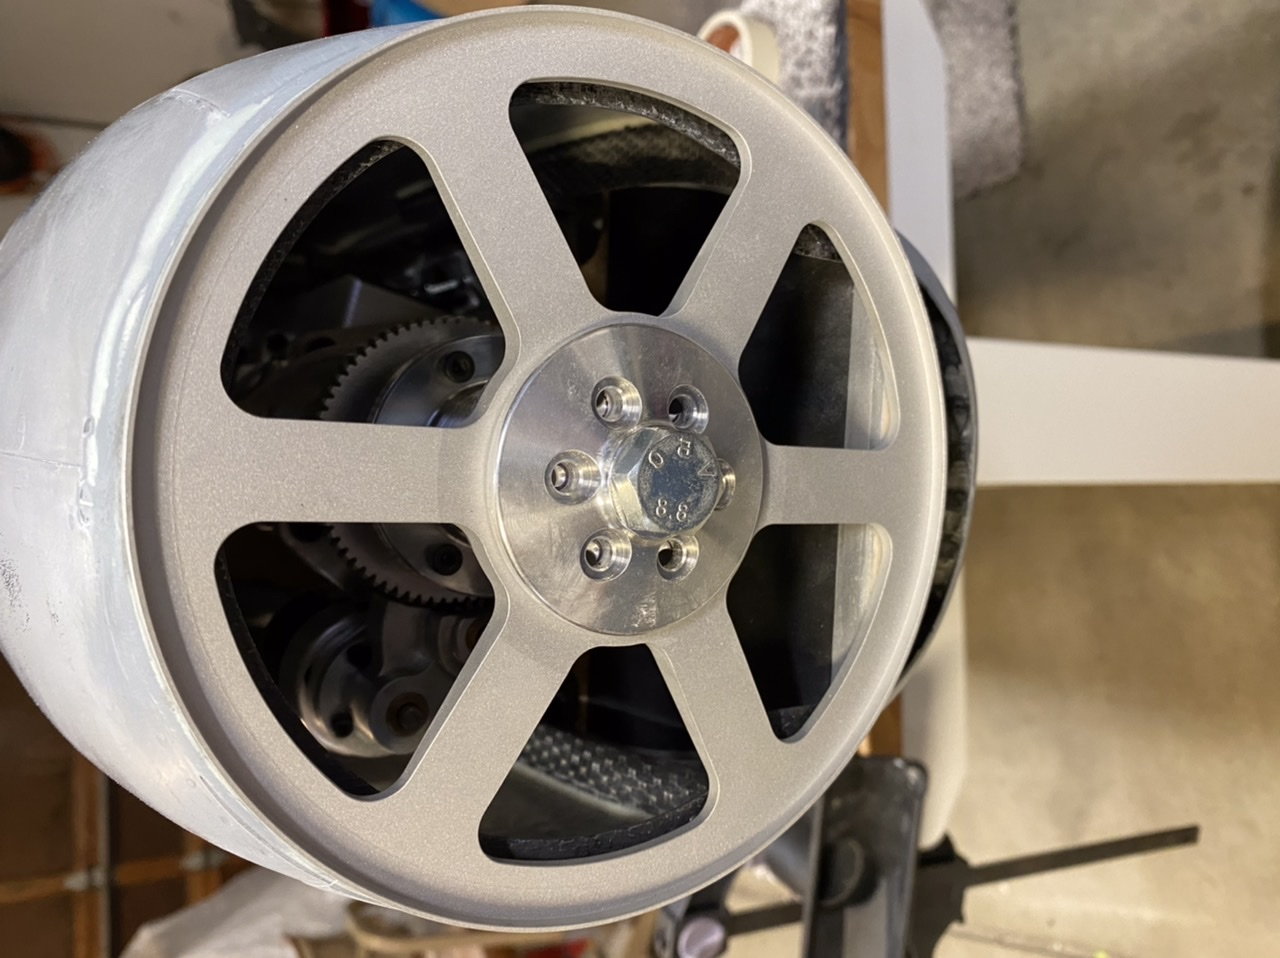
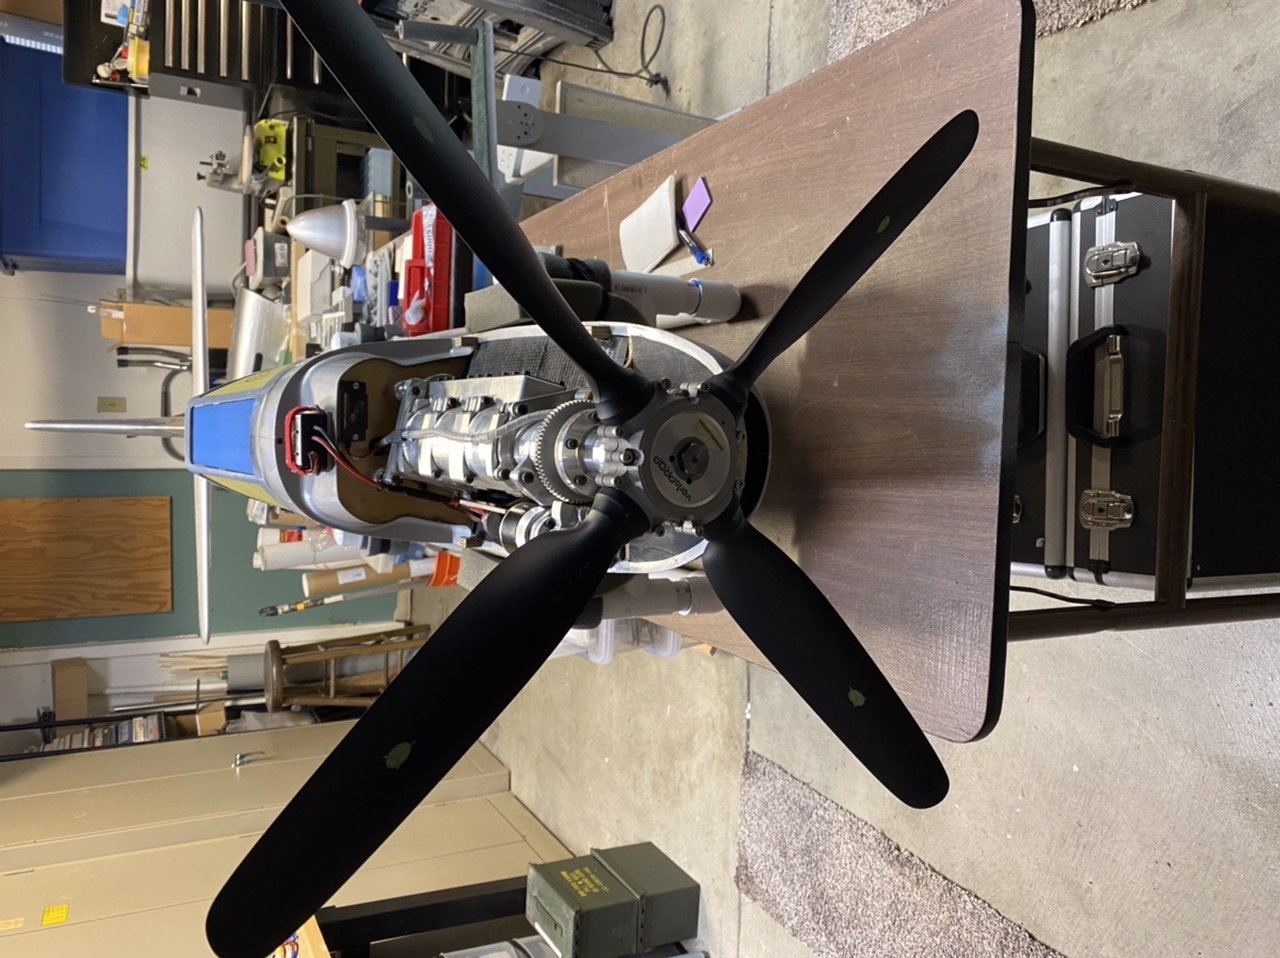
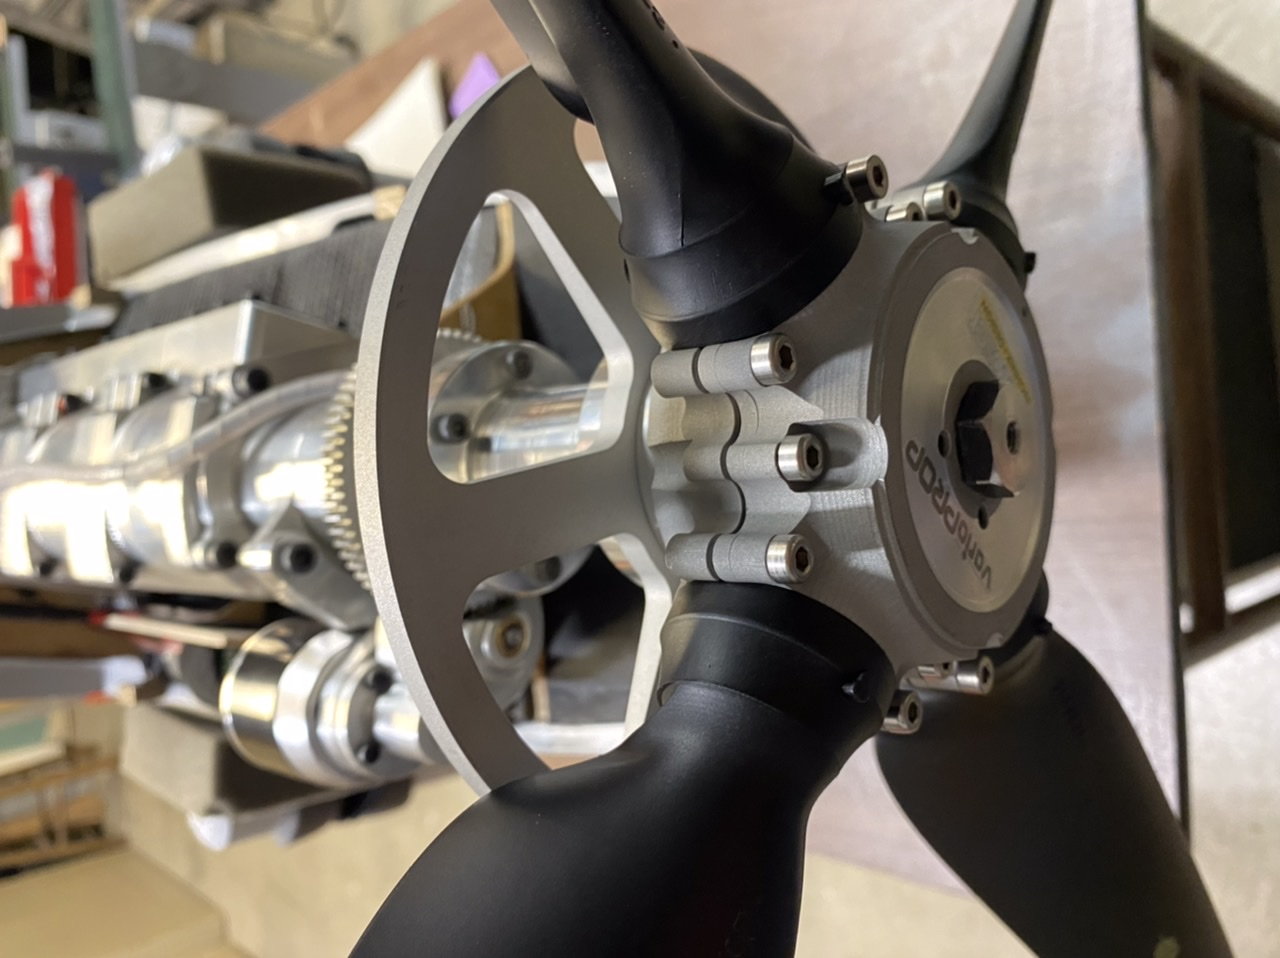
The Vario Prop has arrived!
What a prop this is, it’s pretty impressive in person. I’ll post a video of it running soon.
Combo; Kolm 150x3, VarioProp 32 hub with 26.6 inch blades, Hamilton profile.
Christian Ramoser was very good to deal with and DHL got it to me fast, danke!
NOTICE: if you have an older Kolm 150 check your hub prop bolt pattern. They produced two 6 bolt patters, 29mm and 34mm. The extension I got with the engine was 29mm while the short black anodized hub was 34mm. Don’t mix this up! I’ll be drilling the 34mm pattern into the extension hub now.
The following users liked this post:
apereira (06-22-2023)
The following users liked this post:
apereira (06-22-2023)
The following users liked this post:
Chris Nicastro (09-07-2021)
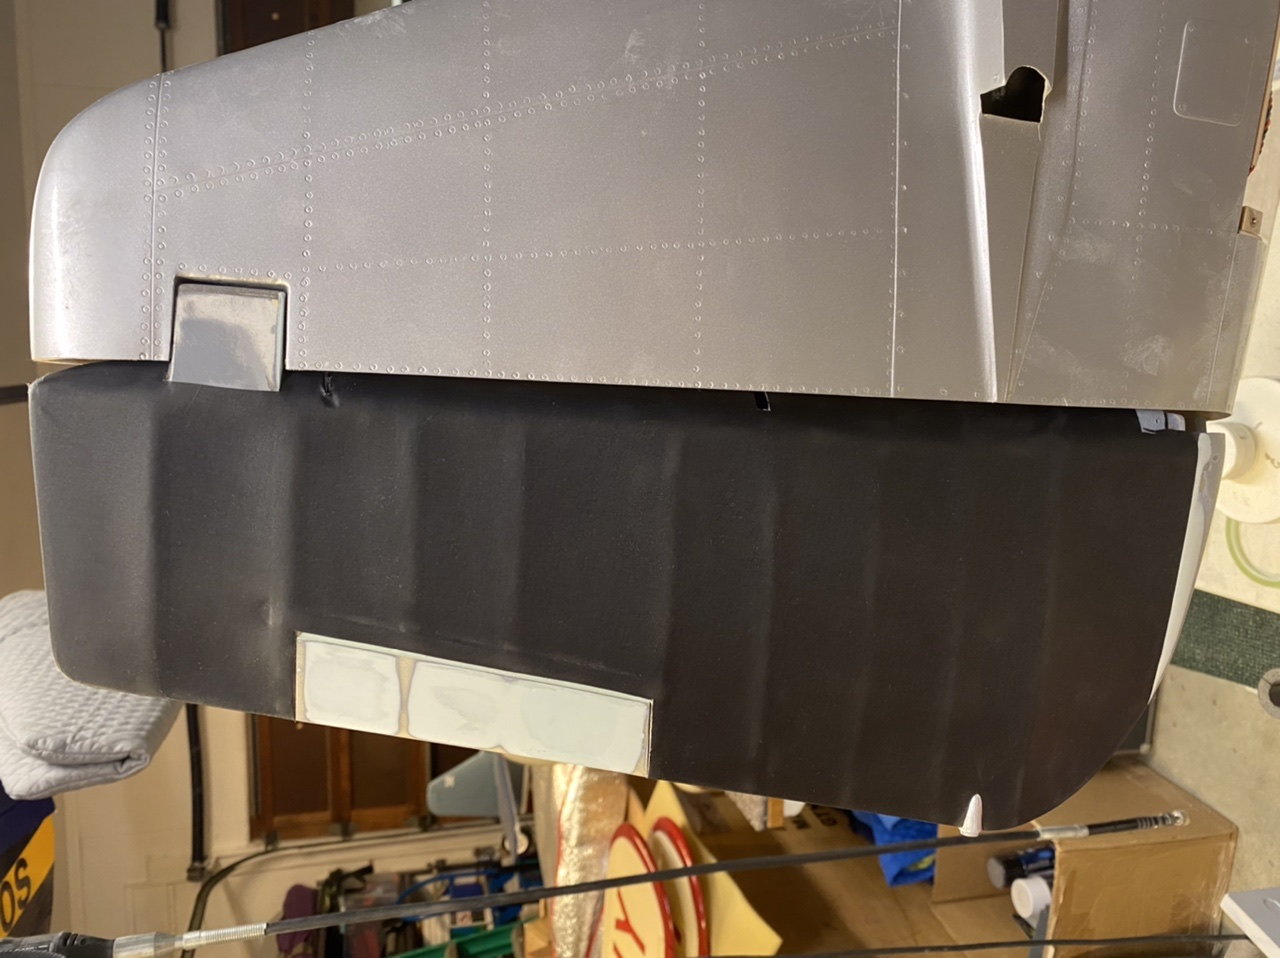
09-07-2021, 12:30 PM
#246
Thanks Craig, I appreciate your support and I hope you get going soon!
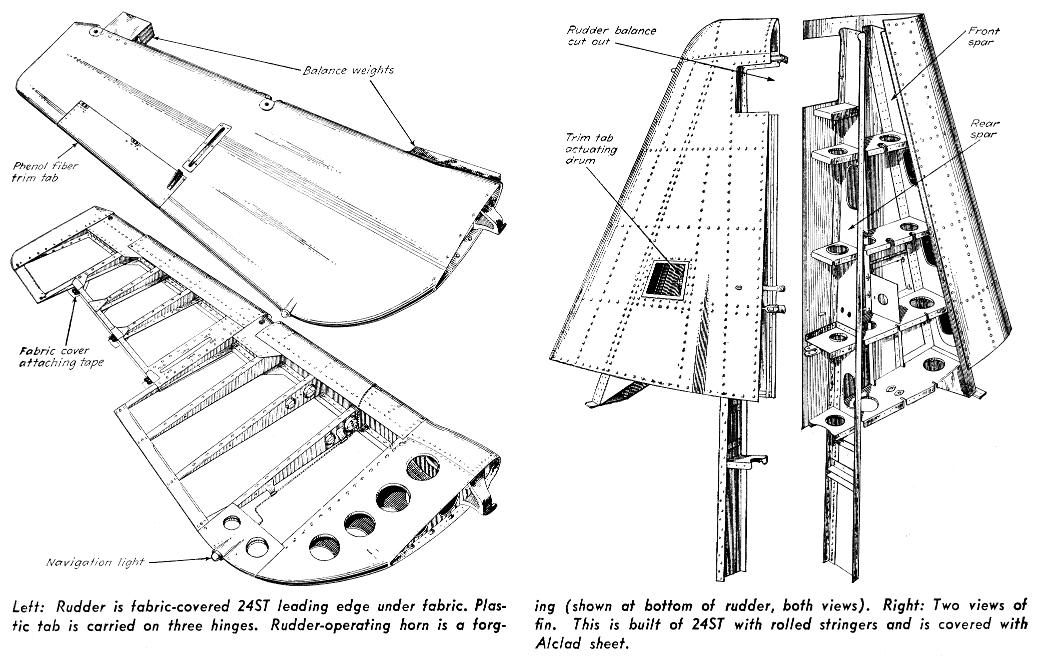
Heres a shot of the rudder, again a moment of OCD, I had to sand off the pimples on the rudder. Just doing that alone was a huge improvement I think. I cut the trim tab out, spaced it, and glued it back in place. I have another idea so I’m going to test that and see if it looks good or not.
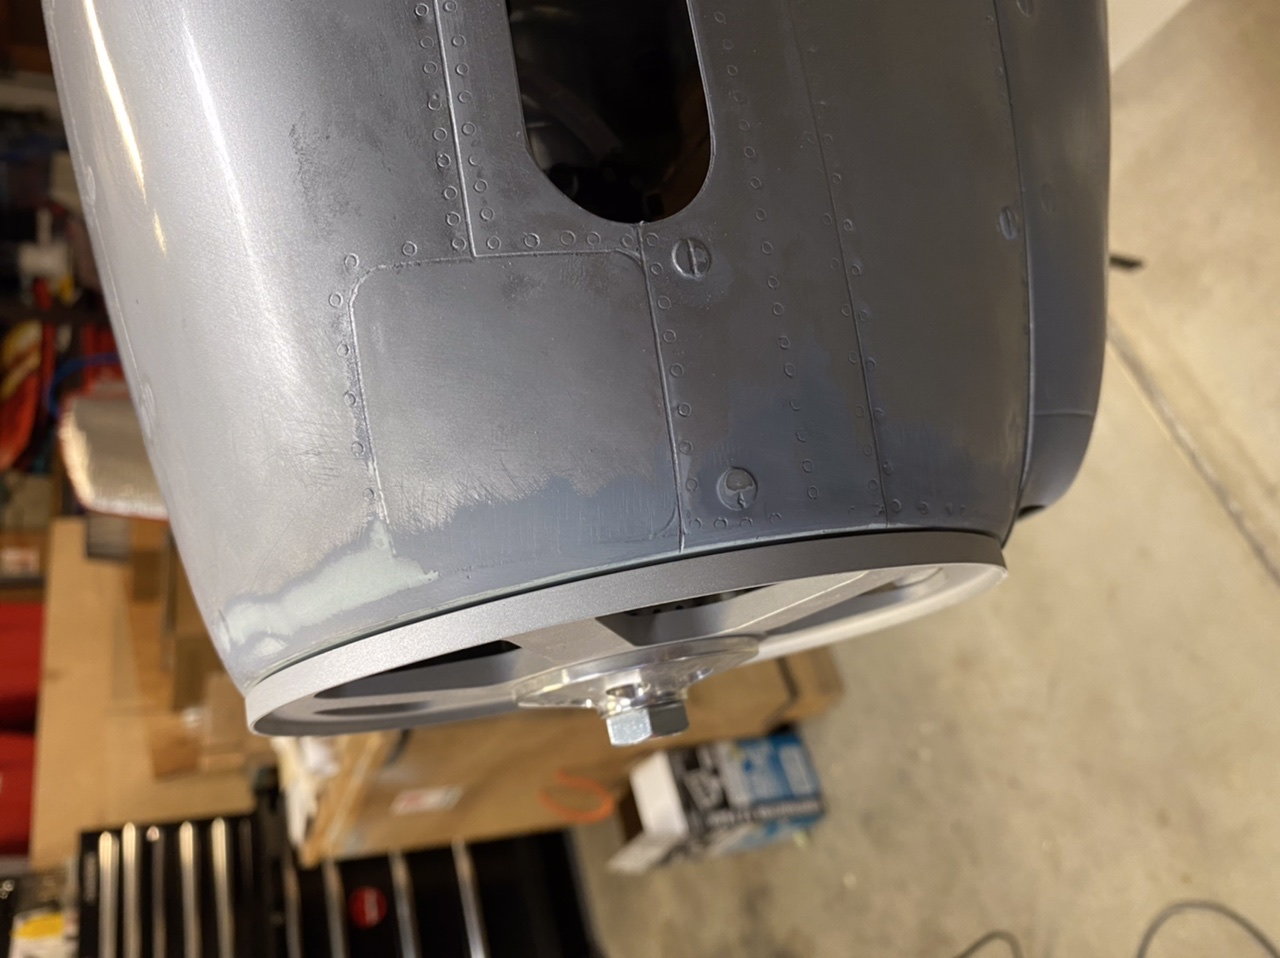
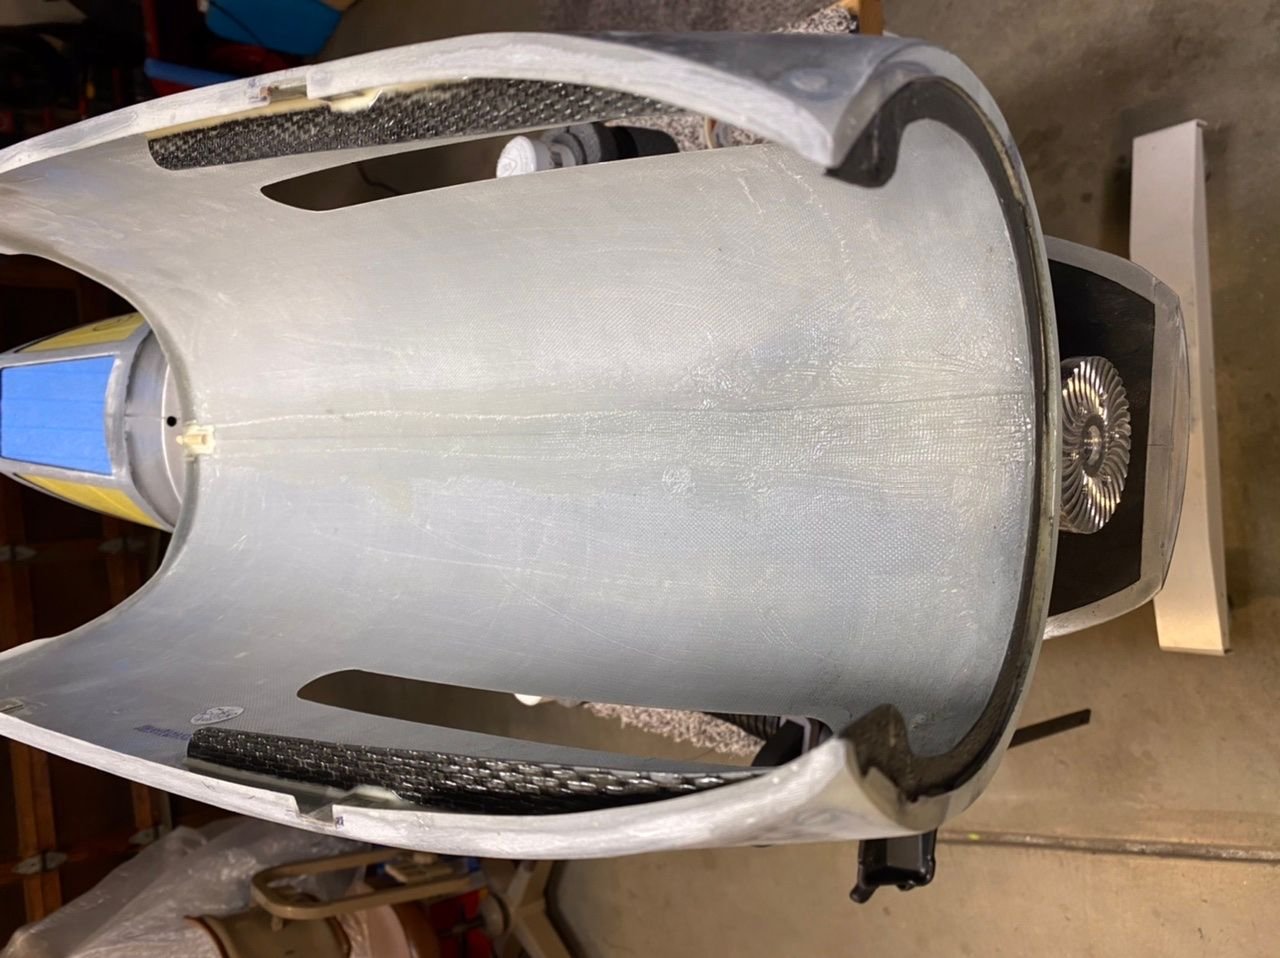
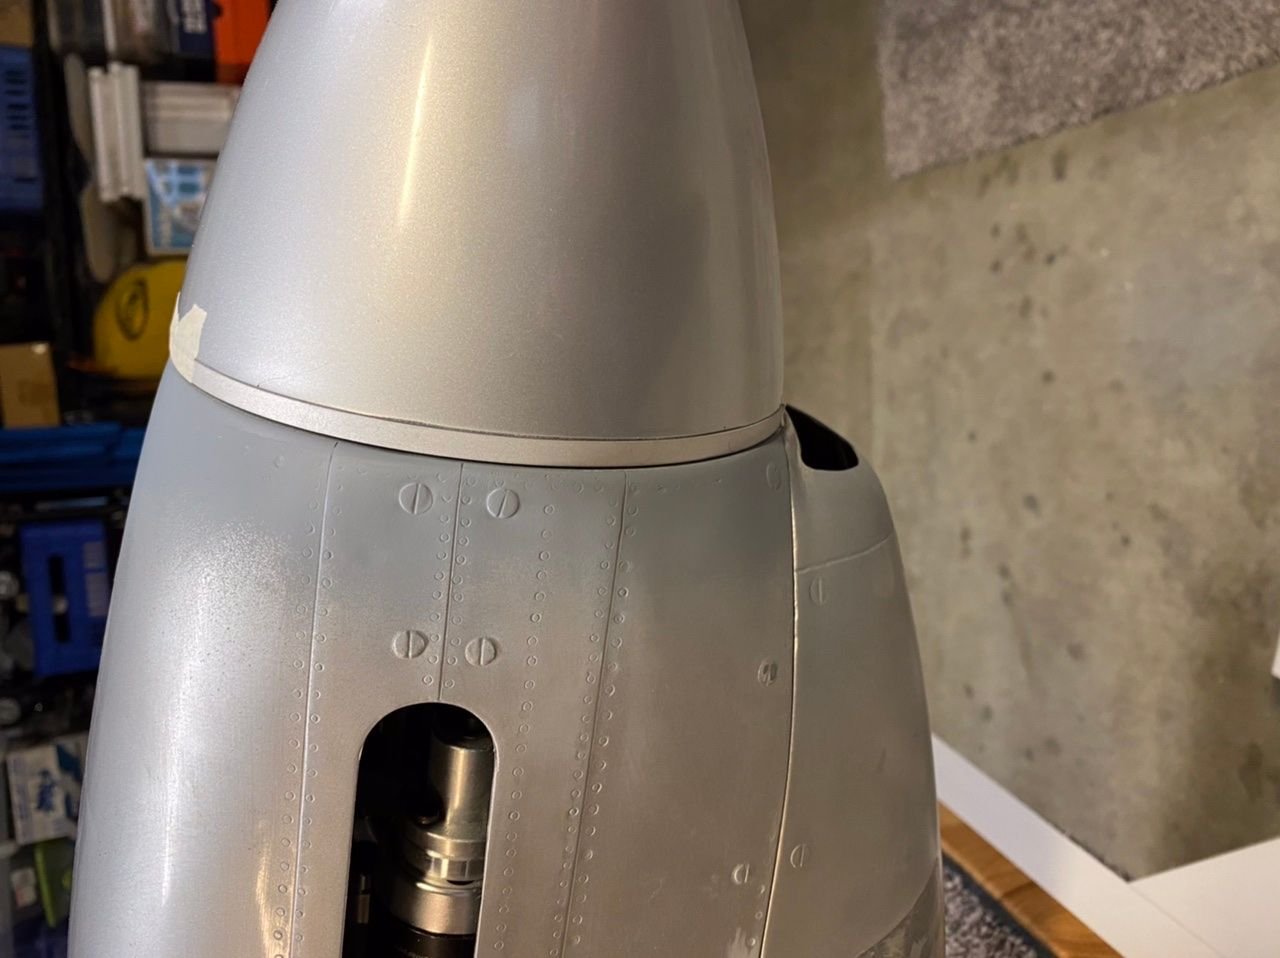
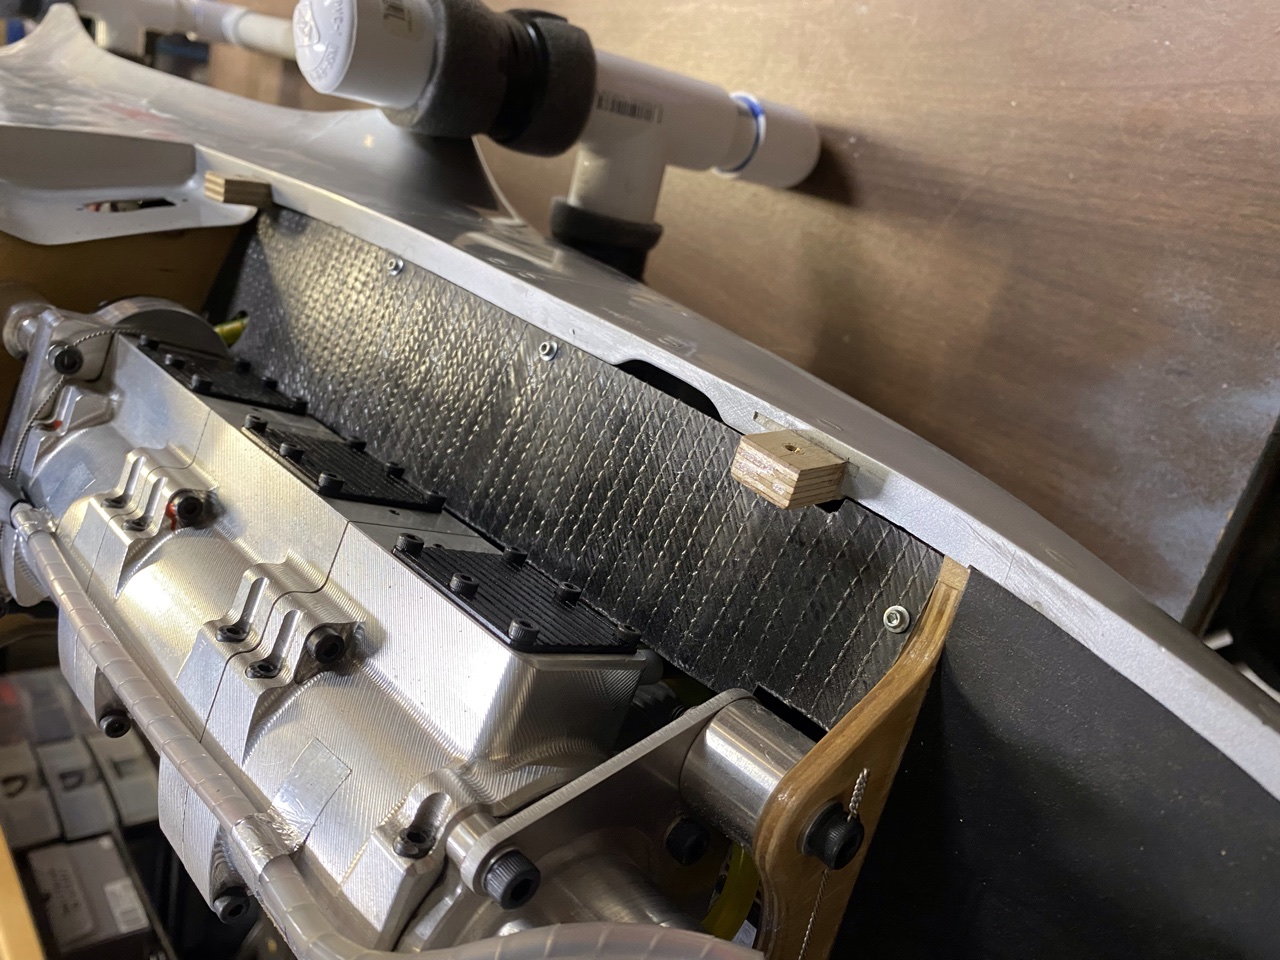
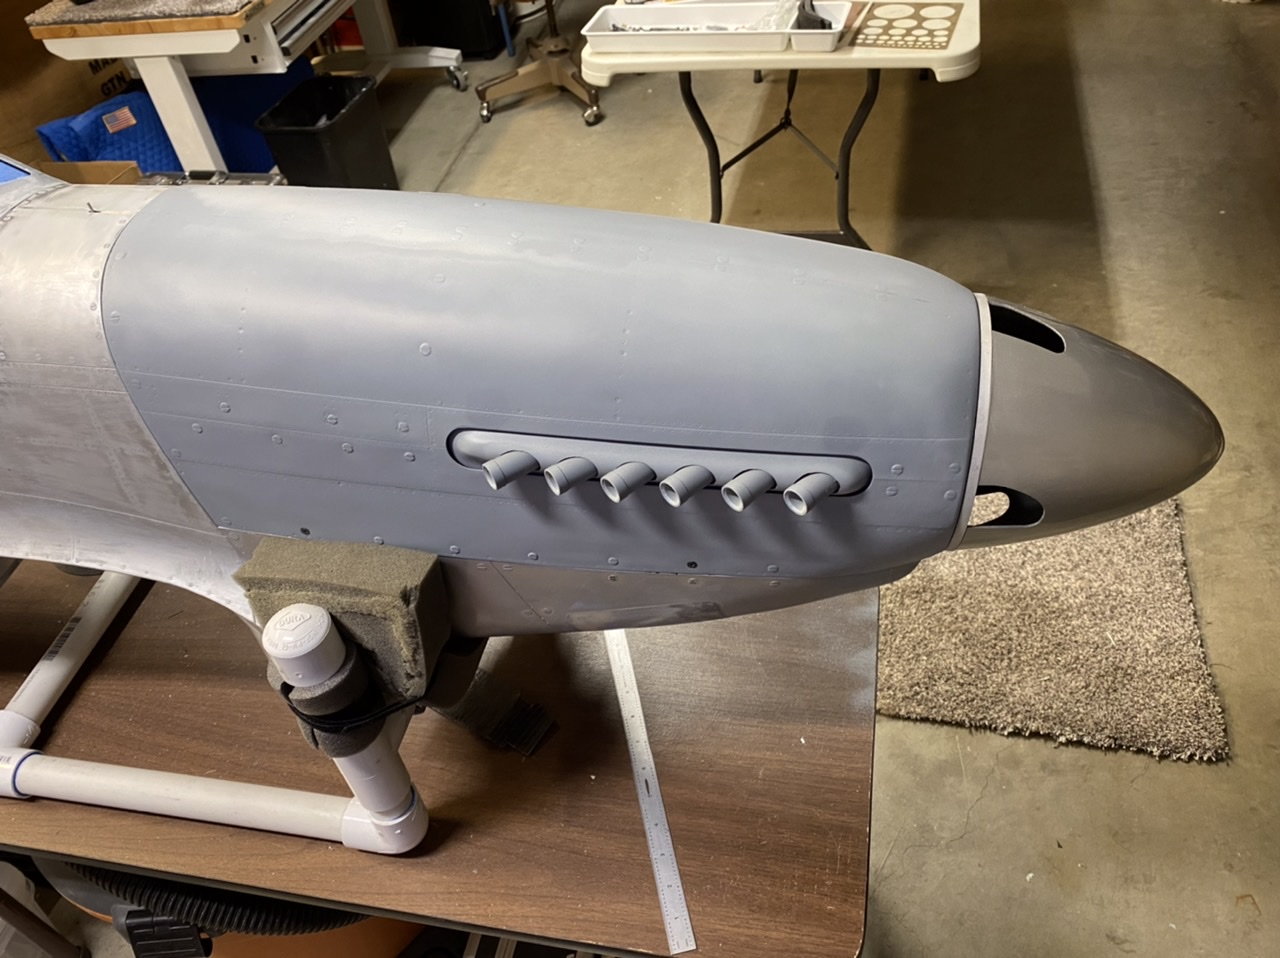
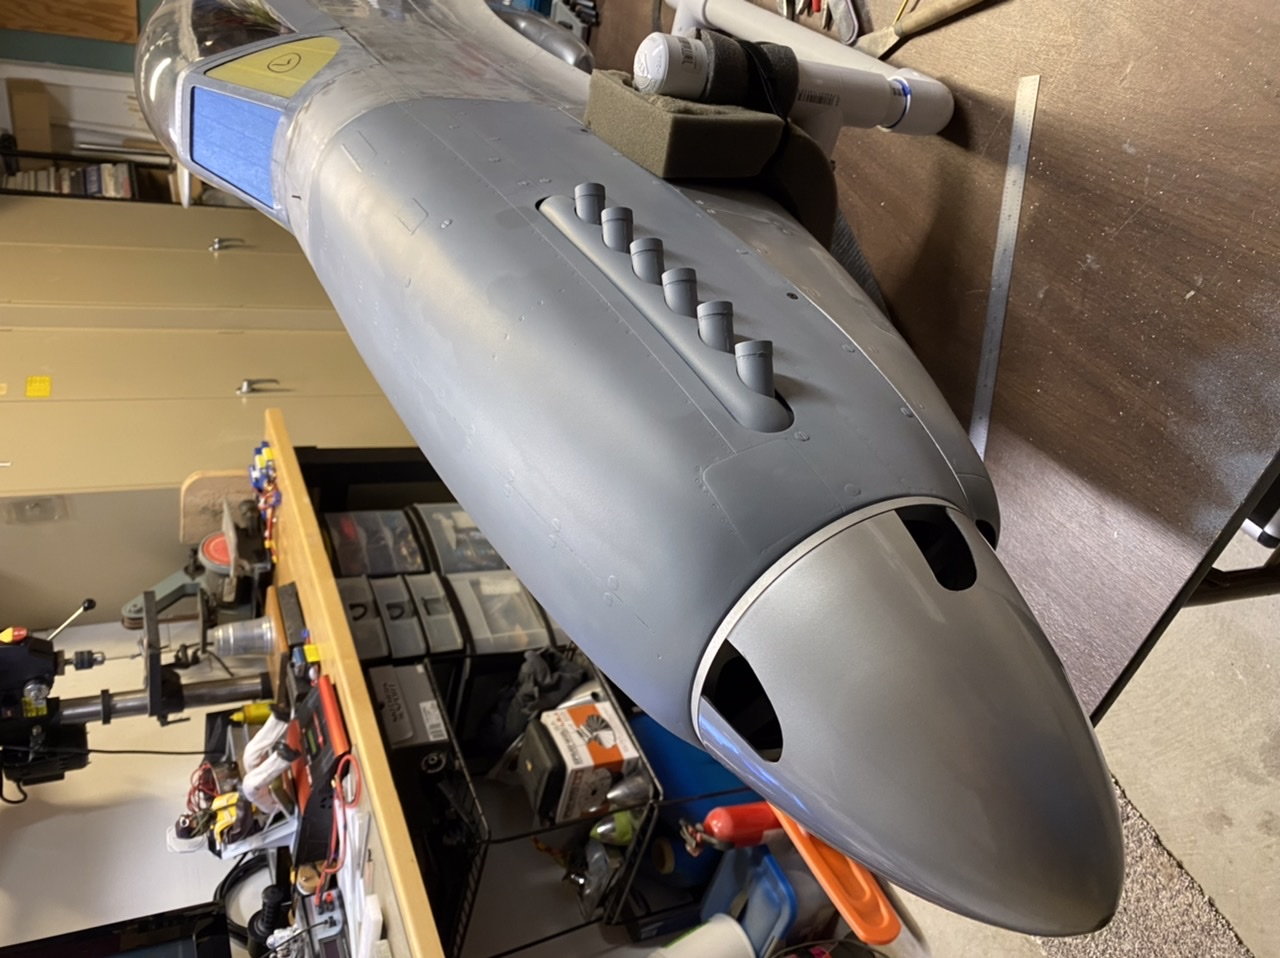
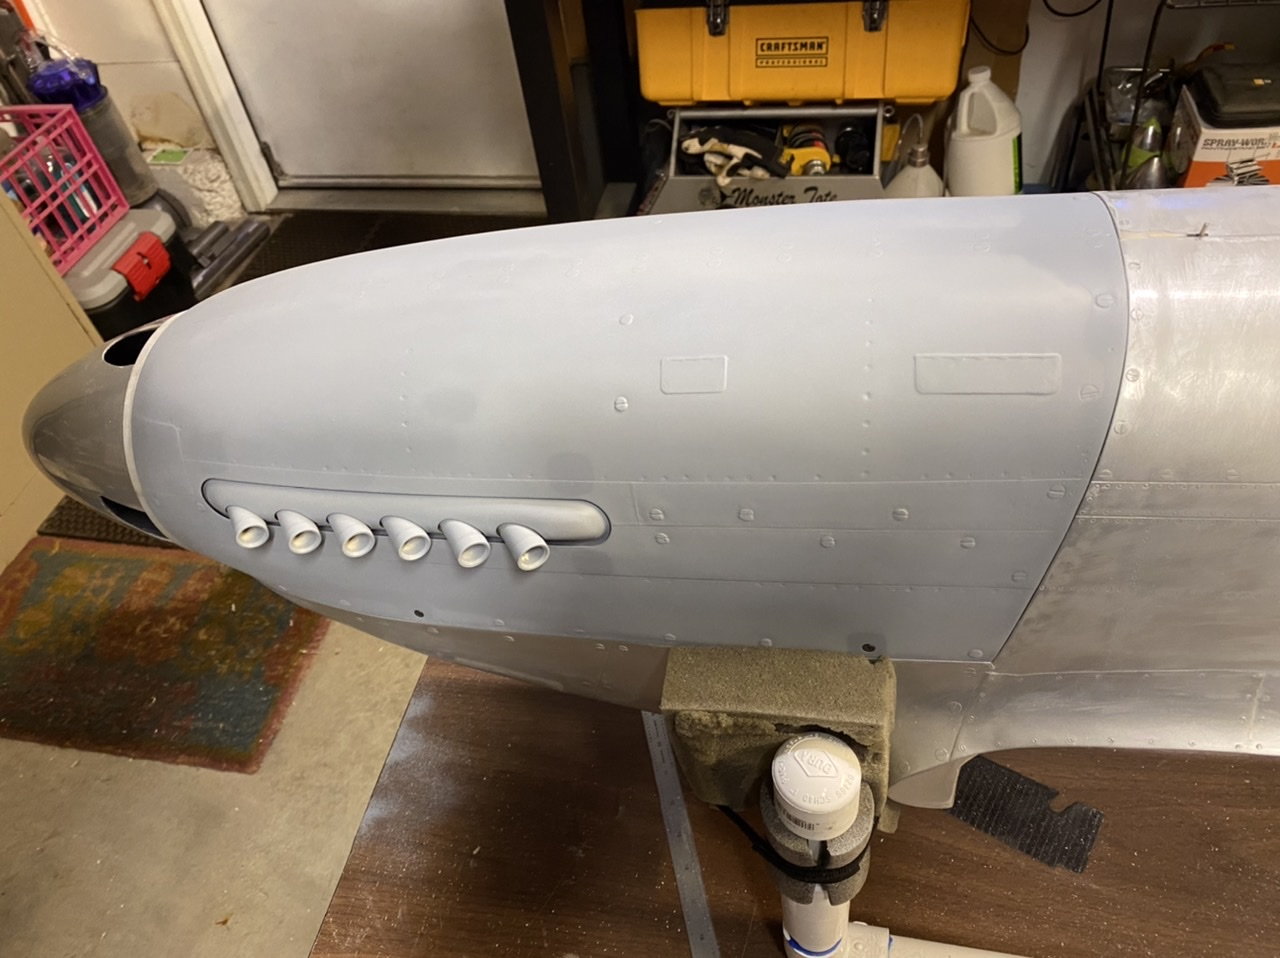
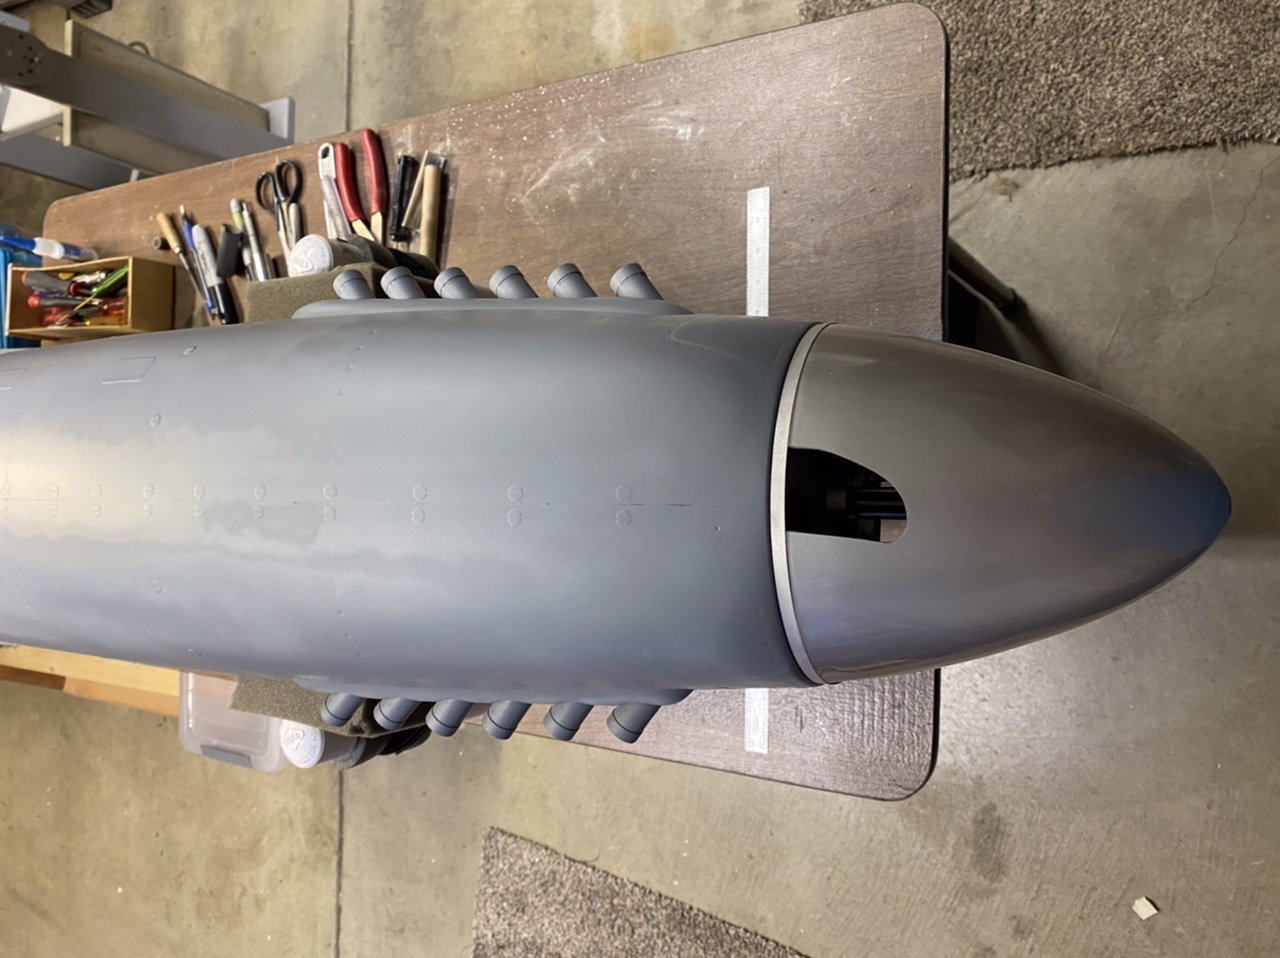
Now I’m in paint prep work and sanding and finishing for primer then paint. Cowl is done, I finished the other side of the exhaust and epoxied them to the cowl. The starter motor clears just fine. A note here is the parts are spaced from the cowl and the pipes are drilled through to promote air flow.
Also note that the spinner with the lightened backplate in conjunction with the 4 blade prop now have a way to pump air into the cowl.
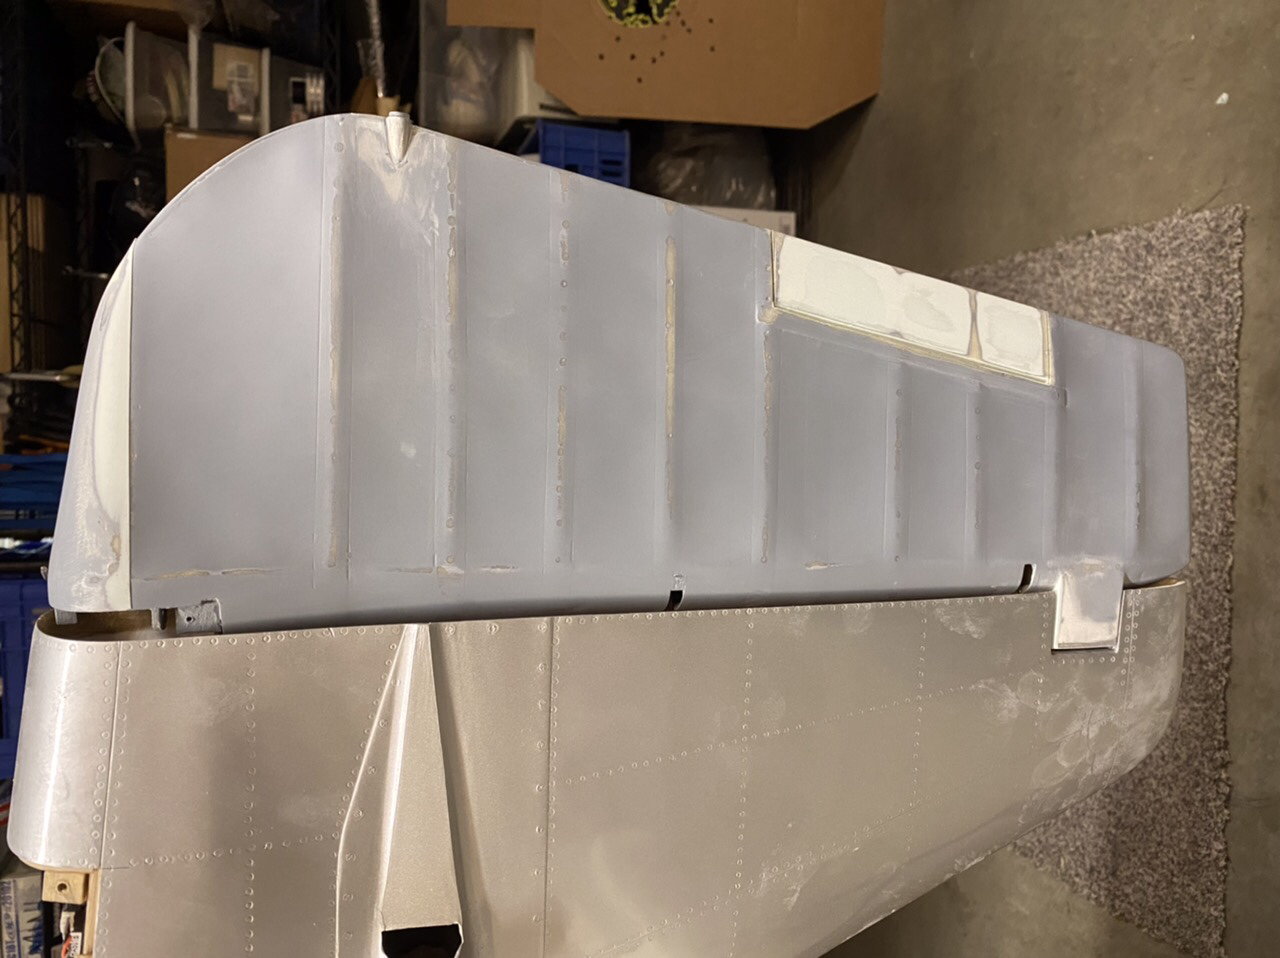
Heres a shot of the rudder, again a moment of OCD, I had to sand off the pimples on the rudder. Just doing that alone was a huge improvement I think. I cut the trim tab out, spaced it, and glued it back in place. I have another idea so I’m going to test that and see if it looks good or not.
Now I’m in paint prep work and sanding and finishing for primer then paint. Cowl is done, I finished the other side of the exhaust and epoxied them to the cowl. The starter motor clears just fine. A note here is the parts are spaced from the cowl and the pipes are drilled through to promote air flow.
Also note that the spinner with the lightened backplate in conjunction with the 4 blade prop now have a way to pump air into the cowl.

The following users liked this post:
Chris Nicastro (09-08-2021)
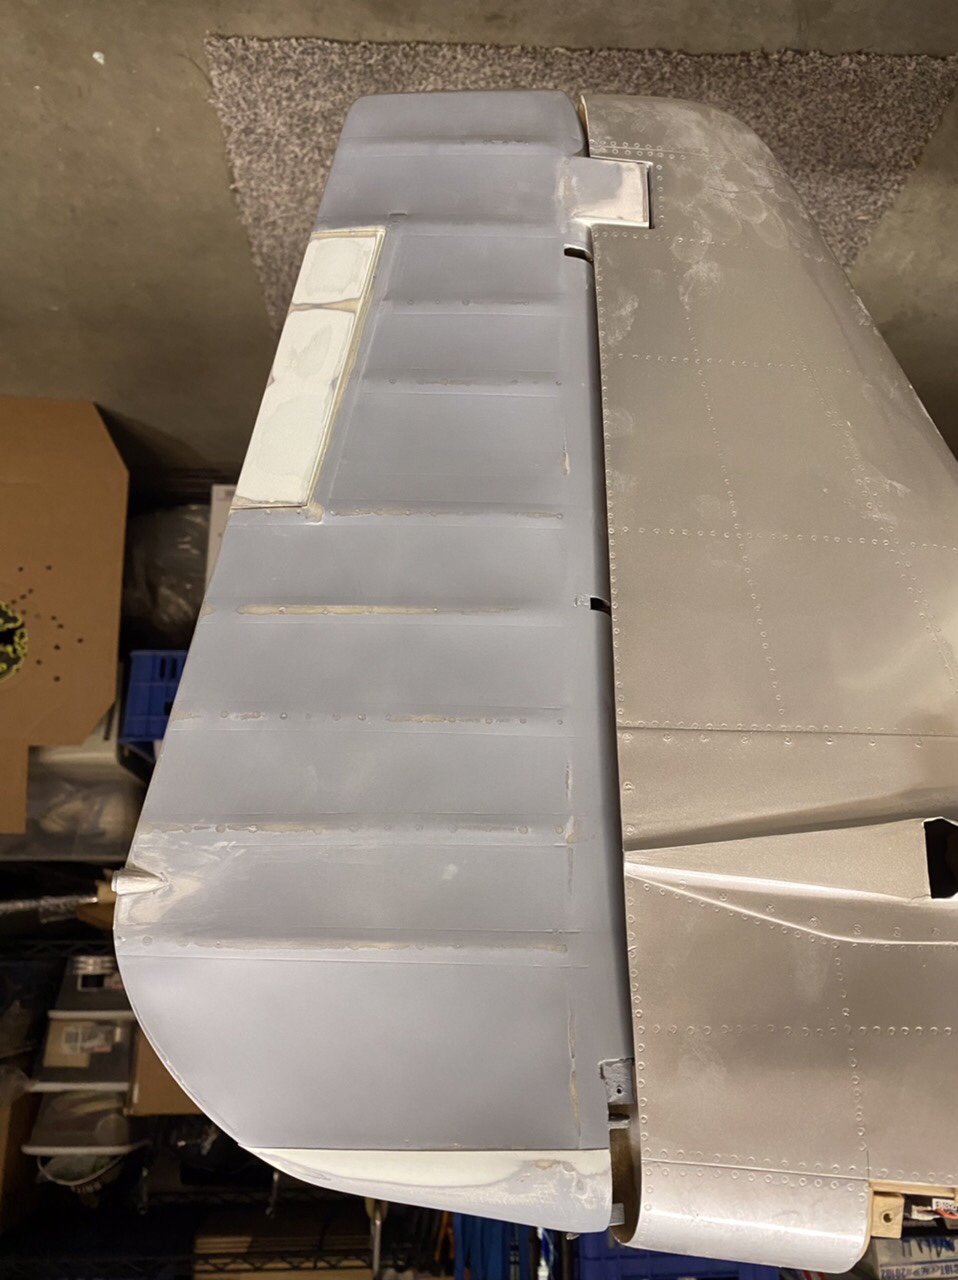
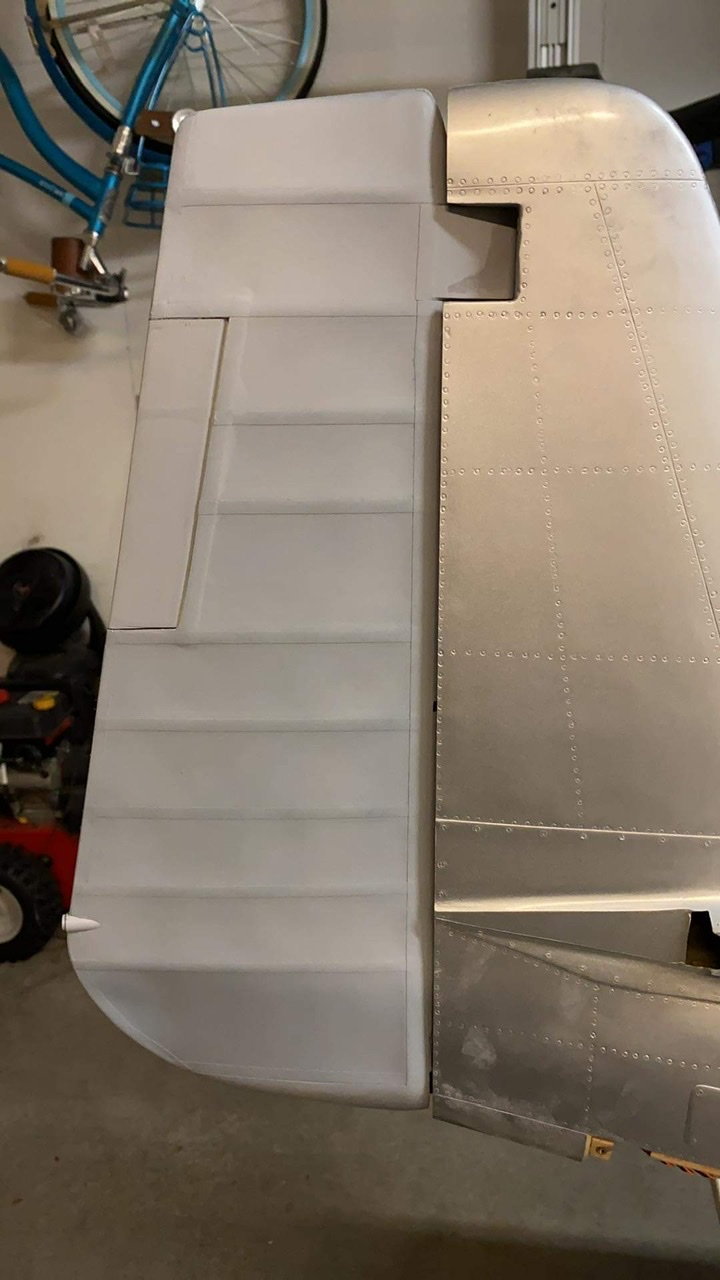
09-13-2021, 09:48 PM
#250
Rudder update, removed the bumps and covered it with black Solartex. Looks better but not really scale. I just had to remove the bumps and clean it up with a fabric finish. I tried looking for a pinking shear or fabric cutting wheel but I didn’t find one small enough.