


Ziroli P-47 92"
 06-22-2018, 07:19 AM
#26

Thread Starter
My Feedback: (1)
Join Date: Sep 2004
Location: Charlotte,
NC
Posts: 112
Likes: 0
Received 0 Likes
on
0 Posts
Thanks SIMCO. I've thought about a dual servo setup in the tail... something I'm accustomed to doing with my large aerobatic birds. To your point about insurance, that's definitely the safest route. BUT, I don't want the weight of two servos that far back and I was really trying to make it as scale as possible - no visible linkages outside the airplane. Still looking at all options...


 07-02-2018, 08:05 PM
#32
Thread Starter
My Feedback: (1)
Join Date: Sep 2004
Location: Charlotte,
NC
Posts: 112
Likes: 0
Received 0 Likes
on
0 Posts
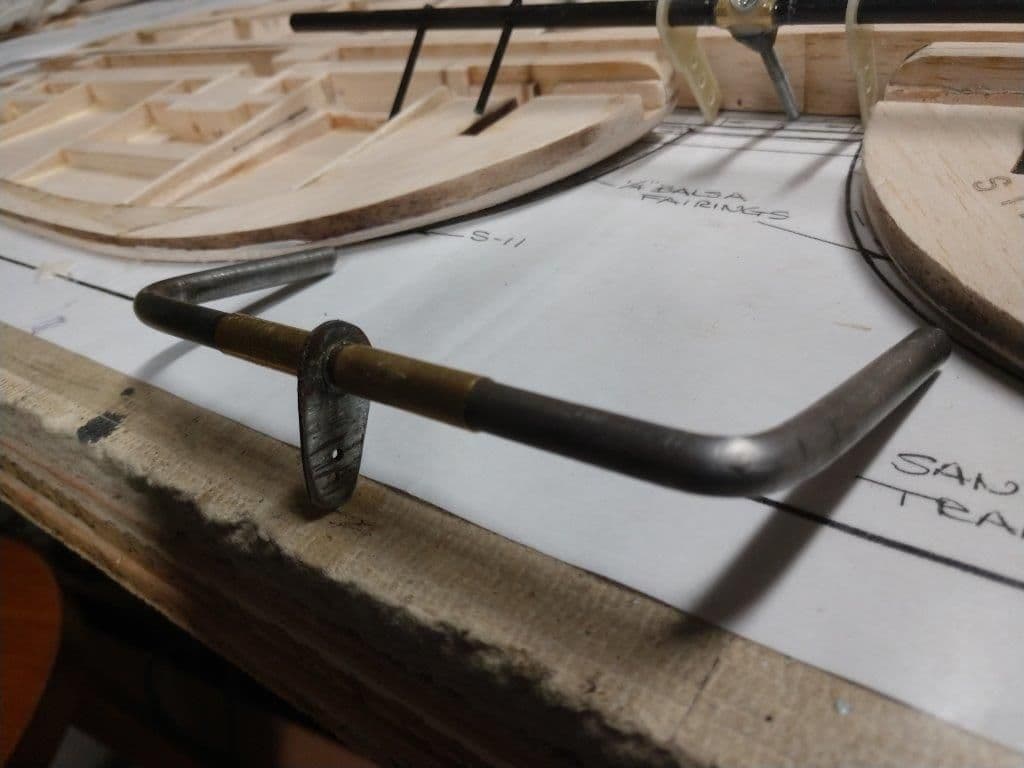
Also followed Ziroli's recommendation of the making the elevator coupler out of 1/4" music wire. Fabricated a servo arm and silver soldered it to the wire. The brass tubing was installed as a hinge for the wire to rotate in. All this was looking good and worked great until I tested the servo arm with some force. The silver solder failed (and yes, I know how to correctly silver solder). I used a lot of force in the tests - probably more than the elevators would ever endure, but I just didn't have a good feeling about the soldered joint.
Last edited by tgking44; 07-02-2018 at 08:10 PM.
07-02-2018, 08:07 PM
#33
Thread Starter
My Feedback: (1)
Join Date: Sep 2004
Location: Charlotte,
NC
Posts: 112
Likes: 0
Received 0 Likes
on
0 Posts
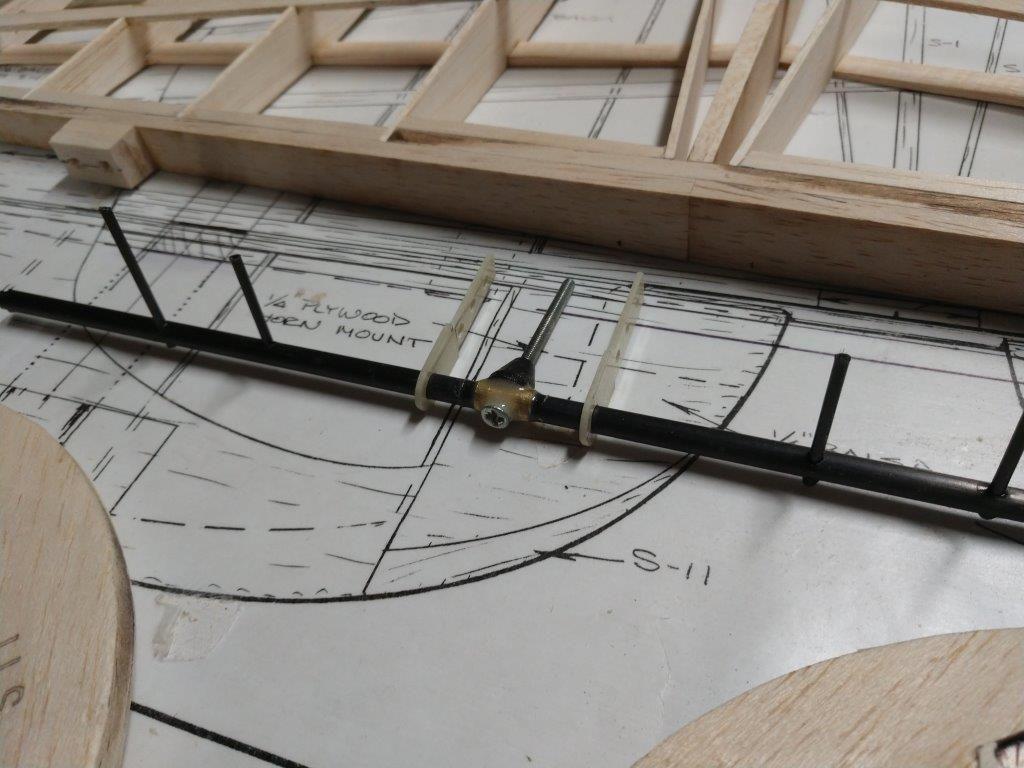
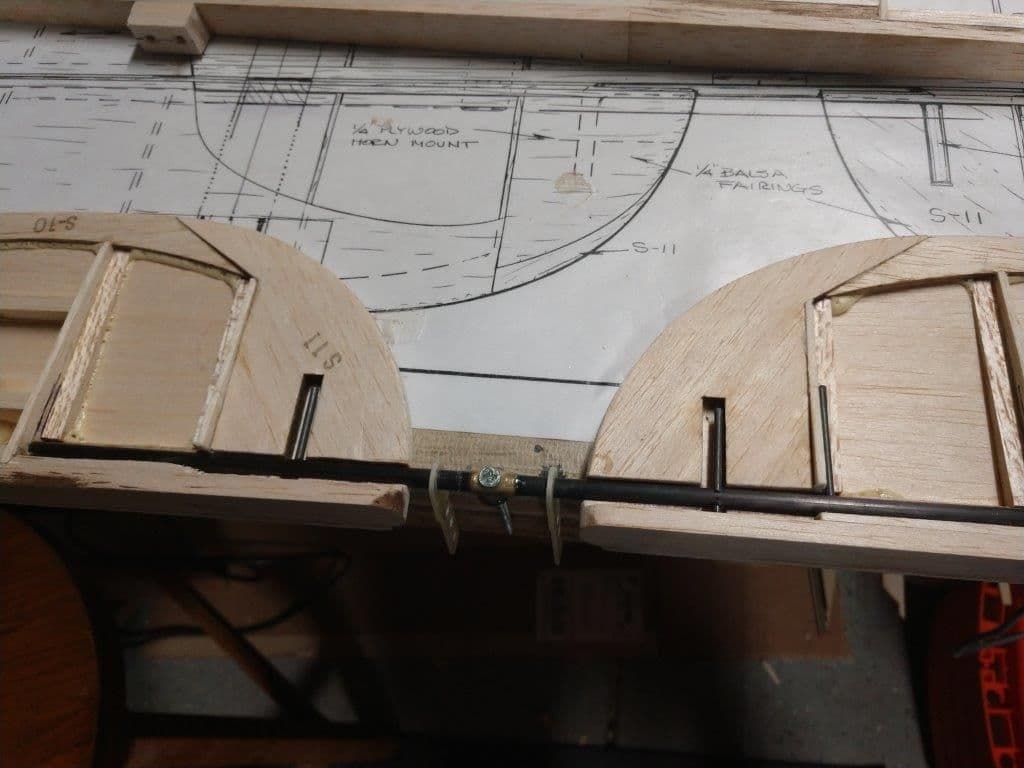
So... I fabricated a new elevator coupler. This one is made out of carbon fiber tubes and a Nelson Hobbies control horn. Very similar to what CARF Models uses in their P-47. It passed all of my exaggerated tests and is 1/3 the weight of the 1/4" wire. It may look silly and overkill, but my gut tells me it'll work (hope I'm right).
Last edited by tgking44; 07-03-2018 at 04:58 AM.
07-02-2018, 08:48 PM
#34
Servo's probably will beat themselves to death if they aren't matched for speed and exact power curve. These airplanes flew and fly fine on 40 oz. power servos. I have his old plans with servos as big as a house. really no need to go overboard. But that's my personal 2 bits!

 08-06-2018, 05:52 AM
#38
Thread Starter
My Feedback: (1)
Join Date: Sep 2004
Location: Charlotte,
NC
Posts: 112
Likes: 0
Received 0 Likes
on
0 Posts
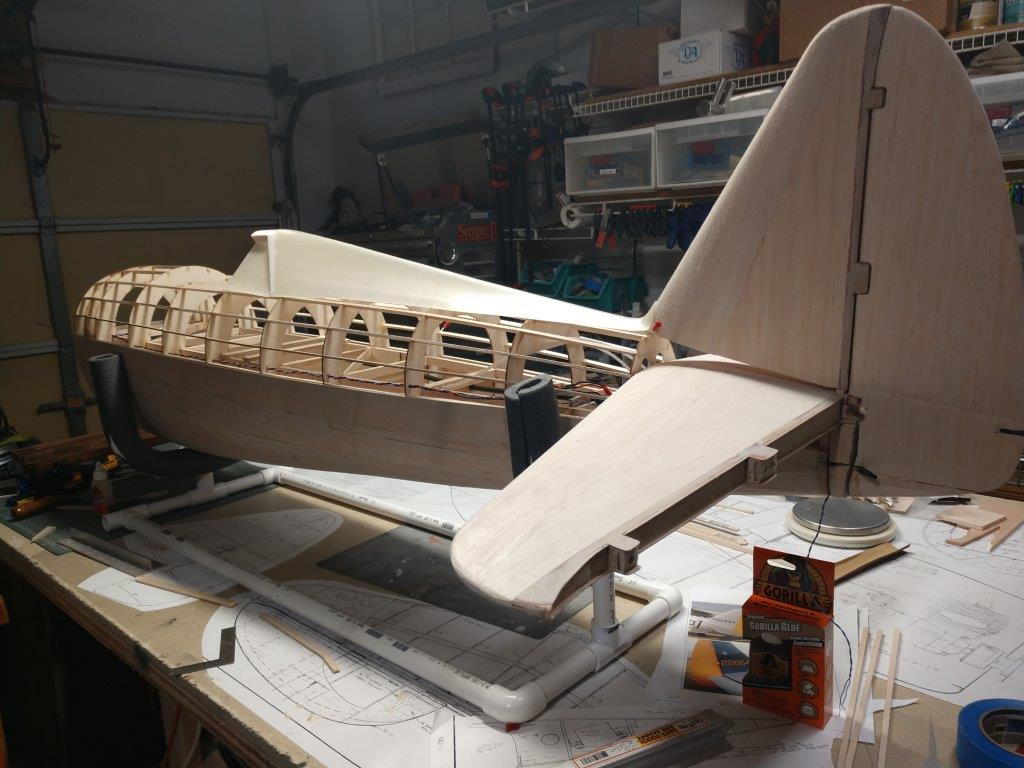
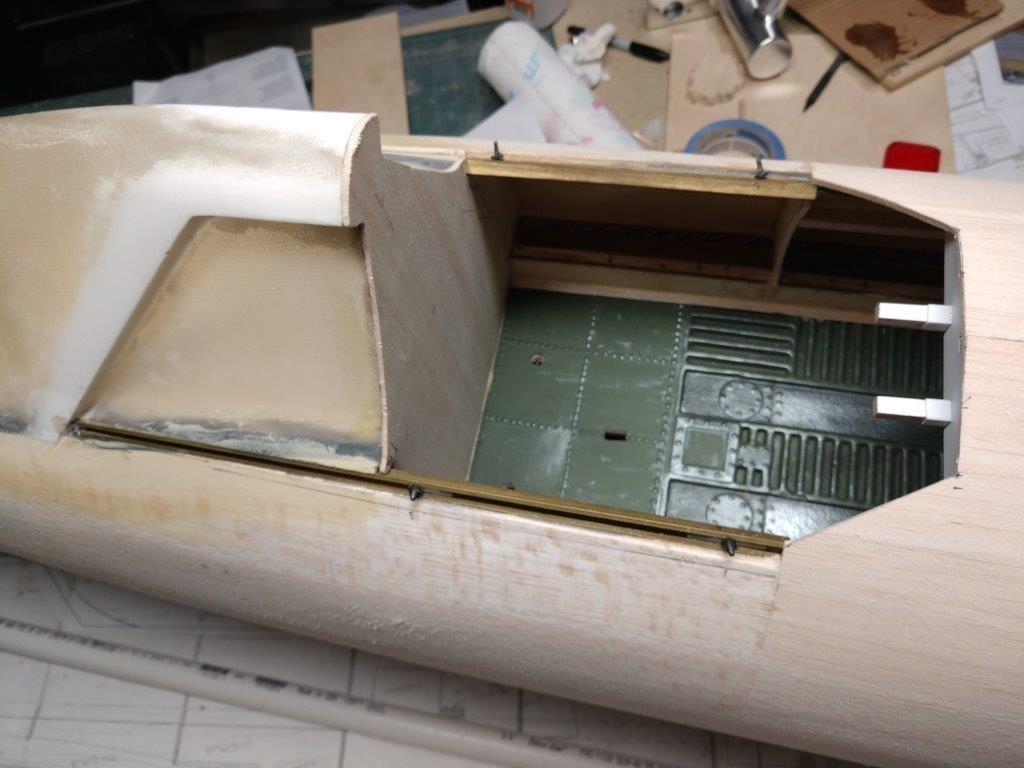
Did some more planking and A LOT of sanding over the weekend. For access to install the sliding canopy hardware, the area in front of the cockpit was left open. I'll fill in that area last.
08-21-2018, 12:37 PM
#39
Thread Starter
My Feedback: (1)
Join Date: Sep 2004
Location: Charlotte,
NC
Posts: 112
Likes: 0
Received 0 Likes
on
0 Posts
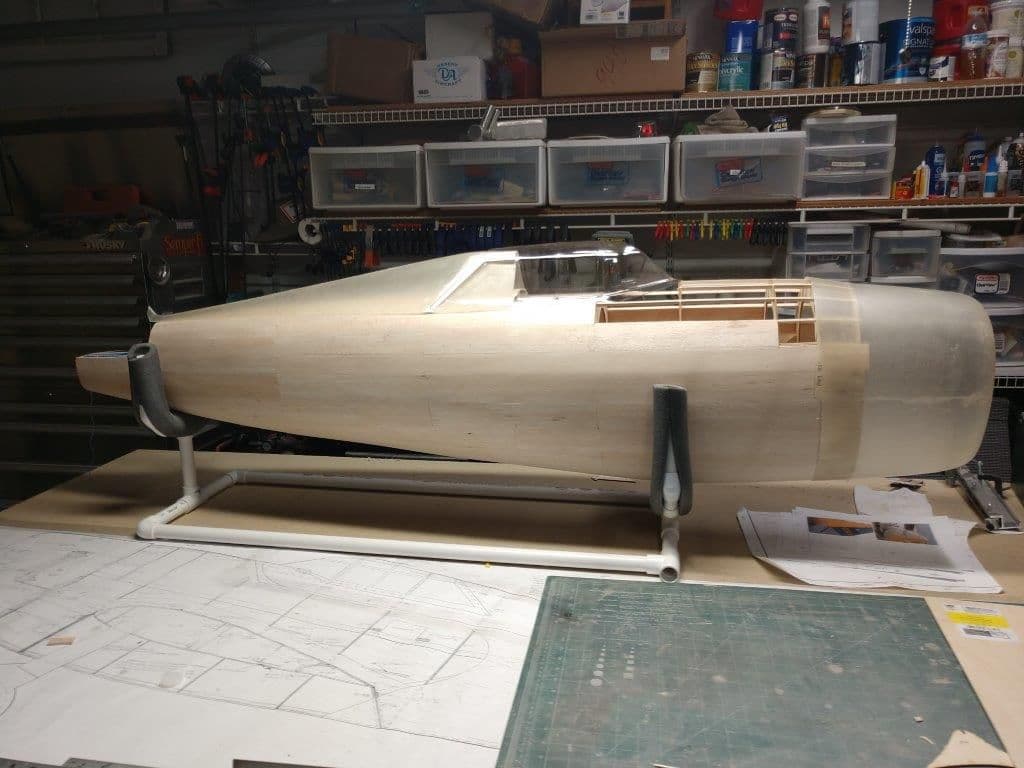
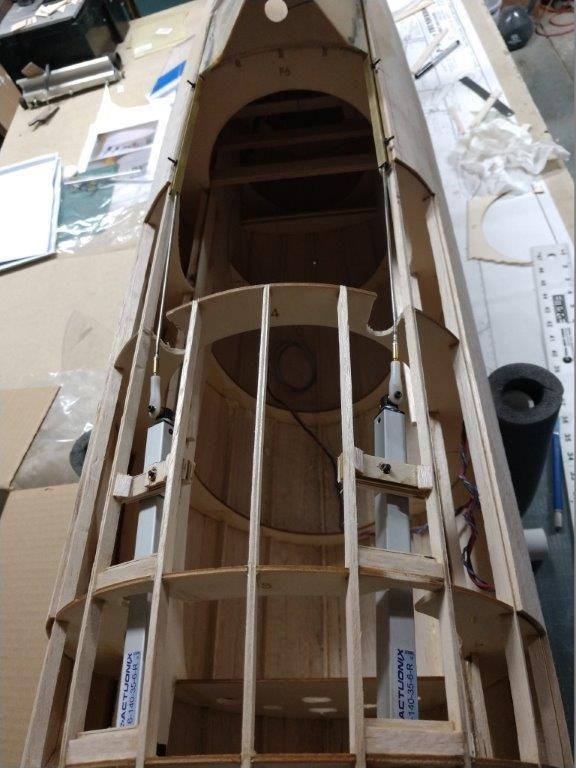
Installed 2 linear servos for the sliding canopy. With 6" of travel, they're ideal for this application. Required some tinkering to get the geometry right, but I'm happy with how it turned out. It works great.


 10-29-2018, 09:40 AM
#41
Thread Starter
My Feedback: (1)
Join Date: Sep 2004
Location: Charlotte,
NC
Posts: 112
Likes: 0
Received 0 Likes
on
0 Posts
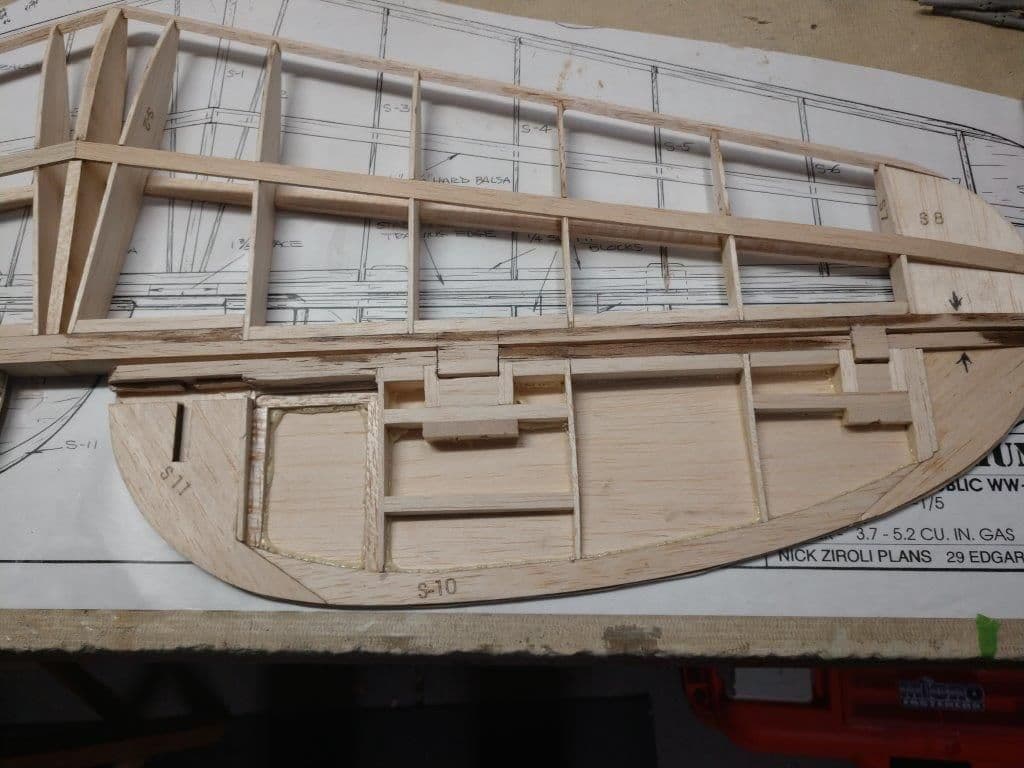
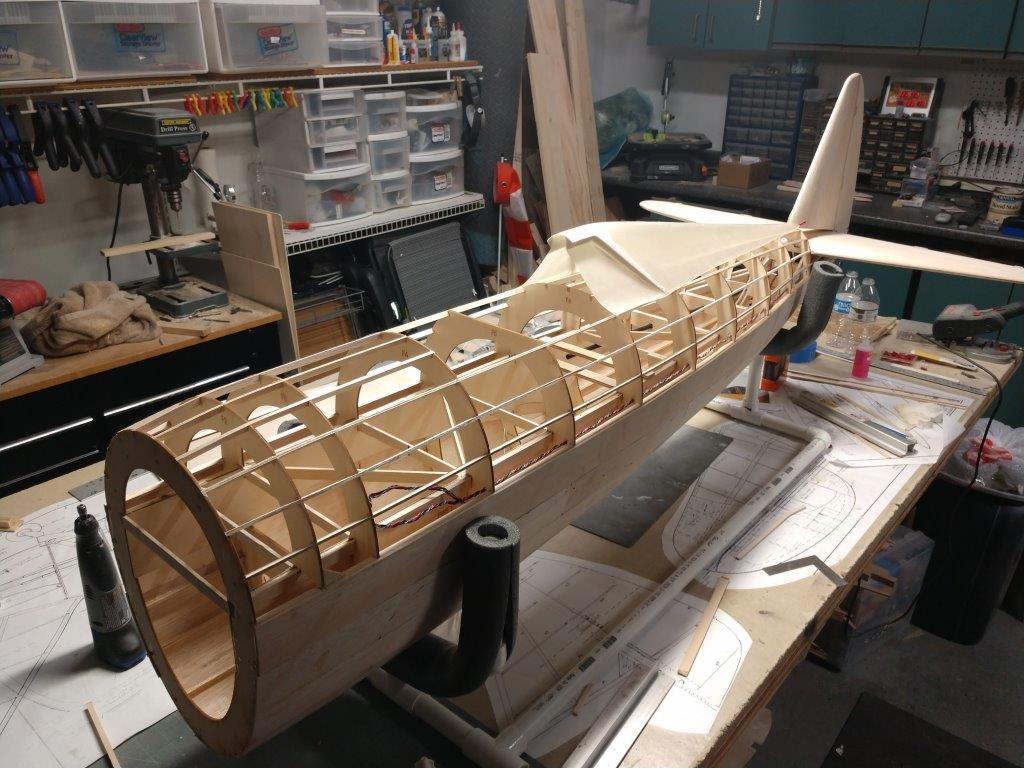
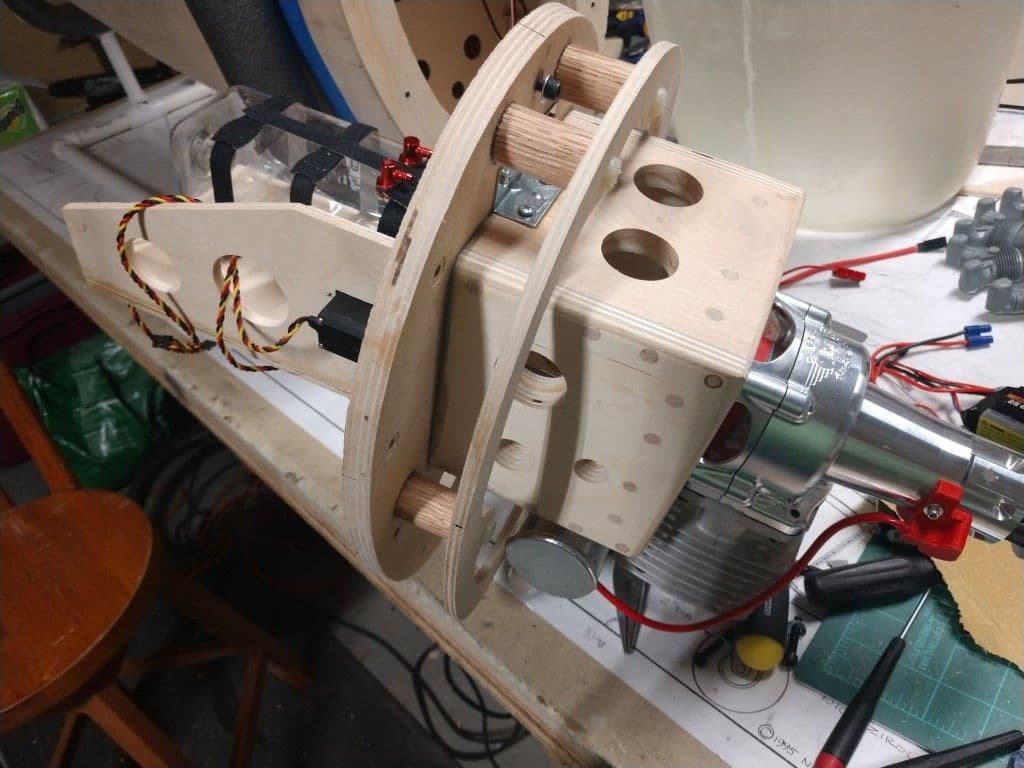
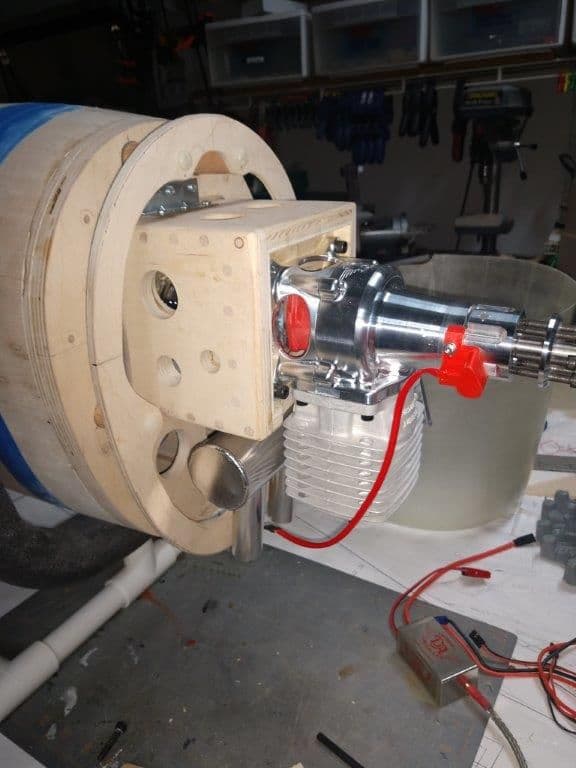
A few pics to update. Slow, but steady progress. Closed up most of the fuse, but had to install the cockpit floor first. The rest of the cockpit walls and details will be added later... just the floor had to be installed before I closed up around it. Also made further progress on the removable firewall. The concept is to have a "system" that includes the engine box, firewall, tank and all electronics in one self contained, removable piece.
10-29-2018, 08:31 PM
#42
Thread Starter
My Feedback: (1)
Join Date: Sep 2004
Location: Charlotte,
NC
Posts: 112
Likes: 0
Received 0 Likes
on
0 Posts
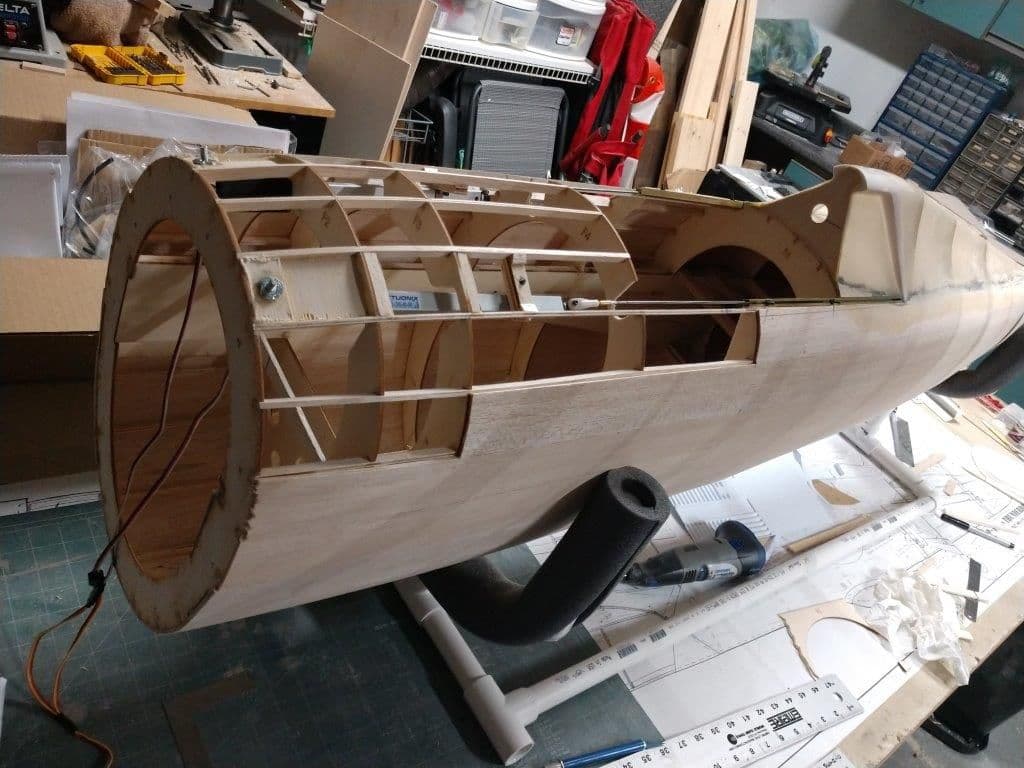
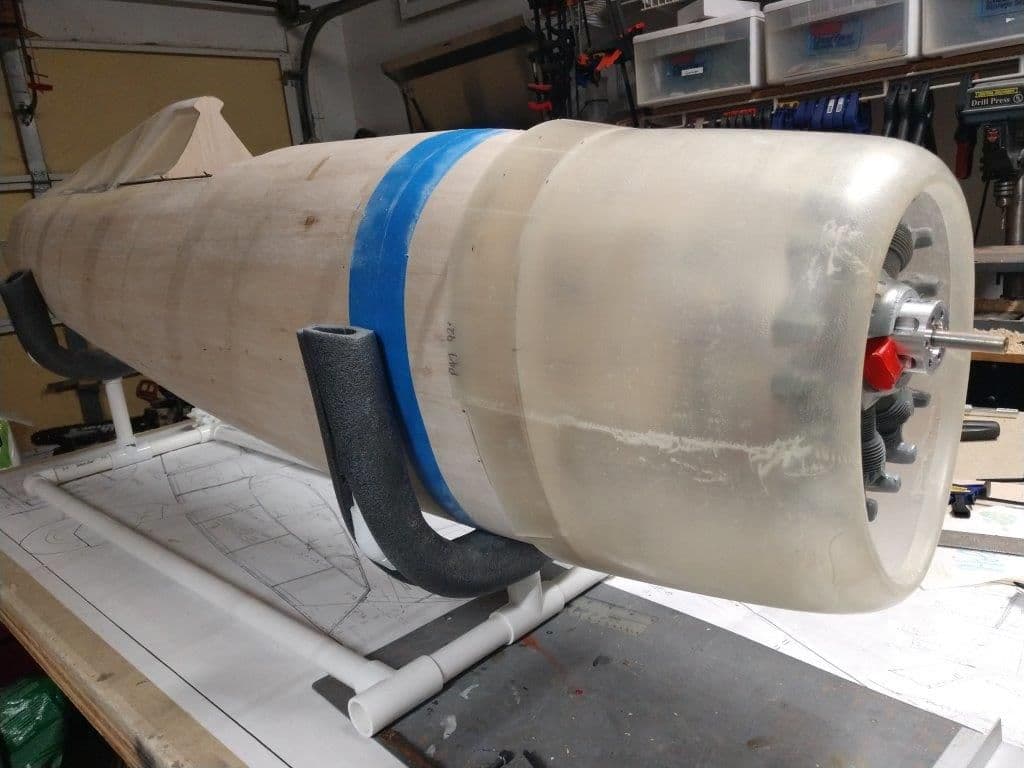
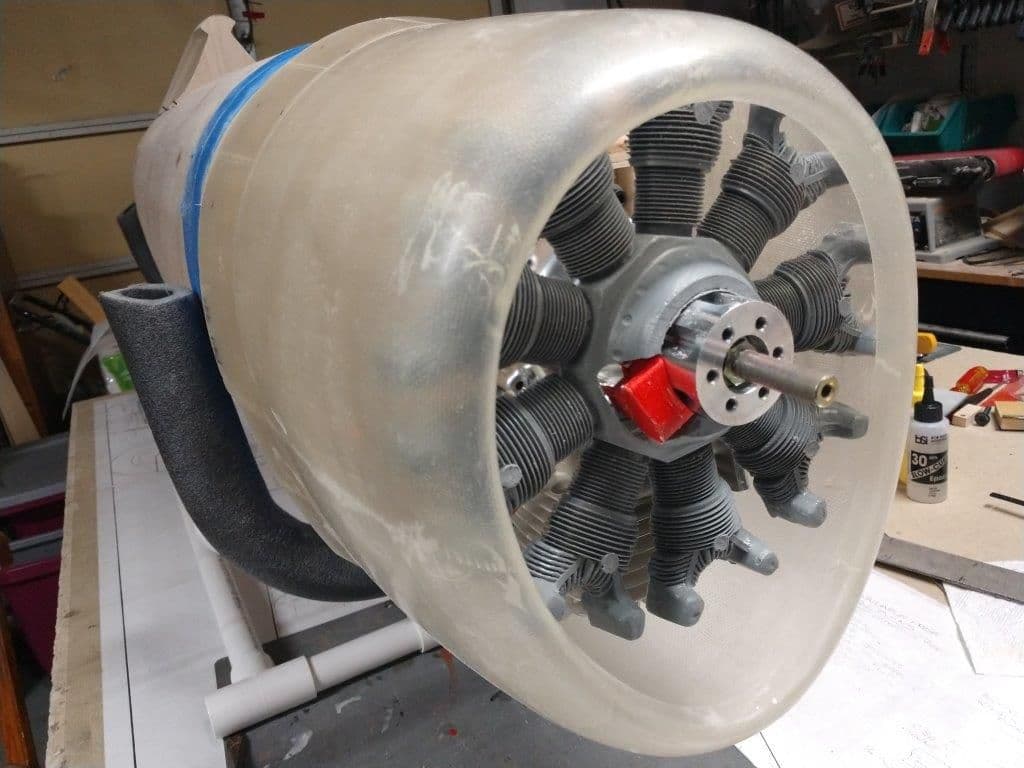
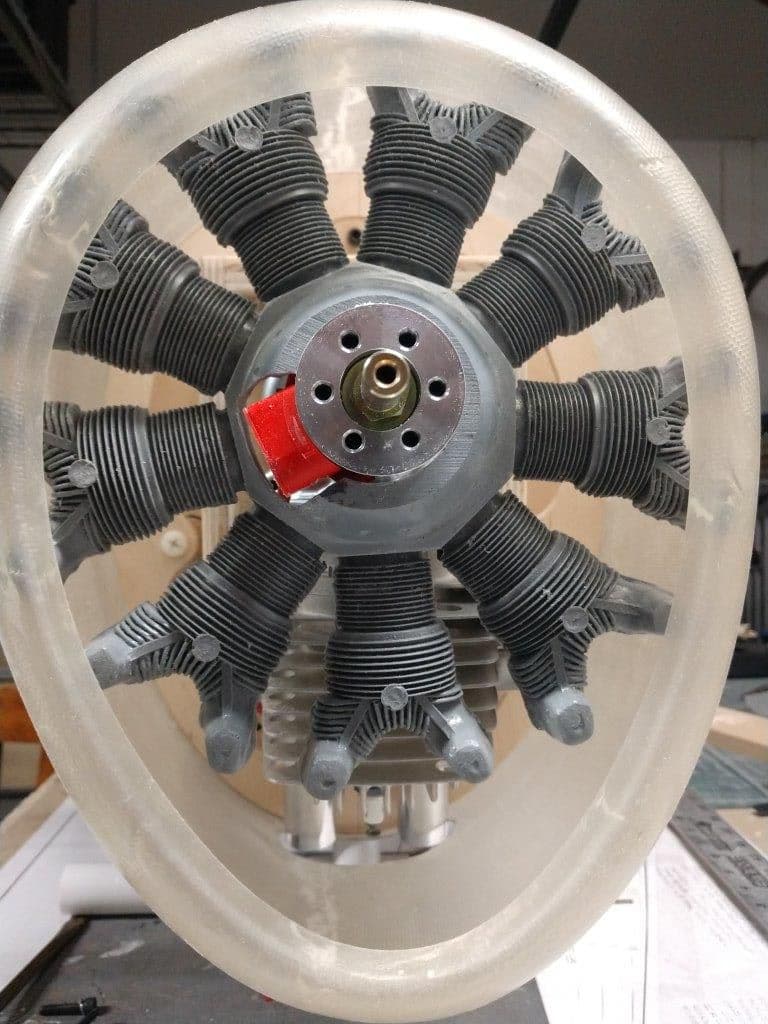
With 2deg of down and right thrust at prop shaft, loose fitting of front-end pieces shows perfect alignment. Makes me giddy...
Half of the time spent on the fuse is ensuring everything aligns and pre-planning part fab and building steps. It's a good feeling when it all comes together.
Now on to engine baffling and the Hysol glue...
Half of the time spent on the fuse is ensuring everything aligns and pre-planning part fab and building steps. It's a good feeling when it all comes together.
Now on to engine baffling and the Hysol glue...
04-17-2020, 05:06 AM
#44
Thread Starter
My Feedback: (1)
Join Date: Sep 2004
Location: Charlotte,
NC
Posts: 112
Likes: 0
Received 0 Likes
on
0 Posts
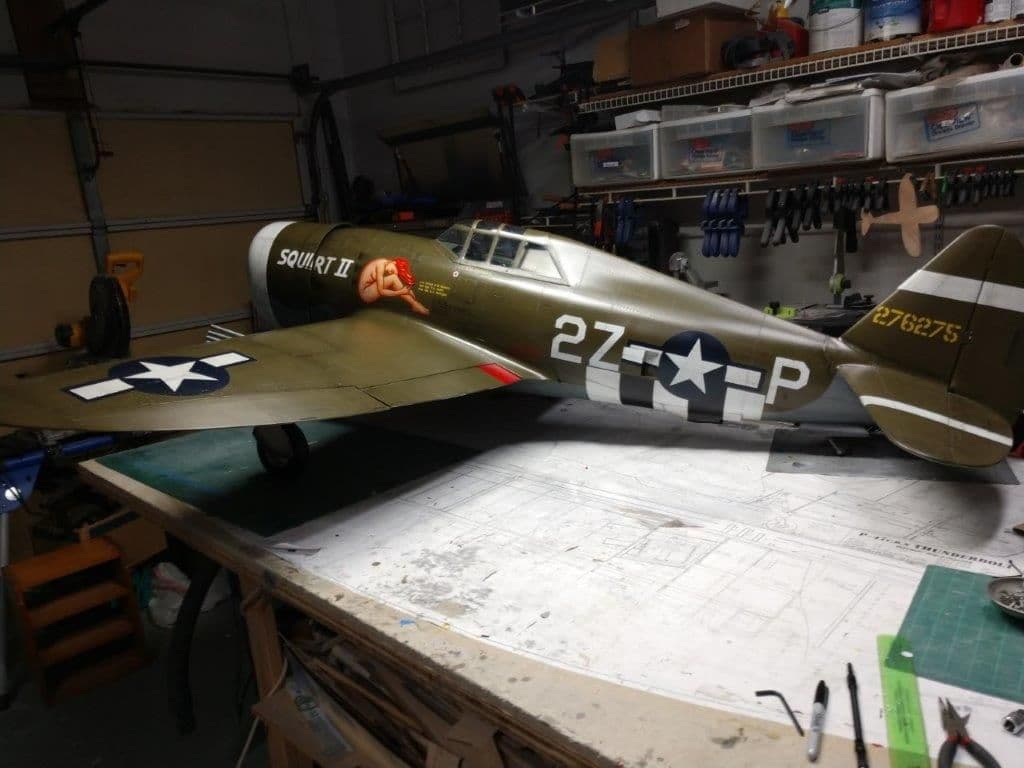
Hey guys, finally got this one finished. Here's a shot of where I am now with her. I pick up where I left off and finished the thread here.
Last edited by tgking44; 04-17-2020 at 12:21 PM.


