TopRCModel FW-190


 11-23-2018, 06:33 AM
#277

My Feedback: (3)

Join Date: Aug 2003
Location: near Innsbruck, AUSTRIA
Posts: 615
Likes: 0
Received 13 Likes
on
10 Posts
Hi,
I am not a company, I just drew them up for the topflite and toprc fw's because I needed them myself. I print them in a special heat resistant material that does not warp like ABS and is a lot more heat resistant (95�C) than PLA. Problem is the material called Greentec BDP is quite expensive so the fans cost 40.- a piece plus shipping. I can ship worldwide for 10.-.
They bolt directly to the back of the original spinner (both topflite and toprrc) and the toprrc Fan has 175mm diameter leaving around 3mm clearance to the cowl opening.
Rev
The following 2 users liked this post by Reverend:
planenutzz (07-12-2021),
Stephen Crisp (06-22-2020)


 12-03-2018, 09:13 PM
#286
My Feedback: (6)
I just got my Butcher Bird, and I have to wait until Christmas before my wife says I can open it up.
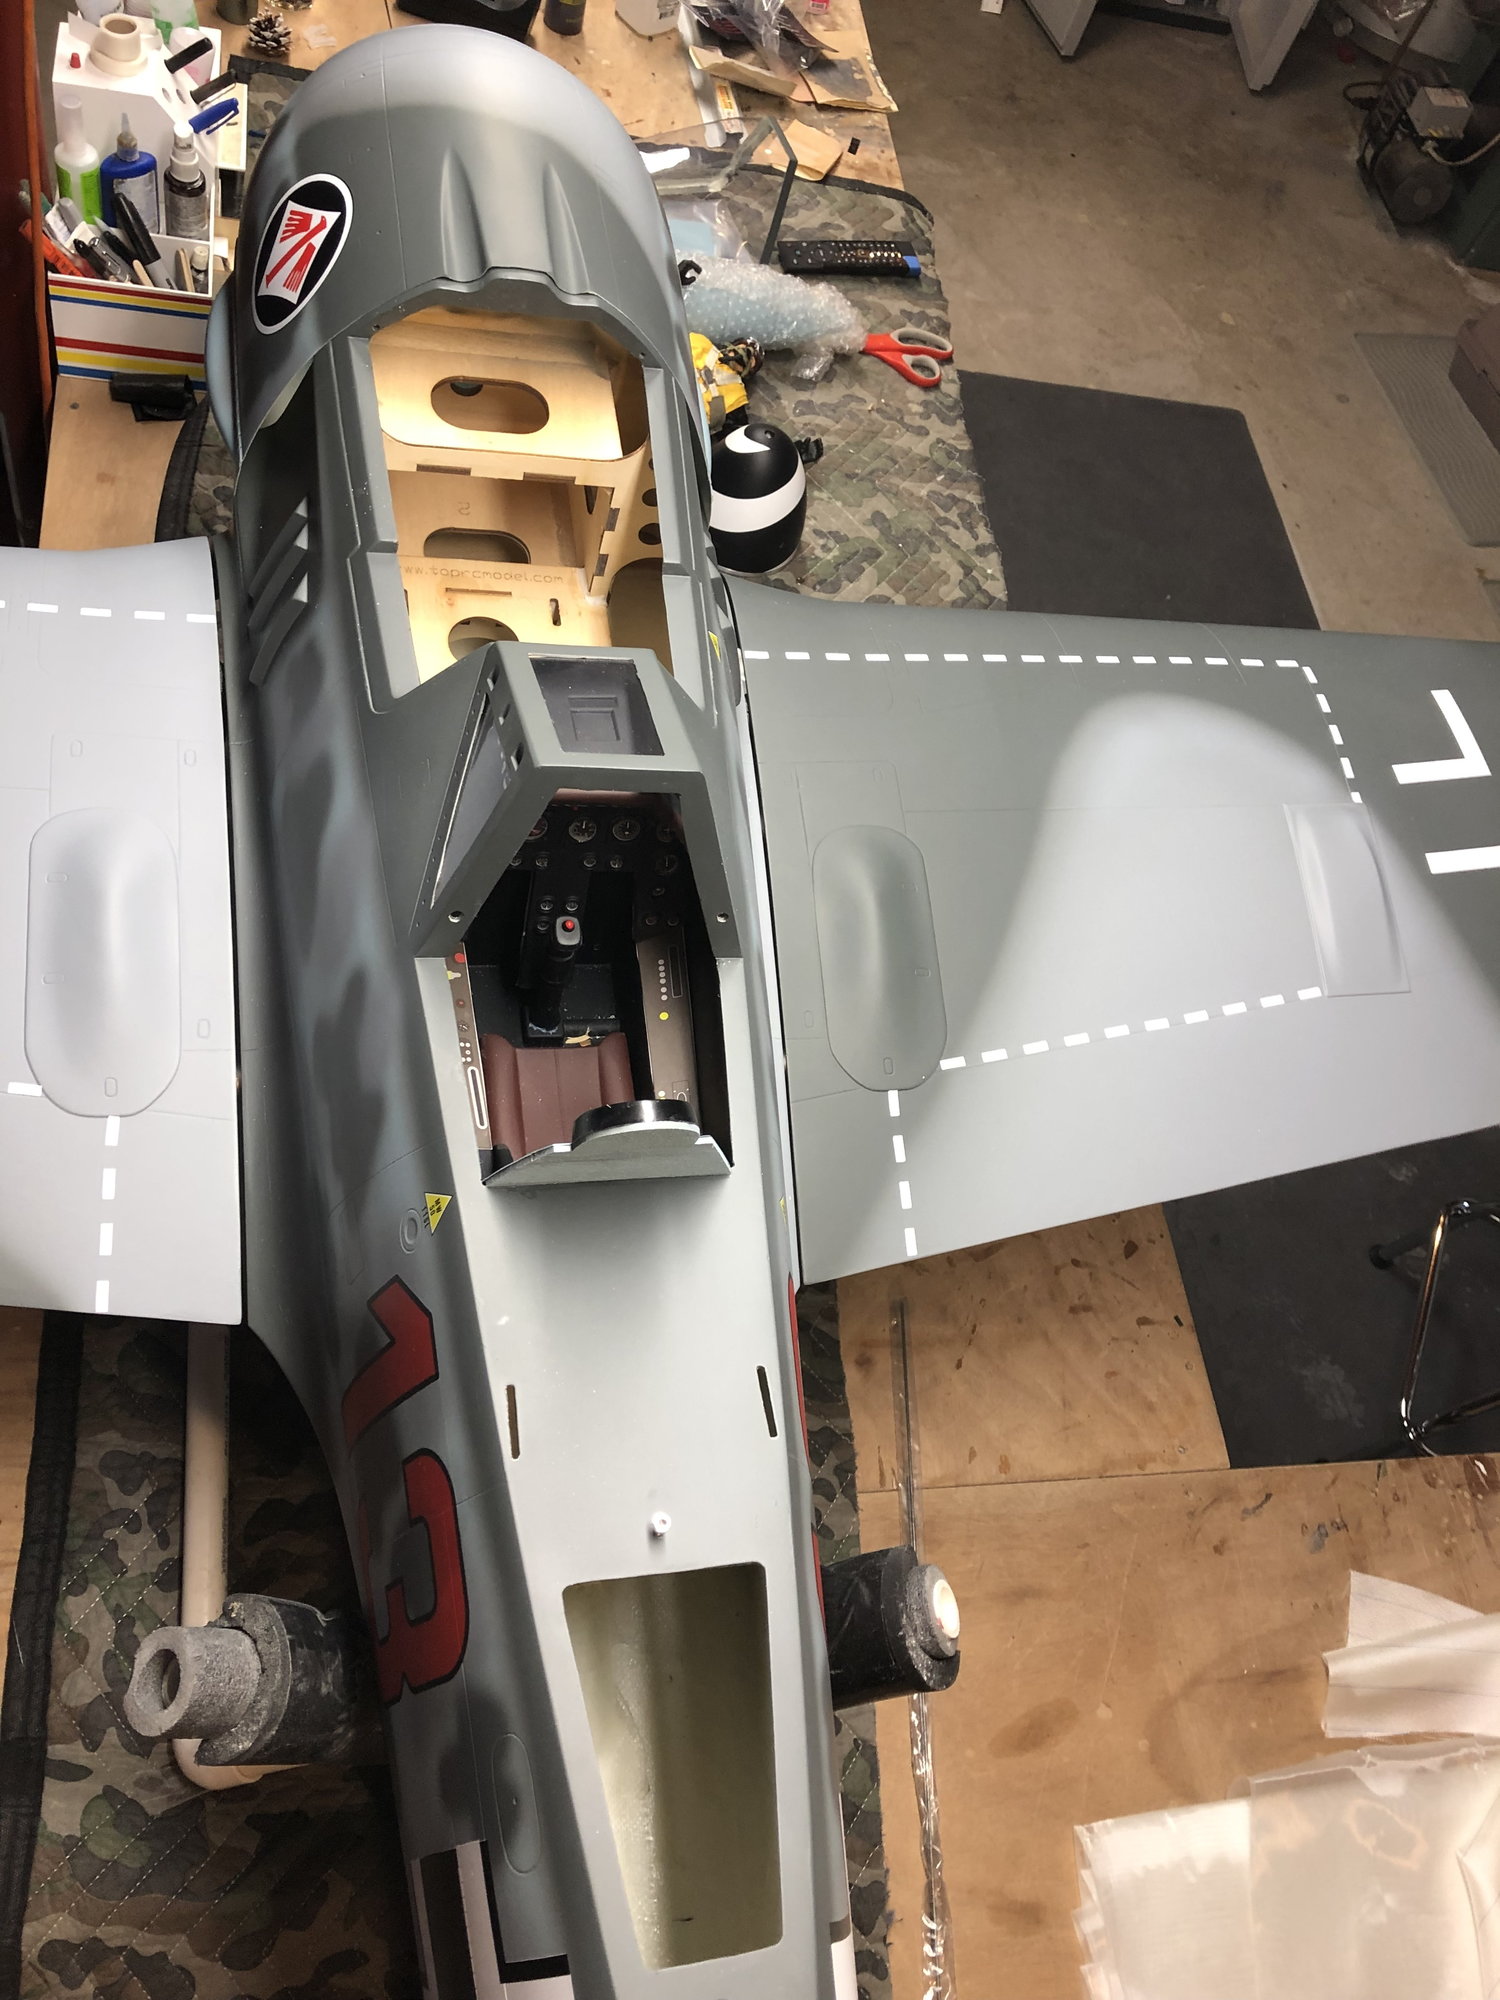
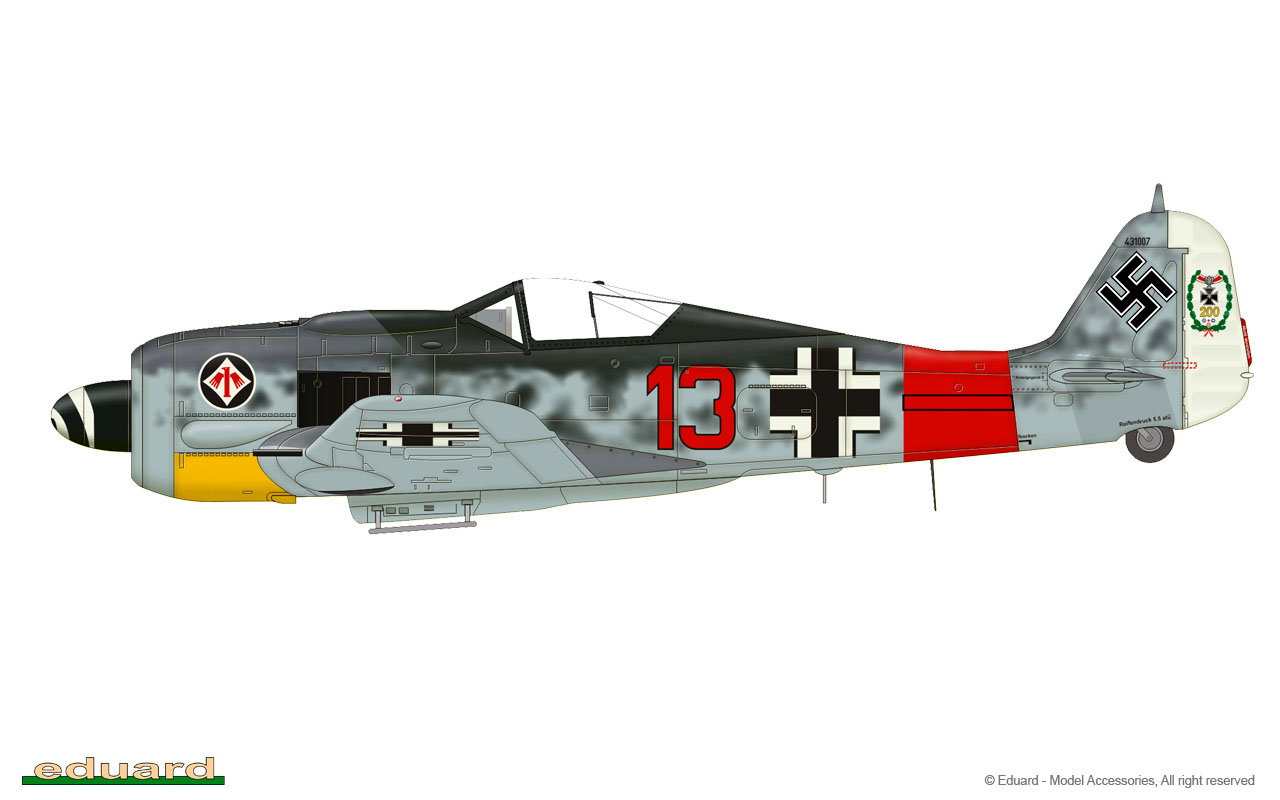
Since i don't want mine to look like all the others. I ordered mine without the markings applied. Does anyone know what the plane with the supplied markings was intended to emulate? Maybe the squadron it was assigned to, any sort of history would be appreciated.
Is the base color and patterns anything scale like or just a best guess and that looks about right?
Any three views that are close to matching what the model looks like.
I have Sierra retracts and a GT-80 to provide power.
The white 190 was at several flyins and looked great in person!
Sparky
12-04-2018, 05:33 AM
#287
The TopRC FW-190 color scheme is fairly accurate. Red 13 was flown by Heinz Bar assigned to 6 Staffe II JG1 in defense of the Western Front circa 1944. An excellent reference book to have is Focke-Wulf FW-190 Aces of the Western Front ($20.00). It has information and photos of Heinz Bar and numerous other FW-190 aces including the color schemes of the FW-190's the aces flew.
12-05-2018, 09:47 AM
#288
My Feedback: (6)
Has anybody tried using any of the accessories that are out there like the instrument panel from:
https://www.iflytailies.com/store/in...panels-1/wwii/
Sparky
https://www.iflytailies.com/store/in...panels-1/wwii/
Sparky
12-06-2018, 05:01 AM
#289
Has anybody tried using any of the accessories that are out there like the instrument panel from:
https://www.iflytailies.com/store/in...panels-1/wwii/
Sparky
https://www.iflytailies.com/store/in...panels-1/wwii/
Sparky
12-06-2018, 12:42 PM
#290
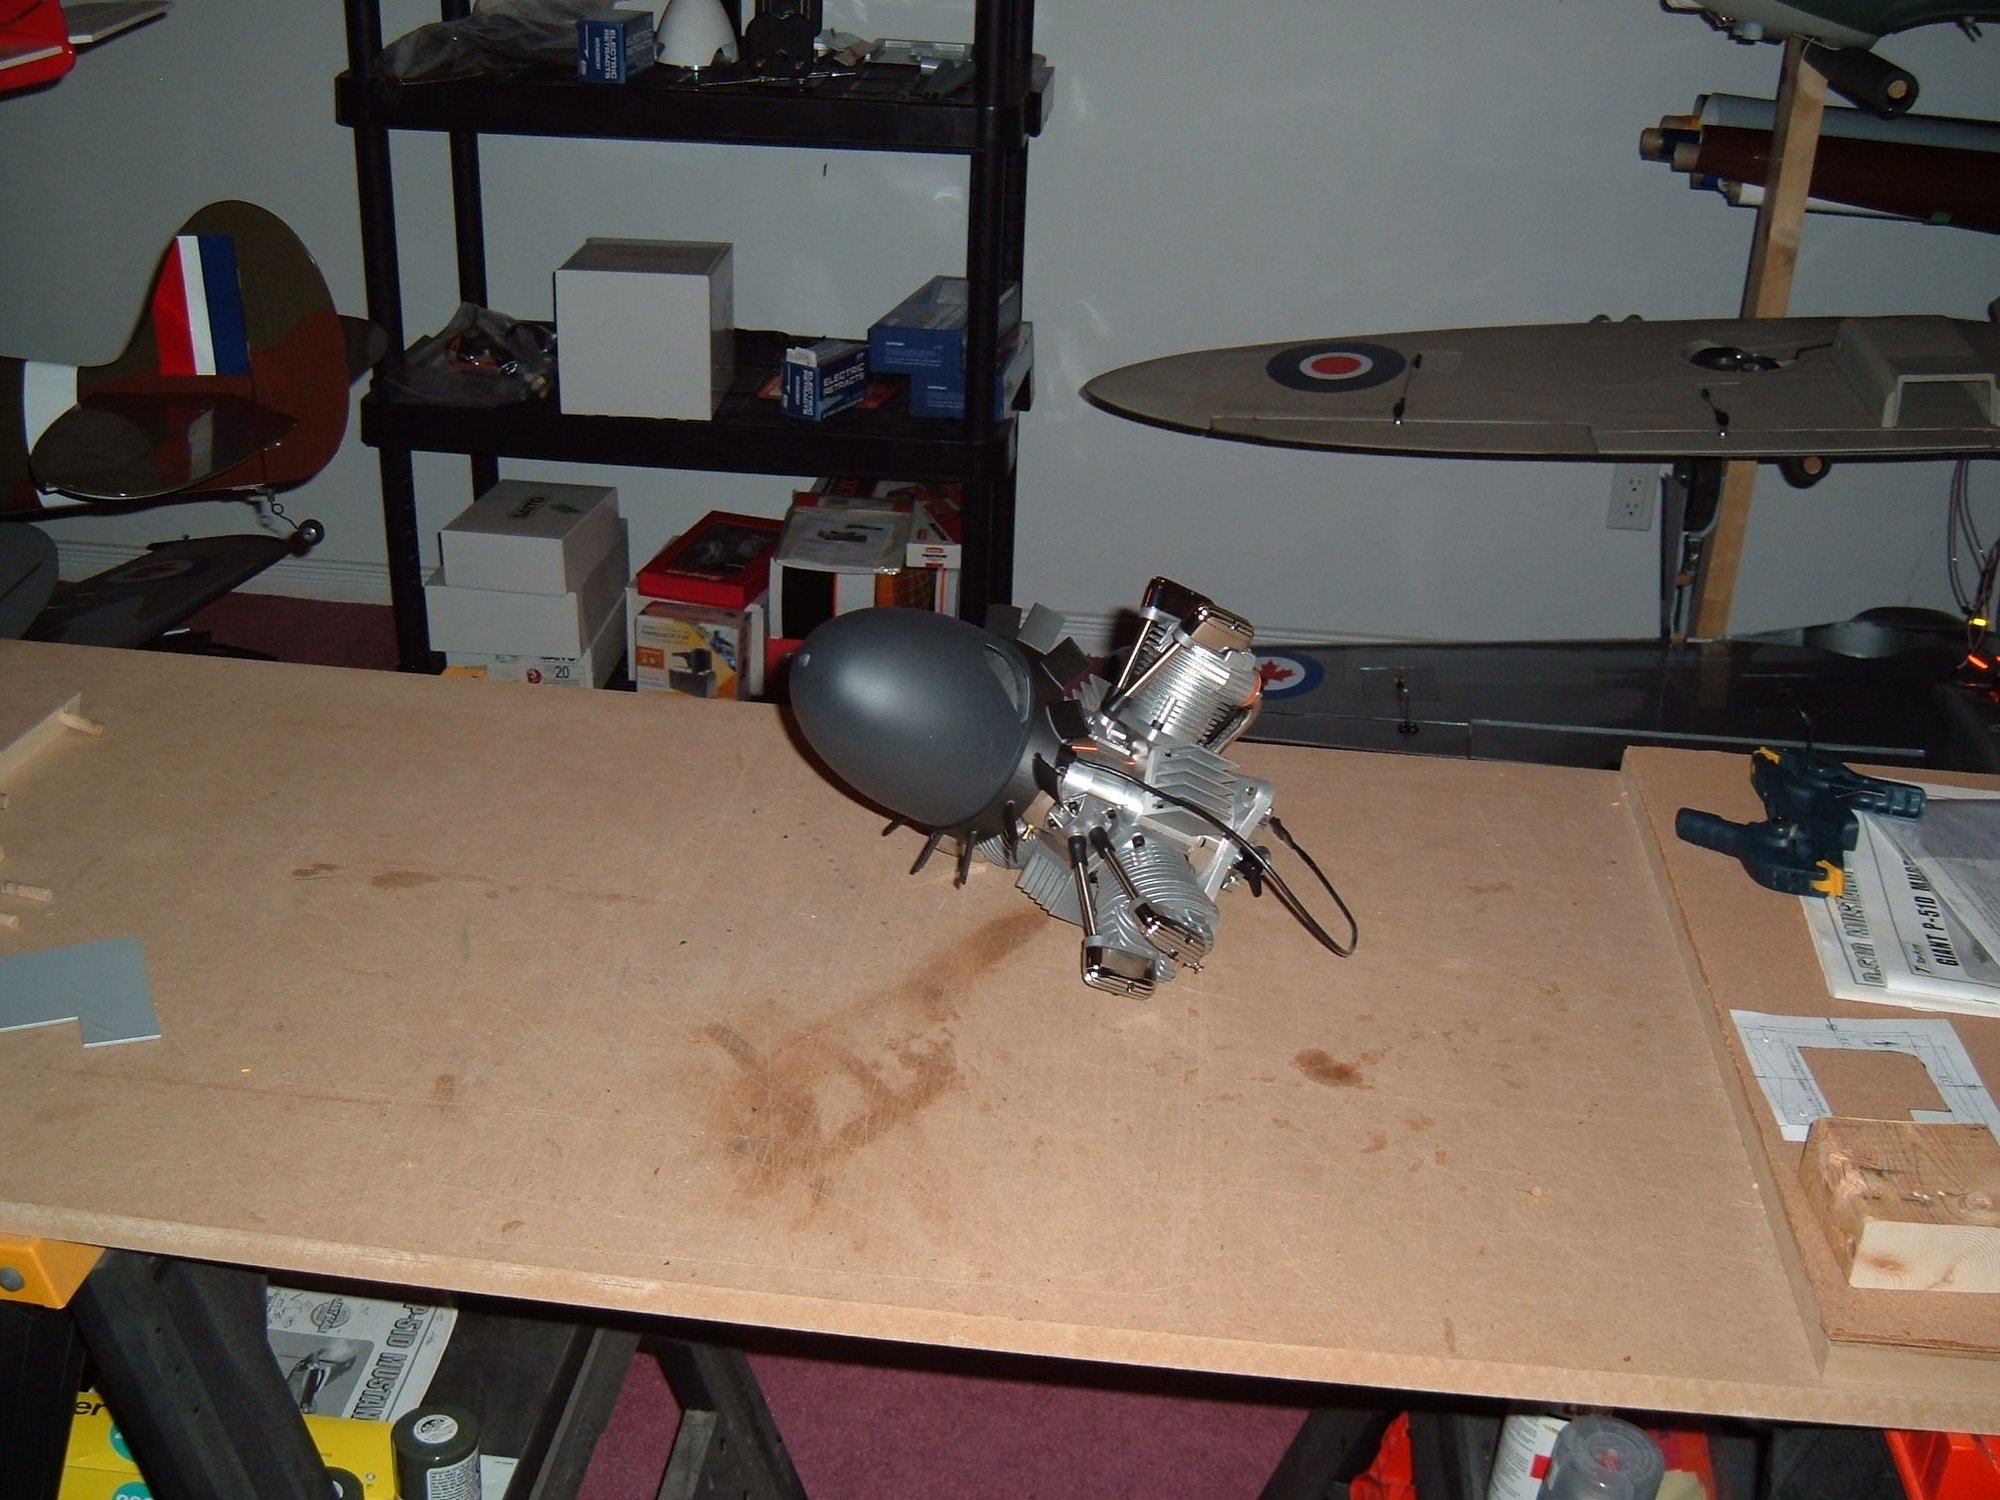
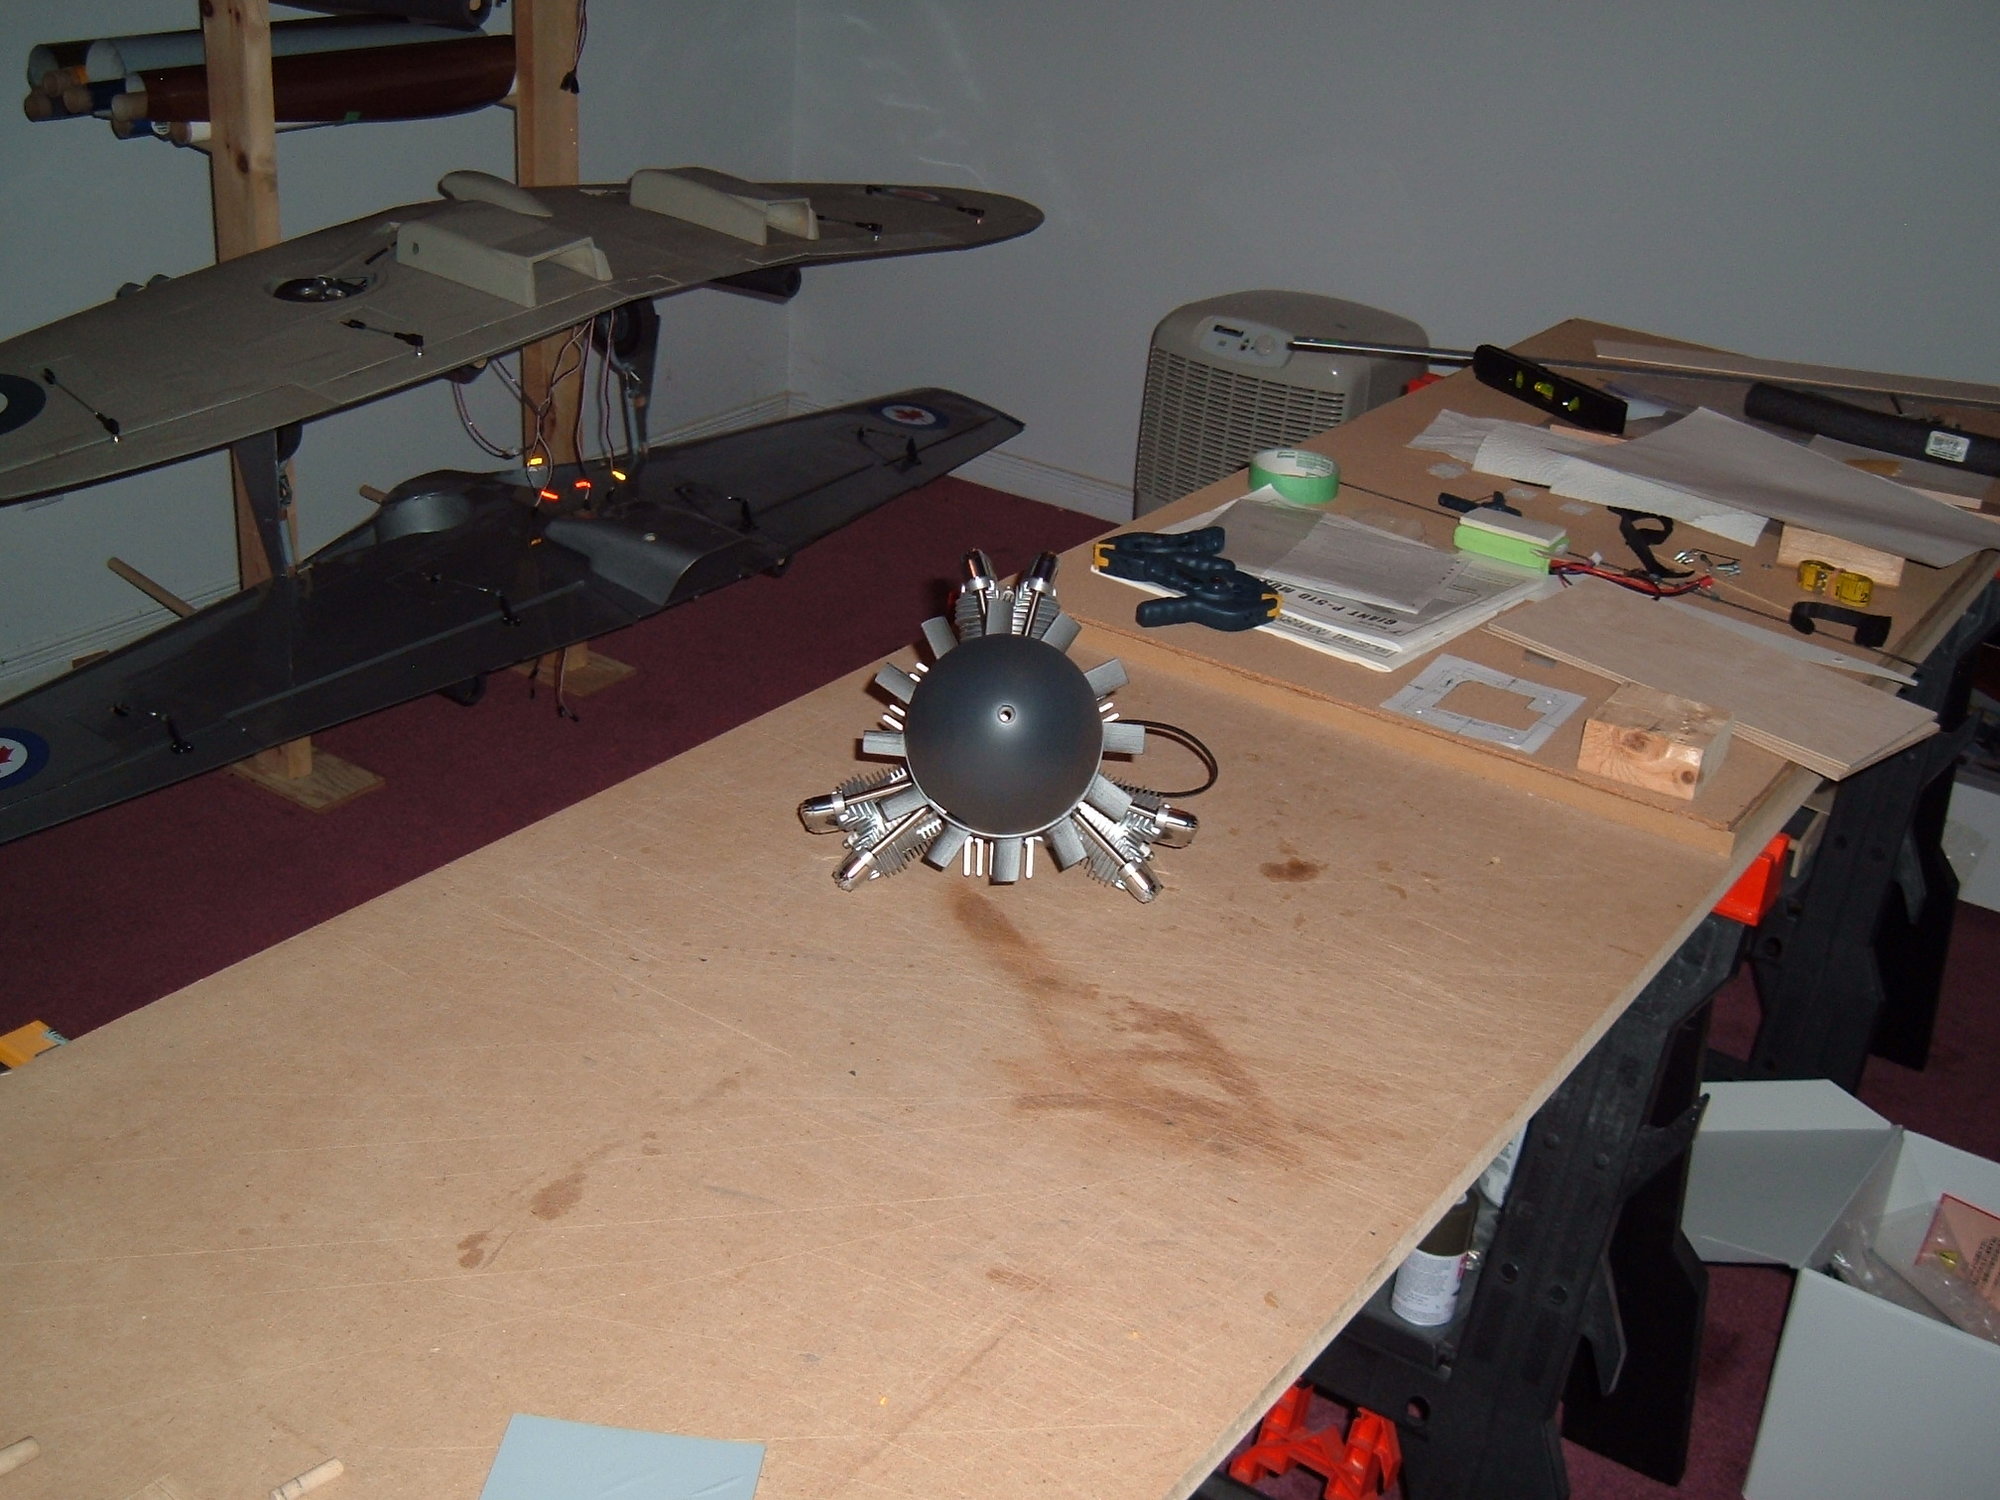
Thanks Guys, this is my dilemma. Can always use a little more power. Like Chris said, "Will the FG90 have authority"? Definitely has the easiest maintenance of all radials and cheapest on the market when compared to UMS and Moki. I will take my time an await Chris test with his friends plane. Hopefully someone is further along that is using a radial.
12-08-2018, 01:09 AM
#291
My Feedback: (3)
Join Date: Aug 2003
Location: near Innsbruck, AUSTRIA
Posts: 615
Likes: 0
Received 13 Likes
on
10 Posts
Hi guys,
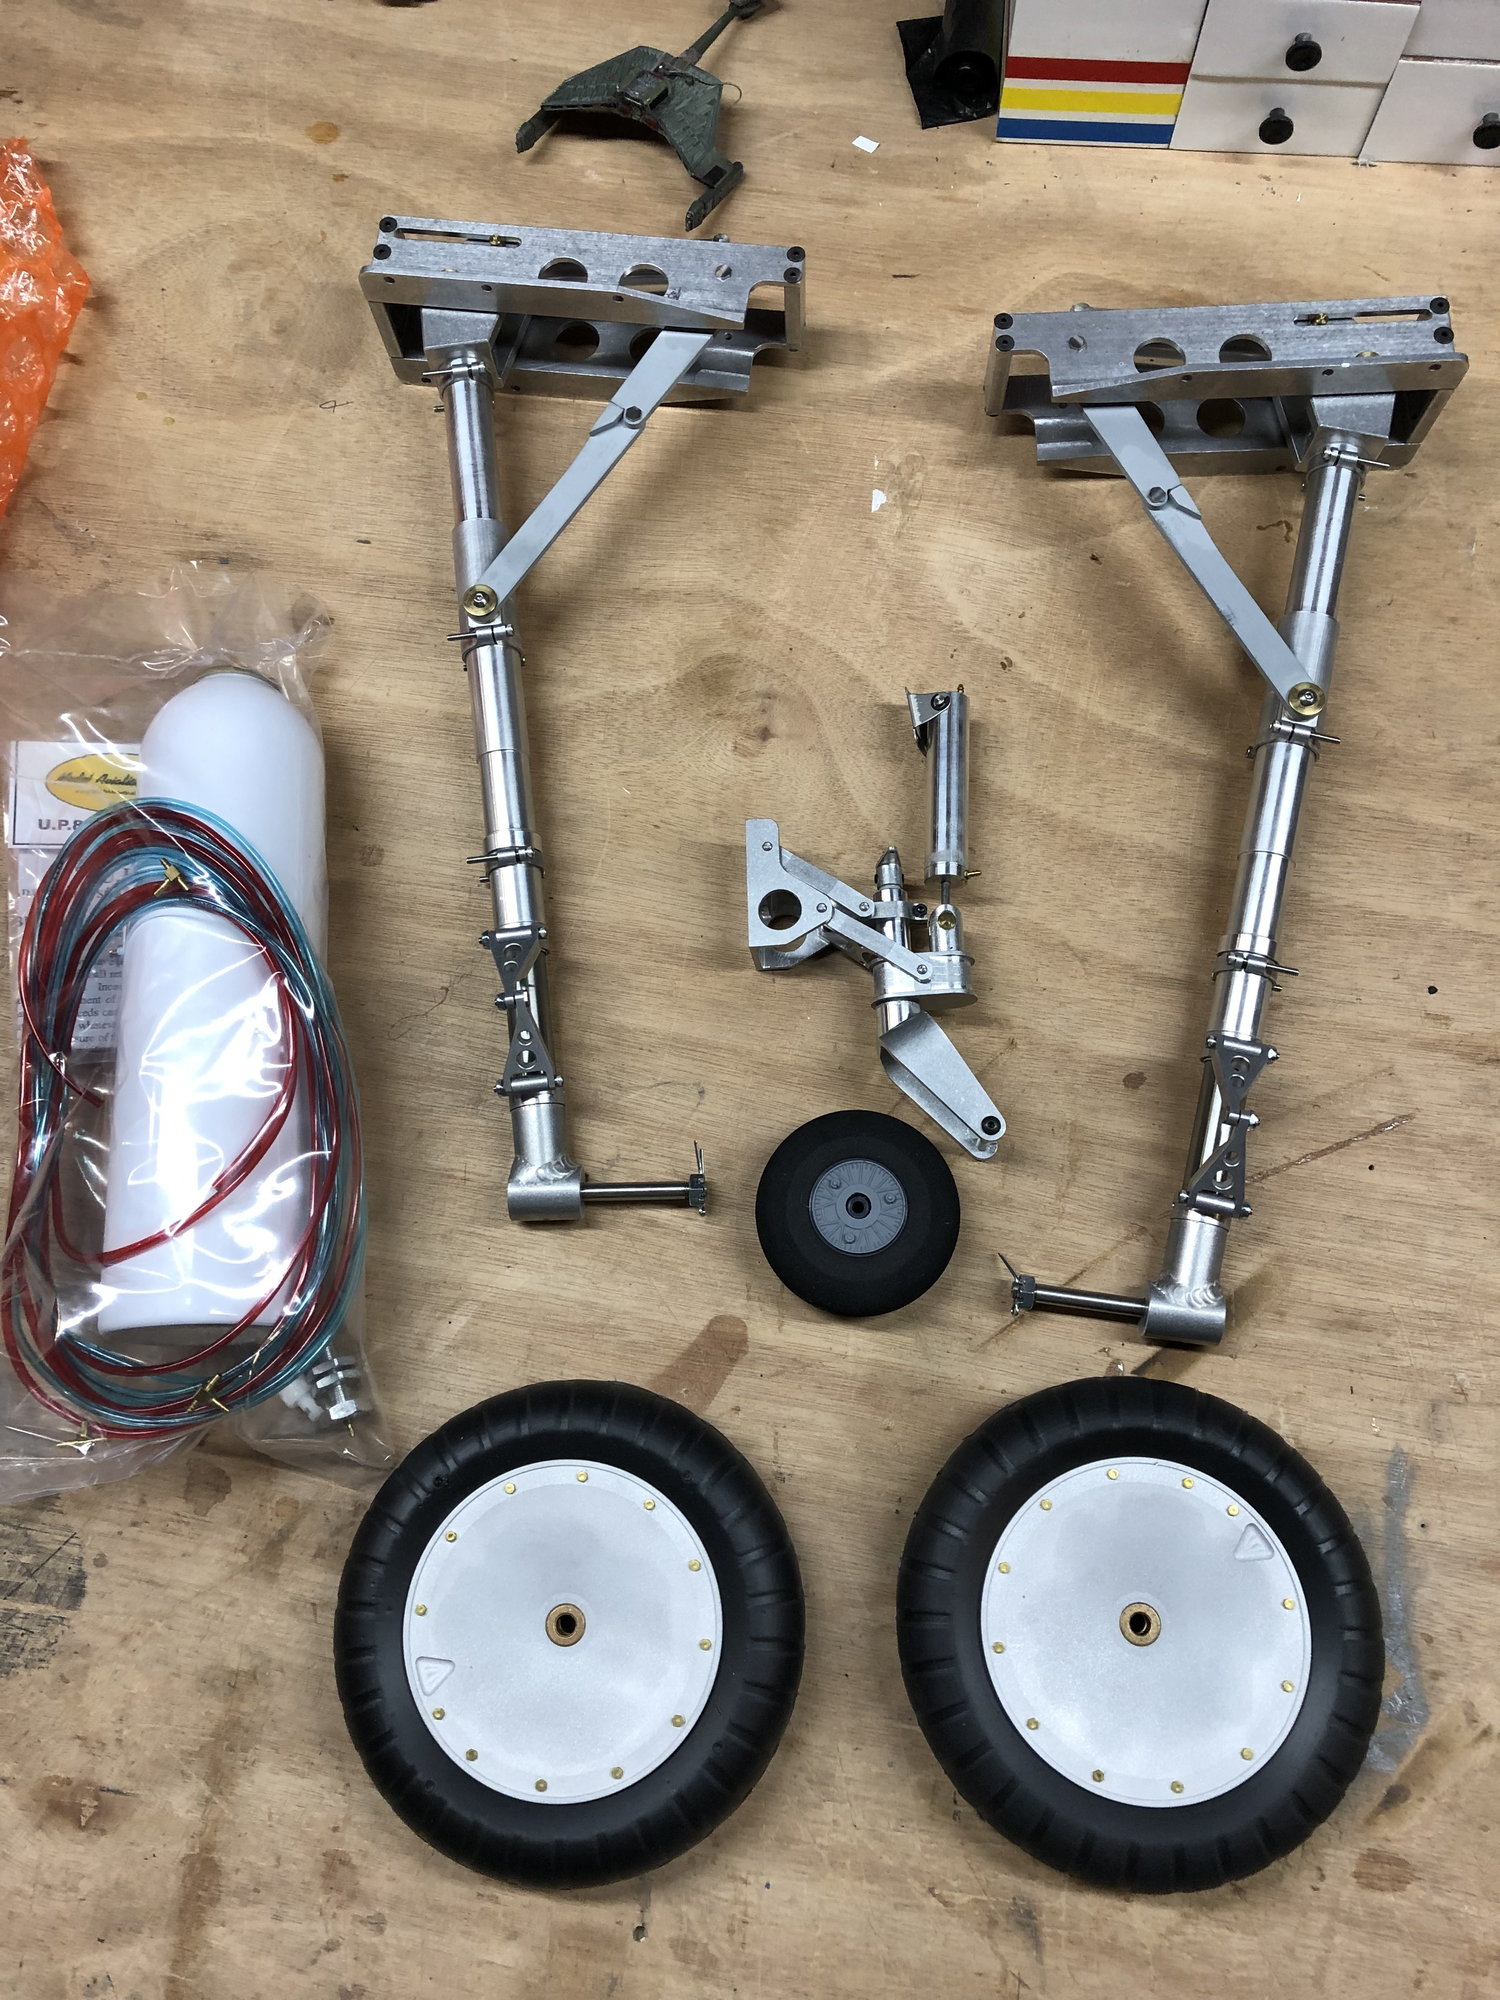
your fans should be arriving soon. I sent them straight off the buildplate so theres a bit of cleanup to do before bolting it to the backplate.
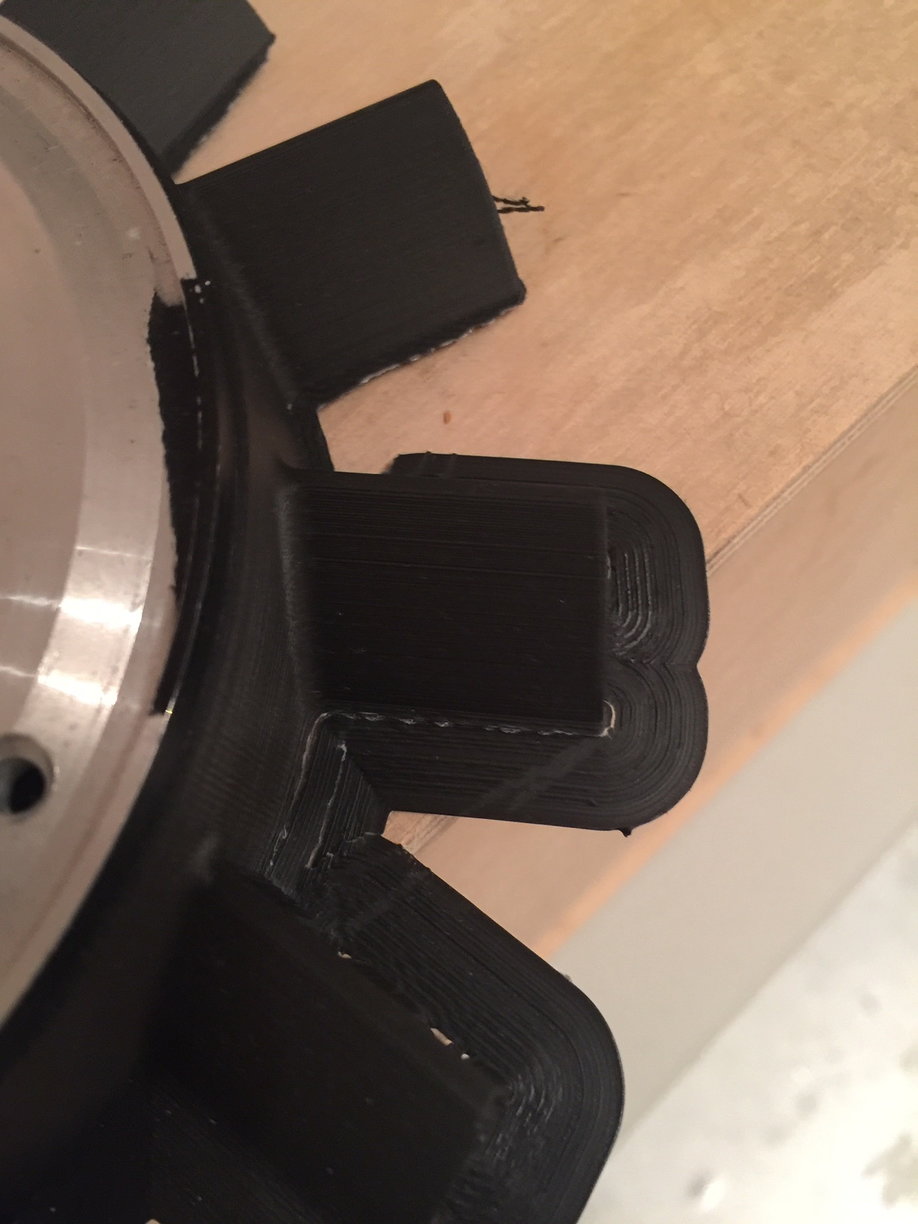
Remove the flash around the outer edges of the fan. Its only 0.4mm thick so its easy to remove. Carefully sand the edges with 300grit sandpaper after removing the flash

Please remove the support grid on the underside of the fan. You can do this by hand. DO NOT damage or remove the bridges! It should look like the picture above after you removed it.
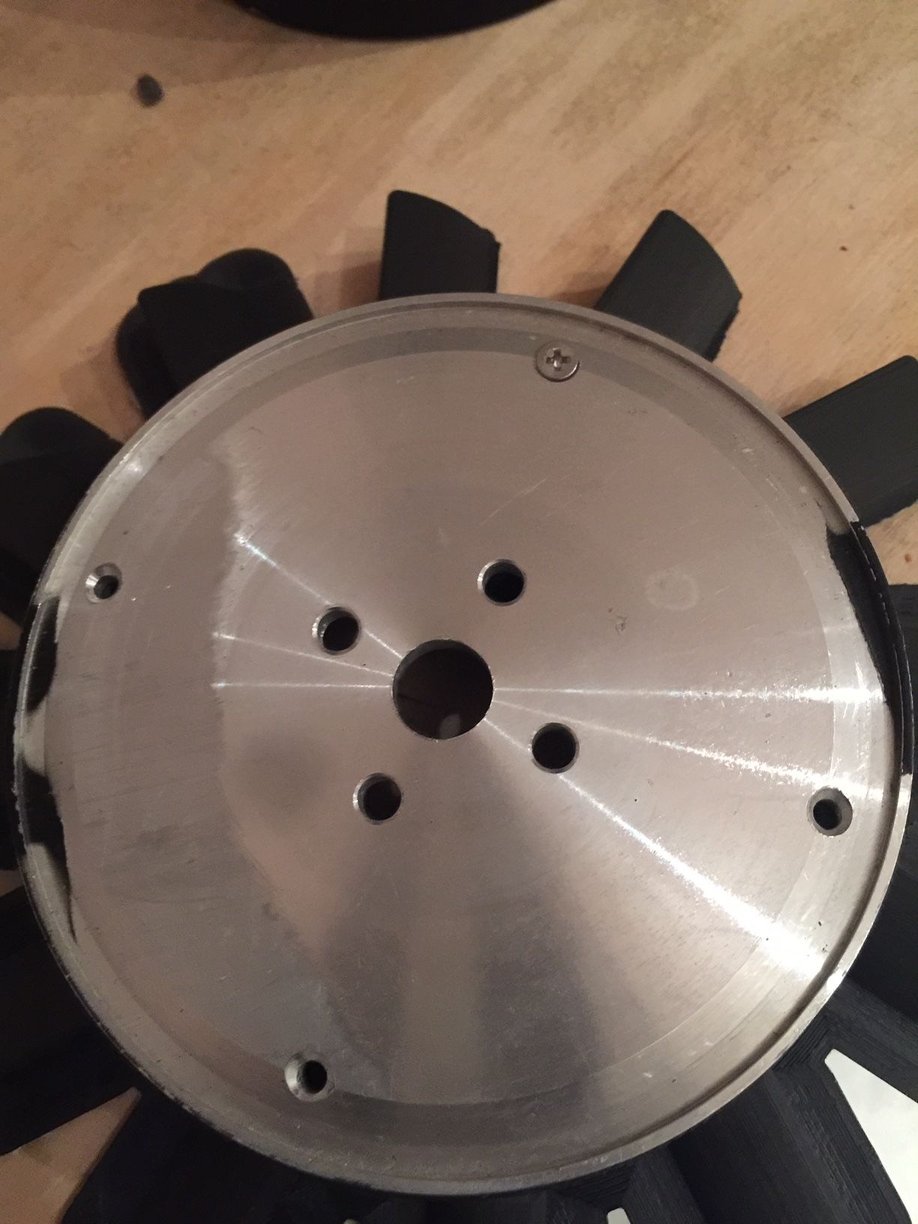
Press the spinner backplate into the fan (its a deliberate tight fit) and use the fan as a template to drill four holes

Using countersunk screws, fasten the fan to the backplate. Make sure you use washers and locknuts on the back!
If anyone is having any issues, drop me a PM!
Rev
your fans should be arriving soon. I sent them straight off the buildplate so theres a bit of cleanup to do before bolting it to the backplate.
Remove the flash around the outer edges of the fan. Its only 0.4mm thick so its easy to remove. Carefully sand the edges with 300grit sandpaper after removing the flash
Please remove the support grid on the underside of the fan. You can do this by hand. DO NOT damage or remove the bridges! It should look like the picture above after you removed it.
Press the spinner backplate into the fan (its a deliberate tight fit) and use the fan as a template to drill four holes
Using countersunk screws, fasten the fan to the backplate. Make sure you use washers and locknuts on the back!
If anyone is having any issues, drop me a PM!
Rev