


TopRCModel FW-190
 08-31-2021, 06:59 PM
#1251


Can anyone show some photos of the tail gear installation including the servo? My friend is building one now and has the TopRC e-retracts but the instructions aren’t very clear as to how the servo is installed. Any photos or direction would be great!
Also If anyone has confirmation that a 180cc radial will fit without modification that would be helpful too. We’re waiting for the new UMS 150cc but in case that falls through we’d like to pivot to the UMS 180cc or Moki 180.
Also If anyone has confirmation that a 180cc radial will fit without modification that would be helpful too. We’re waiting for the new UMS 150cc but in case that falls through we’d like to pivot to the UMS 180cc or Moki 180.
 08-31-2021, 07:38 PM
#1253
Hi Chris
it takes quite a lot of modification on the placement of the servo (which is quite straightforward) and adding a light spring to support the servo on the folding mechanism. The most complicated though, is re-routing the cables to make sure that the cables are slack when the wheel is retracted. It is all possible though - mine works perfectly. Let me know if you want some pictures.
Stephen
The following users liked this post:
Chris Nicastro (09-01-2021)
09-01-2021, 12:54 PM
#1254
Hi Chris
it takes quite a lot of modification on the placement of the servo (which is quite straightforward) and adding a light spring to support the servo on the folding mechanism. The most complicated though, is re-routing the cables to make sure that the cables are slack when the wheel is retracted. It is all possible though - mine works perfectly. Let me know if you want some pictures.
Stephen
it takes quite a lot of modification on the placement of the servo (which is quite straightforward) and adding a light spring to support the servo on the folding mechanism. The most complicated though, is re-routing the cables to make sure that the cables are slack when the wheel is retracted. It is all possible though - mine works perfectly. Let me know if you want some pictures.
Stephen
09-01-2021, 03:12 PM
#1255

Join Date: Aug 2012
Location: San Antonio, TX
Posts: 62
Likes: 0
Received 0 Likes
on
0 Posts
I have a slightly used FW190 air retract system with all 3 scale wheels that are for the Top Flite Giant Scale FW190. Plane somewhat dead, retracts unscathed. PM me if interested.
09-02-2021, 05:47 PM
#1258
09-02-2021, 05:47 PM
#1259
09-05-2021, 08:23 PM
#1260
Hi Chris
sorry for the delay - have been quite busy. To start with, I mounted the rudder so that I could always remove it afterwards. This is to be able to access the tail-wheel retract servo.
Here are some pictures of the method I used to be able to remove the rudder.
Screw through hinge shaft, to hold rudder in place
Screw through hinge shaft, to hold rudder in place
Hinge glued into rudder, but not vertical stabilizer
One screw for each hinge
09-05-2021, 08:29 PM
#1261
Hi Chris
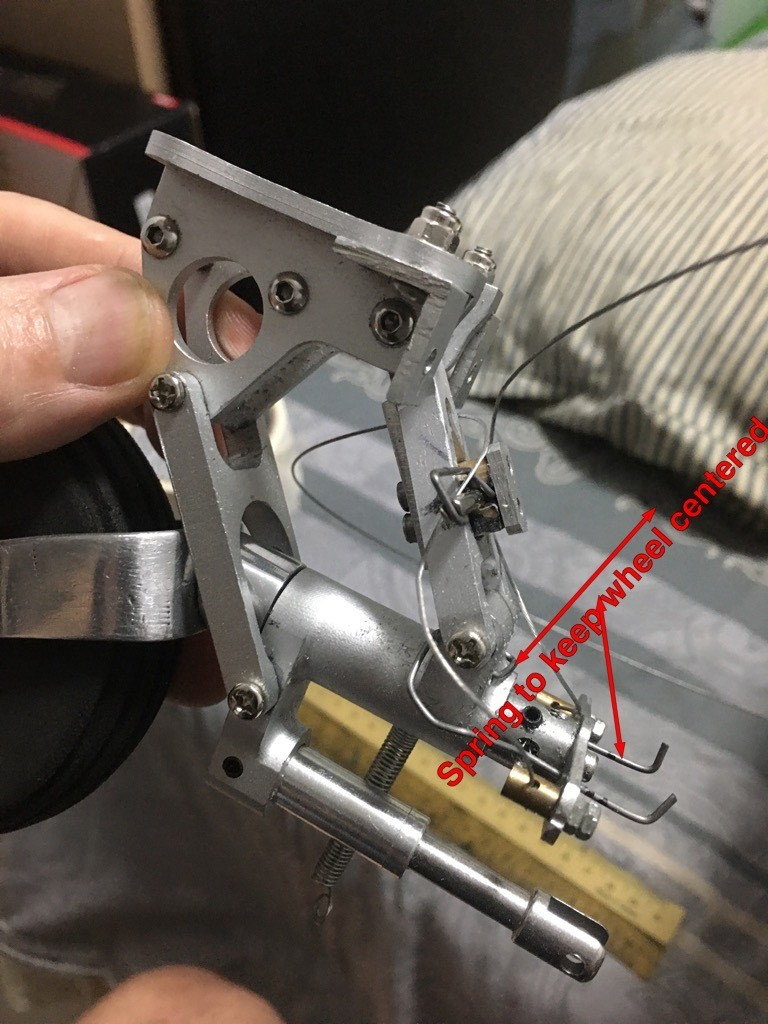
here is a picture of the position of the retract servo. I used a HiTec 180 degree servo. Downside it that it is not a high voltage servo, so I need to supply it with 5 volts. The rest of my plane operated on 7.2 volts.
Stephen
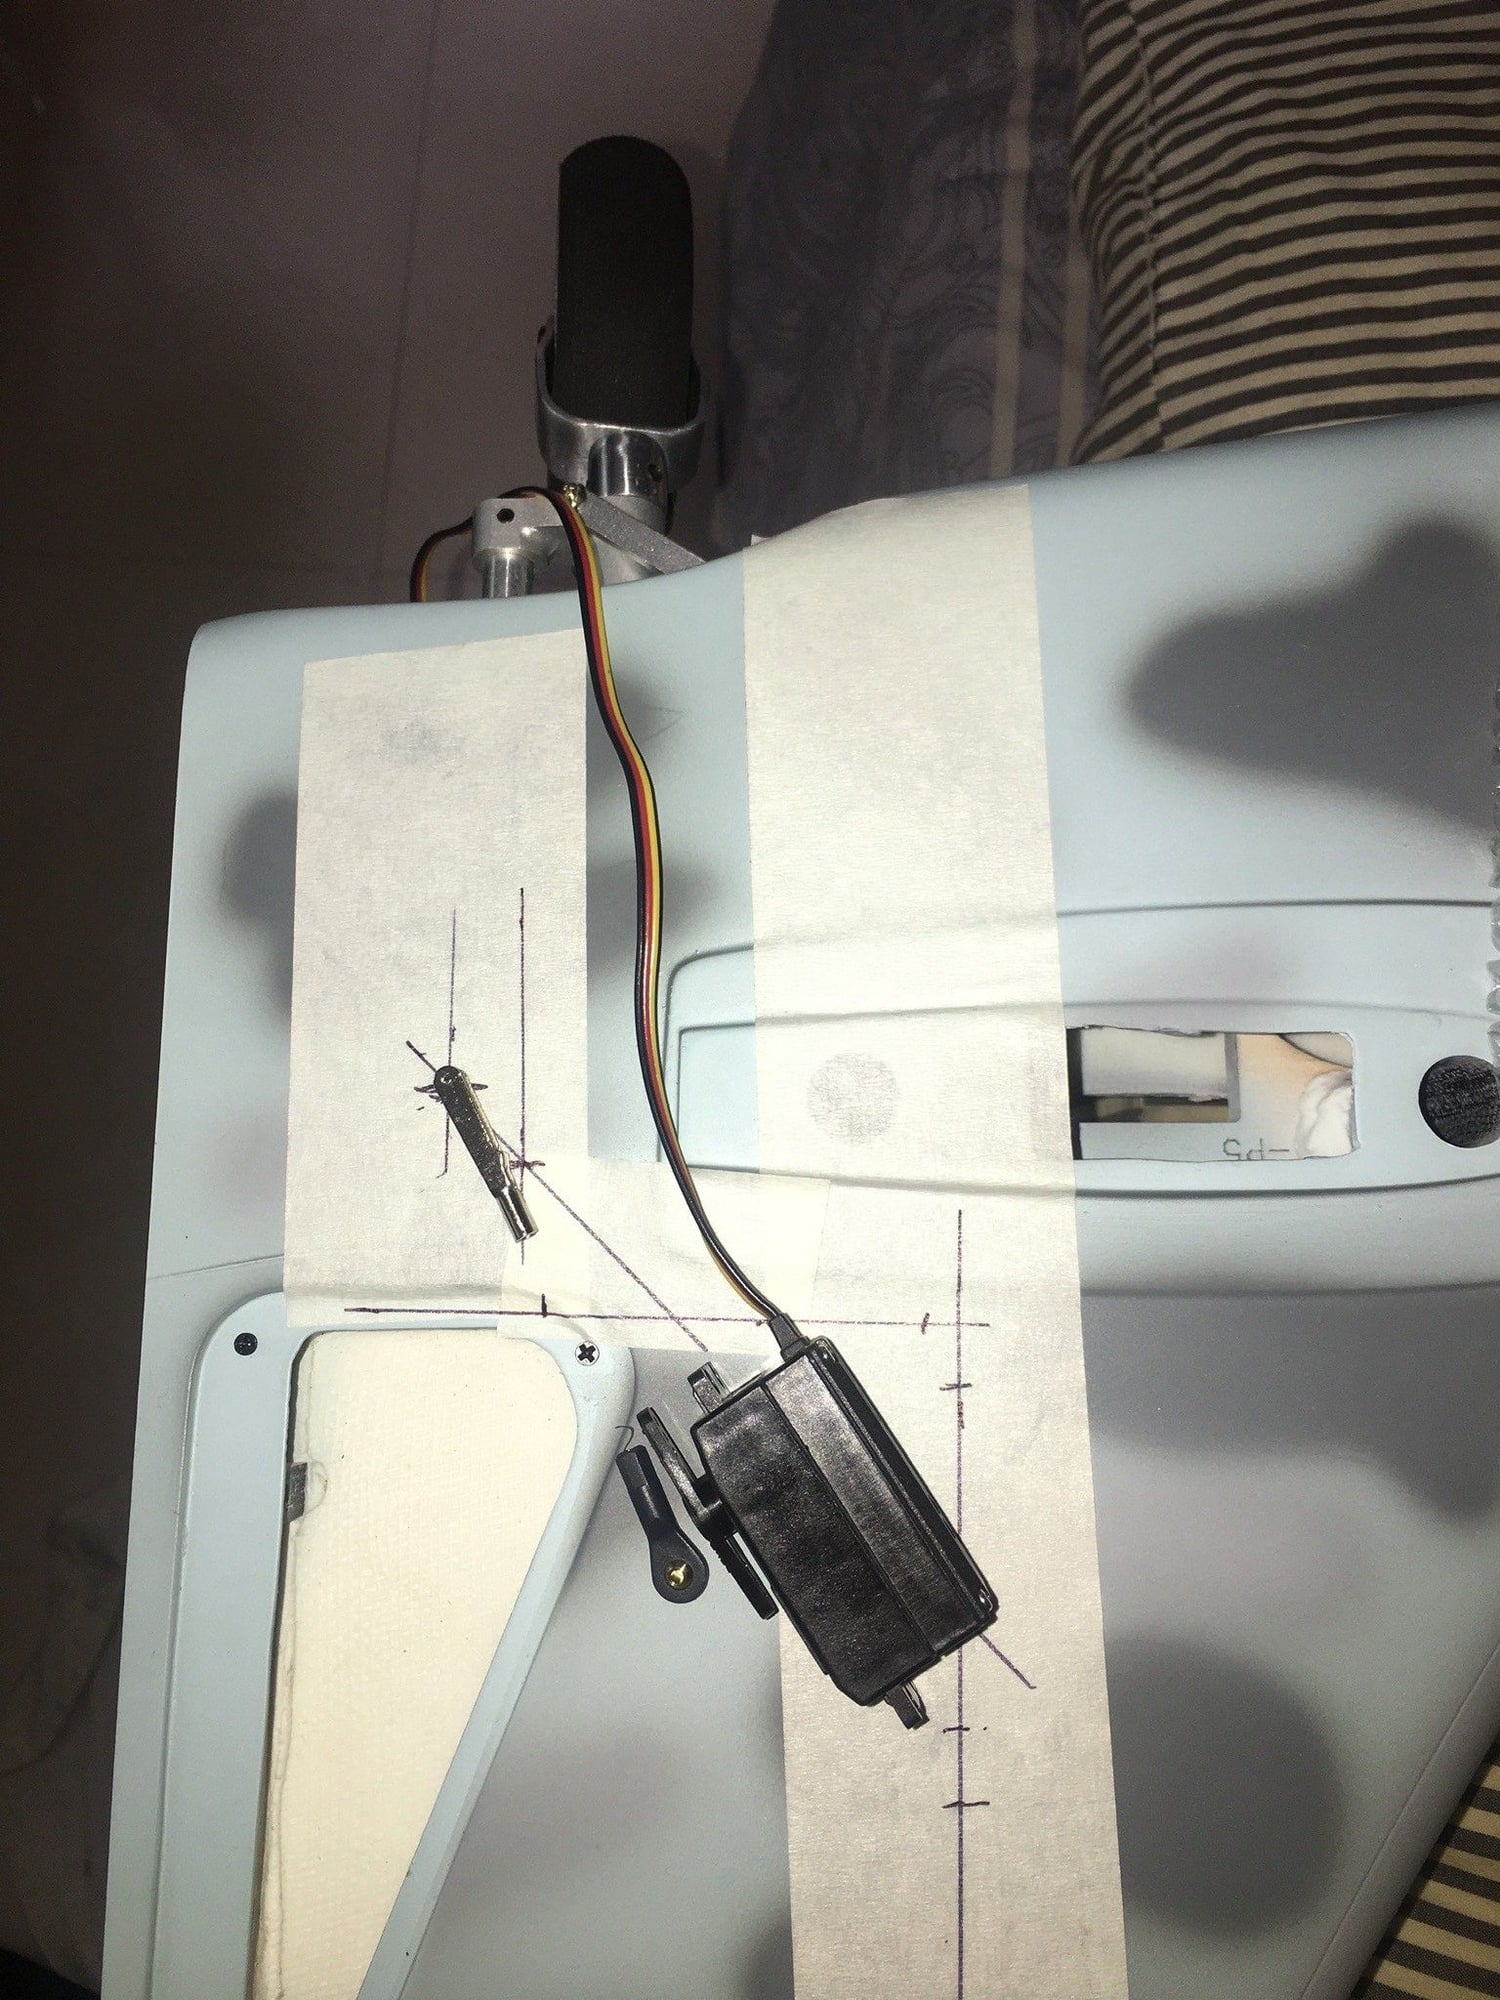
This is the actual position of the servo within the tail.

I built a new yoke and installed a larger more scale tailwheel.
Here you can see the retract "assist" spring - does not work without it.
here is a picture of the position of the retract servo. I used a HiTec 180 degree servo. Downside it that it is not a high voltage servo, so I need to supply it with 5 volts. The rest of my plane operated on 7.2 volts.
Stephen
This is the actual position of the servo within the tail.
I built a new yoke and installed a larger more scale tailwheel.
Here you can see the retract "assist" spring - does not work without it.
Last edited by Stephen Crisp; 09-05-2021 at 11:22 PM.
The following users liked this post:
Chris Nicastro (09-06-2021)
The following users liked this post:
Chris Nicastro (09-06-2021)
09-06-2021, 12:34 AM
#1263
Hi Chris
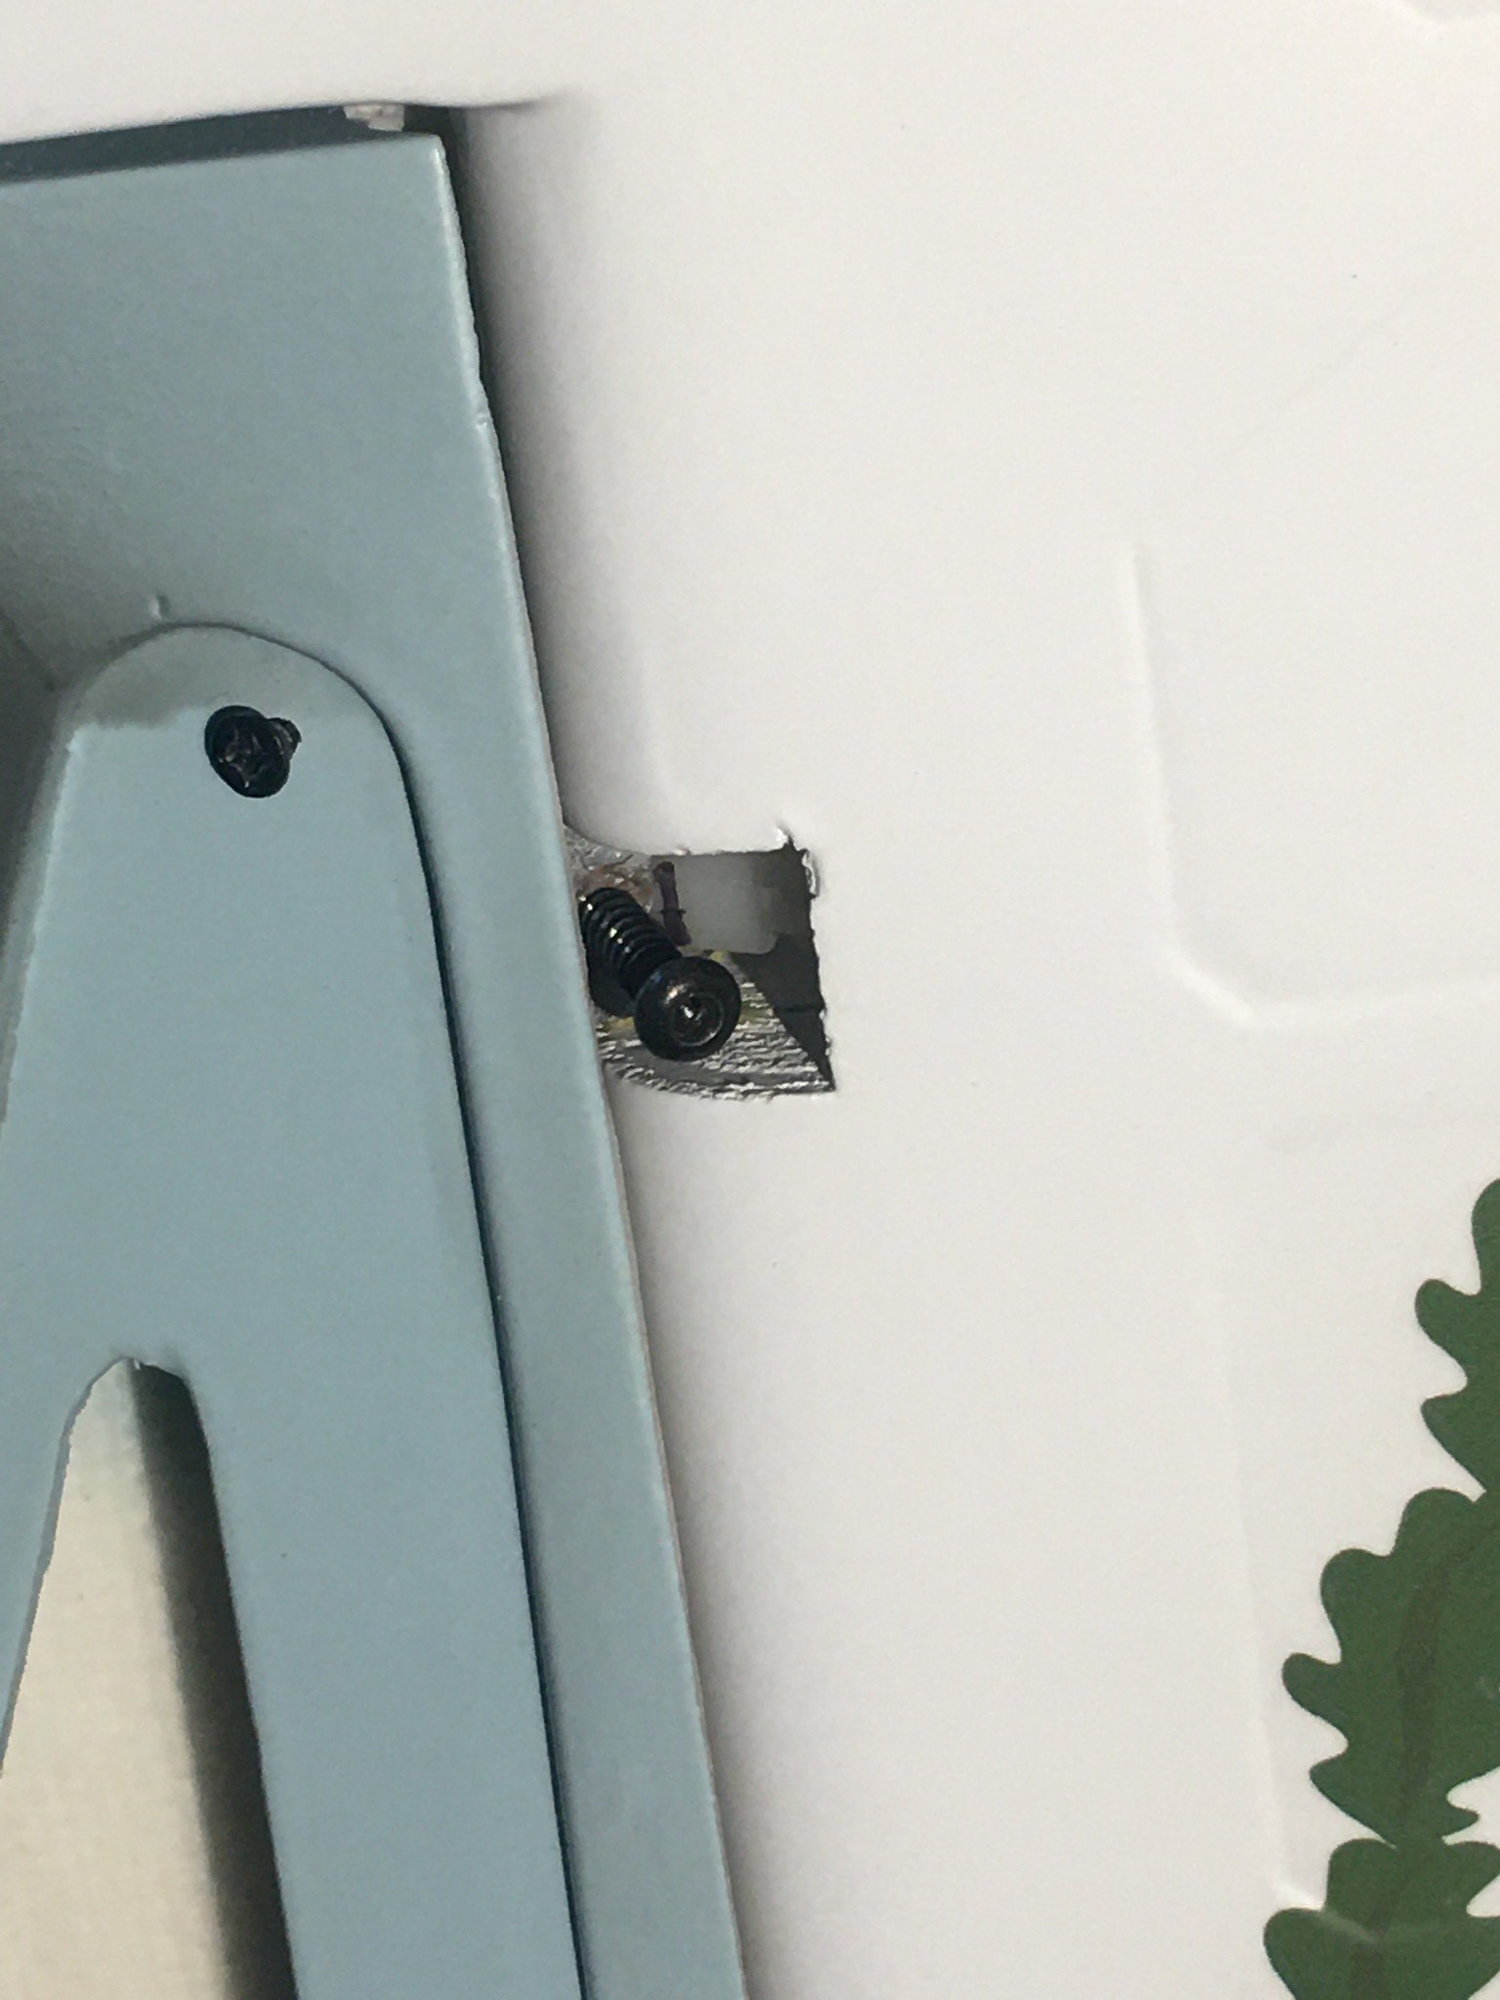
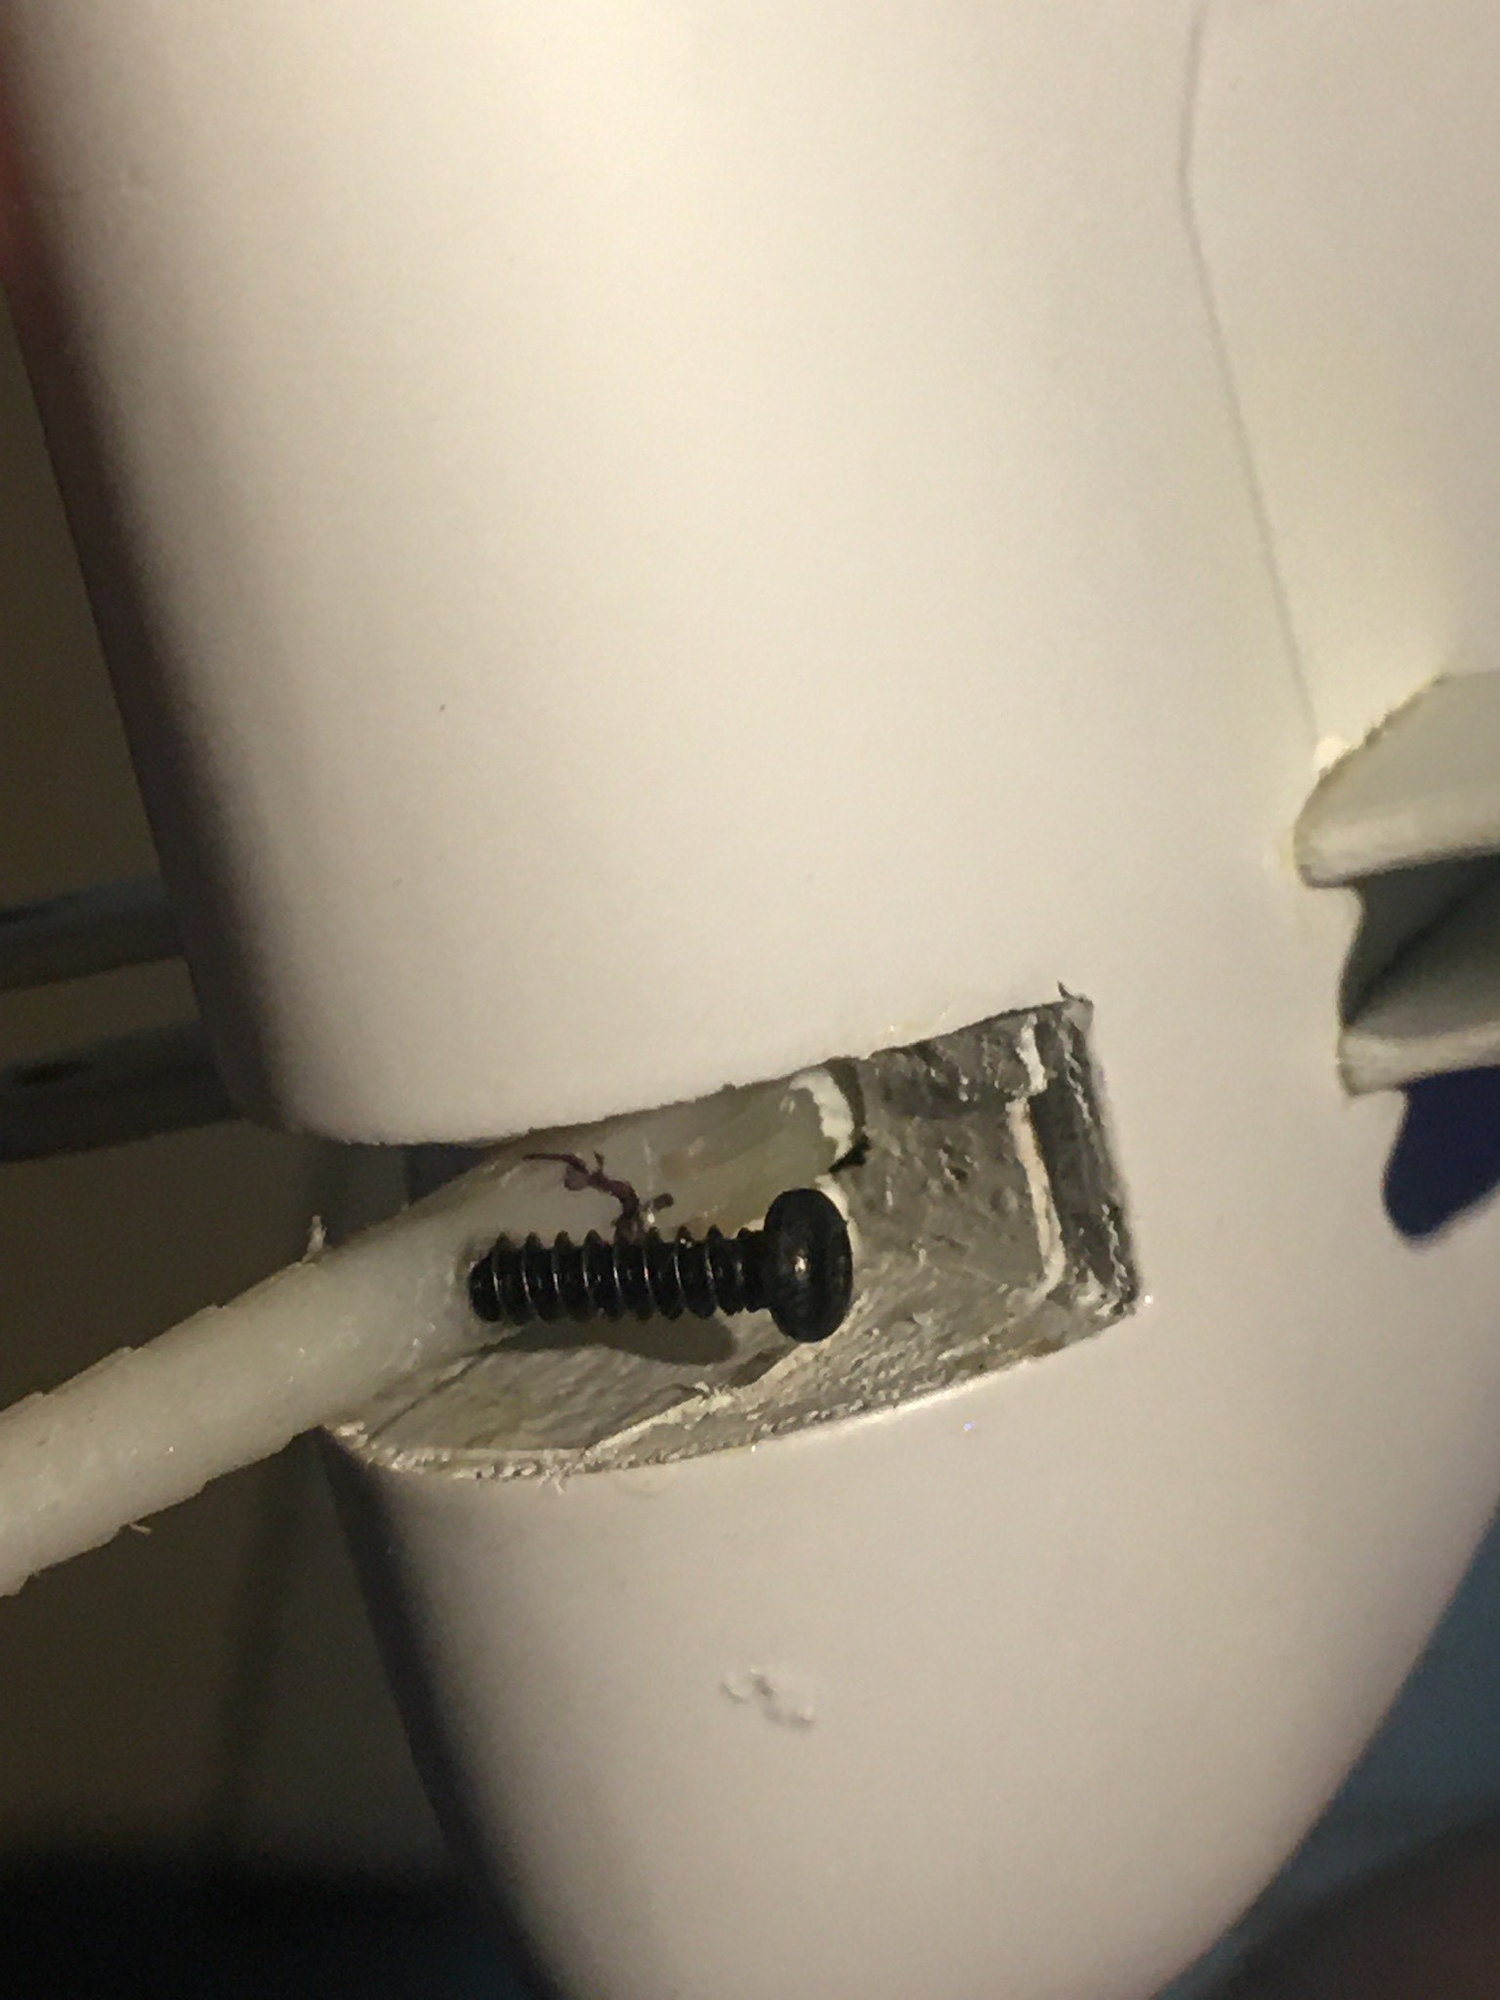
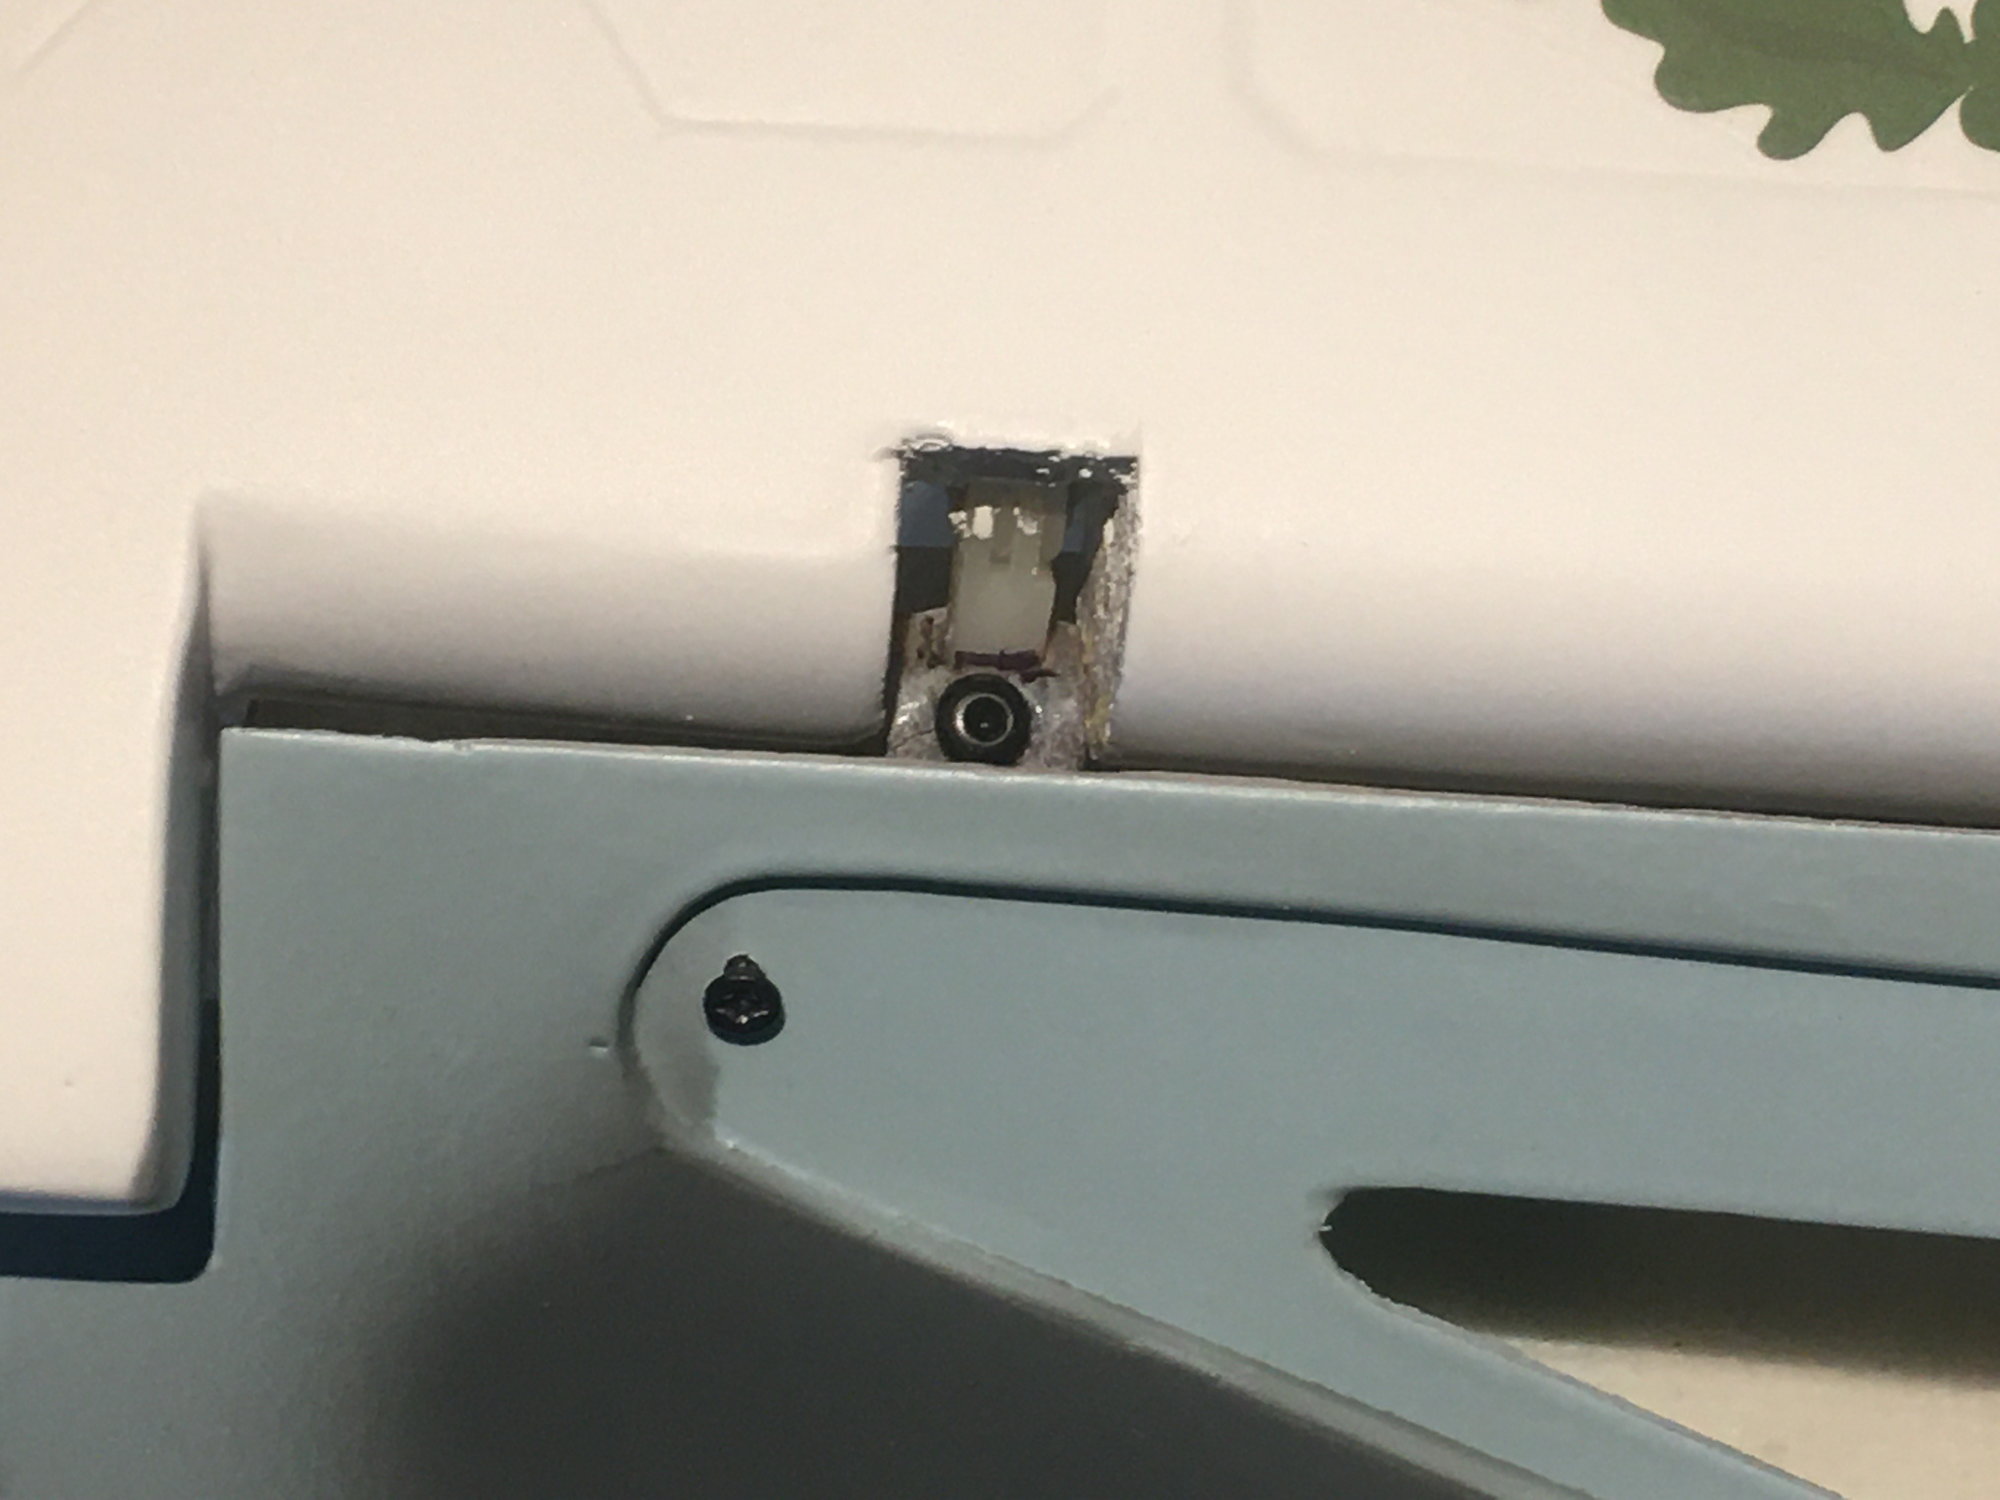
here some pics of the cable. I had to re-route the cable, so that in the down position the cable is tight (longest cable route). In the retracted (up position) the cable becomes slack (shortest cable route), to allow the rudder to operate. To achieve this, I had to build (1.) a shaft on the retracts (see pic) and (2.) and I had to change the route of the cable to a position higher than the original position. Cable enters the fuselage above the rudder cables (see Pic - retract up rear view).
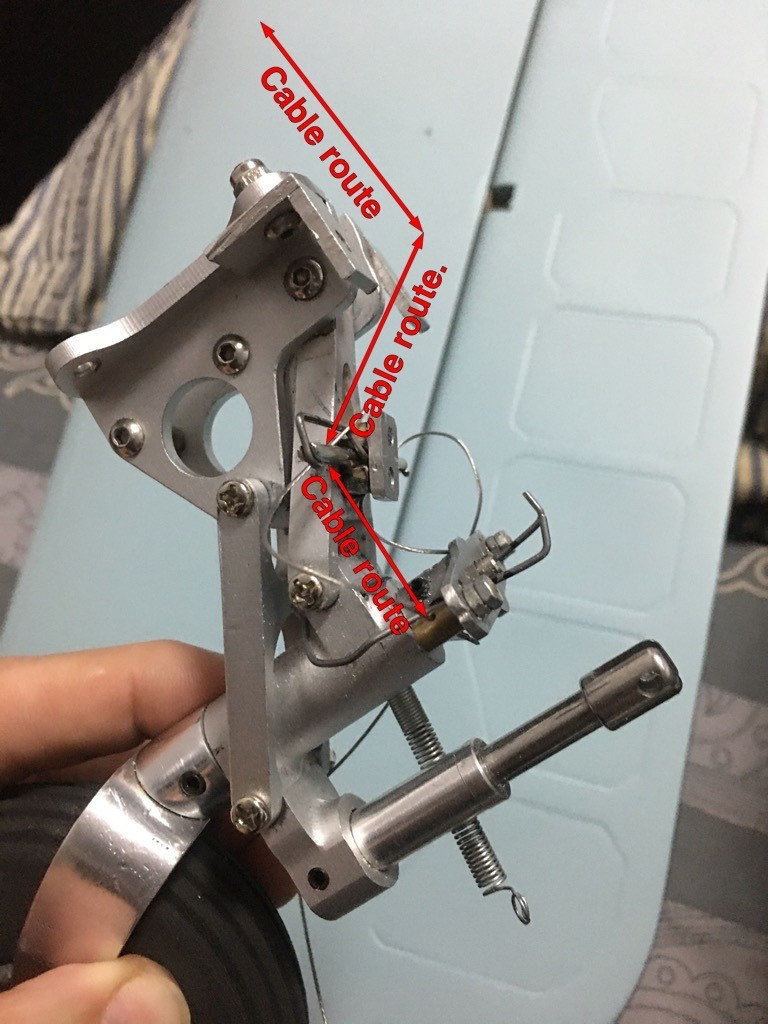
Retracts down. The red lines show where the cable runs (long route). Please note the position of the retract assist spring, which gets attached to the wood in the tail.
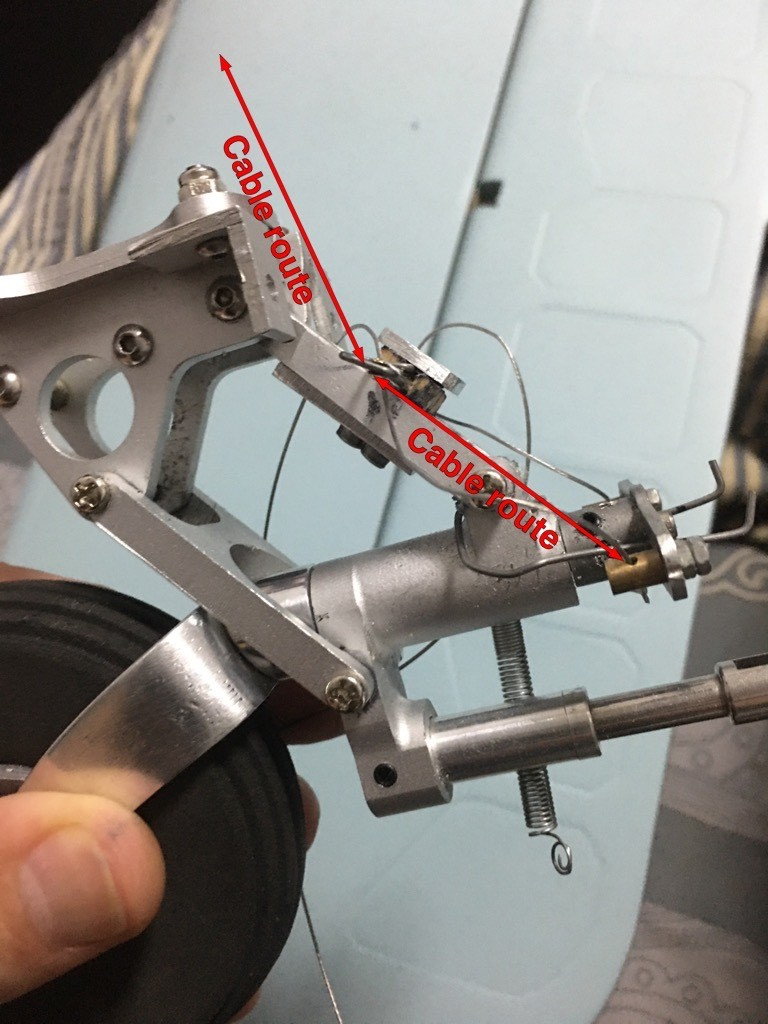
Retracts up. Much more direct route (short route) for the cable, allowing it to be slack in the up position.
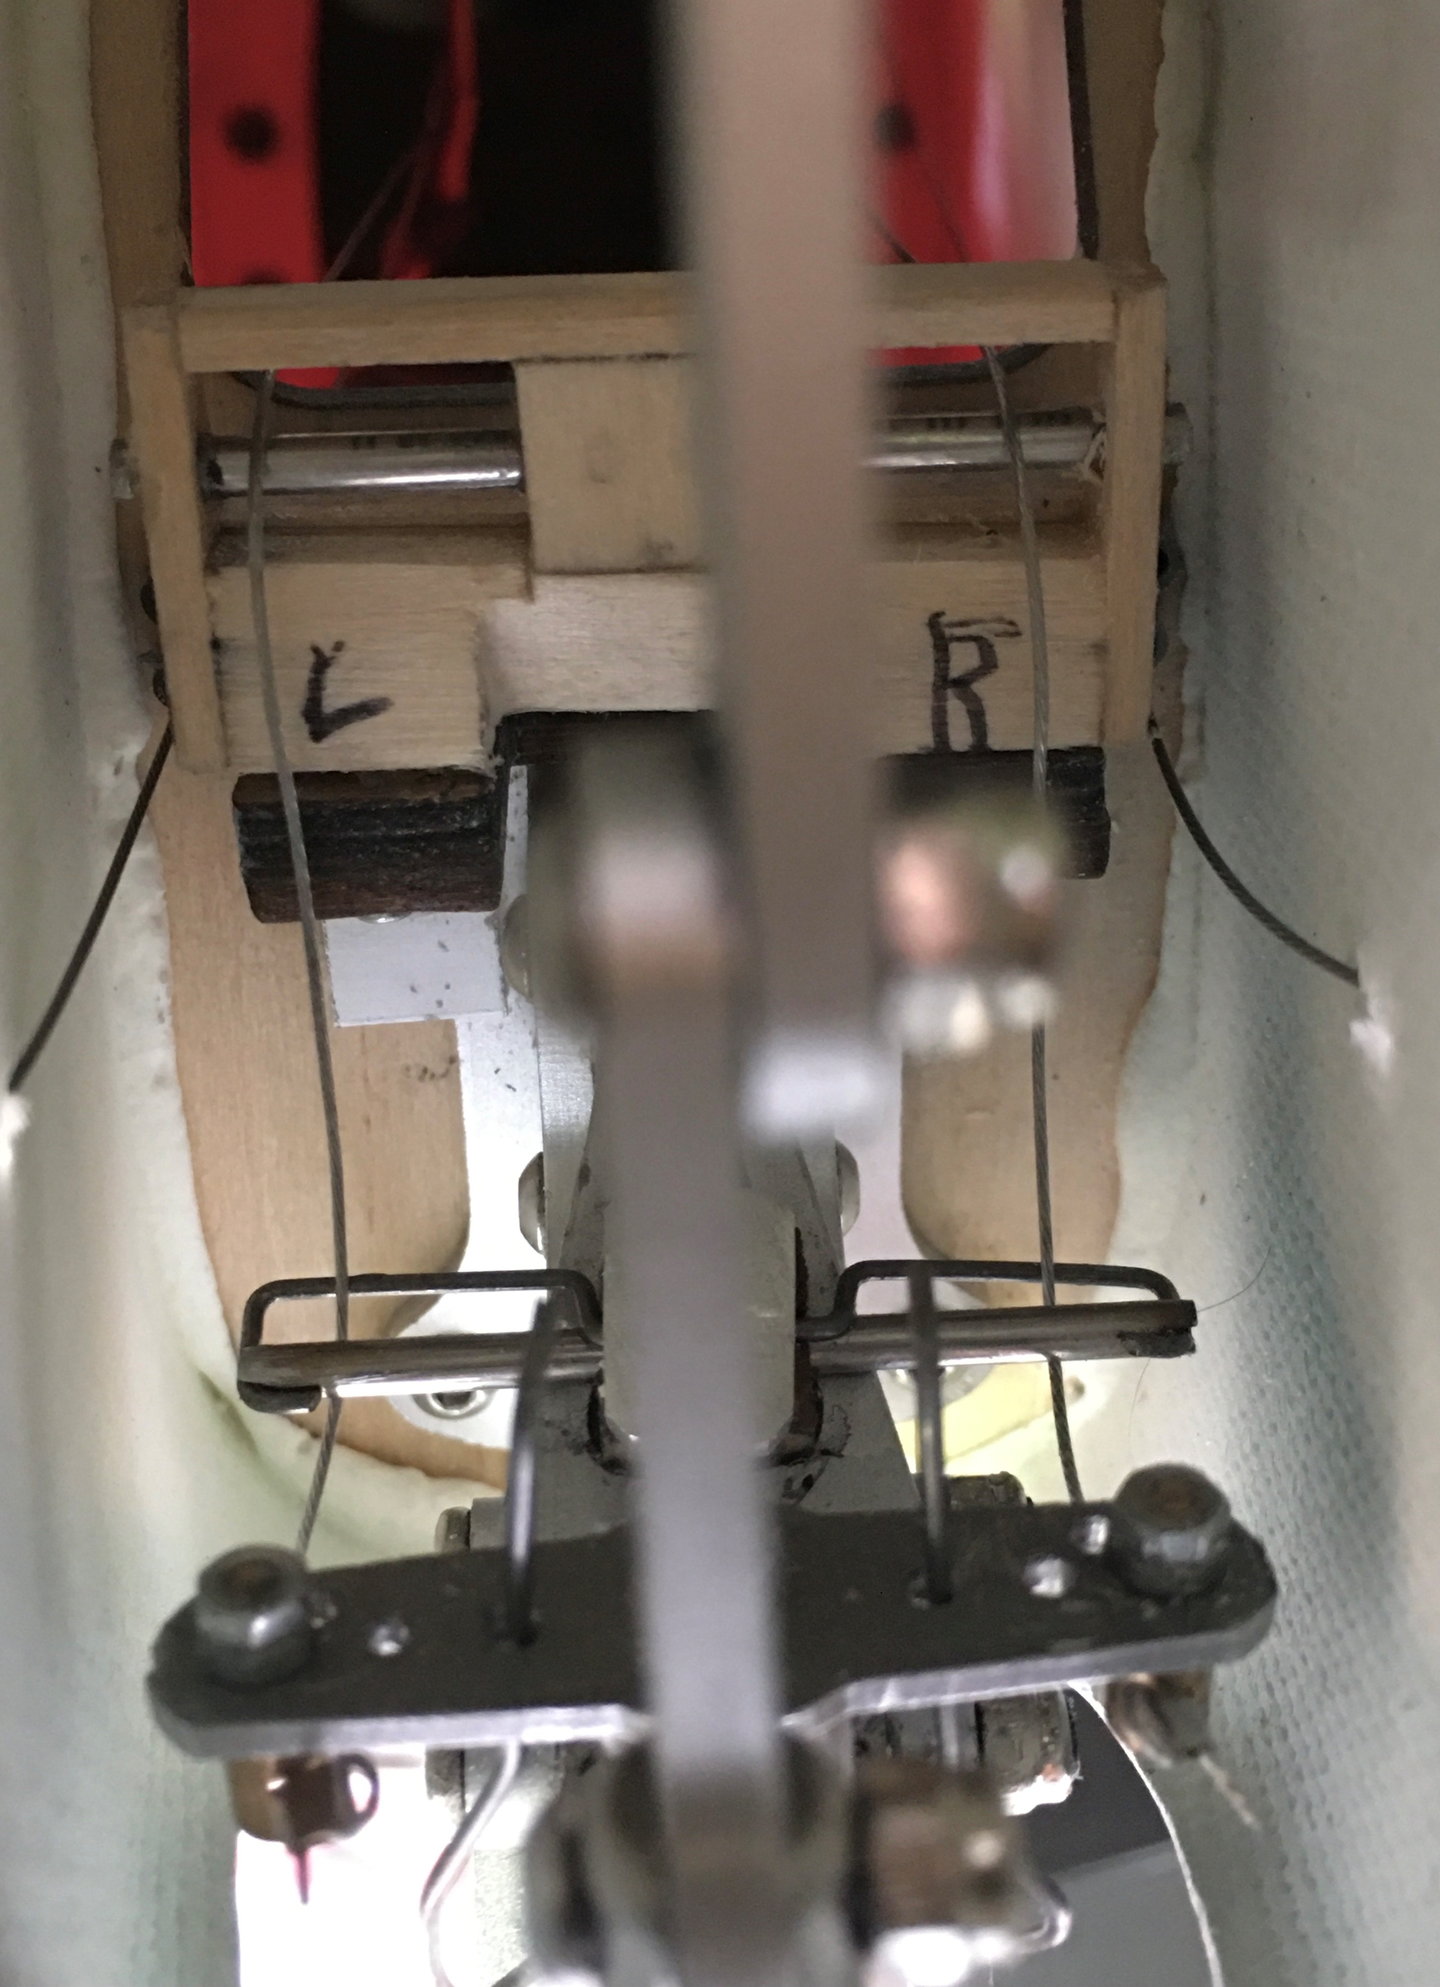
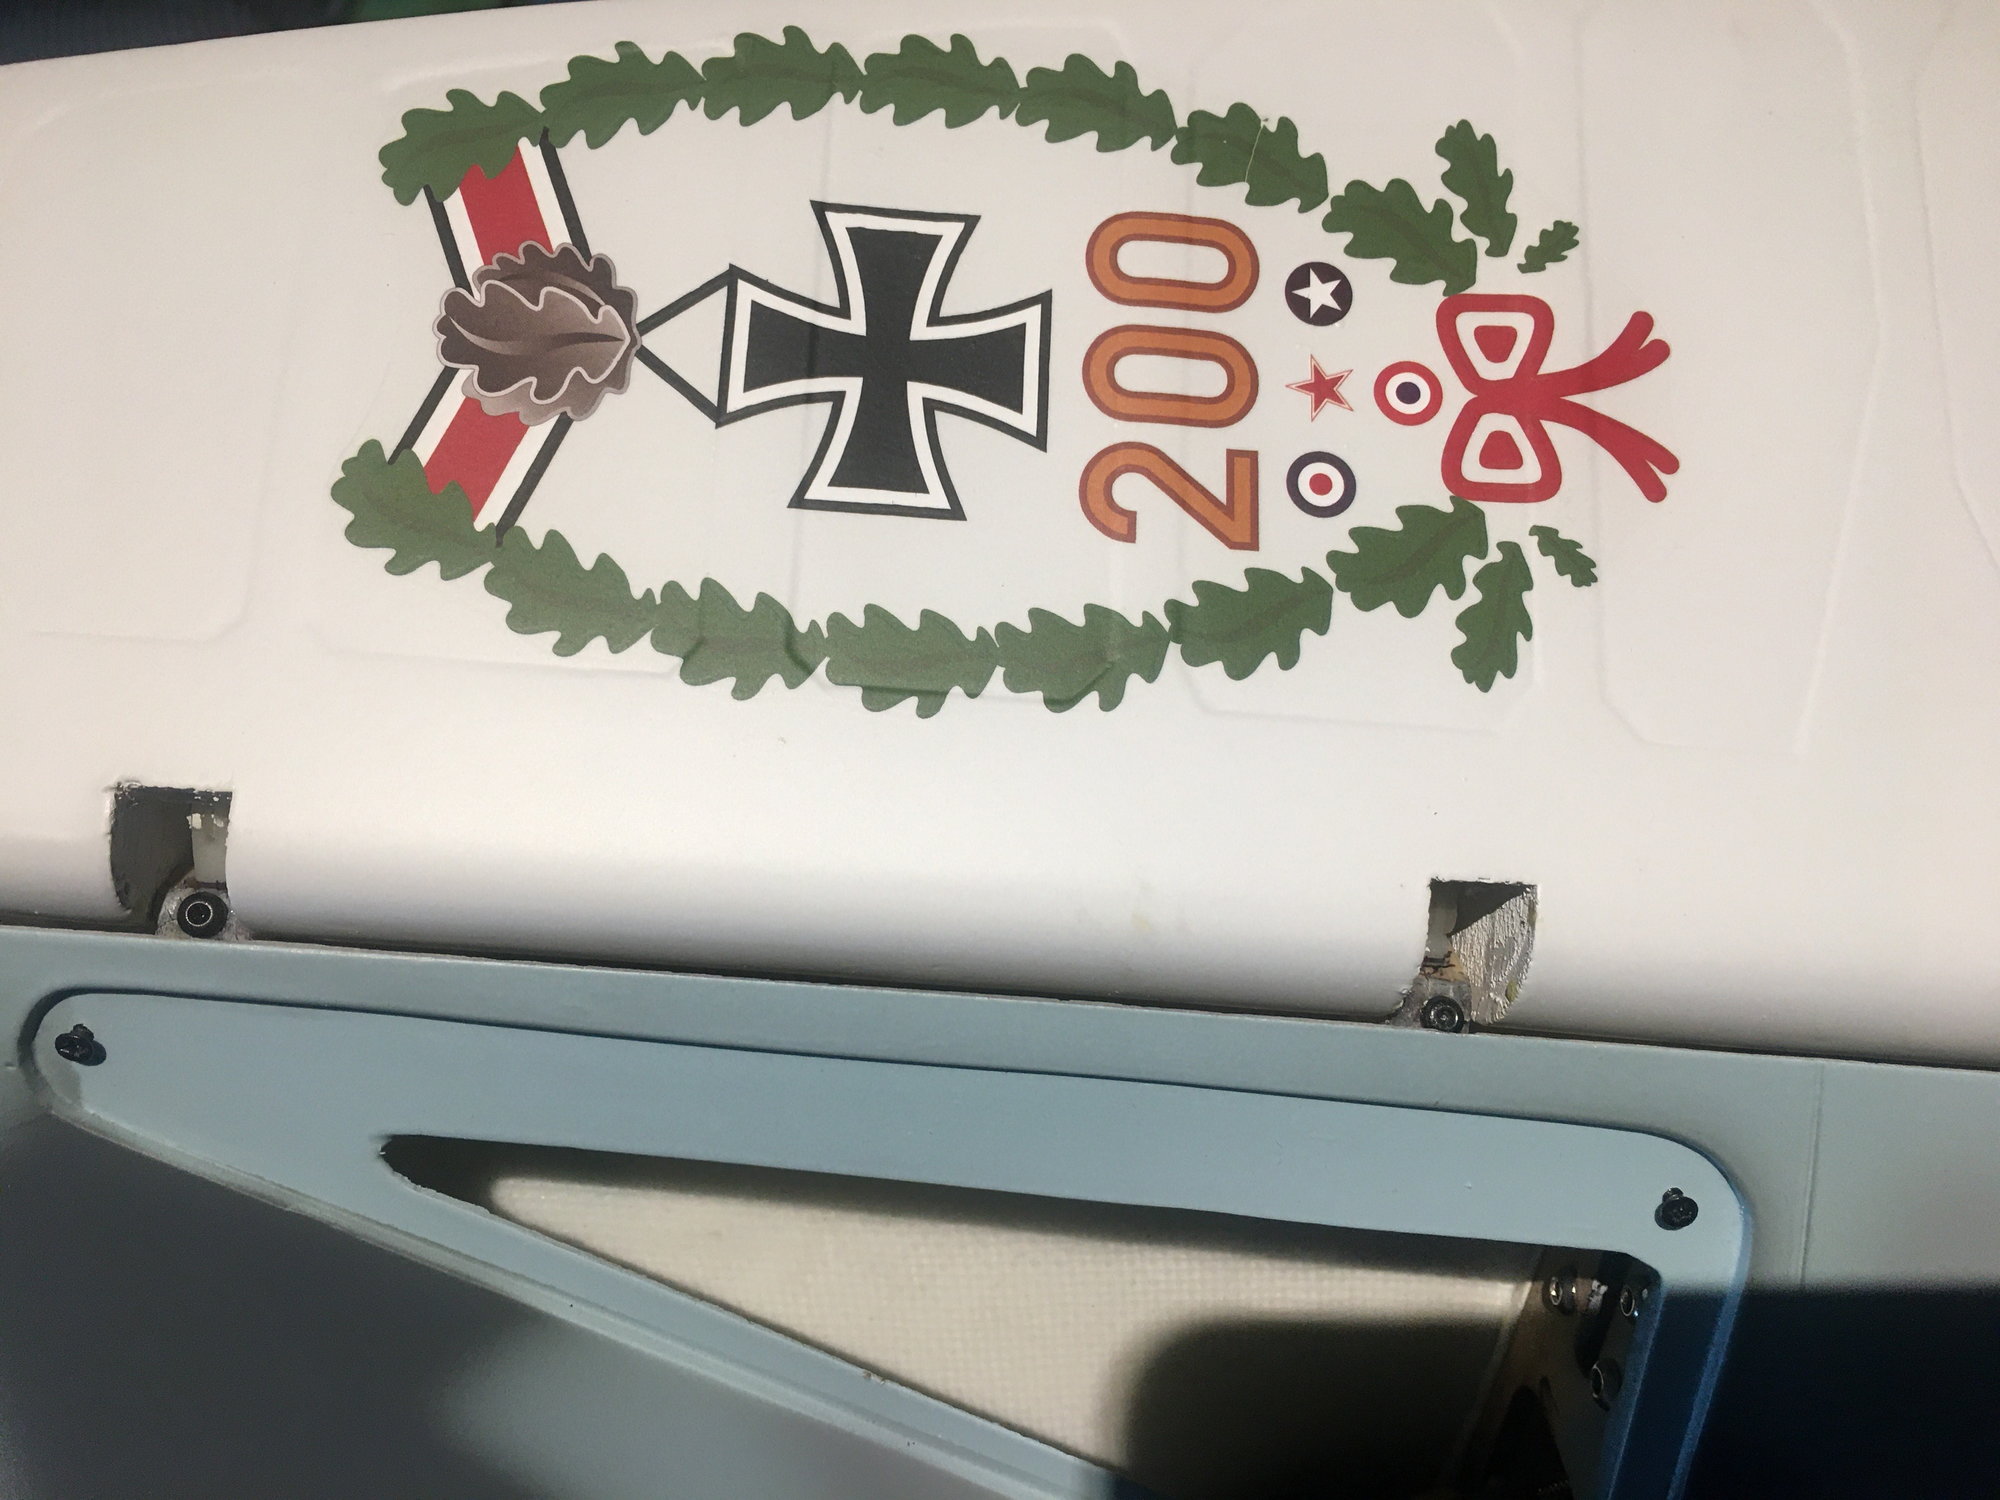
Rear view, showing where the cables enter the fuselage. You can see the rudder cables on each side.
here some pics of the cable. I had to re-route the cable, so that in the down position the cable is tight (longest cable route). In the retracted (up position) the cable becomes slack (shortest cable route), to allow the rudder to operate. To achieve this, I had to build (1.) a shaft on the retracts (see pic) and (2.) and I had to change the route of the cable to a position higher than the original position. Cable enters the fuselage above the rudder cables (see Pic - retract up rear view).
Retracts down. The red lines show where the cable runs (long route). Please note the position of the retract assist spring, which gets attached to the wood in the tail.
Retracts up. Much more direct route (short route) for the cable, allowing it to be slack in the up position.
Rear view, showing where the cables enter the fuselage. You can see the rudder cables on each side.
Last edited by Stephen Crisp; 09-06-2021 at 12:36 AM. Reason: add some info
The following users liked this post:
Chris Nicastro (09-06-2021)
 09-06-2021, 11:30 AM
#1266
Thanks Stephen, really good info and I appreciate your time to post this for me. I’ll work with my friend to get this done but now I understand the issues better as well. We’re going to finish this plane just as winter arrives so maiden will be in the spring. I’ll keep you posted. I’ve ordered the UMS 5-150 for it and it’s getting a VarioProp too so this FW is going to be fun with power.
09-09-2021, 12:19 PM
#1268
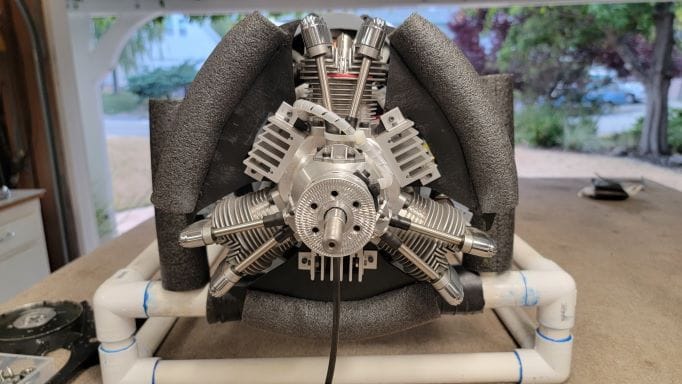
[QUOTE=vertical grimmace;12689497]Looks like a power sucker to me. Would be interesting to see the performance difference between an engine with and without that fan. Completely unnecessary on an RC model.
I've run Reverend's fan in all sorts of configurations on my Saito FG 90 on the ground. Three bladed FW prop, two bladed, cowl on, cowl off, fan on, fan off. The only difference was a drop of around 100rpm with the fan on.
Example: With a 24x12 Zoar two-bladed I got 5800 with the fan and 5900 without. Temps on the ground were 189F with the fan and in the 200s without.
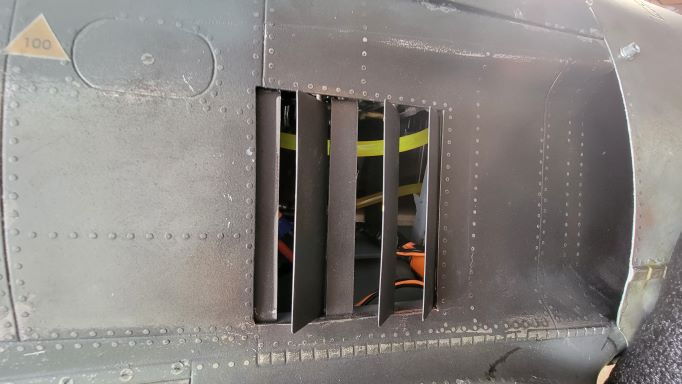
For the record, I also have a FG 84 in a TopRC Zero so I'm very familiar with baffles, exit air, over-heating, etc
Today we maidened the FW 190. The air temp in Northern California was in the 90s. Pretty hot and dry. Plane flew very well at 40lbs. Still playing with the CG but looks like 175mm from leading edge is workable.
What was interesting were the rpm and temps at flying speeds. Prop unloaded to 6500 at full throttle...temps still registered 180s to 195F. They would sneak above 200 when the plane slowed. Most of the flight was at 5600rpm for a 'faster than scale' speed.
After some basic testing, I would say the fan does very well at cooling the engine. Fits like a glove inside the cowl. Well made. Functional. And for me... very scale.
jim

I've run Reverend's fan in all sorts of configurations on my Saito FG 90 on the ground. Three bladed FW prop, two bladed, cowl on, cowl off, fan on, fan off. The only difference was a drop of around 100rpm with the fan on.
Example: With a 24x12 Zoar two-bladed I got 5800 with the fan and 5900 without. Temps on the ground were 189F with the fan and in the 200s without.
For the record, I also have a FG 84 in a TopRC Zero so I'm very familiar with baffles, exit air, over-heating, etc
Today we maidened the FW 190. The air temp in Northern California was in the 90s. Pretty hot and dry. Plane flew very well at 40lbs. Still playing with the CG but looks like 175mm from leading edge is workable.
What was interesting were the rpm and temps at flying speeds. Prop unloaded to 6500 at full throttle...temps still registered 180s to 195F. They would sneak above 200 when the plane slowed. Most of the flight was at 5600rpm for a 'faster than scale' speed.
After some basic testing, I would say the fan does very well at cooling the engine. Fits like a glove inside the cowl. Well made. Functional. And for me... very scale.
jim
The following users liked this post:
apereira (03-27-2022)
 09-09-2021, 06:15 PM
#1273