


Ziroli f4u corsair build.
 06-17-2020, 02:22 PM
#26
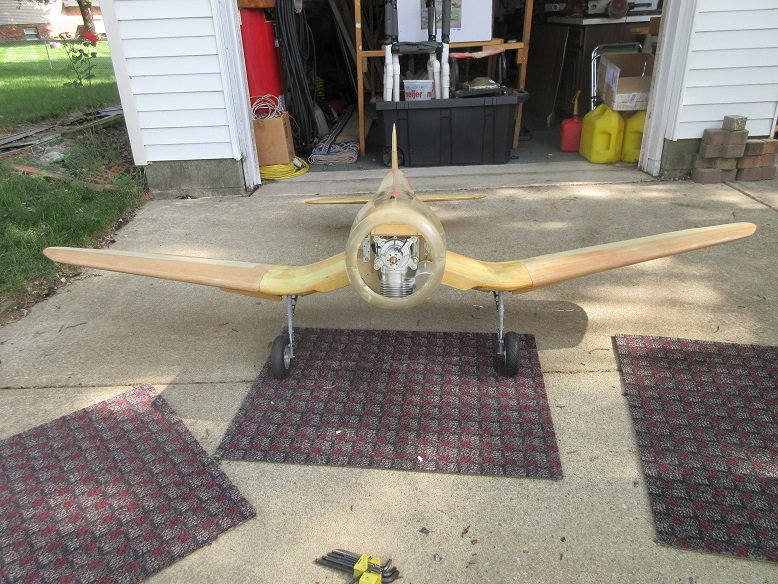
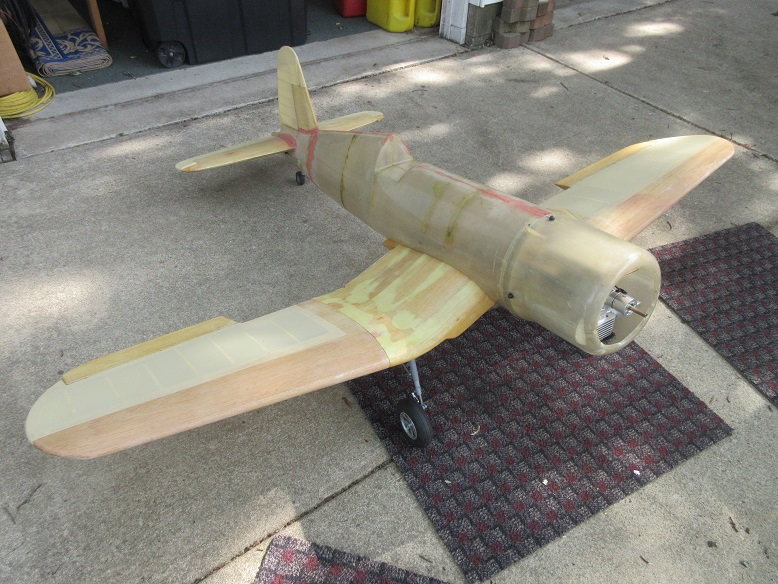
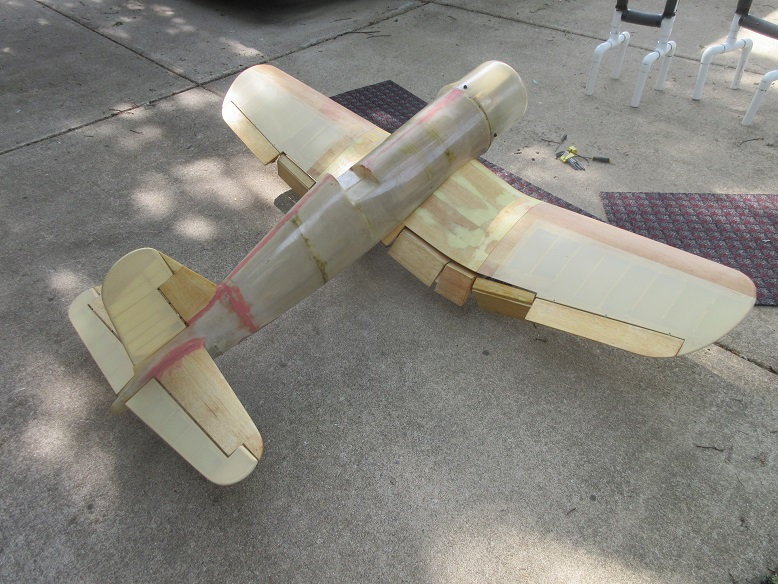
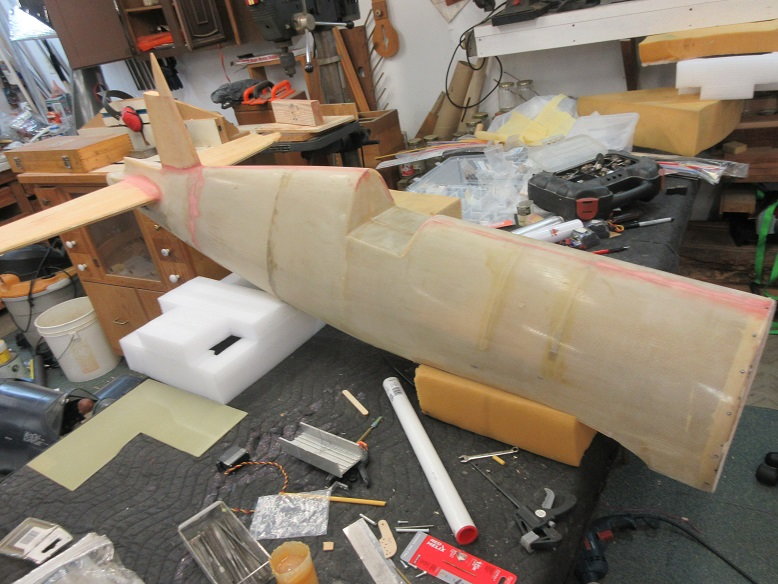
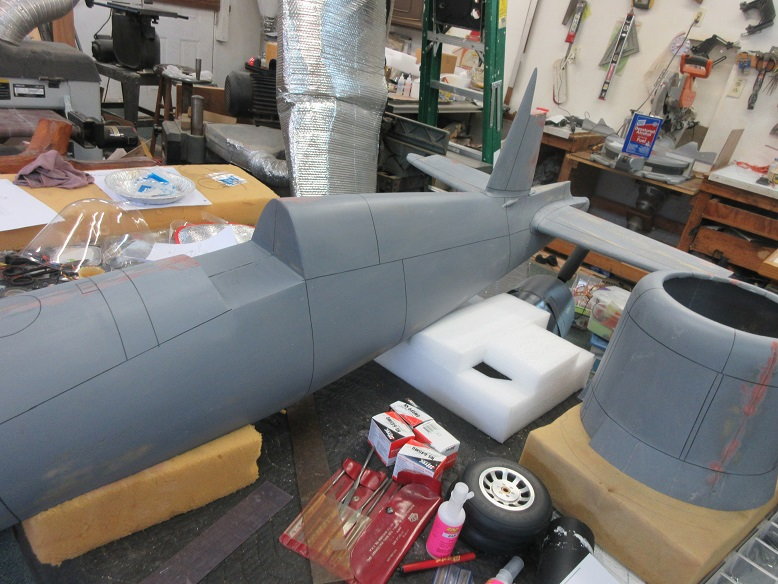
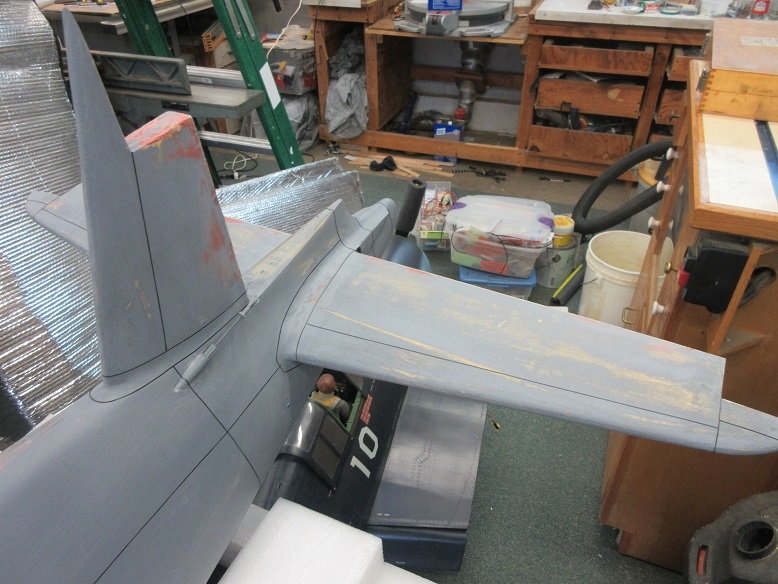
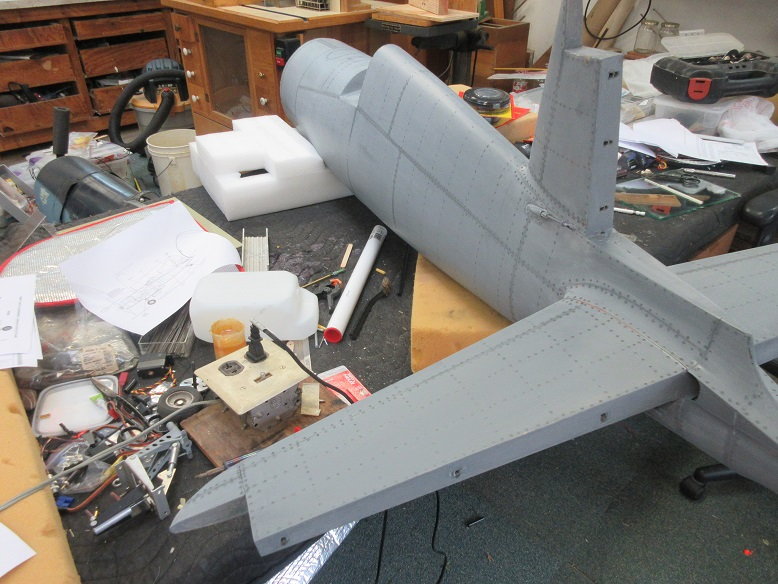
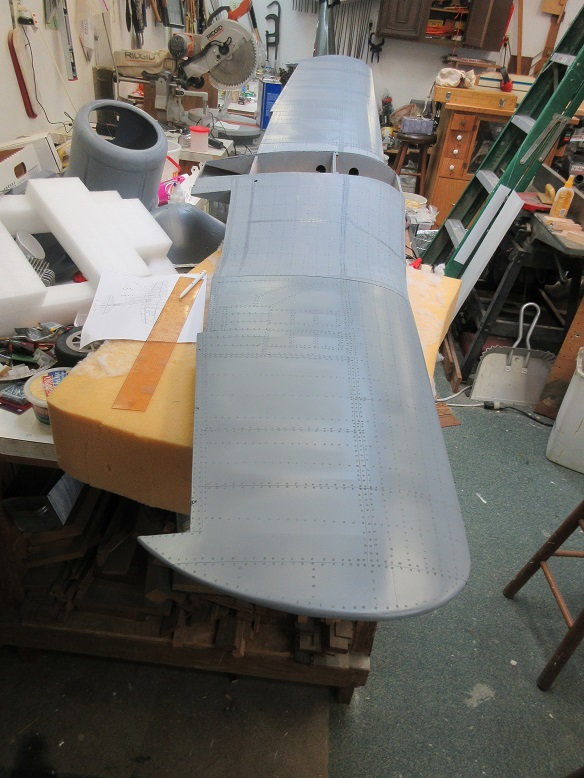
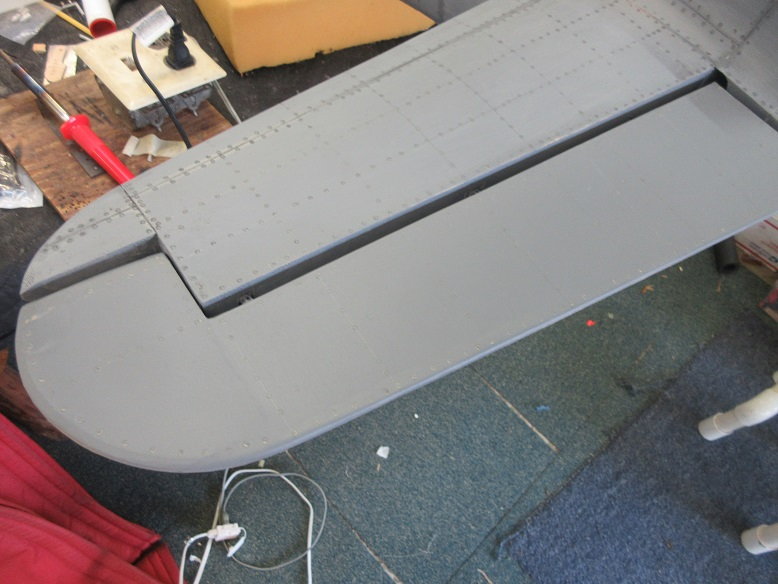
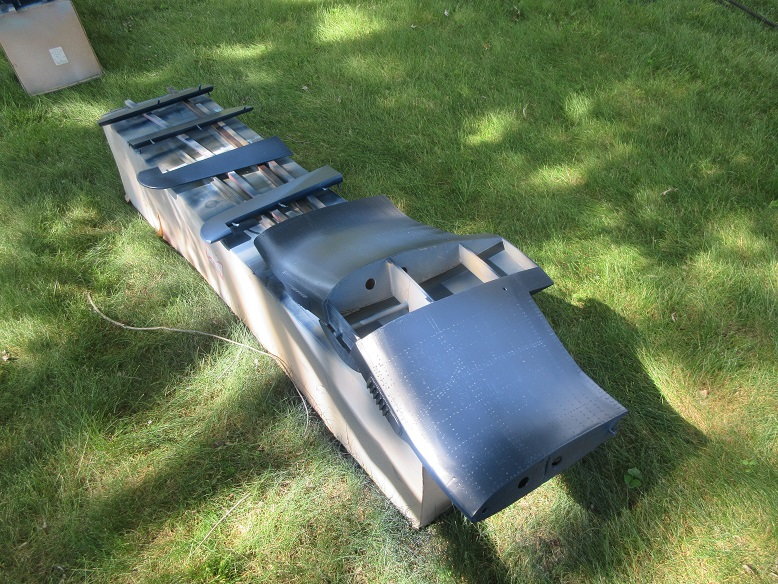
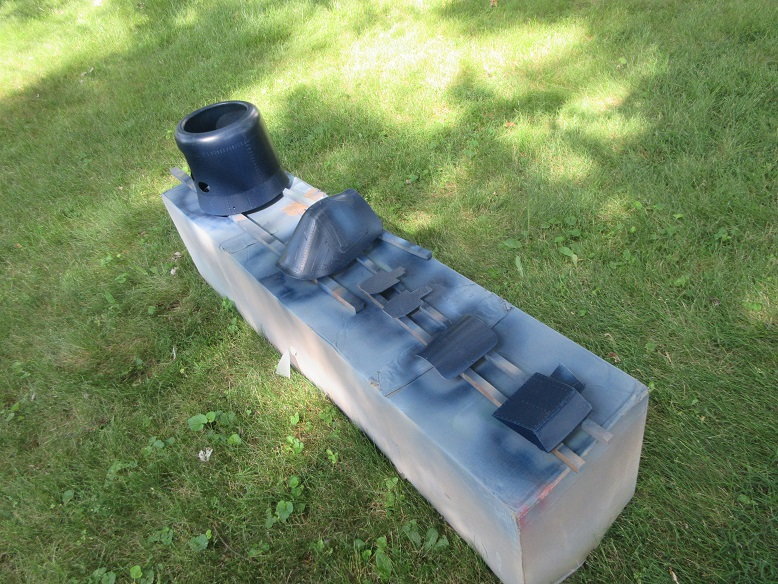
First time on her feet.
Thought I assemble her to make sure all's good.
Thought I've been working on this plane for around 3 weeks but it's only been 10 days.
Only working half a day: 12 hours. Usually 7 or 8 AM until 7 or 10 PM.
Close to putting on the first coat of primer.
NOTE: This site doesn't like me to make multiple posts in a row. Took 3 tries to, finally, get uploads to work.
Last edited by samparfitt; 06-17-2020 at 04:29 PM.

 06-21-2020, 10:27 AM
#28
Thanks, Brian.
============
That's a bummer.
Went to Tower to order EMS unassembled connectors and no longer stock it. Googled EMS and they must be out of business because no one had them.
I did find a place in China that sells what, I'm hoping, is the same thing.
https://www.ebay.com/itm/100Sets-Lot...y/332653089948
Usually, I have plenty of stuff in stock but was down to only 1 package of unassembled female connectors.
Looks like this ebay seller has a nice combo of male and female connectors.
I'll find out in 3-4 weeks when they arrive.
The price is good and one gets a lot of connectors: at least, if I'm wrong on this product, I'm only out 20 bucks.
This is why I hoard stuff!
Last edited by samparfitt; 06-21-2020 at 10:29 AM.
06-21-2020, 11:33 AM
#29
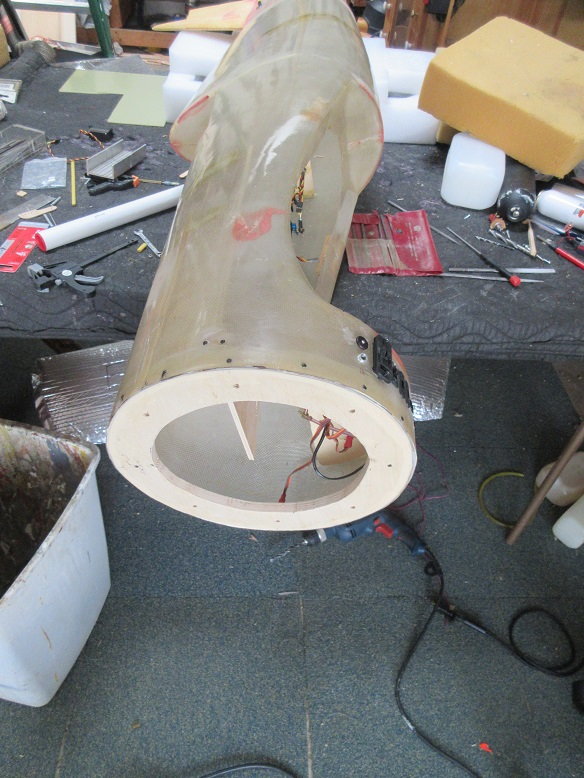
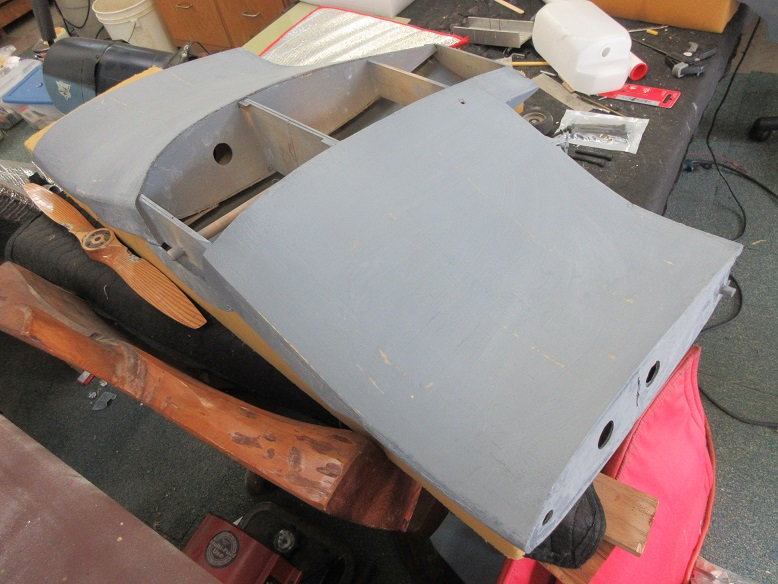
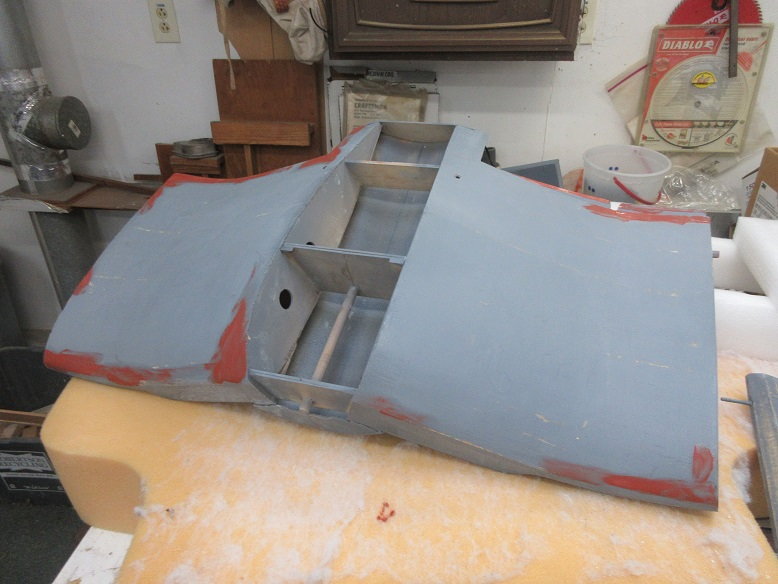
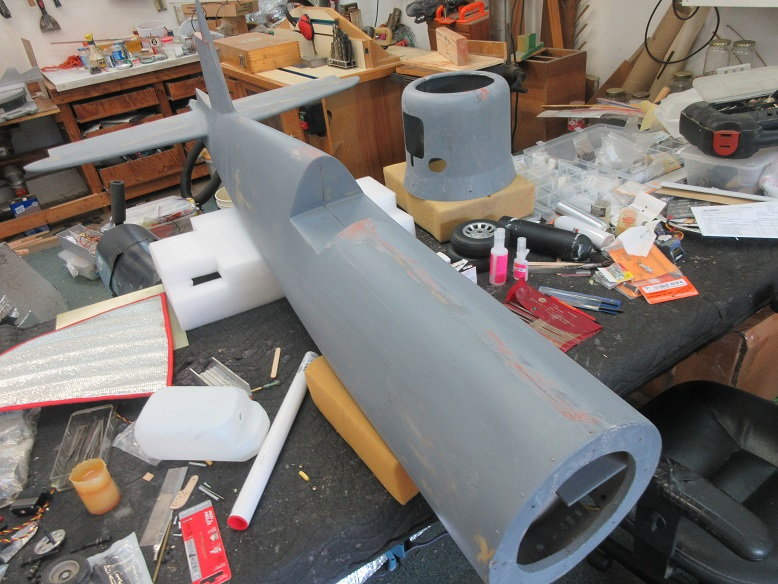
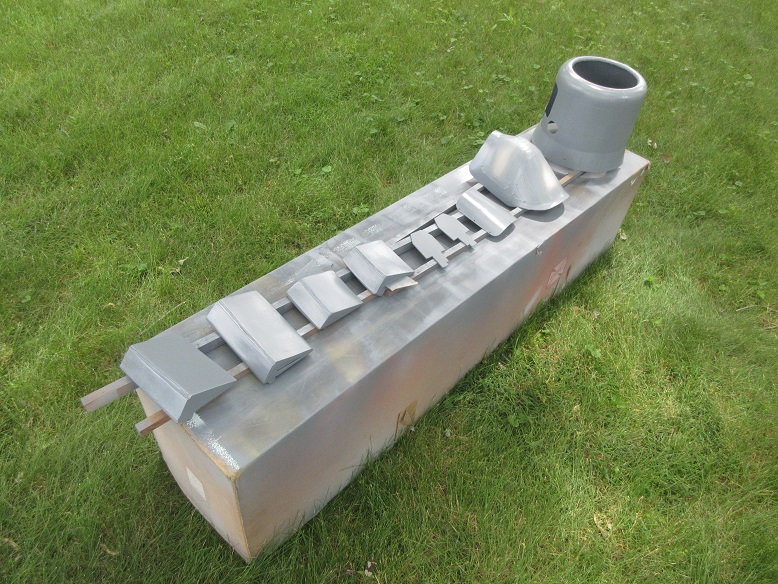
switches.
No access panel made; just secured on the outside of the fuse.
Air filler and pressure gauge.
Ignition switch and charging jack.
Receiver switch.
Two charging jacks for 2 receiver batteries.
Fuel filler.
Fuel overflow.

Along the bottom, right, front side of fuse so won't be easy to see from a viewer's position.
About ready for primer. Got to sand the fuse. Was thinking of putting on the primer today but it looks like a big storm is approaching.
No access panel made; just secured on the outside of the fuse.
Air filler and pressure gauge.
Ignition switch and charging jack.
Receiver switch.
Two charging jacks for 2 receiver batteries.
Fuel filler.
Fuel overflow.
Along the bottom, right, front side of fuse so won't be easy to see from a viewer's position.
About ready for primer. Got to sand the fuse. Was thinking of putting on the primer today but it looks like a big storm is approaching.
06-21-2020, 04:59 PM
#30
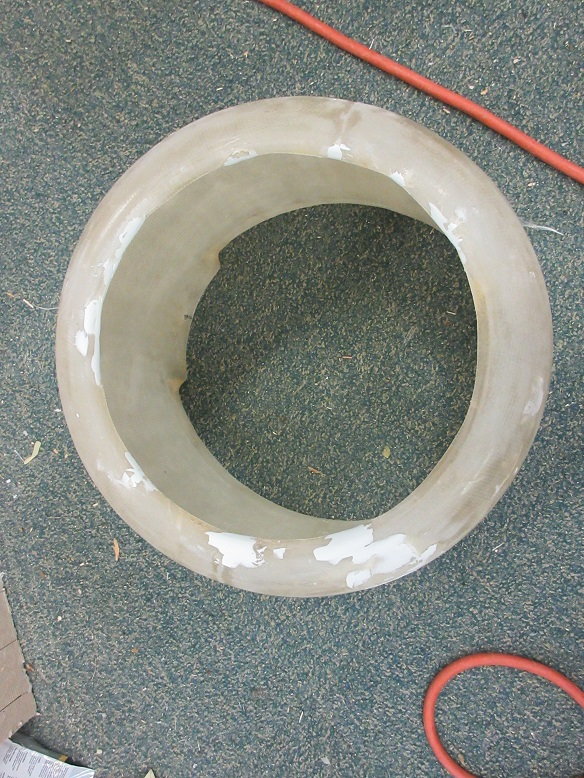
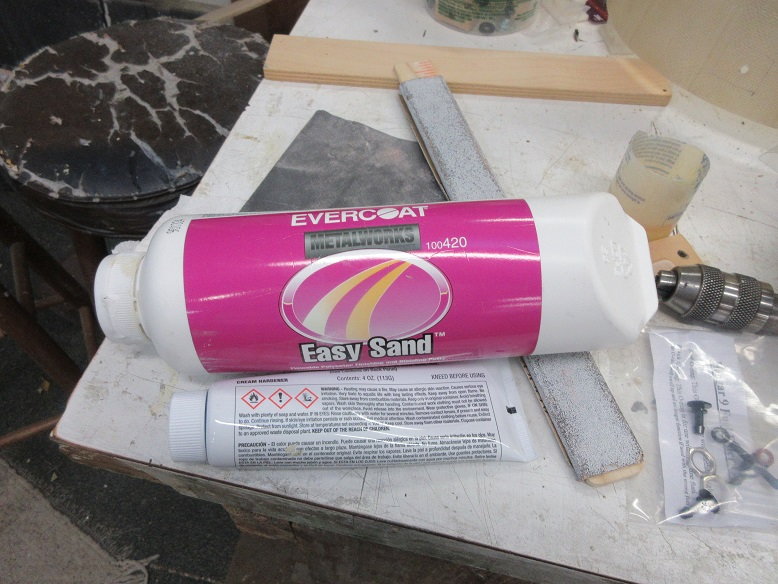
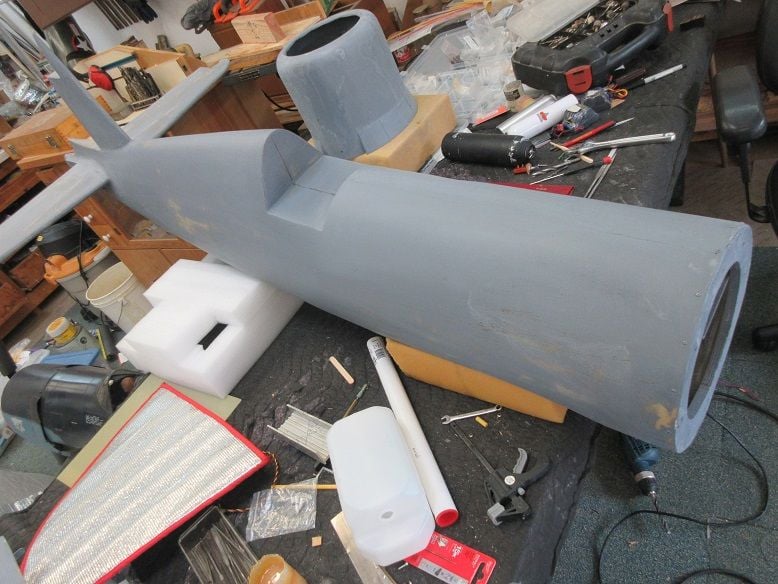
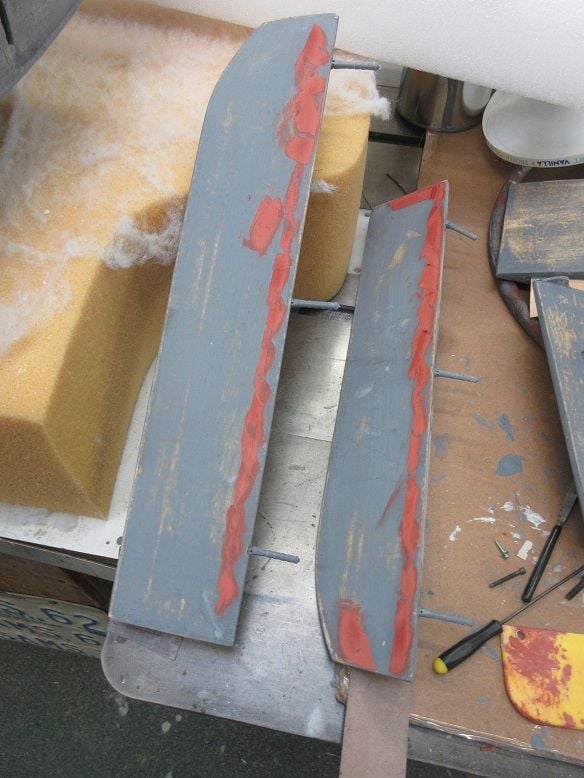
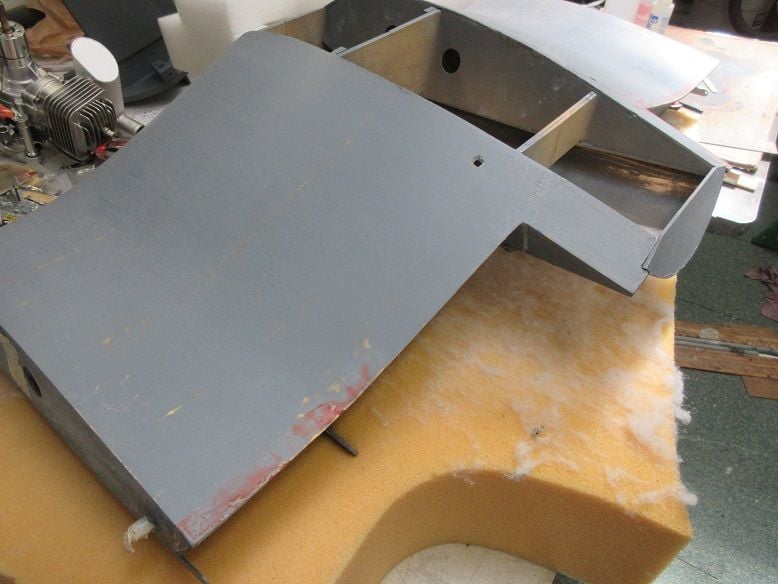
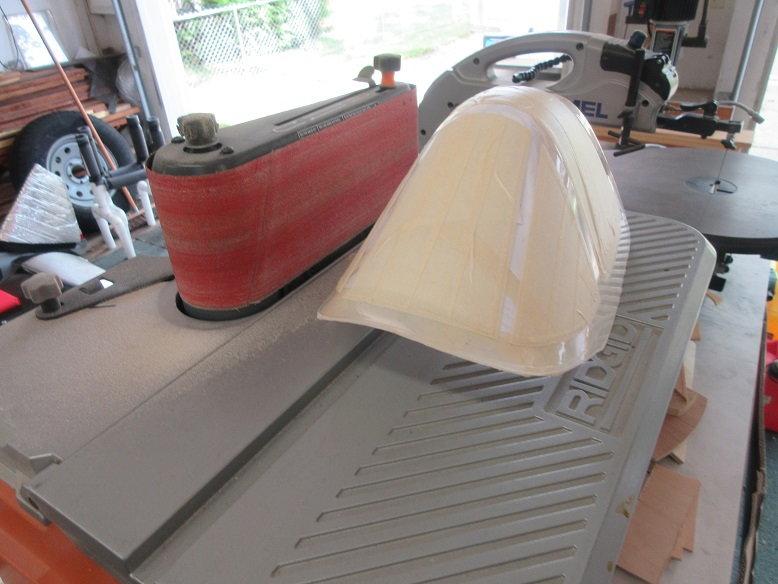
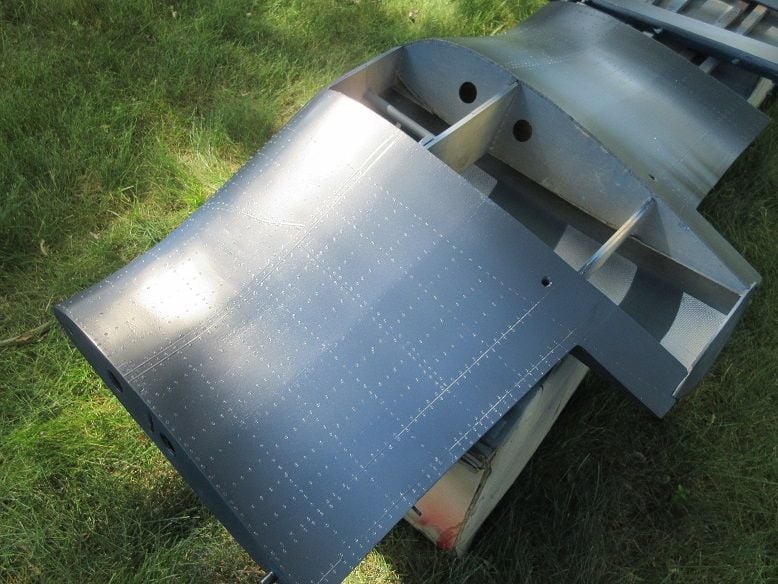
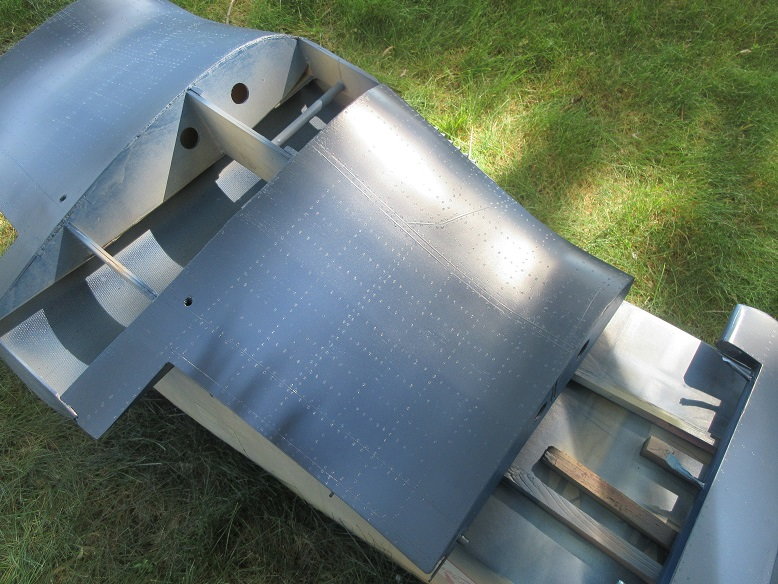
Prep for priming.
Used 220 to sand all the surfaces.
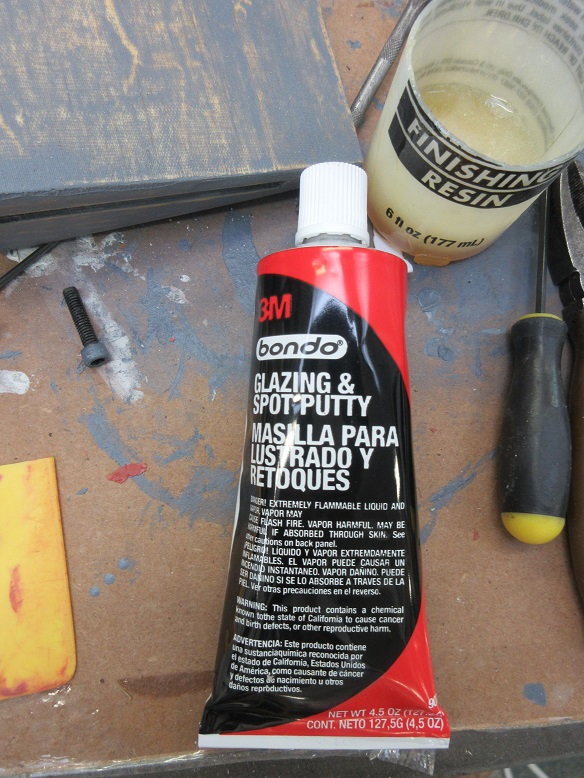
Cowl needed some bondo.
 \\
\\
Been using this for decades; from local auto store. 2 part that hardens within minutes.
NOTES: only took about 6 times to, finally, upload pictures without errors.
Used 220 to sand all the surfaces.
Cowl needed some bondo.
\\Been using this for decades; from local auto store. 2 part that hardens within minutes.
NOTES: only took about 6 times to, finally, upload pictures without errors.
06-21-2020, 07:43 PM
#31

My Feedback: (24)
Went to Tower to order EMS unassembled connectors and no longer stock it. Googled EMS and they must be out of business because no one had them.
Build is looking good!
Hansen Hobbies should have connectors you're looking for
Hansen Hobbies - Servo Connectors, Servo Wire, Crimping Tools, Servo Leads and Accessories
Build is looking good!
Hansen Hobbies should have connectors you're looking for
Hansen Hobbies - Servo Connectors, Servo Wire, Crimping Tools, Servo Leads and Accessories
06-22-2020, 03:19 PM
#33
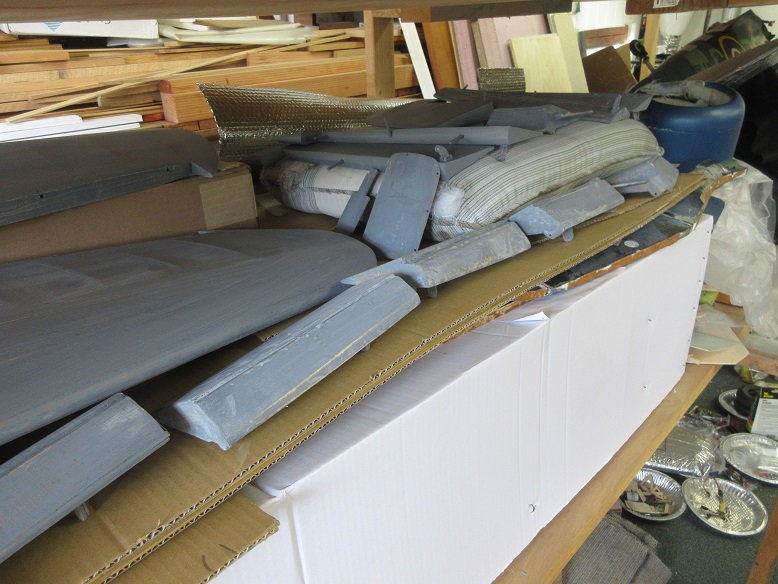
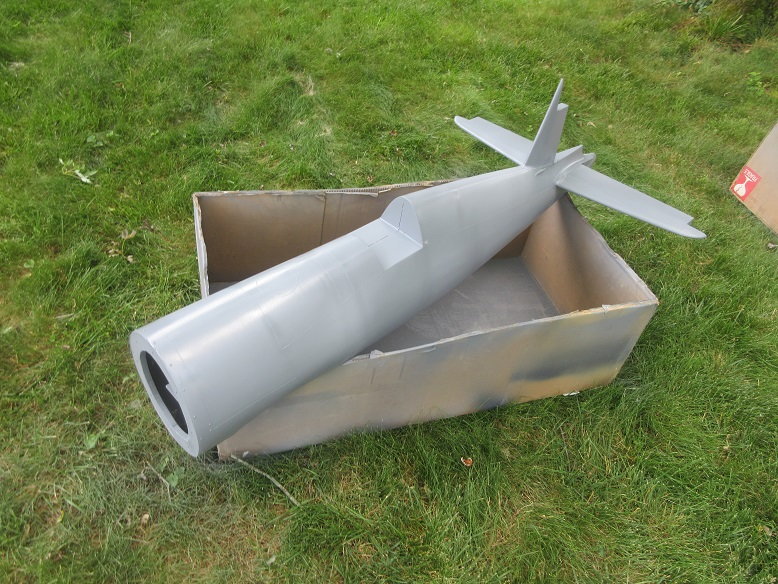
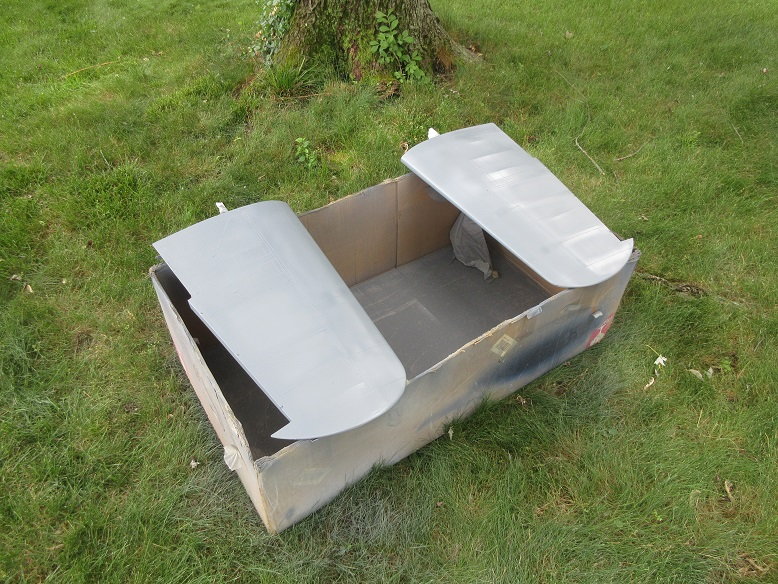
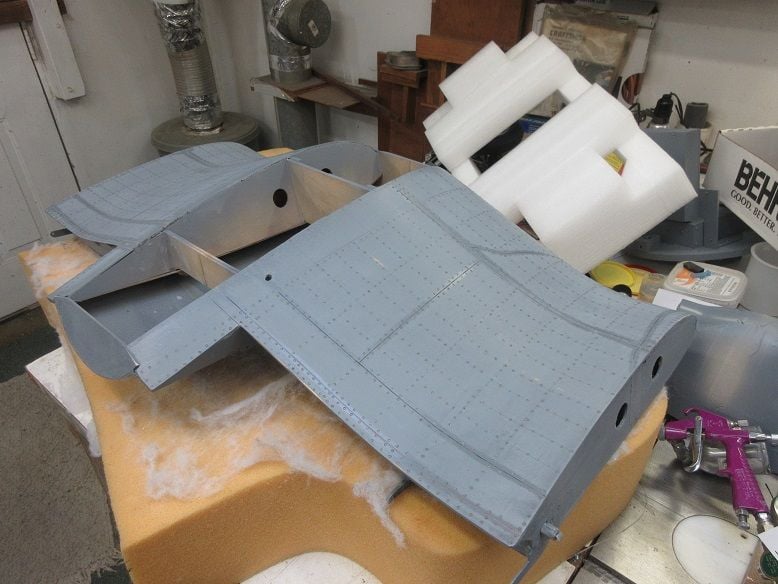
Parts primered.
The boxes I put the parts on are a pain to store; until you want to paint a plane!
I paint all the bottoms, first. By the time I'm done, the first parts are dry enough to flip over. I always do the bottoms, first so, if they are any marks due to not dry enough, they're on the bottom.
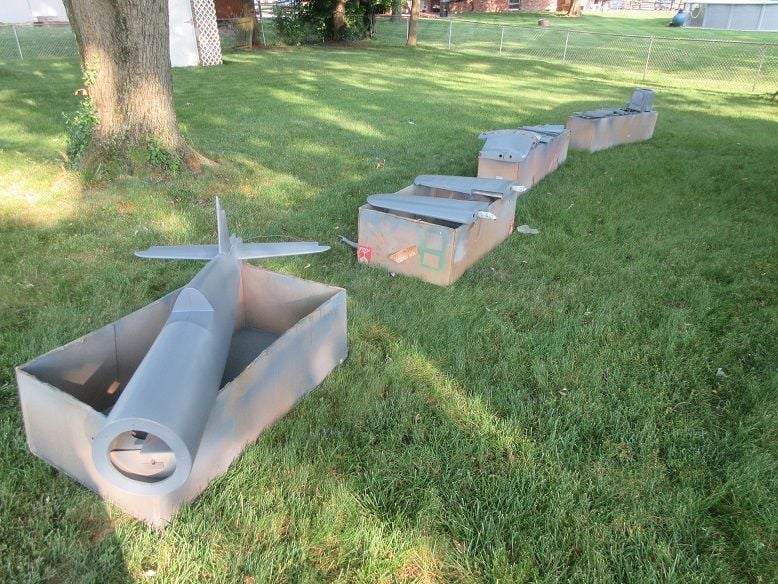

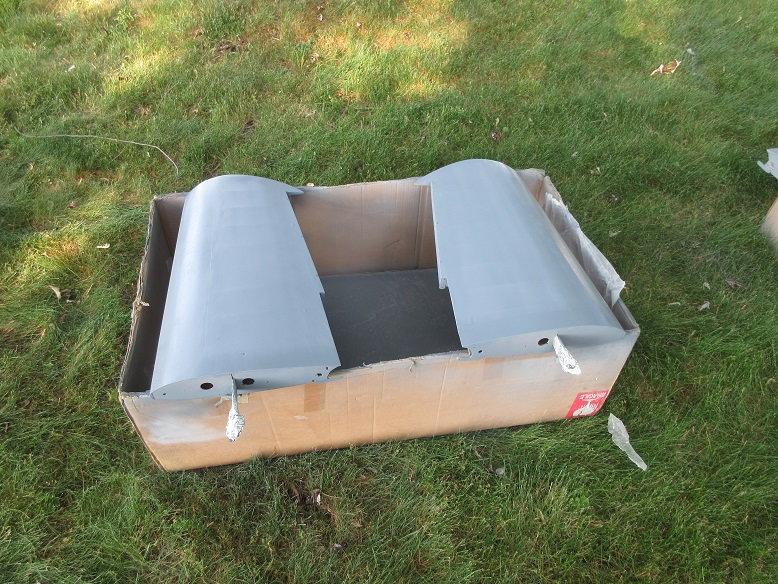

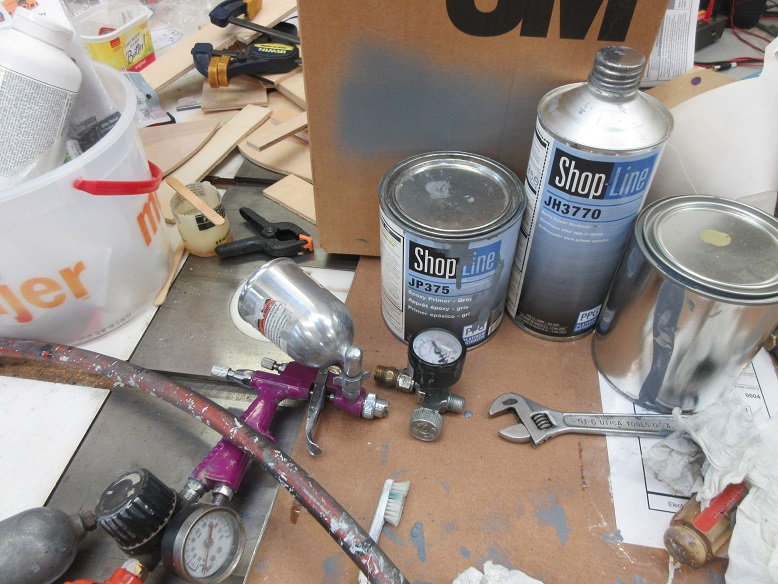
I use a 2 part primer that hardens like iron: never had any pull away, yet. Purchased from my local auto paint supplier. Nasty stuff so all painting is done outside.
A touch up gun from Harbor freight does the 'trick'.
The boxes I put the parts on are a pain to store; until you want to paint a plane!
I paint all the bottoms, first. By the time I'm done, the first parts are dry enough to flip over. I always do the bottoms, first so, if they are any marks due to not dry enough, they're on the bottom.
I use a 2 part primer that hardens like iron: never had any pull away, yet. Purchased from my local auto paint supplier. Nasty stuff so all painting is done outside.
A touch up gun from Harbor freight does the 'trick'.
06-23-2020, 03:18 PM
#34
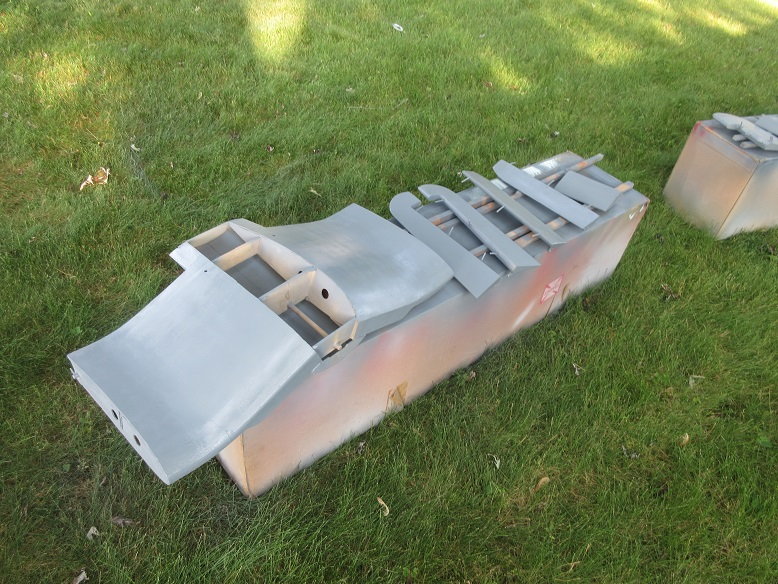
Primer stage (cont):
The tedious part: hand sanding all the parts. This stage lets you know where all the flaws are: any shiny parts are where filler is needed.

The original builder covered up gaps with the FG cloth, which can't be done. Will need to bondo those places.

Best not to put on a thick coat as just more sanding as more primer isn't going to make flaws go away.
The FG parts were easy.
Had to be gentle sanding the solartex: used worn sandpaper and barely sanded the surface. There are lines where the solartex ends; not sure if the edge line will go away on the next primer coat, or not!
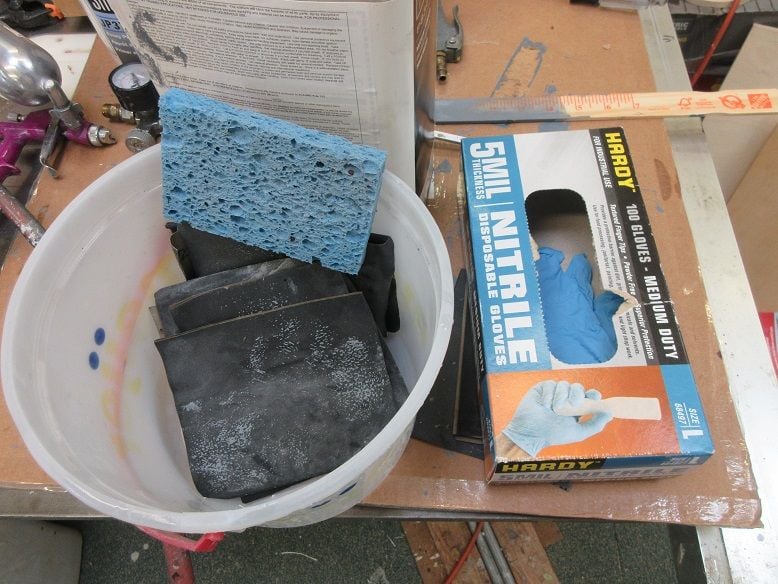
Tools of the trade: 220 wet/dry sandpaper, gloves to keep from sanding skin and lots of water. Those genes with holes in the knees are the best clothing to do this!
Used about 5 sheets to complete one sanding. Water is necessary to wash away the residue else the paper will just clog up and you end up wasting a lot of sand paper.
The tedious part: hand sanding all the parts. This stage lets you know where all the flaws are: any shiny parts are where filler is needed.
The original builder covered up gaps with the FG cloth, which can't be done. Will need to bondo those places.
Best not to put on a thick coat as just more sanding as more primer isn't going to make flaws go away.
The FG parts were easy.
Had to be gentle sanding the solartex: used worn sandpaper and barely sanded the surface. There are lines where the solartex ends; not sure if the edge line will go away on the next primer coat, or not!
Tools of the trade: 220 wet/dry sandpaper, gloves to keep from sanding skin and lots of water. Those genes with holes in the knees are the best clothing to do this!
Used about 5 sheets to complete one sanding. Water is necessary to wash away the residue else the paper will just clog up and you end up wasting a lot of sand paper.
Last edited by samparfitt; 06-23-2020 at 03:21 PM.
06-28-2020, 07:21 AM
#35
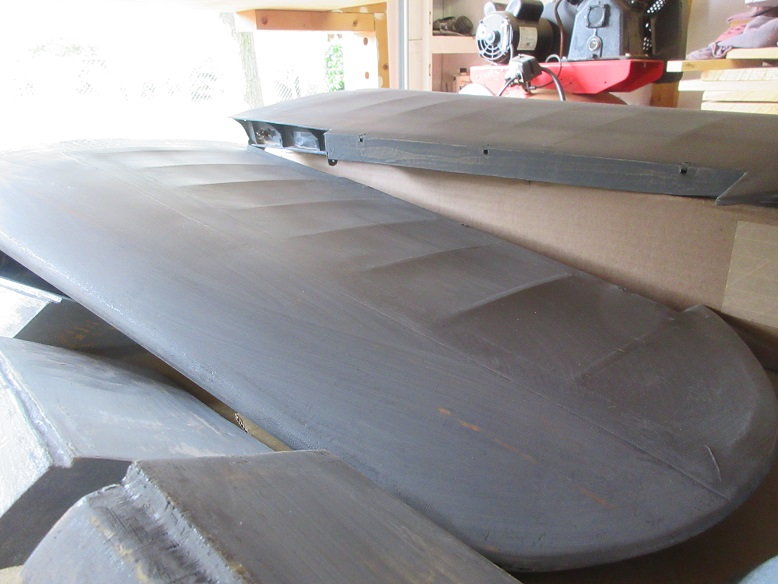
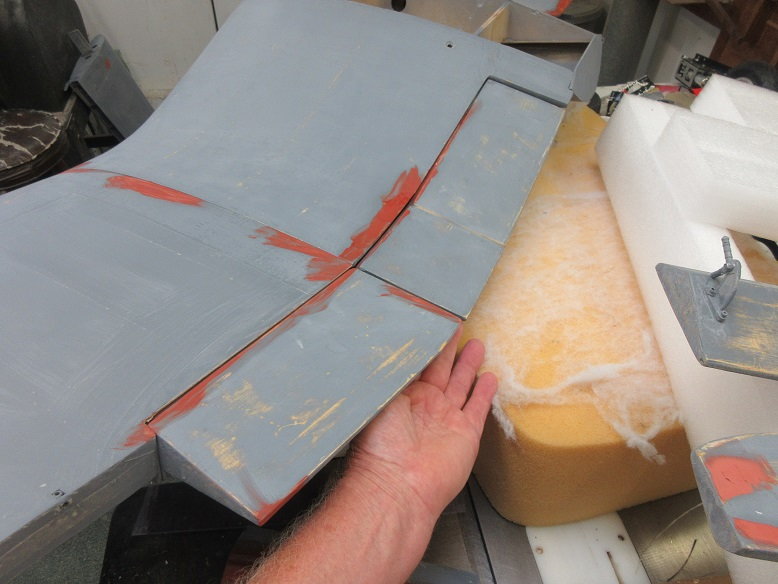
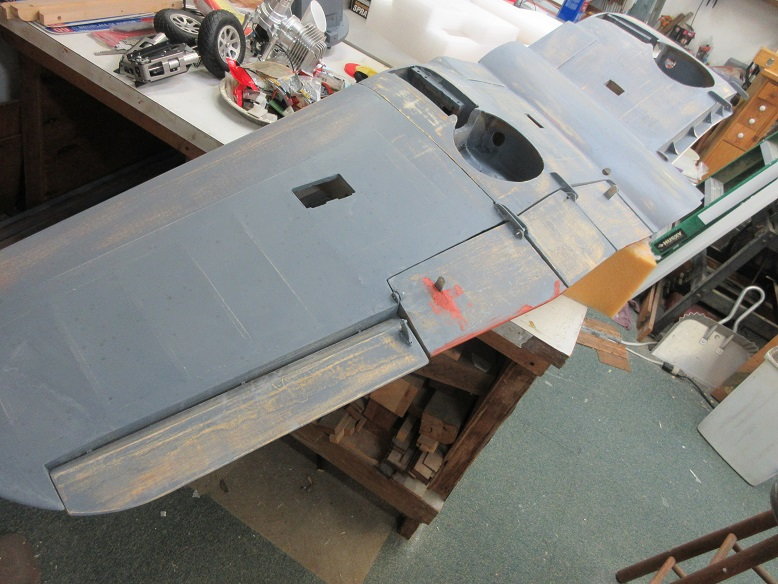
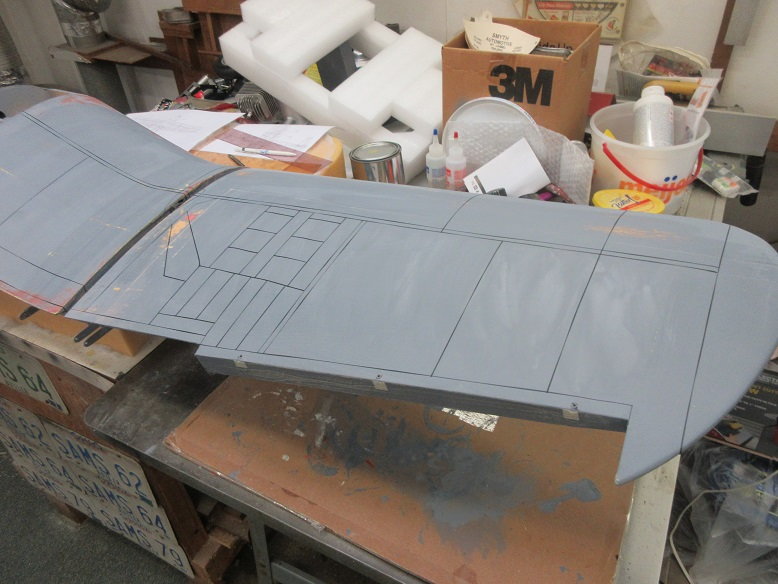
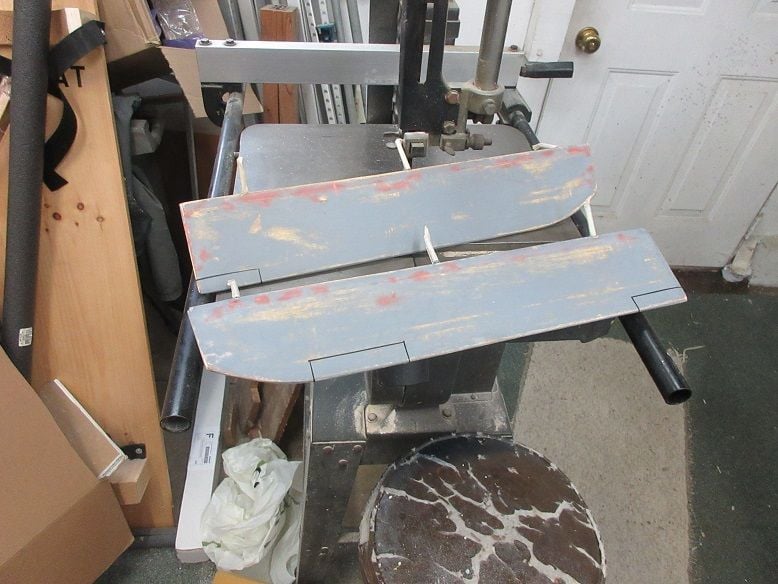
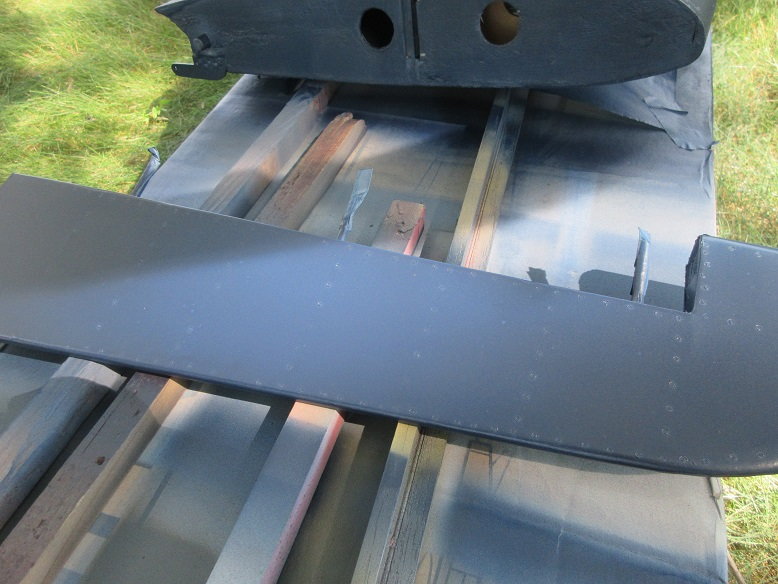
Final prep before 2nd coat of primer.
Flap adjustments:
Center flap's out edge not quite even with wing so re-attached the G-10 hinge.
Some sanding of TE of wing and top LE of some flaps to allow full up position.
Next will be chart tape for the panel lines before priming.

3M bondo to fill in defects. Will wet sand after it dries.
Put all moving surfaces back to insure proper fit.

Flap adjustments:
Center flap's out edge not quite even with wing so re-attached the G-10 hinge.
Some sanding of TE of wing and top LE of some flaps to allow full up position.
Next will be chart tape for the panel lines before priming.
3M bondo to fill in defects. Will wet sand after it dries.
Put all moving surfaces back to insure proper fit.
06-28-2020, 01:02 PM
#36
Wet sanded the 3M red bondo. It didn't take long to sand it. Most of it was removed.

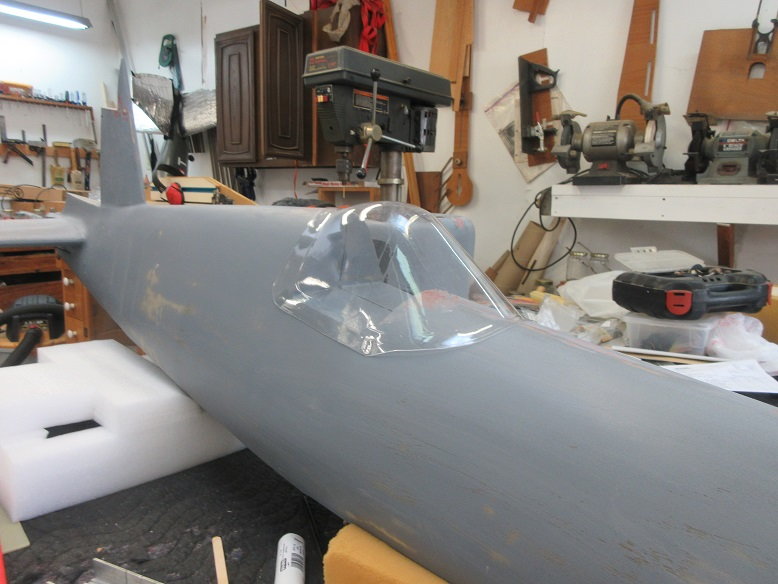
Canopy needs to be cut. Will mask and put primer on the 'frame'.

Button head screws will be used to secure it. There will be a line along the canopy's edge but I like removable canopies.
Almost forgot the wing radiators. Only 14 bucks (including shipping) from Ziroli.
Will start putting on chart tape for the panel lines.

Canopy needs to be cut. Will mask and put primer on the 'frame'.
Button head screws will be used to secure it. There will be a line along the canopy's edge but I like removable canopies.
Almost forgot the wing radiators. Only 14 bucks (including shipping) from Ziroli.
Will start putting on chart tape for the panel lines.
06-28-2020, 05:03 PM
#37
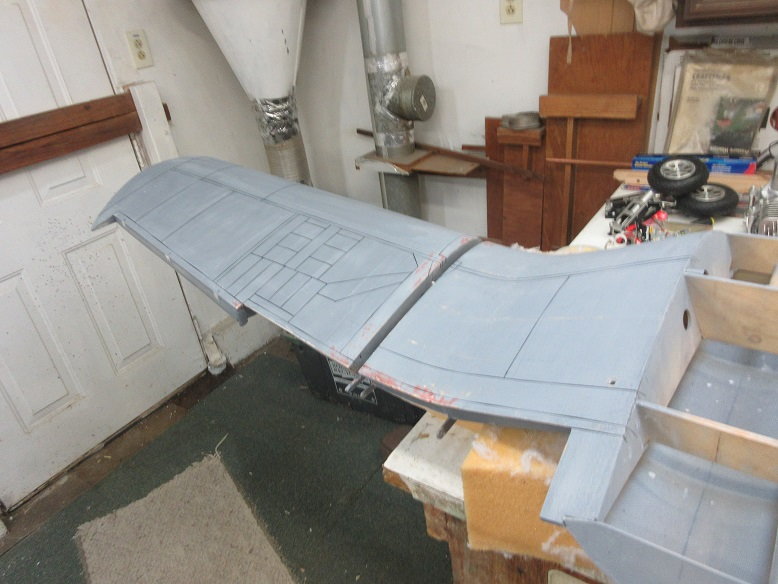
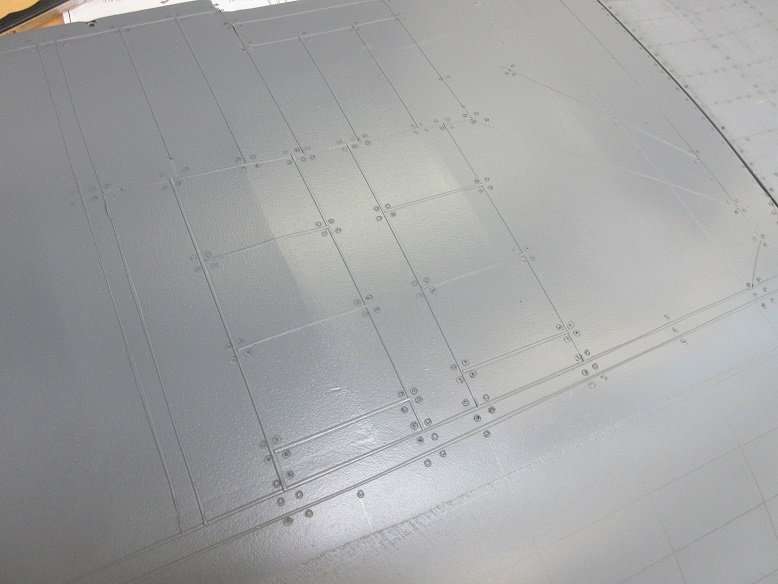
Panel lines.
A plane gets a soul when panel lines and rivets are added.
I cut out all the other details but not the panel lines and rivets!
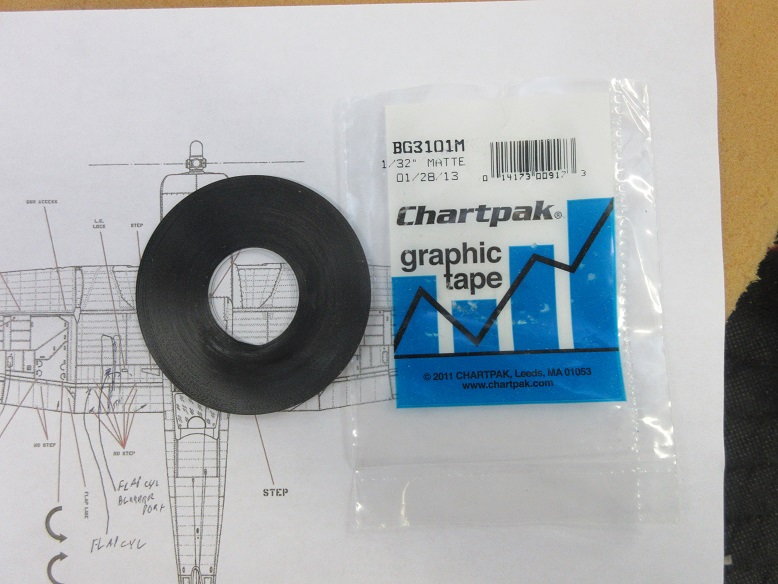
Tools of the trade:
Chart tape, ruler, pencil, scissors, tweezers and pictures!
I use 1/32" width: too wide for scale but I like the looks. At the scale distance that we look at our planes, in actuality, we wouldn't be able to see rivets and panel lines but it looks cool!
Got some done, tonight.
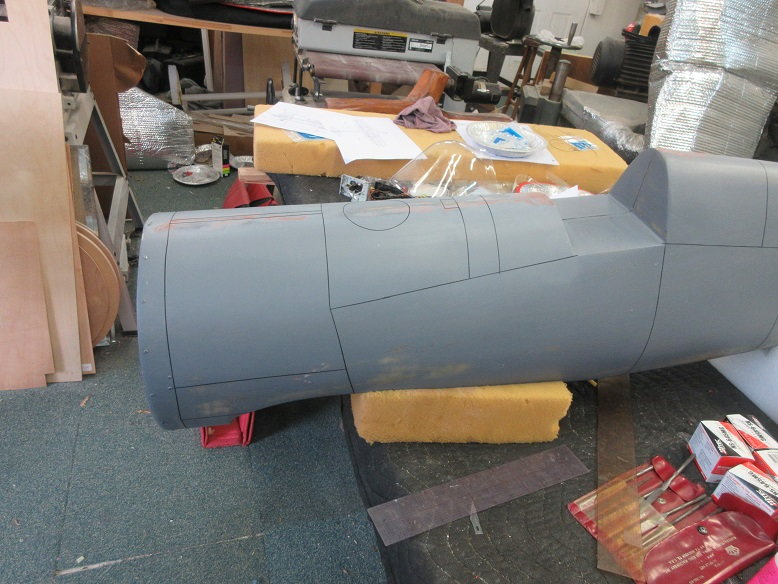
Compass seemed to work well!
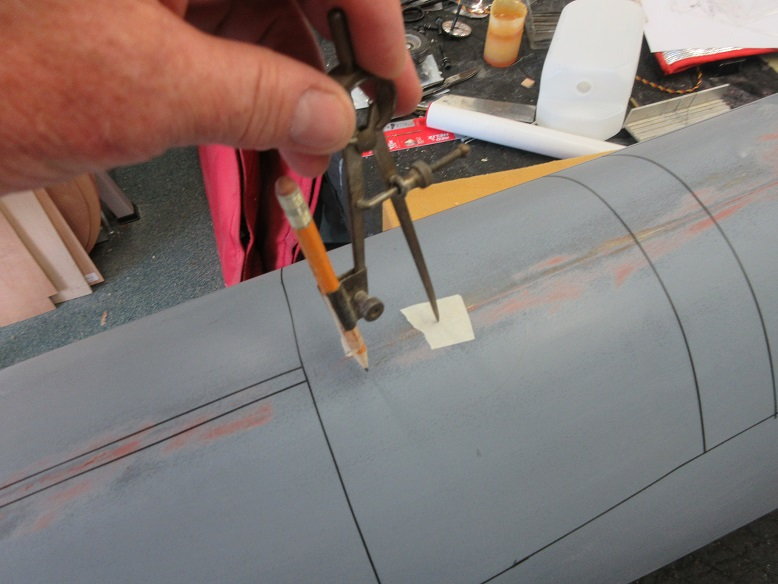
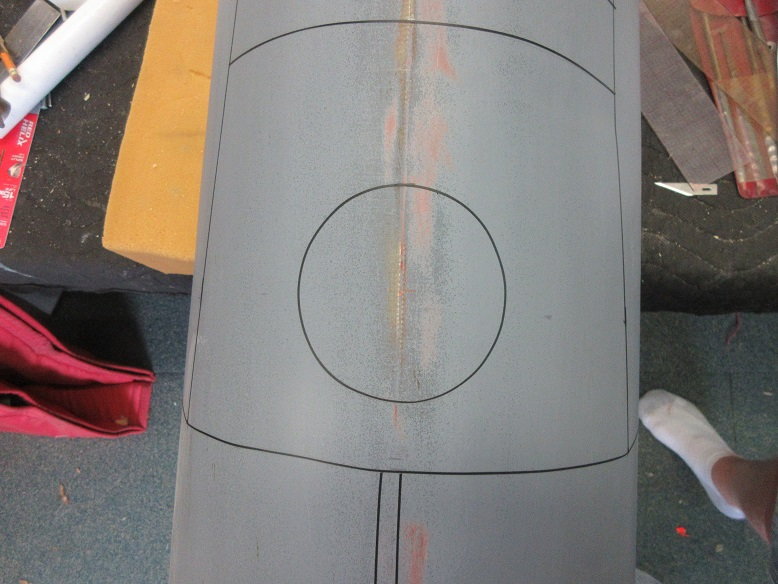

Can't do the front of the center wing until I install the radiators (which should arrive in a few days).

A plane gets a soul when panel lines and rivets are added.
I cut out all the other details but not the panel lines and rivets!
Tools of the trade:
Chart tape, ruler, pencil, scissors, tweezers and pictures!
I use 1/32" width: too wide for scale but I like the looks. At the scale distance that we look at our planes, in actuality, we wouldn't be able to see rivets and panel lines but it looks cool!
Got some done, tonight.
Compass seemed to work well!
Can't do the front of the center wing until I install the radiators (which should arrive in a few days).
Last edited by samparfitt; 06-28-2020 at 05:46 PM.
06-29-2020, 07:34 AM
#38
Panel lines (cont):
Taping off canopy to paint the frame.
Tools of the trade.
Used about 1/4" wide tape for most areas save the tight curves got about a 1/16" wide tape.
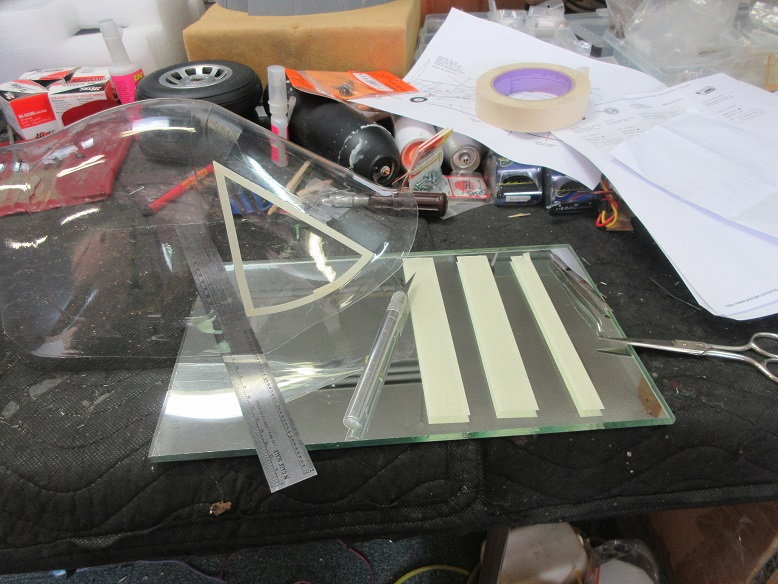

Entire inside covered.
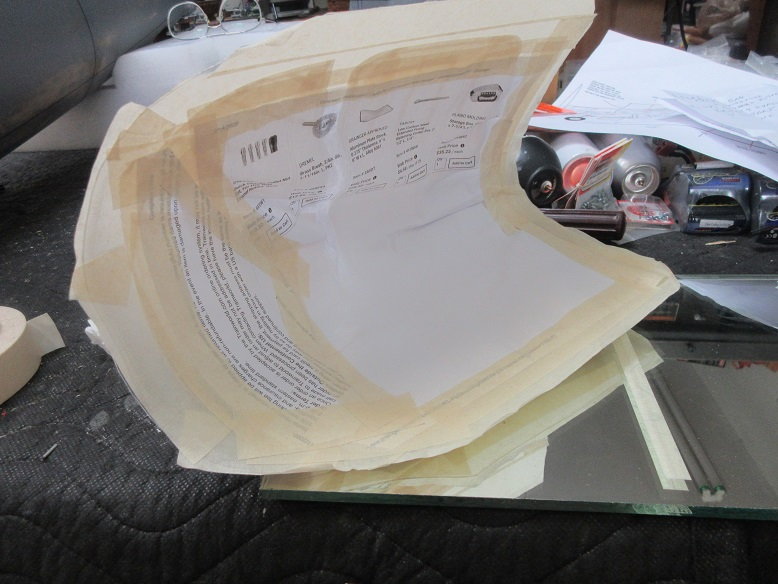
Oscillating sander to bevel the outside edges so they lays smoothly, hopefully, to the fuse.
Final rough 220 (used) sandpaper to roughen the 'frame' for better adhesion with the primer.

Taping off canopy to paint the frame.
Tools of the trade.
Used about 1/4" wide tape for most areas save the tight curves got about a 1/16" wide tape.
Entire inside covered.
Oscillating sander to bevel the outside edges so they lays smoothly, hopefully, to the fuse.
Final rough 220 (used) sandpaper to roughen the 'frame' for better adhesion with the primer.
06-29-2020, 09:45 AM
#39
Second coat of primer.
Decided to prime all the parts before getting the wing radiators from Ziroli; figure I can add them later. Also, suppose to rain later in the week.
The 2 part primer used and panel lines were 'shot' 2-3 times and then a coat on the entire surface.

After painting the bottoms and finishing all parts, came back and did the tops of wings, fuse and moving surfaces. The outer wings stuck a little to the cardboard boxes leaving a small mark but will be easy to sand out.
Usually, I put some wax paper where the parts make contact with the cardboard but didn't think of it, this time.
No second coat on rudder and elevators since they are completely covered in solartex and one coat is good enough since no panel lines and all parts are smooth.
Decided to prime all the parts before getting the wing radiators from Ziroli; figure I can add them later. Also, suppose to rain later in the week.
The 2 part primer used and panel lines were 'shot' 2-3 times and then a coat on the entire surface.
After painting the bottoms and finishing all parts, came back and did the tops of wings, fuse and moving surfaces. The outer wings stuck a little to the cardboard boxes leaving a small mark but will be easy to sand out.
Usually, I put some wax paper where the parts make contact with the cardboard but didn't think of it, this time.
No second coat on rudder and elevators since they are completely covered in solartex and one coat is good enough since no panel lines and all parts are smooth.
Last edited by samparfitt; 06-29-2020 at 09:48 AM.
06-30-2020, 11:32 AM
#40
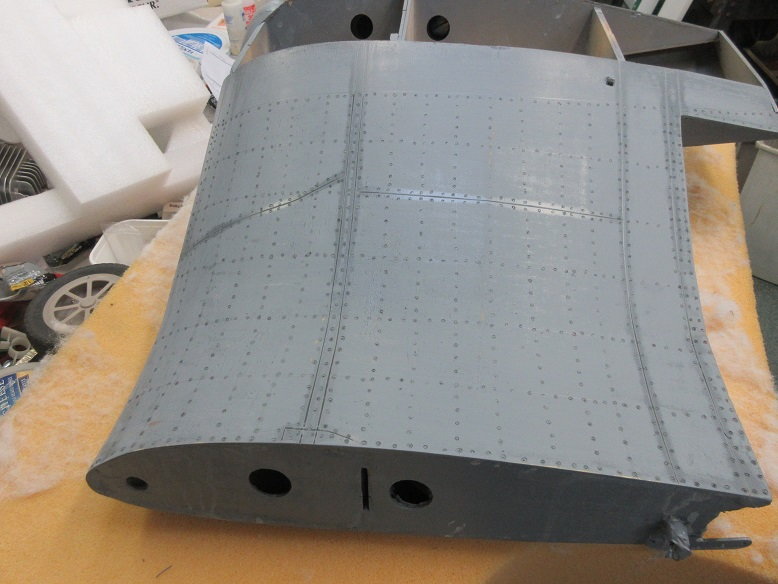
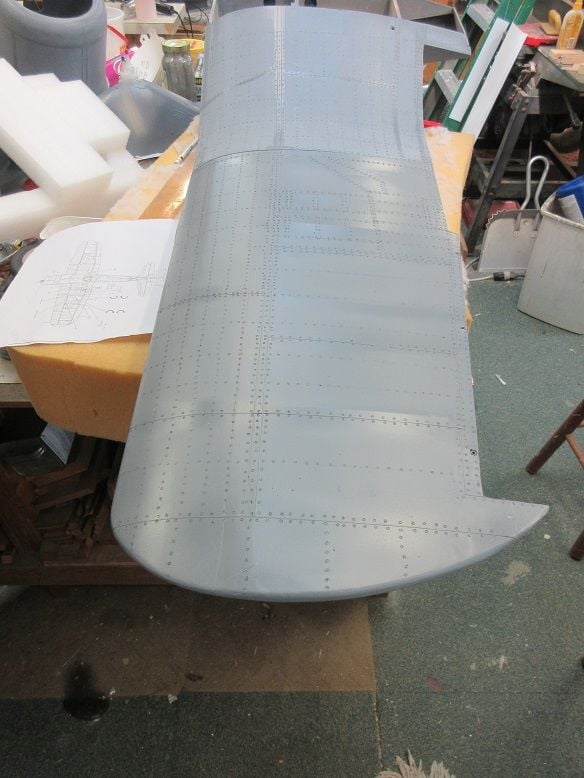
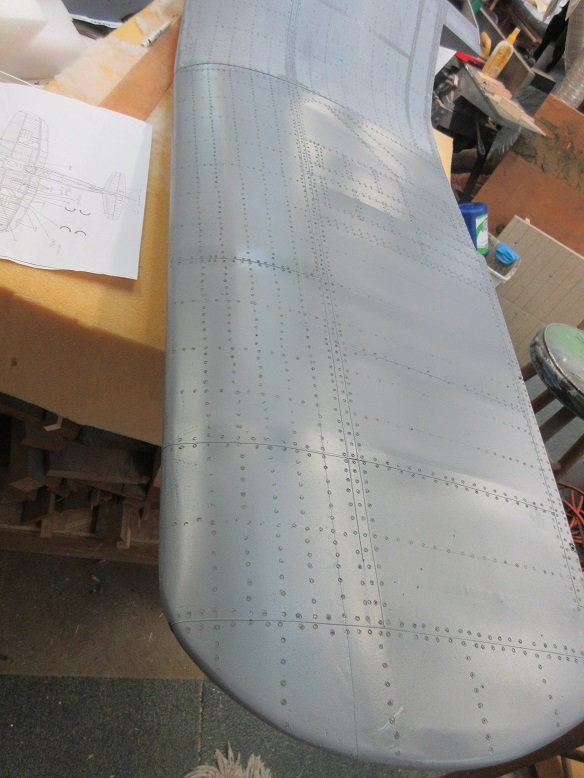
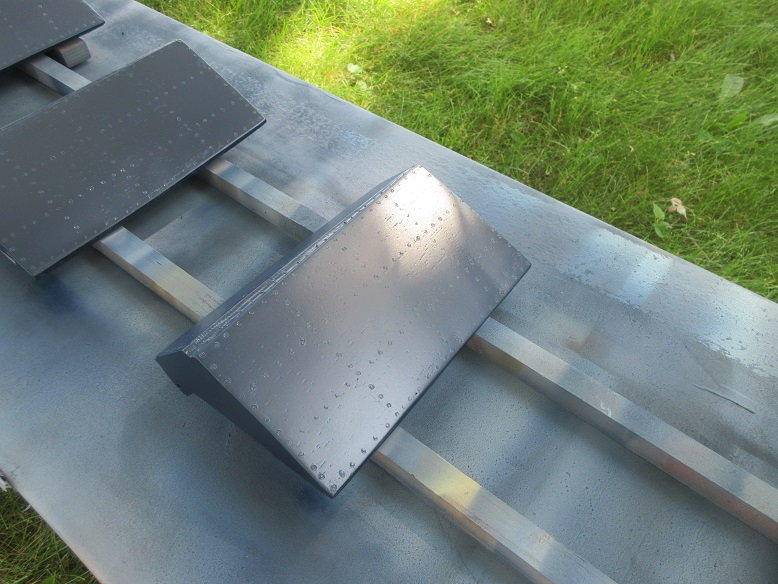
Wet sanding 2nd coat of primer and rivets.
Wet sanded until the chart tape was exposed.

Pulled off most of the tape. Can also leave it on: the 'eye' can't tell if the panel is recessed or raised. (pretty sure that tape can't be reused!)
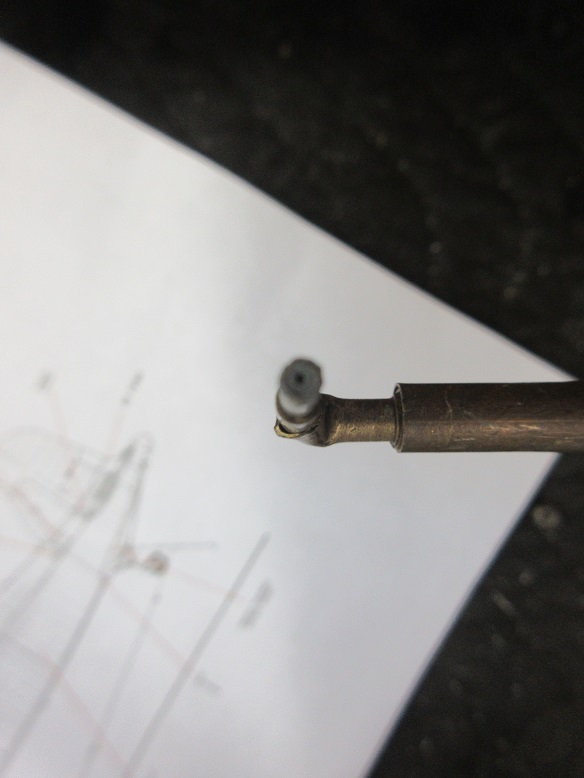
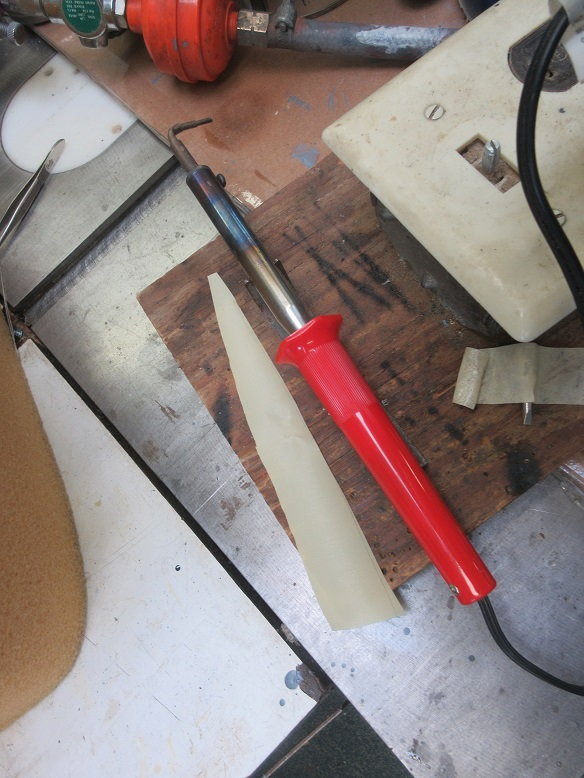
Rivets:
Tools of the trade. 1/16" diameter brass tubing for burning in rivets. Made a straight 'rivet maker' but I prefer the 90 degree one.
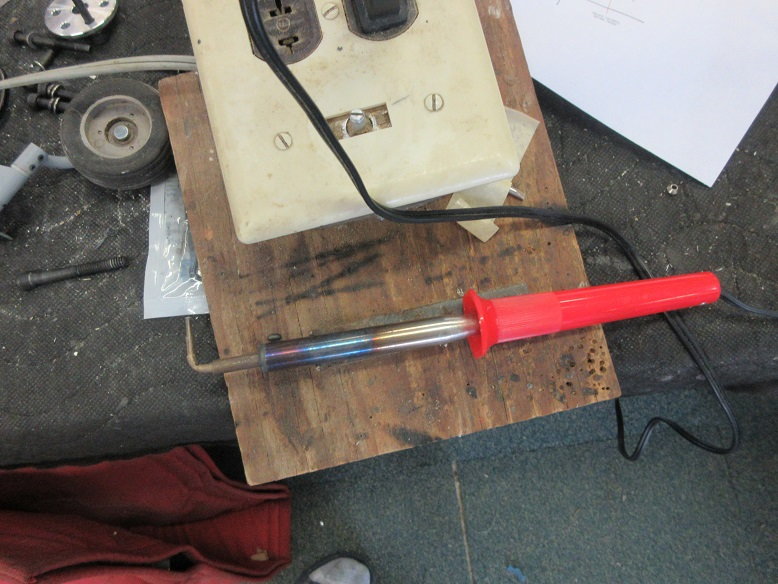
The brass tip will clog up with primer about 50-75 rivets (depending on how thick the primer is). A brass wire brush cleans it out.
Ruler to put in pencil lines as guides for interior rivets within the panels.

My daughter says I have no patience: HA, try burning in thousands of rivets on a corsair!!!
Panel lines get a double row of rivets. Non-panel lines get a single row of rivets.
I'm partial to putting rivets on before painting as less likely, for me, to damage the paint. Putting rivets on after will expose the primer giving a weathered look. Also, could put a coat of silver before painting to expose the aluminum.

Wet sanded until the chart tape was exposed.
Pulled off most of the tape. Can also leave it on: the 'eye' can't tell if the panel is recessed or raised. (pretty sure that tape can't be reused!)
Rivets:
Tools of the trade. 1/16" diameter brass tubing for burning in rivets. Made a straight 'rivet maker' but I prefer the 90 degree one.
The brass tip will clog up with primer about 50-75 rivets (depending on how thick the primer is). A brass wire brush cleans it out.
Ruler to put in pencil lines as guides for interior rivets within the panels.
My daughter says I have no patience: HA, try burning in thousands of rivets on a corsair!!!
Panel lines get a double row of rivets. Non-panel lines get a single row of rivets.
I'm partial to putting rivets on before painting as less likely, for me, to damage the paint. Putting rivets on after will expose the primer giving a weathered look. Also, could put a coat of silver before painting to expose the aluminum.
Last edited by samparfitt; 06-30-2020 at 11:47 AM.
 07-01-2020, 08:40 AM
#42
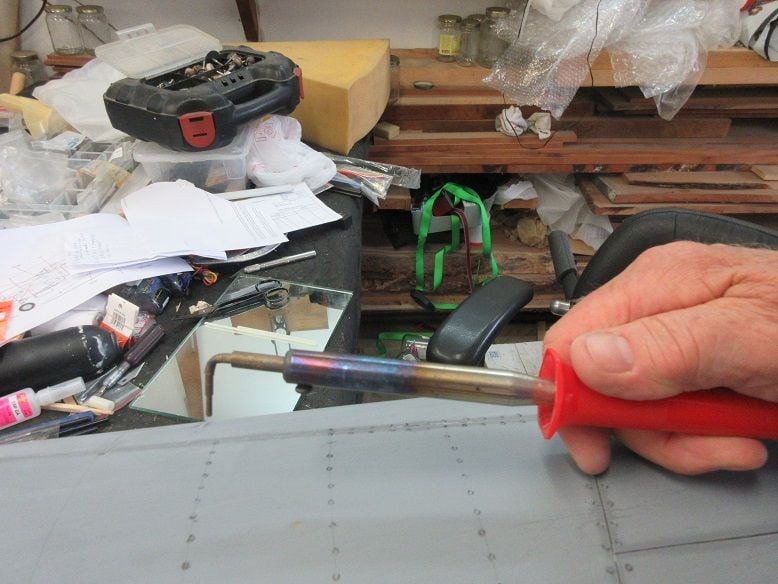
Rivets (cont):
Lucked out: thought for sure the 'rivet maker' would burn through the Solartex but nada.
NOTE: took 3 attempts to get the picture uploads to work.
Put wings together to get rivets for the spars aligned.
Left wing.
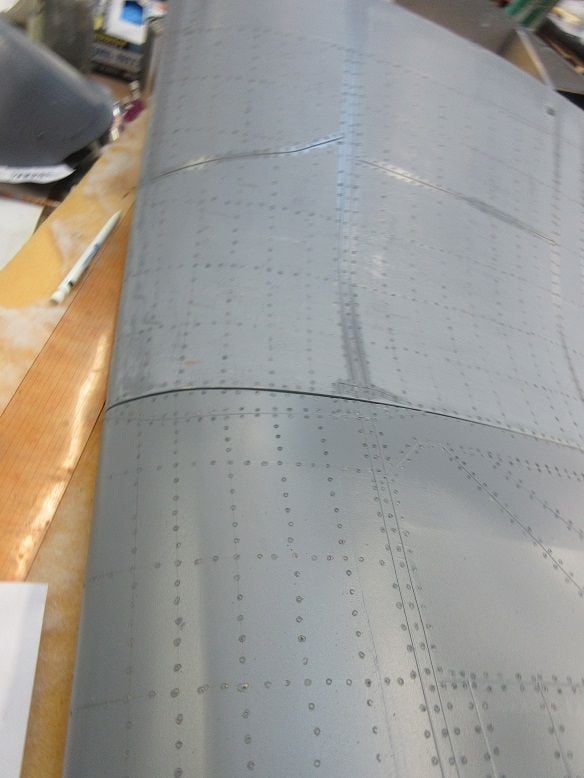
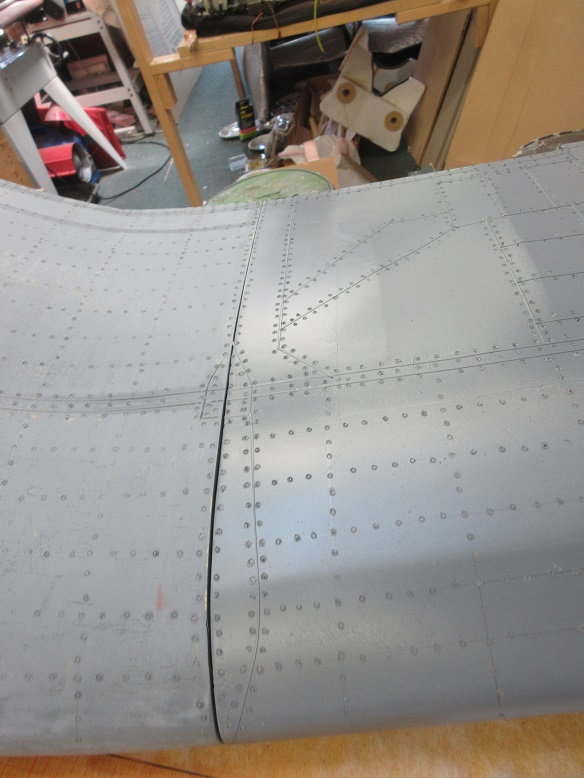

I find I minimize mistakes by, first, putting rivets at all intersections.
Right wing.
Lucked out: thought for sure the 'rivet maker' would burn through the Solartex but nada.
NOTE: took 3 attempts to get the picture uploads to work.
Put wings together to get rivets for the spars aligned.
Left wing.
I find I minimize mistakes by, first, putting rivets at all intersections.
Right wing.
07-01-2020, 01:06 PM
#43
Rivets (cont).
Finished up the remaining parts.
Put flaps next to wing to get correct alignment of ribs.
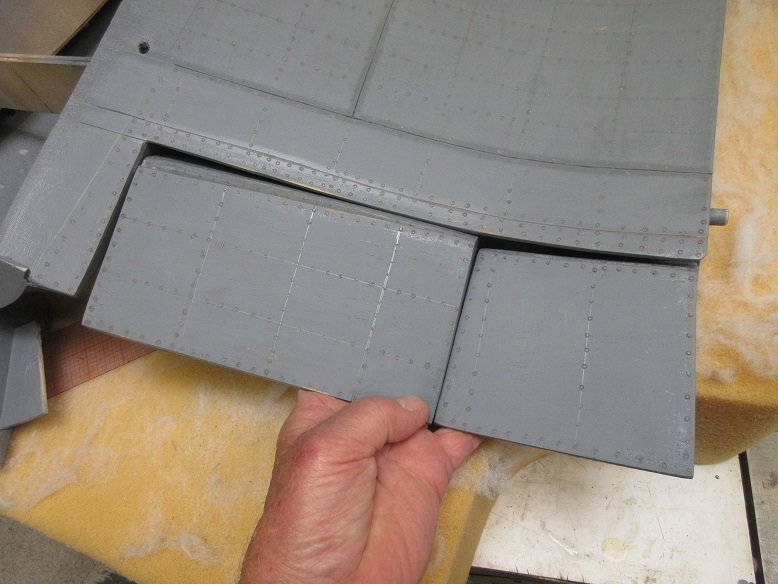
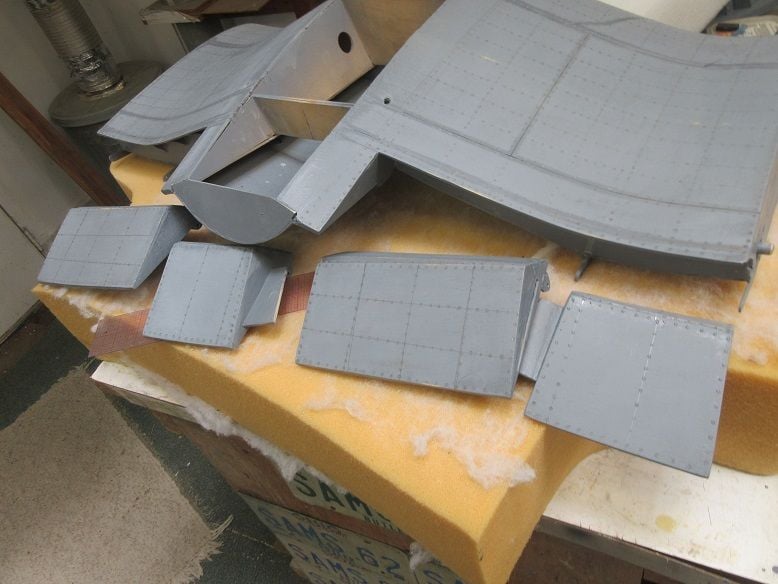
Ditto for the ailerons.

and outer flap.

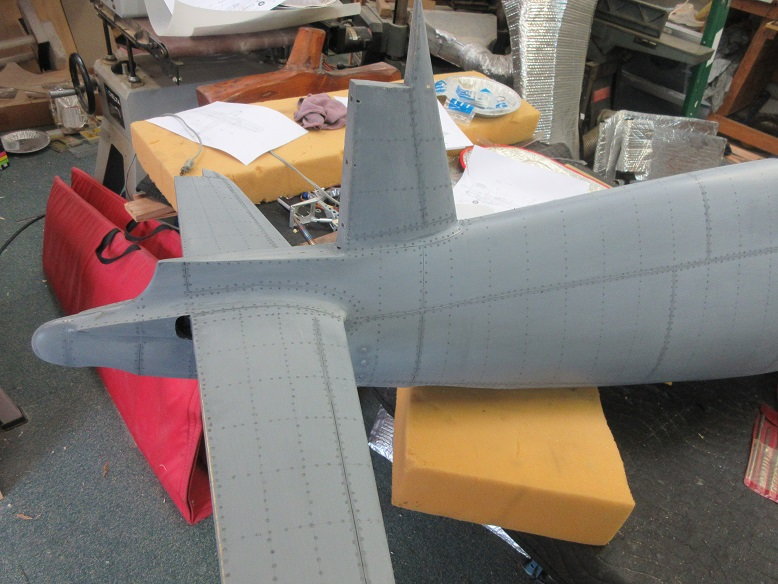
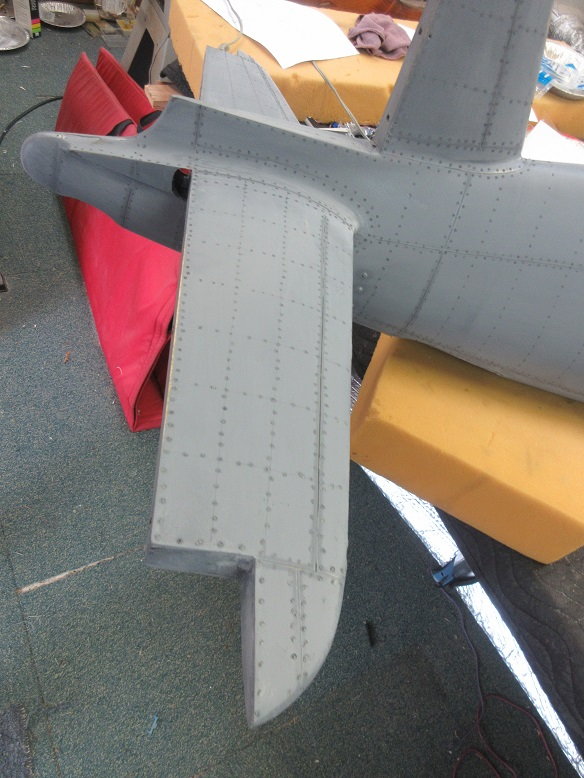
Again, transferred the stab ribs to the elevators. With only one coat of primer on the elevators, the rivet detail is very subtle.

Rudder the same way.

Will only have the front doors.


Now I need the wing radiators to come in soon from Ziroli so I can paint the plane
I've got 2 quarts of dark blue from when I painted the CARF F4U so all set for paint. Should be enough to cover the plane.

Finished up the remaining parts.
Put flaps next to wing to get correct alignment of ribs.
Ditto for the ailerons.
and outer flap.
Again, transferred the stab ribs to the elevators. With only one coat of primer on the elevators, the rivet detail is very subtle.
Rudder the same way.
Will only have the front doors.
Now I need the wing radiators to come in soon from Ziroli so I can paint the plane
I've got 2 quarts of dark blue from when I painted the CARF F4U so all set for paint. Should be enough to cover the plane.
Last edited by samparfitt; 07-01-2020 at 01:08 PM.
07-02-2020, 06:48 AM
#44
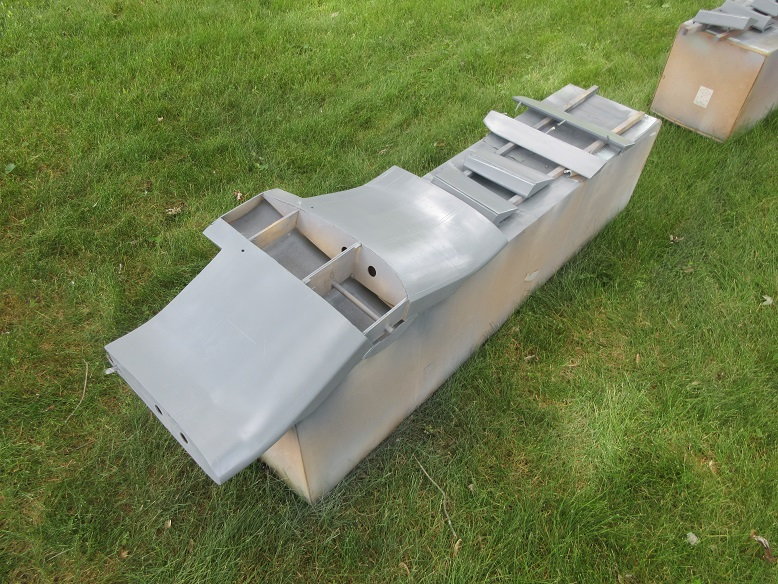
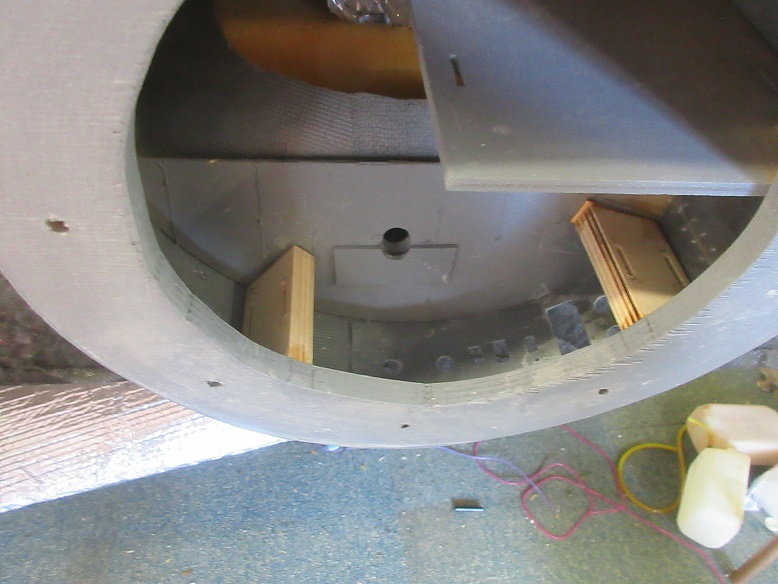
Engine compartment (cont).
While waiting for the wing radiators from Ziroli might as well work on other stuff.
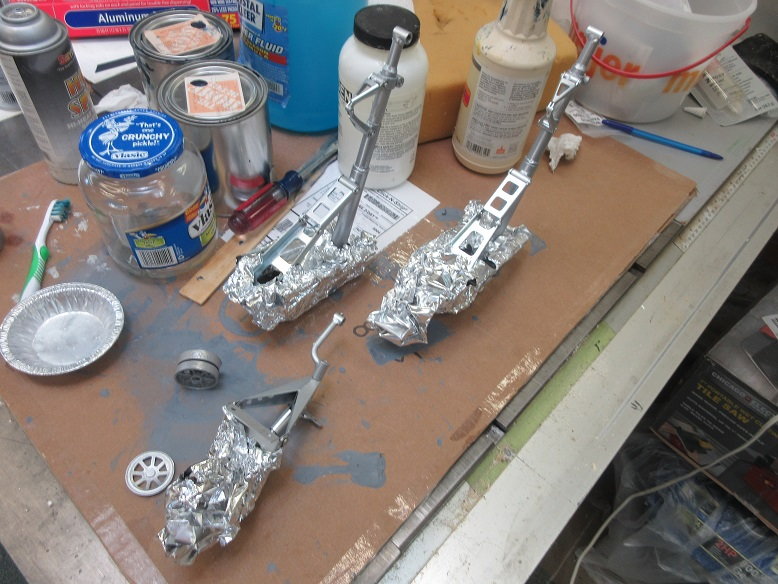
Throttle/Choke servo linkage.
HS-645's used: overkill but who wants a dead stick due to servo failure!
Dubro ball links on servo side.
To save time I copied the Ziroli P-47 transmitter settings to the F4U since all planes are set up the same.
One of the nice things about a removable fire wall: easy to visually check the throttle/choke settings with the transmitter on.
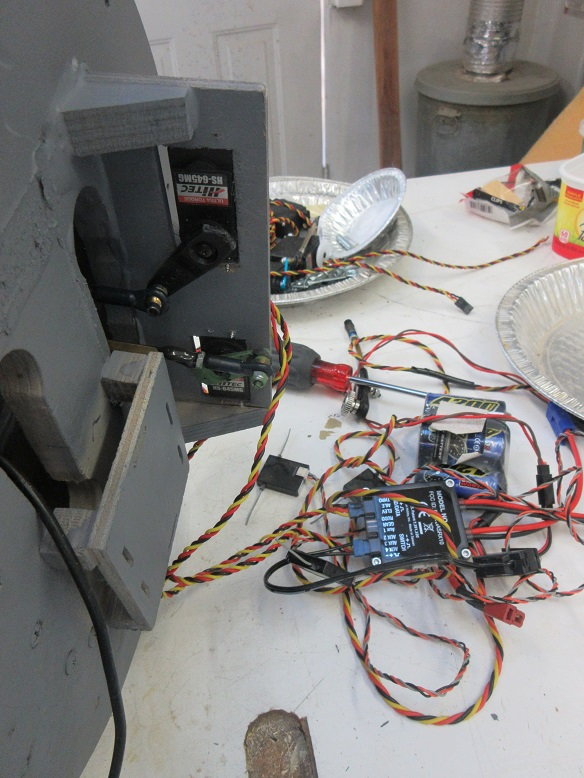
Sullivan easy connect ball links on engine side.
4/40 drill rod reinforced with brass tubing.

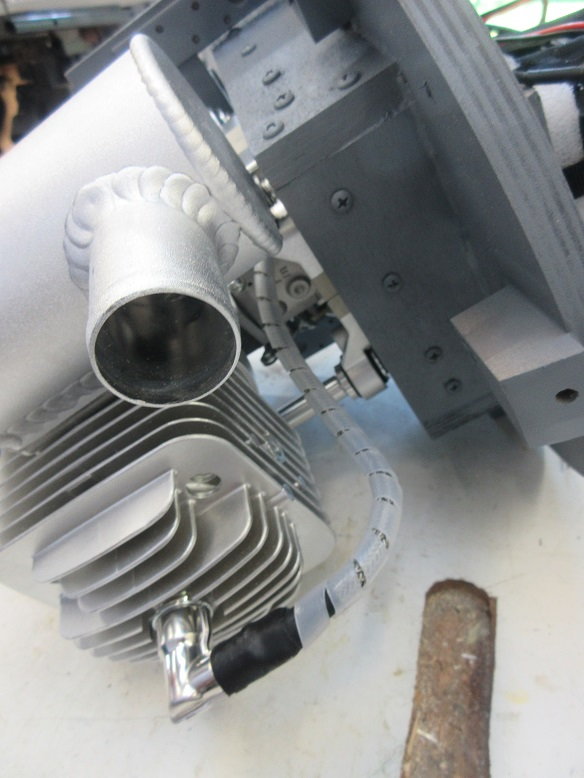
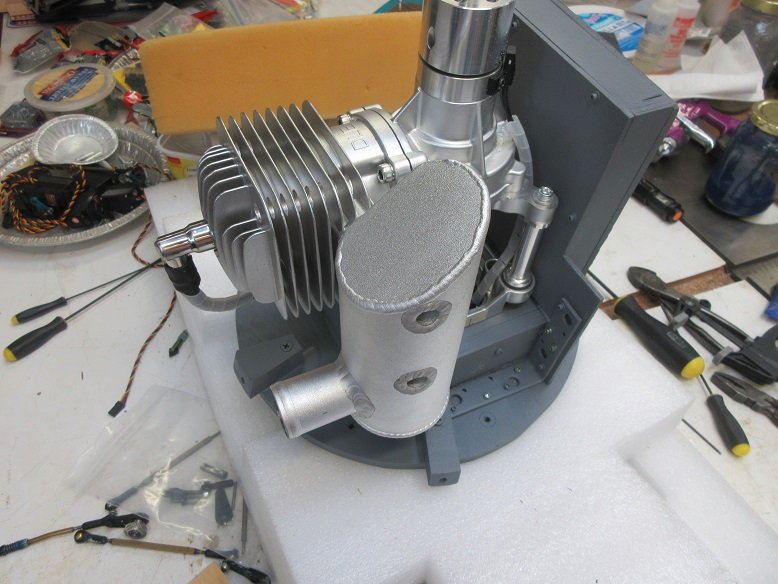
Thread locker on engine mounts and muffler bolts.

Nice that DLE gives you protective wrapping for the spark plug wire.
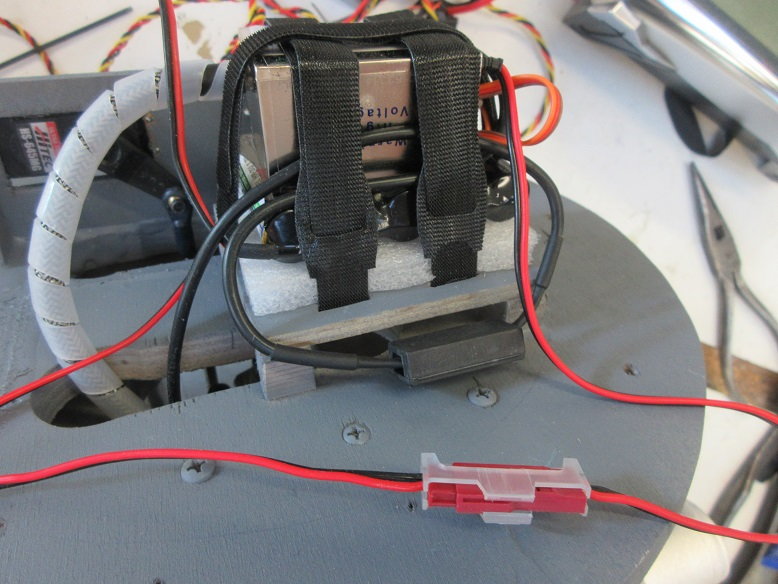
Ignition module and battery velvroed to mounting serface.
DLE, also, gives you wire safety clips, which go on all connections. The sensor wire connection was a little large so I used a 'box' safety clip.
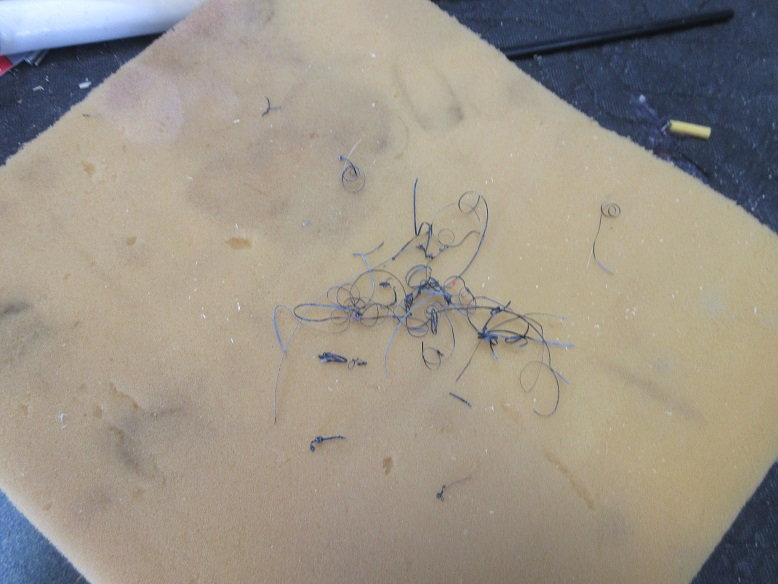
Some of that nice soft, but firm, white foam that came as packing material in something that I bought: never throw 'stuff' away!
Nose weight.
1/16" lead sheet (can also buy it thicker) that I use for weighting my railroad engines.
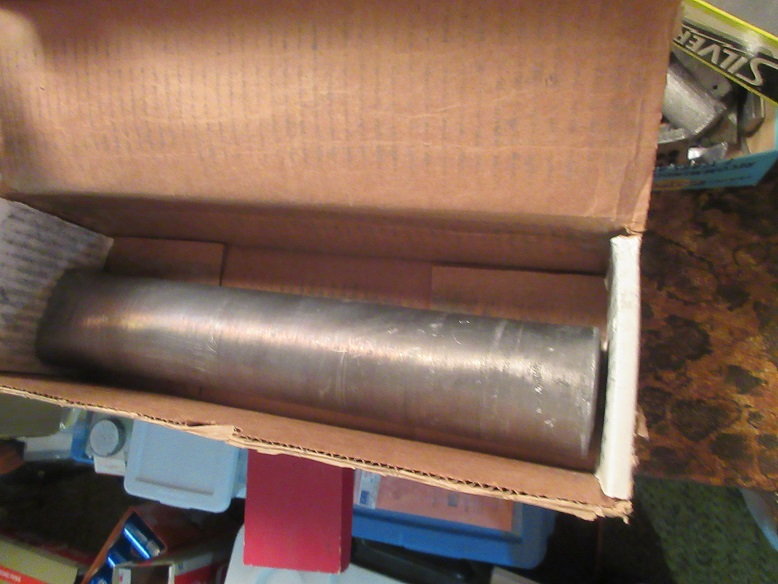
Combo of weight: buckshot and scraps of lead sheeting.
Figure I might as well put weight up front now as it will need it anyway, especially with a short wing to nose ratio.
Later, we'll see how close I get on guessing the weight!
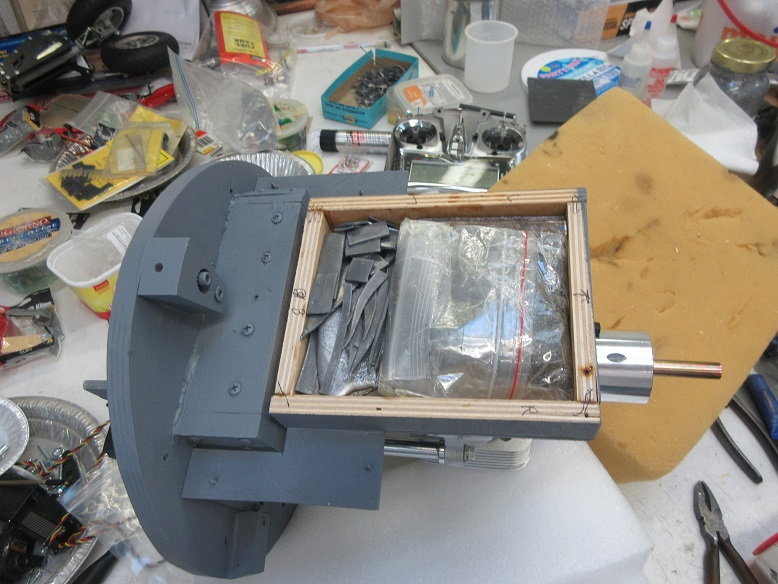
Extra screws added to the weight box brackets.

DLE gives you a rubber exhaust but I'm hoping it will be quiet without it to get a low profile exhaust out the cowl.
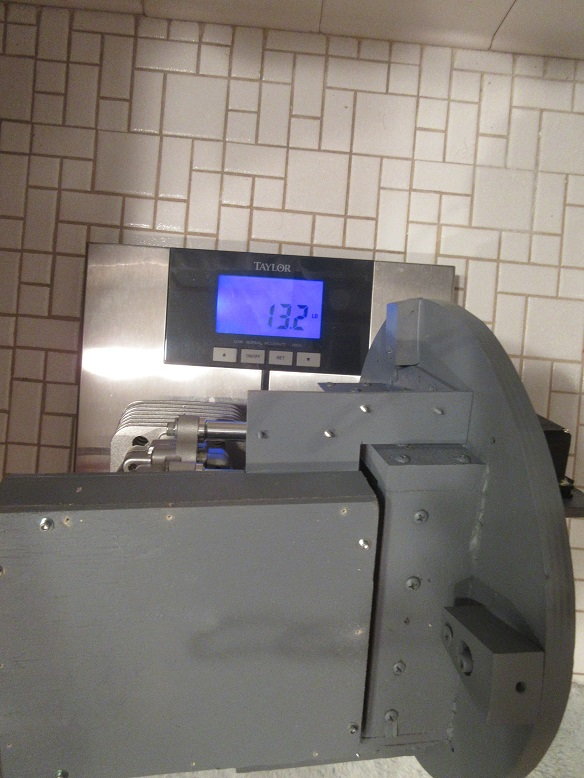
The removable fire wall assembly is pretty hefty weighing in around what a Moki 250 weighs at 13.2 pounds!
While waiting for the wing radiators from Ziroli might as well work on other stuff.
Throttle/Choke servo linkage.
HS-645's used: overkill but who wants a dead stick due to servo failure!
Dubro ball links on servo side.
To save time I copied the Ziroli P-47 transmitter settings to the F4U since all planes are set up the same.
One of the nice things about a removable fire wall: easy to visually check the throttle/choke settings with the transmitter on.
Sullivan easy connect ball links on engine side.
4/40 drill rod reinforced with brass tubing.
Thread locker on engine mounts and muffler bolts.
Nice that DLE gives you protective wrapping for the spark plug wire.
Ignition module and battery velvroed to mounting serface.
DLE, also, gives you wire safety clips, which go on all connections. The sensor wire connection was a little large so I used a 'box' safety clip.
Some of that nice soft, but firm, white foam that came as packing material in something that I bought: never throw 'stuff' away!
Nose weight.
1/16" lead sheet (can also buy it thicker) that I use for weighting my railroad engines.
Combo of weight: buckshot and scraps of lead sheeting.
Figure I might as well put weight up front now as it will need it anyway, especially with a short wing to nose ratio.
Later, we'll see how close I get on guessing the weight!
Extra screws added to the weight box brackets.
DLE gives you a rubber exhaust but I'm hoping it will be quiet without it to get a low profile exhaust out the cowl.
The removable fire wall assembly is pretty hefty weighing in around what a Moki 250 weighs at 13.2 pounds!
Last edited by samparfitt; 07-02-2020 at 06:56 AM.
07-02-2020, 12:11 PM
#45
Miscellaneous.
Tank set up.
Using a 40 oz tank (should be enough!).
I like Dubro's barbs and clips (I, accidentally, put a barb on the vent end).
Gas gets the 'O' gasket (brown).
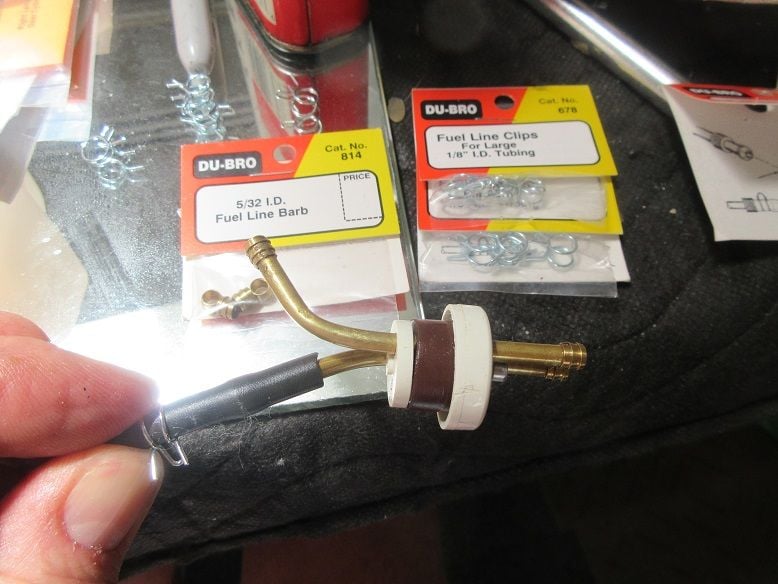
Clunk system all done. A brass tubing inserted going to the clunk to keep it from falling forward towards the front of the tank.
The clunk gets black tubing that stays flexible. Got this stuff about 15 years ago and, I think' it's call viton! I think Sullivan has some new tubing that stays flexible.
I replaced the phillips head screw with a socket head to get better torque. Marked the tops of the brass tubing as I need to twist one brass line to align the bend with the other brass line so I can get them into the tank hole. The markers assures I have both brass tubes aligned correctly.
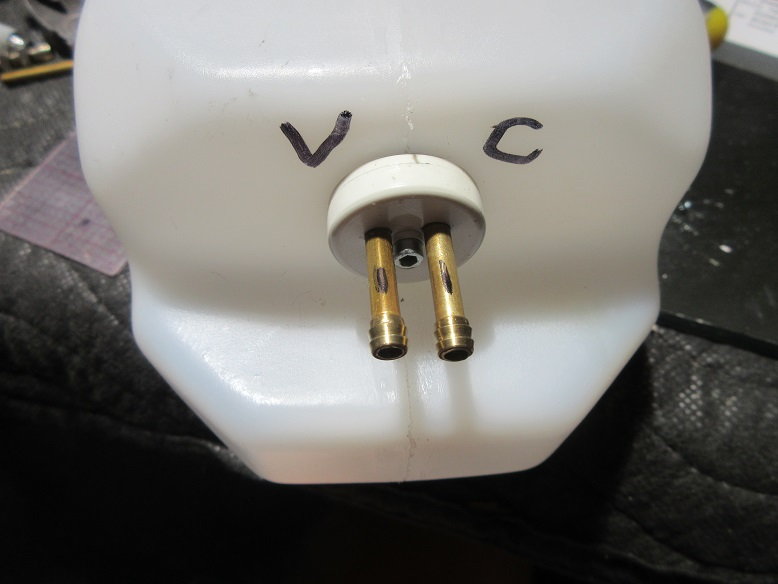
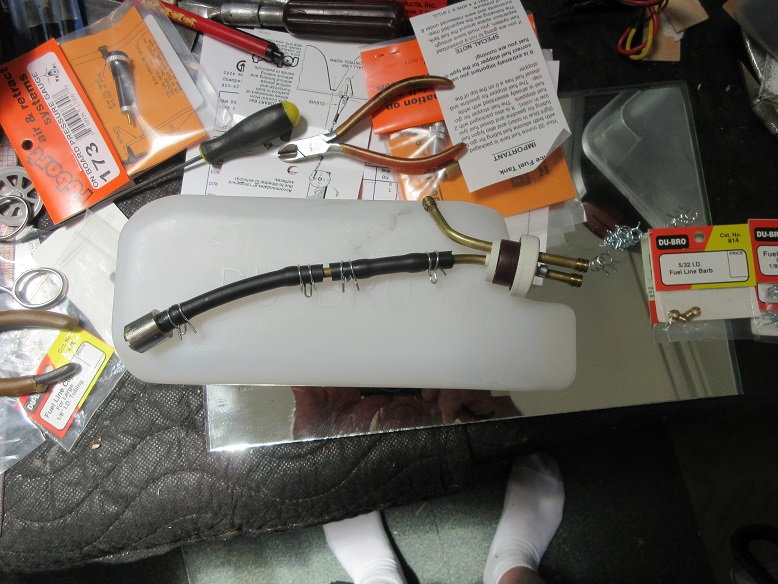
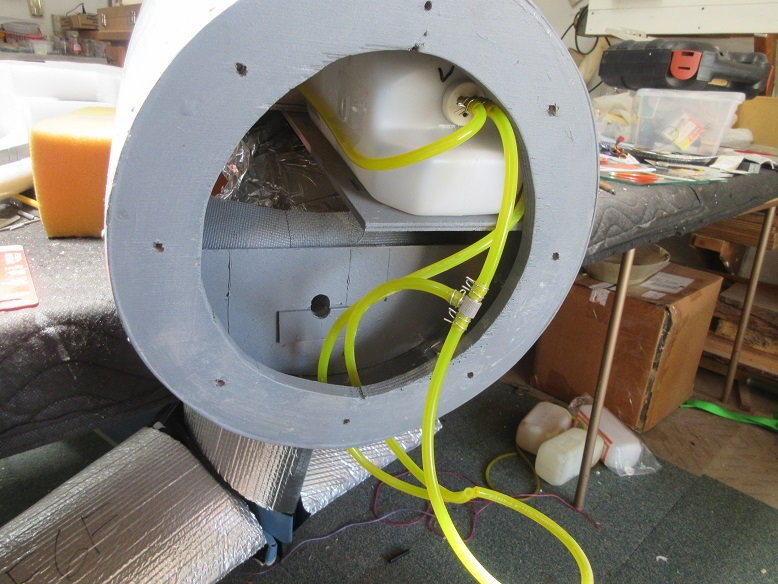
Dry fit. The vent line wraps around the tank before exiting (and box taped to the tank). T is for filling and to carb.
I don't mind using the yellow tubing on the outside of the tank that gets hard after several years as it's easy to replace versus internal.
Glued in two blocks with velcro slots to hold both receiver batteries.
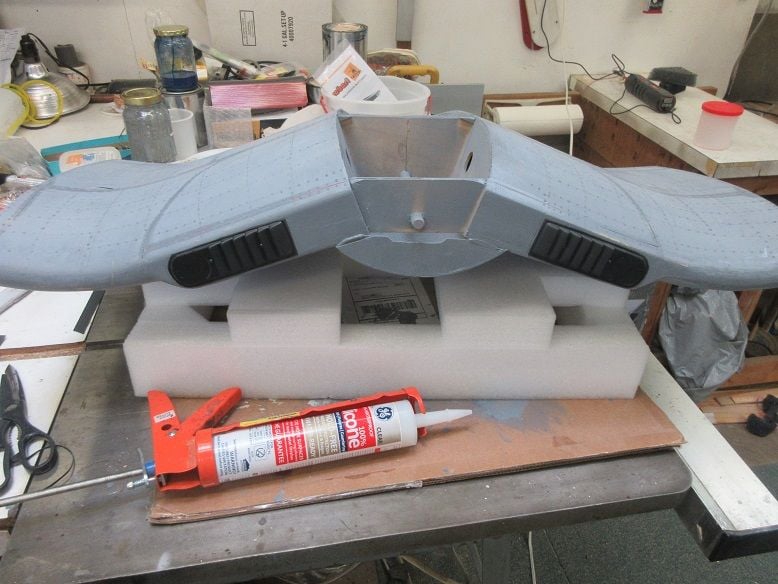
Mail person delivered the wing radiators.
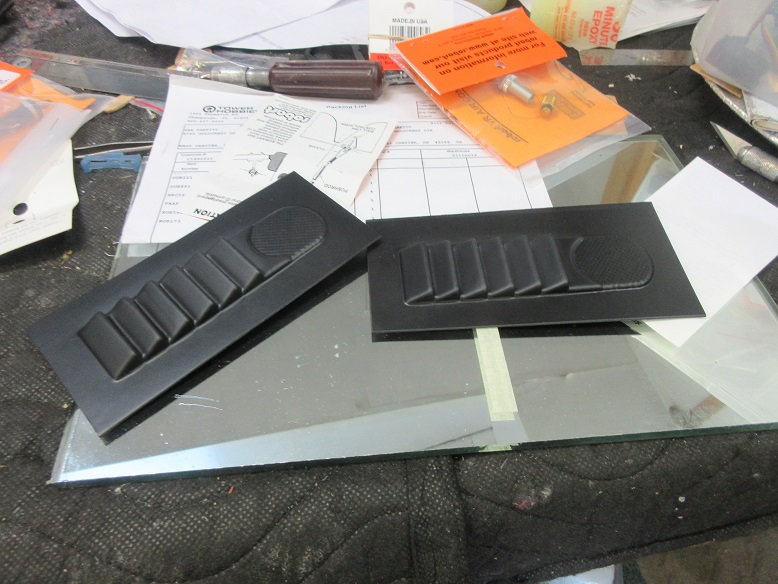
Used caulk and some button head screws to secure them to the wing after cleaning them with alcohol.
Tomorrow, I can paint the plane.
Tank set up.
Using a 40 oz tank (should be enough!).
I like Dubro's barbs and clips (I, accidentally, put a barb on the vent end).
Gas gets the 'O' gasket (brown).
Clunk system all done. A brass tubing inserted going to the clunk to keep it from falling forward towards the front of the tank.
The clunk gets black tubing that stays flexible. Got this stuff about 15 years ago and, I think' it's call viton! I think Sullivan has some new tubing that stays flexible.
I replaced the phillips head screw with a socket head to get better torque. Marked the tops of the brass tubing as I need to twist one brass line to align the bend with the other brass line so I can get them into the tank hole. The markers assures I have both brass tubes aligned correctly.
Dry fit. The vent line wraps around the tank before exiting (and box taped to the tank). T is for filling and to carb.
I don't mind using the yellow tubing on the outside of the tank that gets hard after several years as it's easy to replace versus internal.
Glued in two blocks with velcro slots to hold both receiver batteries.
Mail person delivered the wing radiators.
Used caulk and some button head screws to secure them to the wing after cleaning them with alcohol.
Tomorrow, I can paint the plane.
Last edited by samparfitt; 07-02-2020 at 12:14 PM.
 07-03-2020, 07:12 AM
#47
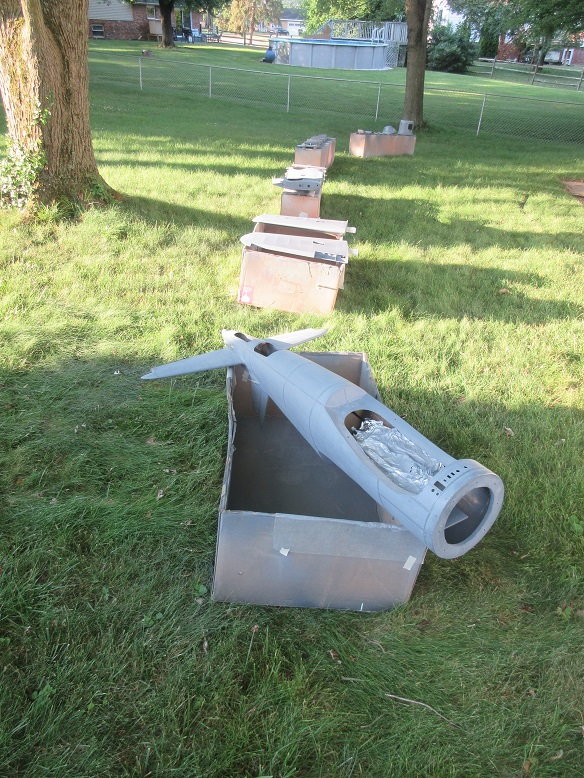
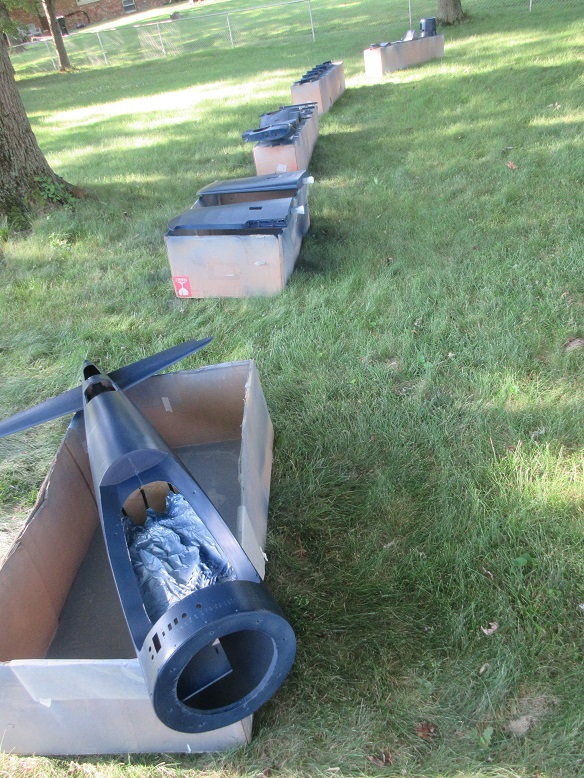
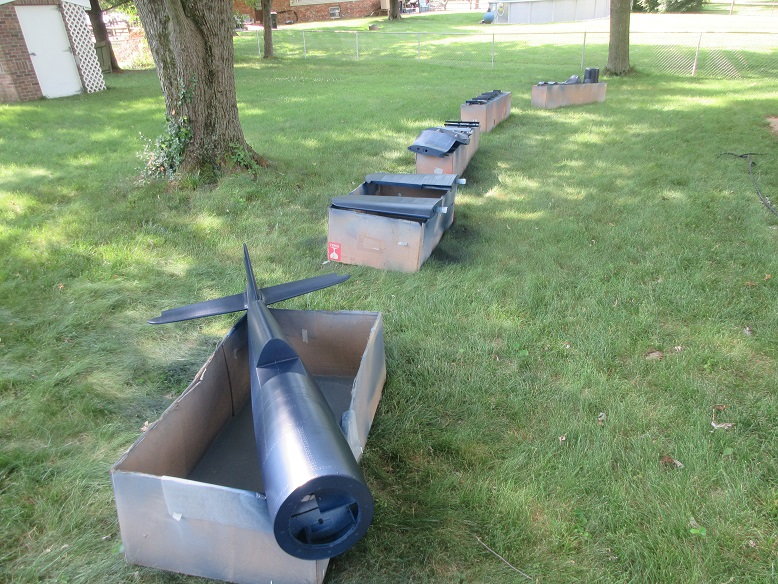
Painting.
Needed lots of boxes to hold all the parts.
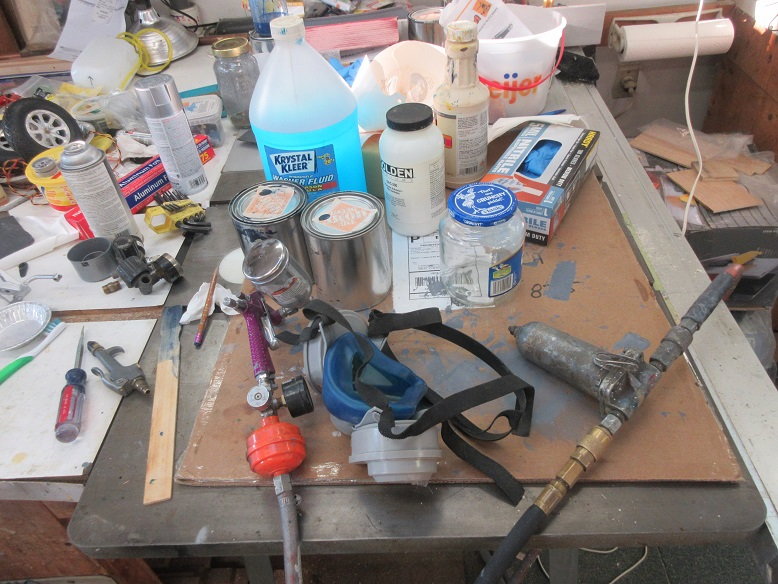
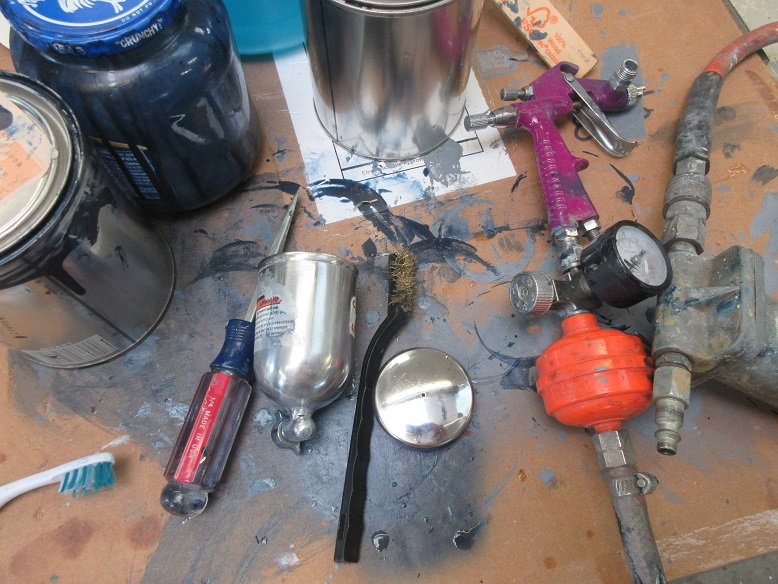
Tools of the trade. Good ol' window wiper fluid (blue kind only) to thin the water base paint. Got my paint from HD Behr exterior 100% acrylic about 9 years ago.
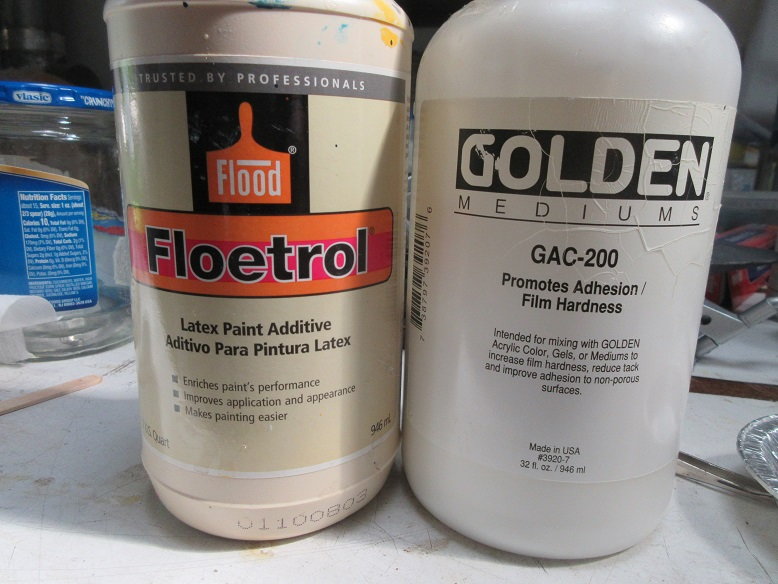
I thin the paint about 30%. This can vary on how thick of paint you use. This is for houses so it's thick but not as much as some of the new paint that I've seen. I dump some 'easy flow' and 'hardener' into the 'mix'.
The gun is a touch up gun from Harbor Freight.
It took a little over a quart to paint this plane. Last corsair I painted, by the time one buys 2 quarts, it doesn't cost that much more for a gallon so I had left over from the last plane.
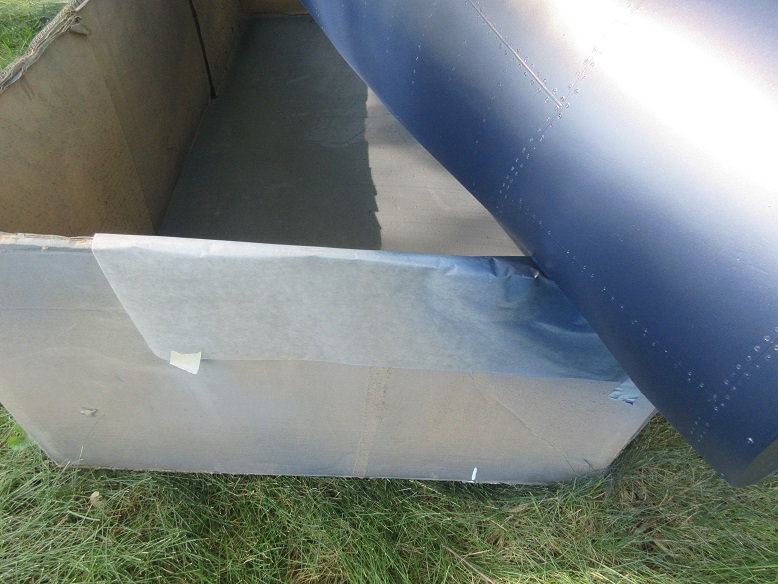
The bottom sides got the first coats. Did about 2 coats on the bottom. All edges and corners first and then the main surface.

Next was the top sides. Waited an hour before flipping the parts over.
Put 3 coats on the top. 2nd coat was perpendicular to the first coat. Three thin coats are always better than one thick coat.
Sometimes, will get 'fish eyes'; don't worry about them, the next coat will cover them.
Again, all edges and corners first.
Wax paper to insure heavy parts don't stick to the boxes. The light parts, I don't worry about them sticking.
Those boxes are about 10 years old: must be as from old Yellow aircraft and old carf.
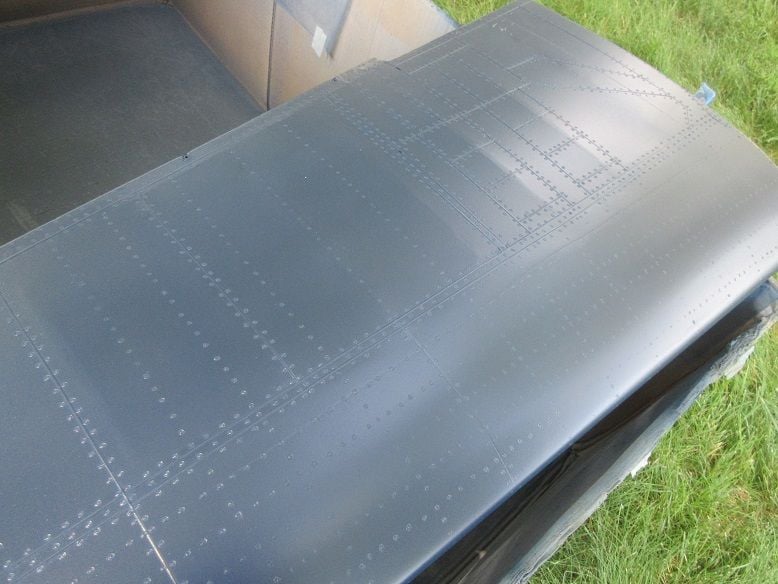
Lots of edges and corners to get, first, on the fuse.

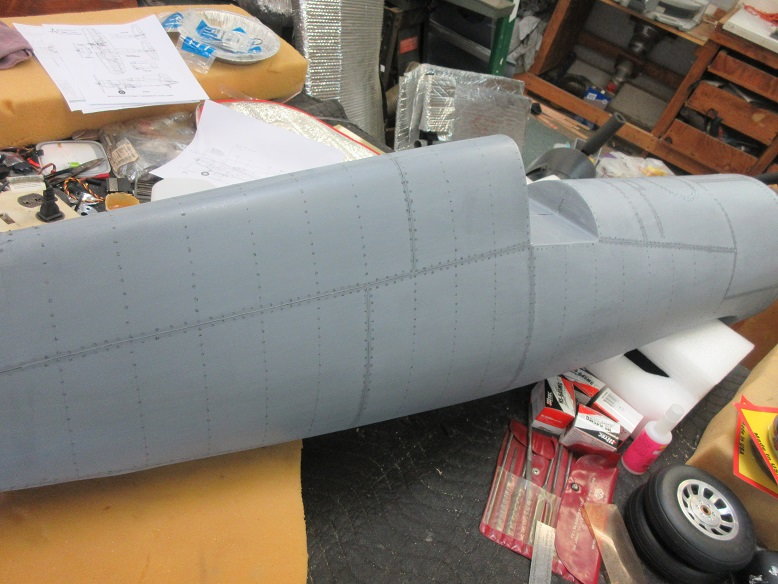
Even household paint won't fill in rivets so they show nicely. Each spray pattern covers 50% of the previous pattern.
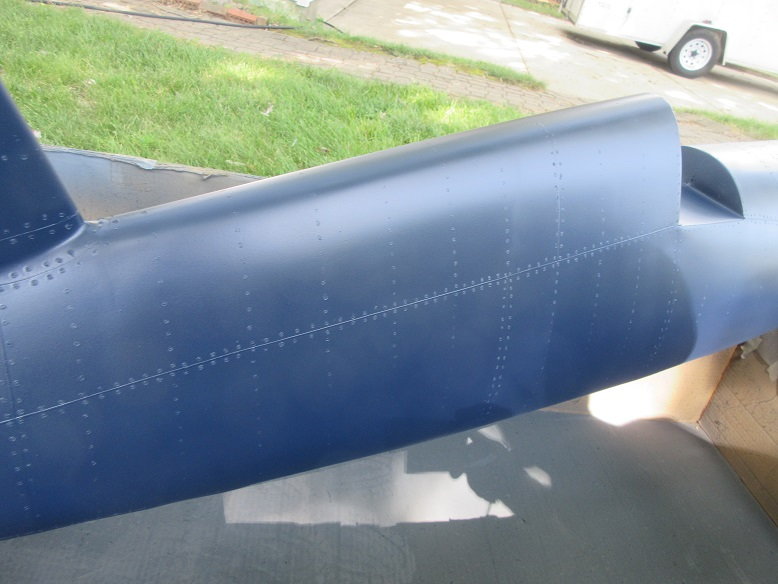
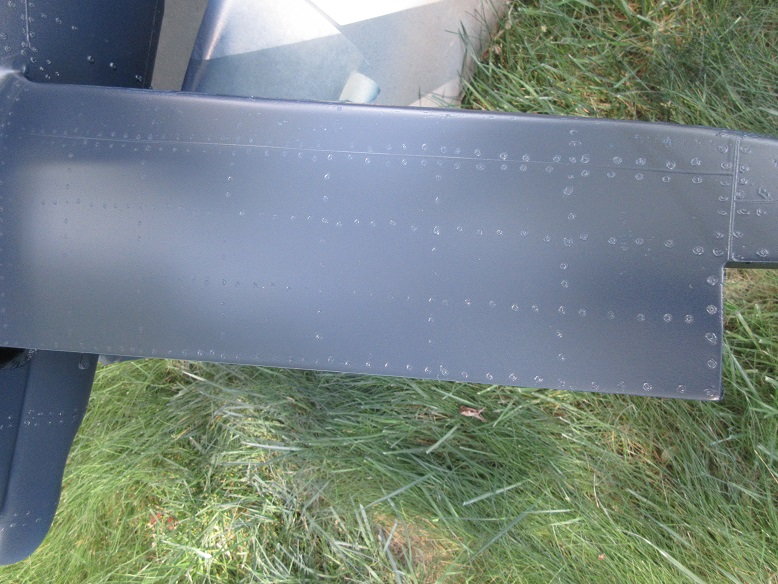

The rivets show even on the elevators that only had one coat of primer on the Solartex.


All painting is best done outdoors as there is a lot of over spray. Best to paint in the shade: the sun may harden the paint before it has a chance to flow.
I've got lots of trees but 'pop ups' can also be used. The surface dries fairly fast so no worry about dust on the paint.
Started at 7:30 AM today. Today it's going to be 91 so the paint should 'cook' pretty well leaving them out for 2-3 hours.
After cleanup, I pick up and set down all the parts to insure they aren't sticking to the boxes. Actually, I've got thin wood strips that the parts rest on.

NO, water base paint is not easy to 'clean up'; had to use a wire brass brush to get the dried on paint off the paint gun.
.
Needed lots of boxes to hold all the parts.
Tools of the trade. Good ol' window wiper fluid (blue kind only) to thin the water base paint. Got my paint from HD Behr exterior 100% acrylic about 9 years ago.
I thin the paint about 30%. This can vary on how thick of paint you use. This is for houses so it's thick but not as much as some of the new paint that I've seen. I dump some 'easy flow' and 'hardener' into the 'mix'.
The gun is a touch up gun from Harbor Freight.
It took a little over a quart to paint this plane. Last corsair I painted, by the time one buys 2 quarts, it doesn't cost that much more for a gallon so I had left over from the last plane.
The bottom sides got the first coats. Did about 2 coats on the bottom. All edges and corners first and then the main surface.
Next was the top sides. Waited an hour before flipping the parts over.
Put 3 coats on the top. 2nd coat was perpendicular to the first coat. Three thin coats are always better than one thick coat.
Sometimes, will get 'fish eyes'; don't worry about them, the next coat will cover them.
Again, all edges and corners first.
Wax paper to insure heavy parts don't stick to the boxes. The light parts, I don't worry about them sticking.
Those boxes are about 10 years old: must be as from old Yellow aircraft and old carf.
Lots of edges and corners to get, first, on the fuse.
Even household paint won't fill in rivets so they show nicely. Each spray pattern covers 50% of the previous pattern.
The rivets show even on the elevators that only had one coat of primer on the Solartex.
All painting is best done outdoors as there is a lot of over spray. Best to paint in the shade: the sun may harden the paint before it has a chance to flow.
I've got lots of trees but 'pop ups' can also be used. The surface dries fairly fast so no worry about dust on the paint.
Started at 7:30 AM today. Today it's going to be 91 so the paint should 'cook' pretty well leaving them out for 2-3 hours.
After cleanup, I pick up and set down all the parts to insure they aren't sticking to the boxes. Actually, I've got thin wood strips that the parts rest on.
NO, water base paint is not easy to 'clean up'; had to use a wire brass brush to get the dried on paint off the paint gun.
.
Last edited by samparfitt; 07-03-2020 at 09:44 AM.
07-03-2020, 01:03 PM
#49
Tony,
This is the stuff I bought about 10 years ago. Don't know if it still exists!
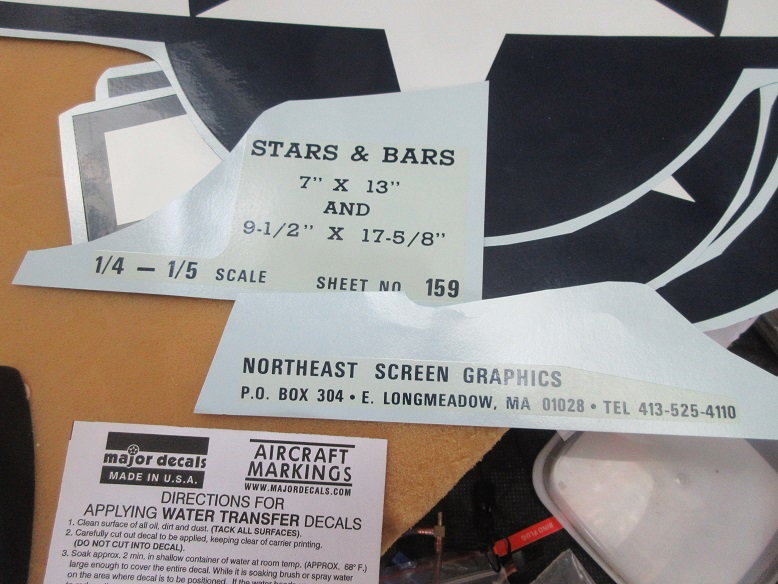
Decals that I use from Major decal. Very nice and cost effective. Around 30 bucks a sheet. By chance, the blue paint matches, exactly, the decals.
These are the best decals that I've ever used. Must be printed with a 2 part epoxy paint as such a large decal doesn't tear. The best part is they show all the rivet details.
I used to paint decals but these give me a nice crisp edge, which would be difficult for me to do when the tape goes over panel lines and rivets.
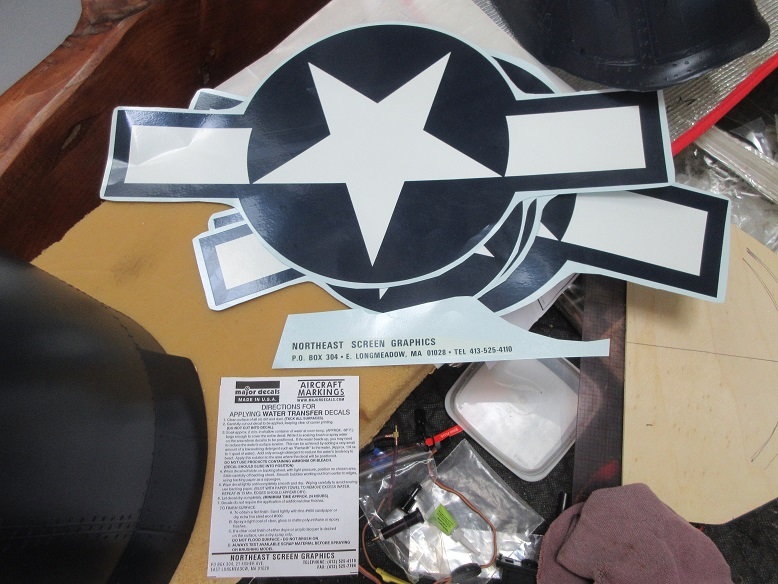
Major decal is owned by Northeast.
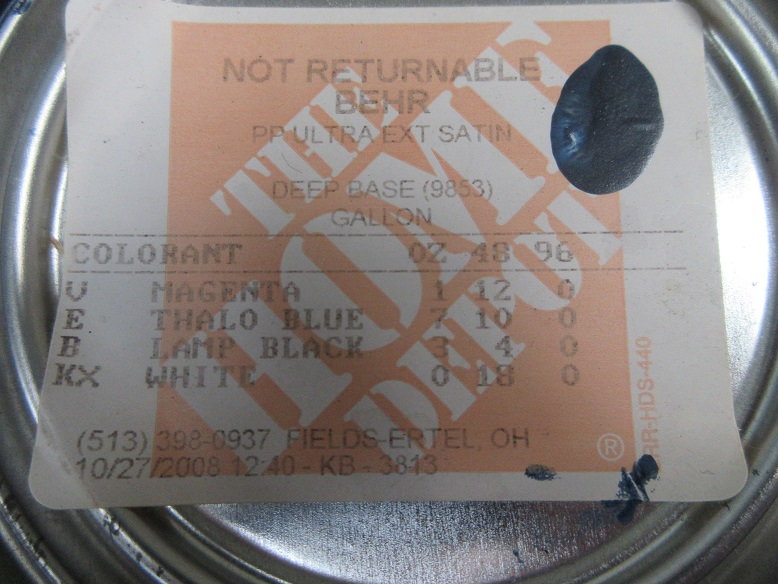
The blue paint 'numbers' from home depot. Again, 10 years ago but HD should be able to replicate it.
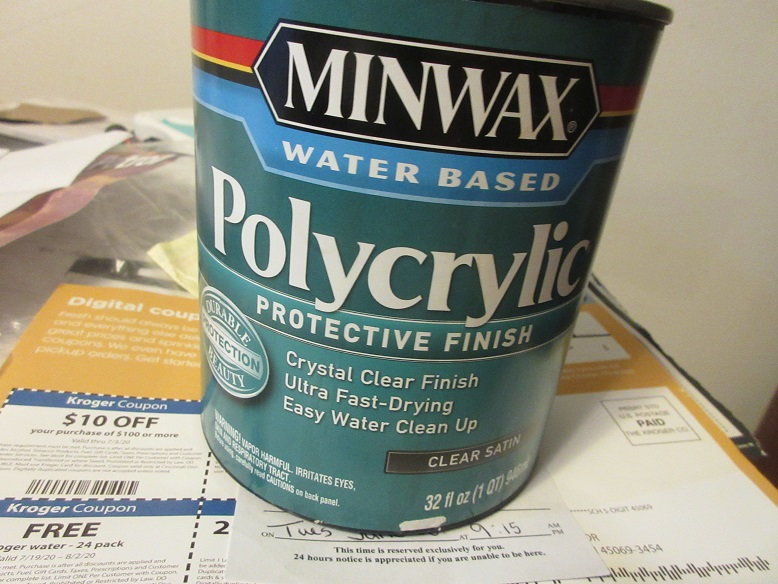
After the decals are applied, I'll use this stuff to seal it. I'll wait until tomorrow to insure the paint is completely dry.
MMM, pretty sure aliens visited my yard!

This is the stuff I bought about 10 years ago. Don't know if it still exists!
Decals that I use from Major decal. Very nice and cost effective. Around 30 bucks a sheet. By chance, the blue paint matches, exactly, the decals.
These are the best decals that I've ever used. Must be printed with a 2 part epoxy paint as such a large decal doesn't tear. The best part is they show all the rivet details.
I used to paint decals but these give me a nice crisp edge, which would be difficult for me to do when the tape goes over panel lines and rivets.
Major decal is owned by Northeast.
The blue paint 'numbers' from home depot. Again, 10 years ago but HD should be able to replicate it.
After the decals are applied, I'll use this stuff to seal it. I'll wait until tomorrow to insure the paint is completely dry.
MMM, pretty sure aliens visited my yard!
Last edited by samparfitt; 07-03-2020 at 01:08 PM.

