


Ziroli f4u corsair build.
 07-04-2020, 11:47 AM
#51

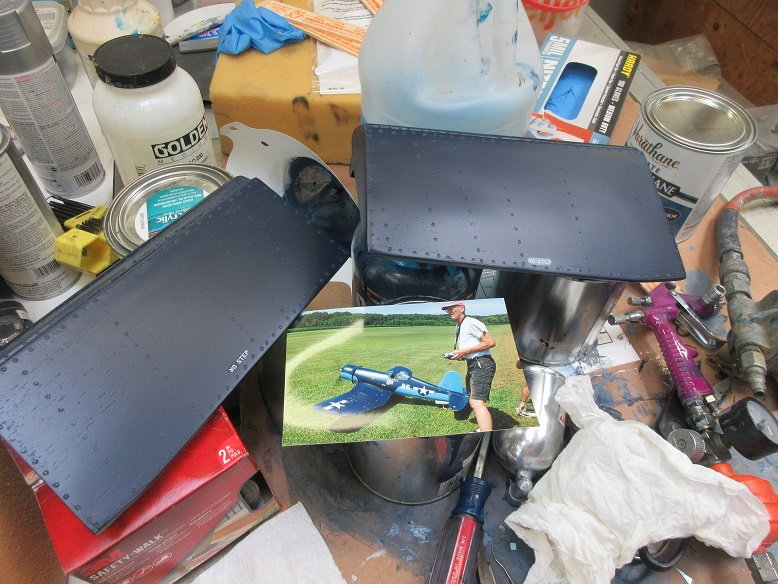
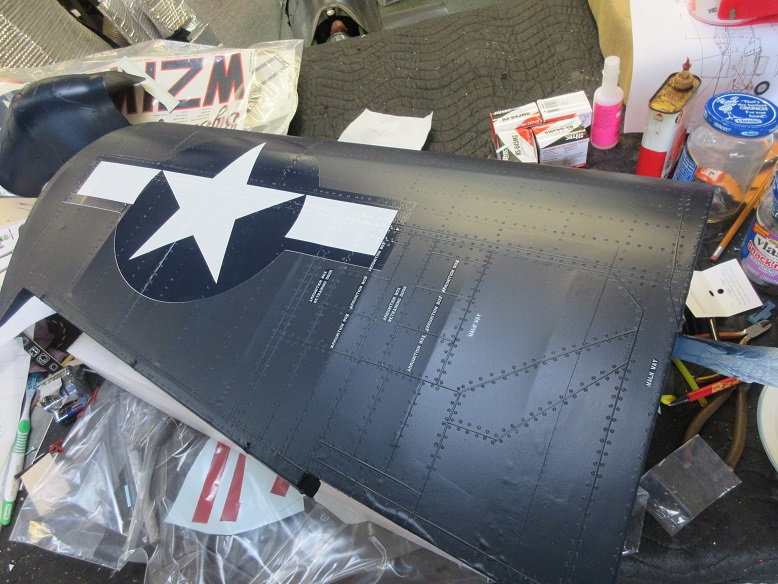
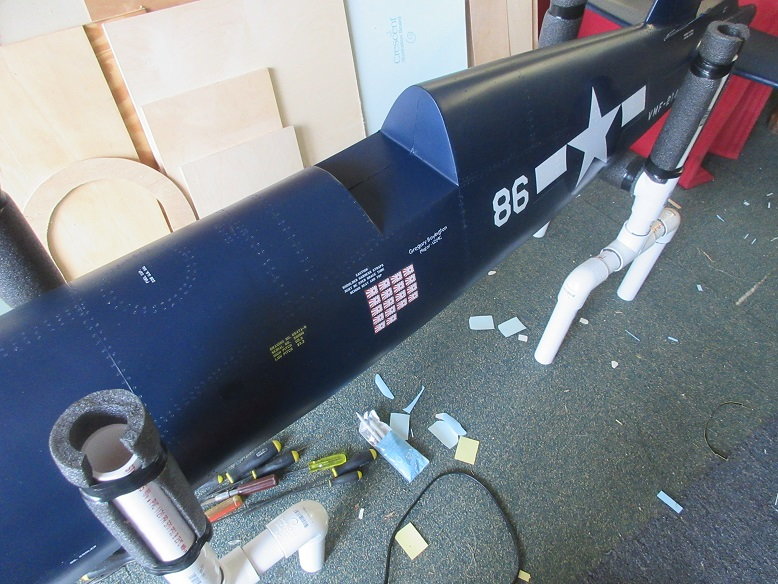
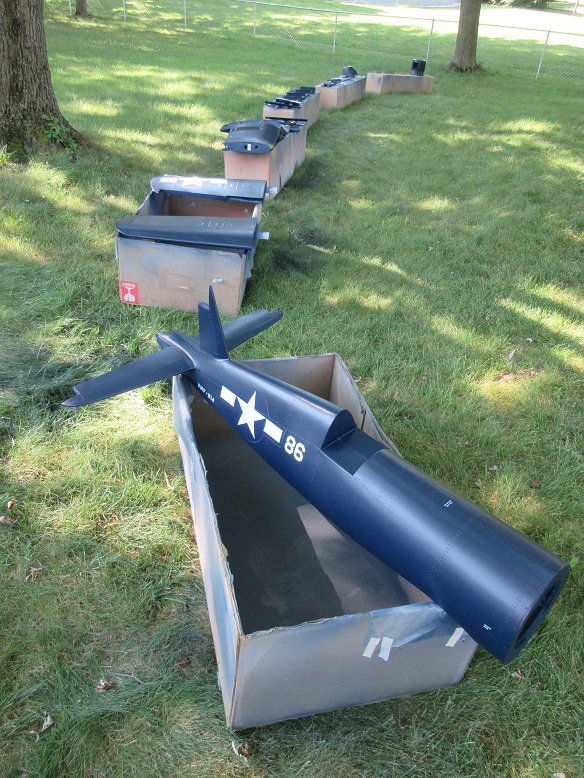
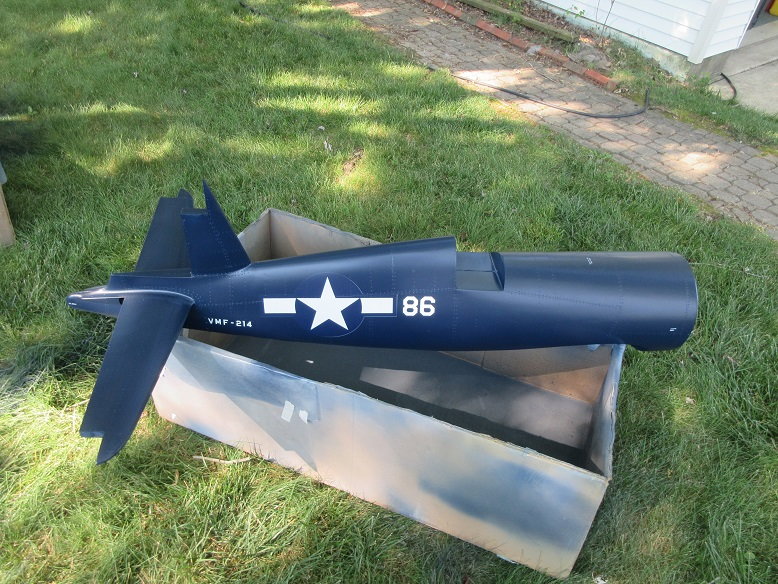
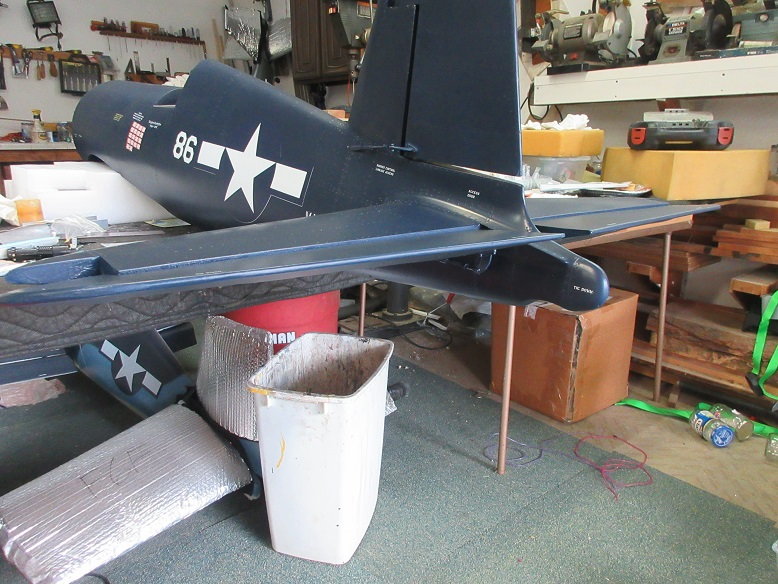
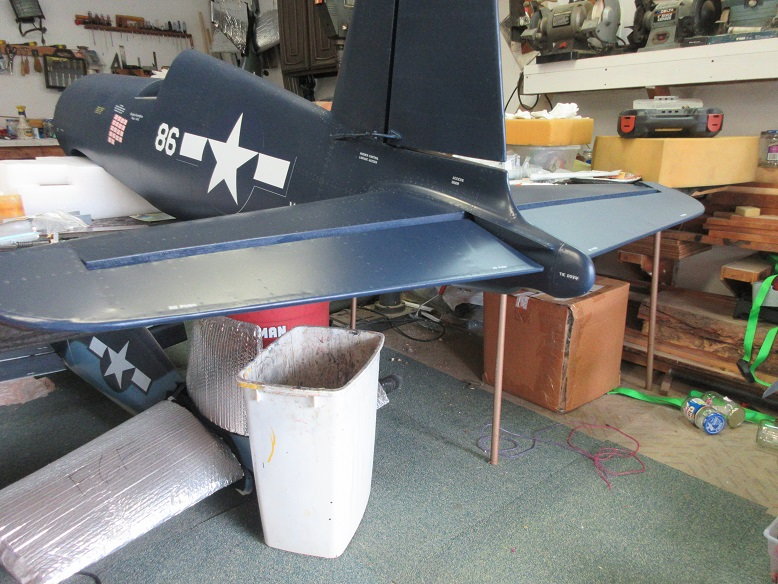
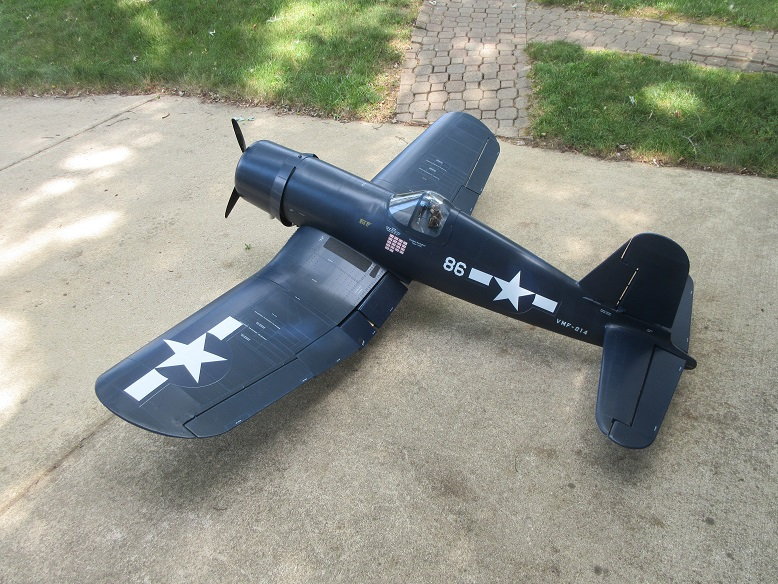
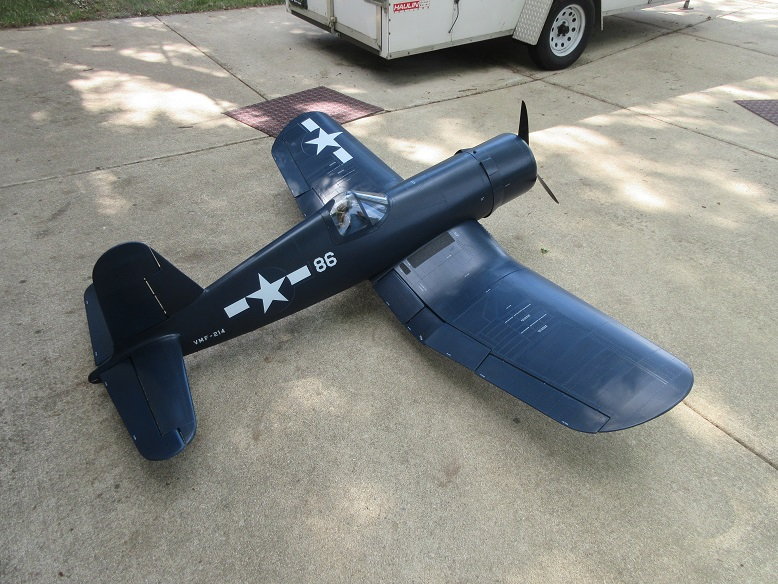
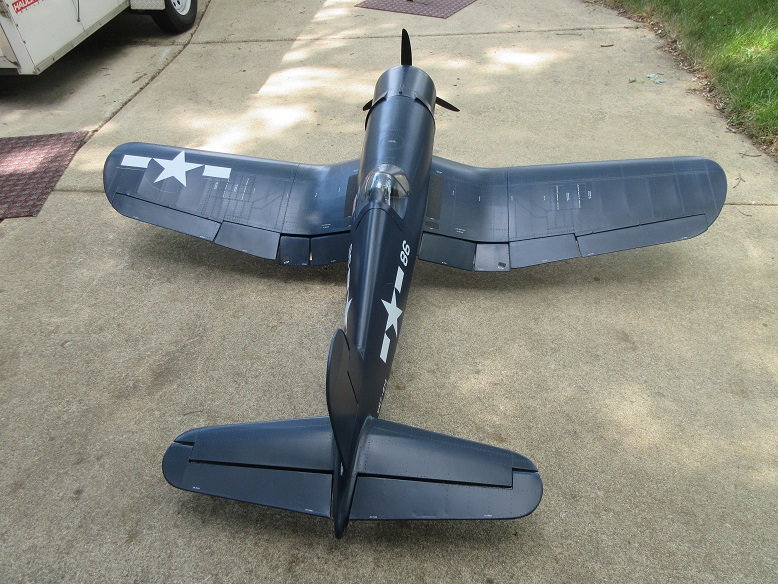
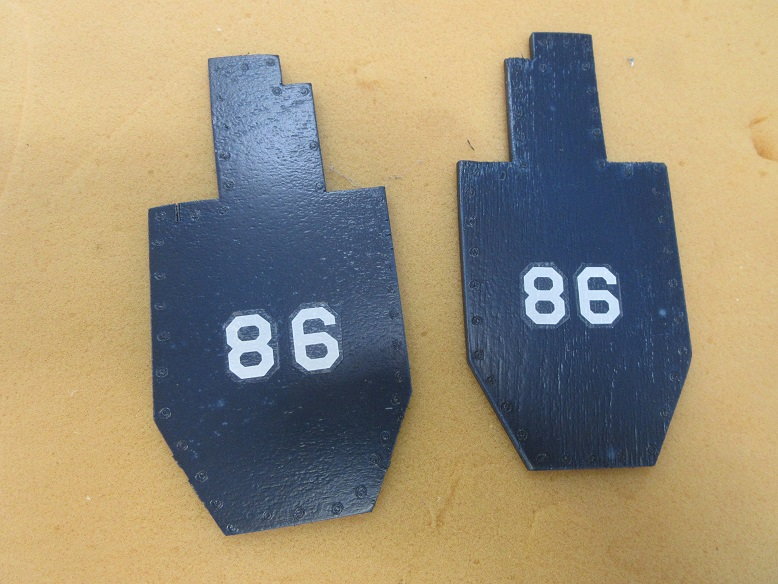
Application of stars-n-stripes and nomenclature.
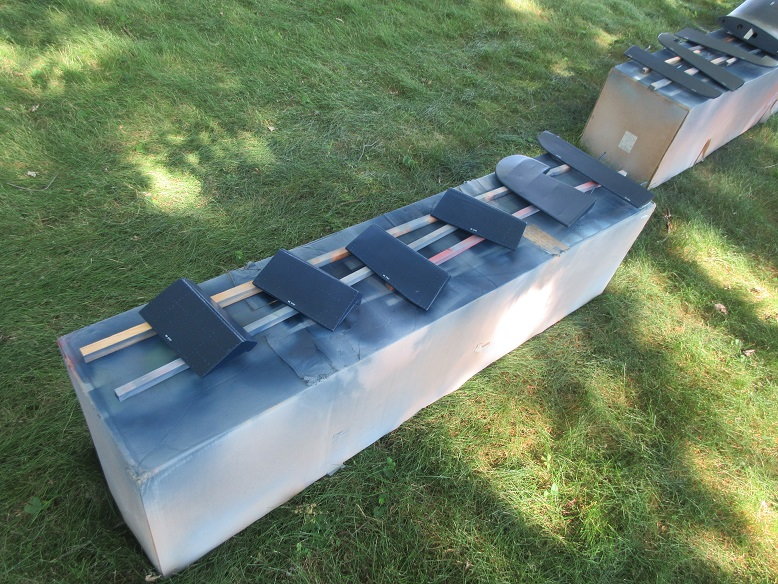
Elevators.
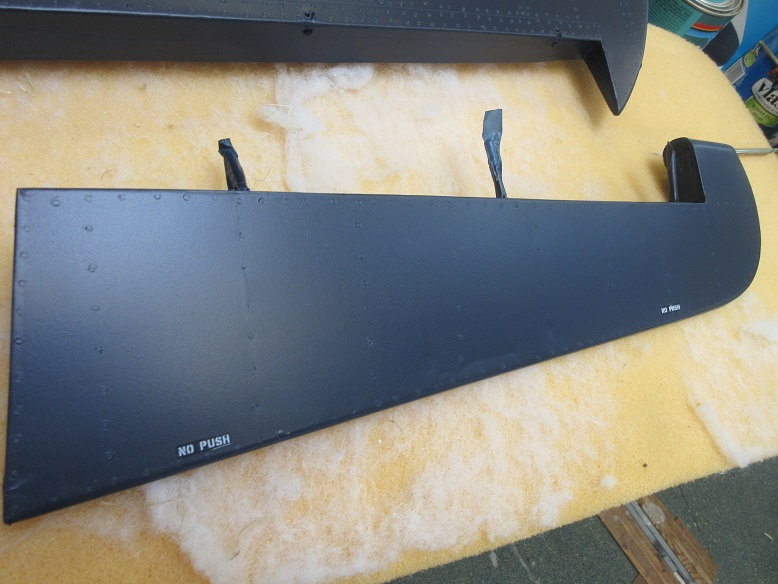
Ailerons.
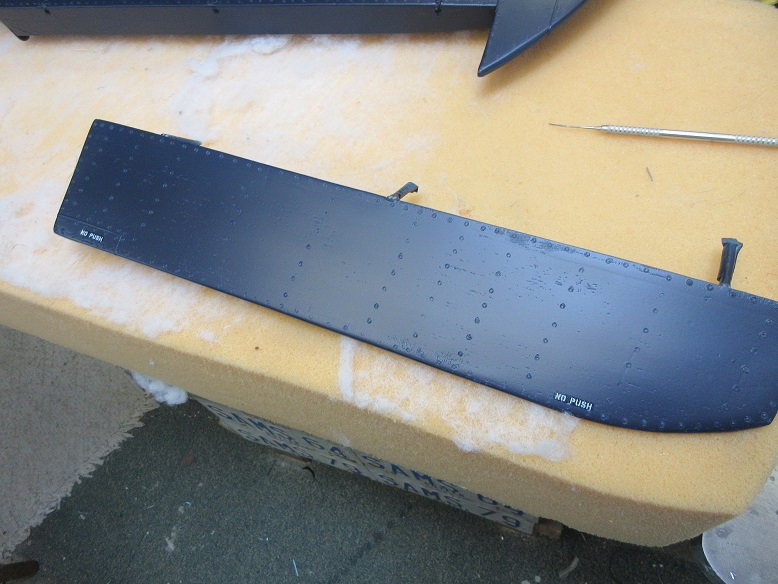
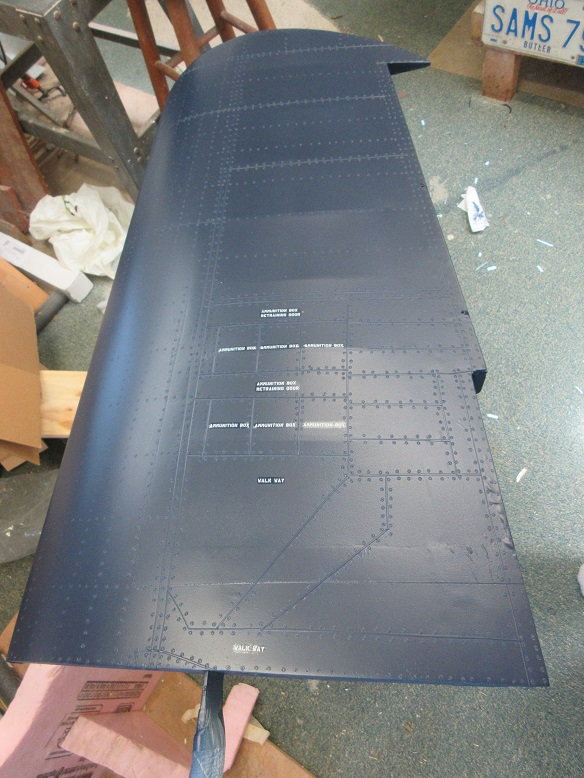
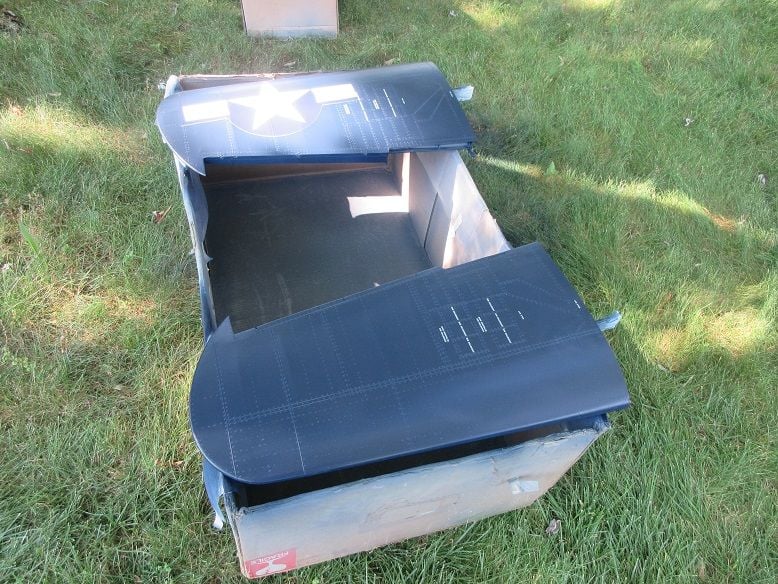
Center wing and inner flaps: used some 3M anti-skid from home depot for 'walk way'.
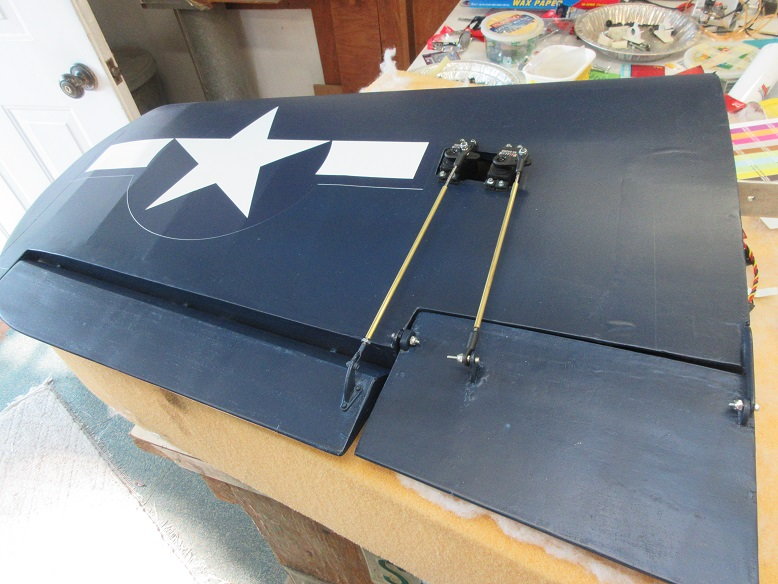
Outer flaps.
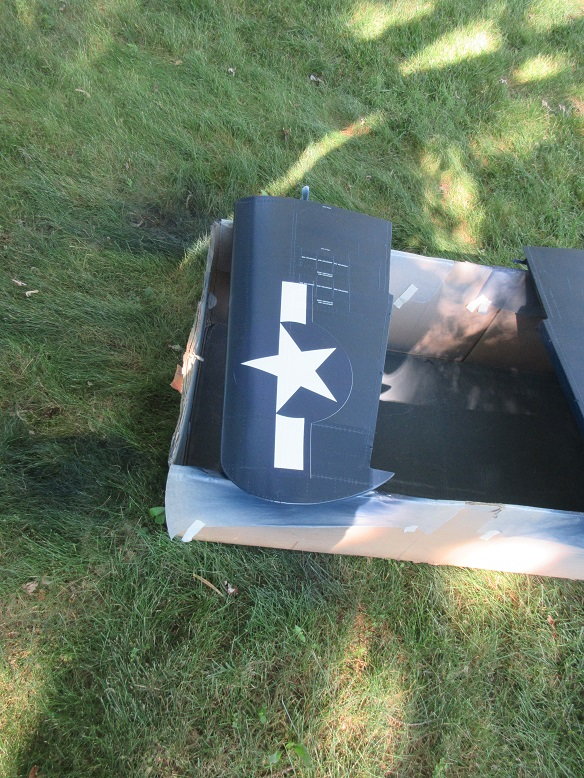
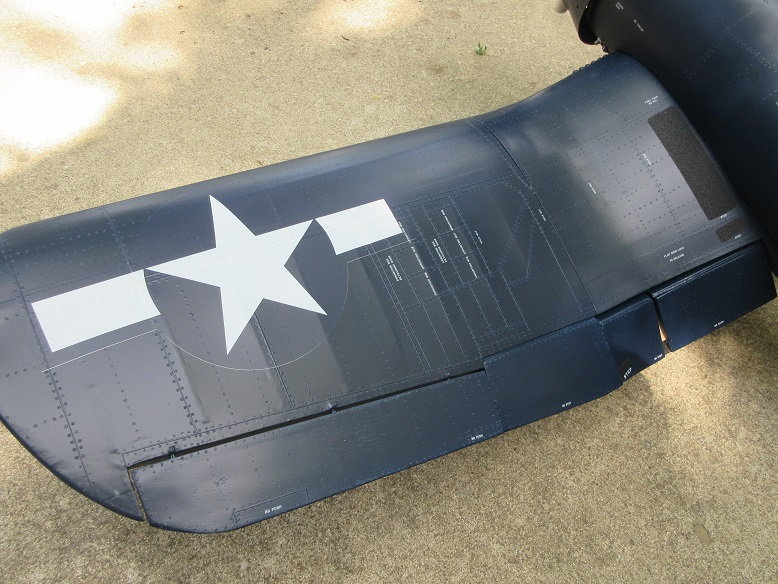
Outer wings.
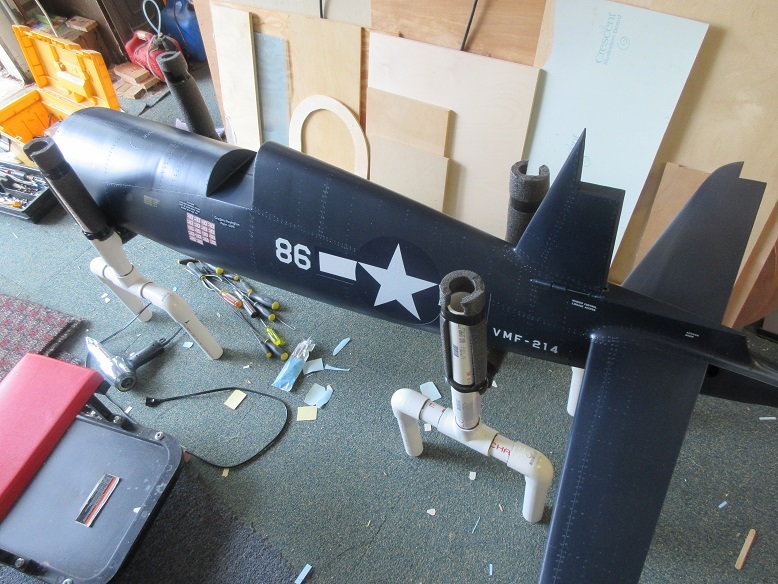
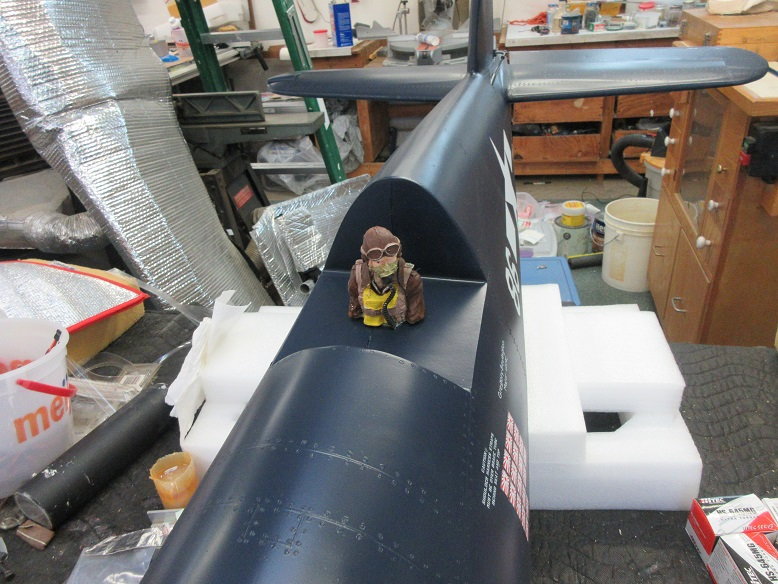
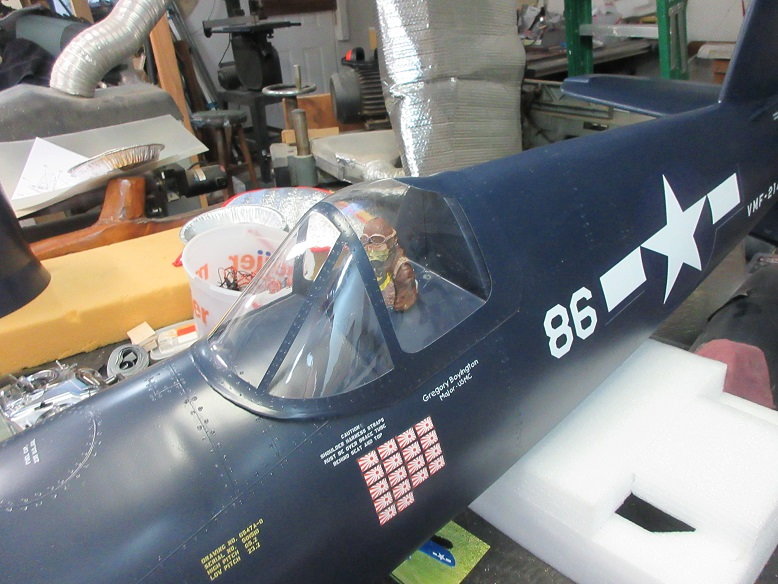
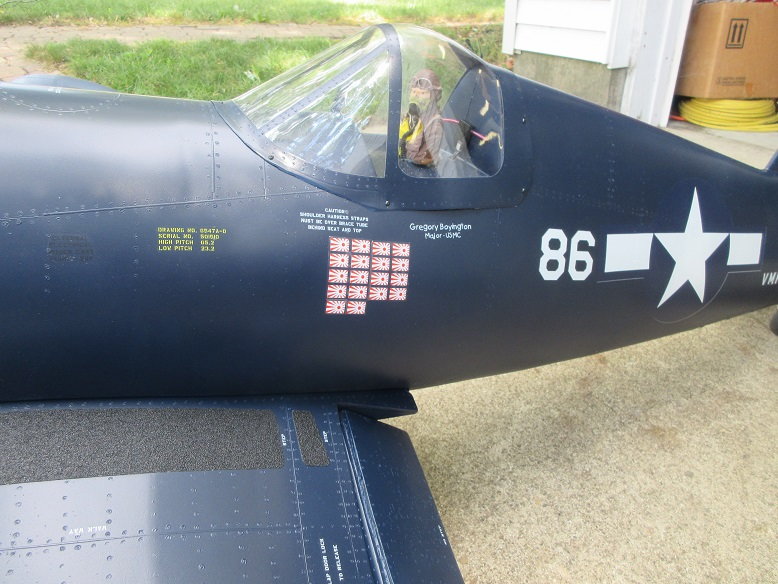
Modeled after 'Pappy'.
Tomorrow, plan to 'clear coat' it.
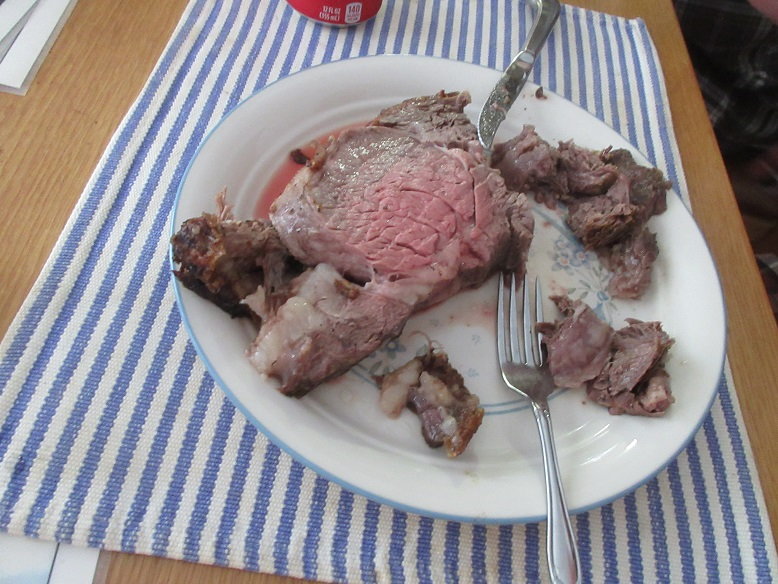
Kids came over for July 4th: everyone had 1.5 lbs of prime rib
Elevators.
Ailerons.
Center wing and inner flaps: used some 3M anti-skid from home depot for 'walk way'.
Outer flaps.
Outer wings.
Modeled after 'Pappy'.
Tomorrow, plan to 'clear coat' it.
Kids came over for July 4th: everyone had 1.5 lbs of prime rib
Last edited by samparfitt; 07-04-2020 at 11:50 AM.


 07-05-2020, 06:24 AM
#53
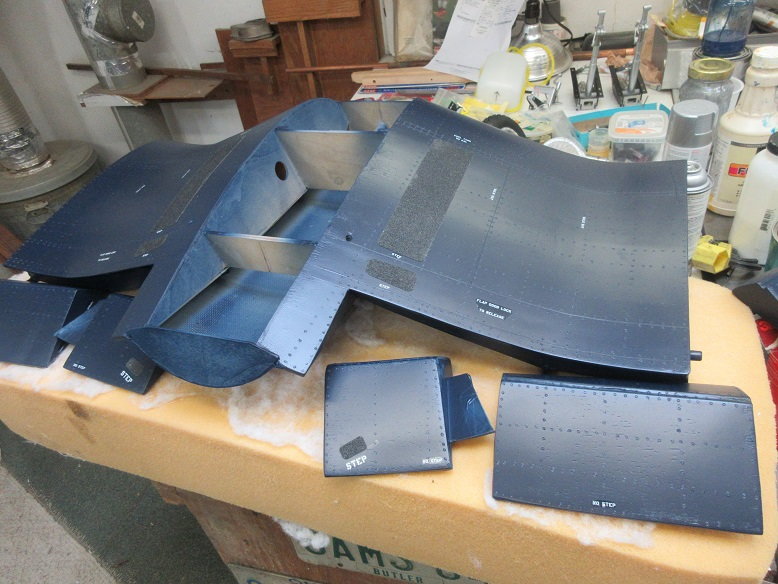
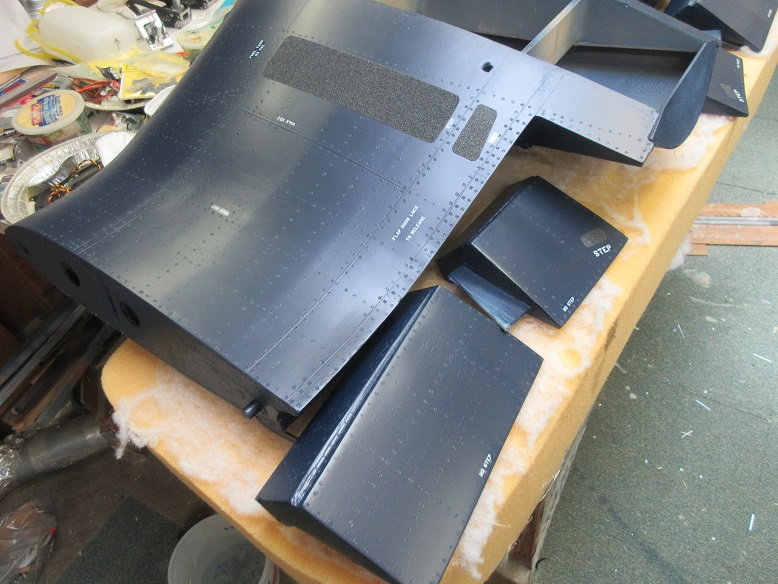
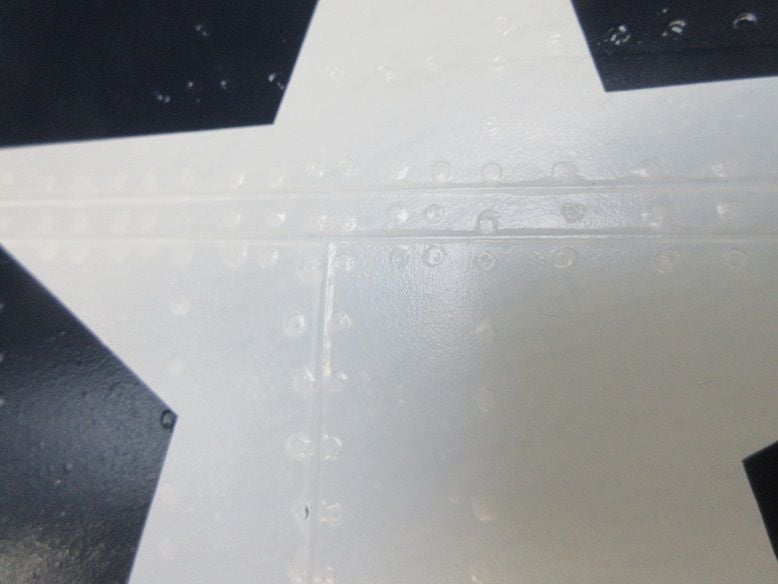
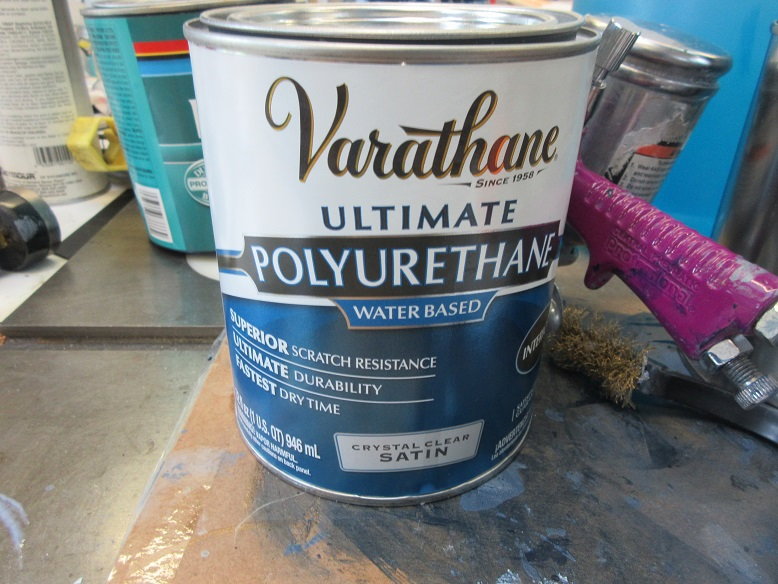
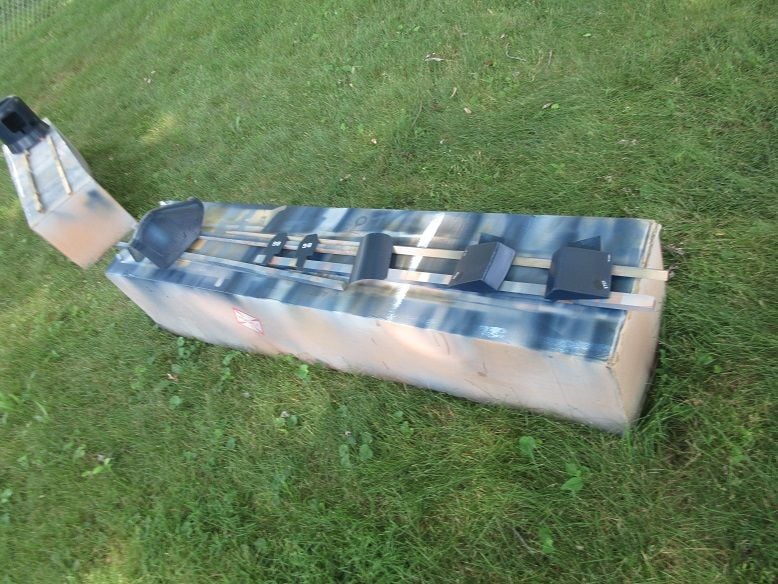
Final clear coat sealant.
HD no longer sold minwax so I got this.
As with each painting, all boxes are air sprayed to remove any dust and then the same for each plane part.
Bottoms done first, waited an hour and did the tops. Applied 2 coats to each side. The clear was thin enough so it was applied 'full strength'.
As usual, edges and corners first and then the main surface.
The clear seals not only the paint but, also, all the decals plus gives a uniform surface.
Another 92 degree day so got this done early in the morning and will let it 'cook' all day.
It's been a lot of work getting to this stage. Now it's just an ARF that requires assembly!
Last edited by samparfitt; 07-05-2020 at 06:32 AM.
07-05-2020, 05:36 PM
#54
Assembly.
The clear coat says wait 24 hours but, with the 93 degrees, it was pretty hard after 8 hours plus spray dries faster than 'brush on'.
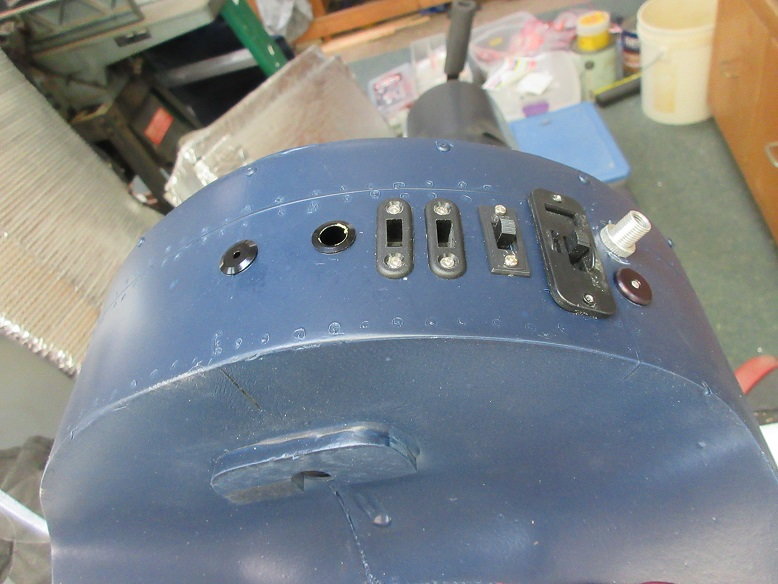
All switches located on bottom front of fuse.
Fuel overflow
fuel filler
two receiver battery charging jacks.
on/off receiver switch
engine ignition switch
air fill/gauge.
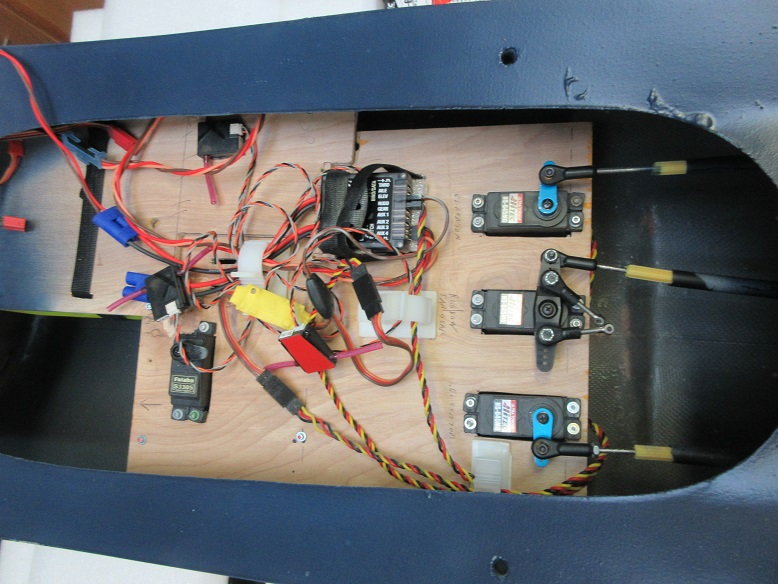
40 oz tank strapped to its tray.
Two receiver batteries strapped to their bases.

Receiver installed and servos for rudder and elevators connected.
Rudder and elevators pin hinges inserted into pocket hinges and secured with set screws: I find 3 full turns sets the pins and vise versa.

Elevator in neutral.
UP elevator.
Down elevator.
Rudder: neutral.
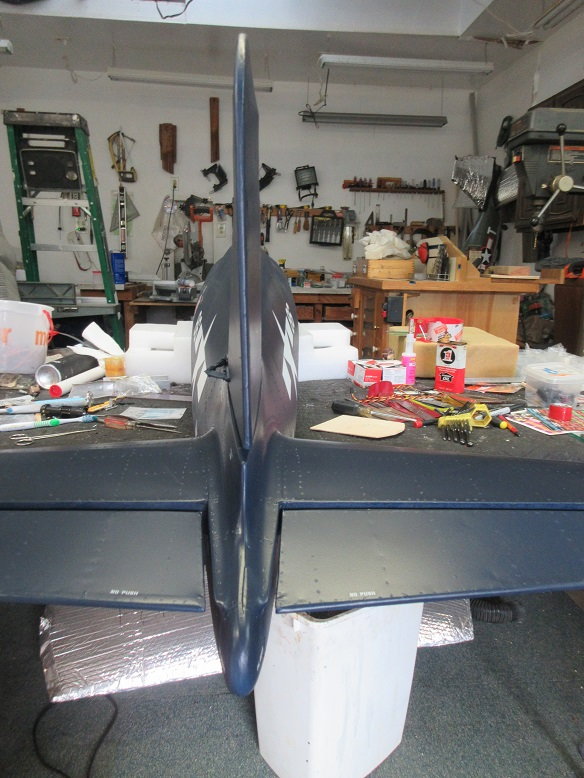
Left.
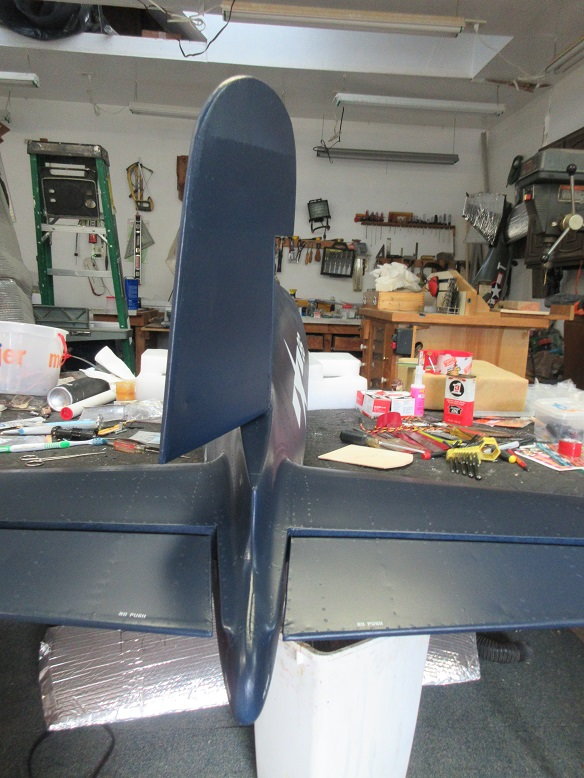
Right.
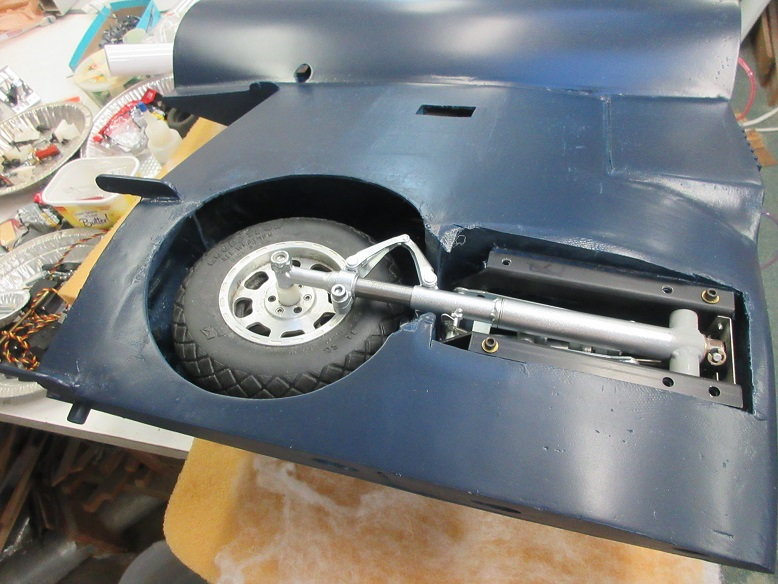
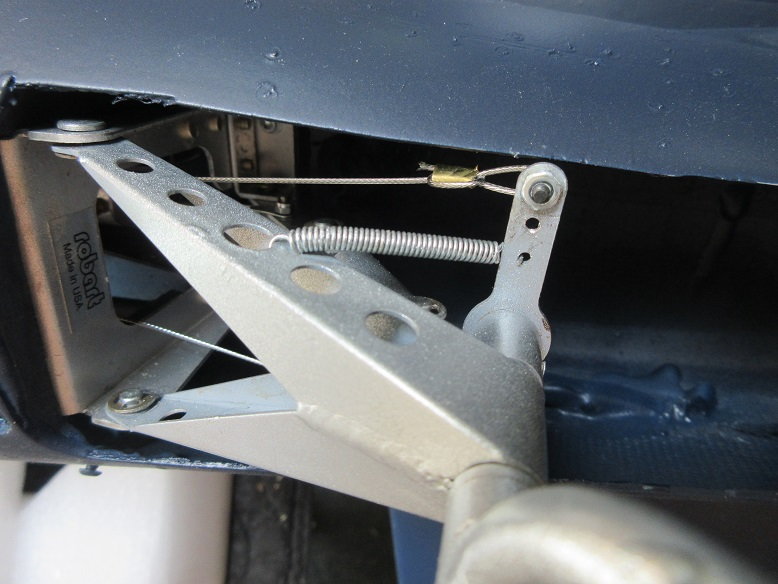
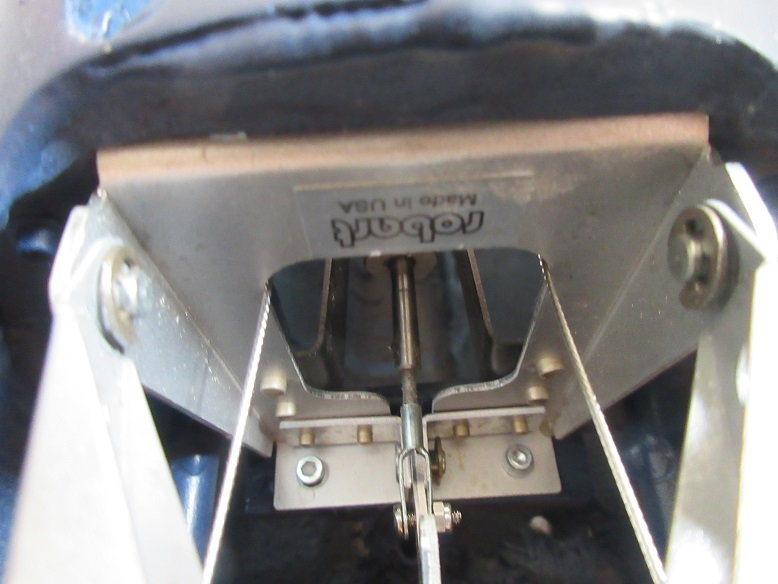
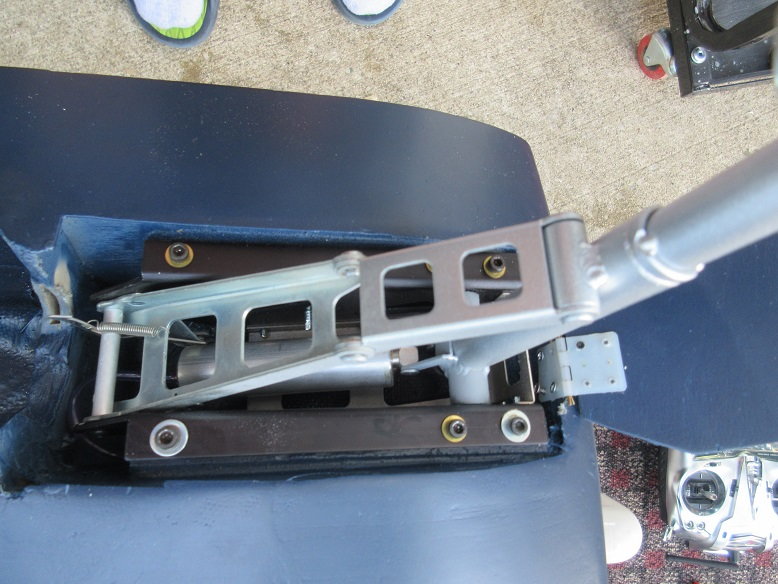
Main gear install.
Some 1/16" long pieces of air tubing used as a collar to secure the air line to the nipple.
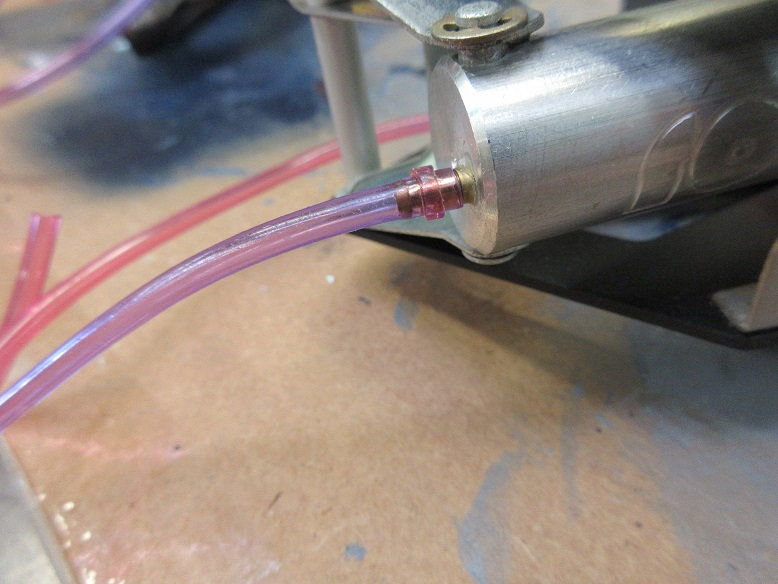
A 12" long 4/40 threaded rod was long enough to route air lines through wing holes.
Dry fit.

A locking nut to insure axles don't come off. Robart didn't put set screws for them like Sierra does.
Air lines will get some quick disconnects.
Inner flaps secured with 4/40 bolts and locking nuts.
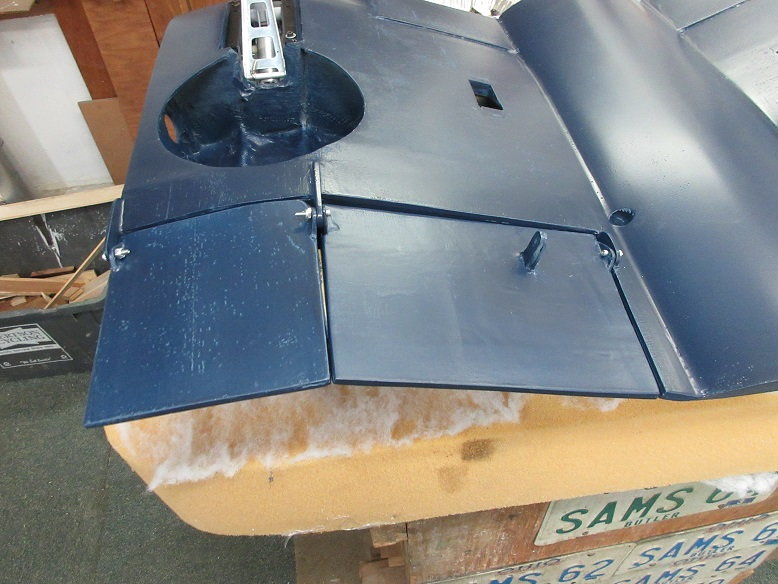
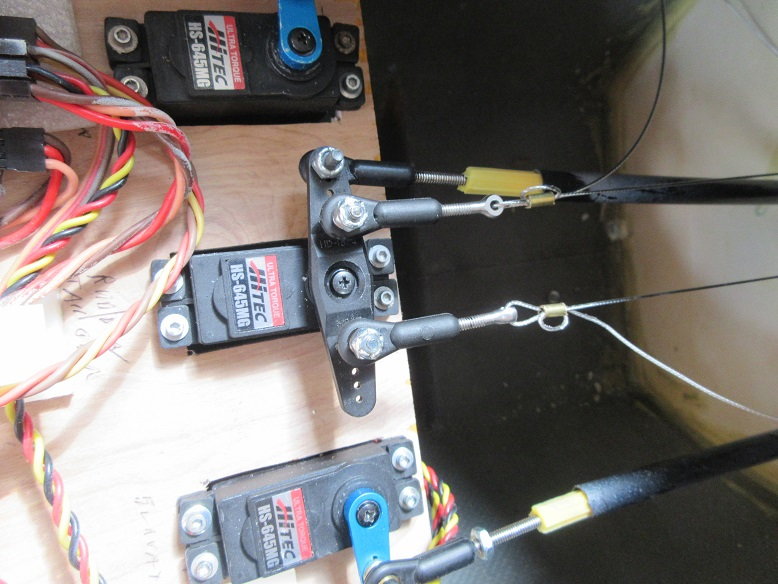
Flap servos installed and aligned with each other. 4/40 threaded rod through brass tubing to make the rod rigid. Dubro ball links.
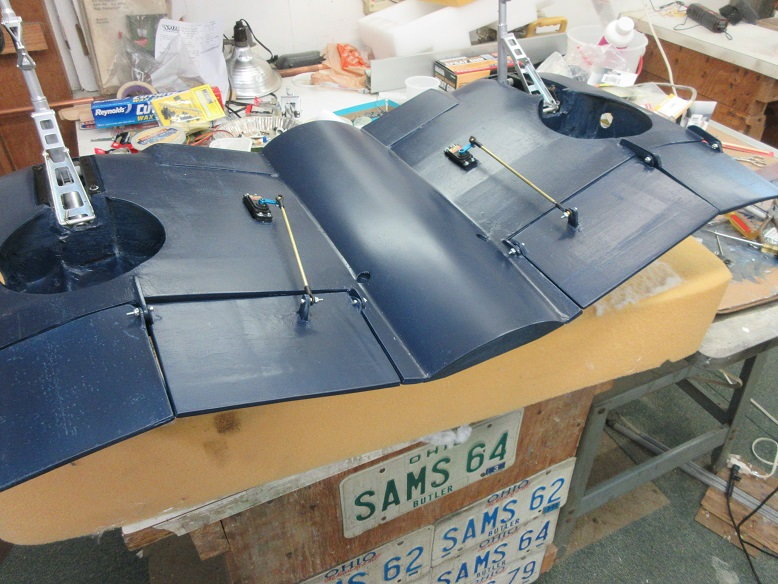
Should be enough flap!
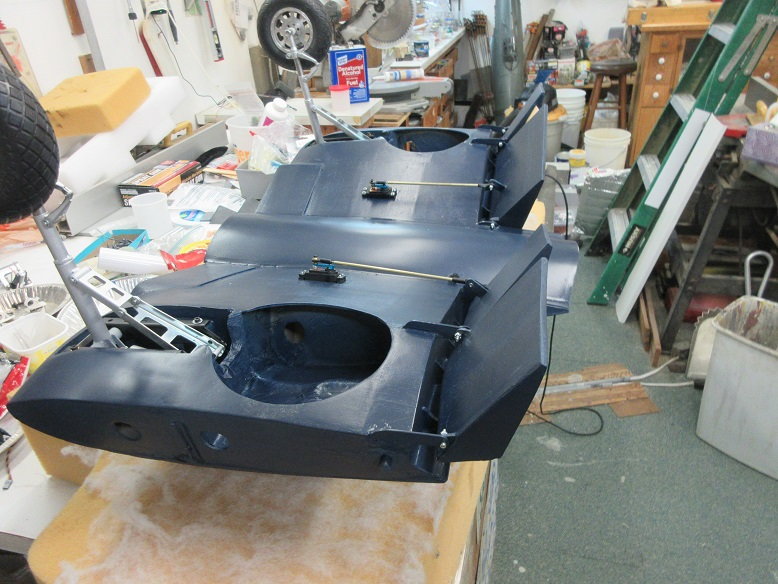
Servo arms in alignment with linkage in down position to put less stress on the motor and gears.

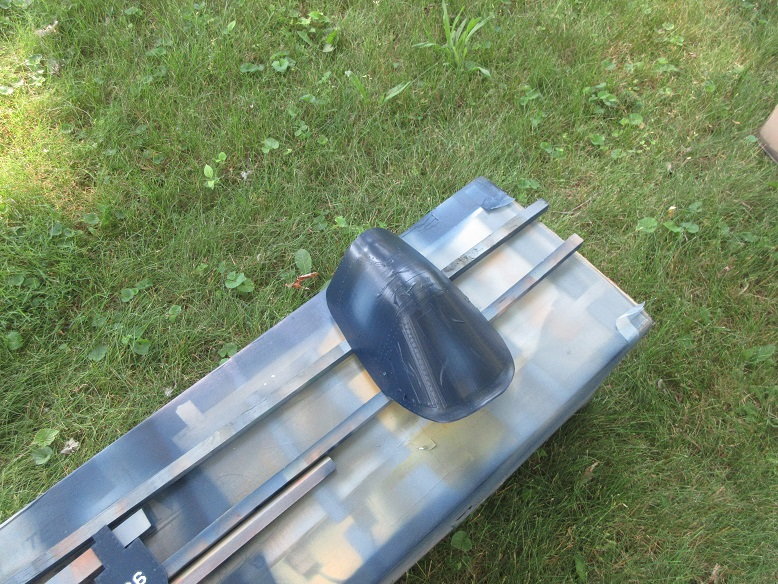
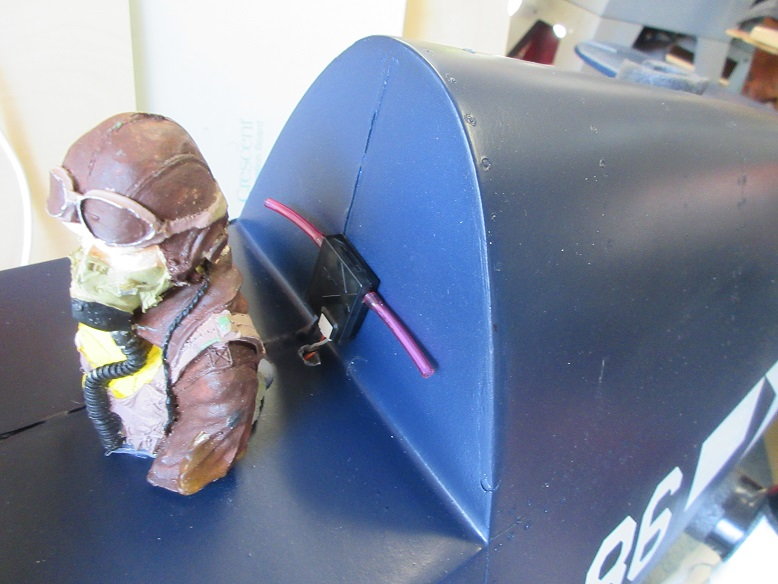
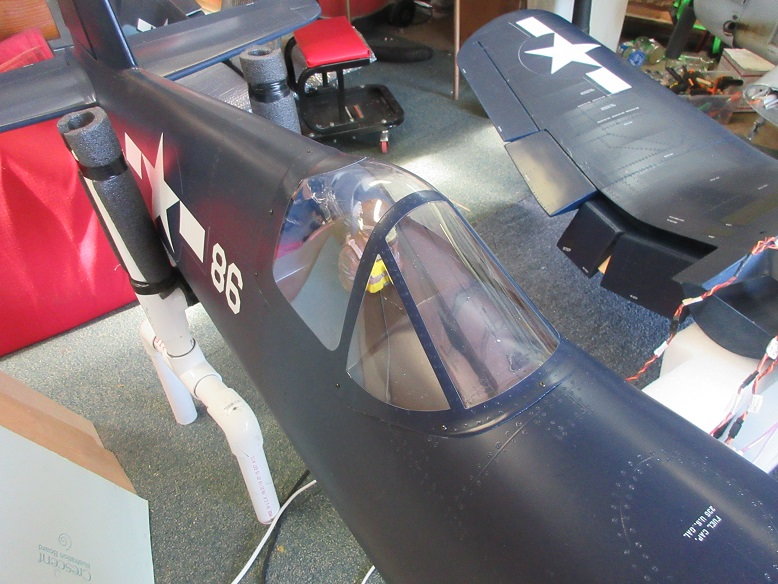
Last thing done: caulk the pilot in the cockpit. Weird: can't remember the last time I built an airplane without a full cockpit and functioning canopy (of course I got this one in the 'bones'). Same for no working main doors.
Dry fit the canopy.
The clear coat says wait 24 hours but, with the 93 degrees, it was pretty hard after 8 hours plus spray dries faster than 'brush on'.
All switches located on bottom front of fuse.
Fuel overflow
fuel filler
two receiver battery charging jacks.
on/off receiver switch
engine ignition switch
air fill/gauge.
40 oz tank strapped to its tray.
Two receiver batteries strapped to their bases.
Receiver installed and servos for rudder and elevators connected.
Rudder and elevators pin hinges inserted into pocket hinges and secured with set screws: I find 3 full turns sets the pins and vise versa.
Elevator in neutral.
UP elevator.
Down elevator.
Rudder: neutral.
Left.
Right.
Main gear install.
Some 1/16" long pieces of air tubing used as a collar to secure the air line to the nipple.
A 12" long 4/40 threaded rod was long enough to route air lines through wing holes.
Dry fit.
A locking nut to insure axles don't come off. Robart didn't put set screws for them like Sierra does.
Air lines will get some quick disconnects.
Inner flaps secured with 4/40 bolts and locking nuts.
Flap servos installed and aligned with each other. 4/40 threaded rod through brass tubing to make the rod rigid. Dubro ball links.
Should be enough flap!
Servo arms in alignment with linkage in down position to put less stress on the motor and gears.
Last thing done: caulk the pilot in the cockpit. Weird: can't remember the last time I built an airplane without a full cockpit and functioning canopy (of course I got this one in the 'bones'). Same for no working main doors.
Dry fit the canopy.
Last edited by samparfitt; 07-05-2020 at 05:41 PM.
07-06-2020, 07:03 AM
#55
Stuff:
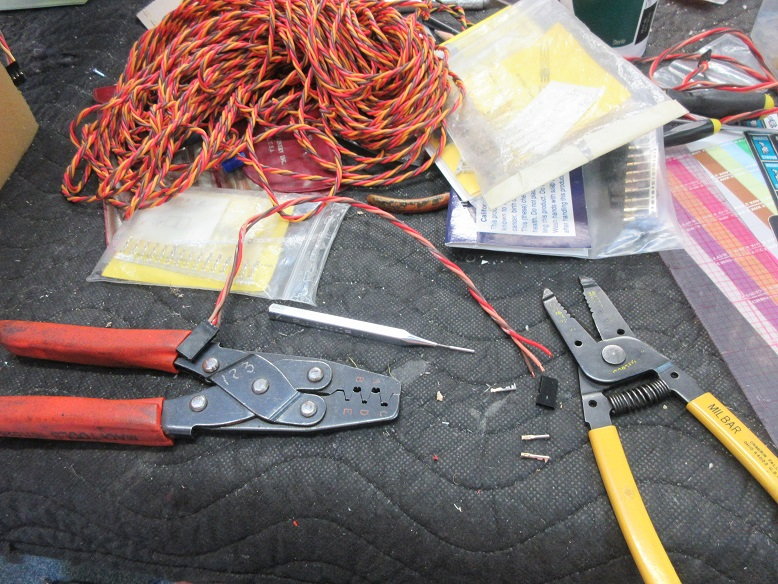
Extensions wires.
Tools of the trade. Able to make the exact length you need, reduces multiple connections and can use 20 gauge wire versus 22.
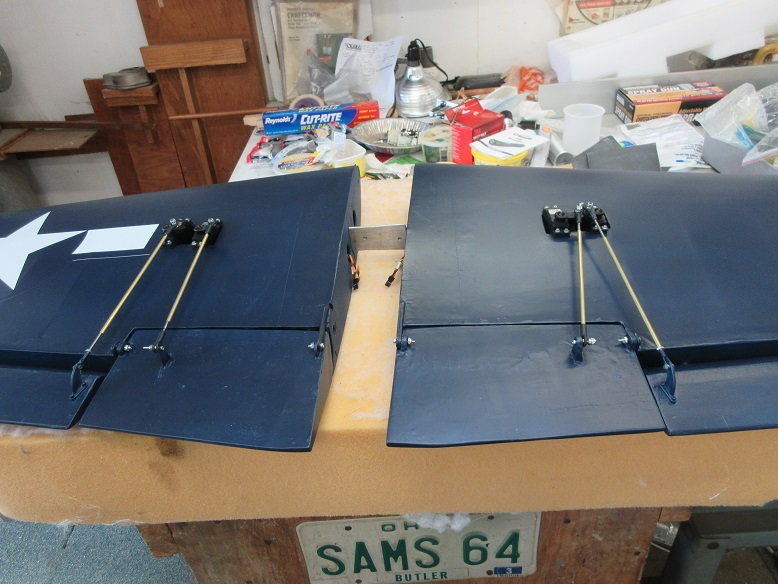
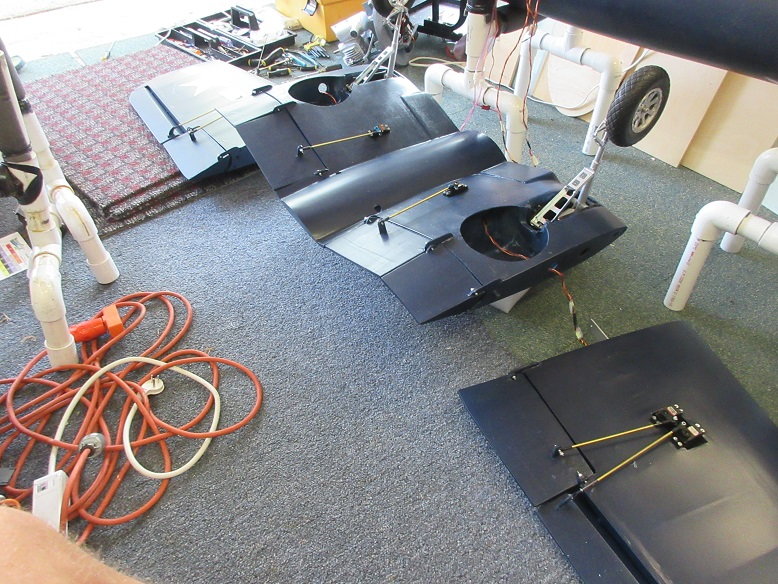
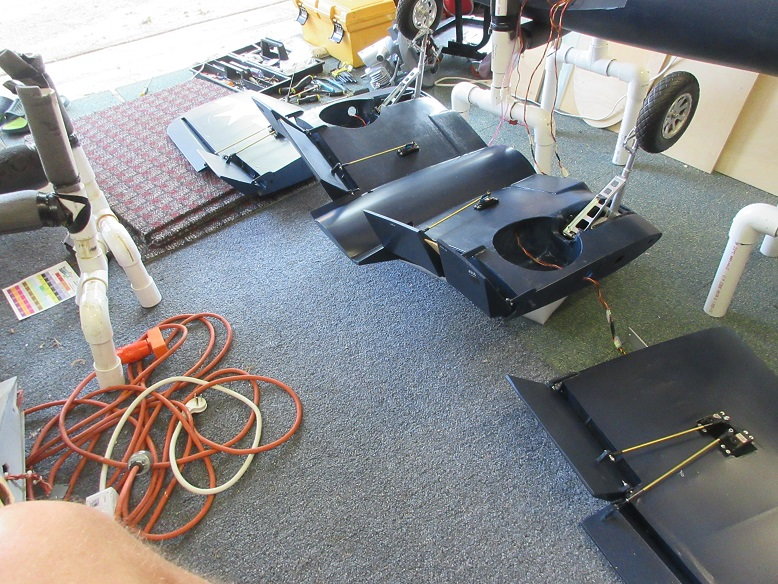
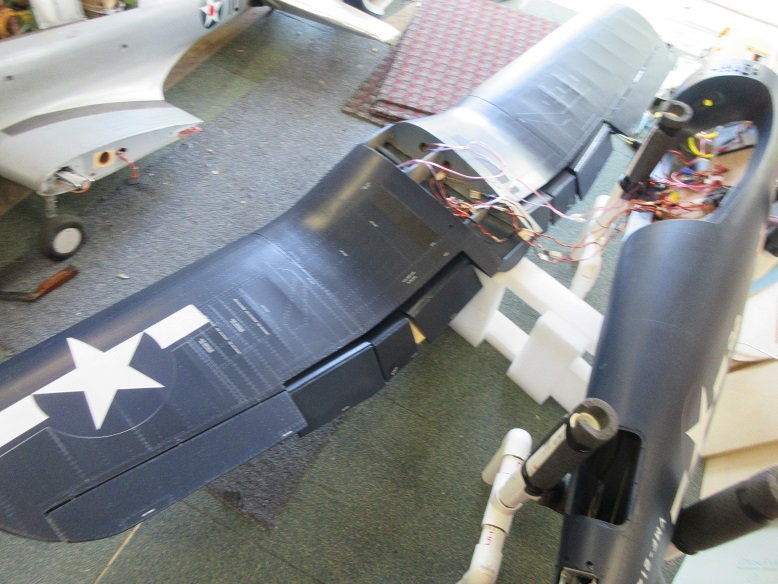
Outer wings:
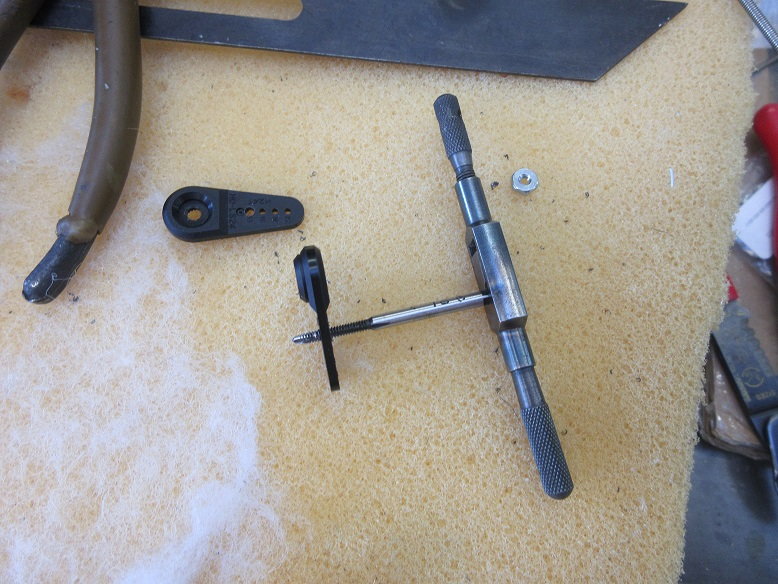
Servo and flap arms tapped for 4/40.
Out flap and ailerons done.
Oriented flap servos so same and aileron servos opposite.
The flap linkage on the right is more angled than I like but, if problems, I'll rotate the arm 180 degrees.
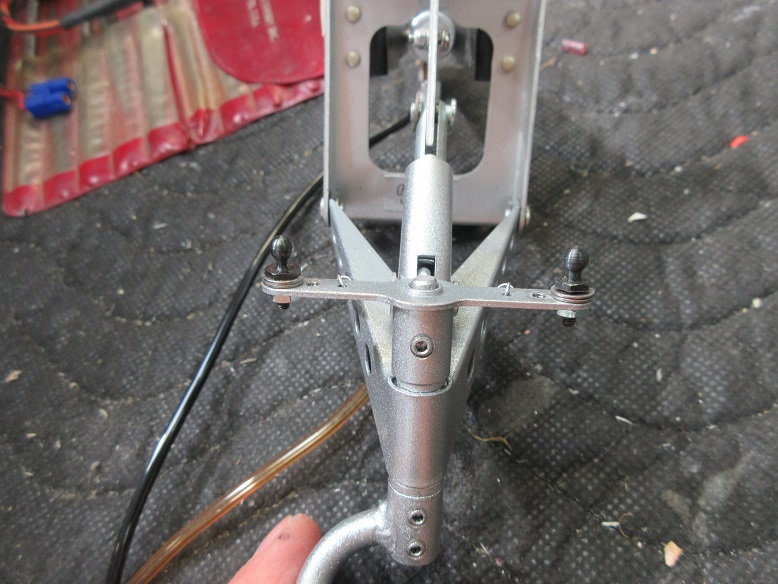
Tail wheel gear.
Tapped for two 2/56 ball links. Plan to just use tight loops over ball link for easy PM.
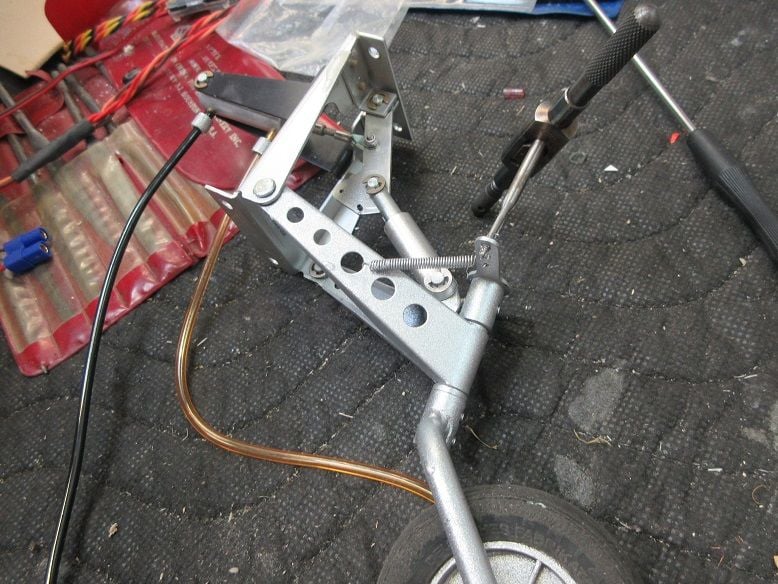
Dry fit.
Extensions wires.
Tools of the trade. Able to make the exact length you need, reduces multiple connections and can use 20 gauge wire versus 22.
Outer wings:
Servo and flap arms tapped for 4/40.
Out flap and ailerons done.
Oriented flap servos so same and aileron servos opposite.
The flap linkage on the right is more angled than I like but, if problems, I'll rotate the arm 180 degrees.
Tail wheel gear.
Tapped for two 2/56 ball links. Plan to just use tight loops over ball link for easy PM.
Dry fit.
07-06-2020, 10:25 AM
#56
More stuff.
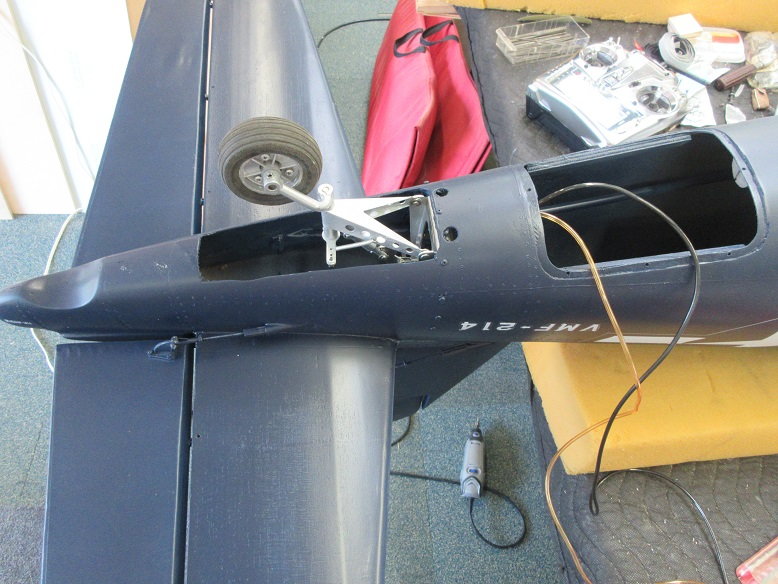
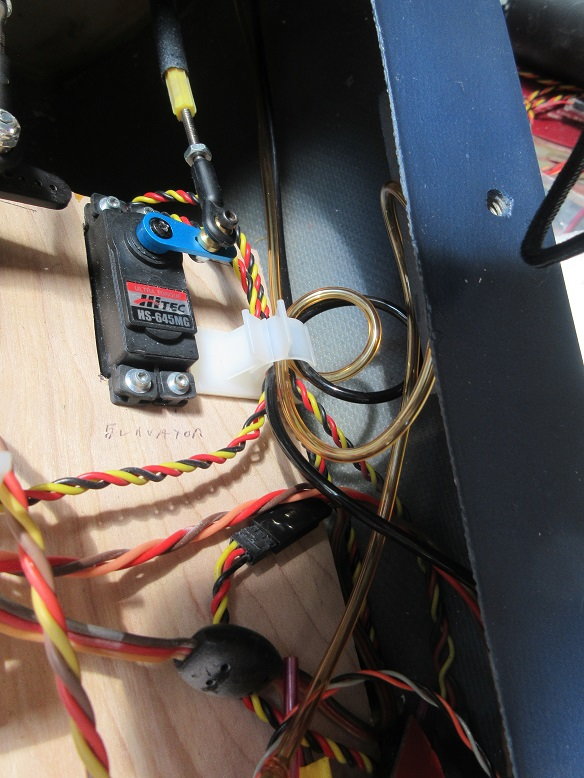
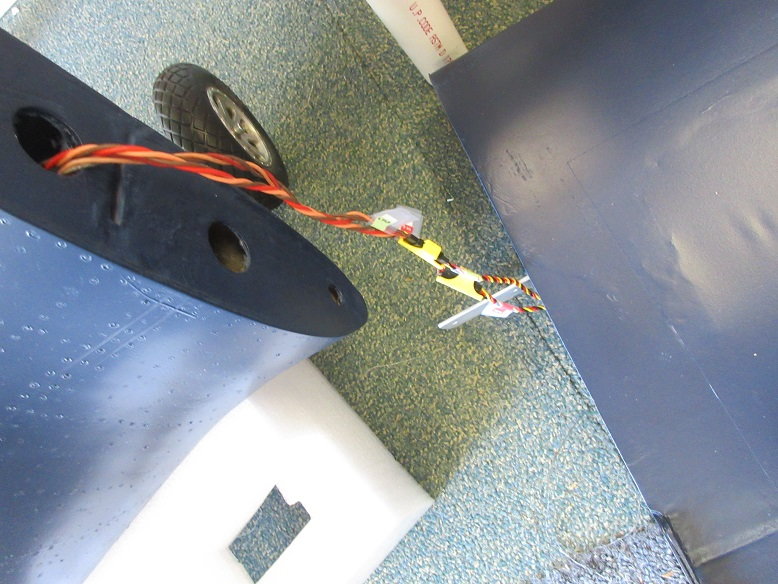
Connected the pull/pull for the tail wheel at the servo end.
Just loops on ball sockets at the tail end.
Forgot to put some protective tubing on the lines: hope they don't fray on the gear.
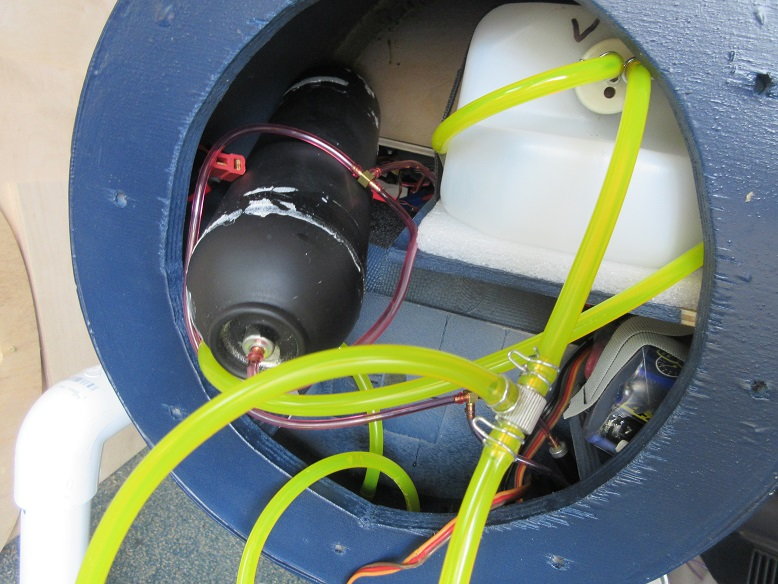
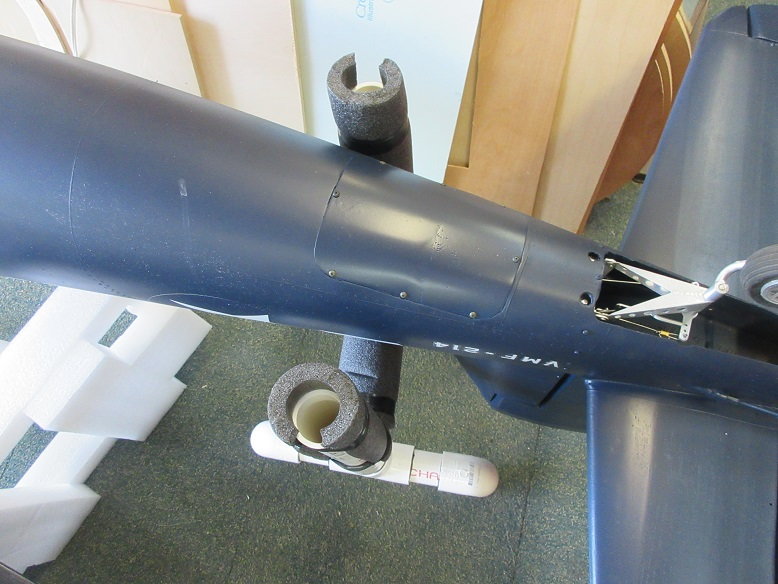
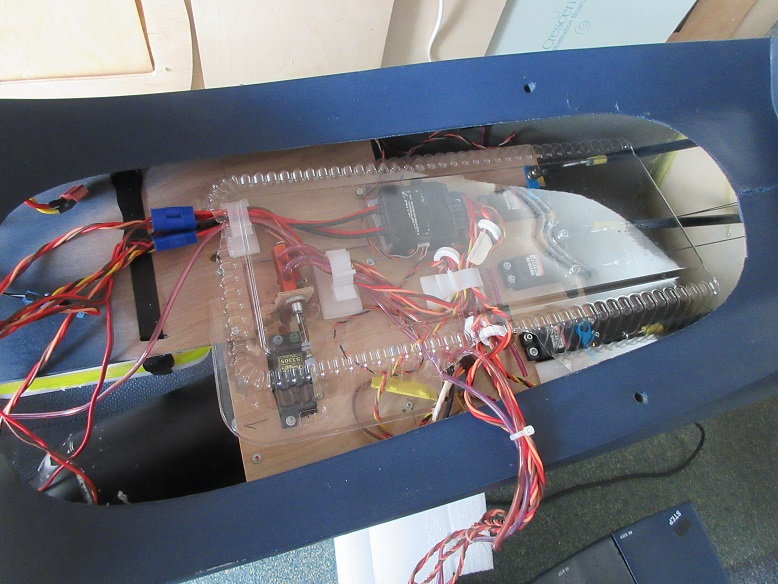
Air system.
Cut some ply to support the air valve and connected all the lines to the main and tail.
Some loops in the air lines to the tail to give me some slack for removing the tail gear for PM. Same for the mains.
STRANGE: Mains and tail wheel operated the first time including not having to reverse the servo to the air valve!
Down.

UP.
Even the tail wheel is partially exposed as the prototype.
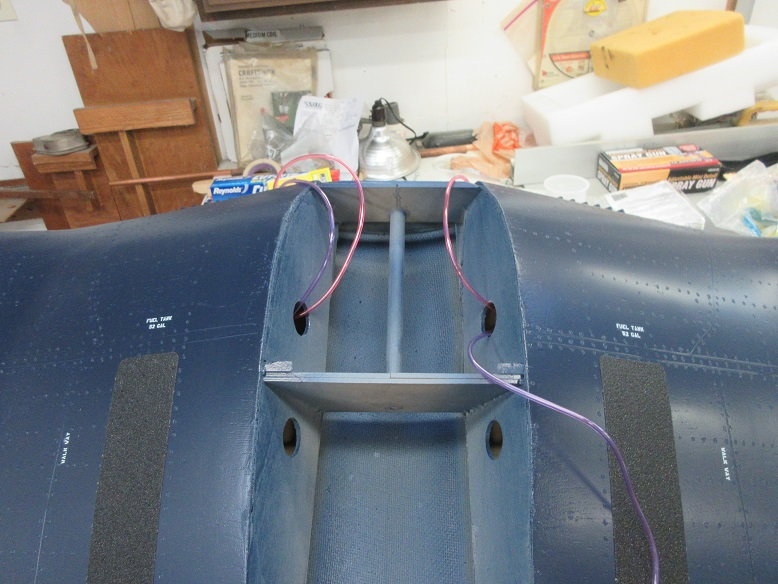
Was going to put the air tank behind the cockpit but too many lines, especially with the pull/pull lines. There was room back in front of the tail gear but noticed that the tank will fit up front.
Will have to cut a hole in the 2nd former to slide the tank to the 3rd former. Too bad I didn't think of that before putting all that stuff in the way!
Connected the pull/pull for the tail wheel at the servo end.
Just loops on ball sockets at the tail end.
Forgot to put some protective tubing on the lines: hope they don't fray on the gear.
Air system.
Cut some ply to support the air valve and connected all the lines to the main and tail.
Some loops in the air lines to the tail to give me some slack for removing the tail gear for PM. Same for the mains.
STRANGE: Mains and tail wheel operated the first time including not having to reverse the servo to the air valve!
Down.
UP.
Even the tail wheel is partially exposed as the prototype.
Was going to put the air tank behind the cockpit but too many lines, especially with the pull/pull lines. There was room back in front of the tail gear but noticed that the tank will fit up front.
Will have to cut a hole in the 2nd former to slide the tank to the 3rd former. Too bad I didn't think of that before putting all that stuff in the way!
07-06-2020, 01:13 PM
#57
After two hours, pressure gauge is the same.
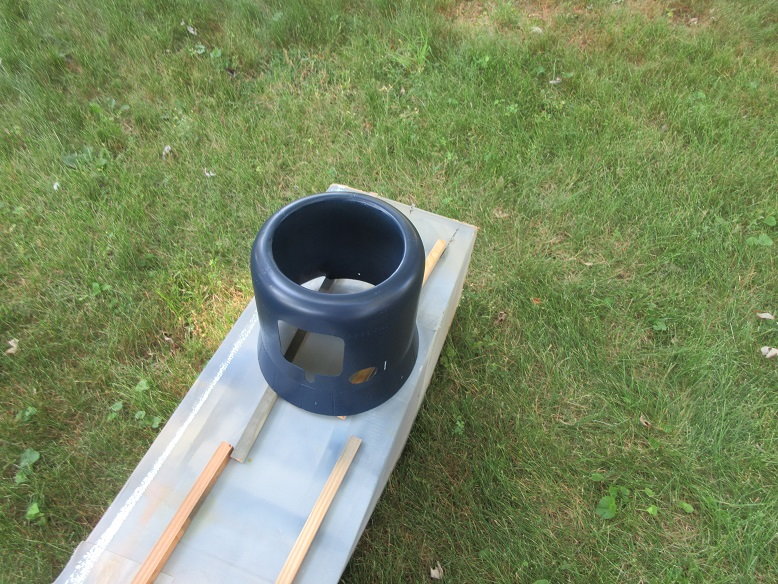
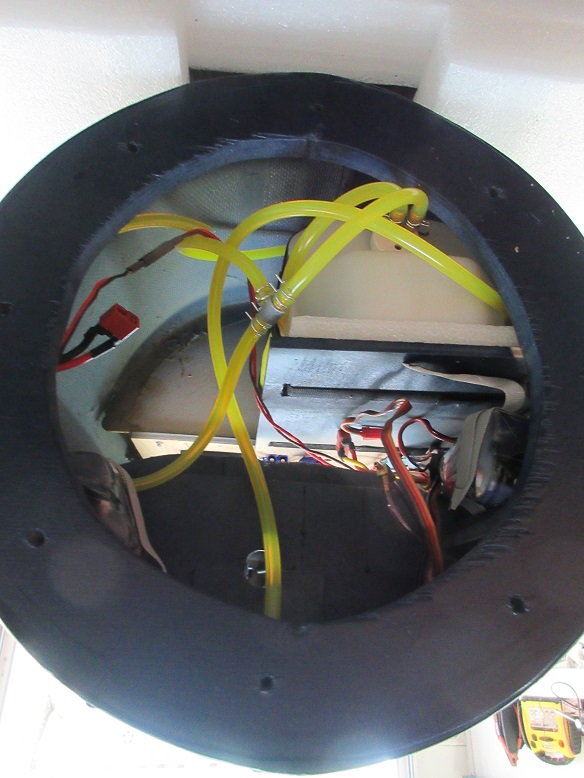
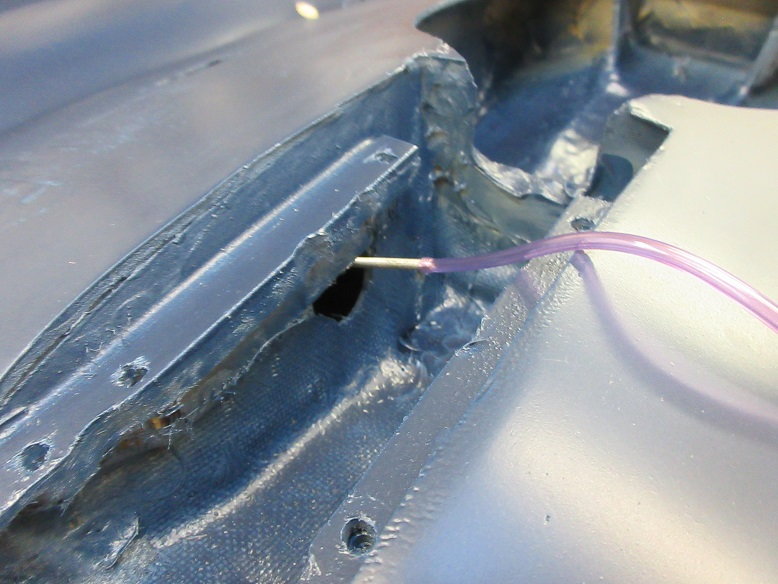
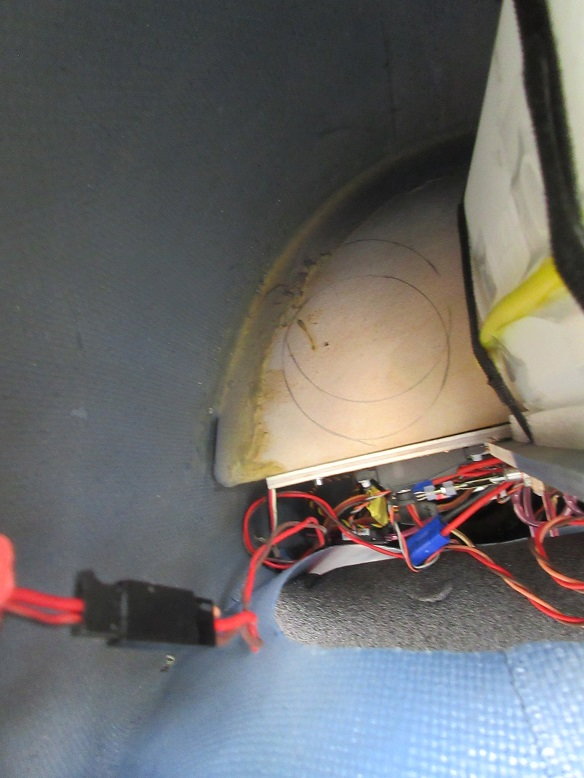
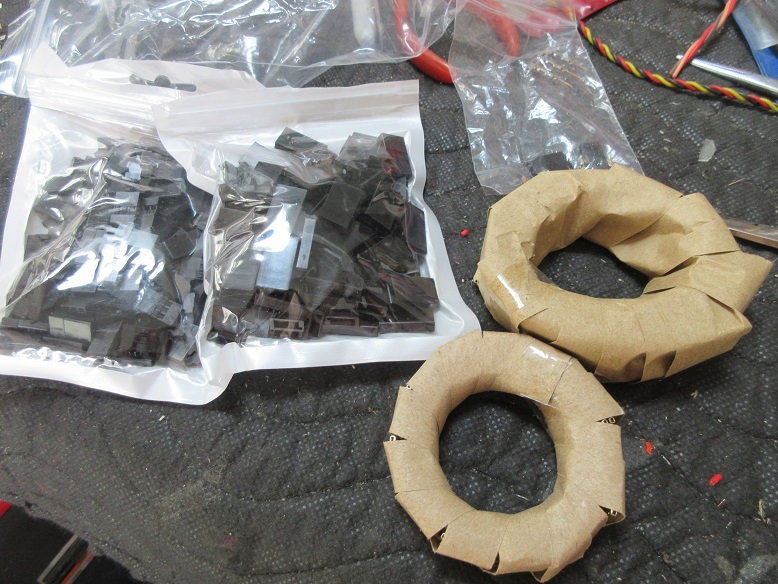
Air tank install.
Used a compass to mark where the tank will be located (upper circle)
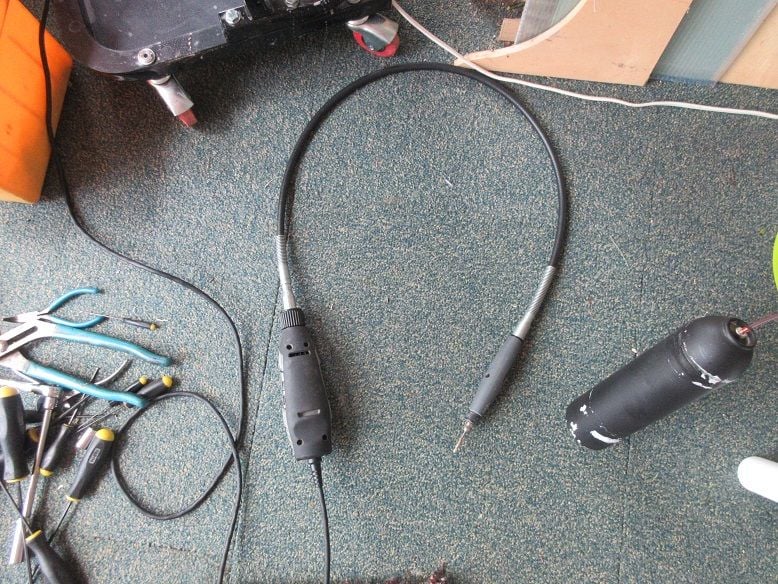
Attached my extension to the Dremel to get into tight spaces.
Not pretty but functional. Drilled a bunch of holes on the circle and then routed between them.
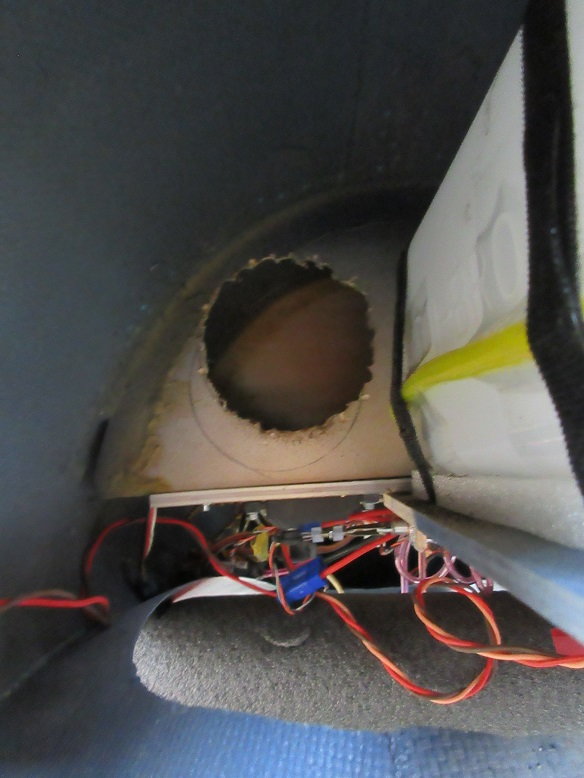
Some 3M house caulk to secure the tank. Inserted the tank at an angle for more clearance to remove the fuel tank, if need be.
A left over large tank from my 120" B-25.

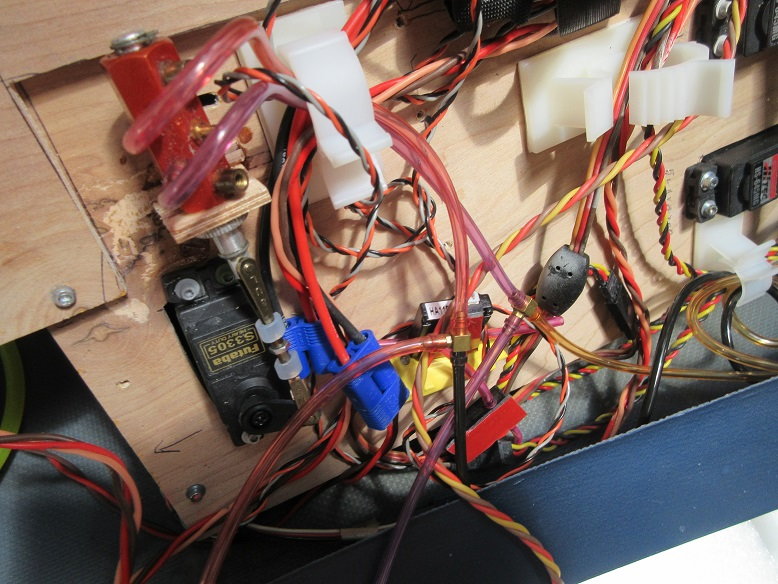
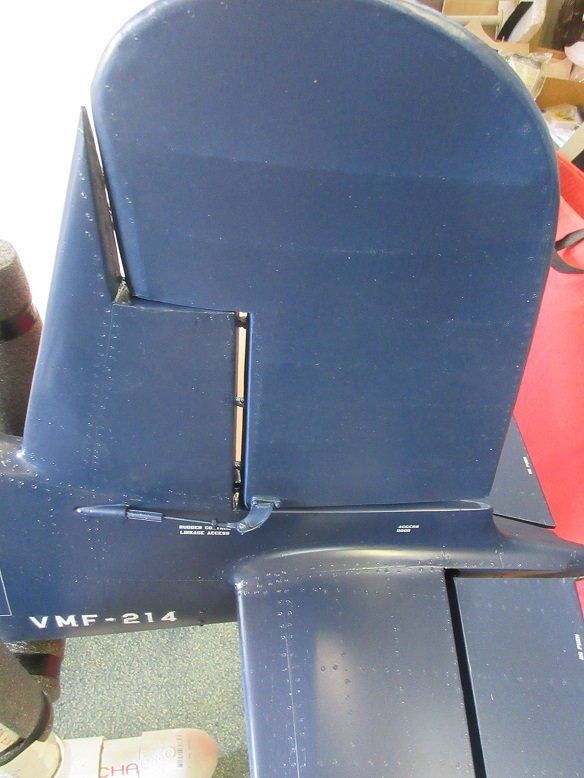
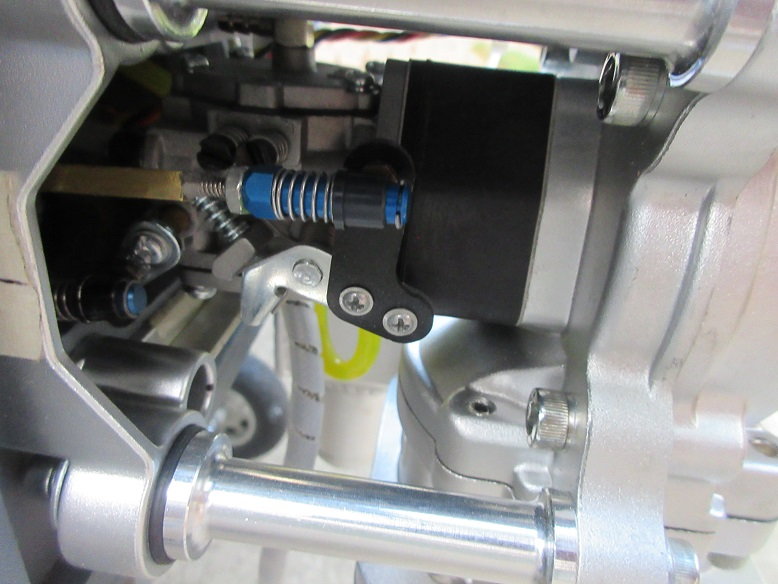
Ugly control linkages visible for the rudder but, during painting, I extended the yellow rod so the blue paint covered it and not as noticeable. All control horns also left on during painting.
Not a whole lot left to do: Just make a bunch of extension wires for the flaps, ailerons and batteries should do it. The assembly is going faster than I thought it would take.
Air tank install.
Used a compass to mark where the tank will be located (upper circle)
Attached my extension to the Dremel to get into tight spaces.
Not pretty but functional. Drilled a bunch of holes on the circle and then routed between them.
Some 3M house caulk to secure the tank. Inserted the tank at an angle for more clearance to remove the fuel tank, if need be.
A left over large tank from my 120" B-25.
Ugly control linkages visible for the rudder but, during painting, I extended the yellow rod so the blue paint covered it and not as noticeable. All control horns also left on during painting.
Not a whole lot left to do: Just make a bunch of extension wires for the flaps, ailerons and batteries should do it. The assembly is going faster than I thought it would take.
Last edited by samparfitt; 07-06-2020 at 01:17 PM.
07-07-2020, 08:17 AM
#58
Miscellaneous.
Ran two sets of Y's harnesses to the flaps. One set to the inner flaps and the other to the outer flaps and, then, slaved the outer flaps to the inner flaps.
The inner flaps and outer flaps go down at a different amount but, as long as each set is symmetrical to itself, all's good. Had to make physical adjustments to get the flaps even in the UP position as well as in the down position.
Ailerons were also Y'ed connected.
Another item not available: Parsons Products safety clips. Have enough to do this plane but not the next. Regular safety clips used on permanent wire connections.
Outer flaps were put on AUX 2 and slaved to the 'FLAPS' (inner flaps).
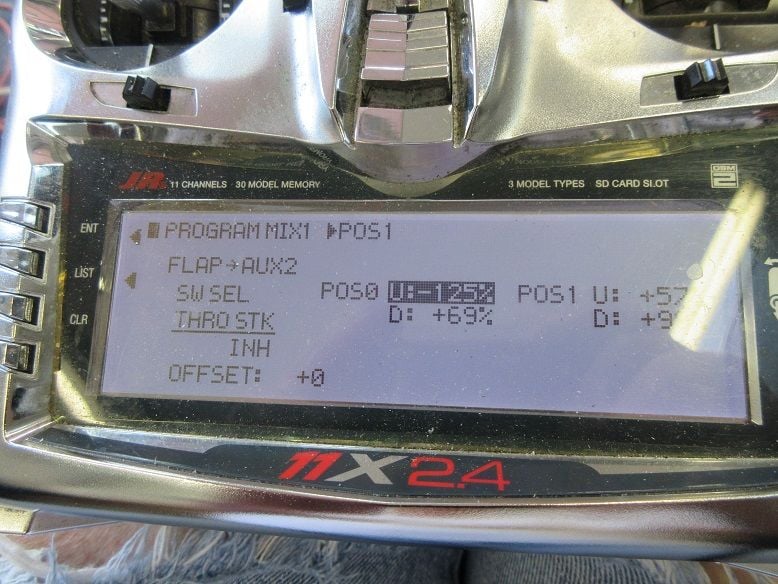
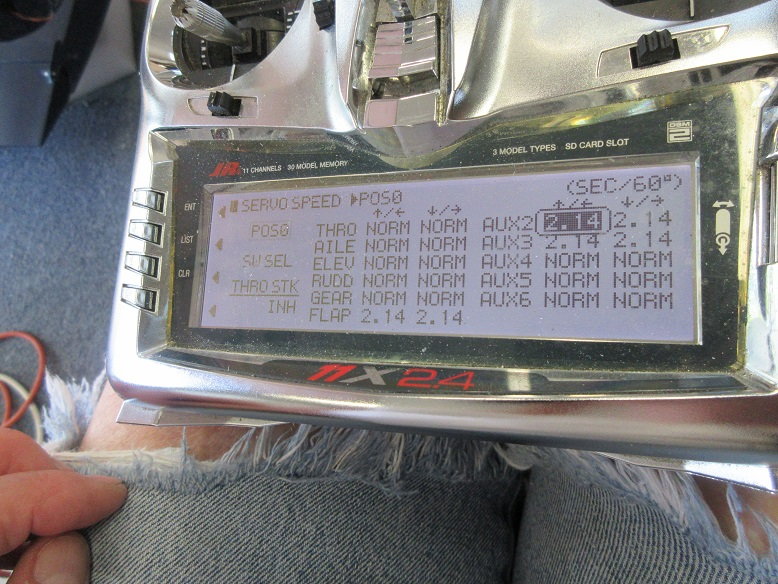
Flaps put on a 2 second motion to deploy. One time on an airplane, the plane slowly started to roll: knew one side of the flaps were not working so landed without them.
Got flaps and ailerons aligned in the neutral position.
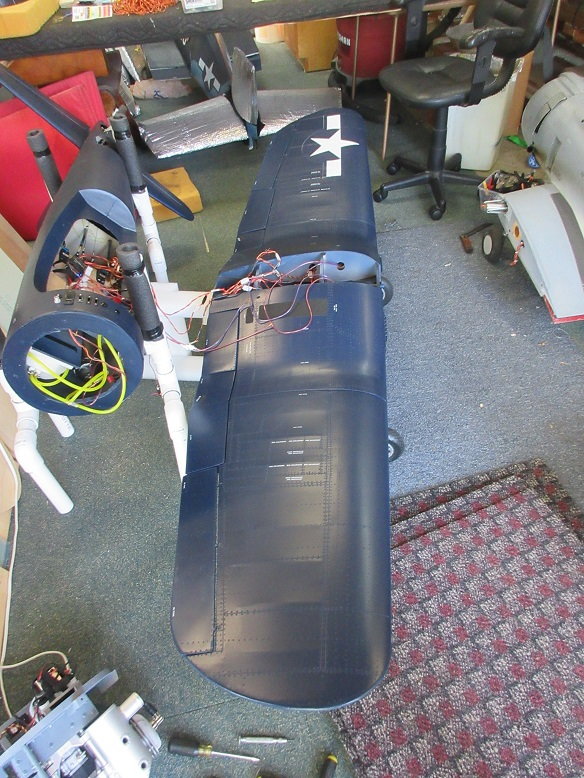
Flaps full down. Also have a 50% deployment.
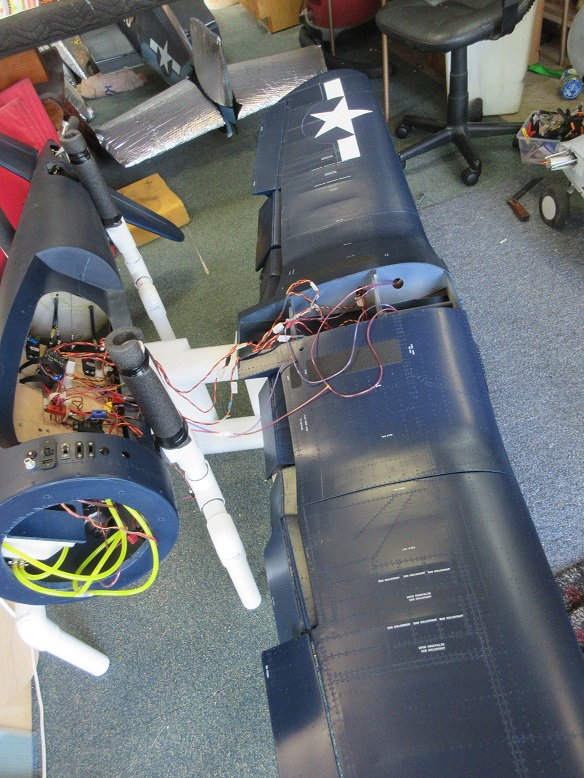
Ailerons working.

Rear access hatch screwed down using button head screws.
I always put one satellite in the cockpit for visual checks. Some air hose to protect the antennae.
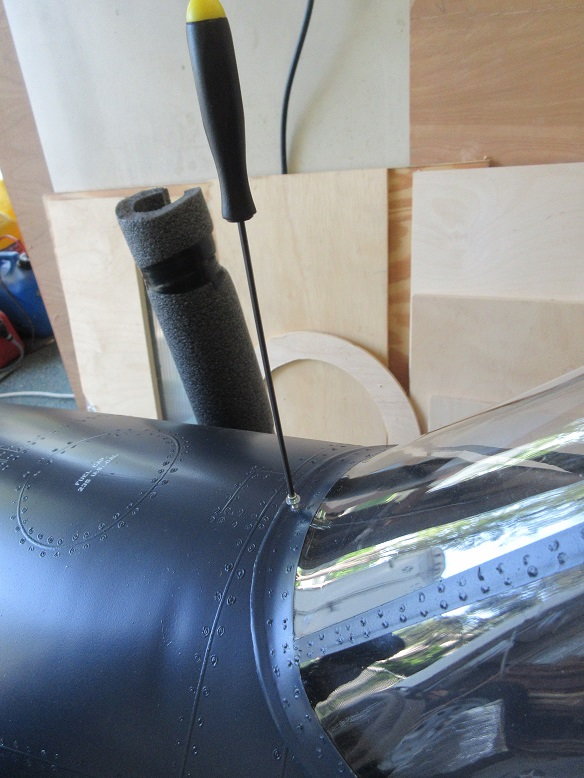
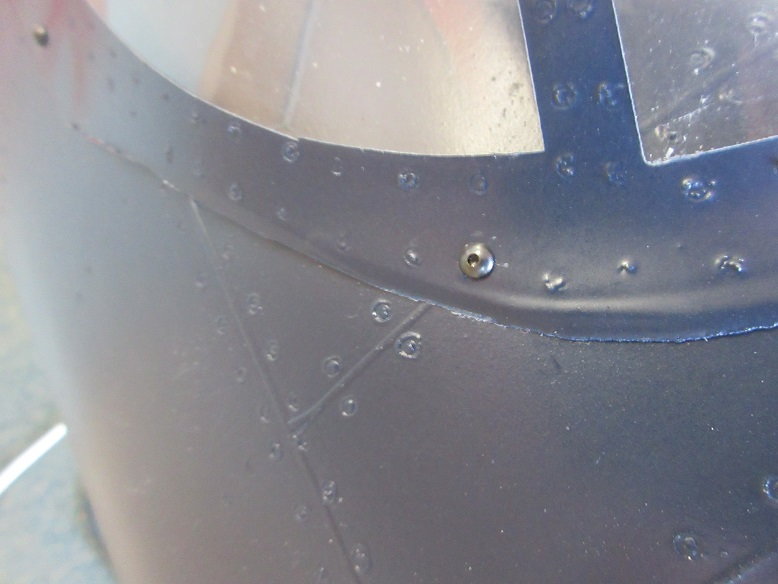
Canopy secured. Need to pre-drill and pre-screw a servo screw in the holes before inserting the button head screws as those small hex heads will strip out.
Getting there: Need some wire extensions for the throttle/choke servos and batteries and then mount the removable fire wall.
Ran two sets of Y's harnesses to the flaps. One set to the inner flaps and the other to the outer flaps and, then, slaved the outer flaps to the inner flaps.
The inner flaps and outer flaps go down at a different amount but, as long as each set is symmetrical to itself, all's good. Had to make physical adjustments to get the flaps even in the UP position as well as in the down position.
Ailerons were also Y'ed connected.
Another item not available: Parsons Products safety clips. Have enough to do this plane but not the next. Regular safety clips used on permanent wire connections.
Outer flaps were put on AUX 2 and slaved to the 'FLAPS' (inner flaps).
Flaps put on a 2 second motion to deploy. One time on an airplane, the plane slowly started to roll: knew one side of the flaps were not working so landed without them.
Got flaps and ailerons aligned in the neutral position.
Flaps full down. Also have a 50% deployment.
Ailerons working.
Rear access hatch screwed down using button head screws.
I always put one satellite in the cockpit for visual checks. Some air hose to protect the antennae.
Canopy secured. Need to pre-drill and pre-screw a servo screw in the holes before inserting the button head screws as those small hex heads will strip out.
Getting there: Need some wire extensions for the throttle/choke servos and batteries and then mount the removable fire wall.
Last edited by samparfitt; 07-07-2020 at 08:20 AM.
07-07-2020, 12:19 PM
#59
Miscellaneous.
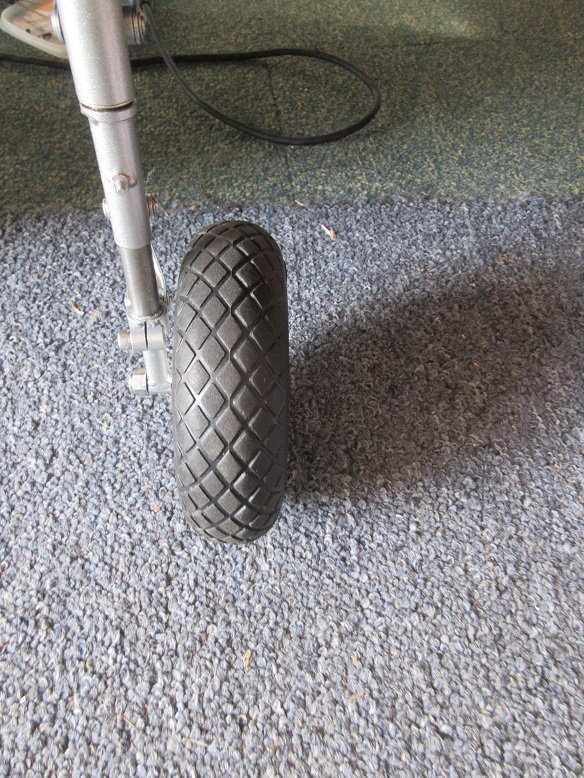
Got these treaded tires from Dino.
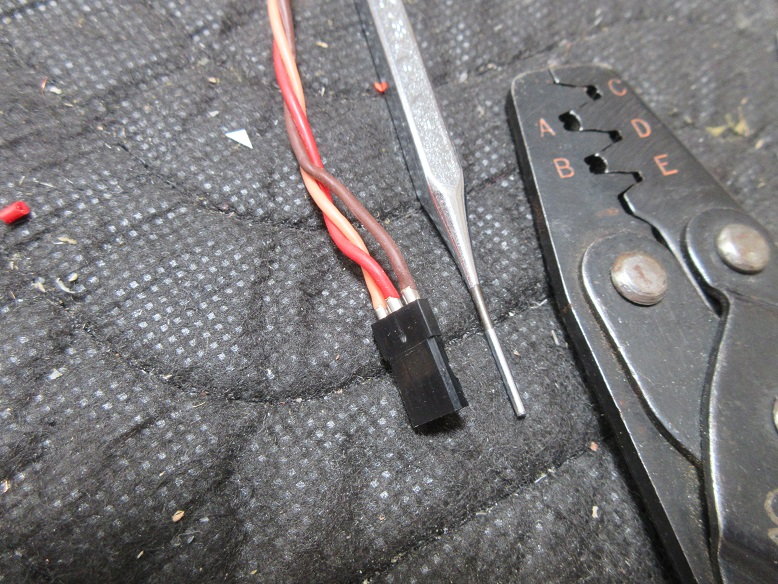
Making wire extensions.
I find about 3/32" of bare wire works best.
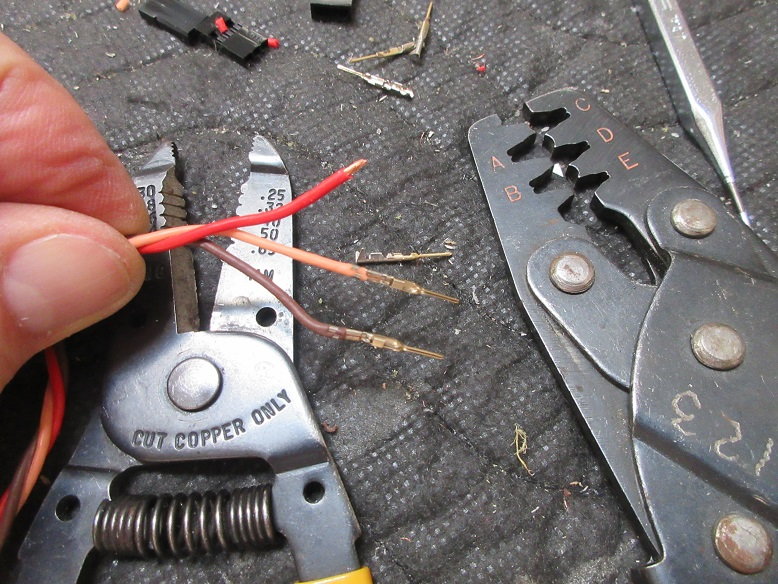
A 1/16" center punch is needed to 'drive home' the metal contacts.
Female and Male charts to make sure I don't install the wires incorrectly.
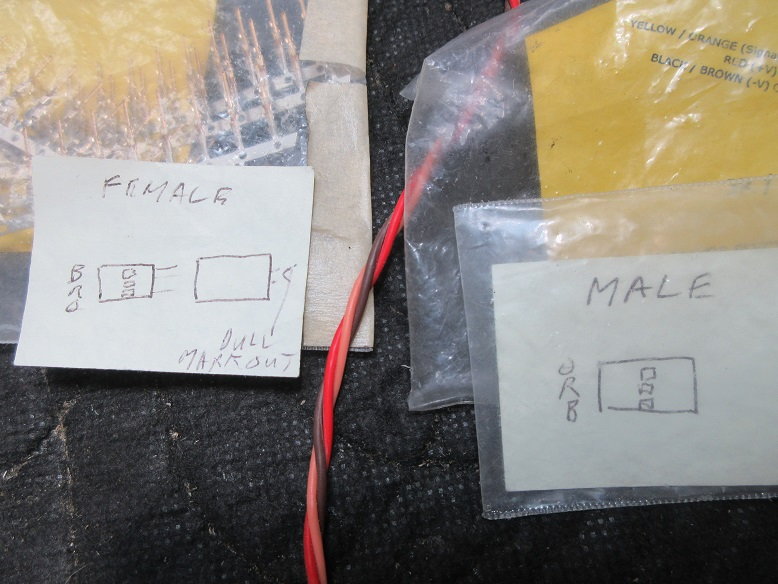
Since my normal USA source of connector kits are no longer made I had to go 'over seas' to find some. Just arrived today. Not bad; 2 weeks 2 days to arrive from China. Got enough until I croak!
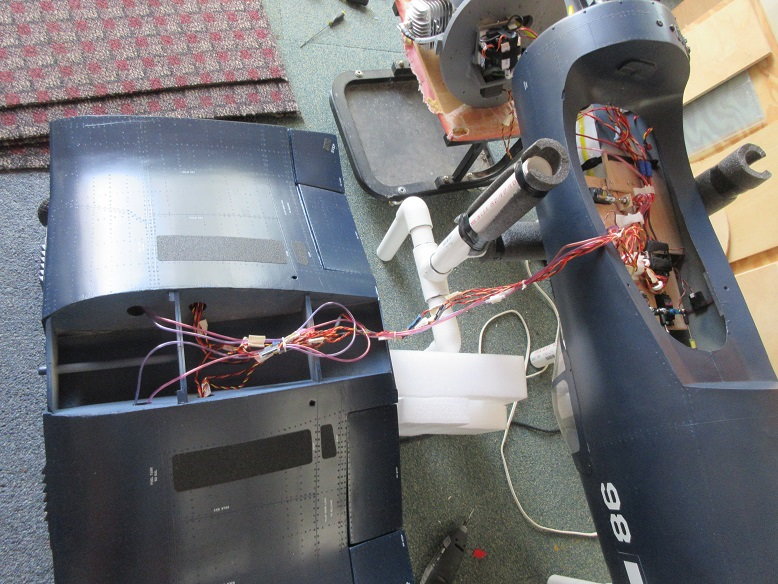
I'm partial to long connections between the fuse and center wing.
One pastry cover to keep the wires from getting entangled with the servos.
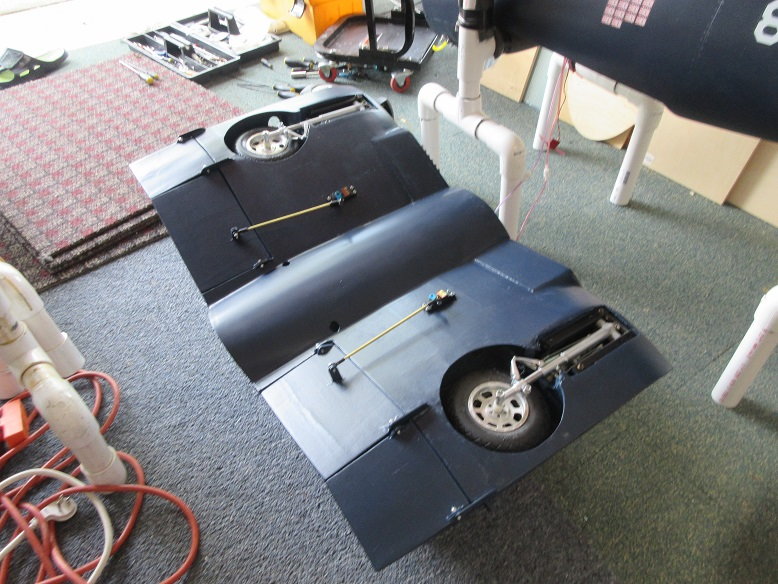
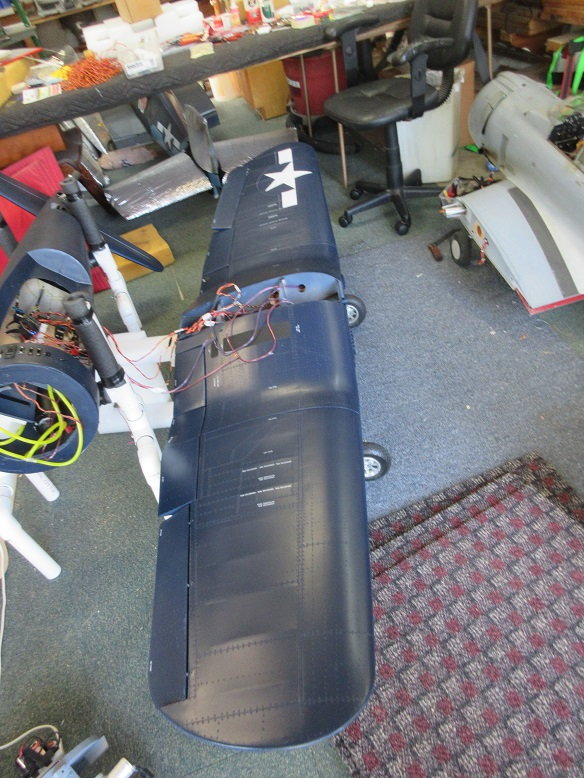
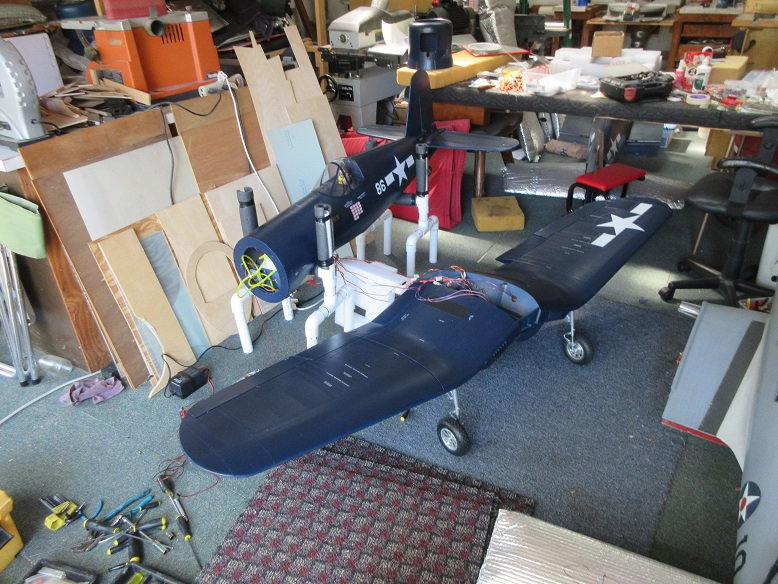
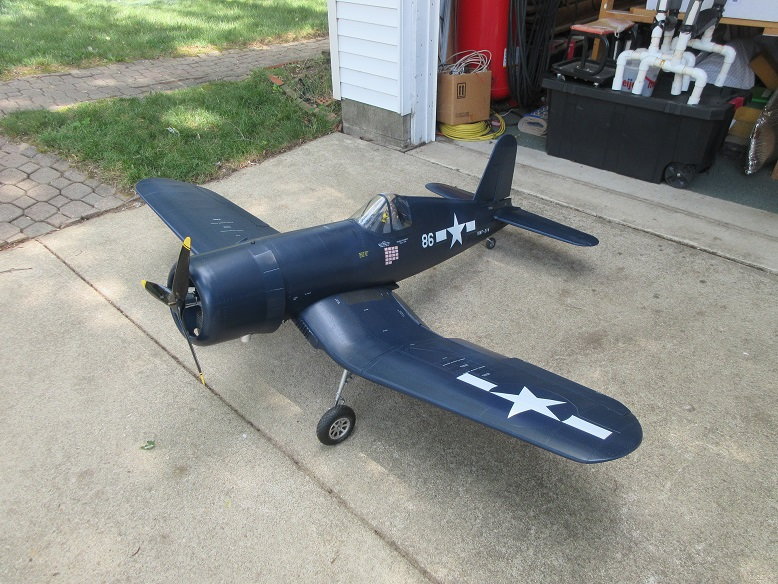
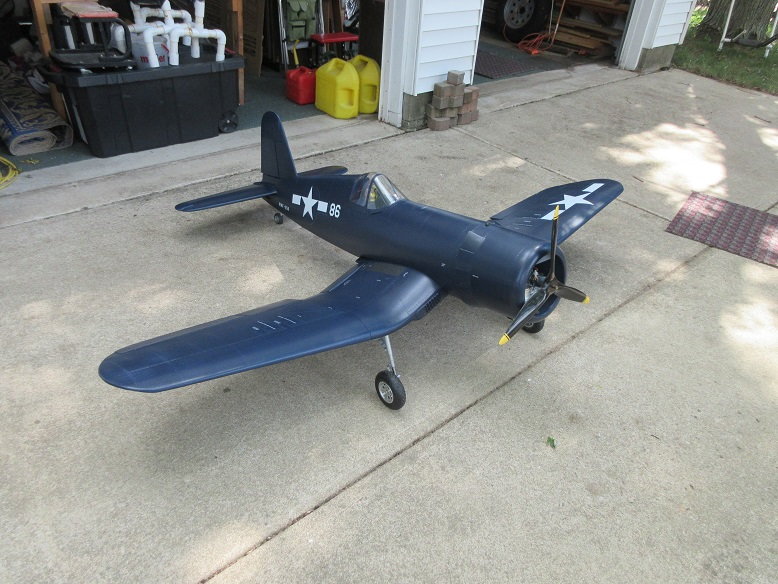
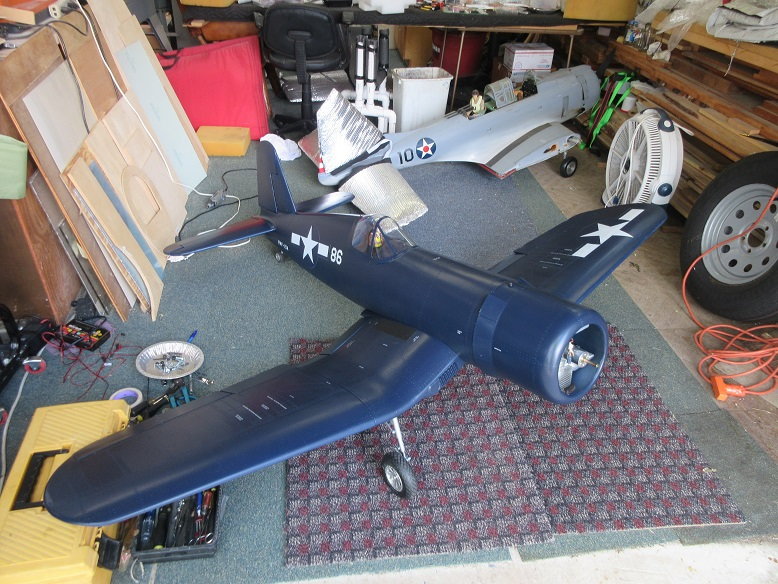
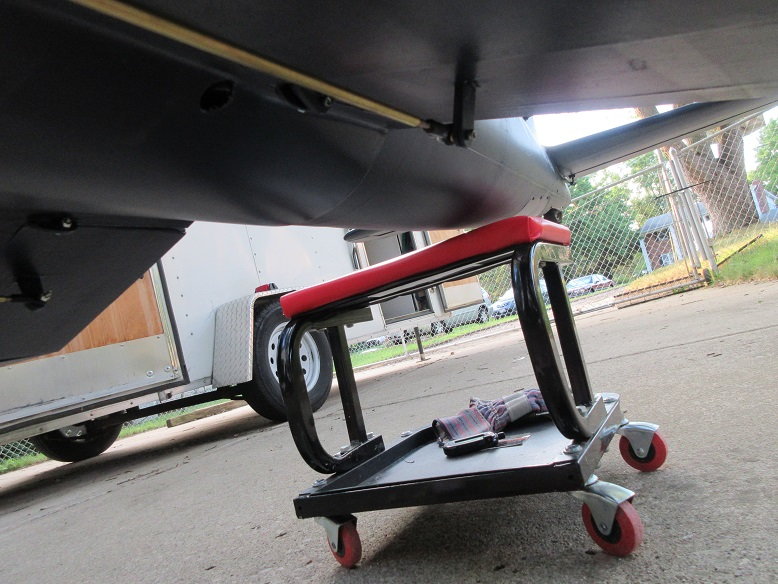
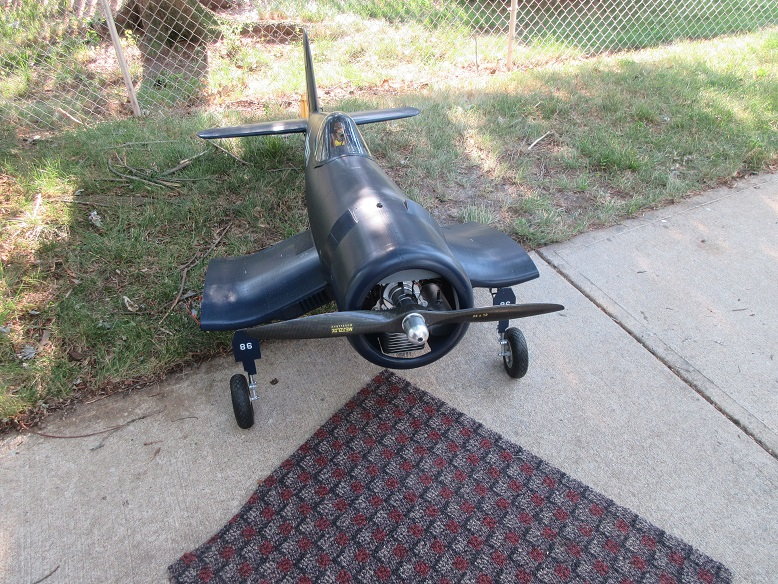
Finally, on her feet. This is my favorite 'all time' airplane. Easy to fly, excellent ground handling, huge flaps, easy to see in the air with the gull wing.
Still got to figure out how I'm going to mount these!
Just makes it in the detached shop!
Things to do: CG, Engine test, Range test. Already re-binded the receiver. And, put front gear doors on.
Got these treaded tires from Dino.
Making wire extensions.
I find about 3/32" of bare wire works best.
A 1/16" center punch is needed to 'drive home' the metal contacts.
Female and Male charts to make sure I don't install the wires incorrectly.
Since my normal USA source of connector kits are no longer made I had to go 'over seas' to find some. Just arrived today. Not bad; 2 weeks 2 days to arrive from China. Got enough until I croak!
I'm partial to long connections between the fuse and center wing.
One pastry cover to keep the wires from getting entangled with the servos.
Finally, on her feet. This is my favorite 'all time' airplane. Easy to fly, excellent ground handling, huge flaps, easy to see in the air with the gull wing.
Still got to figure out how I'm going to mount these!
Just makes it in the detached shop!
Things to do: CG, Engine test, Range test. Already re-binded the receiver. And, put front gear doors on.
Last edited by samparfitt; 07-07-2020 at 12:29 PM.
07-07-2020, 05:06 PM
#60
Just realized I'm beating a dead horse!
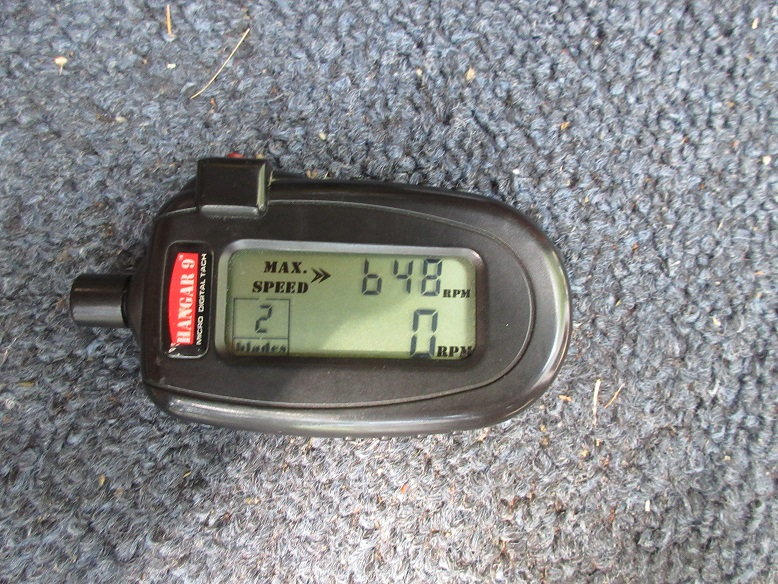
I've got a Xoar 26X10 on my P-47 with a DA-85 and I'm turning 6400 RPM's.
I made the assumption that the results would be the same for the DLE-85: nada.
The best I could get was 5750 RPM's.
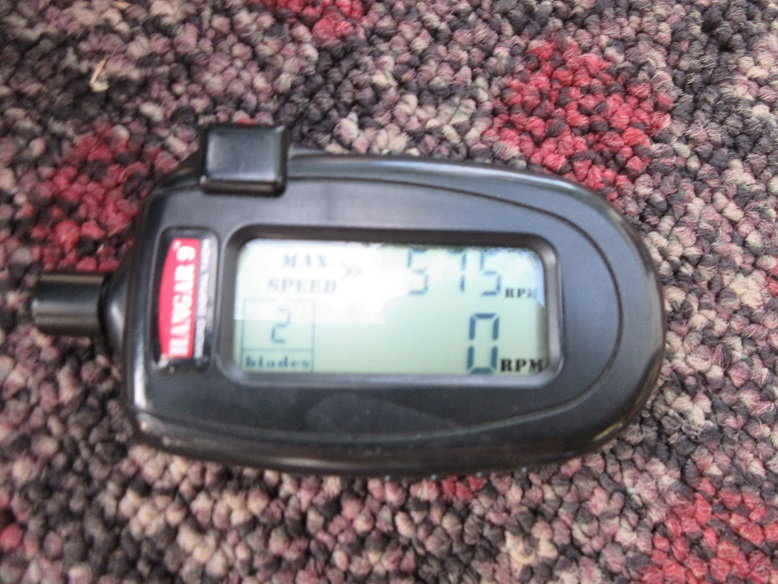
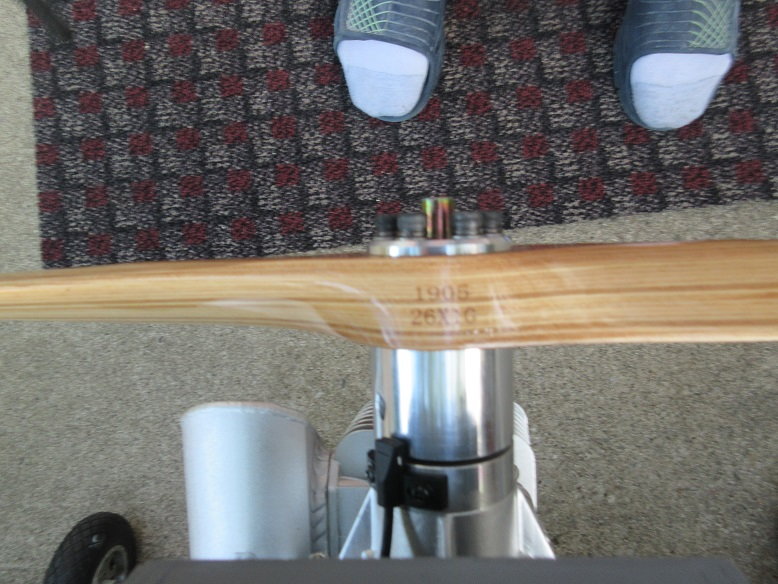
Xoar 26X10.
I looked up the specks for the DLE-85 and it says use a 25X10 and the DA-85 says I can use a 27X10.
Tomorrow, I'll 'slap' a 25X10 on the DLE-85 and see what I get. I'm comfortable with running gas around 6500 RPM's.
I had to do a lot of needle adjustment to get the 5750 RPM's.
Low end was around 9/10's open and high end was around 1 1/4. Initially, I had the low end around 1.5 turns (the 'normal') and took forever to 'run up' to top speed.
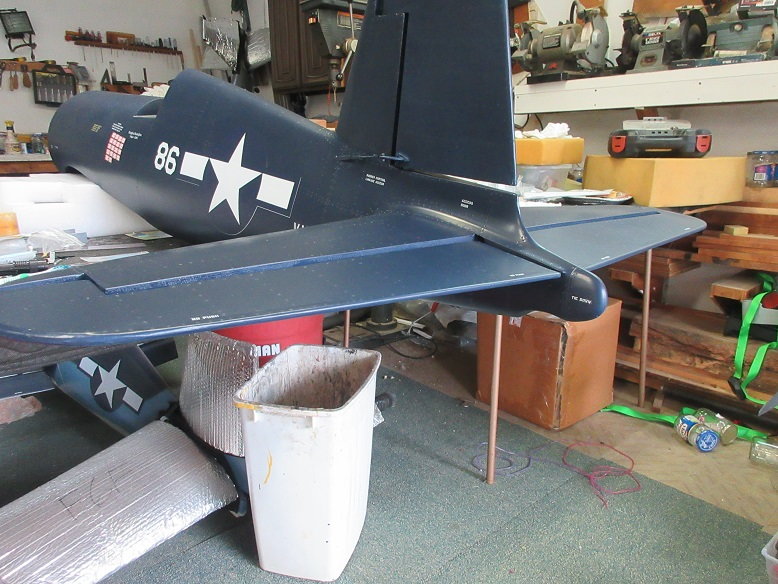
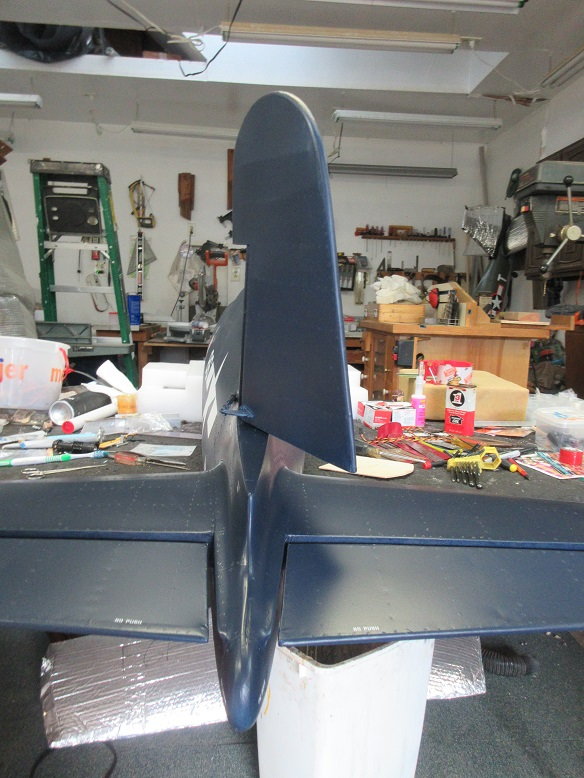
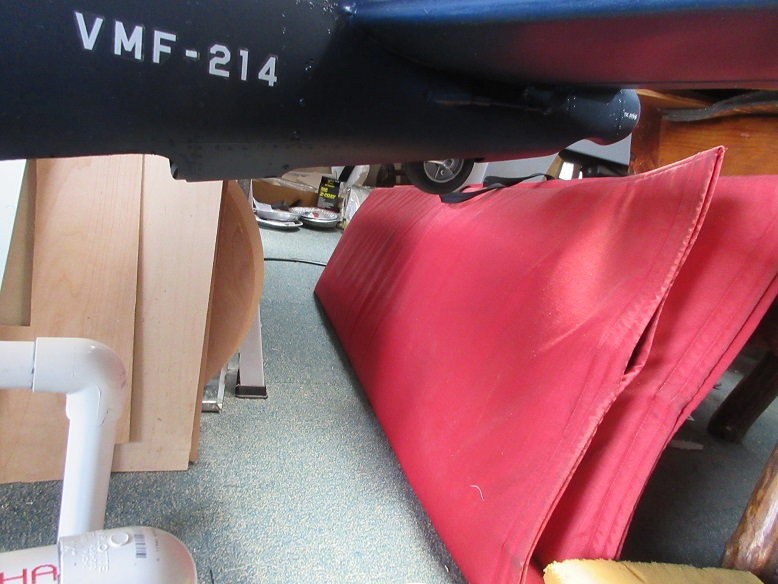
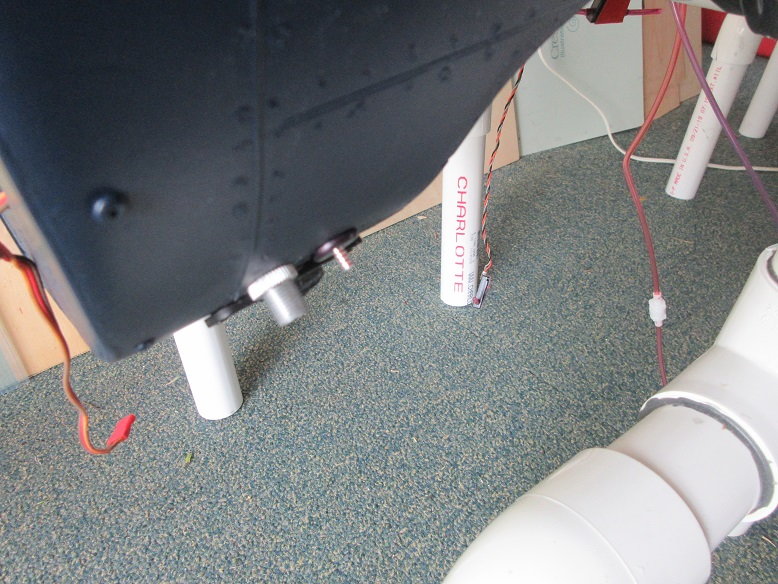
Balanced plane at 5" back from LE of wing at fuse and just about perfect.
Just slightly above the red stool.
When I put the gear down, it went nose heavy, quickly. Makes for a nice 'safety net' on the maiden: if plane is too tail heavy, just lower the gear.
I've got a Xoar 26X10 on my P-47 with a DA-85 and I'm turning 6400 RPM's.
I made the assumption that the results would be the same for the DLE-85: nada.
The best I could get was 5750 RPM's.
Xoar 26X10.
I looked up the specks for the DLE-85 and it says use a 25X10 and the DA-85 says I can use a 27X10.
Tomorrow, I'll 'slap' a 25X10 on the DLE-85 and see what I get. I'm comfortable with running gas around 6500 RPM's.
I had to do a lot of needle adjustment to get the 5750 RPM's.
Low end was around 9/10's open and high end was around 1 1/4. Initially, I had the low end around 1.5 turns (the 'normal') and took forever to 'run up' to top speed.
Balanced plane at 5" back from LE of wing at fuse and just about perfect.
Just slightly above the red stool.
When I put the gear down, it went nose heavy, quickly. Makes for a nice 'safety net' on the maiden: if plane is too tail heavy, just lower the gear.
Last edited by samparfitt; 07-07-2020 at 05:11 PM.
07-08-2020, 02:50 PM
#61
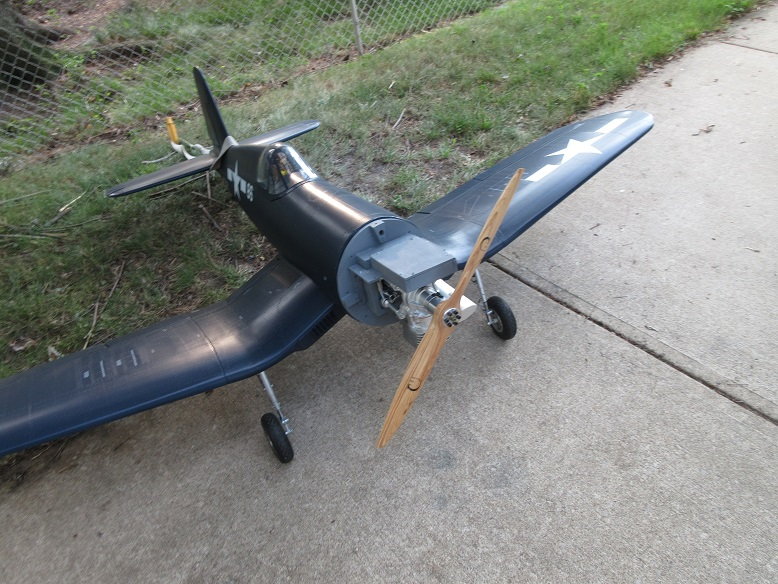
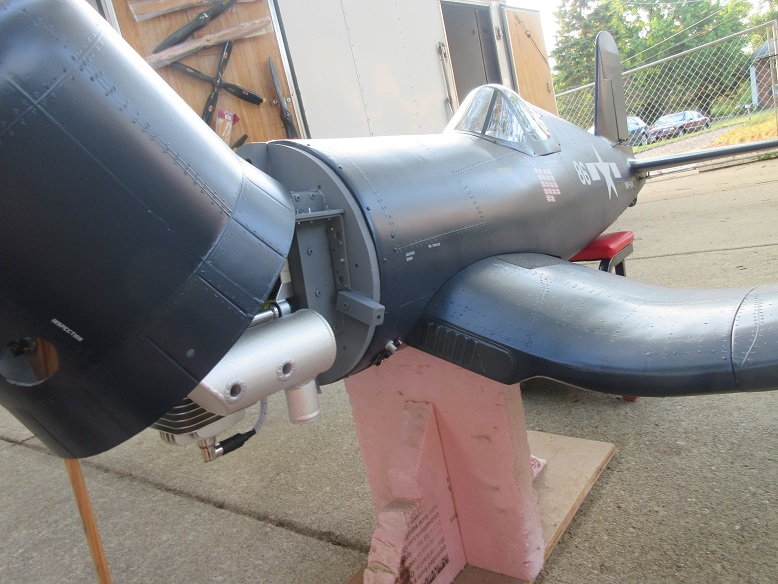
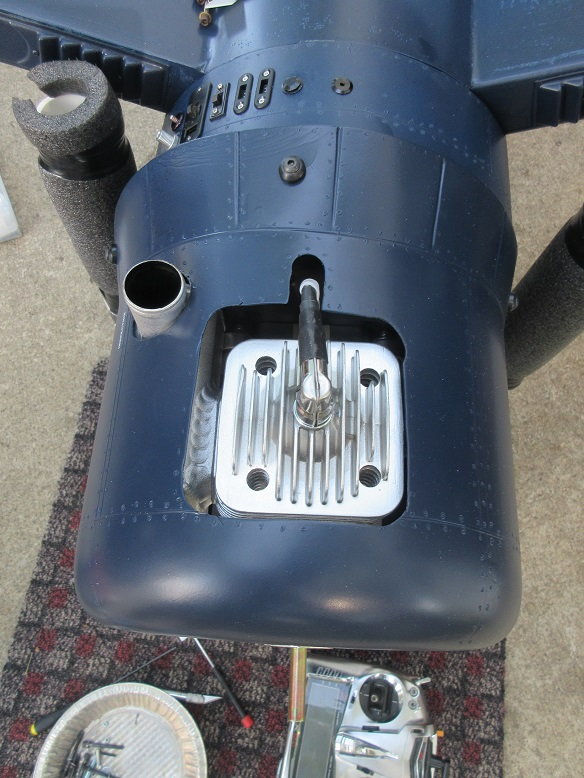
Engine test.
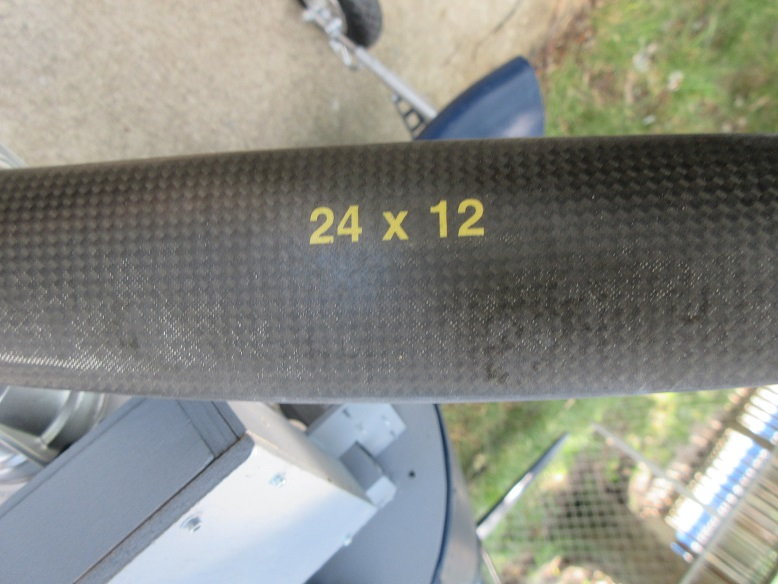
Put a Mejzlik 24X12 prop and got my desired RPM's of 6500. I've found Mejzlik to be the most efficient props on the market. I heard props are hard to get, presently.

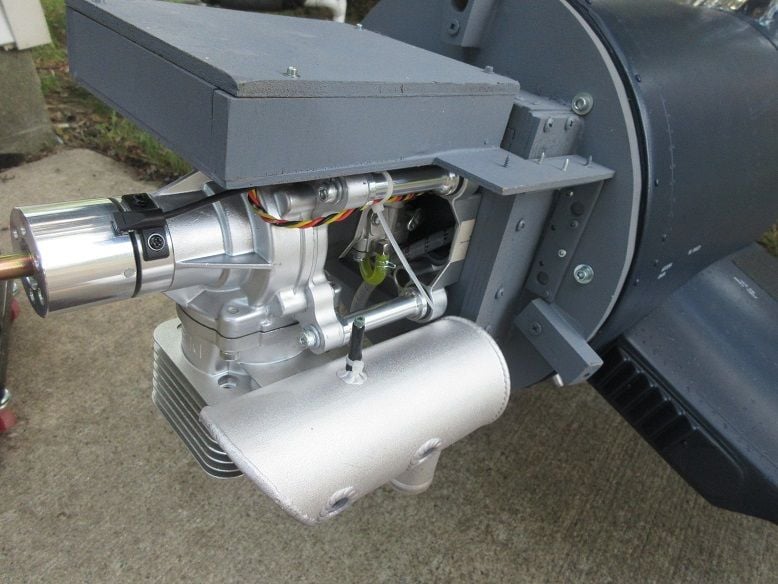
I plugged up the smoke hole in the muffler and put all the bolts into the removable firewall.
I've routed an extra extension to the engine area so I can use my 'data checker' to insure reception is good when I range test the plane.
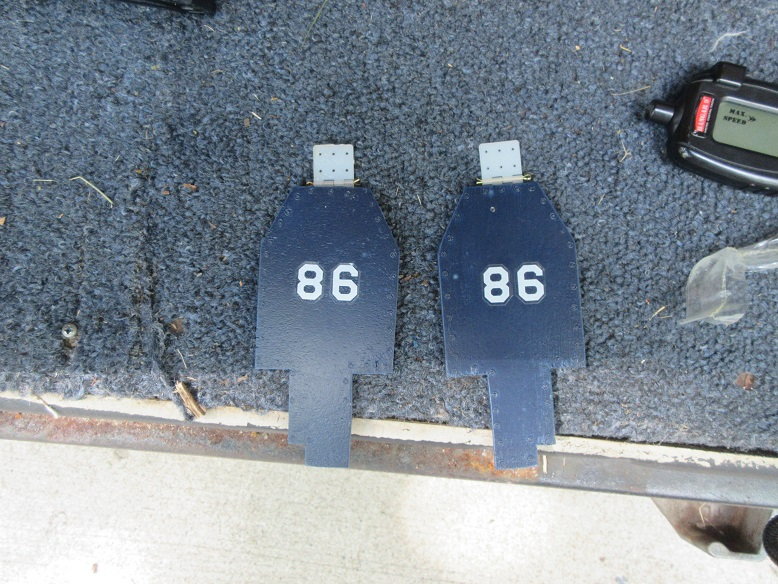
Front main gear doors.
Easy fix. Just used the same method that I used on my Z F6F Hellcat. Attach hinge to wing and let the wind push it up and the gear push it down.
Some dubro heavy duty hinges and small #0 screws.
I, also, had to rotate the numbers as I put them on upside down (senility).
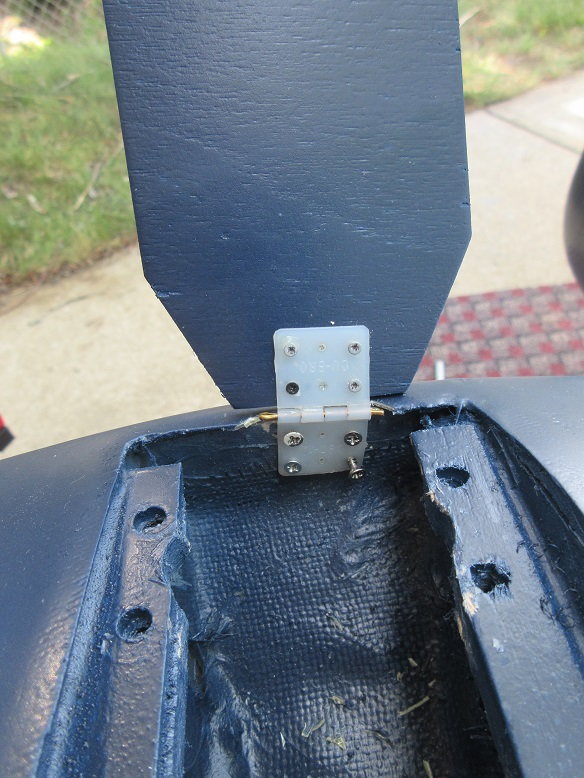
Had to cut an angle on the door as the pin sticking out of the oleo was 'catching' it.

Robart gives lots of bolt holes. Used blind nuts on the bottom.
Noticed all the screws on one side of the gear were loose so checked them all.
Shouldn't have any problem with engine overheating.
Re-tightened the wing nuts as they, too, were loose.
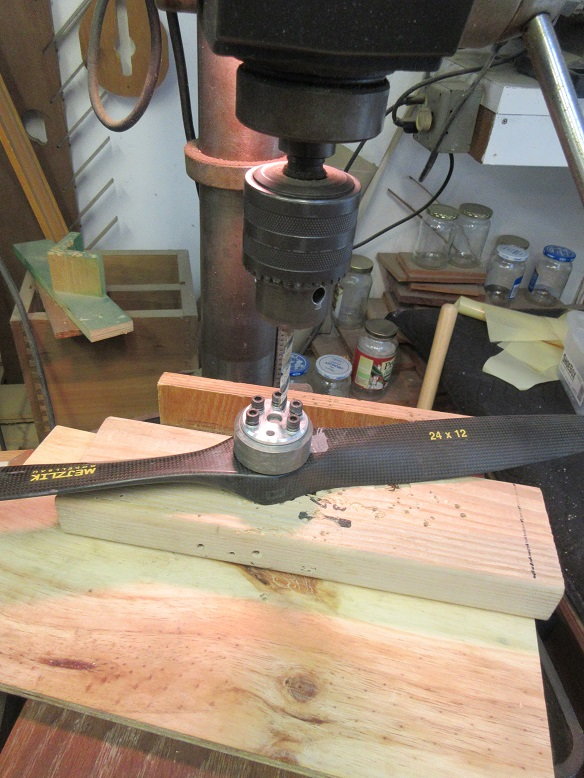
Use a drill press and metal jig to drill holes into the prop.
After drilling the proper size, I re-drill with the next number higher drill bit to make the holes just a bit larger as at least one bolt will bind if I don't when mounting the prop on the engine.
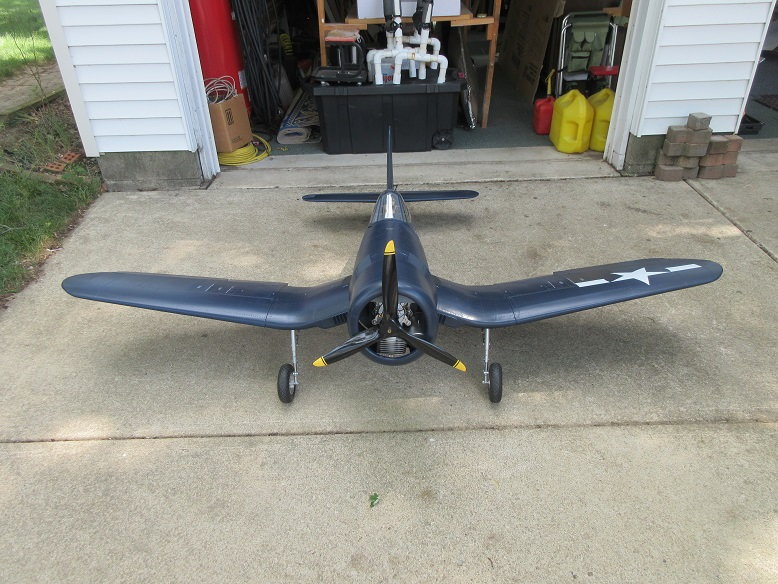
All ready for the maiden.
The 'numbers' that I want. Last night the engine wouldn't start when I was testing the new prop: ran out of gas (more senility!)
Can never have too many props!
Put a Mejzlik 24X12 prop and got my desired RPM's of 6500. I've found Mejzlik to be the most efficient props on the market. I heard props are hard to get, presently.
I plugged up the smoke hole in the muffler and put all the bolts into the removable firewall.
I've routed an extra extension to the engine area so I can use my 'data checker' to insure reception is good when I range test the plane.
Front main gear doors.
Easy fix. Just used the same method that I used on my Z F6F Hellcat. Attach hinge to wing and let the wind push it up and the gear push it down.
Some dubro heavy duty hinges and small #0 screws.
I, also, had to rotate the numbers as I put them on upside down (senility).
Had to cut an angle on the door as the pin sticking out of the oleo was 'catching' it.
Robart gives lots of bolt holes. Used blind nuts on the bottom.
Noticed all the screws on one side of the gear were loose so checked them all.
Shouldn't have any problem with engine overheating.
Re-tightened the wing nuts as they, too, were loose.
Use a drill press and metal jig to drill holes into the prop.
After drilling the proper size, I re-drill with the next number higher drill bit to make the holes just a bit larger as at least one bolt will bind if I don't when mounting the prop on the engine.
All ready for the maiden.
The 'numbers' that I want. Last night the engine wouldn't start when I was testing the new prop: ran out of gas (more senility!)
Can never have too many props!
Last edited by samparfitt; 07-08-2020 at 03:09 PM.
07-09-2020, 07:36 AM
#62
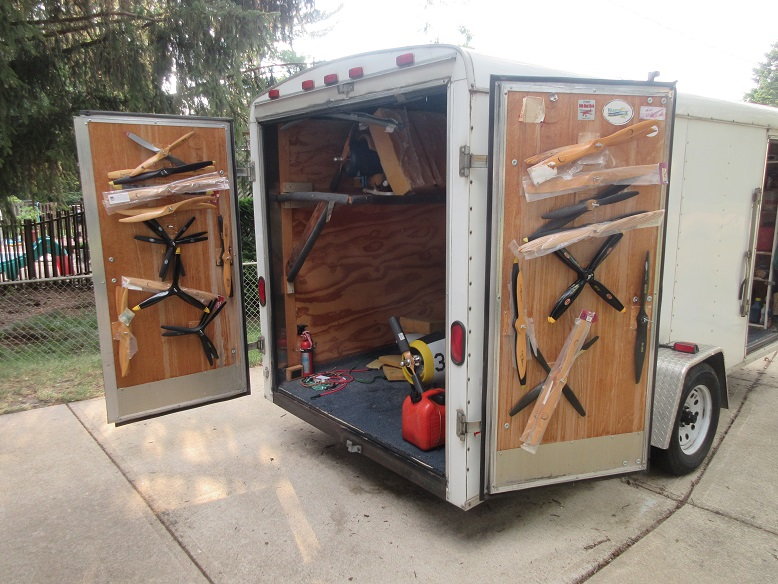
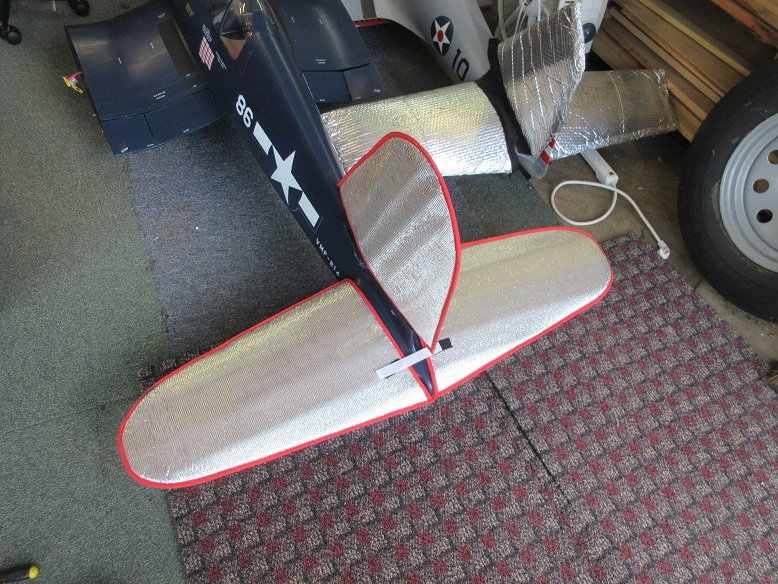
Hanger rash protectors.
Forgot I had this nice wing bag as it was under a damaged spitfire.

Had some tail feather protectors, also.
That's a 'wrap' for this thread until I do the maiden.
Next, I'll work on the Spitfire by Phoenix which is a thread I started awhile ago. I damaged my first one so bought a 2nd one, last year.
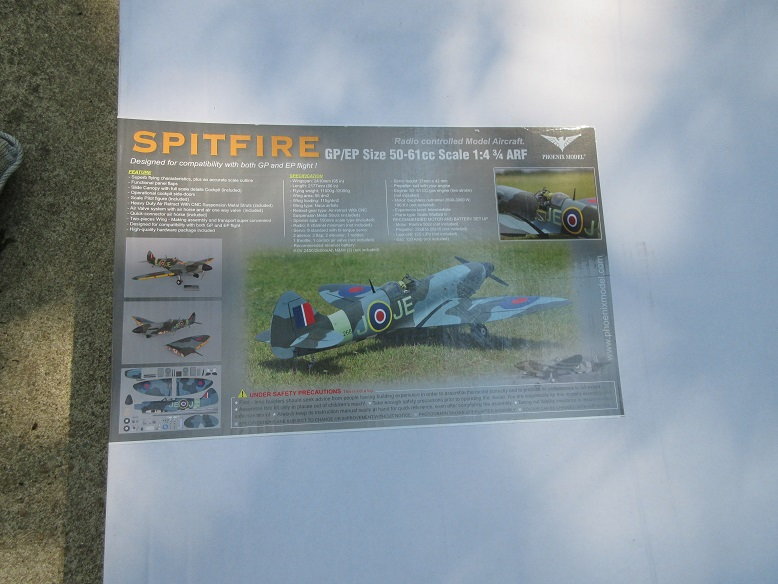
After the Spitfire, I'll probably work on the Ziroli P-51 that I've been building for about 15 years (I'm a radial guy)!
Today, getting my Nieuport 28 ready for a Dawn Patrol flyin only 40 miles from my house.
Forgot I had this nice wing bag as it was under a damaged spitfire.
Had some tail feather protectors, also.
That's a 'wrap' for this thread until I do the maiden.
Next, I'll work on the Spitfire by Phoenix which is a thread I started awhile ago. I damaged my first one so bought a 2nd one, last year.
After the Spitfire, I'll probably work on the Ziroli P-51 that I've been building for about 15 years (I'm a radial guy)!
Today, getting my Nieuport 28 ready for a Dawn Patrol flyin only 40 miles from my house.
 07-11-2020, 03:34 PM
#65
Thanks guys.
I just use Venom 5 cell NIMH 6.0 volt batteries. Always two of them.
I store the planes in a detached shop so it can get cold out there in the winter but the NIMH hold up well.
I never replace them until one of them goes bad which is, usually, several years.
I never 'fast' charge them; they get the default 'low' setting for charging.
The batteries are always 'deep' inside the fuse so it's too much trouble to remove them unless they are defective.
As long as I have two batteries, I don't worry about one going bad.
My JR 'power safe' receivers takes from the highest voltage battery until they are equal. If one battery goes bad , the receiver prevents the other from being drained or hampered by the bad battery.
If the switch goes bad, the receiver defaults to on.
Venom used to have 4200 ma but I don't see them listed, anymore.
I have from 8400-10,000 ma on each receiver.
The ignition, usually, gets a 2700 ma.
The bulk of pilots are using lipos.
https://www.towerhobbies.com/cgi-bin...p?I=LXVTG1&P=7
Last edited by samparfitt; 07-11-2020 at 03:37 PM.
08-15-2020, 05:04 PM
#66
Congratulations on your beautiful Corsair. Your thread will be very helpful to me in building my wood Corsair. I am not up to doing thousands of rivets, but I do intend to include a detailed cockpit, dummy radial, and functional gear doors.
How much lead did you end up with in the nose, and what is the total dry weight?
How much lead did you end up with in the nose, and what is the total dry weight?
08-15-2020, 10:32 PM
#67
I'm guessing around 5 pounds of lead and I actually weighed this plane and, if I remember, it was about 34 lbs. Was much lighter than my usual planes as I didn't put all the 'bells and whistles' on it.
To me, a Ziroli, whether it weighs 34 or 44 lbs, they still fly great.
To me, a Ziroli, whether it weighs 34 or 44 lbs, they still fly great.
