


TopRC giant P-47 Thunderbolt ARF


The following users liked this post:
jgibbons (03-09-2024)
 05-18-2022, 08:35 AM
#177
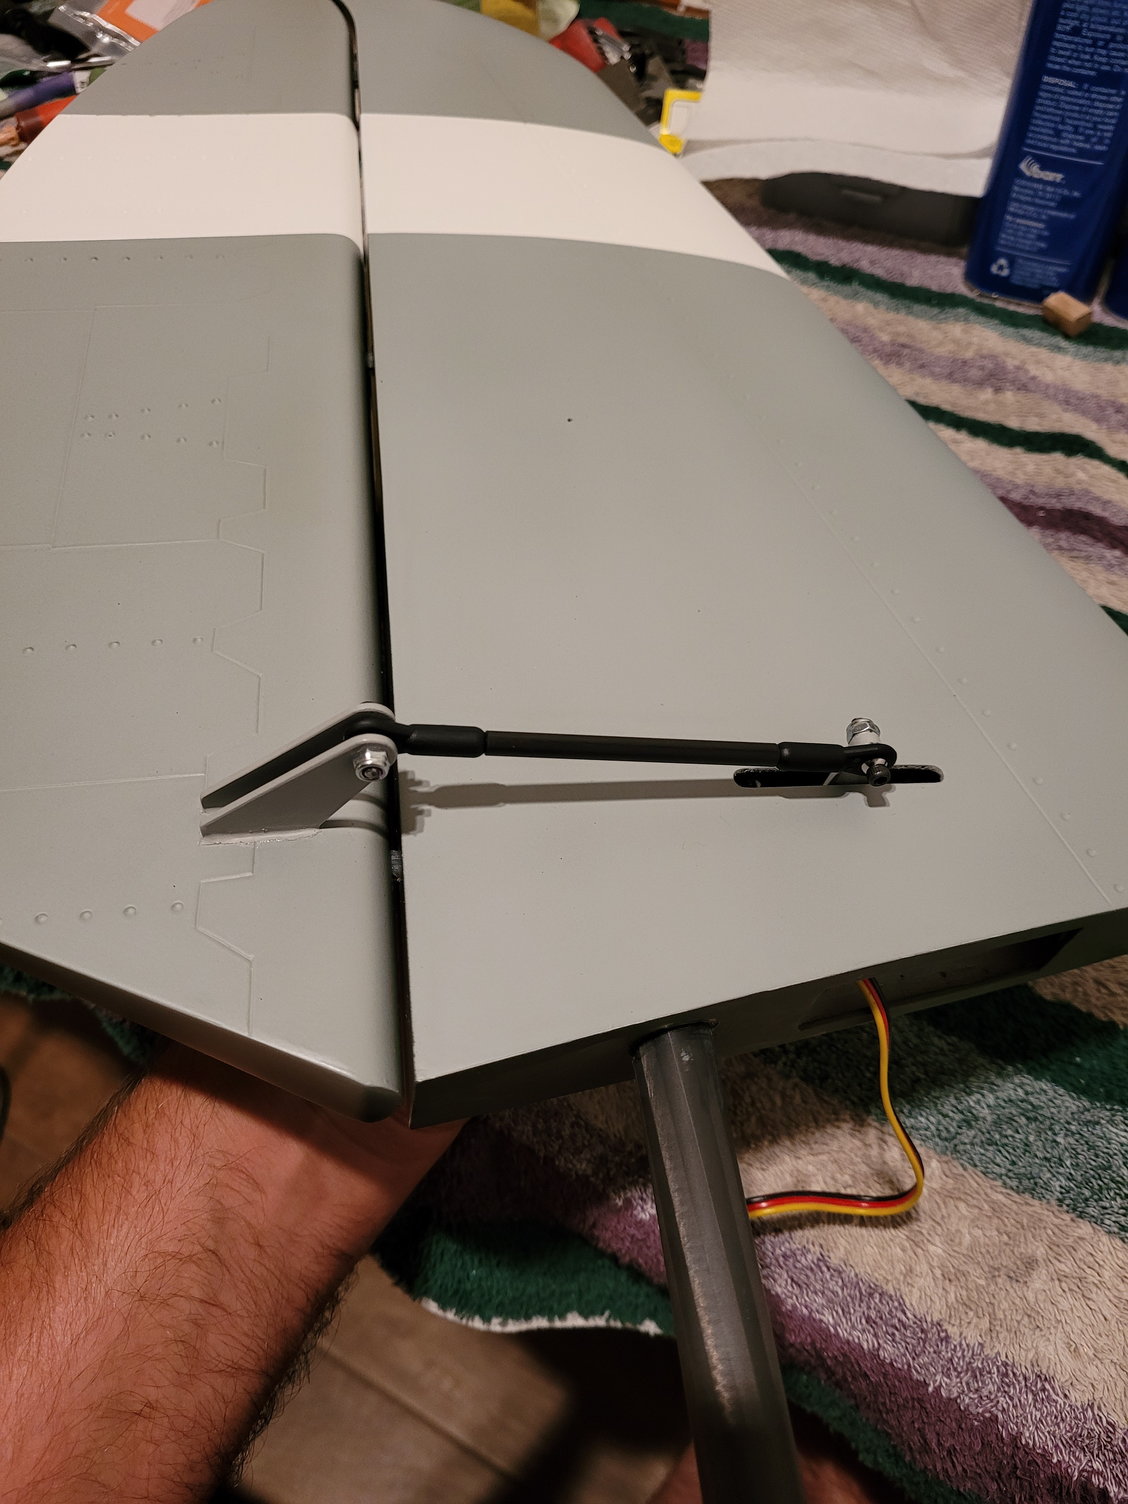
Finished up the horizontal stabs and the elevators.
Can anyone share photos of their tailwheel door opening and closing setup? Kind of stuck on this one, thanks.
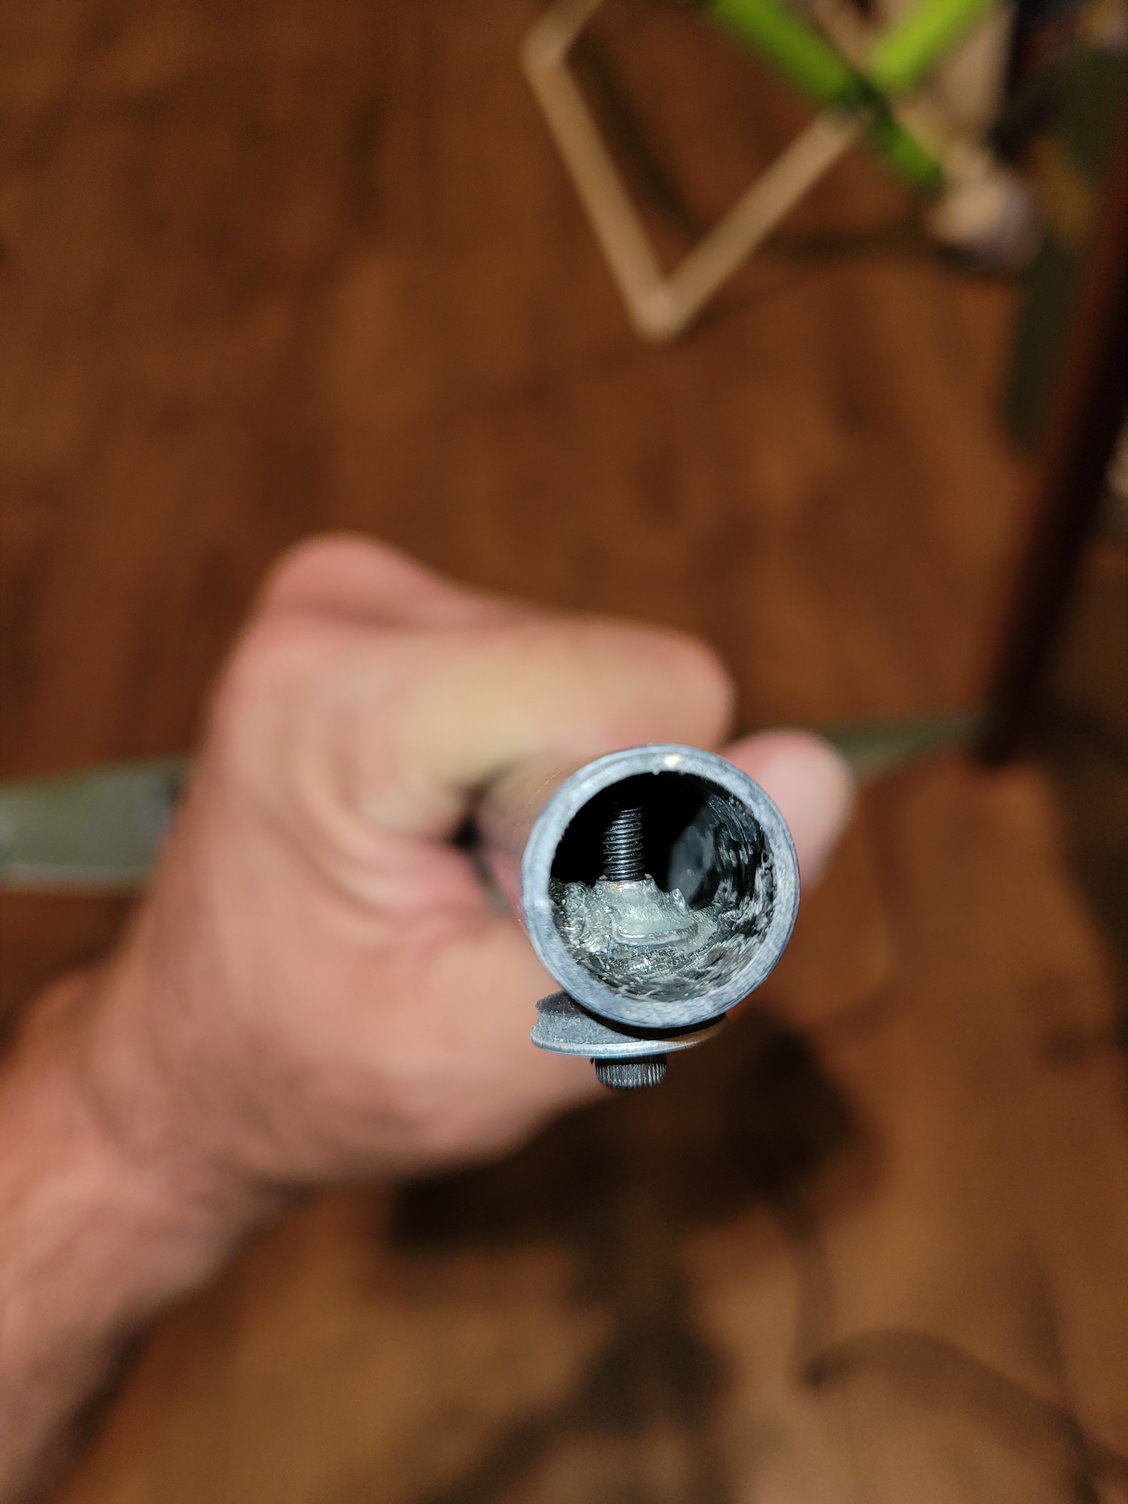
4-40 t-nut in horizontal tube
got away with 1" arms
keeping things in place
Can anyone share photos of their tailwheel door opening and closing setup? Kind of stuck on this one, thanks.
4-40 t-nut in horizontal tube
got away with 1" arms
keeping things in place
The following users liked this post:
JRSmith (05-18-2022)
05-18-2022, 08:46 AM
#178
For those that haven't played with the tailwheel assembly at all, I noticed the spring motion was very stiff and clunky.
I descrambled the spring portion and found a sharp burred edge on the bottom of the cylinder that goes into the shock. I removed that burr and put some grease on the cylinder, which improved the movement quite a bit.
I descrambled the spring portion and found a sharp burred edge on the bottom of the cylinder that goes into the shock. I removed that burr and put some grease on the cylinder, which improved the movement quite a bit.
05-18-2022, 05:42 PM
#179


Mine arrived today and upon initial inspection, it looks very nice. They do pack them well and I have not seen any damage yet, still a couple parts to open up. But the main parts all look good. The landing gear was shipped in a separate shipping box, which was good. I will get a closer look once I start diving into the assembly.
Couple of item to quickly check off the list first are:
I have all the parts here to start working and the Neu-Motor 8025-150kV should work out great.
Anyways, I figured I would post some picture if interested. I am not sure if you guys want me to clog up this thread, so please let me know if you would like me to take my assembly into another forum or thread. No offense taken if you guys want me to pound sand and move on. I learned my lesson with the 3D part! Thanks and take care.
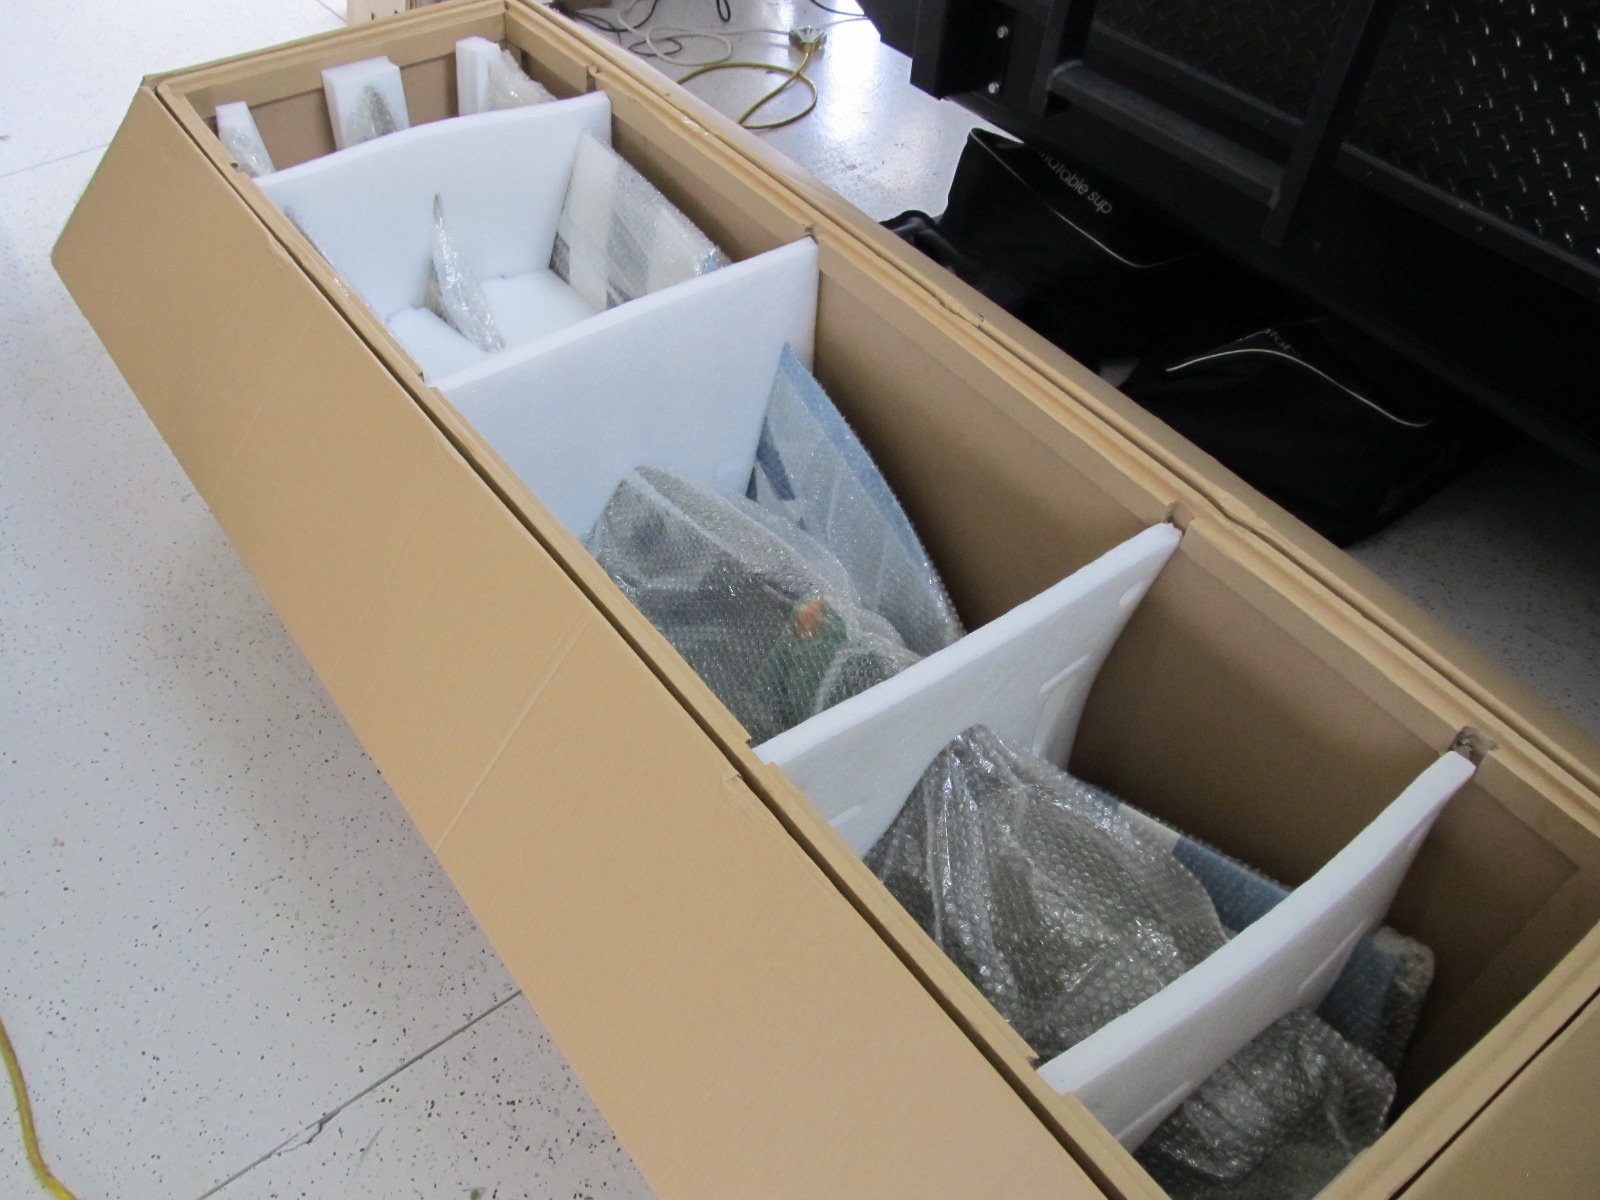
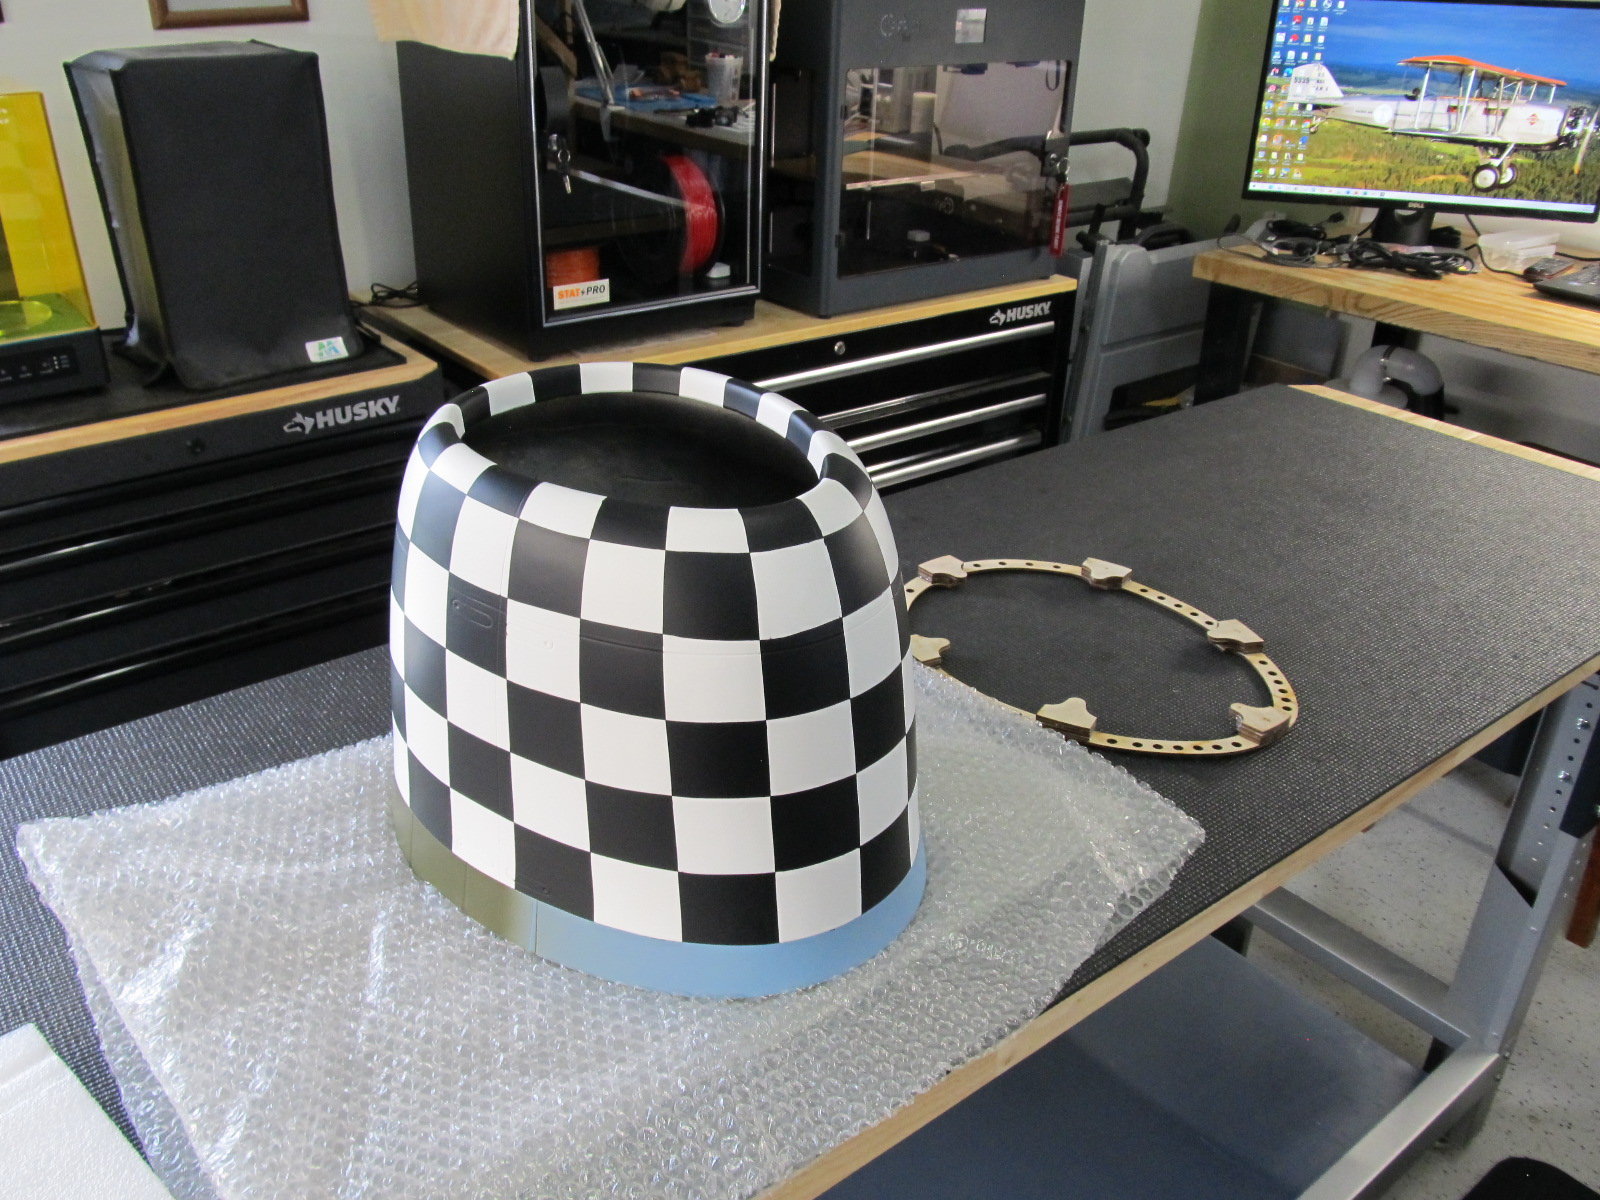
Initial unboxing of ARF
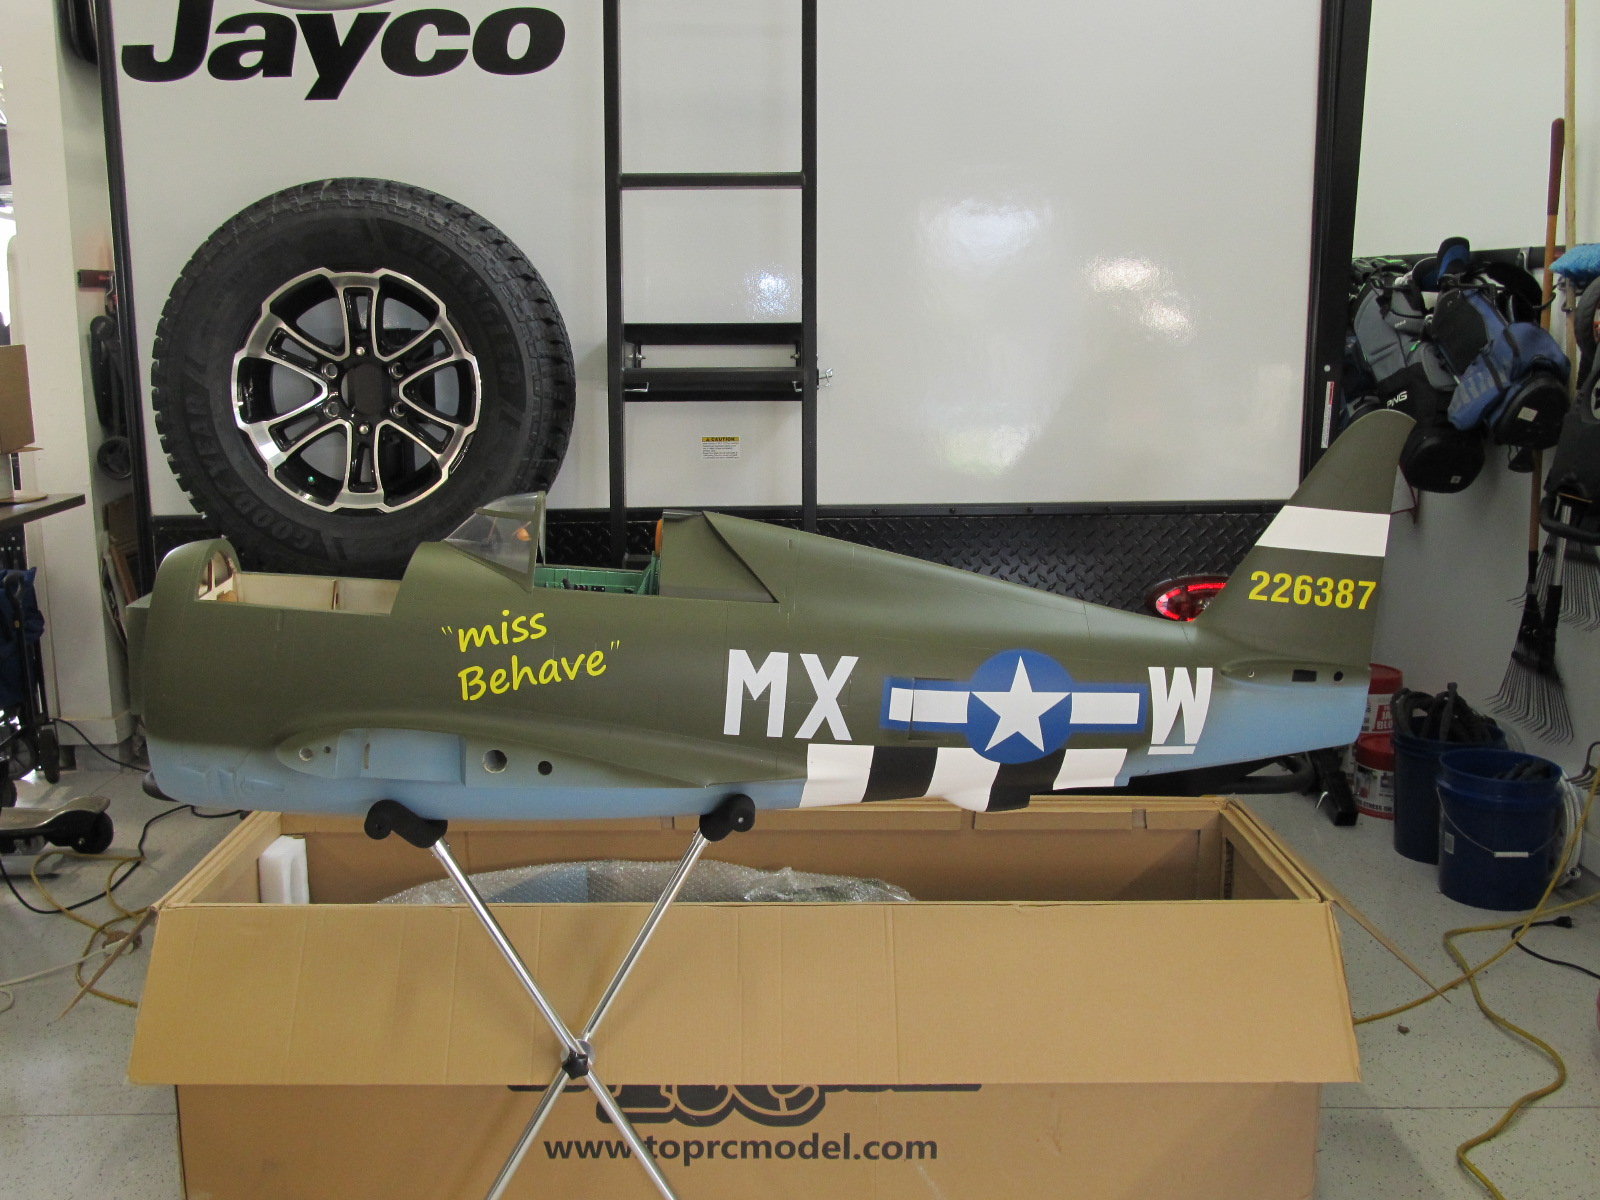
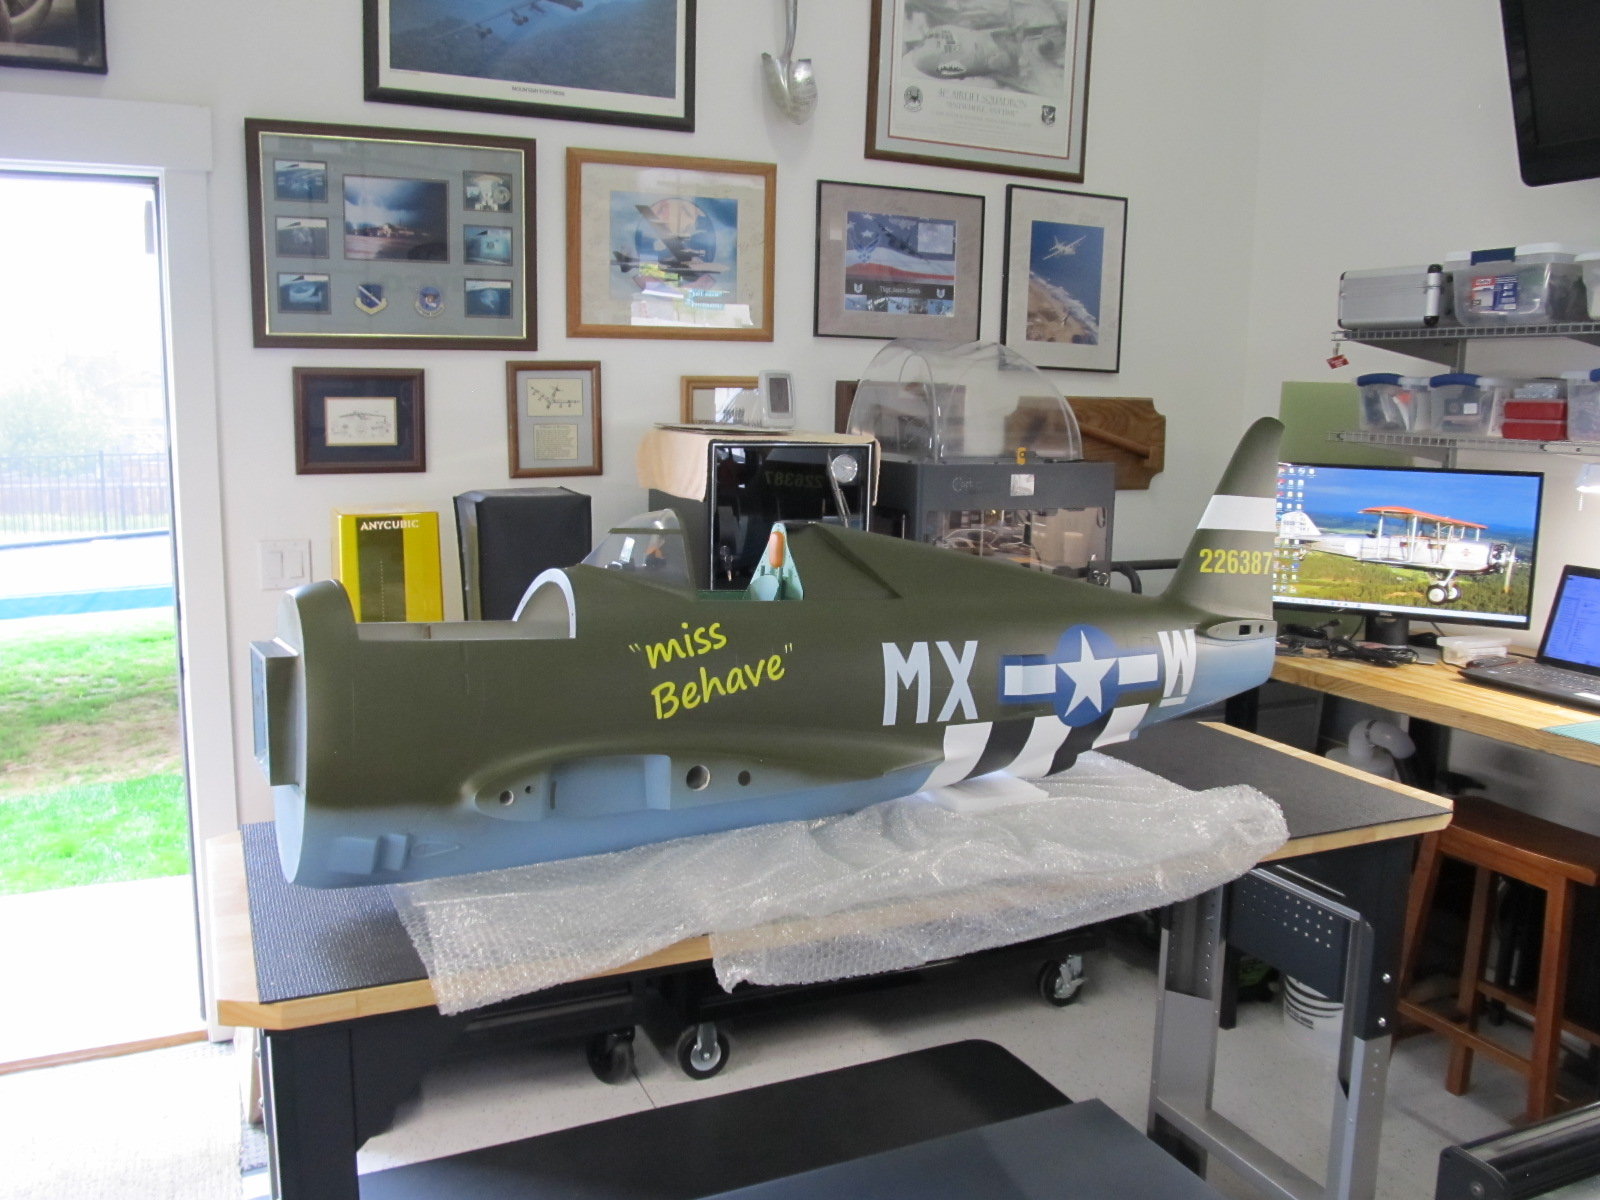
Fuselage left side, paint work is very good.
Fuselage front right angled, love the shape of the P-47!
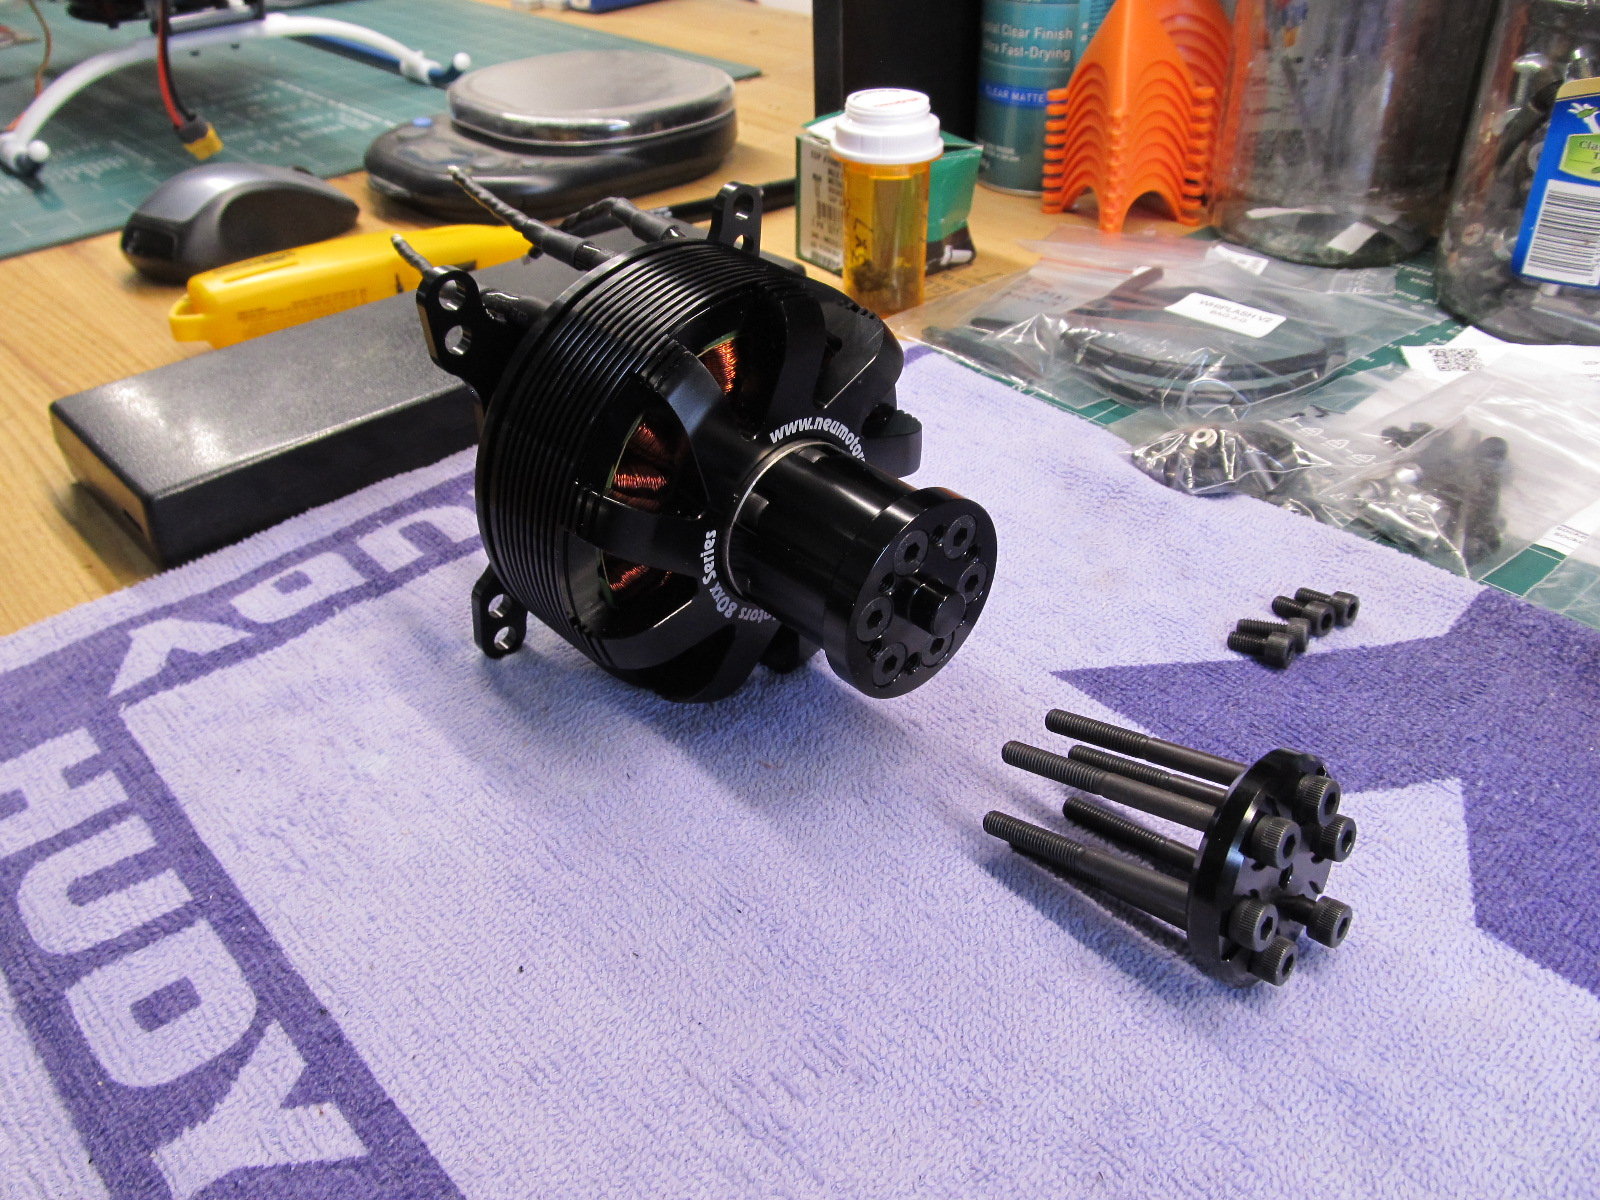
Neu Motors 8025-150kV with DA 100 prop adapter
Very tempting to design a full cowl frame and have opening panels for battery access.
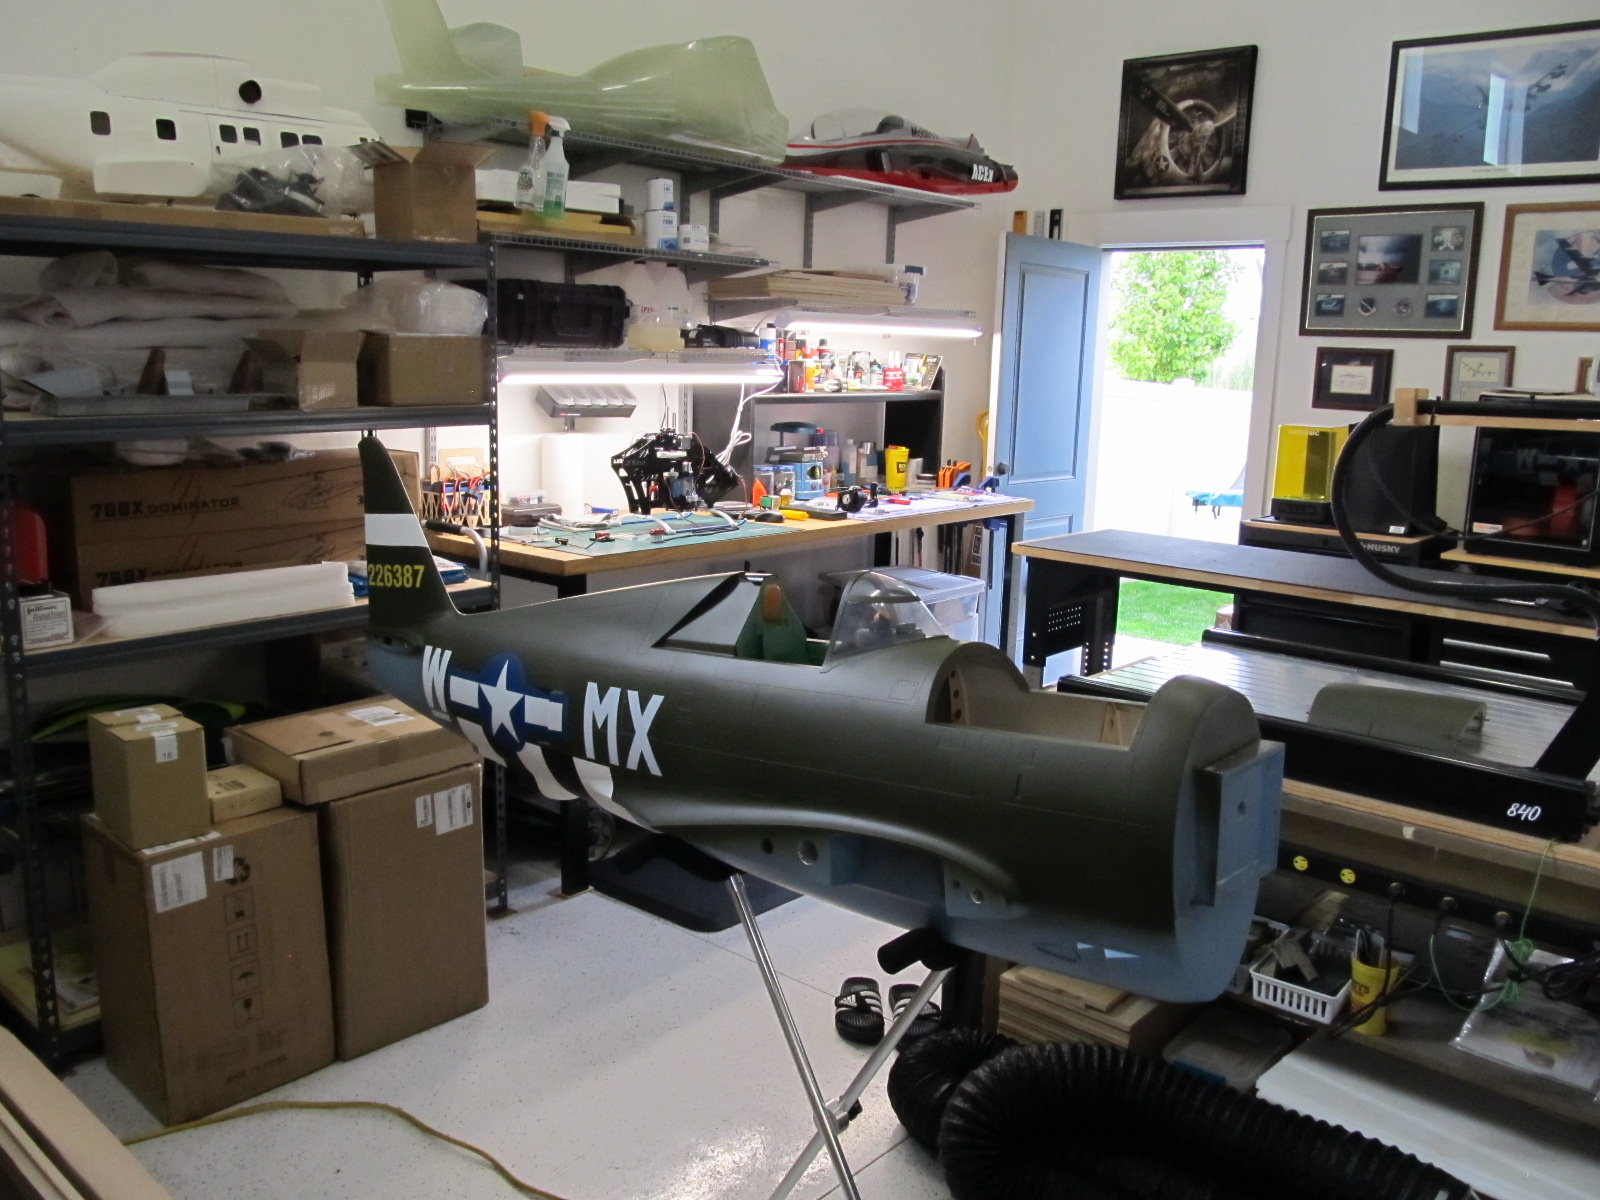
Takes up the entire work table , may have to reorganize the area to get more space.
Couple of item to quickly check off the list first are:
- I would like to make the cockpit removable for easier access to the rear half of the fuselage. Feels like a couple areas that could use some type of re-enforcement and they only way I can see to access is to have the cockpit removable.
- Designing a stand to hold the fuselage in place on the work table.
I have all the parts here to start working and the Neu-Motor 8025-150kV should work out great.
Anyways, I figured I would post some picture if interested. I am not sure if you guys want me to clog up this thread, so please let me know if you would like me to take my assembly into another forum or thread. No offense taken if you guys want me to pound sand and move on. I learned my lesson with the 3D part! Thanks and take care.
Initial unboxing of ARF
Fuselage left side, paint work is very good.
Fuselage front right angled, love the shape of the P-47!
Neu Motors 8025-150kV with DA 100 prop adapter
Very tempting to design a full cowl frame and have opening panels for battery access.
Takes up the entire work table , may have to reorganize the area to get more space.
The following 2 users liked this post by JRSmith:
Colt4570 (05-18-2022),
maddog-RCU (05-19-2022)
05-18-2022, 07:46 PM
#180
Not a huge fan of baby blue, but I really like the overall scheme on that one.
I enjoy seeing what other people are doing with theirs. Giving each other ideas is how we come up with the best results on our builds.
I enjoy seeing what other people are doing with theirs. Giving each other ideas is how we come up with the best results on our builds.
05-19-2022, 05:18 AM
#182

Welcome JRSmith; keep posting your build; I think yours is the first for an electric build here.
Yes the fuselage does take up a lot of space; I found a nice holder from RCplanestands for working on my P-47.
If you want to invest some dollars they also have a table top version.
I have been chasing gremlins with mine now for weeks and NOW had to order a replacement jack screw for the tailwheel; one day it was working fine the next it wouldn't run but for a second in either direction.
Here is a picture of mine in it's work cradle.
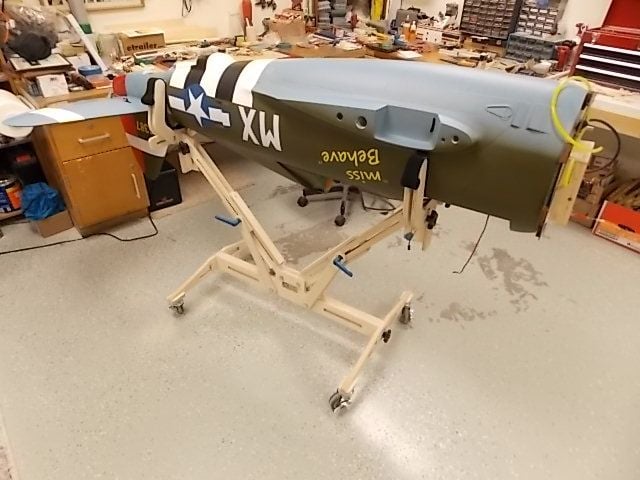
05-19-2022, 05:58 AM
#183
Welcome JRSmith; keep posting your build; I think yours is the first for an electric build here.
Yes the fuselage does take up a lot of space; I found a nice holder from RCplanestands for working on my P-47.
If you want to invest some dollars they also have a table top version.
I have been chasing gremlins with mine now for weeks and NOW had to order a replacement jack screw for the tailwheel; one day it was working fine the next it wouldn't run but for a second in either direction.
Here is a picture of mine in it's work cradle.
I like the RCplanestands and may invest in one, they seem to be very nice and much more robust then the aluminum stand I have. Although, for the table top stand I will be making my own cradle to hold it and will also serve as a transport stand. Just have to get time in CAD.
Yours looks very nice. BTW, did you receive the part I sent you? Thanks.
The following users liked this post:
bradley (05-20-2022)
05-20-2022, 05:11 AM
#185
JR; yes I did get the part; I shot you an e-mail thanking you; now I just need to install it.
Darrin; My interference issue was solved once I went to all digital servos for the flying surfaces; it seems the analog servos with the long servo wire runs couldn't handle it.
Still waiting on the replacement jack screw I ordered on Wednesday the 18th; I was told it was in stock and they were going to ship that day or the next at the latest.
05-20-2022, 05:40 AM
#186
JR; yes I did get the part; I shot you an e-mail thanking you; now I just need to install it.
Darrin; My interference issue was solved once I went to all digital servos for the flying surfaces; it seems the analog servos with the long servo wire runs couldn't handle it.
Still waiting on the replacement jack screw I ordered on Wednesday the 18th; I was told it was in stock and they were going to ship that day or the next at the latest.
Darrin; My interference issue was solved once I went to all digital servos for the flying surfaces; it seems the analog servos with the long servo wire runs couldn't handle it.
Still waiting on the replacement jack screw I ordered on Wednesday the 18th; I was told it was in stock and they were going to ship that day or the next at the latest.
05-20-2022, 07:39 AM
#187
JR; yes I did get the part; I shot you an e-mail thanking you; now I just need to install it.
Darrin; My interference issue was solved once I went to all digital servos for the flying surfaces; it seems the analog servos with the long servo wire runs couldn't handle it.
Still waiting on the replacement jack screw I ordered on Wednesday the 18th; I was told it was in stock and they were going to ship that day or the next at the latest.
Darrin; My interference issue was solved once I went to all digital servos for the flying surfaces; it seems the analog servos with the long servo wire runs couldn't handle it.
Still waiting on the replacement jack screw I ordered on Wednesday the 18th; I was told it was in stock and they were going to ship that day or the next at the latest.

 05-23-2022, 07:54 AM
#191
Colt; you will need to redrill the holes in the former also now that you added that spacer on the bottom.
I avoided this by re doing the doors on mine so they would open up wider so not to drag on the grass.
I pulled the doors off and sanded down the edge of the door so it could open up wider.
I avoided this by re doing the doors on mine so they would open up wider so not to drag on the grass.
I pulled the doors off and sanded down the edge of the door so it could open up wider.
 05-23-2022, 10:52 PM
#193
Colt; you will need to redrill the holes in the former also now that you added that spacer on the bottom.
I avoided this by re doing the doors on mine so they would open up wider so not to drag on the grass.
I pulled the doors off and sanded down the edge of the door so it could open up wider.
I avoided this by re doing the doors on mine so they would open up wider so not to drag on the grass.
I pulled the doors off and sanded down the edge of the door so it could open up wider.
Now just trying to get all the servo leads and pull pull wires ready to go just so I don't have to take the tailwheel out too many times. The screws are a pain in the *** to install with the gear in place!
Darrin
05-24-2022, 05:27 AM
#194
LOL;
Darrin I have been down that road 3 times now; and starting today with the replacement of the jack screw for the tailwheel will be number 4.
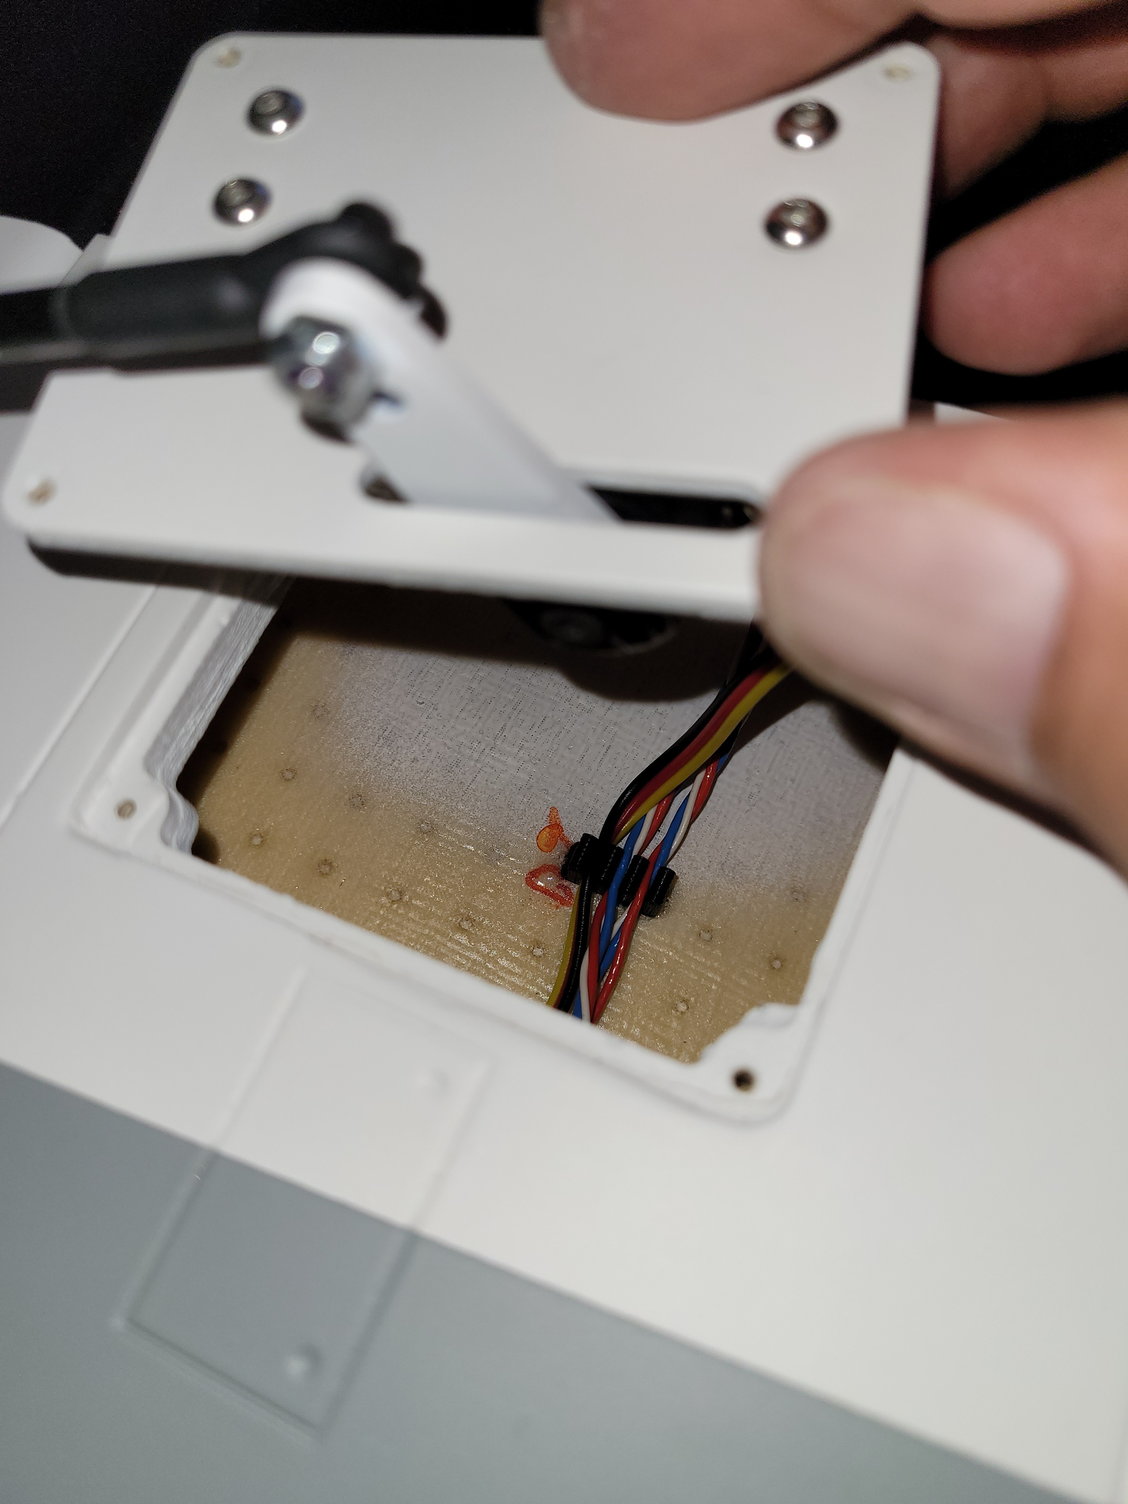
The toughest part is keeping the servo leads from being entangled with the pull pull cables for the rudder and tail wheel.
Darrin I have been down that road 3 times now; and starting today with the replacement of the jack screw for the tailwheel will be number 4.
The toughest part is keeping the servo leads from being entangled with the pull pull cables for the rudder and tail wheel.
05-24-2022, 09:09 AM
#195
Finished up the horizontal stabs and the elevators.
Can anyone share photos of their tailwheel door opening and closing setup? Kind of stuck on this one, thanks.
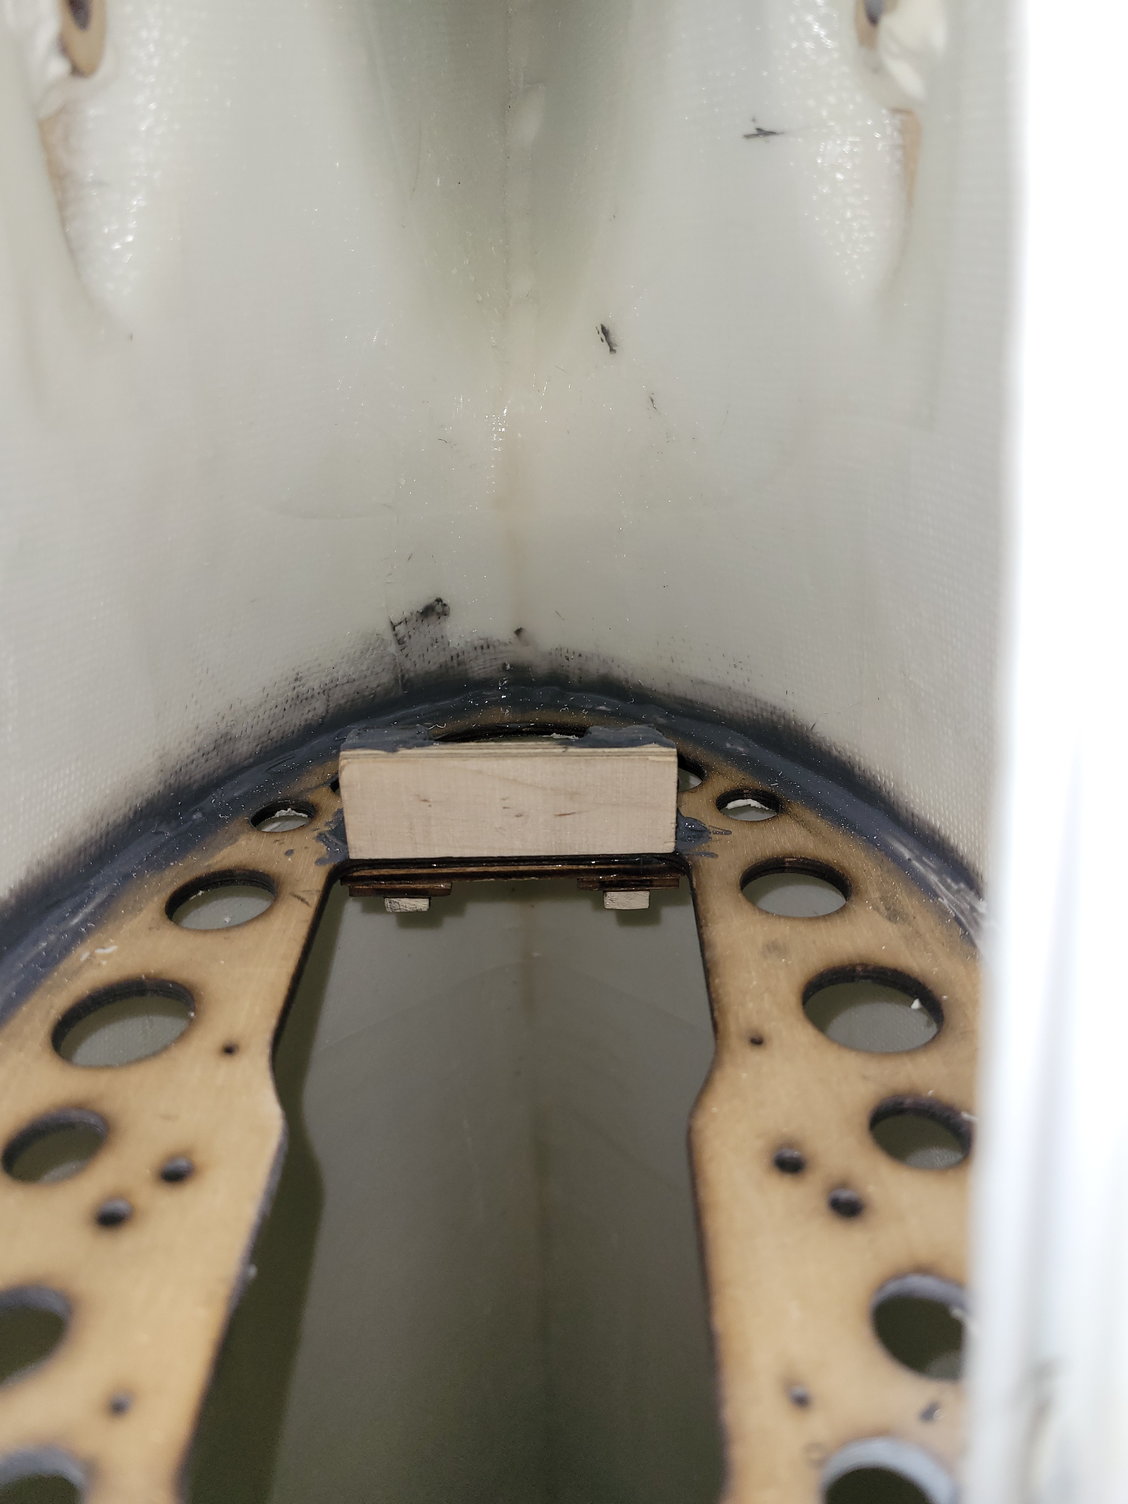
After reading some posts on a FB group I discovered the stock tailwheel mounting location is too high up in the fuse and with the compression of the
4-40 t-nut in horizontal tube
got away with 1" arms
keeping things in place
Can anyone share photos of their tailwheel door opening and closing setup? Kind of stuck on this one, thanks.
After reading some posts on a FB group I discovered the stock tailwheel mounting location is too high up in the fuse and with the compression of the
4-40 t-nut in horizontal tube
got away with 1" arms
keeping things in place
05-24-2022, 09:10 AM
#196
Colt; you will need to redrill the holes in the former also now that you added that spacer on the bottom.
I avoided this by re doing the doors on mine so they would open up wider so not to drag on the grass.
I pulled the doors off and sanded down the edge of the door so it could open up wider.
I avoided this by re doing the doors on mine so they would open up wider so not to drag on the grass.
I pulled the doors off and sanded down the edge of the door so it could open up wider.
PaulD
05-24-2022, 12:13 PM
#197
Well guys it sure seems I got the lemon when it comes to this P-47.
When my plane arrived, the canopy was all smashed to heck because the landing gear was just tossed into the box; it wasn't even in its own box at all.
So, during the transport it broke the canopy glass which Gator RC did replace for me; but now I have a tail gear with a jack screw that will not work; I called and told them I needed a replacement they checked, and they had one; GREAT I think.
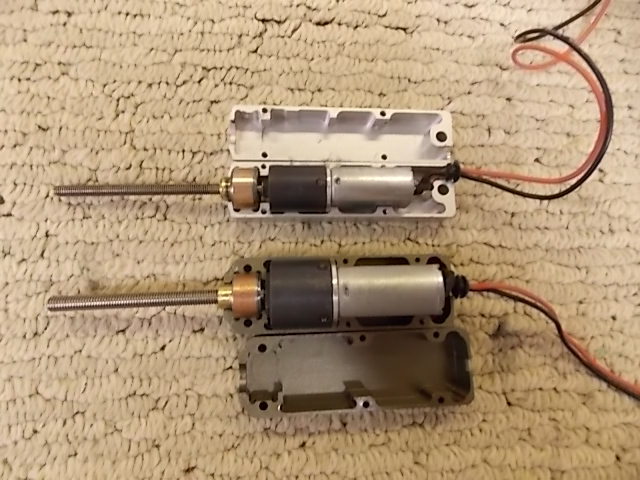
Well it shows up and it is for something else all together; I thought maybe I could swap out the internals but the one they sent is to big to fit into the casing needed for the P-47.
So now I sit here with no retractable tailwheel.
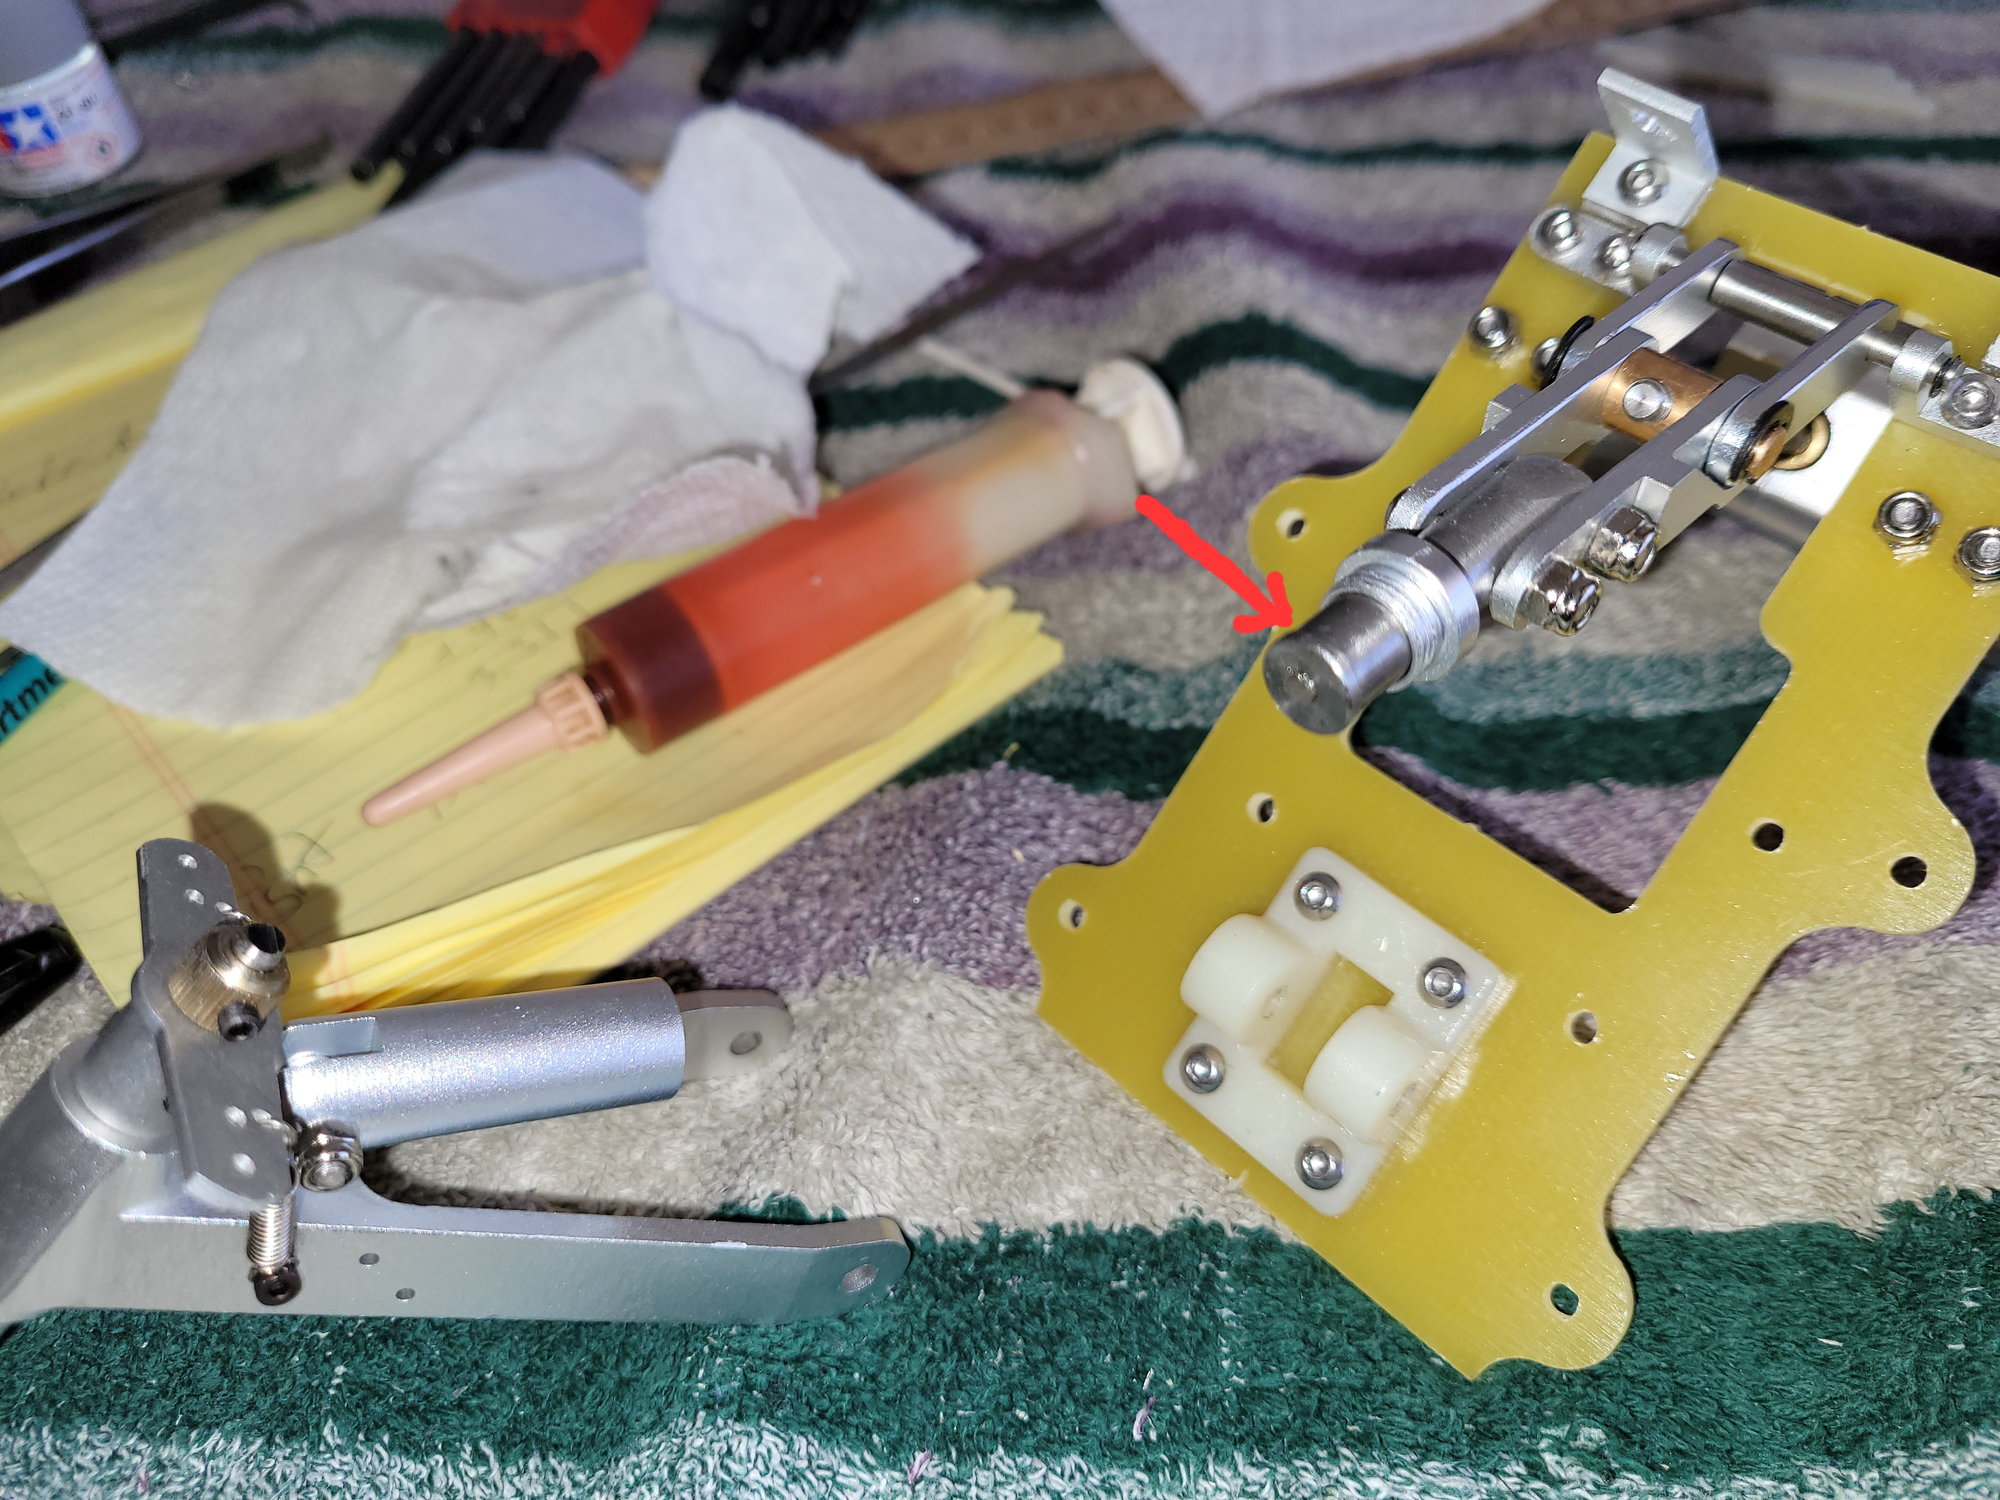
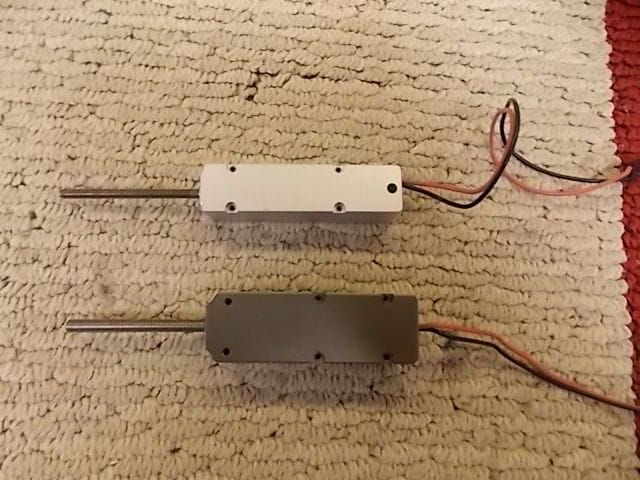
The attached pictures show the unit I got shipped to me as a replacement (copper colored one) and the P-47 unit (silver colored one)
This is my first big warbird that has electric retracts and I can tell you it is leaving a very sour taste in my mouth.
Thanks for letting me vent.
When my plane arrived, the canopy was all smashed to heck because the landing gear was just tossed into the box; it wasn't even in its own box at all.
So, during the transport it broke the canopy glass which Gator RC did replace for me; but now I have a tail gear with a jack screw that will not work; I called and told them I needed a replacement they checked, and they had one; GREAT I think.
Well it shows up and it is for something else all together; I thought maybe I could swap out the internals but the one they sent is to big to fit into the casing needed for the P-47.
So now I sit here with no retractable tailwheel.
The attached pictures show the unit I got shipped to me as a replacement (copper colored one) and the P-47 unit (silver colored one)
This is my first big warbird that has electric retracts and I can tell you it is leaving a very sour taste in my mouth.
Thanks for letting me vent.
05-25-2022, 05:44 AM
#198

That sucks...and quite frankly a bit surprising to hear that the kits are still being shipped in that manner after the feedback from earlier shipments. The manufacturer does a great job of packaging the airframe, but the box gets opened after arriving in the U.S. and poorly secured retracts and retract controller get tossed in. In my case, the gear was not secured at all!
05-25-2022, 05:56 AM
#199
That sucks...and quite frankly a bit surprising to hear that the kits are still being shipped in that manner after the feedback from earlier shipments. The manufacturer does a great job of packaging the airframe, but the box gets opened after arriving in the U.S. and poorly secured retracts and retract controller get tossed in. In my case, the gear was not secured at all!