


Build thread: readying the Hanger 9 mustang 1/5th scale.
 12-06-2021, 10:36 AM
#26
Senior Member
Thread Starter
In addition to the carbon plate and ply, I've ordered some cf mat. So if I have to make a scoop to cover the carburetor, I'll be able to do so using the plywood templates to make a mold in combination with some plastic as a barrier to shape the top of the scoop. Be my first attempt at composite molding a part..so another expansion of knowledge. When I get to that point, I'll need some serious input.
 12-06-2021, 05:23 PM
#27
Senior Member
Thread Starter
The last round of deliveries before I head off to work. Got the choke servo in.
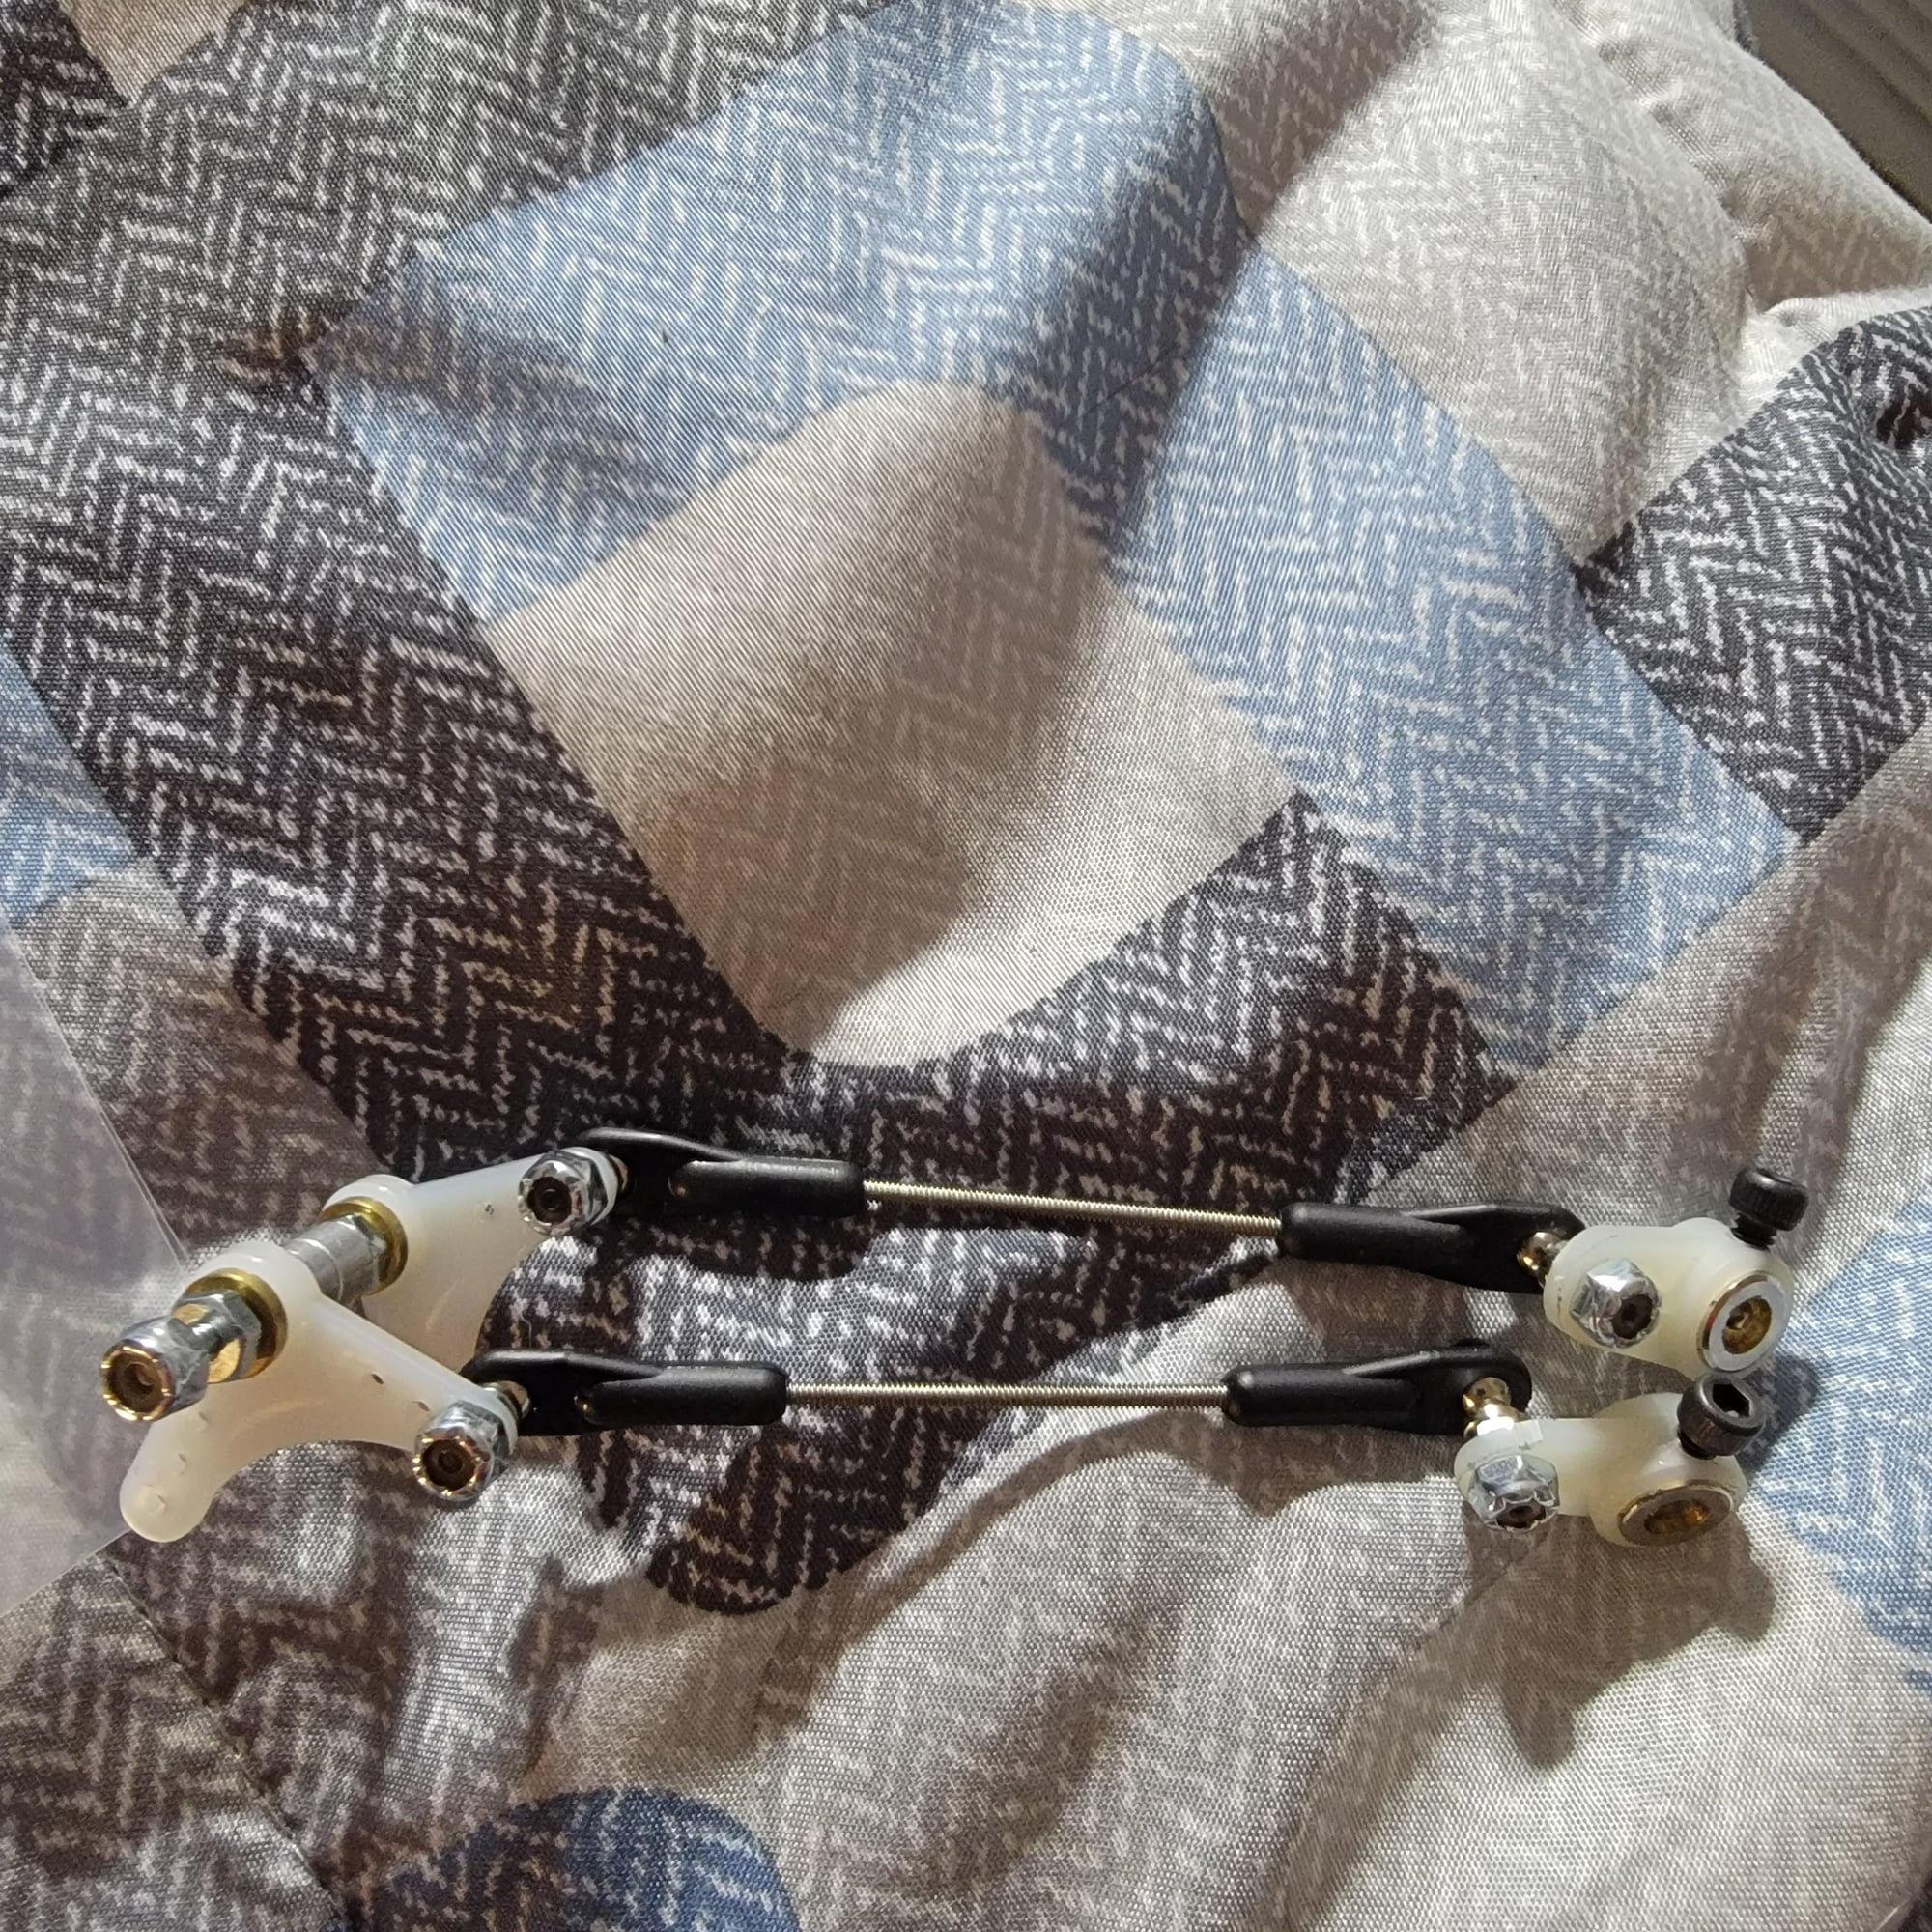
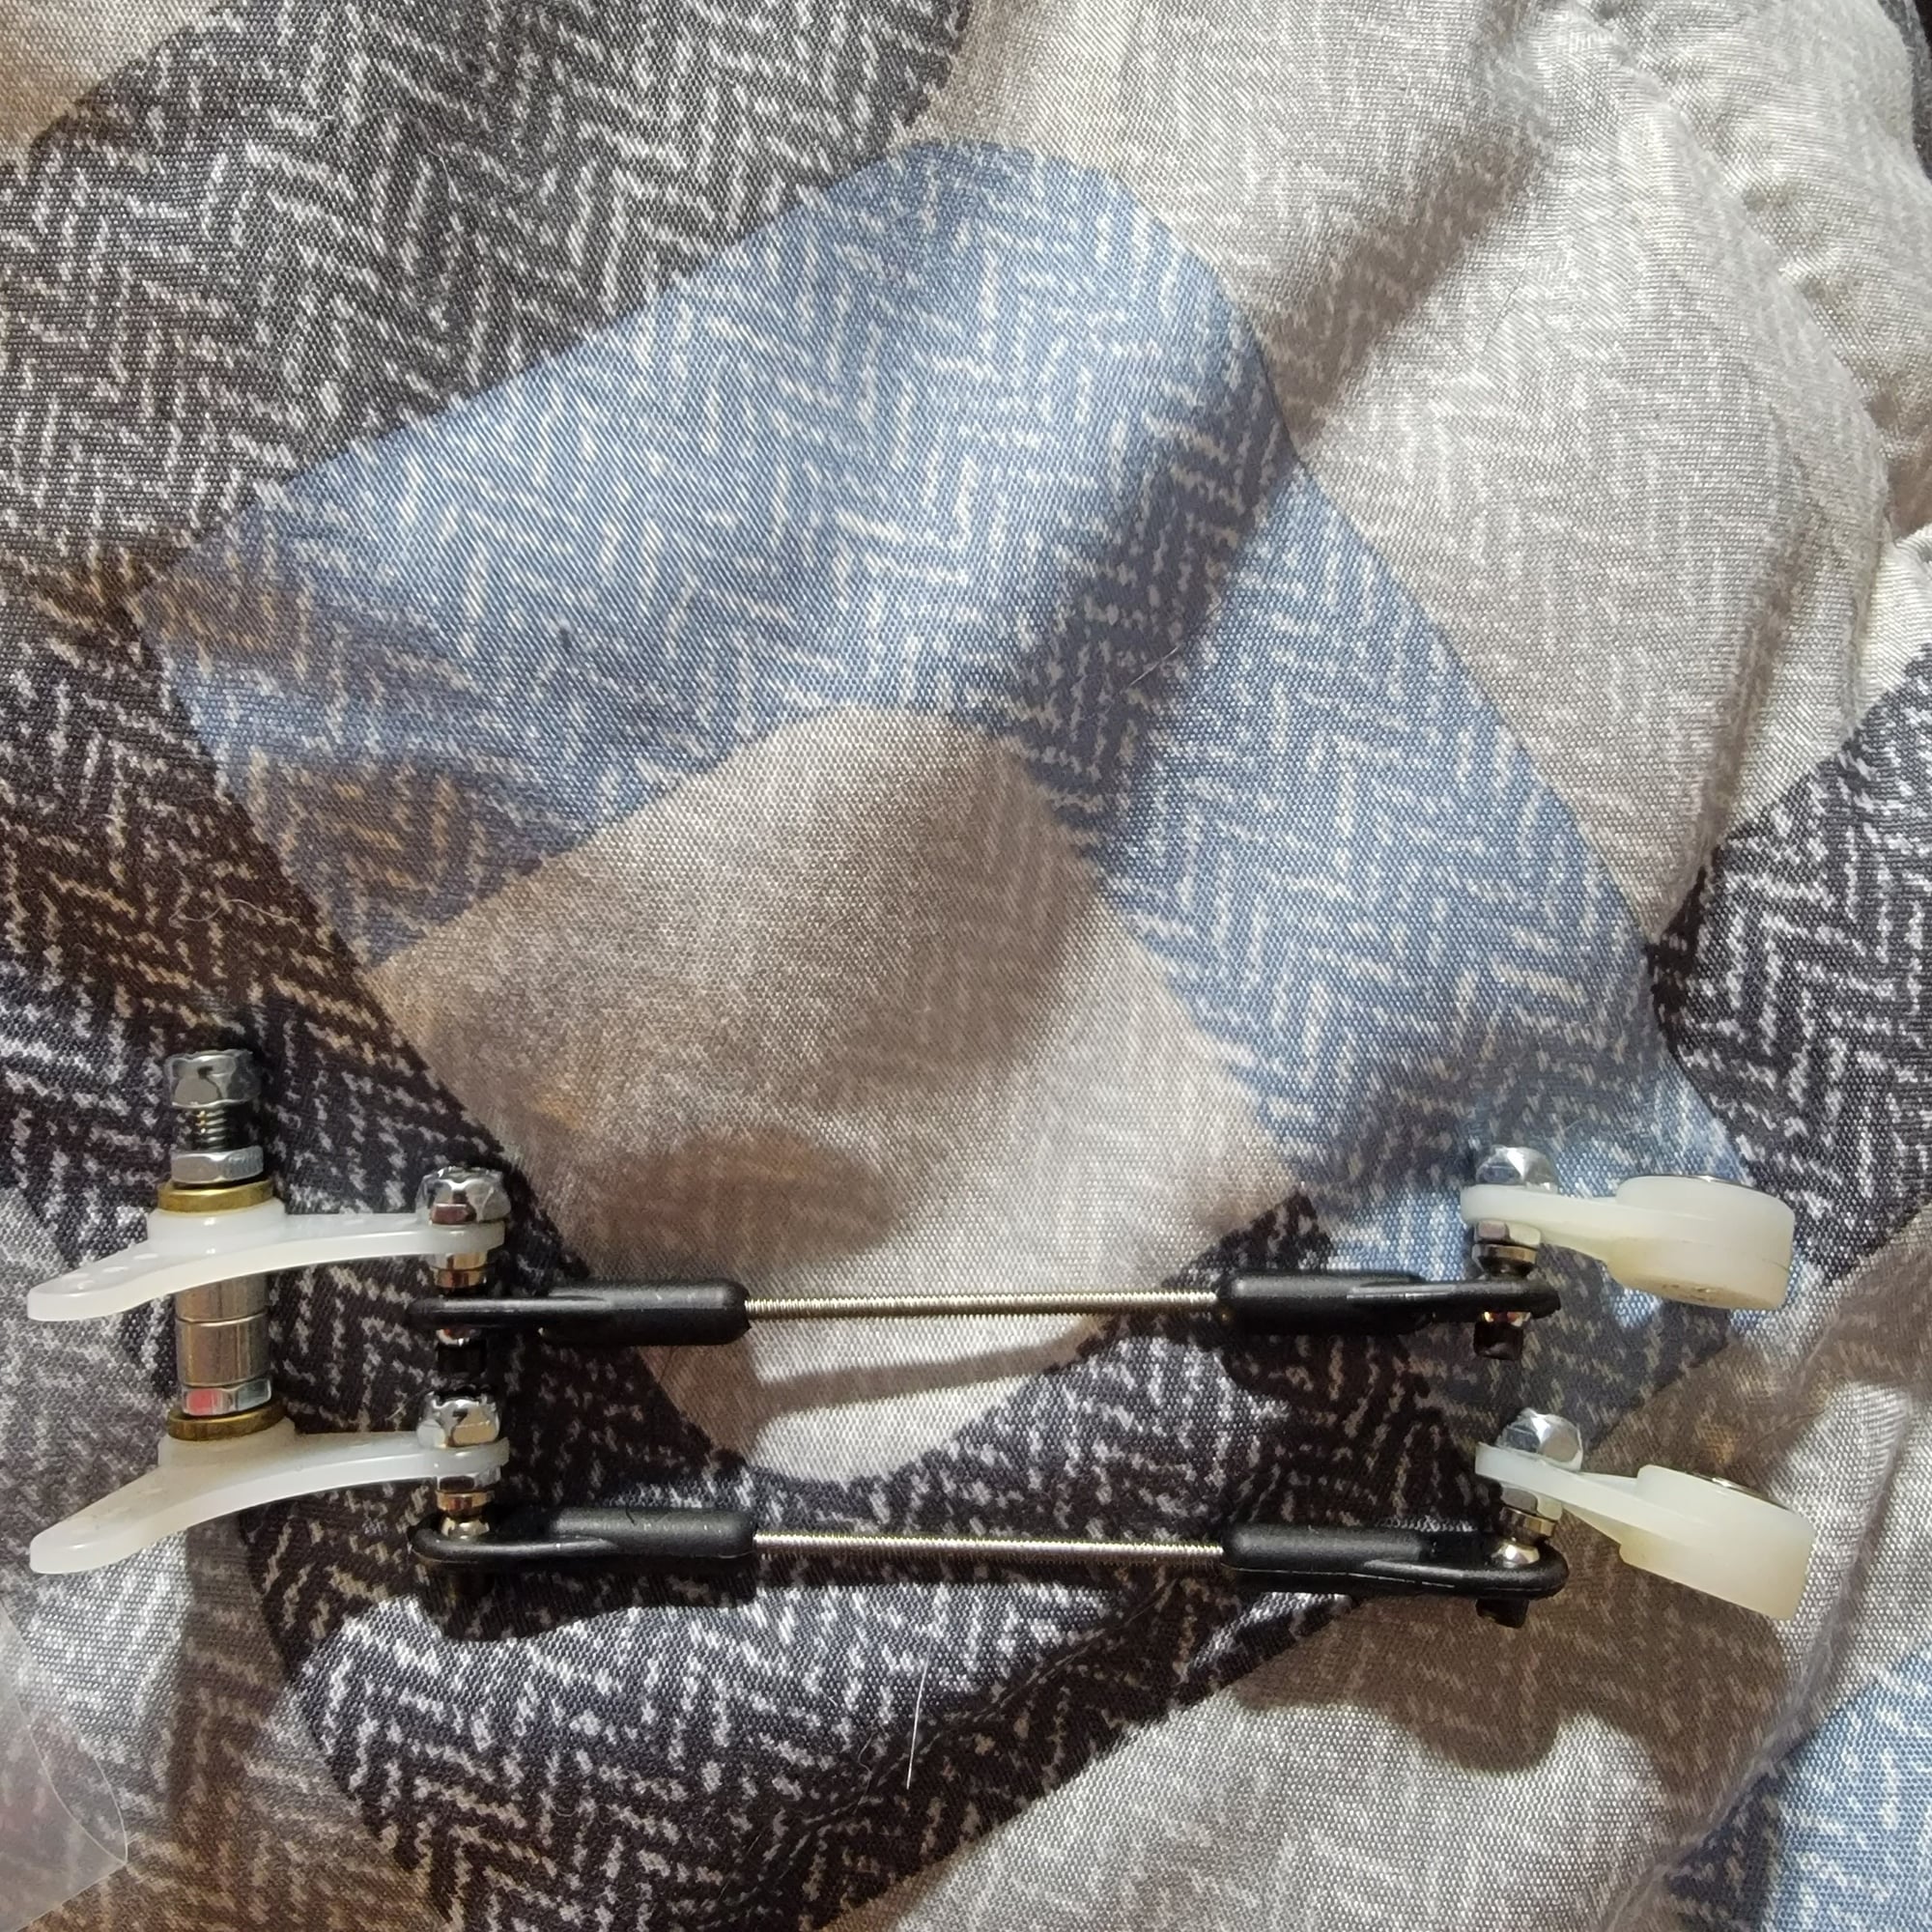
And the B&B specialties throttle linkage is in. Their nifty carb adjustment tool came with it.
The idea is to "bend the corner" using the turnbuckles. It, normally, works with their G62 cup mount which is too big for my application. Thanks to the read valve conversion kit, I have some options on carb position, but still would have some really funky bends. The servos are on left side of engine. The carb on the right side, so, using the linkage gets me closer. A bend or two might still be needed, but not some crazy, funky looking thing. The servos will be able to pull the throttle instead of push it, same with choke.Just have to fashion my own bracket off the firewall.
12-07-2021, 10:35 AM
#28
Senior Member
Thread Starter
In discussion with Les at Performance Unlimited, the final decision on the reed valve modification has been made. Due to pushing the carburetor past the limits of the cowl and disturbing the scale appearance of the Mustang. I've elected to leave that modification out.
The gain from the reed valve at the rpms the engine will be living at is not substantial enough to warrant the hassle. Yes, the Zenoah is piston valve by design and with that form of induction it does suffer blow back up the intake until the piston seals the valve.
but, with the Vario-prop being limited to 6300 rpm unloaded, the gain from the reed valve would not be noticeable. So the reed valve is out. Les stated that the performance of the engine, without it, will still be enough to reach the goal.
If, for some reason, it does not, then I have found a possible engine option that will that is roughly the same price as the zenoah, modified.The complications the reed valve conversion would have caused just weren't going to be worth it in the end. As it is, the rpm limitations of the Vario-prop may require as much as 18 degrees pitch, if not more to keep the unloaded rpm of engine/prop at or just below 6300
Last edited by Txmustangflyer; 12-07-2021 at 07:48 PM.
12-10-2021, 01:48 PM
#29
Senior Member
Thread Starter
Starting to get a little irritated with DHL. Still no package from Germany. I know Ramoser shipped it, but getting run around from DHL. No tracking info has ever been provided...
12-12-2021, 03:09 PM
#30
Senior Member
Thread Starter
Well, found out what happened with the varioprop shipment...lol...Christian accidently put destination country as the UK instead of the US...(oops)
The poor guy stayed up 18 hours straight remaking everything, before I even knew what happened, to make it right. Had I known, I would have told him no big deal. But, it is on its way. DHL hasn't got it out of Germany yet...we can hope that starts happening tomorrow..
The poor guy stayed up 18 hours straight remaking everything, before I even knew what happened, to make it right. Had I known, I would have told him no big deal. But, it is on its way. DHL hasn't got it out of Germany yet...we can hope that starts happening tomorrow..
12-14-2021, 06:54 AM
#31
Senior Member
Thread Starter
Well, the zenoah reached performance unlimited, but, apparently I didn't pack it well enough. The top two cooling vents got bent but they'll be able to straighten them.
We discussed the engine, at length. The G62, u like the g35 and smaller engines, does not have a lot of thickness to the combustion chamber walls, so modifications to the combustion chamber will have to be approached carefully. The piston, is, indeed being modified, compression being bumped, intake and exhaust ports cleaned up.
The reed valve conversion is being left off simply because I want to keep the mustang scale. The reed valve conversion would push the carb out too far. I'd have to open the side of the cowl and fabricate a rear facing air scoop to keep the prop wash from messing with the carburetor which would destroy the scale appearance of the right side of the plane and possibly cause a change in flight characteristics as the scoop would be in front of the wing leading edge. Not a risk I want to take.
So, the reed valve conversion will go on the shelf, either for use later, or to eventually be sold.
As the G62 is no longer manufactured by Zenoah, it may become a hard to find upgrade for the engine.
Last edited by Txmustangflyer; 12-14-2021 at 08:14 AM.
12-15-2021, 07:58 PM
#32
Senior Member
Thread Starter
So..I get this from DHL Germany...
"Guten Tag,
am 12.12.2021 haben Sie uns beauftragt, Sie per E-Mail �ber den aktuellen Status Ihrer Sendung mit der Nummer RC619534184DE zu informieren.
Folgende Information zu Ihrer Sendung liegt uns nun vor:
Die Sendung wurde am 14.12.2021 im internationalen Logistikzentrum zur Weiterbef�rderung nach Vereinigte Staaten von Amerika �bergeben. Weitere Informationen stellt auch das Postunternehmen des Ziellandes auf der eigenen Homepage zur Verf�gung.
Mit freundlichen Gr��en"
Roughly translated: We put your package on a plane to the US. There, it will be handed over to USPS for their turn to lose it this time...
First time it was shipped, it ended up in the UK (honest mistake by shipper)
This time..it might end up in south Africa by the time USPS gets done with it...
And, of course, no USPS tracking number...
Last edited by Txmustangflyer; 12-15-2021 at 08:03 PM.
12-16-2021, 05:07 PM
#33
Senior Member
Thread Starter
Today was tool day:
New dremel
Dremel work stand
New canopy scissors
New covering iron.
Paid the bill to Performance Unlimited for the engine work.
Next week rcplanestands.com for a floor stand
Week after that, the Jtec exhaust if the engine is back so can get measurements on the reshaped exhaust port and pictures for Al. As long as he's been ok'd by his doc to do the work then the only thing left will be the spinner. Clamps for fuel lines ordered. The last of the fidley stuff on its way from Aloft. Servo lead connector locks for in the wing, retracts, etc. A new balance charging board. (Can't find the old one) balance charging plug extensions.
Parts wise it's all on the way except those two things. Build tools bought, supplies bought, adhesives are here, servo leads, fuel tank battery straps...
Just need tower to ship the farkin plane and the main gear wheels...Come on, tower...
12-16-2021, 05:35 PM
#34
Senior Member
Thread Starter
Oh yeah.. update on the varioprop. Deutschepost just says it was dropped at international hub..usps says Origin prepping shipment..no change since the 12th..
Last edited by Txmustangflyer; 12-17-2021 at 02:53 PM.
12-17-2021, 02:50 PM
#35
Senior Member
Thread Starter
I found the missing link!
https://www.aeroscale.shop/collectio...um-intake-bend
The problem that was going to rear it's ugly head was the throttle linkage. That fixes that....but (and there is always a but) it may mess with plans for the exhaust. We'll see, but I think I'm going to have to wait until engine and plane are sharing the same real estate.
Got chastised a bit by Christian. I was going to have performance modify the hub to better support the prop. Was told not only was it not needed, but could interfere with the mechanics of the varioprop....so canceled that modification.
12-18-2021, 02:20 PM
#36
Senior Member
Thread Starter
The varioprop has made it stateside Landed in New York this morning and USPS now has the package. Might even make it by New Years.
If it does, expect lots of pictures because they are a beautiful design.
assembly has to be done dirt free, not so much as a hair, that's going to be tough with two Akitas in the house that are mid blow..
Hopefully engine will be back by then and I can make the drill guide and drill the hub prior to doing the pictures. Can then show its assembly.
Now, I understand there are many that think I'm either nuts, or clueless about engines on many forums. I'm not saying I know, for sure, that the path I'm taking is going to succeed. I don't. But, there is no challenge in easy. I started out with a basic plan, a two blade prop just like everyone else, but, it's not a Mustang without its distinctive 4 blade propellor at the nose. I've heard the usual "you won't notice it when it's flying" stuff. Or the "a four blade isn't as efficient" which is true.
Here is what I know. I've been told by multiple people that the engine mods increase power. I've been told stories, long tales or not, of their modified G62's being able to hang with 120 moki equipped corsair on two blade props. I've been told they've had to go to 25 inch, even 26 inch 2 blades after modification to keep the engine rpms down. I've been told to be careful using a 22x10 to tune the engine after mods as there's a good chance of over rpm'ing the prop and motor.
All of that adds up to, yes, it will turn the 23.5 varioprop and I'm going to have to dial up the pitch. Estimates by both the engine builder and others, put the probable pitch at around 14 degrees when its all said and done. We will see if their estimates are right. Otherwise this journey may have been wasted.
Last edited by Txmustangflyer; 12-18-2021 at 04:09 PM.
12-19-2021, 04:53 PM
#37
Senior Member
Thread Starter
Ok guys, if you have one and know the answer, please chime in. The zenoah G62 prop hub has two pinch pins used to keep the prop from spinning on the hub. These pins have to be drilled for. in a wood prop, the size would not matter so much as long as it was close. but on a varioprop with its hub being aluminum, the pins become very important. the knurling on the zenoah hub can't bite into the aluminum of the varioprop hub. I need to know the diameter of the pins, or..if someone still has one laying around, the bit size that came with the zenoah engine drill guide.
The following users liked this post:
John H Stewart (12-19-2021)
12-20-2021, 02:13 PM
#38
Senior Member
Thread Starter
Ok, so found an answer to an issue I've been mulling over and researching for a while...finally. I'm going to describe what I'll be doing to prevent it from being a problem.
Its the zenoah's prop hub. Origionally, I was going to have Performance modify the hub to, mainly, reassure myself that the prop wasn't going to spin on the hub itself, making sure the two would stay locked together..If I was going with a standard two blade wood prop, even that wouldn't have needed to be done....but this is where this build departs "standard" and starts forging ahead through what many say can't be done.
Its simple, really. I want a four blade propeller on my plane..its a Mustang, Full scale Mustangs have four blade props, my rc Mustang will have a four blade prop. Not difficult to understand.
As has been previously stated in this thread I've gone to great lengths to achieve Mustang 4 blade supremacy with a 62 cc engine. Its already apart on a workbench in florida getting heavy modifications done to its various parts, upgraded bearings, seals, change in stroke and timing, reshaping of the piston, porting, etc in order to bump its power output to where I need it. That means the torque and power at the prop is going to be more than stock at WOT and the power curve leading that that max output is going to be..steeper, which leads me to this issue.
The prop the engine will be spinning once the carburetor is tuned is a 23.5 inch Ramoser-Teknik Varioprop, machined by Christian Ramoser himself. Its going to ride on a stainless steel bushing at 31mm length, 13mm OD, 10mm ID. that will sit up against the spinner back plate, which will sit up against the knurled back plate of the prop hub. Now, my hub has the factory location pins installed. Trying to find out what size to drill the varioprop hub has been a weeks long research project as it seems nearly no threads in recent years so much as mention a diameter for those pins..but I finally found it..
the diameter of the pins, zenoah part number 04025-00312 is exactly 1/8 inch. the length showing above the hub back plate is 7mm..just a hair over 1/4 inch. So, using a tuning prop I'll mark the varioprop hub at the proper locations and use a 1/8th bit to drill a 7mm deep hole at each location. The thickness of the varioprop hub is the question..if 7mm punches through, I will have to trim the pins so they sit flush, otherwise they will interfere with the pitch adjustment mechanism and won't allow full travel of the prop blades. that part is not a big deal and easily accomplished.
The other part of all this is a bit old school, and really just added insurance. using the front plate of the prop hub as a template, I'll cut a disk out of sandpaper..won't be a large grit, probably 1000 grit wet/dry and sandwich that between the rear of the spinner back plate, and the knurled backplate of the zenoah prop hub. this will keep everything right where its supposed to be with zero chance of the prop trying to rotate on the prop hub in flight. The hole size means the pins will be compressed a bit in the varioprop hub making it an ultra snug fit and nearly one complete unit.
The other part of that is actually a side effect of the intake being used..I was figuring I'd have to use a slower throttle input, either via radio programming or just plain discipline to keep from slamming power too fast to the prop and hub. The inntake that will be on the engine actually kind of does that for me..a longer intake runner slows throttle response. slightly which is ok, in this case, especially if you are aware of it and plan accordingly.
Result will be nicer take offs, smoother transitions from lower power levels to WOT...it will really have to be paid attention to during landing.
Most think I am overthinking this problem in particular and the build in general, but there are a number of reasons why. Number 1 is primarily safety. My wife, having never been exposed to rc in any way shape or form, really, wants to learn to fly rc. I'm all for that, but that means she's going to be at the field when this mustang is a. being prepped, b. being started, and c. being flown. She'll be playing the part of ground crew until take off, and again upon landing. I don't want her hurt by something I built so I am thinking everything through and seeing if there are better ways or more reliable ways to do things. The other part, this mustang is quickly turning into my dream rc mustang. I want it to last.
So, with that hurdle solved, things are starting to gel. Voltages have been sorted for both engine and reciever, the needed switches have been modified so no adapters will be needed, removing a potential failure point, servos are all sorted, A plan of action is ready for getting a spinner and doing measurements for the exhaust..even without the airframe I've managed to figure that out. So, by the time the airframe gets here, other than sorting the known issues with the Hanger 9 wings and covering wrinkles and bubbles, it should (and I stress that) be a pretty straight forward build.
As long as it arrives intact and in workable condition with nothing crushed or broken, progress should go fairly quickly. I have one set of tools I'll need to order still but may just get specific ones from the local lowes instead of buying a whole set.
I mainly need a 3mm tap, and a 10 mm die. the 3mm tab is used on the horizontal stab tube, the 10mm die will be used on the 90 mm grade 8 bolt sourced to take the place of the zenoah 50 mm prop bolt once its cut to the proper length. I had origionally thought I would turn it into a stud and may still do so, but for now, the plan is to just clip and run the threads to clean them up after beveling the edge at the cut, keeping the hex head. Why over complicate matters. I've got ten of the bolts (cheaper that way and there's always spares if I mess up the first time) and matching nuts..might be able to use one of the nuts just to clear the burrs from the threads once it's cut..sometimes that works..sometimes you strip the bolt or the nut..like I said..I have spares lol
Last edited by Txmustangflyer; 12-20-2021 at 02:29 PM.
12-20-2021, 03:12 PM
#39
Senior Member
Thread Starter
Ok..so the next hurdle is how to figure out the exhaust if I have no airframe..
The answer has been kind of staring me in the face..its in the pictures.
The zenoah comes with a steel mounting plate, meant to be used on firewalls without an engine box. The hanger 9 has an engine box already built in. Not a problem. I can use the metal mounting plate to substitute for the mounting surface of the engine box. so I can still do the measurements needed for Al at Jtec to make the exhaust, starting with the hanger 9/toprc P51 mustang compact wrap around. It may not require any modification at all..I don't know. I haven't seen the exhaust in its standard form to judge but with the change in the intake and carb location I'm thinking its probably going to have the muffler shortened and the outlets moved a bit. but I can use the mounting plate to mock it up. and do the measurements so Al can see it.
I'll be able to do the spinner measurements as well in kind of a similar method...I think. its basically measurements from the prop hub back plate to the blades at the right radius. and defining the shape of the notch. Whats funny, is the notch shape is the same as tru-turns pusher spinner they can cut without templates but they are being rather stubborn on it.
Sorry guys, but after what has happened trying to get the prop here...I'm not going to be shipping it off somewhere else and hoping it makes it back intact. As I couldn't ship it assembled, anyway, it would be pointless..Not risking lost parts, dirt, or damage, to the internal mechanism of the varioprop hub, or damage to the blades. With shipping the way it is now..theres just too much risk. The difficulty will be in the curve of the spinner..I don't have an accurate way to do that to make a pattern so I'm going to have to eyeball it and hope its close.. the result may not be an exact fit..but a close enough fit with any error being a slightly larger gap in front of the blades. I can live with that.
12-22-2021, 04:41 PM
#40
Senior Member
Thread Starter
The engine will be on its way back from Florida tomorrow. It is now a 15:1 compression beast, measured after modification. Target rpm for peak hp and torque 7000 rpm. It is now a perfect match for a Ramoser varioprop.
Add in the Vogelsang intake which turns 90 degrees and, as a result, has a longer intake runner, which should also improve things in the mid range and the results should be what's needed to get the varioprop, easily to max rpm, on the ground, or in the air.
Mods done to engine: new, higher grade bearings, cdi conversion with a change in timing, port matched. During test run in Performances shop, a 22x10 apc prop snapped a blade at WOT so no max rpm recorded.
A 23x8 ran at 7400 rpm.
I think she's a stout contender now..anybody wanna race hanger 9 mustangs? (Joke)
12-23-2021, 01:52 PM
#41
Senior Member
Thread Starter
The engine returns on the 27th of this month, the new intake the same day. The varioprop has already been delivered and waiting on my return on the 30th.
ordered floor stand from rcplanestands.com so I have a good place to work on it without having to manhandle it a lot. The large amount if tools ordered, couple of small things needed in that area.
Other than that. Spinner and exhaust. With everything coming back I should be able to get those ordered after the first of the year...
12-24-2021, 12:38 PM
#42
Senior Member
Thread Starter
If any of you have ever spoken to Glen at rcplanestands.com,, you know he's open to ideas and customization of his plane stands.
From the floor models to the bench tops, if you want, or need something changed he can, usually, accommodate it.
It was a modification I had in mind when I gave him a call.
I was looking to have him drill a line of 1/4 inch diameter holes, about an inch apart in two of the legs to make a wing rack, using dowels.
He took that idea and knocked it WAY out the park. He asked me to give him two weeks and let him see if he could come up with something even better.
Oh boy did he.
I give you the wing rack for the floor models of his rc plane stands. It will retail for 85.00 on the website very very soon.
This is mine, assembled so he could send the pictures, prior to disassembly and shipping.
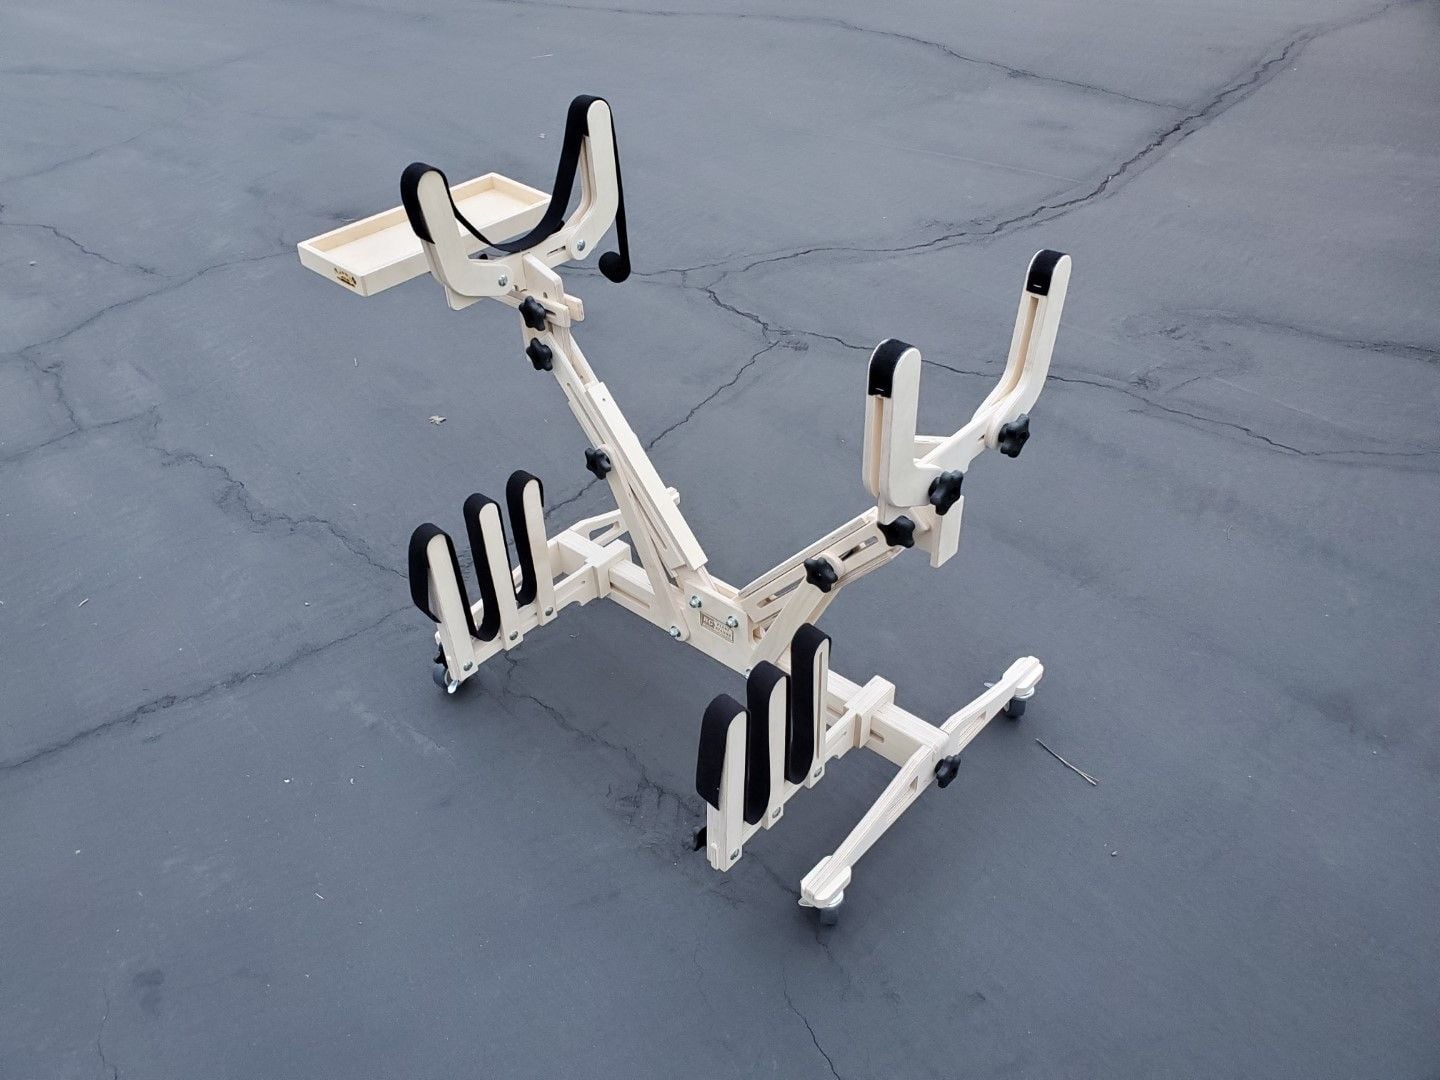

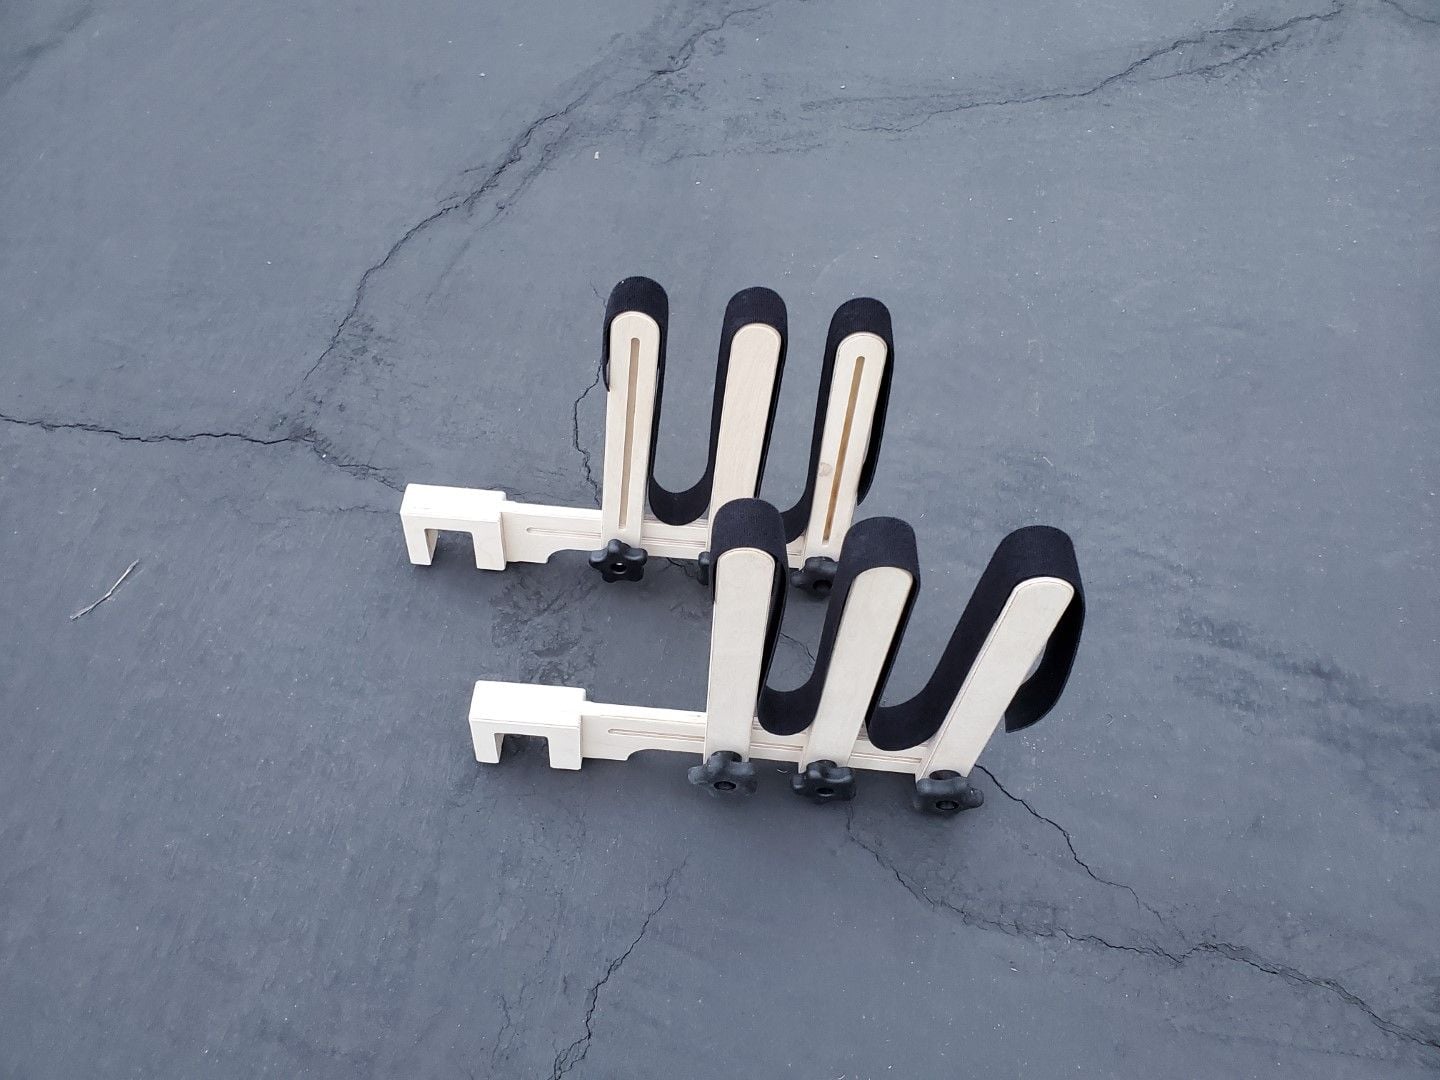
Fully adjustable..got longer wings, just slide them further apart..short ones, closer together..the uprights have adjustable spacing, so they will hold the wings snug, without crushing. Just loosen and slide.
The stepping can be added to to further hold the wings in wing bags or not, for transport.
Let's keep the man busy. Great product done with an eye to make our building and storage of planes as rash free as possible.
From the floor models to the bench tops, if you want, or need something changed he can, usually, accommodate it.
It was a modification I had in mind when I gave him a call.
I was looking to have him drill a line of 1/4 inch diameter holes, about an inch apart in two of the legs to make a wing rack, using dowels.
He took that idea and knocked it WAY out the park. He asked me to give him two weeks and let him see if he could come up with something even better.
Oh boy did he.
I give you the wing rack for the floor models of his rc plane stands. It will retail for 85.00 on the website very very soon.
This is mine, assembled so he could send the pictures, prior to disassembly and shipping.
Fully adjustable..got longer wings, just slide them further apart..short ones, closer together..the uprights have adjustable spacing, so they will hold the wings snug, without crushing. Just loosen and slide.
The stepping can be added to to further hold the wings in wing bags or not, for transport.
Let's keep the man busy. Great product done with an eye to make our building and storage of planes as rash free as possible.
12-25-2021, 08:47 AM
#43
Senior Member
Thread Starter
Being gone for work for two to three weeks at a time means this build is going to be a slow progression over a number of months. The goal is to have it flying by May of 2022.
To meet that goal I have to plan ahead on what to accomplish while still waiting on Tower to ship the airframe.
So, I'll be home again on the 30th of December. What has come in while I've been away this round is the engine, back from Performance Unlimited, the varioprop, the magnetic switch to go from the battery to reciever, the new dremel, the new dremel work station, the long grade 8 bolts to be modified for duty as the varioprop bolt to the zenoah, the last of the servo extensions and the Vogelsang Aeroscale intake for the engine. Already there are the retracts with their controller,
So some things can progress and will save some time later. Using the steel mounting plate as a stand in for the firewall I can get measurements for the exhaust from jtec, in case modification has to be done to clear the carburetor in its new position. That means I have to assemble to the engine, the intake and carb, moving it to its new position. Pictures will be taken and emailed to Jtec along with the measurements. That should mean the exhaust will be in by end of January, as should the airframe, if the Tower holds true and ships mid january.
I can get the spinner template, at least started, if not finished. all the servos centered, the final setup done in the retract controller, and get it set up working with the reciever. Then, when the airframe is here..and the covering issues addressed, wing fitment issues addressed, from there, it should go pretty quickly..I hope. Callie-graphix has sent the new scheme..the cub yellow ultrakote is in for the rudder to change it over. So even though no airframe, progress can be made that will allow things to just be screwed in place. I'll also order the Klass Kote for the firewall, inside of gear doors, main gear bays, in their zinc oxide color so some of that can be done before assembly starts..the main gear bays will have to wait until the door stops are in place, then painted.
Klass Kote is a two part epoxy paint, its fuel proof, and durable. As for painting of the spinner, when its time, that will just use krylon rattle cans as It will probably need to be touched up from time to time.
So there's the plan..Get the engine together, drill the props, get the bolt cut down for the varioprop, allowing enough room for spinner back plate, measure for exhaust, template for spinner, and start dealing with the electronics. Believe it or not, that will take the better part of three days. I hope I get it all done.
12-26-2021, 06:47 PM
#44

If you have a Zenoah, and you want to get it back in top condition for use again. You have a number if options.
1. B&B Specialties: they have whole engines, as well as parts, rebuild kits, etc to restore a zenoah to "like new"
2. CH Ignitions has Zenoah cdi conversions available. They include the hall sensor, bracket, flywheel, and module. The bracket bolts in the same location as the magneto. Doing this conversionshaves 6 oz off the overall engine weight.
3. For the Aero engines, you can also send it in to performance unlimited products to get any zenoah modified. They can also apply similar mods to other engines. They can modify to improve performance in the mid range, or give you a high rpm, screaming, race engine that, with proper propeller, will let you take that pylon racer as fast as you dare.
I'm not trying to do a racing engine, but look8ng for that mid range bump. I keep circling back to this as it's uncharted territory for me. Bring me a V8 engine and I can work some magic, but when it comes to single cylinder 2 cycles...yeah..I leave those to others.
Some of the same principles apply, sure. Improve intake and exhaust flow, improve piston and cylinder profiles, changing stroke..those work with any engine to a degree.
how much of an improvement it does for a two cycle 62 cc engine...I can only keep my fingers crossed its enough. Invested, the engine, now, is approaching 1200 dollars (including performance unlimited price for mods)
how that stacks up to an off the shelf kolm 70..I'm still a thousand dollars under their price.
12-27-2021, 06:41 PM
#46
Senior Member
Thread Starter
When I'm sitting around, with nothing to do, my mind runs through this build..parts checklists, things I still gotta get toolwise for particular steps, and so on.
One thats bugging me is trying to CG an 89 inch wingspan, nearly 7 feet long nose to tail P51 mustang, weighing 30 lbs, without having to drill holes in the ceiling that would really tick off a landlord and balance it accurately. Key word, accurately.
Due to accuracy, weight, and size of the Mustang..that kinda rules out the old tried and true fingertip method..that would take 4 people, two cases of beer and patience with half drunk people trying to hold a 30 lb plane up and not drop it....yeah..not gonna attempt that.
Option 2..the Venessa Rig..see part of comment about landlord. no go
Option 3, a simple balancer stand. of which there are three options..one is the Easybalancer, price 250 bucks..(umm..no)
The Sig pro balancer..It might be strong enough to hold a 30 lb mustang, but if you goof up building it..it don't work.
The Great Planes balancer..It says it can hold a 40 lb plane..It don't look like it could hold a 15 lb plane....I may be wrong. Looks like a lot of flexing of little metal rods would happen.
Then we get into the high tech, pricy scale systems of which there are two.
The Xicoy, with incidence meter option..385 bucks
and the Aeropanda at 285, which aeropanda hasn't had in stock for the last 5 months..
Input needed
12-27-2021, 07:16 PM
#47
Senior Member
Thread Starter
Revisiting the plane stand for a moment...
I'm going to stain it before assembly..I've narrowed it down to two colors...the wife likes one..I like the other..So..I'm going to leave it up to a majority vote...
My choice
The wife's choice
I'm going to stain it before assembly..I've narrowed it down to two colors...the wife likes one..I like the other..So..I'm going to leave it up to a majority vote...
My choice
The wife's choice
Last edited by Txmustangflyer; 12-27-2021 at 07:19 PM.
12-31-2021, 09:52 AM
#48
Senior Member
Thread Starter
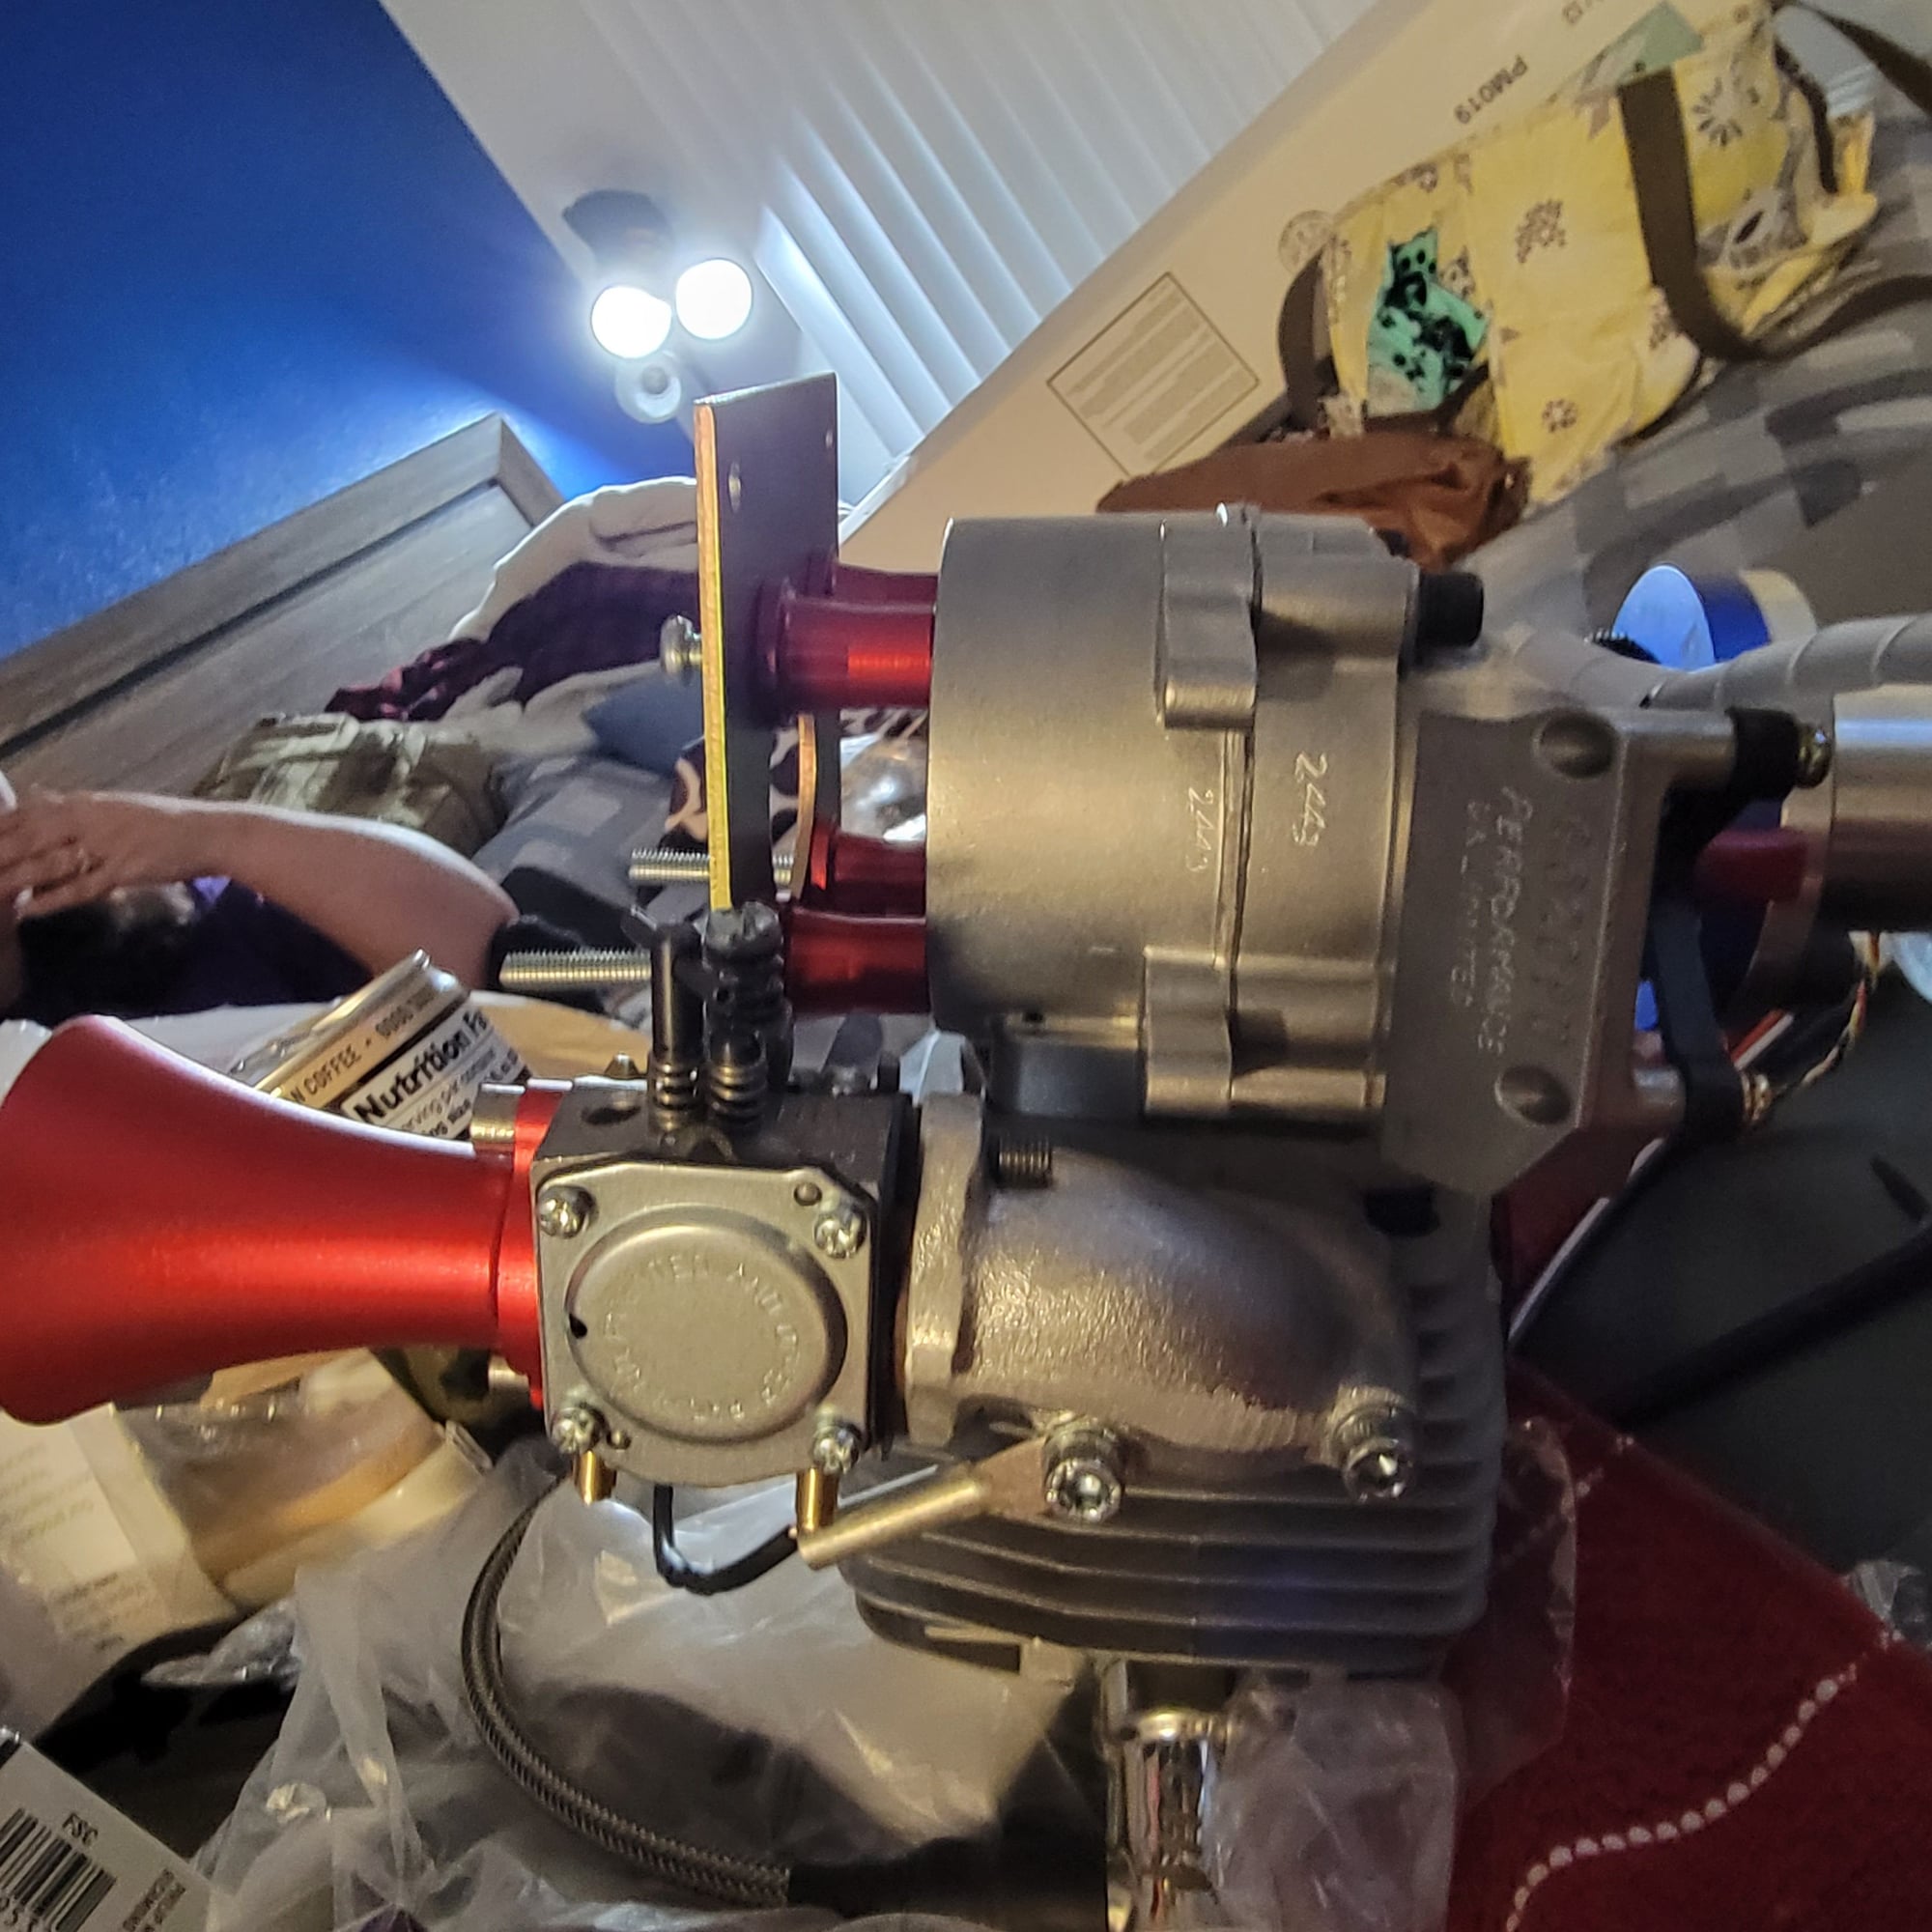
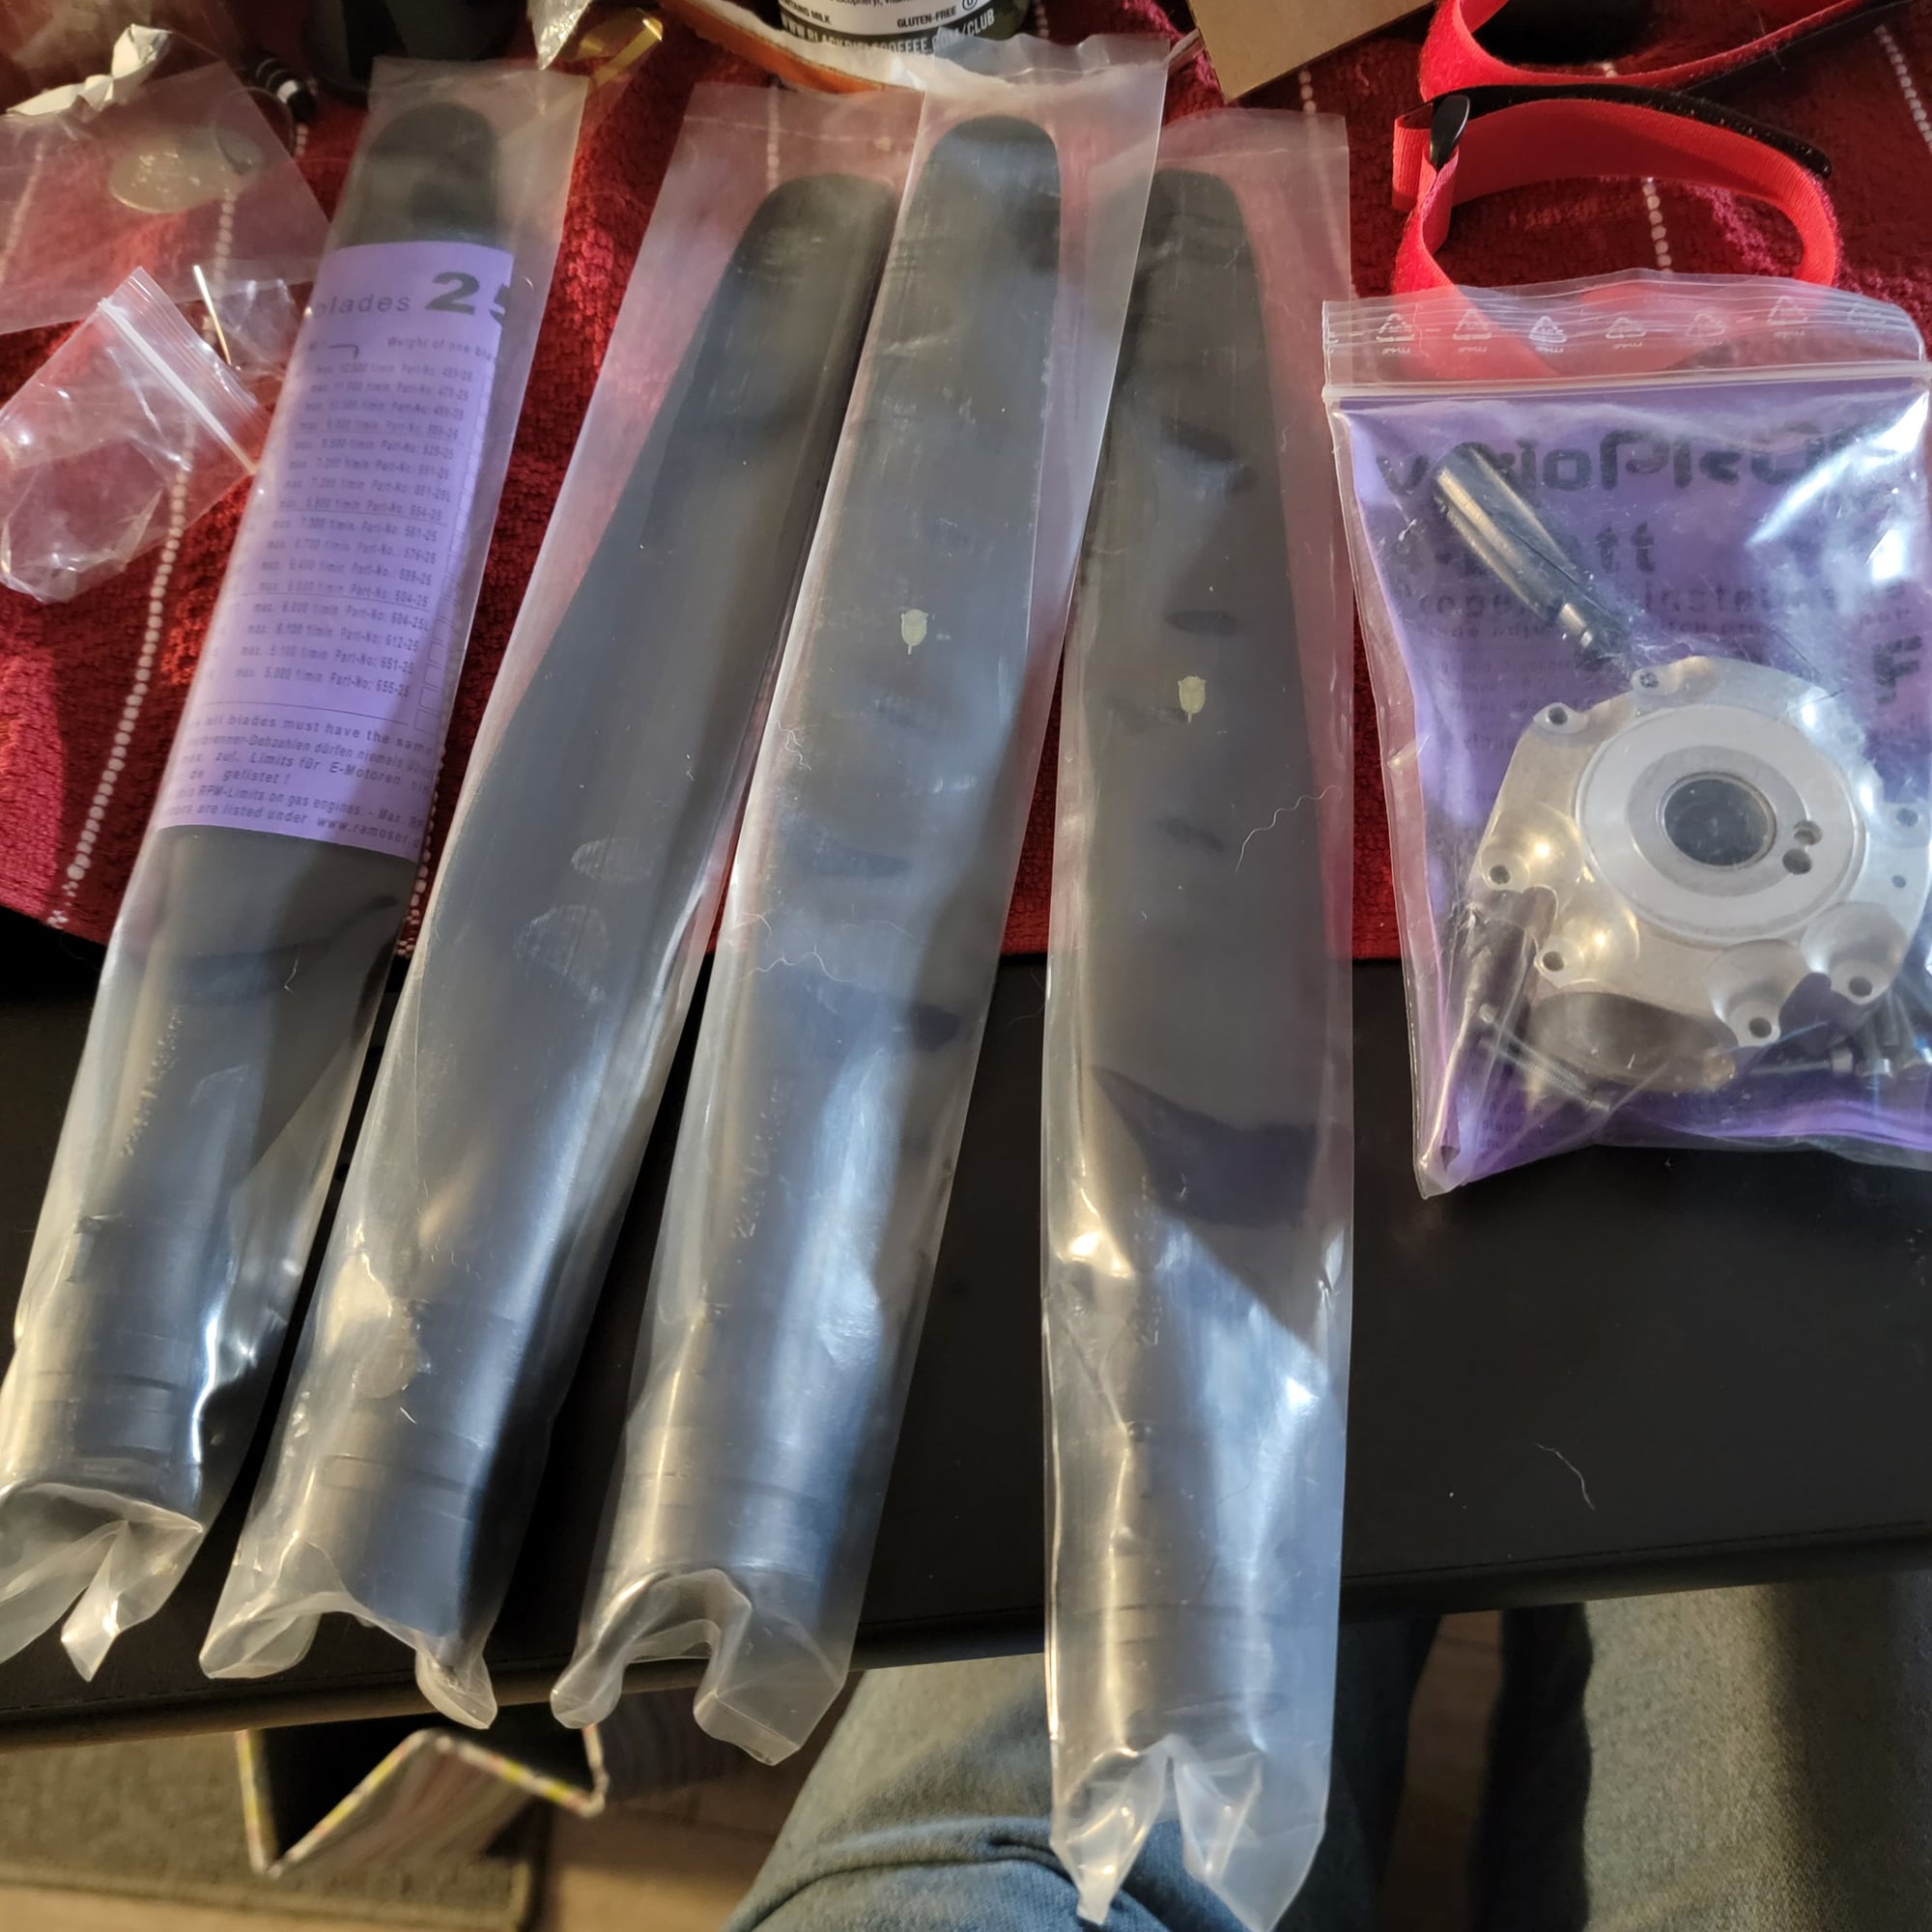

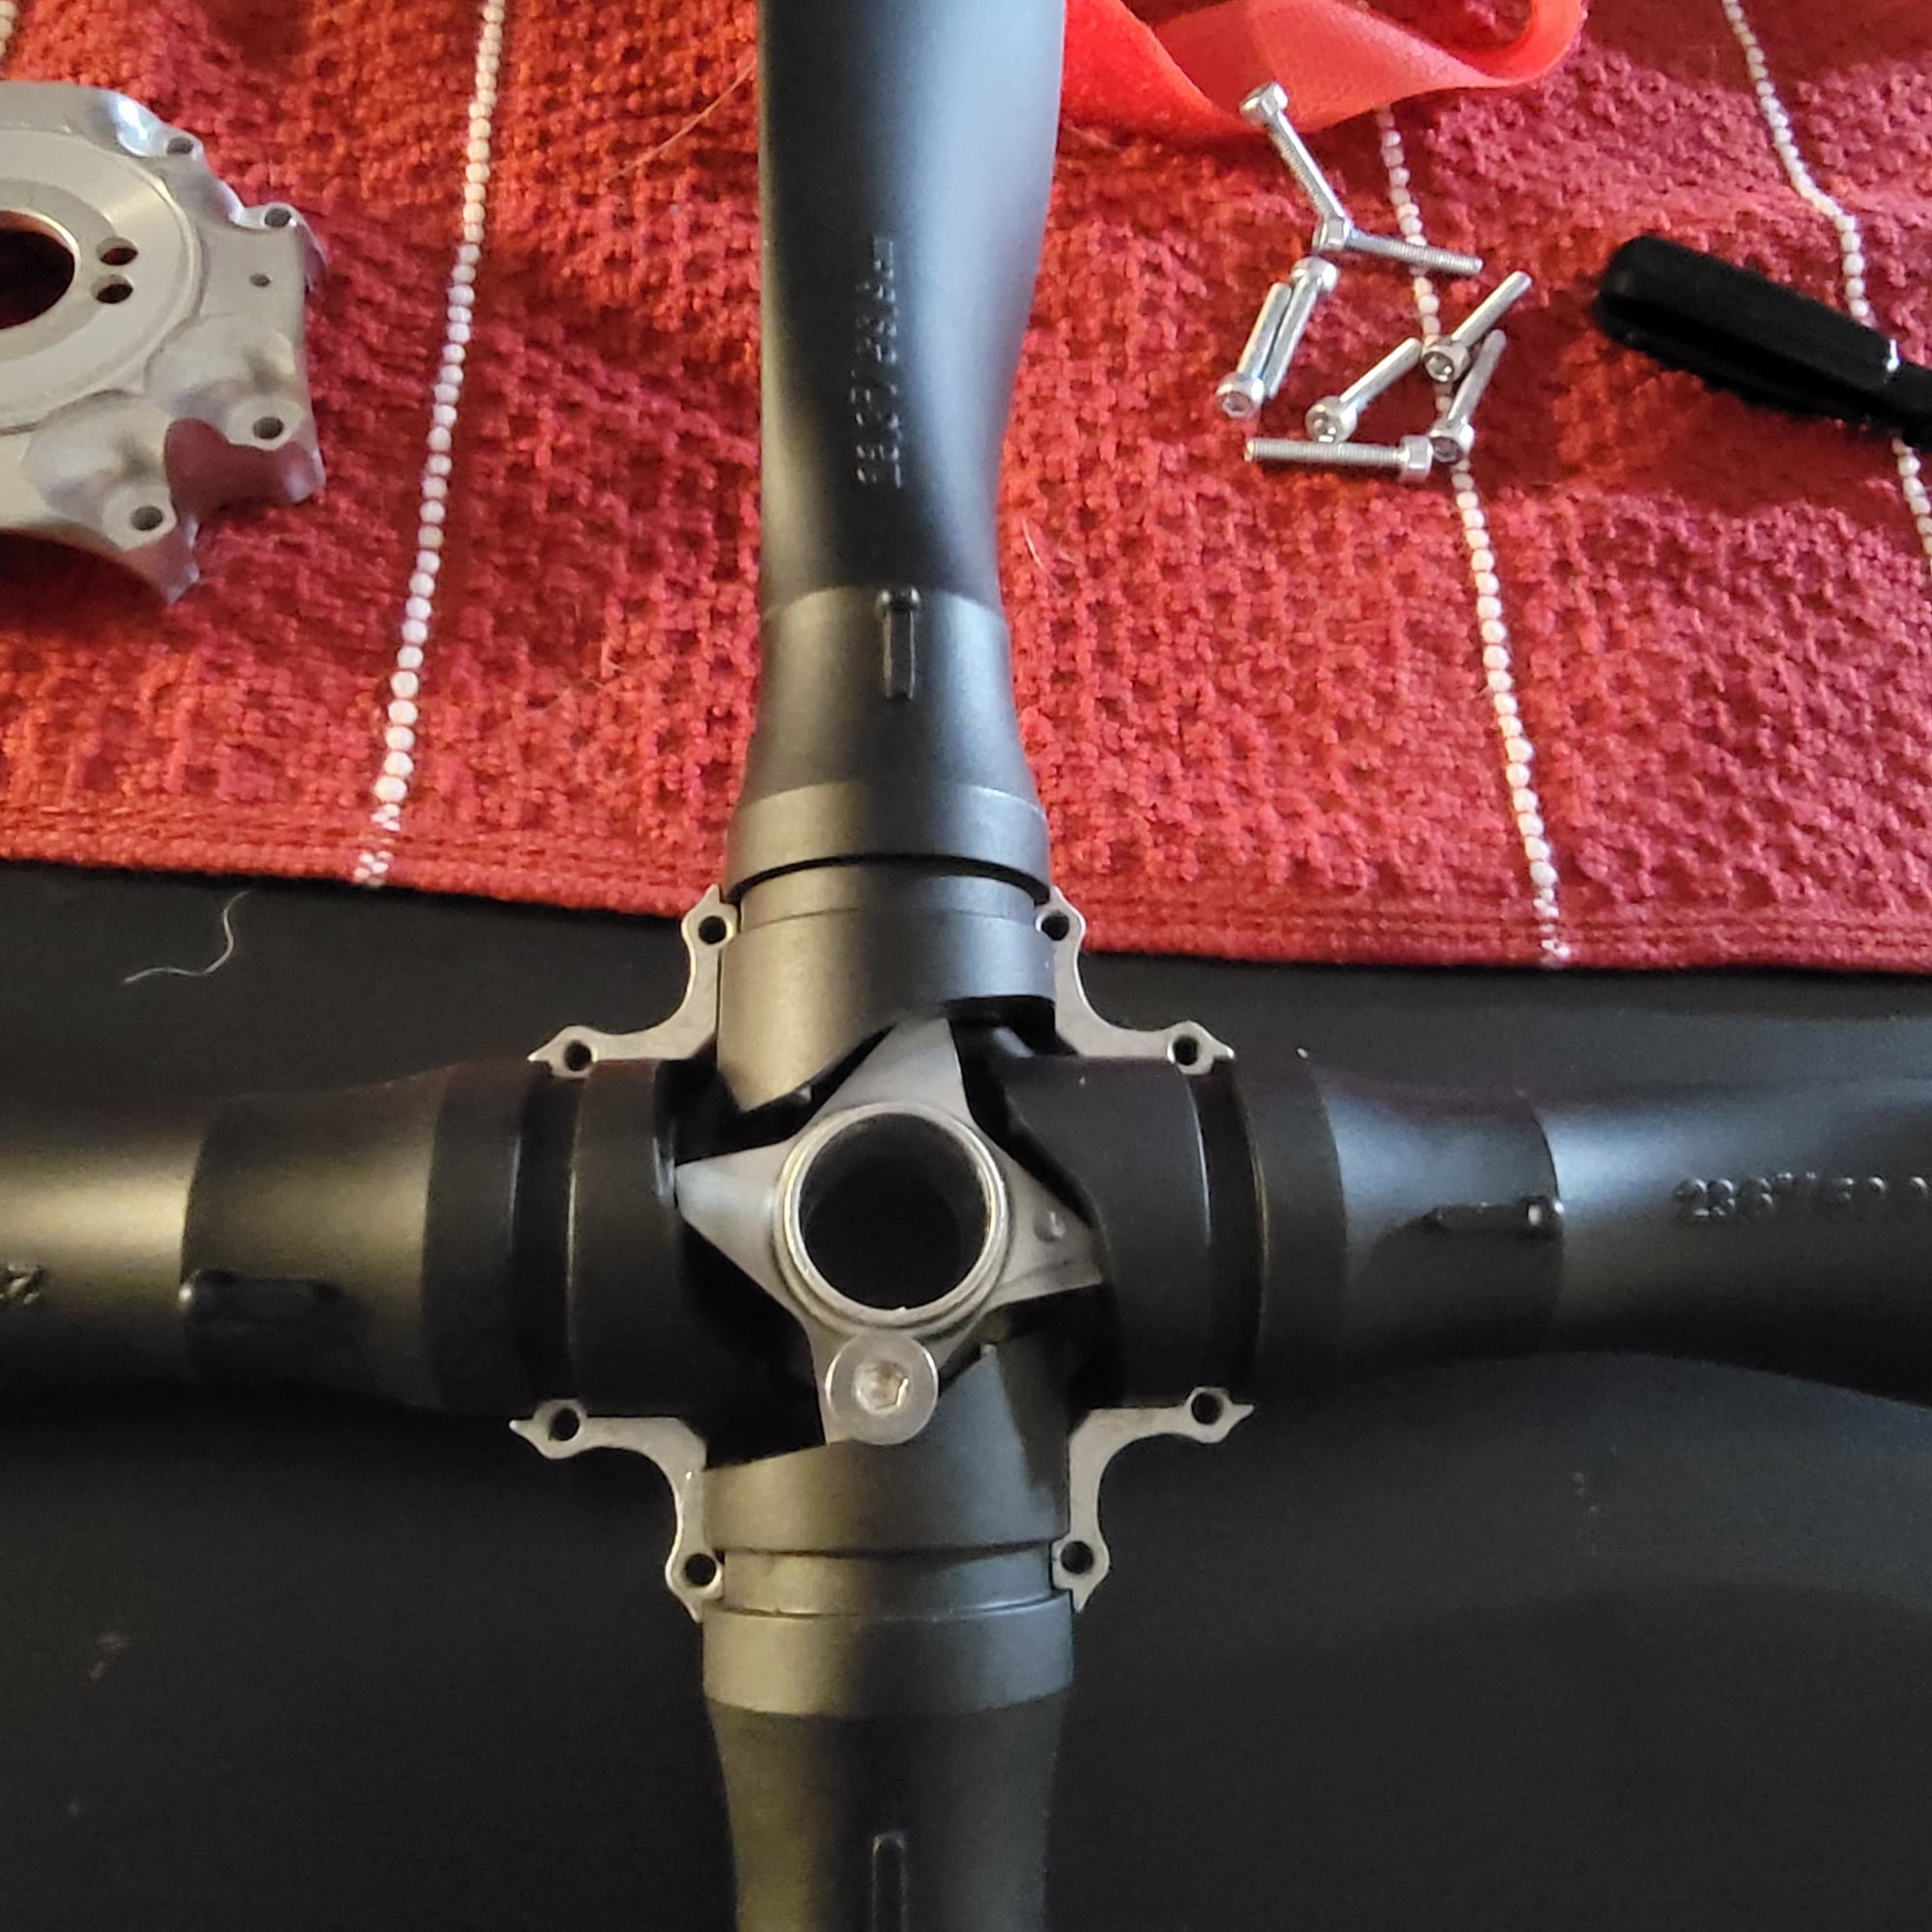
The engine and the varioprop. Working on getting the two to mate up. Taking some filing. Once its done and I have the spinner back plate to tell how much to cut the bolt down (I am going to turn it into a stud.) I can finalize that..
Its a gorgeous bit of hardware.
12-31-2021, 10:37 AM
#49
When I'm sitting around, with nothing to do, my mind runs through this build..parts checklists, things I still gotta get toolwise for particular steps, and so on.
One thats bugging me is trying to CG an 89 inch wingspan, nearly 7 feet long nose to tail P51 mustang, weighing 30 lbs, without having to drill holes in the ceiling that would really tick off a landlord and balance it accurately. Key word, accurately.
Due to accuracy, weight, and size of the Mustang..that kinda rules out the old tried and true fingertip method..that would take 4 people, two cases of beer and patience with half drunk people trying to hold a 30 lb plane up and not drop it....yeah..not gonna attempt that.
Option 2..the Venessa Rig..see part of comment about landlord. no go
Option 3, a simple balancer stand. of which there are three options..one is the Easybalancer, price 250 bucks..(umm..no)
The Sig pro balancer..It might be strong enough to hold a 30 lb mustang, but if you goof up building it..it don't work.
The Great Planes balancer..It says it can hold a 40 lb plane..It don't look like it could hold a 15 lb plane....I may be wrong. Looks like a lot of flexing of little metal rods would happen.
Then we get into the high tech, pricy scale systems of which there are two.
The Xicoy, with incidence meter option..385 bucks
and the Aeropanda at 285, which aeropanda hasn't had in stock for the last 5 months..
Input needed
One thats bugging me is trying to CG an 89 inch wingspan, nearly 7 feet long nose to tail P51 mustang, weighing 30 lbs, without having to drill holes in the ceiling that would really tick off a landlord and balance it accurately. Key word, accurately.
Due to accuracy, weight, and size of the Mustang..that kinda rules out the old tried and true fingertip method..that would take 4 people, two cases of beer and patience with half drunk people trying to hold a 30 lb plane up and not drop it....yeah..not gonna attempt that.
Option 2..the Venessa Rig..see part of comment about landlord. no go
Option 3, a simple balancer stand. of which there are three options..one is the Easybalancer, price 250 bucks..(umm..no)
The Sig pro balancer..It might be strong enough to hold a 30 lb mustang, but if you goof up building it..it don't work.
The Great Planes balancer..It says it can hold a 40 lb plane..It don't look like it could hold a 15 lb plane....I may be wrong. Looks like a lot of flexing of little metal rods would happen.
Then we get into the high tech, pricy scale systems of which there are two.
The Xicoy, with incidence meter option..385 bucks
and the Aeropanda at 285, which aeropanda hasn't had in stock for the last 5 months..
Input needed
12-31-2021, 01:40 PM
#50
Senior Member
Thread Starter
This is what I use to check the CG on all my giant RC aircraft, it's under $100.00usd. It's easy to use and hasn't failed me yet in placing the CG in the right location. https://www.legendhobby.com/product/vic-rc-cger-stand/