


The Typhoon and the Tempest - dual build


 11-15-2022, 08:43 AM
#27
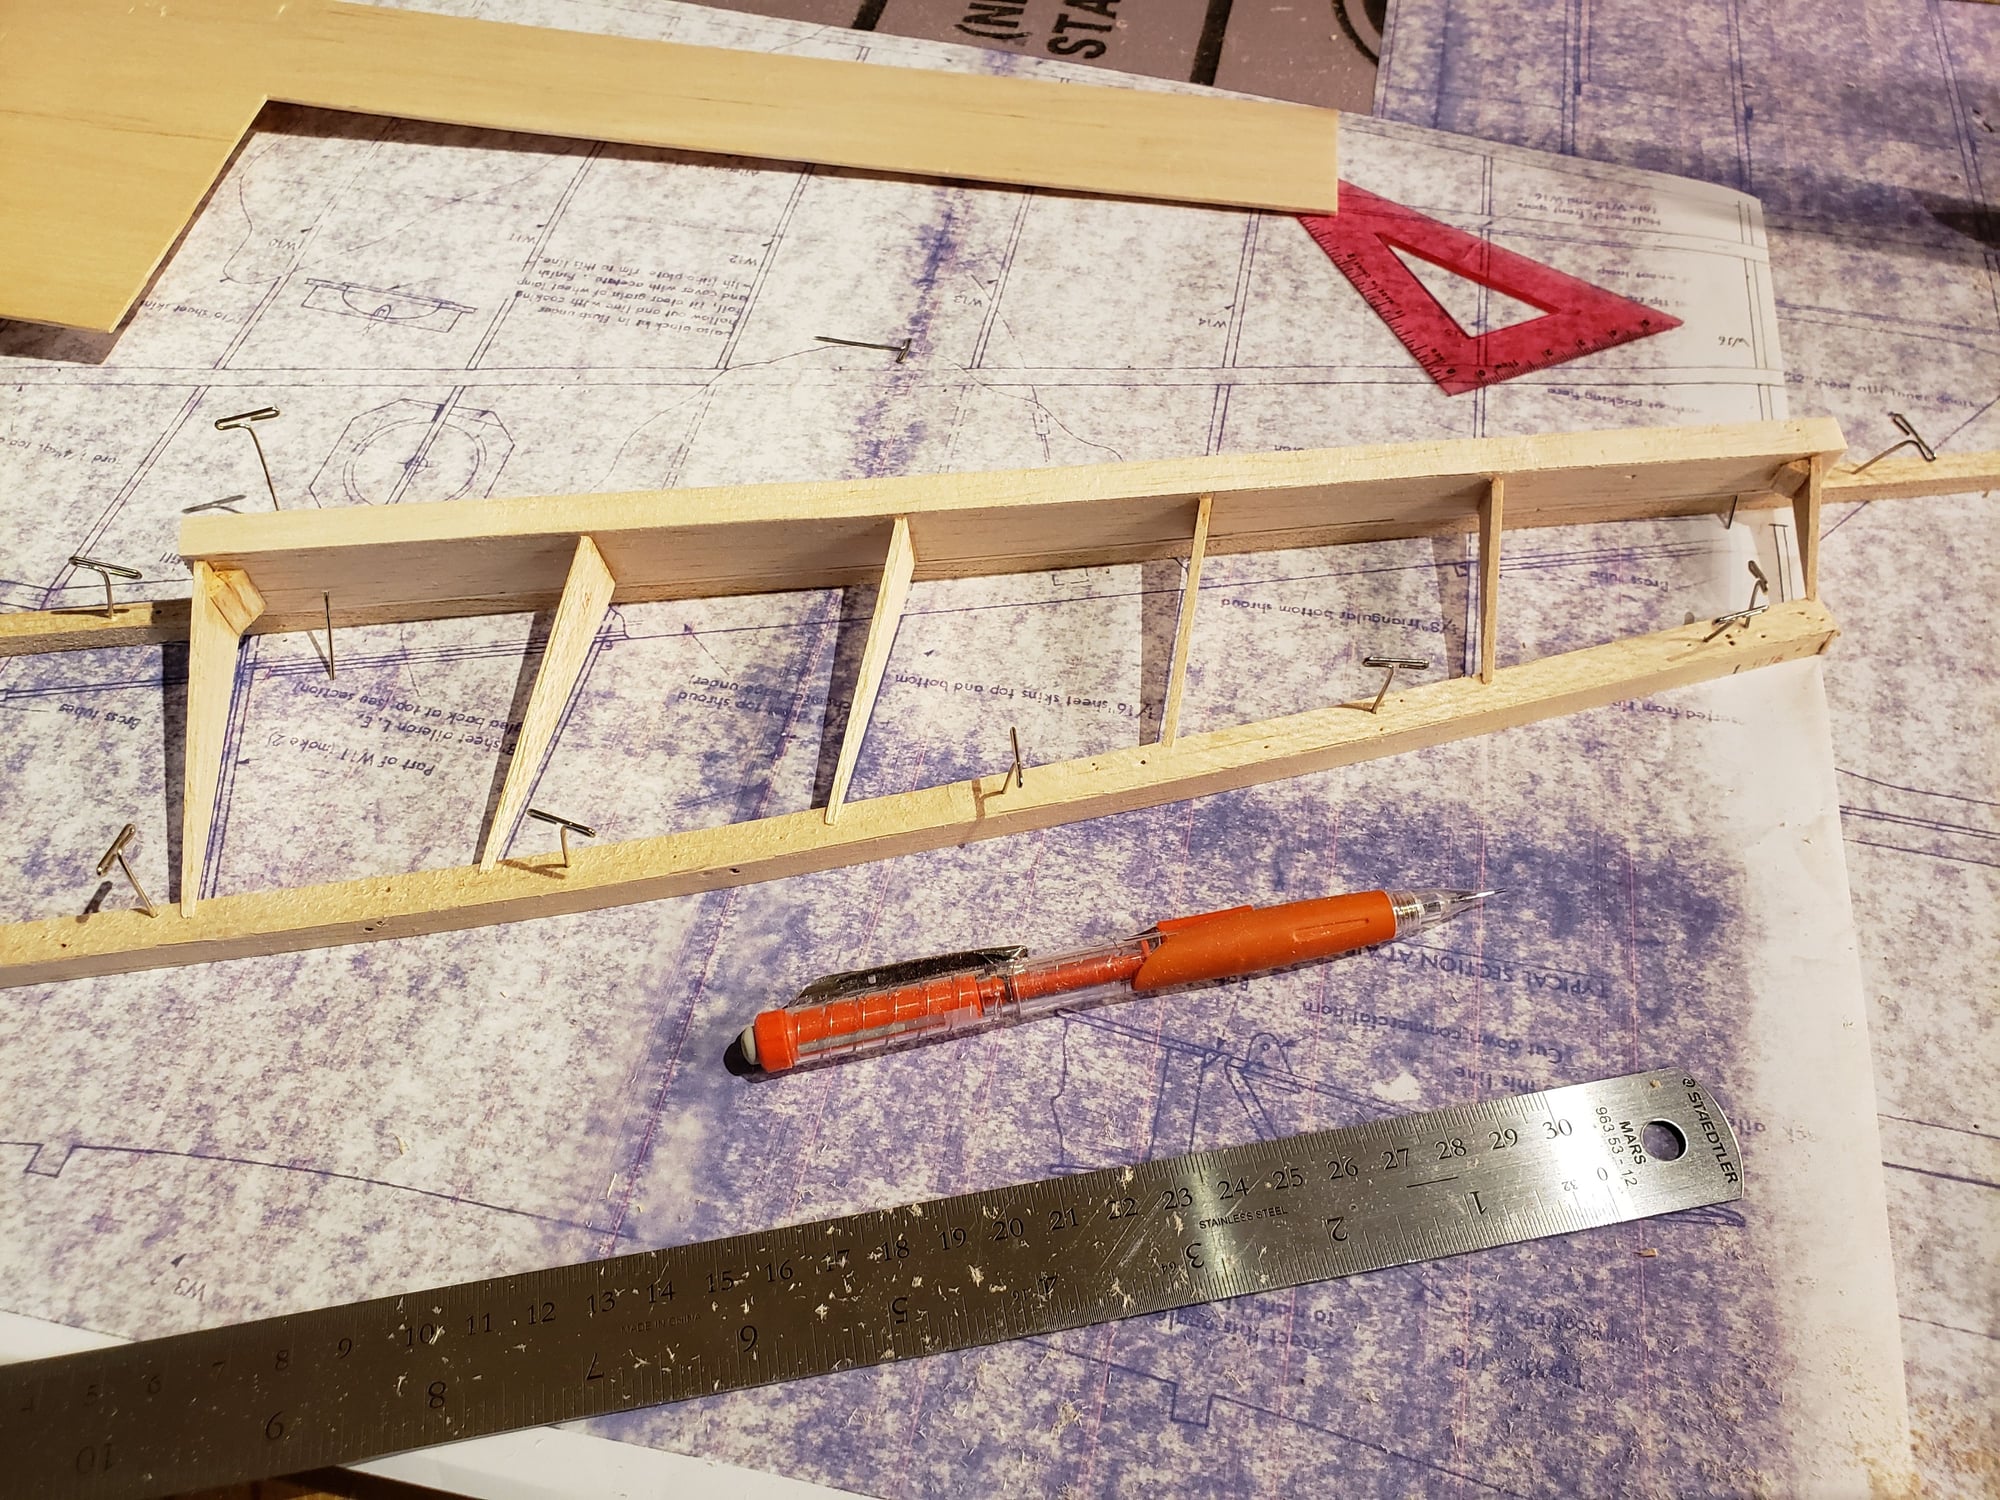
Now working on the ailerons. Ian's design called for a hinge line near the top of the aileron and 1/2" back from its leading edge. With his brass tube and steel rod hinge, this worked great, was completely hidden. I'm keeping things simpler with Robart pin hinges. But, if I hinge at the locations he shows, there will be big slots in the top of the aileron at each pin hinge. So, I'm building more traditional ailerons that have a rounded face and hinge in the center.


 11-20-2022, 03:54 PM
#29
The following users liked this post:
apereira (11-21-2022)
03-11-2023, 12:51 PM
#31
It's been a while since I posted here ... our club has a winter building group who this year took on the Duelist. I joined in, but bashed it into a Pucara. Here's the finished plane, waiting for a maiden.


03-11-2023, 12:53 PM
#32
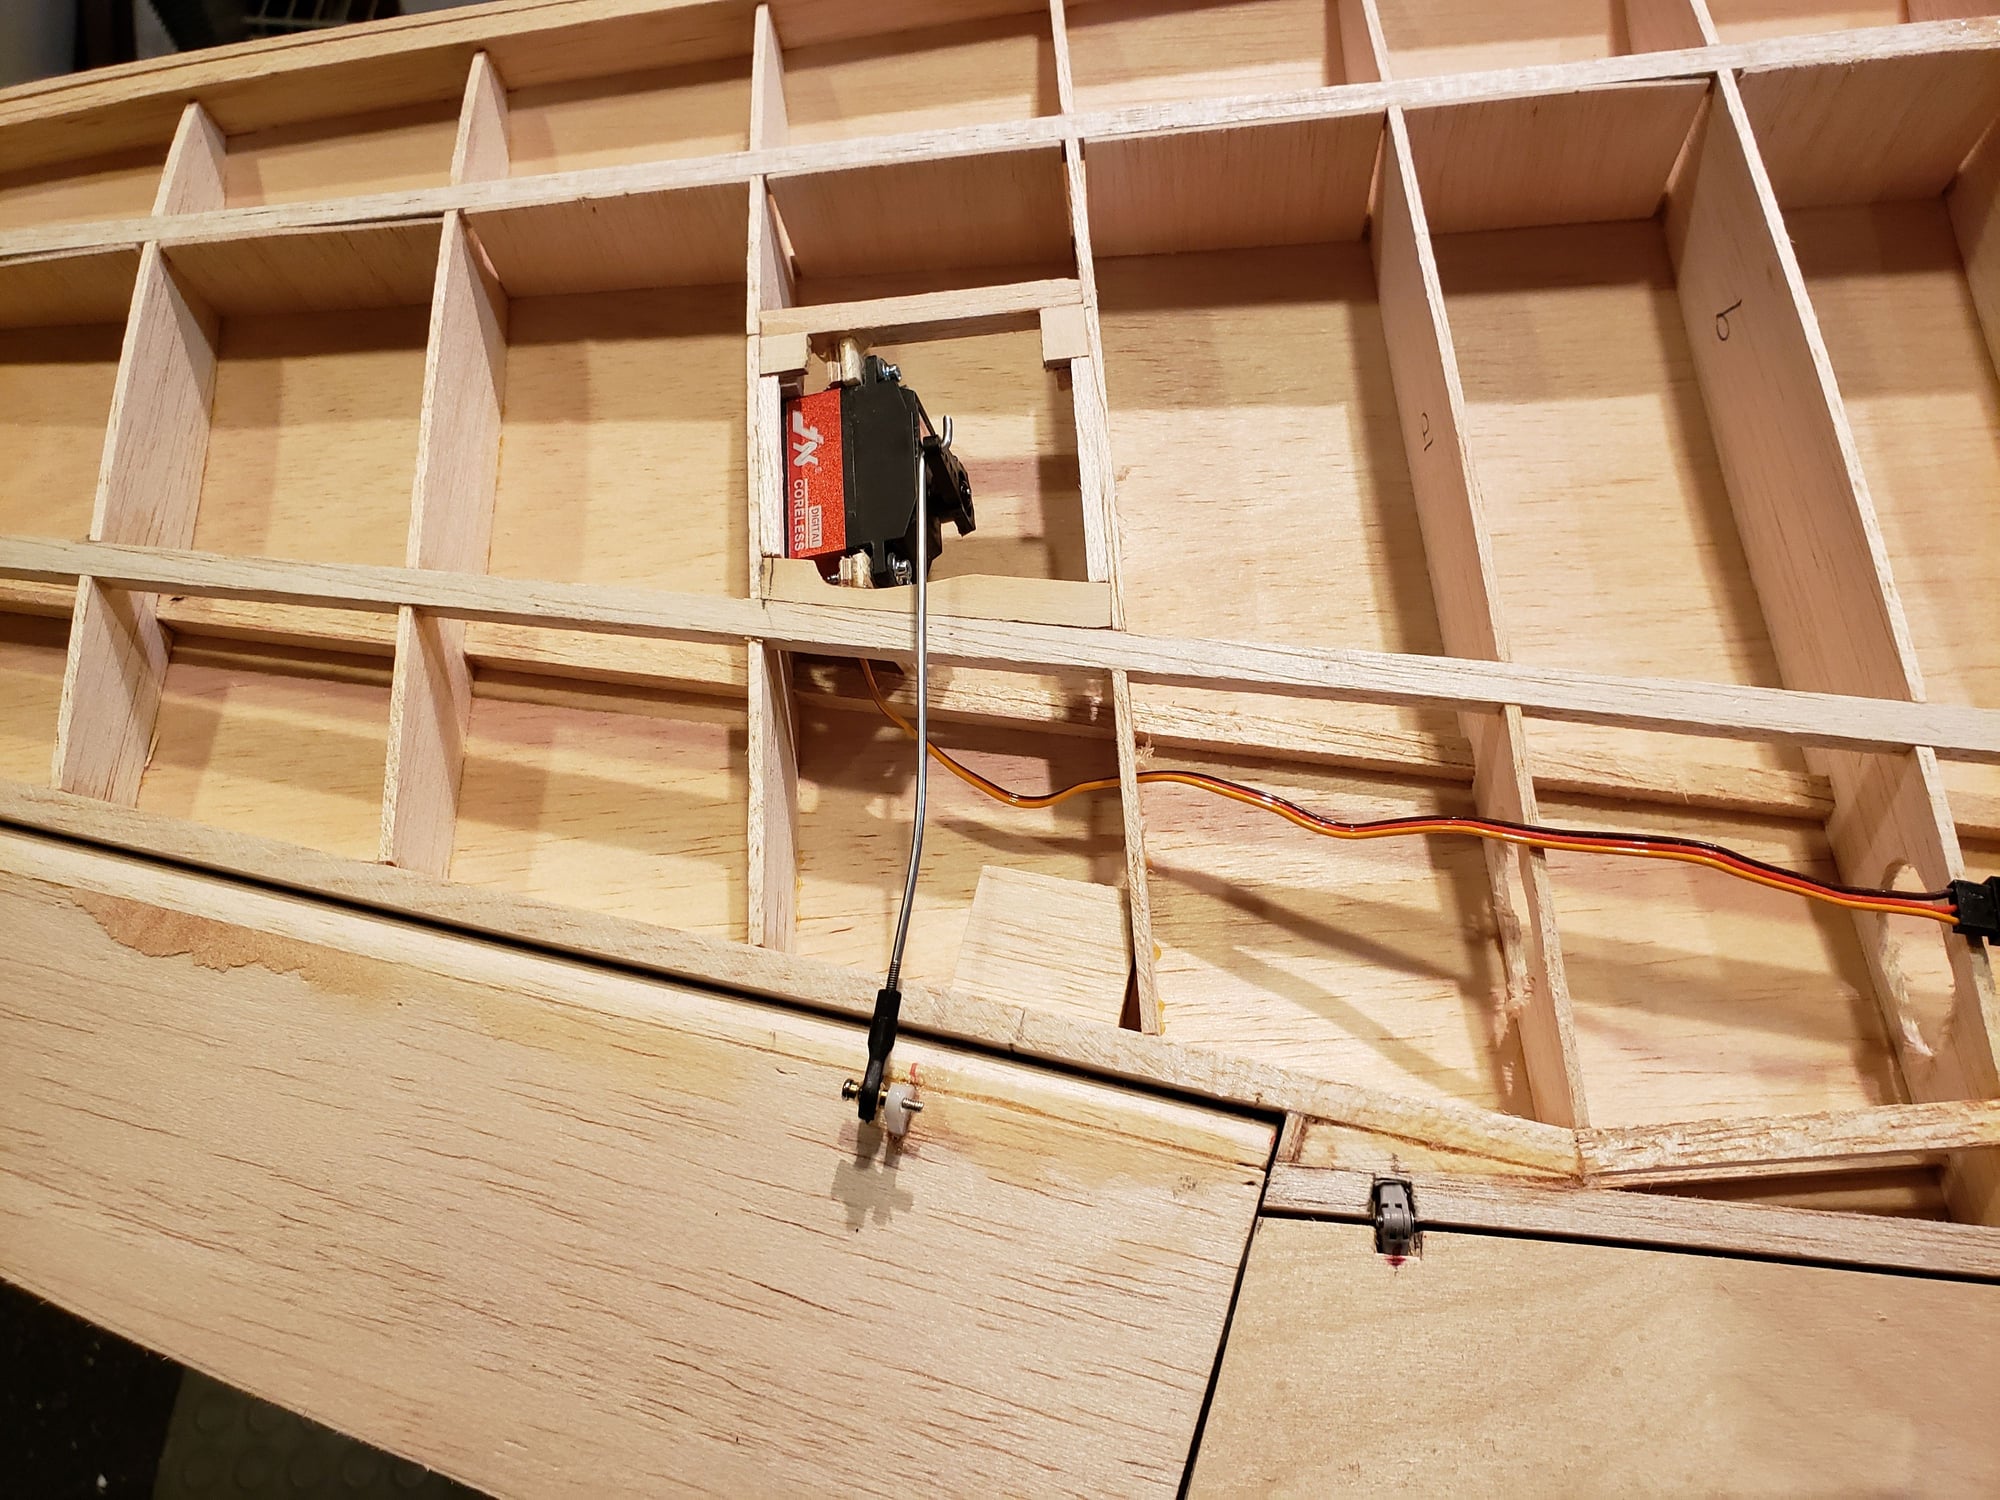
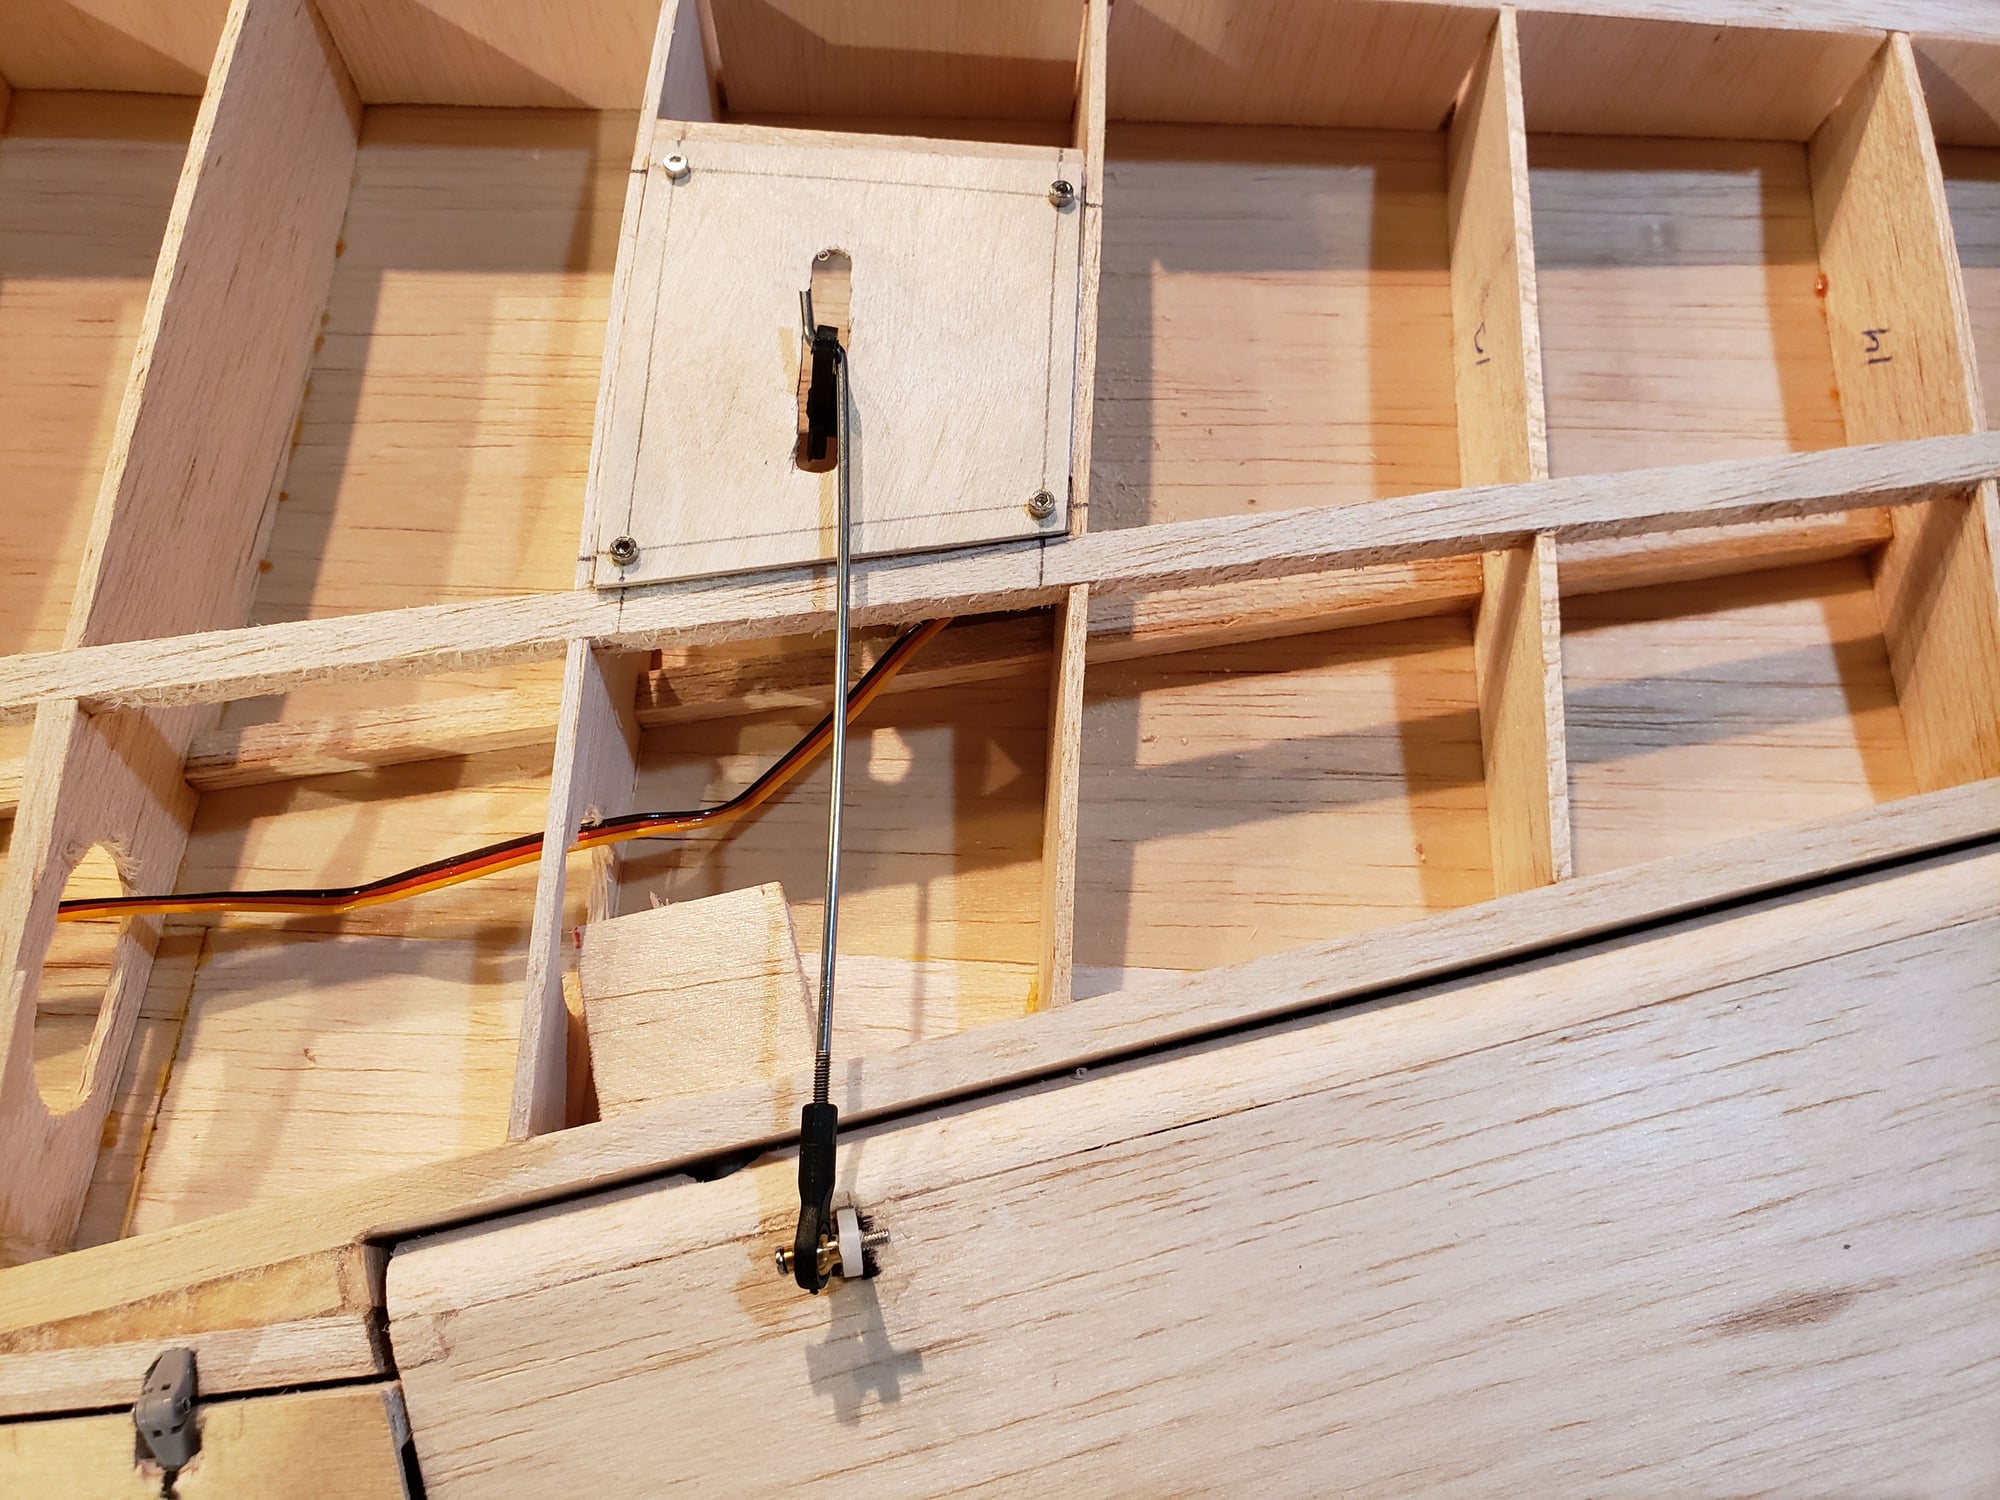
Back to the Tempest. The ailerons are complete and servos installed. I mounted the servo to the inside of the wing instead of to the bottom of the hatch. Thought it might be easier, but it was just as much work.
04-29-2023, 06:49 AM
#33
More progress on the wing. It's mostly complete now. Built out wheel wells and some bottom sheeting
Need to finish the bottom sheeting and add the wing tips.


Need to finish the bottom sheeting and add the wing tips.

 04-29-2023, 06:58 AM
#35
Framing up the whole fuse. aligned to 2 box frames. Joined them with 1/4" sq. Then started adding the rounded formers.
You'll note that the firewall is set back from the front of the box frames as the NGH 38 is much larger than the intended engine. To this end, I have also made the firewall 3/8" thick (instead of the 1/4"). Also will add ply doublers to the sides and pin the firewall to the doublers.


You'll note that the firewall is set back from the front of the box frames as the NGH 38 is much larger than the intended engine. To this end, I have also made the firewall 3/8" thick (instead of the 1/4"). Also will add ply doublers to the sides and pin the firewall to the doublers.
04-29-2023, 07:01 AM
#36
Took a bit of a detour to assemble the cowl. This arrived as 2 halves of very heavy vacuum formed plastic. Like 1/8" thick. With all the curves to this cowl it took a lot of cutting and sanding to get the 2 parts to mate. Ultimately did and the whole seam is reinforced with fiberglass on the inside.


04-29-2023, 07:07 AM
#37
I'm just going to add that while the cowl looks good, I think the idea of making this out of vacuum formed plastic was a terrible idea. Couple of reasons:
- the 1/8" thick plastic is a LOT thicker than the original fiberglass one shown in the plans. This means I'll have to alter the fuse formers where they mate to the cowl to get a smooth transition. Was the primary reason I got the cowl together now.
- I don't think the plastic will take the abuse that fiberglass will. Also, when dealing with repairs, making a fiberglass to fiberglass patch will get a better result than a fiberglass to plastic patch.
04-29-2023, 07:46 AM
#38

My Feedback: (20)
I have been able to improve the durability of plastic parts by lining the inside with fiberglass. I use PVC pipe cement to do this. Use the minimum amount of cement to avoid melting the plastic. Usually epoxy will not bond the fiberglass to the plastic.
Chuck
Chuck
