


Well here goes... my first plans build! Travel Air Mystery Ship
 04-21-2014, 03:29 PM
#1

There's a cool history behind this aircraft, and I just love her lines. So I found 69" wingspan Jack Swift plans from Scale Plans & Photo Service, had Roger @ Camden Custom Cutters scan these plans and he then cut all the ribs, formers, firewall, etc (he did a very nice job, and the price was very reasonable  ), and I picked up wheel pants and a cowl (specifically for these plans) from Fiberglass Specialties. A Saito FA-120R3 will serve powerplant duties.
I believe that there were only 5 of these ever produced, and they each have their history attached to them. There were 2 paint schemes: the original black & red "batwing" scheme, and also the Texaco paint job. They're both really cool- and then the whimsical part of me wants to go with the Harley-Davidson scheme as seen on this coin bank!

), and I picked up wheel pants and a cowl (specifically for these plans) from Fiberglass Specialties. A Saito FA-120R3 will serve powerplant duties. I believe that there were only 5 of these ever produced, and they each have their history attached to them. There were 2 paint schemes: the original black & red "batwing" scheme, and also the Texaco paint job. They're both really cool- and then the whimsical part of me wants to go with the Harley-Davidson scheme as seen on this coin bank!
 04-21-2014, 04:56 PM
#3

Well its been awhile since I plan built anything.. but I THINK the crutch they are referring to is the flat wood that goes down on the plans first when you look at your top view of the fuselage. This is the wood that you will be gluing the top fuse formers/bulkheads to. On many complicated fuselages with no flat sides you build the top half of the fuse first flat on the board, and then flip it over and build the bottom half of the fuse off of that. Some plans might build the bottom flat on the plans.. and then glue the two halves together...
If you look at that shape it is wide near the front, and tapers down narrow at the tail..and it should have some cross braces.. so it actually does LOOK like a crutch ... Sometimes building from plans with little or no instructions is like solving a mystery on your own... It helps if you look at the top, and side views of some areas.. just POUR over those plans, and look for a kitbuild online for more pics and info..
Have fun.
Last edited by foodstick; 04-21-2014 at 05:01 PM.
04-22-2014, 07:07 AM
#6

My Feedback: (11)
Yes, you cannot examine the plans enough. How much building do you have under your belt? The best models to teach building, believe it or not, are the old WW1 or WW2 stick models by Comet, Guillows, or Sterling. Those things required attention to detail and attention to reading the plans to see where everything went. They usually were also inexpensive enough ( and still may be!) to make them good training projects. Build a few of those and you won't be intimidated by other models, kit-built or plans-built.
04-22-2014, 07:12 AM
#7
So far I've built 2 Somethin' Extras, a Smith Miniplane, and a Sig 25th Anniversary 1/5 Cub. I think my skills are up to the challenge
Like I said though- these plans are VERY sparse with the info, so I'm just going to take my time and glean as much help from RCU as possible, haha
Like I said though- these plans are VERY sparse with the info, so I'm just going to take my time and glean as much help from RCU as possible, haha
04-22-2014, 08:38 AM
#8
OK gang, first question. What's the difference between "planking" and "sheeting"? I mean, I know what sheeting is, but the plans call for the formers to be "planked" with 3/32 balsa before sheeting the fuse sides. Are they talking about stringers? See photo of text:

04-22-2014, 11:46 AM
#11
Another question for you'all: when should I start thinking about fuel tank and servo placement? Is it too early? Also, I'm planning on using a pushrod for the elevator, and pull-pull for the rudder. Any early tasks I should be thinking of?
Also, it looks like it's up to me to figure out placement and construction of hardpoints, servo placement, etc. Boy, oh, boy...
Any advice, tips, etc will be greatly appreciated!
Also, it looks like it's up to me to figure out placement and construction of hardpoints, servo placement, etc. Boy, oh, boy...
Any advice, tips, etc will be greatly appreciated!
04-22-2014, 12:01 PM
#12
Senior Member
Join Date: Jan 2003
Location: Spring Hill,
FL
Posts: 4,734
Likes: 0
Received 0 Likes
on
0 Posts
Planking vs. Sheeting. Depends on who says it.
Usually planking means strips of wood to make compound curves and end up with a fully sheeted surface when a sheet of wood can't bend in all the directions necessary. Some people use planking and sheeting interchangeably.
I would Google the model and see if you can find someone else who did an online build. Might help through some of the rough spots.
04-22-2014, 12:07 PM
#14
Senior Member
Join Date: Jan 2003
Location: Spring Hill,
FL
Posts: 4,734
Likes: 0
Received 0 Likes
on
0 Posts
Scroll down this page to see fuselage construction. This model has a planked fuselage: http://www.people.vcu.edu/~rhklenke/rc/panther.html
http://www.people.vcu.edu/~rhklenke/rc/picts/panther/done_planking0.JPG

http://www.people.vcu.edu/~rhklenke/rc/picts/panther/done_planking0.JPG
 04-23-2014, 12:09 PM
#17
I've run into an issue while planking, where the strips are starting to interfere around where the vertical stabilizer will attach. See photo. What should I do? I can tolerate this where it is, because the vertical stab will need a cutout here anyway. But I certainly don't want a sloppy "zipper' going all the way up the spine of the fuse!

04-23-2014, 05:27 PM
#18
Senior Member
You need to install 'stealer' planks at those kinds of areas. The 'stealers' are small planks wider the two, three or four plank ends. Terminate your planks at a fuselage former. Leave a little edge of the former so the 'stealer' plank can be glued to the former edge while abutting the previously laid planks. Sometimes it's easier to glue a block of balsa near the end of a fuselage and sand it fair to the rest of the fuselage.
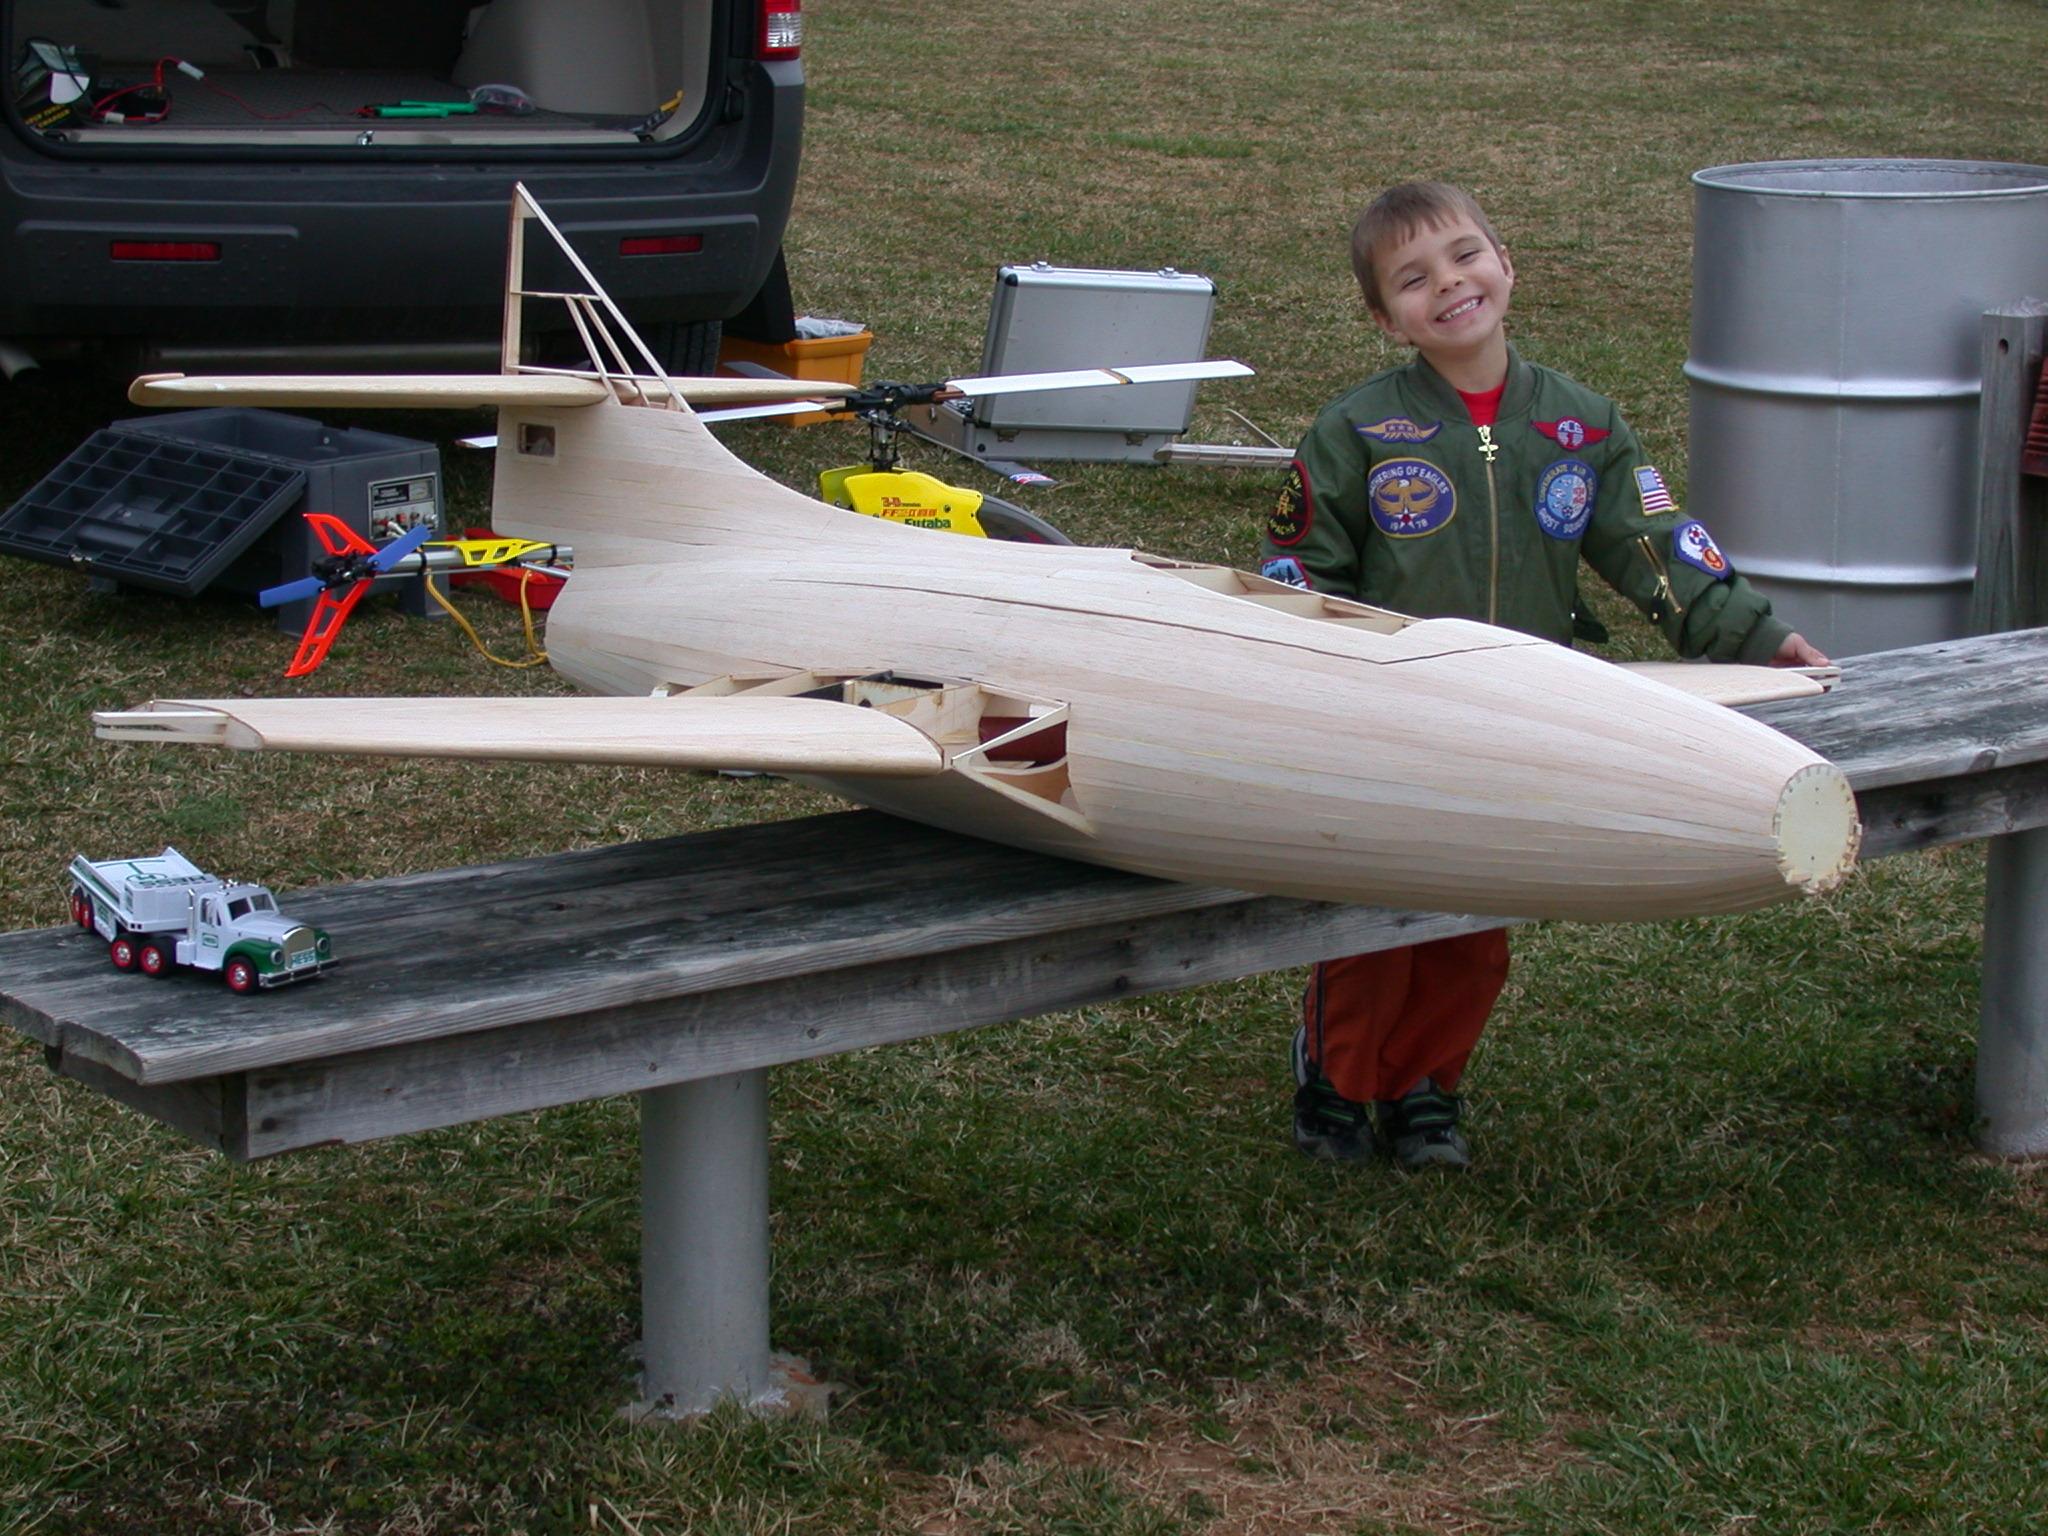
Some folks alternately taper the planks where they meet one from an opposite side. Personally, I don't like that because twist is induced in the plank. My approach is to taper the plank as needed. The 'Mystery Ship' needs planks that are wider at the front and taper toward the rear due to its coke-bottle shaped fuselage. What I do is measure circumference of fuselage at the former locations and divide each station by the same number of planks that gives planks of ~1/4" max width. It's kinda laborious but gives excellent results! The planks will pretty much lay flat. It's like boat building so if you look the techniques for that it will be more easily understood than my jibberish.
Where the fin and stab attach is a little tricky but easy once you know the trick! Make your fin and stab mounts in the crutch or ladder frame. Temporarily pin 'dummy' fin and stab stubs in place. Sheet or plank for fit then sand as needed. Remove the stubs then replace with the 'real' fin and stab when ready. The stab can go in place in halves. Oftentimes I'll place the internal elevator and rudder horn before the fin and stab but after planking, sheeting and sanding. This all requires a little pre-planning.
The 'Mystery Ship' is a cool airplane but you have picked a tough one to model and paint! Kudos to you!!!!
Last edited by ARUP; 04-23-2014 at 05:37 PM.
05-01-2014, 09:41 AM
#19
So I trashed my first attempt at planking in a fit of frustrated rage 
And here's what attempt #2 looks like. Much better! It's amazing what a little reading will do. For my first real attempt at this, I'm giving myself a B+


And here's what attempt #2 looks like. Much better! It's amazing what a little reading will do. For my first real attempt at this, I'm giving myself a B+
Last edited by Rv7garage; 05-01-2014 at 09:51 AM.
05-01-2014, 12:59 PM
#21
Inverted fuse, with the bottom half partially sheeted.
Am I building an airplane, or a submarine??

Now I'm at the point where I feel like I need to take a step back and think about things. Things like:
Servo tray, Linkages, Tank placement, Electronics placement, and Access to the above... also hard points for rigging?
What have I missed? Any suggestions? I'd like to hide the elevator control horn; how can I do this?
Please share your thoughts & expertise
Am I building an airplane, or a submarine??
Now I'm at the point where I feel like I need to take a step back and think about things. Things like:
Servo tray, Linkages, Tank placement, Electronics placement, and Access to the above... also hard points for rigging?
What have I missed? Any suggestions? I'd like to hide the elevator control horn; how can I do this?
Please share your thoughts & expertise
05-01-2014, 03:06 PM
#22
Senior Member
Here are pics of rudder and elevator parts installed before finishing the planking. You have to work things out before closing it up!


See how a small block was glued then sanded to shape at the end of fuselage.
See how a small block was glued then sanded to shape at the end of fuselage.
05-01-2014, 05:10 PM
#23
Thanks for the pics, ARUP! You obviously made those pushrods from scratch; very nice. I've gone ahead and ordered Sig's hidden elevator horn, and will be using a scale pull-pull for the rudder. I think that my biggest challenge is going to be setting up the rigging for the flying wires (hard points, turnbuckles, spacers, etc.). I guess I'll need to install bulkheads to support the internal elevator pushrod.
05-02-2014, 04:28 PM
#25
Senior Member
I don't think you have to worry about supporting the pushrod internally. A 1/4" dowel should be plenty stiff. You can go 'hi-tech' and use CF shaft but that's overkill for something this size, IMHO. I liberally use gussets in my builds. They are fiddly but add tremendous strength for what little weight they add. For hard points use dowel rod segments in wings, fin and stab. Drill thru them for bolts to pass. The end grain of the dowel won't crush when bolts tightened. I use 'carry thru' rods made of wire in some apps. One thing that works great is to cut a piece of music wire to proper length. Then, hammer the ends flat after heating cherry red. Once the ends are flat enough for the connectors of choice just drill to receive bolts. The heating makes them soft enough to drill (and tap) by hand. I have done this on two antique sailplanes. One is the Prufling (as seen on RCScalebuilder.com in 'scale sailplanes... the very first build there!) and the other is the Vampyr (as seen on RCAerotowing.com in 'scale sailplanes' forum). I'd put my sailplane builds on RCU but what I have posted in the past hardly gets a look.
I really like the Mystery Ship so keep up the great work! Golden Age race planes are very under modeled.
I really like the Mystery Ship so keep up the great work! Golden Age race planes are very under modeled.

