Go Back  RCU Forums > RC Boats > Speed - RC Gas Boats
Reload this Page >

New Design & Build SSV 565 deep vee

Community
Search
Notices
Speed - RC Gas Boats Discuss gas RC boats right here!

New Design & Build SSV 565 deep vee

Thread Tools
 
Search this Thread
 
Old 04-09-2014, 01:41 PM
  #1  
F1madness
Thread Starter
 
F1madness's Avatar
 
Join Date: Sep 2010
Location: Staffs, UNITED KINGDOM
Posts: 895
Likes: 0
Received 0 Likes on 0 Posts
Default New Design & Build SSV 565 deep vee

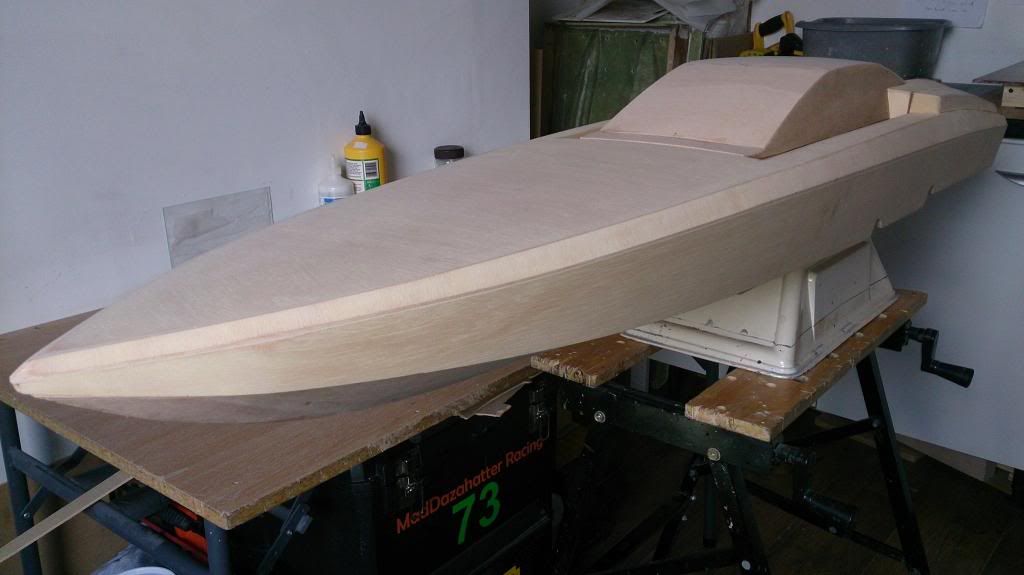
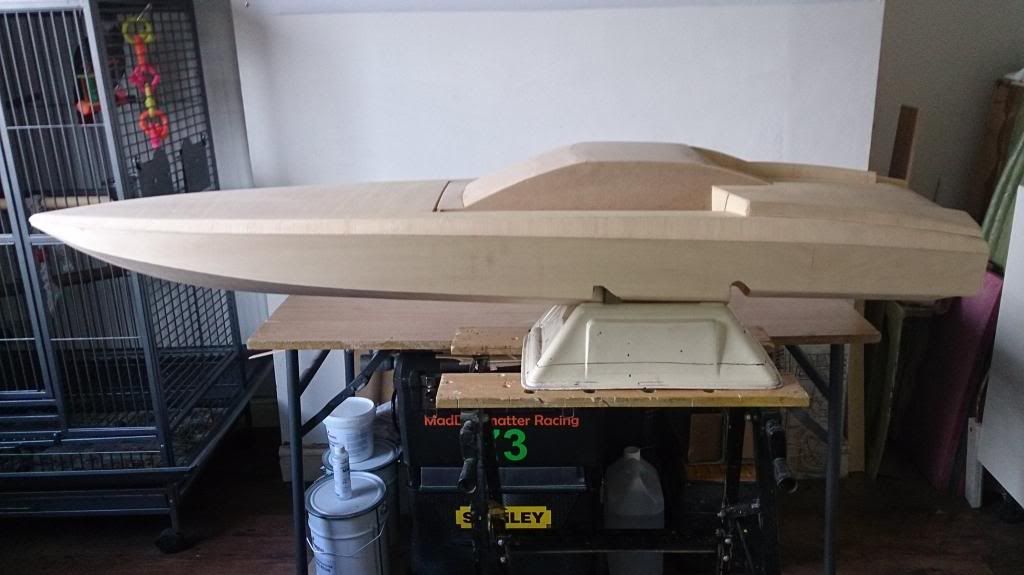
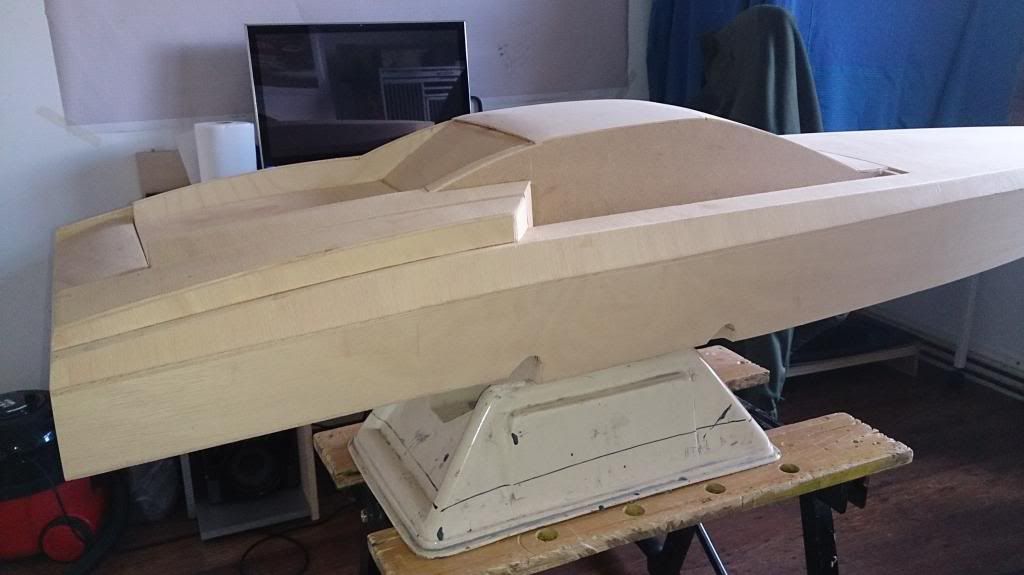
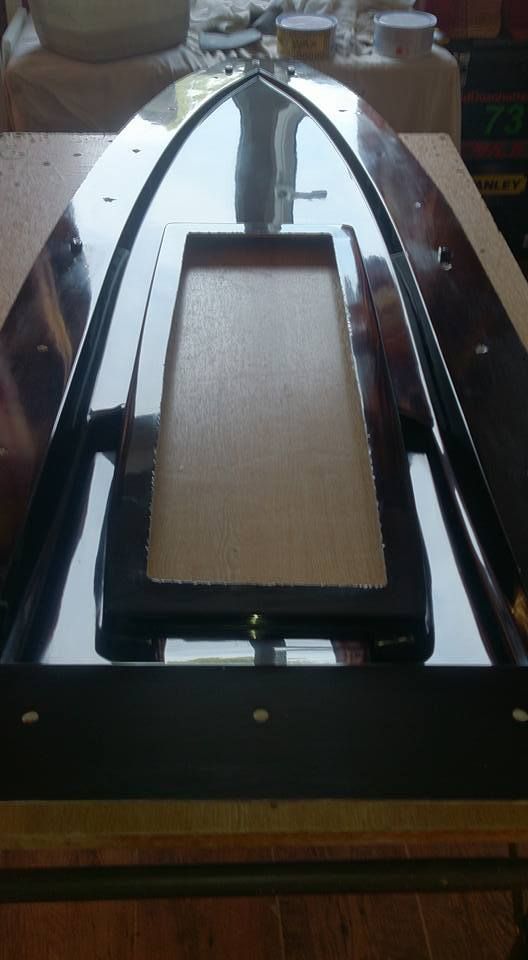
My latest project on the quiet LOL,well been buiding it inbetween making moulds and moulding etc of other projects
purely experimental design and something different
Im not a massive lover of deep vees but really wanted to have ago at this 1 for while and push my building skills,and this 1 has certainly been a brain job haha
Had to and still making some changes as i progress with build and hoping to finish all construction very soon and start prepping for coatings
Size: 56.5" L x 14" W


http://youtu.be/ZvZkROvnlXM

Last edited by F1madness; 04-09-2014 at 01:55 PM.
Old 04-09-2014, 03:58 PM
  #2  
madanna67
My Feedback: (9)
 
madanna67's Avatar
 
Join Date: May 2008
Location: Muscatine, IA
Posts: 37
Likes: 0
Received 1 Like on 1 Post
Default

Can't wait to see how this one turns out. If it's anything like the gas cat you just built it's gonna be top notch. I really like the looks of it. Keep us posted on your progress.
Old 04-10-2014, 12:05 AM
  #3  
F1madness
Thread Starter
 
F1madness's Avatar
 
Join Date: Sep 2010
Location: Staffs, UNITED KINGDOM
Posts: 895
Likes: 0
Received 0 Likes on 0 Posts
Default

Cheers madanna
Ill keep posting pics etc ,im looking forward to finishing this 1 got another couple of builds i wanna start once this 1 completed aswell
Old 10-13-2014, 06:57 AM
  #4  
F1madness
Thread Starter
 
F1madness's Avatar
 
Join Date: Sep 2010
Location: Staffs, UNITED KINGDOM
Posts: 895
Likes: 0
Received 0 Likes on 0 Posts
Default

Filling and shaping work done


Old 10-13-2014, 07:04 AM
  #5  
F1madness
Thread Starter
 
F1madness's Avatar
 
Join Date: Sep 2010
Location: Staffs, UNITED KINGDOM
Posts: 895
Likes: 0
Received 0 Likes on 0 Posts
Default

Pattern coated topdeck,sides and transom


Old 10-13-2014, 07:09 AM
  #6  
F1madness
Thread Starter
 
F1madness's Avatar
 
Join Date: Sep 2010
Location: Staffs, UNITED KINGDOM
Posts: 895
Likes: 0
Received 0 Likes on 0 Posts
Default

Strakes added to bottom


Old 10-13-2014, 07:11 AM
  #7  
F1madness
Thread Starter
 
F1madness's Avatar
 
Join Date: Sep 2010
Location: Staffs, UNITED KINGDOM
Posts: 895
Likes: 0
Received 0 Likes on 0 Posts
Default

And this is how it looks at present


Old 10-13-2014, 08:05 AM
  #8  
SS RC Boats
Senior Member
 
Join Date: Aug 2007
Location: Pembroke, BERMUDA
Posts: 536
Likes: 0
Received 0 Likes on 0 Posts
Default

Looks really nice Daz. Cant wait to see finish product.
Old 10-13-2014, 09:04 AM
  #9  
F1madness
Thread Starter
 
F1madness's Avatar
 
Join Date: Sep 2010
Location: Staffs, UNITED KINGDOM
Posts: 895
Likes: 0
Received 0 Likes on 0 Posts
Default

Thanks Bud
im looking forward to finishing it and getting it on the water
Old 10-17-2014, 04:23 AM
  #10  
F1madness
Thread Starter
 
F1madness's Avatar
 
Join Date: Sep 2010
Location: Staffs, UNITED KINGDOM
Posts: 895
Likes: 0
Received 0 Likes on 0 Posts
Default

Finished the filling and sanding of the strakes and bottom


Old 10-17-2014, 04:26 AM
  #11  
F1madness
Thread Starter
 
F1madness's Avatar
 
Join Date: Sep 2010
Location: Staffs, UNITED KINGDOM
Posts: 895
Likes: 0
Received 0 Likes on 0 Posts
Default

Pattern coated ,so more sanding LOL


Gloss coated the hatch ,then wetsand and polish up


Old 10-29-2014, 07:42 AM
  #12  
F1madness
Thread Starter
 
F1madness's Avatar
 
Join Date: Sep 2010
Location: Staffs, UNITED KINGDOM
Posts: 895
Likes: 0
Received 0 Likes on 0 Posts
Default

Getting there now
Wetsanded and polished the hatch ,just needs flange board now then start waxing for moulding it


Old 10-29-2014, 07:45 AM
  #13  
F1madness
Thread Starter
 
F1madness's Avatar
 
Join Date: Sep 2010
Location: Staffs, UNITED KINGDOM
Posts: 895
Likes: 0
Received 0 Likes on 0 Posts
Default

Main hull all patterncoated and sanded and now glosscoated ,just letting it fully cure then more wetsanding and polishing


Old 11-15-2014, 10:37 AM
  #14  
F1madness
Thread Starter
 
F1madness's Avatar
 
Join Date: Sep 2010
Location: Staffs, UNITED KINGDOM
Posts: 895
Likes: 0
Received 0 Likes on 0 Posts
Default

Well after many hrs wetsanding and polishing this build is now complete
Next job is start on the parting board and get it ready for moulding


Old 11-15-2014, 02:15 PM
  #15  
James Brand
Member
 
Join Date: Nov 2014
Posts: 30
Likes: 0
Received 0 Likes on 0 Posts
Default

coming along nicely!
Old 04-25-2015, 12:28 AM
  #16  
F1madness
Thread Starter
 
F1madness's Avatar
 
Join Date: Sep 2010
Location: Staffs, UNITED KINGDOM
Posts: 895
Likes: 0
Received 0 Likes on 0 Posts
Default

Been awhile but finally got round to making the moulds
Hopefully have 1st hull done ready for building up and testing


Old 05-17-2015, 05:16 PM
  #17  
odie106
Junior Member
 
Join Date: Jun 2010
Location: wildomar, CA
Posts: 3
Likes: 0
Received 0 Likes on 0 Posts
Default

look nice, i like it a lot.
Old 05-18-2015, 11:42 PM
  #18  
F1madness
Thread Starter
 
F1madness's Avatar
 
Join Date: Sep 2010
Location: Staffs, UNITED KINGDOM
Posts: 895
Likes: 0
Received 0 Likes on 0 Posts
Default

Thanks odie
Nearly there now ready to mould 1st hull
Old 05-22-2015, 08:15 AM
  #19  
F1madness
Thread Starter
 
F1madness's Avatar
 
Join Date: Sep 2010
Location: Staffs, UNITED KINGDOM
Posts: 895
Likes: 0
Received 0 Likes on 0 Posts
Default

Nearly there
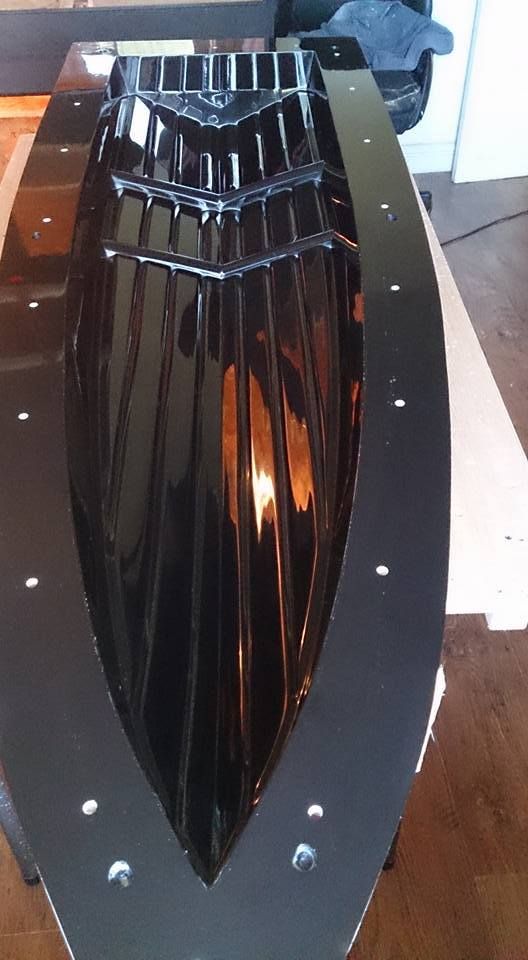
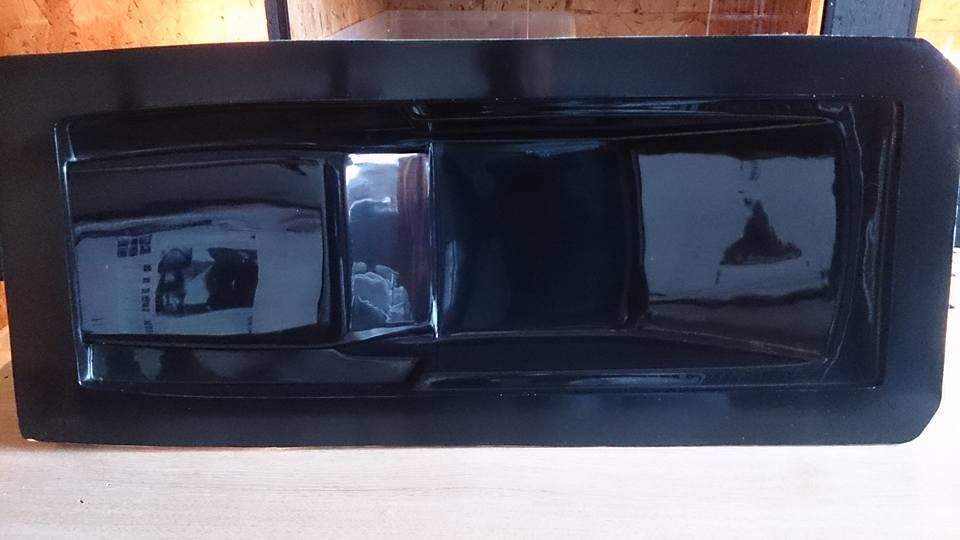
Moulds have been wetflatted and polished and started the coats of release wax so wont be long and will have the 1st hull out the moulds


Old 05-22-2015, 04:13 PM
  #20  
odie106
Junior Member
 
Join Date: Jun 2010
Location: wildomar, CA
Posts: 3
Likes: 0
Received 0 Likes on 0 Posts
Default

Looking good.
Old 05-30-2015, 08:08 AM
  #21  
Dana W
 
Join Date: Jul 2006
Location: Yukon OK
Posts: 791
Received 13 Likes on 12 Posts
Default

Nicely done.
Old 05-30-2015, 08:31 AM
  #22  
F1madness
Thread Starter
 
F1madness's Avatar
 
Join Date: Sep 2010
Location: Staffs, UNITED KINGDOM
Posts: 895
Likes: 0
Received 0 Likes on 0 Posts
Default

Thanks Guys
Getting there now
Old 05-30-2015, 08:34 AM
  #23  
F1madness
Thread Starter
 
F1madness's Avatar
 
Join Date: Sep 2010
Location: Staffs, UNITED KINGDOM
Posts: 895
Likes: 0
Received 0 Likes on 0 Posts
Default

UPDATE
All waxed and a thin break in layup done ,came out quite nice LOL
Moulds cleaned and prepped for full layup and joined hull next week


Old 05-30-2015, 12:50 PM
  #24  
axel2
Junior Member
 
Join Date: Mar 2005
Location: Wedemark, GERMANY
Posts: 16
Likes: 0
Received 0 Likes on 0 Posts
Default

Love it
cant wait till maiden
top
Old 06-03-2015, 03:04 AM
  #25  
F1madness
Thread Starter
 
F1madness's Avatar
 
Join Date: Sep 2010
Location: Staffs, UNITED KINGDOM
Posts: 895
Likes: 0
Received 0 Likes on 0 Posts
Default

1st full layup hull out moulds .only had quick trim ,next is wet flat and polish and start prepping it for the build up


Contact Us - Archive - Advertising - Cookie Policy - Privacy Statement - Terms of Service -

Copyright © 2024 MH Sub I, LLC dba Internet Brands. All rights reserved. Use of this site indicates your consent to the Terms of Use.