


Mini Ultra Stik Conversion
 08-26-2012, 04:42 PM
#1
Senior Member
Thread Starter
Join Date: Jan 2012
Location: Danville,
GA
Posts: 224
Likes: 0
Received 0 Likes
on
0 Posts
Since my last conversion was a total bust (Maxford USA - Gee Bee "Y"), I stripped all the parts out of it and did this Mini Ultra Strik EP conversion.
Eflite Mini Ultra Stik EP
Converted using OS .25 LA
9 x 5 wood prop
4 oz tank
9 gram servos
1100-mah 6-volt NIMH battery
Spektrum receiver.
AUW came out at 32oz
Last Sunday night I ordered the plane from Horizon Hobby. It was shipped on Monday. It arrived on Wednesday. I started the conversion and finished it up Last night (Saturday). This was a very easy converision. I took it to the field and even thought is was a bit windy with decently strong gusts I maidened it anyway. I got 3 flights in total.
Take off's were way crazy. They had a good bit of right angle thrust built into the motor mount/frame area. In the future I am going to add a few washers to take out some of that right thrust in hopes of calming down ther takeoffs. Once in the air she flew great. She had plenty of power. Seemed like unlimited vertical or at least vertical until I got uncomfortable with the altitude and then throttled back and let her dive out of the sky doing a few spins on the way down. The control throws even on low rates were more then adequete. Landings were smooth and gentle. Not sure why one would want to split the aileron into quad flaps but to each their own as I will keep it with full ailerons.. The rudder was more then adequate for decent ground handeling even with the tail skid. I really saw no need to convert it into a stearable tail wheel. The main gear wheels are a bit skinny and coupled with the light weight, it really didn't like taxing on the grass. Fater "Tundra" style tires might help that.
The next few posts will be pics of the conversion.
This is a full pic of the Mini Ultra Stik Conversion.
 08-26-2012, 04:47 PM
#2
Senior Member
Thread Starter
Join Date: Jan 2012
Location: Danville,
GA
Posts: 224
Likes: 0
Received 0 Likes
on
0 Posts
I cut out the battery holder tray from the front compartment. I then reinforced the front compartment with some plywood strips and added a foam and velcro mounting system for the fuel tank. I used a 4oz flex tank. A 6oz tank was a smige big and I have yet to find a 5oz tank available for sale.
08-26-2012, 04:51 PM
#3
Senior Member
Thread Starter
Join Date: Jan 2012
Location: Danville,
GA
Posts: 224
Likes: 0
Received 0 Likes
on
0 Posts
The battery was installed about 1/2 way between the TE and the horizontal stabilizer inside the fuselage. I had to glue in place a plywood holding tray with a vecro strap in order to hold tyhe battery in place.
08-26-2012, 04:56 PM
#4
Senior Member
Thread Starter
Join Date: Jan 2012
Location: Danville,
GA
Posts: 224
Likes: 0
Received 0 Likes
on
0 Posts
Here is the final electronics placement inside the main fuselage compartment. I am not fond of the quick connect type of servo/pushrod holders but thats what came with the plane so with some blue locke-tite I used them anyway.
Anyway enjoy the pics and if I get a chance I will try and take a video at some time. This was a great conversion and would make an awesome first conversion for someone wanting to get into small glow planes. If you have any questions be sure to ask.
Anyway enjoy the pics and if I get a chance I will try and take a video at some time. This was a great conversion and would make an awesome first conversion for someone wanting to get into small glow planes. If you have any questions be sure to ask.
 09-02-2012, 04:50 AM
#6
Junior Member
Join Date: Sep 2012
Location: Aosta, ITALY
Posts: 10
Likes: 0
Received 0 Likes
on
0 Posts
Hi everyone, I'm new  I just bought a mini ultra stick (almost impossible to find here in Italy) to be converted with an Irvine 20 which is around 20 years old
I think I'm putting on a 9x4 prop, 4 oz fuel tank etc...
I'm so excited to bring back to life that engine
ckreef, have you reinforced the firewall or only the nose?
Thank you, and sorry for my not-so-good english
I just bought a mini ultra stick (almost impossible to find here in Italy) to be converted with an Irvine 20 which is around 20 years old I think I'm putting on a 9x4 prop, 4 oz fuel tank etc...
I'm so excited to bring back to life that engine
ckreef, have you reinforced the firewall or only the nose?
Thank you, and sorry for my not-so-good english
09-06-2012, 05:35 PM
#7
Senior Member
Thread Starter
Join Date: Jan 2012
Location: Danville,
GA
Posts: 224
Likes: 0
Received 0 Likes
on
0 Posts
ORIGINAL: Zampa
Hi everyone, I'm new I just bought a mini ultra stick (almost impossible to find here in Italy) to be converted with an Irvine 20 which is around 20 years old
I think I'm putting on a 9x4 prop, 4 oz fuel tank etc...
I'm so excited to bring back to life that engine
ckreef, have you reinforced the firewall or only the nose?
Thank you, and sorry for my not-so-good english
Hi everyone, I'm new
I just bought a mini ultra stick (almost impossible to find here in Italy) to be converted with an Irvine 20 which is around 20 years old I think I'm putting on a 9x4 prop, 4 oz fuel tank etc...
I'm so excited to bring back to life that engine
ckreef, have you reinforced the firewall or only the nose?
Thank you, and sorry for my not-so-good english
Choose your fuel tank carefully as there is not a lot of room in there. I used a 4 oz flex tank surrounded on the bootom and sides w/ 1/4" foam then velcro'ed in place.
The Rx battery I used was a long, thin, 6v 1100 mah NIMH and installed per the pictures.
I've flown it 5 times since my last post including 2 tanks of fuel about 2 hours ago. She is a bit nose heavy even with the battery installed way back where it is. Some time in the near future I will add a little tail weight. On a calm day (no head wind) she lands a bit hot and if you slam her down the main gear will flex a lot and you might have to flex it back into shape.
With the .25 LA she is a fast little plane with unlimited vertical, very manuverable and a blast to fly.
09-09-2012, 04:39 PM
#8
Senior Member
Thread Starter
Join Date: Jan 2012
Location: Danville,
GA
Posts: 224
Likes: 0
Received 0 Likes
on
0 Posts
Last night I added 1 oz of lead weight to the underside of the tail just between the 2 rudder mounting bolts. This greatly improved the CG and she flys better then ever. She also does a little better taxing through the grass.
Flew another 3 tanks earlier with the new weight configuration.
Flew another 3 tanks earlier with the new weight configuration.
09-15-2012, 07:06 PM
#9
Senior Member
Thread Starter
Join Date: Jan 2012
Location: Danville,
GA
Posts: 224
Likes: 0
Received 0 Likes
on
0 Posts
I taxi through grass to a rubber mat runway. It's actually an old conveyor belt off of a large newpaper printing press. The problem is the rubber mat is slick and the tail skid doesn't do well on it. Last night I installed a stearable tail wheeel. I used a Du-Bro Tailwheel Bracket (part # 375) and the associated Du-Bro Tailwheel for that bracket (can't find the part # but rubber wheel and aluminum hub). This is the bracket and tailwheel for a .40 sized plane which is a little big but..........
The front hole of the bracket is the correct length to match up with the back bolt that secures the vertical/horizontal stabilizers to the the airframe. just ream out the front bracket hole a little and install it with the rear bolt/nut. This correctly aligns the tail wheel wire with the rudder/elevator hinge line. I used a long thin screw to secure the back bracket hole through the horizontal stabiler into the air frame. This made take off, landing and taxing much more stable and manageable. Pictured below is the tail wheel assembly along with the extra weight for CG.
.................................................. .
Also I started out using a Zinger 9x5 wood prop. I then switched to a Master Airscrew 9x5 prop which I balanced as close as humanly posible. Immediatly I noticed the Master Airscrew prop vibrated and shook the airframe much more then the wood prop. After 2 flights I switched back to the wood prop.
I flew another 3 flights after work today (yea sucks I had to work on Saturday). The more I tweak this plane the more I like it. I already have metal gear servos for the rudder and elevator. I have order metal gear servos for the ailerons and will install them as soon as they arrive. She is a fast flyer (for her size) and I tend to fly the "snot" out of her so I don't want to strip the aileron servos in mid-flight causing a crash like I did with the electrostik conversion.
09-28-2012, 04:13 PM
#10
Senior Member
Thread Starter
Join Date: Jan 2012
Location: Danville,
GA
Posts: 224
Likes: 0
Received 0 Likes
on
0 Posts
After about 30 dead stik landings and a fuel line reconfiguration I think the motor is fully broken-in and running right (finally). She starts up instantly and flys for 6 min at WOT on a 4oz tank leaving me about 1/4 tank after landing.
I also replaced my aileron servos after one totally stripped in-flight. I knew something wasn't right when the riffle rolls turned into barrel rolls [X(] Now she has digital, metal gear servos on all the control surfaces (except throttle).
I love my MiniStik.
I also replaced my aileron servos after one totally stripped in-flight. I knew something wasn't right when the riffle rolls turned into barrel rolls [X(] Now she has digital, metal gear servos on all the control surfaces (except throttle).
I love my MiniStik.
 11-06-2012, 06:47 PM
#13
Senior Member
Thread Starter
Join Date: Jan 2012
Location: Danville,
GA
Posts: 224
Likes: 0
Received 0 Likes
on
0 Posts
Idid the same TE fix on the Mini that I did on my 25e conversion. I did this one 1st and the 25e fix came out better but this still gets the job done.
Here is the fix preped. You can see the soft balsa crushed by the washers/wing bolts.
Here is the fix preped. You can see the soft balsa crushed by the washers/wing bolts.
11-06-2012, 06:52 PM
#15
Senior Member
Thread Starter
Join Date: Jan 2012
Location: Danville,
GA
Posts: 224
Likes: 0
Received 0 Likes
on
0 Posts
At this point I have flown this plane easily over sixty flights. I can't wait to finish up the 25e conversion to give the Mini a rest. Here is a pic next to his big brother.
10-04-2015, 09:57 PM
#16

My Feedback: (13)
Aloha Gentlemen,
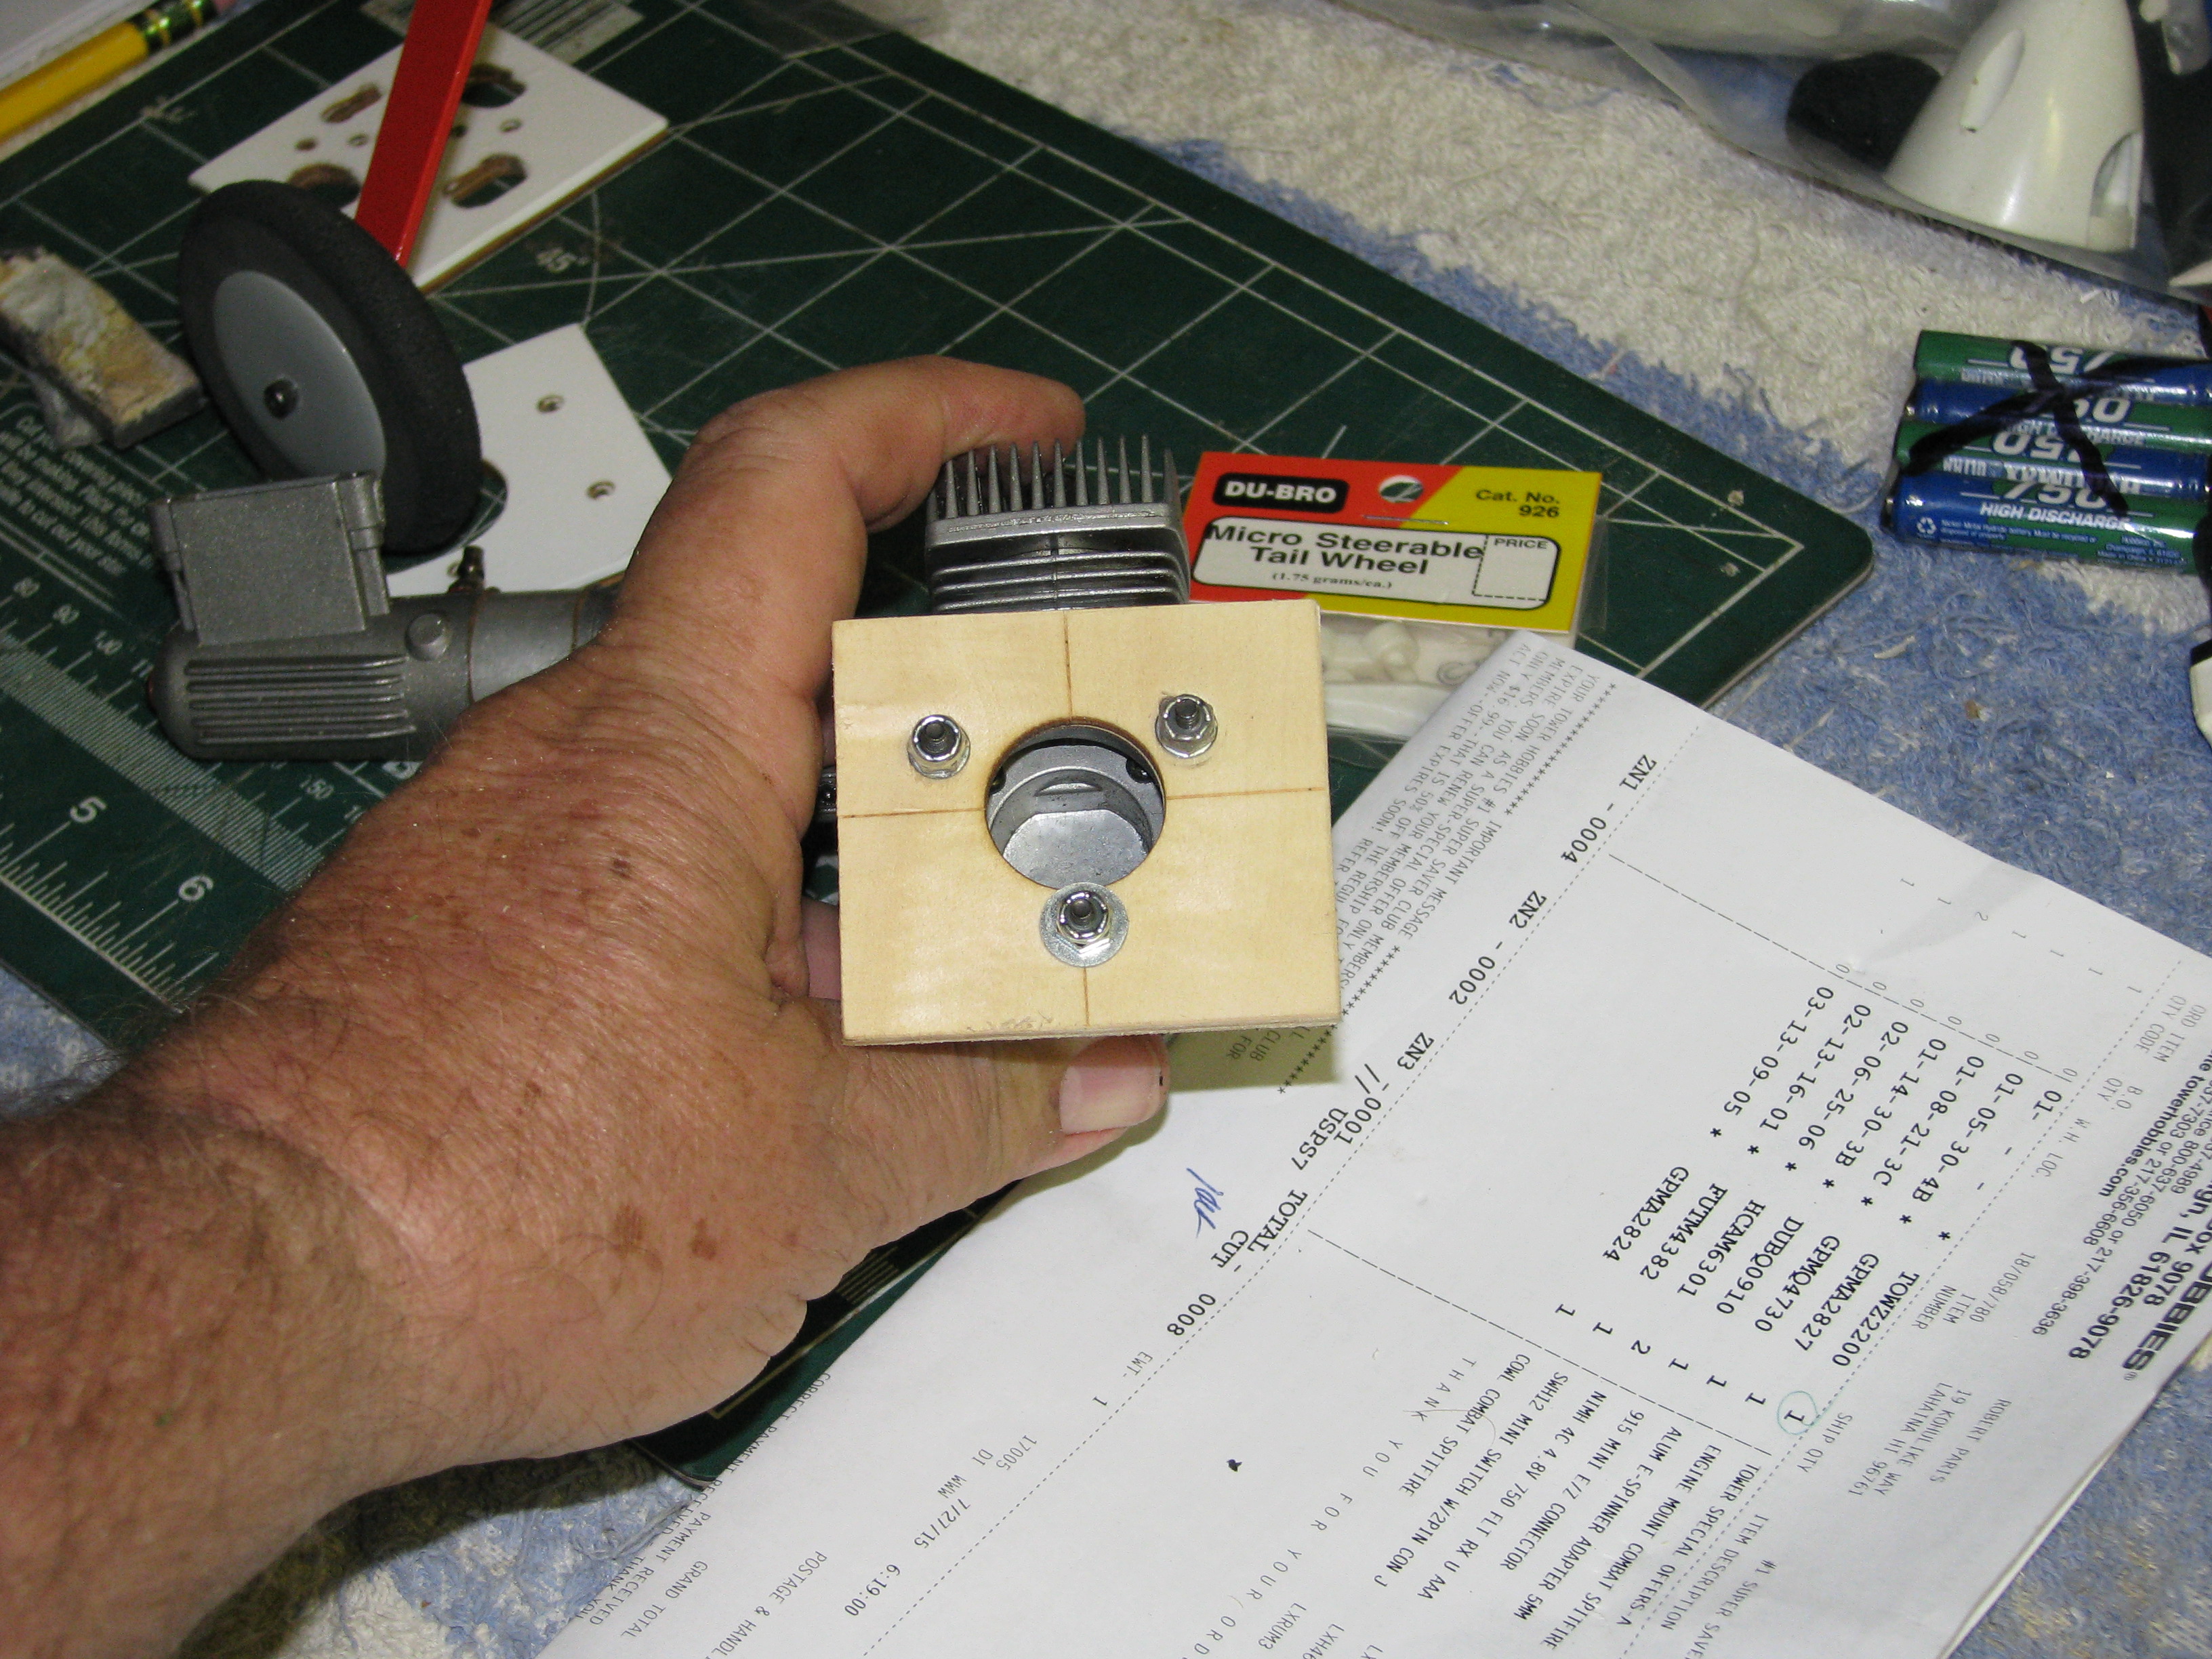
I built a Mini Ultra Strick, just like my larger version I built many years ago. I powered mine with a K&B .18 (a Clarence Lee engine), installed a 4oz. fuel tank, a DuBro mini tail steering wheel, 5 each 13 gram MGBB E-Flight servo's, a 750 mha. nickel battery and used a Master Airscrew 8x5 prop.
I mounted the battery in the rear of the airframe, exactly where the cooling hole is placed in the stock model. I made a hatch cover for the rear cooling hole, beefed up inside the fuselage where the battery hatch I made would screw into, for proper justice, and ty-rapped in the battery onto the cover plate. I knew the model was going to be nose heavy with the larger nitro engine, so it was a good place to put the battery, and help with any C.G. issues.
I placed both rudder and elevator servo's in the tail, again to help out with the balance issues and exactly like I did on my larger Ultra Stick. I made sure I had a pull for up elevator, and connected my rudder and tail wheel steering with the wires that came with the kit. These wires are light, but stiff enough for the job.
I made a fire wall out of light ply and epoxied it into place. I then used thin epoxy and coated the inside of the model from the fire wall, top the #3 bulkhead. This is to fuel proof everything and add some strength to the forward part of the airframe.
I used the stock wheels and landing gear, and with the steerable tail wheel, able to taxi out and take off in low wind conditions. The model balances perfect with out any lead and pleased with the outcome of the build. The model flies great in winds and is very maneuverable. In high winds (over 10 mph) I just point the model into the wind and hit the throttle. It will be airborne in a couple of feet and has enough power to go vertical with a vengeance. It flies great, just like any other stick type model, but I was pleasantly surprised at just how well it handled higher winds. I've flown the model in winds in excess of 15 mph, in gusts too and its not only manageable, but very predictable. Its a sweet heart to fly, and very happy with this little model. It is the smallest model I have in m inventory and a real kick in the tail feathers to fly.
If any of you guys want a simple easy to fly small very maneuverable model, don't hesitate to buy this model. Its about as inexpensive as you can get in the hobby and pure fun to fly.
Soft Landings Always,
Bobby of Maui
Last edited by Bob Paris; 10-04-2015 at 10:05 PM.

