


AMR Trainer 26 - (my) official build thread

 01-16-2015, 06:49 AM
#253
Senior Member
Thread Starter

You may have noticed a lack of activity in this thread recently - we are preparing for vacation (our first cruise) so the build will likely pick up again in early February.
02-06-2015, 07:19 AM
#254
Senior Member
Thread Starter
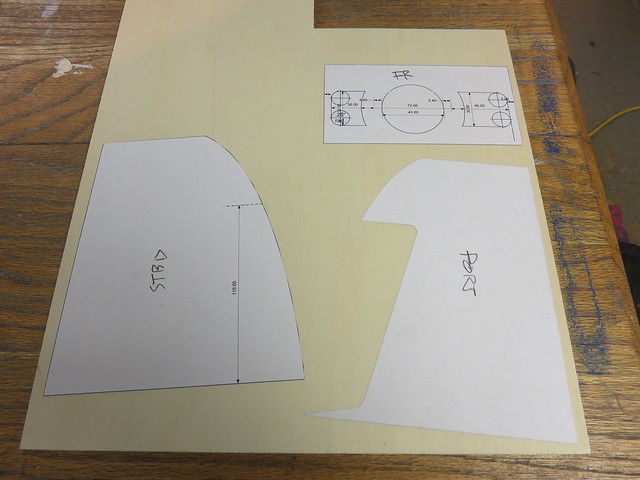
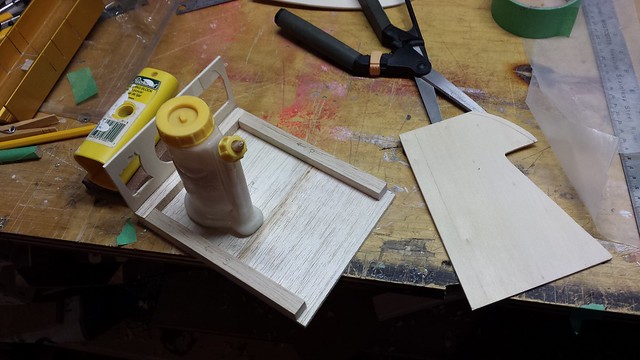
Back in the shop last night for the first time in a month. After test fitting the dummy cowl I'm ready to start cutting the real thing. That meant printing and cutting out the most recent version of the templates.
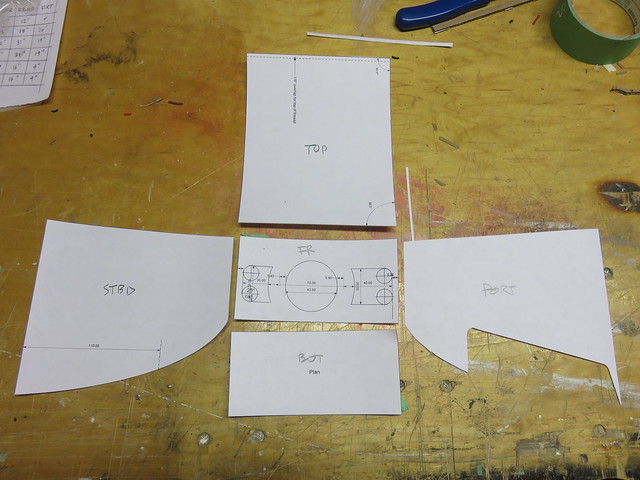
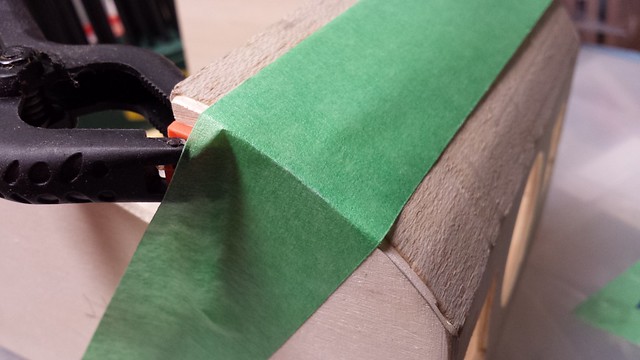
The top and bottom will be 1/8" balsa while the sides and front will be 1/8" ply. I had to edge-glue the balsa. Tape on top.
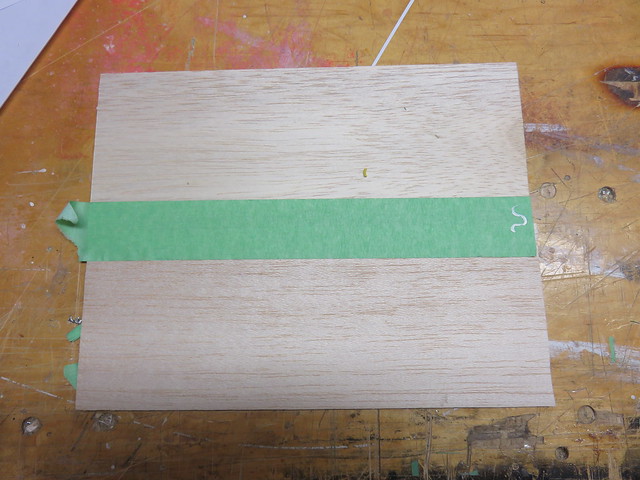
Glue applied.
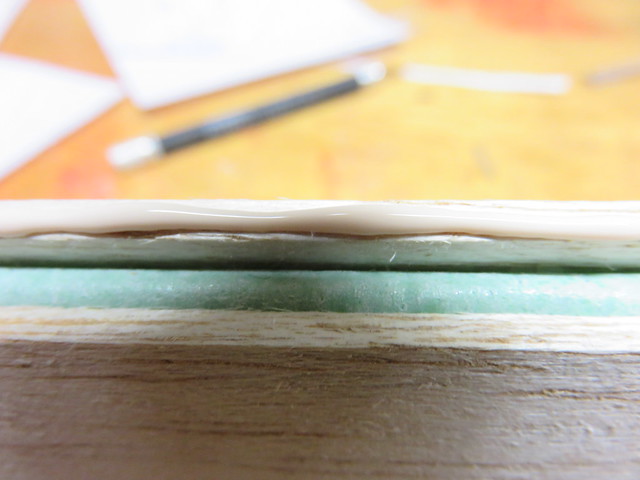
Weighted for curing (no drilling is involved but the table had free space). In this way the weight of the outboard sheet provides the clamping action.
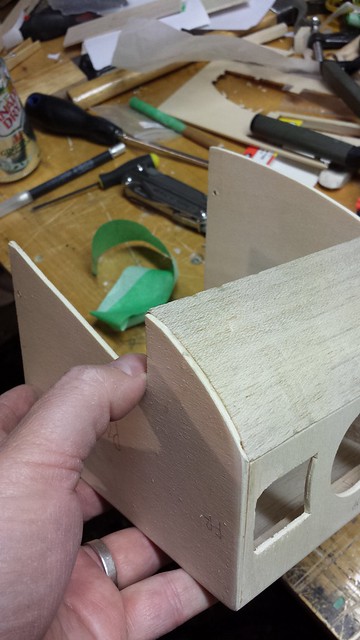
Here are the side and front pieces adhered to the plywood.
Next session I'll adhere the top and bottom to the balsa and start cutting.
The top and bottom will be 1/8" balsa while the sides and front will be 1/8" ply. I had to edge-glue the balsa. Tape on top.
Glue applied.
Weighted for curing (no drilling is involved but the table had free space). In this way the weight of the outboard sheet provides the clamping action.
Here are the side and front pieces adhered to the plywood.
Next session I'll adhere the top and bottom to the balsa and start cutting.
02-08-2015, 11:02 AM
#256
Senior Member
Thread Starter
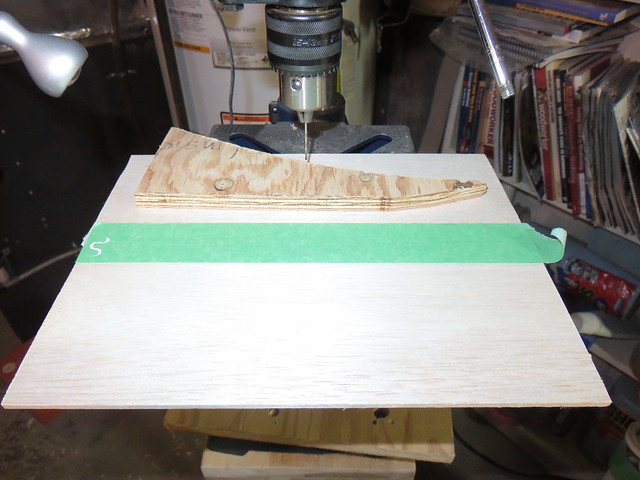
Cooling holes started.
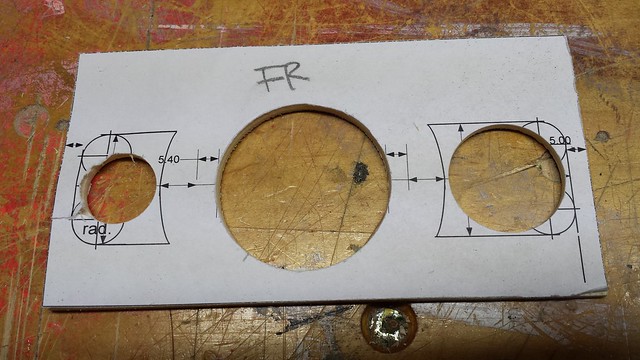
I finished the cooling holes with files and a sanding block. All pieces ready for assembly.

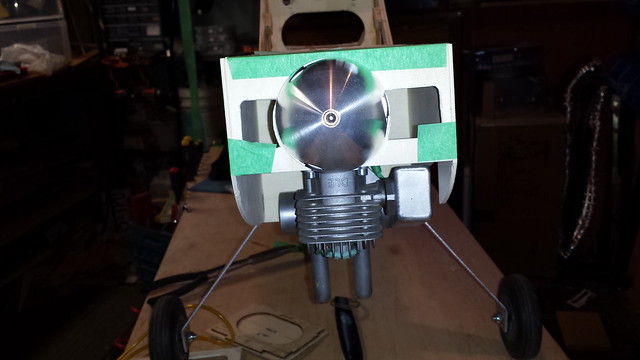
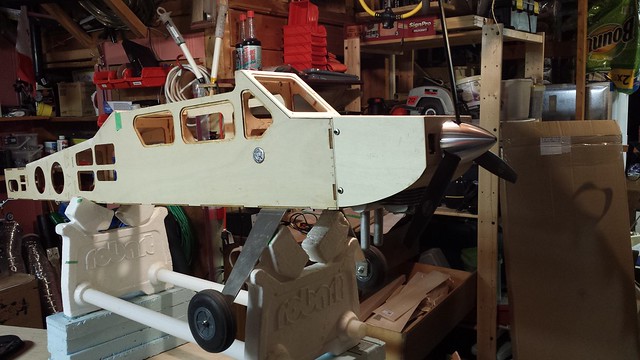
Taped together for a test fit. The prob hub is a little high...
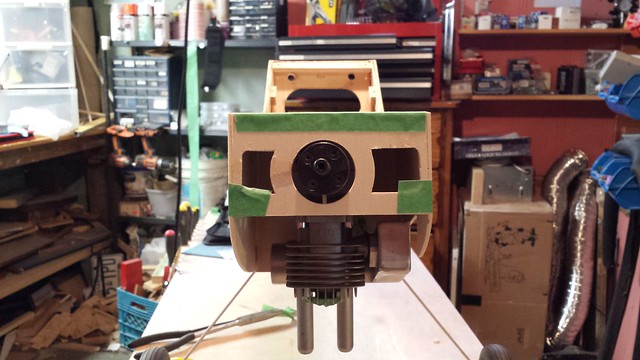
... but with the spinner on you can't tell. By my book, we have TLAR!
I finished the cooling holes with files and a sanding block. All pieces ready for assembly.
Taped together for a test fit. The prob hub is a little high...
... but with the spinner on you can't tell. By my book, we have TLAR!
02-08-2015, 11:14 AM
#257
Senior Member
Thread Starter
Assembly in progress. Balsa blocks are on the underside of the top piece. They provide reinforcement and will also provide form for when I round the corners after assembly.
Where clamps don't fit, weight often works!
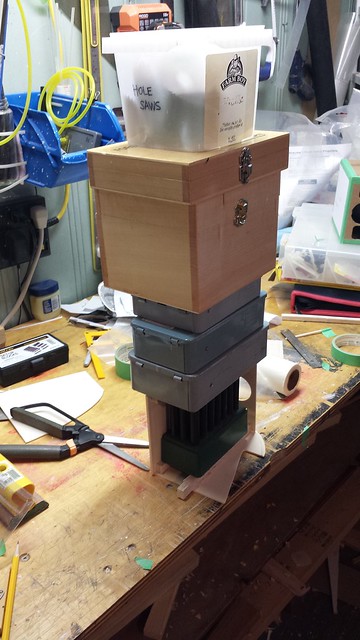
The weight is to hold the top and its attached block to the freshly glued port side piece. Looks like it's doing a fine job. The block on the right is there temporarily to level the stack of weight.
Getting there.
Where clamps don't fit, weight often works!
The weight is to hold the top and its attached block to the freshly glued port side piece. Looks like it's doing a fine job. The block on the right is there temporarily to level the stack of weight.
Getting there.
02-11-2015, 07:08 AM
#258
Senior Member
Thread Starter
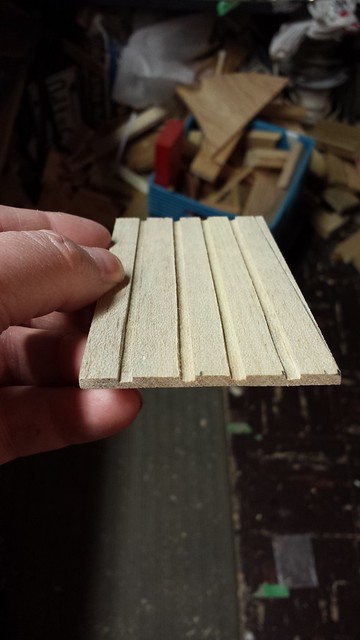
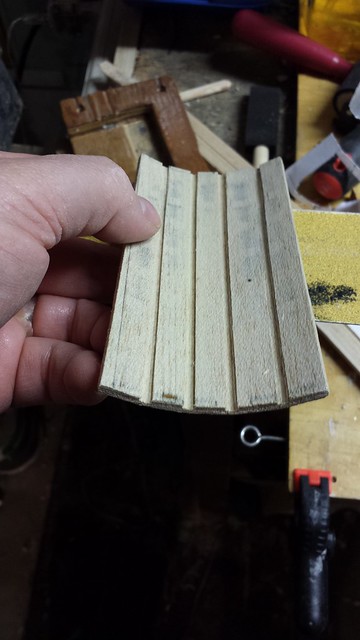
The bottom piece is also 1/8" balsa and will have to be convinced if it is to be bent to the required shape.
I started by using the mitre saw to make half-depth kerfs on the bottom.
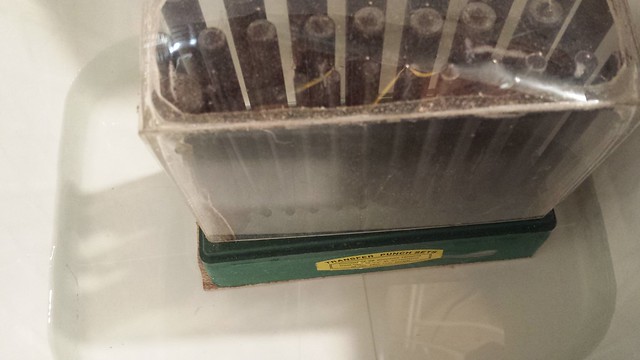
A gentle test bend showed a little bit of flex, but it would have to be soaked to go all the way. Here it is held under by my transfer punch set.
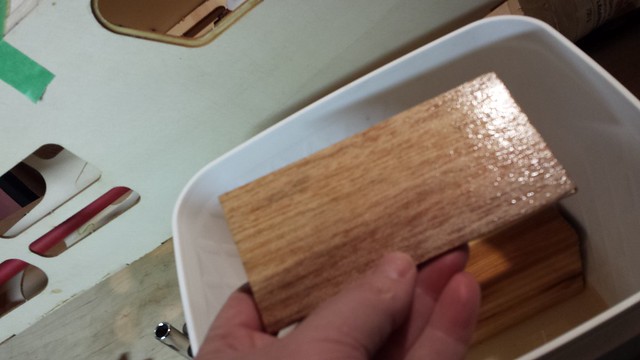
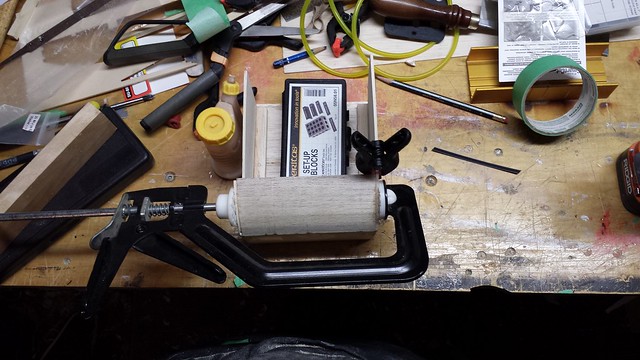
Well soaked after a couple of hours.
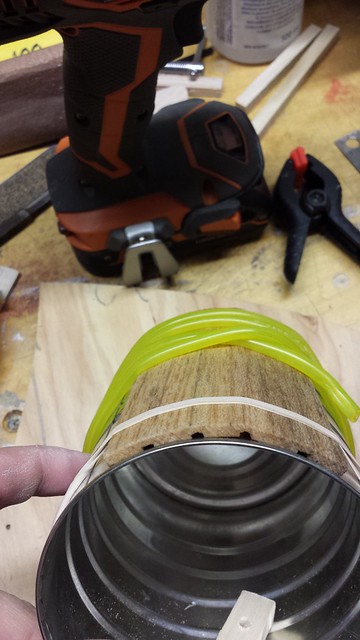
Clamped around a can for a bit of a curve. It started to split a bit near the centre of one end; hoping I can still work with it when it's dry. If not I'll try a longer soak next time.
I started by using the mitre saw to make half-depth kerfs on the bottom.
A gentle test bend showed a little bit of flex, but it would have to be soaked to go all the way. Here it is held under by my transfer punch set.
Well soaked after a couple of hours.
Clamped around a can for a bit of a curve. It started to split a bit near the centre of one end; hoping I can still work with it when it's dry. If not I'll try a longer soak next time.
02-11-2015, 07:19 AM
#259
Senior Member
Thread Starter
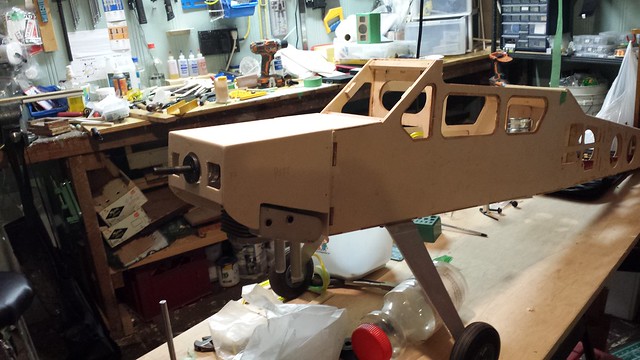
While the bottom piece was in the water I turned my attention to the rest of the completed assembly. I have decided to mount it with four bolts through 3/8" hardwood mounting rails that will be glued to and protrude 1/2" from the firewall. The rails will be backed with blind nuts - all hardware 4-40.
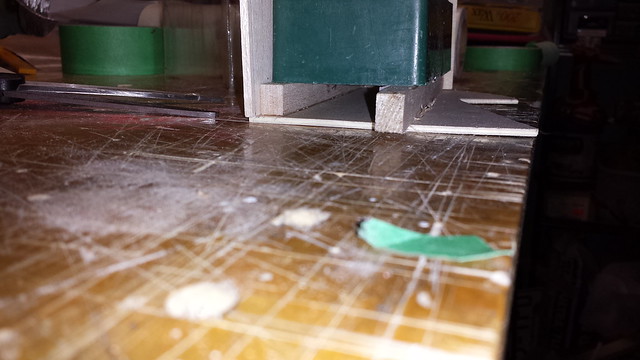
Marks for the rails on the firewall, port...
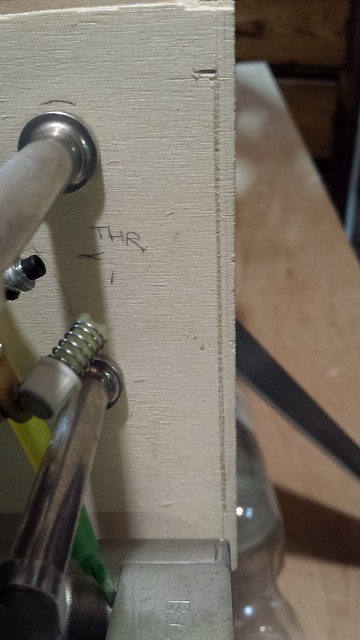
... and starboard.
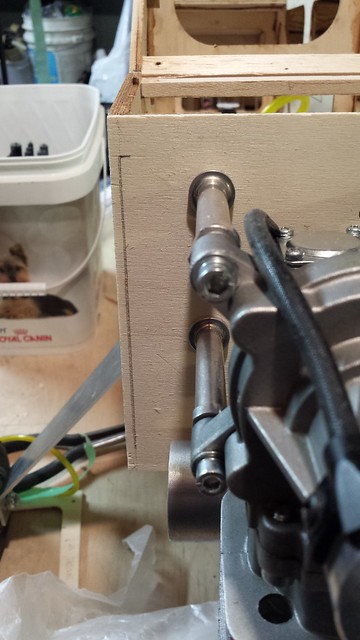
Port and starboard rails mounted.
Rails shimmed for best fit - shims glued and clamped.

Marks for the rails on the firewall, port...
... and starboard.
Port and starboard rails mounted.
Rails shimmed for best fit - shims glued and clamped.
02-11-2015, 07:31 AM
#260
Senior Member
Thread Starter
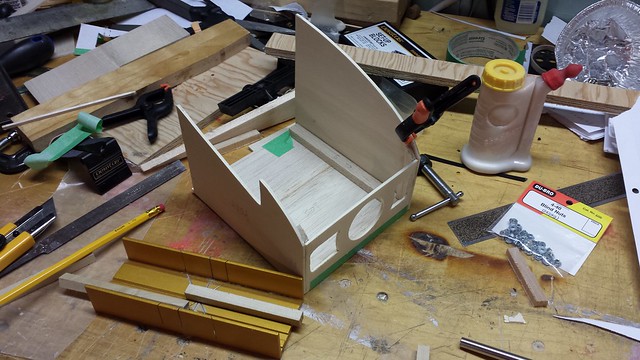
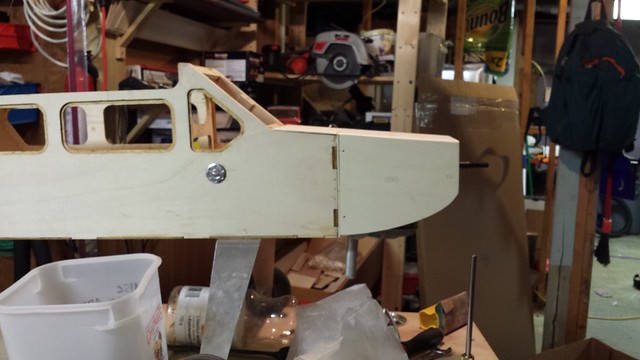
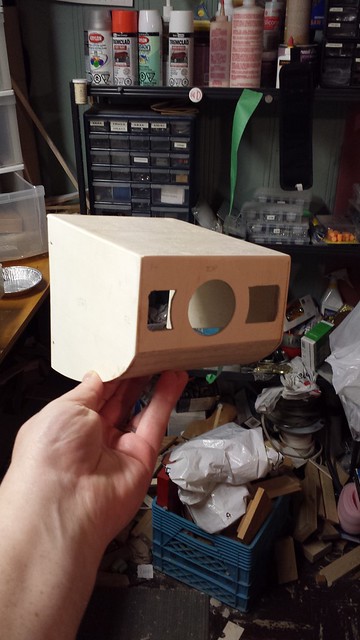
Test fit of cowl (sans bottom piece) with shims. Something must have been off with the last test fit because the prop hub is just about perfectly centred now. The mounting rails and shims are visible through the cooling inlets and below the cowl front, especially to starboard.
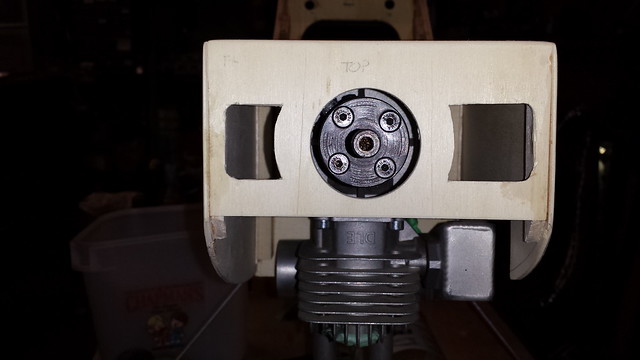
3/4 views, port...
... and starboard.
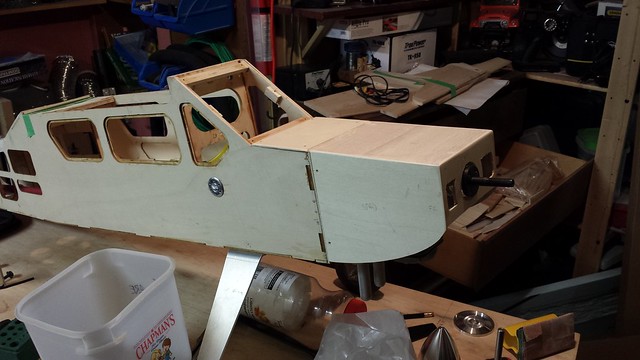
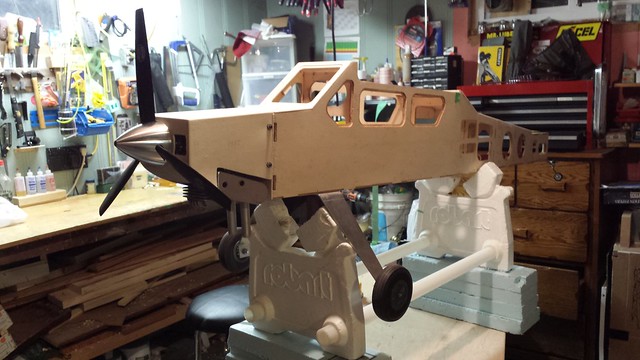
Profile from starboard. Looks good to me! If you look closely the mounting holes are visible - next step is to mark and drill the rails to 5/32" for the blind nuts.
3/4 views, port...
... and starboard.
Profile from starboard. Looks good to me! If you look closely the mounting holes are visible - next step is to mark and drill the rails to 5/32" for the blind nuts.
02-11-2015, 01:03 PM
#261

My Feedback: (13)
Hay Grosbeak,
Nice work my friend...really nice work. I can't wait to see your finish work on the covering and also your first flight information. I've been following your build and love your work...its clean and the attention to detail is sweet.
Soft Landings Always,
Bobby of Maui
Nice work my friend...really nice work. I can't wait to see your finish work on the covering and also your first flight information. I've been following your build and love your work...its clean and the attention to detail is sweet.
Soft Landings Always,
Bobby of Maui
02-11-2015, 01:20 PM
#262

Grosbeak
For what its worth, when I need to bend balsa parts I soak them in ammonia water, 50/50 solution.......the ammonia helps relax the balsa on a cellular level (so I have heard) - I do know it makes for easier forming of balsa parts. I also use ammonia water when I need to bend spruce or basswood longerons......I soak the hardwood a lot longer than balsa........then clamp to a form and allow to dry overnight.
I am waiting of the flight report, too!
Cheers,
Art
02-12-2015, 06:33 AM
#263
Senior Member
Thread Starter
Hay Grosbeak,
Nice work my friend...really nice work. I can't wait to see your finish work on the covering and also your first flight information. I've been following your build and love your work...its clean and the attention to detail is sweet.
Soft Landings Always,
Bobby of Maui
Nice work my friend...really nice work. I can't wait to see your finish work on the covering and also your first flight information. I've been following your build and love your work...its clean and the attention to detail is sweet.
Soft Landings Always,
Bobby of Maui
Grosbeak
For what its worth, when I need to bend balsa parts I soak them in ammonia water, 50/50 solution.......the ammonia helps relax the balsa on a cellular level (so I have heard) - I do know it makes for easier forming of balsa parts. I also use ammonia water when I need to bend spruce or basswood longerons......I soak the hardwood a lot longer than balsa........then clamp to a form and allow to dry overnight.
I am waiting of the flight report, too!
Cheers,
Art
For what its worth, when I need to bend balsa parts I soak them in ammonia water, 50/50 solution.......the ammonia helps relax the balsa on a cellular level (so I have heard) - I do know it makes for easier forming of balsa parts. I also use ammonia water when I need to bend spruce or basswood longerons......I soak the hardwood a lot longer than balsa........then clamp to a form and allow to dry overnight.
I am waiting of the flight report, too!
Cheers,
Art
How long do you soak a balsa part in your solution?
Would I have been able to bend 1/8" balsa without grooving the back as I did?
Thanks!
02-12-2015, 06:34 AM
#264
Senior Member
Thread Starter
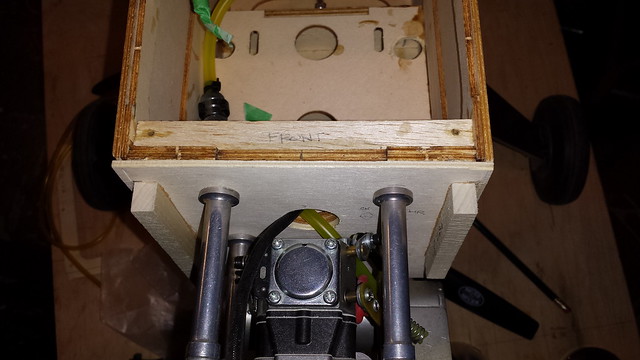
5/32" holes drilled. Here I'm seating the blind nuts with a view from the front...
... and the back.
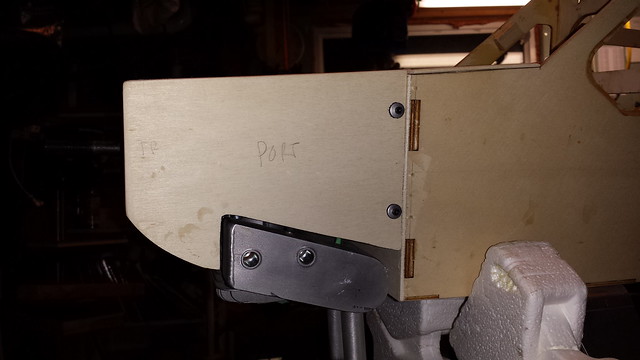
And here's the cowl bolted on for the first time. Starboard...
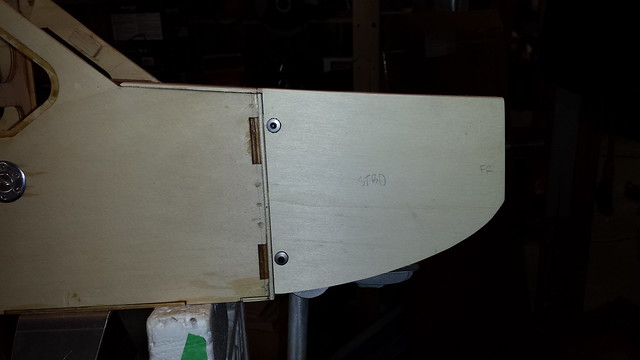
... and port.
... and the back.
And here's the cowl bolted on for the first time. Starboard...
... and port.
02-12-2015, 06:38 AM
#265
Senior Member
Thread Starter
Here's my bent bottom cowl piece after spending a night clamped around a form.
Glued and clamped to the starboard side.
Starboard side cured.
Glued and clamped to port. That's where I left things last night.
Glued and clamped to the starboard side.
Starboard side cured.
Glued and clamped to port. That's where I left things last night.
02-12-2015, 04:15 PM
#266
Nice tip, Art - a couple of questions.
How long do you soak a balsa part in your solution? I think your approach on "how long" is correct - if a while isn't long enough, soak a while longer. Sometimes a piece of wood just doesn't lend itself to bending. When that happens try a softer piece or one which has better grain orientation.
Would I have been able to bend 1/8" balsa without grooving the back as I did? Probably, but remember it isn't a perfect science. It helps to bend slowly, with even pressure.
Thanks!
02-13-2015, 04:17 PM
#268
Senior Member
Thread Starter
Clamps are off and the cowl is done (except for the finish filling and sanding).
Bolted in place for a test fit with prop and spinner on.
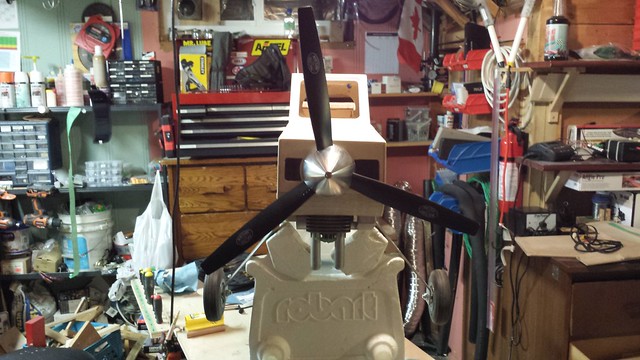
Bolted in place for a test fit with prop and spinner on.
02-14-2015, 07:00 PM
#269
Senior Member
Thread Starter
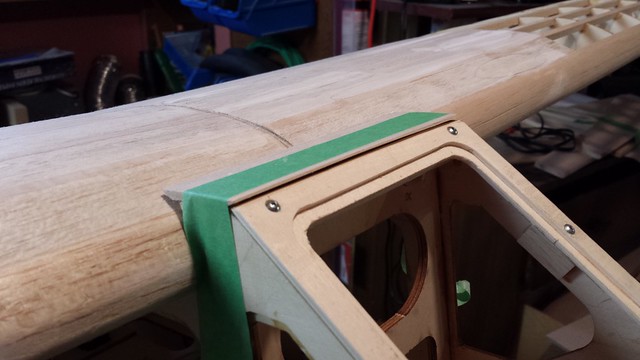
As designed, there is a huge gap between the top of the forward wing saddle and the leading edge of the wing.
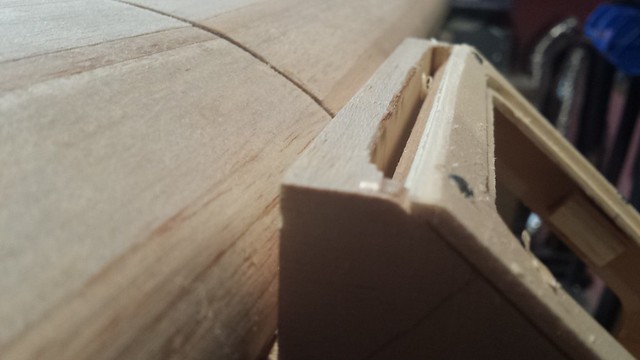
I wanted a fairing to fill that gap - here it is.
Glued and clamped.
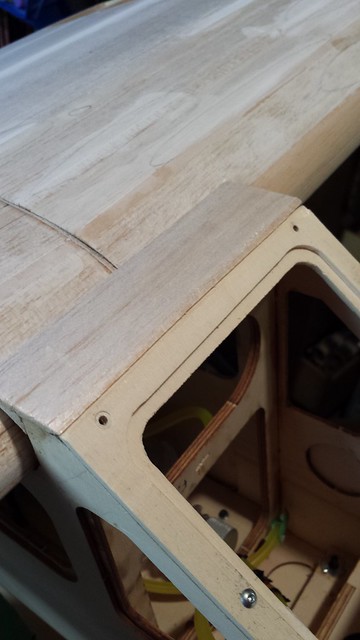
Cured with leading edge shaped.
I wanted a fairing to fill that gap - here it is.
Glued and clamped.
Cured with leading edge shaped.
02-14-2015, 07:17 PM
#270
Senior Member
Thread Starter
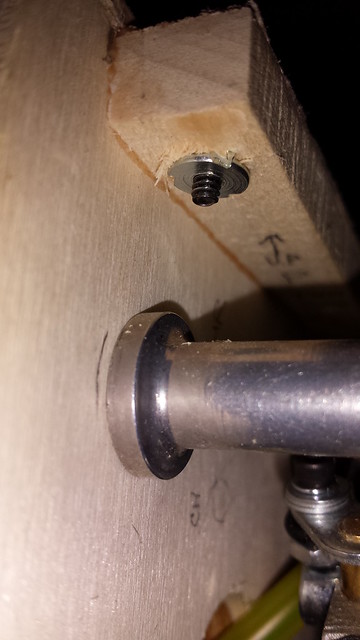
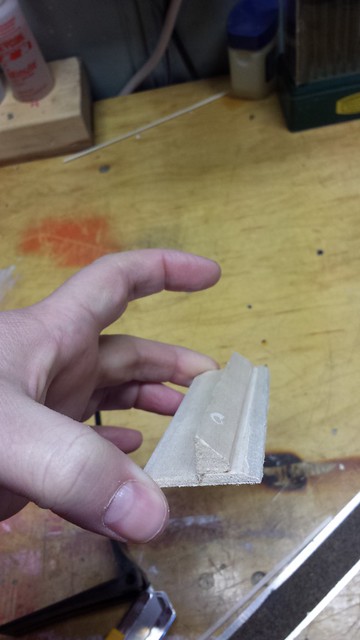
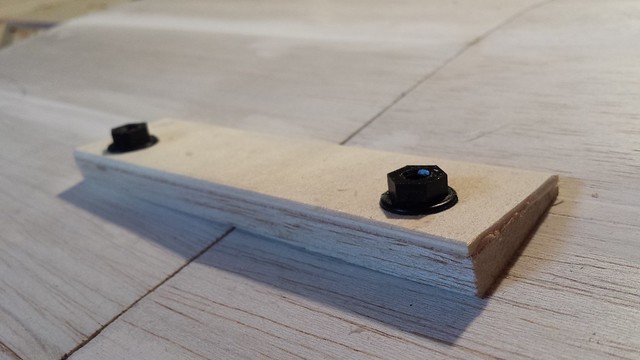
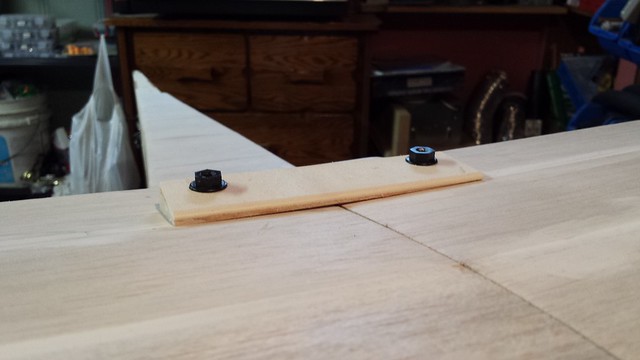
The top of the wing slopes down from the main spar to the trailing edge and therefore is not 90� from the wing bolts, which causes the heads of the nylon bolts to bend and weaken. I needed a plate to with about a 10� slope to level the bolt heads. It's mostly balsa with an 1/8" ply skin.
I also wanted to replace a small corner of the windshield frame that I had sanded a little too zealously. First step was to remove the oversanded section - here it's been notched out.
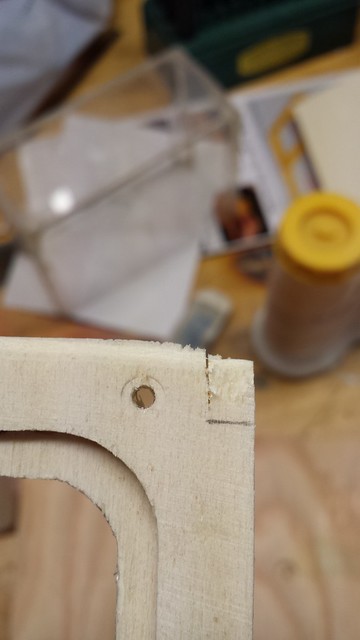
And here's the new section in place, sanded to fit with the frame reinstalled.
I'm running out of things to do before I start the covering, but I would really like to have a plan in place for those window frames before I get started. I will probably start with the empennage parts and move on to the wing while I mull it over.
I also wanted to replace a small corner of the windshield frame that I had sanded a little too zealously. First step was to remove the oversanded section - here it's been notched out.
And here's the new section in place, sanded to fit with the frame reinstalled.
I'm running out of things to do before I start the covering, but I would really like to have a plan in place for those window frames before I get started. I will probably start with the empennage parts and move on to the wing while I mull it over.
02-15-2015, 06:16 AM
#271
02-15-2015, 06:34 AM
#272
I had a Robin Hood 80 a long time ago and before covering I ironed on clear Monocote over the window openings. Then I cut out the window openings in the covering for the fuselage and ironed it on, placing the cut outs over the window areas. Just a thought........
02-17-2015, 07:16 AM
#273
Senior Member
Thread Starter
If the windows don't want to stay in the frames for any reason I may well do that... thanks for the tip, Art.
02-17-2015, 07:16 AM
#274
Senior Member
Thread Starter
In other news, I had also heard that Monokote doesn't stick to ply very well.
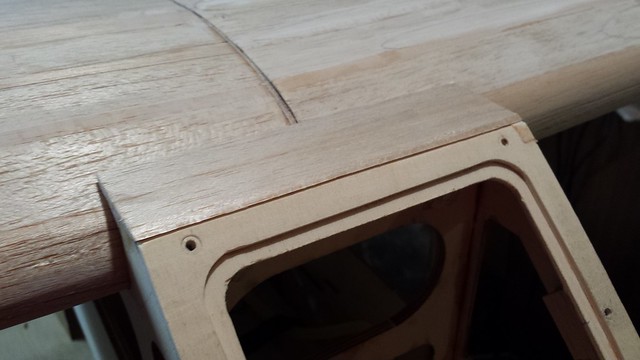
I picked up some SIG Stix-It from my LHS and from some scraps I mocked up a test section of the window frame - 1/8" ply over 1/8" ply with a 5mm overhang.

I brushed a very thin layer of Stix-It above and into the overlap.

A test piece of Monokote...

...ironed into the gap at about 240�F. The rest of the Monokote didn't want to stick to the ply at 240� so I turned the iron up to about 275� and it stuck fairly well.

I was very pleased with how easy it was to iron the covering into the overlap, even with my big iron. I plan to use the Stix-It wherever there is a seam or the Monokote has to fold over an edge.
I picked up some SIG Stix-It from my LHS and from some scraps I mocked up a test section of the window frame - 1/8" ply over 1/8" ply with a 5mm overhang.
I brushed a very thin layer of Stix-It above and into the overlap.
A test piece of Monokote...
...ironed into the gap at about 240�F. The rest of the Monokote didn't want to stick to the ply at 240� so I turned the iron up to about 275� and it stuck fairly well.
I was very pleased with how easy it was to iron the covering into the overlap, even with my big iron. I plan to use the Stix-It wherever there is a seam or the Monokote has to fold over an edge.
02-19-2015, 09:04 AM
#275
Senior Member
Thread Starter
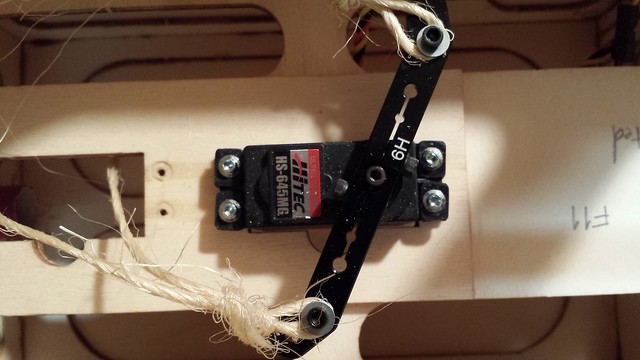
There are still a few things left to do before covering starts. Spent a little time last night setting up the pull-pull rudder - if I need to make exit holes in the fuse I want to do it now.
I started by bolting some twine to each end of the rudder servo arm (a little low-tech but it gets the job done).
Next, I mocked up the horns at the rudder end through 3/8" balsa (same as the rudder) and set the spread of the horns to match the servo arm.

I crossed the lines and checked the fit at the rear. Looks like I will be needing to make a hole (more to come).
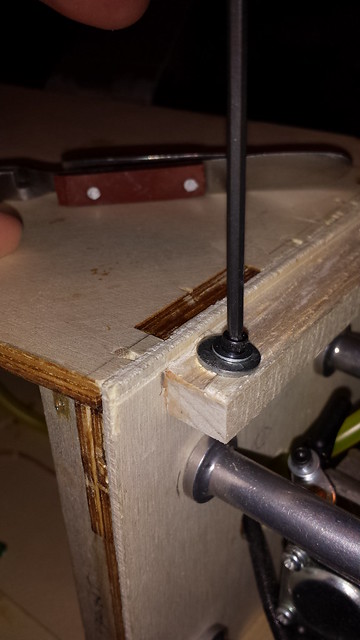
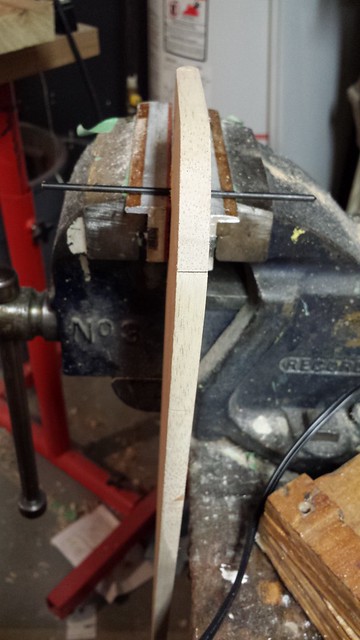
I've already installed a hardwood centre in the solid balsa rudder for the rudder-to-tailwheel steering assembly. Now it's time to install one for the control horns.
I put a transfer punch through the dowel piece and glued it into the hole I cut in the rudder, then rested the punch ends on the soft jaws in my vice and ever-so-gently clamped it in place. This arrangement will keep the dowel hole perpendicular to the rudder face.

I started by bolting some twine to each end of the rudder servo arm (a little low-tech but it gets the job done).
Next, I mocked up the horns at the rudder end through 3/8" balsa (same as the rudder) and set the spread of the horns to match the servo arm.
I crossed the lines and checked the fit at the rear. Looks like I will be needing to make a hole (more to come).
I've already installed a hardwood centre in the solid balsa rudder for the rudder-to-tailwheel steering assembly. Now it's time to install one for the control horns.
I put a transfer punch through the dowel piece and glued it into the hole I cut in the rudder, then rested the punch ends on the soft jaws in my vice and ever-so-gently clamped it in place. This arrangement will keep the dowel hole perpendicular to the rudder face.