


SIG Somethin Extra Build - 2nd Plane
 12-31-2014, 03:50 PM
#26

My Feedback: (53)
Join Date: Jul 2003
Location: milwaukee, WI
Posts: 941
Likes: 0
Received 0 Likes
on
0 Posts
Hey Bob,
Great Job on the Sig ( even though you have gone to the dark side(electric). Keep it up and you will have it done for the next club meeting!
Don't forget about the News Year day Fun Fly!
Great Job on the Sig ( even though you have gone to the dark side(electric). Keep it up and you will have it done for the next club meeting!
Don't forget about the News Year day Fun Fly!
 01-01-2015, 03:34 AM
#27

I have to agree on the LG/prop clearance issue. You may be able to slightly rebend the gear to get more height though. I had to do that on my electrified Sig Skybolt with no issues. Looking good.
01-02-2015, 08:12 AM
#28
My Feedback: (84)

Join Date: Jan 2003
Location: New Berlin,
WI
Posts: 456
Likes: 0
Received 0 Likes
on
0 Posts
Hi Bob
Nice work and it looks like you are just about done.
Just a thought on the surfaces, since you talked about doing 3D with this SSE check into doing a double bevel on the surfaces, this will help keep the hinge gap tight and still keep the surfaces from binding at full deflection.
Nice work and it looks like you are just about done.
Just a thought on the surfaces, since you talked about doing 3D with this SSE check into doing a double bevel on the surfaces, this will help keep the hinge gap tight and still keep the surfaces from binding at full deflection.
01-02-2015, 09:03 AM
#29

My Feedback: (10)
FYI, having built several SSE's, I've had great success using this landing gear, and always upgrade to it now. Use the Dubro axles in conjunction, and you have awesome prop clearance, and a much stronger LG setup.
http://www3.towerhobbies.com/cgi-bin/wti0001p?&I=LXNM65
Even better, if you attach this gear with nylon bolts, if you ever have a landing mishap the bolts will fail before tearing out the belly. Just replace the bolts and you're all fixed.
http://www3.towerhobbies.com/cgi-bin/wti0001p?&I=LXNM65
Even better, if you attach this gear with nylon bolts, if you ever have a landing mishap the bolts will fail before tearing out the belly. Just replace the bolts and you're all fixed.
 01-21-2015, 01:47 PM
#32
Thread Starter
Join Date: Sep 2014
Location: Scottsdale, AZ
Posts: 169
Likes: 0
Received 0 Likes
on
0 Posts
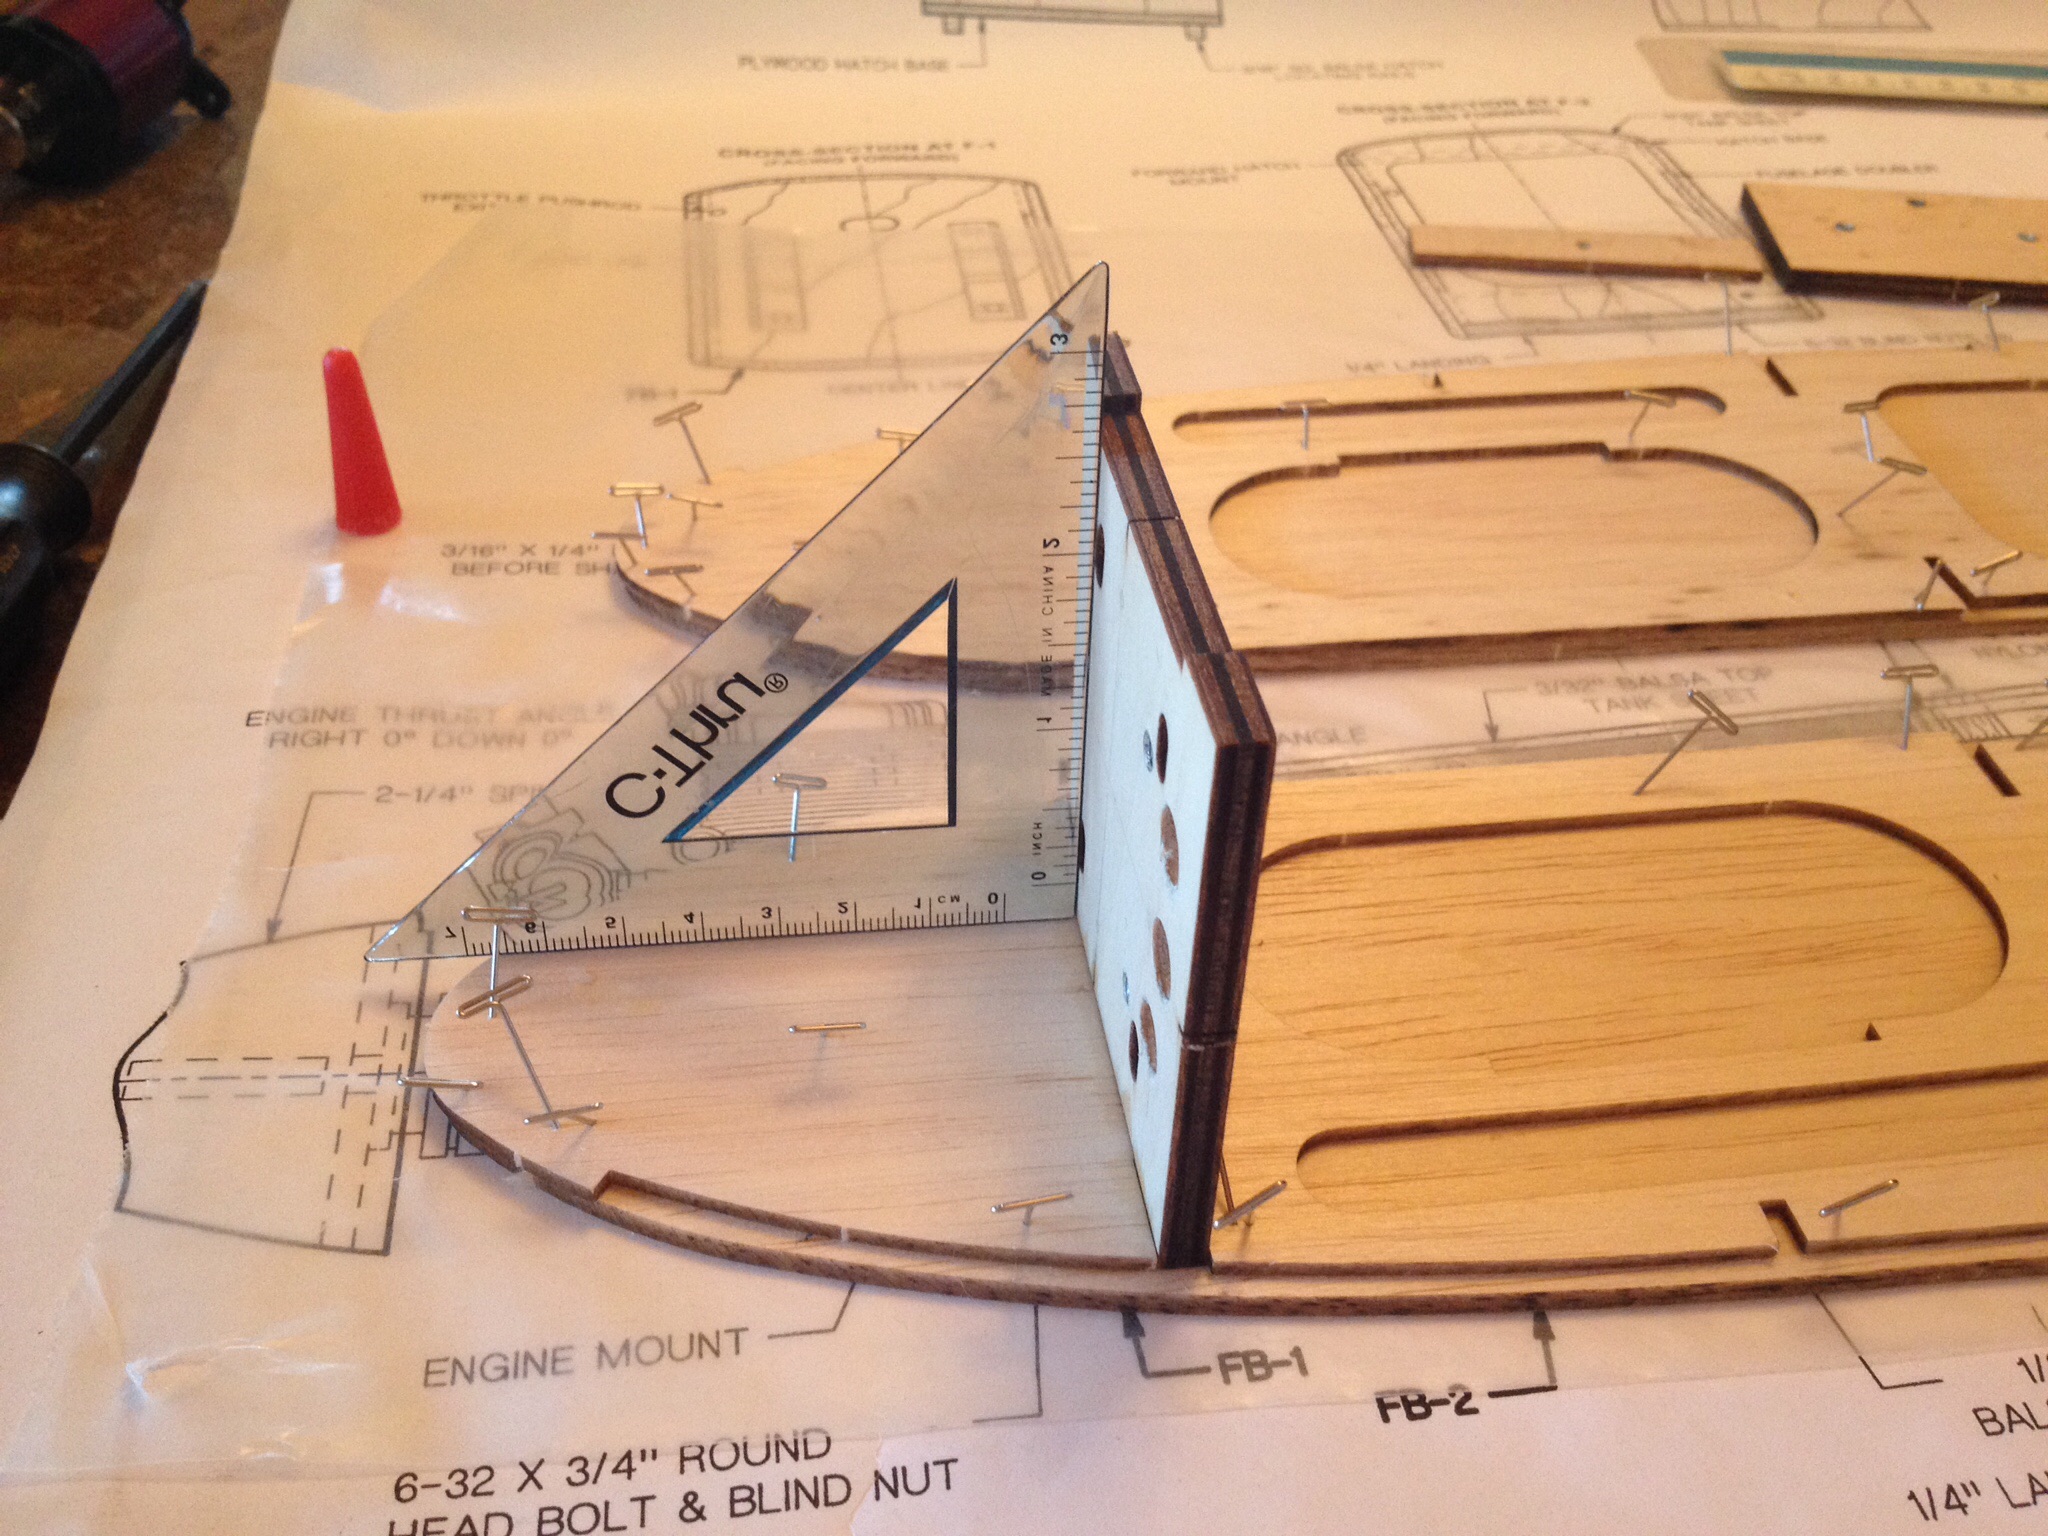
I'm finally back to the build. With the motor in hand, I have a decision to make for the mount. Going back to post #21, there are some great ideas for adding airflow that I plan to use. I will also use the aluminum stand offs.
i started by looking at the placement of the motor

As yel914 advised, I'll be going with a big spinner to help reduce the amount of taper I will need on the FG cowl.
Now I need to decide the orientation of the mounting plate. I plan to ask my Thursday morning breakfast group of experts for their advice.


Either way, there will be lots of airflow, especially with the holes I will add along the bottom. Opinions?
i started by looking at the placement of the motor
As yel914 advised, I'll be going with a big spinner to help reduce the amount of taper I will need on the FG cowl.
Now I need to decide the orientation of the mounting plate. I plan to ask my Thursday morning breakfast group of experts for their advice.
Either way, there will be lots of airflow, especially with the holes I will add along the bottom. Opinions?
01-21-2015, 02:45 PM
#34
Thread Starter
Join Date: Sep 2014
Location: Scottsdale, AZ
Posts: 169
Likes: 0
Received 0 Likes
on
0 Posts
Hey, better than 6 guys with 8 opinions.
Meanwhile, I started the fuselage sides. You need to be quick at spreading the aliphatic glue around nice and thin and get the pieces together as the balsa likes to bow. Wish I had just used weights vs. pins but the result will be the same (I hope).


Looks like I made the sides "left" and "right" rather than 2 of the same. Need to get the firewall ready for the next step.
The most nerve racking step will be cutting off the nose sides for building the cowl and making the fiberglass mold. More research needed on that topic.
Meanwhile, I started the fuselage sides. You need to be quick at spreading the aliphatic glue around nice and thin and get the pieces together as the balsa likes to bow. Wish I had just used weights vs. pins but the result will be the same (I hope).
Looks like I made the sides "left" and "right" rather than 2 of the same. Need to get the firewall ready for the next step.
The most nerve racking step will be cutting off the nose sides for building the cowl and making the fiberglass mold. More research needed on that topic.
 01-22-2015, 07:58 AM
#38
That's all looking great Bob. I'm envious of that motor and cant wait to see what it does for this plane. When I glue up sides like the SSE has, I spread the yellow glue on one of the doubler but leave the ends unglued for the last 1/2". I put the pieces together and hit the ends with thin CA glue to lock the pieces in position so they don't slide around. I then weight them for a couple of hours until dry. But, that's just how I do it. Don't worry about cutting off those cheeks. Just jump in. Plenty of help here to get a cowl on this plane.
Rick
Rick
01-22-2015, 02:49 PM
#39
My Feedback: (84)
Join Date: Jan 2003
Location: New Berlin,
WI
Posts: 456
Likes: 0
Received 0 Likes
on
0 Posts
Hi Bob
I need to finish your answer on what prop, APS E is ok but I do like the wood type. The other was to is to try the wood E props, Xoar, Falcon and from Precision Aerobatic RC has a very nice VOX prop, http://www.precisionaerobatics.com/category.php?cid=70
I need to finish your answer on what prop, APS E is ok but I do like the wood type. The other was to is to try the wood E props, Xoar, Falcon and from Precision Aerobatic RC has a very nice VOX prop, http://www.precisionaerobatics.com/category.php?cid=70
01-22-2015, 09:54 PM
#40
Thread Starter
Join Date: Sep 2014
Location: Scottsdale, AZ
Posts: 169
Likes: 0
Received 0 Likes
on
0 Posts
A short update and some decisions that need to be made. First, the update.
I went with the first version of the mount. I added some lower openings for air flow.

I checked the the alignment and glued in the first 3 formers.

And after checking the fit, the opposite side was glued on, complete with soup cans


And now the decisions. I added in in the triangle stock, but realized if I want to have a slow taper starting before the firewall, I will need to add in some triangle stock on the long sides to be able to round the top to the sides. Tom Pierce covered this on his 4Star build. I am not sure about hatching the battery compartment - may go with a slide in tray like SIG does for the ARF. I like the idea of a bottom hatch for the ESC, but again not sure how that will affect the shaping leading to a cowl.


I also need to fix a servo related problem. I used a Futaba servo for setting the screw holes. Those fit real nice in the cut outs. But I am actually using Hitec, which have a smaller body. So I will need to correct the spacing for the (screw) holes.
I went with the first version of the mount. I added some lower openings for air flow.
I checked the the alignment and glued in the first 3 formers.
And after checking the fit, the opposite side was glued on, complete with soup cans
And now the decisions. I added in in the triangle stock, but realized if I want to have a slow taper starting before the firewall, I will need to add in some triangle stock on the long sides to be able to round the top to the sides. Tom Pierce covered this on his 4Star build. I am not sure about hatching the battery compartment - may go with a slide in tray like SIG does for the ARF. I like the idea of a bottom hatch for the ESC, but again not sure how that will affect the shaping leading to a cowl.
I also need to fix a servo related problem. I used a Futaba servo for setting the screw holes. Those fit real nice in the cut outs. But I am actually using Hitec, which have a smaller body. So I will need to correct the spacing for the (screw) holes.
01-25-2015, 12:46 PM
#41
Thread Starter
Join Date: Sep 2014
Location: Scottsdale, AZ
Posts: 169
Likes: 0
Received 0 Likes
on
0 Posts
Time for an update. I corrected my servo spacing. I used the blanks and reinforced with a strip of ply below. Now the 5245's fit. I kept the E/R servos positioned to the center of the fuse so I could use the metal arm with plenty of room.
The triangle stock is installed. I'm planning to make the battery that slide in. The battery compartment bottom piece will need to be made from my own material. The kit parts (FB-1 & FB-2) join at the firewall and I need it to be flush with the face of the firewall.

Also installed an extra dowel & blind nut for the rear tall wheel mount. I used the Sullivan red/yellow tubes and began to work on the exit finish.


When I checked the wing fit, I found the aluminum tube to be just a bit to long. I must have cut the wing tubes a hair too short, even though I built right over the plans!?! So I trimmed the tubes back and checked the wing fit.
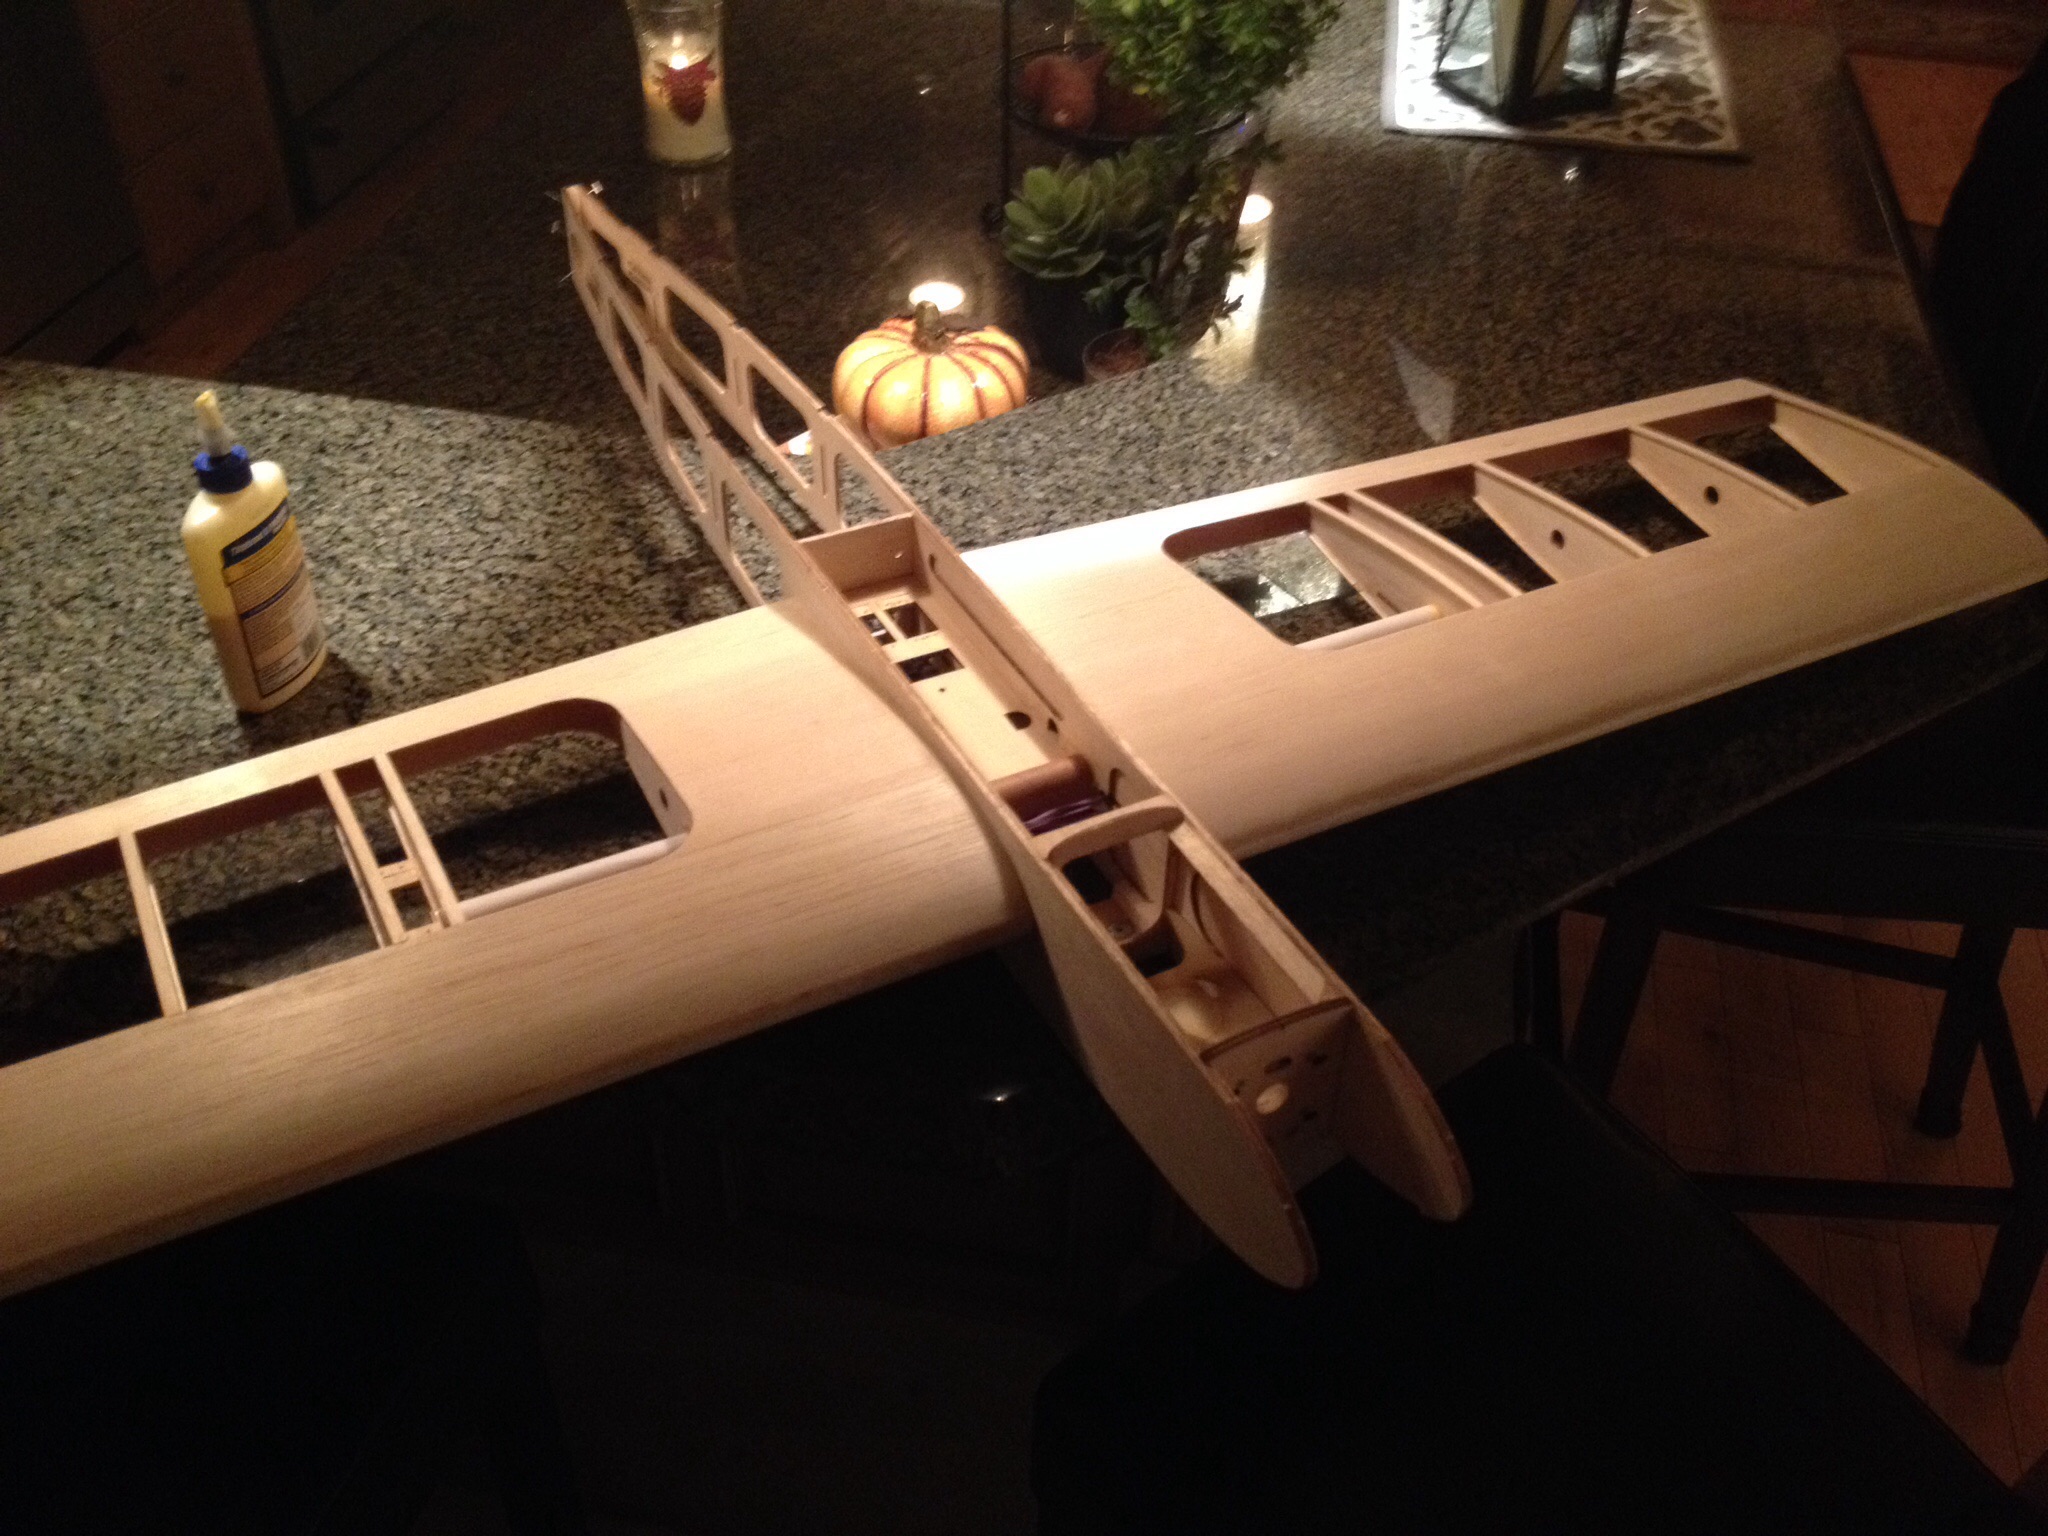
Almost looks lke like a plane. One thing I noticed, when installing the J hooks in the wings, the hole is not laser cut in both ply ribs at the root end. Not sure if this is a miss or I missed something, but if you screw in the J hooks, they won't cut into the second rib. Instead, it lifts the outer rib.
I started working on the fit of the stab and fin, checking how my one off parts work. I'm looking forward now to cutting off the cheeks but I first need to built up the turtle deck. More to come...
The triangle stock is installed. I'm planning to make the battery that slide in. The battery compartment bottom piece will need to be made from my own material. The kit parts (FB-1 & FB-2) join at the firewall and I need it to be flush with the face of the firewall.
Also installed an extra dowel & blind nut for the rear tall wheel mount. I used the Sullivan red/yellow tubes and began to work on the exit finish.
When I checked the wing fit, I found the aluminum tube to be just a bit to long. I must have cut the wing tubes a hair too short, even though I built right over the plans!?! So I trimmed the tubes back and checked the wing fit.
Almost looks lke like a plane. One thing I noticed, when installing the J hooks in the wings, the hole is not laser cut in both ply ribs at the root end. Not sure if this is a miss or I missed something, but if you screw in the J hooks, they won't cut into the second rib. Instead, it lifts the outer rib.
I started working on the fit of the stab and fin, checking how my one off parts work. I'm looking forward now to cutting off the cheeks but I first need to built up the turtle deck. More to come...
01-25-2015, 05:52 PM
#42
Definitely looking like a plane now. It's probably too late now for you, but I installed blind nuts in the wing to screw the J hooks into. There's something about the connection screwing into wood that left me uneasy, but I tend to overbuild. I also connected the wings together with a spring. I know the instructions have you use a rubber band but that's kind of a hassle. Others have used zip ties. Whatever you like best. You're having fun on this build, right?
Rick
Rick
01-27-2015, 04:37 PM
#44
Thread Starter
Join Date: Sep 2014
Location: Scottsdale, AZ
Posts: 169
Likes: 0
Received 0 Likes
on
0 Posts
Rick, it's never too late, but I plan to hit the threads with CA to toughen them up. I could always open up the sheeting to add a nut. Not sure why SIG doesn't go this route. Was thinking that the concern might be more severe damage, but that's kinda like focus on surviving a crash rather than insuring the plane stays together.
The last day was spent sheeting, both the tank area and the turtle deck. You'll find two of the formers do not need adjusting for sheeting. Just the front and back former. (One correction - the two middle formers need the notchs set deep for stringers to be flush)


 C
C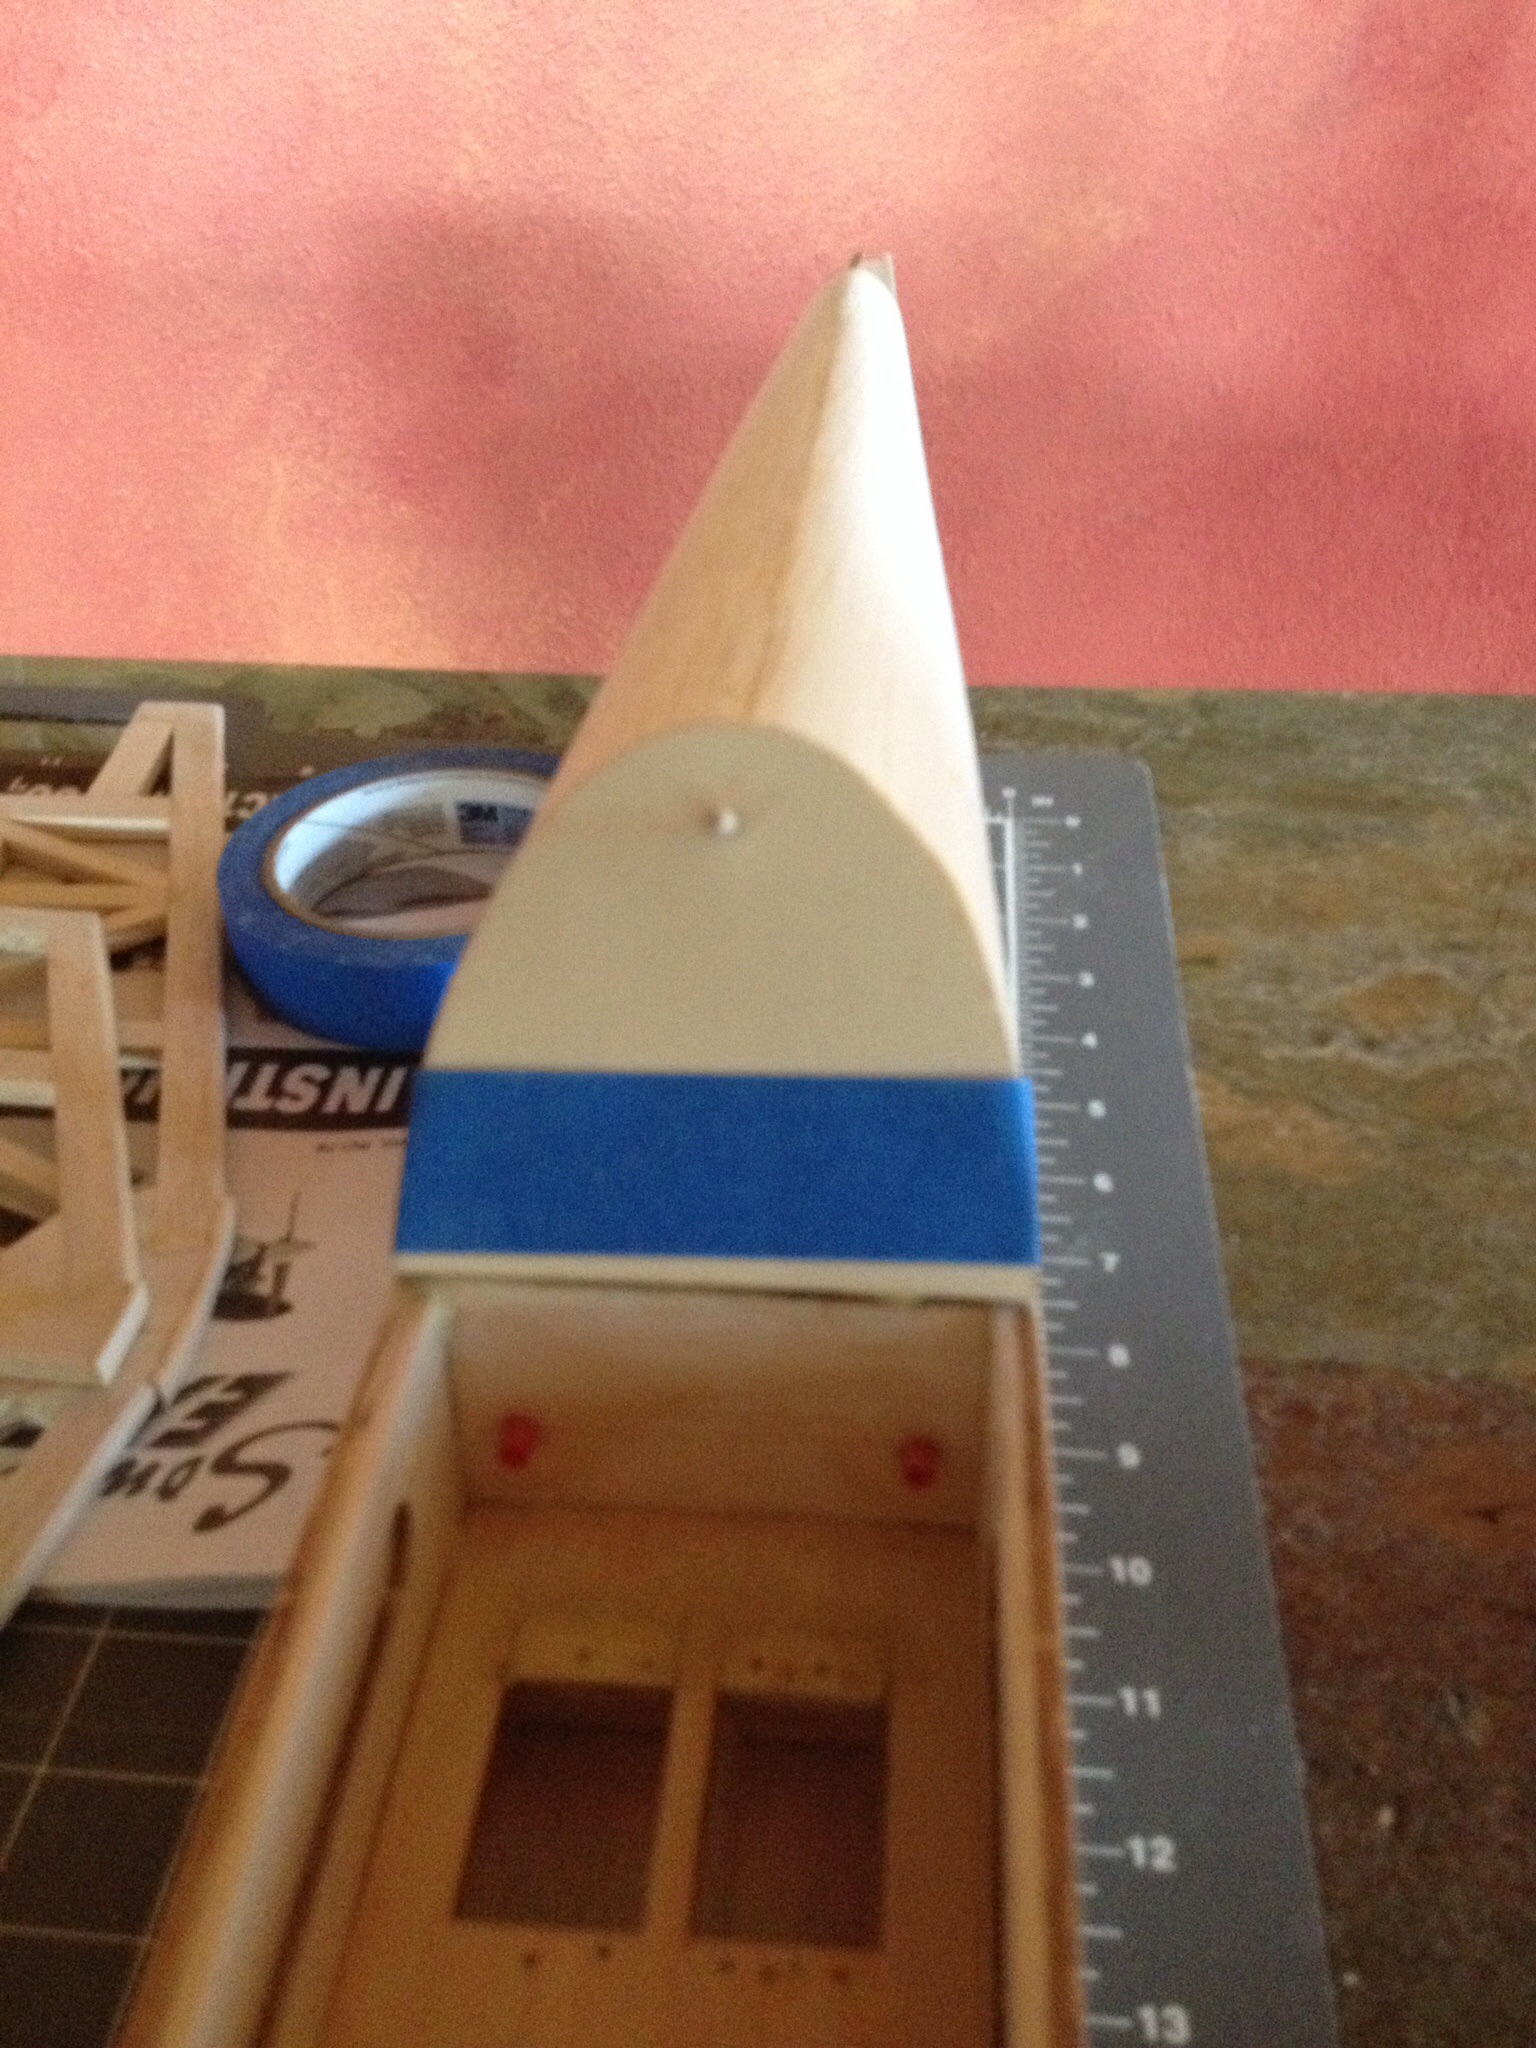
I would be interested in how others do this kind of sharp rounded sheeting. I got the balsa soaking wet and waited a while. Still found it hard to avoid a crack even after doing this in multiple steps of soaking, bending to a form, drying and repeat.
The last day was spent sheeting, both the tank area and the turtle deck. You'll find two of the formers do not need adjusting for sheeting. Just the front and back former. (One correction - the two middle formers need the notchs set deep for stringers to be flush)
I would be interested in how others do this kind of sharp rounded sheeting. I got the balsa soaking wet and waited a while. Still found it hard to avoid a crack even after doing this in multiple steps of soaking, bending to a form, drying and repeat.
Last edited by BatteryBob; 01-27-2015 at 07:58 PM.
01-27-2015, 05:03 PM
#45
Thread Starter
Join Date: Sep 2014
Location: Scottsdale, AZ
Posts: 169
Likes: 0
Received 0 Likes
on
0 Posts
I built up around the breaking lines in the tank area. I'm anticipating sanding close to the inside joint lines to make the pointed cowl (like Rick did). I'm planning to use a 2.5" spinner to lessen the slope but felt this would be good insurance. Adding the sheeting on top is not easy (for me). The bends on the side are sharp.

I contoured this to the front and back formers.

Then after lots of soaking, apply the sheeting

I need to finish the hatch next, and then on to the rear fillets. Next week is some travel so my guess is that the cheeks will come off in February.
The hatch so far (word of advice that has been given before on RCU - be careful with aliphatic glue, it likes to warp things that are not held firmly):

I contoured this to the front and back formers.
Then after lots of soaking, apply the sheeting
I need to finish the hatch next, and then on to the rear fillets. Next week is some travel so my guess is that the cheeks will come off in February.
The hatch so far (word of advice that has been given before on RCU - be careful with aliphatic glue, it likes to warp things that are not held firmly):
Last edited by BatteryBob; 01-28-2015 at 09:47 AM.
01-29-2015, 06:34 PM
#46
Thread Starter
Join Date: Sep 2014
Location: Scottsdale, AZ
Posts: 169
Likes: 0
Received 0 Likes
on
0 Posts
Quick update. Cheeks are gone. Waiting for a 2.5" spinner to begin the cowl. All the LHS's were low on spinners.

The14 x 7 prop looks huge. I plan to get the kit LG on with the Sullivan TW to get an idea of the size LG I need from TnT.
Any suggestions for applying the interior hatch color? The instructions say use a light art paper. How is this wrapped around the sides of the (angled) hatch back?
The14 x 7 prop looks huge. I plan to get the kit LG on with the Sullivan TW to get an idea of the size LG I need from TnT.
Any suggestions for applying the interior hatch color? The instructions say use a light art paper. How is this wrapped around the sides of the (angled) hatch back?
 01-30-2015, 04:48 AM
#48
Looks good Bob. No cheeks, now you're committed! I used paper on my cockpit floor with no issues, but after I glued the canopy in place, I ran silver pin striping around the perimeter of the canopy to cover the seam. This also covered the visible edge of the paper. Paint should work well also.
Rick
Rick
01-30-2015, 02:15 PM
#49
Thread Starter
Join Date: Sep 2014
Location: Scottsdale, AZ
Posts: 169
Likes: 0
Received 0 Likes
on
0 Posts
Thanks guys. I picked up some flat black. I plan to spray the area first, and then depending on the results, apply paper to the floor and back. That way I know the edges will be covered.
Hopefully I'll have a couple spinners in the mail when I get back from a quick trip next week. It will be time to start cutting foam.
Oh, and I still have no idea for a color scheme.
Hopefully I'll have a couple spinners in the mail when I get back from a quick trip next week. It will be time to start cutting foam.
Oh, and I still have no idea for a color scheme.
01-31-2015, 12:32 PM
#50
Thread Starter
Join Date: Sep 2014
Location: Scottsdale, AZ
Posts: 169
Likes: 0
Received 0 Likes
on
0 Posts
Rick -
I measured the fuse width at the FW. Got 3.25". I recall you saying to go with a spinner about .5" smaller. Do you think 2.75" is much of a difference vs. 2.5"?
I have a 2.75" and took a couple pics. Understand it may be tough to tell from these.


I assume I will need to add a washer on the standoffs on one side to counter thrust. I currently have one washer between each standoff and the FW to prevent them from digging in.
I measured the fuse width at the FW. Got 3.25". I recall you saying to go with a spinner about .5" smaller. Do you think 2.75" is much of a difference vs. 2.5"?
I have a 2.75" and took a couple pics. Understand it may be tough to tell from these.
I assume I will need to add a washer on the standoffs on one side to counter thrust. I currently have one washer between each standoff and the FW to prevent them from digging in.
Last edited by BatteryBob; 01-31-2015 at 12:39 PM.