


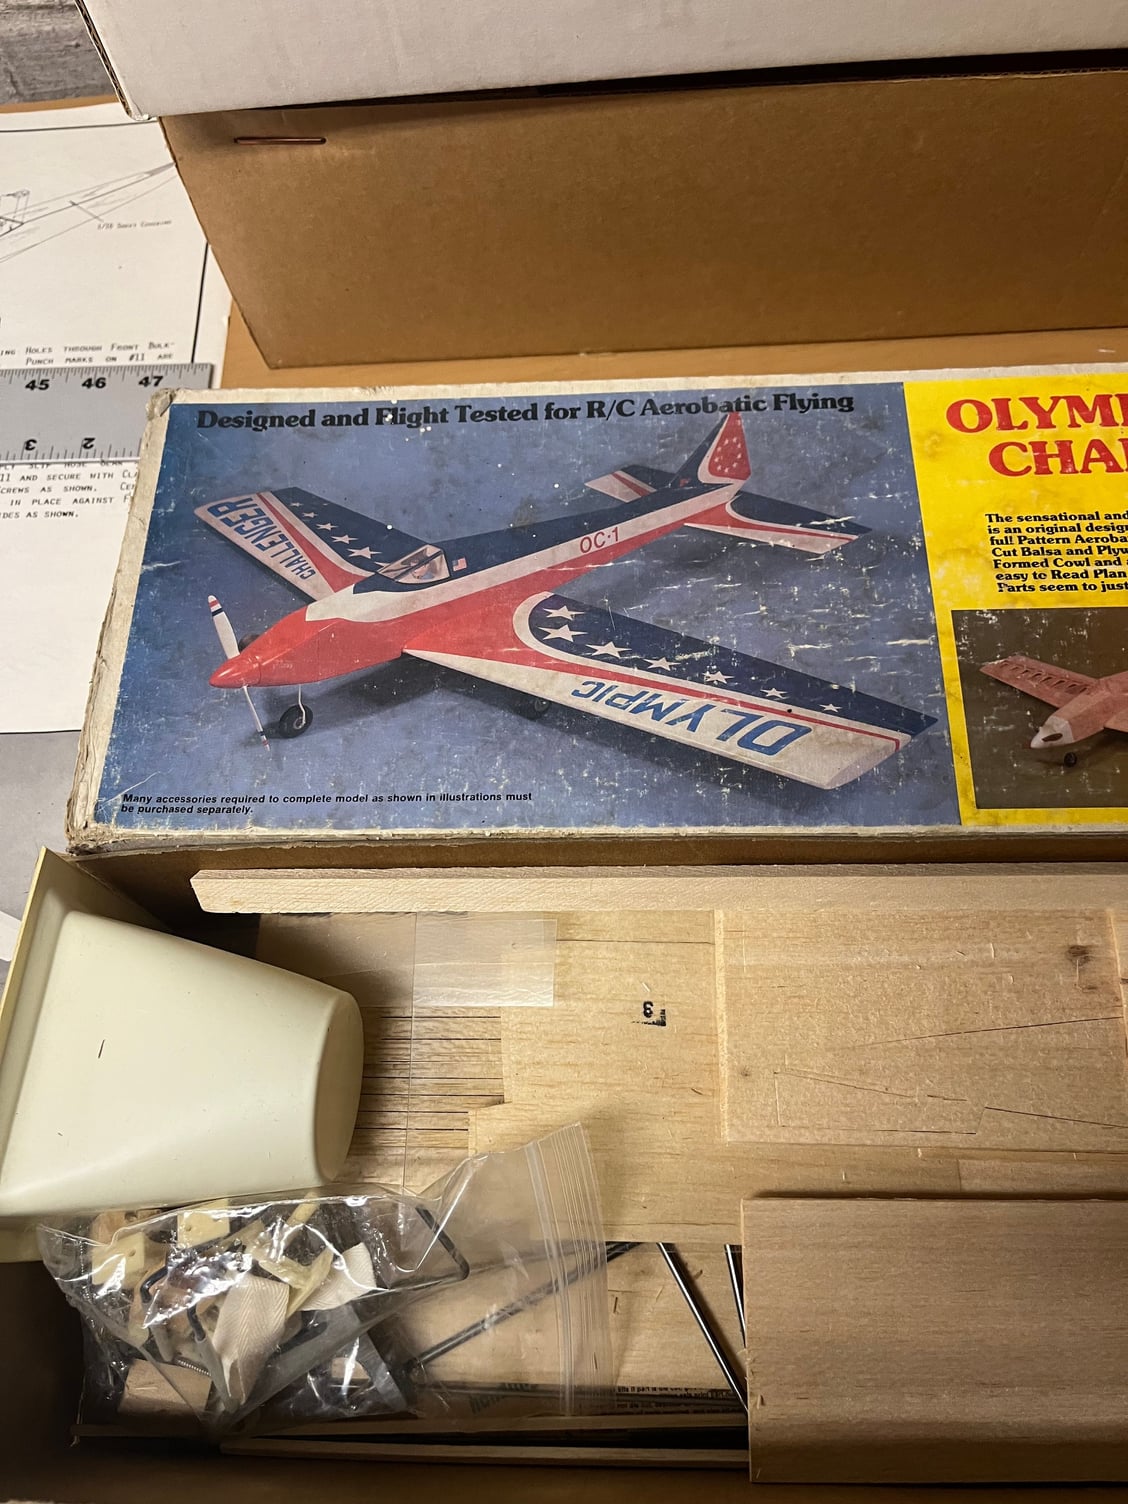
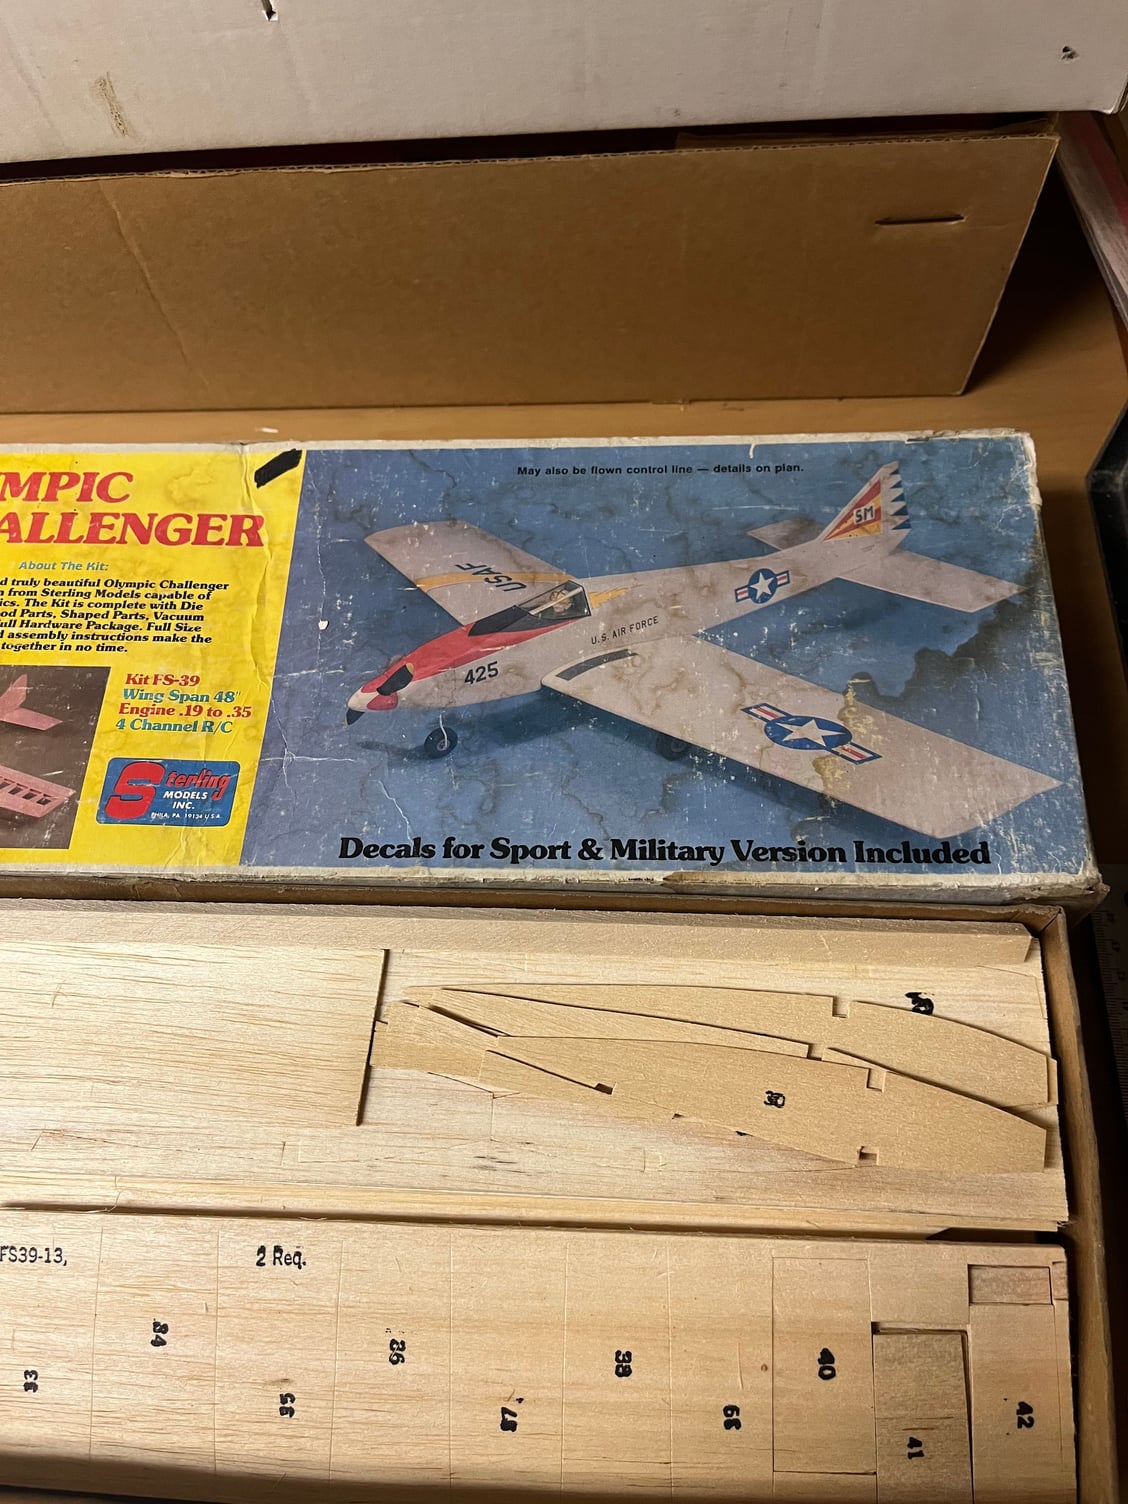
Sterling Olympic Challenger
 04-19-2023, 02:36 PM
#1


Anyone interested in seeing this kit built.
I just pulled it out of the pile today and am thinking about tossing it together.
I'm thinking a Thunder Tiger GP bushing 40 would be a perfect engine for this little guy.
I just pulled it out of the pile today and am thinking about tossing it together.
I'm thinking a Thunder Tiger GP bushing 40 would be a perfect engine for this little guy.

The following users liked this post:
mikeainia (05-20-2023)
04-19-2023, 03:01 PM
#2
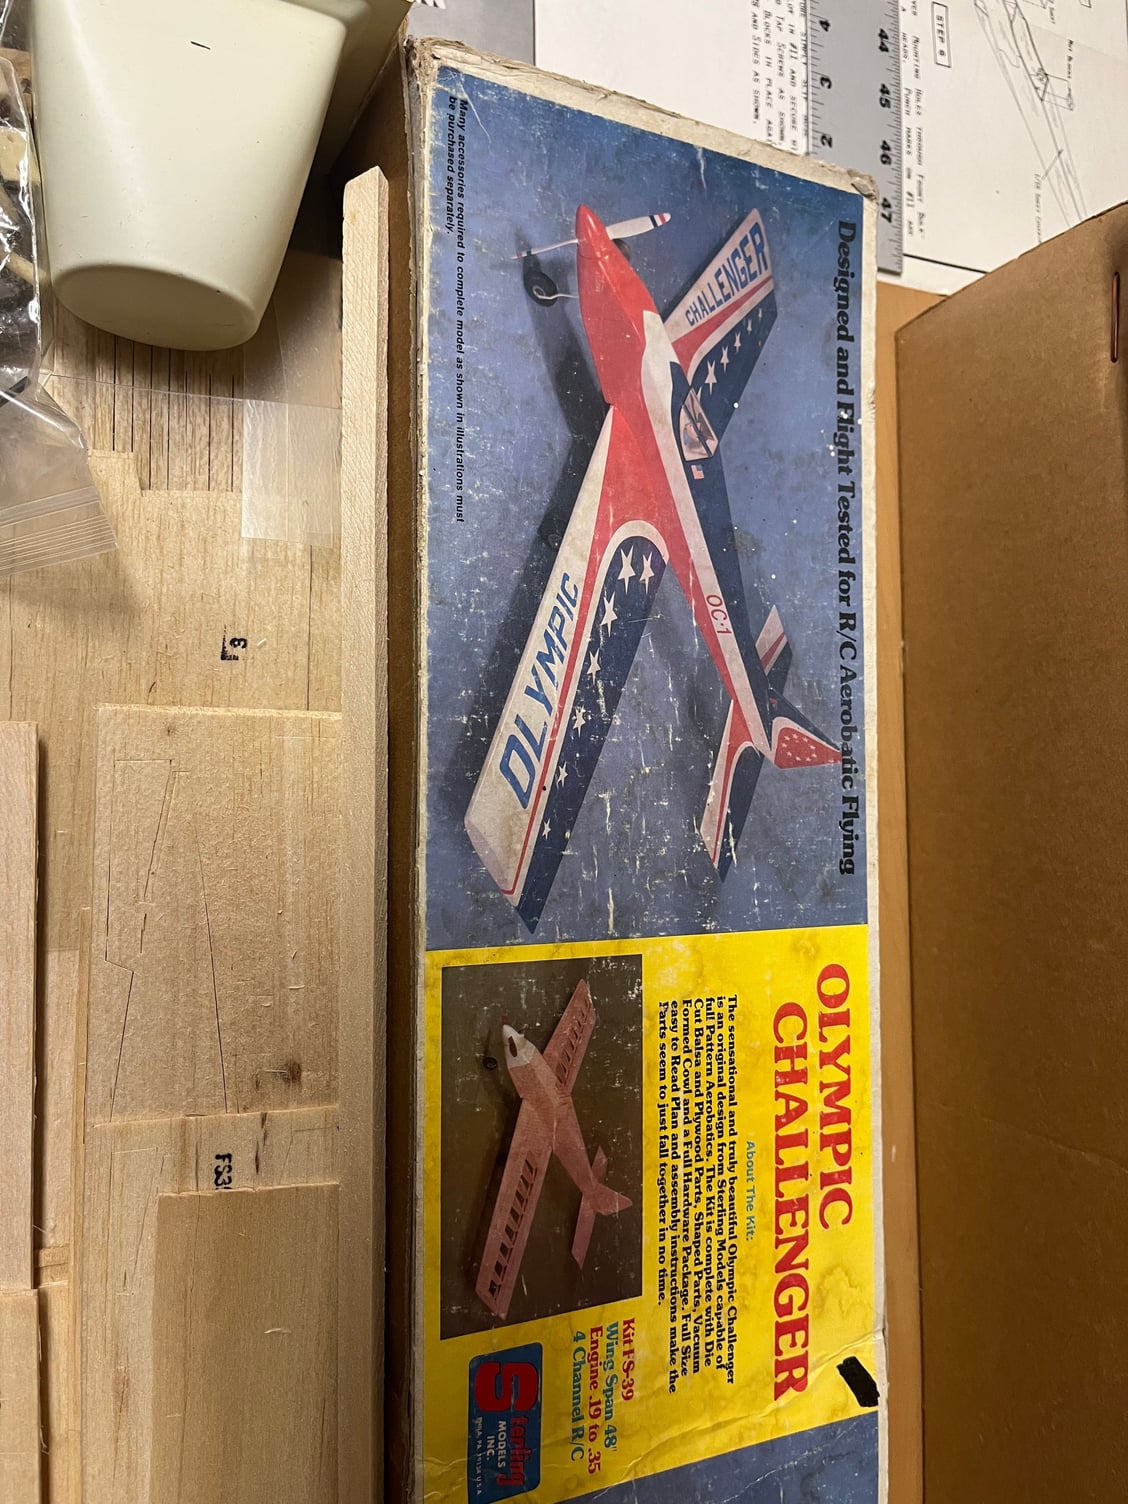
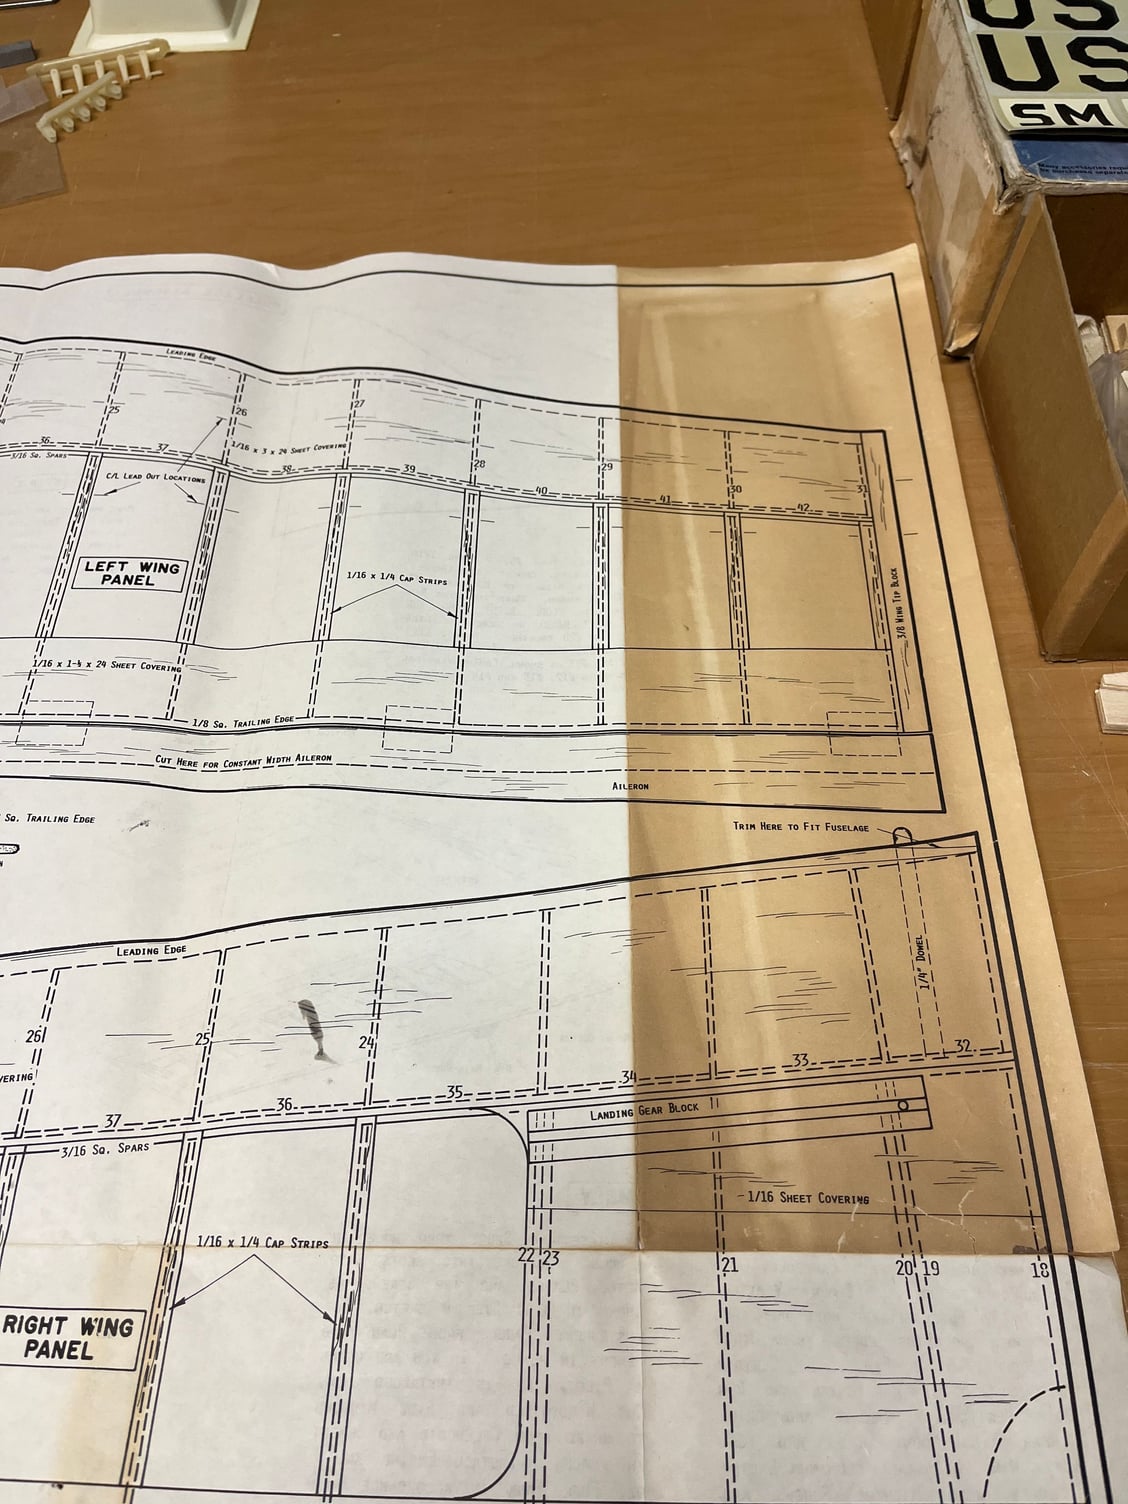
This is the Olympic Challenger kit. I always liked the looks of it and am looking for a small kit to build to burn a little time. It looks to me that most of the hardware included in the kit needs replaced with modern hardware.
Last edited by plumberdeluxe; 04-19-2023 at 03:31 PM.


 04-20-2023, 12:23 PM
#10
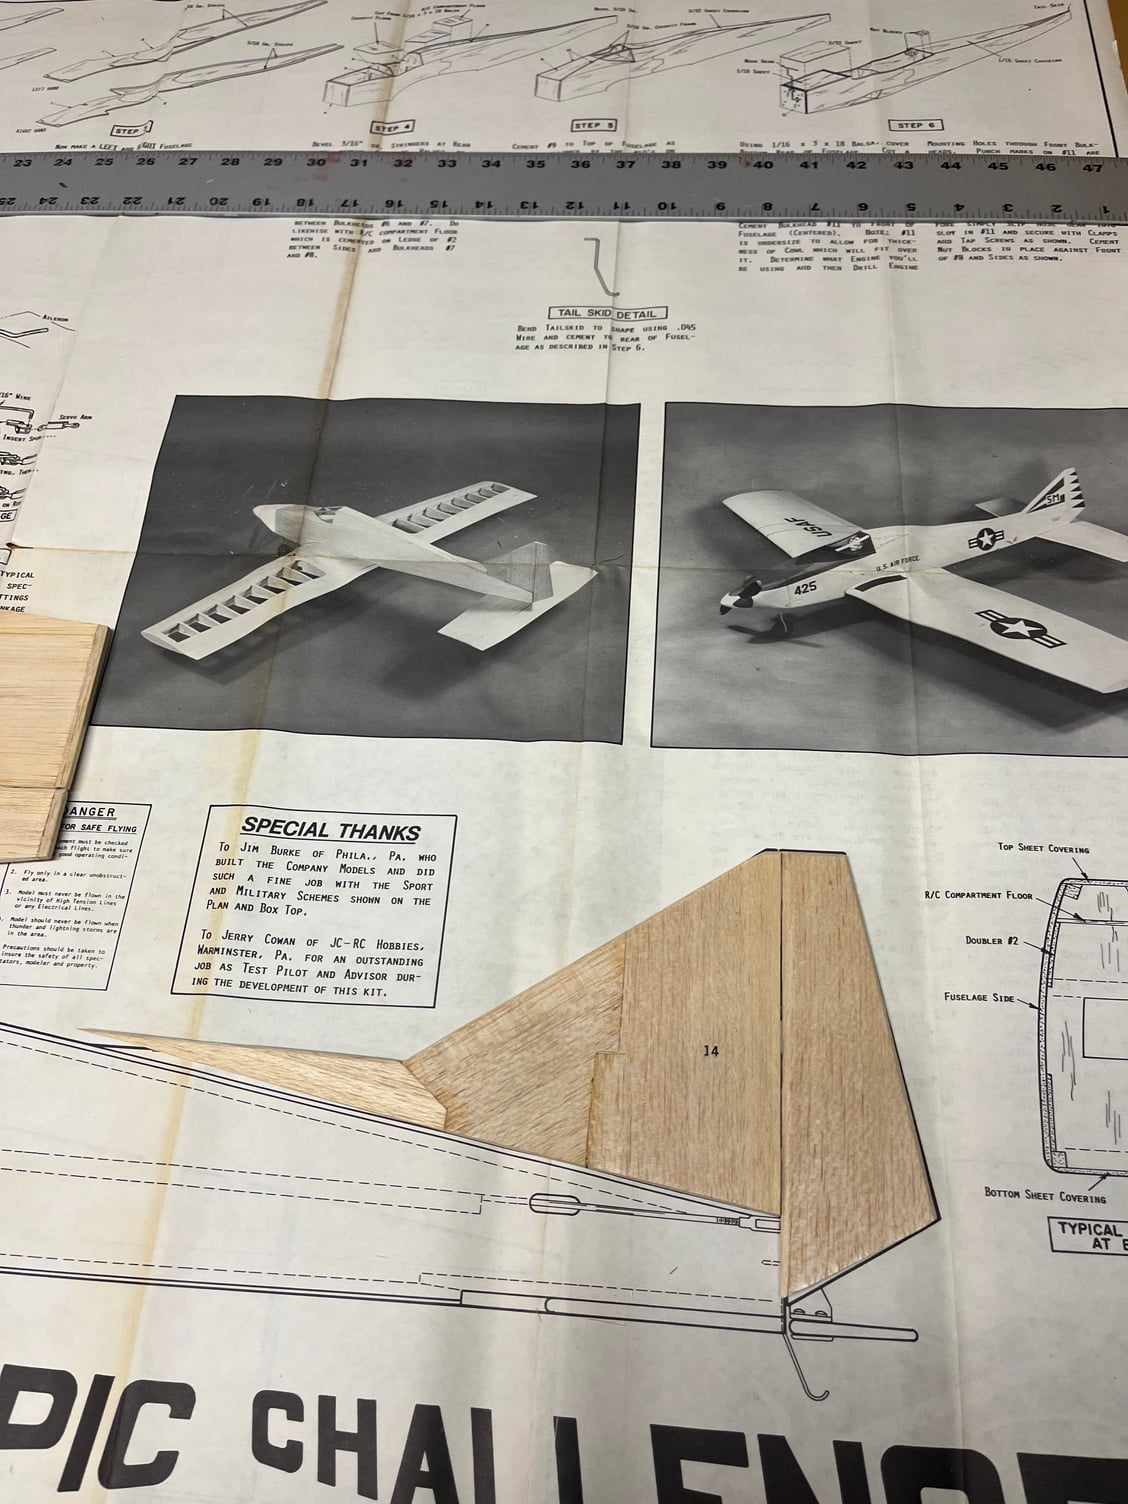
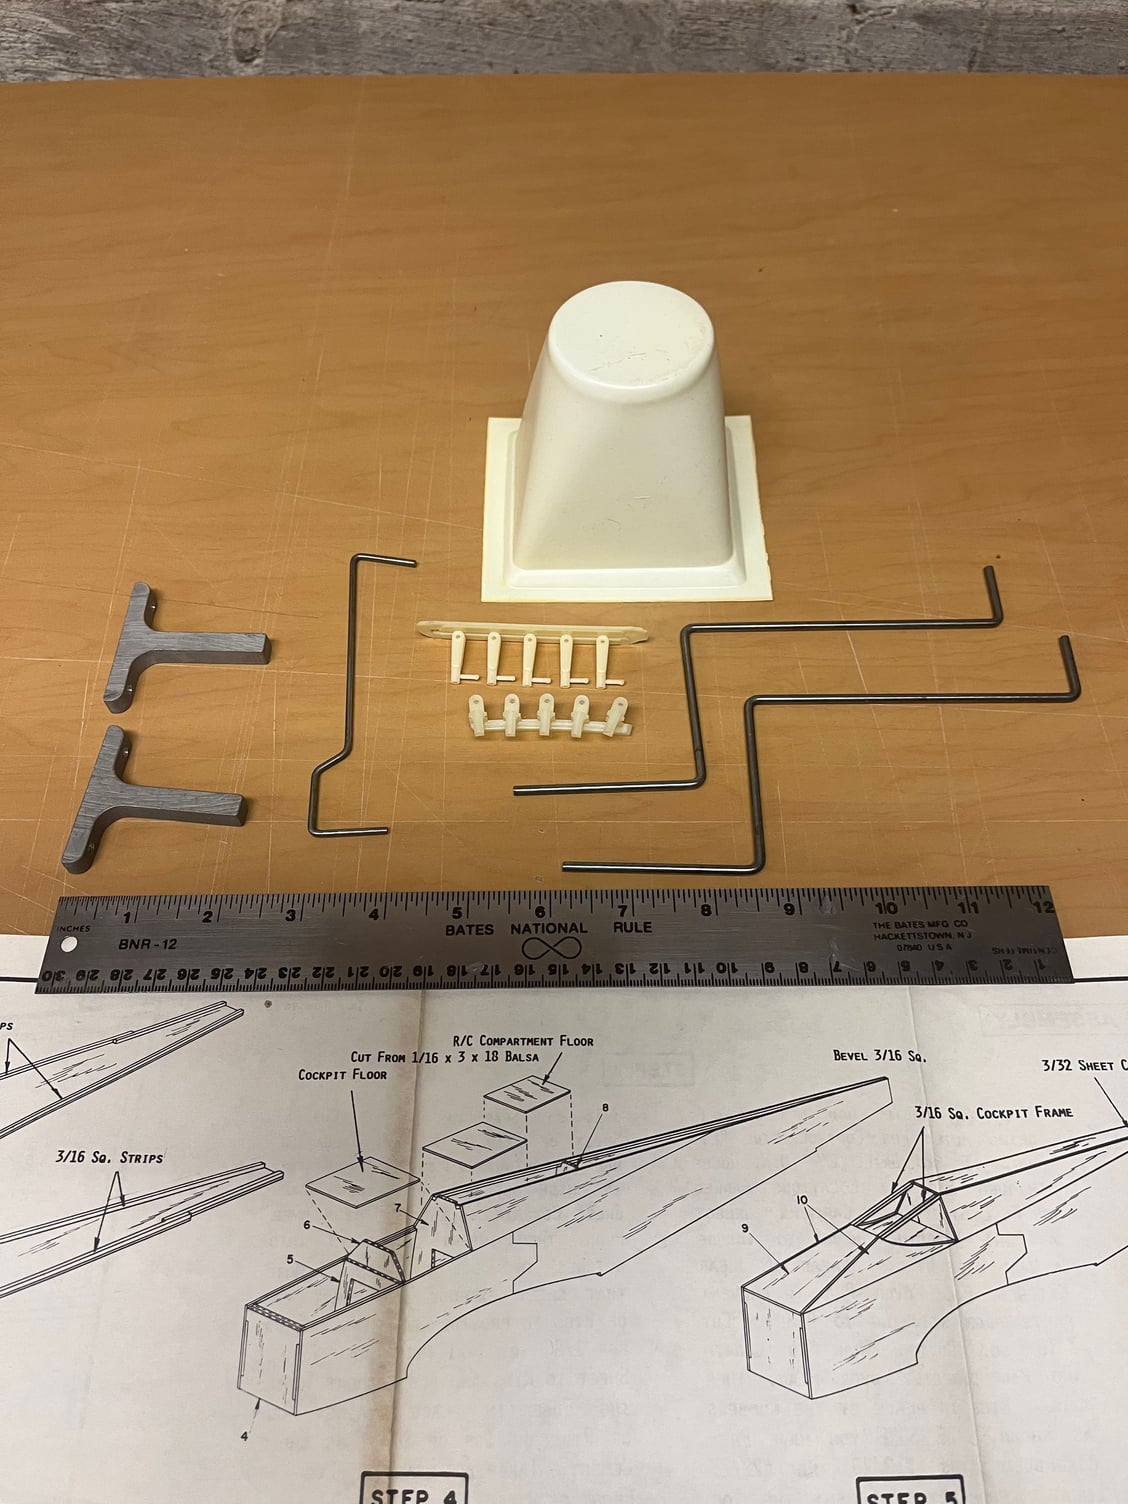
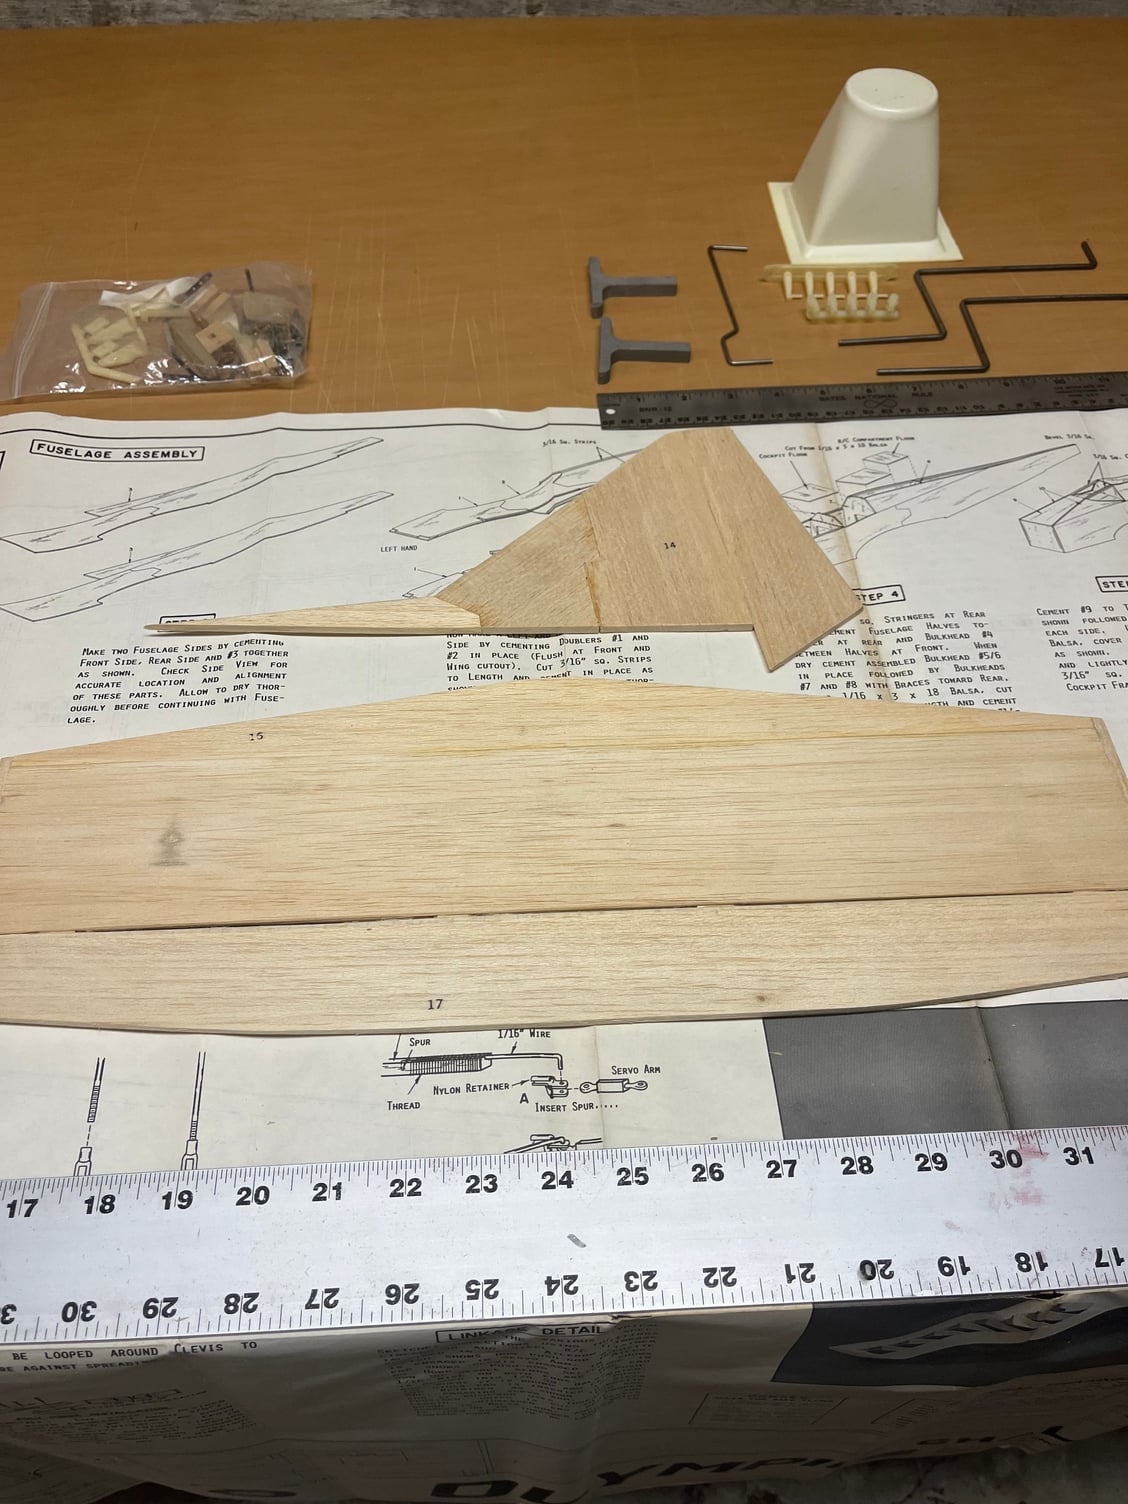
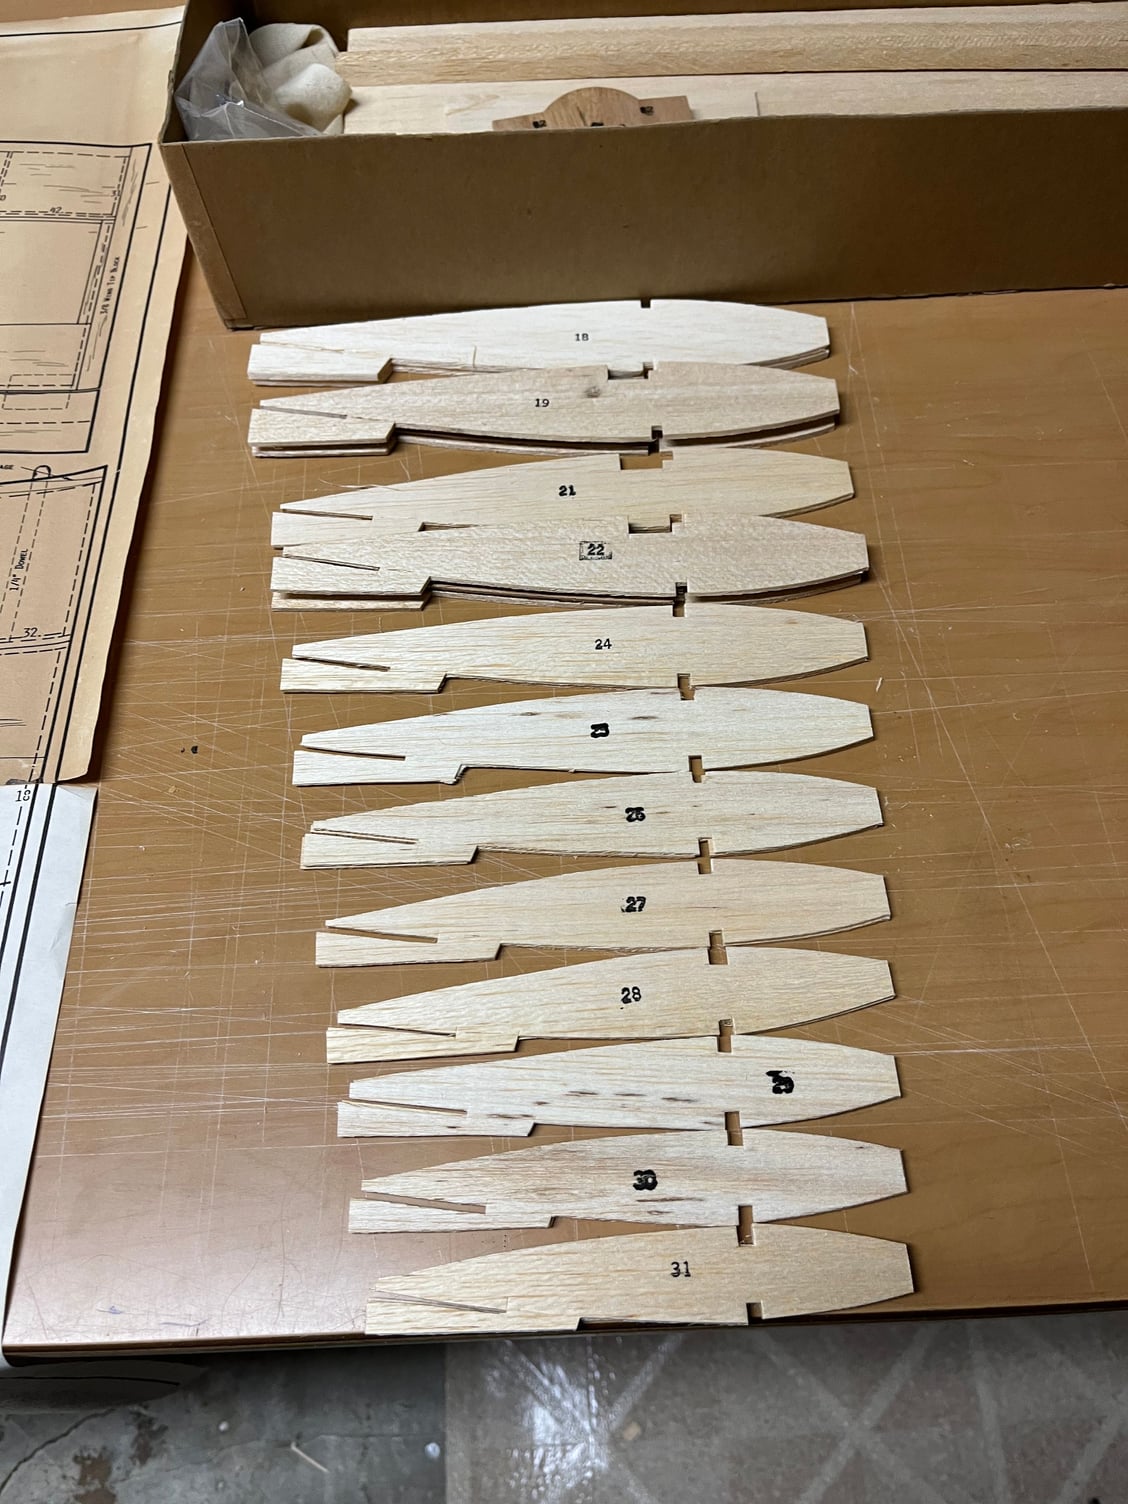
Here are the fuse parts ready to be assembled, it took quite awhile to separate them cleanly from the trees. I think I know why so many guys scratched kits back in the 70�s. It was probably quicker and easier than getting kits to assemble strait and clean
Fuse sides complete and ready to assemble
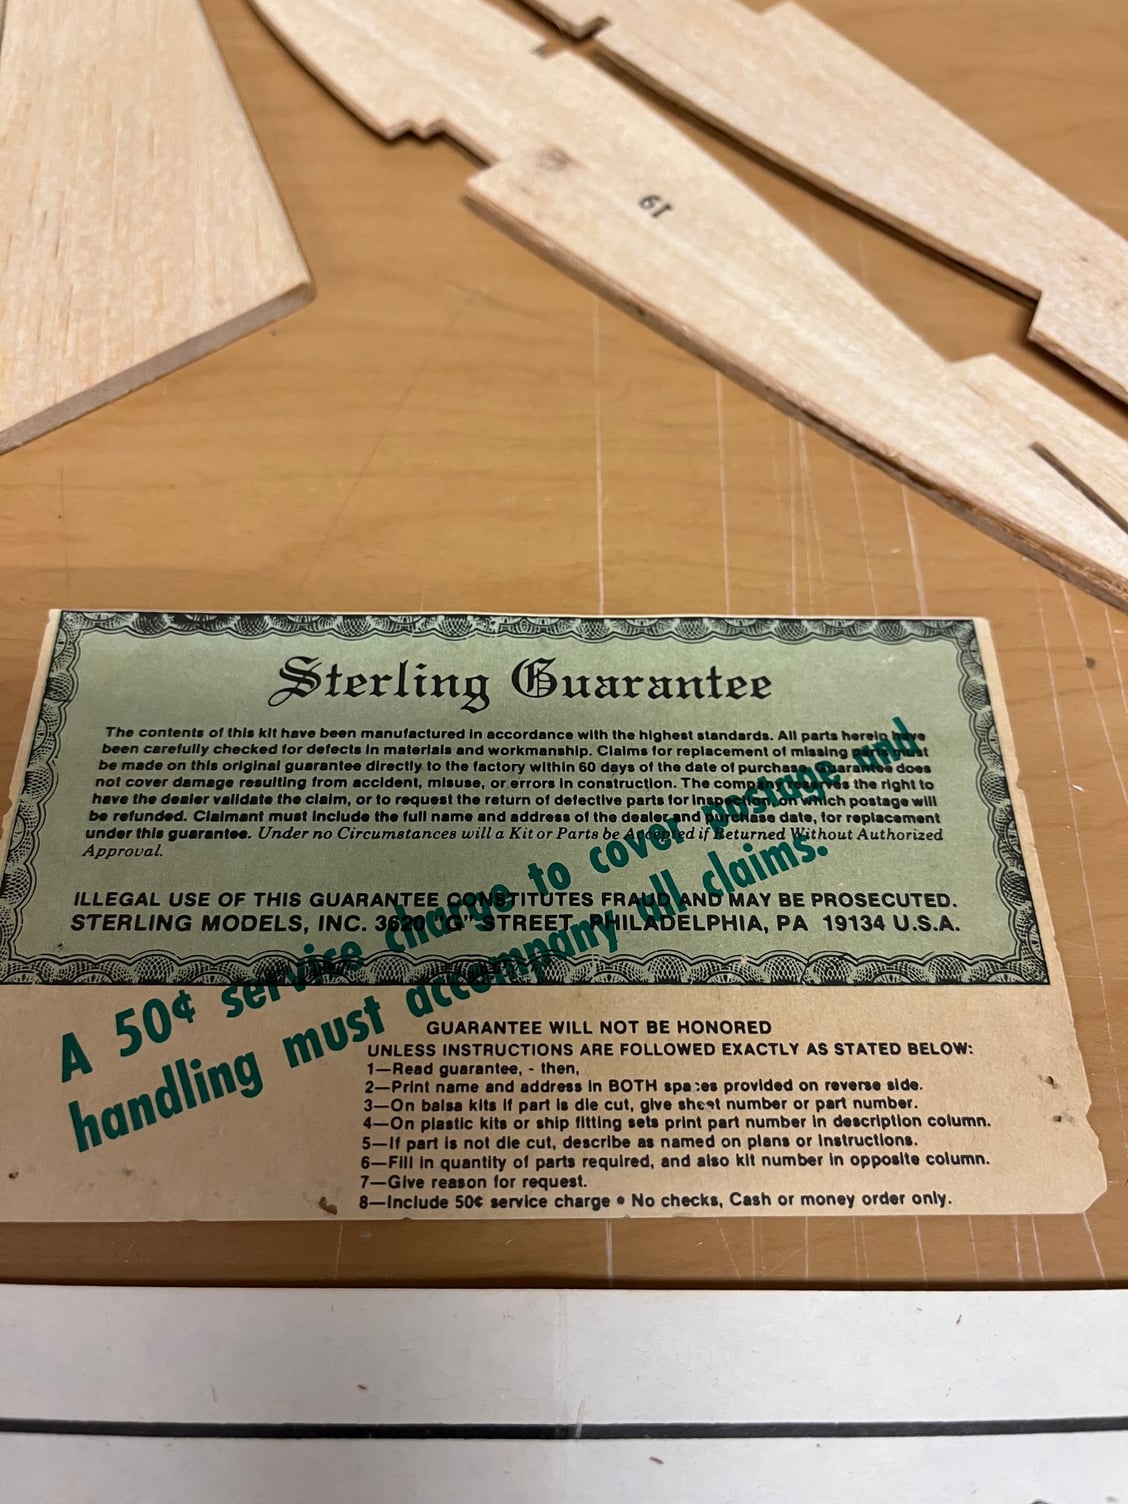
Feeling pretty good about this warranty being included. Lots of nostalgia here. Warranty not so much
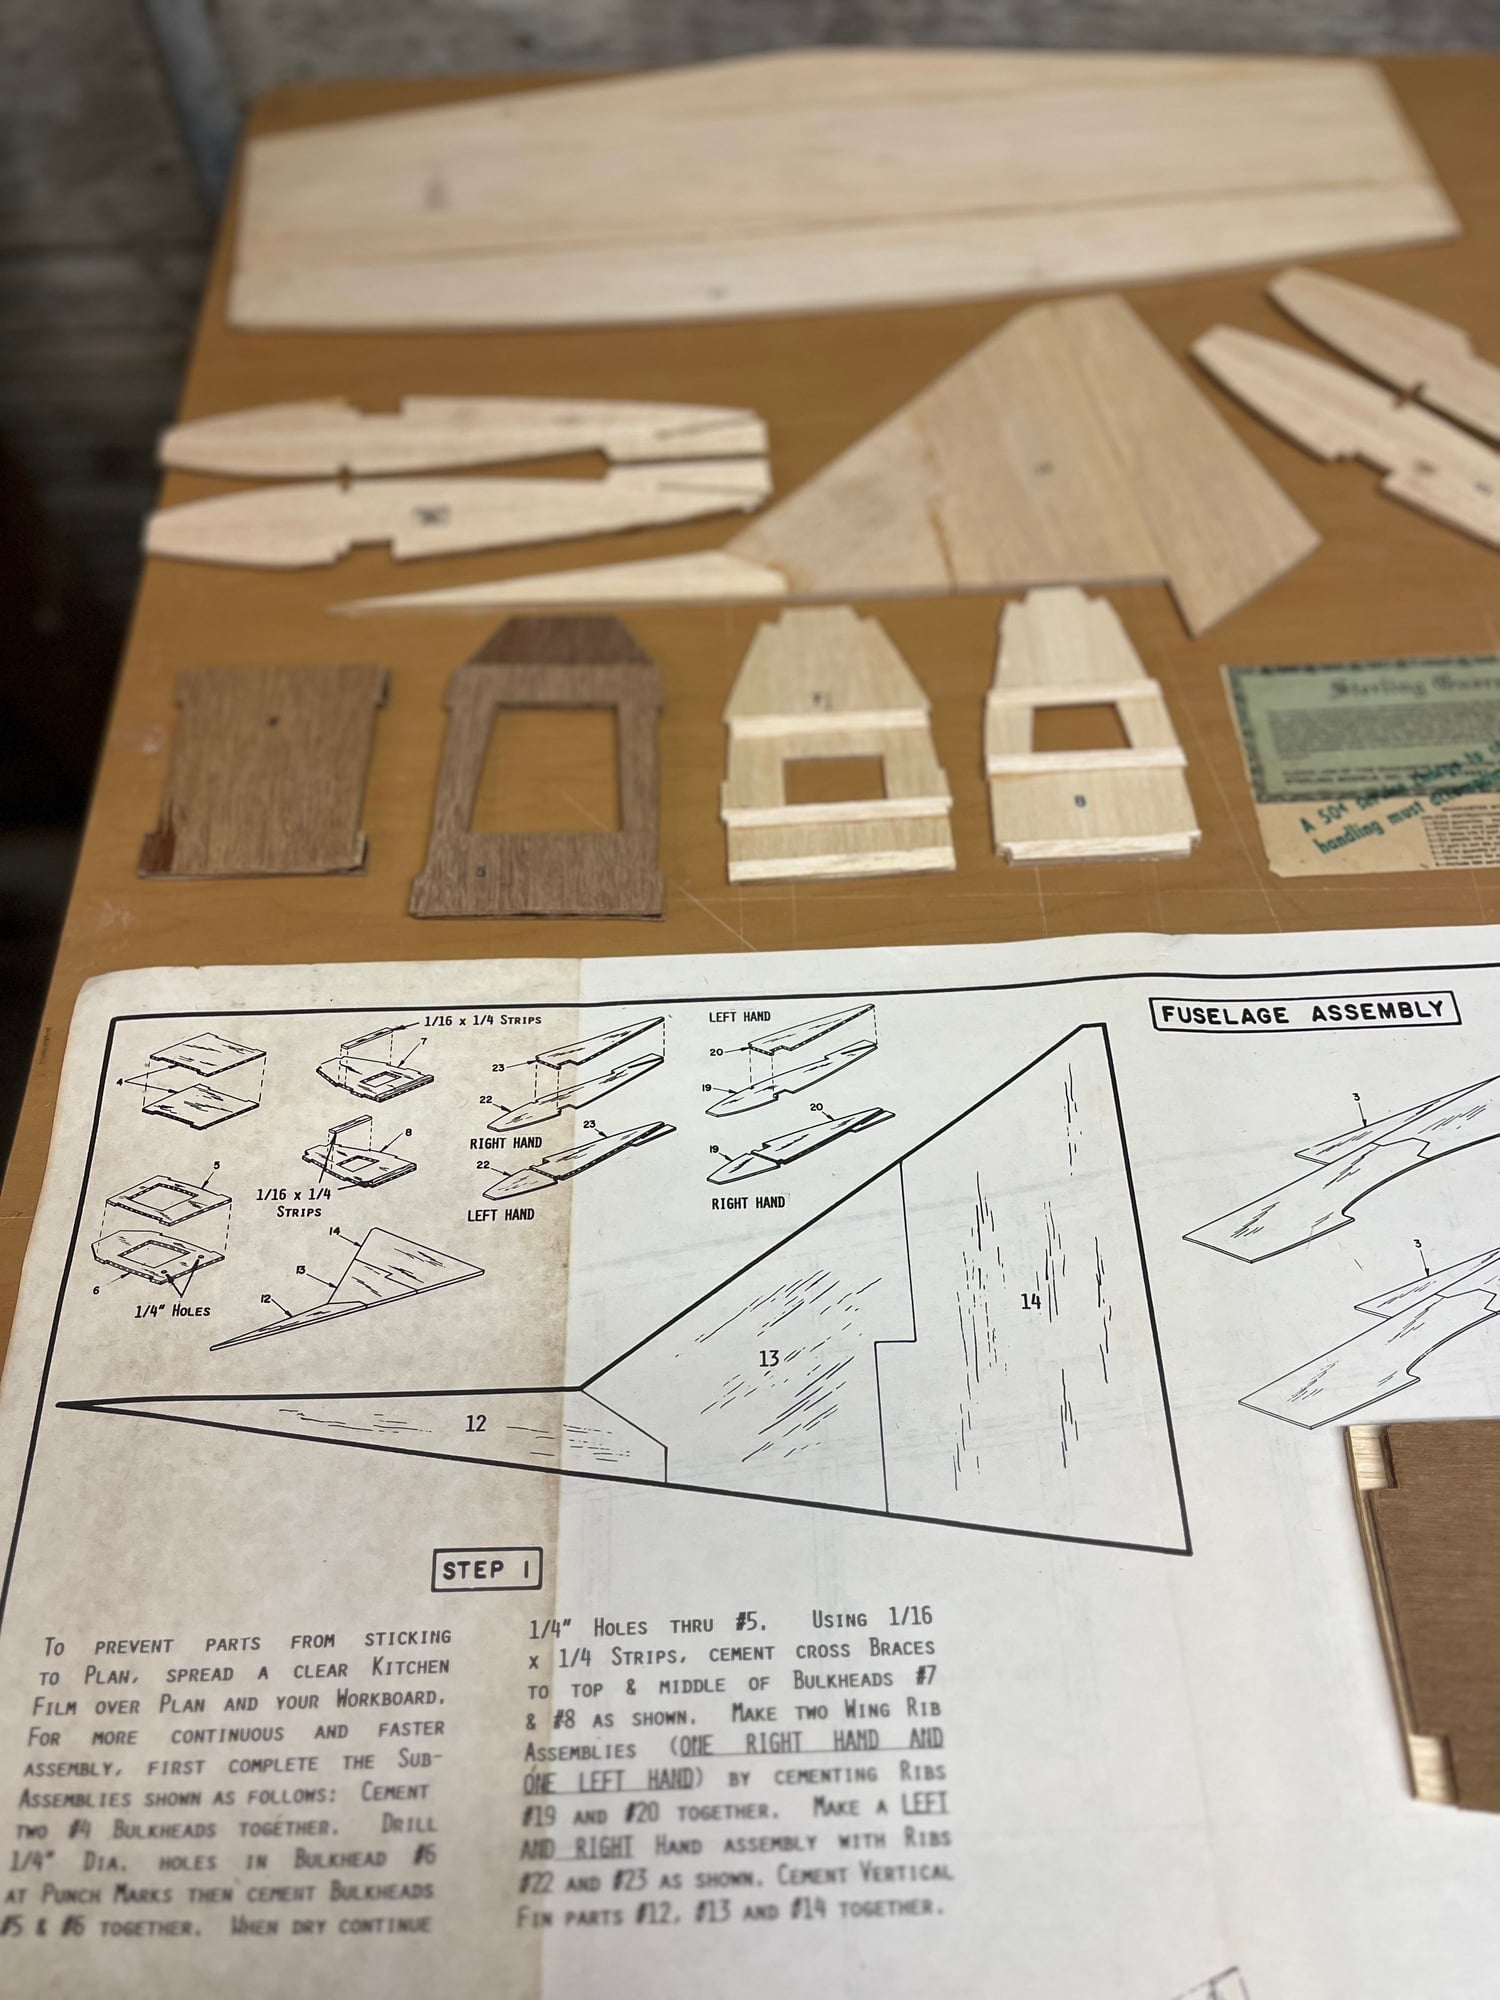
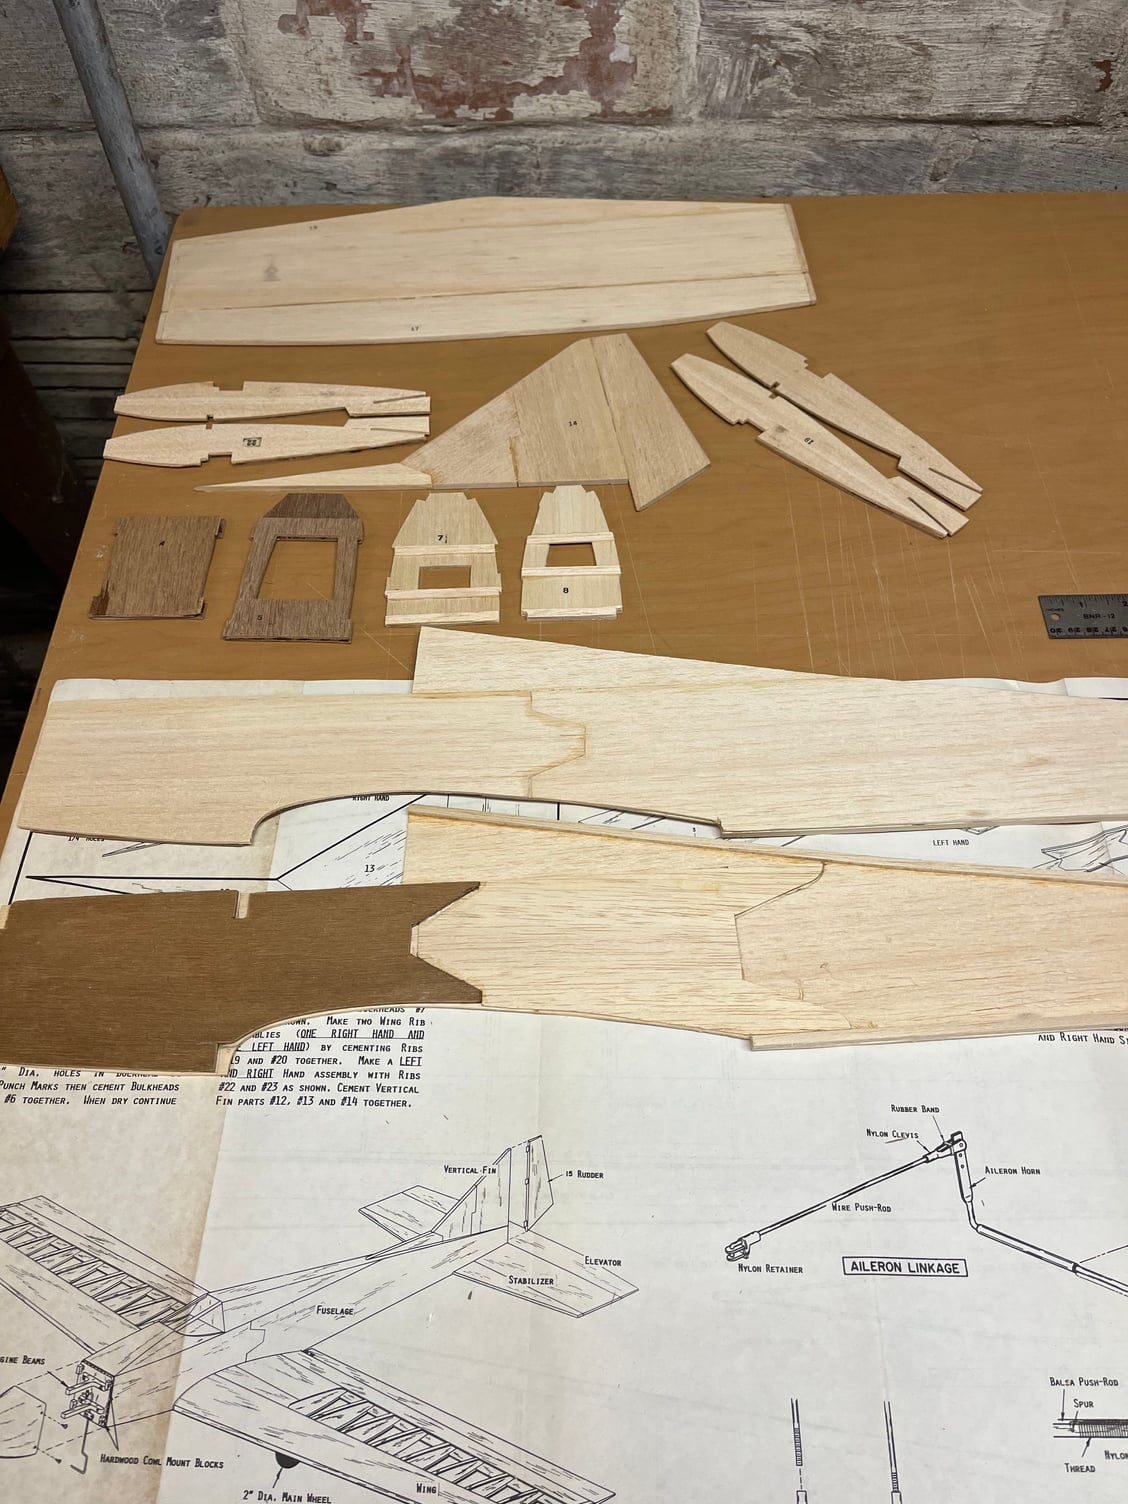
Formers and landing gear rib�s assembled ready to install
Fuse sides complete and ready to assemble
Feeling pretty good about this warranty being included. Lots of nostalgia here. Warranty not so much
Formers and landing gear rib�s assembled ready to install
04-20-2023, 03:06 PM
#11
It looks like getting this fuse straight will be the biggest challenge that I�ve run into yet. Wood fit is really tough around the formers and it seems almost every piece will need to be altered to get a nice fit. I�m thinking it will be ok but can�t get in a hurry when parts fit this poorly.

Fuse loose layup
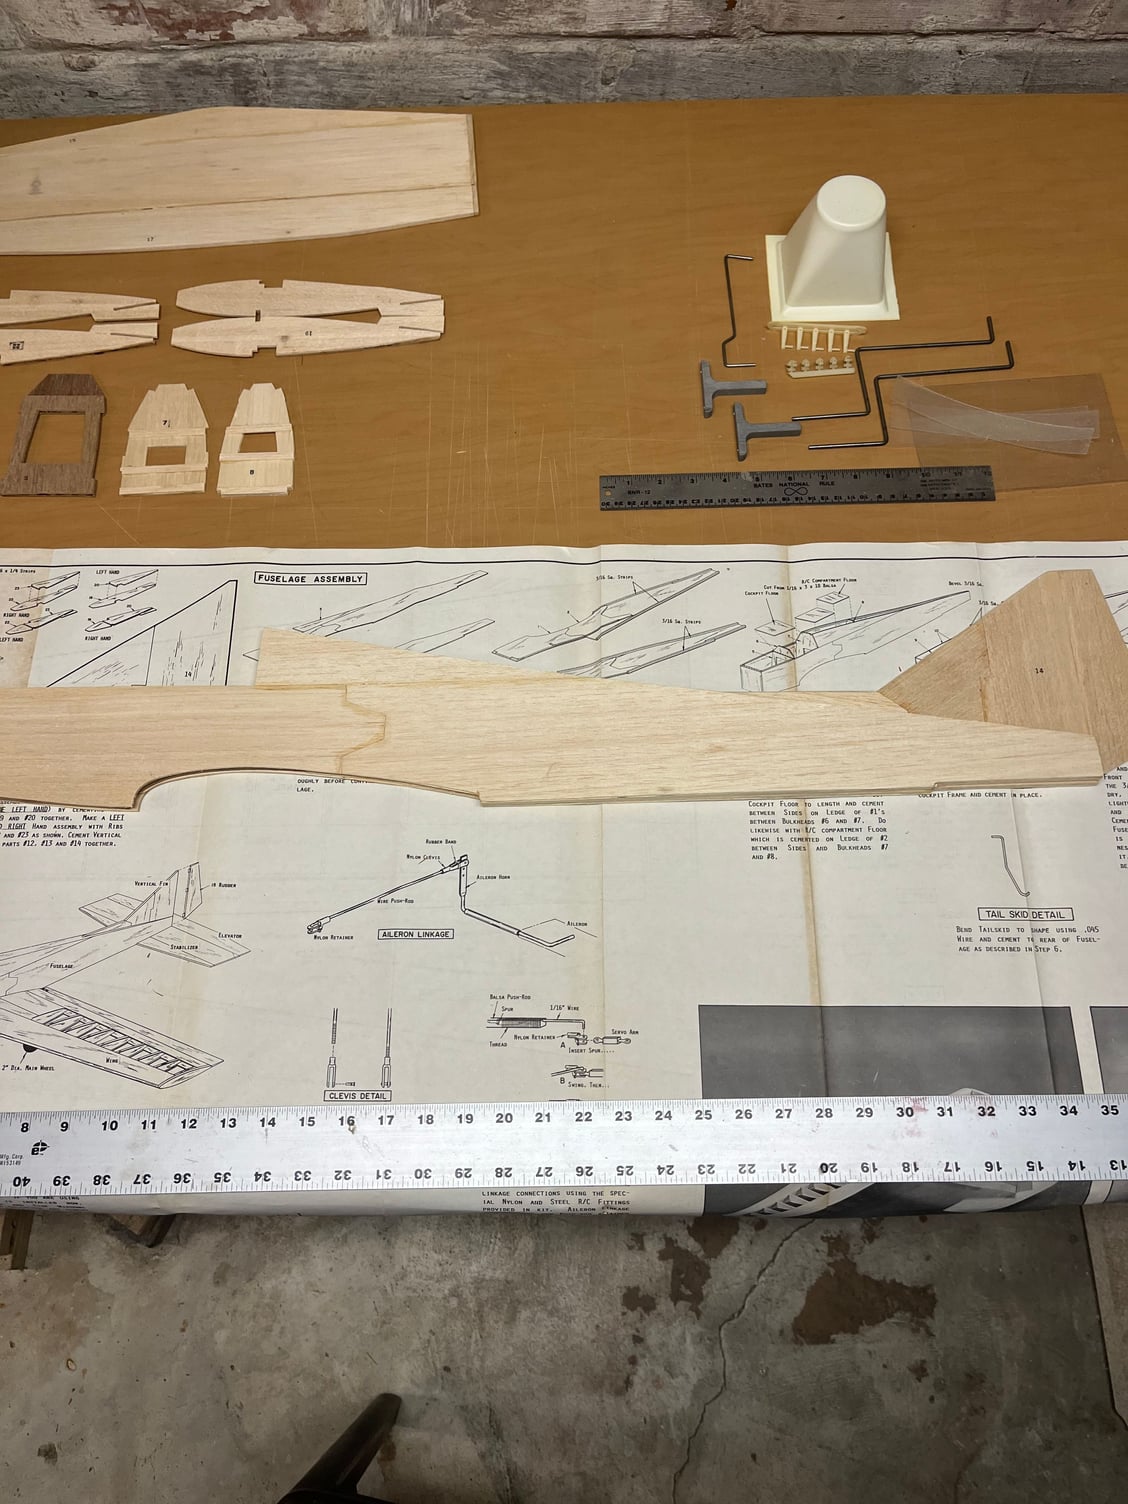
Fuse sides
Fuse loose layup
Fuse sides
Last edited by plumberdeluxe; 04-20-2023 at 03:09 PM.
04-22-2023, 08:49 AM
#12
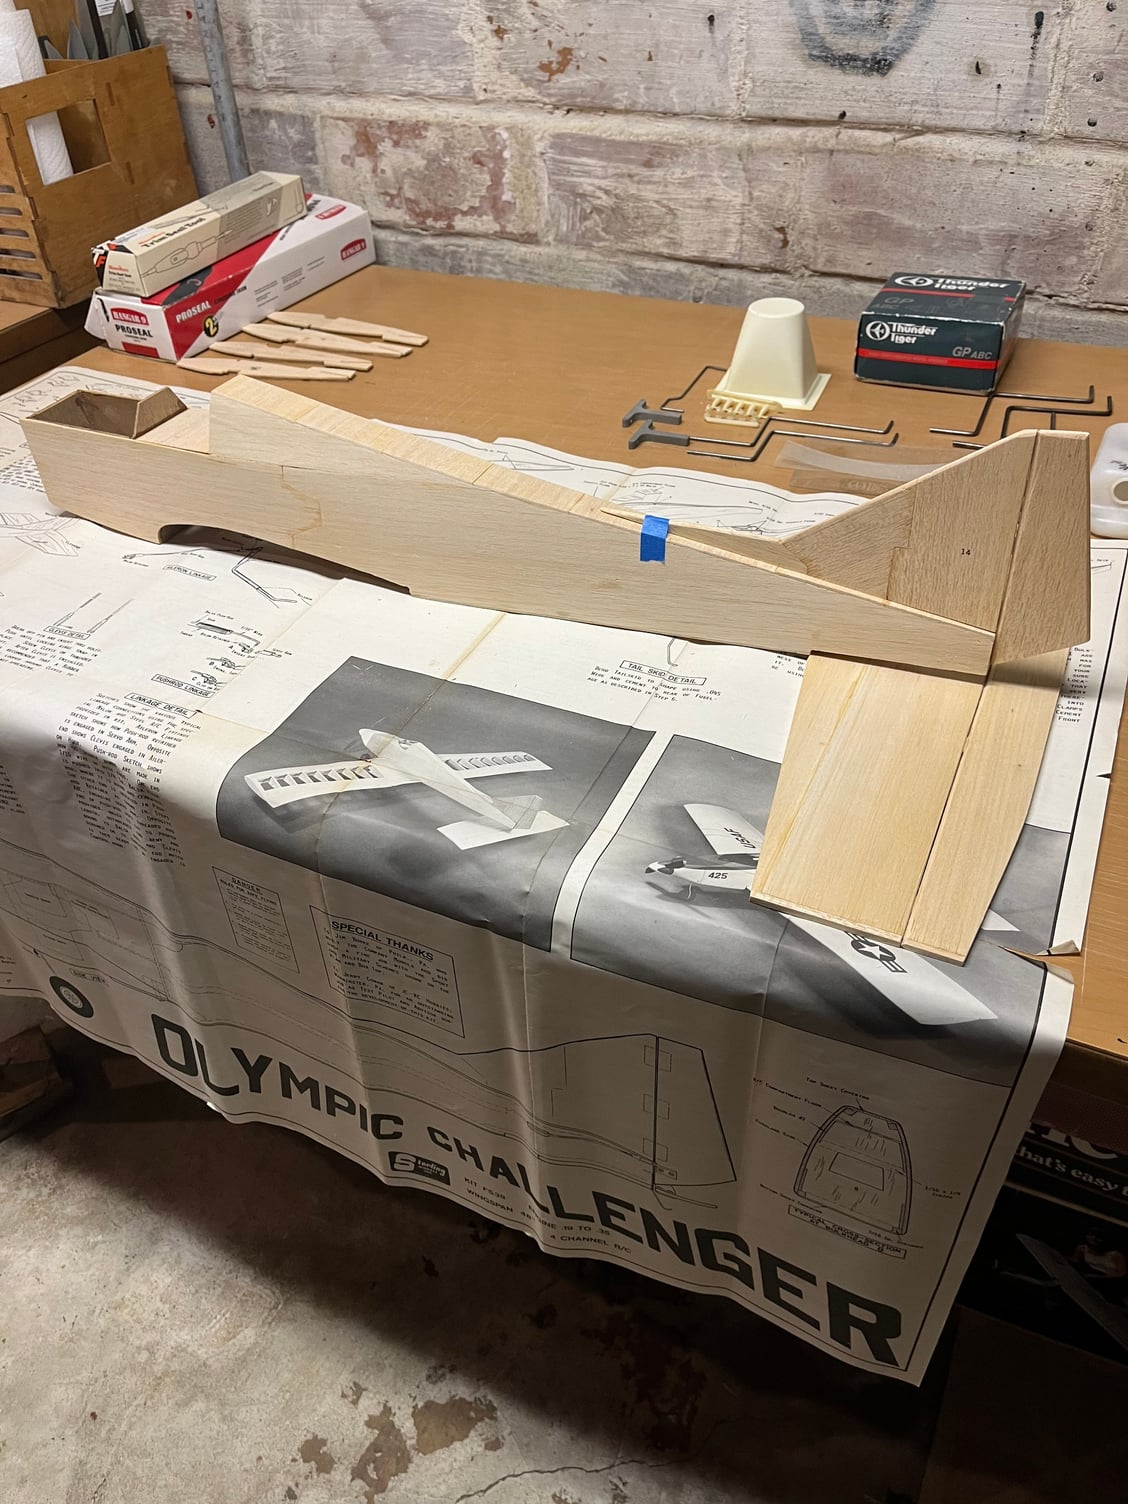
Here is the fuse starting to come together, it looks like it will be pretty light when completed.
I have room for an 8 oz. tank so my choice for engines is either a Super Tiger .29 abc or a Thunder Tiger .40 gp. The ST weighs 11.8 oz. and the TT weighs 11.4 oz. Looks like the bushing 40 gets the nod
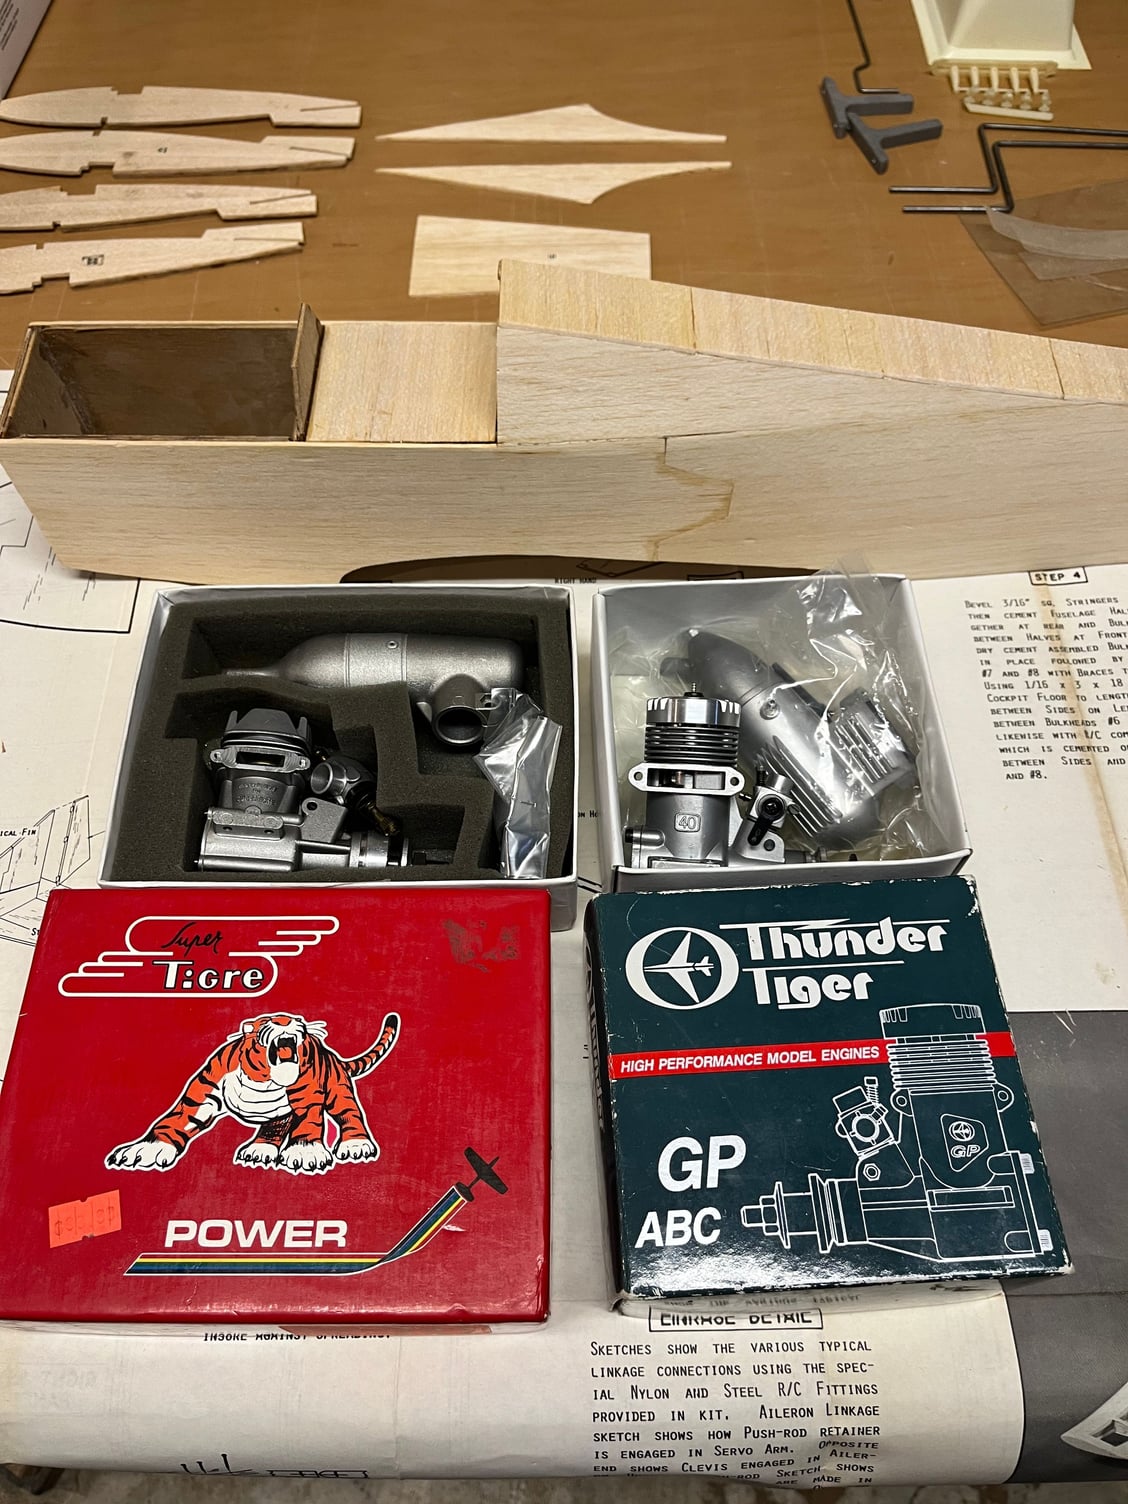
I have room for an 8 oz. tank so my choice for engines is either a Super Tiger .29 abc or a Thunder Tiger .40 gp. The ST weighs 11.8 oz. and the TT weighs 11.4 oz. Looks like the bushing 40 gets the nod
04-22-2023, 10:00 AM
#13
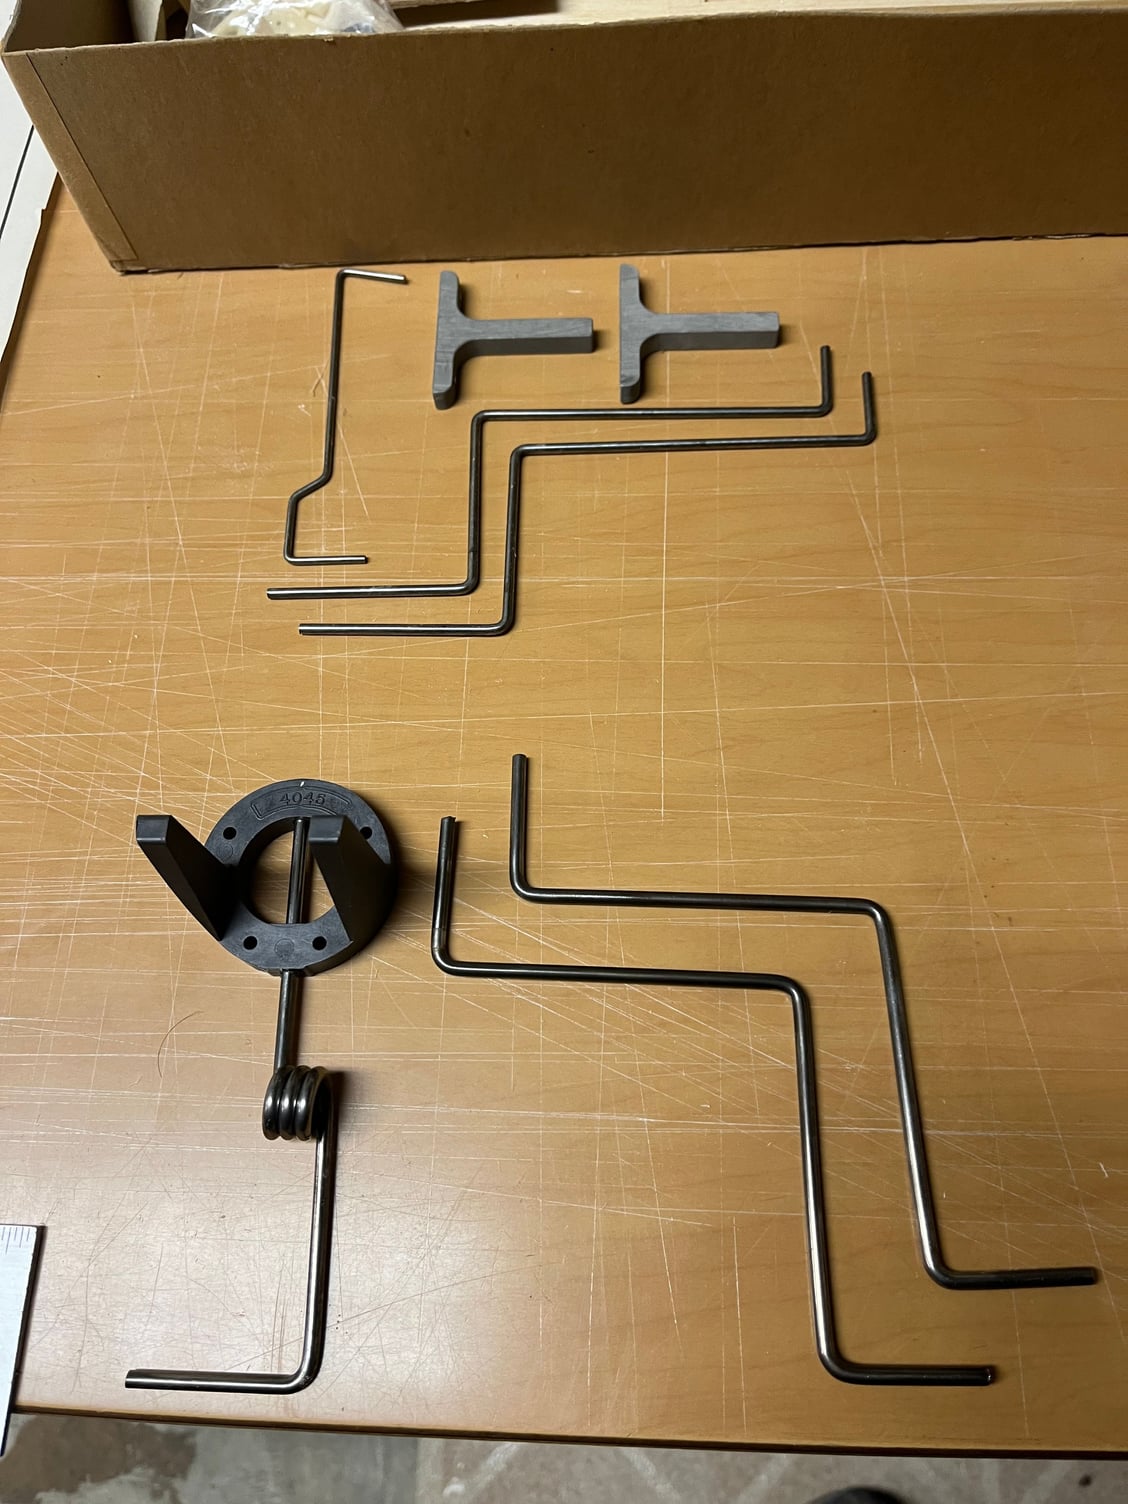
Here is where I start changing out hardware that come supplied with the kit and start adding what I think will work better. Above is the 1/8 landing gear and steel mounts that came with the kit. Below is a decent set up of 5/32 gear and a Dave Brown .40 mount which allows me nose steering. I will be using the lower set up.
04-22-2023, 12:48 PM
#14
A little more changing as the fuse comes together, I decided to sheet the cockpit area instead of adding plastic windows. The windows can be replicated with a piece of Ultracote and save the hassle. Tank is in, mount with steering arm, throttle cable, so engine now can be mounted. I will then shape a nose of balsa and toss the plastic cowl.
Last edited by plumberdeluxe; 04-22-2023 at 12:55 PM.
04-23-2023, 06:35 AM
#16
Thank You
I'm actually having fun with it, regardless of all the things I don't like about the kit.
I will try to keep this under 4 pounds flying weight, not sure how that will go yet.
So far things have been going well considering all the changes.
It's fun to try and bring life to these old kits..............
04-23-2023, 09:00 AM
#17
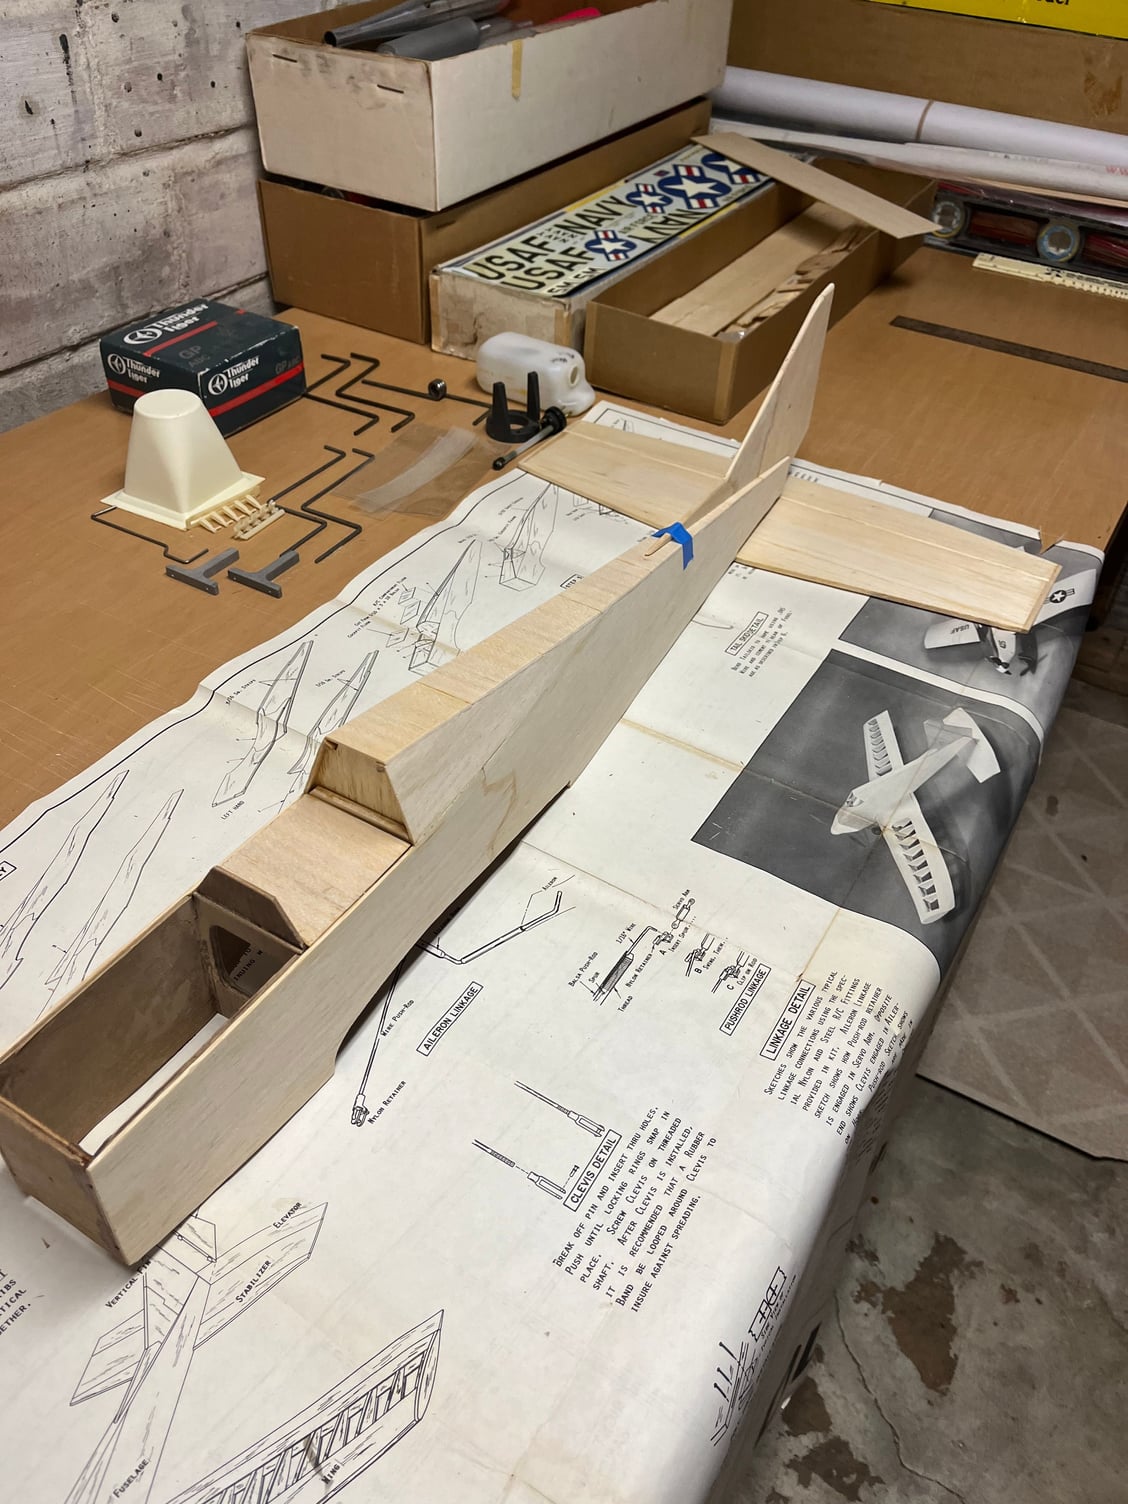
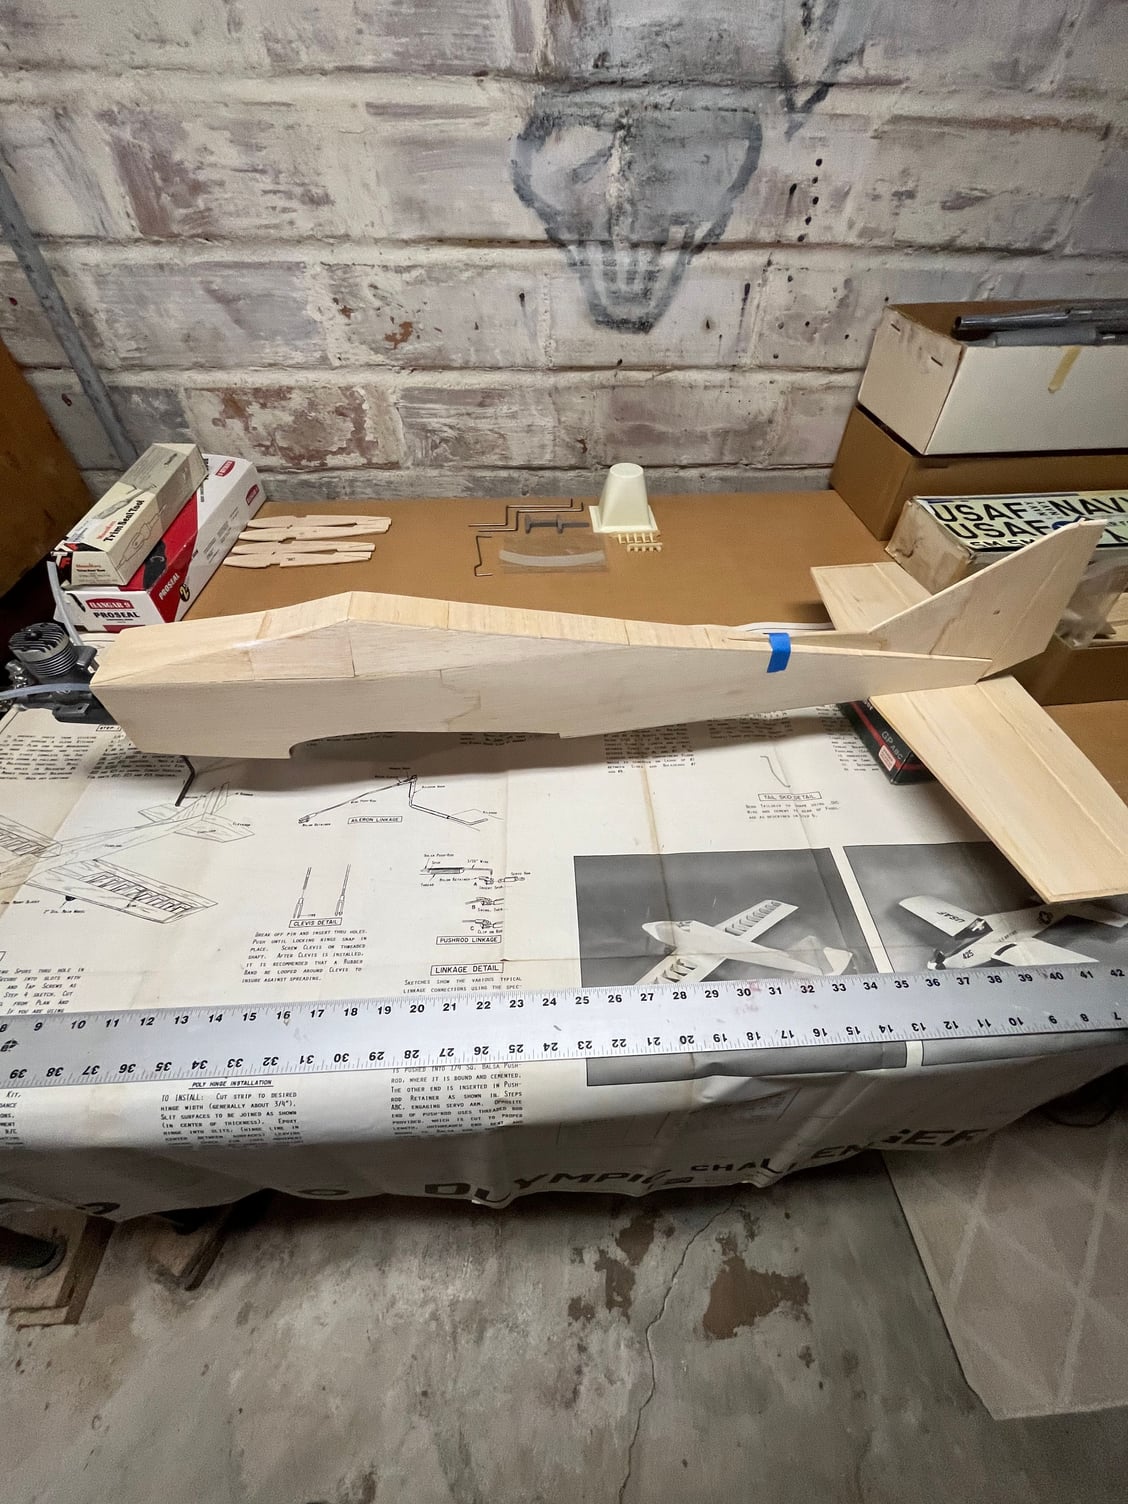
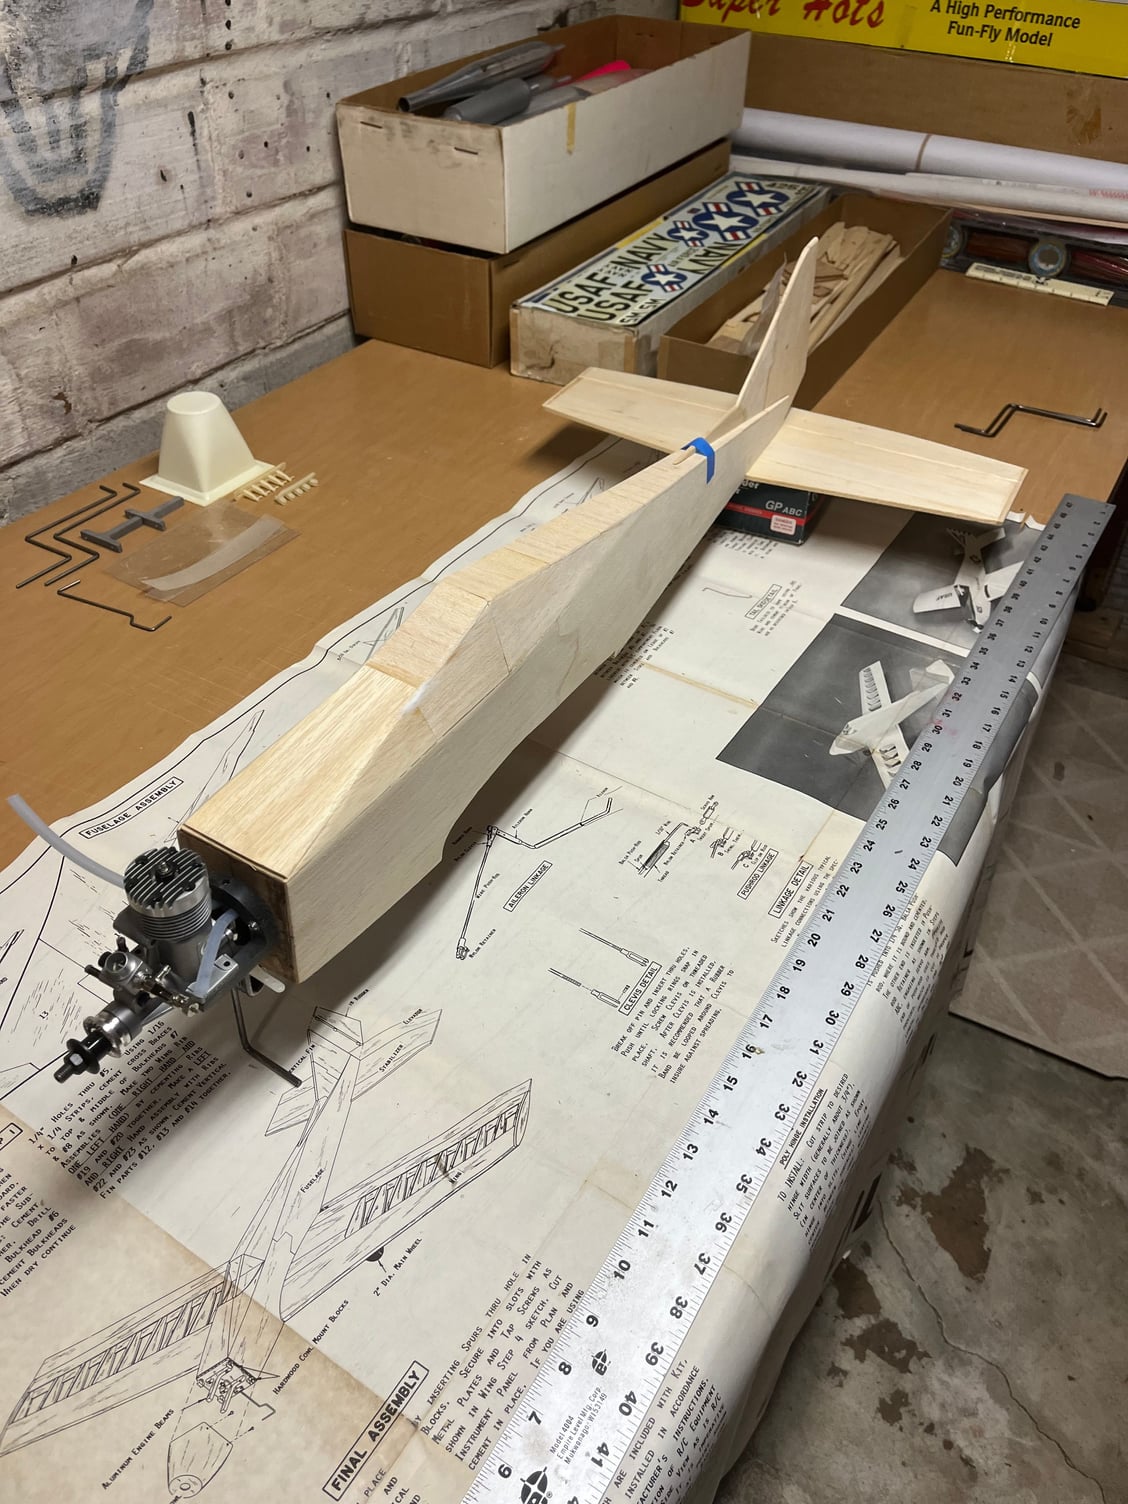
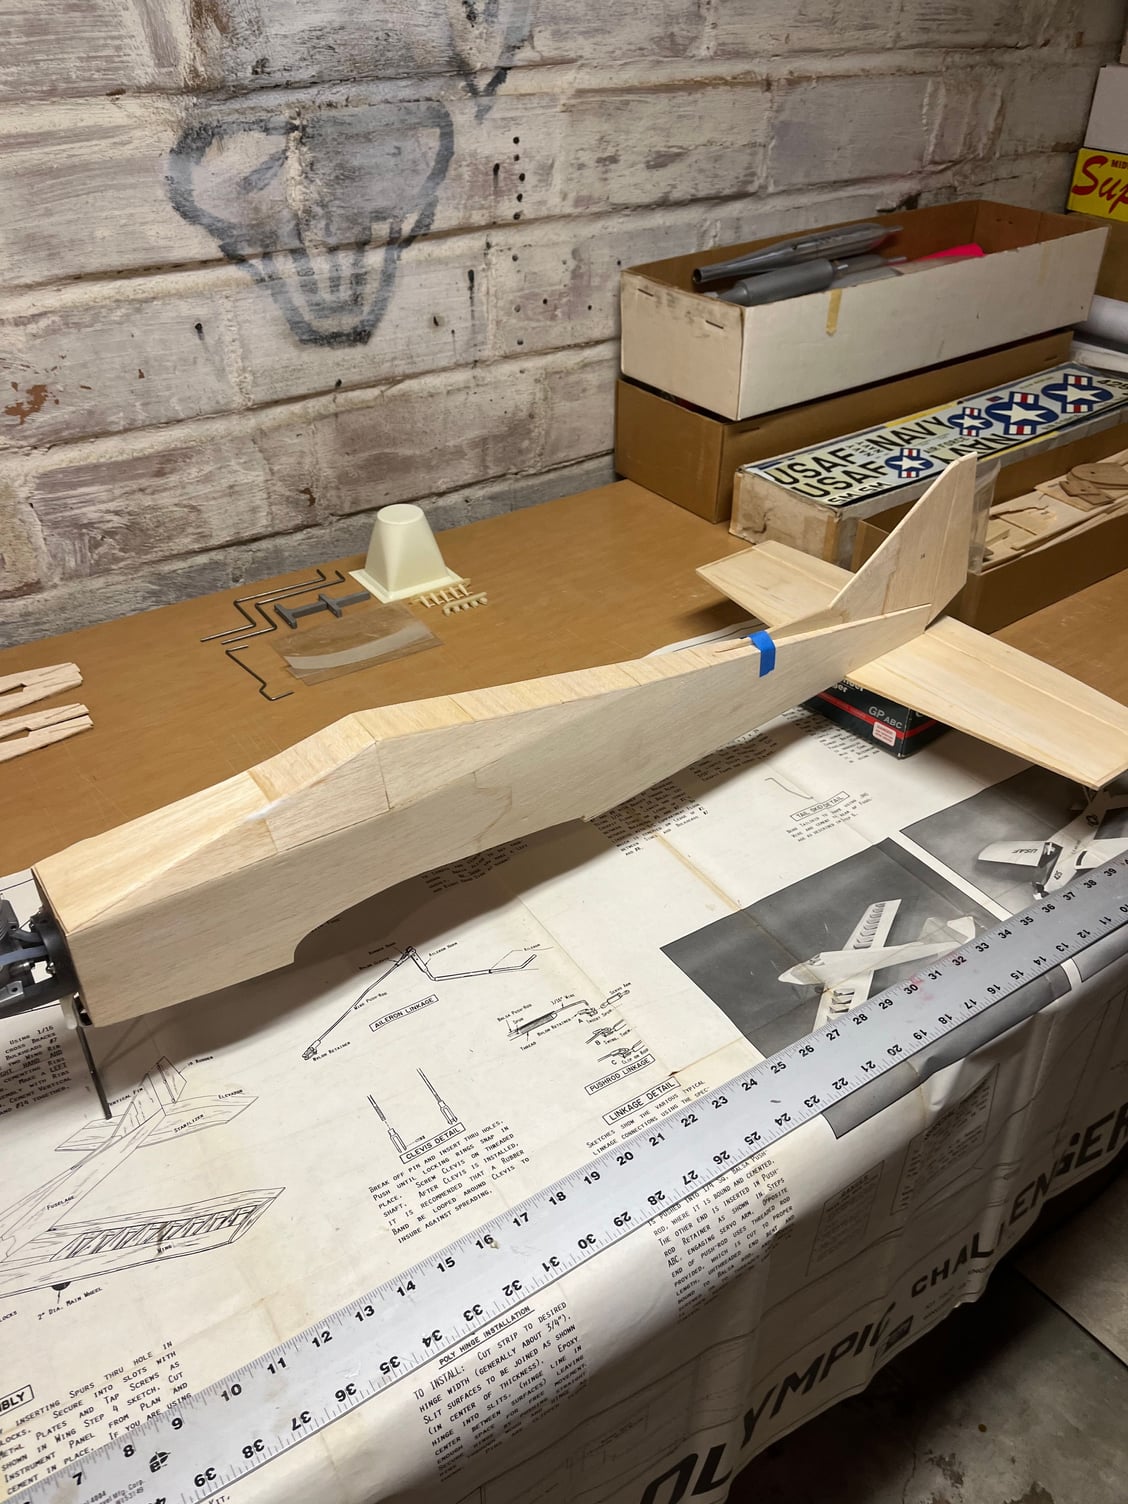
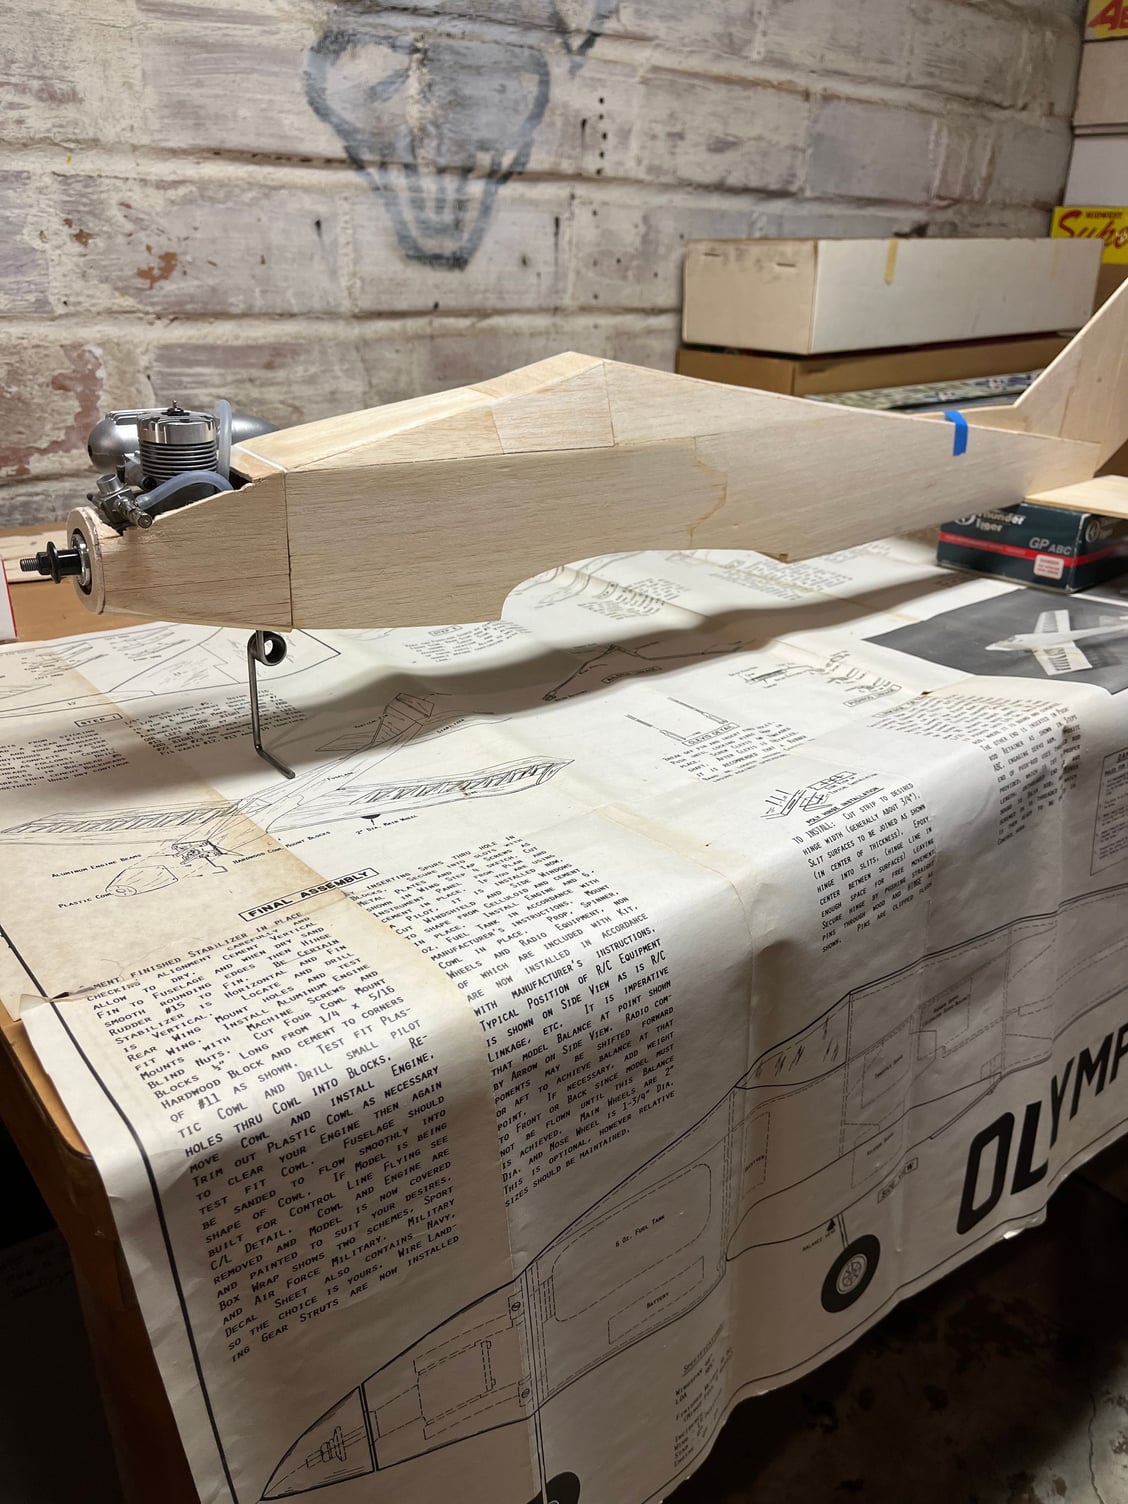
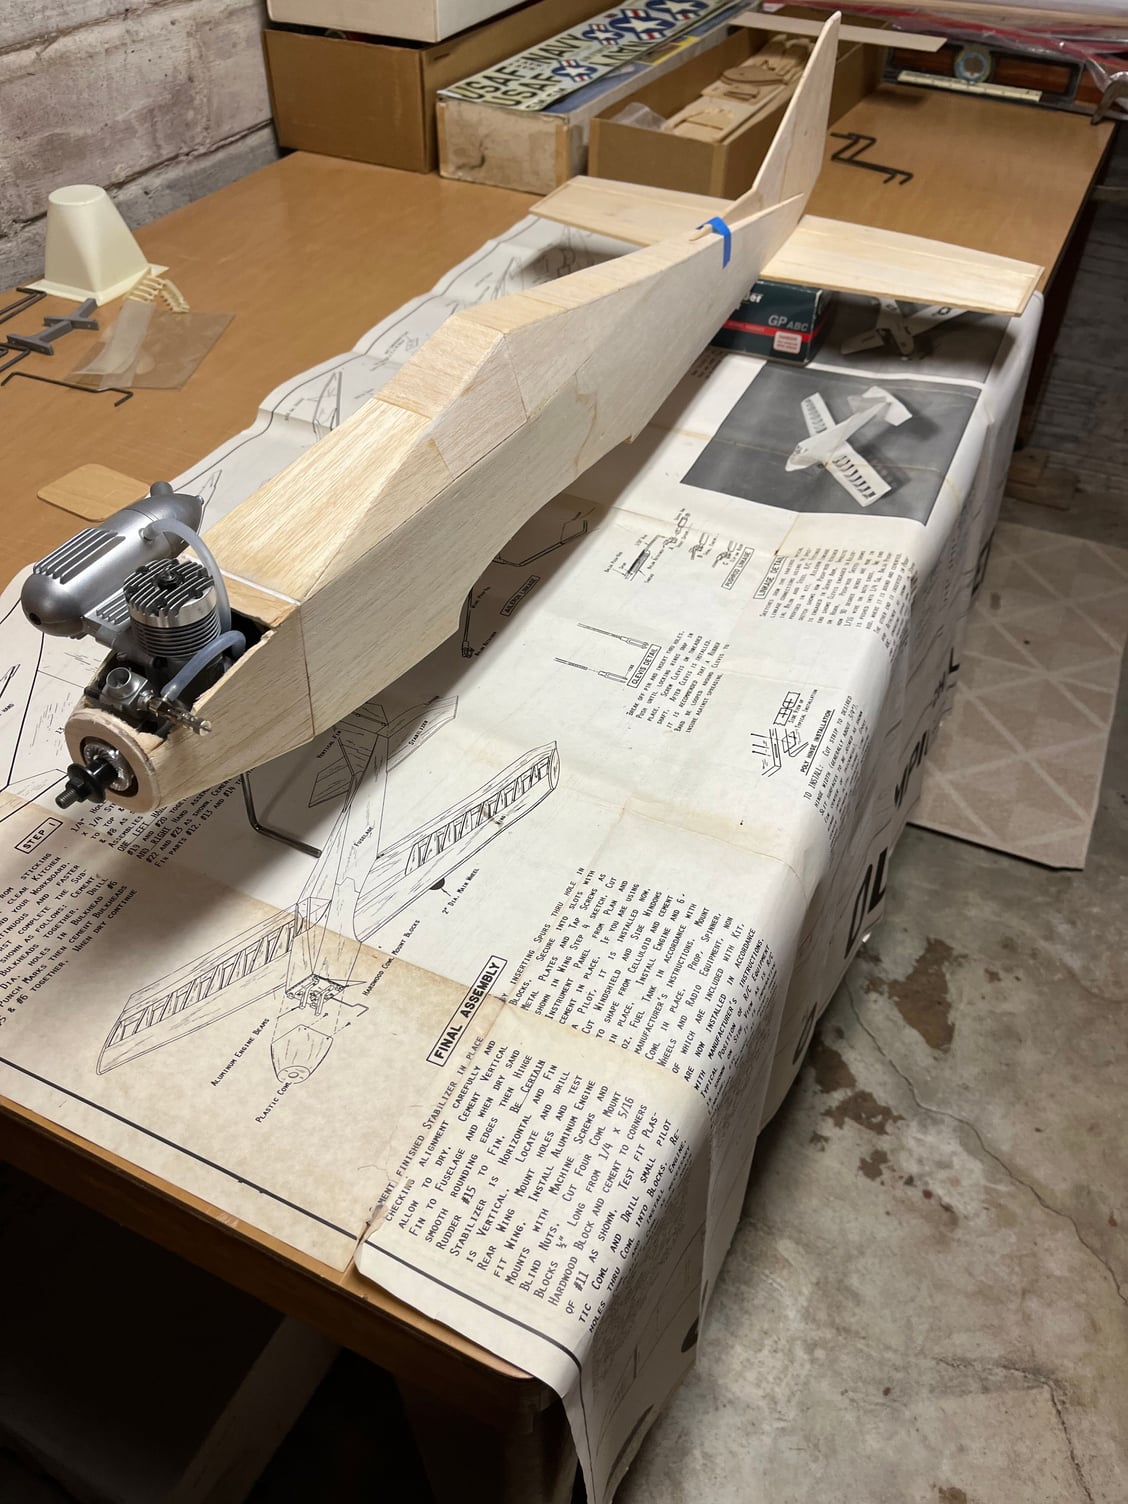
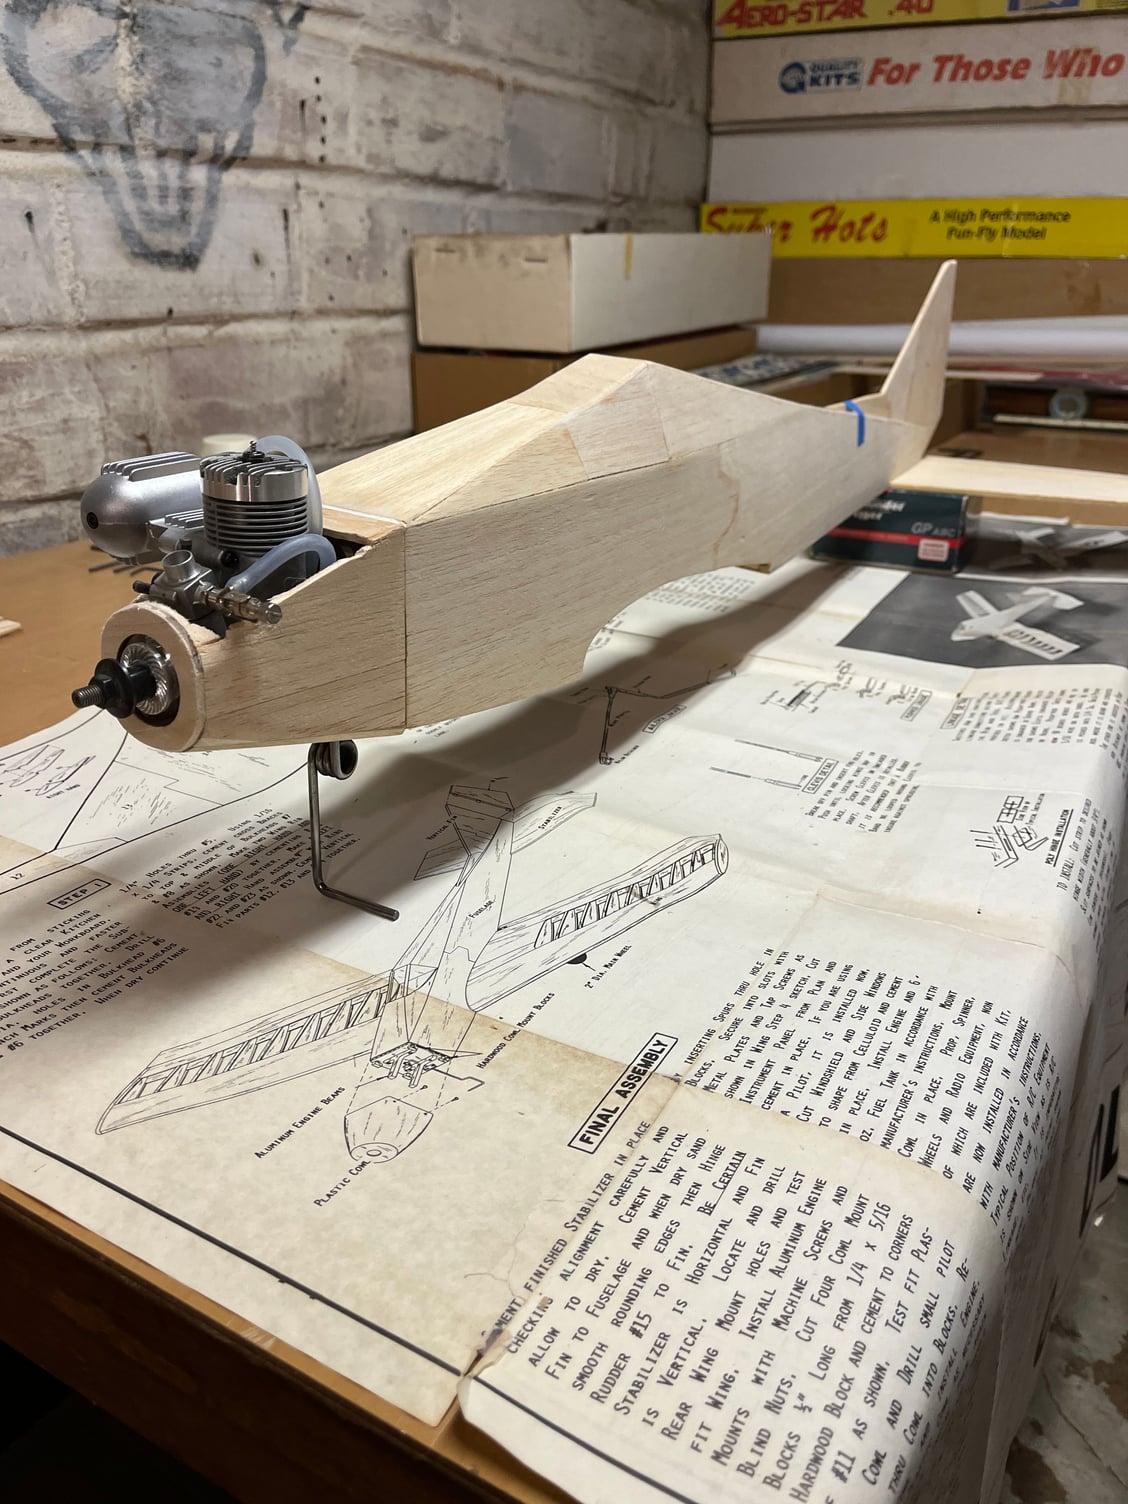
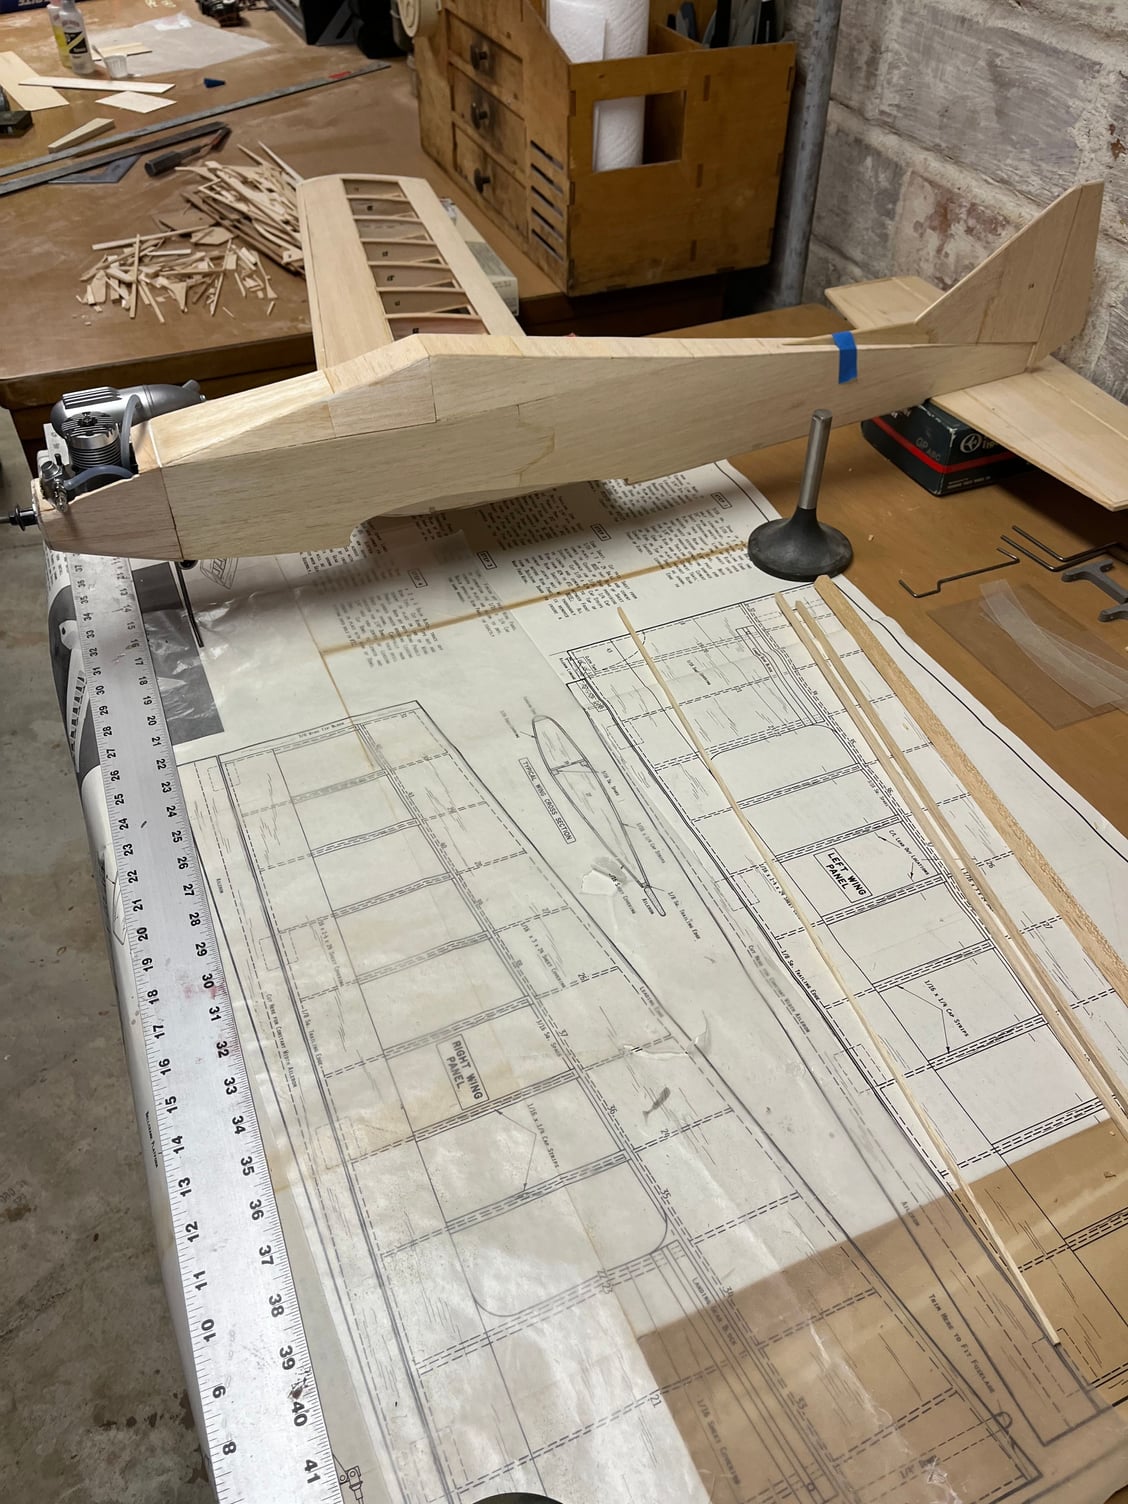
Here the nose is roughly shaped and engine temporarily installed. Next is to pull the engine, fuel proof the compartment and sand and finish shaping. I�ll set the fuse aside for now and start the wing assembly. I think it will clean up nice and look fine once covered. All up weight on fuse,tail feathers, and engine is 1 pound 9.4 ounces.
Last edited by plumberdeluxe; 04-23-2023 at 09:40 AM.
 04-24-2023, 10:01 AM
#19
I started a wing today and was surprised at how well it went even
Die cut ribs
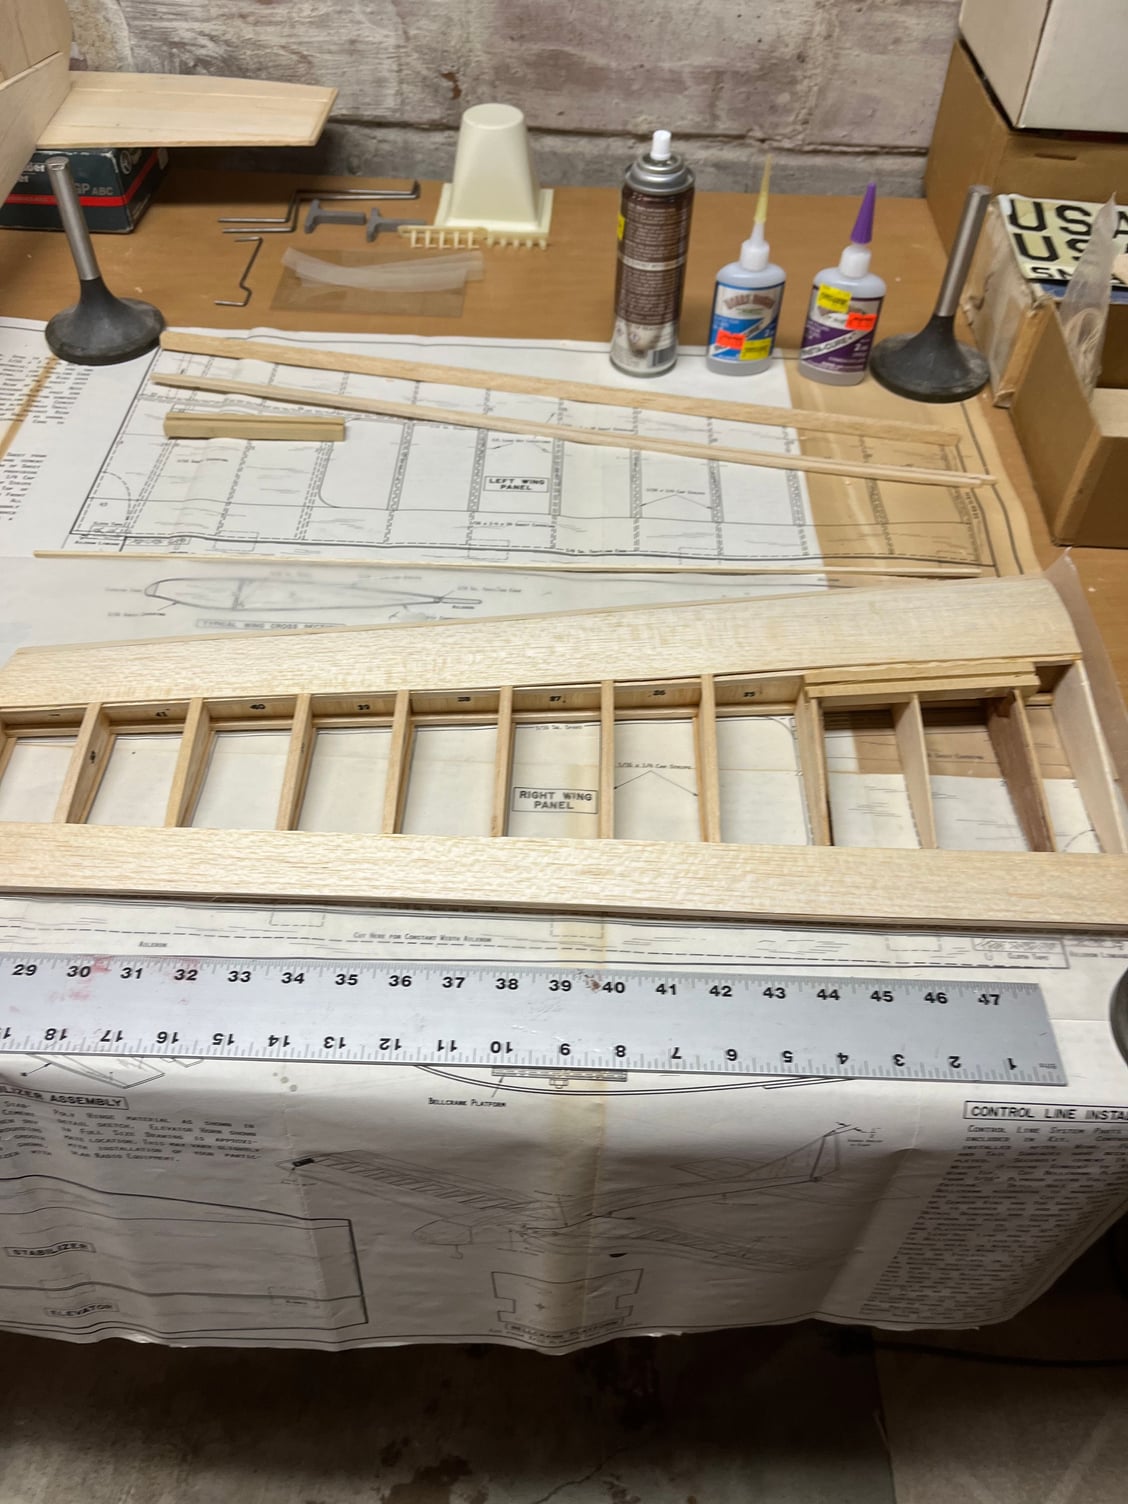
Wing bottom

Wing top
with all the die cutting issues. It went fairly smooth with few problems. It feels fairly strong and is complete minus a wing tip and the center sheeting. All up weight so far for this wing is 3.3 ounces. Not bad considering 4 pounds is my target weight.
Die cut ribs
Wing bottom
Wing top
with all the die cutting issues. It went fairly smooth with few problems. It feels fairly strong and is complete minus a wing tip and the center sheeting. All up weight so far for this wing is 3.3 ounces. Not bad considering 4 pounds is my target weight.
 04-24-2023, 03:41 PM
#21
Isn't it crazy how the design "technology" has changed over the years.
Look at the size of the control surfaces compared to what we see today...
Landing gear blocks in the wing with wire gear... Don't see much of that any more...versus the cut and shaped aluminum flat bar screwed to the bottom of the fuse..
Look at the size of the control surfaces compared to what we see today...
Landing gear blocks in the wing with wire gear... Don't see much of that any more...versus the cut and shaped aluminum flat bar screwed to the bottom of the fuse..
04-25-2023, 01:27 AM
#23
Rick,
Those valves are made for Caterpillar, not sure what they went to, something big for sure.
I just use them as weights to hold things down to the table.
Control surfaces are made in 2 sizes, one for rc and one for control line........rc is cut in half
Those valves are made for Caterpillar, not sure what they went to, something big for sure.
I just use them as weights to hold things down to the table.
Control surfaces are made in 2 sizes, one for rc and one for control line........rc is cut in half
04-29-2023, 02:37 PM
#24
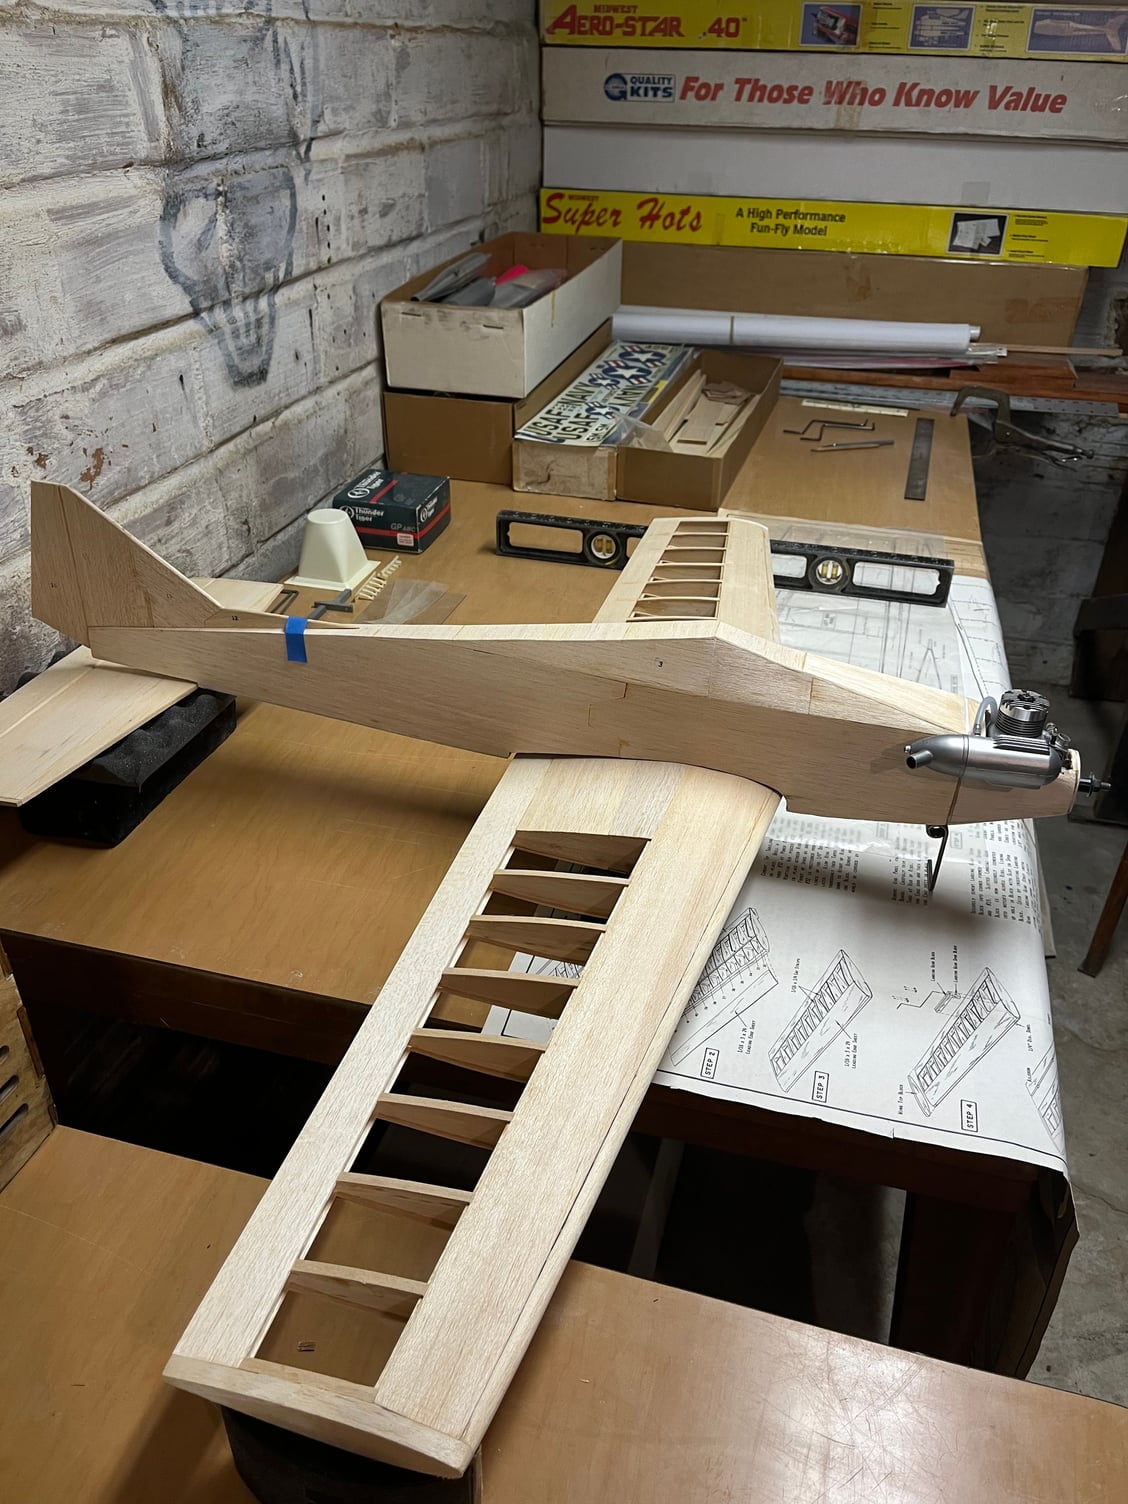
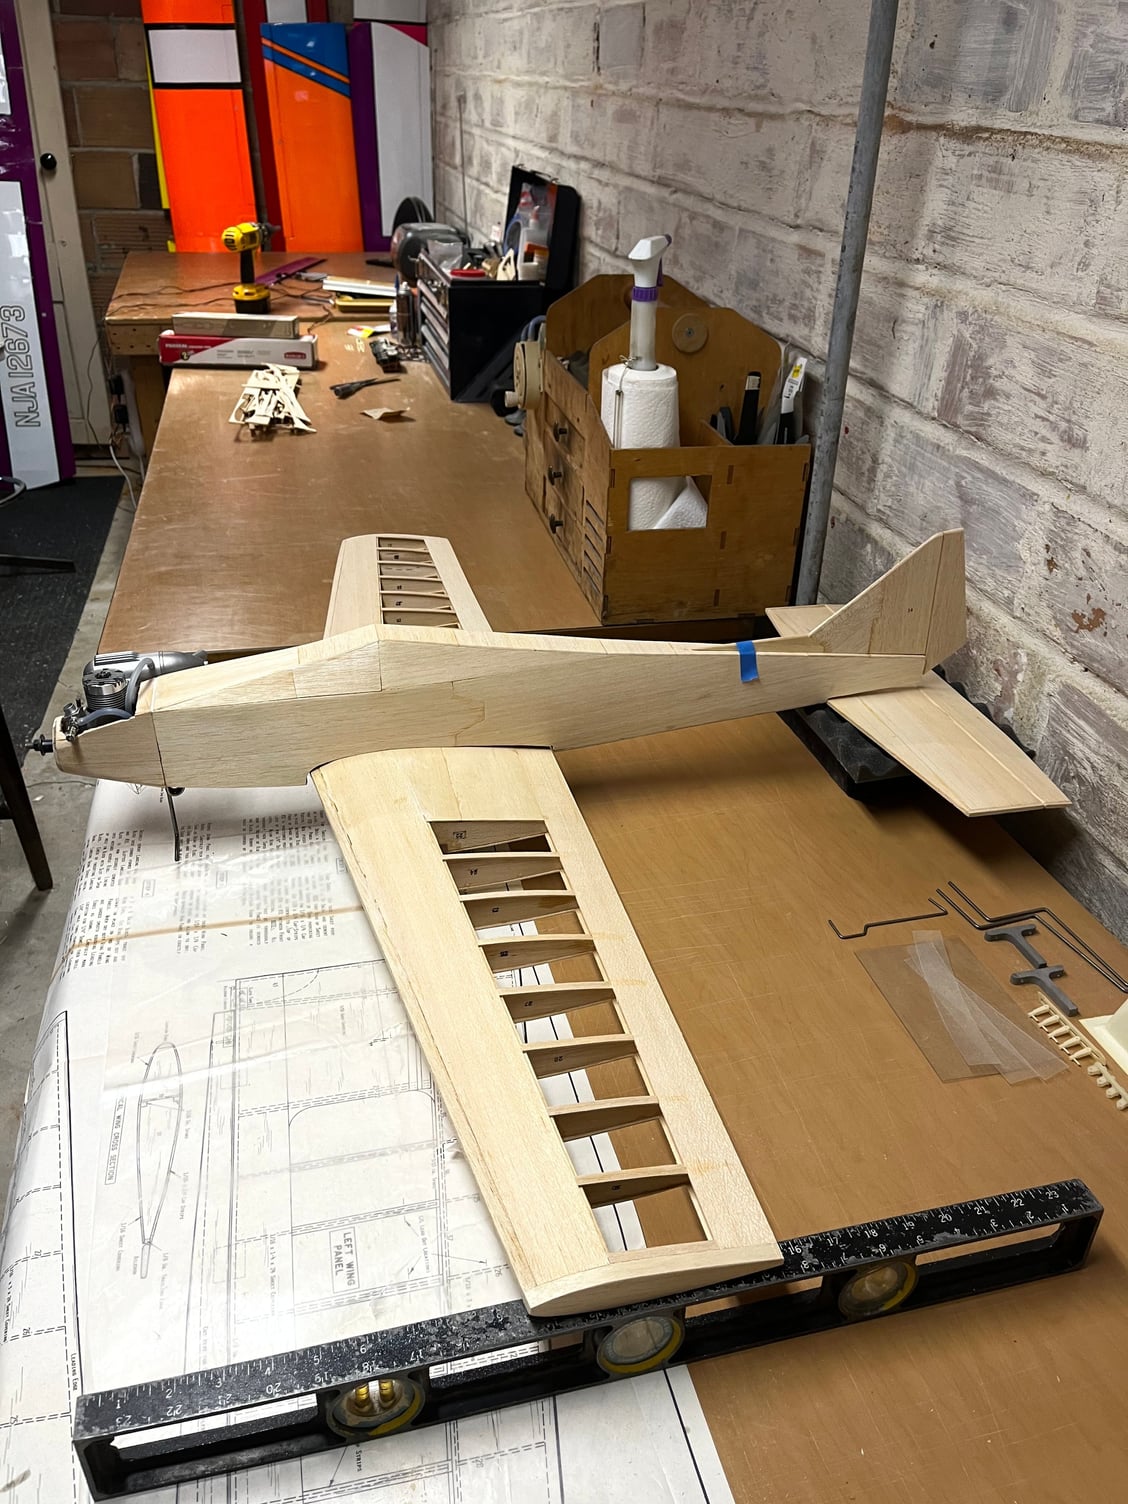
Here is the basic construction completed with other wing in place. From here on out will be sanding, covering, and radio installation. I will join the wings next and glass the center section. As you can see my shop is very basic with no fancy tools. This should show anyone can build an old kit easily. I�ll update the thread as I progress.

04-30-2023, 03:22 AM
#25
Looking GOOD...
Now the real fun begins....
I am always trying to come up with some kind of snazzy color scheme on my planes. Sometimes all I do is create a lot of work and a mess of colors on an airplane..
But hey, I can guarantee there is never another one that looks like mine...")
Now the real fun begins....
I am always trying to come up with some kind of snazzy color scheme on my planes. Sometimes all I do is create a lot of work and a mess of colors on an airplane..
But hey, I can guarantee there is never another one that looks like mine...