


Hammer.40+ YS.60 build
 01-06-2024, 05:22 AM
#1


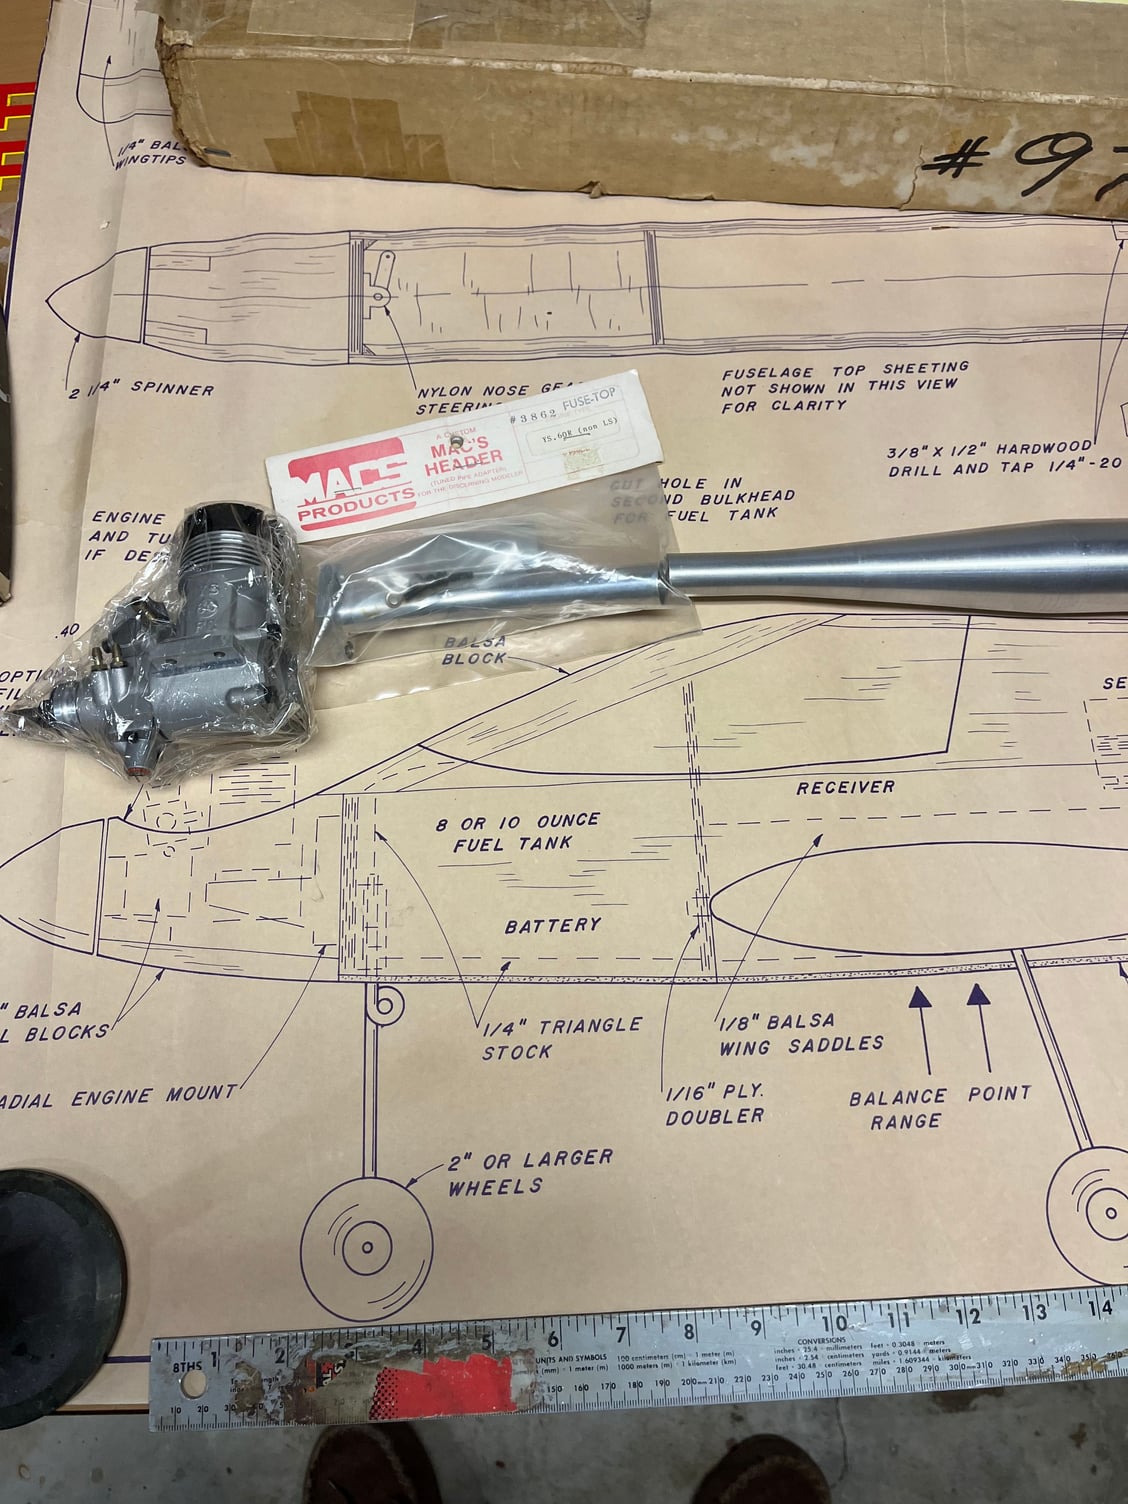
Here is an old favorite I’m thinking about building. I have a new YS 60 rear exhaust engine, header, and pipe that would wake this up pretty good. This plane is made for an 40 but has 620 inches of wing and is begging for a little kick in the tail. Any interest out there in seeing this little plane go together?

Last edited by plumberdeluxe; 01-06-2024 at 05:24 AM.

The following users liked this post:
TheEdge (01-06-2024)
01-06-2024, 05:58 AM
#2


You Know I am going to say yes..
I bet you get that thing done quick...
With that engine and pipe there is no doubt it will get down the road..
by the way, I bought plans and Balsa to build a "SUPER HOTS". Who knows when i will actually build it. I have not been getting any building and my next build "PLANS" change monthly sometimes...
01-06-2024, 06:57 AM
#3
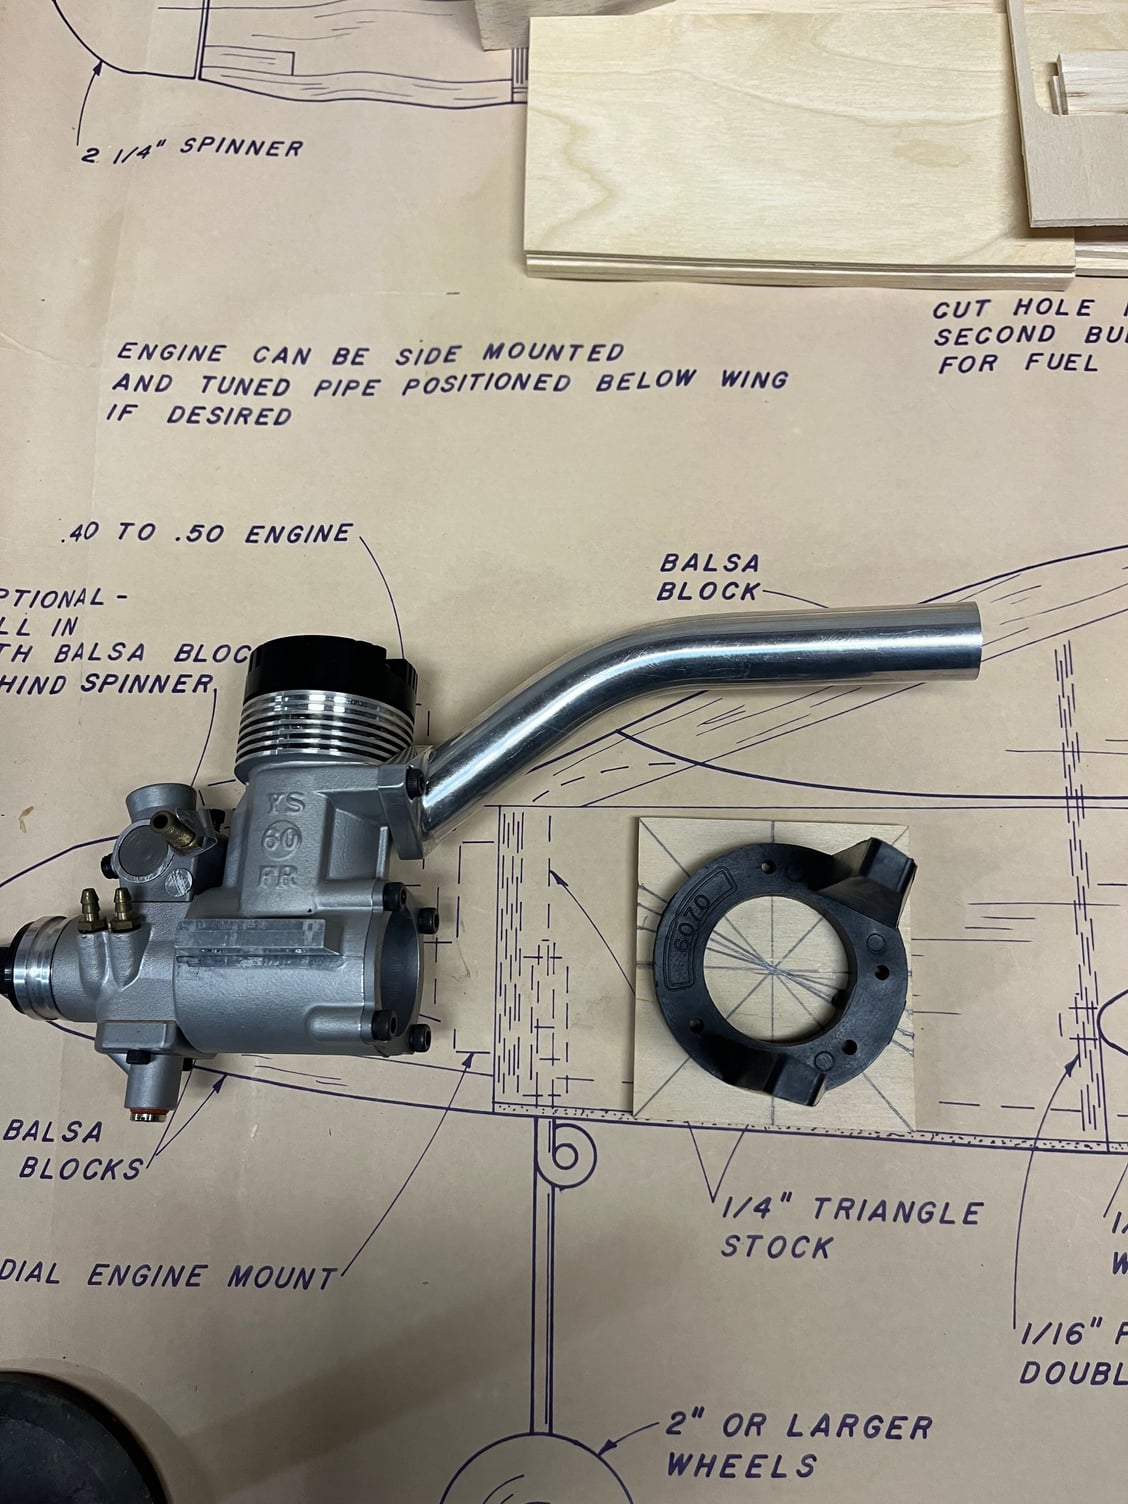
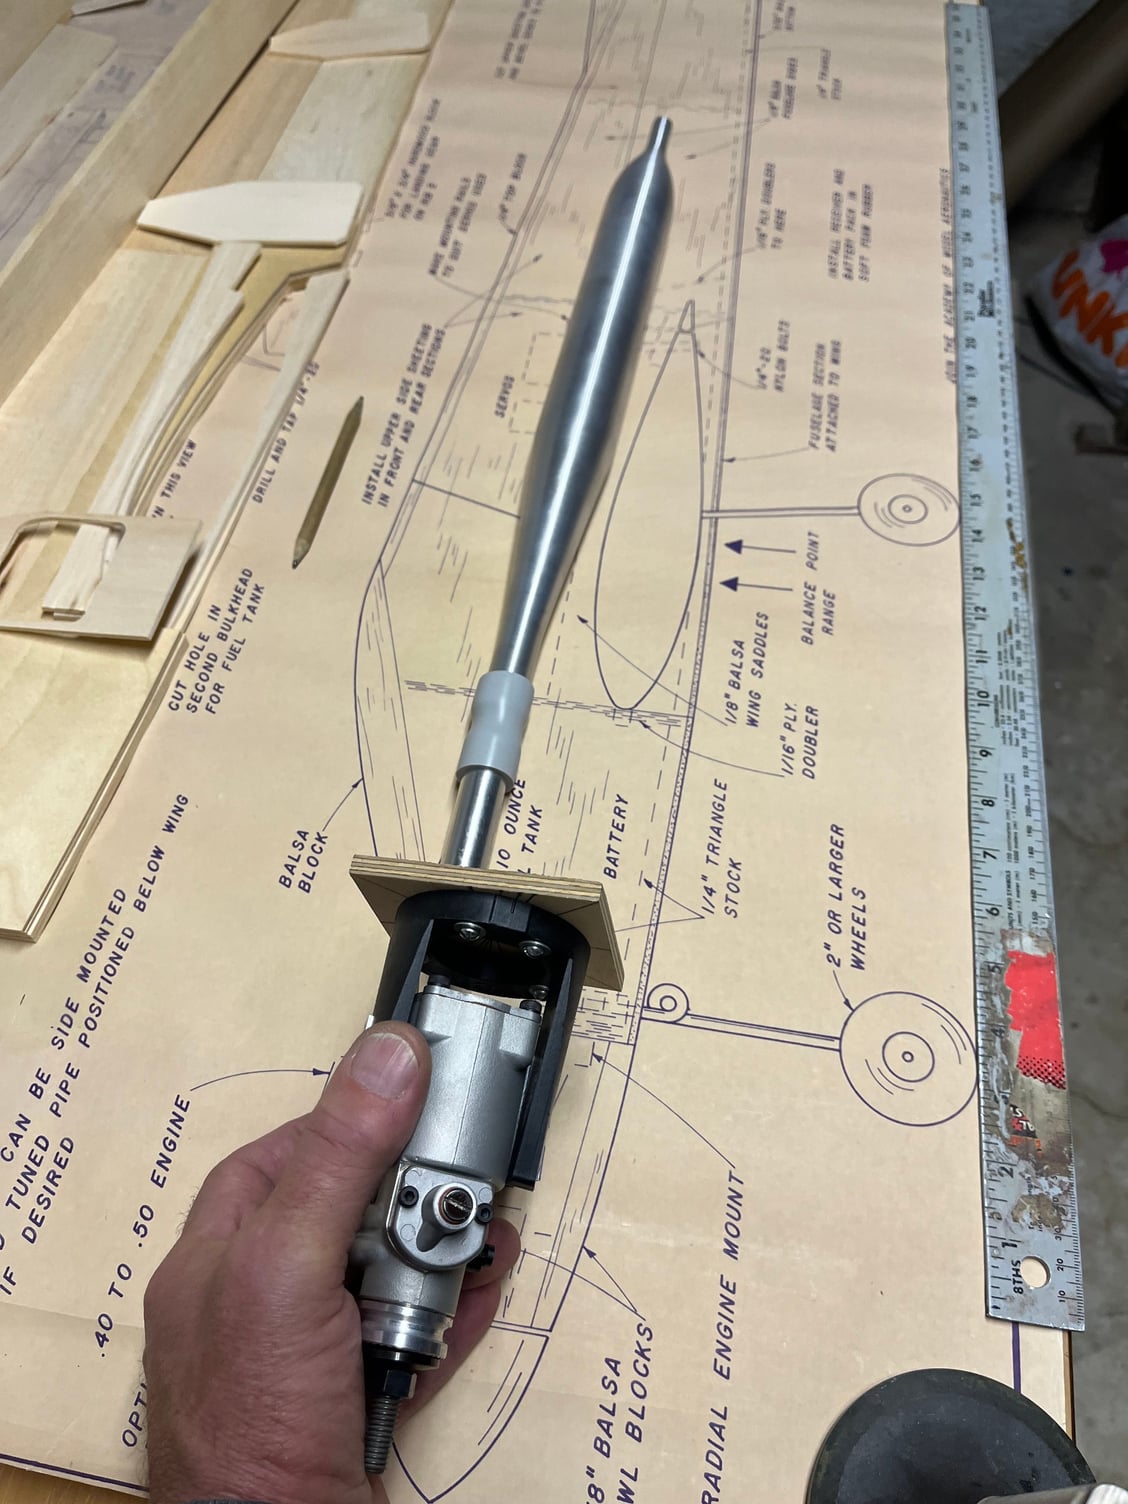
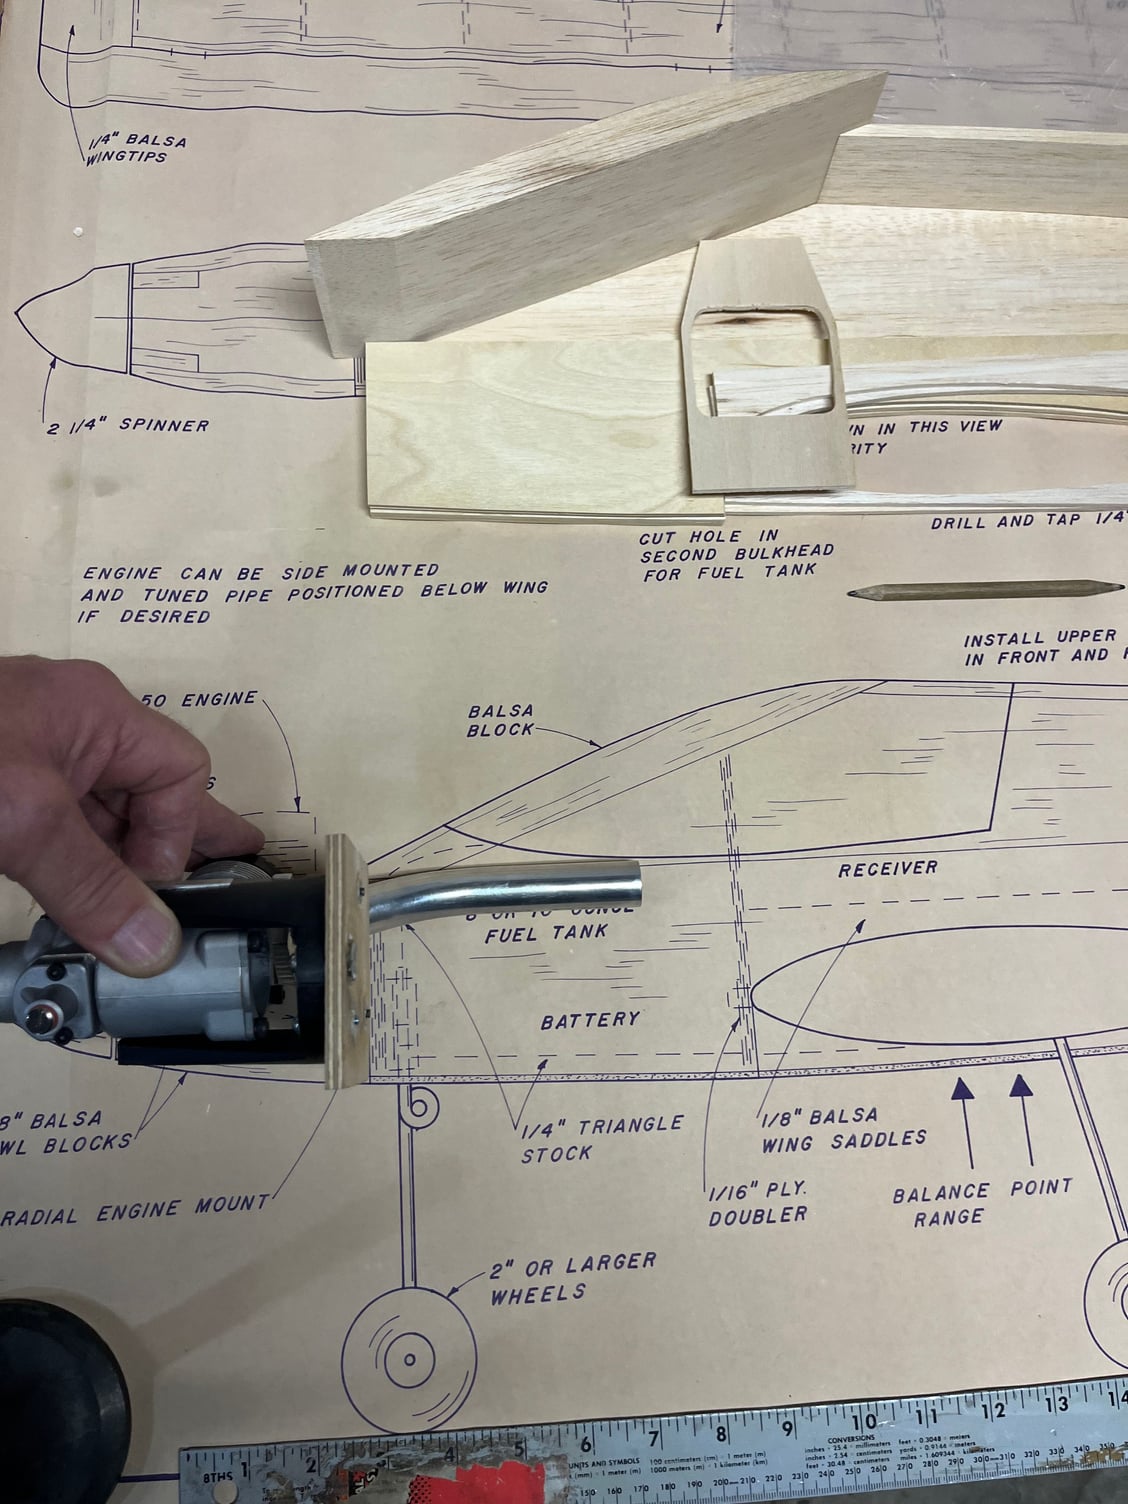
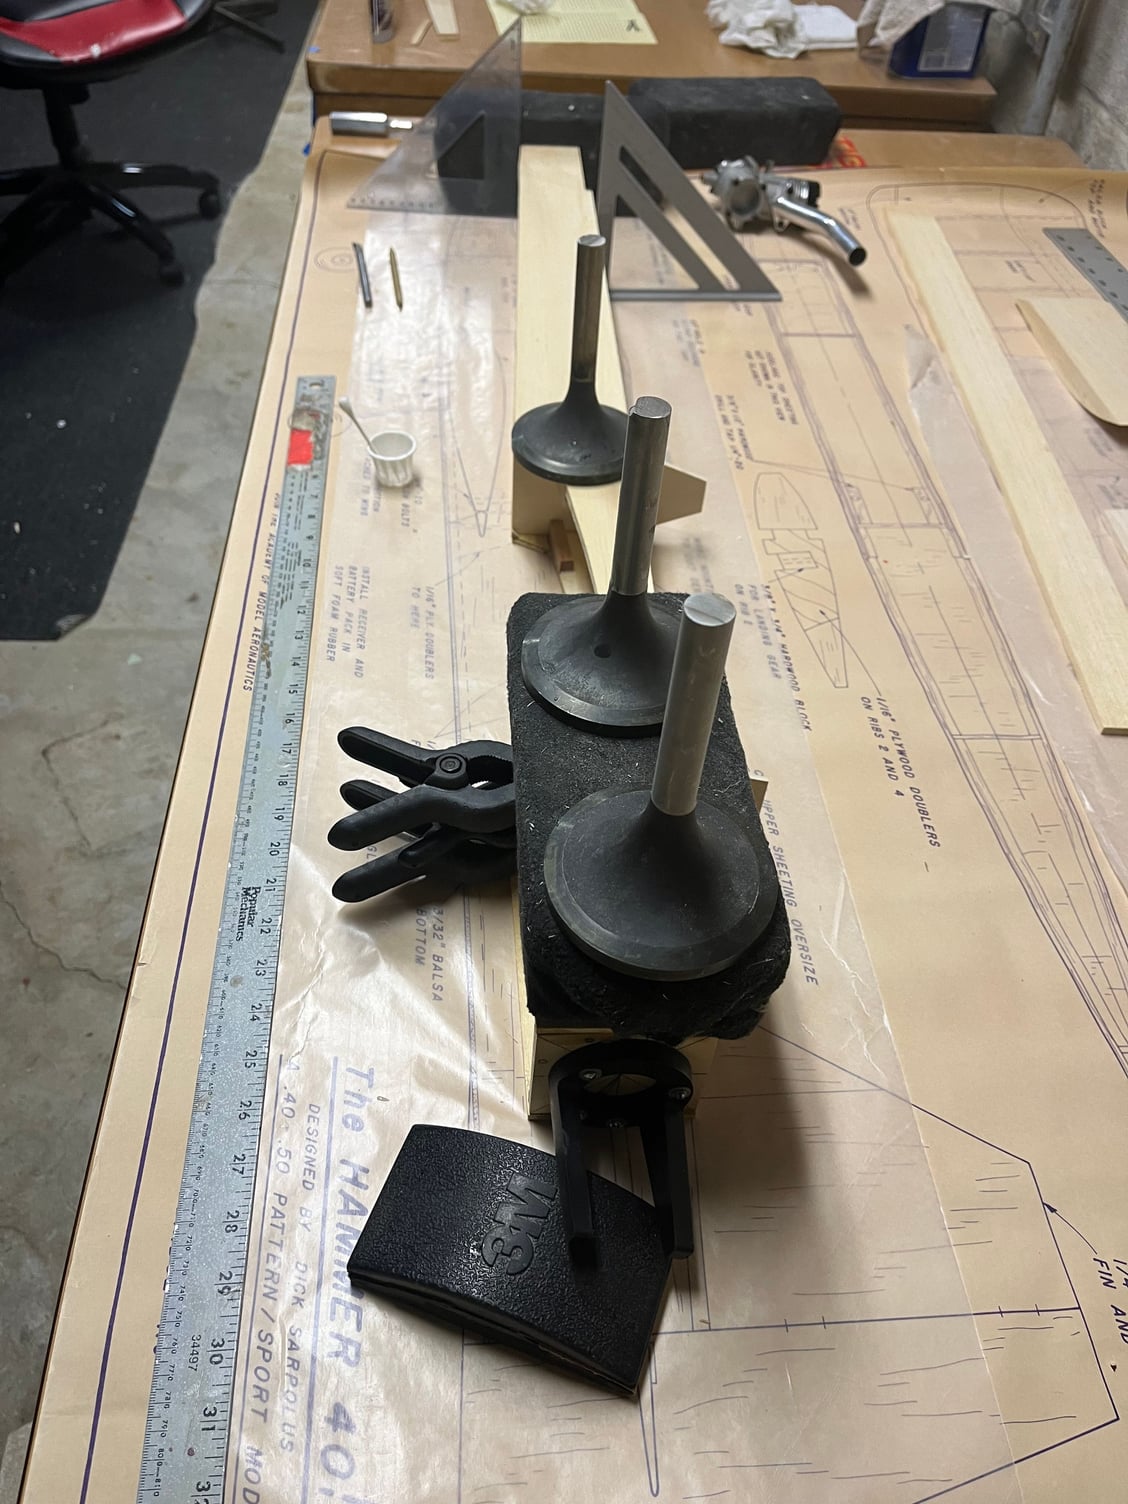
First thing I need to do is figure out what angle the engine needs to be mounted. Strait 90 degree install will be problematic as the pipe will hit the wing.
I'll kick the engine up a few degrees to miss the wing. Once I figure the right kick, this plane can begin...........
Very cool on the Hots, a must have plane if you ask me.
I'll kick the engine up a few degrees to miss the wing. Once I figure the right kick, this plane can begin...........
Very cool on the Hots, a must have plane if you ask me.
The following users liked this post:
TheEdge (01-06-2024)
01-06-2024, 07:31 AM
#4
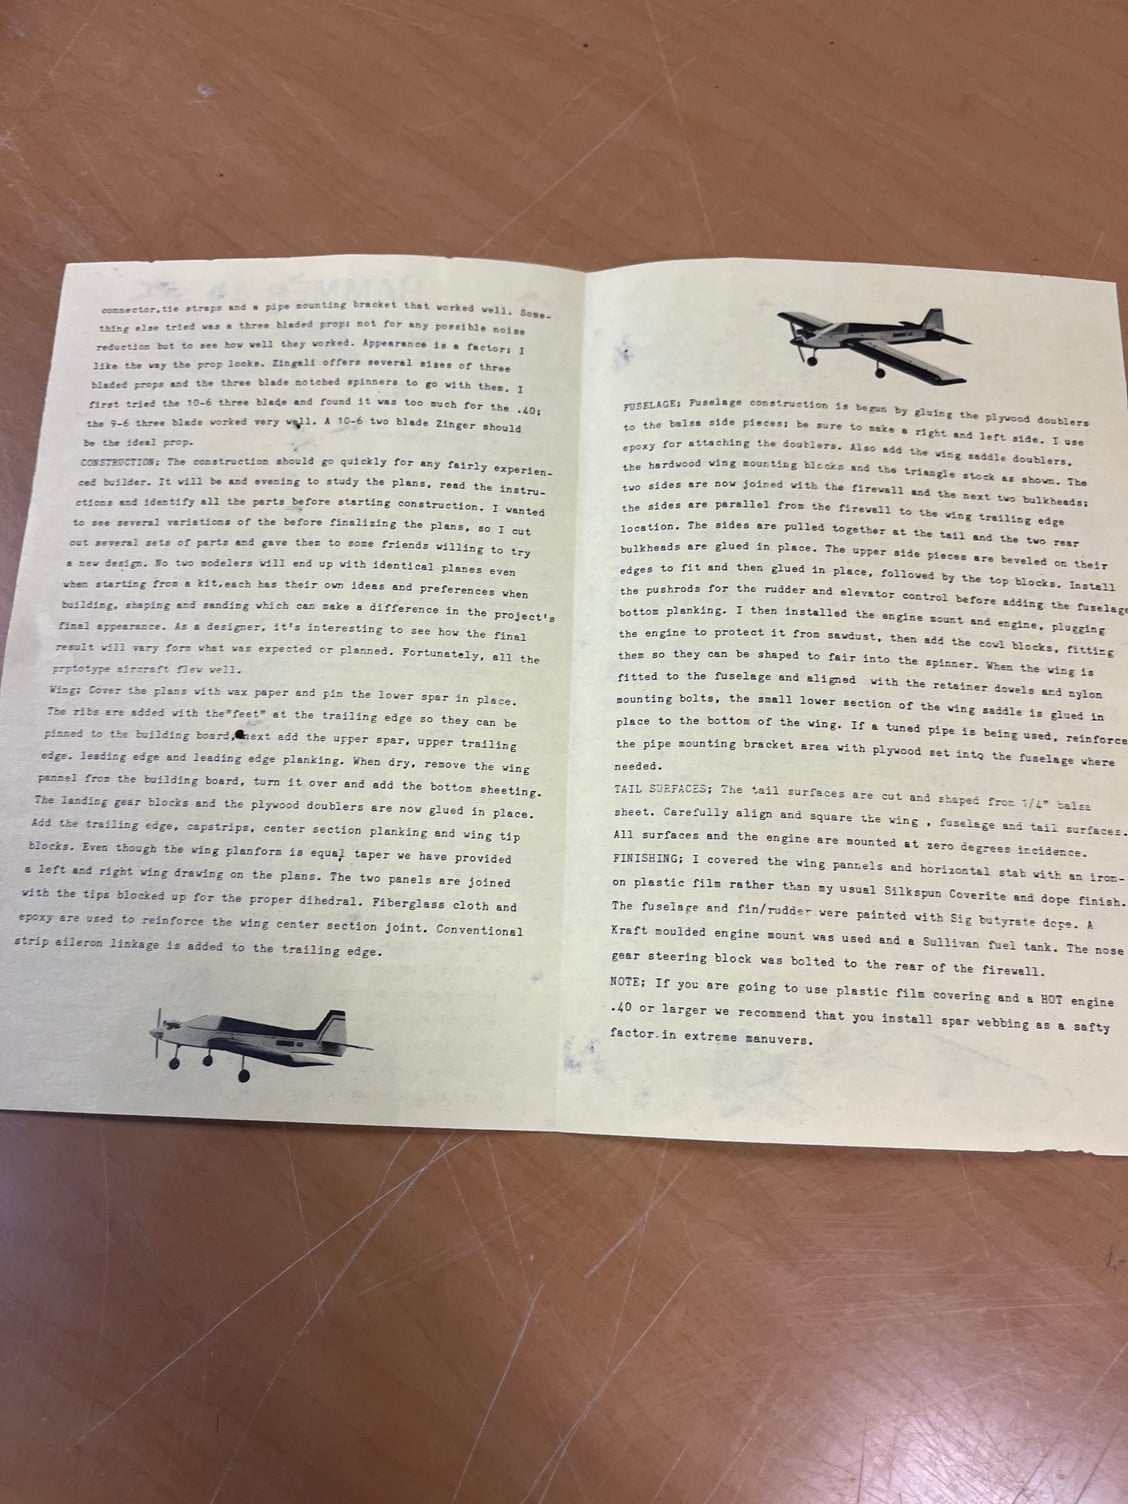
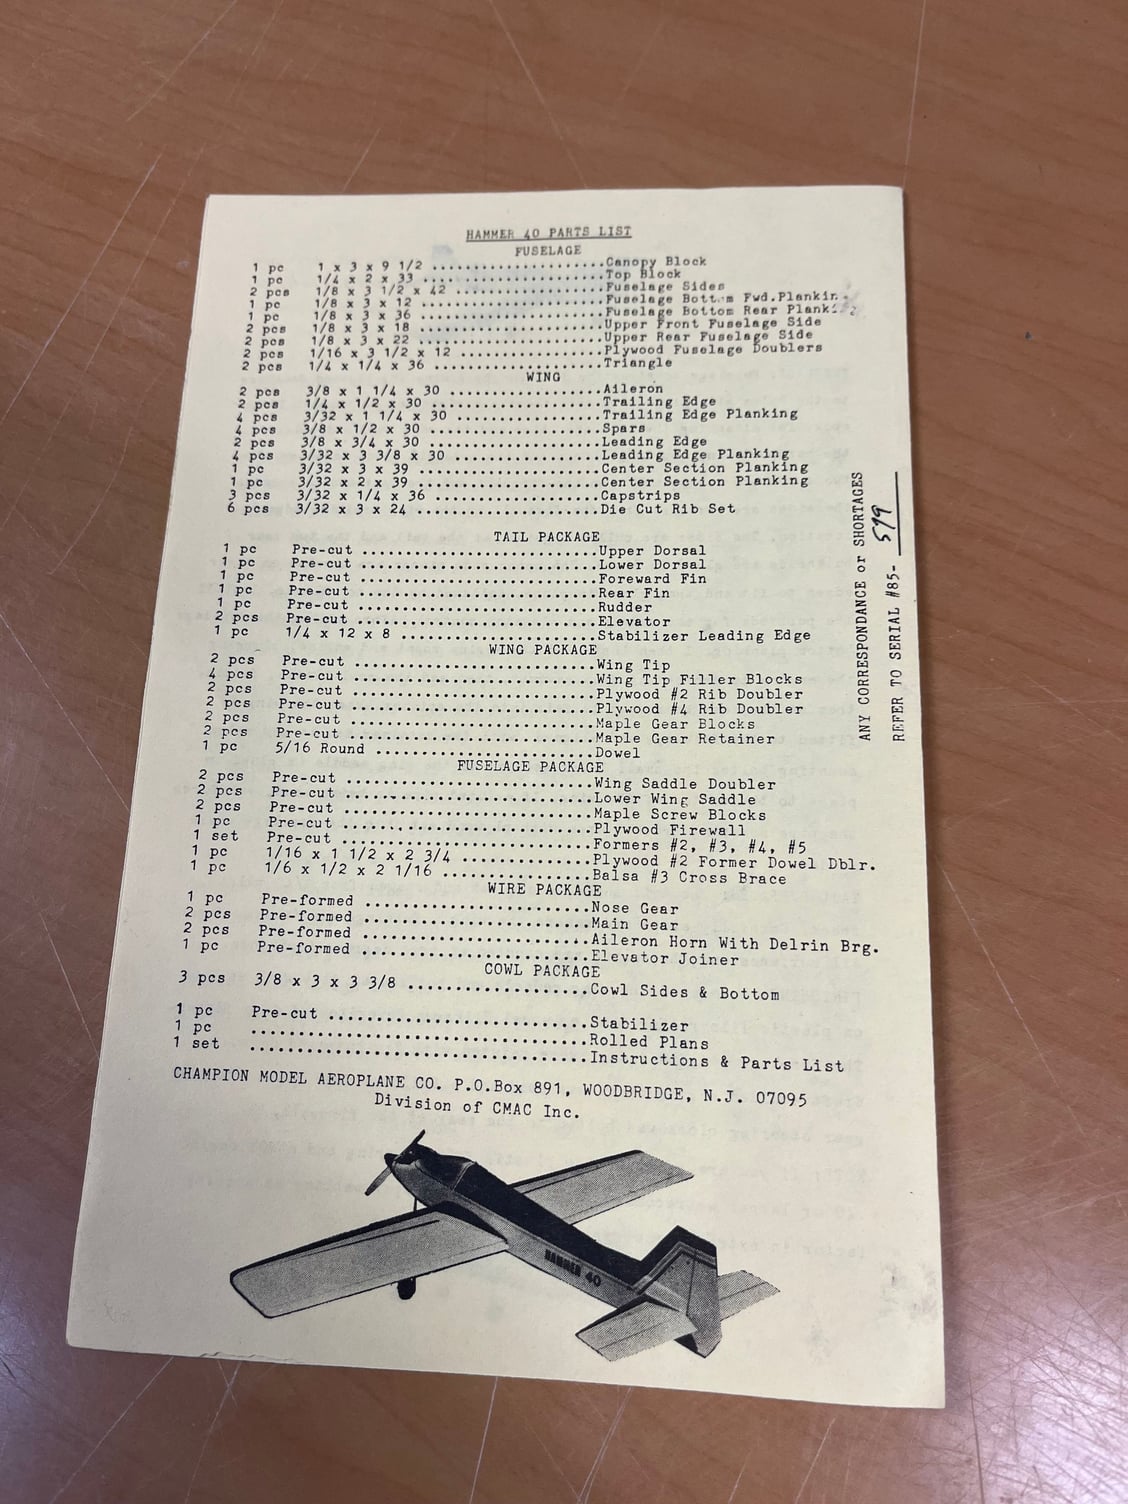
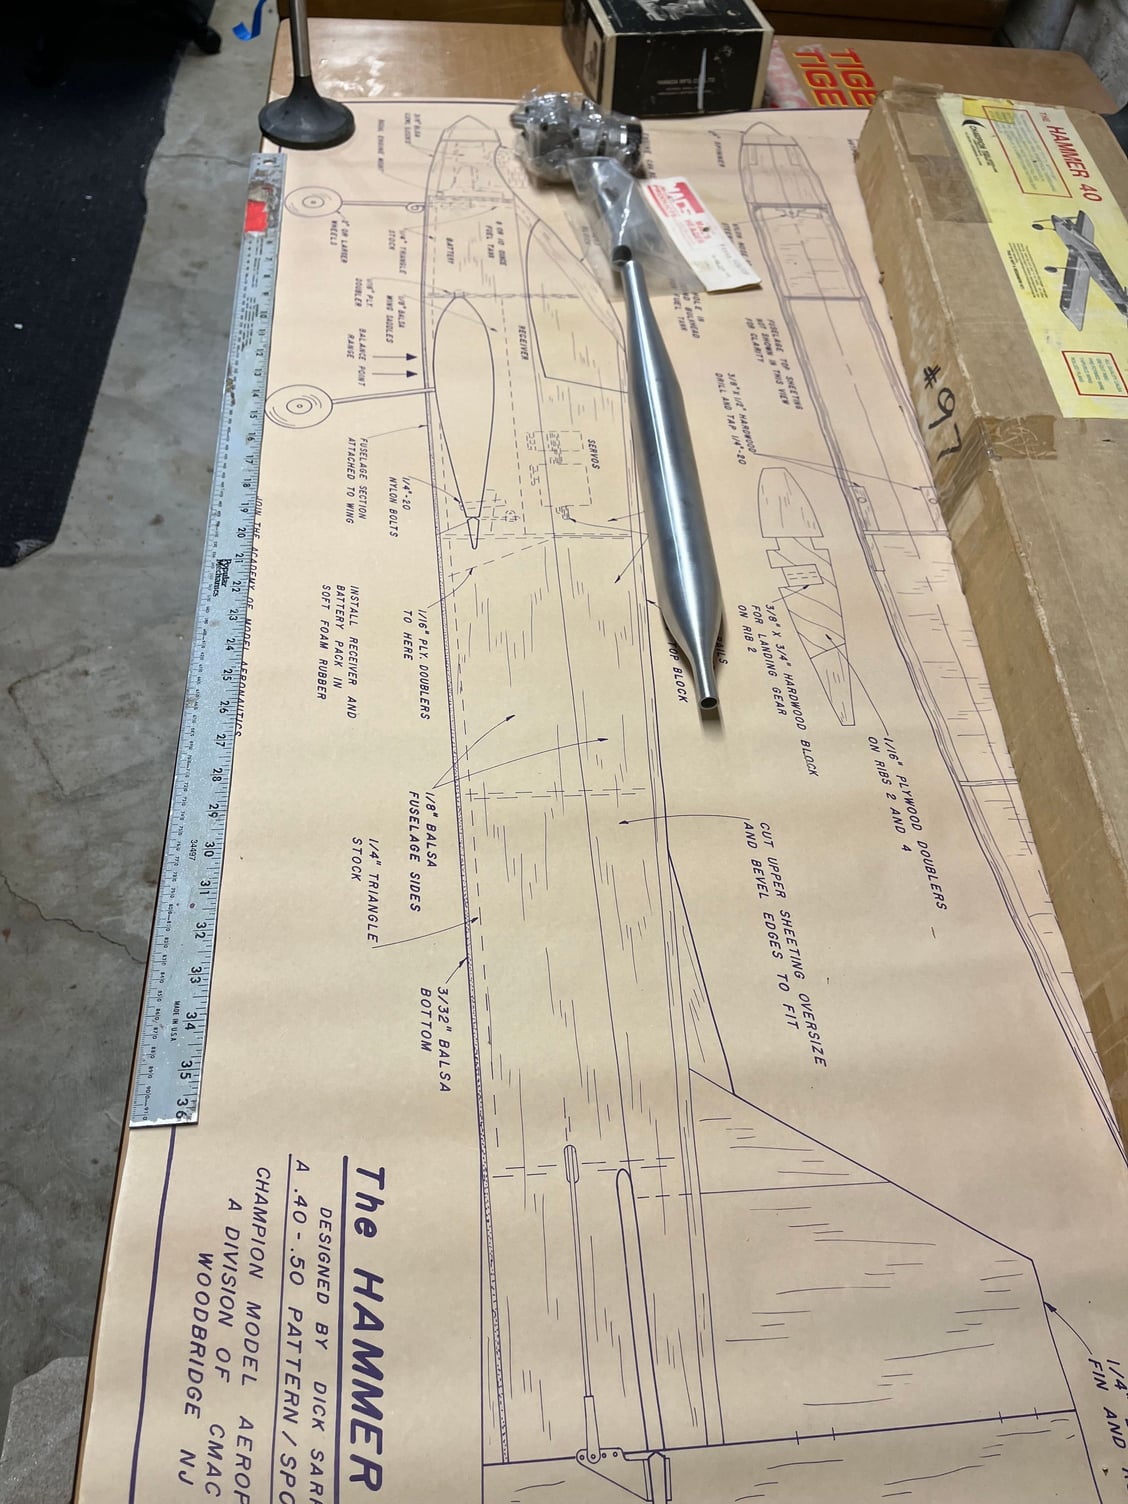
Here are the instructions for the kit, it has been several years since I built a hammer, last one was a Hammer.20 with a hot little .40 on it, Irvine I believe, it was a real fun plane to fly. Basically you just look at the plans and build, this will be fun and refreshing, I’ll start it after I lay everything out and decide on a few preferences, tri gear or taildragger, radio set up, pipe set up, and engine angle……..
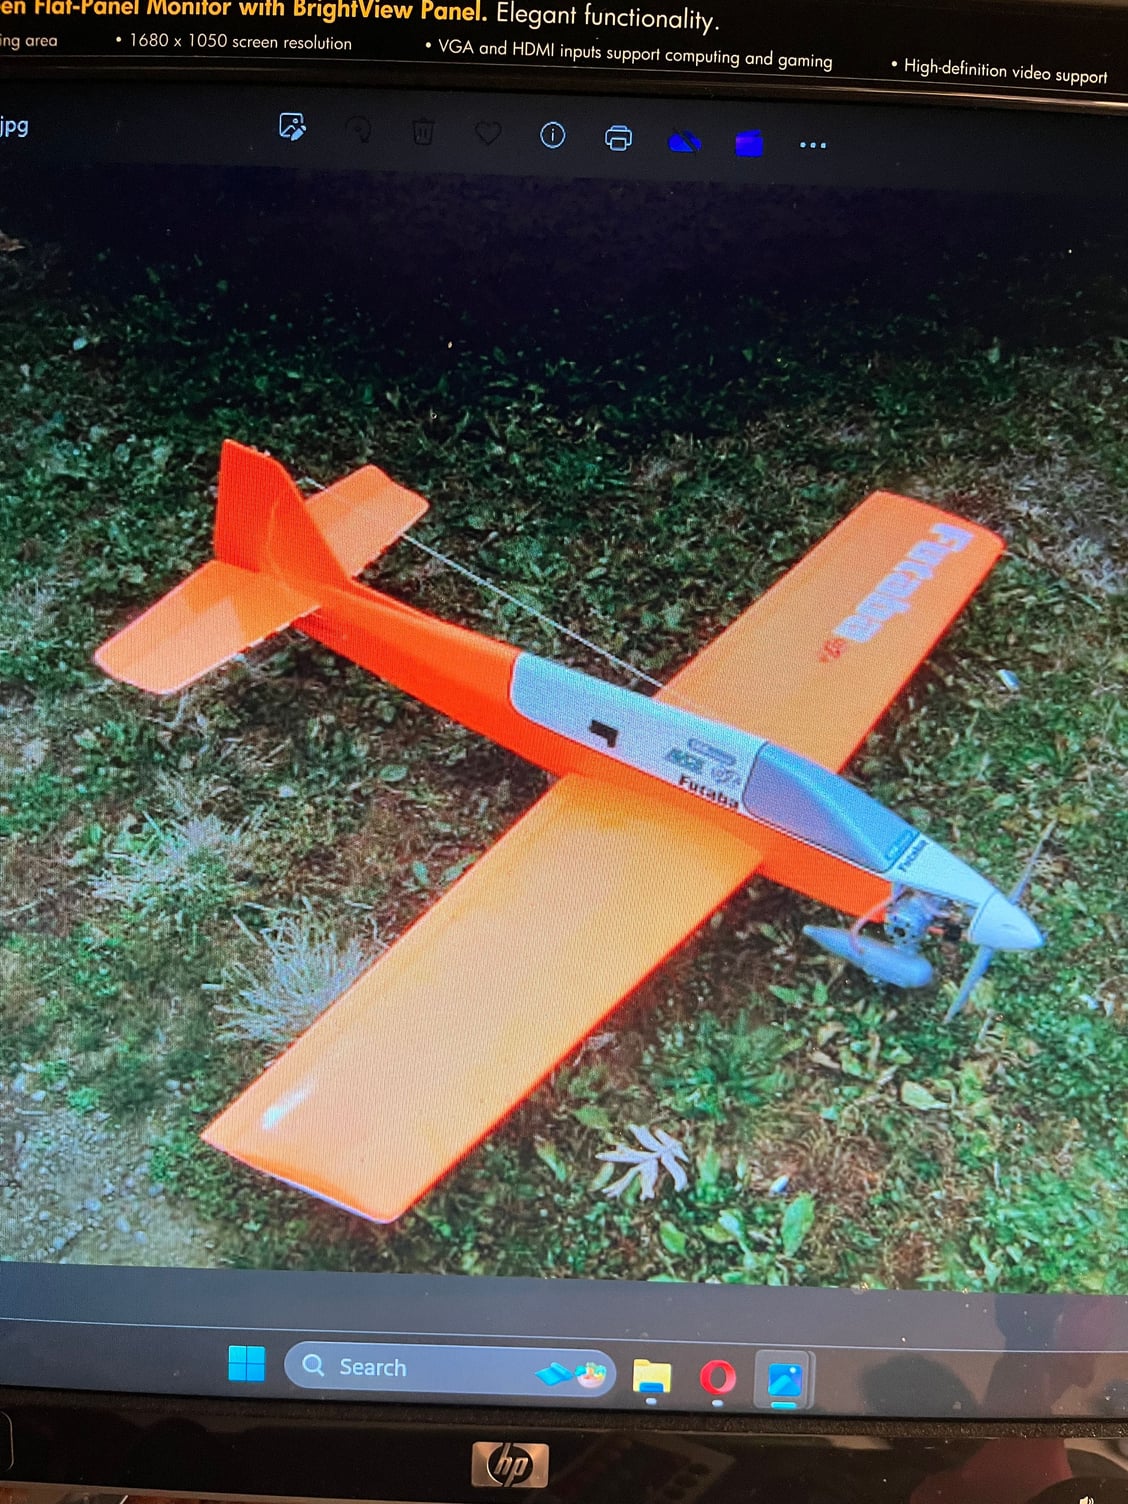
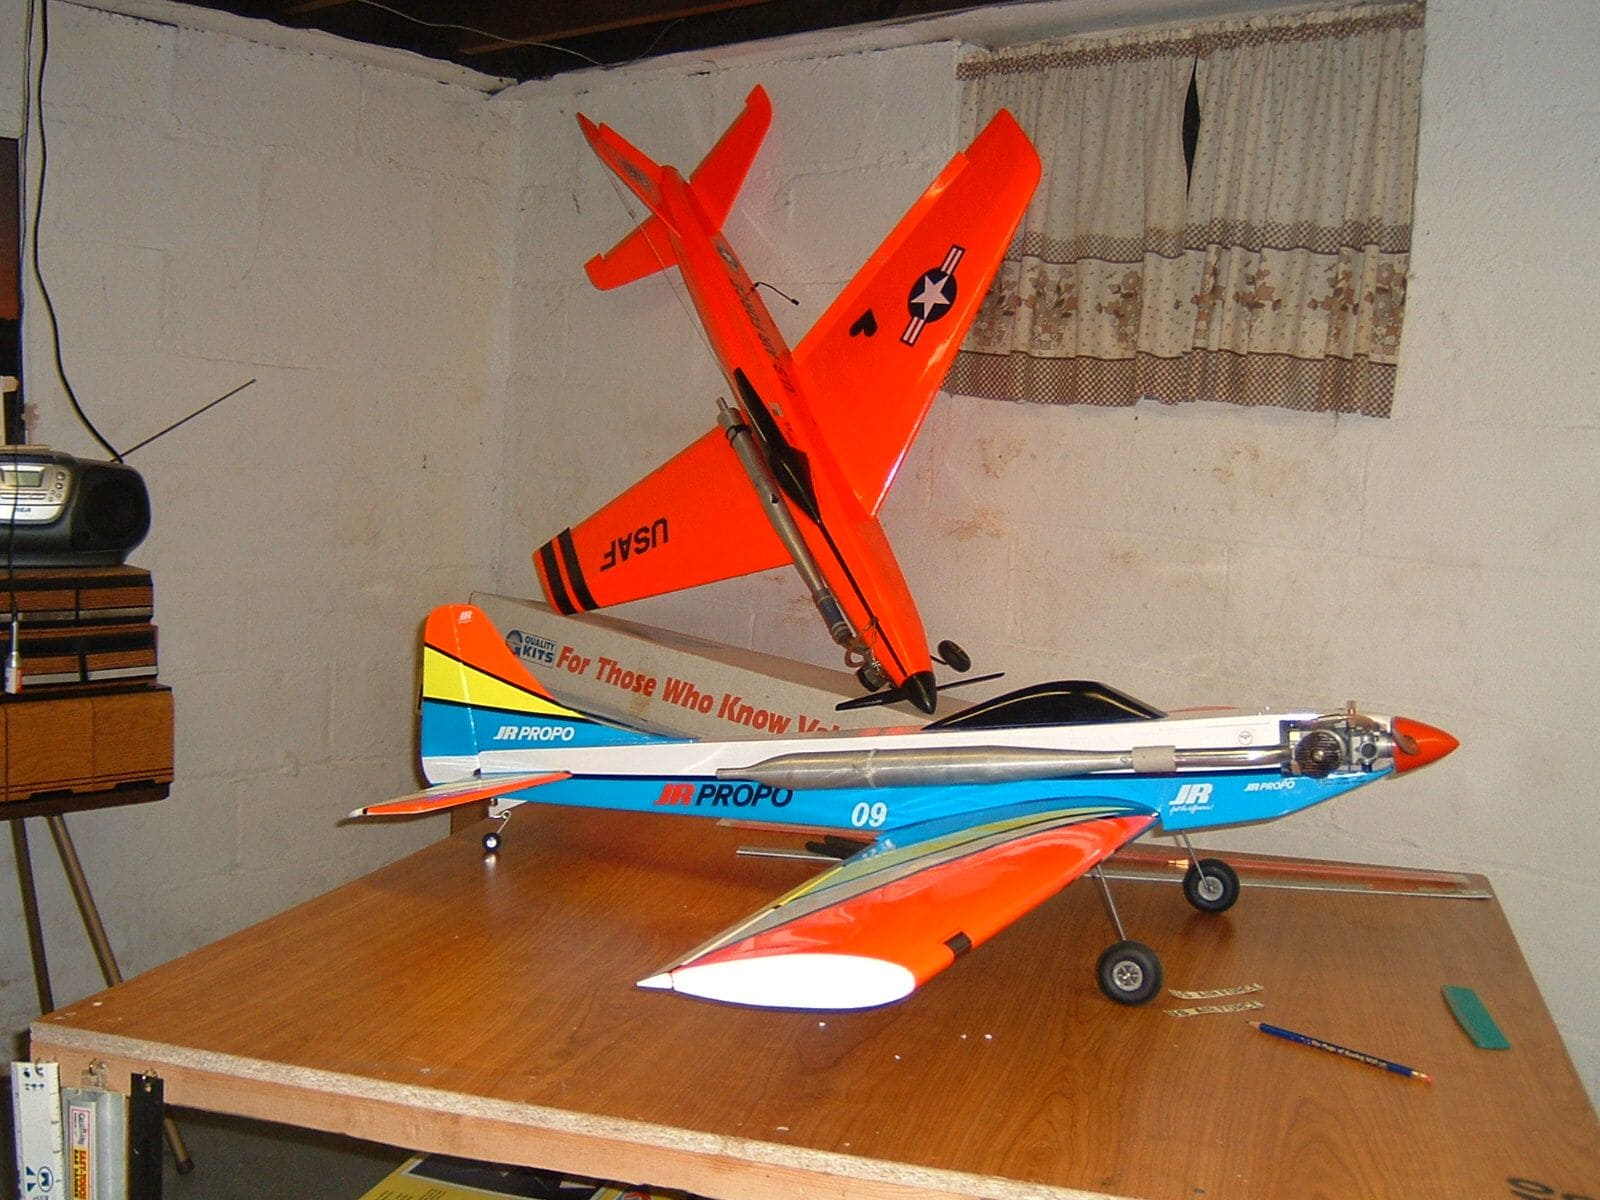
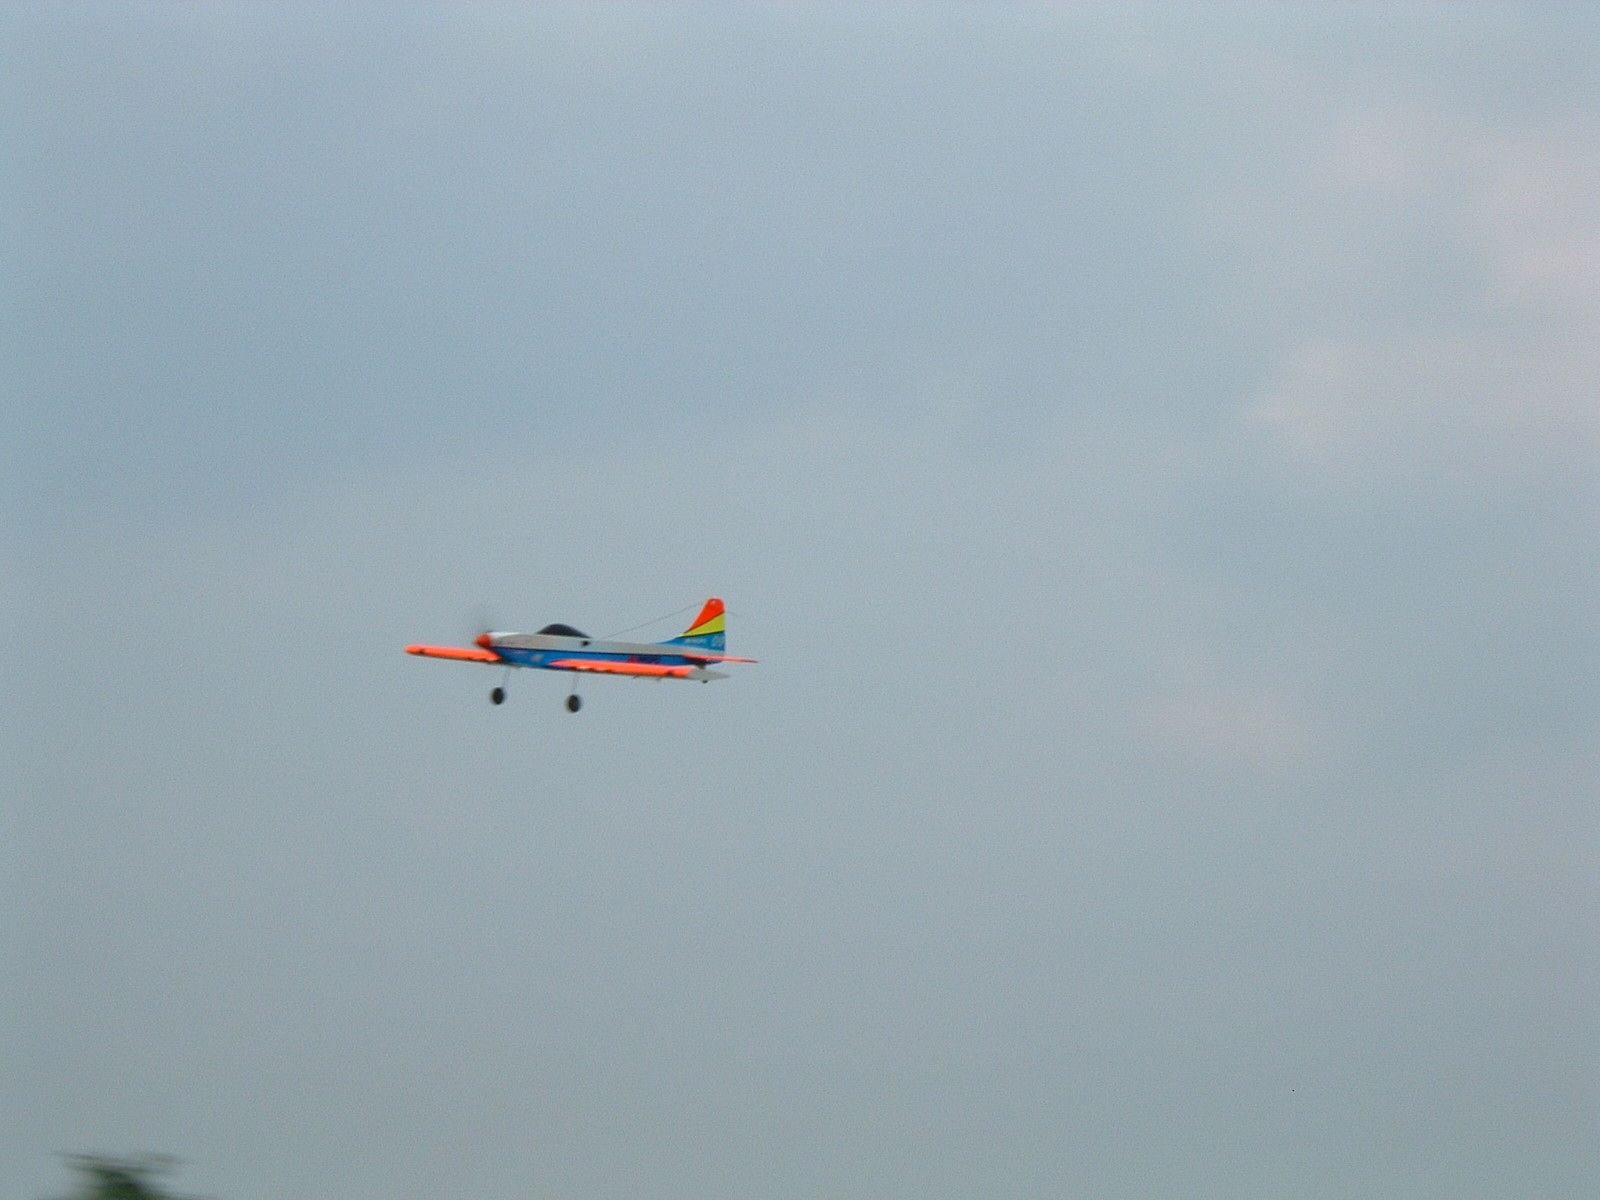
Here is my Hammer 20
Last edited by plumberdeluxe; 01-06-2024 at 07:37 AM.
01-06-2024, 08:45 AM
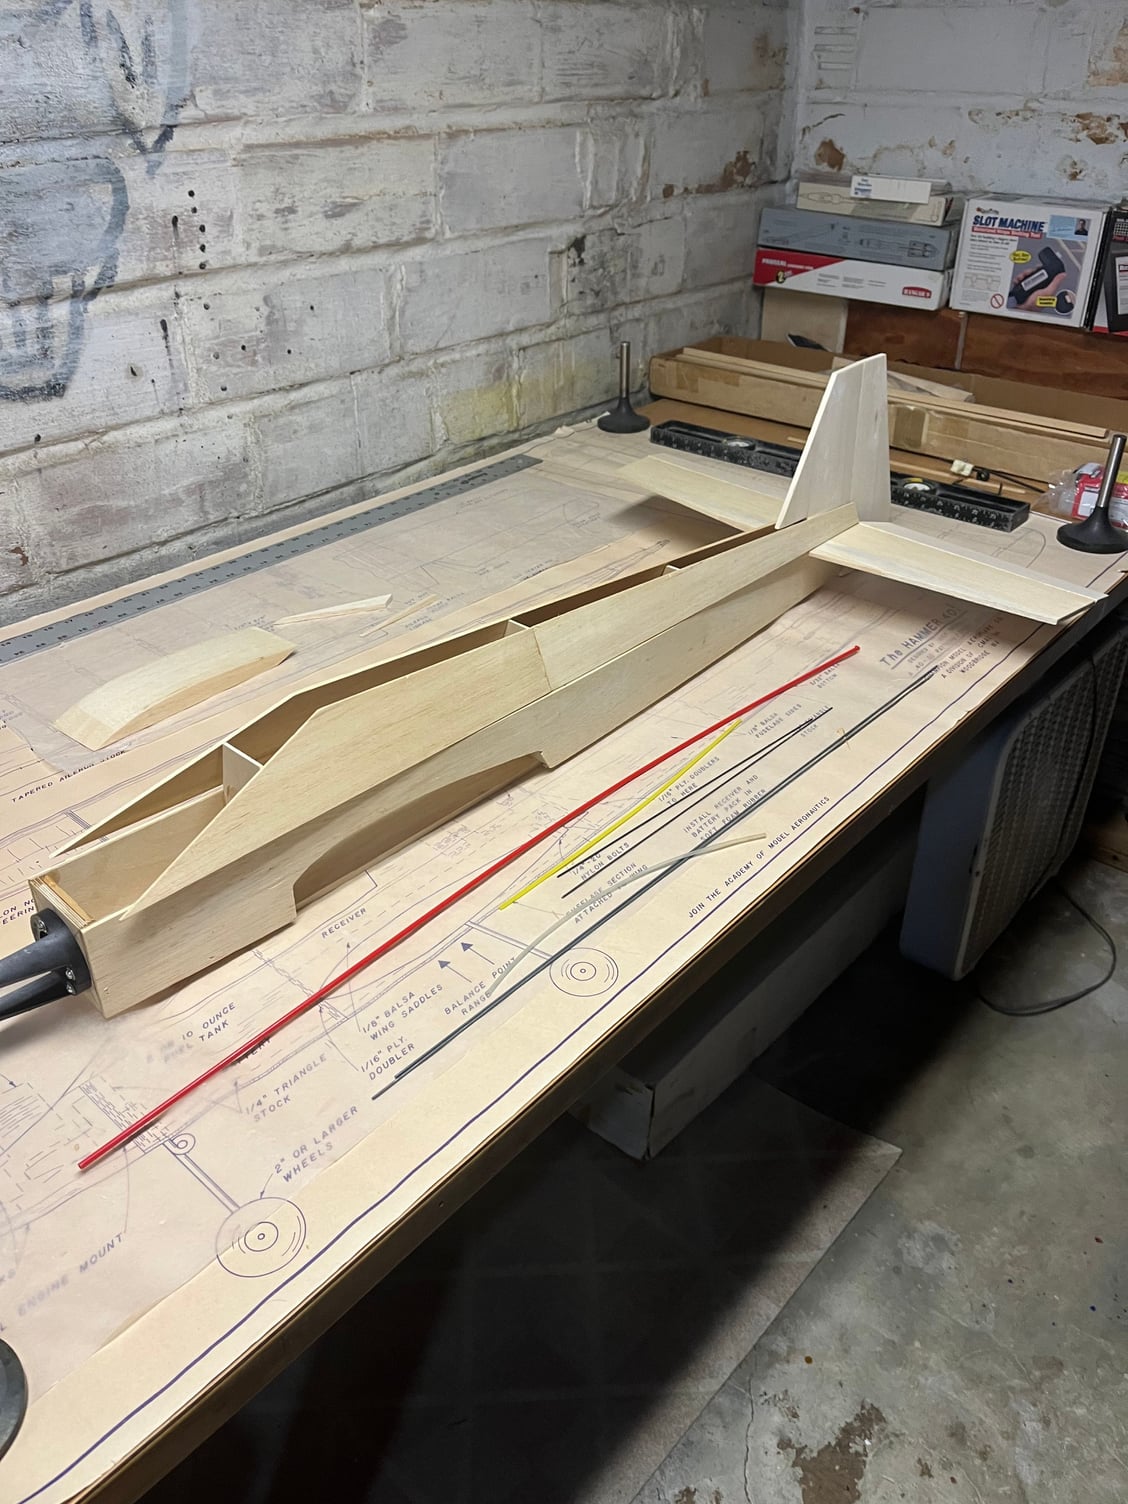
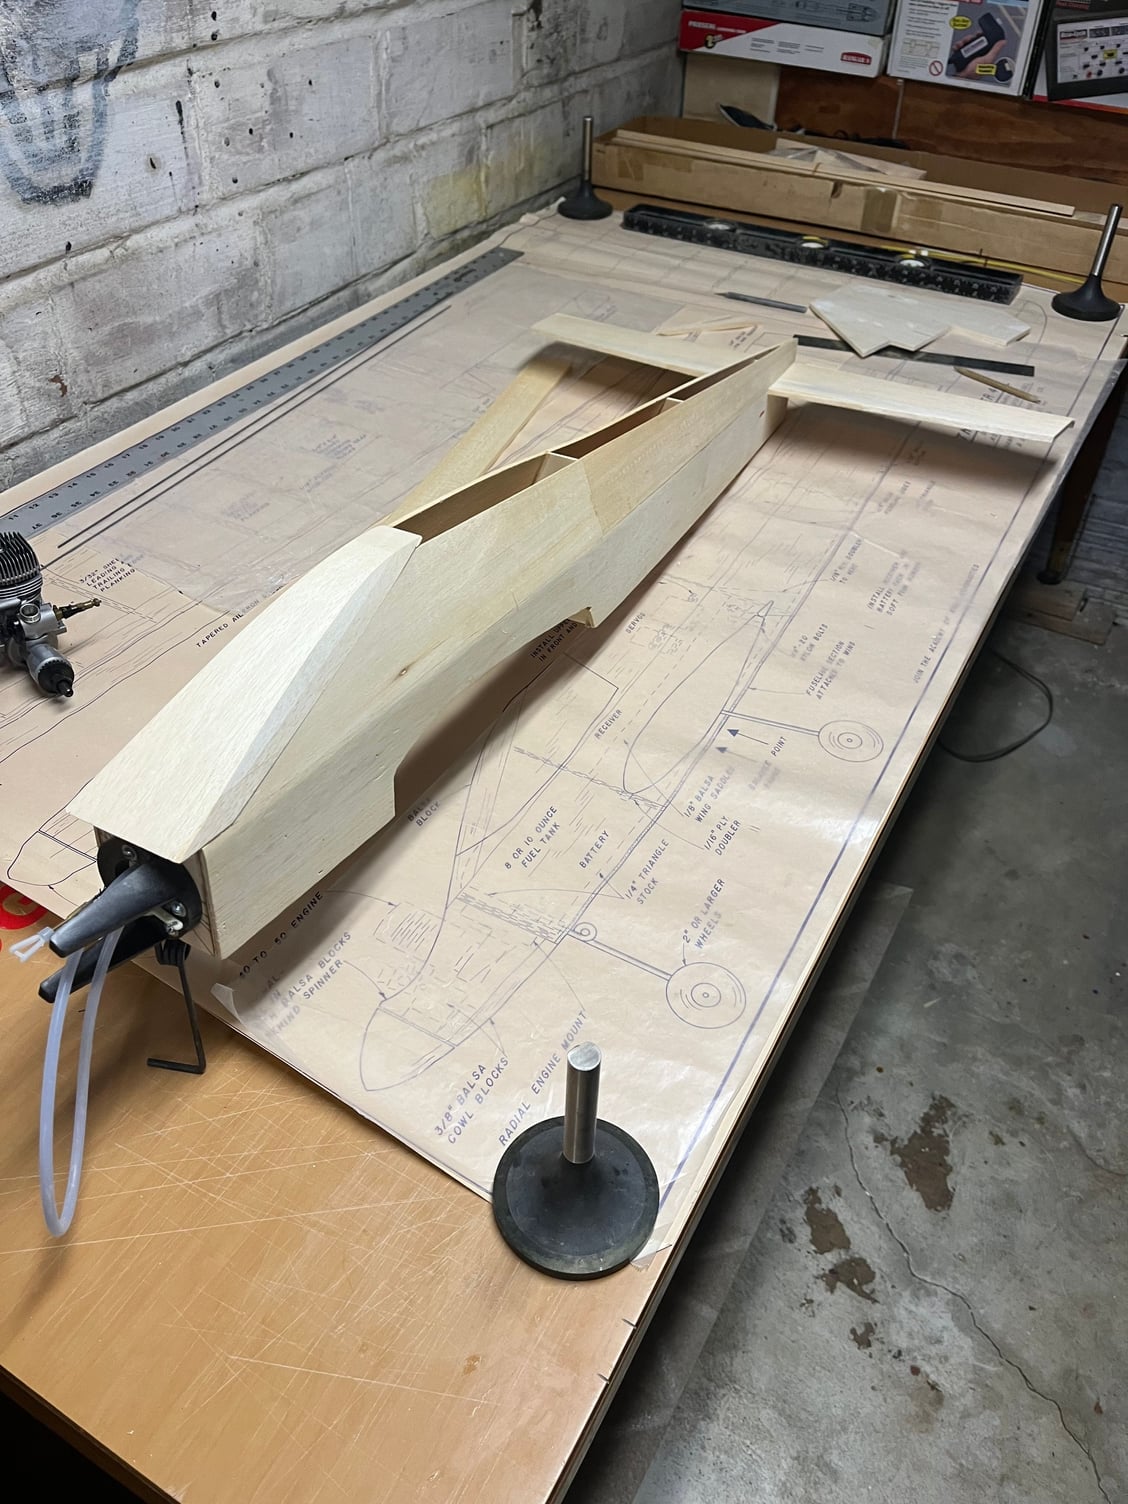
#5
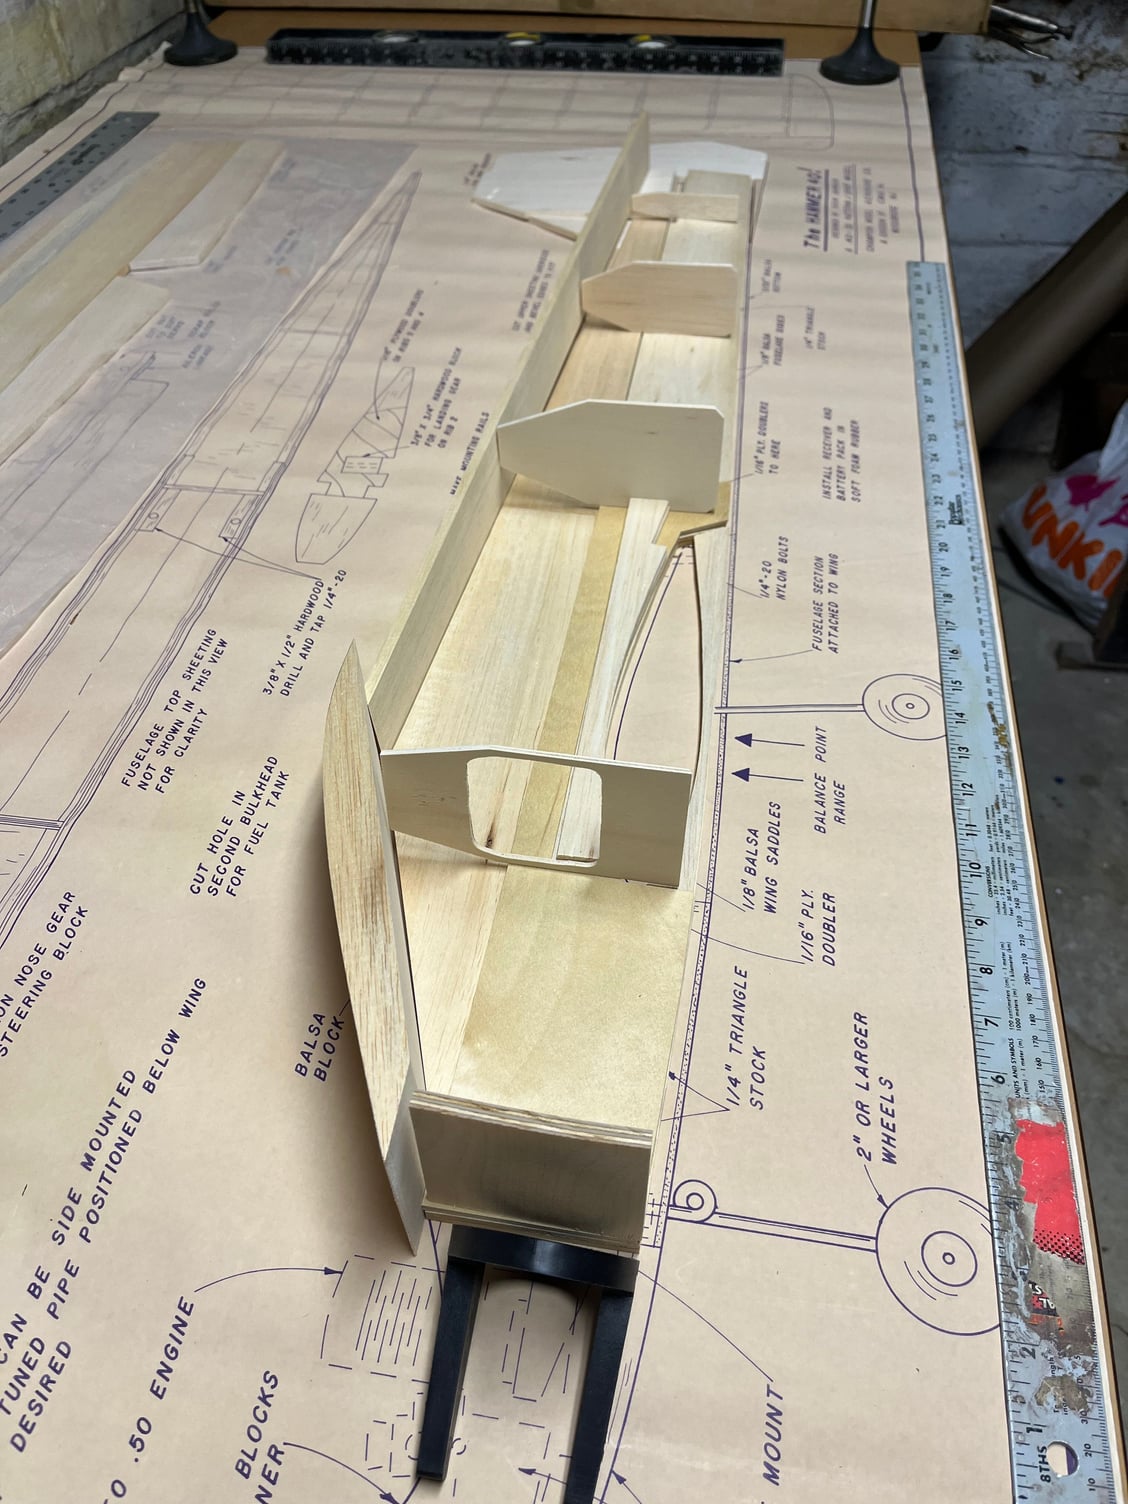
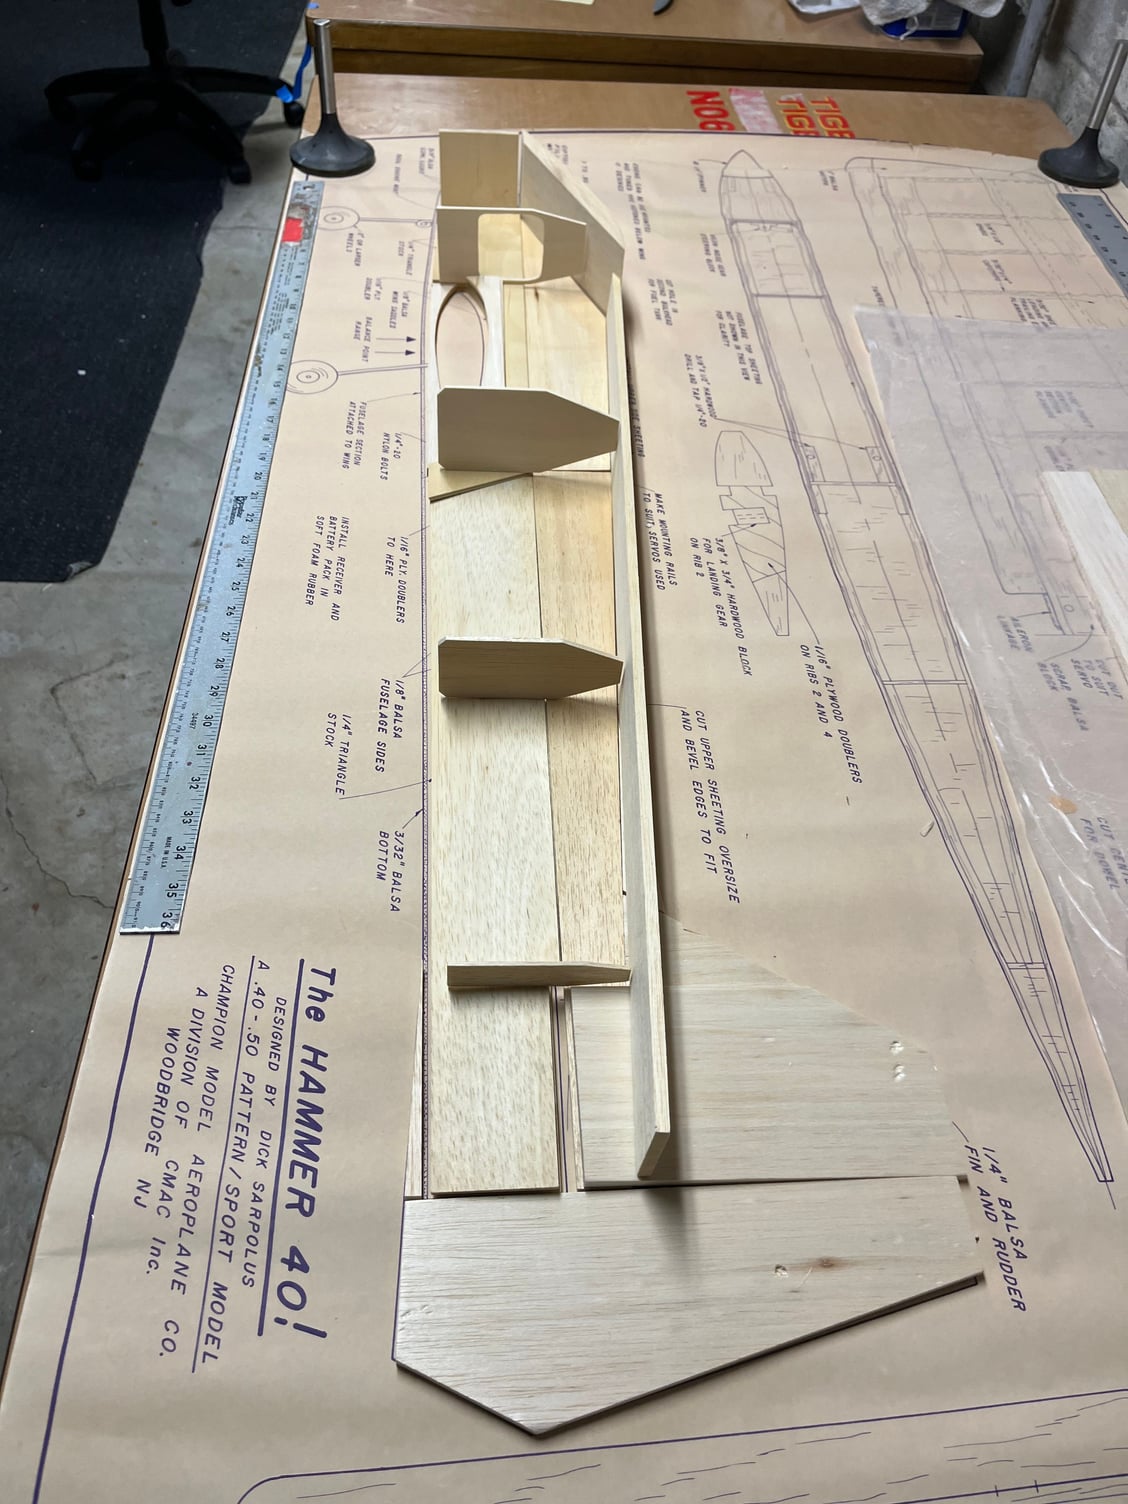
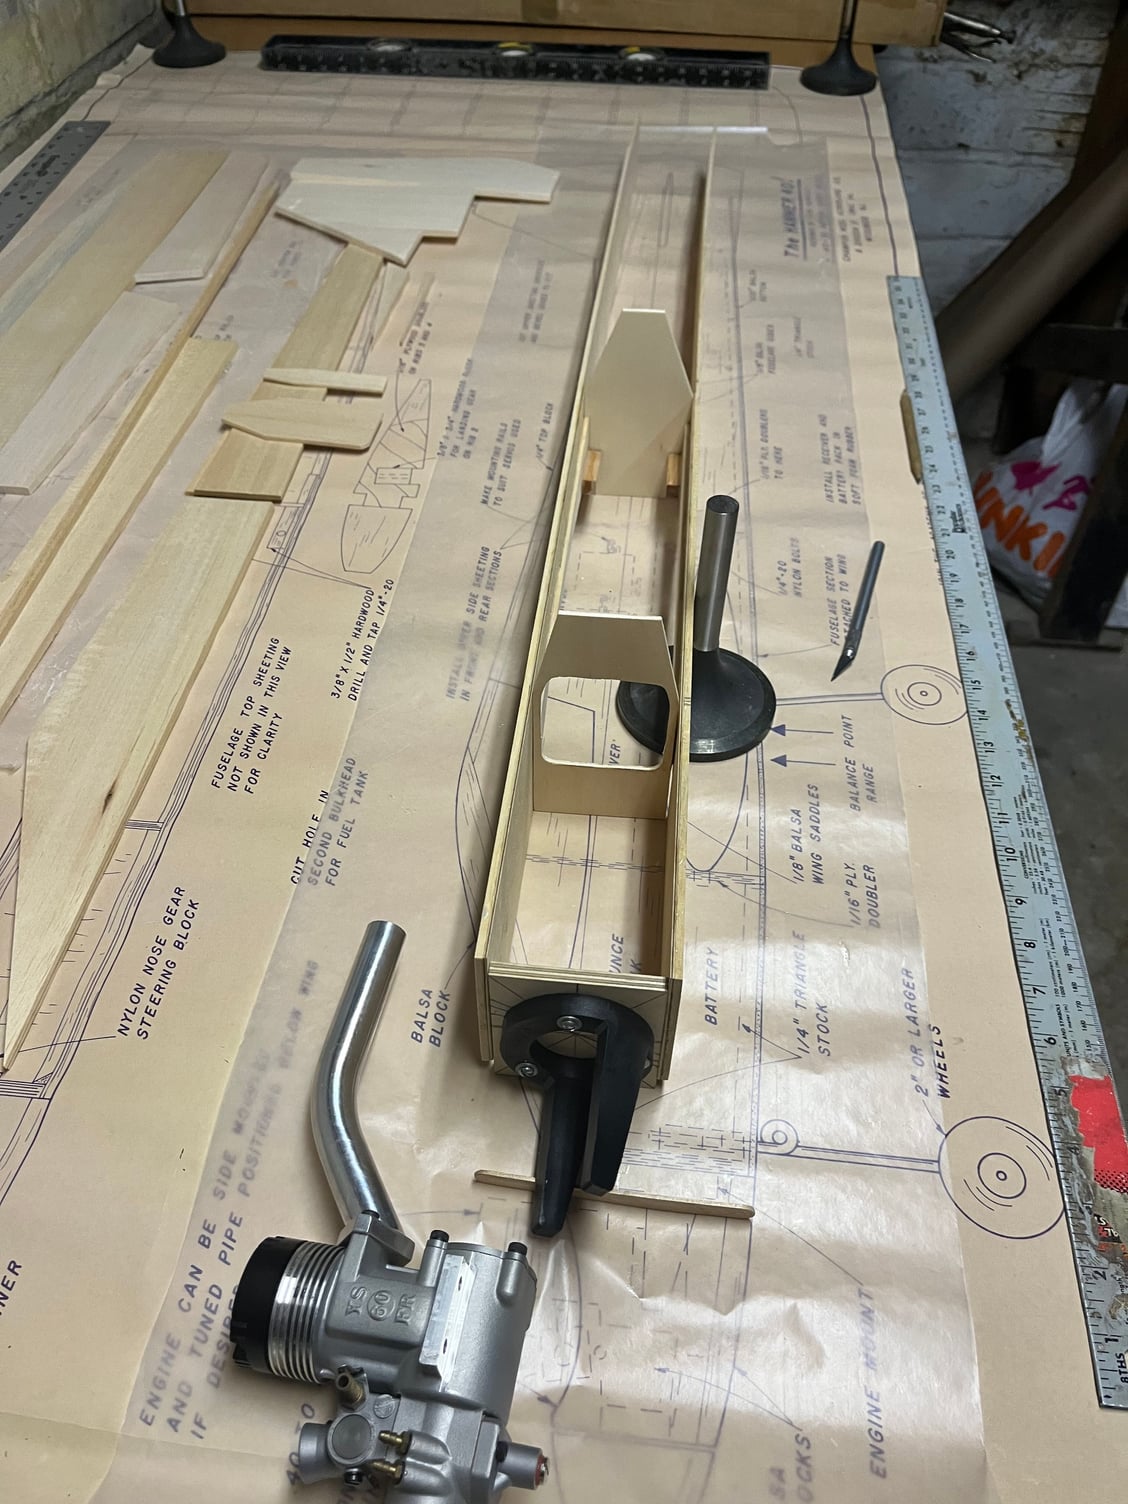
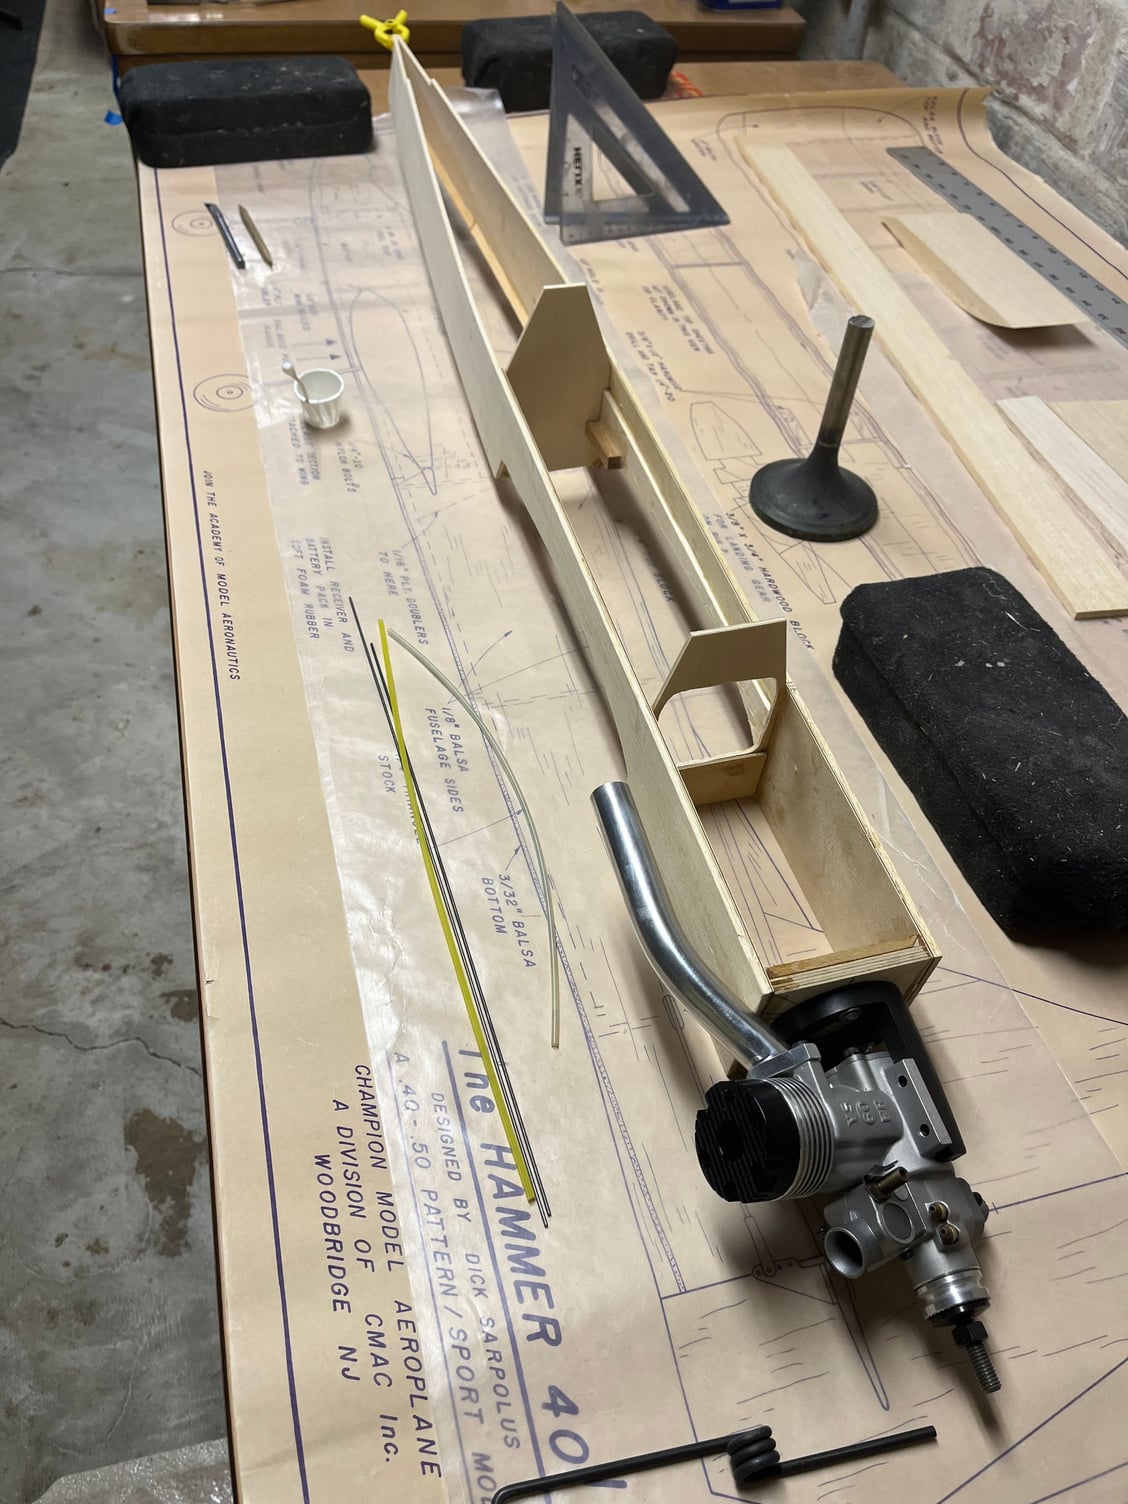
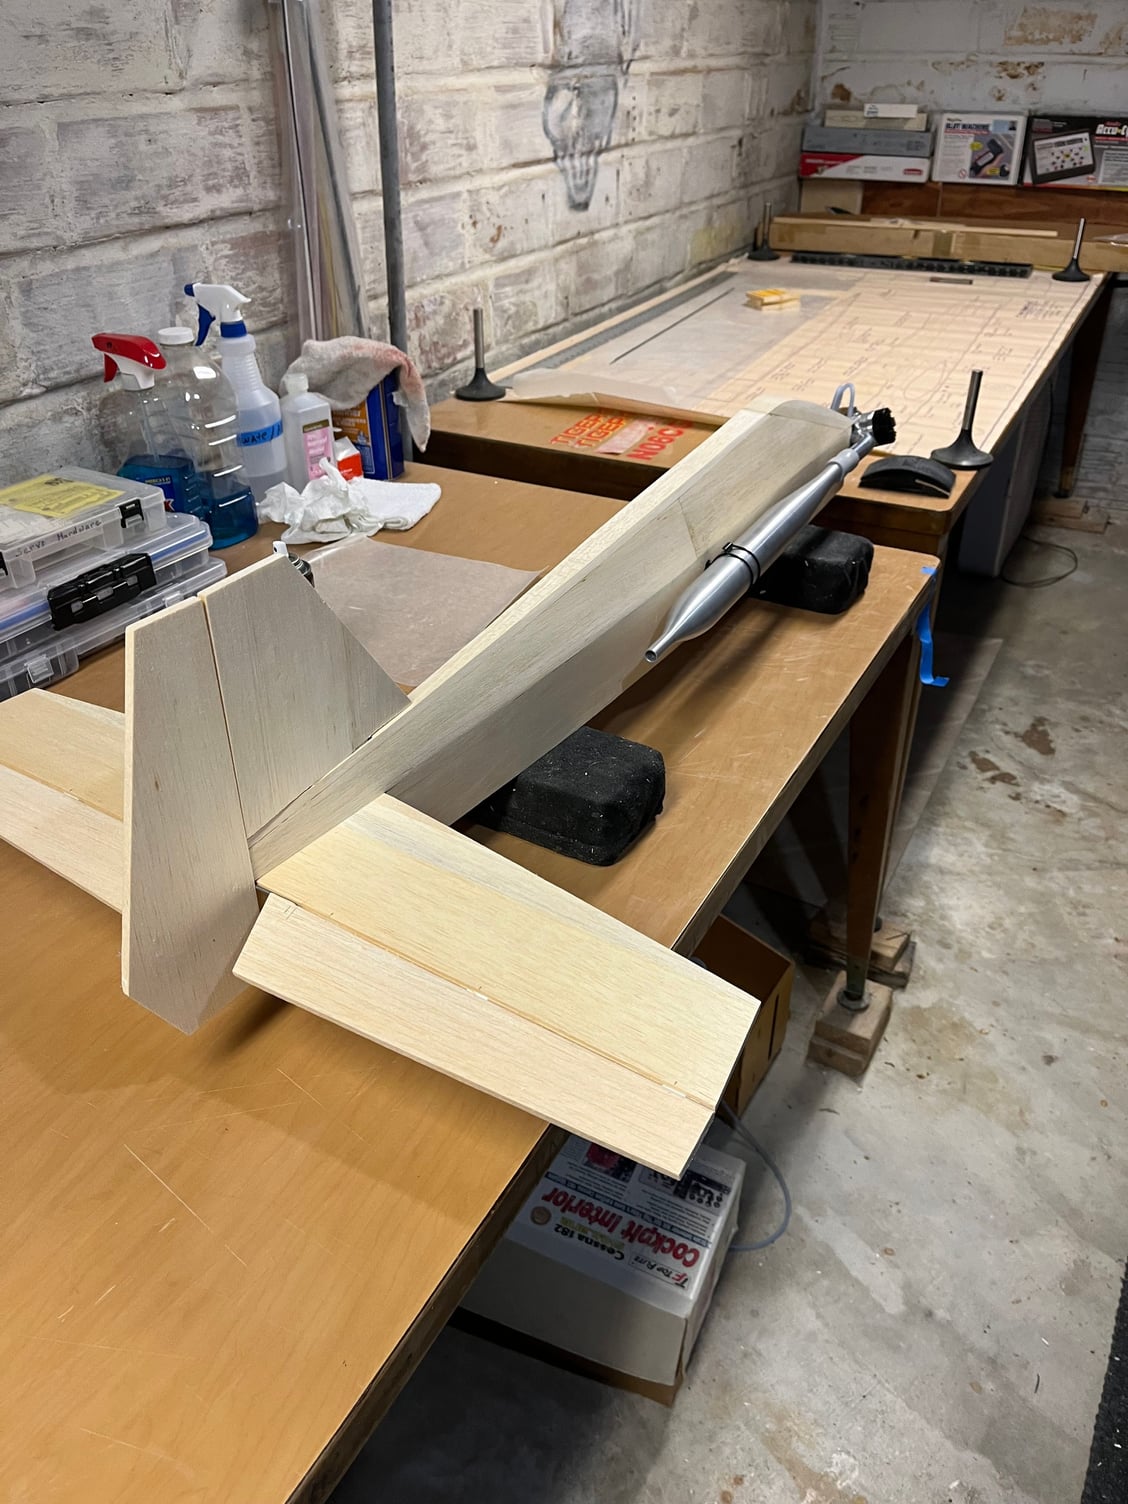
Here is the fuse parts laid out. This may go faster than what I was thinking. Looks like all the decision making will be in the fuse and the wing will be rather easy. Last one I built was 15-18 years ago, and I forgot how nice these kits were to build. Very nice kit, gonna be a fun one…..🤓
01-06-2024, 08:57 AM
#6

I'm doing the short kit - I wish I would have found this Champion kit. I'm putting an Eflite 46 motor on it which should have plenty of power for me. I'm not interested in screaming around the field but am interested in smooth aerobatics. I'm going to watch this thread.
01-06-2024, 09:20 AM
#7
You got about 11 inches of prop clearance, not sure what your electric prop size will be..........I'm going 11-9 or 10-10. I am very interested in screaming around the field. I like going fast, this plane was designed for it
Last edited by plumberdeluxe; 01-06-2024 at 09:22 AM.
 01-06-2024, 10:23 AM
#9
I had forgotten that Dick Sarpolus had designed the Hammer.
Assuming I knew it once upon a time.
Over the years he has designed a lot of nice building - good flying airplanes.
That engine, header and pipe is nice! That stuff is hard to come by these days!
I'd bet that thing will get well over 120 MPH. Maybe even while running on FAI (no nitro) fuel.
Assuming I knew it once upon a time.
Over the years he has designed a lot of nice building - good flying airplanes.
That engine, header and pipe is nice! That stuff is hard to come by these days!
I'd bet that thing will get well over 120 MPH. Maybe even while running on FAI (no nitro) fuel.
01-06-2024, 10:31 AM
#10
Yes correct, Im shooting for 125 or better, but it always comes down to the prop and the rpm’s. I got my mount ready so that is out of the way. Yes these engines, pipes and headers are super difficult to acquire, I got this one from Japan last year.

 01-06-2024, 05:59 PM
#13
You'll like the 40 size. I build one about two years ago from plans. It's a fairly easy and quick build. I have a os 40FX on it. Gives it good power. A 60 will be a monster.
01-07-2024, 06:34 AM
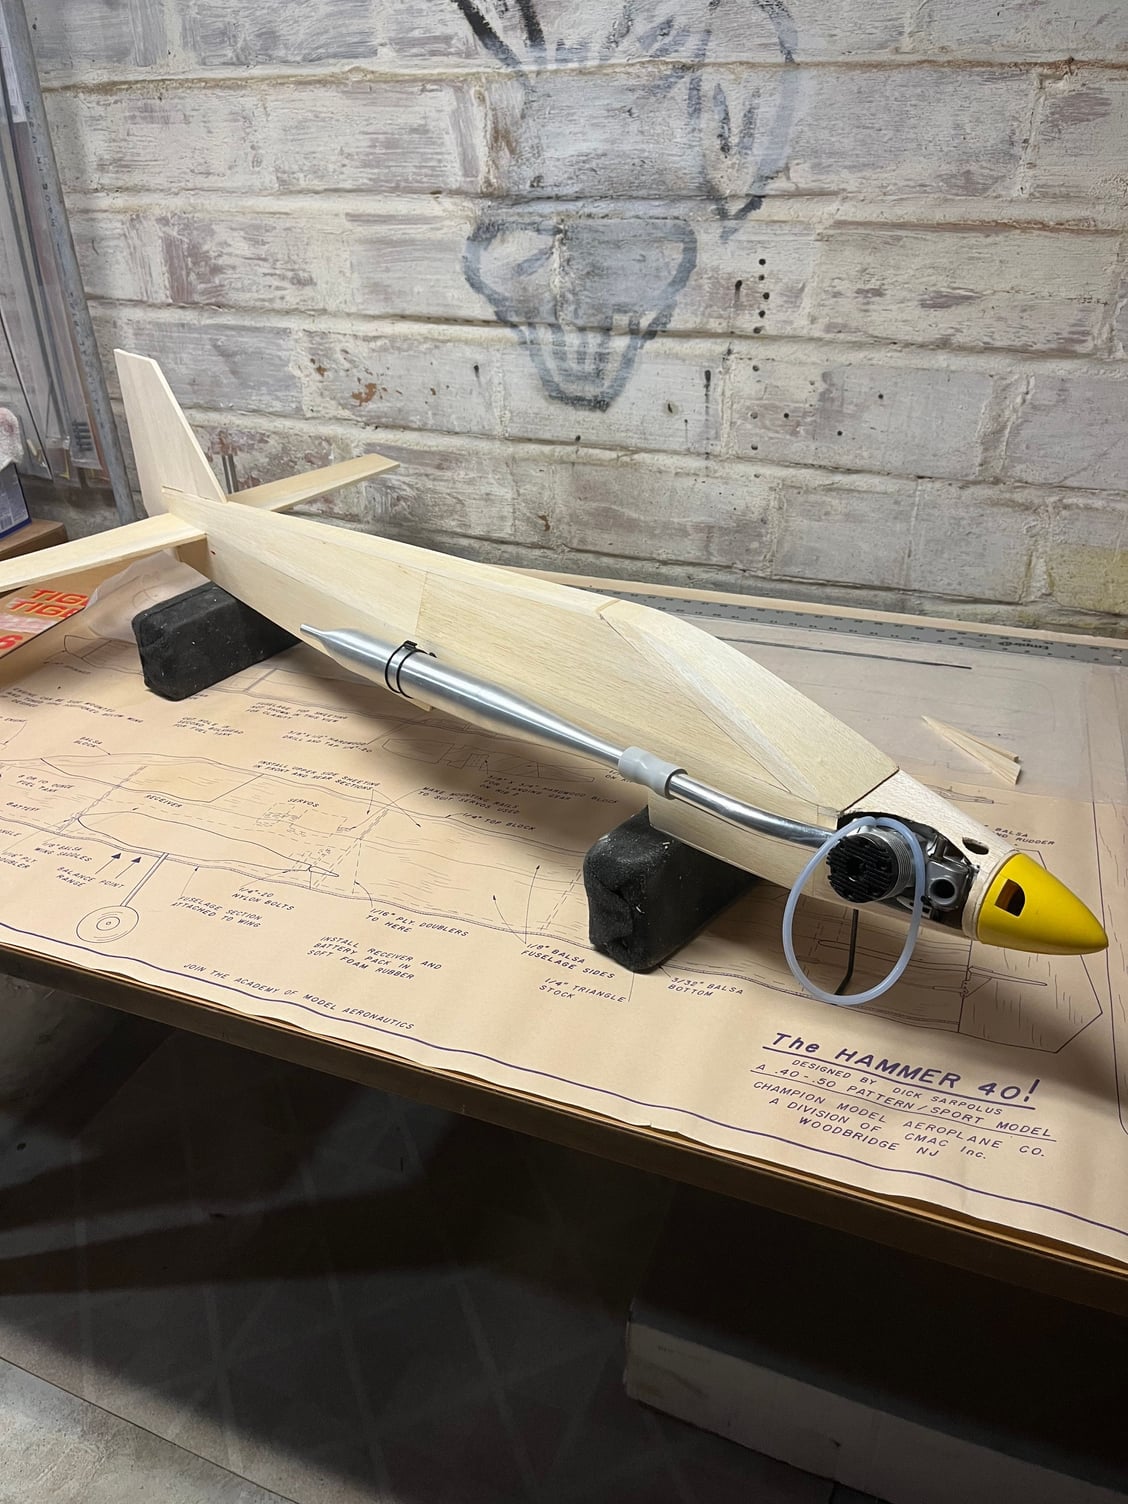
#14
The basic box is assembled and curing. Amazing how well everything fits and the quality of a kit that is 45 years old. I got this particular kit from Rhinopius and he always takes good care of his stuff. Best way I can think of to spend a Sunday morning!
Last edited by plumberdeluxe; 01-07-2024 at 07:46 AM.
01-07-2024, 06:58 AM
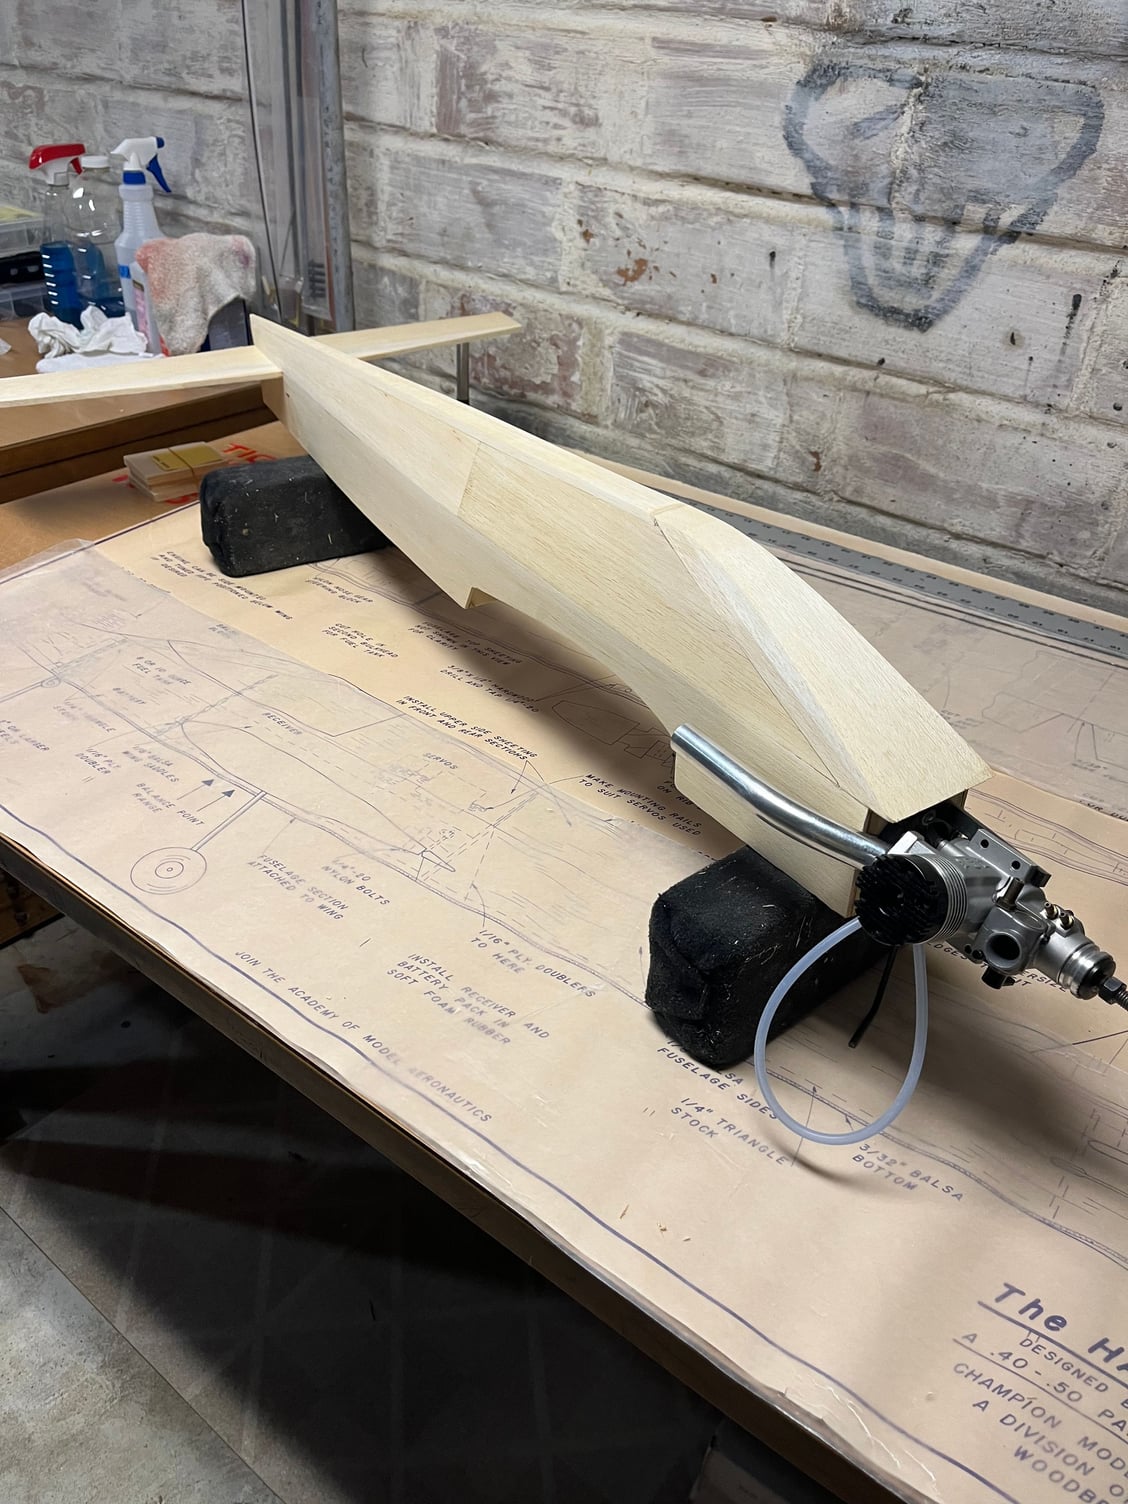
#15
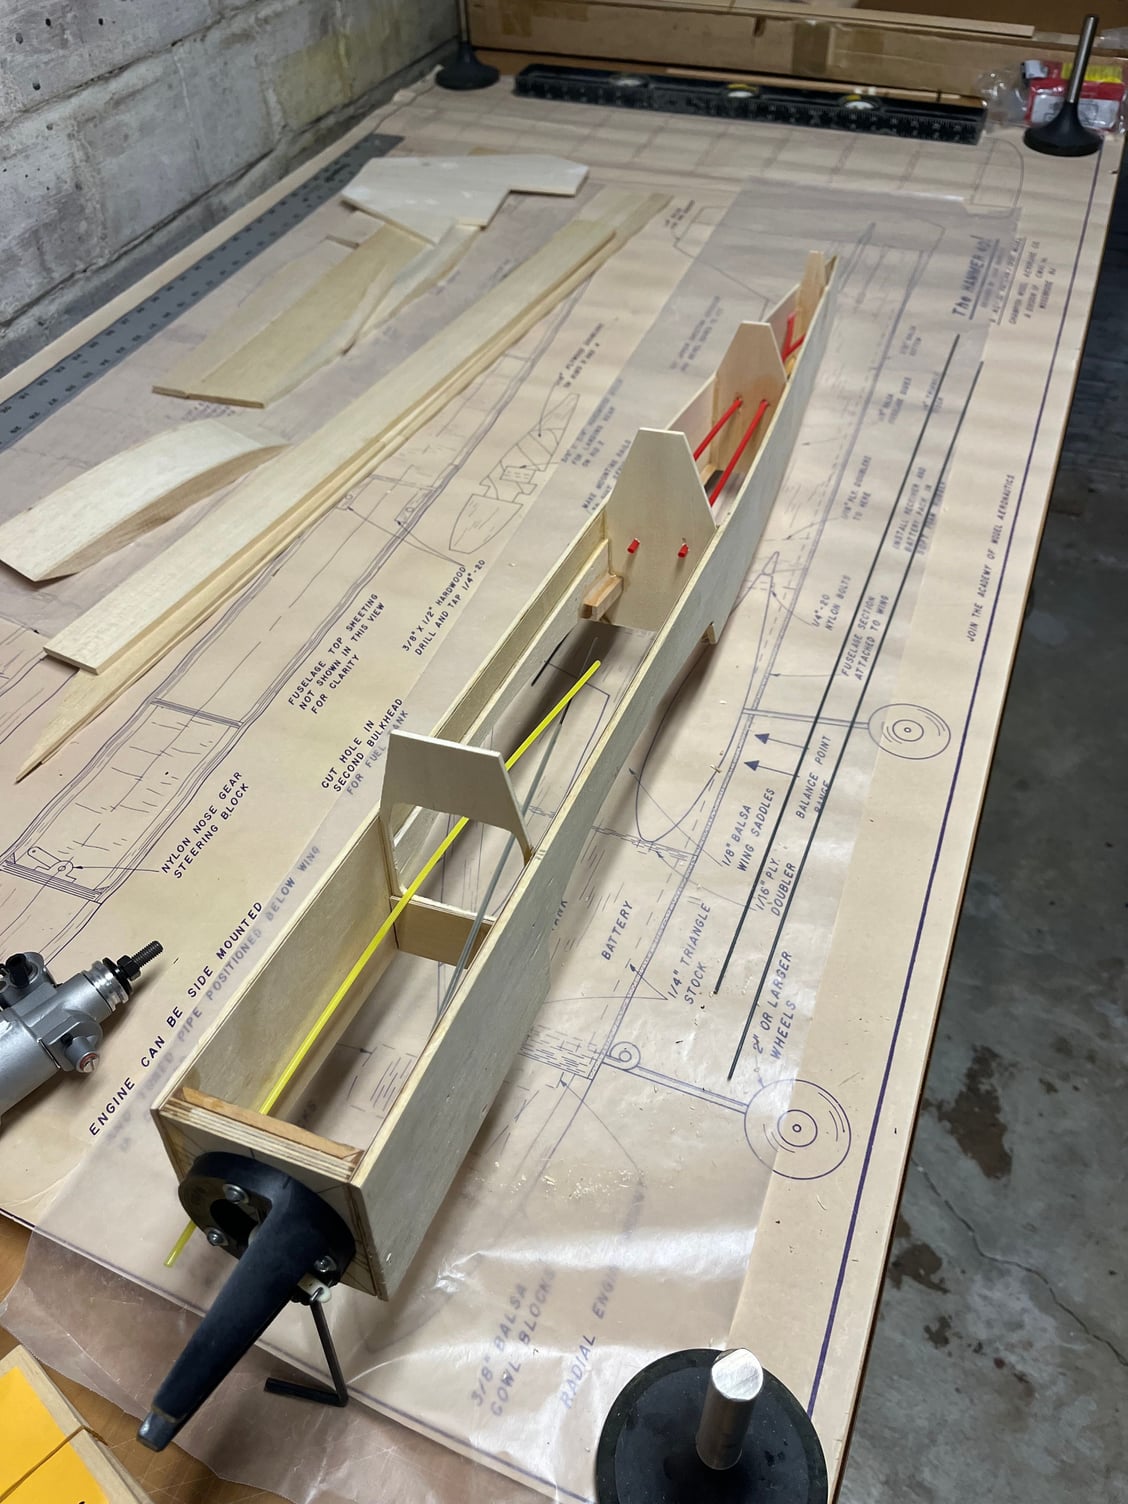
Decision time………Since this is getting a YS and they respond pretty quickly from idle to full speed I think going taildragger is not the best option. Last thing I need is squirrelly take offs……I’m going to do a trike gear with bearing and arm up front of the firewall, plans are showing it inside behind the firewall which is never a good idea. I need all the tank room I can get, looks like this will accommodate a 14 oz tank.
The following users liked this post:
RICKSTUBBZ (01-07-2024)
The following users liked this post:
TheEdge (01-07-2024)
 01-08-2024, 02:26 PM
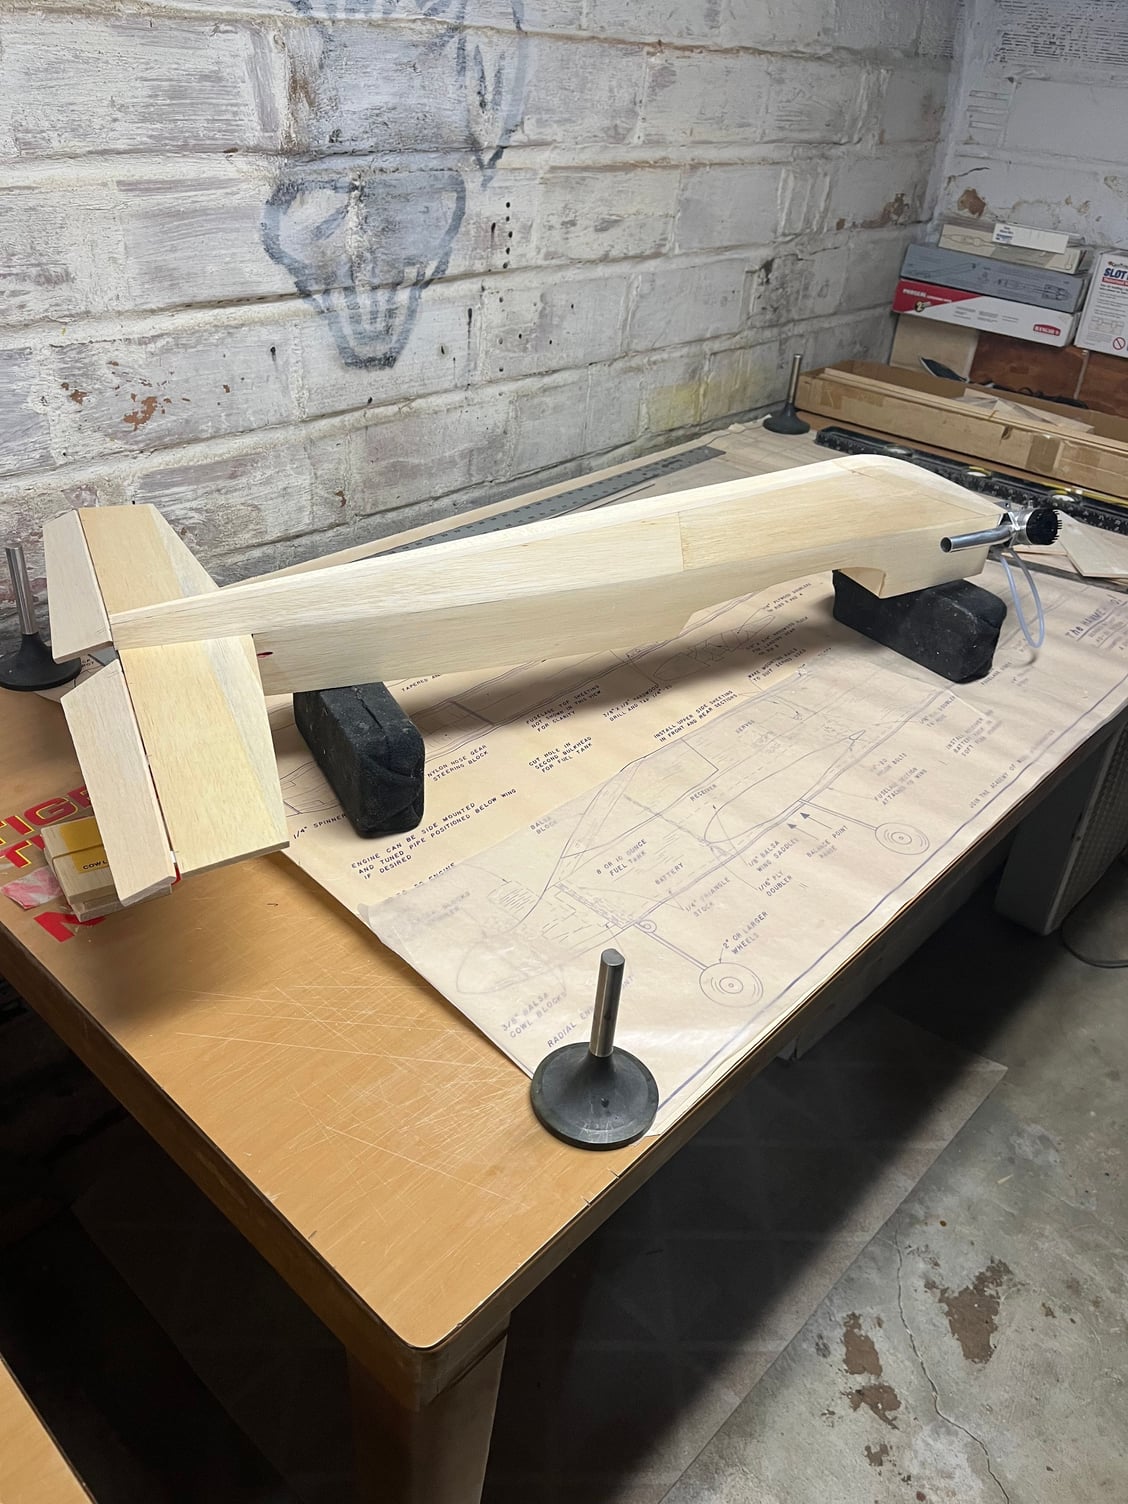
#23
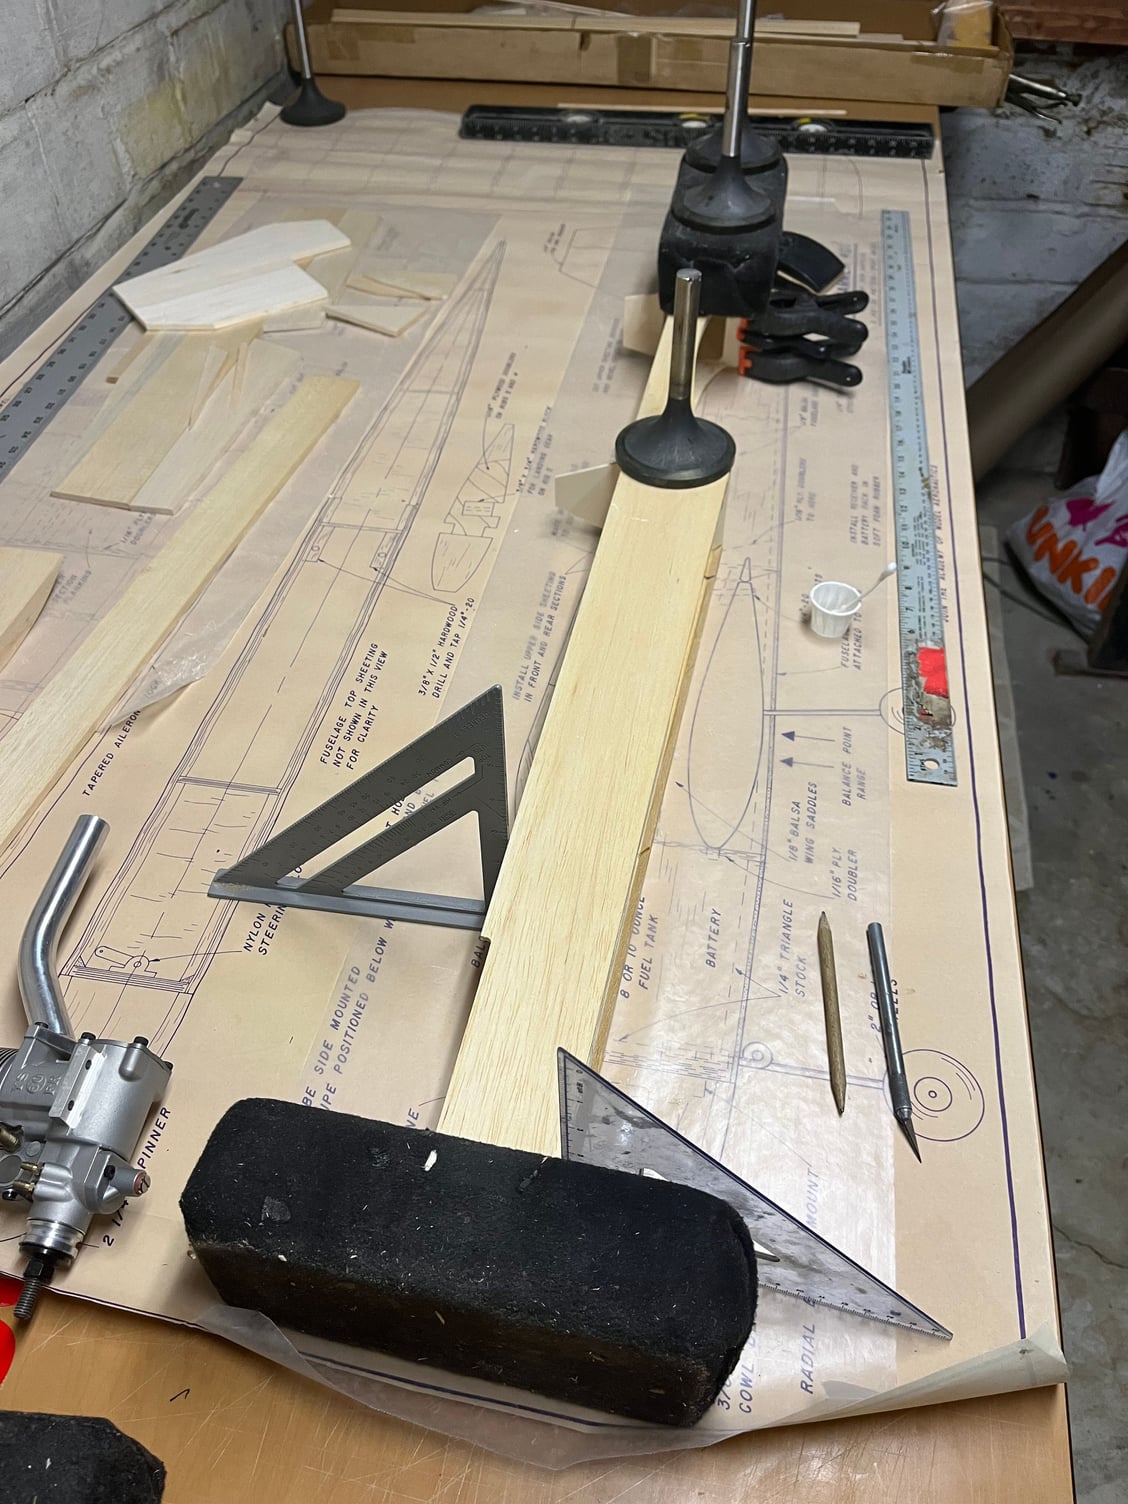
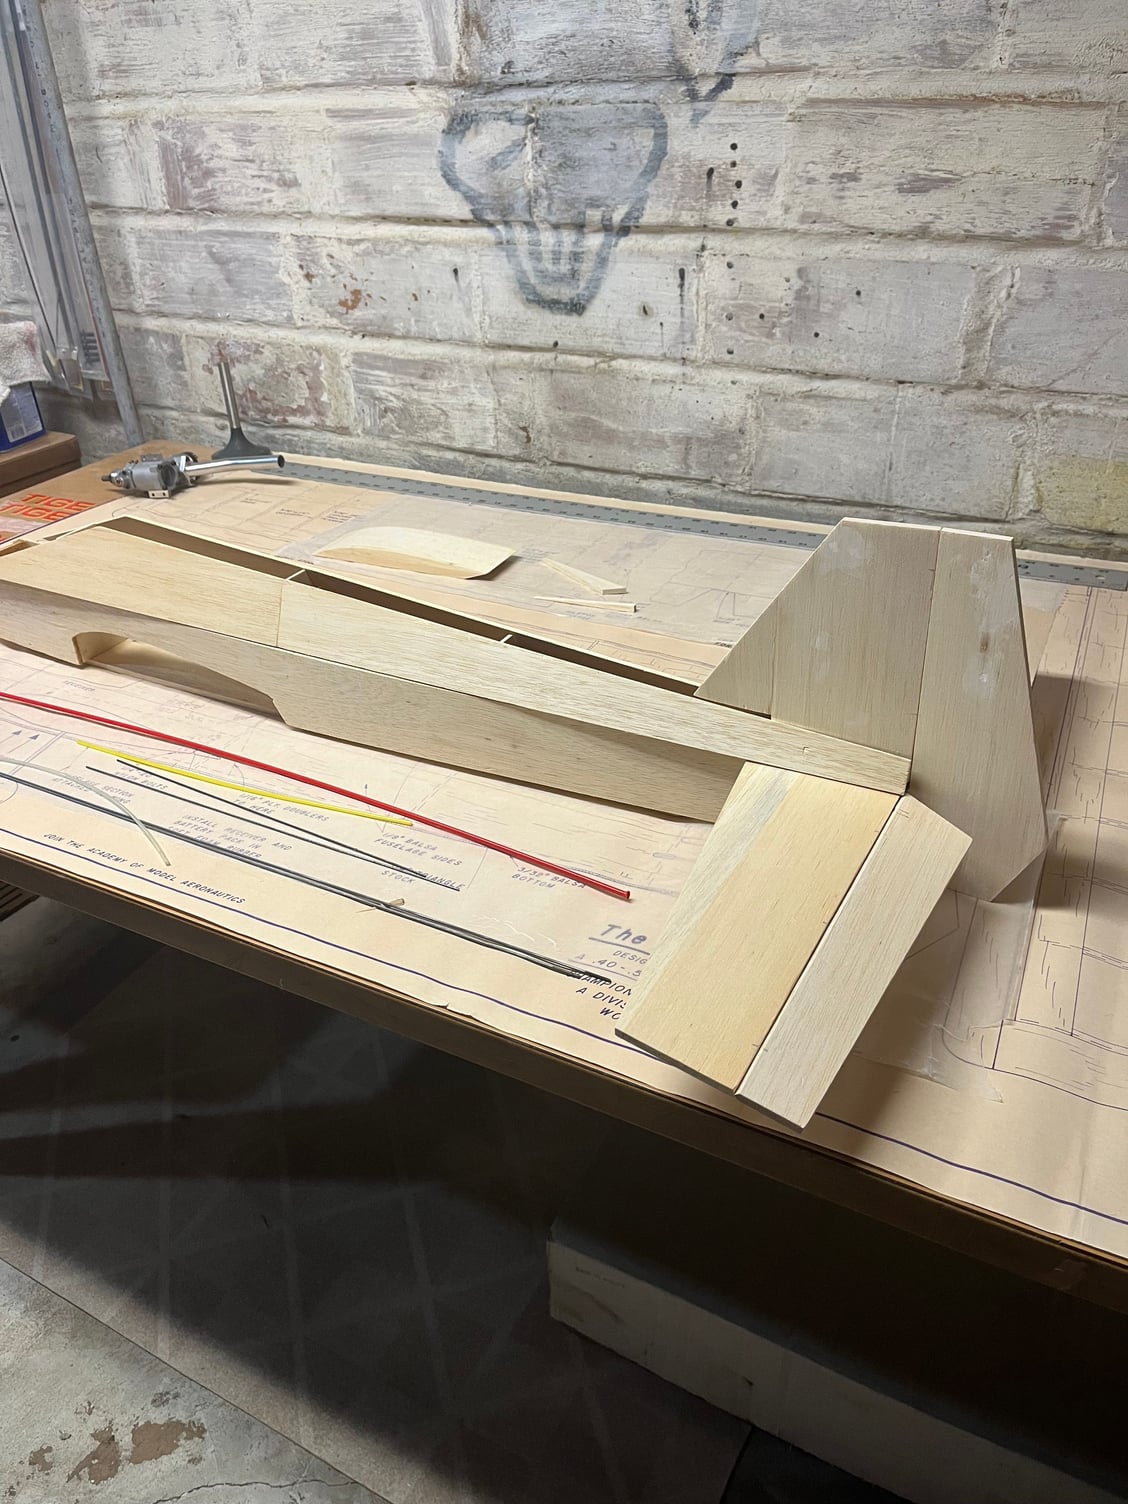
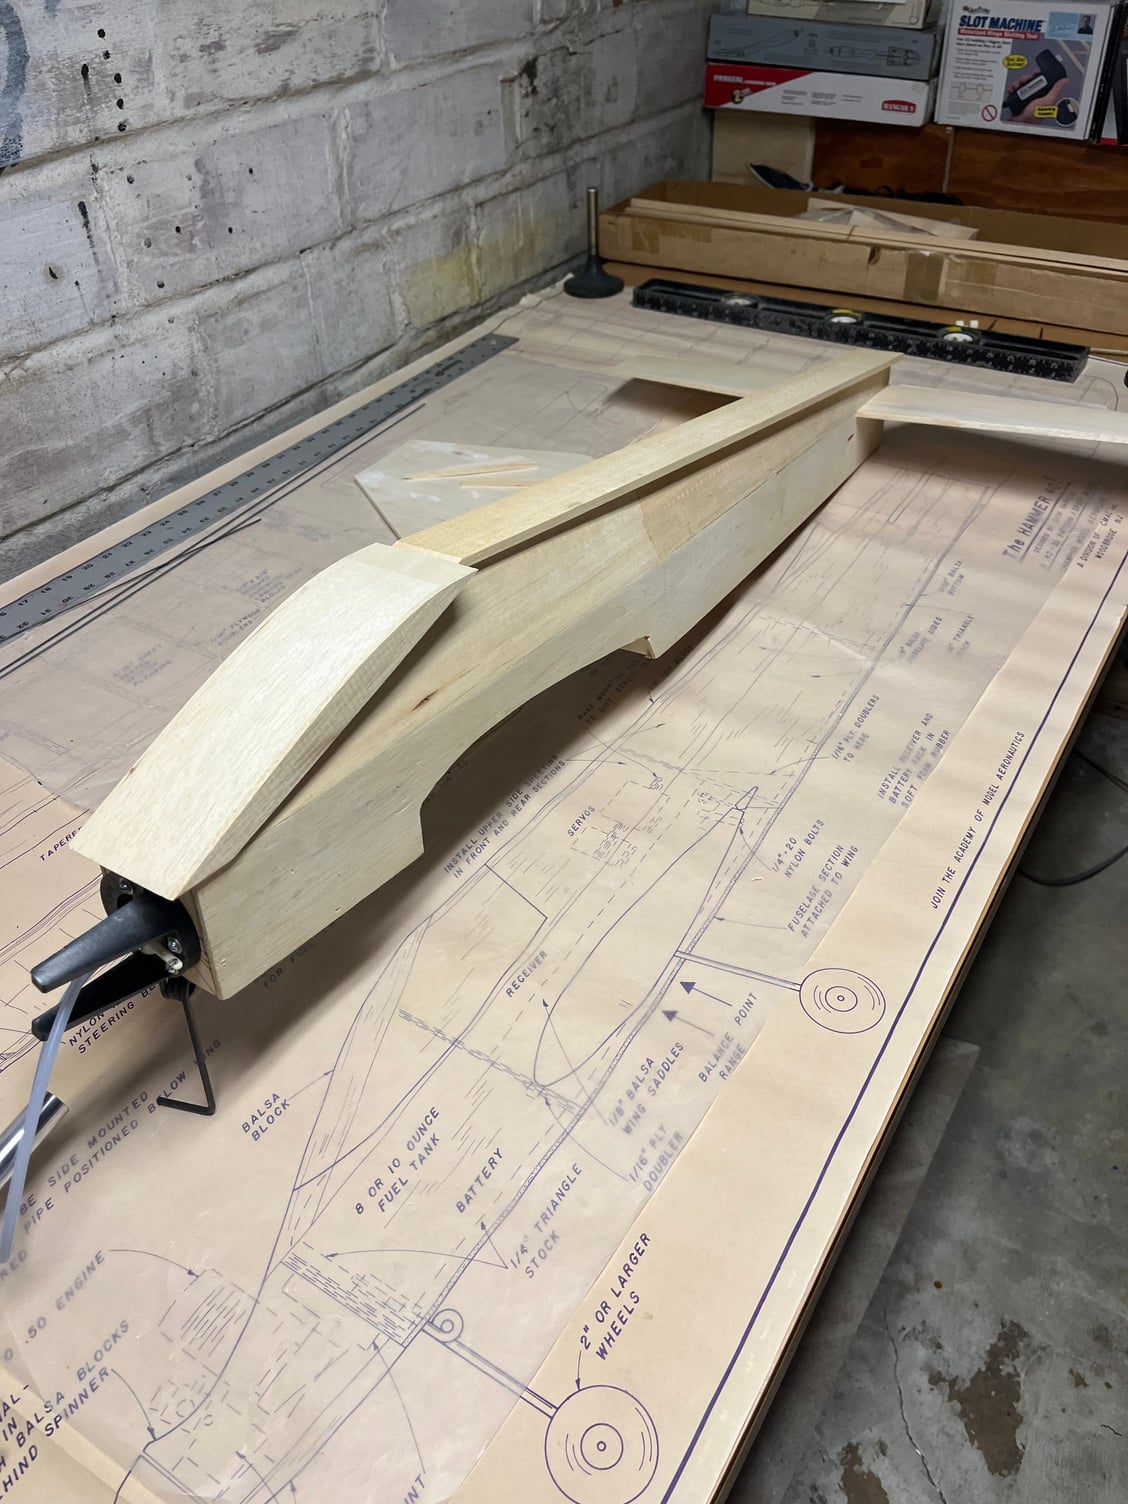
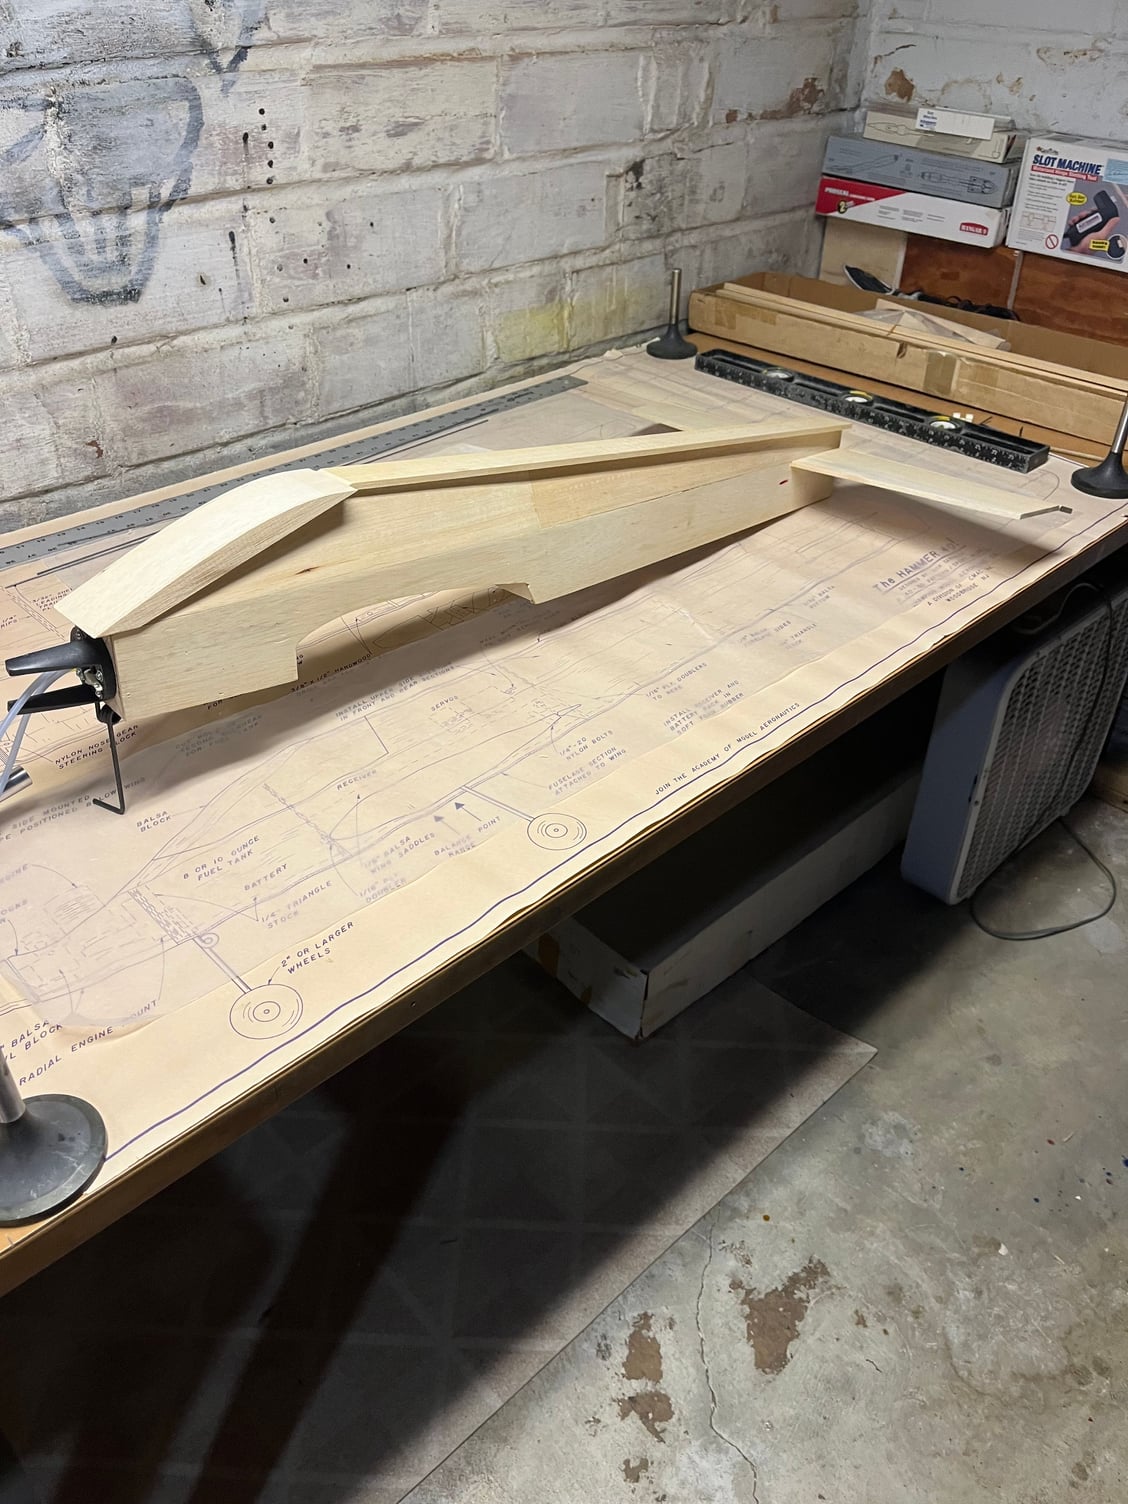
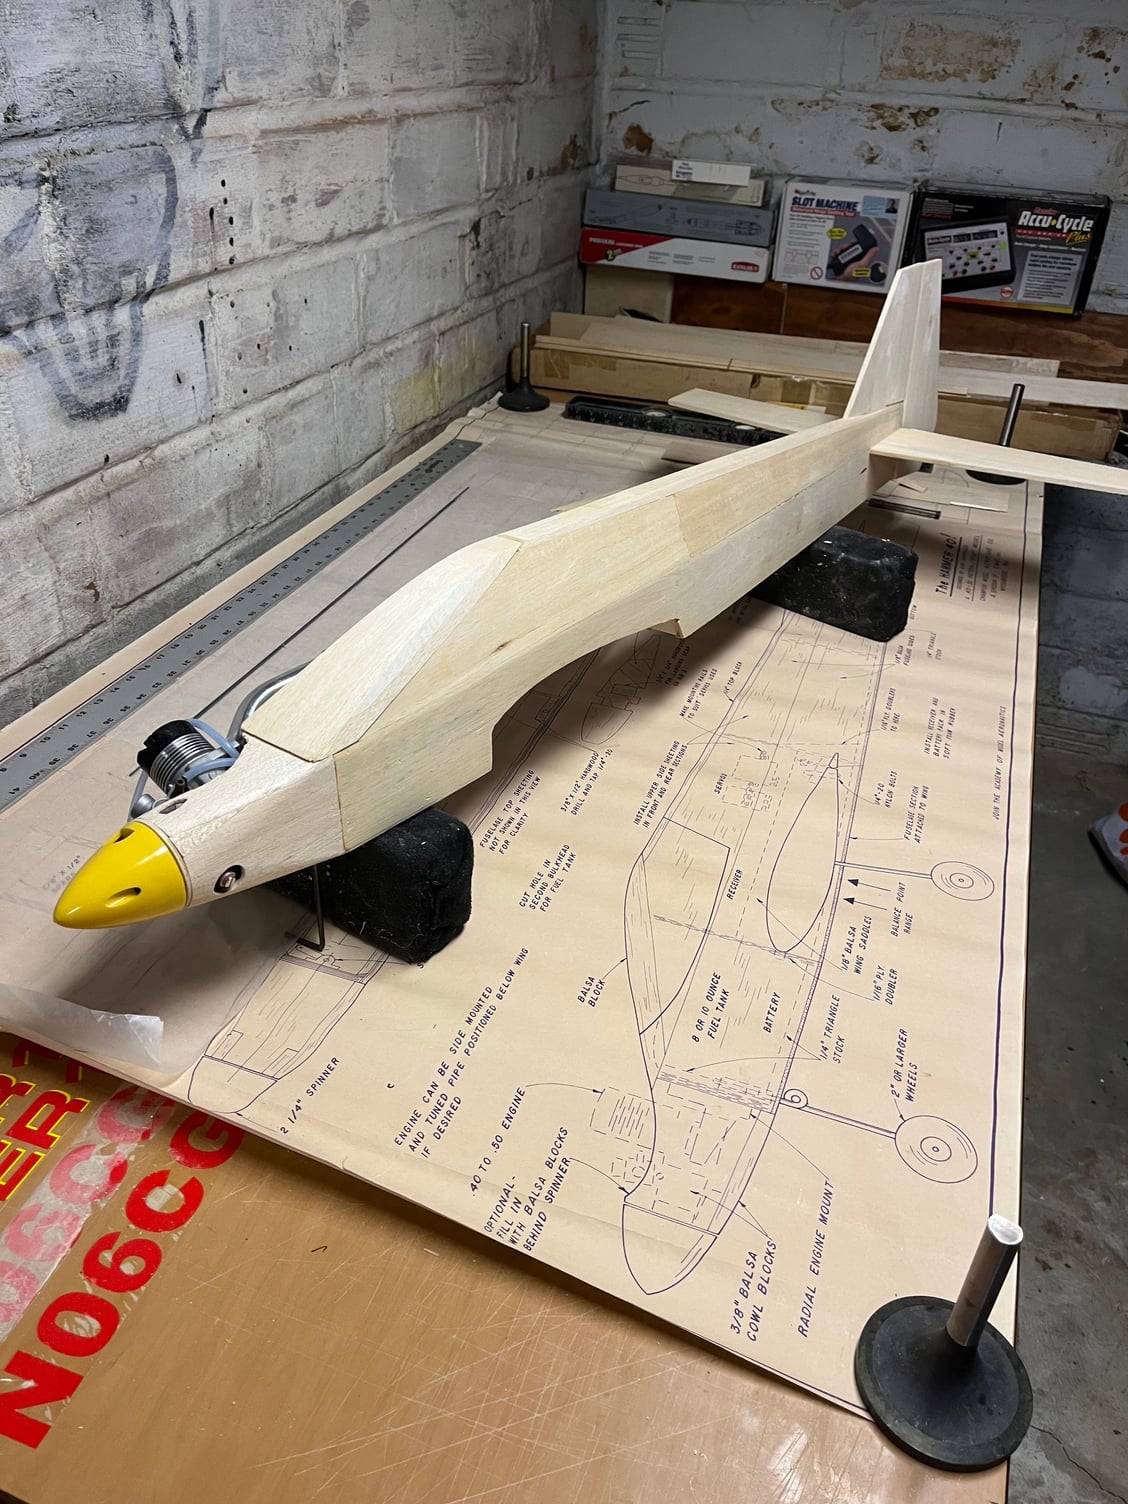
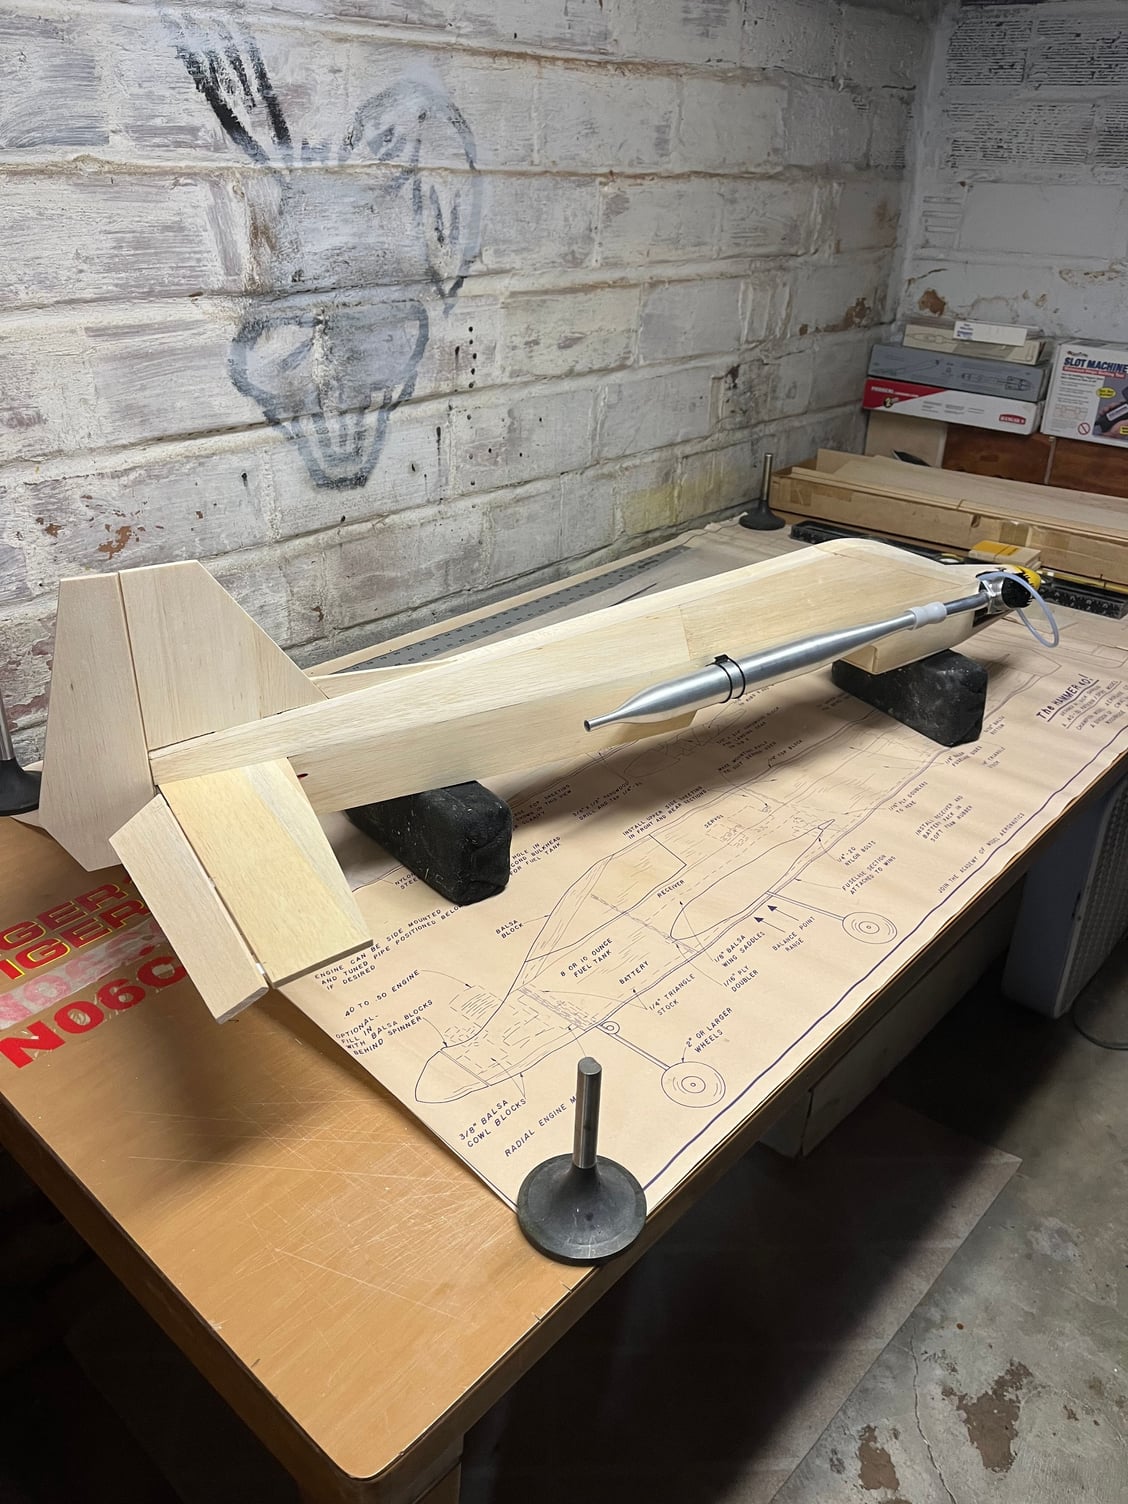
Here is the nose shaped rough, basic fuse is now assembled, took maybe 6 hours total, weight of the fuselage, engine, pipe, spinner to this point is 3 pounds even, looks like the 5.5 is going to be tough to reach. I’ll take 6 but preferably 5.5……….😘
The following 3 users liked this post by plumberdeluxe:
01-09-2024, 04:36 AM
#24
If the wing builds as quick as the fuse, you'll be covering that thing this weekend..
I can hear that thing getting up on the pipe just looking at it.
I know it's a little early yet. But, I sure hope we get to see some video of that thing zipping through the sky. Camera person is going to have to be quick...
I can hear that thing getting up on the pipe just looking at it.
I know it's a little early yet. But, I sure hope we get to see some video of that thing zipping through the sky. Camera person is going to have to be quick...
01-09-2024, 05:07 AM
#25
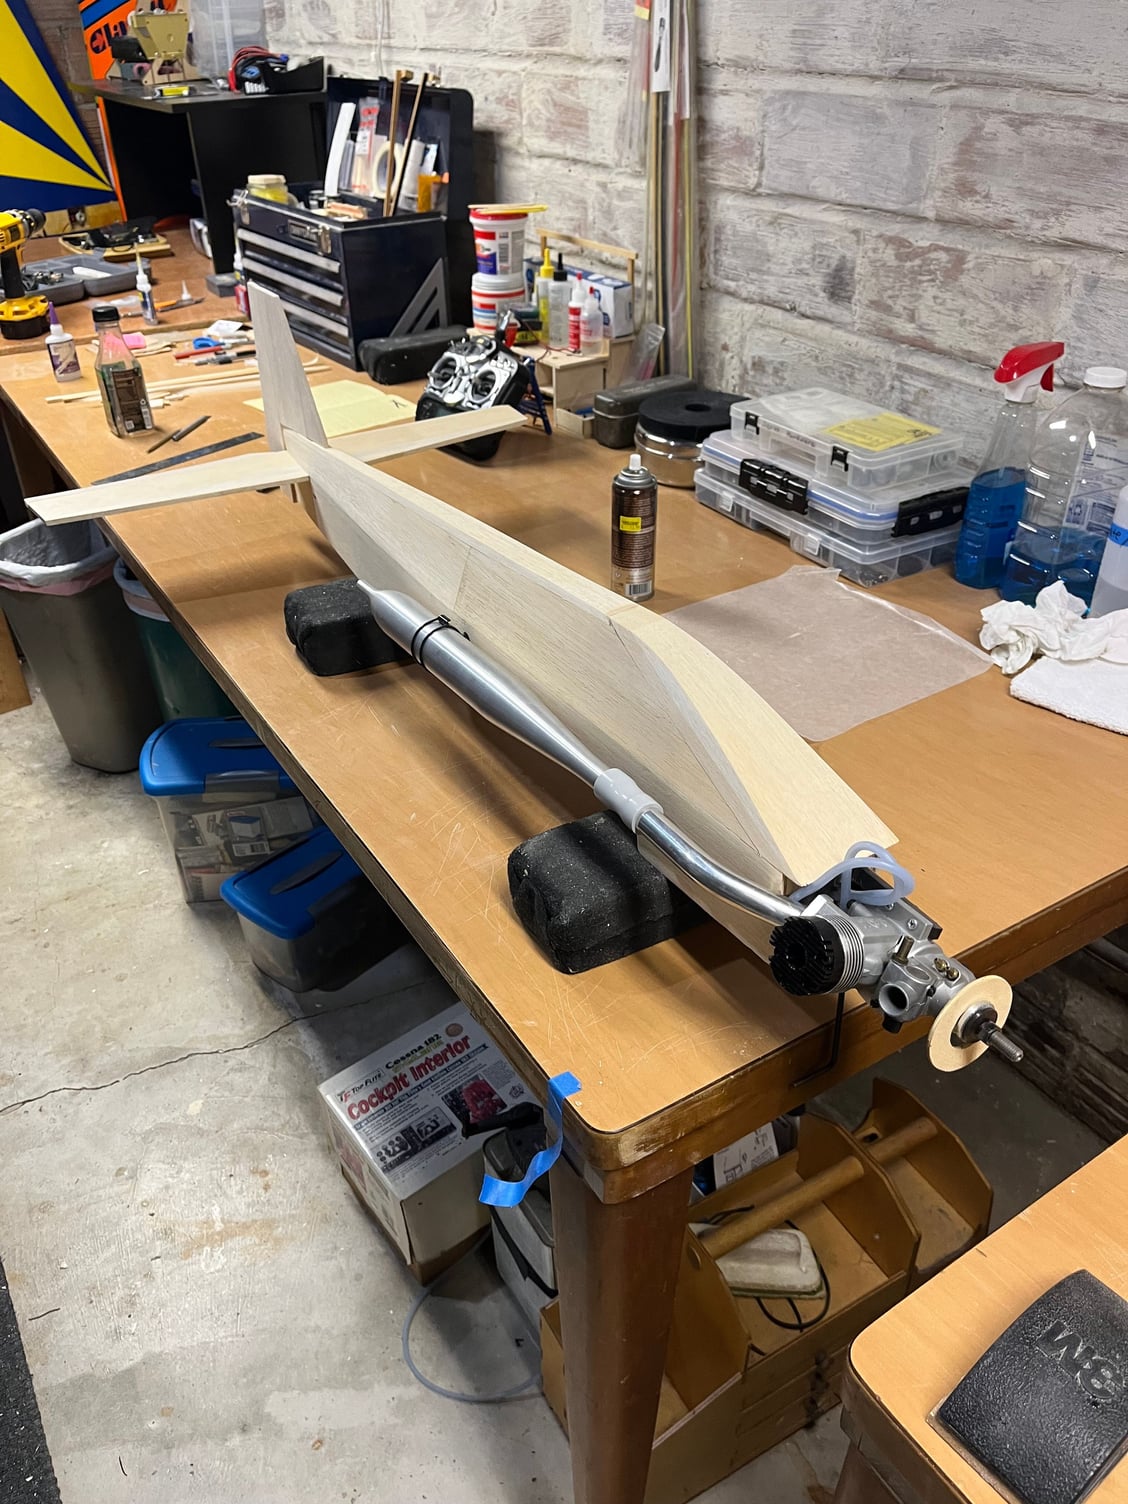
Thanks Rick, appreciate you checking it out, I get a kick out of seeing peoples reaction to my stuff..... I once made a Scen Puma 3 with the same set up and it was wonderful to fly. 5 3/4 pounds on it.
I really enjoy this engine set up and save it for planes I think will enhance the power to weight.
Even if this Hammer comes in at 6.5 pounds, it will fly great and land like a trainer.....
I have one guy I can hand my transmitter to,................................. and he loves doing it............................ so then I can film.
how do you load video on here?
Last edited by plumberdeluxe; 01-09-2024 at 05:17 AM.
The following users liked this post:
J330 (01-10-2024)