


Lanier 81" Cap 232
 02-26-2008, 08:39 PM
#1
Senior Member
Thread Starter
My Feedback: (1)

Join Date: Aug 2005
Location: Eugene, Or
Posts: 1,152
Likes: 0
Received 0 Likes
on
0 Posts
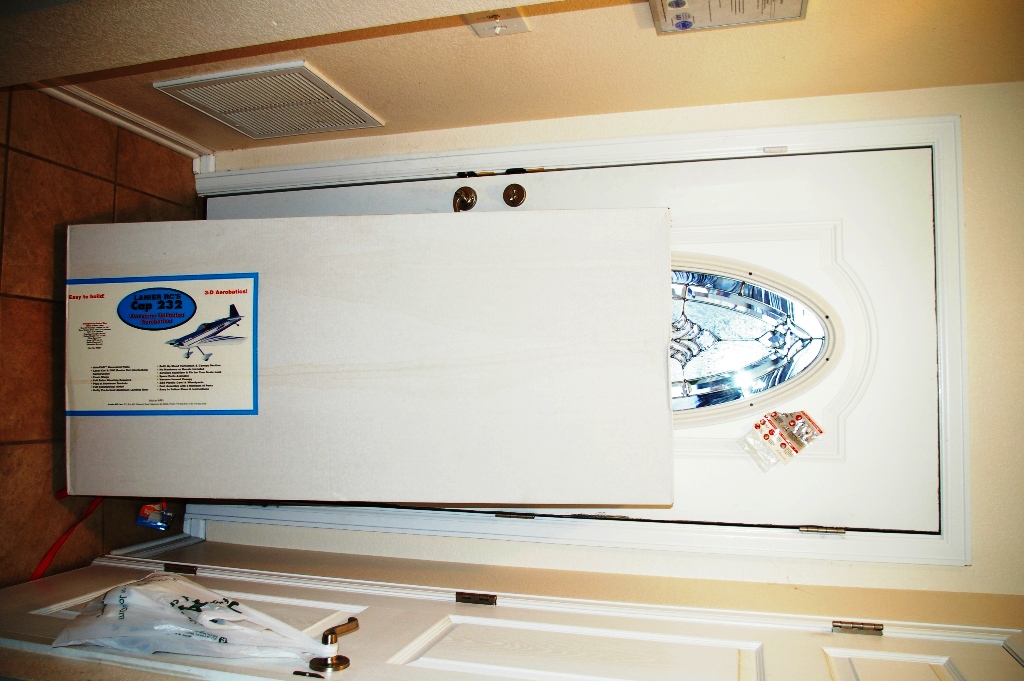
I got my Lanier Cap 232 kit today..
Here's the specs
Overall Length: 79-1/8" (201.4cm)
Wingspan: 81" (206cm)
Wing Area: 1275 sq in (82.36 sq dm)
Flying Weight: 12lbs - (5443g - 7711g)
pics soon
It's a big kit.. Well it's my first giant so it's big for me..
First thing was an inventory.
The box arrived undamaged..
The primary packing material is packing paper.. no foam or bubble wrap.. No big deal they used loads of it... everything was in ok shape..
All the foam cores for the wings horizontal and vertical stabs were in great shape.. ..
the shuck on the horz stab was slightly damaged but it's not going to hurt anything.
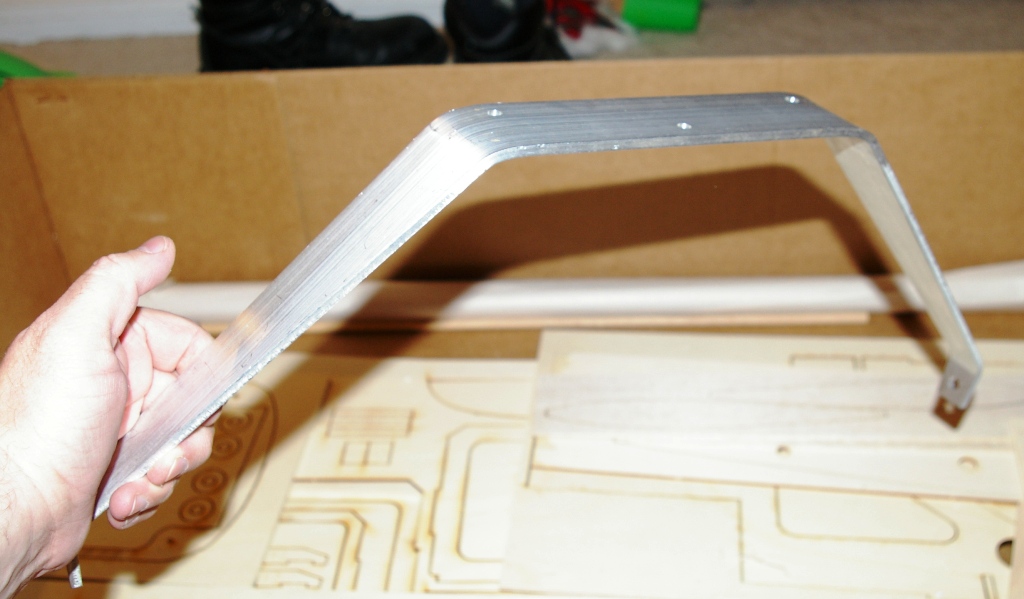
Wing tube.. heavy!! Landing gear... thick and heavy.. I'm thinking CF here. I'll weigh them later.
the LG isn't the straight set pictured on the box but a tapered set.
I got a bunch of bundles of sheeting.. I need to weigh them..
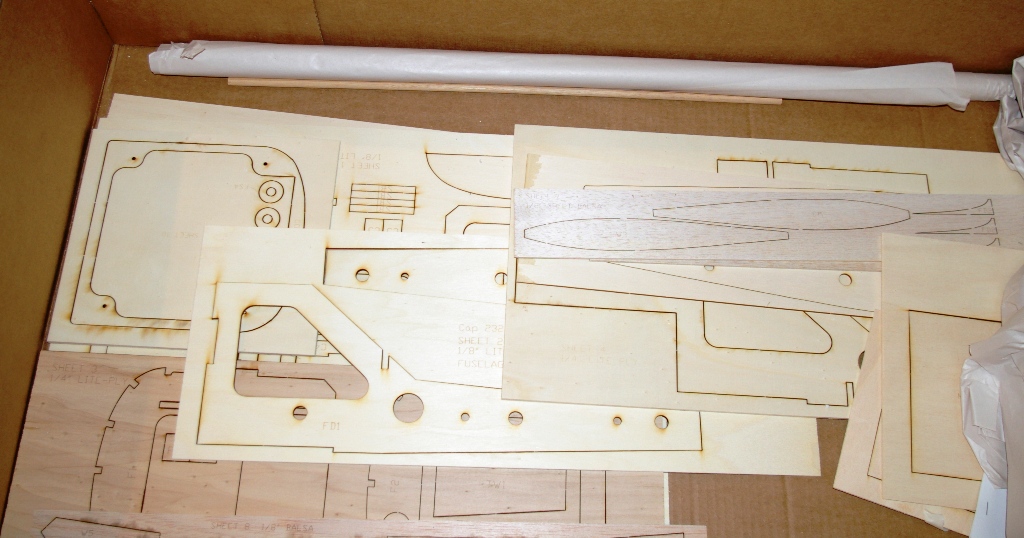
All ply parts except the fuse sides were laser cut and clearly marked. No luan here.. 100% lite ply. Even the 1/4 formers.
The fuse sieds are 1 piece , cnc routed and also lite ply.. Some more wood can be taken out to save weight.
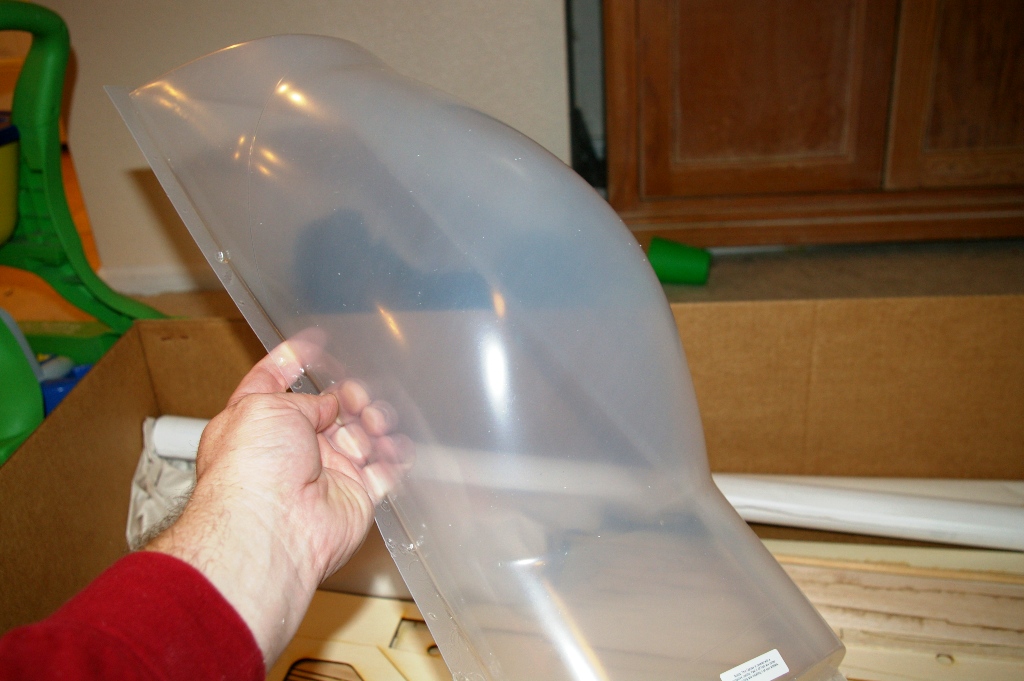
Canopy in good shape..
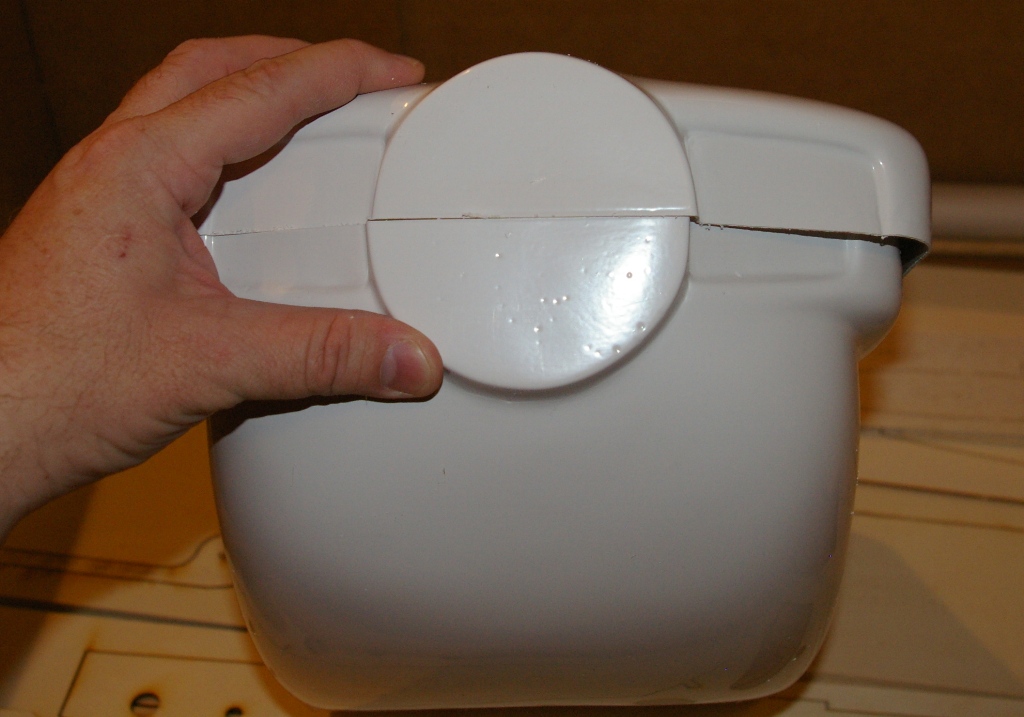
Cowel.. 2 piece ABS.. looks like a nightmare.. I'll be calling Stans. or seeing if a GP 80" arf cowel will fit.
Pants are also ABS but might work.
2 sets of plans
bundles of tri stock and stringers..
Overall out of the box I give it a 4 out of 5.. Knocking it a point for the horrible ABS cowl.
Here's the specs
Overall Length: 79-1/8" (201.4cm)
Wingspan: 81" (206cm)
Wing Area: 1275 sq in (82.36 sq dm)
Flying Weight: 12lbs - (5443g - 7711g)
pics soon
It's a big kit.. Well it's my first giant so it's big for me..
First thing was an inventory.
The box arrived undamaged..
The primary packing material is packing paper.. no foam or bubble wrap.. No big deal they used loads of it... everything was in ok shape..
All the foam cores for the wings horizontal and vertical stabs were in great shape.. ..
the shuck on the horz stab was slightly damaged but it's not going to hurt anything.
Wing tube.. heavy!! Landing gear... thick and heavy.. I'm thinking CF here. I'll weigh them later.
the LG isn't the straight set pictured on the box but a tapered set.
I got a bunch of bundles of sheeting.. I need to weigh them..
All ply parts except the fuse sides were laser cut and clearly marked. No luan here.. 100% lite ply. Even the 1/4 formers.
The fuse sieds are 1 piece , cnc routed and also lite ply.. Some more wood can be taken out to save weight.
Canopy in good shape..
Cowel.. 2 piece ABS.. looks like a nightmare.. I'll be calling Stans. or seeing if a GP 80" arf cowel will fit.
Pants are also ABS but might work.
2 sets of plans
bundles of tri stock and stringers..
Overall out of the box I give it a 4 out of 5.. Knocking it a point for the horrible ABS cowl.
 02-26-2008, 09:27 PM
#2

My Feedback: (-1)
80 inch is A big plane, just today 40% plus is way bigger and being seen A lot. Fiberglass Specialties also has the cowls for that plane. I'm now always impressed when I open A kit box and see A real fiberglass cowl, way back when it was the norm, today it's A nice surprise.
Are you going to be posting up the build here?? Hope so.
Are you going to be posting up the build here?? Hope so.
02-27-2008, 12:15 AM
#3
Senior Member
Thread Starter
My Feedback: (1)
Join Date: Aug 2005
Location: Eugene, Or
Posts: 1,152
Likes: 0
Received 0 Likes
on
0 Posts
This will be a build thread.. It may not start for a month or two.. I have to finish my Citabria first.
It's a much better kit than I'd expected from Lanier.
I did a 2nd inventory and found a few errors with the list..
FN1 (2) does not exist.. It's really FT1 and there is only 1.. the directions call for FT1
FS4 is missing from the inventory sheet. (4 pieces)
FS3 is listed as 4 parts but I only have 2..
I believe FS4 is incorrectly listed as FS3 on the sheet and FS3 is the one that is really missing.. (get it?)
FS2 is 1/4 inch.. not 1/8th
C6 (2 pieces) is not listed.
LG1 and firewall are not marked. just cut pieces of 1/4" birch ply.
Inventory sheet calls for a rudder post but it's stamped as Finpost.
That's it for the inventory list errors.
Wing tube.. T6 60161 Aluminum.. 215 grams. I should be able to get that down to 144g with a CF tube.. saves almost 1/4 pound
Landing gear.. 372 grams (13.2 ounces) should be good for another 1/2 pound if replaced with CF.
03-01-2008, 12:53 PM
#4
Senior Member
Thread Starter
My Feedback: (1)
Join Date: Aug 2005
Location: Eugene, Or
Posts: 1,152
Likes: 0
Received 0 Likes
on
0 Posts
OK here's What ya get..
How UPS lot a box this big baffles me. (this is the 2nd one they shipped)
What's inside? Paper! lots of it..
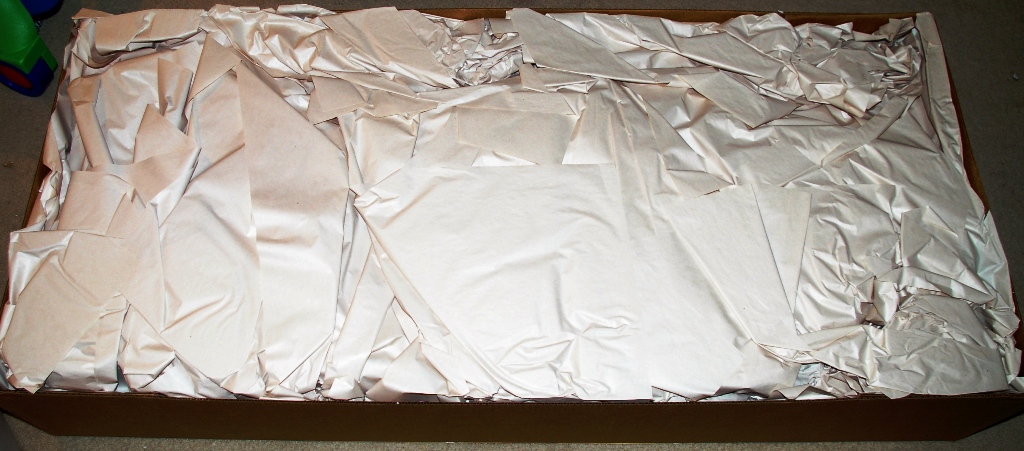
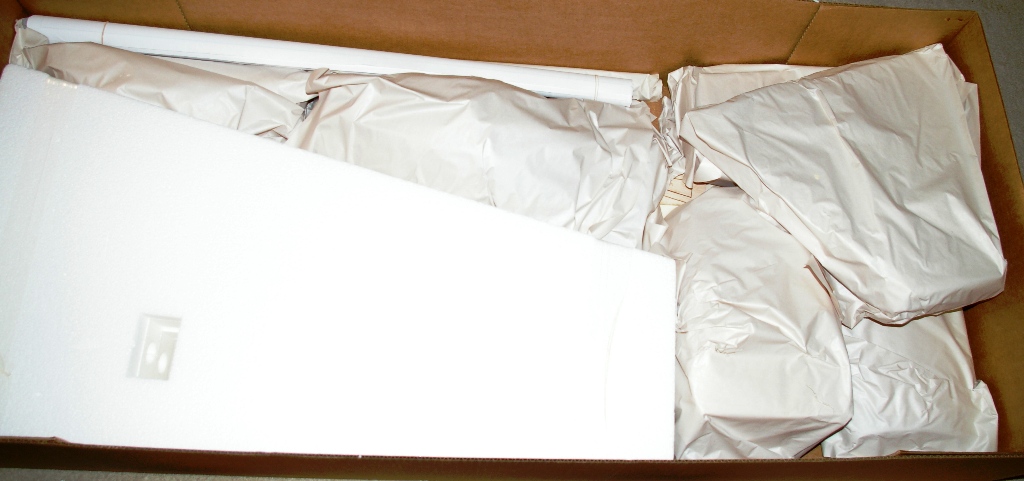
Under that.. Wing cores and more paper!
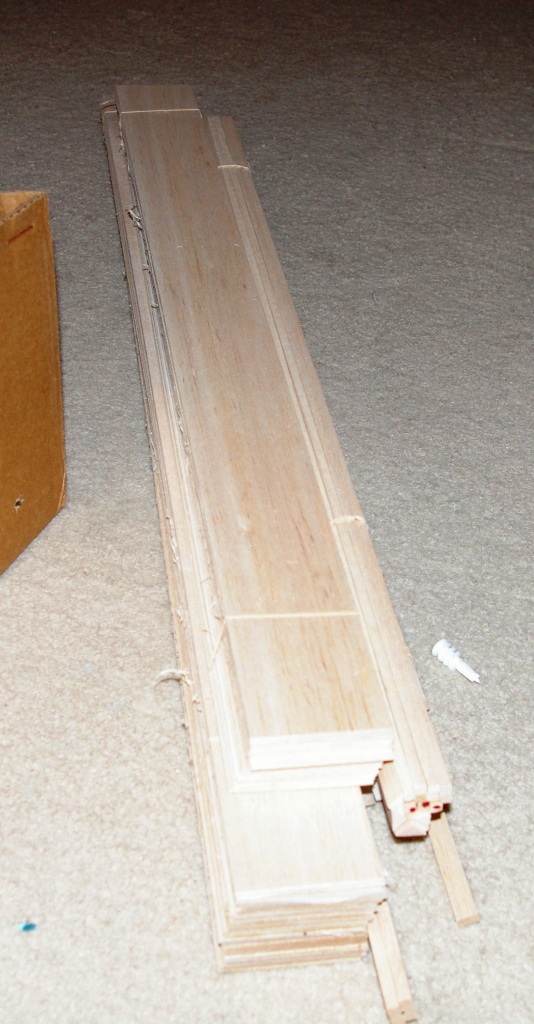
Bundles of sticks and sheets..
I weighed the wing sheeting.. 26 sheets of 3/32x3x42.. High was 72g low.. 40g.. average 50-60g pr sheet
Canopy/Hatch.. I'll build a balsa hatch and just keep the canopy section
Laser cut lite ply.. (it's all lite ply.. no luan)
Crappy ABS 2 piece Cowl thing.. I'll get glass
Gear.. Havvy
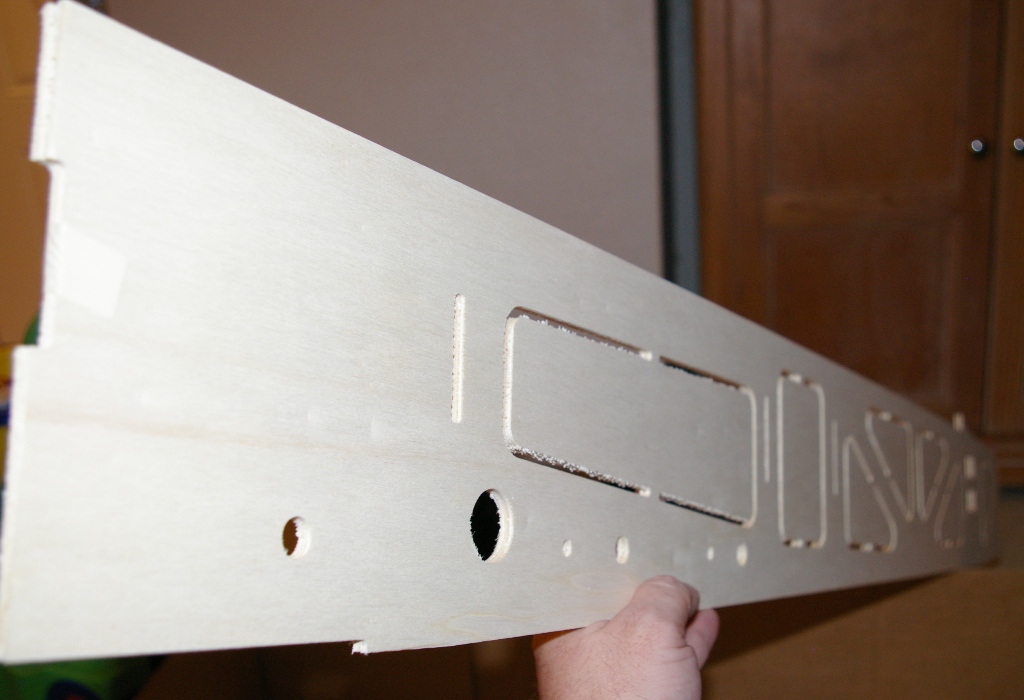
Fuse side.. 1 piece lite ply.. CNC routed..
How UPS lot a box this big baffles me. (this is the 2nd one they shipped)
What's inside? Paper! lots of it..
Under that.. Wing cores and more paper!
Bundles of sticks and sheets..
I weighed the wing sheeting.. 26 sheets of 3/32x3x42.. High was 72g low.. 40g.. average 50-60g pr sheet
Canopy/Hatch.. I'll build a balsa hatch and just keep the canopy section
Laser cut lite ply.. (it's all lite ply.. no luan)
Crappy ABS 2 piece Cowl thing.. I'll get glass
Gear.. Havvy
Fuse side.. 1 piece lite ply.. CNC routed..
 03-02-2008, 01:19 AM
#6
Senior Member
My Feedback: (264)
Join Date: Apr 2003
Location: Great Mills,
MD
Posts: 2,223
Likes: 0
Received 0 Likes
on
0 Posts
I had one of these same kits delivered from tower a few weeks ago. I have not yet started mine, I was also happy it did not have luan doorskin parts in the box. I also pulled the ABS parts from the box and threw them in the recycle bin.
Although I have built many kits over the years, I have never skinned foam cores before. I am still on the fence as to whether a vaccum bag setup is the way to go for this project. I really don't want to mess up on my first foam core wing skinning job.
Both FG spaecialties, and stans list a cowl for this kit.
I will probably use a 50cc gasser in my plane, although I have a new MOKI 2.1 that would work well also.
Mike
.
03-02-2008, 02:25 AM
#7
Senior Member
Thread Starter
My Feedback: (1)
Join Date: Aug 2005
Location: Eugene, Or
Posts: 1,152
Likes: 0
Received 0 Likes
on
0 Posts
If you get a chance read through this 6 part giant scale Extra build featured in MA
http://www.modelaircraft.org/Mag/hurley/hurley1.asp
change the # after hurley to get to the next section..
The have several great tips and go over several methods of sheeting the wings.
How I do it is really up in the air now..
Just found out on Wednesday we are being re-orged at work.. Everyone gets to re-apply for their jobs 10% pay cuts yadda yadda..
I'm sure outsource will be the next thing we hear...
So anyway I'm going to try and beat the rush, pull some strings and see if I can get back to Washington..
If I can do that I'll see if one of my old glider buddies can help me vacuum bag the wings..
Otherwise I'll be going with PVA glue, culls and about 200 pounds of bagged sand.
If I can get my hands on a cutting bow I'd like to cut a foam turtle beck and canopy hatch.. Time will tell.
Anyway die to the job issue any actual building is on hold for now.
I can still do lots of planning..
Engine will depend on what I find..
I've seen some good deals on used DA and 3W 50cc motors..
DL-50 is another option..
This 50cc twin wins the cool factor but it's down on power and a bit heavy.. Should run smooth though.. well compared to a big single.
03-02-2008, 03:09 AM
#8


Weigh the balsa skis and use the light ones for the wings.
Use the heavy ones for the front hatch area and stabs.
Looks good. I'm jealous. I just went back to work after 4 months off and I can't afford much more than food and gasoline right now. If I had the $$, I'd be buying those Lanier kits from Tower--as many as I could afford. [ ] I REALLY want one of those 35% Giles 202 kits. $200 is a steal. Maybe if they still have any left next month, I'll go ahead and buy a kit. You can always rathole another kit for down the road.
Use the heavy ones for the front hatch area and stabs.
Looks good. I'm jealous. I just went back to work after 4 months off and I can't afford much more than food and gasoline right now. If I had the $$, I'd be buying those Lanier kits from Tower--as many as I could afford. [
] I REALLY want one of those 35% Giles 202 kits. $200 is a steal. Maybe if they still have any left next month, I'll go ahead and buy a kit. You can always rathole another kit for down the road.
03-02-2008, 08:43 PM
#9
Senior Member
My Feedback: (264)
Join Date: Apr 2003
Location: Great Mills,
MD
Posts: 2,223
Likes: 0
Received 0 Likes
on
0 Posts
ORIGINAL: sscherin
Just found out on Wednesday we are being re-orged at work.. Everyone gets to re-apply for their jobs 10% pay cuts yadda yadda..
I'm sure outsource will be the next thing we hear...
Just found out on Wednesday we are being re-orged at work.. Everyone gets to re-apply for their jobs 10% pay cuts yadda yadda..
I'm sure outsource will be the next thing we hear...
Uuuuuggggh........[
]Sorry to hear that. Those things really put a damper on the flying time.
 05-02-2008, 05:16 PM
#12

My Feedback: (15)

Join Date: May 2005
Location: La Vergne,
TN
Posts: 3,743
Likes: 0
Received 0 Likes
on
0 Posts
Hi all,
Just drug one of these home from the LHS today. Being down at $110 at this point, it was just too cheap NOT to, ya know?
Since I was thinking of doing a buld thread, but then found this one, I PM'd sscherin, and he agreed to let me "horn in" on this thread, so I'll be doing build pics and such here as well. Perhaps, a few months down the road, we can have THE Cap 232 build thread to end all build threads. *heh*
Here's some prelim. info:
====================
Power will be a DL-50. I've been curious about the DL-50 for a while, and since I won't be hugely "involved" with this airplane, financially or emotionally, seems like the best time to give one a try. Worst case, I cough up $350 on a motor in a plane I'm not that worried about, best case, I get some experience with them, and will have reason to jump on a DL-100 when they arrive.
Scheme is going to be Nicolas Ivanoff's Cap 232 from the Red Bull series a few years back. Not a huge fan of Nic's or anything (More of a Kirby guy myself *heh*), but it's a drop-dead gorgeous scheme imo:

Plans are to do some fairly "basic" things to lighten her up, but nothing outrageous. Wing and stab sheeting will be done with contest grade balsa, CF tube and gear, lightening holes in the formers, that sort of thing.
Will probably pull a glass cowl off the ABS "thing" in the box, using it as a plug. May decide instead to wimp out, and just buy one...we'll see. Will also mod the canopy with a wood frame.
Anywho, hope to get started on it soon...going to shelve the TF Mustang that's on the table right now, and "knock this out" fairly "quickly" if I can. Doubtful the Mustang would be done this season anyway, and it'll be nice to have something new to take to the field before the season ends.
Just drug one of these home from the LHS today. Being down at $110 at this point, it was just too cheap NOT to, ya know?
Since I was thinking of doing a buld thread, but then found this one, I PM'd sscherin, and he agreed to let me "horn in" on this thread, so I'll be doing build pics and such here as well. Perhaps, a few months down the road, we can have THE Cap 232 build thread to end all build threads. *heh*
Here's some prelim. info:
====================
Power will be a DL-50. I've been curious about the DL-50 for a while, and since I won't be hugely "involved" with this airplane, financially or emotionally, seems like the best time to give one a try. Worst case, I cough up $350 on a motor in a plane I'm not that worried about, best case, I get some experience with them, and will have reason to jump on a DL-100 when they arrive.
Scheme is going to be Nicolas Ivanoff's Cap 232 from the Red Bull series a few years back. Not a huge fan of Nic's or anything (More of a Kirby guy myself *heh*), but it's a drop-dead gorgeous scheme imo:
Plans are to do some fairly "basic" things to lighten her up, but nothing outrageous. Wing and stab sheeting will be done with contest grade balsa, CF tube and gear, lightening holes in the formers, that sort of thing.
Will probably pull a glass cowl off the ABS "thing" in the box, using it as a plug. May decide instead to wimp out, and just buy one...we'll see. Will also mod the canopy with a wood frame.
Anywho, hope to get started on it soon...going to shelve the TF Mustang that's on the table right now, and "knock this out" fairly "quickly" if I can. Doubtful the Mustang would be done this season anyway, and it'll be nice to have something new to take to the field before the season ends.
05-02-2008, 05:29 PM
#13
Senior Member
Thread Starter
My Feedback: (1)
Join Date: Aug 2005
Location: Eugene, Or
Posts: 1,152
Likes: 0
Received 0 Likes
on
0 Posts
Sounds like a good plan gboulton.
Sorry I've been so quiet lately..
Lots going on here.. I'll be moving back to Washington in June.
So long story short all my builds are on hold till we get moved.
Just to add to the pile of projects I picked up a Byron P-51 Kit too.
Sorry I've been so quiet lately..
Lots going on here.. I'll be moving back to Washington in June.
So long story short all my builds are on hold till we get moved.
Just to add to the pile of projects I picked up a Byron P-51 Kit too.
05-02-2008, 09:25 PM
#14
My Feedback: (10)
Join Date: Nov 2001
Location: Puryear, TN
Posts: 2,712
Likes: 0
Received 0 Likes
on
0 Posts
Hey guys,
I've seen gboulton get into a building frenzy marathon, so you better stay tuned. If he gets the urge, he'll have this Cap framed up in 4 or 5 days!
What's that? Do I hear the dremel cutting lightening holes in the fuse sides already? [X(]
I've seen gboulton get into a building frenzy marathon, so you better stay tuned. If he gets the urge, he'll have this Cap framed up in 4 or 5 days!
What's that? Do I hear the dremel cutting lightening holes in the fuse sides already? [X(]
05-02-2008, 09:35 PM
#15
My Feedback: (15)
Join Date: May 2005
Location: La Vergne,
TN
Posts: 3,743
Likes: 0
Received 0 Likes
on
0 Posts
Call me a maniac (others do) but...
The Cap's started. Fuse sides are done, and F2 and F3 are curing in the right side as I type. *heh* (I'll get some pics up tomorrow, hopefully)
Thus far, I must echo most of what sscherin said above:
Everything seems to be decently cut...which is to say, no dinged edges, anything like that. And everything is, indeed, CNC routed or laser cut...not die-crushed.
I'm less than impressed with the precision, however. Having recently worked on Top-Flight's big mustang, which WAS die cut, I got spoiled by how nicely EVERYTHING lines up in that kit. From the very first step here, putting the fuse doublers in, already I see where some holes are enough off that some drilling/opening will be required. The instructions suggest you align the doublers using the fiber tube and a 1/2" dowel....nice idea, except both holes don't line up, so you CAN'T. Not a big deal...will just mean that things have to be cleaned out as we move along.
The wood seems to be of decent quality...no rips, splintering, anything like that. Certainly not the lightest stuff though. To be certain, the plane could absolutely be built with the wood available, imo, but it's an easy and relatively inexpensive thing to replace. I won't replace everything, obviously, but I DID just order some contest grade sheeting from National Balsa to do the wings, stabs, and turtledeck. That alone should take a fair amount of weight out of her.
Speaking of weight...good lord. Apparently, when Lanier went shopping for the aluminum to make the gear and wing tube, they requested some sort of aluminum/lead alloy. I'm fairly certain I own .40 sized planes that weigh less than either of those things. There's definitely some carbon fiber in our future here, at least for the wing tube. (We'll see if we need some weight up front before chucking the gear)
The cowl is, as reported above, some sort of ABS plastic monstrosity that fits together as well as...err...as well as two things that don't fit together will. I shan't bother you with another picture, but suffice to say that sscherin's above is "flattering".
All of that aside however, it seems a fairly simple kit, and has the feel of one that's going to go together fairly quickly. And, as mentioned above, none of the stock stuff is "unusable"...I just think some judicious purchases here and there will deliver a lot of "bang for the buck" as it were.
The Cap's started. Fuse sides are done, and F2 and F3 are curing in the right side as I type. *heh* (I'll get some pics up tomorrow, hopefully)
Thus far, I must echo most of what sscherin said above:
Everything seems to be decently cut...which is to say, no dinged edges, anything like that. And everything is, indeed, CNC routed or laser cut...not die-crushed.
I'm less than impressed with the precision, however. Having recently worked on Top-Flight's big mustang, which WAS die cut, I got spoiled by how nicely EVERYTHING lines up in that kit. From the very first step here, putting the fuse doublers in, already I see where some holes are enough off that some drilling/opening will be required. The instructions suggest you align the doublers using the fiber tube and a 1/2" dowel....nice idea, except both holes don't line up, so you CAN'T.
Not a big deal...will just mean that things have to be cleaned out as we move along.The wood seems to be of decent quality...no rips, splintering, anything like that. Certainly not the lightest stuff though. To be certain, the plane could absolutely be built with the wood available, imo, but it's an easy and relatively inexpensive thing to replace. I won't replace everything, obviously, but I DID just order some contest grade sheeting from National Balsa to do the wings, stabs, and turtledeck. That alone should take a fair amount of weight out of her.
Speaking of weight...good lord. Apparently, when Lanier went shopping for the aluminum to make the gear and wing tube, they requested some sort of aluminum/lead alloy. I'm fairly certain I own .40 sized planes that weigh less than either of those things. There's definitely some carbon fiber in our future here, at least for the wing tube. (We'll see if we need some weight up front before chucking the gear)
The cowl is, as reported above, some sort of ABS plastic monstrosity that fits together as well as...err...as well as two things that don't fit together will. I shan't bother you with another picture, but suffice to say that sscherin's above is "flattering".
All of that aside however, it seems a fairly simple kit, and has the feel of one that's going to go together fairly quickly. And, as mentioned above, none of the stock stuff is "unusable"...I just think some judicious purchases here and there will deliver a lot of "bang for the buck" as it were.
05-02-2008, 09:39 PM
#16
My Feedback: (15)
Join Date: May 2005
Location: La Vergne,
TN
Posts: 3,743
Likes: 0
Received 0 Likes
on
0 Posts
ORIGINAL: Nogyro
Hey guys,
I've seen gboulton get into a building frenzy marathon, so you better stay tuned. If he gets the urge, he'll have this Cap framed up in 4 or 5 days!
What's that? Do I hear the dremel cutting lightening holes in the fuse sides already? [X(]
Hey guys,
I've seen gboulton get into a building frenzy marathon, so you better stay tuned. If he gets the urge, he'll have this Cap framed up in 4 or 5 days!
What's that? Do I hear the dremel cutting lightening holes in the fuse sides already? [X(]
And no, that's not the Dremel you hear. That was the squealing of my credit card at National Balsa.
05-03-2008, 03:30 AM
#17
Senior Member
Thread Starter
My Feedback: (1)
Join Date: Aug 2005
Location: Eugene, Or
Posts: 1,152
Likes: 0
Received 0 Likes
on
0 Posts
Did you order 3/32 or 1/16 to sheet the wings?
OK let me know if my math matches reality..
My stack of 26 3/32x3x42" sheets was about 50 ounces..
contest claims 4-7lbs pr cubic foot
so thats what about 17g pr sheet for 3/32x3x42? 15.6oz for the 26 sheets. A big weight savings..
Overall I figure a 2lb savings going with 3/32 contest grade.. save another 1/4lb with 1/16 sheets.
Not bad for $40-$45
05-03-2008, 10:58 AM
#18
My Feedback: (15)
Join Date: May 2005
Location: La Vergne,
TN
Posts: 3,743
Likes: 0
Received 0 Likes
on
0 Posts
I stuck with the same thicknesses as called for in the plans. 3/32" for the wings, 1/16" for the stabs. I'll use what was in the kit for the turtledeck sheeting and such, figuring that for a few sheets, I can dig out the highest quality wood and have enough to get by.
And yeah...I'm looking to take 1-2 lbs out of it by going this route...absolutely worth the expense, imo.
================================================== =======
Couple of comments about specifics in the instructions.
First, the "build" of the motor box/F1 is...er...well, bleh. The design makes it IMPOSSIBLE to get F1 in first, nice and square. F1 and the sides to the box MUST go in at the same time, but can NOT go in as an assembled unit...in other words, you've got to have the whole assembly sort of "together", but nothing glued...this makes building straight and square ALMOST (but not quite) impossible.
I highly recommend a trick i picked up from Bob Parkinson...
Buy/find yourself a small sheet of 18" or so balsa. Cut out numerous right triangles in all sorts of various sizes. Take great care to ensure that the 90 degree corner is well and truly SQUARE.
As you're building, if you have say a former or something that needs to be square to another piece (like a fuse side), epoxy it in, and then tack-glue 2-3 of the triangles in the corners with thin CA...just a couple drops. They'll do a fine job of keeping things nice and square, and can be easily knocked out with a tap once things are cured.
This is the ONLY way I could get a square and true motorbox/F1 assembly in this thing. I basically just wedged in in there roughly, stuffed some epoxy down into joints, and then started at each corner, using the triangles to true it up, sort of working around to each corner.
Also, one other bit of info...the instructions say, once you're ready to move to the tail and install F7, to score the fuse sides just aft of F3, and to notch the stringers at top and bottom, or you won't be able to make the bends. Bah. The sides will bend just fine without doing that, and you'll avoid weakening the structure in those areas. I didn't even have to soak the wood to get it to bend...just takes a little care, and some clamps on the bottoms of the formers, and it'll go together fine.
=====================================
Have attached a couple of photos...nothing spectacular, just documenting the progress, and making Nogyro look like a psychic. )
First is formers F2 & F3 in the right fuse side. Next is the motor box loosely framed up. Finally, the fuse with things curing...yes, the fuse is all framed up. Frank DID say I've been known to get into a "frenzy". *heh*
And yeah...I'm looking to take 1-2 lbs out of it by going this route...absolutely worth the expense, imo.
================================================== =======
Couple of comments about specifics in the instructions.
First, the "build" of the motor box/F1 is...er...well, bleh. The design makes it IMPOSSIBLE to get F1 in first, nice and square. F1 and the sides to the box MUST go in at the same time, but can NOT go in as an assembled unit...in other words, you've got to have the whole assembly sort of "together", but nothing glued...this makes building straight and square ALMOST (but not quite) impossible.
I highly recommend a trick i picked up from Bob Parkinson...
Buy/find yourself a small sheet of 18" or so balsa. Cut out numerous right triangles in all sorts of various sizes. Take great care to ensure that the 90 degree corner is well and truly SQUARE.
As you're building, if you have say a former or something that needs to be square to another piece (like a fuse side), epoxy it in, and then tack-glue 2-3 of the triangles in the corners with thin CA...just a couple drops. They'll do a fine job of keeping things nice and square, and can be easily knocked out with a tap once things are cured.
This is the ONLY way I could get a square and true motorbox/F1 assembly in this thing. I basically just wedged in in there roughly, stuffed some epoxy down into joints, and then started at each corner, using the triangles to true it up, sort of working around to each corner.
Also, one other bit of info...the instructions say, once you're ready to move to the tail and install F7, to score the fuse sides just aft of F3, and to notch the stringers at top and bottom, or you won't be able to make the bends. Bah. The sides will bend just fine without doing that, and you'll avoid weakening the structure in those areas. I didn't even have to soak the wood to get it to bend...just takes a little care, and some clamps on the bottoms of the formers, and it'll go together fine.
=====================================
Have attached a couple of photos...nothing spectacular, just documenting the progress, and making Nogyro look like a psychic. )
First is formers F2 & F3 in the right fuse side. Next is the motor box loosely framed up. Finally, the fuse with things curing...yes, the fuse is all framed up.
Frank DID say I've been known to get into a "frenzy". *heh*
05-03-2008, 04:15 PM
#19
My Feedback: (15)
Join Date: May 2005
Location: La Vergne,
TN
Posts: 3,743
Likes: 0
Received 0 Likes
on
0 Posts
Holy umm...err....stuff.
Wandered up to the LHS today, scale in hand :
Stock Landing Gear - 13 oz
CF "F3A Long" Gear - 4.2 oz
Stock Wing Tube - 8.1 oz
CF Wing Tube - 2.7 oz
For about $130, I'll drop 14.2 oz...dang near a pound. Pretty cost effective as well, especially given the $110 price for the kit.
==============
On a different note, I may have been hasty in my judgment of the ABS cowl. After doing just a bit of trimming, and taping the thing together, it looks downright usable. Going to spend some time this afternoon futzing with it, adding a lap joint, etc...see what i can come up with. But I have significantly higher hopes for it than I did.
Also plan on laying up the templates for the wing sheeting. I'll be documenting the wing sheeting process pretty thoroughly, since over the past year or so, I've come to use a "combination" of methods that, imo, works exceptionally well, is easy and quick, and produces absurdly light and strong wings. So, more to come on that.
05-04-2008, 12:35 PM
#20
My Feedback: (15)
Join Date: May 2005
Location: La Vergne,
TN
Posts: 3,743
Likes: 0
Received 0 Likes
on
0 Posts
Finished up the canopy frame last night...leaving it aside now until I decide how crazy I want to get trying to model the inside of Nic's Cap.
Started on the prep-work for the wings today. This is the time consuming part of doing foam wings, imo...but it pays huge dividends down the road.
First, I'll outline the basic process, then I'll describe what's happened so far in some detail.
The process is fairly simple. I do any prep work to the cores (inserting tube sockets, cutting slots or holes for servo leads, that sort of thing. Next, I lay down some poster board between wing and shuck, and trace the edges. That's then cut out to form a wing pattern, on which I can draw any lines for servo bays/etc. Once that's done, I'll be able to form the sheets as single units, and cut any holes needed BEFORE it goes down. When the sheeting's ready, we'll cover it with VERY little epoxy, throw them on the wings, put everything back in the shucks, and bag 'em.
Today's work covers most of the prep of the cores. Below is the process for prepping the bottom of the left wing.
Step 1 was to do any "internal" prep for the cores. In this case, this consisted of simply putting in the wing tube sockets, and the W2 plate to receive them.
Next, make a sheet of poster board large enough to cover the entire wing. Scotch tape pieces together if necessary to make it big enough.
Lay down the bottom shuck, and then lay the poster board in it. IME, it's best not to try to line any of the edges up, since poster board rarely has clean and straight edges. Just let it overlap. Next, place the wing in the shuck, "sandwiching" the poster board between the core and the shuck:

Make sure everything's lined up exactly (core lined up in its shuck), and trace around the edges of the core. For cores like this one, which have a paper-thin trailing edge, it's best to just mark a few spots alont the TE, and use a straight edge to draw that line later.
Remove the skin, and mark it to indicate what it is. I've marked mine "LB vis" with an arrow. LB = Left bottom, vis=visible side (so you'll know how it's oriented when you start making the sheets, and can put the best wood on the outside), and the arrow to indicate leading edge.

Now pull the template out, placing the wing back in its shucks. Use a straight edge and NEW x-acto blade (you'll only use scissors once, I promise) to cut the pattern on the outline.
Now, take the OPPOSITE (in this case, top) shuck, lay the wing core in it, and tape the template over the wing core, making sure to carefully line up all the edges.

Now, with a nice flat and steady surface, you can mark out any holes or locations you may need to...such as the hole for the servo bay. Be sure you extend the lines beyond the size of the hole, so when you lay the template down on the balsa sheeting, you can make allowances for any overlap or setback you may want for a particular application. For example, in this case, I'm going to sheet OVER the 1/8" ply I'll be using to box in the servo bay, so I'll want the hole in my balsa sheeting to be slightly SMALLER than the hole I'm cutting in the balsa. You can also go ahead and draw in "details", such as the framework for the box in the servo bay, as shown here:

Finally, since you have your nice steady surface, and no balsa in the way, you can go ahead and cut out the servo bay, using your pattern on the template as a guide.

It's handy to save the "mini-template" for the servo bay, as it can serve as a guide for cutting the wood you'll use to box in the bay.
Once any features like the servo bay are done, you can remove the wing template, set it aside, and finish framing in the servo bay, cut the slot or hole for the wires, etc:

Though not shown above, I also went ahead and marked a line for the push rod, so I knew where the control horn would go, and placed a hardpoint in the aileron for the horn hardware.
Started on the prep-work for the wings today. This is the time consuming part of doing foam wings, imo...but it pays huge dividends down the road.
First, I'll outline the basic process, then I'll describe what's happened so far in some detail.
The process is fairly simple. I do any prep work to the cores (inserting tube sockets, cutting slots or holes for servo leads, that sort of thing. Next, I lay down some poster board between wing and shuck, and trace the edges. That's then cut out to form a wing pattern, on which I can draw any lines for servo bays/etc. Once that's done, I'll be able to form the sheets as single units, and cut any holes needed BEFORE it goes down. When the sheeting's ready, we'll cover it with VERY little epoxy, throw them on the wings, put everything back in the shucks, and bag 'em.
Today's work covers most of the prep of the cores. Below is the process for prepping the bottom of the left wing.
Step 1 was to do any "internal" prep for the cores. In this case, this consisted of simply putting in the wing tube sockets, and the W2 plate to receive them.
Next, make a sheet of poster board large enough to cover the entire wing. Scotch tape pieces together if necessary to make it big enough.
Lay down the bottom shuck, and then lay the poster board in it. IME, it's best not to try to line any of the edges up, since poster board rarely has clean and straight edges. Just let it overlap. Next, place the wing in the shuck, "sandwiching" the poster board between the core and the shuck:
Make sure everything's lined up exactly (core lined up in its shuck), and trace around the edges of the core. For cores like this one, which have a paper-thin trailing edge, it's best to just mark a few spots alont the TE, and use a straight edge to draw that line later.
Remove the skin, and mark it to indicate what it is. I've marked mine "LB vis" with an arrow. LB = Left bottom, vis=visible side (so you'll know how it's oriented when you start making the sheets, and can put the best wood on the outside), and the arrow to indicate leading edge.
Now pull the template out, placing the wing back in its shucks. Use a straight edge and NEW x-acto blade (you'll only use scissors once, I promise) to cut the pattern on the outline.
Now, take the OPPOSITE (in this case, top) shuck, lay the wing core in it, and tape the template over the wing core, making sure to carefully line up all the edges.
Now, with a nice flat and steady surface, you can mark out any holes or locations you may need to...such as the hole for the servo bay. Be sure you extend the lines beyond the size of the hole, so when you lay the template down on the balsa sheeting, you can make allowances for any overlap or setback you may want for a particular application. For example, in this case, I'm going to sheet OVER the 1/8" ply I'll be using to box in the servo bay, so I'll want the hole in my balsa sheeting to be slightly SMALLER than the hole I'm cutting in the balsa. You can also go ahead and draw in "details", such as the framework for the box in the servo bay, as shown here:
Finally, since you have your nice steady surface, and no balsa in the way, you can go ahead and cut out the servo bay, using your pattern on the template as a guide.
It's handy to save the "mini-template" for the servo bay, as it can serve as a guide for cutting the wood you'll use to box in the bay.
Once any features like the servo bay are done, you can remove the wing template, set it aside, and finish framing in the servo bay, cut the slot or hole for the wires, etc:
Though not shown above, I also went ahead and marked a line for the push rod, so I knew where the control horn would go, and placed a hardpoint in the aileron for the horn hardware.
05-04-2008, 12:37 PM
#21
My Feedback: (15)
Join Date: May 2005
Location: La Vergne,
TN
Posts: 3,743
Likes: 0
Received 0 Likes
on
0 Posts
I expect the sheeting from National Balsa will arrive Wed or Thurs or so. When it does, I'll document the process of making the skins, and then the actual sheeting and bagging process.
05-07-2008, 08:11 AM
#22
My Feedback: (15)
Join Date: May 2005
Location: La Vergne,
TN
Posts: 3,743
Likes: 0
Received 0 Likes
on
0 Posts
Well, all the foam is prepped. Everything has hard points installed for control horns, lines drawn for control surface cuts, bays made for servos where appropriate, etc. Wing, Stab, and Fin patterns are ready to go as well.
Got shipping information from National yesterday...the boys in brown say the wood will be here Friday, which should still give me time to put the sheets together and get them into bags over the weekend, so by Monday this thing will be to "ARF/ARC" status, give or take.
As a quick preview of what will happen with the sheets over the weekend:
We'll put the sheets together with masking tape (NOT EDGE GLUED!), and cut them down to the shape of the patterns. Then we'll lay them out, squeegee a THIN coat of epoxy on them, sandiwch the wings/sheets into the shucks, and toss everything into the bags for the night.
Pictures and details will be forthcoming.
=================
05-07-2008, 01:25 PM
#24
My Feedback: (15)
Join Date: May 2005
Location: La Vergne,
TN
Posts: 3,743
Likes: 0
Received 0 Likes
on
0 Posts
2 reasons, really.
First, yes, you'll get adhesive into those seams ANYWAY...why add the extra weight of yet more glue?
Second, any glue in those areas won't compress as well as the wood, and won't be as easy to sand...resulting in 'ridges' along every joint.
If, instead, the sheets are put together, and then taped in place (tape on the outside surface), they'll seal up nicely, and then when the tape is pulled off, sand and finish just like the rest of the surface.
05-09-2008, 01:02 PM
#25
My Feedback: (15)
Join Date: May 2005
Location: La Vergne,
TN
Posts: 3,743
Likes: 0
Received 0 Likes
on
0 Posts
Just received the wood from National Balsa.
[X(][X(][X(]
All I can say is WOW. This stuff is too pretty to defile by making a plane out of it. SUPERB quality, every piece. Very securely packaged for shipment, and a reasonable price.
I'd heard very good stuff about National before, and must now add my own compliments. They absolutely have just made a customer for life.