


s/m 1/6 f16 in my hot little hands!
 06-10-2018, 06:23 AM
#1926

My Feedback: (3)

Join Date: Oct 2005
Location: san jose,
CA
Posts: 880
Likes: 0
Received 0 Likes
on
0 Posts
Skymaster CGs, per their instructions, are generally too far forward making takeoffs and landings difficult/fast. 225 to 230 mm back for a much nicer flying airplane..
 06-10-2018, 06:28 AM
#1927

JanR
I have had 4 of these planes, CG is relative to pilot preference, however I can confirm that the plane WILL fly fine at the 220 mark, That is where I start for my CG, I know I am further than that now because I shifted a few components to get a little more weight off the nose. If you are not sure, I can tell you the easiest way to balance this plane is to make 2 wing root template ribs that match the fuse profile at the wing base, trace the outline on a piece of AC ply, and mark the holes where the carbon rods are so they can pass through, leave a tab on top at the recommended cg, slide them on the wings, then put the wings on the plane, use some S-hooks or even knots in a hole to suspend the plane with those ribs. Place a table about 4 in under the plane, just in case,,, If you put the holes at 220 and have the plane where it just slightly noses down, you will be fine, and really close to where I run mine. And once you are done, you have the ribs, so if you get another one, you already have what you need to balance, or if a buddy has one you can lend them to him. IF you were closer I would lend you mine, but you are just a few blocks away from me. Remember, balance with UAT full, and Gear down, everything in the plane as It would fly,, Cockpit, hatch, ETC,, these are great jets, I will always have one..
I am attaching a pic of one of my Plates to help you see what I mean, youll see in the pic, I have mine marked at 8 5/8 which comes in at a little over 219mm, and like I said I shifted some stuff around, so I know I am a little further back than 220,,
Hope this helps,
Ronnie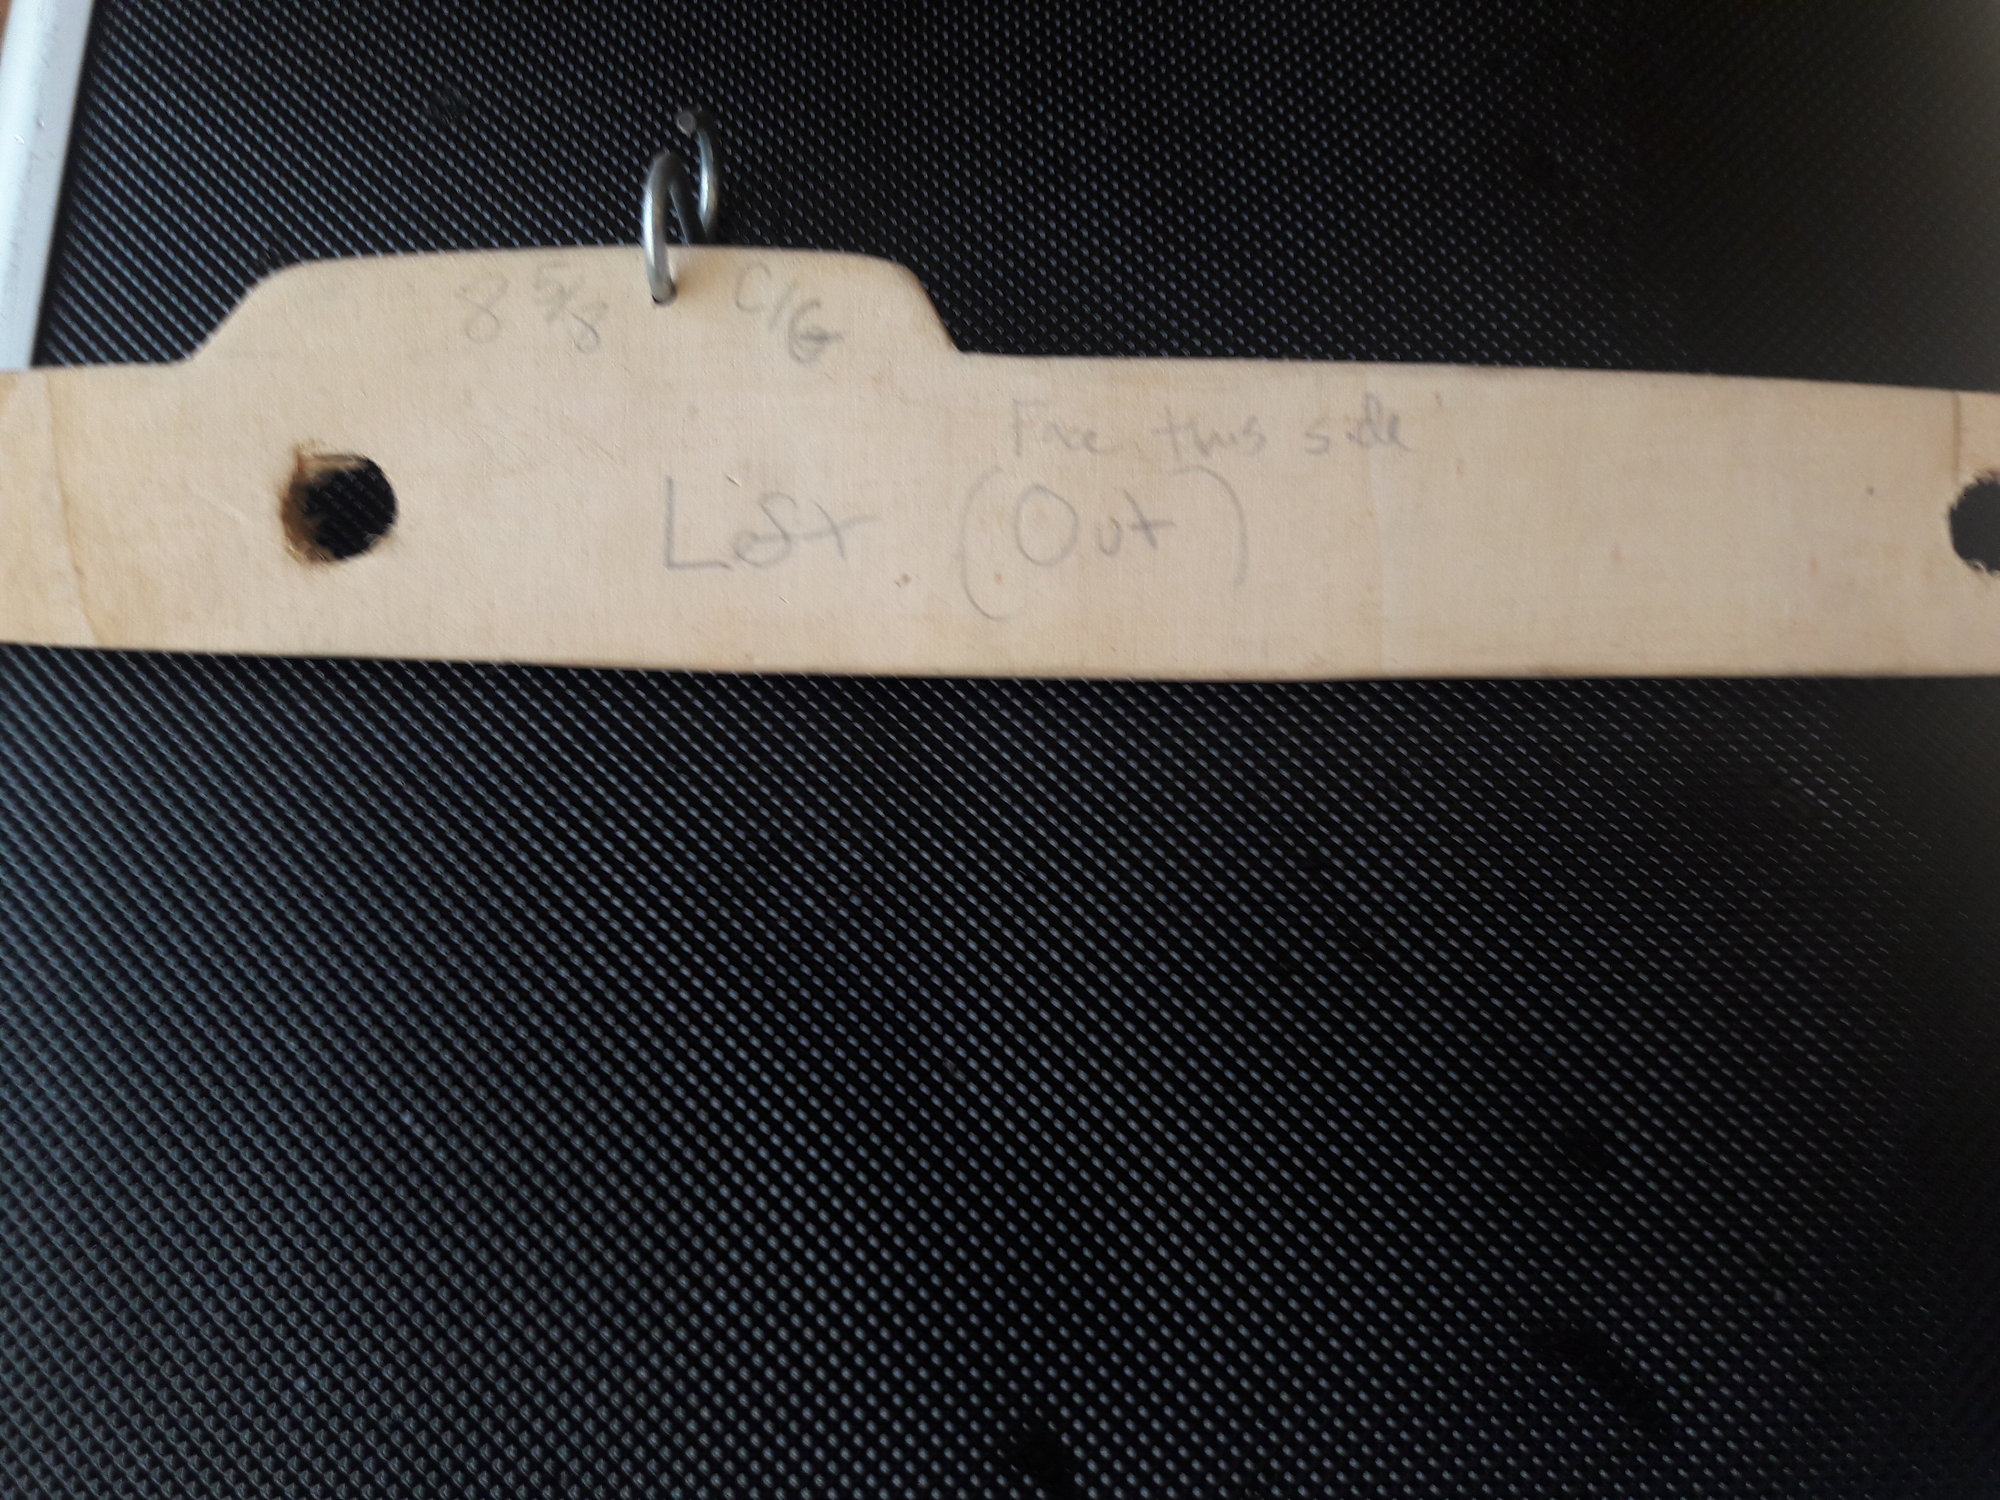
Last edited by raron455; 06-10-2018 at 06:31 AM.
 06-10-2018, 01:04 PM
#1929


Join Date: Jun 2006
Location: Gold Coast, Queensland, AUSTRALIA
Posts: 1,469
Received 26 Likes
on
24 Posts
Thank you guys, the cg advice is much appreciated.
A different question; do any of you shortern the two dorsal fins to improve ground clearance during take-off and landing? If so how do you suggest I do this? I fly from grass and it seem to me that these fins are too close to the ground, which will only get worse when the jet rotate.
Finally, look like my final empty weight is going to be 17kgs (37.4lbs) - what do you think?
JanR
Last edited by Springbok Flyer; 06-10-2018 at 01:23 PM.
06-10-2018, 02:44 PM
#1930
JanR, I cut 1/2 inch off the bottom of mine, Now that I think about it, this was something that my buddy AD CLARK recommended to me when I put my first one together,
( Addison, thanks buddy) and I have done it on everyone I have had since. I take a straight edge, and mark a 1/2 in up from the bottom edge parallel with the bottom edge, then use a cutoff wheel on a grinder and sliced the 1/2 inch section off. I then Glue a piece of square balsa cut to fit inside the two halves about 1/16 down inside the edge, fill the void with a mix of Hysol with milled fiber, building it up enough to form a domed curve that can be sanded. Once dried and sanded, and filled with spot putty where needed, I then painted with the closest model masters paint I could find. You can not tell this mod was done on the plane, and it gains some needed clearance. To get a little more protection, I took a 1/4 thick piece of carbon fiber, cut it 1 inch tall, and 1.5 in long, sanded it to a wedge shape, and then hysoled it to the bottom of my fuse under the large thick rear former. this will keep my ventrils and cone from contacting the runway if I ever get the nose too high, it will contact and then push the nose down.
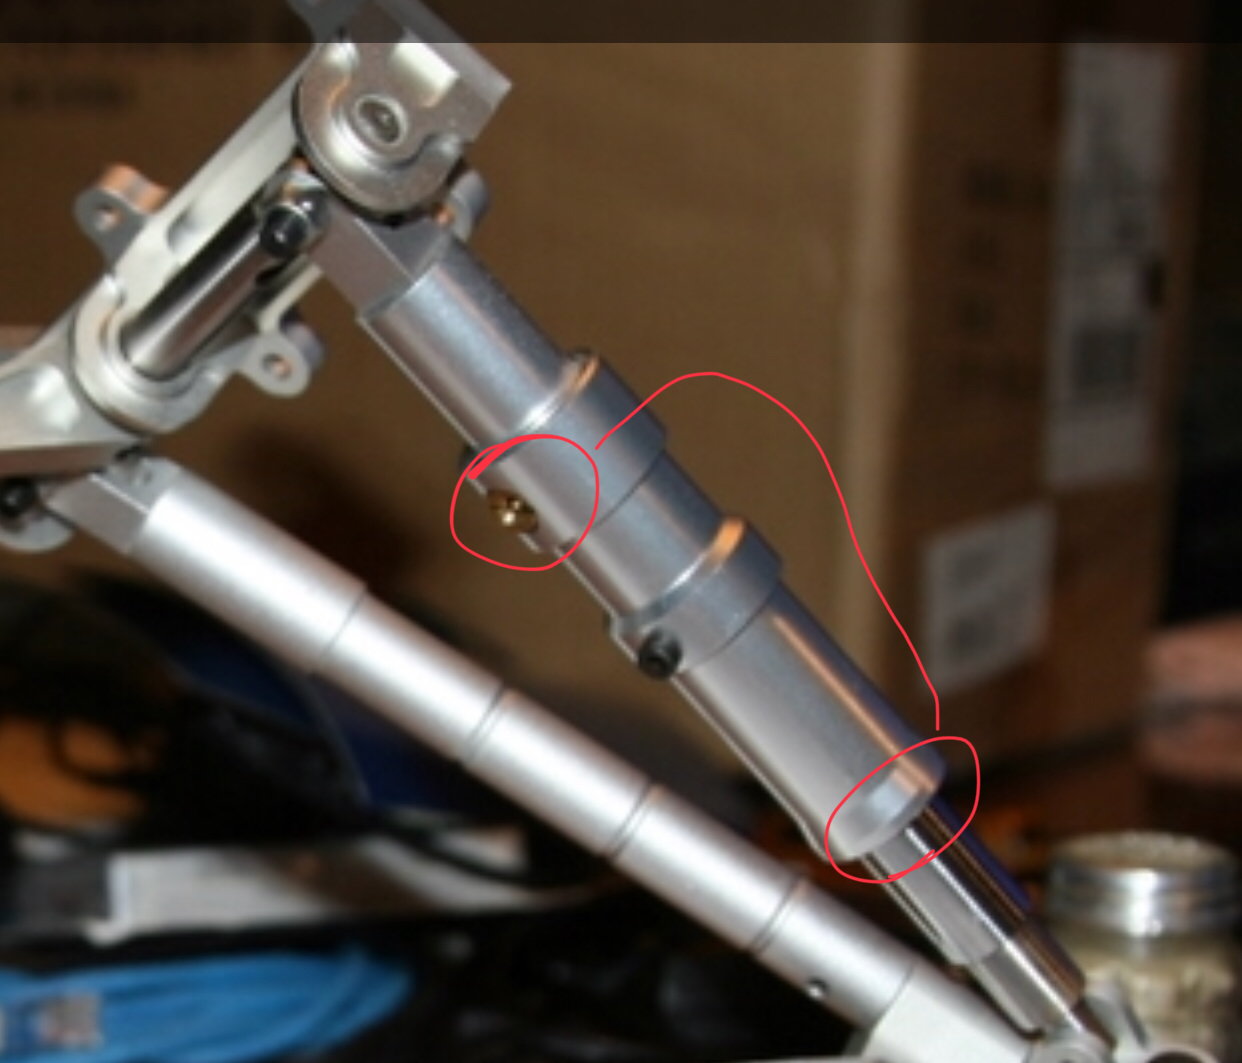
Another thing that will help is maintaining your strut pressure, I started at 120lbs and it was not enough, through different values, what works best for me is 170-175lbs pressure in the main struts, this is enough to allow the gear to compress, but still give it enough firmness not to bottom out, which is easy considering this jet weighs and honest 50lbs full of fuel RTF. If you are not familiar with Skymaster gear, Be sure when you fill the struts the first thing you need to do is clean the fill valve (I keep q-tips in my flight box just for this),, Then clean and oil the fill nipple,, if you skip this step, and have any debris on the valve or nipple when you go to fill, you run the risk of damaging the small O-ring in the fill valve. damage that, and the strut will not hold pressure and you will NOT be able to fly the plane due to a collapsed suspension. Back to the ventrils, the 1/2 inch cut seems to be enough to protect them.
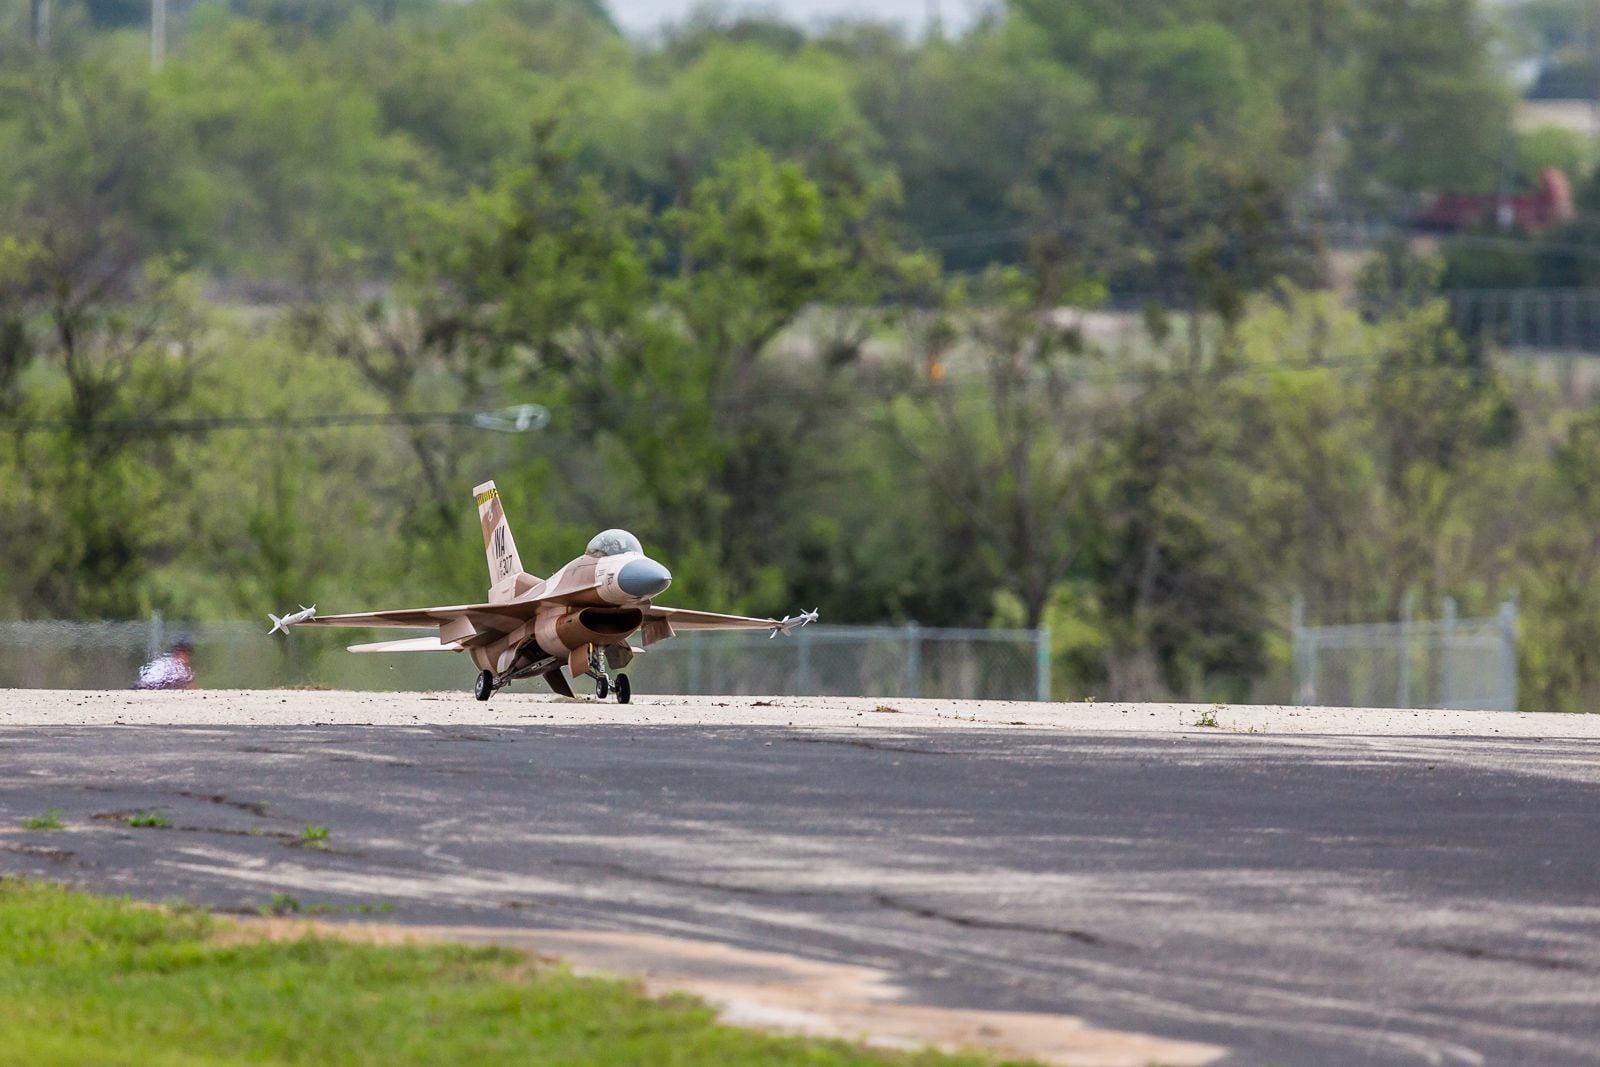
Above is a pic of mine taken earlier this year in Austin Tx,, photo thanks to camera master- Jeremy Royall-, The pic clearly shows my plane at compression on a landing that to be honest was a little too Hot, You can see that even though the gear is spread out, and the nose is up,, The ventrils are not touching,, They are close, but they are not touching. This mod has worked well, and the proof is that I have no scratches on the bottom of my ventrils. Hope this info helps,
As far as your empty weight,, that' fine, mine was just a few ounces over 40lbs empty, yours is lighter so you are good to go..
Ronnie
Last edited by raron455; 06-10-2018 at 02:50 PM.
06-11-2018, 12:06 PM
#1932
My Feedback: (3)
Join Date: Oct 2005
Location: san jose,
CA
Posts: 880
Likes: 0
Received 0 Likes
on
0 Posts
I did similar as Ronnie did and cut the fins probably 3/4". I seemed to be getting into a landing mode at one point where I was applying too much elevator in the flare and banging the cone and fins a little bit. ..switching between planes often causes me to loose the specific feel for each jet. Anyways, I've also lowered the rates a bit for the elev in landing phase to prevent that tendency on my part and remember to flare by adding just a couple clicks of throttle and I'm finding it to work well.
06-11-2018, 02:01 PM
#1933
Join Date: Jun 2006
Location: Gold Coast, Queensland, AUSTRALIA
Posts: 1,469
Received 26 Likes
on
24 Posts
Are you guys flying with or without leading edge slats? Mine don't have them. Also, are you using the conventional setup of ailerons and elevators or flaperons and elevons? What throws on everything, as per the manual or not?
Cheers,
JanR
06-11-2018, 04:57 PM
#1934
Jan, I am flying without the leading edge flaps, my last one had them and to be honest, personally I didn't care for them, so my current one, I ordered without them. I fly a standard configuration of elevator, rudder, ailerons. I do not do any of the flaperon, or elevon stuff, to be honest I don't think the plane needs it. My buddy Addison has his setup with flaperons, and he says he prefers it, nothing drastic, says he has the ailerons down to where they are touching the lower square edge of the fuse, that's not a whole lot. So its kind of up to you, I started with the throws in the manual, and they are plenty.
06-26-2018, 08:39 PM
#1936
Join Date: Jun 2006
Location: Gold Coast, Queensland, AUSTRALIA
Posts: 1,469
Received 26 Likes
on
24 Posts
Hi guys,
Next question: where are you guys setting the neutral position for the flying stabs when using 220mm for the cg. Basically I am looking for a safe starting position. Once I have flown my F-16 and I have sorted the final cg I will then also have my neutral stab position, which should not be too far away, I hope.
Thanks for your advice.
JanR
06-30-2018, 02:18 AM
#1938
Join Date: Jun 2006
Location: Gold Coast, Queensland, AUSTRALIA
Posts: 1,469
Received 26 Likes
on
24 Posts
Hi guys,
How did you bolt the front section to the rear section with the tanks in position? I cannot reach the three bolts in the top half of the fuselage. If I take the tanks out and bolt the halves together, then I cannot get the tanks and bypass in.
Thanks for the advice.
JanR
How did you bolt the front section to the rear section with the tanks in position? I cannot reach the three bolts in the top half of the fuselage. If I take the tanks out and bolt the halves together, then I cannot get the tanks and bypass in.
Thanks for the advice.
JanR
06-30-2018, 04:51 AM
#1939
You can not bolt the fuse halves together with the tanks in place. You have to bolt the fuse.together then manipulate the tank assembly in place, and its a pain in the ass. Som more advice, at minumum use larger fender washers for the bolts for the upper fuse halves to spread the load. After time that gap can open up a little so any additional strength you can give it is worth it. I am atually going to pull mine apart and hysol it on my next inspection.
06-30-2018, 07:46 PM
#1941
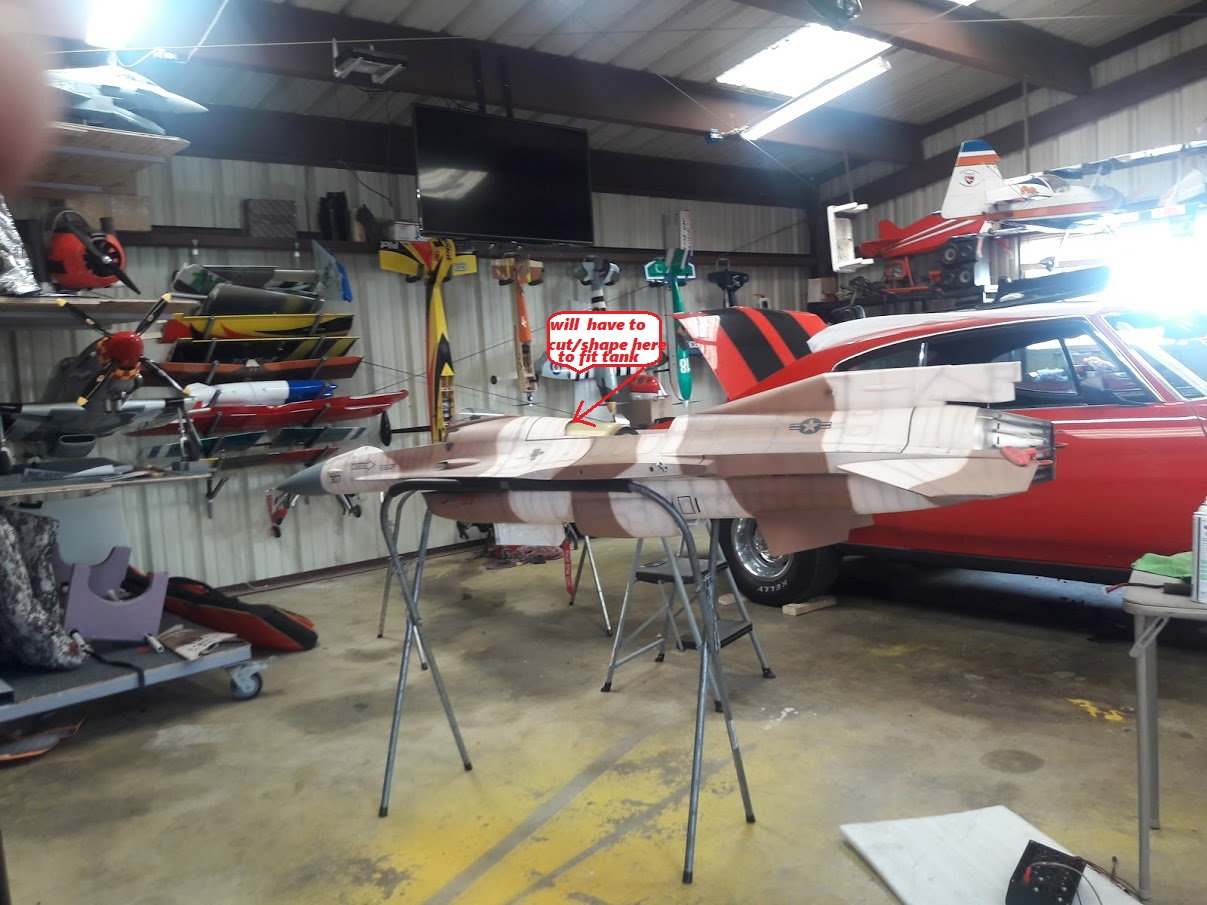
No problem buddy, you are not going to be able to get a really big washer in there, I believe it will interfere with tank fitting in place, just use the biggest one you can fit and stay on the formers. The Gen1s were easier because the hatch access hole was larger, but on the gen 2s that hole and cover got smaller, making tank install harder. You need to lay out your lines, remember keep the lines the same length, ex vent lines, suction lines, feeder lines to the main tank. once you get the two tanks fully plumbed, safety wire them together, and then it will take some time and positioning and even some cussing, but you can get them in there. Then put your top tank in, and you will have to reach thru the cockpit to make those connections, hope this helps. Also just FYI, be prepared to make a relief cut in the front lower section of the hatch, try to make an outline of the top tank and transfer it to the hatch flange, don't cut much, just enough to get the tank in. If you don't, you will never get the tank in there on top of the other 2.
Last edited by raron455; 06-30-2018 at 07:59 PM.
07-01-2018, 02:03 AM
#1942
Join Date: Jun 2006
Location: Gold Coast, Queensland, AUSTRALIA
Posts: 1,469
Received 26 Likes
on
24 Posts
Ronnie,
I have made my top tank half the length (as a total of 5 liters fuel for my AMT Pegasus HPe is more than enough) so it fit in front of the hatch under the fuse section. I have also now changed the shape of the cross brace in front of the tanks (as I don't need the panel over the intake) so that I can plumb the tanks a lot easier. The latter change is due to the AMT being heavy and all my other components will be installed around the cockpit in the front section.
Another 'magic' modification I have made; was to turn the fastening of the front and rear fuselage sections around. Your suggestion of the bigger fender washers started me thinking. I drilled out the thread in the three T-nuts (blind nuts) and fitted three new ones into the other fuselage section. This way I now use the back of the original T-nuts as washers AND I get to put the bolts in from the front, through the cockpit section. Hooray, now I can fit and plumb the tanks properly AND then put the two fuselage s4ctions together. I cannot believe Skymaster never thought of that. Hopefully they will do it on the latest Gen 2 kits.
I have also remade the framework in the nose so that all my batteries can go there without risking the framework breaking. By moving all this around, my F-16 is balancing at 220mm and weigh 16.3kgs (36lbs) dry.
Once I am done completely, I will post some photo's (incase there are other guys planning to use an AMT too).
Thanks for all your help.
JanR
Last edited by Springbok Flyer; 07-02-2018 at 01:52 AM.
07-09-2018, 05:22 PM
#1943
My Feedback: (5)

Join Date: Jun 2002
Location: Murray Ky
Posts: 142
Likes: 0
Received 0 Likes
on
0 Posts
I have a generation 1 1/6 F 16 and I need to get some Orings for the main landing gear shock absorbers.
Any one know where or how to order these.
Thanks
Jay
07-09-2018, 07:02 PM
#1944
Last edited by raron455; 07-09-2018 at 07:04 PM.
07-16-2018, 02:57 AM
#1945
Join Date: Jun 2006
Location: Gold Coast, Queensland, AUSTRALIA
Posts: 1,469
Received 26 Likes
on
24 Posts
Hi guys,
My build is finish and I am doing final setup. SM suggest the following throws; ailerons 20mm up and down, elevators 60mm up and down, rudder 25mm both ways. Then they also suggest 30% expo on all the controls.
What do you think?
Thanks for your advice.
JanR
My build is finish and I am doing final setup. SM suggest the following throws; ailerons 20mm up and down, elevators 60mm up and down, rudder 25mm both ways. Then they also suggest 30% expo on all the controls.
What do you think?
Thanks for your advice.
JanR
 08-28-2018, 11:57 AM
#1950
My Feedback: (3)
Join Date: Oct 2005
Location: san jose,
CA
Posts: 880
Likes: 0
Received 0 Likes
on
0 Posts
Would be great to get confirmation from Jon or Anton. This one flies great and IF it is now lighter, will land a little easier and shorter...probably easier to lift and move around too.... so, several benefits.