


NEW Tamiya Owner!!: Pershing doesn't drive but recoils. Any suggestions?
 09-14-2013, 11:30 AM
#1
Member
Thread Starter
Join Date: Aug 2011
Location: San Diego,
CA
Posts: 96
Likes: 0
Received 0 Likes
on
0 Posts
Here is a video which shows the trouble
http://youtu.be/C80Go0neGmY The original owner tied both electronics units to one connector. This is the last simple thing I can think of which might cause this. The tank recoils so it seems that the electronics are indeed partially OK at least. It makes all the right signs of going forward but it just doesn't do it!
But if the connector tie is not a problem...then I want to do that to the tiger also sitting on the bench! (That one is fully functional).
I want to get these running so I can get battling! Which also brings me to ask what are the options nowadays? Impact battle unit? Anything with 360* hit sensitivity?...or can the impact be modified to do so?
Best place to get impact battle unit?
 09-14-2013, 11:57 AM
#2

Did you get ALL the booklets with your Pershing?
There is a rev feature on the Pershing that must be disabled to drive the tank. PM me for additional help and maybe I could call you to get you through this.
Jeff
There is a rev feature on the Pershing that must be disabled to drive the tank. PM me for additional help and maybe I could call you to get you through this.
Jeff
09-14-2013, 12:31 PM
#4
Glad things worked out Ian. 
Anytime, feel free to ask me for help on the Tamiyas!
Have a great weekend and enjoy running your Pershing.
Jeff
Anytime, feel free to ask me for help on the Tamiyas!
Have a great weekend and enjoy running your Pershing.
Jeff
 09-14-2013, 04:05 PM
#6
Member
Thread Starter
Join Date: Aug 2011
Location: San Diego,
CA
Posts: 96
Likes: 0
Received 0 Likes
on
0 Posts
For others having this problem:
I needed to put the Pershing in full reverse (do this outside in an open space) and then move the throttle trim all the way back and then move everything to neutral--then it should move when you. You've just gotta give it more than full throttle (I believe in the reverse direction) before it will let you drive. I wasn't really driving it...I was driving the Tiger

 Will have to glue back on. These are missing all kinds of accessories but they sound and drive great. Only a few mechanical challenges on the Pershing turret is all I have to complain about!
09-14-2013, 04:45 PM
Will have to glue back on. These are missing all kinds of accessories but they sound and drive great. Only a few mechanical challenges on the Pershing turret is all I have to complain about!
09-14-2013, 04:45 PM
#8
And Ian on those turret issues, you will need to do a little wiring maintence to make the Pershing work. Send me a PM and I can go through it with you OR I can call you again... just let me know. After a while the clutch on the turret rotation will start to wear out and especially if the wiring causes it to stick and hang up.
There are ways to fix everything and I can get your Pershing rotating just like the Tiger, just let me know!
Jeff
There are ways to fix everything and I can get your Pershing rotating just like the Tiger, just let me know!
Jeff
09-14-2013, 06:15 PM
#9
Member
Thread Starter
Join Date: Aug 2011
Location: San Diego,
CA
Posts: 96
Likes: 0
Received 0 Likes
on
0 Posts
Hi Jeff,
Thanks for another help offer! I zip tied the wiring all neatly, loosened and lubed the little plastic rollers, bent the gearbox a little, and now it rotates pretty well. We'll probably come back to it. Its just the Pershing body is sooo crowded!
Now the elevation is another story. Not really sure what exactly is going on there but it worked well without the spring but with the spring (which causes the barrel to move up naturally. But the clutch slips when the spring is installed and I try to depress the barrel. So I experienced a cartoon-like too long, too short scenario when I tried to stretch the spring to make it less powerful. I didn't know the spring stretched so easily! So my spring is a lot shorter, slightly too loose, and thus the barrel wobbles by hand...but at least the barrel depreses now!
09-14-2013, 08:22 PM
#10
Member
Thread Starter
Join Date: Aug 2011
Location: San Diego,
CA
Posts: 96
Likes: 0
Received 0 Likes
on
0 Posts
A lot of the fine, easy to break off details (eg. Headlights on tiger)--and a lot of the major ones on the Pershing since it seems they were never installed. But we're going to fpv battle these so that's ok. The tiger is in the worst condition asthetically but best mechanical...and it has a lot of room. Like both though!
Need to get get battle units...what about the landmine simulator? Sounds cool!
Need to get get battle units...what about the landmine simulator? Sounds cool!
09-14-2013, 09:31 PM
#12
Member
Thread Starter
Join Date: Aug 2011
Location: San Diego,
CA
Posts: 96
Likes: 0
Received 0 Likes
on
0 Posts
Thanks for the heads up. The plus in this is---its one less thing to buy! But yeah, those would have been fun. Ugh. Now I want to get the 1:35 ones...have been curious about those for a long while.
09-15-2013, 04:32 AM
#13
Hi Jeff,
Thanks for another help offer! I zip tied the wiring all neatly, loosened and lubed the little plastic rollers, bent the gearbox a little, and now it rotates pretty well. We'll probably come back to it. Its just the Pershing body is sooo crowded!
Now the elevation is another story. Not really sure what exactly is going on there but it worked well without the spring but with the spring (which causes the barrel to move up naturally. But the clutch slips when the spring is installed and I try to depress the barrel. So I experienced a cartoon-like too long, too short scenario when I tried to stretch the spring to make it less powerful. I didn't know the spring stretched so easily! So my spring is a lot shorter, slightly too loose, and thus the barrel wobbles by hand...but at least the barrel depreses now!
Thanks for another help offer! I zip tied the wiring all neatly, loosened and lubed the little plastic rollers, bent the gearbox a little, and now it rotates pretty well. We'll probably come back to it. Its just the Pershing body is sooo crowded!
Now the elevation is another story. Not really sure what exactly is going on there but it worked well without the spring but with the spring (which causes the barrel to move up naturally. But the clutch slips when the spring is installed and I try to depress the barrel. So I experienced a cartoon-like too long, too short scenario when I tried to stretch the spring to make it less powerful. I didn't know the spring stretched so easily! So my spring is a lot shorter, slightly too loose, and thus the barrel wobbles by hand...but at least the barrel depreses now!
HTH
Jeff
09-15-2013, 06:37 AM
#14

Congrats on the Pershing. One of my personal favorites. The Pershing does have the reverse safety feature as has been mentioned. You must put the throttle in the full reverse position then forward to "unlock" the drive function.
Also you may want to inform your brother of the gentleman's 3 foot rule. Never get any closer than 3 feet to another tank. many highly detailed tanks have been damaged from someone new to the hobby not knowing of the rule or understanding how much damage can occur from being a little careless or reckless even.
Also you may want to inform your brother of the gentleman's 3 foot rule. Never get any closer than 3 feet to another tank. many highly detailed tanks have been damaged from someone new to the hobby not knowing of the rule or understanding how much damage can occur from being a little careless or reckless even.
09-15-2013, 01:11 PM
#15
Member
Thread Starter
Join Date: Aug 2011
Location: San Diego,
CA
Posts: 96
Likes: 0
Received 0 Likes
on
0 Posts
You can either glue the clutch gear solid in that elevation unit (and in the turret rotation unit too) or get the 6-SPEED Tamiya gearbox #72005**1200 using the BLUE gears in their place. The clutch gear really come into play if you accidentally run into an obstruction and keeps you from breaking things if the barrel hits something.
HTH
Jeff
HTH
Jeff

Congrats on the Pershing. One of my personal favorites. The Pershing does have the reverse safety feature as has been mentioned. You must put the throttle in the full reverse position then forward to "unlock" the drive function.
Also you may want to inform your brother of the gentleman's 3 foot rule. Never get any closer than 3 feet to another tank. many highly detailed tanks have been damaged from someone new to the hobby not knowing of the rule or understanding how much damage can occur from being a little careless or reckless even.
Also you may want to inform your brother of the gentleman's 3 foot rule. Never get any closer than 3 feet to another tank. many highly detailed tanks have been damaged from someone new to the hobby not knowing of the rule or understanding how much damage can occur from being a little careless or reckless even.
And that safety feature is excellent!
09-16-2013, 06:57 PM
#16
Senior Member
I am glad to see my buddy Jeff set you straight on the M26...don't feel bad. It happens to about half the Pershing owners....they just won't admit it. I WILL...I bought one used and it came without any manuals of instructions. I figured it out accidentally...LOL. The KVs and IS have the same feature.
As for the wiring...Keep it neat. I call it "Wire Hygiene". JUST SAY NO TO "BIRDS NESTS"! Don't go crazy with the damned wire tires. This is not a car or boat where you want everything to stay put forever. Wire ties can be made too tight an ruin wire flexibility and cut other wires by "Chaffing". Especially when firs timers cut the tag ends off the ties at angles, leaving sharp edges to cut your hands and wires. Cut them flush and dab with a hot soldering iron if they are sharp.
Here are a few pix to give you ideas.


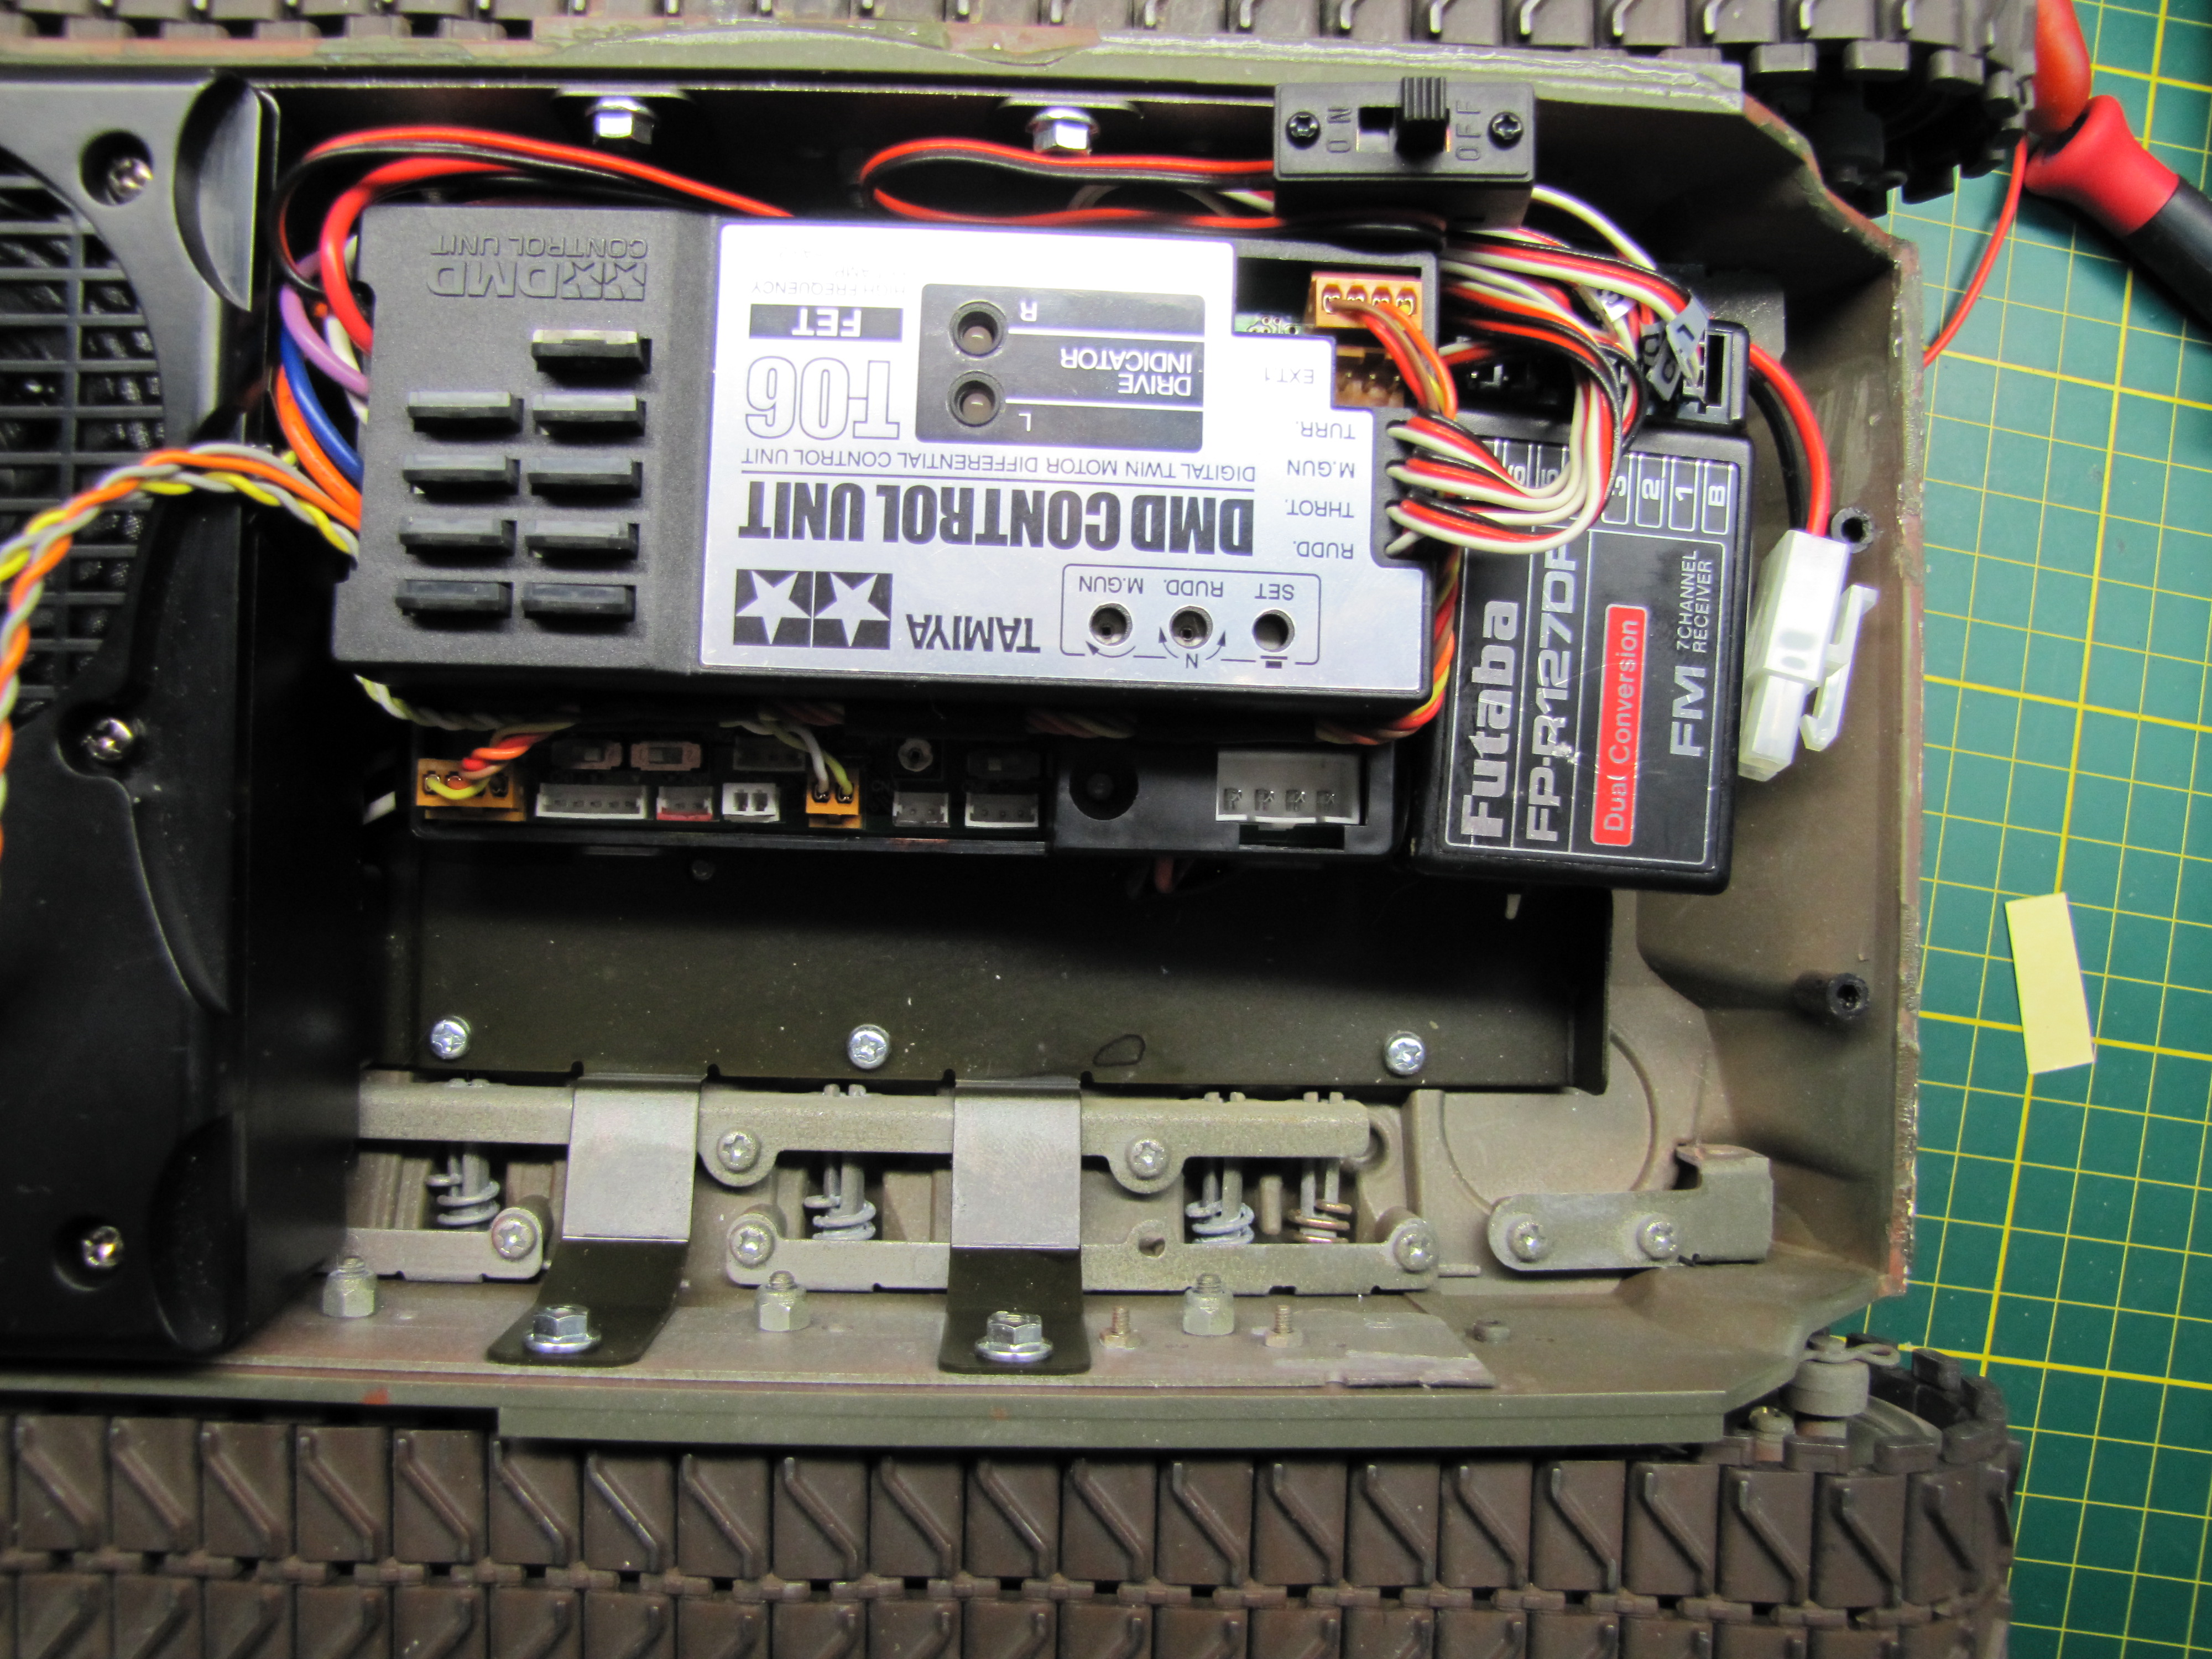


I just finished this Panther for a customer in NC. He bought a beautiful Tank but the builder (who was in no doubt a talented modeler) DID NOT follow the Tamiya instructions. He routed the wires poorly (Using about 15 wire ties), ignored the tube of thread locker/lock-tite Tamiya gave him, and used too little cement for a RC model. Static models are under very little stress compared to RCs. Do eliminate the Y-harness. It will not effect you Tamiya warranty but will give you more room and better reliability.


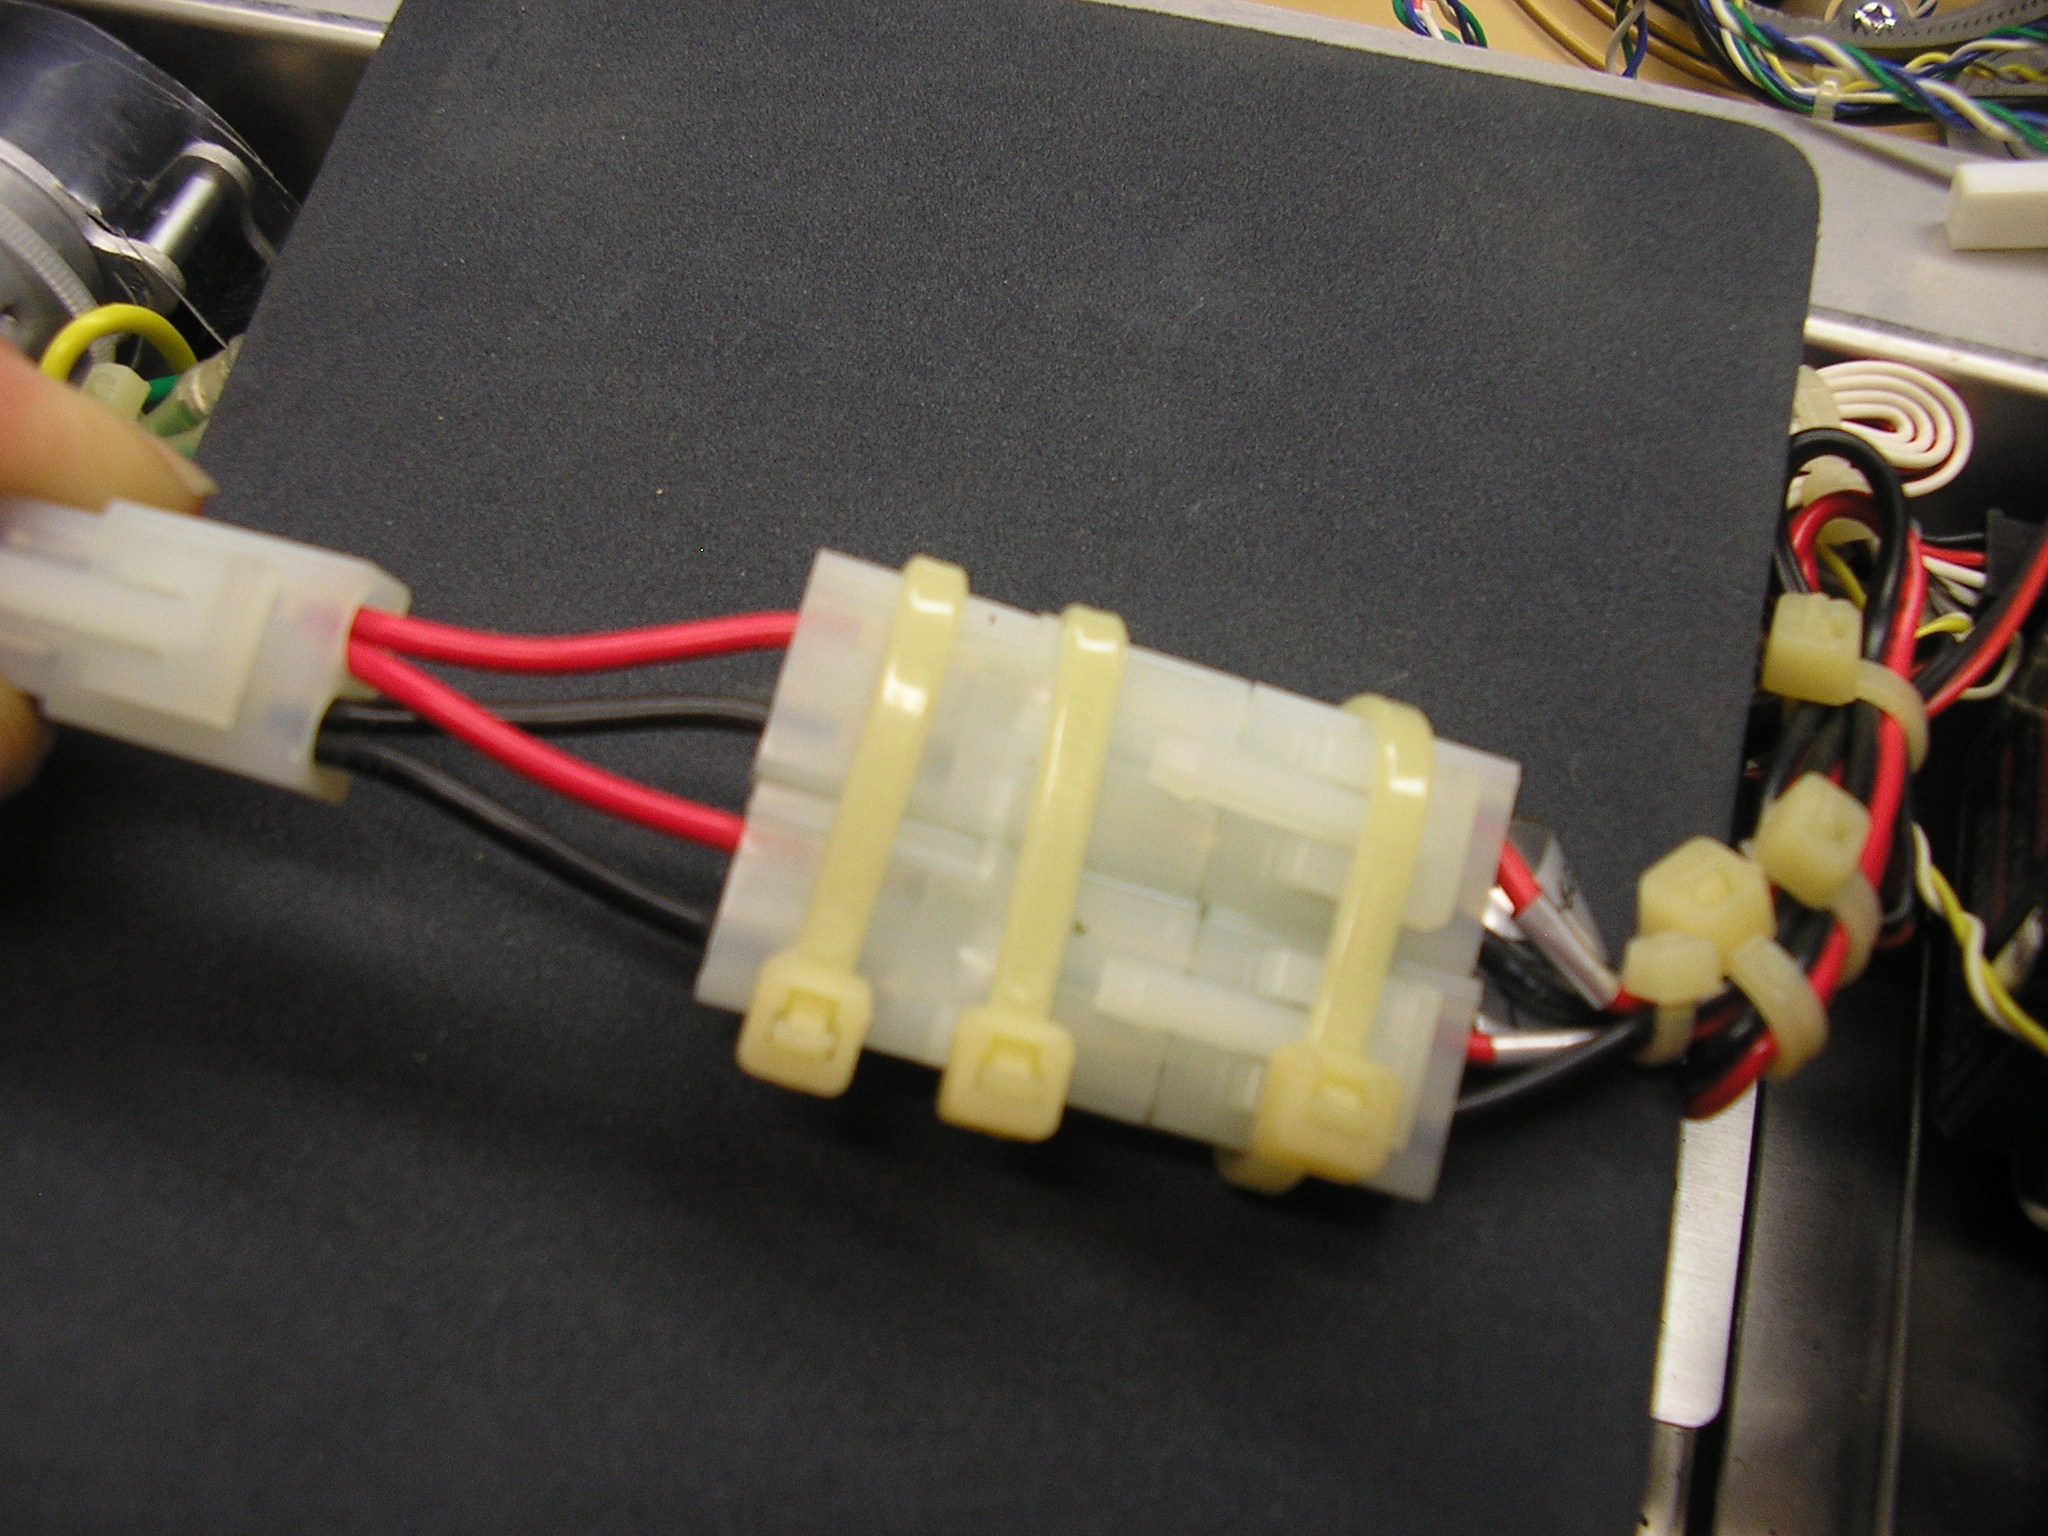


Follow the instructions and use common sense. I mount most DMDs & MFs and all RXs with Velcro. It makes work and mods mush easier. The more you do the more you will hate wire ties except for the most secure items. Like DMD wires to the motors secured from movement. Battery wires + metal TU gears = FIRE. I use none at all on the turret wires and I even remove the stock Tamiya wires on the TBU base wire harness. The turret wires you keep together in one strand must be kept loose and flexible. DO NOT make that rigid. It must move and hopefully coil under the turret. For tight tank interiors like the M26 & KV the Tamiya black double sided tape is a must. But use it sparingly, or else they are very hard to remove and can break the case which may void your Tamiya warranty. We are all here to help as you can see. I there is anything we can do please just ask. Learn from our mistakes.
Good luck a and enjoy the Pershing. It is the best US tank Tamiya makes. Bob, thecommander
As for the wiring...Keep it neat. I call it "Wire Hygiene". JUST SAY NO TO "BIRDS NESTS"! Don't go crazy with the damned wire tires. This is not a car or boat where you want everything to stay put forever. Wire ties can be made too tight an ruin wire flexibility and cut other wires by "Chaffing". Especially when firs timers cut the tag ends off the ties at angles, leaving sharp edges to cut your hands and wires. Cut them flush and dab with a hot soldering iron if they are sharp.
Here are a few pix to give you ideas.
I just finished this Panther for a customer in NC. He bought a beautiful Tank but the builder (who was in no doubt a talented modeler) DID NOT follow the Tamiya instructions. He routed the wires poorly (Using about 15 wire ties), ignored the tube of thread locker/lock-tite Tamiya gave him, and used too little cement for a RC model. Static models are under very little stress compared to RCs. Do eliminate the Y-harness. It will not effect you Tamiya warranty but will give you more room and better reliability.
Follow the instructions and use common sense. I mount most DMDs & MFs and all RXs with Velcro. It makes work and mods mush easier. The more you do the more you will hate wire ties except for the most secure items. Like DMD wires to the motors secured from movement. Battery wires + metal TU gears = FIRE. I use none at all on the turret wires and I even remove the stock Tamiya wires on the TBU base wire harness. The turret wires you keep together in one strand must be kept loose and flexible. DO NOT make that rigid. It must move and hopefully coil under the turret. For tight tank interiors like the M26 & KV the Tamiya black double sided tape is a must. But use it sparingly, or else they are very hard to remove and can break the case which may void your Tamiya warranty. We are all here to help as you can see. I there is anything we can do please just ask. Learn from our mistakes.
Good luck a and enjoy the Pershing. It is the best US tank Tamiya makes. Bob, thecommander
Last edited by thecommander; 09-16-2013 at 07:28 PM.
09-16-2013, 10:33 PM
#17
Member
Thread Starter
Join Date: Aug 2011
Location: San Diego,
CA
Posts: 96
Likes: 0
Received 0 Likes
on
0 Posts
I don't feel bad--would never have thought of it at all--I mean never would it have occurred to me. Trim tabs used for the day-to-day operation of a rc vehicle?! I'm just glad it was so simple, and that safety really is a good thing as otherwise we can have accidents. These tanks are FAST. Speed doesn't seem scale to me, at least because many people were complaining about the speed of the Heng Long tanks--these are faster.
Thanks for your very thoughtful reply, Bob. The pictures you so kindly included (need to get some of my tanks to add to the thread! Very busy now, however, and may not get to running the tanks for awhile. What I am really doing is trying to get parts for a FPV Video system for each of them. IMHO, rc tank battling is not that much fun when you have a god-like view of the battlefield and everyone else. FPV puts you in the commander's cupola, and you can't see your opponent all the time! There's some involved tactics involved now...how to "ambush" the enemy! We are going to do long range FPV battling in the scrub around San Diego...probably get lost )
)
Those pics are a level of neatness to aim for, to be sure. My question is how do you disconnect the battery? Looks like you don't install the 4 screws which provide interior access, because if you did it would be a great pain to remove the top each time you wanted to use the tank!
Need to wire the tiger up a bit more nicely...its not bad by any stretch but you'd win 1st, 2nd, and 3rd places in a contest!
Oh, BTW, I used the mini cable ties (2mm wide?) and chained the cables to going to the turret together. Ideally we would use something that is reusable but I don't know of anything right now. Well, maybe some small bits of wire. But with these small cable ties I do not think sharpness is a big deal. They're cheaper too. Got at least 50 for 99 cents at a local discount store. My only worry is snipping them off without snipping the wiring. I'm sure I'll manage.
I've always liked the suspension on the Pershing. Don't relish the turret, but the body of the tank is one of my favorites! Love how the wheels are. With my early tiger I, I don't like the suspension and some parts of the body (too squarish for my tastes) but I love the turret, gun, and the back of the body. Front also.
But I was very blest to get both my favorite axis tank and favorite American tank in the same lot! Never dreamed I would have these.
Thanks for your very thoughtful reply, Bob. The pictures you so kindly included (need to get some of my tanks to add to the thread! Very busy now, however, and may not get to running the tanks for awhile. What I am really doing is trying to get parts for a FPV Video system for each of them. IMHO, rc tank battling is not that much fun when you have a god-like view of the battlefield and everyone else. FPV puts you in the commander's cupola, and you can't see your opponent all the time! There's some involved tactics involved now...how to "ambush" the enemy! We are going to do long range FPV battling in the scrub around San Diego...probably get lost
)Those pics are a level of neatness to aim for, to be sure. My question is how do you disconnect the battery? Looks like you don't install the 4 screws which provide interior access, because if you did it would be a great pain to remove the top each time you wanted to use the tank!
Need to wire the tiger up a bit more nicely...its not bad by any stretch but you'd win 1st, 2nd, and 3rd places in a contest!
Oh, BTW, I used the mini cable ties (2mm wide?) and chained the cables to going to the turret together. Ideally we would use something that is reusable but I don't know of anything right now. Well, maybe some small bits of wire. But with these small cable ties I do not think sharpness is a big deal. They're cheaper too. Got at least 50 for 99 cents at a local discount store. My only worry is snipping them off without snipping the wiring. I'm sure I'll manage.
I've always liked the suspension on the Pershing. Don't relish the turret, but the body of the tank is one of my favorites! Love how the wheels are. With my early tiger I, I don't like the suspension and some parts of the body (too squarish for my tastes) but I love the turret, gun, and the back of the body. Front also.
But I was very blest to get both my favorite axis tank and favorite American tank in the same lot! Never dreamed I would have these.
09-17-2013, 02:45 AM
#18
Join Date: Jun 2011
Location: Charlotte, NC
Posts: 558
Likes: 0
Received 0 Likes
on
0 Posts
Also, if you have not figured this out already, NEVER turn the tank and radio on while it is on a table top.
ALWAYS put a block (a 1 ft piece of 4x4 works perfectly) underneath the chassis to keep the tracks off the ground.
This is also helpful when working on the tank.
If you store it this way it will save your suspension in the long run.
ALWAYS put a block (a 1 ft piece of 4x4 works perfectly) underneath the chassis to keep the tracks off the ground.
This is also helpful when working on the tank.
If you store it this way it will save your suspension in the long run.
09-17-2013, 10:22 AM
#19
Member
Thread Starter
Join Date: Aug 2011
Location: San Diego,
CA
Posts: 96
Likes: 0
Received 0 Likes
on
0 Posts
Also, if you have not figured this out already, NEVER turn the tank and radio on while it is on a table top.
ALWAYS put a block (a 1 ft piece of 4x4 works perfectly) underneath the chassis to keep the tracks off the ground.
This is also helpful when working on the tank.
If you store it this way it will save your suspension in the long run.
ALWAYS put a block (a 1 ft piece of 4x4 works perfectly) underneath the chassis to keep the tracks off the ground.
This is also helpful when working on the tank.
If you store it this way it will save your suspension in the long run.
09-17-2013, 01:45 PM
#20
These are all good reasons I feel that the Tamiya Pershing is one of the best RC Tanks to build. It has some great features, is interesting to build and teaches the necessity of building and wiring neatly. It actually forces you to learn wiring hygiene.
09-17-2013, 08:12 PM
#21
Senior Member
For the Pershing just use the two front screws. The rear of the upper hull has a tab that interlocks with the rear lower hull just above eh exhaust. The two rear screw at the sponson are a nightmare waiting to happen. I'm glad Dave chimed in about the tank blocks. I forgot that. THEY ARE A MUST. We have never had a runaway at Danville because we are so anal about the blocks. They are everywhere. Even when we see a tank that is now ours we shove a block under its butt. The Tiger has a load of room and you can be creative. I will take more pix of the turrets and such too.
Enjoy your dream tanks....we are. I hope to battle out west some time soon.
Enjoy your dream tanks....we are. I hope to battle out west some time soon.
