


Tamiya EZ8 build
 07-15-2015, 08:14 AM
#51

Thread Starter

If you are building a tamiya, Nick Aguilar has a nice sherman nose with tow shackle points cast on. Wish I knew this in advance.
mine will not break, i have them reinforced on the rear.
mine will not break, i have them reinforced on the rear.
 07-15-2015, 08:23 AM
#52
Oh yeah... I have them.  I was speaking more of the additional metal work than just the tow points which I guess I hastily assembled.
Next time it will stay.
Jeff
I was speaking more of the additional metal work than just the tow points which I guess I hastily assembled.Next time it will stay.
Jeff
Last edited by Panther F; 07-15-2015 at 08:26 AM.
07-15-2015, 09:17 AM
#53

Where would one acquire Nick Aguilar Sherman parts? I ask because I see the name thrown around a lot, but nothing about where the parts were bought. From my research, it looks like that's where people get the T23 turret for the Sherman?
Last edited by Roboticus_Prime; 07-15-2015 at 09:29 AM.
07-15-2015, 09:25 AM
#54
Thread Starter
Nick can be reached at Firenick1265 at yahoo
he makes an E8 conversion kit for the tamiya sherman, including the T23 turret.
he also makes a jumbo kit for vvss shermans, an early small hatch ford conversion, an m4a1 large hatch hull and i belive some tank destroyer semi kits.
Hes been working on a catalog, not sure if its done yet.
he makes an E8 conversion kit for the tamiya sherman, including the T23 turret.
he also makes a jumbo kit for vvss shermans, an early small hatch ford conversion, an m4a1 large hatch hull and i belive some tank destroyer semi kits.
Hes been working on a catalog, not sure if its done yet.
07-15-2015, 09:48 AM
#56
I promised not to say exactly what but I have seen photos of his next offering and all I have to say is EVERYONE will be VERY pleased!
I believe I have all of what he makes and anyone new to the hobby and with dealing Nick will be very satisfied with them PLUS working with him. They are not like most of the resin products out there where his work is just about perfect in quality.
Jeff
09-20-2015, 07:05 PM
#57
Thread Starter
I have been moving slowly since the start of summer. I got deployed with the Guard for wildfire support up in Humbolt, what an odd place it is up there, but beautiful. Then vacation with the family to Utah to see the National parks in the area and see my wifes sister up in Tooele. I did find an M5 Stewart sitting around up there.
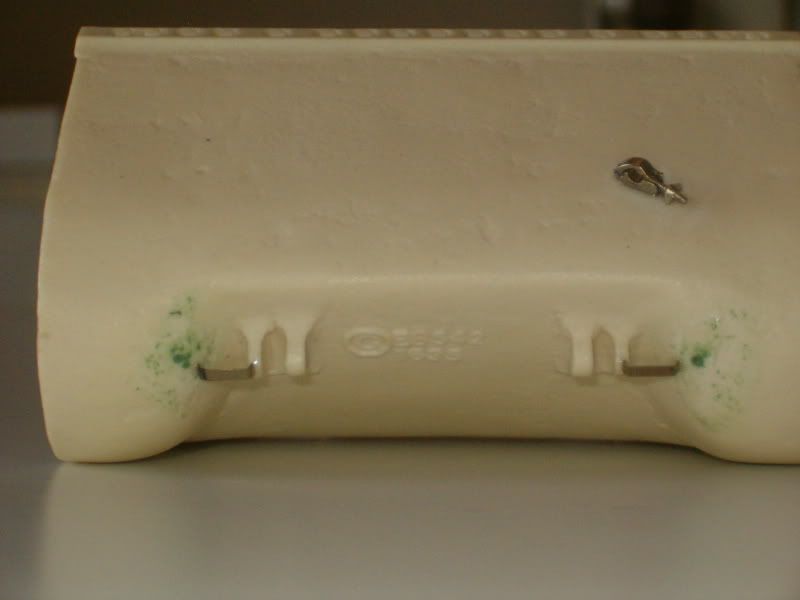
So I have been focusing on finishing this thing up, though I got distracted by doing all the mechanics on an M4a3 76 using a HL and Mato turret. I put it back down and decided I needed to follow through on the E8. The tool mounting. Also, while testing out a new battlefield, I was at full throttle and caught air, yes air, on a huge rut, and when I landed the .50 MG barrel clamp disappeared. Its a cast urethane part made by Nick for the kit, so I fabbed up one out of brass using the one from another kit as a pattern. Ooh that was a serious pain, every part you see in it is the second part because all the first ones disappeared one by one while I was building it.. Don't ask...
Any way, none of the tools are glued down. Tomorrow after work I will paint the hull and spray the tools in the areas that have the hull welded mount cast onto them. I will move on to individually painting and detailing the tools as I did on my M4a1 build.
Im on the home stretch now, I want to have this tank finished for the San Diego battle coming on 25 Oct.
09-21-2015, 07:07 AM
#58

Join Date: Oct 2014
Location: Roseville, CA
Posts: 888
Likes: 0
Received 0 Likes
on
0 Posts
I 've been following along and it all looks great. I've received a kit from Nick just the other day. Are you going to put a barrel recoil unit in the turret, will one even fit?
09-21-2015, 07:40 AM
#59
Thread Starter
Go back to page 1, I described how diffcult it was to install and what was required to get it in there.
if you dont mind dumping the tamiya system for other electronics, it is much easier to fit a servo recoil unit in the turret rather than the tamiya recoil unit which is huge.
if you dont mind dumping the tamiya system for other electronics, it is much easier to fit a servo recoil unit in the turret rather than the tamiya recoil unit which is huge.
09-21-2015, 11:00 AM
#60
Specifically look at post #13, I included detailed pictures in those 2 links showing a method of fitting the Tamiya recoil.
You can also use a servo for recoil if you have a radio that you can program a channel mix - I done this a few times with Spektrum DX6i's.
You can also use a servo for recoil if you have a radio that you can program a channel mix - I done this a few times with Spektrum DX6i's.
09-22-2015, 09:56 PM
#61
Thread Starter
Well I got the hull painted and clear coated and began applying decals.
Sadly, I am very unhappy with how the paint job came out. For some reason the testors OD came out of my gun very course and dusty like. It was not a smooth finish it was very flat and course. Took lots of clear to get it decal ready. I didn't test out my paint on a peiece of scrap first. I thought I had it thinned enough but maybe the paint was too old. Any way, kinda pissed me off but nothing I could do once it was on the hull. Even after the clear coat, you can run your fingers down the sides of the hull and it feels like sand paper. Man it just pisses me off. a bad paint job can ruin a model, and one that took a really friggin long time to make.


Sadly, I am very unhappy with how the paint job came out. For some reason the testors OD came out of my gun very course and dusty like. It was not a smooth finish it was very flat and course. Took lots of clear to get it decal ready. I didn't test out my paint on a peiece of scrap first. I thought I had it thinned enough but maybe the paint was too old. Any way, kinda pissed me off but nothing I could do once it was on the hull. Even after the clear coat, you can run your fingers down the sides of the hull and it feels like sand paper. Man it just pisses me off. a bad paint job can ruin a model, and one that took a really friggin long time to make.
09-23-2015, 03:44 AM
#62
It looks just fine to me Rich but don't feel too bad as this has happened to me (not that it's okay) before BUT, some clever weathering applications can help hide a coarse finish a lot.
Have you ever tried window frosting? FIRST, try this on a practice piece as it can change the colors tint some but will hide that finish. My Oddball tank was left with this rough appearance and the window frosting (which is another form of weathering) helped with that problem.
I do like your choice of decals a lot!
Jeff
09-23-2015, 05:12 AM
#63
Senior Member

Join Date: Nov 2006
Location: Grande Prairie,
AB, CANADA
Posts: 8,976
Likes: 0
Received 4 Likes
on
4 Posts
It has happened to all of us. Luckily on a tank it is easier to hide. I take some wet 600 grit sandpaper and sand the finish smooth again. My wife bought me one of those powered hobby hand sanders from Micro-Mark and it is perfect for getting into the tight spaces. In an hour you would have this all worked out, and then a top coat of dullcoat and it would be perfect.
Last edited by YHR; 09-23-2015 at 05:15 AM.
09-23-2015, 06:09 AM
#65
Thread Starter
Yeah, It was very humid, like 80 degrees and some sprinkling. You think the humidity caused the course finish?
I was wondering if I needed to start straining my model paint like I do when I paint a vehicle. This was an older bottle of paint, though it was unopened.
I did vary my air pressure up and down as low as 10psi until the paint wouldn't spray but it didn't change the finish of the paint.
I contemplated stopping right at the get go when I realized what was happening, but I wouldn't have been able get between the sides support bars, and I was not going to pull them of. Its been very hot and humid here most of the summer, somewhat unusual for San Diego and very miserable.
Last edited by RichJohnson; 09-23-2015 at 06:14 AM.
09-23-2015, 06:16 AM
#66
Senior Member
Join Date: Dec 2012
Location: littlestown, PA
Posts: 758
Likes: 0
Received 0 Likes
on
0 Posts
No question it was a part of it. Temp at 80 not so much. You may want to use a "Flow improver" and depending on the paint I'll use a retarder to slow the dry time. I rarely need to slow the dry time.
09-23-2015, 03:47 PM
#67
Join Date: Oct 2014
Location: Roseville, CA
Posts: 888
Likes: 0
Received 0 Likes
on
0 Posts
Thanks for directing me to your build photos of the recoil. Seems like a bit of a task. Your E8 looks great. Mine is going to be a winter build. If winter ever comes to Ca.
09-24-2015, 07:30 PM
#68
Senior Member
Well I got the hull painted and clear coated and began applying decals.
Sadly, I am very unhappy with how the paint job came out. For some reason the testors OD came out of my gun very course and dusty like. It was not a smooth finish it was very flat and course. Took lots of clear to get it decal ready. I didn't test out my paint on a peiece of scrap first. I thought I had it thinned enough but maybe the paint was too old. Any way, kinda pissed me off but nothing I could do once it was on the hull. Even after the clear coat, you can run your fingers down the sides of the hull and it feels like sand paper. Man it just pisses me off. a bad paint job can ruin a model, and one that took a really friggin long time to make.
Sadly, I am very unhappy with how the paint job came out. For some reason the testors OD came out of my gun very course and dusty like. It was not a smooth finish it was very flat and course. Took lots of clear to get it decal ready. I didn't test out my paint on a peiece of scrap first. I thought I had it thinned enough but maybe the paint was too old. Any way, kinda pissed me off but nothing I could do once it was on the hull. Even after the clear coat, you can run your fingers down the sides of the hull and it feels like sand paper. Man it just pisses me off. a bad paint job can ruin a model, and one that took a really friggin long time to make.
Many of us feel your pain Rich. If this happens to me I paint only one surface at a time and keep it perfectly flat and level. I paint one side at a time. It takes longer but eliminates problems and the paint never runs. I just lay one a little heavier coat and the paint usually flows and smooths out fine. You may need to spray closer. FYI... I have to run a dehumidifier all summer long to keep my shop humidity down. Sometimes I draw out 2 to 3 gallons of water a day.
09-24-2015, 08:41 PM
#69
Thread Starter
Yeah, the humidity here this summer has been killer. That day it was hot, and sprinkling. I was in the garage spaying with a fan behind me. I wont paint in humidity any more.
09-30-2015, 09:32 PM
#70
Thread Starter
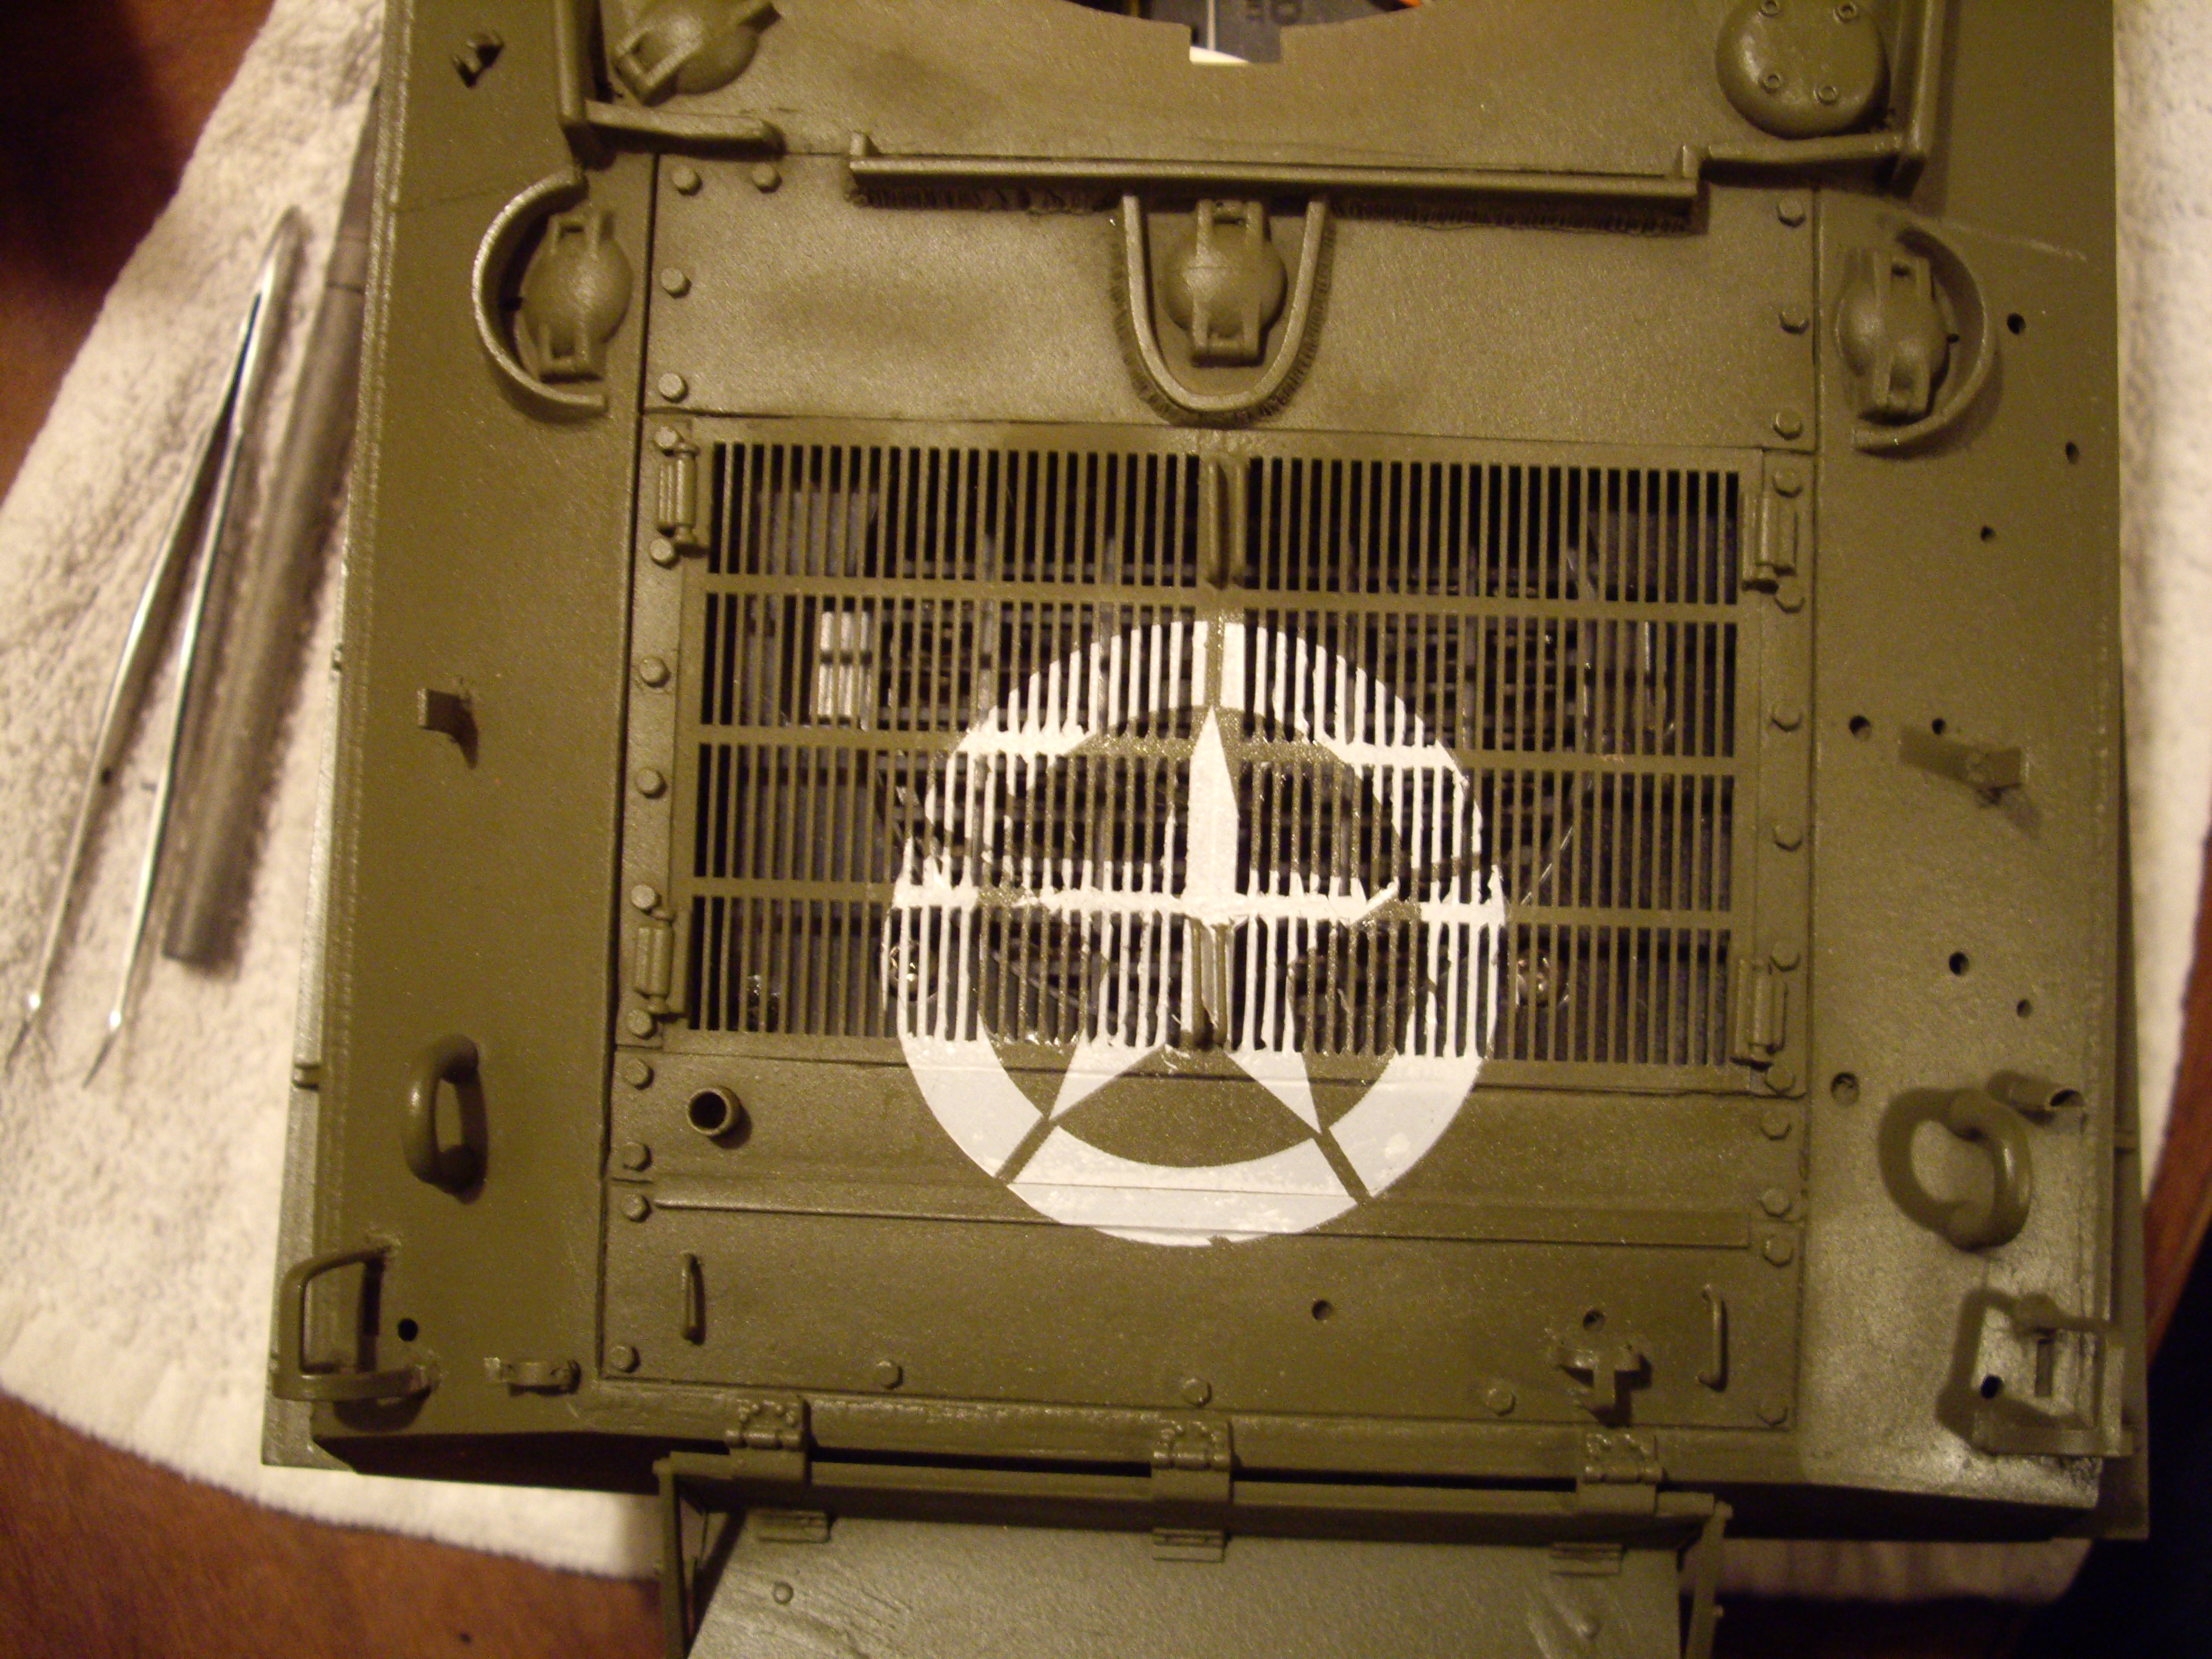
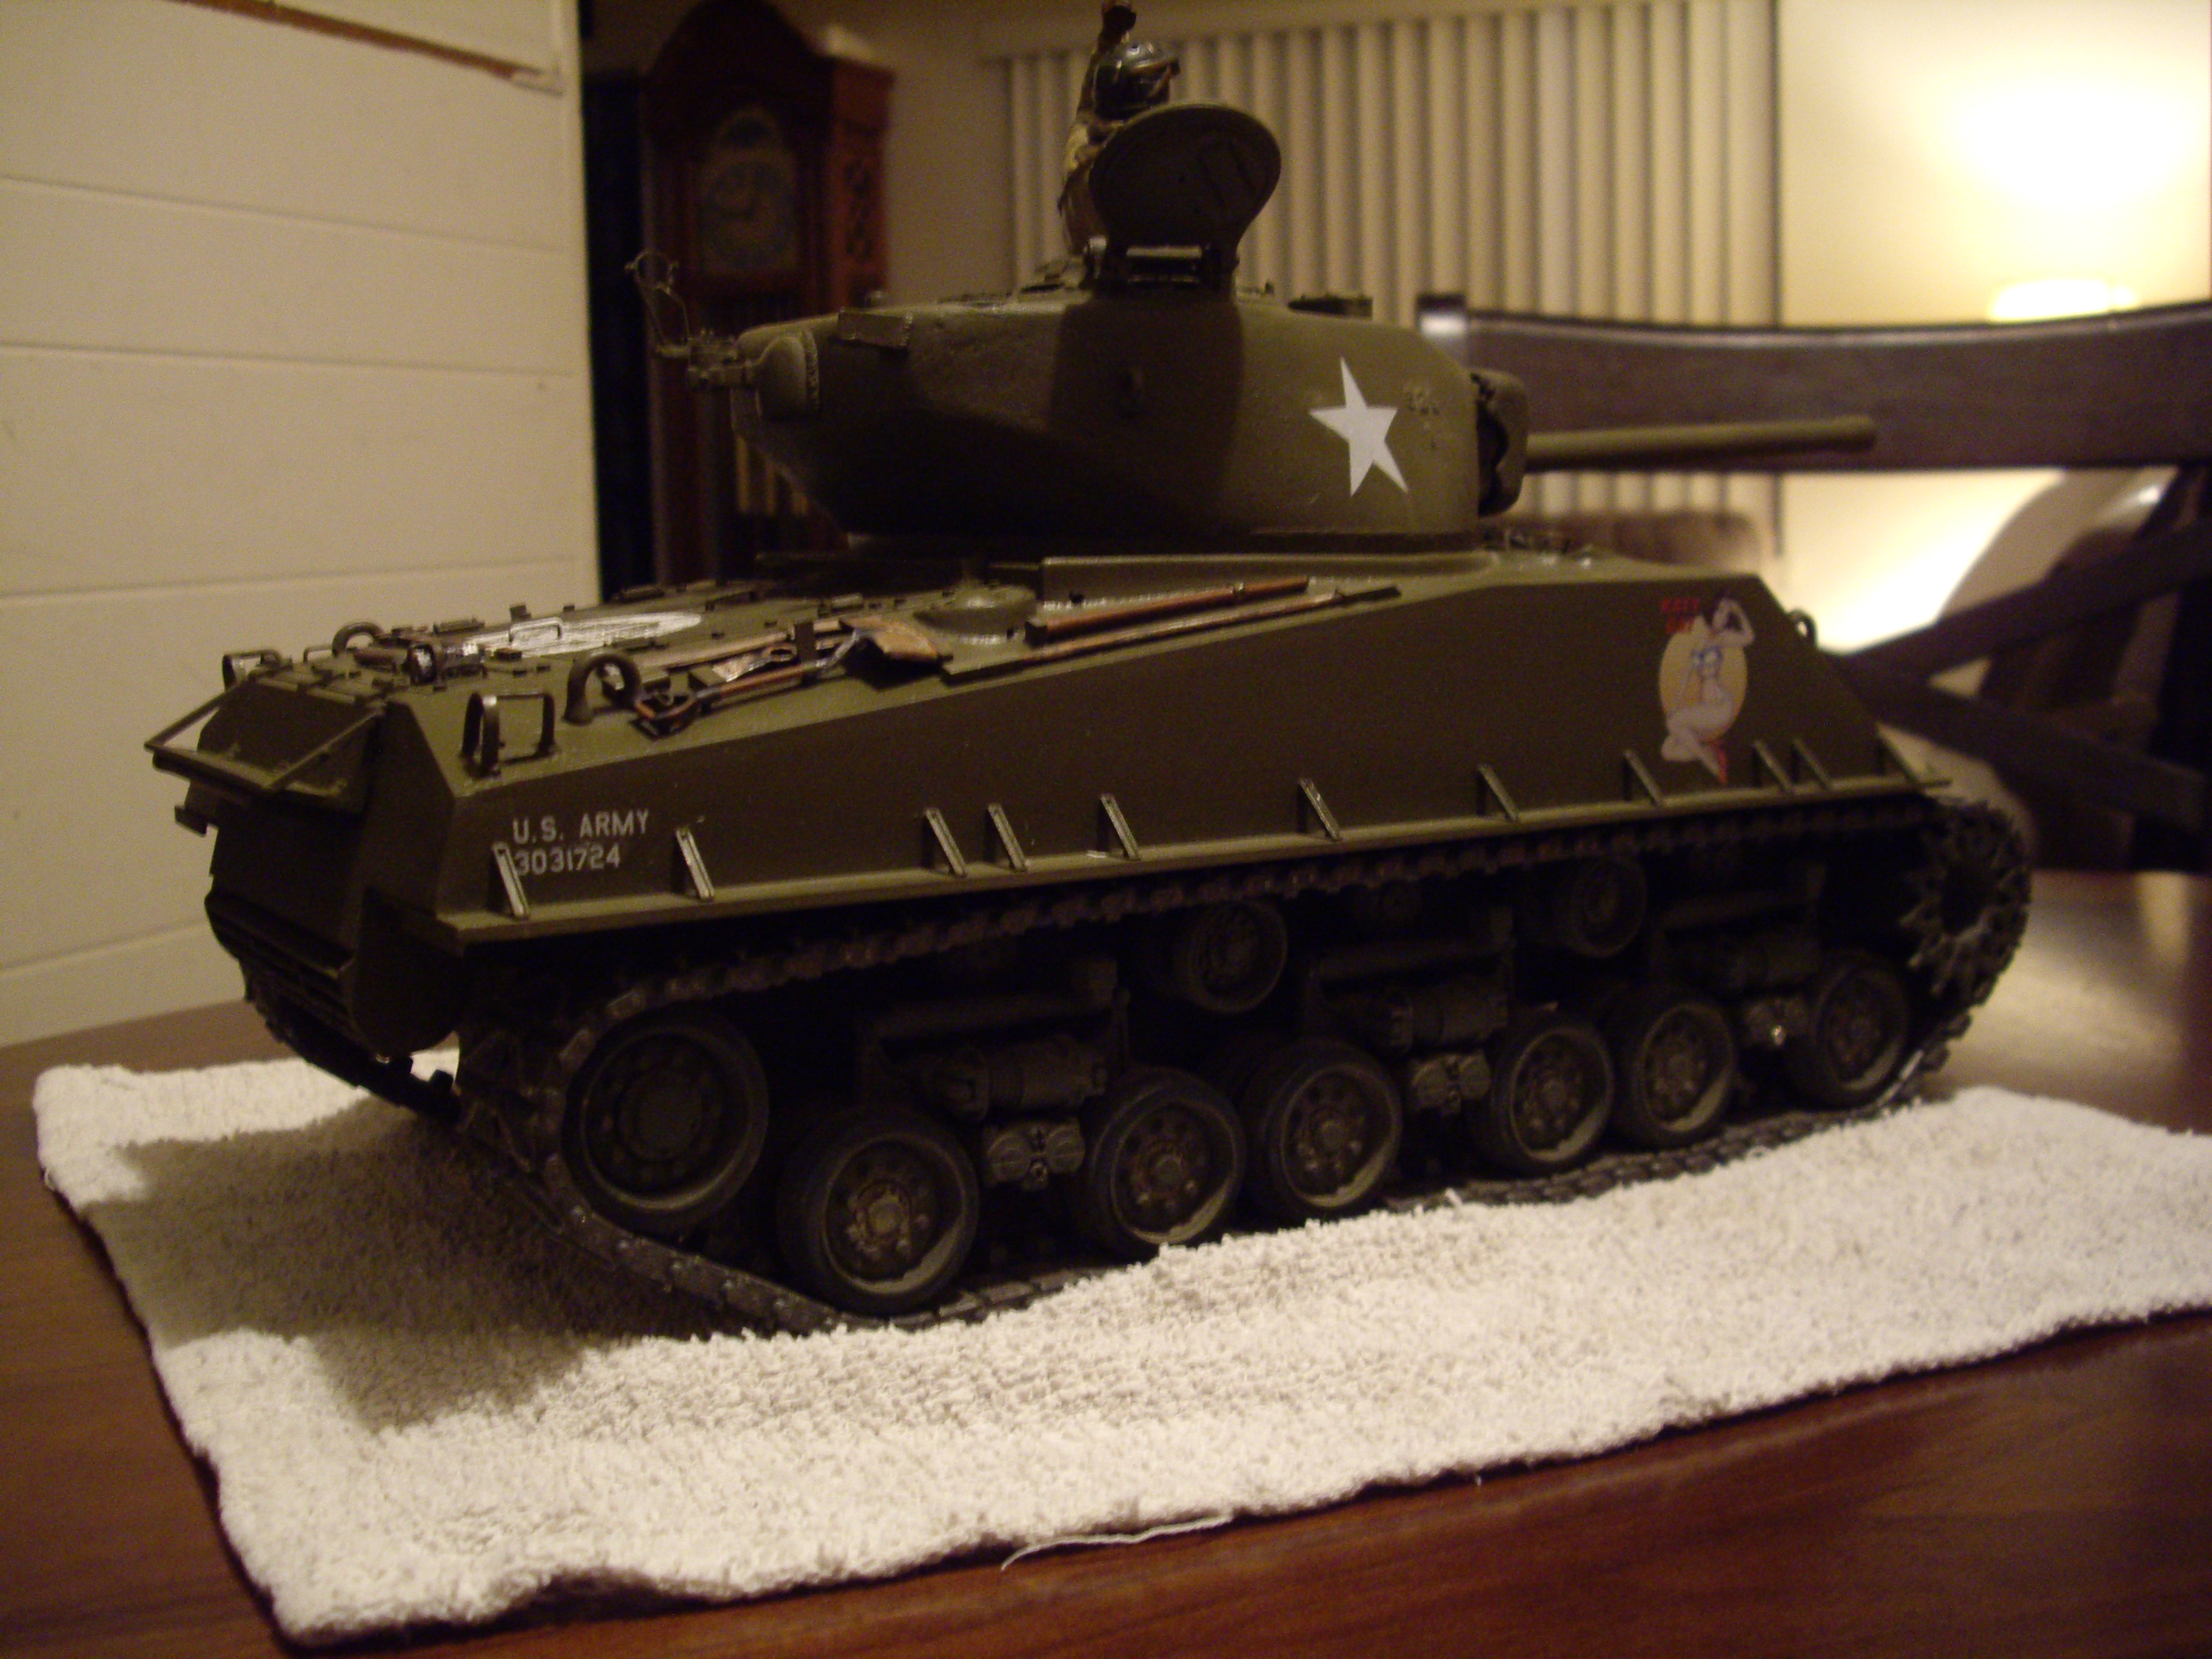
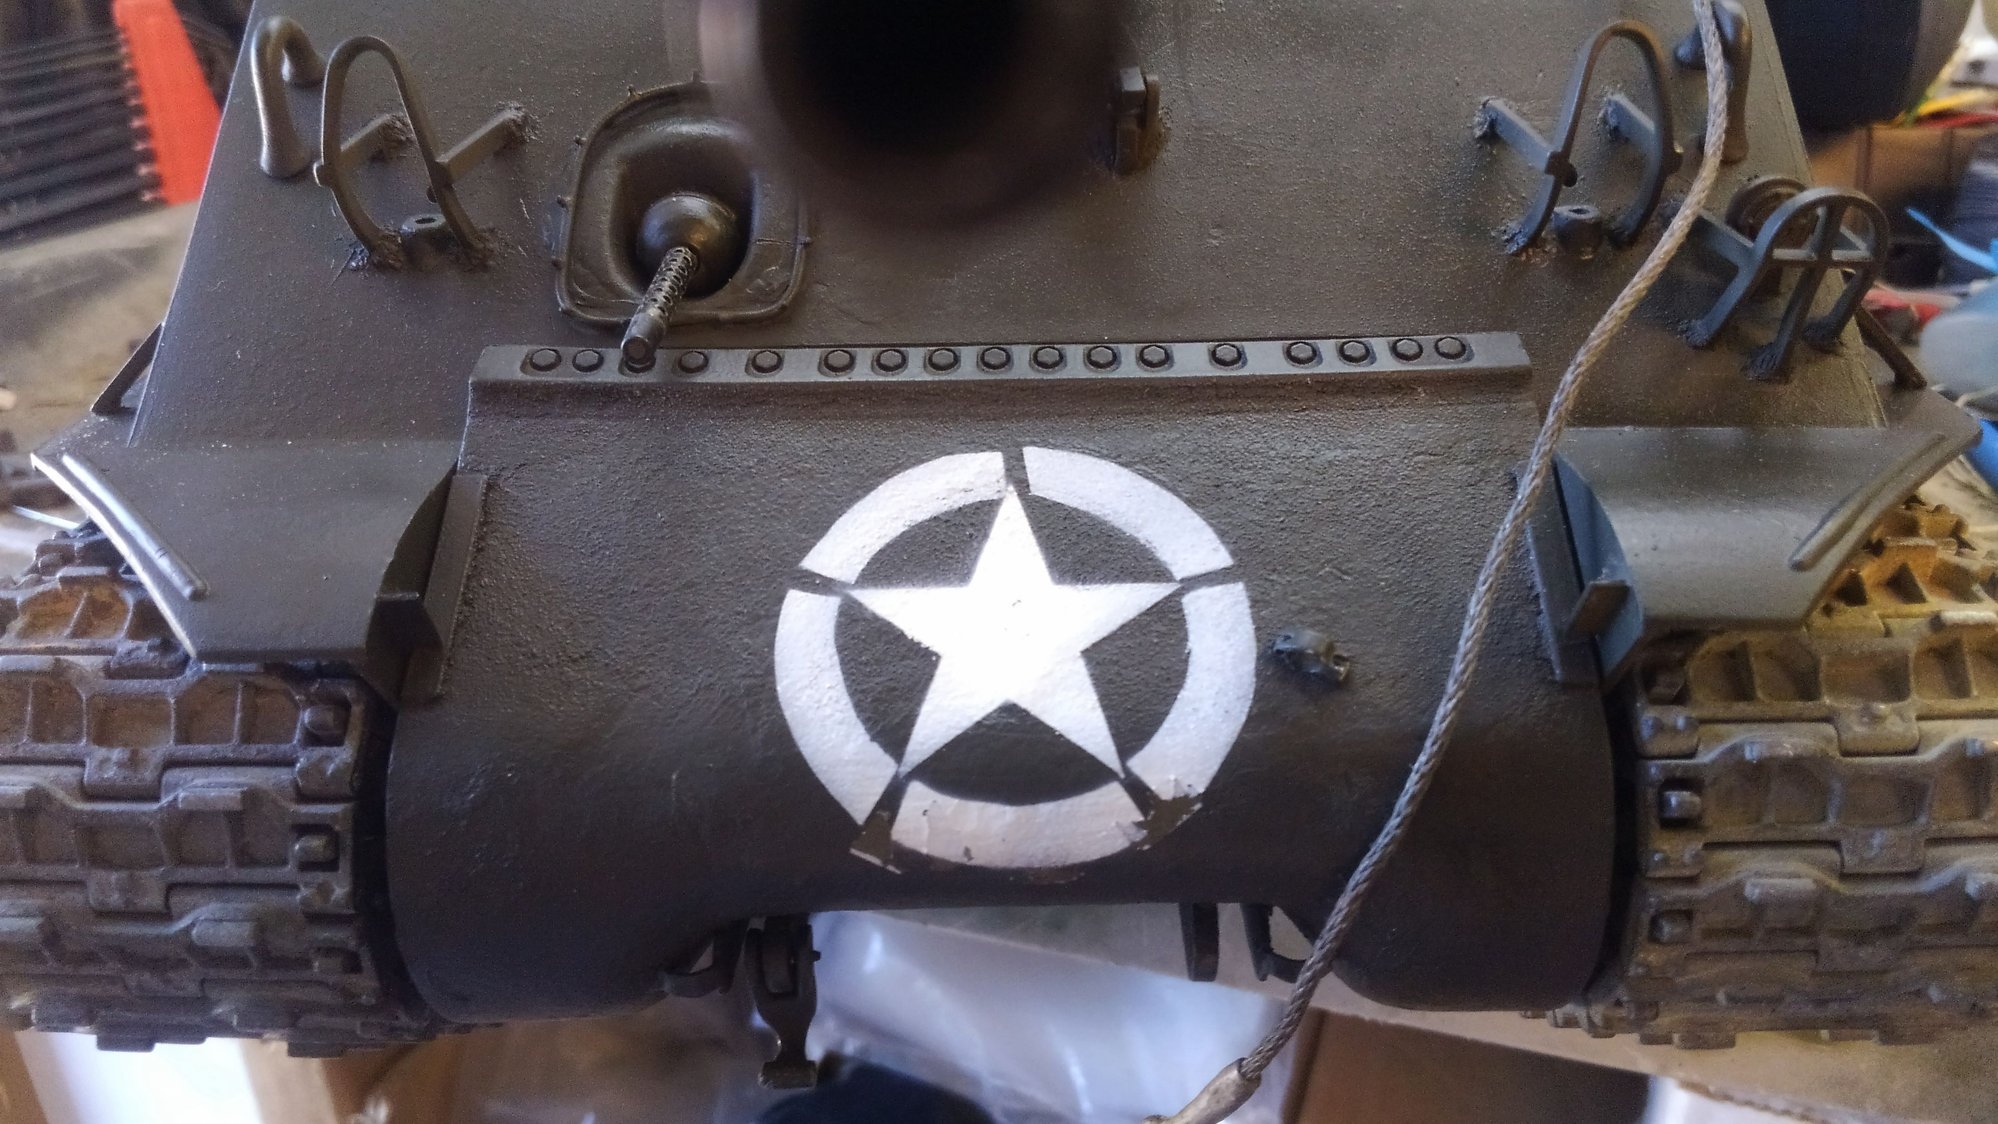
I got the stars and USA number finished. It has a number from about September 1944 production, to fit with the HVSS, no Muzzle brake and the split loaders hatch.
I finished the tools and mounting them on the hull. I mixed them between Tamiya tools that I salvaged off another hull, and HL tools.
I trimmed up the Tamiya sledge so the head was true and made a correct scale mounting bracket for it soldered out of brass strip.
I wanted to put the invasion star on the turret side, but was afraid the tank would look too gaudy with it along with the Katy Perry pin up painted over the lower hull star. I did a bunch of research, period photos and some documentation and the TM for color and marking of US Vehicles.
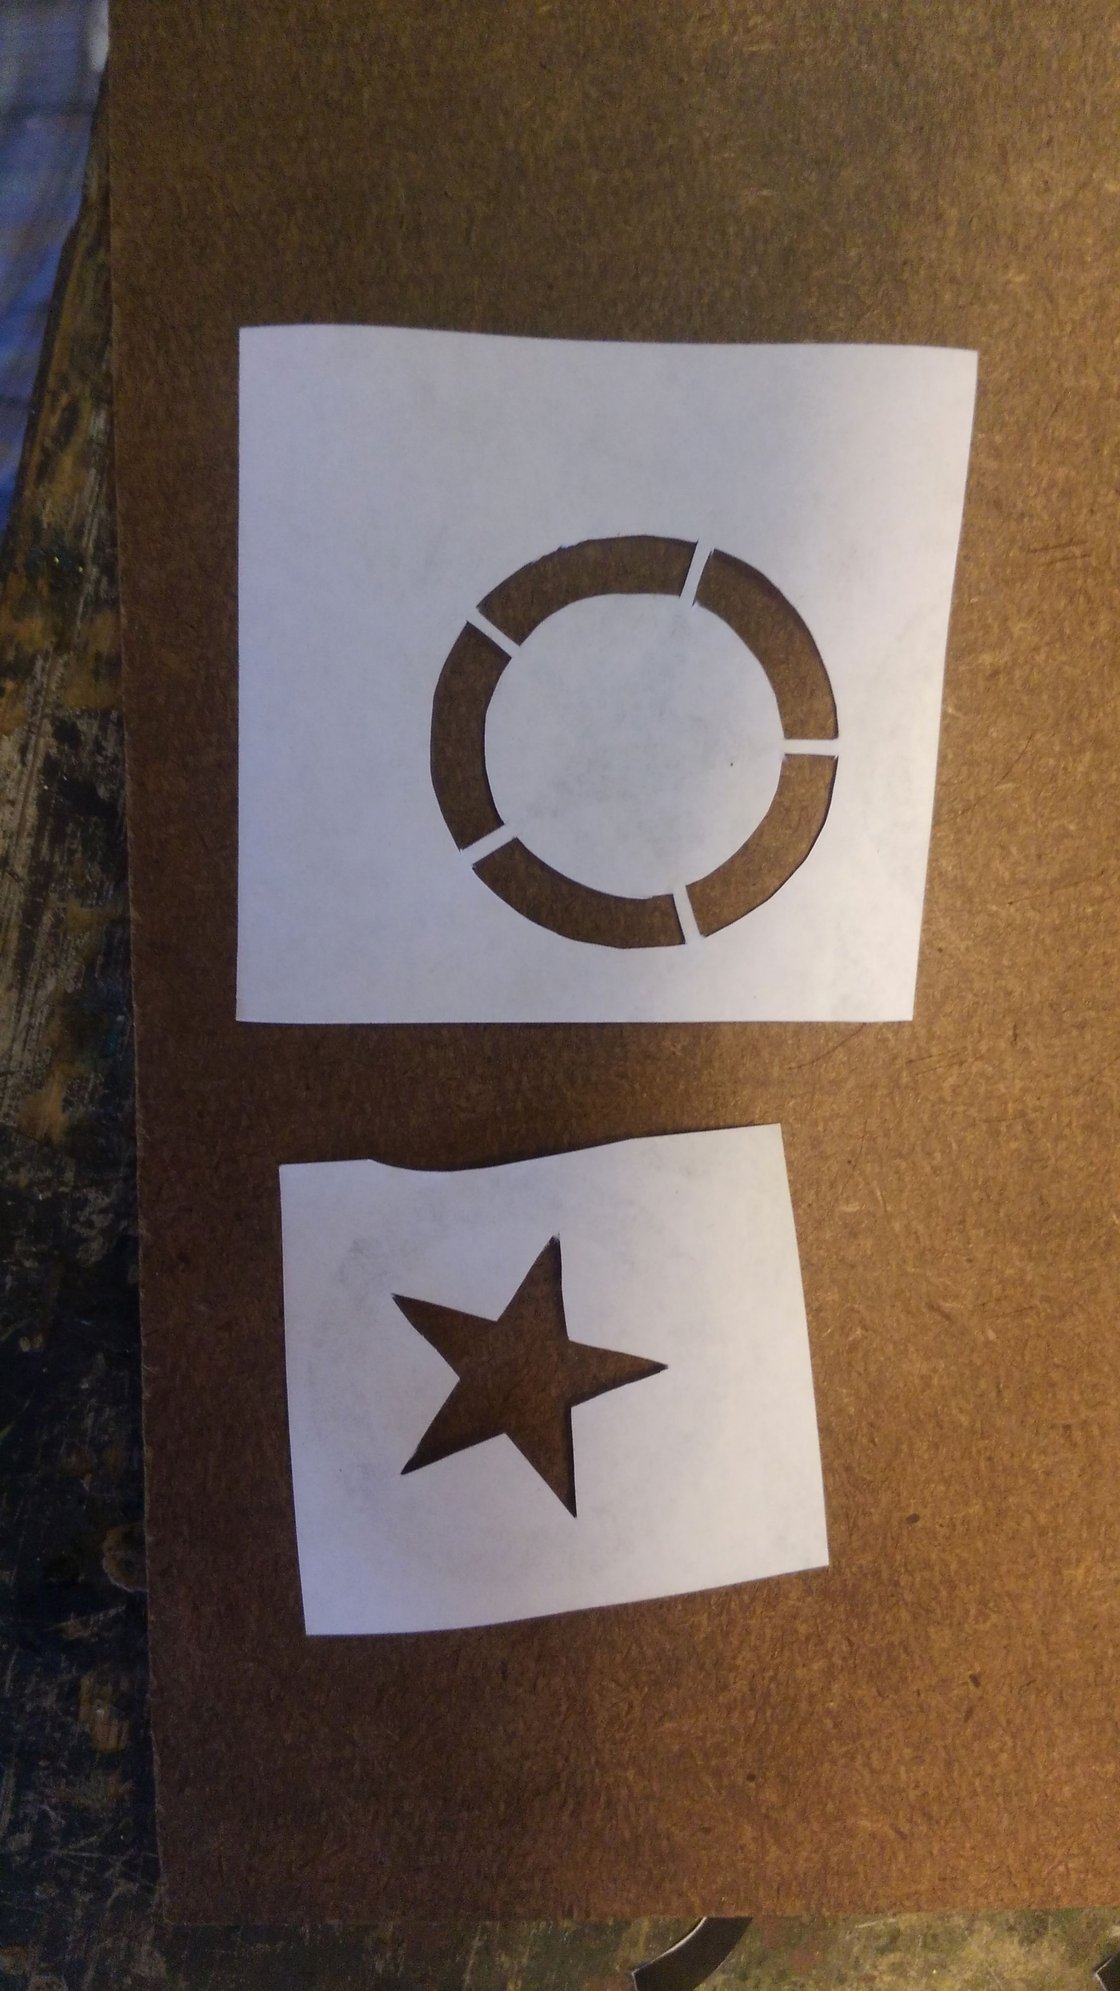
The "Invasion star" the star with a circle, I always thought came out just for D day, but infact it was in use much earlier. The circled star was designed to be used for aerial recognition, not for vehicle sides. The stencil had broken lines in the circle to hold it together, (I have a real one) and the broken lines in the circle were supposed to be painted in by hand after spraying on the vehicle. The sides were to only get the star from the center of the same stencil. However, it just depended on the depot guys and how lazy or hasty they had to be to get things marked. Often AFVs got the circle on the side as we see in photos, some got it on all possible spots some got painted only in one or two. The emphasis post D day was on aerial view, especially when applique armor or things were going to cover up the sides and front any way. Rear deck or turret top was essential. Especially when some units began to use black to add cammo to their tanks. I bet this is a big flaw in FURY, those tanks should have a circled star on top somewhere to be correct, and I don't recall seeing any stars on them at all.
More or less, it looks as though, if there were stars on the sides of the hull or turret, it could have been one or the other or both places, and it was about 50 /50 with the plain star, or the whole circle included. And occasionally you find one where somebody spent the time to paint in the circle brakes.
A lot of you guys know this or bits of it already, but I thought I would post it because as much as I know or thought I knew, I didn't know the details, and I wanted to be accurate.
So, unless you are copying a photo of a particular tank, decal how ever you like, as long as the stencils are the correct size.
75 and 105mm turrets had a smaller stencil on them than the hull side, the T23 76mm used the same stencil as the hull side, and there are some photos of one that got a huge circled star on the minutia site, probably the stencil for the transmission cover its so huge.

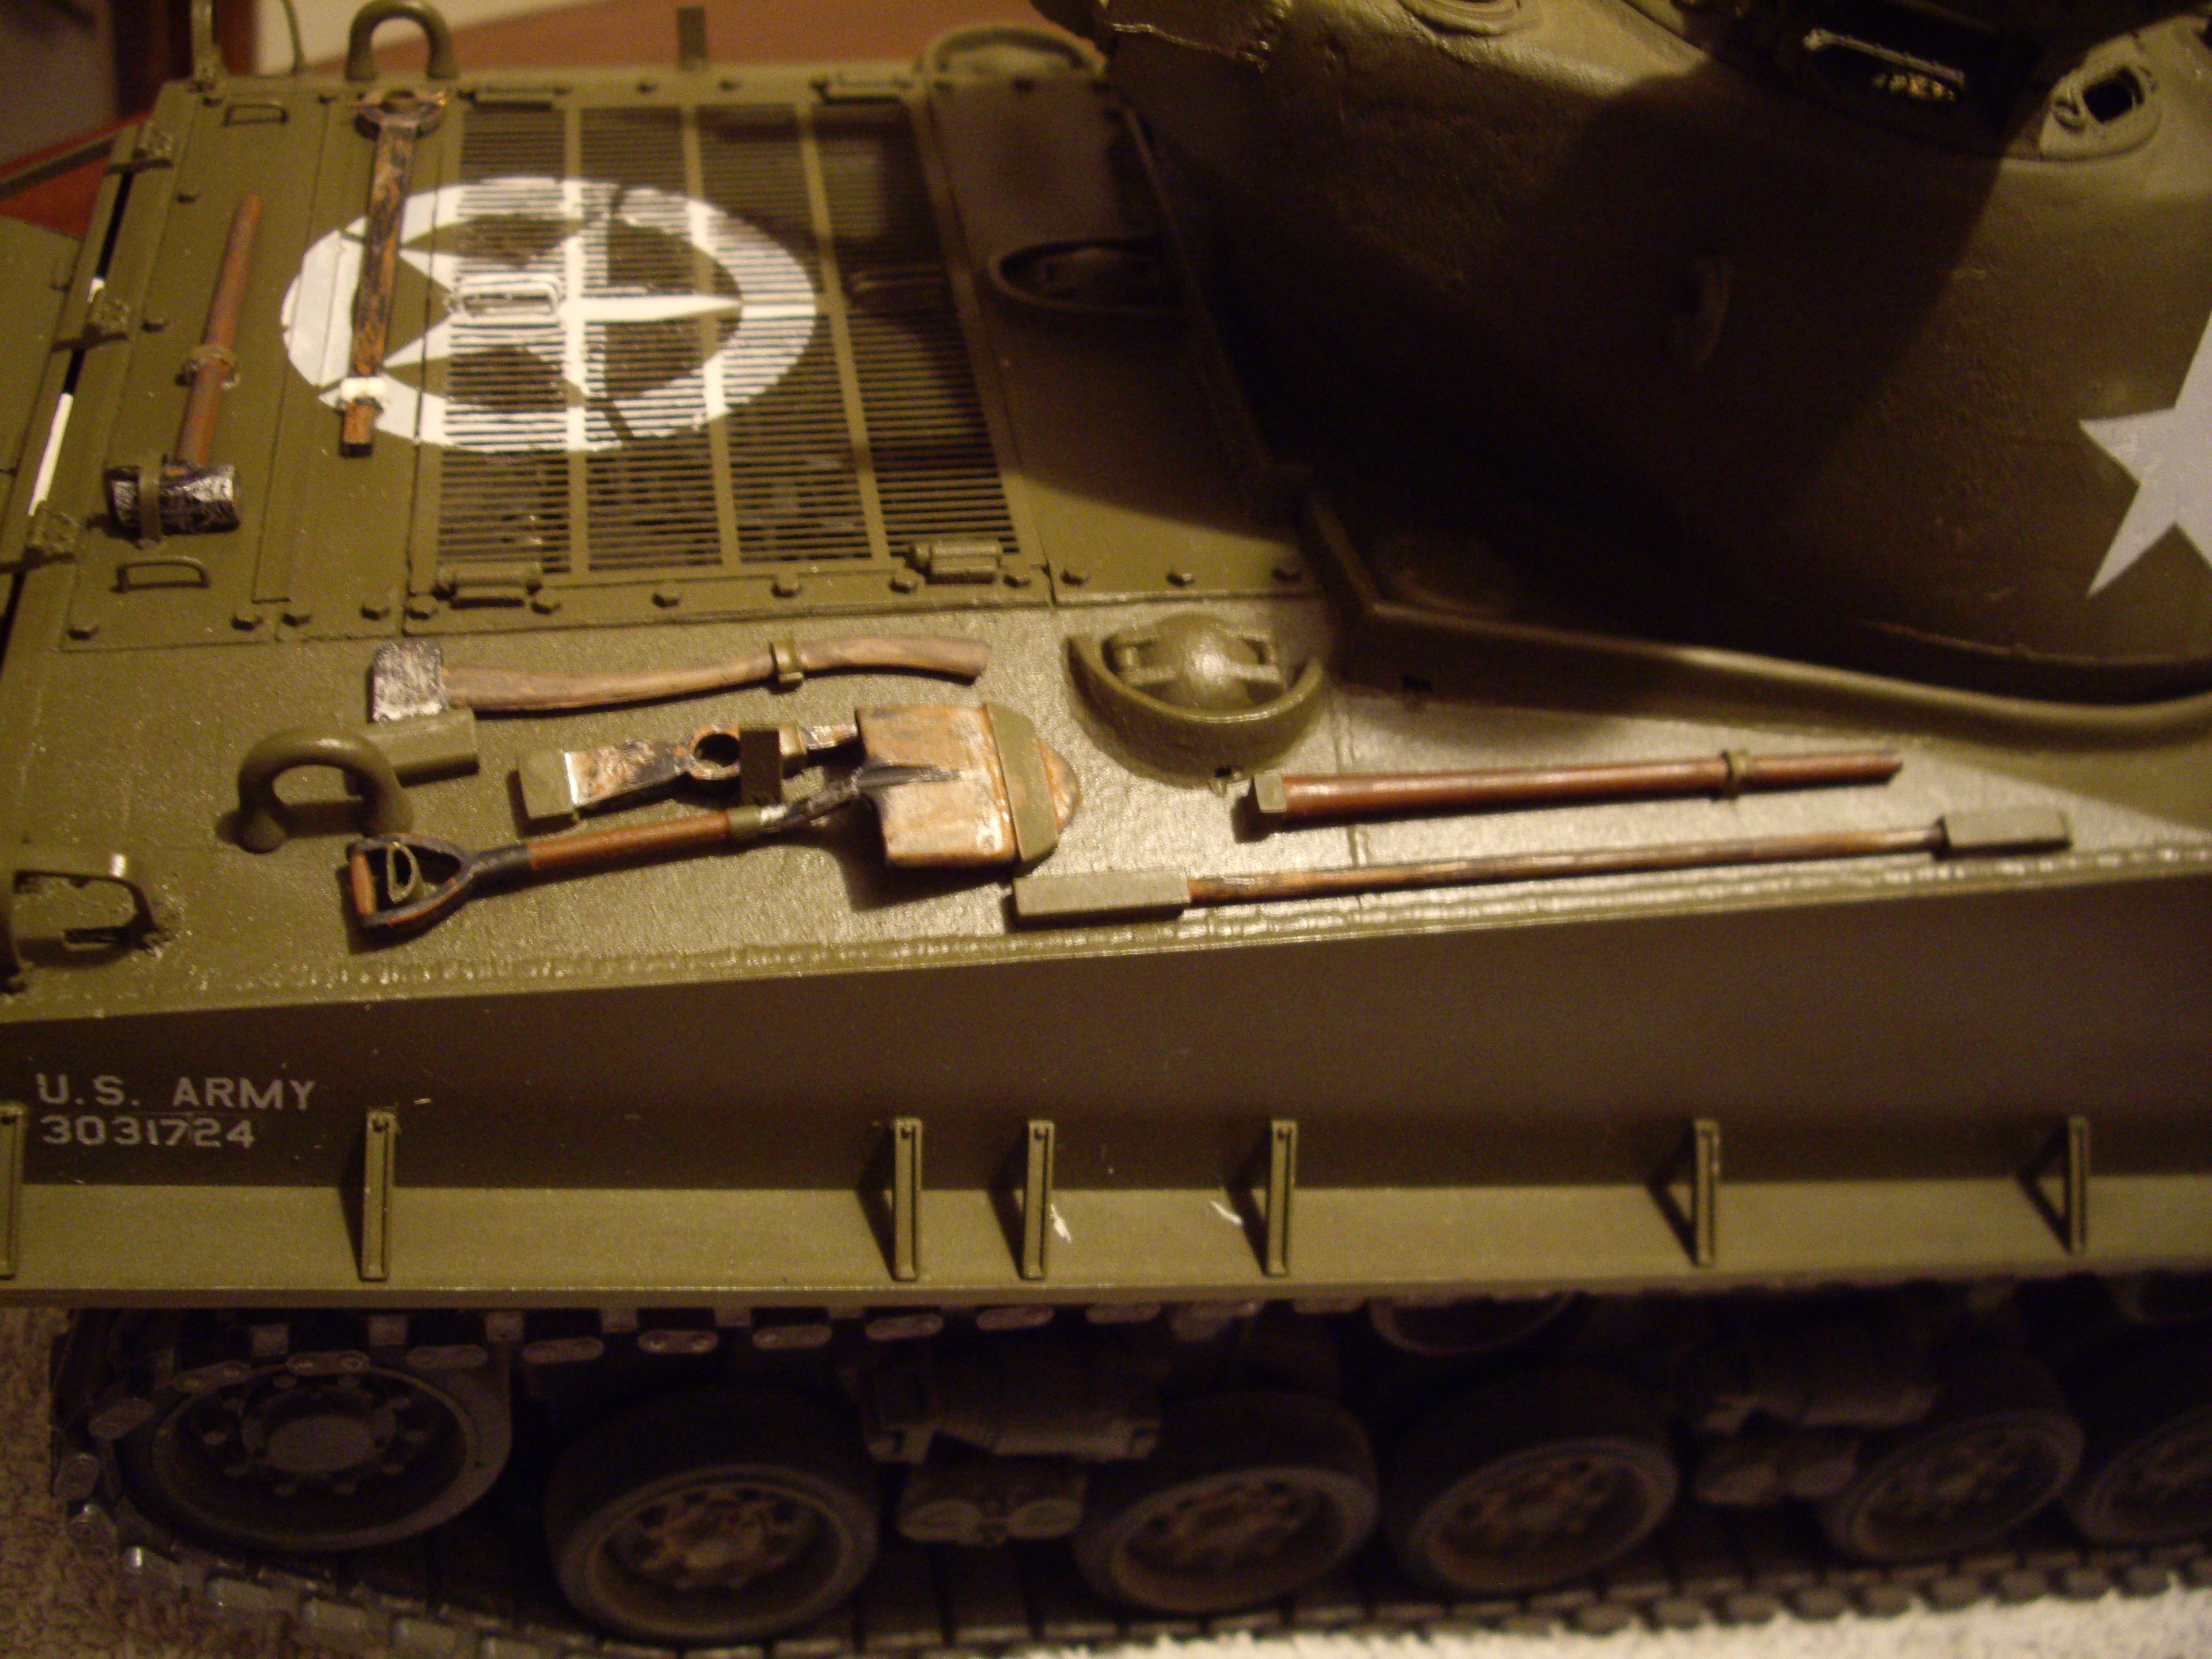
I finished the tools and mounting them on the hull. I mixed them between Tamiya tools that I salvaged off another hull, and HL tools.
I trimmed up the Tamiya sledge so the head was true and made a correct scale mounting bracket for it soldered out of brass strip.
I wanted to put the invasion star on the turret side, but was afraid the tank would look too gaudy with it along with the Katy Perry pin up painted over the lower hull star. I did a bunch of research, period photos and some documentation and the TM for color and marking of US Vehicles.
The "Invasion star" the star with a circle, I always thought came out just for D day, but infact it was in use much earlier. The circled star was designed to be used for aerial recognition, not for vehicle sides. The stencil had broken lines in the circle to hold it together, (I have a real one) and the broken lines in the circle were supposed to be painted in by hand after spraying on the vehicle. The sides were to only get the star from the center of the same stencil. However, it just depended on the depot guys and how lazy or hasty they had to be to get things marked. Often AFVs got the circle on the side as we see in photos, some got it on all possible spots some got painted only in one or two. The emphasis post D day was on aerial view, especially when applique armor or things were going to cover up the sides and front any way. Rear deck or turret top was essential. Especially when some units began to use black to add cammo to their tanks. I bet this is a big flaw in FURY, those tanks should have a circled star on top somewhere to be correct, and I don't recall seeing any stars on them at all.
More or less, it looks as though, if there were stars on the sides of the hull or turret, it could have been one or the other or both places, and it was about 50 /50 with the plain star, or the whole circle included. And occasionally you find one where somebody spent the time to paint in the circle brakes.
A lot of you guys know this or bits of it already, but I thought I would post it because as much as I know or thought I knew, I didn't know the details, and I wanted to be accurate.
So, unless you are copying a photo of a particular tank, decal how ever you like, as long as the stencils are the correct size.
75 and 105mm turrets had a smaller stencil on them than the hull side, the T23 76mm used the same stencil as the hull side, and there are some photos of one that got a huge circled star on the minutia site, probably the stencil for the transmission cover its so huge.
10-15-2015, 07:57 PM
#71
Thread Starter
Well, Ive been sick for about a week, had a 4 day weekend and didn't do a damn thing. Just tried to stay alive, this cold has kicked my ass. Now its turned into an ear infection with fluid behind my eardrum, ugh.
So last night I went out and installed the ETO armor tail lights and ran the bulbs through the hull. I realized that they way Tamiya designed them, and how they actually light up, is not how the real tail lights work, I know because I have vehicles that have them. The tail and stop light on the left should not operate with the black out stop white light on the right. The little convoy markers at the bottom of both are useless in real life let alone on a model, so I only put one bulb in each tail light.
I did not mount the head lights yet. I am pondering not installing them since they were removed except for night driving so they wouldn't get shot up.
I also am not going to run the lights off the TO Mf unit. Im going to use a 4AA pack to do it on a switch, if I even ever bother to do it. I just feel like Im not really into lights for some reason.
03-17-2016, 11:00 PM
#72
Thread Starter
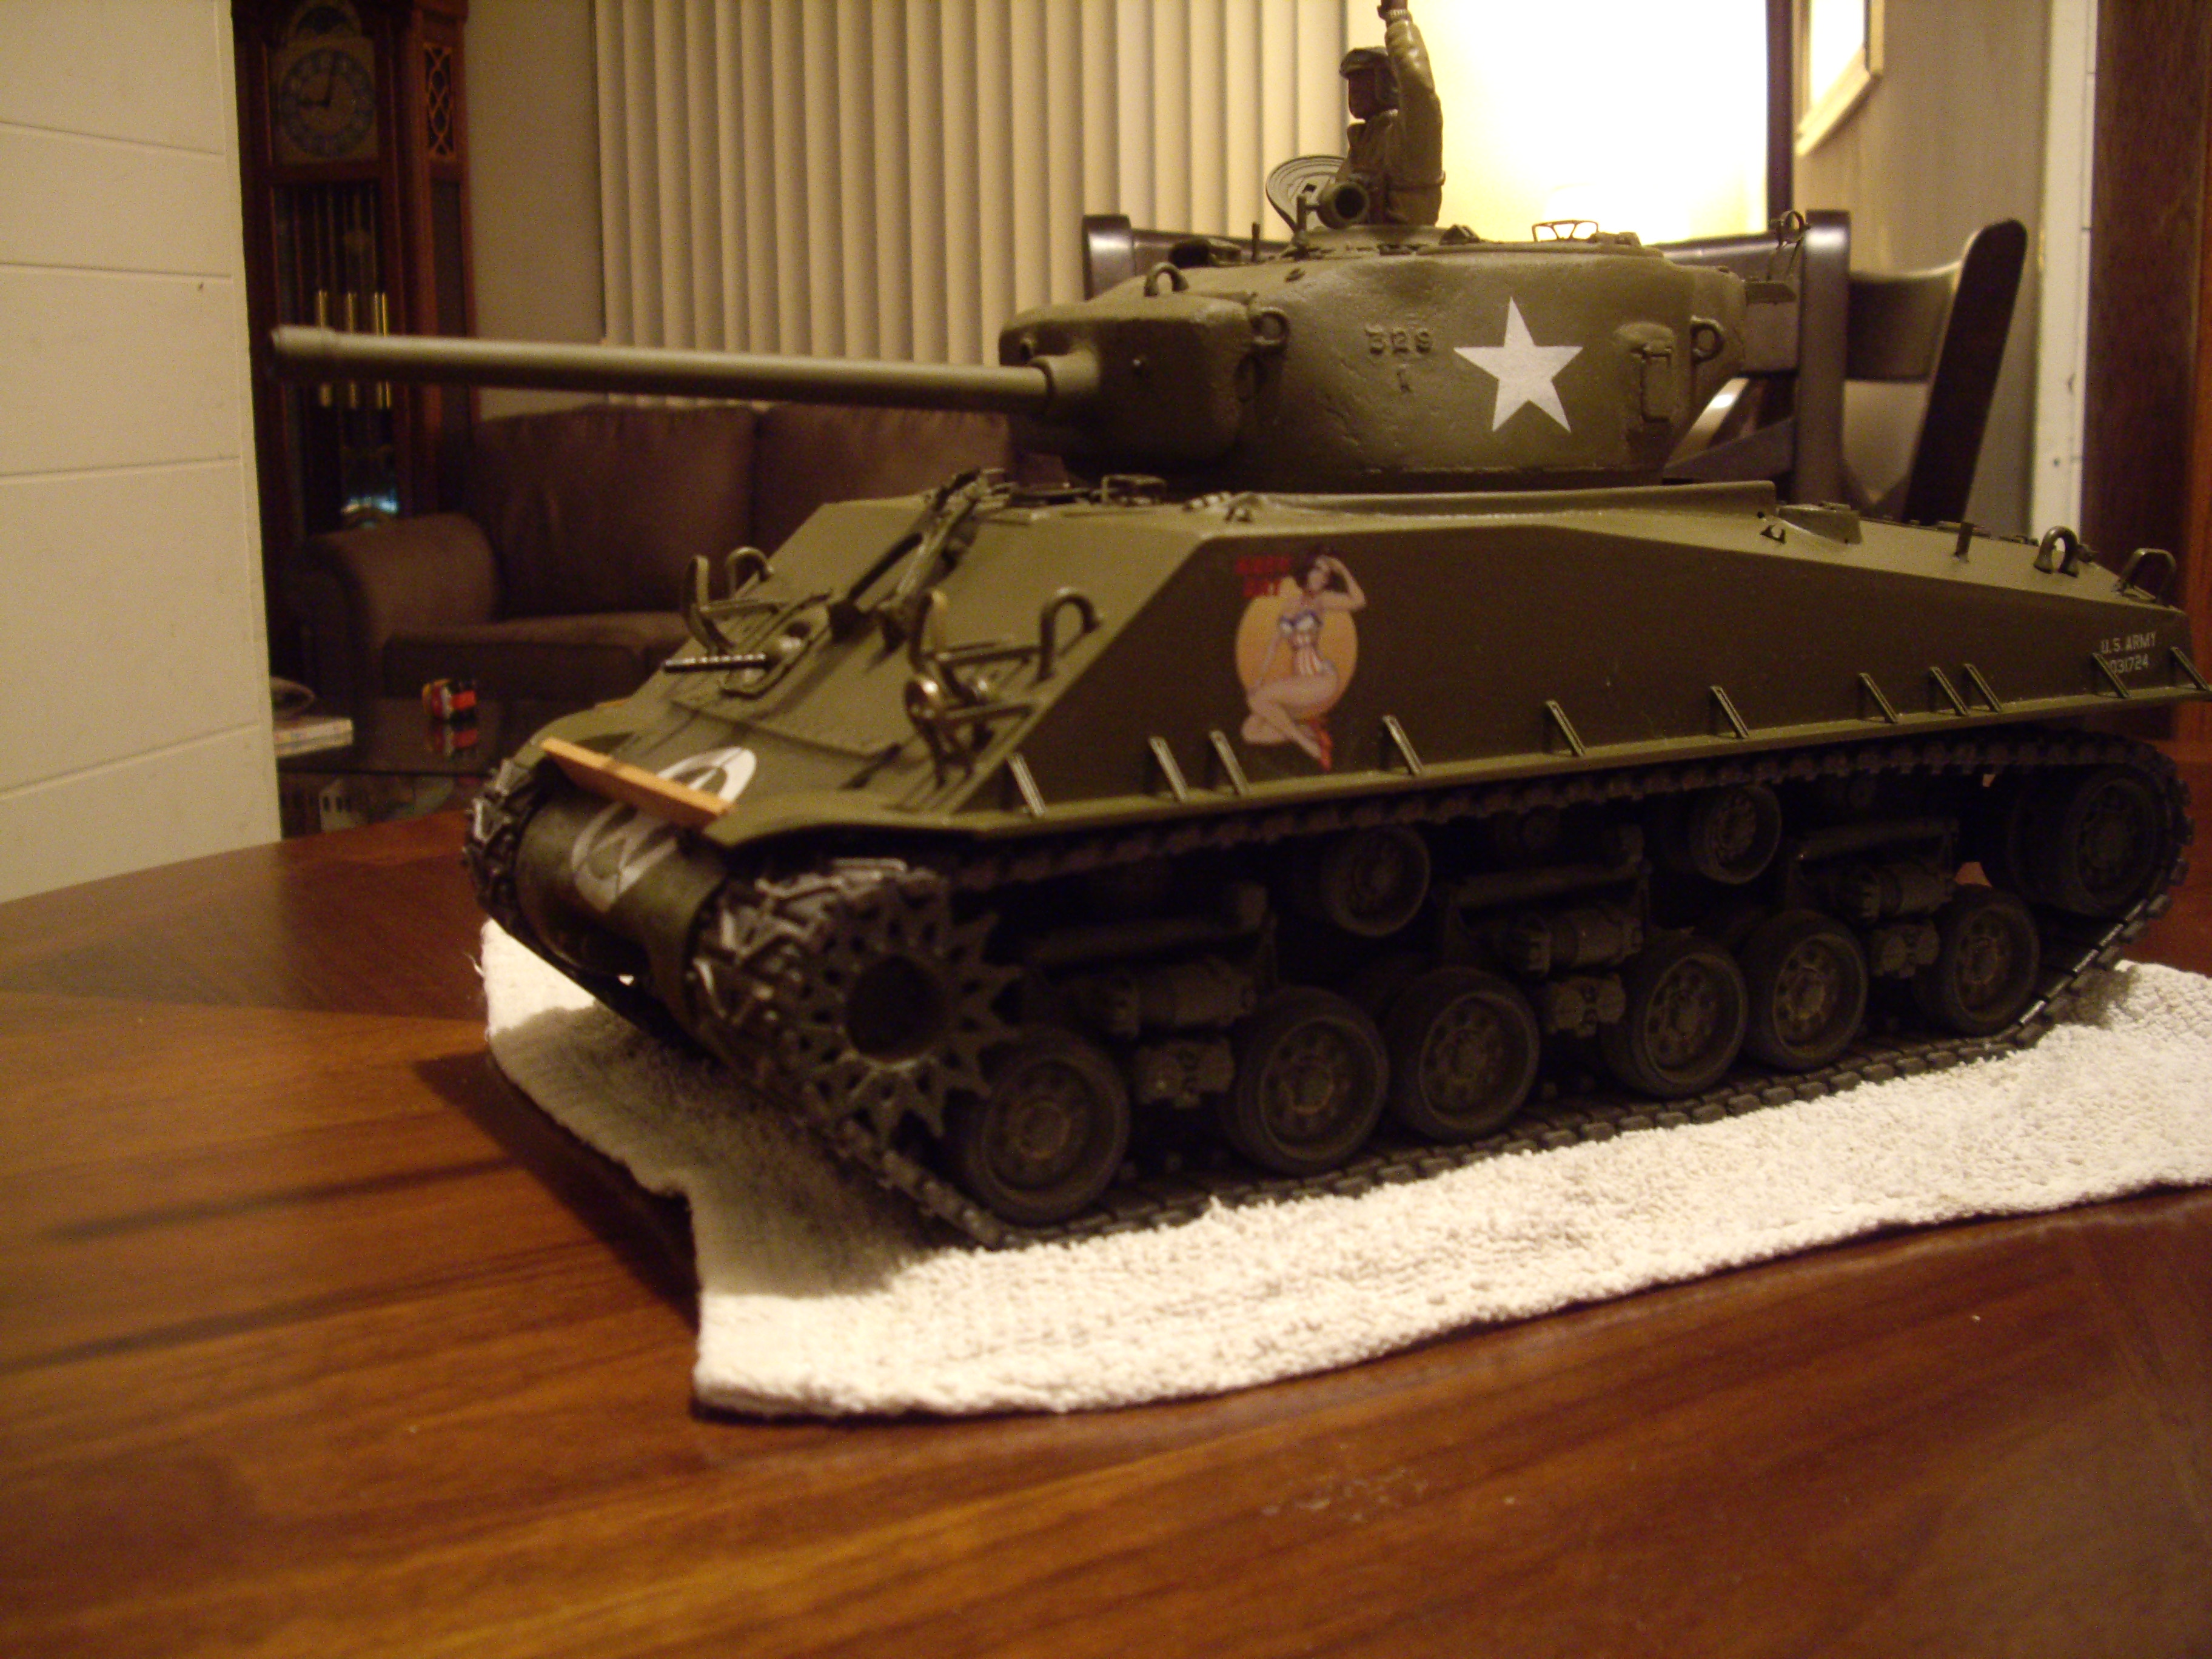
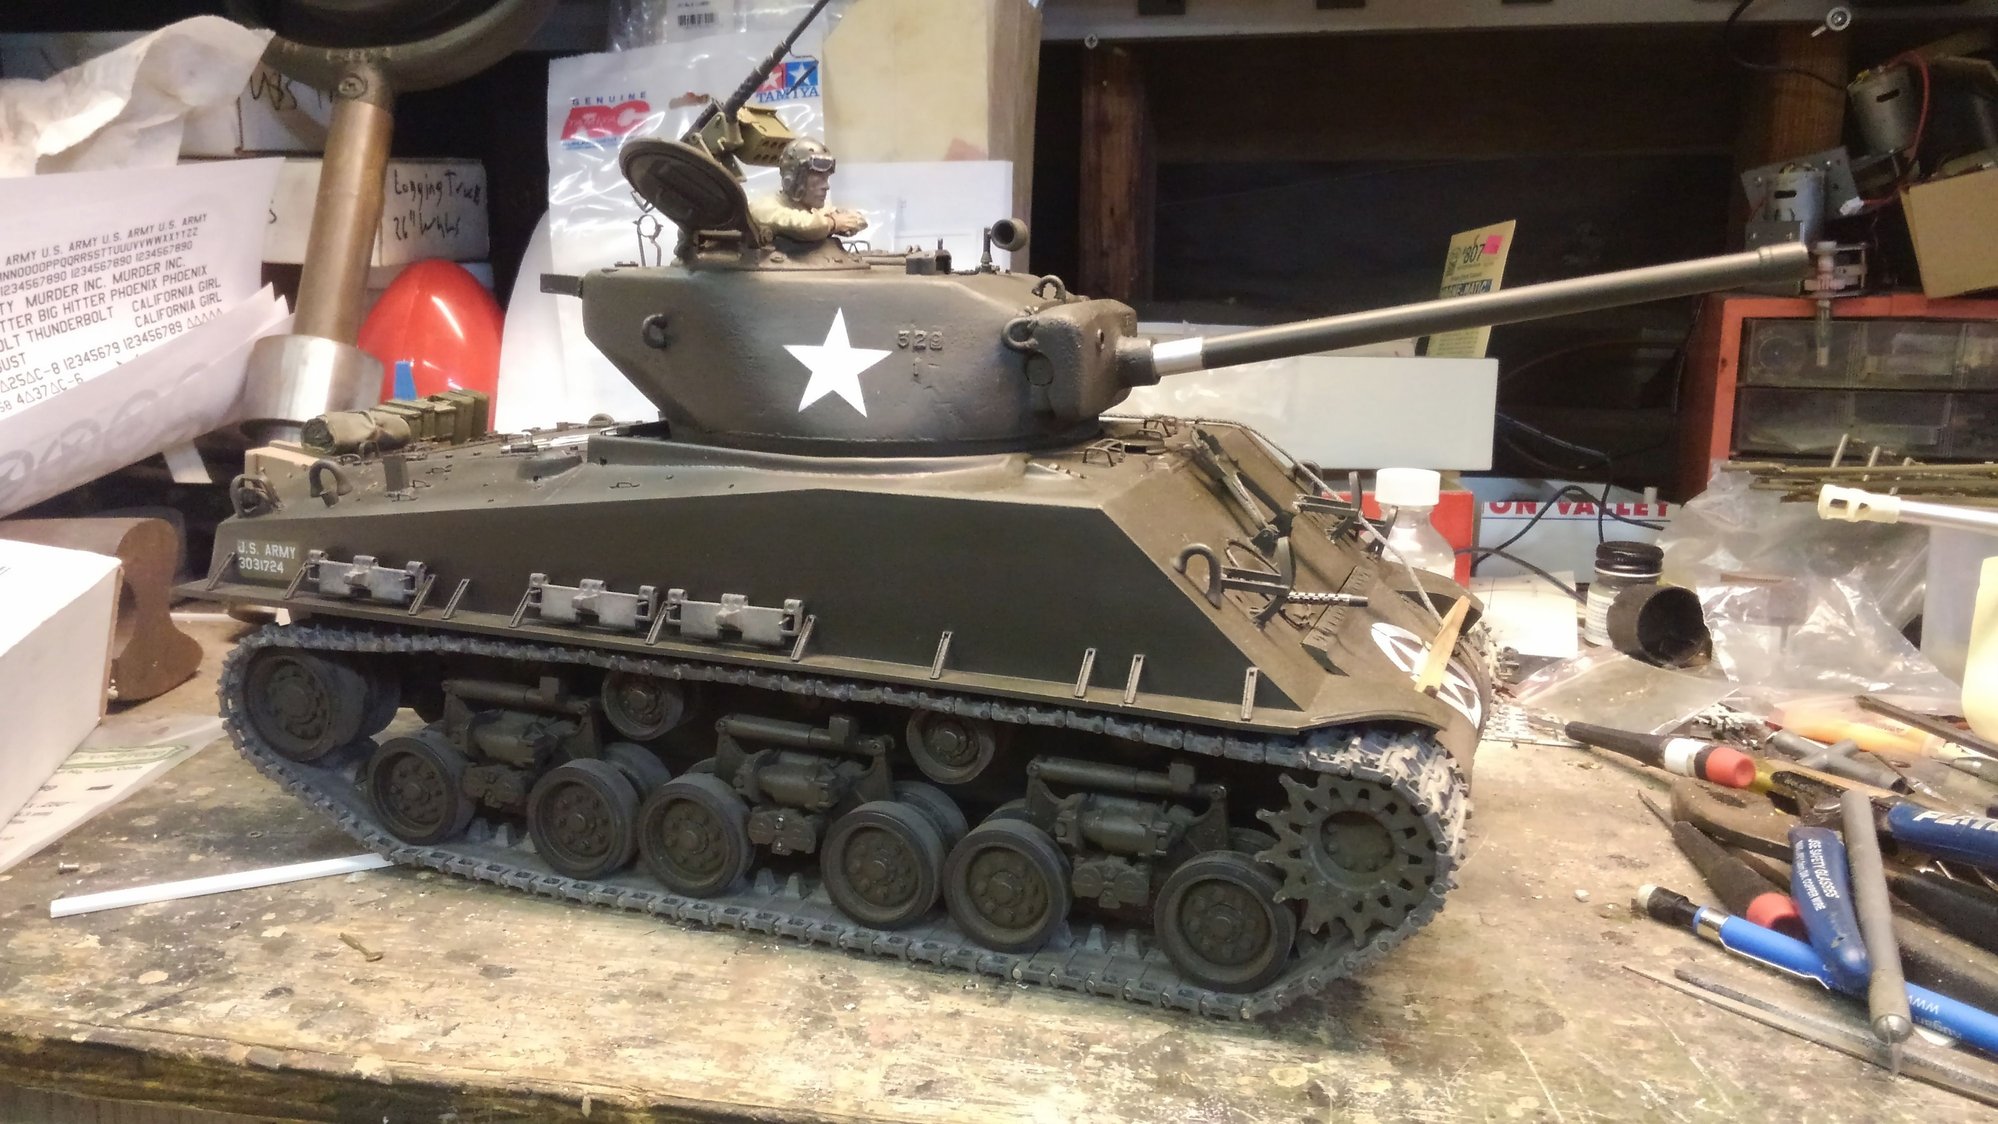
Well, I haven't done any weathering to this tank. I kinda don't want to. I like how it looks, though the paint is way too light in shade and color but I like it for what it is. Several years of on and off putzing with it and then banging it out over a year to completion.
I have played around with stowage and how I wanted it to be held on and look and I finally came up with this and tied it up tonight.


I have played around with stowage and how I wanted it to be held on and look and I finally came up with this and tied it up tonight.
04-22-2019, 09:20 PM
#73
Thread Starter
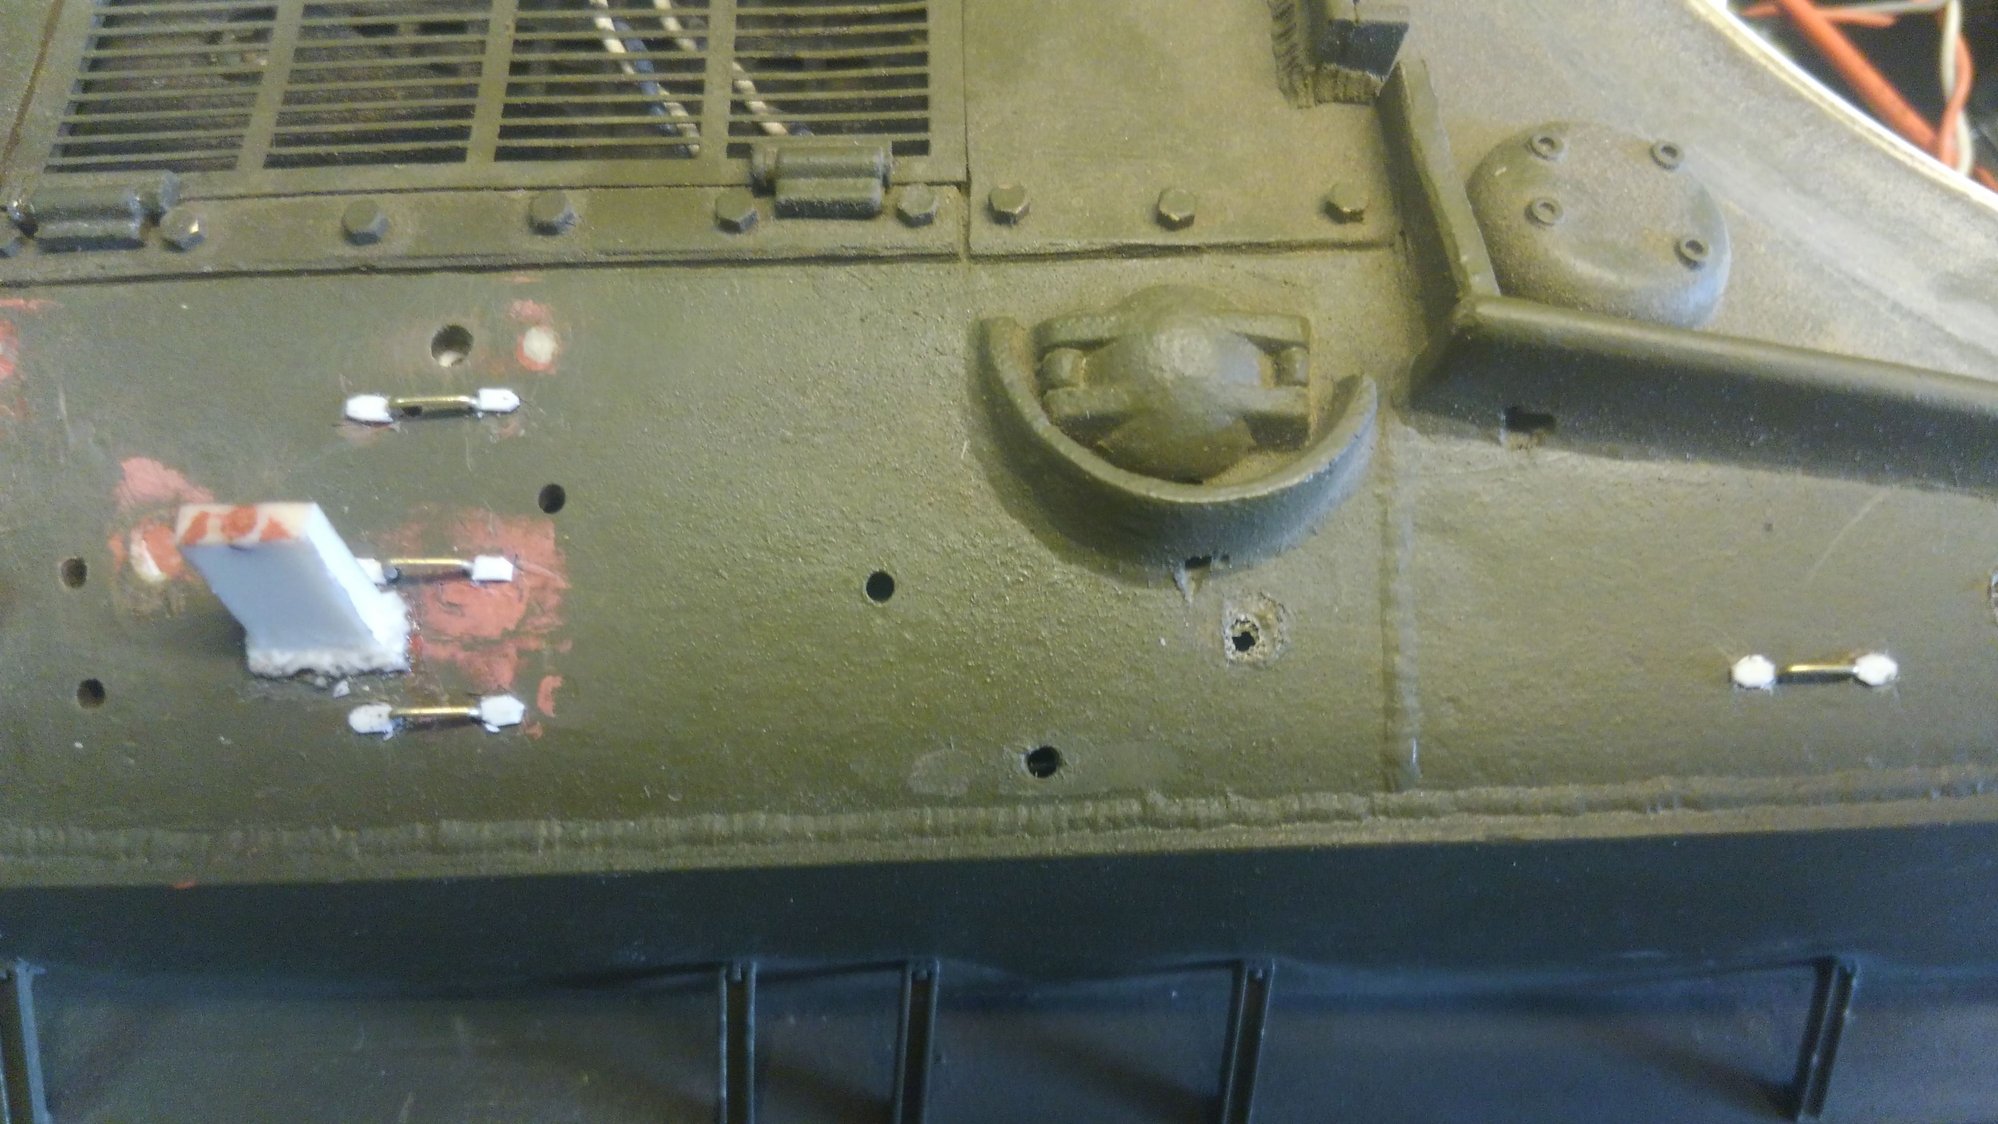
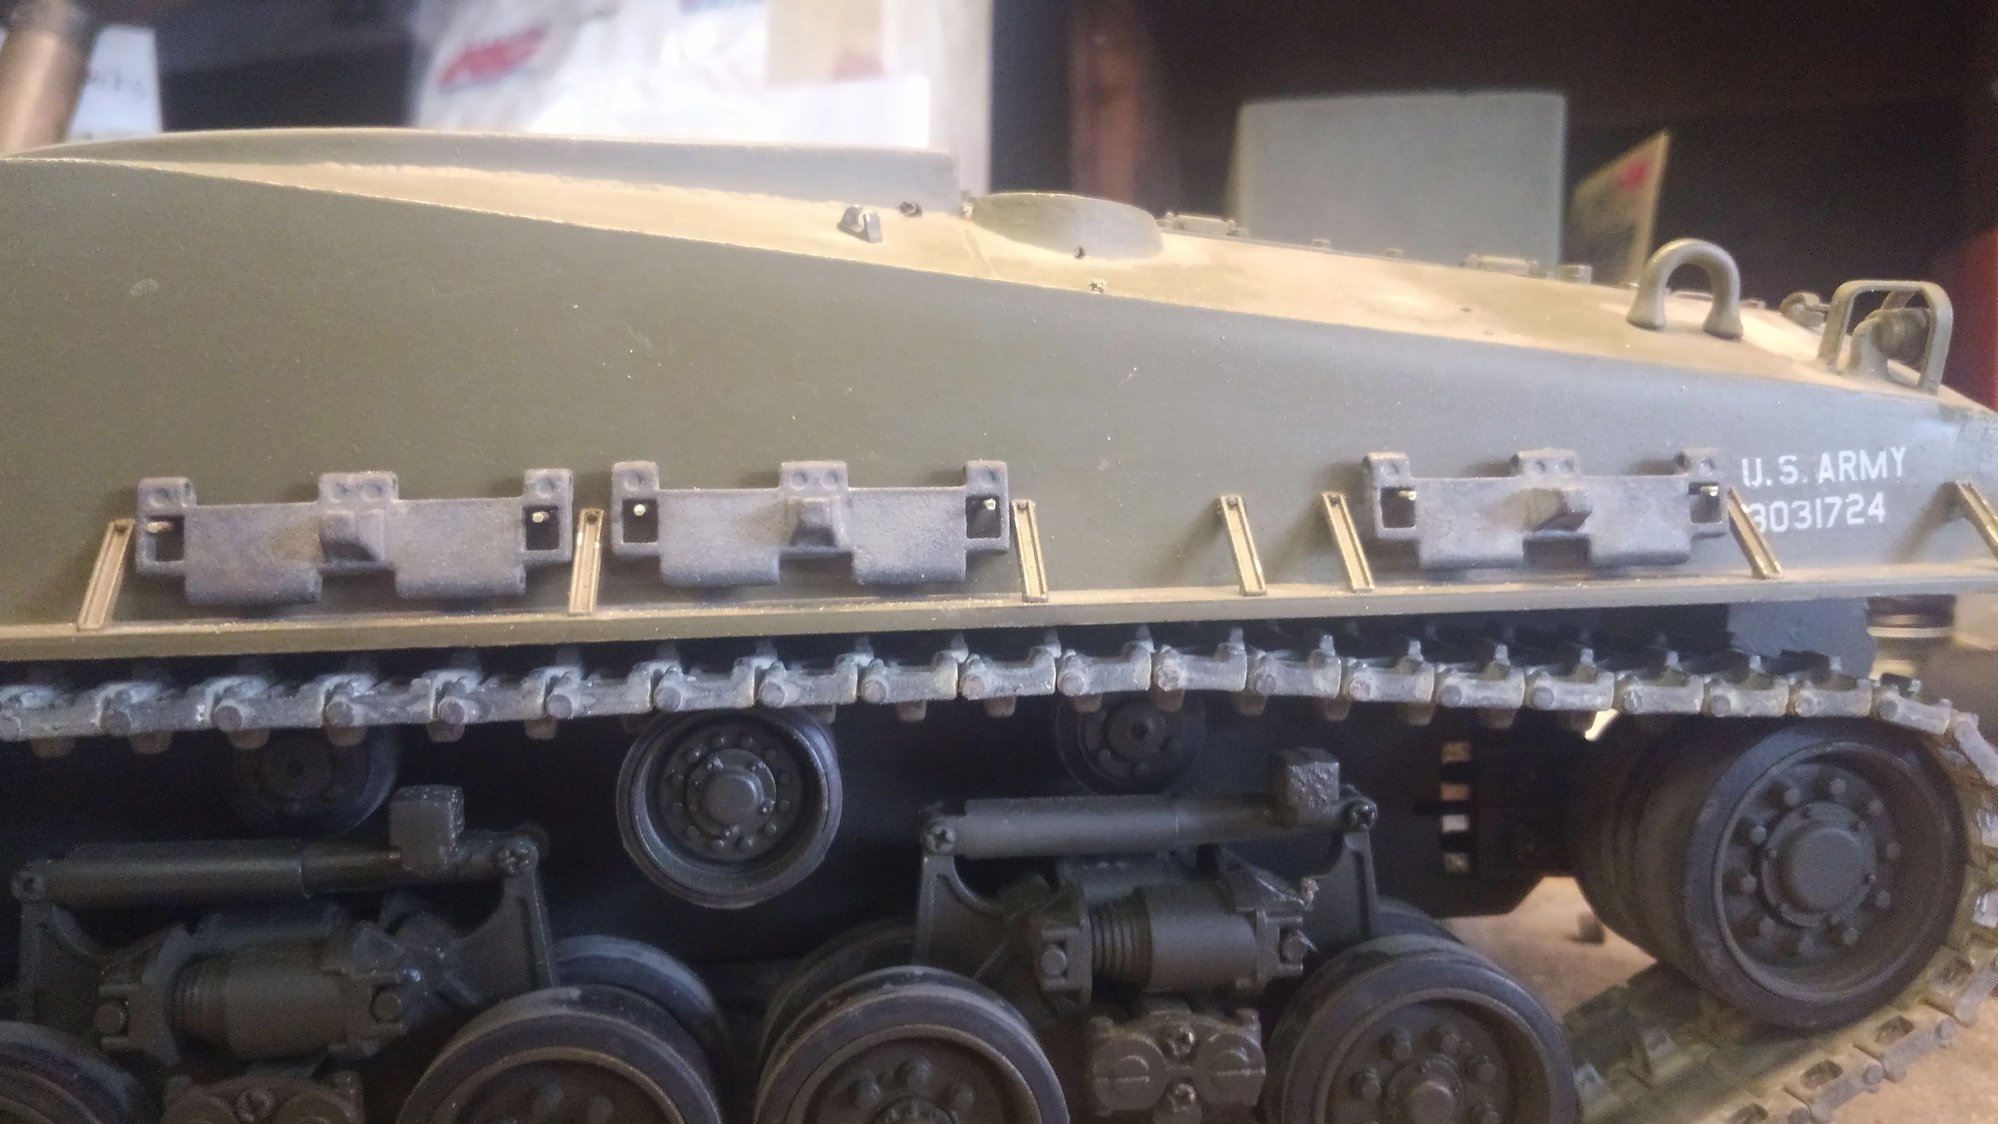
The color on Katy Cat has always bugged me. I used testors OD as it was my second tank I built not knowing how to get good OD mixed. Other things were wrong too like I never built the A3 rear and my barel was too short. Nick told me how long to make it from memory, and it was quite short, I had someone measure a real one for me so I had to fix it.The tank was build on an old 2 channel dmd hull, which had the old suspension which I wore out. So I got modern full option bogies and installed bearings and impact rubber tire coated return roller set too. I also decided to update the detail a bit and add the footman tie down loops for the tools and add track holders for the spare bocks since I put T66 on the tank I have to mount them the way the real ones were done. Im still working on doing that, My first spare track retainers today didn't work out. Probably going to have to make them from brass.....ugh. Yes, my attempt at spraying an invasion star on the nose came out terrible, but its covered with stowage now so you cant see how bad it is....


04-29-2019, 10:26 AM
#75
Fought against this EZ8 last weekend in San Diego at the SD Tank Clubs "HUGE" outdoor battlefield. This tank is a monster and one excellent fighting vehicle. I was impressed at just how GREAT it looked, how smooth it ran and NOT so impressed that it had an engagement range of well over 125ft (because it was shooting at me). I had a number to long range (100-150ft) maneuvering duals to the death between it and my M51 (and M41). Fun tank to fight against, but you better bring your "A" game and best tank or just be ready to be a range target getting "wholes" punched into you, because it has RANGE and is ACCURATE! Good thing I also have the long range IR bulb, just wish I had the dialed in accuracy of this EZ8.
If you are in CA, NV or AZ it is worth the time and effort to make the trip down to San Diego for one of the SD Tank Clubs battles and take your best shots at defeating this tank. I know I will be doing some improvements to my M41 just so I can bring some payback next time.
On another note. The SD Tank Club where this EZ8 is based is by all accounts the BEST OPEN COUNTRY BATTLE FIELD in the Western U.S. It is about three acres of usable space, lots of natural cover/concealment, lots of open spaces, trails, packed fine silt dirt and areas of DEEP loose fine silt to kick up in hard turns or get stuck and shot to pieces (ask me how I know).
I will add a few photos later taken during the battle just after I was killed by this EZ8. LOL
Last edited by Fsttanks; 04-29-2019 at 10:29 AM.
