Go Back  RCU Forums > RC Airplanes > RC Warbirds and Warplanes
Reload this Page >

125% (1/4 scale) Anderson TA-152H

Community
Search
Notices
RC Warbirds and Warplanes Discuss rc warbirds and warplanes in this forum.

125% (1/4 scale) Anderson TA-152H

Thread Tools
 
Search this Thread
 
Old 04-17-2015, 09:19 AM
  #326  
invertmast
Thread Starter
My Feedback: (23)
 
invertmast's Avatar
 
Join Date: Dec 2003
Location: Capon Bridge, WV
Posts: 8,198
Received 225 Likes on 116 Posts
Default

Originally Posted by Melchizedek
Impressive
You are going to keep one for yourself aren't you ?

Kevin
Probably two
Old 04-17-2015, 09:20 AM
  #327  
invertmast
Thread Starter
My Feedback: (23)
 
invertmast's Avatar
 
Join Date: Dec 2003
Location: Capon Bridge, WV
Posts: 8,198
Received 225 Likes on 116 Posts
Default

Originally Posted by fw190
Looking great!

I wanna see the composite wing with detail!!!
Yea that is gonna be fun. I need to reposition the wing tube location in the ribs and then i can send out the files for cutting so i can start building a correct wing.
Old 04-17-2015, 04:32 PM
  #328  
invertmast
Thread Starter
My Feedback: (23)
 
invertmast's Avatar
 
Join Date: Dec 2003
Location: Capon Bridge, WV
Posts: 8,198
Received 225 Likes on 116 Posts
Default

Parts set #4 is drying.


I also sanded down both stab halves.


I also laid out the panel line splits and rivet rows on one of the stabs.


Old 04-19-2015, 09:09 AM
  #329  
invertmast
Thread Starter
My Feedback: (23)
 
invertmast's Avatar
 
Join Date: Dec 2003
Location: Capon Bridge, WV
Posts: 8,198
Received 225 Likes on 116 Posts
Default

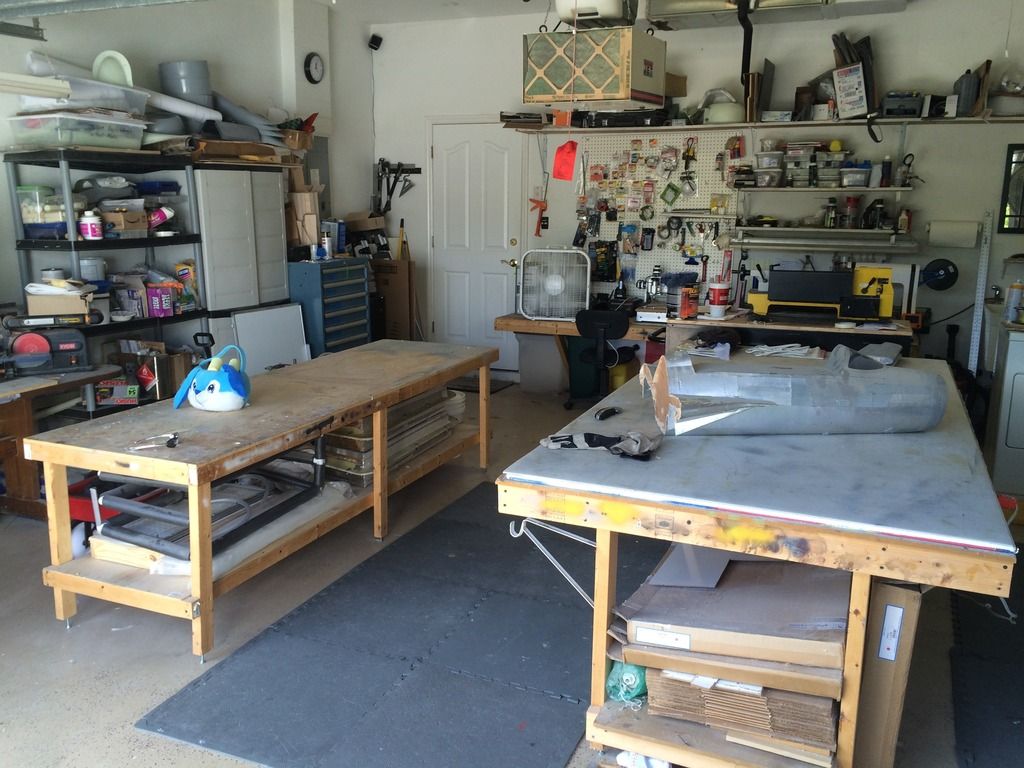
Today was spring cleaning..


The F-14's plug was moved (to the trash can) to make room to hang up the fuse to the ceiling and the mold was stood up in a corner. This made room on my molding table for the TA fuse to get molded.


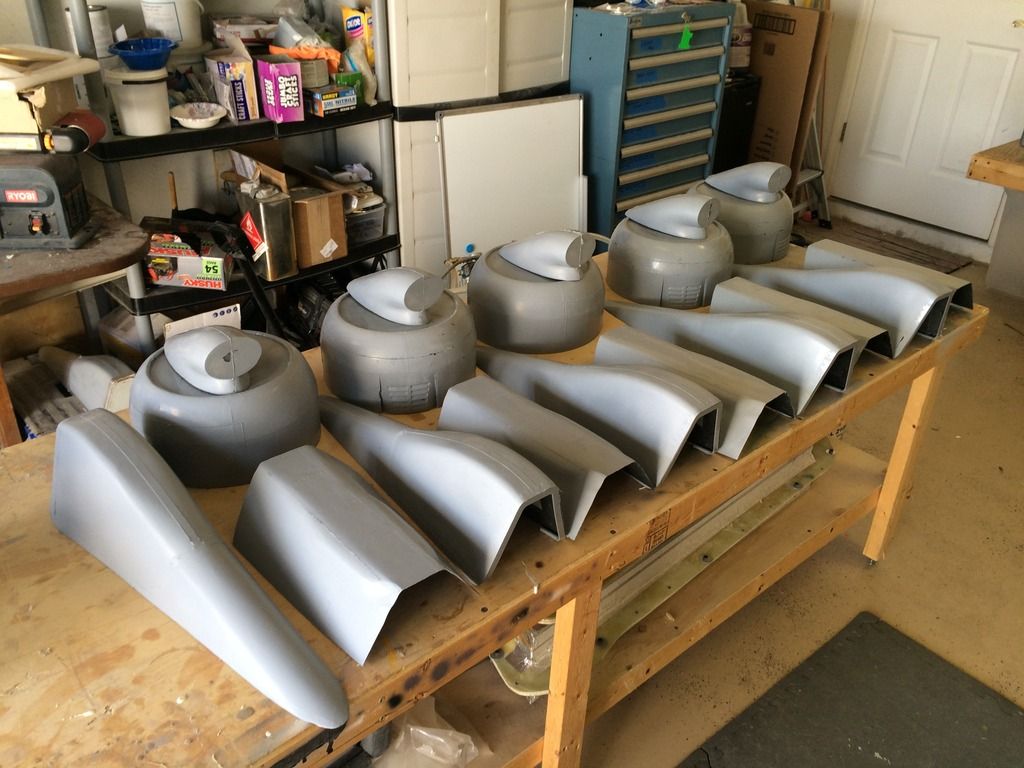
And here is the results of this weeks work. 5 sets of TA molded small parts.


Old 04-19-2015, 09:36 AM
  #330  
vertical grimmace
My Feedback: (1)
 
vertical grimmace's Avatar
 
Join Date: Mar 2004
Location: ft collins , CO
Posts: 7,252
Received 12 Likes on 11 Posts
Default

Lookin' awesome. I am really looking forward to cleaning my shop as well. As soon as I get the TA done. Get everything organized for flying season, and my next build.

Will be watching the fuse layups to see how that goes.
Old 04-19-2015, 10:17 AM
  #331  
Melchizedek
 
Melchizedek's Avatar
 
Join Date: Jul 2012
Location: Missouri
Posts: 1,127
Likes: 0
Received 0 Likes on 0 Posts
Default

Will be watching the molding of the fuse closely also.
Wish to learn as much as I can from this.

Kevin
Old 04-19-2015, 02:53 PM
  #332  
invertmast
Thread Starter
My Feedback: (23)
 
invertmast's Avatar
 
Join Date: Dec 2003
Location: Capon Bridge, WV
Posts: 8,198
Received 225 Likes on 116 Posts
Default

Horizontal stabs are done and detailed.


Old 04-19-2015, 04:32 PM
  #333  
ticketec
My Feedback: (2)
 
Join Date: Jul 2003
Location: Brisbane, QLD, AUSTRALIA
Posts: 2,787
Likes: 0
Received 8 Likes on 4 Posts
Default

Wow, Thomas!!!

Looking really awesome there mate!! you sure do work at a furious pace!

Thanks

dave
Old 04-19-2015, 04:38 PM
  #334  
invertmast
Thread Starter
My Feedback: (23)
 
invertmast's Avatar
 
Join Date: Dec 2003
Location: Capon Bridge, WV
Posts: 8,198
Received 225 Likes on 116 Posts
Default

Originally Posted by ticketec
Wow, Thomas!!!

Looking really awesome there mate!! you sure do work at a furious pace!

Thanks

dave
yea i am really pressing to get all the tooling done before the end of May. Ill probably have the fuselage and tail done, but having to redesign the wing is really slowing things done. Plus in a week ive got a long week of 16hr days so there wont be any progress that week. Hopefully i can get the fuse all waxed and the parting planes built up so i can start molding it the first week of May.
Old 04-21-2015, 12:54 PM
  #335  
invertmast
Thread Starter
My Feedback: (23)
 
invertmast's Avatar
 
Join Date: Dec 2003
Location: Capon Bridge, WV
Posts: 8,198
Received 225 Likes on 116 Posts
Default

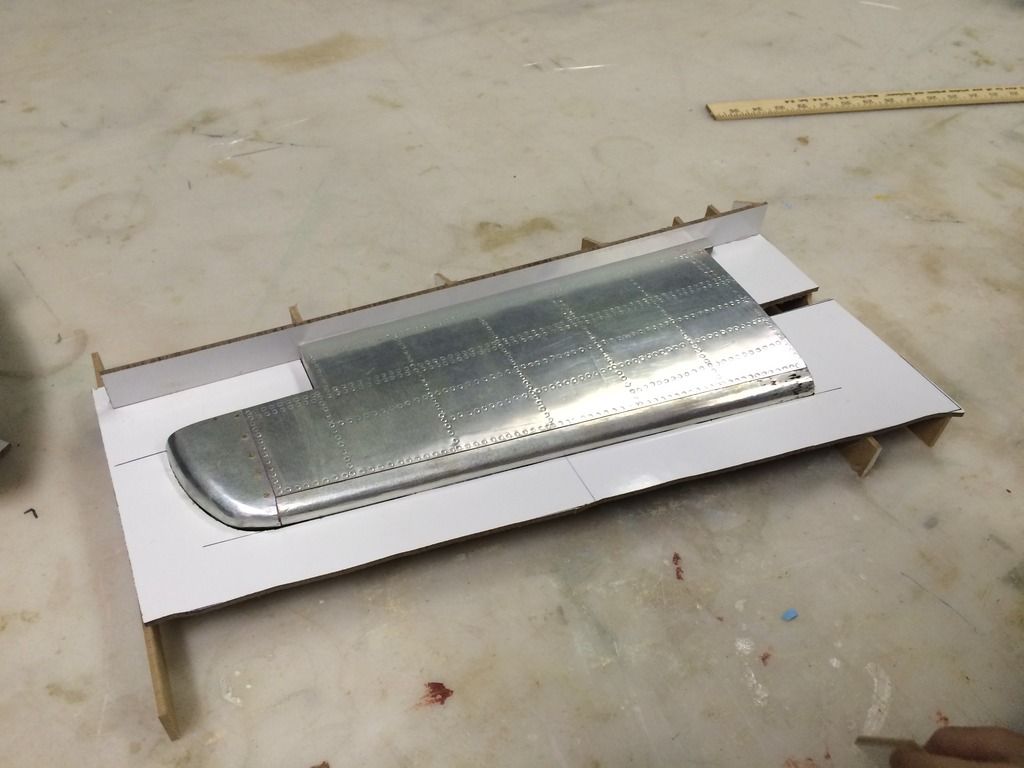
I got the wing ribs all redesigned and sent off to the laser cutter so i can get those on the way. I also got the elevator structure finalized with just a little bit of finish's to do to it and to flatten out the skin so those parts can be laser cut.

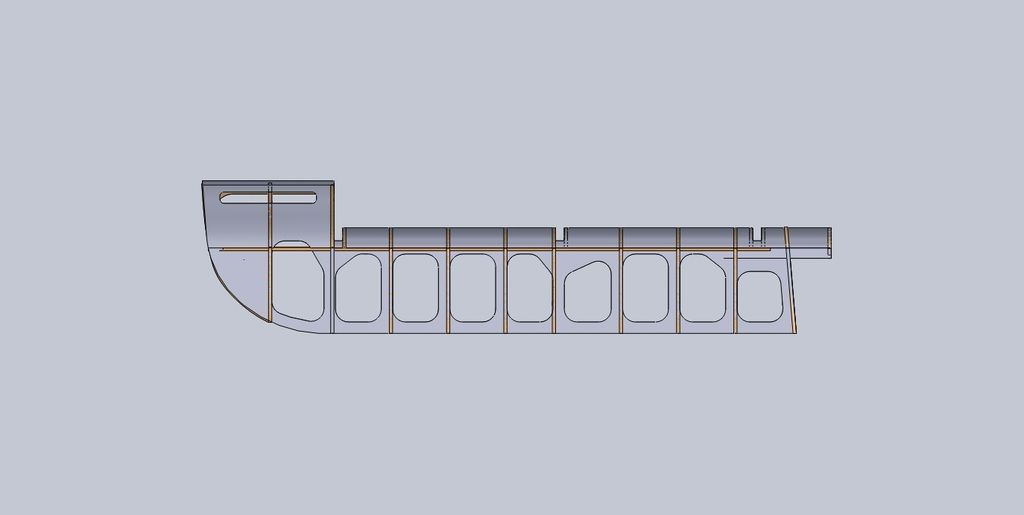
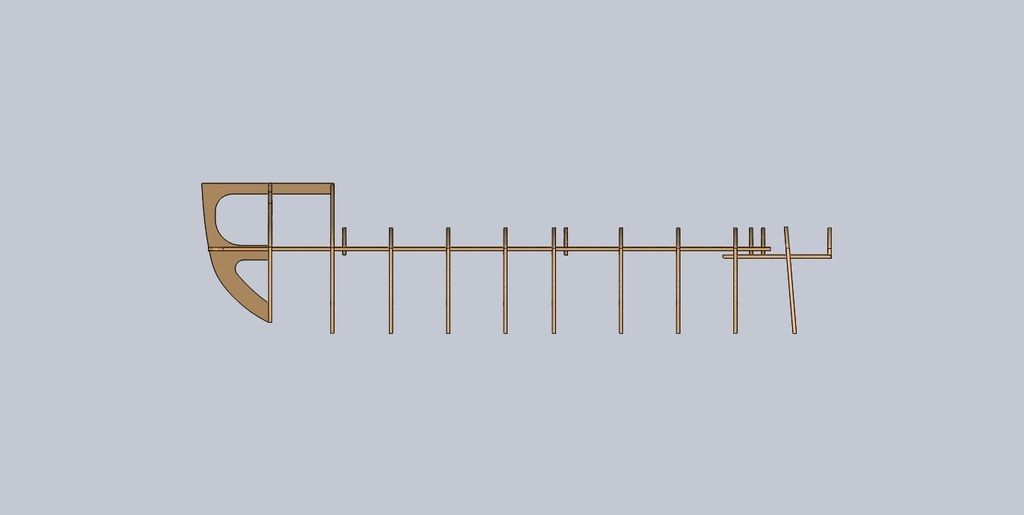
Here are a few photo's of the structure. It is all laser cut and interlocking so you can assemble the entire thing flat on a table without any glue. Weight without the skin is 1 ounce with a combination of balsa and lite ply. I'll probably end up using light ply for the majority of it for the extra ruggedness.


Old 04-21-2015, 05:42 PM
  #336  
invertmast
Thread Starter
My Feedback: (23)
 
invertmast's Avatar
 
Join Date: Dec 2003
Location: Capon Bridge, WV
Posts: 8,198
Received 225 Likes on 116 Posts
Default

Parting planes for the stabs are done. I'll mold them in the same parting plane (which is 99% perfect from one side to the next) to save myself some time and labor.


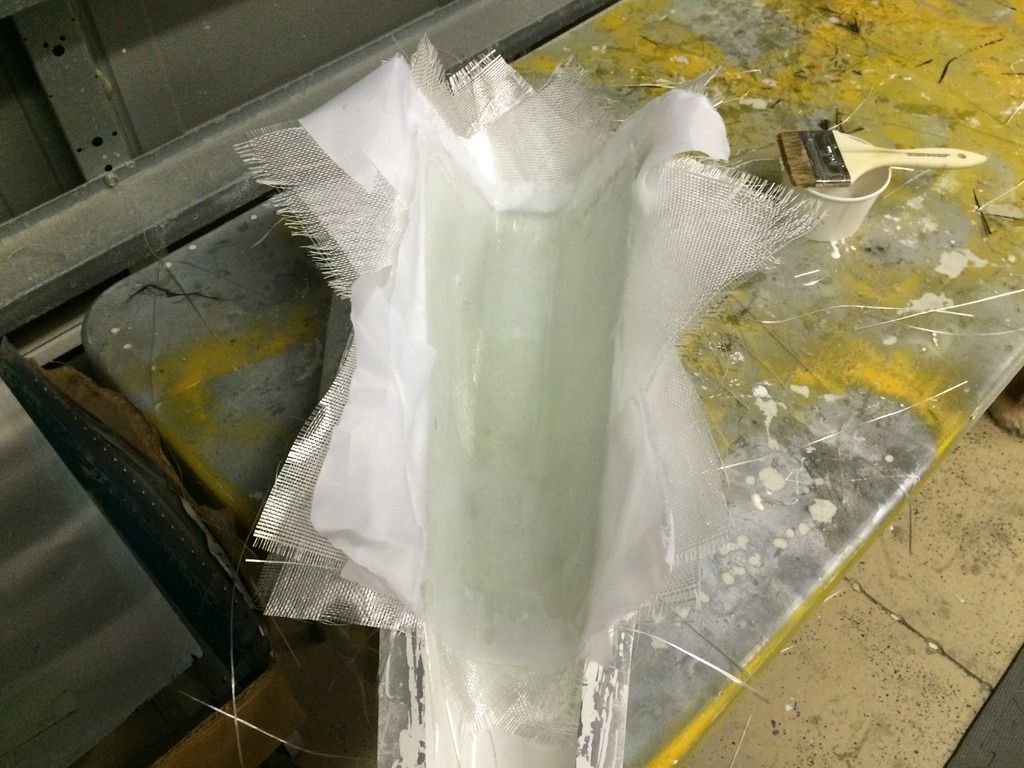
I also did the vacuum form tool layup for the canopy.


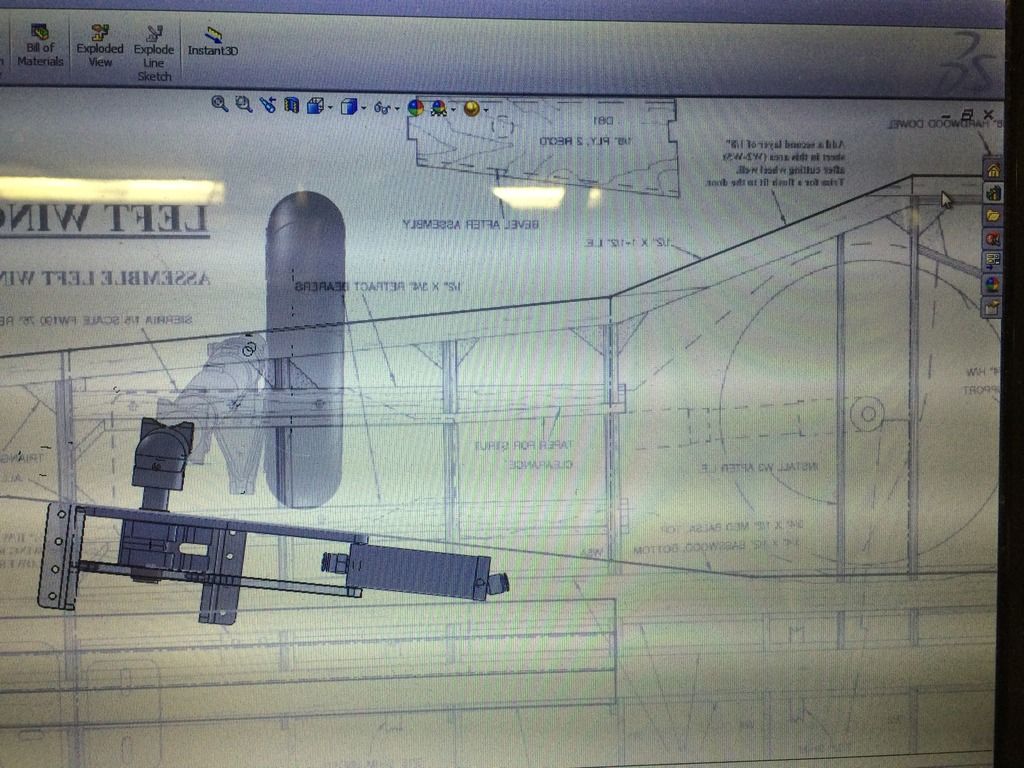
And the landing gear design is done. Here is the retract mechanism, strut and wheel overlaid over the plans with the scale spar face location. The oleo is full compressed and is right at the wing leading edge, so im happy with the final design.


Old 04-30-2015, 03:32 PM
  #337  
invertmast
Thread Starter
My Feedback: (23)
 
invertmast's Avatar
 
Join Date: Dec 2003
Location: Capon Bridge, WV
Posts: 8,198
Received 225 Likes on 116 Posts
Default

Now that the past week is over with and while i wait on parts for the airplane at work, i have a few days to do something fun.


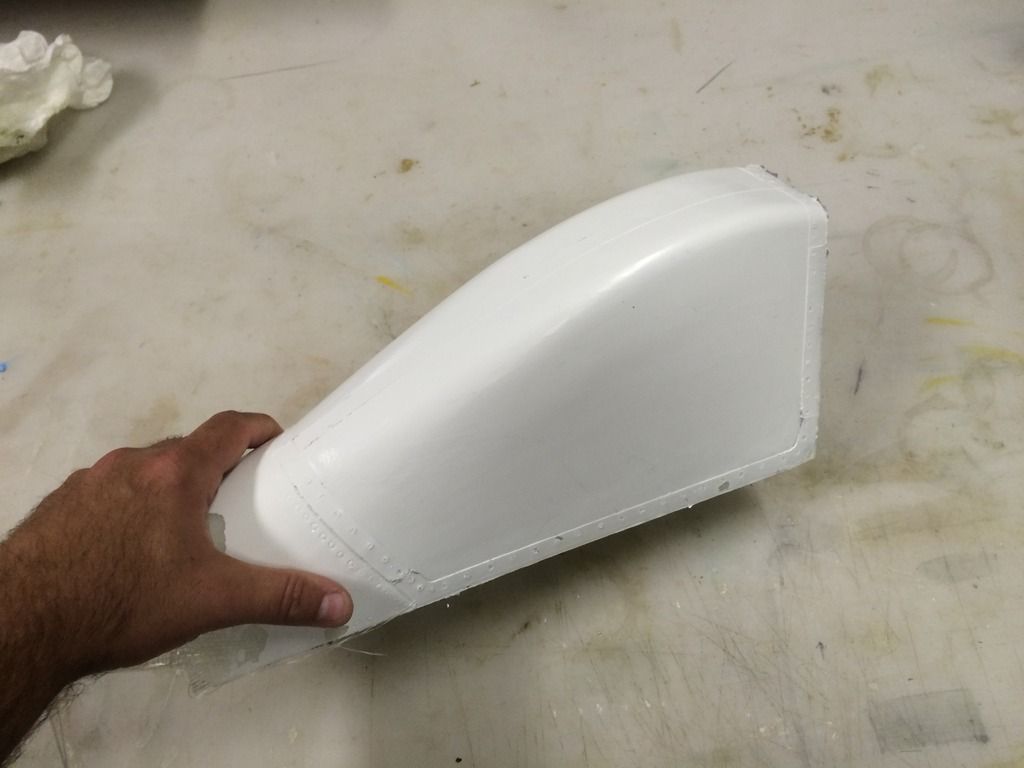
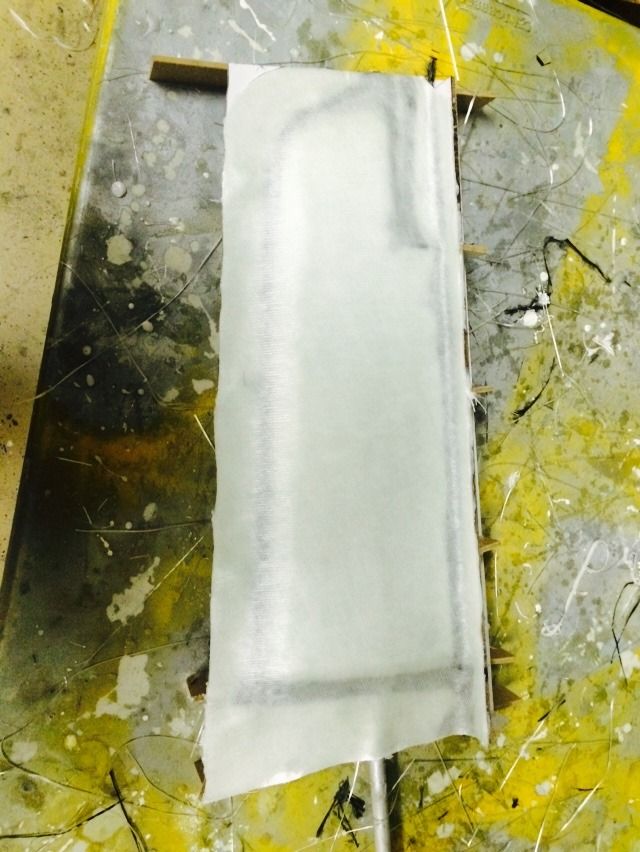
I pulled the vacuum form layup from the canopy frame mold. Ill add some balsa structure to the inside and then pull a few canopies.


I also have the first half of the first stab half molded. Tomorrow i hole to finish this mold and get the first half of the other done as well. Then after topgun on saturday, finish the second stab half mold.


Sunday will most probably be a parting plane day for the fuselage.


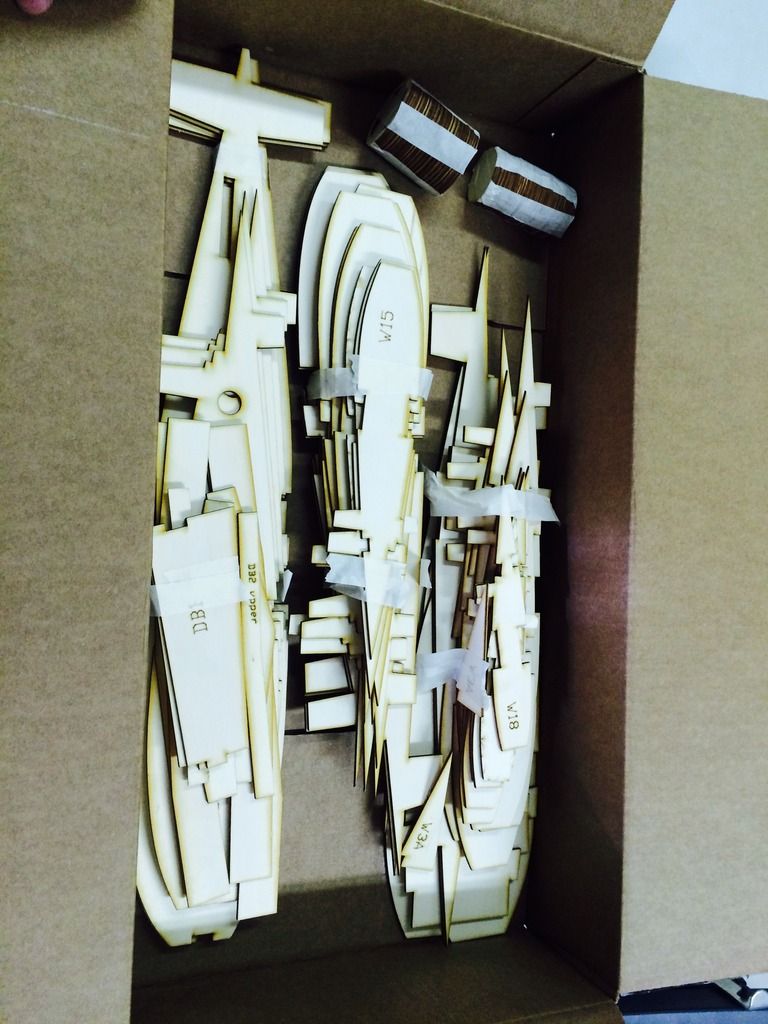
The redesigned wing laser cut ribs and parts also arrived. Since these are just for a plug, i left all of the lightening holed out of them. Once the fuse is molded and the tube sockets arrive, ill start building the new wing.


Old 05-03-2015, 05:23 PM
  #338  
invertmast
Thread Starter
My Feedback: (23)
 
invertmast's Avatar
 
Join Date: Dec 2003
Location: Capon Bridge, WV
Posts: 8,198
Received 225 Likes on 116 Posts
Default

The stab molds are all done.. And

8 hours of work and the fuselage parting planes are done:


I need to get some more cheap bowls and chip brushes, then its time to mold this thing.
Old 05-03-2015, 05:36 PM
  #339  
fw190
My Feedback: (37)
 
Join Date: Jan 2002
Location: Burbank, CA,
Posts: 1,418
Received 2 Likes on 2 Posts
Default

That is going to be an long fuselage, have you thought about making it two pieces? Where the tail fits over the front portion of the fuselage. Just something you may need to consider before making a mold
Old 05-03-2015, 05:38 PM
  #340  
Melchizedek
 
Melchizedek's Avatar
 
Join Date: Jul 2012
Location: Missouri
Posts: 1,127
Likes: 0
Received 0 Likes on 0 Posts
Default

Thomas,

When you mold it. Will you include cloth weights, number of ply's and any other materials used.
I wish to do this one day also.

Love watching your creations

Thanks

Kevin
Old 05-03-2015, 05:44 PM
  #341  
invertmast
Thread Starter
My Feedback: (23)
 
invertmast's Avatar
 
Join Date: Dec 2003
Location: Capon Bridge, WV
Posts: 8,198
Received 225 Likes on 116 Posts
Default

Originally Posted by fw190
That is going to be an long fuselage, have you thought about making it two pieces? Where the tail fits over the front portion of the fuselage. Just something you may need to consider before making a mold

Yea i realized i forgot to do the one where the tail extension bolts to the forwars fuse on the real thing. Im going to do all US based fuselages as one piece (unless requested otherwise) and all international fuse's as two piece where the tail section bolts on.
Old 05-03-2015, 05:45 PM
  #342  
invertmast
Thread Starter
My Feedback: (23)
 
invertmast's Avatar
 
Join Date: Dec 2003
Location: Capon Bridge, WV
Posts: 8,198
Received 225 Likes on 116 Posts
Default

Originally Posted by Melchizedek
Thomas,

When you mold it. Will you include cloth weights, number of ply's and any other materials used.
I wish to do this one day also.

Love watching your creations

Thanks

Kevin
One layer of 3oz
two of 6oz
1 of 18oz
2 of 6oz
1 of 3oz
Old 05-04-2015, 03:15 PM
  #343  
invertmast
Thread Starter
My Feedback: (23)
 
invertmast's Avatar
 
Join Date: Dec 2003
Location: Capon Bridge, WV
Posts: 8,198
Received 225 Likes on 116 Posts
Default

Now the parting planes are all done:

Old 05-04-2015, 04:34 PM
  #344  
invertmast
Thread Starter
My Feedback: (23)
 
invertmast's Avatar
 
Join Date: Dec 2003
Location: Capon Bridge, WV
Posts: 8,198
Received 225 Likes on 116 Posts
Default

The torture fest... Err molding has begun:


Old 05-04-2015, 05:28 PM
  #345  
Melchizedek
 
Melchizedek's Avatar
 
Join Date: Jul 2012
Location: Missouri
Posts: 1,127
Likes: 0
Received 0 Likes on 0 Posts
Default

Exciting it is...

Kevin
Old 05-04-2015, 05:57 PM
  #346  
Melchizedek
 
Melchizedek's Avatar
 
Join Date: Jul 2012
Location: Missouri
Posts: 1,127
Likes: 0
Received 0 Likes on 0 Posts
Default

Thomas,

Will you use a filler in the tight corners for the glass to bridge ?
Or will the 3 oz conform to the corners.

Thanks,

Kevin
Old 05-04-2015, 06:01 PM
  #347  
invertmast
Thread Starter
My Feedback: (23)
 
invertmast's Avatar
 
Join Date: Dec 2003
Location: Capon Bridge, WV
Posts: 8,198
Received 225 Likes on 116 Posts
Default

Originally Posted by Melchizedek
Thomas,

Will you use a filler in the tight corners for the glass to bridge ?
Or will the 3 oz conform to the corners.

Thanks,

Kevin
I put small strips in the corner, then put 50k carbon tow in the corner. Then make a fillet with filler and a large piece of 3oz to go over the whole thing.
Old 05-04-2015, 10:01 PM
  #348  
invertmast
Thread Starter
My Feedback: (23)
 
invertmast's Avatar
 
Join Date: Dec 2003
Location: Capon Bridge, WV
Posts: 8,198
Received 225 Likes on 116 Posts
Default

First section done:


Old 05-05-2015, 09:19 AM
  #349  
invertmast
Thread Starter
My Feedback: (23)
 
invertmast's Avatar
 
Join Date: Dec 2003
Location: Capon Bridge, WV
Posts: 8,198
Received 225 Likes on 116 Posts
Default

First coat of resin on the front segment.


Old 05-05-2015, 04:31 PM
  #350  
invertmast
Thread Starter
My Feedback: (23)
 
invertmast's Avatar
 
Join Date: Dec 2003
Location: Capon Bridge, WV
Posts: 8,198
Received 225 Likes on 116 Posts
Default

Half way there!


Contact Us - Archive - Advertising - Cookie Policy - Privacy Statement - Terms of Service -

Copyright © 2024 MH Sub I, LLC dba Internet Brands. All rights reserved. Use of this site indicates your consent to the Terms of Use.