Ziroli 92" p-47 build thread
 04-12-2019, 11:36 AM
#151

Jim,
Along that far, one would think it would get done quickly as there isn't a whole lot of work to be done on it.
During the winter, I've been working on my railroad.
https://ogrforum.ogaugerr.com/topic/...ailway?page=26
Plus, I've got enough planes built so I'm in no hurry to complete any more although I would like to complete the P-47 and twin Beechcraft C-45.
 06-30-2019, 04:40 PM
#152
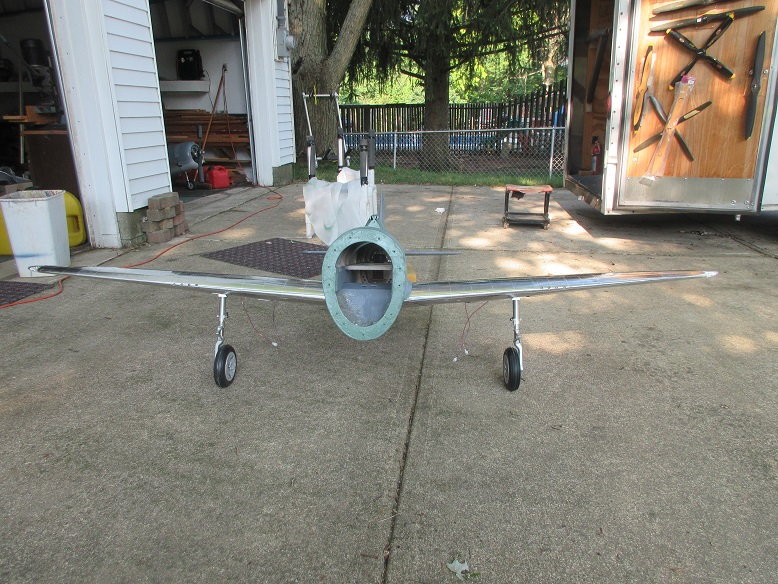
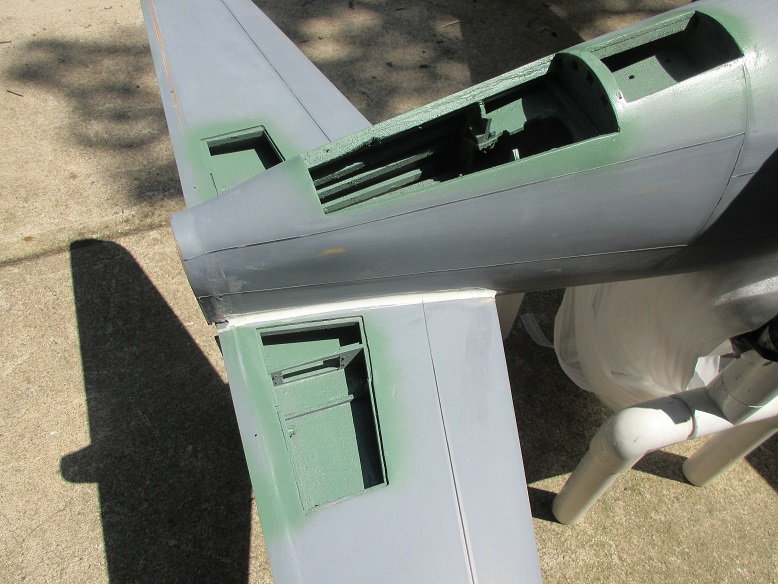
I finally 'broke down' and got the P-47 off the shelf.
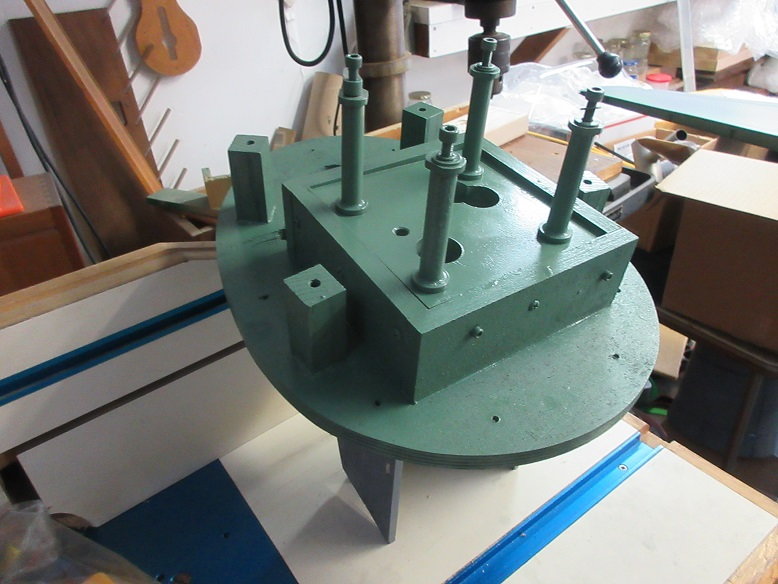
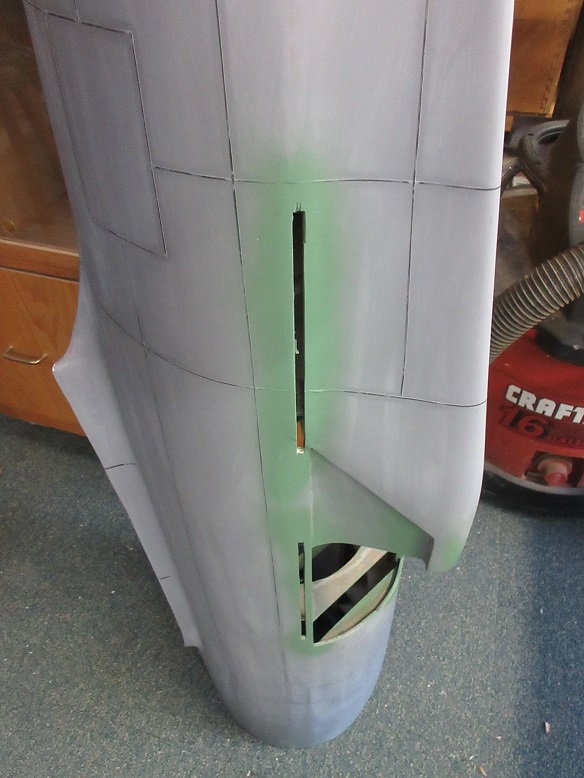
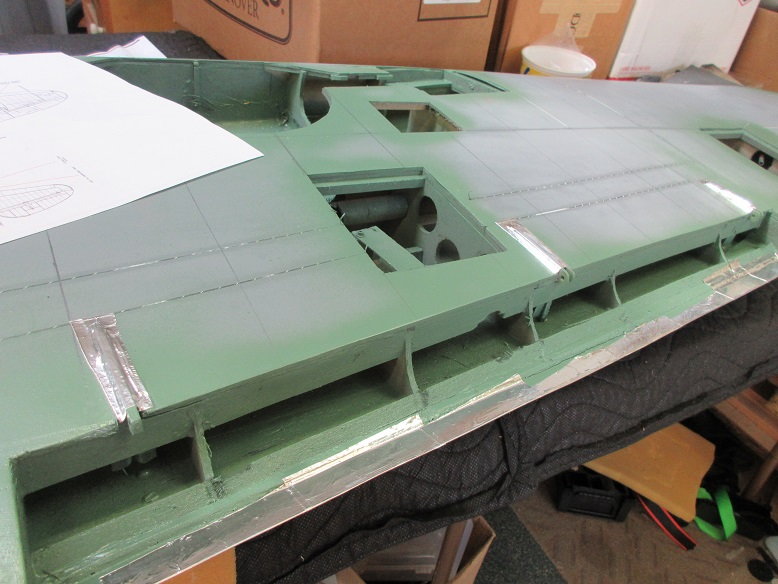
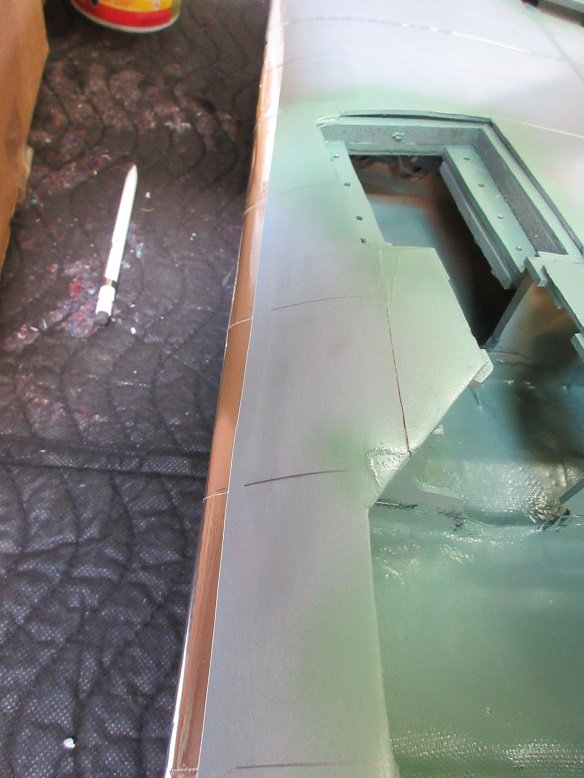
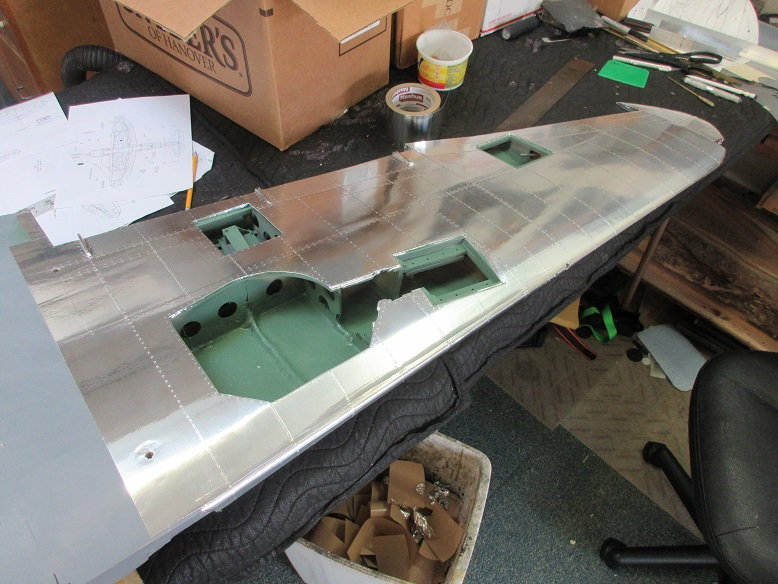
Used some rustoleum moss green to paint the interiors that will be seen.
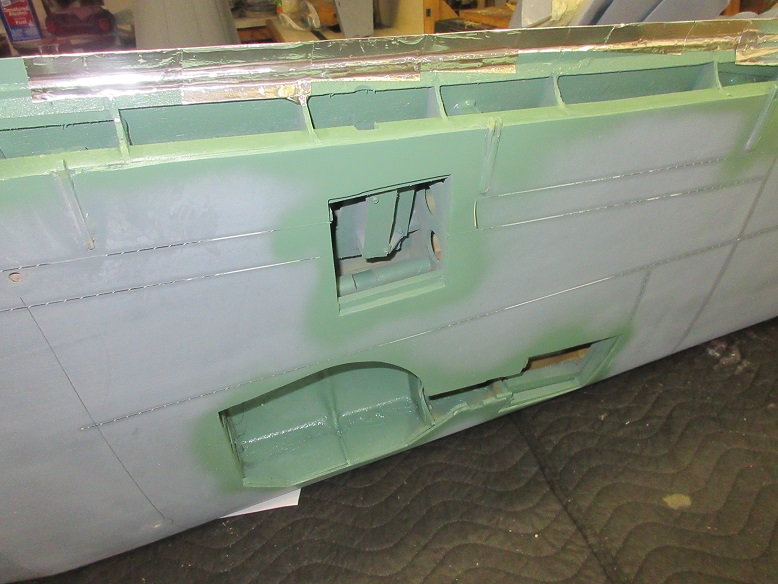
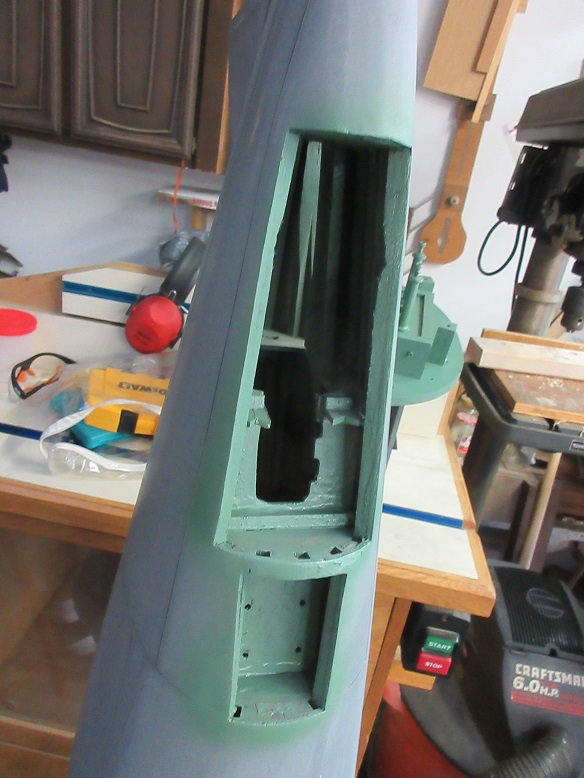
Removable fire wall.
Used a razor saw to cut out the slots for the functioning canopy and final finish with a small flat file.
Was going to cut a hatch in the side of the fuse; front, left side for switches, etc but held off to see if I can think of a better option.
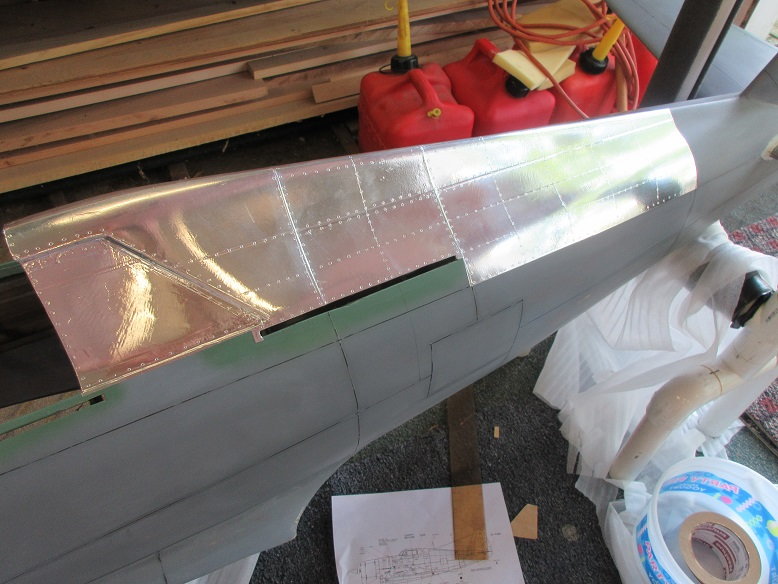
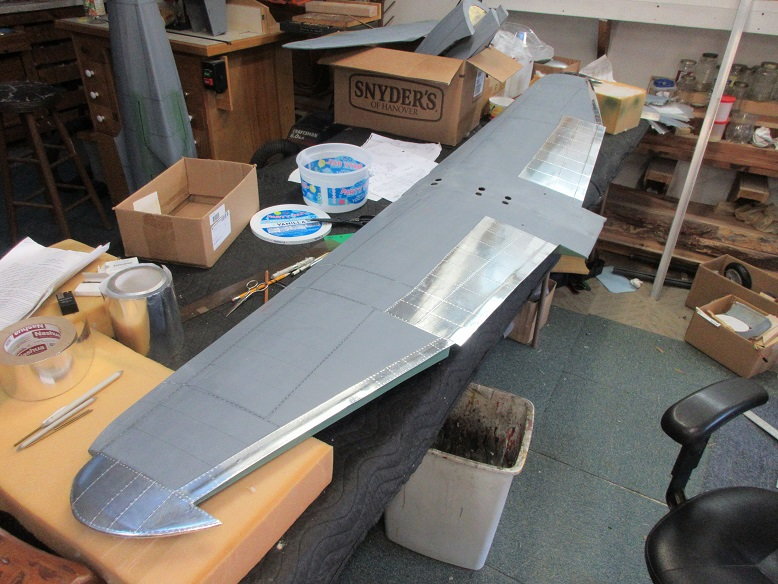
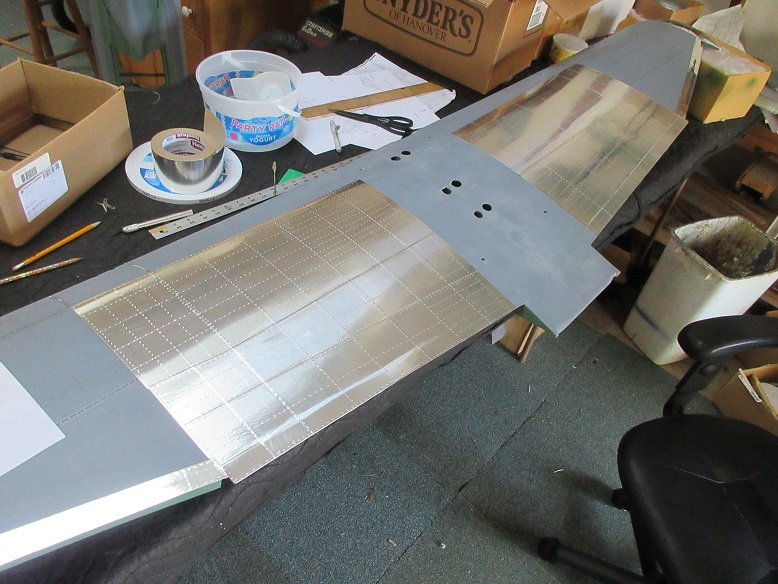
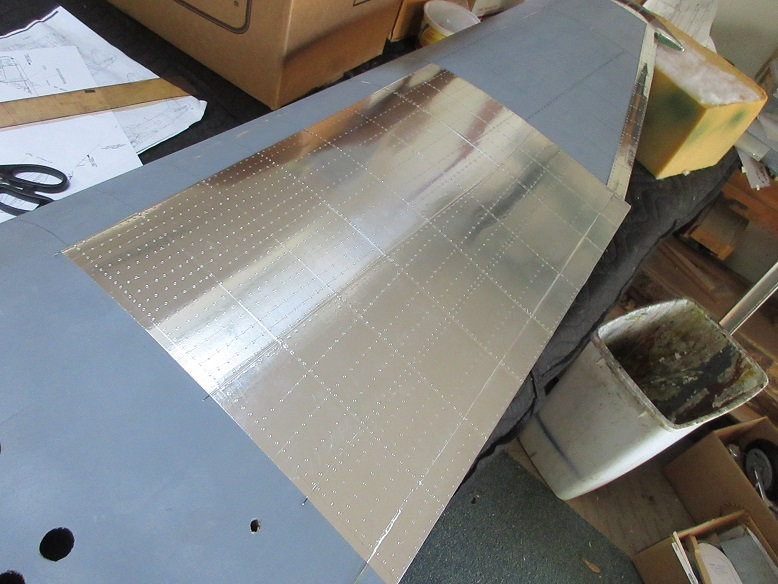
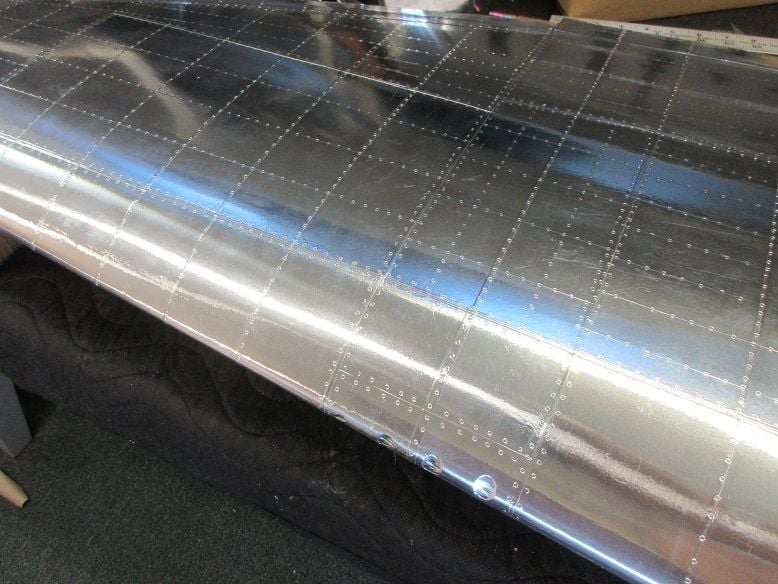
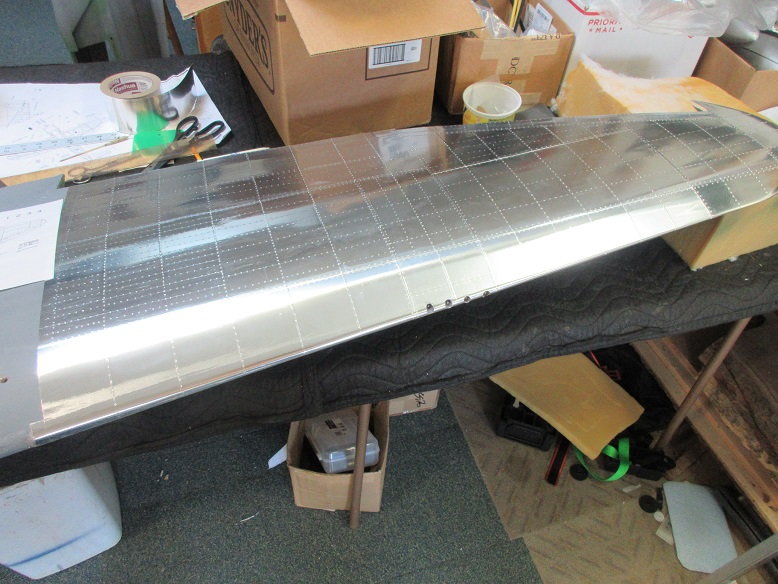
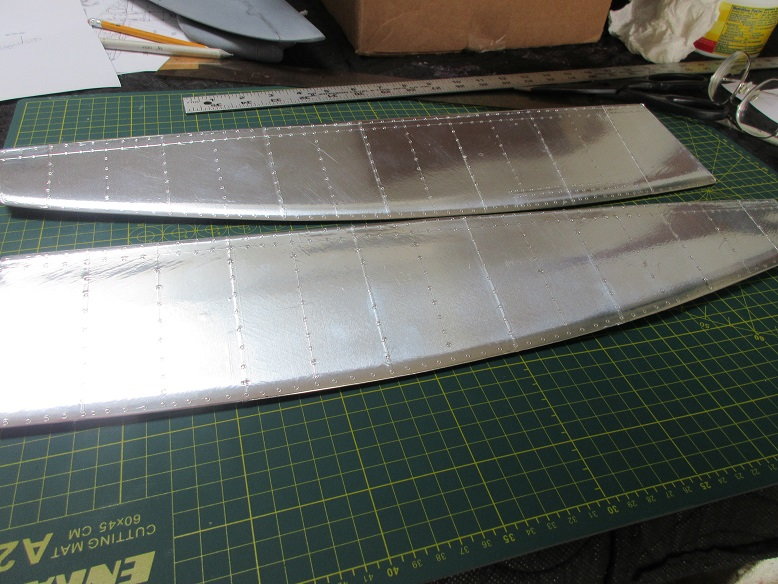
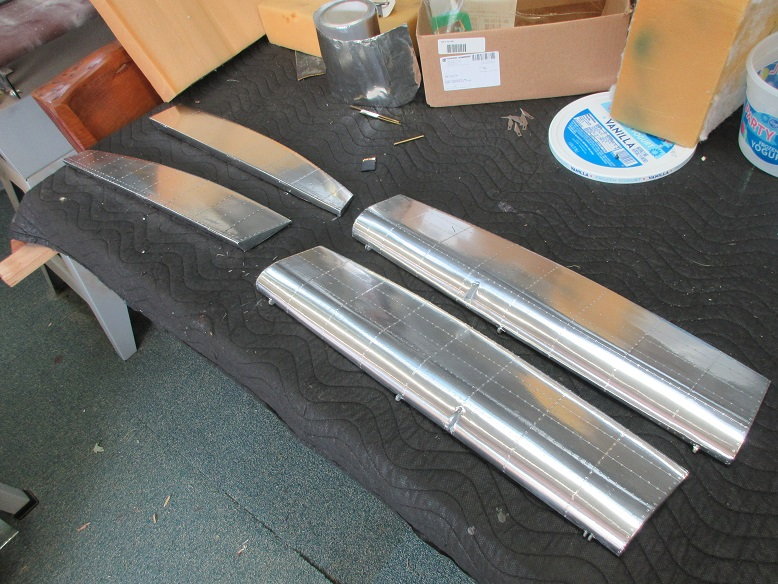
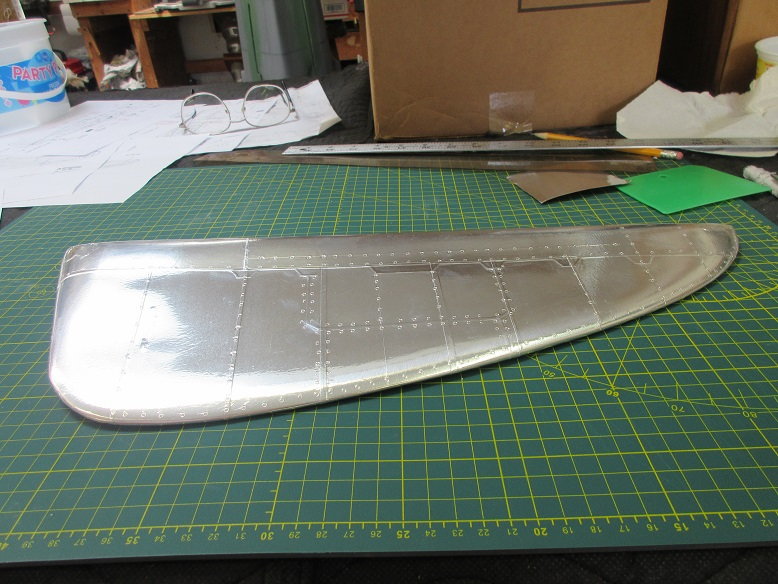
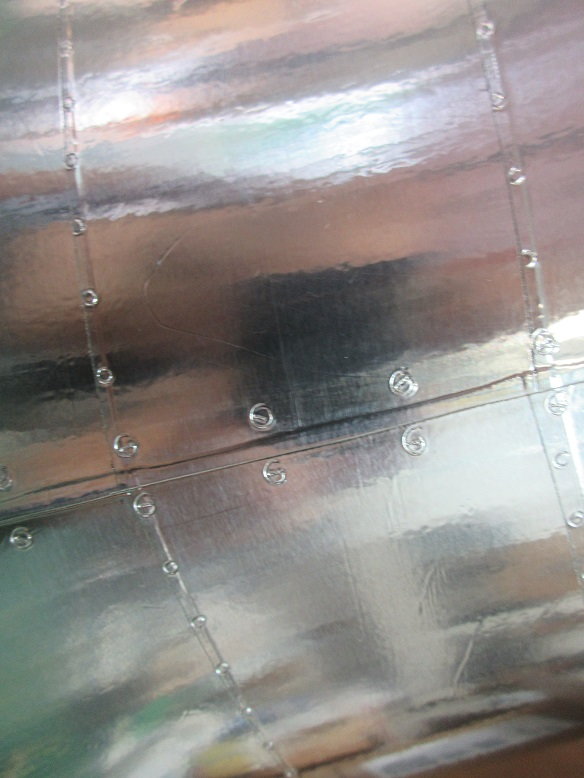
Started applying the aluminum tape to the wings.
I do 'mirror' images of the wing and do all the rivets at the same time to reduce errors.
Panel lines get double row of rivets. Other places, ie wing ribs, get one set of rivets.
This process takes about 130 hours to complete.
The cockpit kit from d-balsa will take several days to complete.
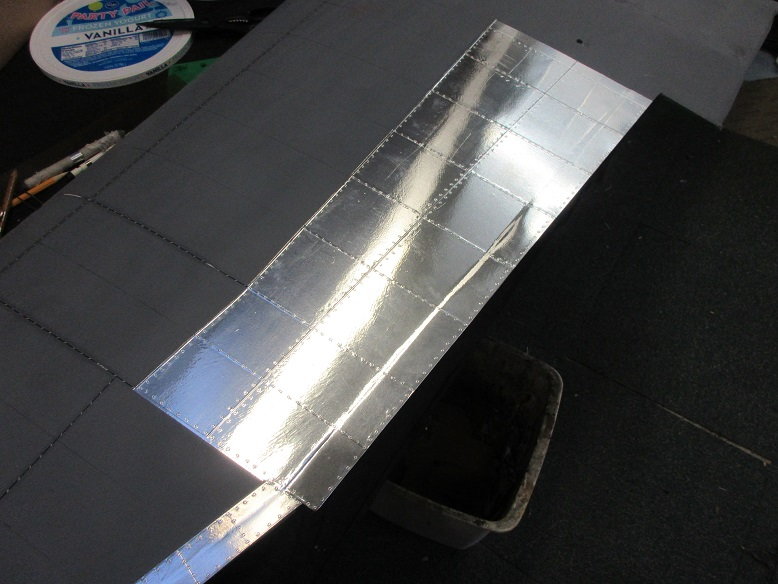
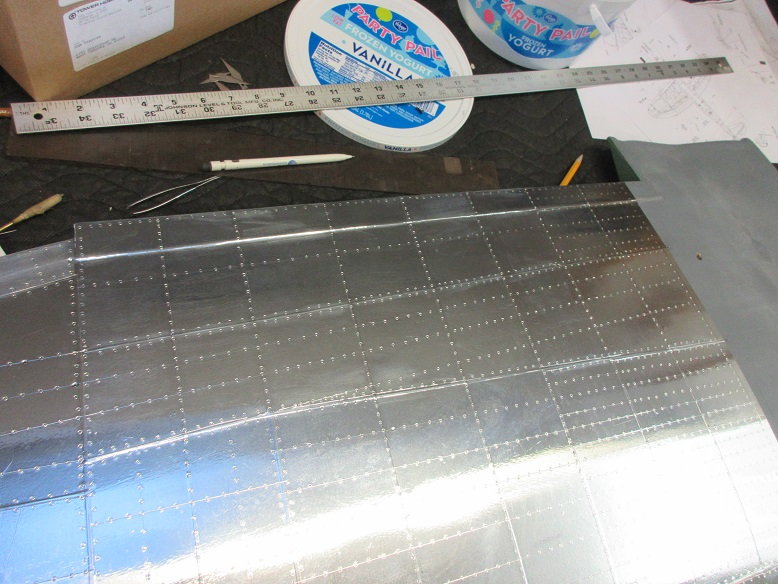
Five individual pieces of tape added.
Tape cut about every 1/4" along the edge to wrap tape around the edge.
Use short pieces.
There are 8 pieces to cover between each wing rib for this panel.
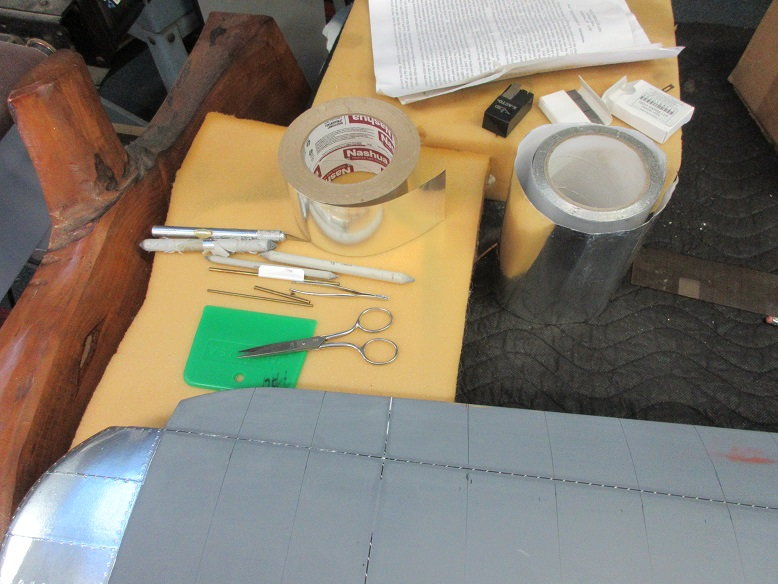
Tools of the trade.
Duct tape from home depot.
Burnishing stumps (rolled up, gray paper) from Michaels.
Sharpened brass tubing.
Bondo applicator from local auto store.
Used some rustoleum moss green to paint the interiors that will be seen.
Removable fire wall.
Used a razor saw to cut out the slots for the functioning canopy and final finish with a small flat file.
Was going to cut a hatch in the side of the fuse; front, left side for switches, etc but held off to see if I can think of a better option.
Started applying the aluminum tape to the wings.
I do 'mirror' images of the wing and do all the rivets at the same time to reduce errors.
Panel lines get double row of rivets. Other places, ie wing ribs, get one set of rivets.
This process takes about 130 hours to complete.
The cockpit kit from d-balsa will take several days to complete.
Five individual pieces of tape added.
Tape cut about every 1/4" along the edge to wrap tape around the edge.
Use short pieces.
There are 8 pieces to cover between each wing rib for this panel.
Tools of the trade.
Duct tape from home depot.
Burnishing stumps (rolled up, gray paper) from Michaels.
Sharpened brass tubing.
Bondo applicator from local auto store.
Last edited by samparfitt; 06-30-2019 at 04:54 PM.


 07-01-2019, 04:49 PM
#156
Thanka, 6 guns.
It's a very riveting experience.
=========
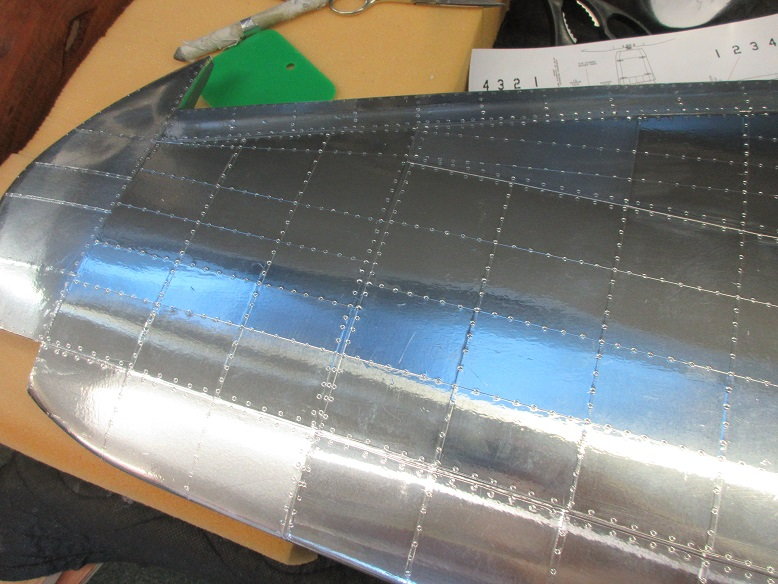
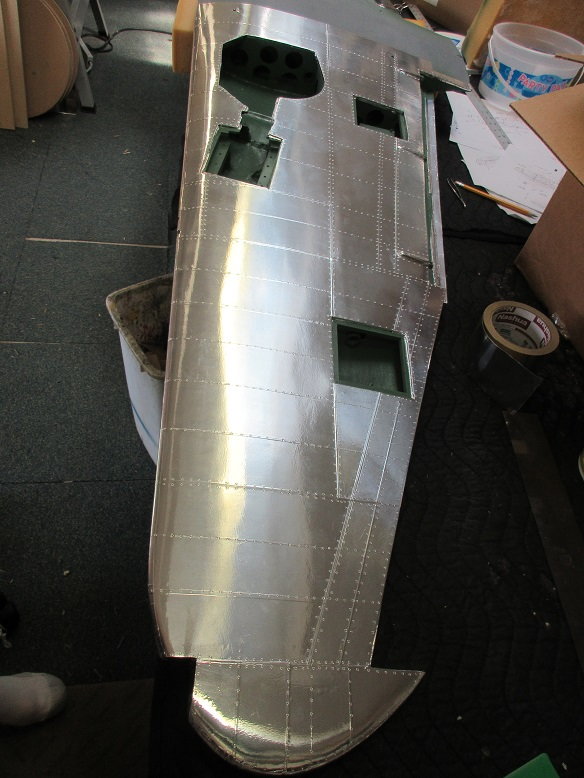
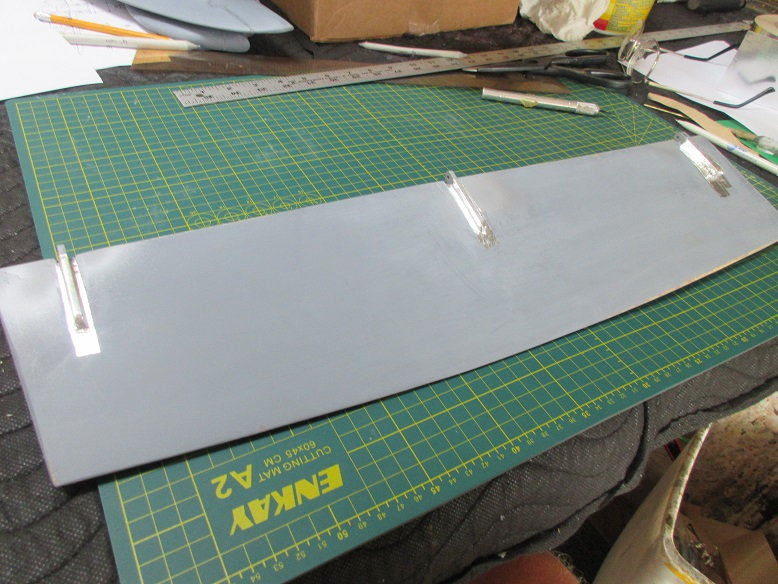
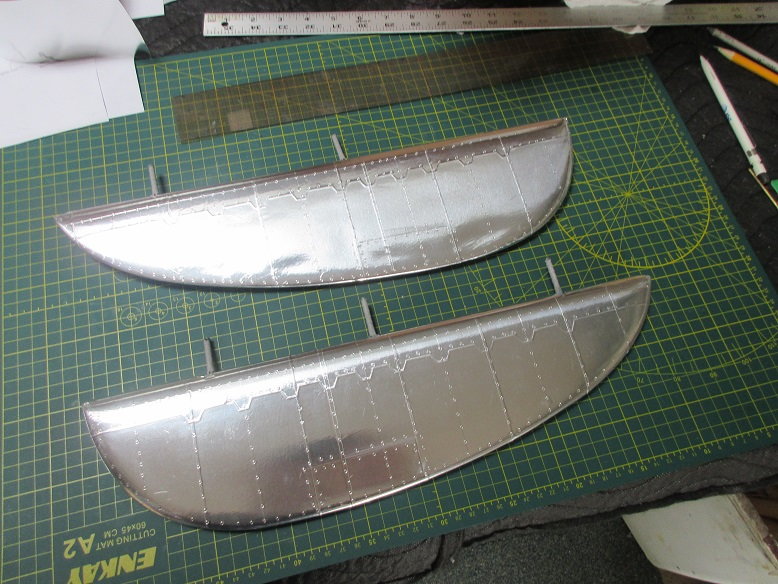
Aluminum tape application (cont)
A cutting board saves on the x-acto blades.

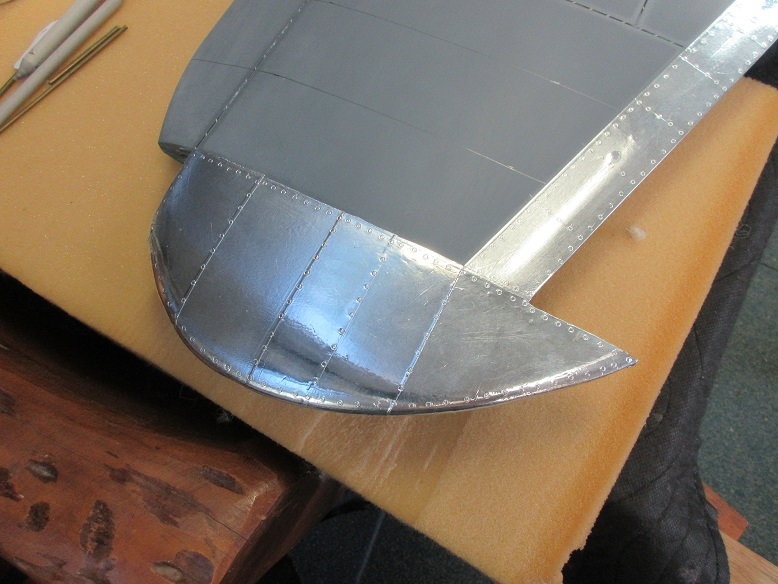
First, the intersections are 'riveted' to keep me from making errors.
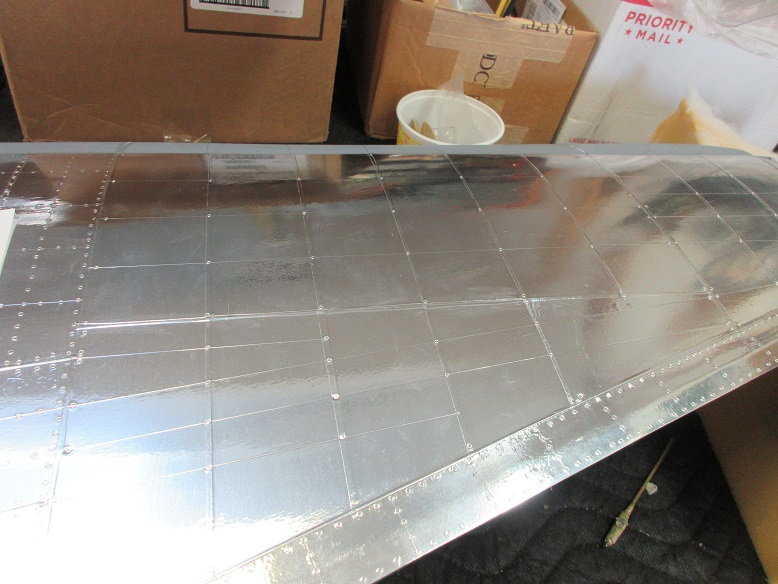
One quarter of one wing done.

It's a very riveting experience.
=========
Aluminum tape application (cont)
A cutting board saves on the x-acto blades.
First, the intersections are 'riveted' to keep me from making errors.
One quarter of one wing done.
Last edited by samparfitt; 07-01-2019 at 04:55 PM.
07-02-2019, 06:11 AM
#158
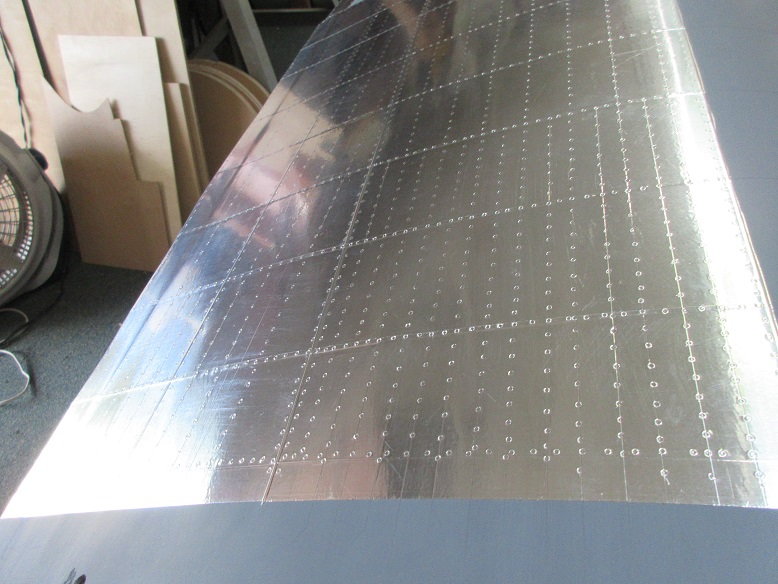
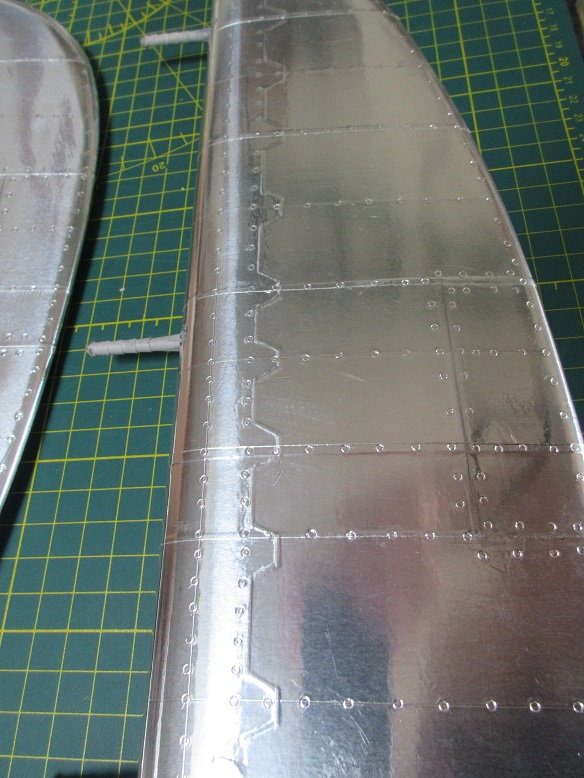
I'm using a 1/16" brass tubing sharping on one end.
In reality, we cannot see the rivets from the distance that we stand to our models, compared to the same distance of a full size aircraft, but then it wouldn't look cool!
A thorough coverage of this can be found in the Robart P-47 ARF thread where I first tried using aluminum tape starting at post #100:
http://www.rcuniverse.com/forum/rc-warbirds-warplanes-200/8016112-robarts-ziroli-92%22-arf-p-47-assembly-4.html
Memories: Boy, that was back in 2008. Had over 300 flights on that plane.
After putting aluminum on that first plane, I decided to cover all my planes if they flew that way.
I enjoy seeing the plane fly on a clear, blue sky day as it looks like a full size aircraft.
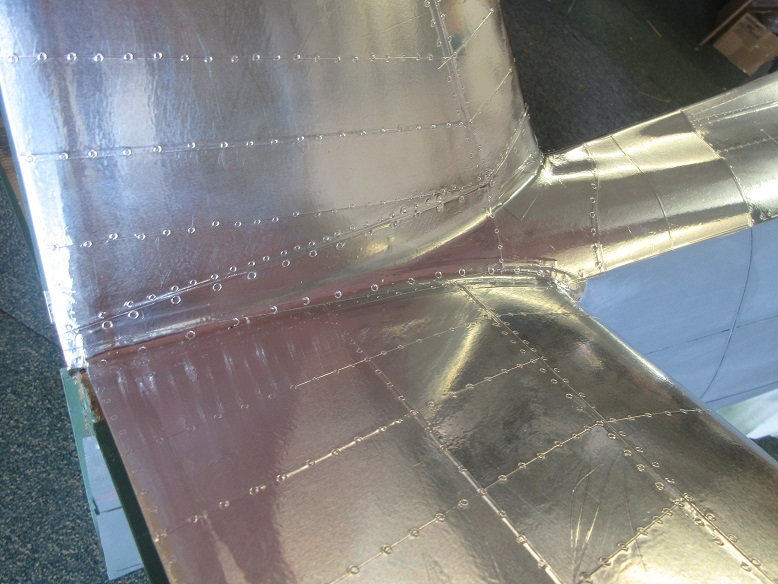
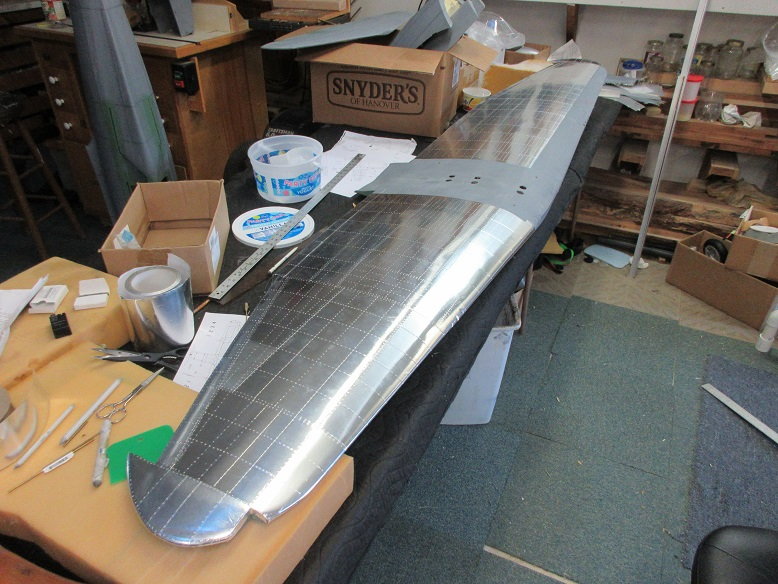
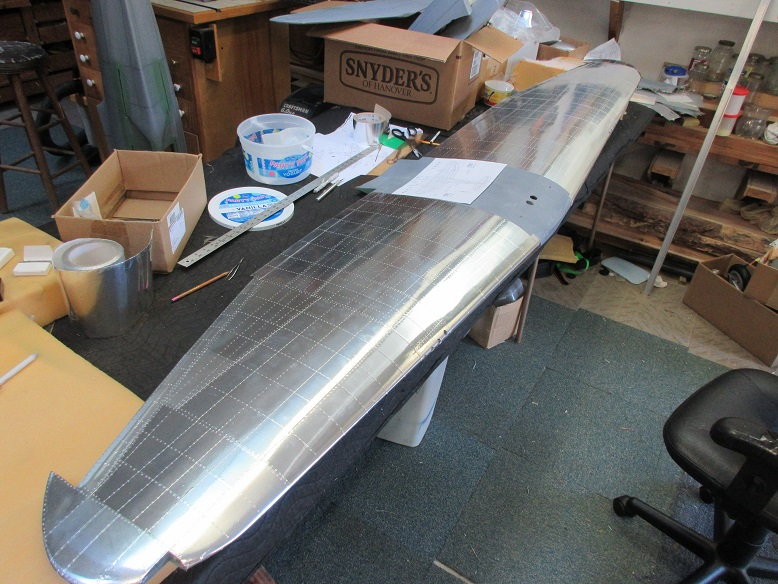
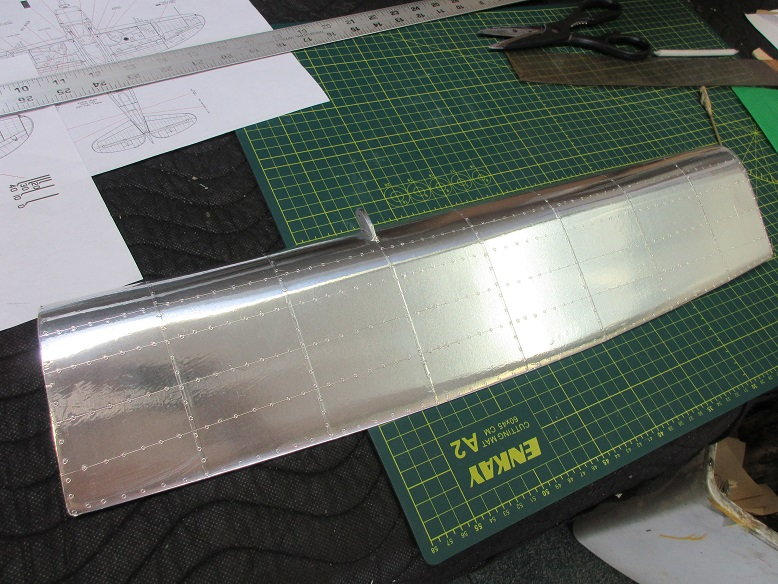
===============
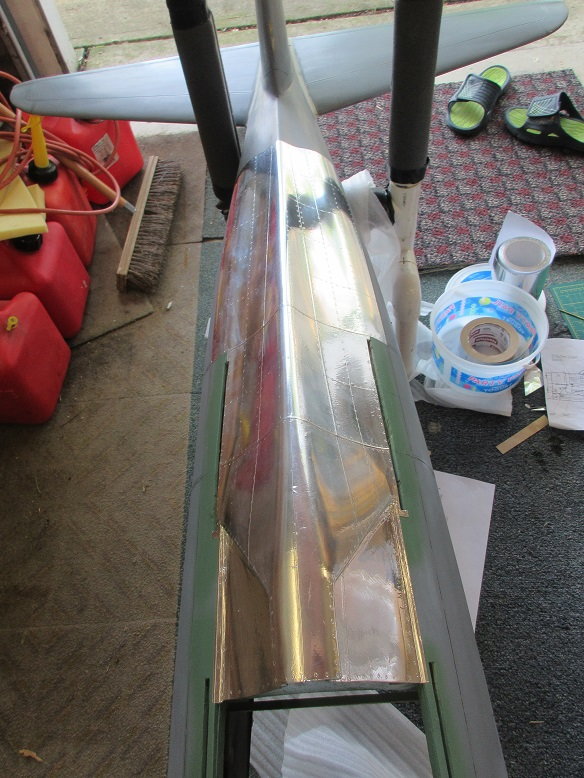
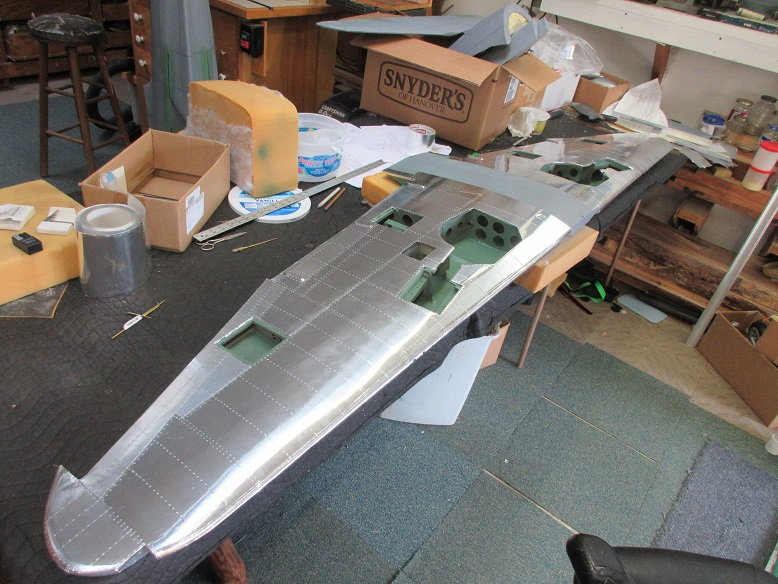
Aluminum finish (cont)
Top wing done.
In reality, we cannot see the rivets from the distance that we stand to our models, compared to the same distance of a full size aircraft, but then it wouldn't look cool!
A thorough coverage of this can be found in the Robart P-47 ARF thread where I first tried using aluminum tape starting at post #100:
http://www.rcuniverse.com/forum/rc-warbirds-warplanes-200/8016112-robarts-ziroli-92%22-arf-p-47-assembly-4.html
Memories: Boy, that was back in 2008. Had over 300 flights on that plane.
After putting aluminum on that first plane, I decided to cover all my planes if they flew that way.
I enjoy seeing the plane fly on a clear, blue sky day as it looks like a full size aircraft.
===============
Aluminum finish (cont)
Top wing done.
Last edited by samparfitt; 07-02-2019 at 06:18 AM.
07-02-2019, 12:01 PM
#160
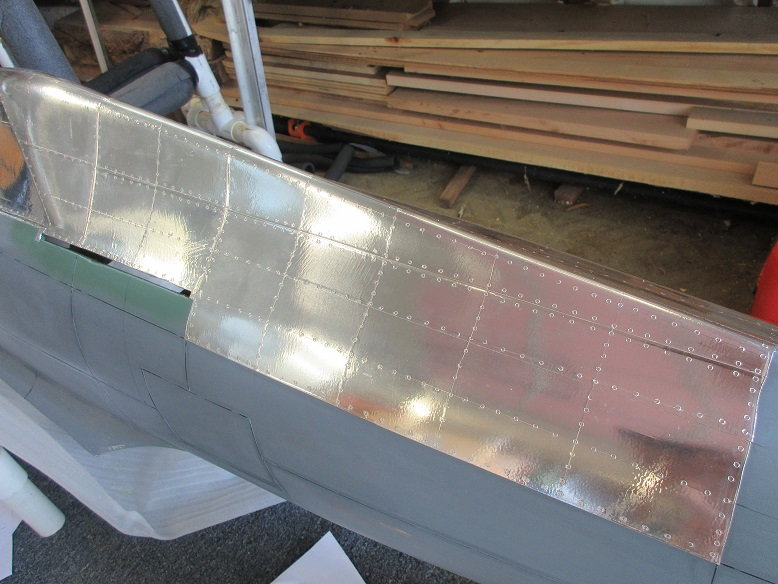
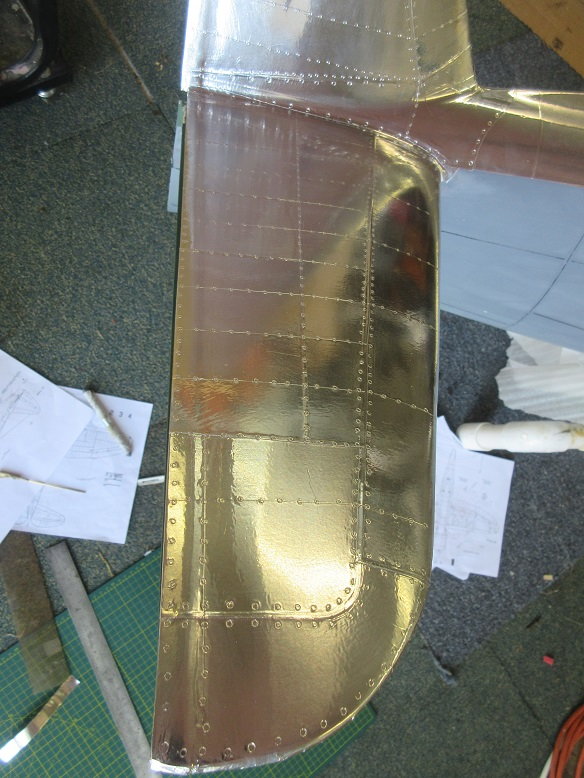
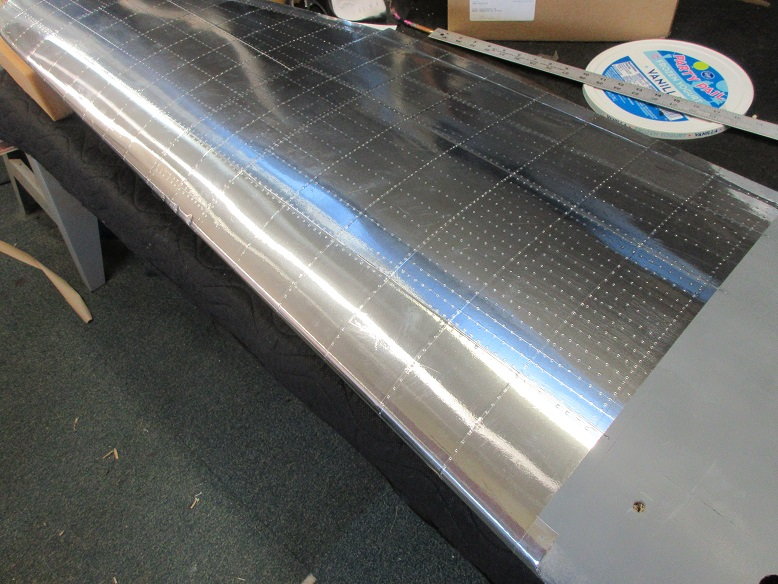
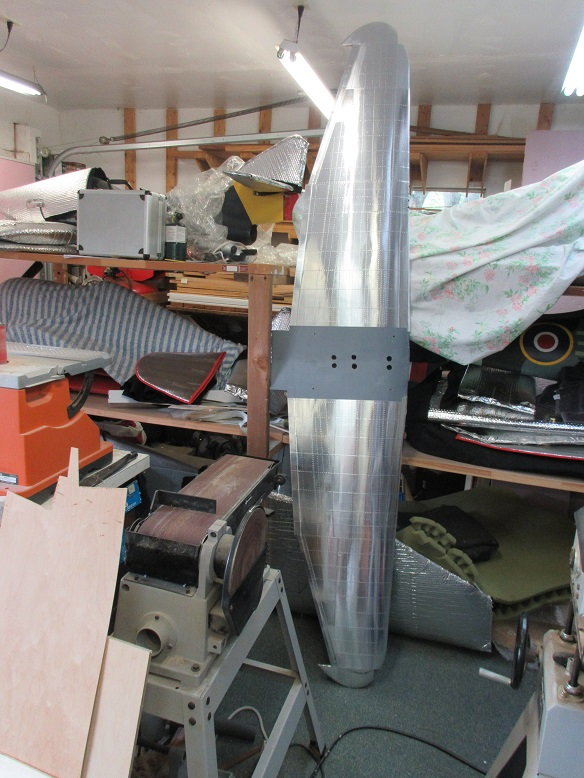
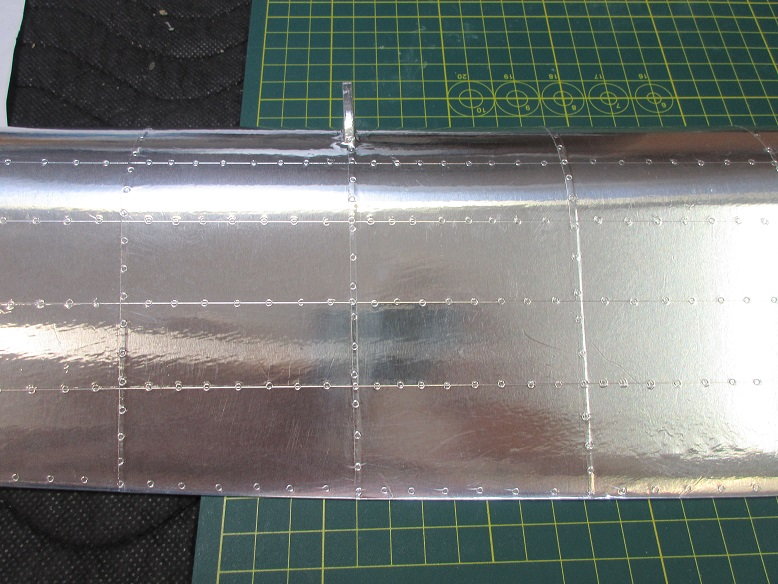
Aluminum application: wings (cont)
Got one side of the bottom wing completed.
With a little luck, I maybe able to get the other side done, today.
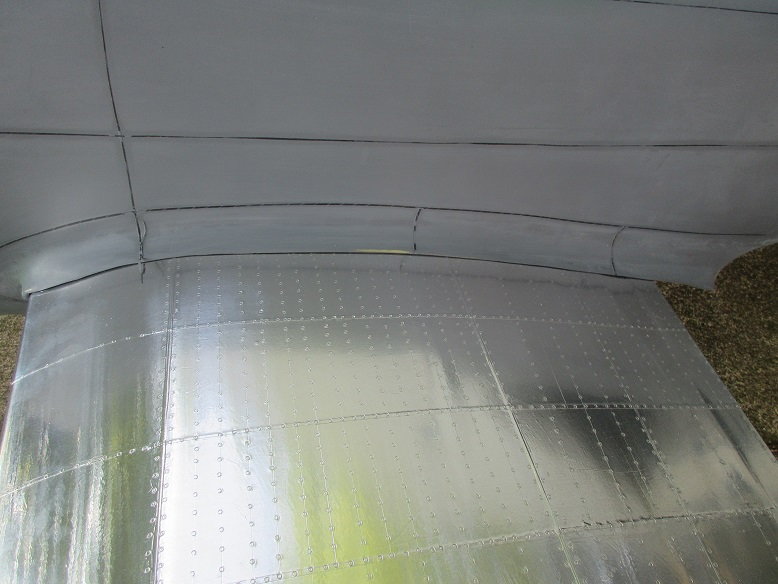
First, covered the 'fowler type' flap hinges.
Trimmed off the top tape that wrapped around the LE.
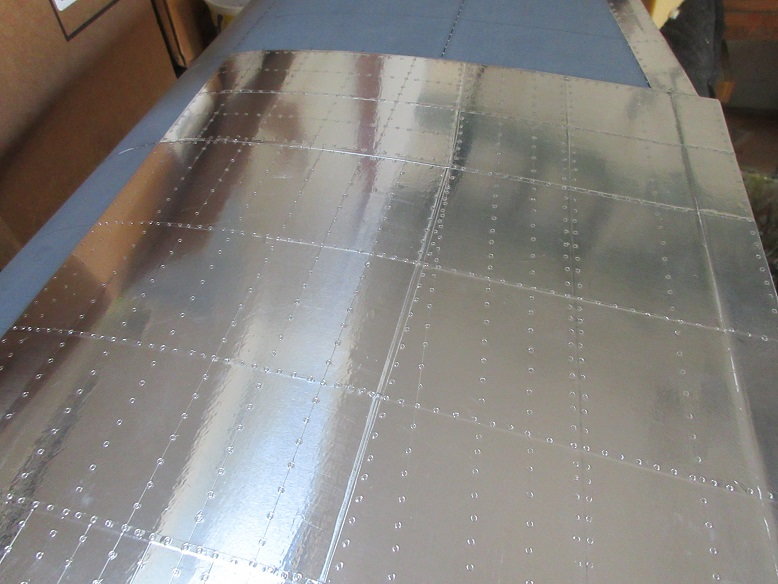
With all the open holes on the bottom, taping is completely different from the top.
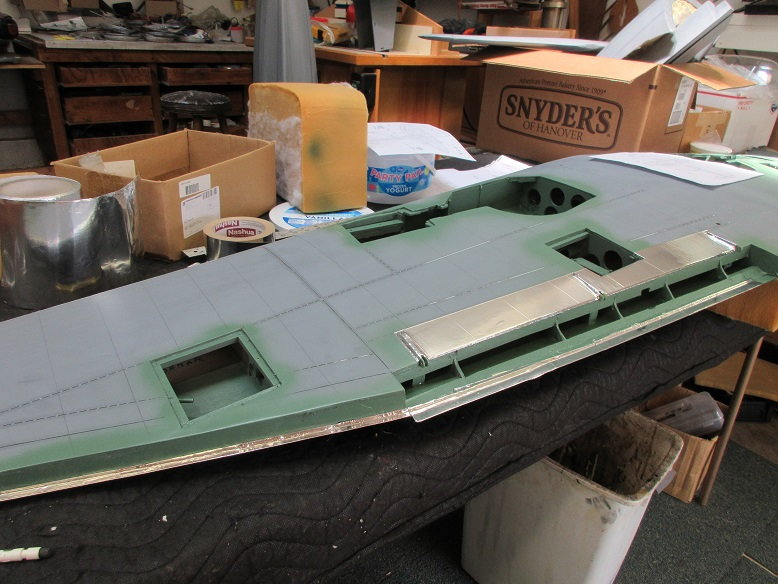
Bottom right wing done.
Initially, I wasn't going to put any rivets on the bottom of the wing since no one ever sees it, but I decided to put the basic rivet detail on.
Got one side of the bottom wing completed.
With a little luck, I maybe able to get the other side done, today.
First, covered the 'fowler type' flap hinges.
Trimmed off the top tape that wrapped around the LE.
With all the open holes on the bottom, taping is completely different from the top.
Bottom right wing done.
Initially, I wasn't going to put any rivets on the bottom of the wing since no one ever sees it, but I decided to put the basic rivet detail on.
Last edited by samparfitt; 07-02-2019 at 12:03 PM.


 07-04-2019, 10:50 AM
#165
6 guns,
The aluminum will not be clear coated but age and get it's own patina.
I use Major Decals for the stars and stripes. They are super thin and will reveal all rivet detail. I bought from them a long time ago so I don't know if they are still in business.
I would get runs under all those rivets so, for me, the decals are the best way to get my desired results.
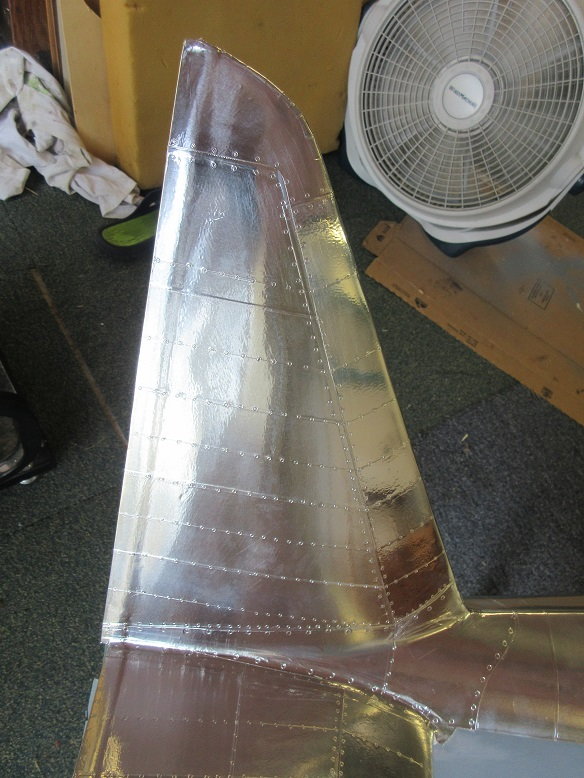
==================
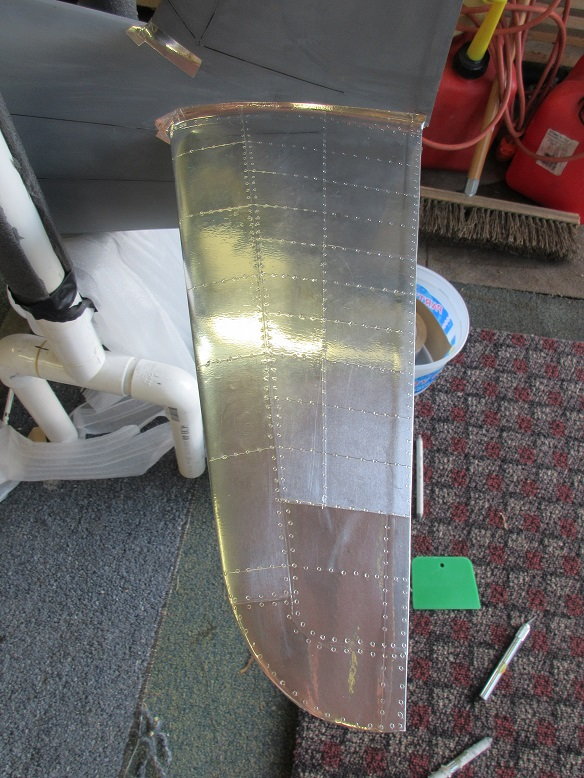
Aluminum application (cont)
Rudder done.
The aluminum will not be clear coated but age and get it's own patina.
I use Major Decals for the stars and stripes. They are super thin and will reveal all rivet detail. I bought from them a long time ago so I don't know if they are still in business.
I would get runs under all those rivets so, for me, the decals are the best way to get my desired results.
==================
Aluminum application (cont)
Rudder done.
07-04-2019, 11:00 AM
#166
Looks like Major decal is still in business but maybe under new ownership.
Used to have to send in a check. Don't know if you can now pay via credit card.
Very cost effective.
Also, I bought lots of sheets of their numbers and letters so I could have more freedom to apply any order of numbers/letters that I wanted.
I'm guessing their decals must be made using some kind of epoxy paint because they are super thin but don't disintegrate when being applied to a surface and these stars and stripes are really large.
https://www.propshophobbies.com/sear...show=90&page=1
Last edited by samparfitt; 07-04-2019 at 11:03 AM.
07-04-2019, 02:05 PM
#167
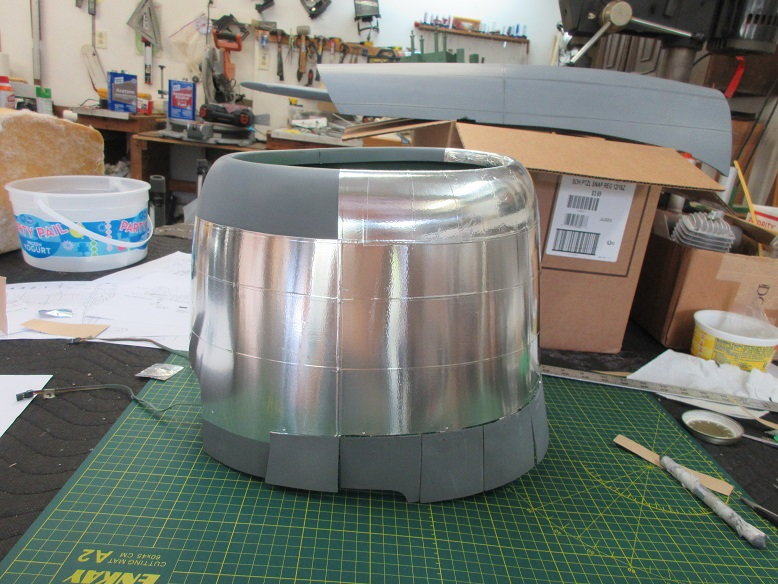
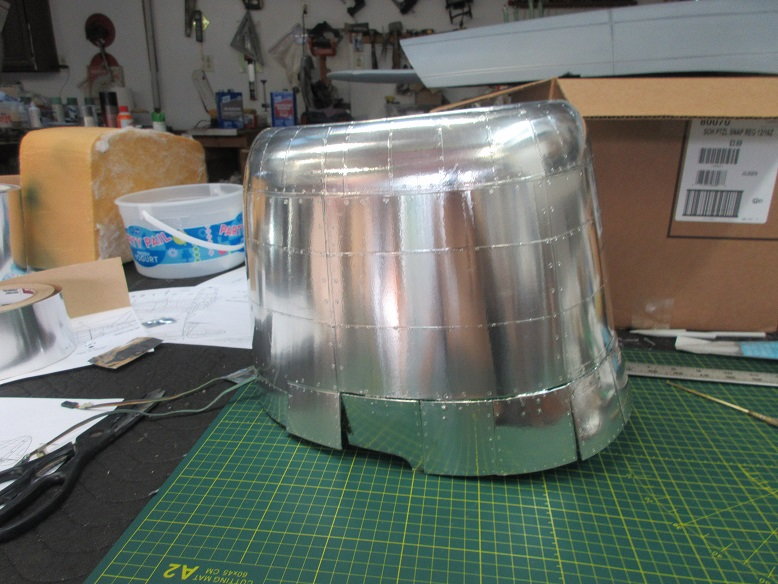
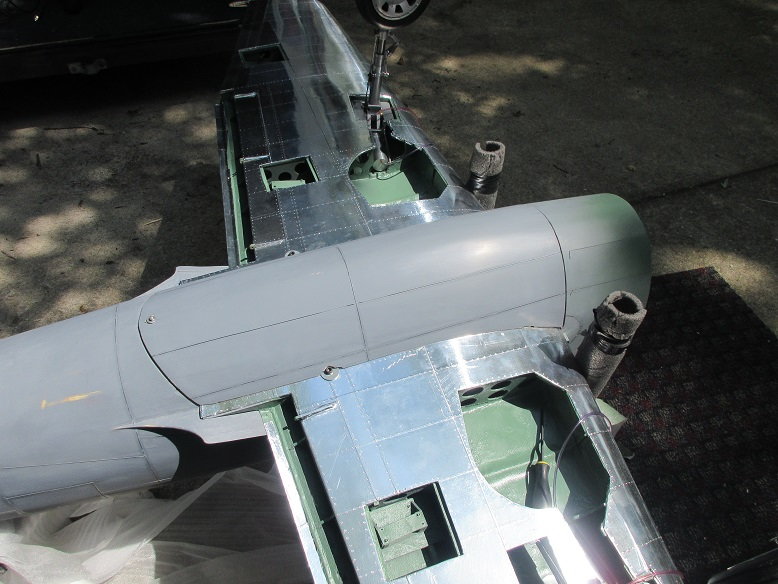
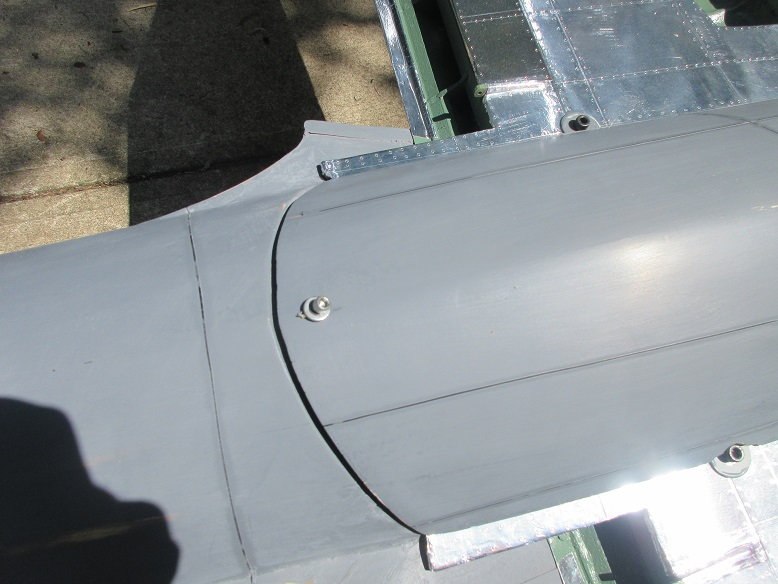
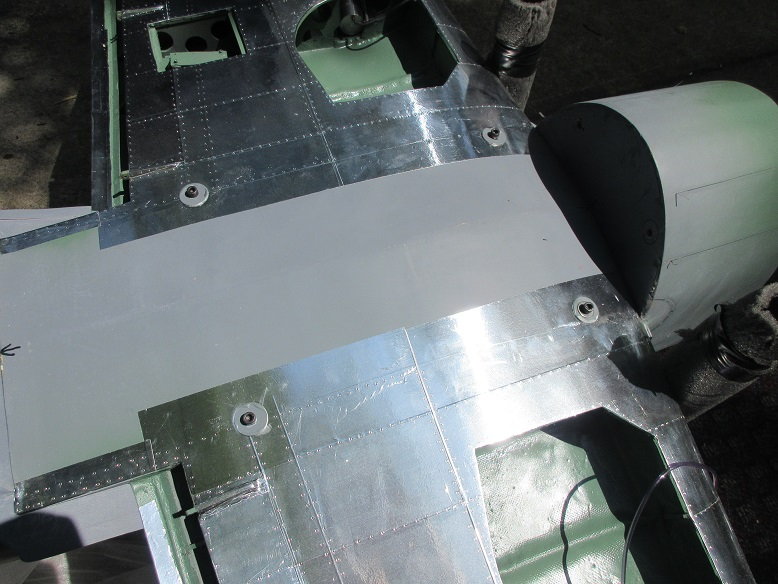
Aluminum application (cont)
Started on the cowl.
With compound curves, especially on the front, the tape pieces have to be narrow.
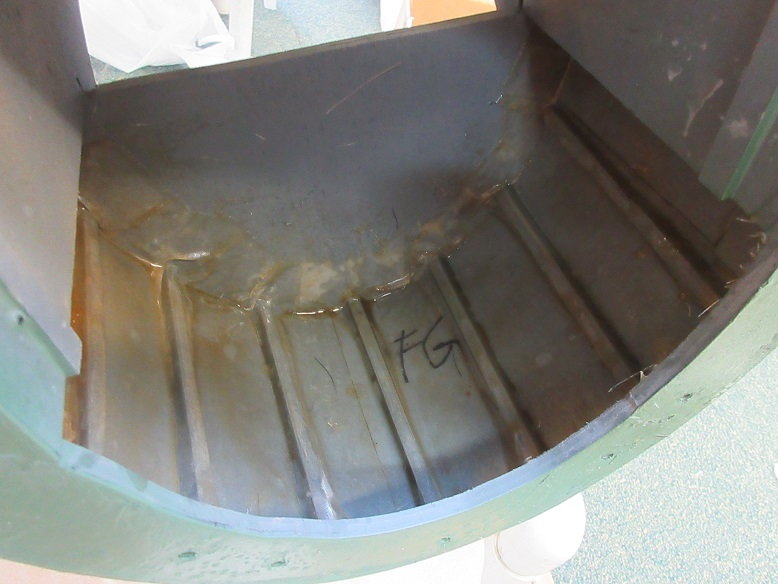
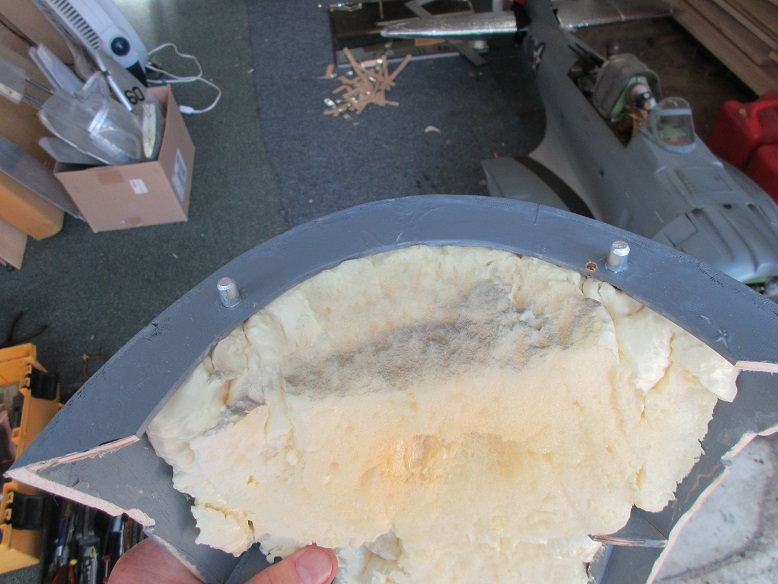
Getting late so I thought I'd FG and resin coat the inside of the fuse between the fire wall and 2nd former. Some 2 oz FG cloth and an extra 2" wider than the distance from the two formers so the edges can cover one inch of each former. Sides had slot cuts about every couple inches to prevent wrinkles. Some Zap finishing resin and it should be cured by morning.
Started on the cowl.
With compound curves, especially on the front, the tape pieces have to be narrow.
Getting late so I thought I'd FG and resin coat the inside of the fuse between the fire wall and 2nd former. Some 2 oz FG cloth and an extra 2" wider than the distance from the two formers so the edges can cover one inch of each former. Sides had slot cuts about every couple inches to prevent wrinkles. Some Zap finishing resin and it should be cured by morning.
 07-05-2019, 08:28 AM
#169
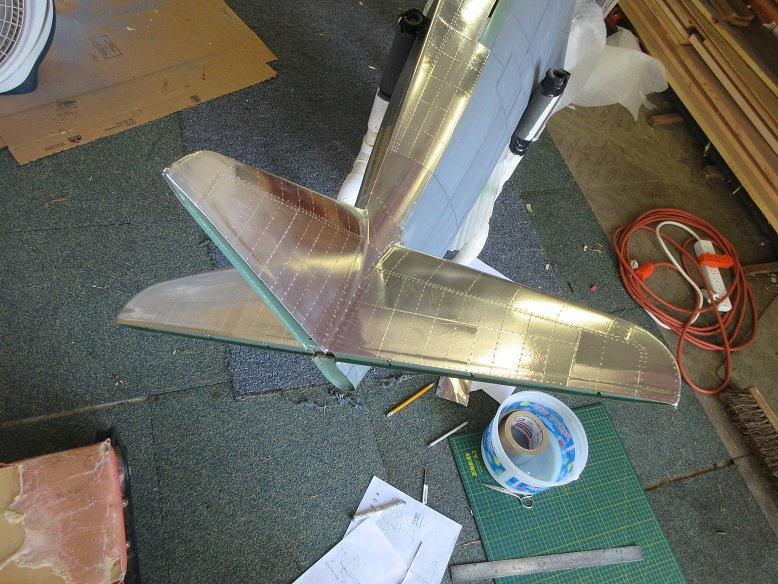
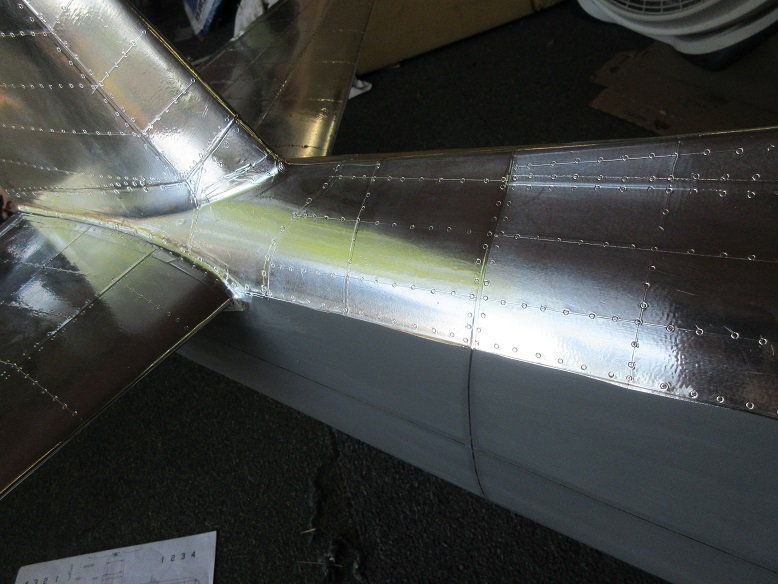
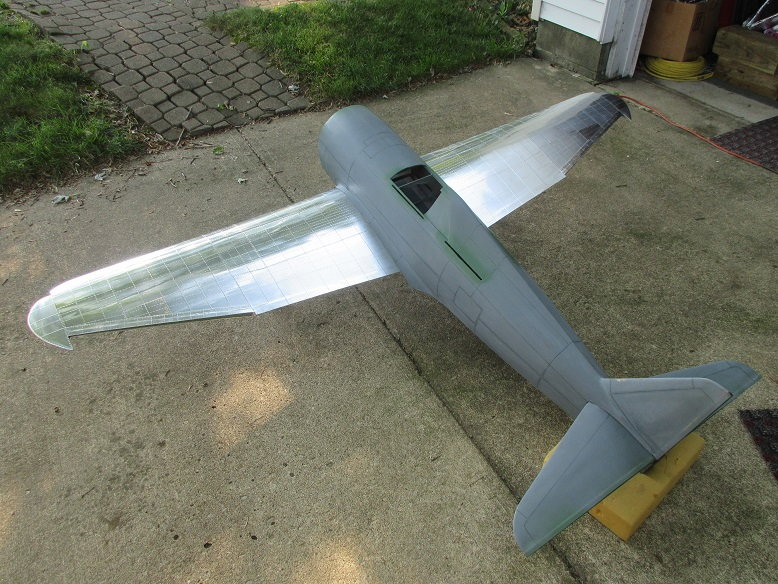
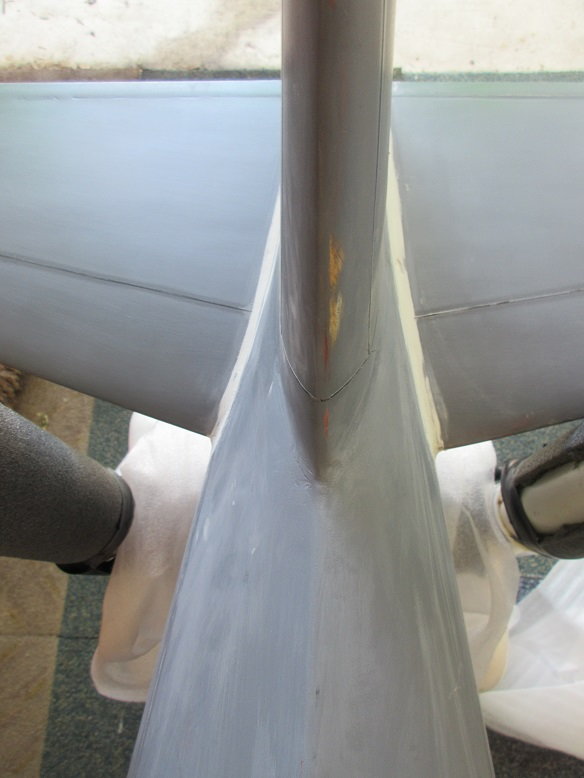
Attaching horizontal stab and belly pan.
I'm partial to glassing the stab and prepping it before attaching it to the fuse.
Stab parallel to wing and correct distance to each wing tip.
Mounted the wing and measured from the fuse to the wings nav lights to insure both are same distance.
Made sure fuse and wing are flush.
Aligned stab tips so equal distance to each wing nav light.
Had to do some sanding to get stab parallel to ground and wing.
Masked off gluing area and applied epoxy, top and bottom.
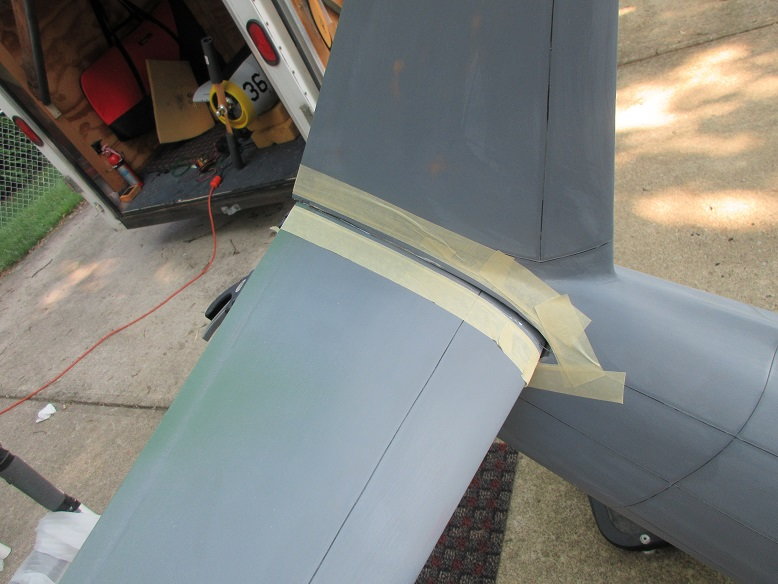
Applied easy sand to form stab fillets, sanded to the tape, removed tape and made final fine sanding of area.
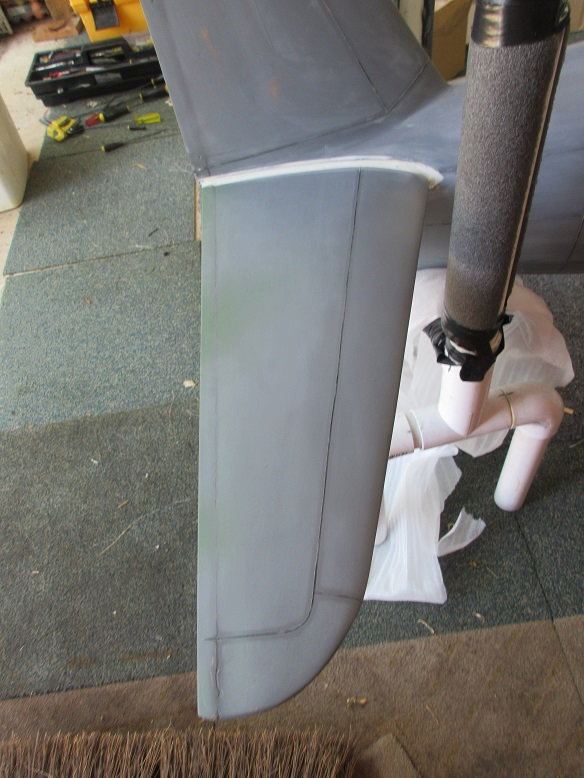
Belly pan sanded to fit flush with wing.
Long machine bolt to hold back of belly pan.
Two aluminum rods for dowels on the front of the belly pan. Alignment was pretty easy as I could drill holes from the front of the fuse into the fuse former and belly pan.
Four bolts secure wing to fuse.
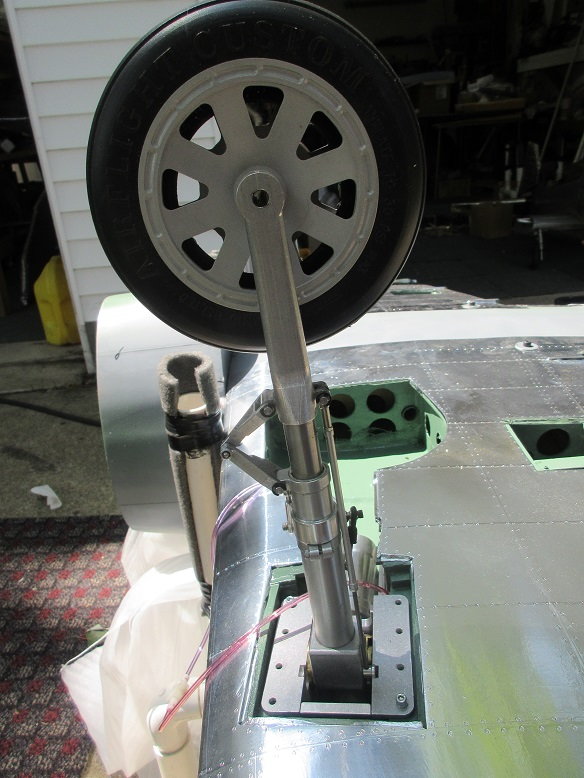
Darrell's gear and wheels are used.

The gear has the shrink bar to compress the gear in the up position as with the prototype.
I'm partial to glassing the stab and prepping it before attaching it to the fuse.
Stab parallel to wing and correct distance to each wing tip.
Mounted the wing and measured from the fuse to the wings nav lights to insure both are same distance.
Made sure fuse and wing are flush.
Aligned stab tips so equal distance to each wing nav light.
Had to do some sanding to get stab parallel to ground and wing.
Masked off gluing area and applied epoxy, top and bottom.
Applied easy sand to form stab fillets, sanded to the tape, removed tape and made final fine sanding of area.
Belly pan sanded to fit flush with wing.
Long machine bolt to hold back of belly pan.
Two aluminum rods for dowels on the front of the belly pan. Alignment was pretty easy as I could drill holes from the front of the fuse into the fuse former and belly pan.
Four bolts secure wing to fuse.
Darrell's gear and wheels are used.
The gear has the shrink bar to compress the gear in the up position as with the prototype.