


Charlie Kellogg's TBM Avenger Build
 12-15-2018, 09:52 AM
#3501

Boyd and Larry - don't kid yourselves. I have and will continue LEARNING from each of you guys and all the others who chime in on each of our build threads. But - it is a Scale Builders Site so I guess the scale builders are there. Nice bunch of guys - ALSO. Chic
 01-17-2019, 03:02 PM
#3507

My Feedback: (6)

Join Date: Feb 2002
Location: Ocala,
FL
Posts: 142
Likes: 0
Received 0 Likes
on
0 Posts
Hey Noah, Peter, or anyone with experience with a Moki radial on the Kellogg TBM..
Did you do any reinforcement to the formers or stringers between the firewall (F1) and the next formers (F2-F4)?
I am FINALLY making some progress on mine and wanted some feedback on the structural integrity at the firewall, before I get further along.
Thanks,
Jerry
Did you do any reinforcement to the formers or stringers between the firewall (F1) and the next formers (F2-F4)?
I am FINALLY making some progress on mine and wanted some feedback on the structural integrity at the firewall, before I get further along.
Thanks,
Jerry
01-19-2019, 10:52 AM
#3508

My Feedback: (15)
Join Date: May 2003
Location: Iowa City, Iowa (again!)
Posts: 1,579
Likes: 0
Received 1 Like
on
1 Post
Hey, Jerry
I did a fair bit of messing with the front formers. shifted the forward-most former back to accommodate the longer Moki engine.
Here is a link to the start of the relevant descriptions and photos:
http://www.rcuniverse.com/forum/8605188-post253.html
I think Peter ended up with a much better installation, but I don't recall seeing the details of how he finessed it all into place.
Perhaps he'll chime in here?
Upload some pictures of your build here, man!
Best
Noah
01-22-2019, 11:54 AM
#3509
My Feedback: (6)
Join Date: Feb 2002
Location: Ocala,
FL
Posts: 142
Likes: 0
Received 0 Likes
on
0 Posts
Hey, Jerry
I did a fair bit of messing with the front formers. shifted the forward-most former back to accommodate the longer Moki engine.
Here is a link to the start of the relevant descriptions and photos:
http://www.rcuniverse.com/forum/8605188-post253.html
I think Peter ended up with a much better installation, but I don't recall seeing the details of how he finessed it all into place.
Perhaps he'll chime in here?
Upload some pictures of your build here, man!
Best
Noah
I did a fair bit of messing with the front formers. shifted the forward-most former back to accommodate the longer Moki engine.
Here is a link to the start of the relevant descriptions and photos:
http://www.rcuniverse.com/forum/8605188-post253.html
I think Peter ended up with a much better installation, but I don't recall seeing the details of how he finessed it all into place.
Perhaps he'll chime in here?
Upload some pictures of your build here, man!
Best
Noah
I read all what you posted several times
 I cannot thank you and the others on this forum enough for keeping it alive, as there is a TON of valuable information. I used what both you and Peter did with the false (F0) firewall, and that has work out great.
My question is around the statement you made as follows:
The other thing I did was to cut a new F-3. My plan is to tie together F-1 through F-4 with hardwood dowls to help distribute the forces (torque and weight) of the radial engine. The original F-3 was, in my opinion, too thin for this particular motor installation. For those keeping score, there is no F-2. Not sure why that number was omitted from the plans and drawings.
Did you add the dowels (dowls) or just use the stringers on the plans?
Thanks,
Jerry
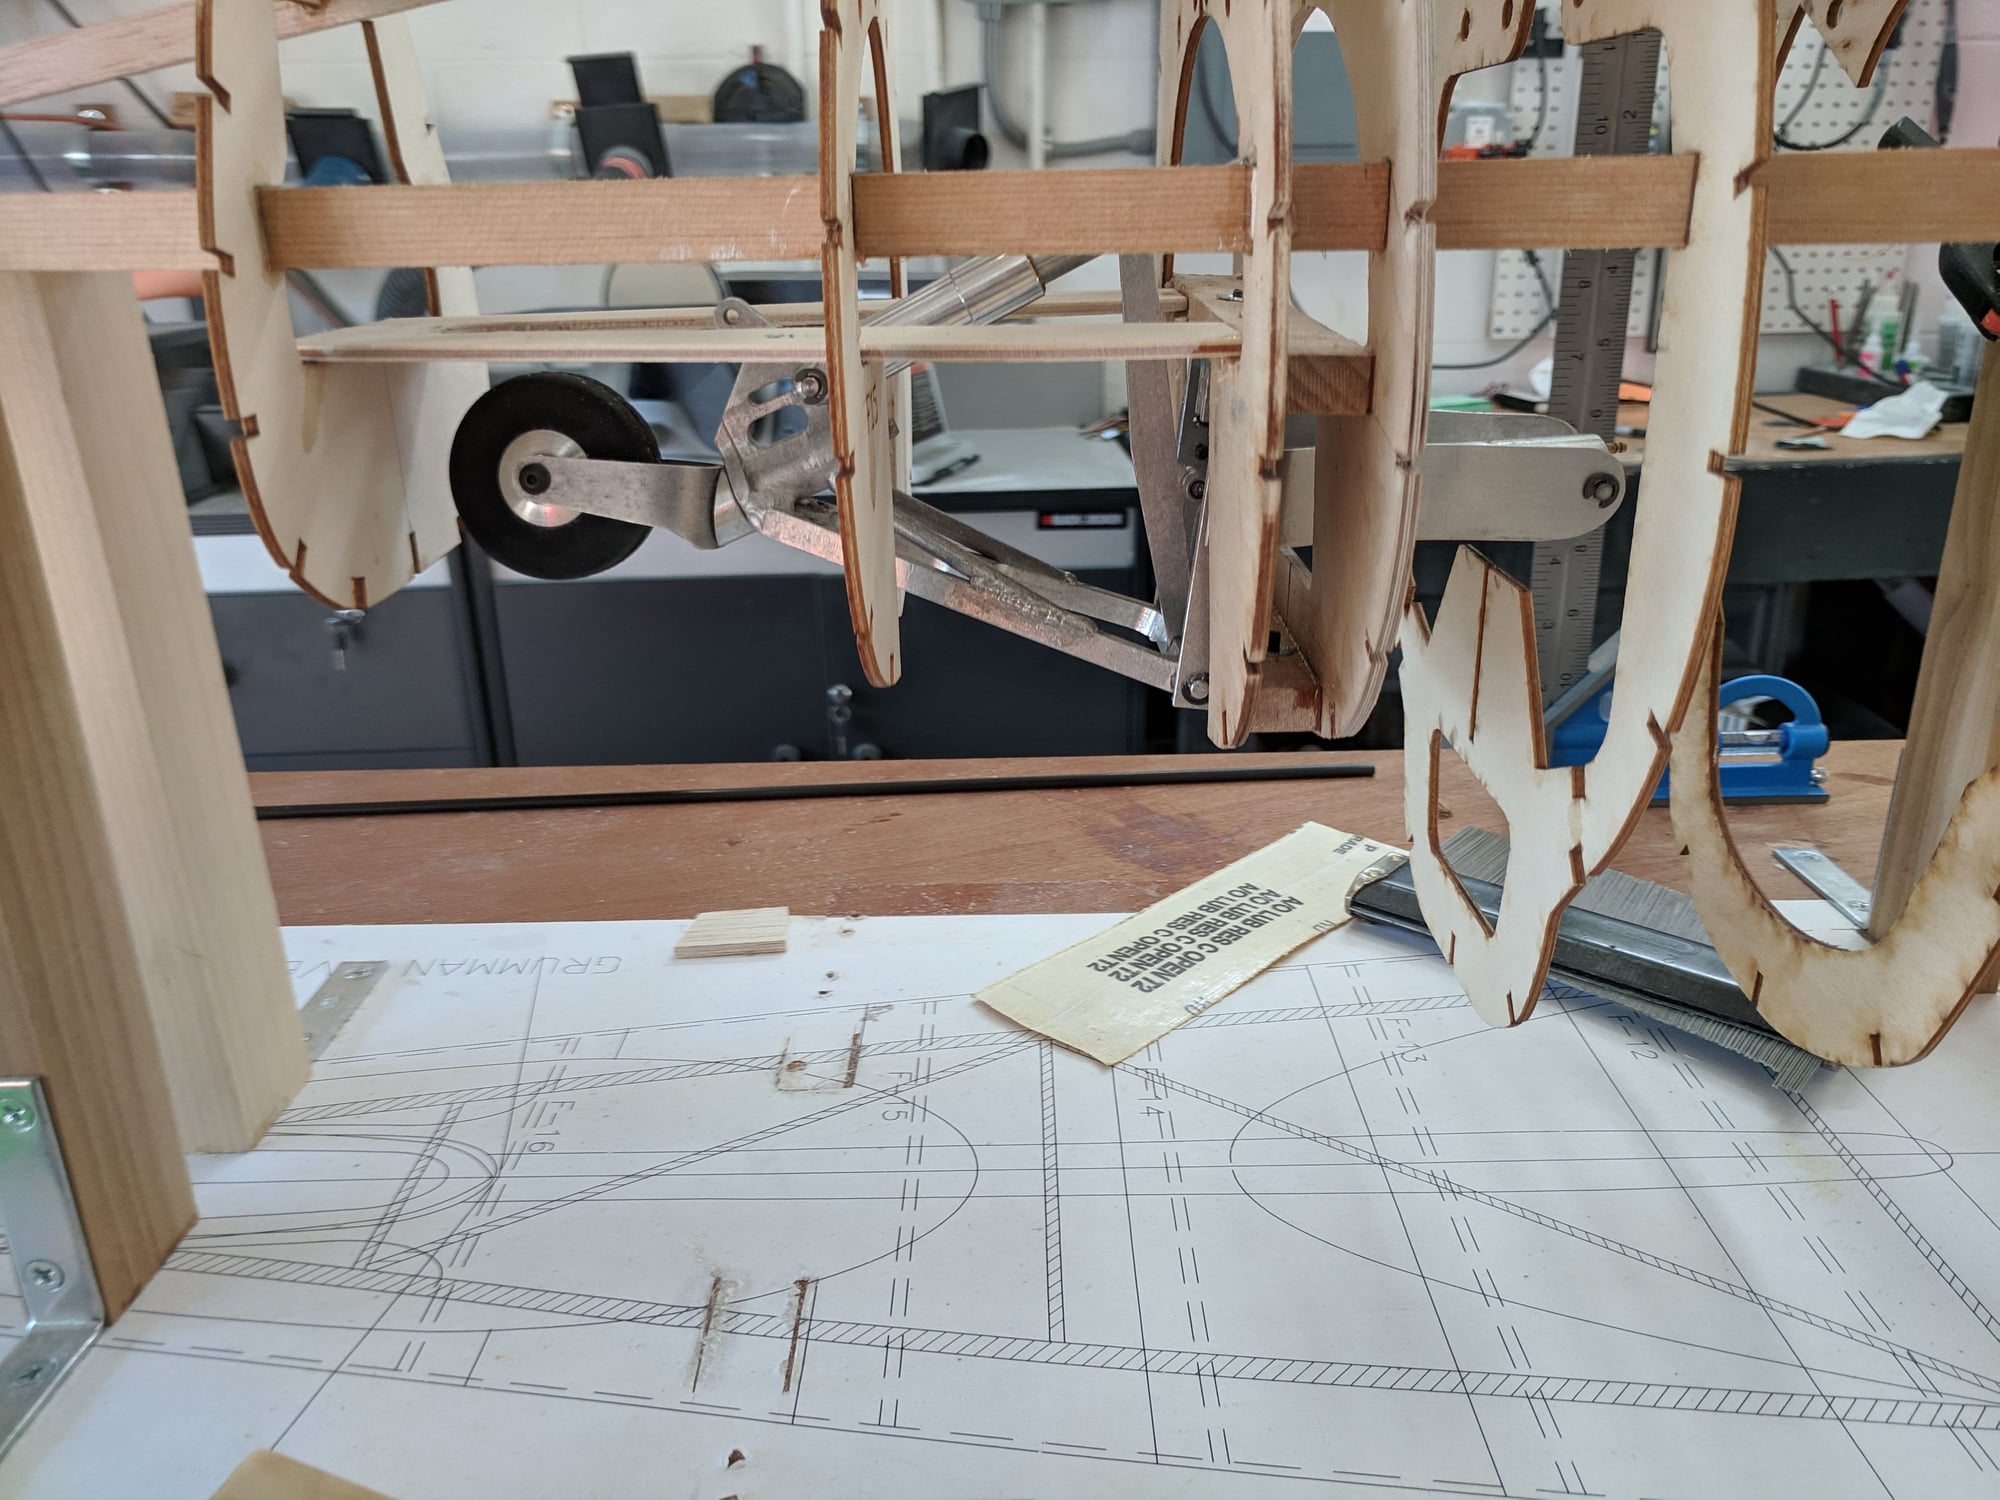
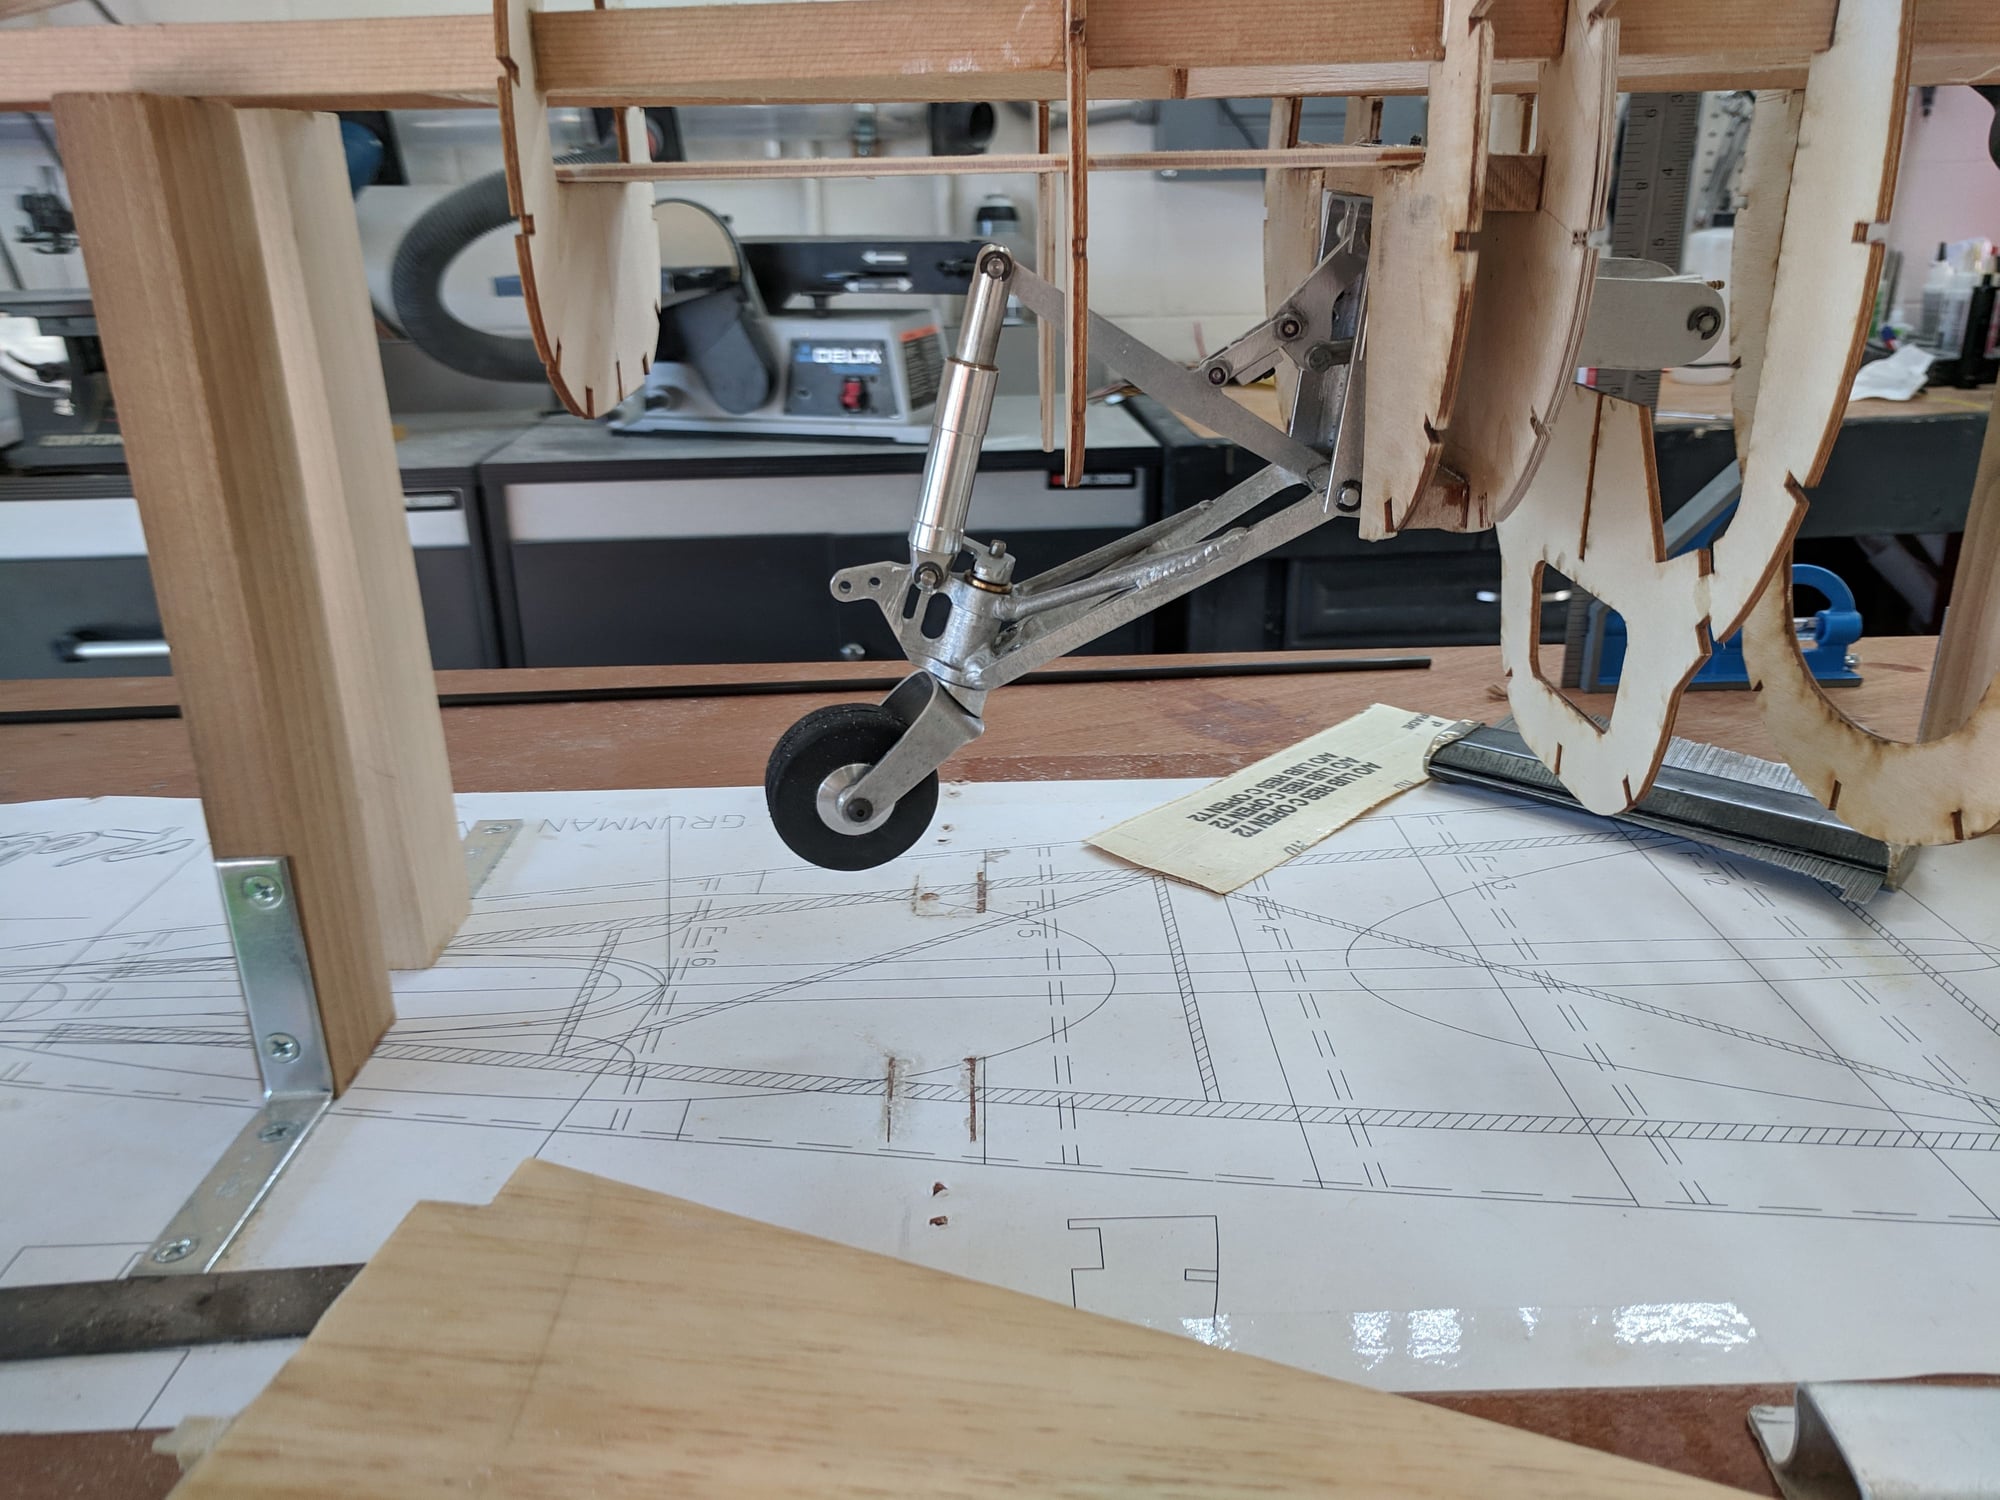
Here are a couple of pictures of my TBM.
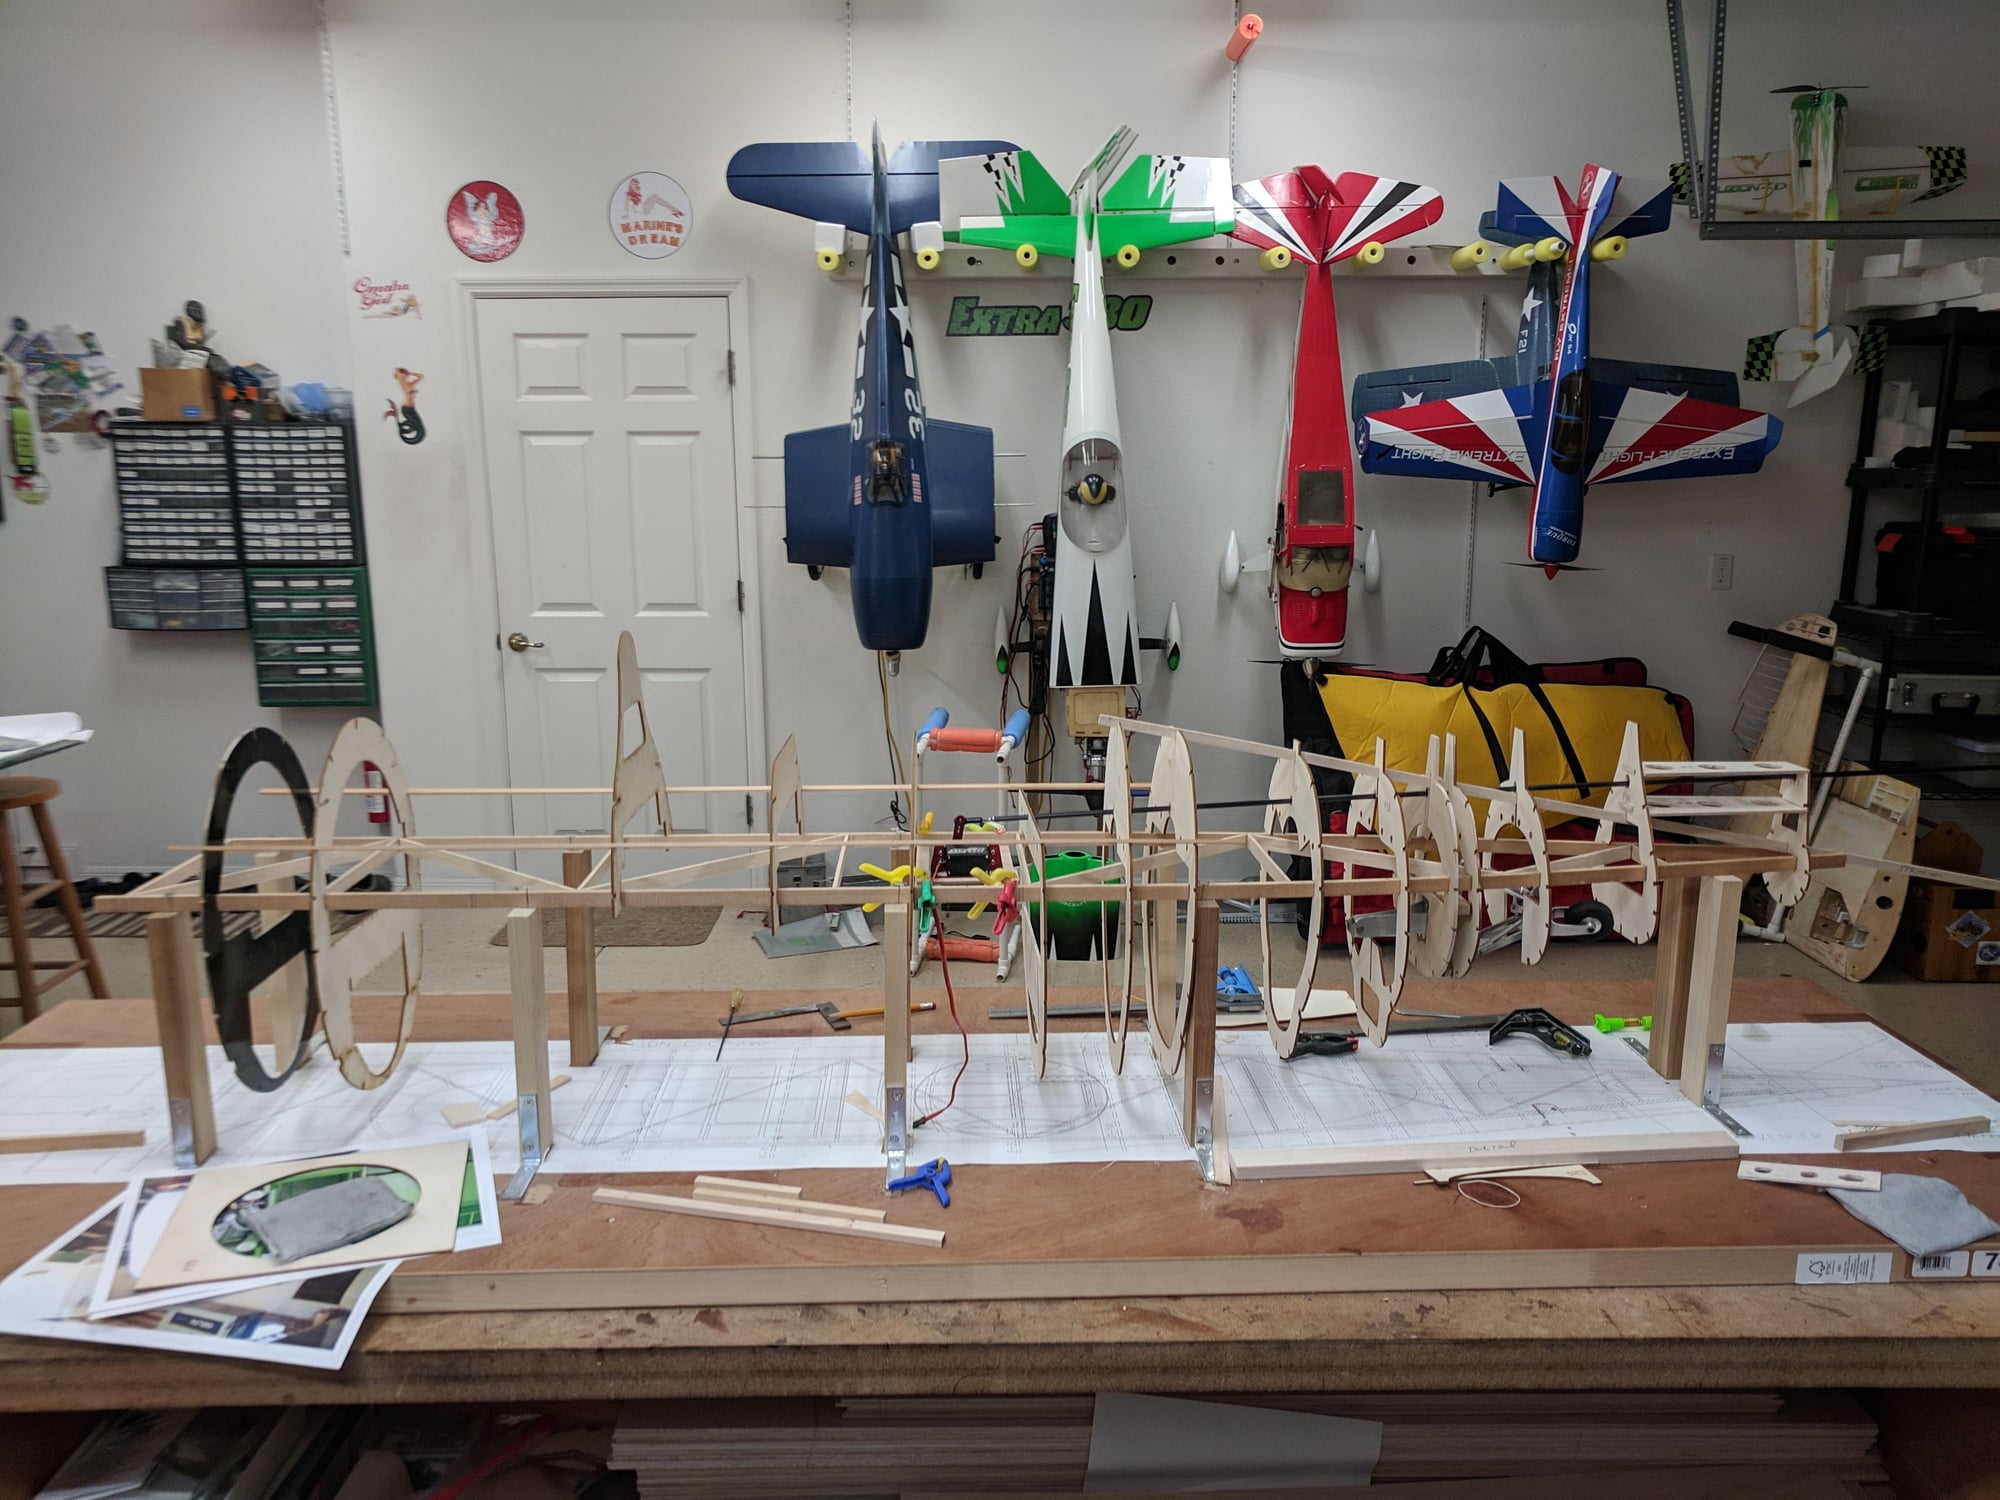
Fuselage under way!
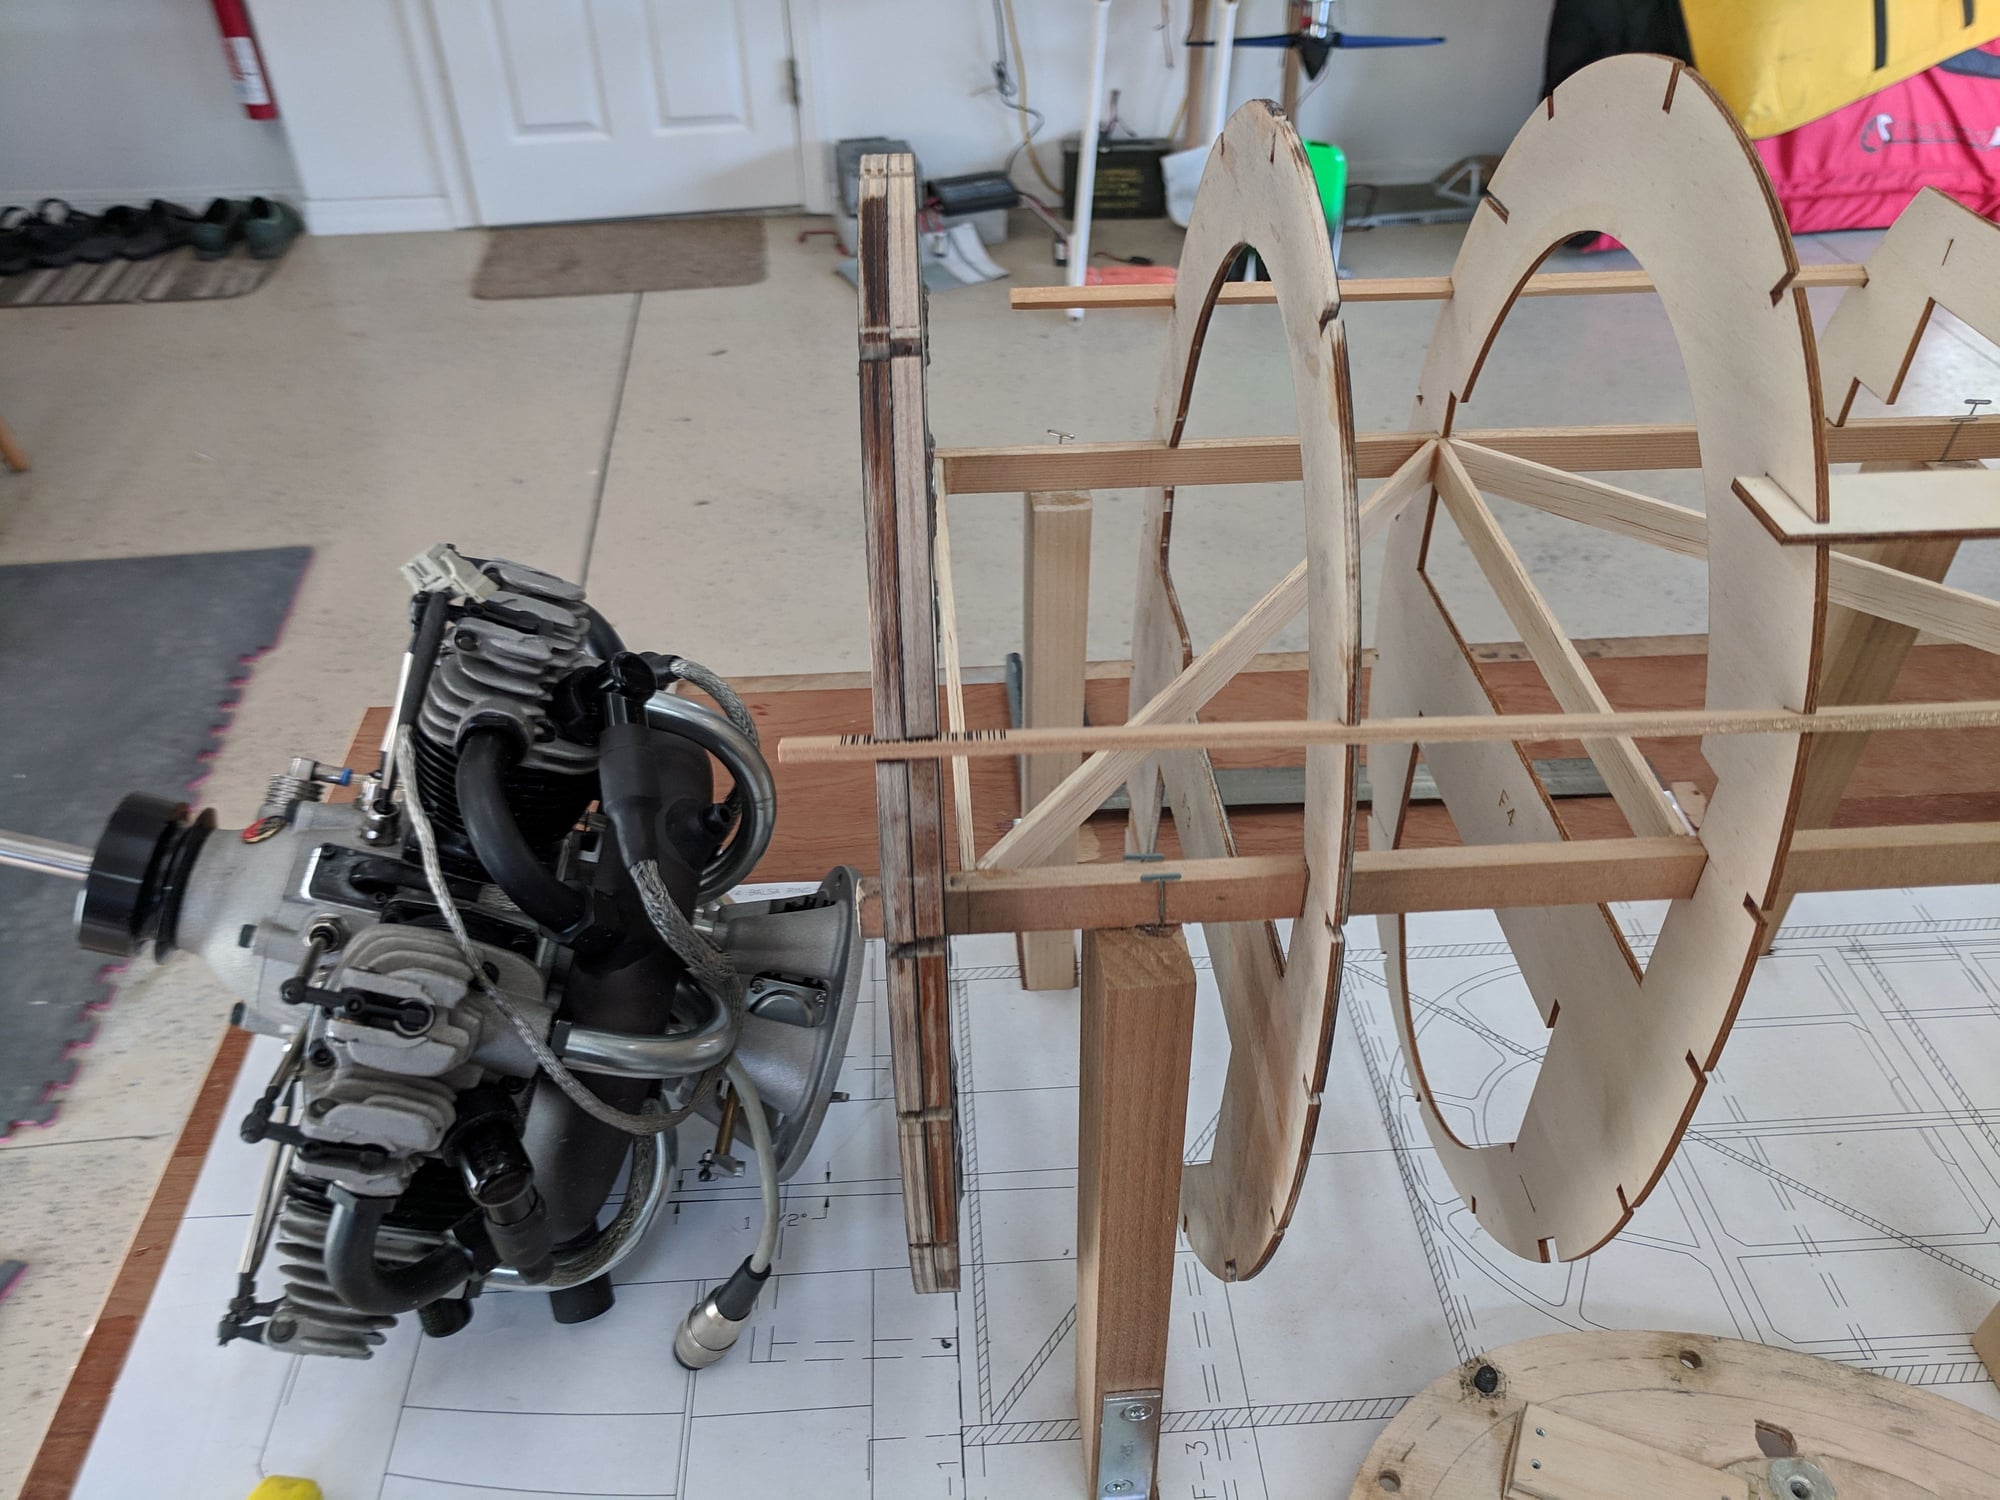
My Question is did you beef up the stringers between these formers?
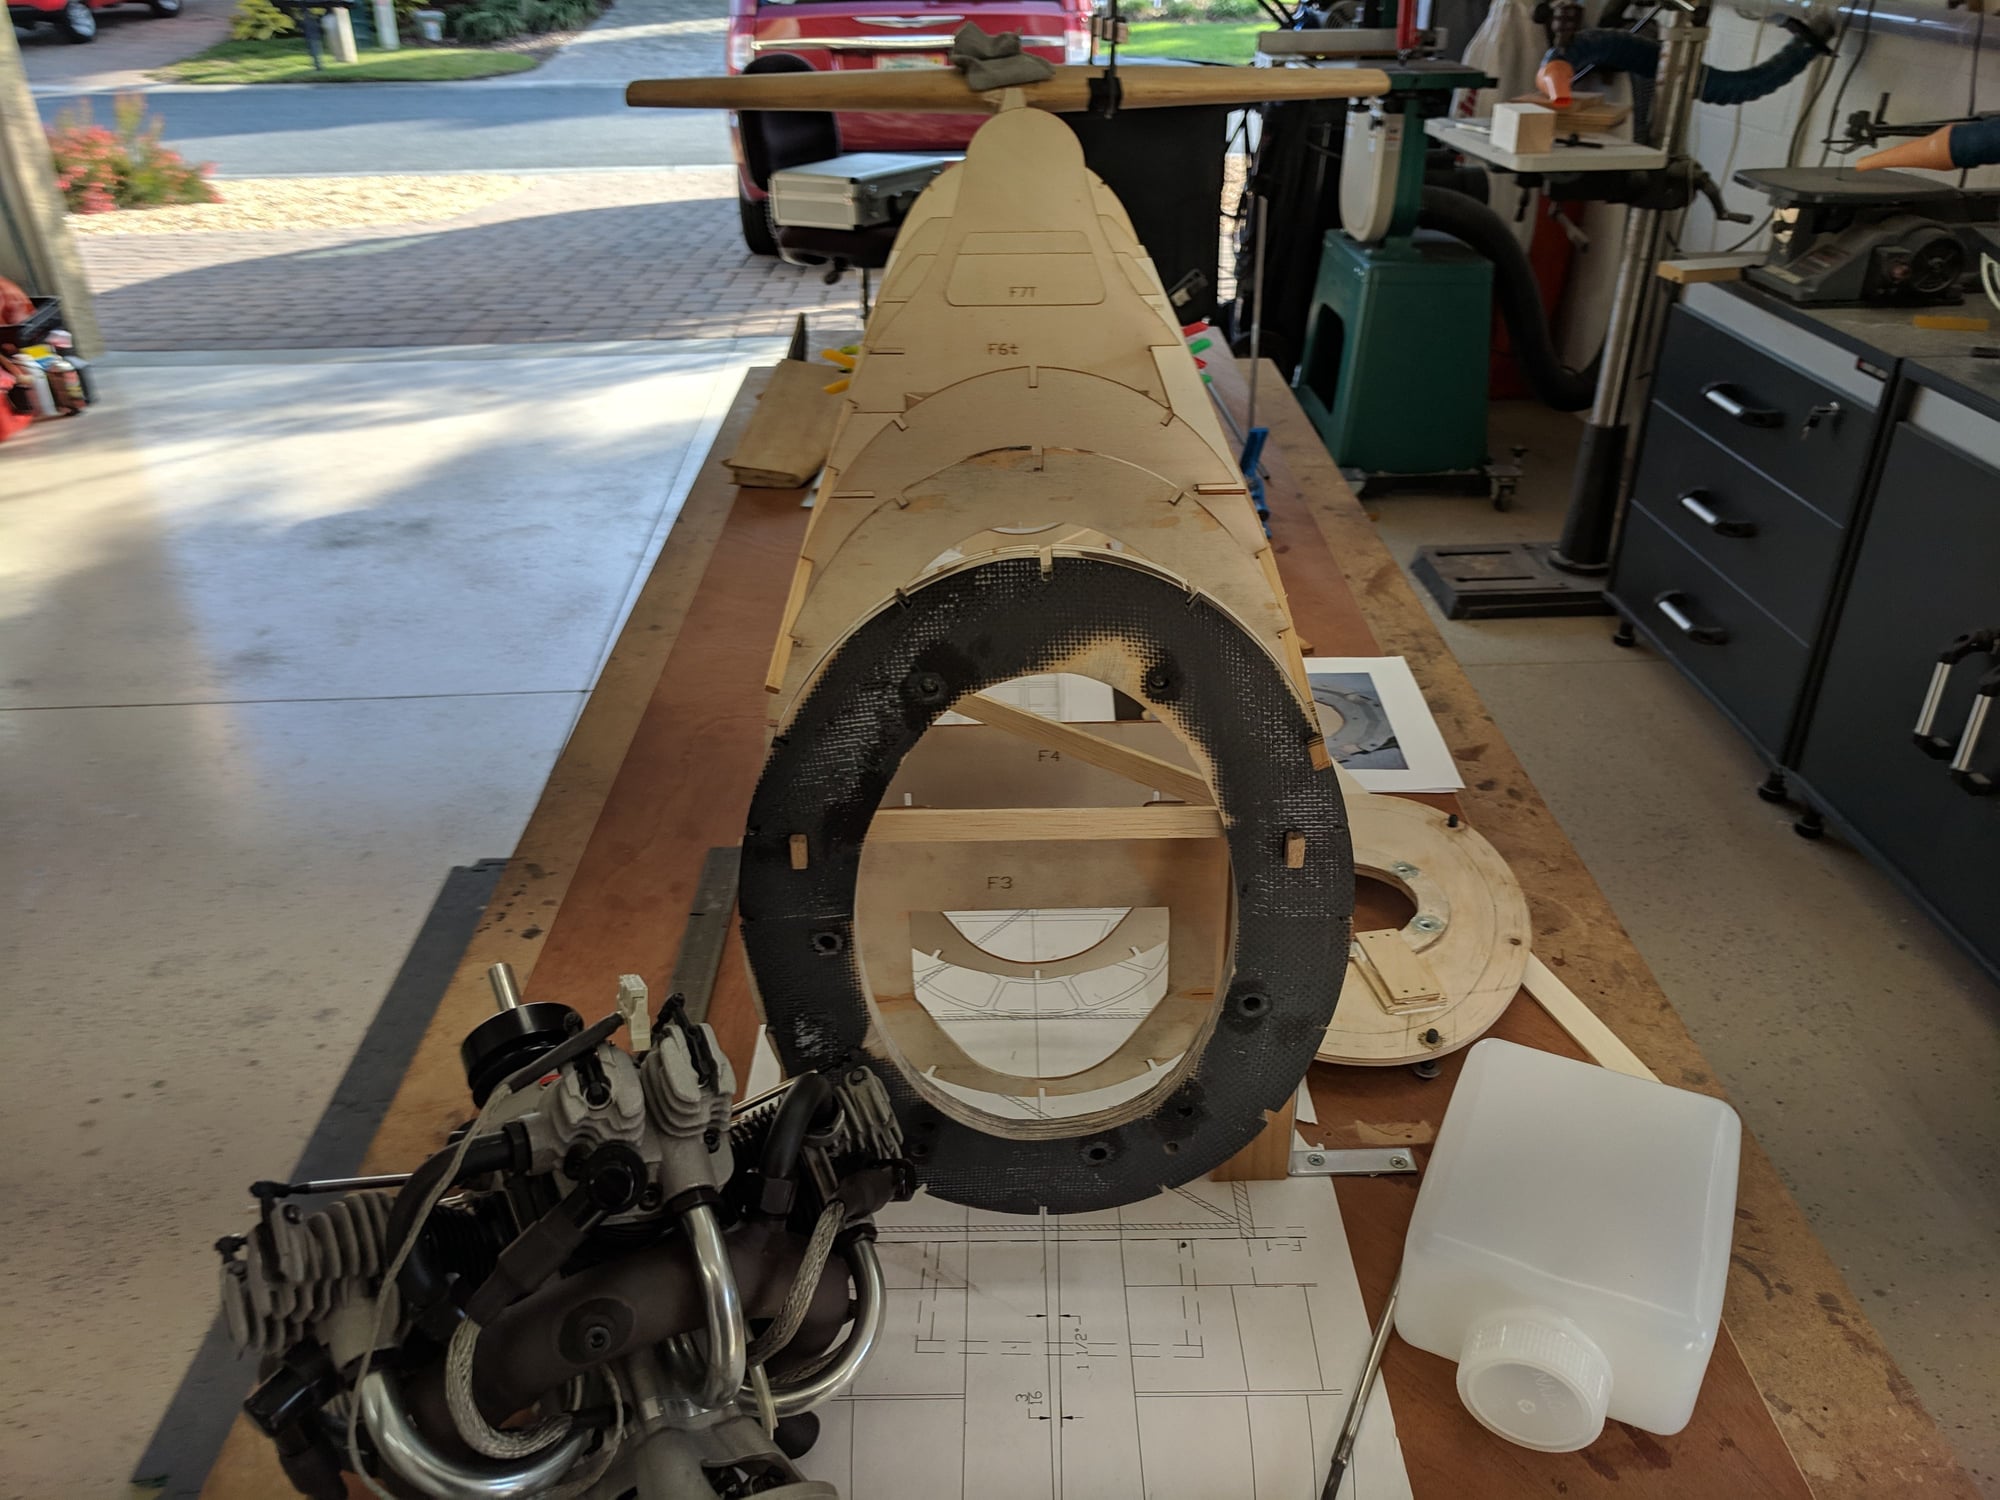
Removal firewall
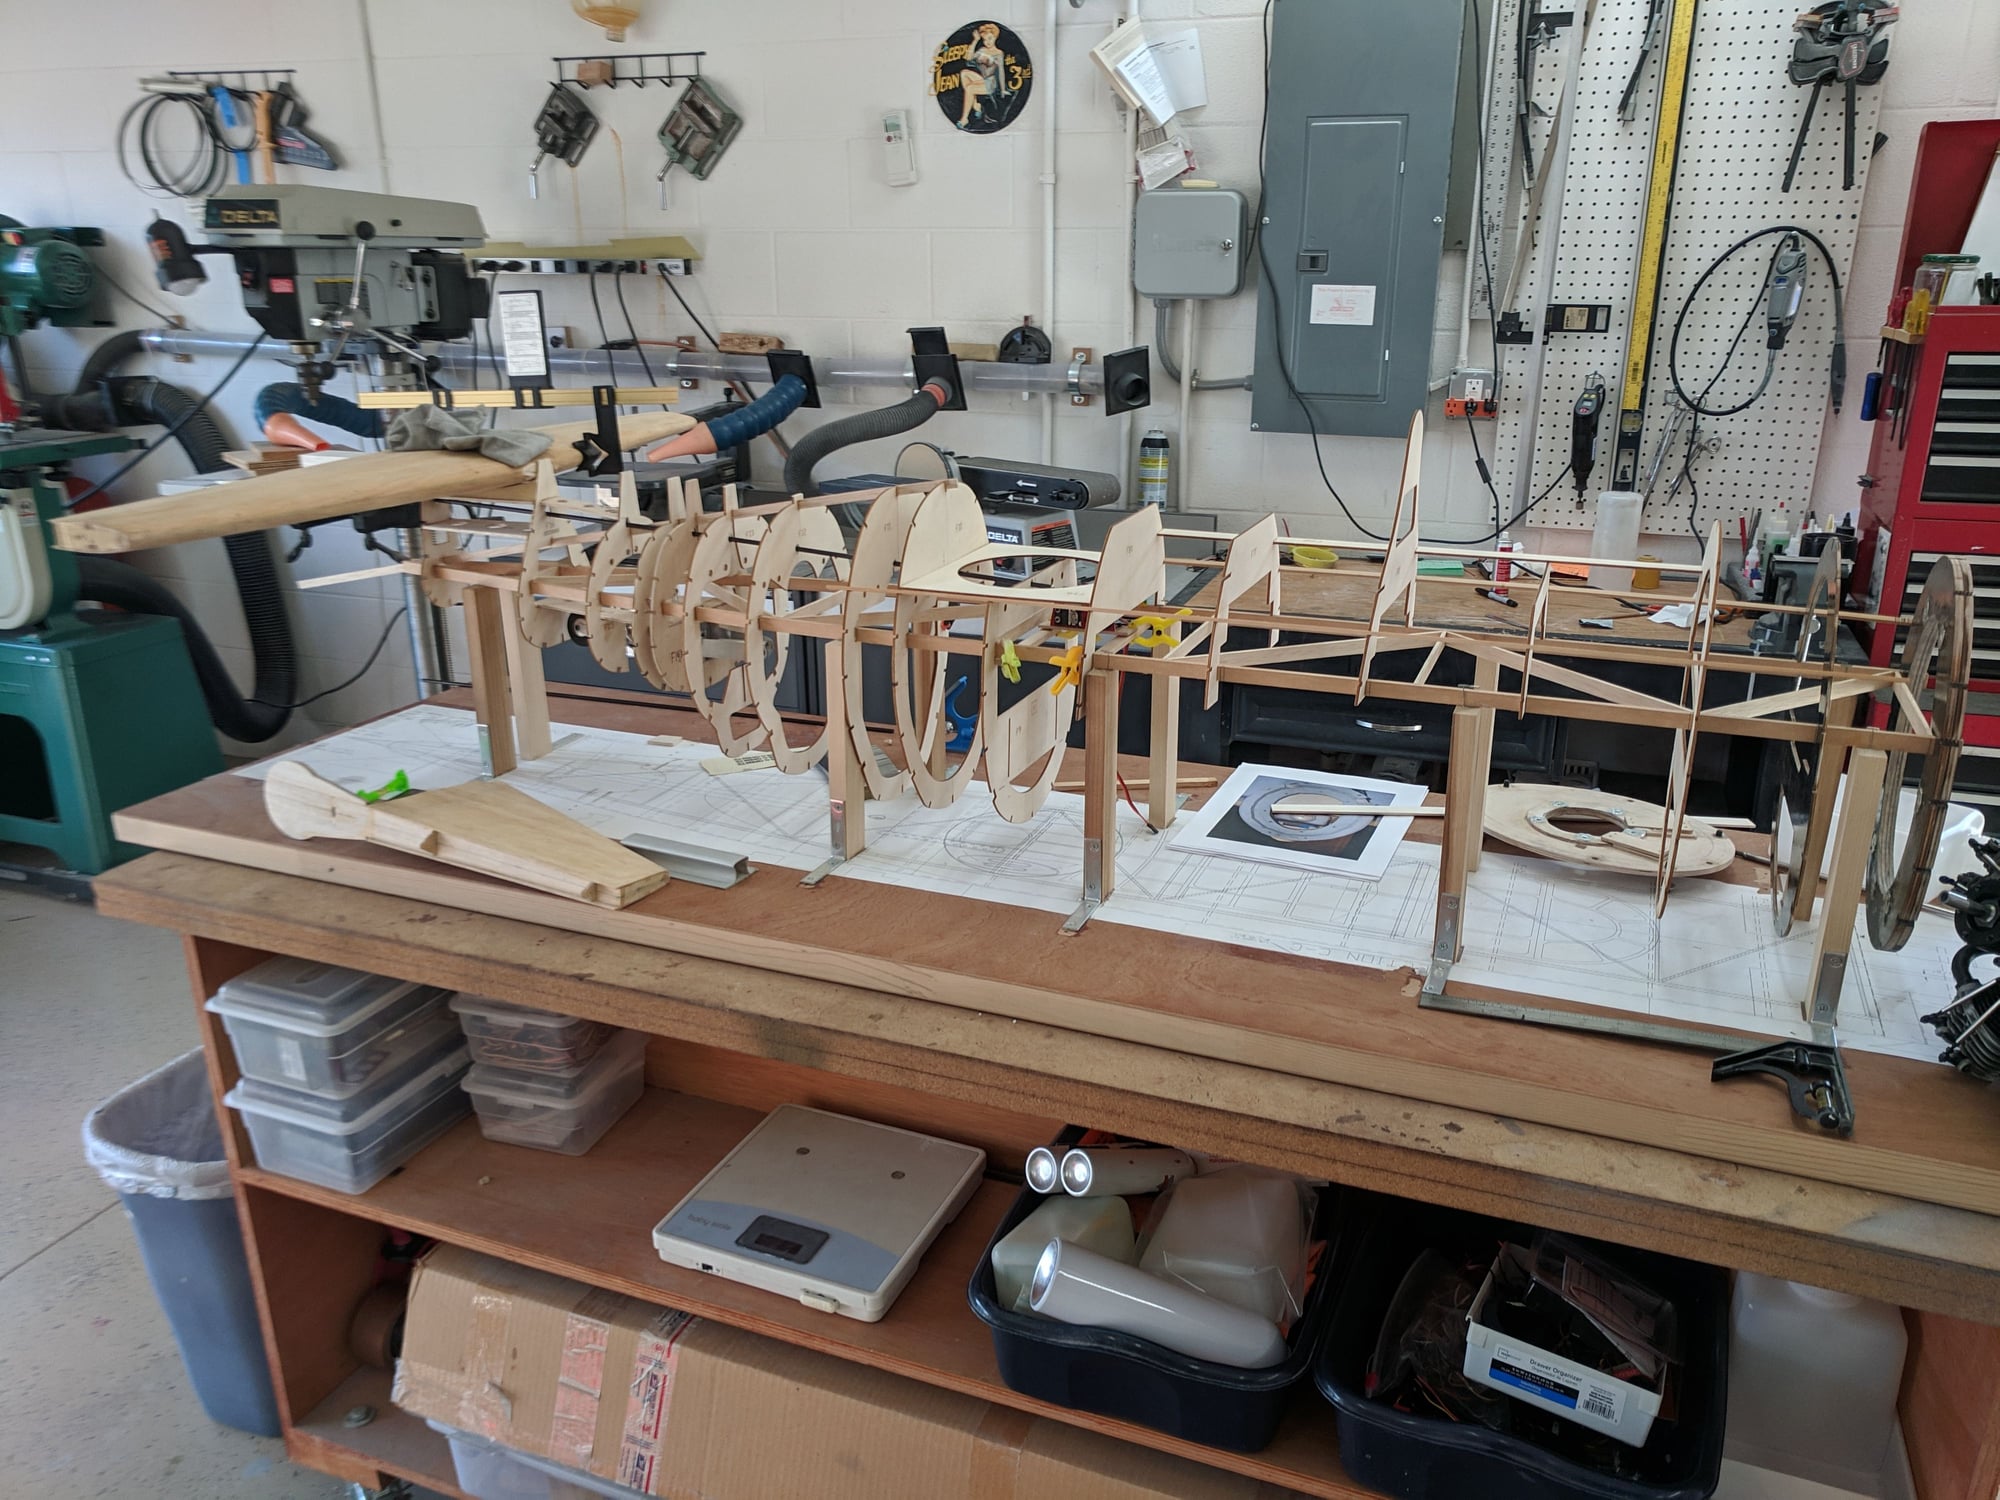

Horizontal stab test placement
Last edited by jdeluyck; 01-22-2019 at 12:06 PM. Reason: Needed to change the pictures
01-22-2019, 01:19 PM
#3510
Jerry,
not sure which is more impressive the build or the shop, nice work.
FYI, if that's a Sierra tail wheel double check that it locks when in the dow position, ours needed to be filed a bit to get it to lock.
Larry
not sure which is more impressive the build or the shop, nice work.
FYI, if that's a Sierra tail wheel double check that it locks when in the dow position, ours needed to be filed a bit to get it to lock.
Larry
01-22-2019, 03:35 PM
#3511
My Feedback: (15)
Join Date: May 2003
Location: Iowa City, Iowa (again!)
Posts: 1,579
Likes: 0
Received 1 Like
on
1 Post
Looks great, Jerry!
Yes, sorry. I did use dowels. 1/4 inch hardwood, installed about 5-6, as I recall, distributed equally around F1 (drilled half-way between inner and outer edges of F1). Used a long drill bit so I could pass the dowel through 3-4 formers (or as many as I could tack together. Then cut the excess flush with front of F1. used hysol to lock them into place where they passed through each former.
Not sure if I captured any pictures of that. I will have to go back and check. Might have been shown in later stages of build. Maybe not, as I sheeted the fuse pretty quickly after that.
Noah
 01-22-2019, 04:28 PM
#3515
My Feedback: (15)
Join Date: May 2003
Location: Iowa City, Iowa (again!)
Posts: 1,579
Likes: 0
Received 1 Like
on
1 Post
If you zoom in on the picture, you can see the dowel passing from F1 through F3 and F4. I added an arrow below. I still think the plans don't show an F2, right? Maybe I dreamed all the up.
Anyway, you cannot pass through too many formers at the bottom (because the torpedo bay, of course), but you should be able to tie several together with some dowels.
Also, I am planning a new project for the summer (I'll be starting it this summer)... 1/3 scale Brewster Buffalo!
And of course I'll be needing some stencils from you eventually!
Best,
Noah
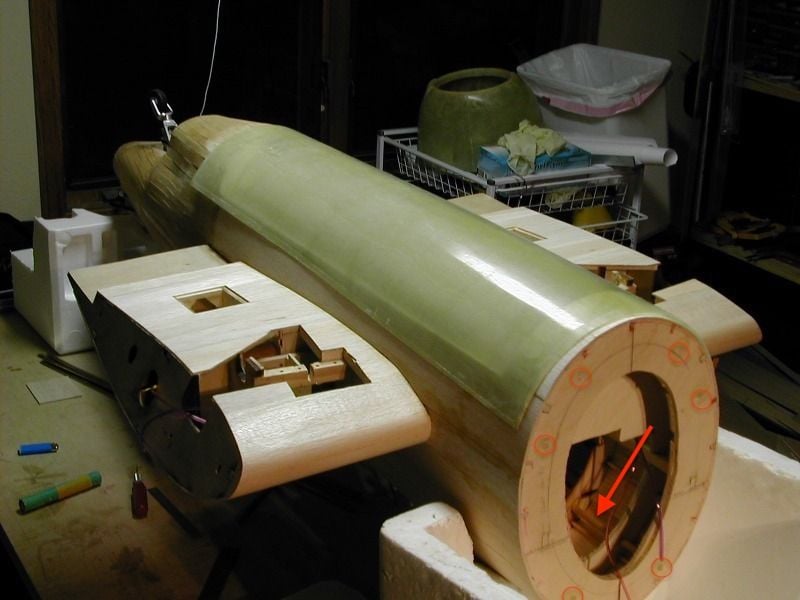
03-26-2019, 04:55 PM
#3516
I'm BACK. Turning attention back on the Royal Navy TBF Avenger getting it ready for its maiden. Next week will begin with the engine install, etc. Glad to be back. I see we have another build. Great news. There is a scale event in June in Ohio. Lets see if I can manage to attend and work out some bugs. Can't thank all of you who contributed heavy to my build - again THANKS. The 1/8th scale Royal Navy Sea Vixen turbine can wait till Fall. Jerry, what a great looking shop, and the build isn't half bad either. I see the center section of the wing and tail feathers sitting in the background. Another Moki, wow, should sound and fly just great. Can't keep up with you Moki guys. I know the guys welcomed you, so do I. Keep the photos coming. Smile. Chic
Last edited by redtail; 03-26-2019 at 05:01 PM.
 04-26-2019, 03:36 AM
#3525
My Feedback: (15)
Join Date: May 2003
Location: Iowa City, Iowa (again!)
Posts: 1,579
Likes: 0
Received 1 Like
on
1 Post
I would have to check back through the thread to see if documented that, but I think it should not matter too much given the gear retract nearly straight out into the wing, so CG should be too affected.
Let me dig around a bit, Chic.
Have you run the engine?! Taxi tested?
Let me dig around a bit, Chic.
Have you run the engine?! Taxi tested?