I can say it has been a pretty strait forward build without much hassle at all. It really does build more like a aerobatic plane from Pilot than a Jet from any other manufacturer. The overall quality is great. Now lets talk about the last few things I did to it to conclude the build part of the thread.
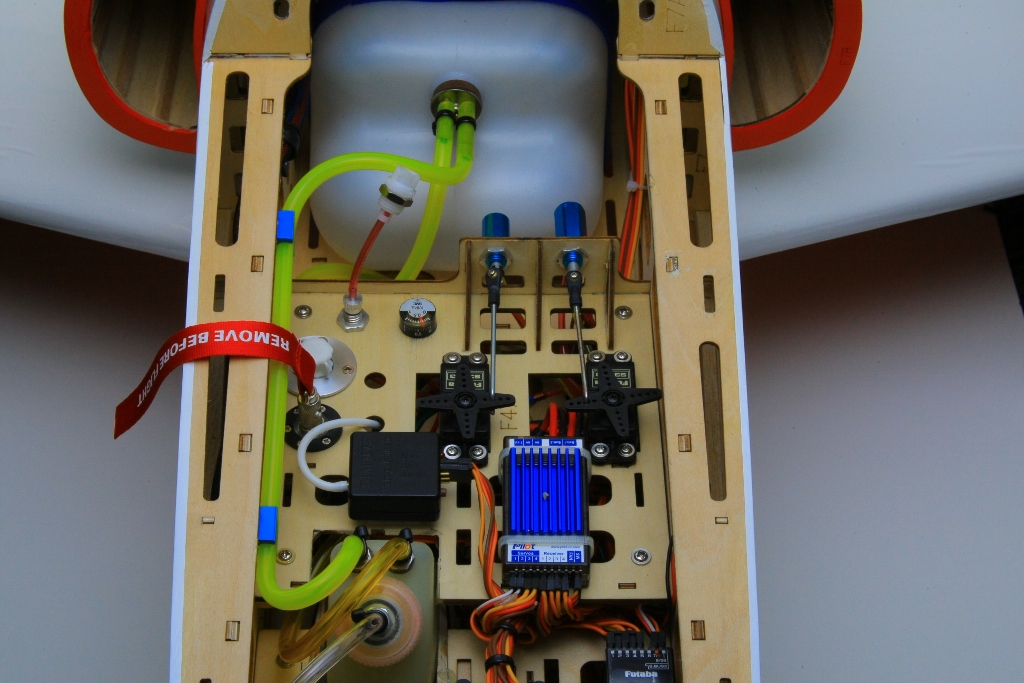
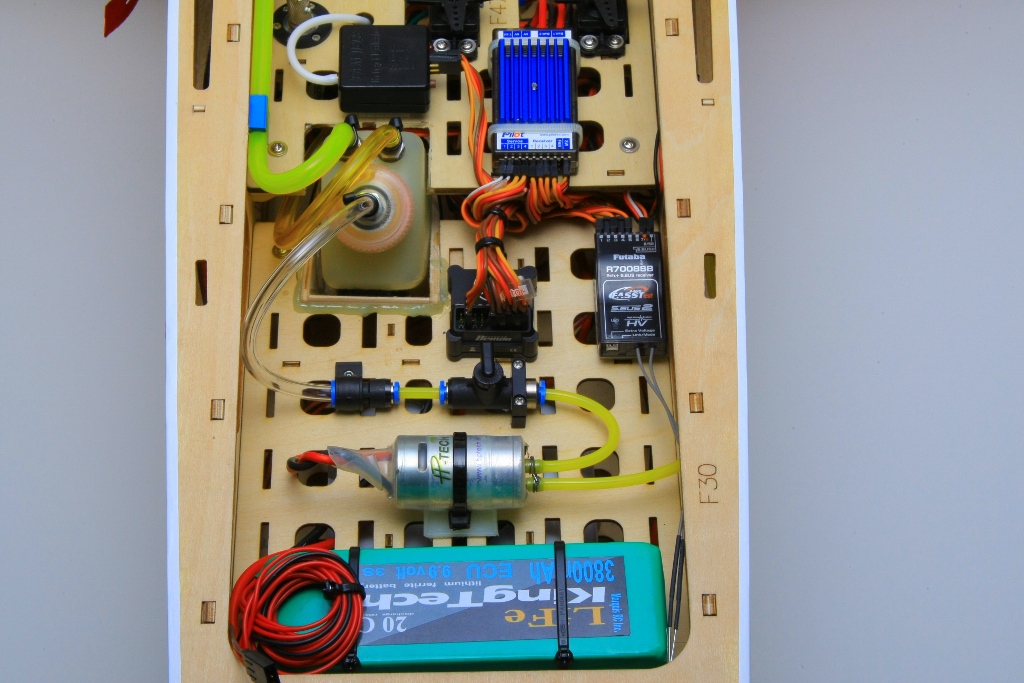
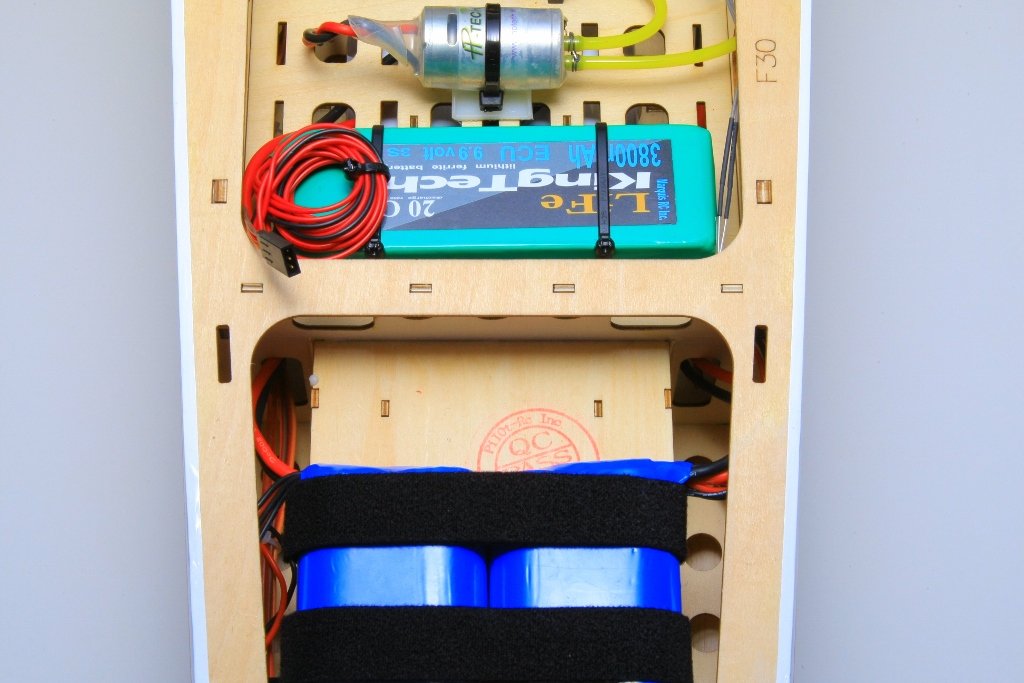
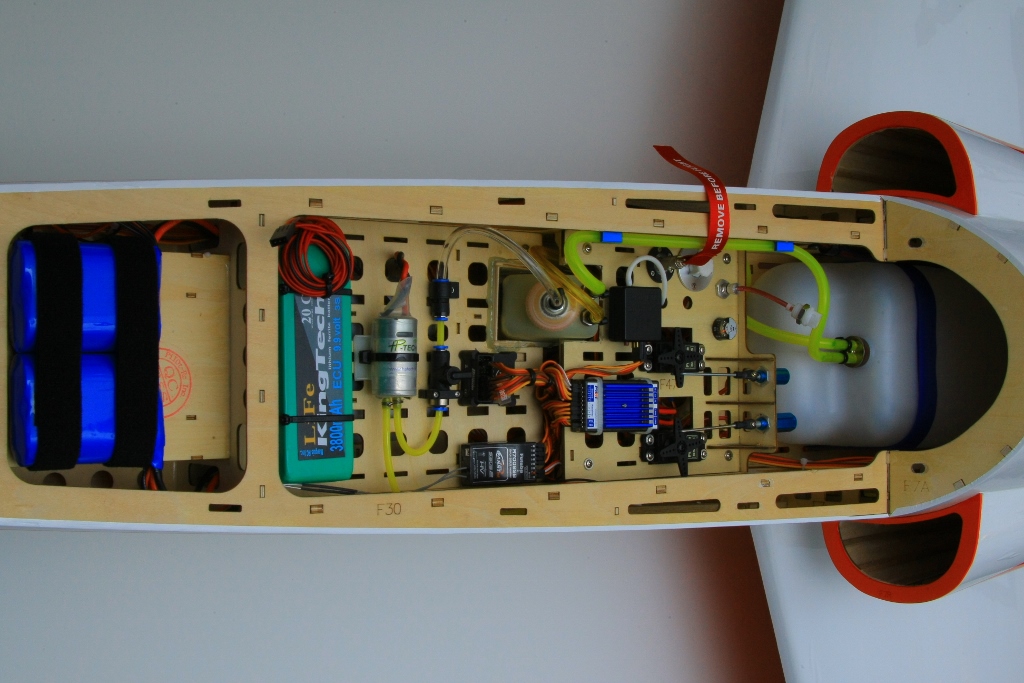
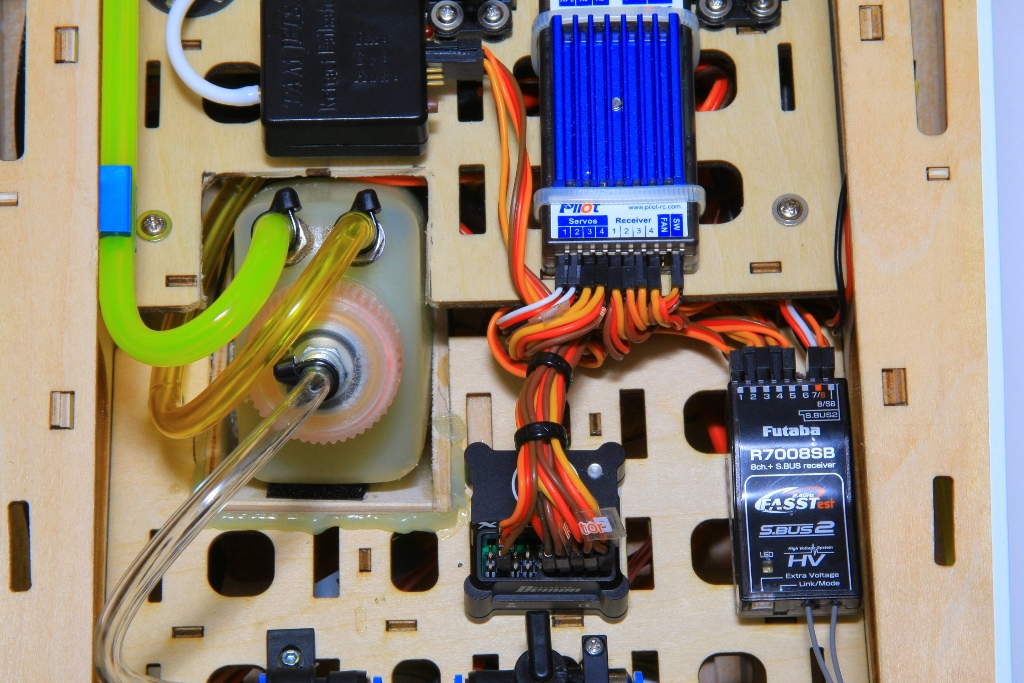
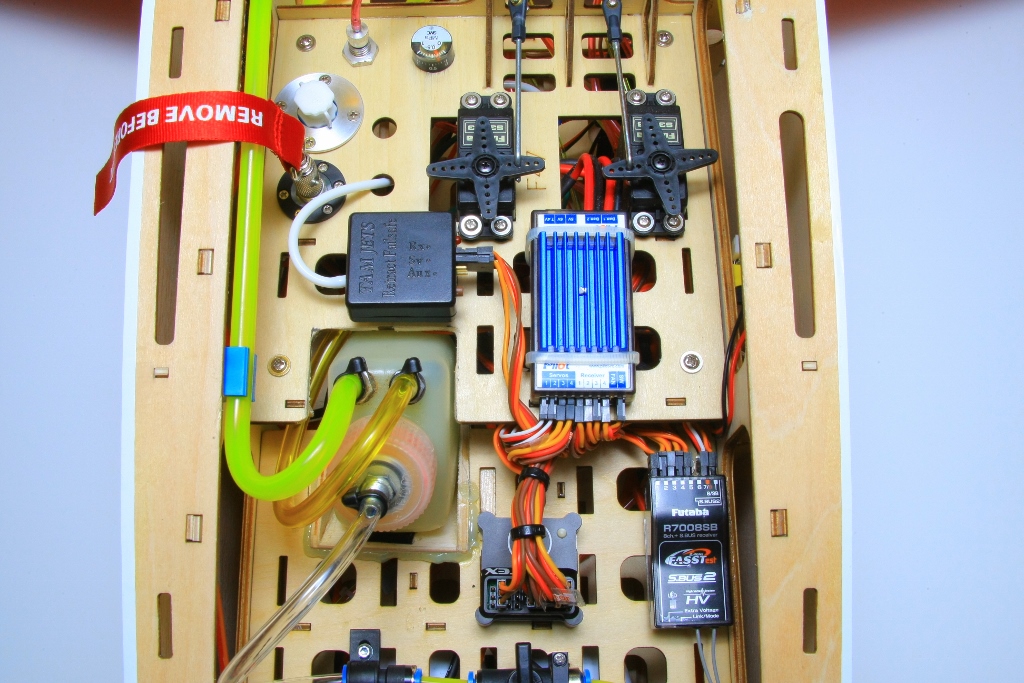
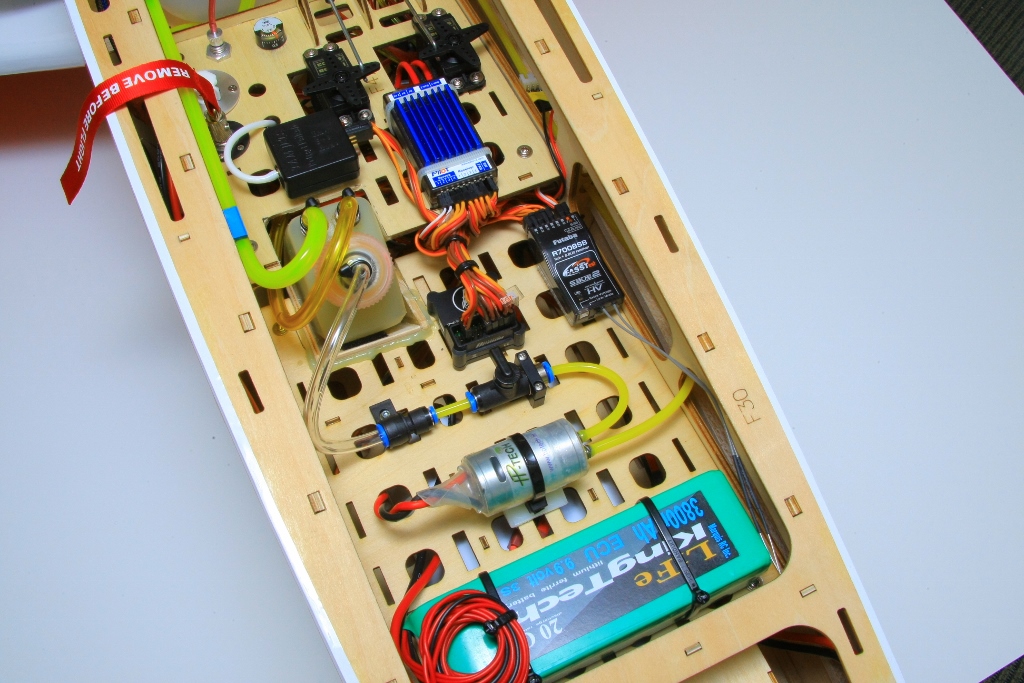
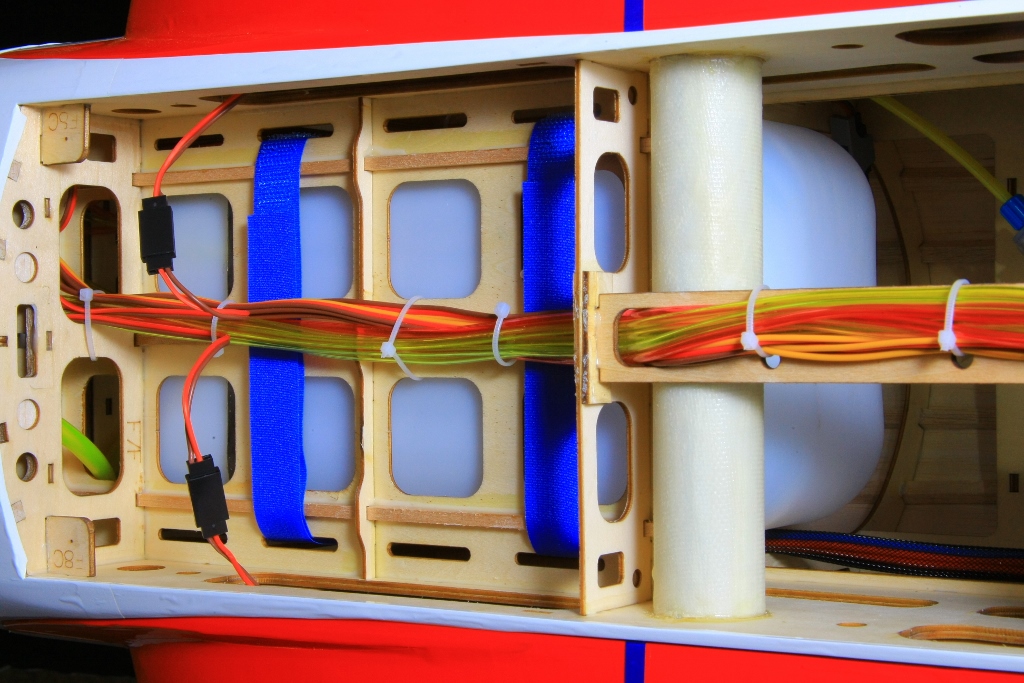
First I mounted all the batteries and radio gear. I did this after placing the plane on a balancer and moving stuff around until I got the balance where I wanted it. I balanced with a full UAT and the gear in the down position. We do this because the UAT should always be full and the gear is down in landing and takeoff conditions. The Fuel tank in the jet is properly located on the CG (actually just forward of it). The tank sits 80% ahead of the CG, leaving about 20% behind the CG. This is nice because you never have to worry about the plane going tail heavy on you as fuel burns. You take off with a nose heavy jet, and as you burn fuel you are moving closer to a neutral balanced plane. This make landings easier. Now, back to the radio install. I placed the receiver batteries on top of the nose gear well, and then the turbine battery aft of that, followed by the fuel pump, followed by the gyro and receiver. If you look back at the thread you can see the weight of each of these items. The radio install was strait forward and was not any harder than a basic jet, plug your servo leads into the receiver (or gyro and receiver in my case) and move on to programming. The voltage regulator they give is a nice piece of equipment, it gives you four inputs from the receiver and four outputs to servos, I ran them just because it was there and my receiver is getting power in four ports now because all four inputs of the regulator supply power out to the receiver. So this reduces the load on the receiver and gives it power across the receiver board. Nice added bonus from Pilot. The regulator had two beefy inputs for power from your receiver pack, I cut the connectors they had on them off and ran Deans Ultras to them.
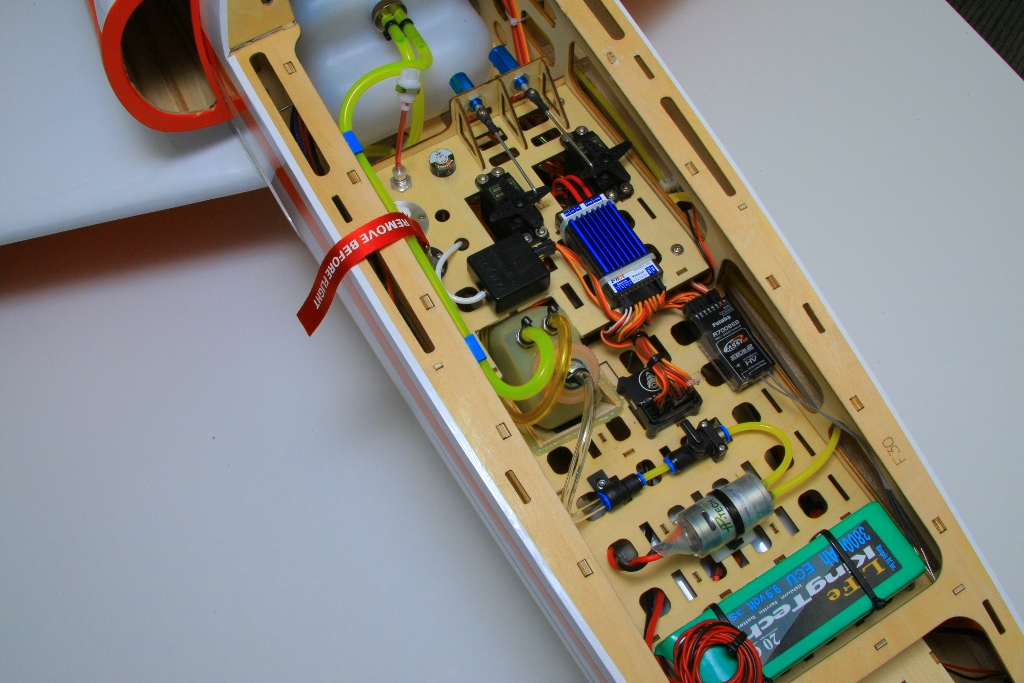
Now onto the air system. The air system is not really how I would have done it if I was starting from scratch with it. Let me explain this. They used two air tanks and combined them for both breaks and gear. I would prefer to have the system separate, but I can see why they did this from a beginner standpoint and TR standpoint. This eliminates one more fill valve and one more pressure gauge. and if the systems were separate they would have needed one big tank and one smaller tank, in this install I don't see how there would be room in the plane. (at least where they are mounted now, there is plenty of room in the turbine bay for more air). Since they used two medium sized tanks they can join them and get more capacity that way since the gear eats up more than the brakes ever will. Next lets talk about a air failsafe. I installed a Tams Air Failsafe. I am a true believer in safety. This piece of equipment can save the day if you develop an air leak in flight. Once the pressure drops to the programmed amount the gear swings down and will not allow you to put it back up. The alternative is a belly landing when your gear will not come down. Lastly on the topic of the air system, the air lines at the wing root. Here is where I was not too happy, they are a pain in the butt to get on. First you must have the plane upside down (no big deal), remove the cover, slide the wings on the tube, (still nothing new here) my issue was with the colors... one red, one green? and one yellow? it is really hard to tell the difference, not to mention you need really small hands to get in there to tighten them down. I ended up marking the brake lines so I don't have to go through that again. Now, sliding the wings into position to lock them down. took a few minutes to figure out that everything has to be in just the right spot for the wing to clear the wing root. There is no room to push the excess into the fuse because of how the lines are held into the fuse, so everything has to get pushed into the wing. Kind of a pain until you do it a few times. other than that the air system held air overnight and works like a champ.
Ill include some pics now for you to see the final radio install and such. then ill do a "hits and "misses" post shortly. My plan is to fly the plane as soon as weather permits. this weekend is looking great.