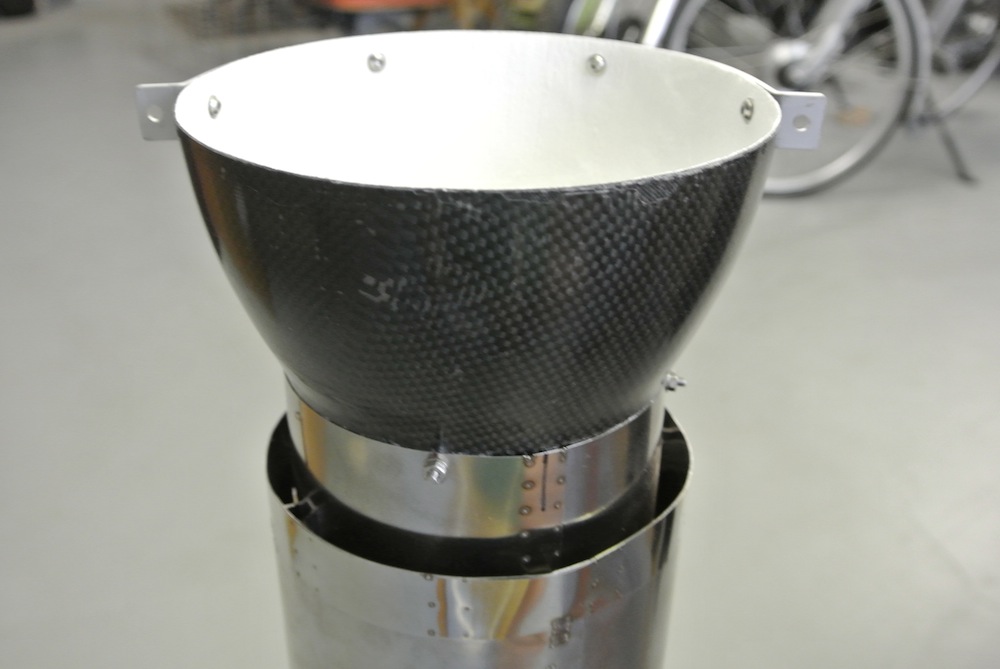
Thrust Pipe
The pipe supplied is well made and dual walled, it was measured to fit the Vixen WITHOUT the bypass so this works for my current build however it will need to be around 95mm shorter to work when the bypass is installed so this info has been passed back to Wagner and the guys at Xtreme ARF.
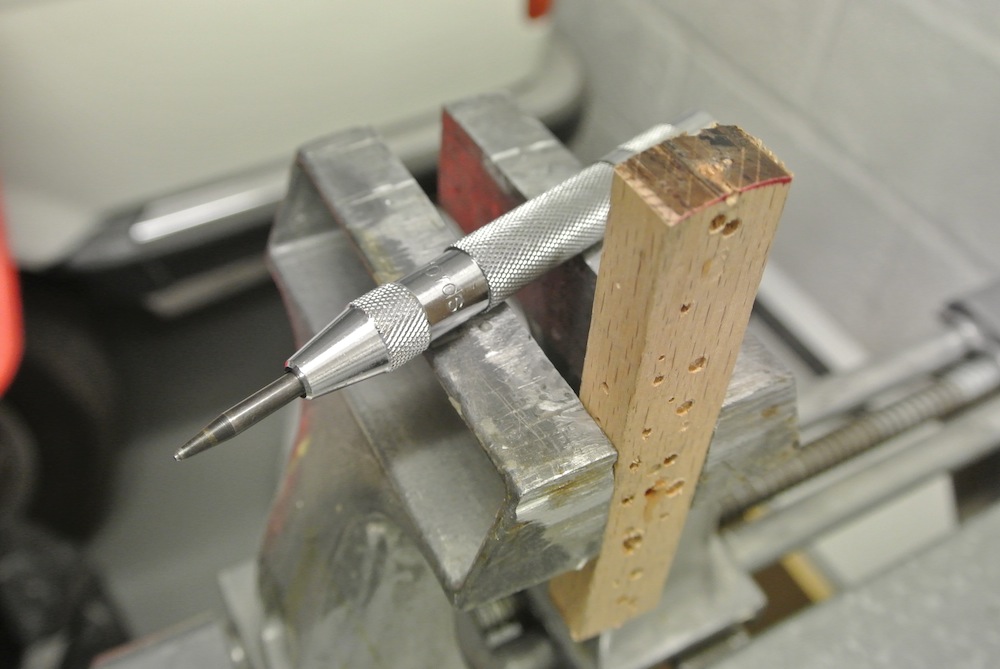
The bell mouth is carbon moulded and the first job was to mark it up and fit it too the thrust pipe. I guess I'm not the only one who hates drilling stainless steel but I have found a neat way of doing it easier rather than fighting with blunt drill bits.
First mark up the location of the holes, to get this even I wrap a piece of masking tape round the pipe, mark the overlap, remove and divide up the length with the amount of holes you need then re-apply the tape and use the marks as the points to drill. So here is the method I use.
Grab an off cut of hard wood and band saw it so one end is curved to mimic the inside curve of the pipe to be drilled, hold the pipe on this curved wooden jig where you want to make the hole, take a sprung punch tool and indent the pipe where you want the hole. The wooden jig will stop the pipe moving while the punch pops a neat hole right through the stainless steel, this can then easily be opened up with the drill of your choice - saves a lot of time and hassle.
With the pipe drilled and the bell mouth set up I also made the fixing strap for the pipe, this is a piece of aluminium flat which I curve round an old tin to get the shape, then make two tabs which locate on the turbine rail formers (having perviously marked the locations for the tabs), drill the strap to fix to the bell mouth and set aside.
Four coats of BVM Ceramic Heat Shield on the bell mouth will help with heat, once dry the assembly is bolted together with M3 fixings.
Ready to fit in place once the tail section is ready...


Wooden jig and sprung punch.
marcs