

Spent most of the day with my wife

, but somehow I did find myself in the workshop for a couple of hours.
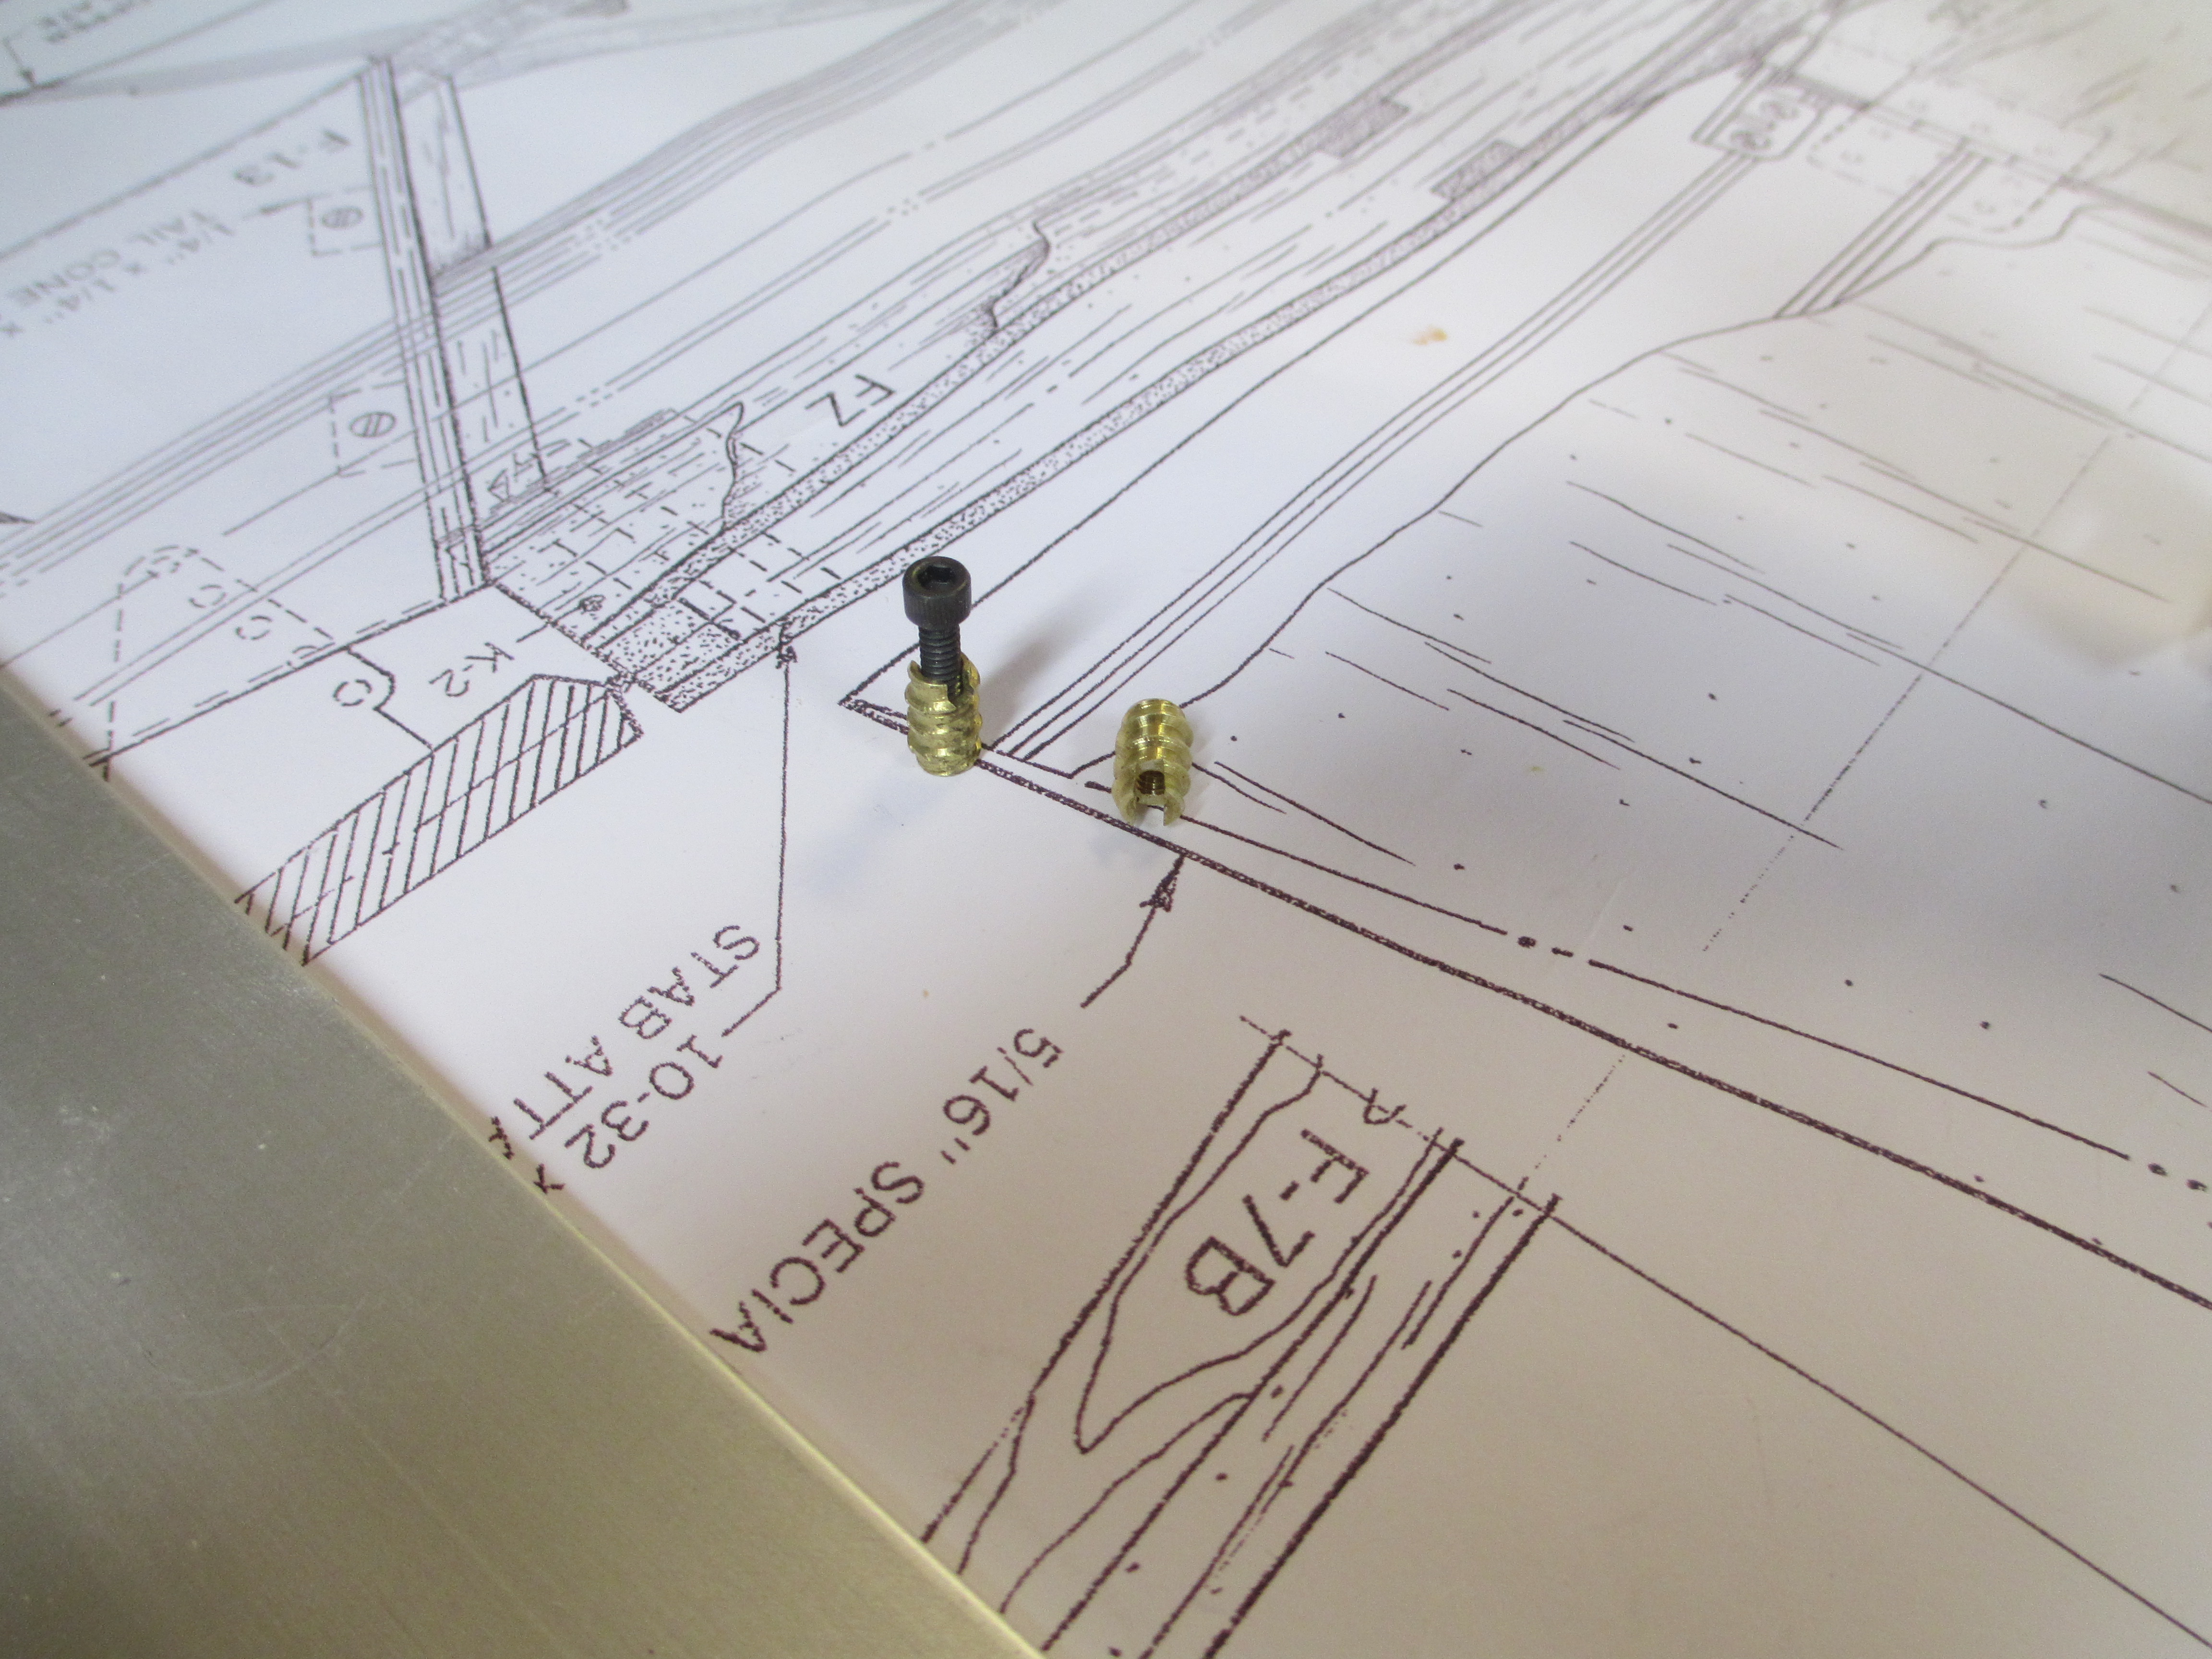
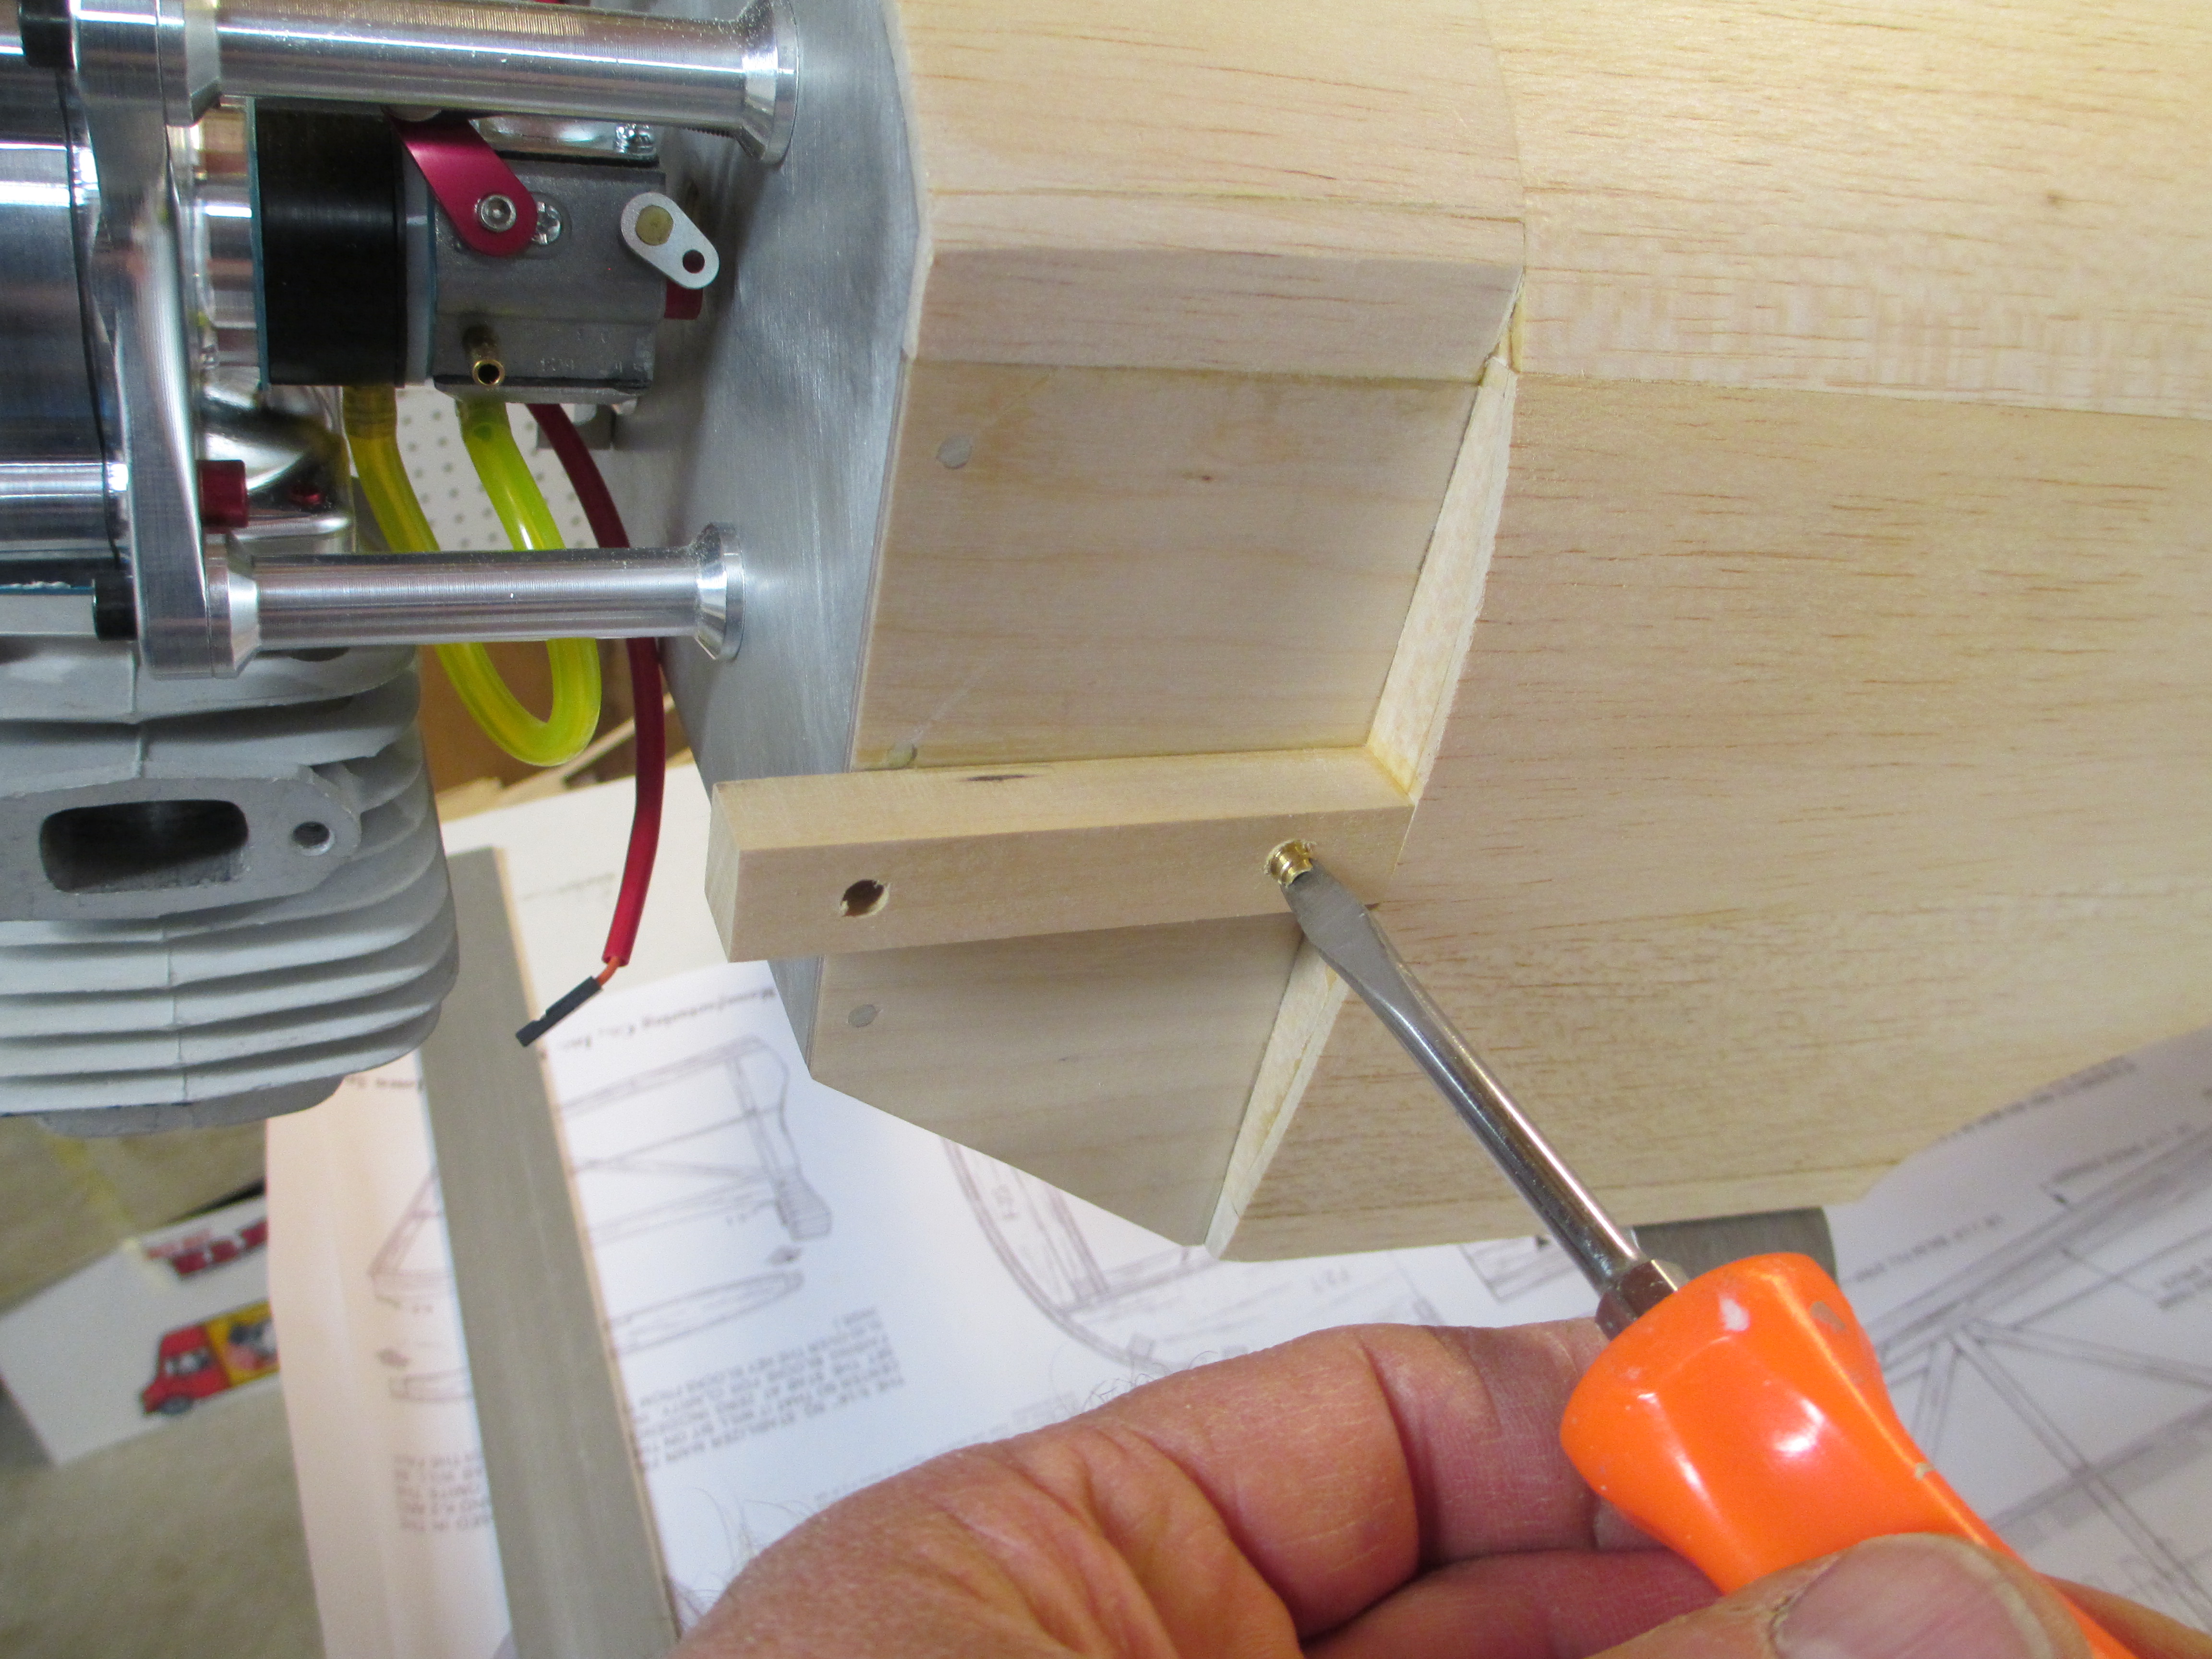
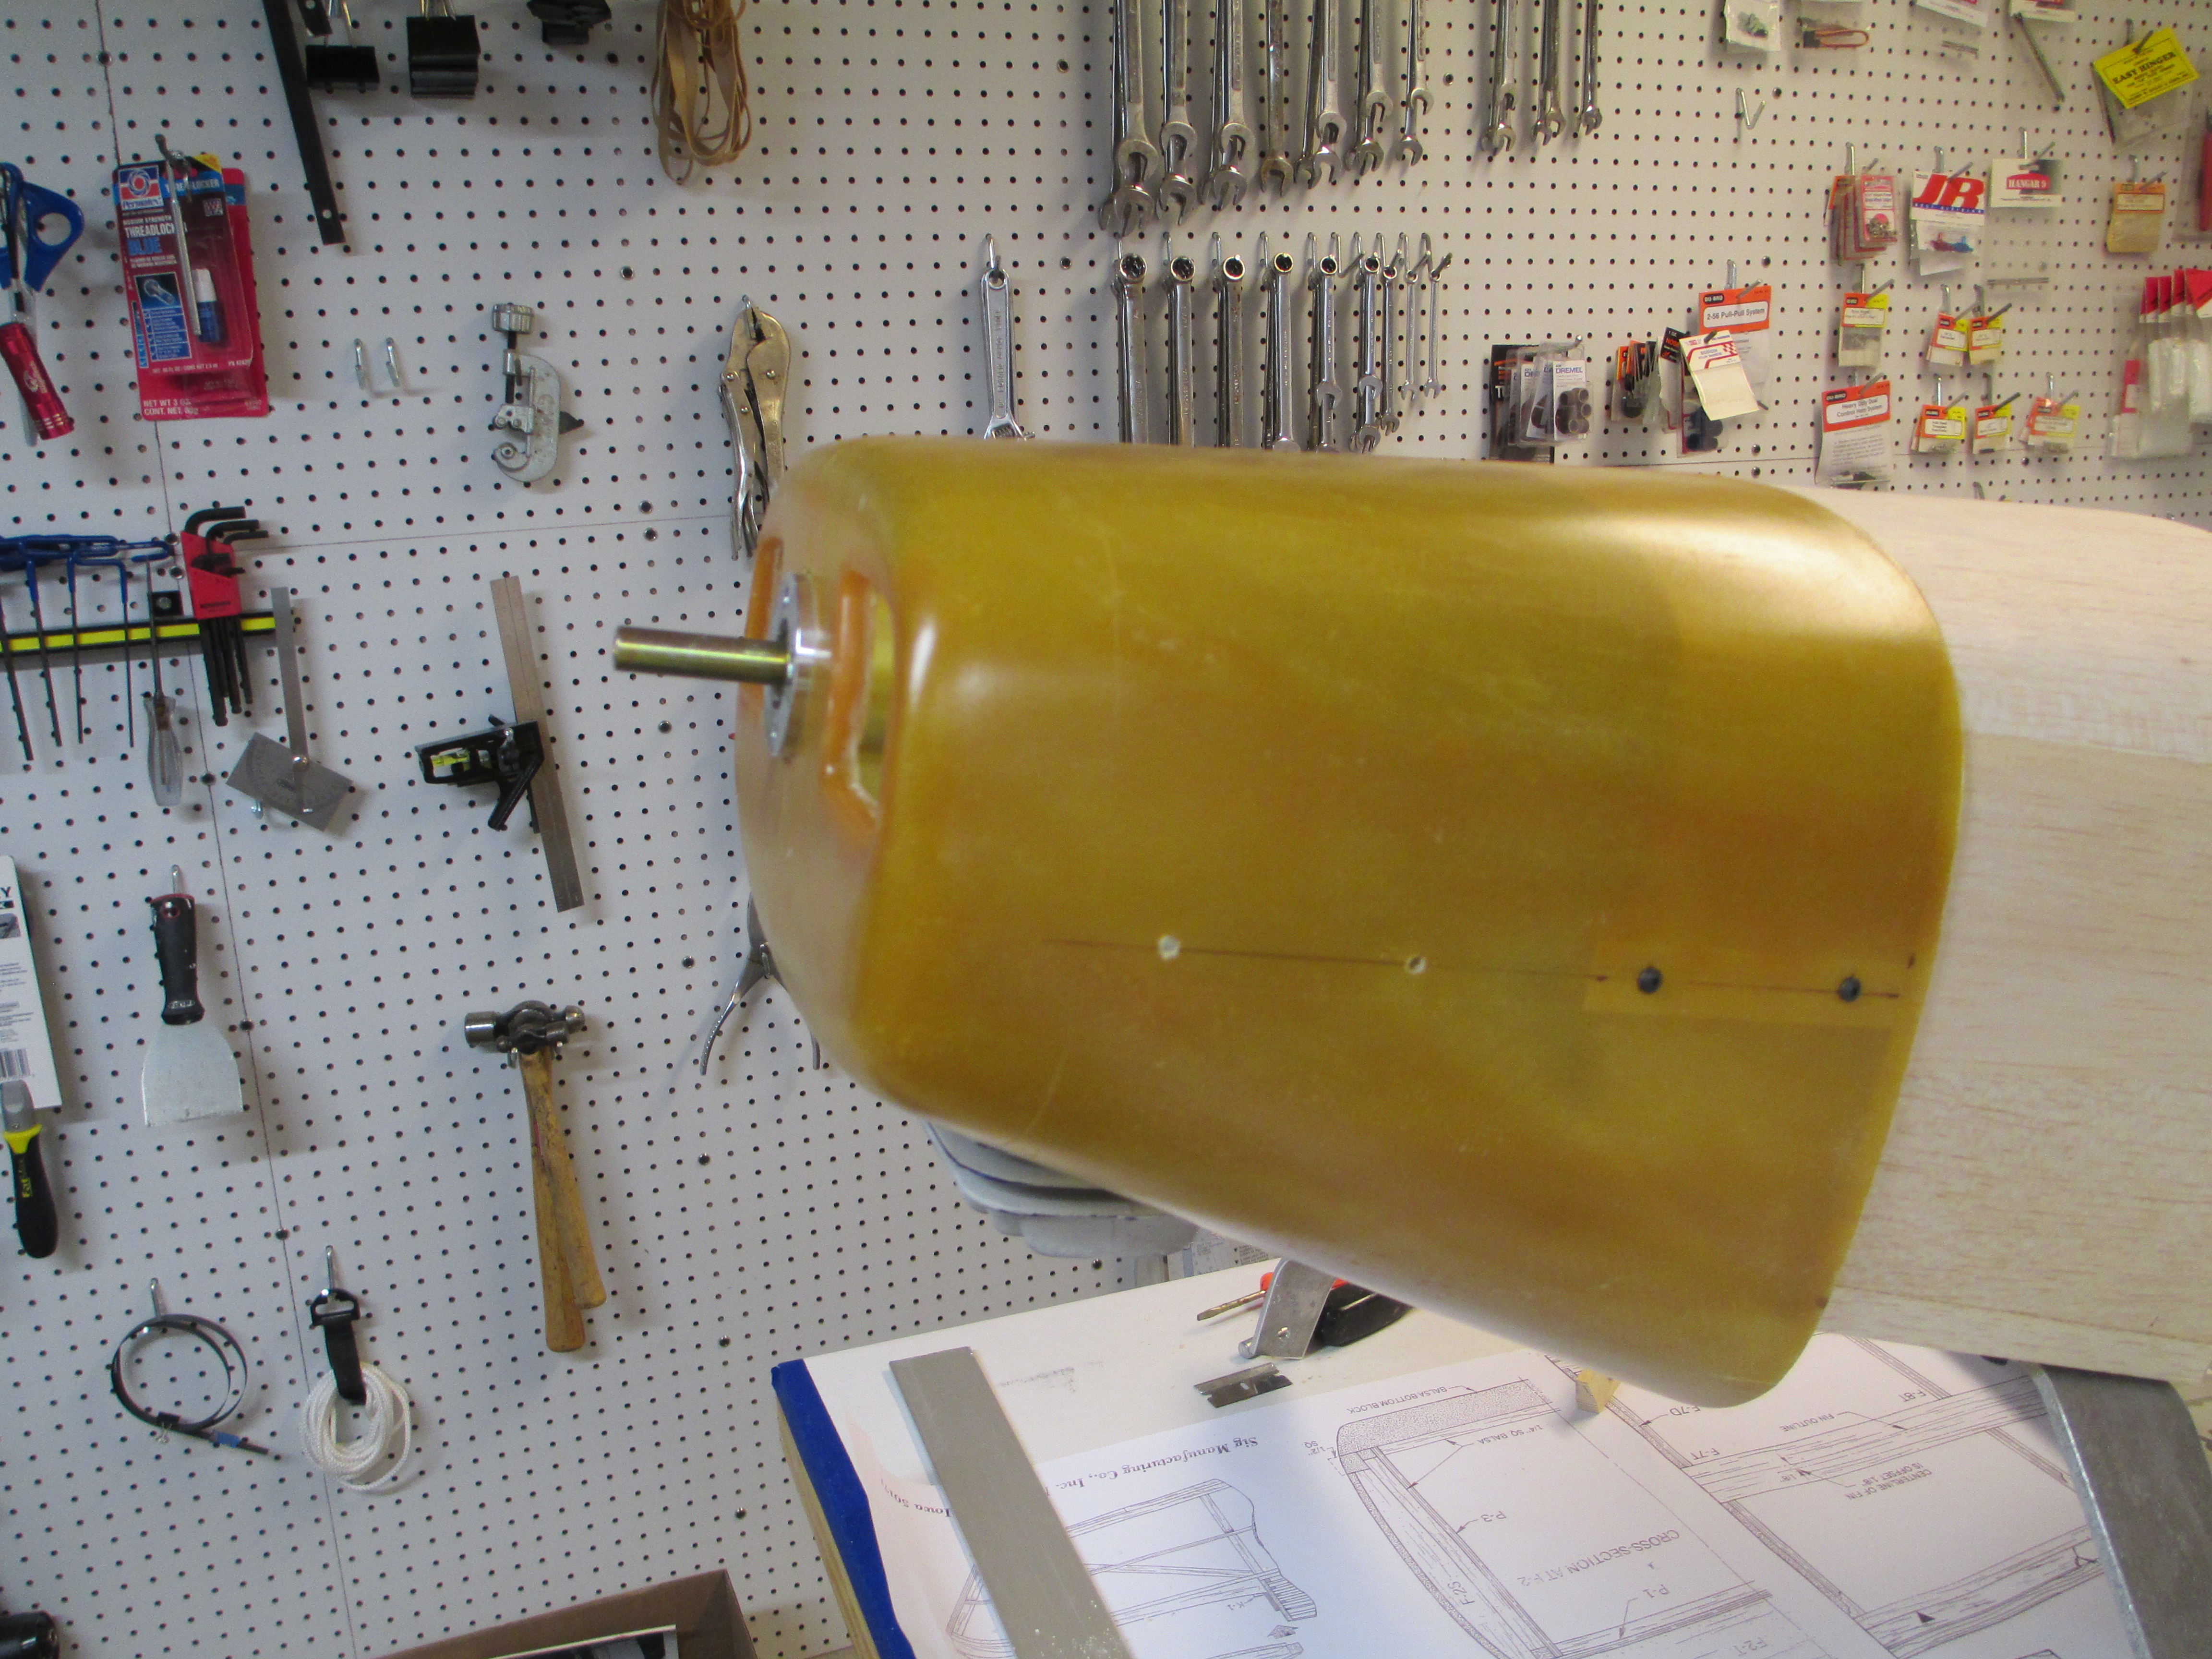
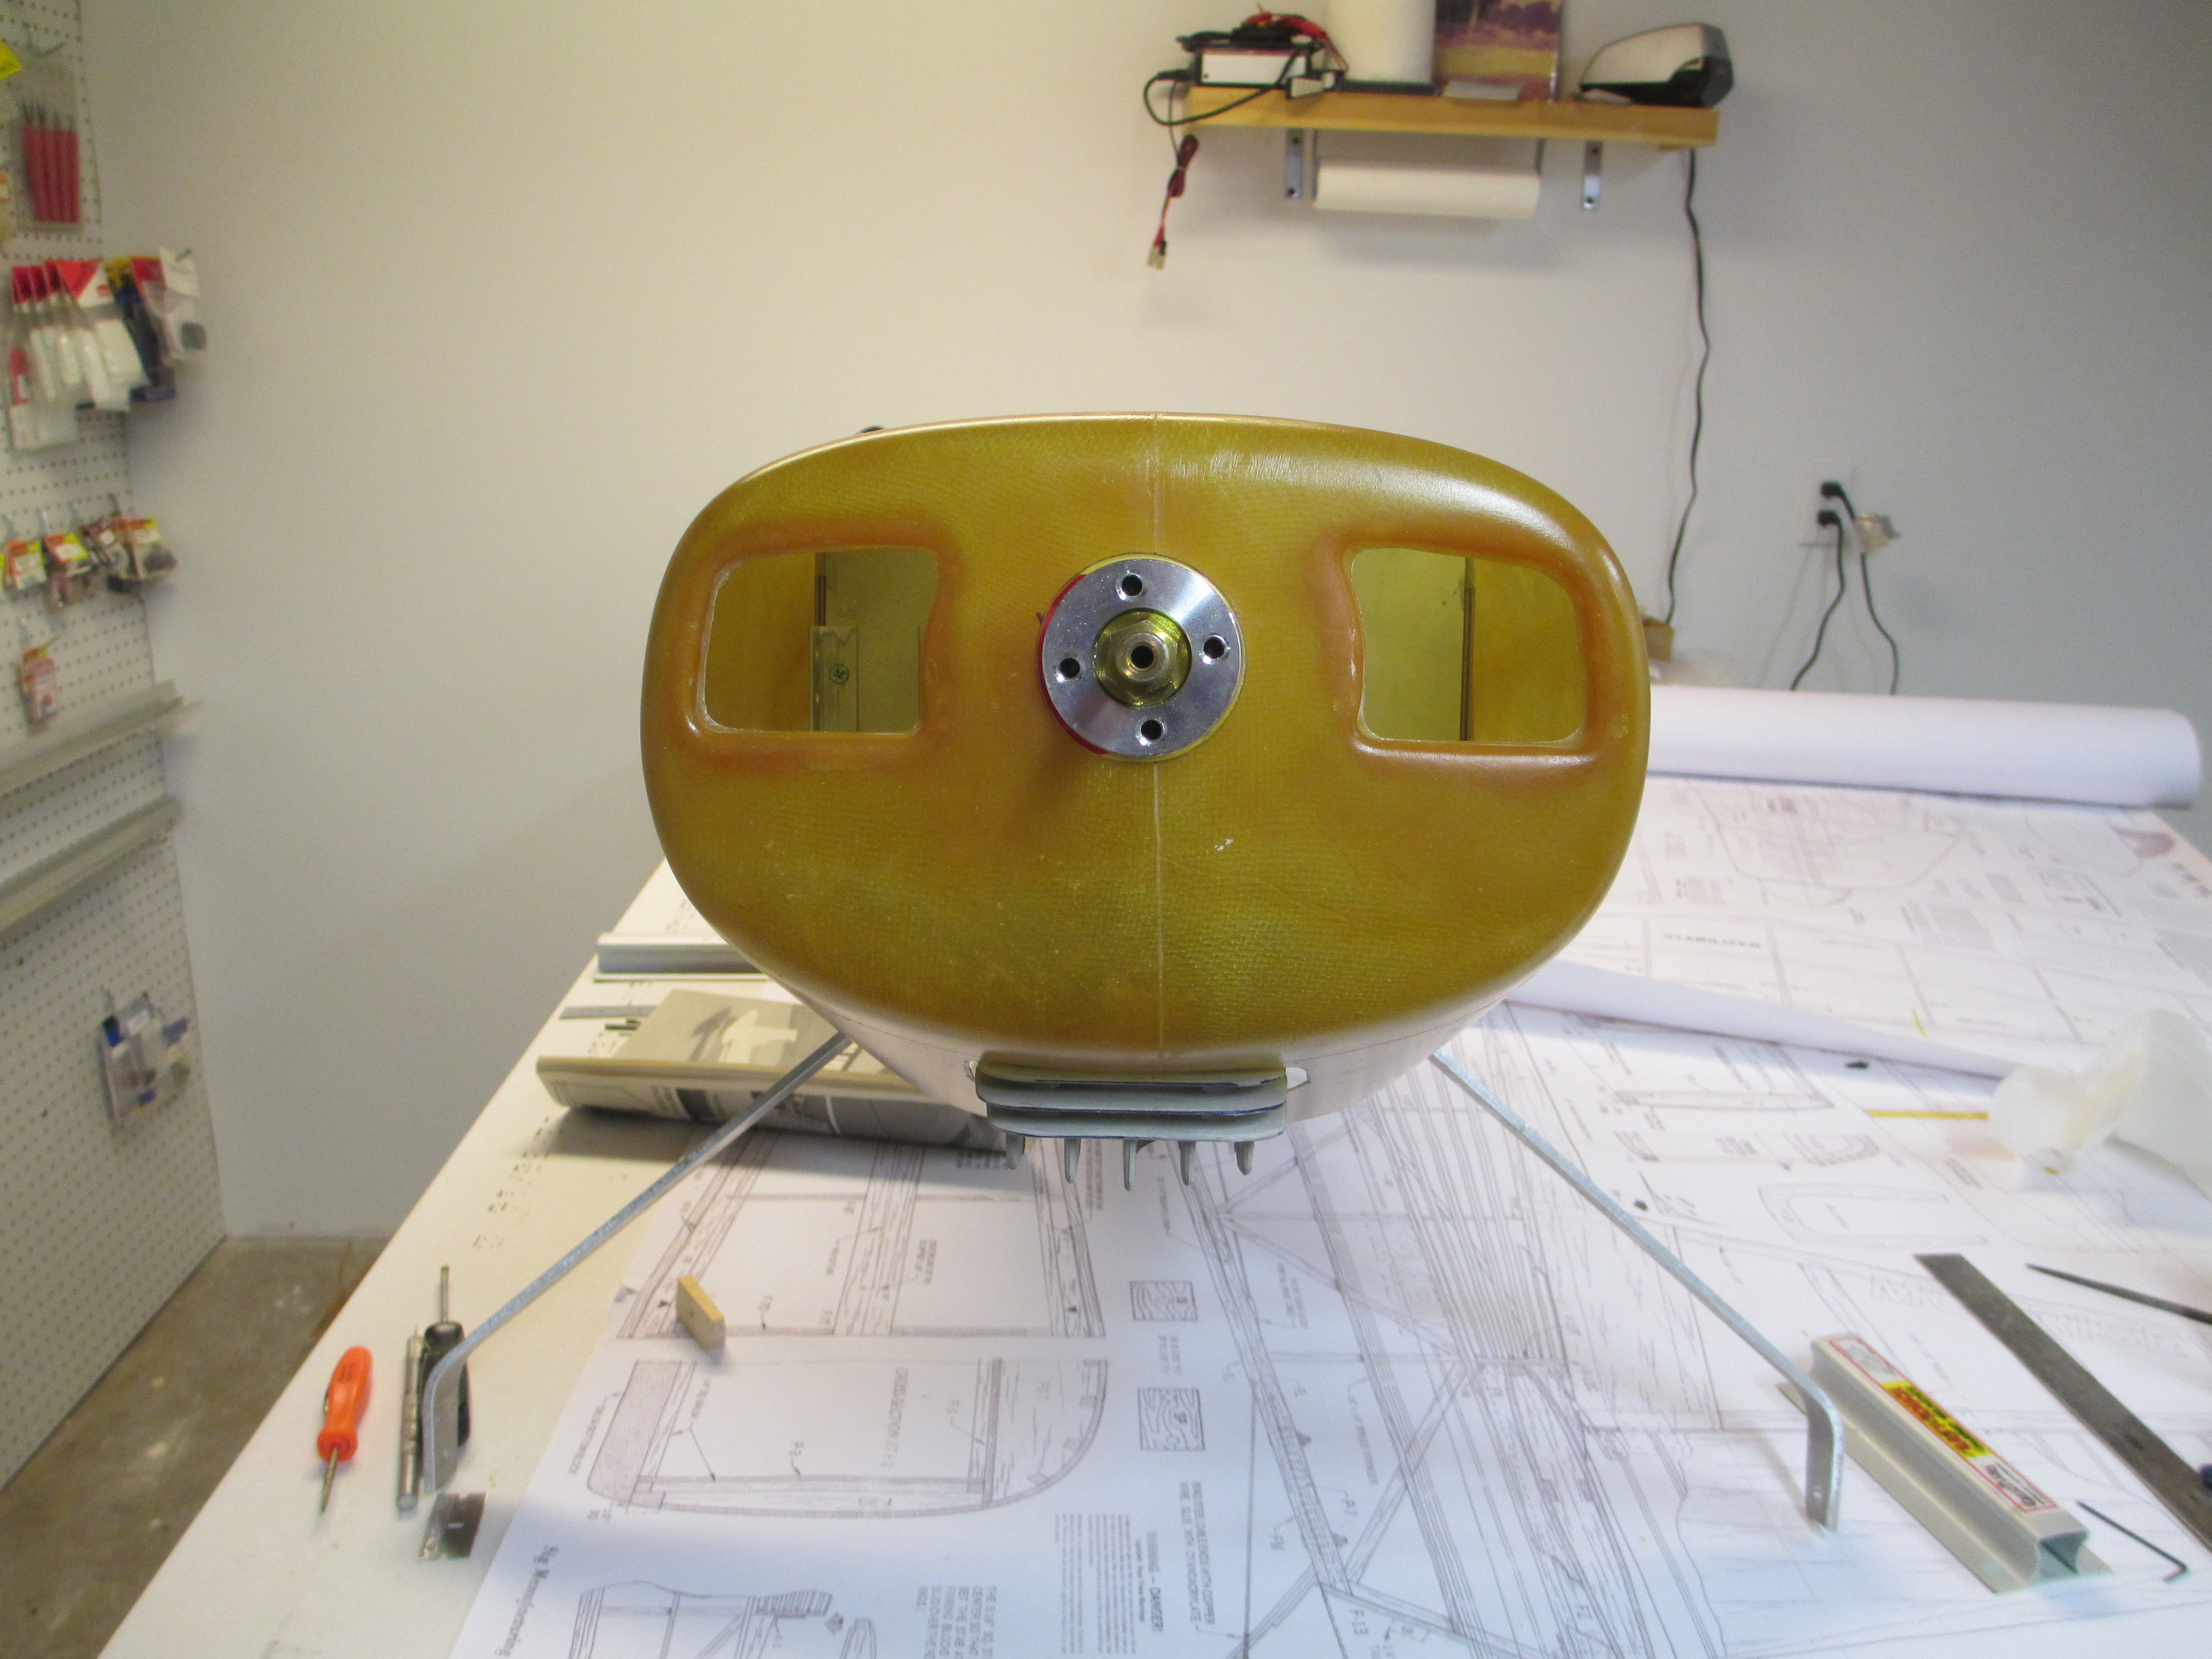
I thought I would get the cowl mounting done. I am going to use something a bit different to secure the cowl in place, specifically brass
Thread Inserts. These inserts are for 4-40 screws, but they do come in other larger sizes. They couldn't be simpler to install, just drill and thread them in place with a flat bladed screwdriver. They will be removed later and I will put some epoxy on the threads then reinstall, making them a permanent fixture. I decided to go this route because I tend to remove the cowl a lot and I wanted something that wouldn't wear out quickly. I think they will do the trick! I am pretty pleased with the transition lines between the fuselage and cowl. Notice, there are four holes on each side of the cowl, two are used to secure the cowl to the fuse, the others will have "dummy" screws to simulate a scale detail that the original Bravo had
(see photo on page 1, post #15) .