Here is an update.
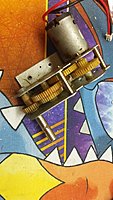
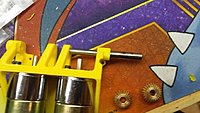
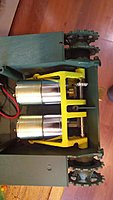
I revised the design to lighten the frame and use less plastic, making it faster and cheaper to print.
Also, I angled the motors slightly so that they do not interfere with some of the old mounting and alignment holes for the original transmissions. This way you do not have to modify your tank at all to use this transmission.
I am able to salvage the main shafts from the original Heng Long transmission to save on cost and ease manufacturing.
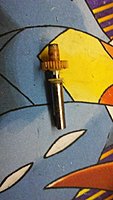
First, we remove the main shaft from the original Heng Long transmission:

Then we need to remove the gear pressed onto it. We can start moving it by using a pair of pliers to bear against the side of the gear, and tap it off the spline. Then we can finish driving the shaft out using a small punch.


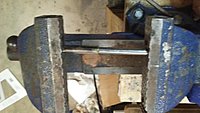
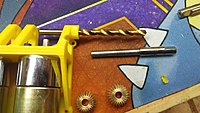
Next I found some 6mm OD x 45mm spacers, which can be used to lengthen the stock Heng Long shaft. But to make it fit we have to drill it out. I believe I used a #9 drill bit. You want to drill it out just slightly smaller than the knurling on the original shaft.


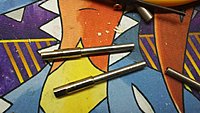
After it is drilled out, we can use a bench vice to easily press the shaft over the spline on the original shaft. This completes the shaft.

The holes in the 3D printed part are deliberately undersized, so next I drill them out to accept the shafts with a perfect fit. It's likely that with this plastic no bearings will be necessary. If they turn out to be necessary, it will be trivial to add them simply by drilling the holes a bit larger.
Because when you press the spacer over the knurling on the original shaft it may slightly bulge it larger than the 6mm OD it originally had, you may need to very slightly drill out one of the bevel gears so that it easily fits over the shaft.

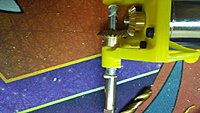
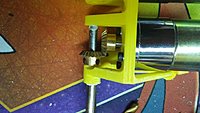
To set the spacing of the gears, first slip a bevel gear onto the motor shaft, and then temporarily install the main shaft and its bevel gear. Push the bevel gear on the motor shaft as far forward as needed to fully engage the main shaft bevel gear, and tighten its set screw onto the motor shaft.
Then remove the main shaft and its bevel gear - you can't install the transmission in the tank with the main shafts in place.

I'm using white lithium grease to lubricate the shaft. I hope this will be safe with this plastic.

Finally, we install the transmission in the tank, and re-install the main shafts and their bevel gears.

I also salvaged the original wiring pigtail off of the Heng Long motors, as well as the capacitors or whatever they are that evidently tie the leads to the motor frame. I guess this eliminates noise or something.
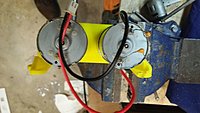

I've only got one motor wired up right now, but it runs. The speed seems good - slower than stock but stock was too fast anyway. The motor is supposedly 200 RPM out at 12V. I'm guessing this is a bit slower at tank voltage. Torque seems a bit light though when I grab the drive sprocket. I may have to investigate a more torqey motor. But I won't know for sure until I get the tank all together and test drive it.
But it seems likely to work. The motors are roughly $12 each, and you need 2 of them.. The shafts are McMaster-Carr: Stainless Steel Unthreaded Spacer - 6 mm OD, 45 mm Length, for M4 Screw Size - 92871A208, and are roughly $3 each, and you need 2 of them. The bevel gears are from Servo City
https://www.servocity.com/6mm-bevel-gears and are about $6 each, and you need 4 of them. I don't know how much the frame will cost to print at Shapeways, but let's just guess $30 for now.
So, you will be able to build this transmission for under $100.
This is for my Heng Long Jagdpanther. After I get it working, I'll move on to my HL Sherman.
Steve