I started this project 2 years ago and for a while i managed to make some good progress; all major components were built and ready for film covering. The initial plan was to finish the model, test it and improve it as much as possible before releasing the drawings.
Unfortunately sometimes real life gets in the way of our projects and at the moment it seems there will be a long while before I will be able to work on this again. I would hate to see all the work go to waste though, so I decided to publish the drawings anyway and maybe others will enjoy building and flying this model. I tried to use all the experience gathered with my previous designs and all my flight testing observations to make Vortex a great flying model, but of course since the prototype is not finished yet i can't make any claims about its flight performance.
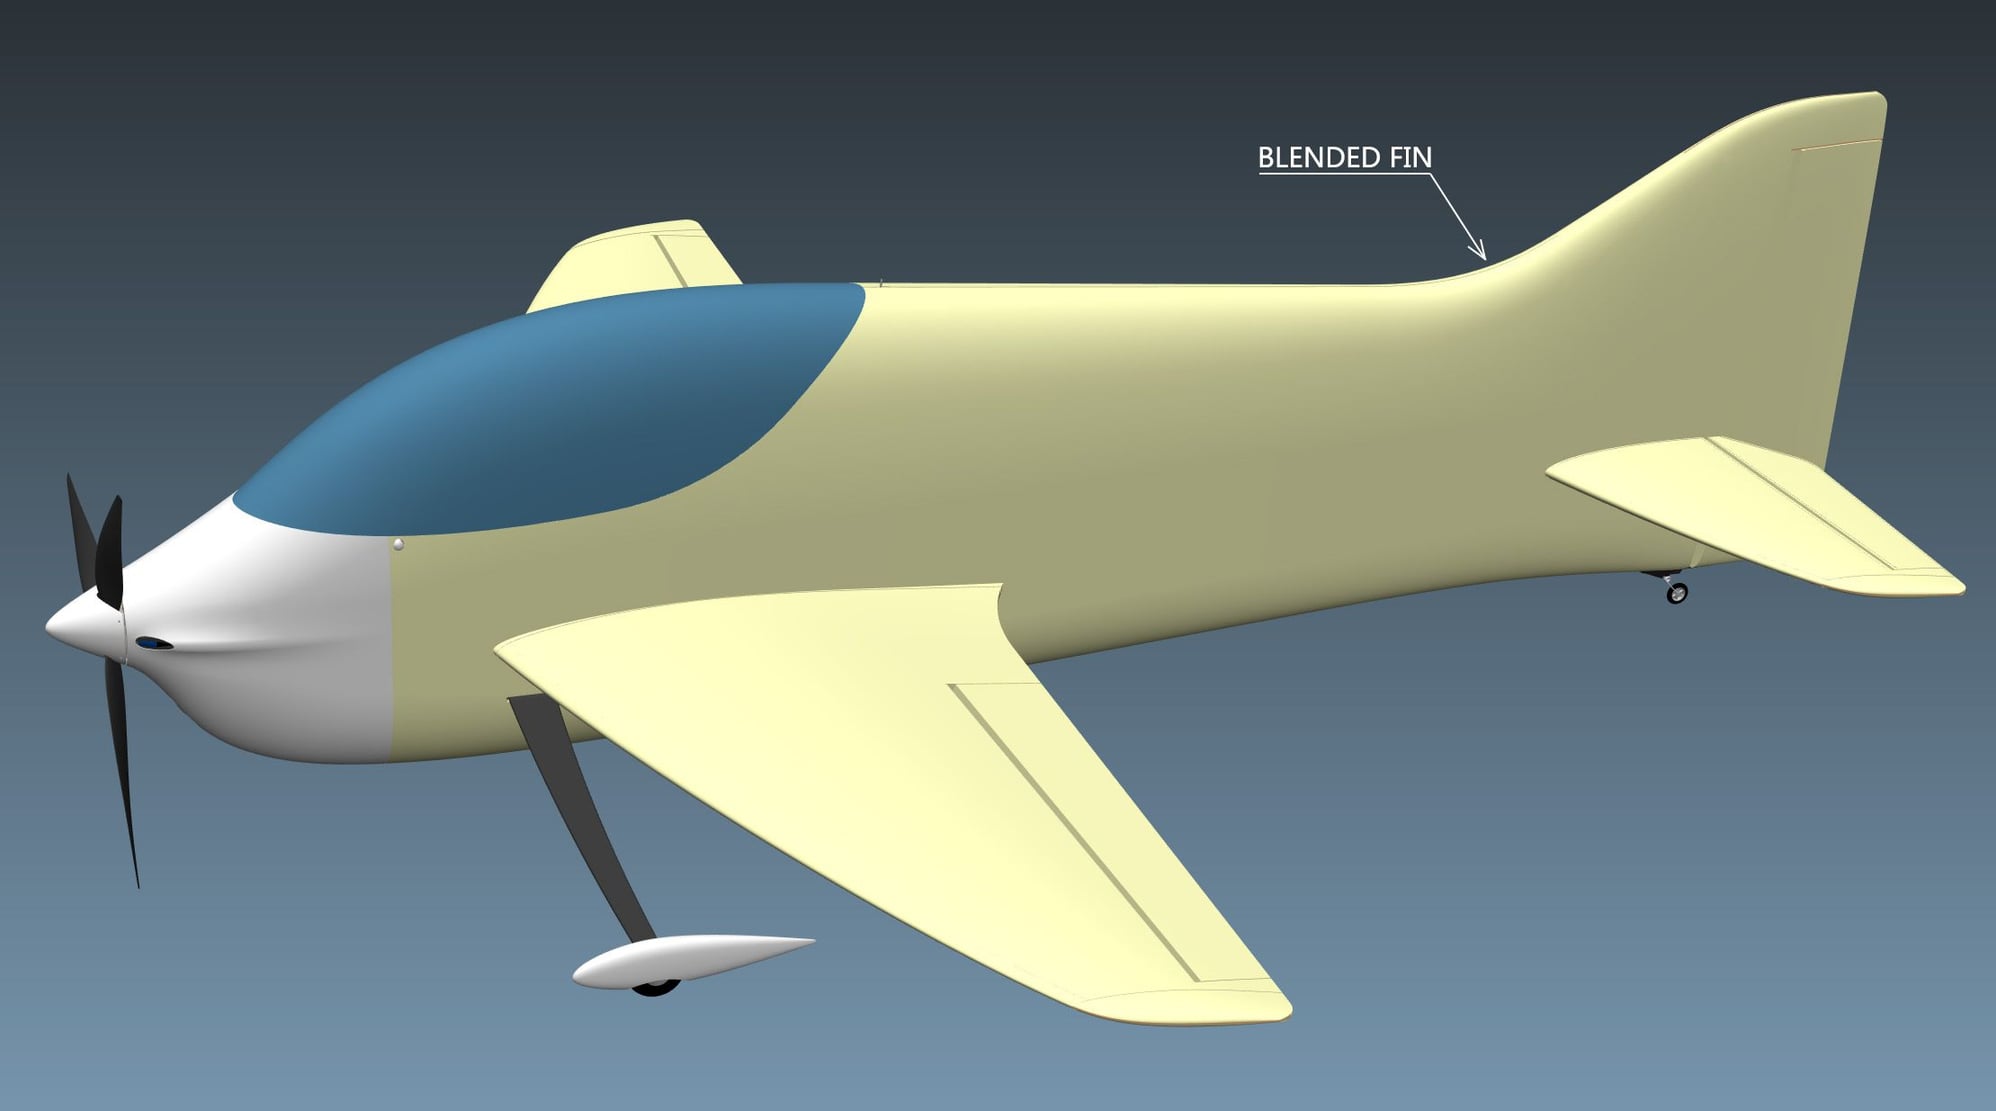
My prototype has a more complex fin that blends into the fuselage; this may look nice but it takes some time and effort to build. That�s why I designed another version with a simplified fin and the builder can decide which version he prefers.
So the main 2 versions of Vortex are Blended Fin (BF) and Simplified Fin (SF); the drawings for these 2 versions are completely separate so there is no risk for confusion. Each of these 2 versions has a number of options, depending on the type of motor you plan to use (front mounted or back mounted).
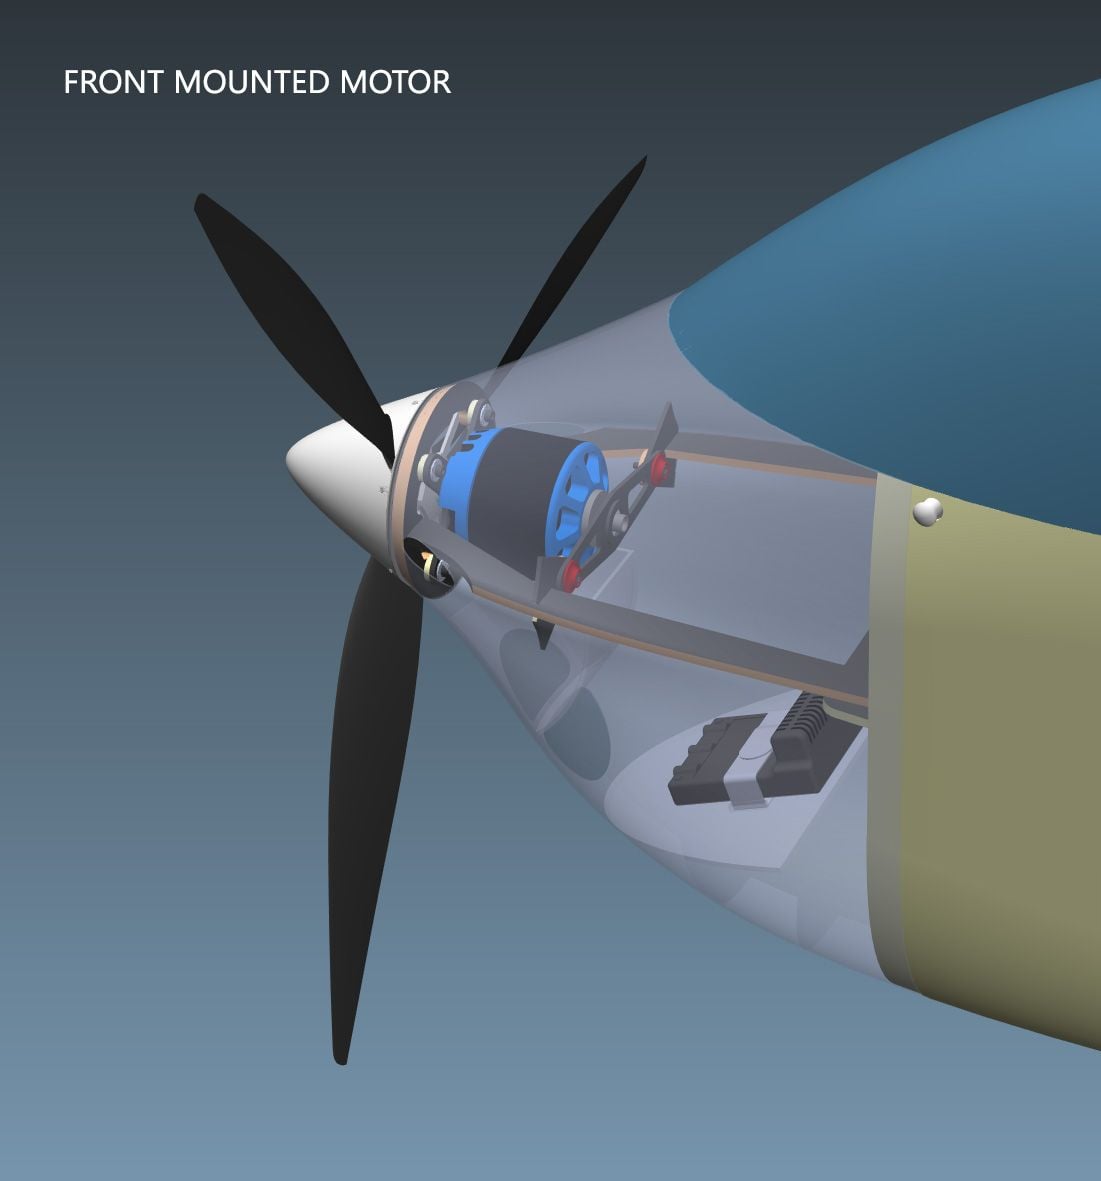
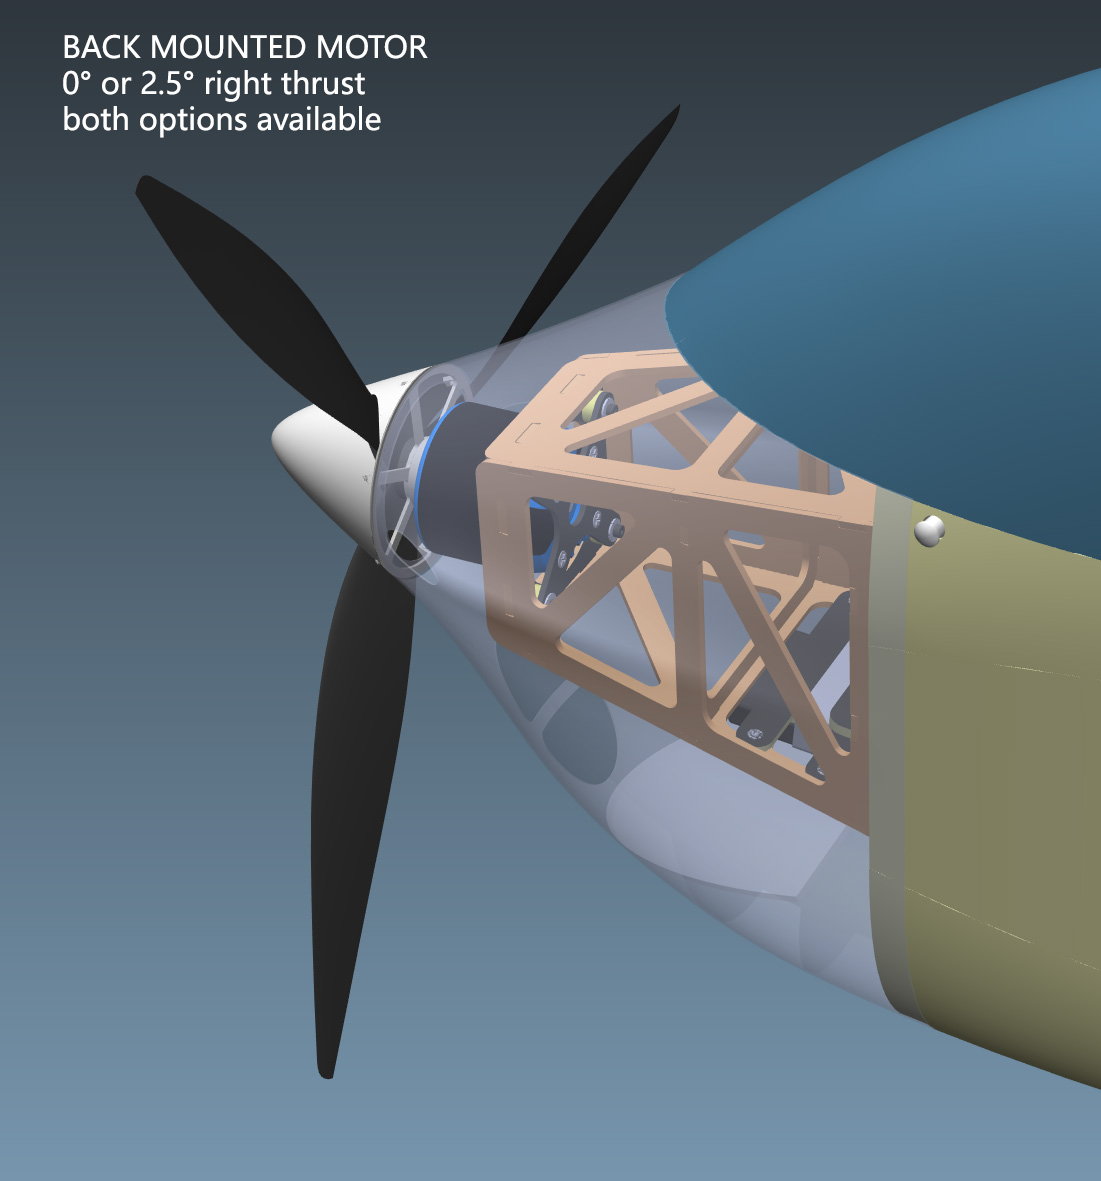
For the front mounted motors the fixation points are very close to the spinner, so it�s easy to adjust the right thrust angle by shimming the motor, from 0 to at least 3 degrees. For the back mounted motors it�s a little more difficult, so I included 2 different motor mounts, one with 0 degrees right thrust (if you plan to use a setup similar to the Allure / Alchemy) and one with 2.5 degrees right thrust.
The cowl will be 5mm longer than needed at the front, so you can cut them according to your preferred right thrust angle or for slightly different spinner sizes. I would recommend leaving the nose a little longer, and you can trim it after the first flights when the thrust angle is set.
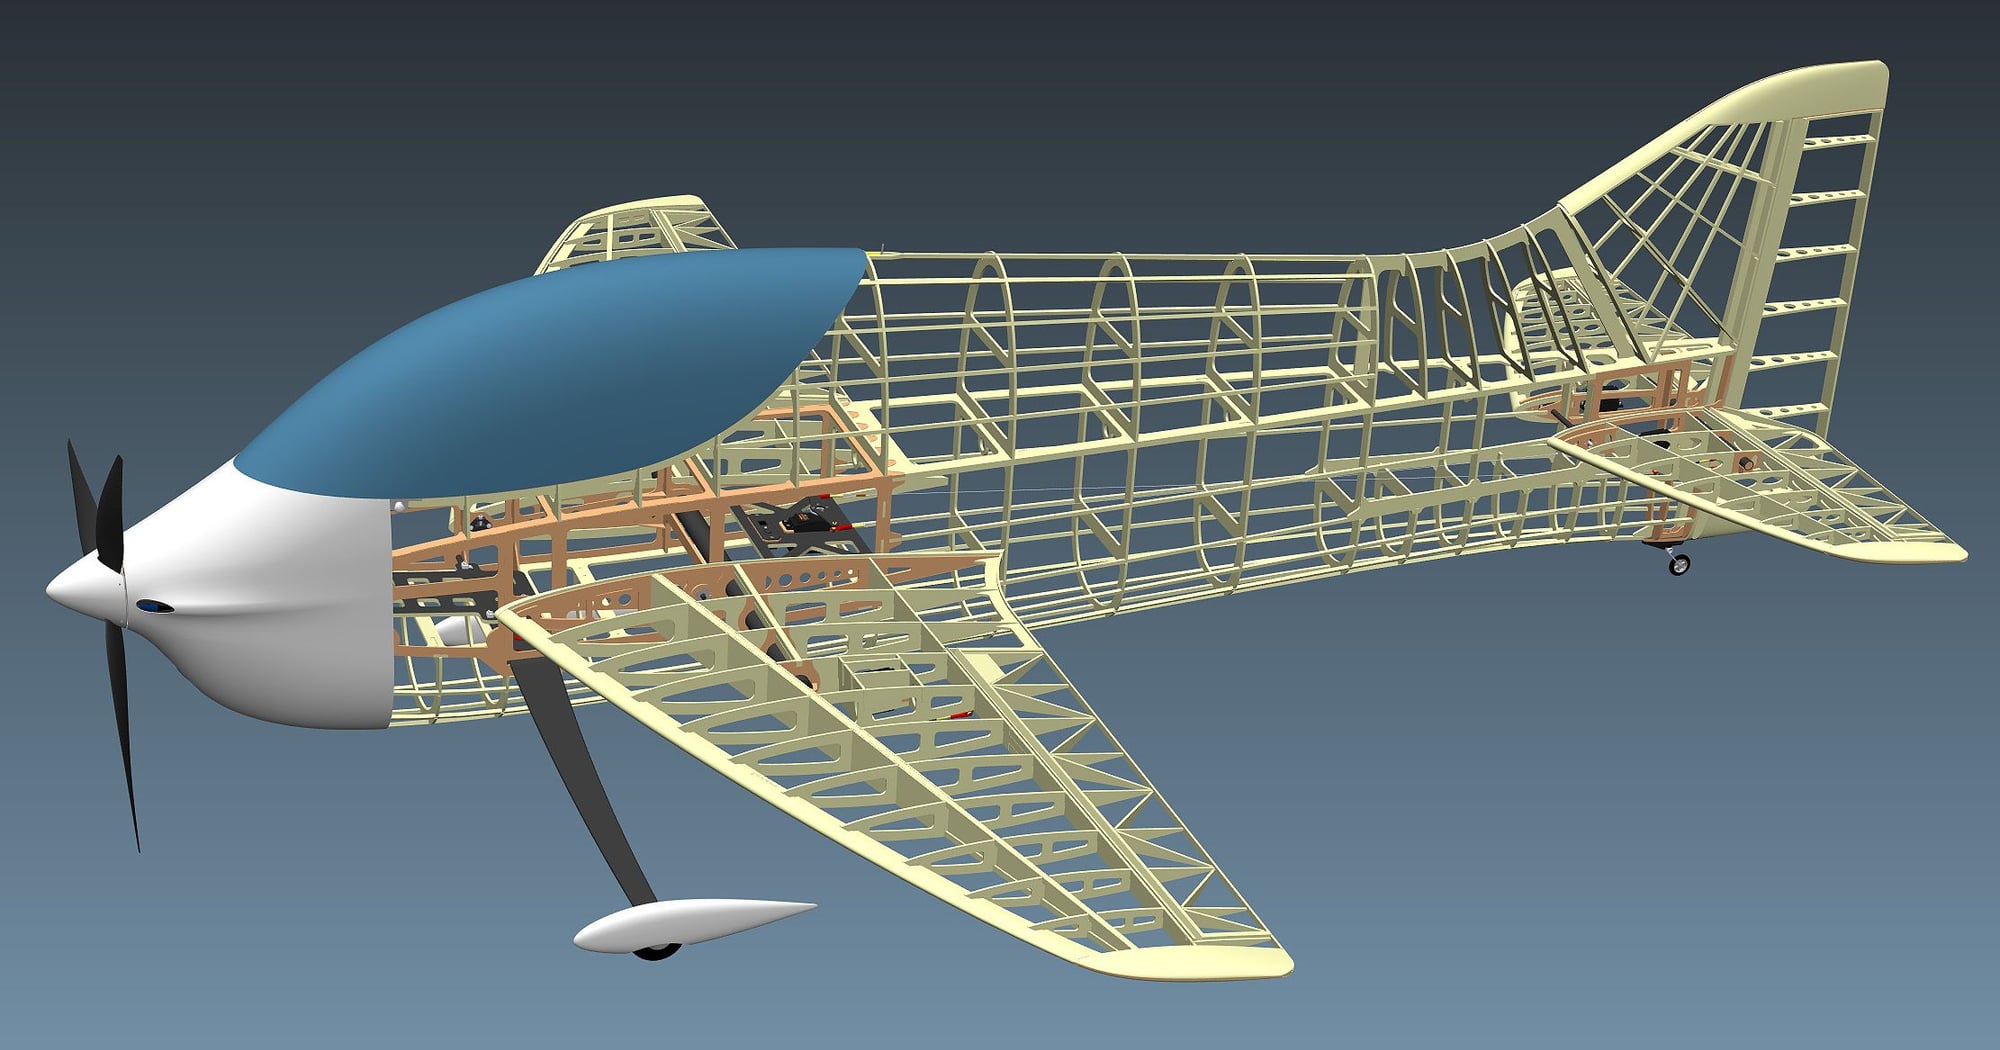
The pictures may not reveal the true dimensions of this model but Vortex is a VERY large plane: the fuselage is almost half a meter tall in the canopy area (480mm to be more exact) and the fin is 563mm. Of course when building a plane of this size you need to be very careful with the materials selection, so you should use only contest grade balsa. I used 100 kg/m3 density balsa which is far from the lightest but I think the final weight will be under 5Kg with film covering.
The drawings are structured in folders depending on the material type and the required sheet dimensions are included in the file names. You will notice that some balsa sheets dimensions are 500x200mm which means they are made of two 100 mm wide sheets glued together before laser cutting.
The file format is DWG and there are 2 main layers on each drawing: one named �Cutting� (red color) and one named �Marking� (green color, used only for engraving part codes and other useful marks).
All the major structural parts are found inside the �Laser Cutting Files� folder - I do not recommend cutting these parts on a CNC router! To ensure proper interlocking between parts, I used a small offset to compensate for the width of the laser beam. This offset is quite small for soft balsa or liteply parts (0.15mm) but it can be double for tough materials like the 3mm hard plywood. If you use a CNC router, you will have to sand off this small offset to make the parts fit.
In the �CNC cutting files� folder you will find all the materials that are impossible to cut by laser. The parts in this folder are mostly accessories like control horns, ESC support, battery tray, motor X mounts, etc. You can of course choose to cut these by hand or change the materials if you wish.
If you wish to download the drawings please follow the links below and click the download icon (small arrow at the top right corner of the screen). I will add pictures of the building process here on the forum so you have something to guide you and I will do my best to support you if you need any advice or more information.
Vortex F3A BF � blended fin version:
https://drive.google.com/�/1QYhsgJMIUQnEe71J8_UnipDOg_C4KDNe
Vortex F3A SF � simplified fin version:
https://drive.google.com/�/1lZ0lNyZL-c27EtNUiYrh8-5Cky374BtO