PART 1.
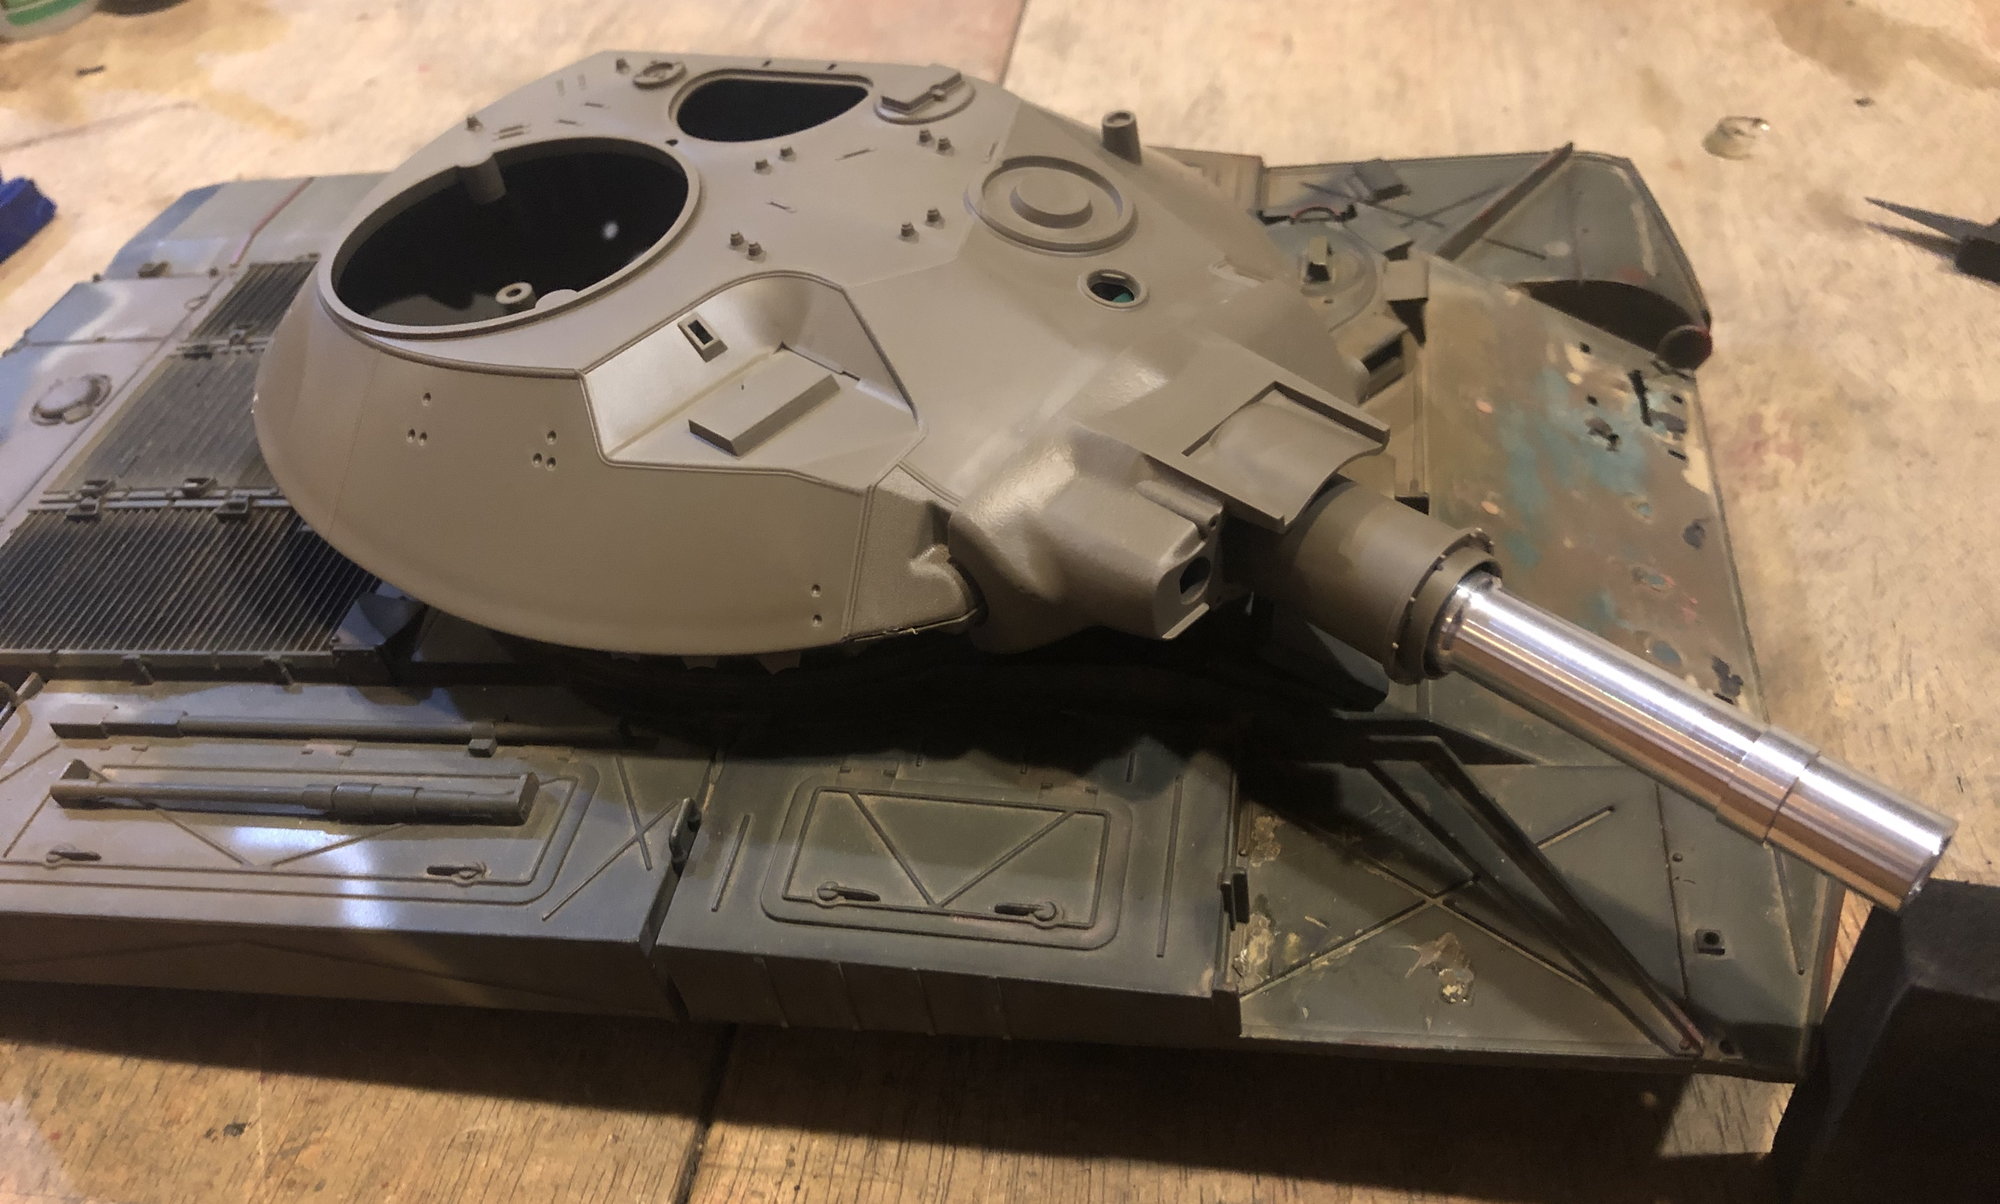
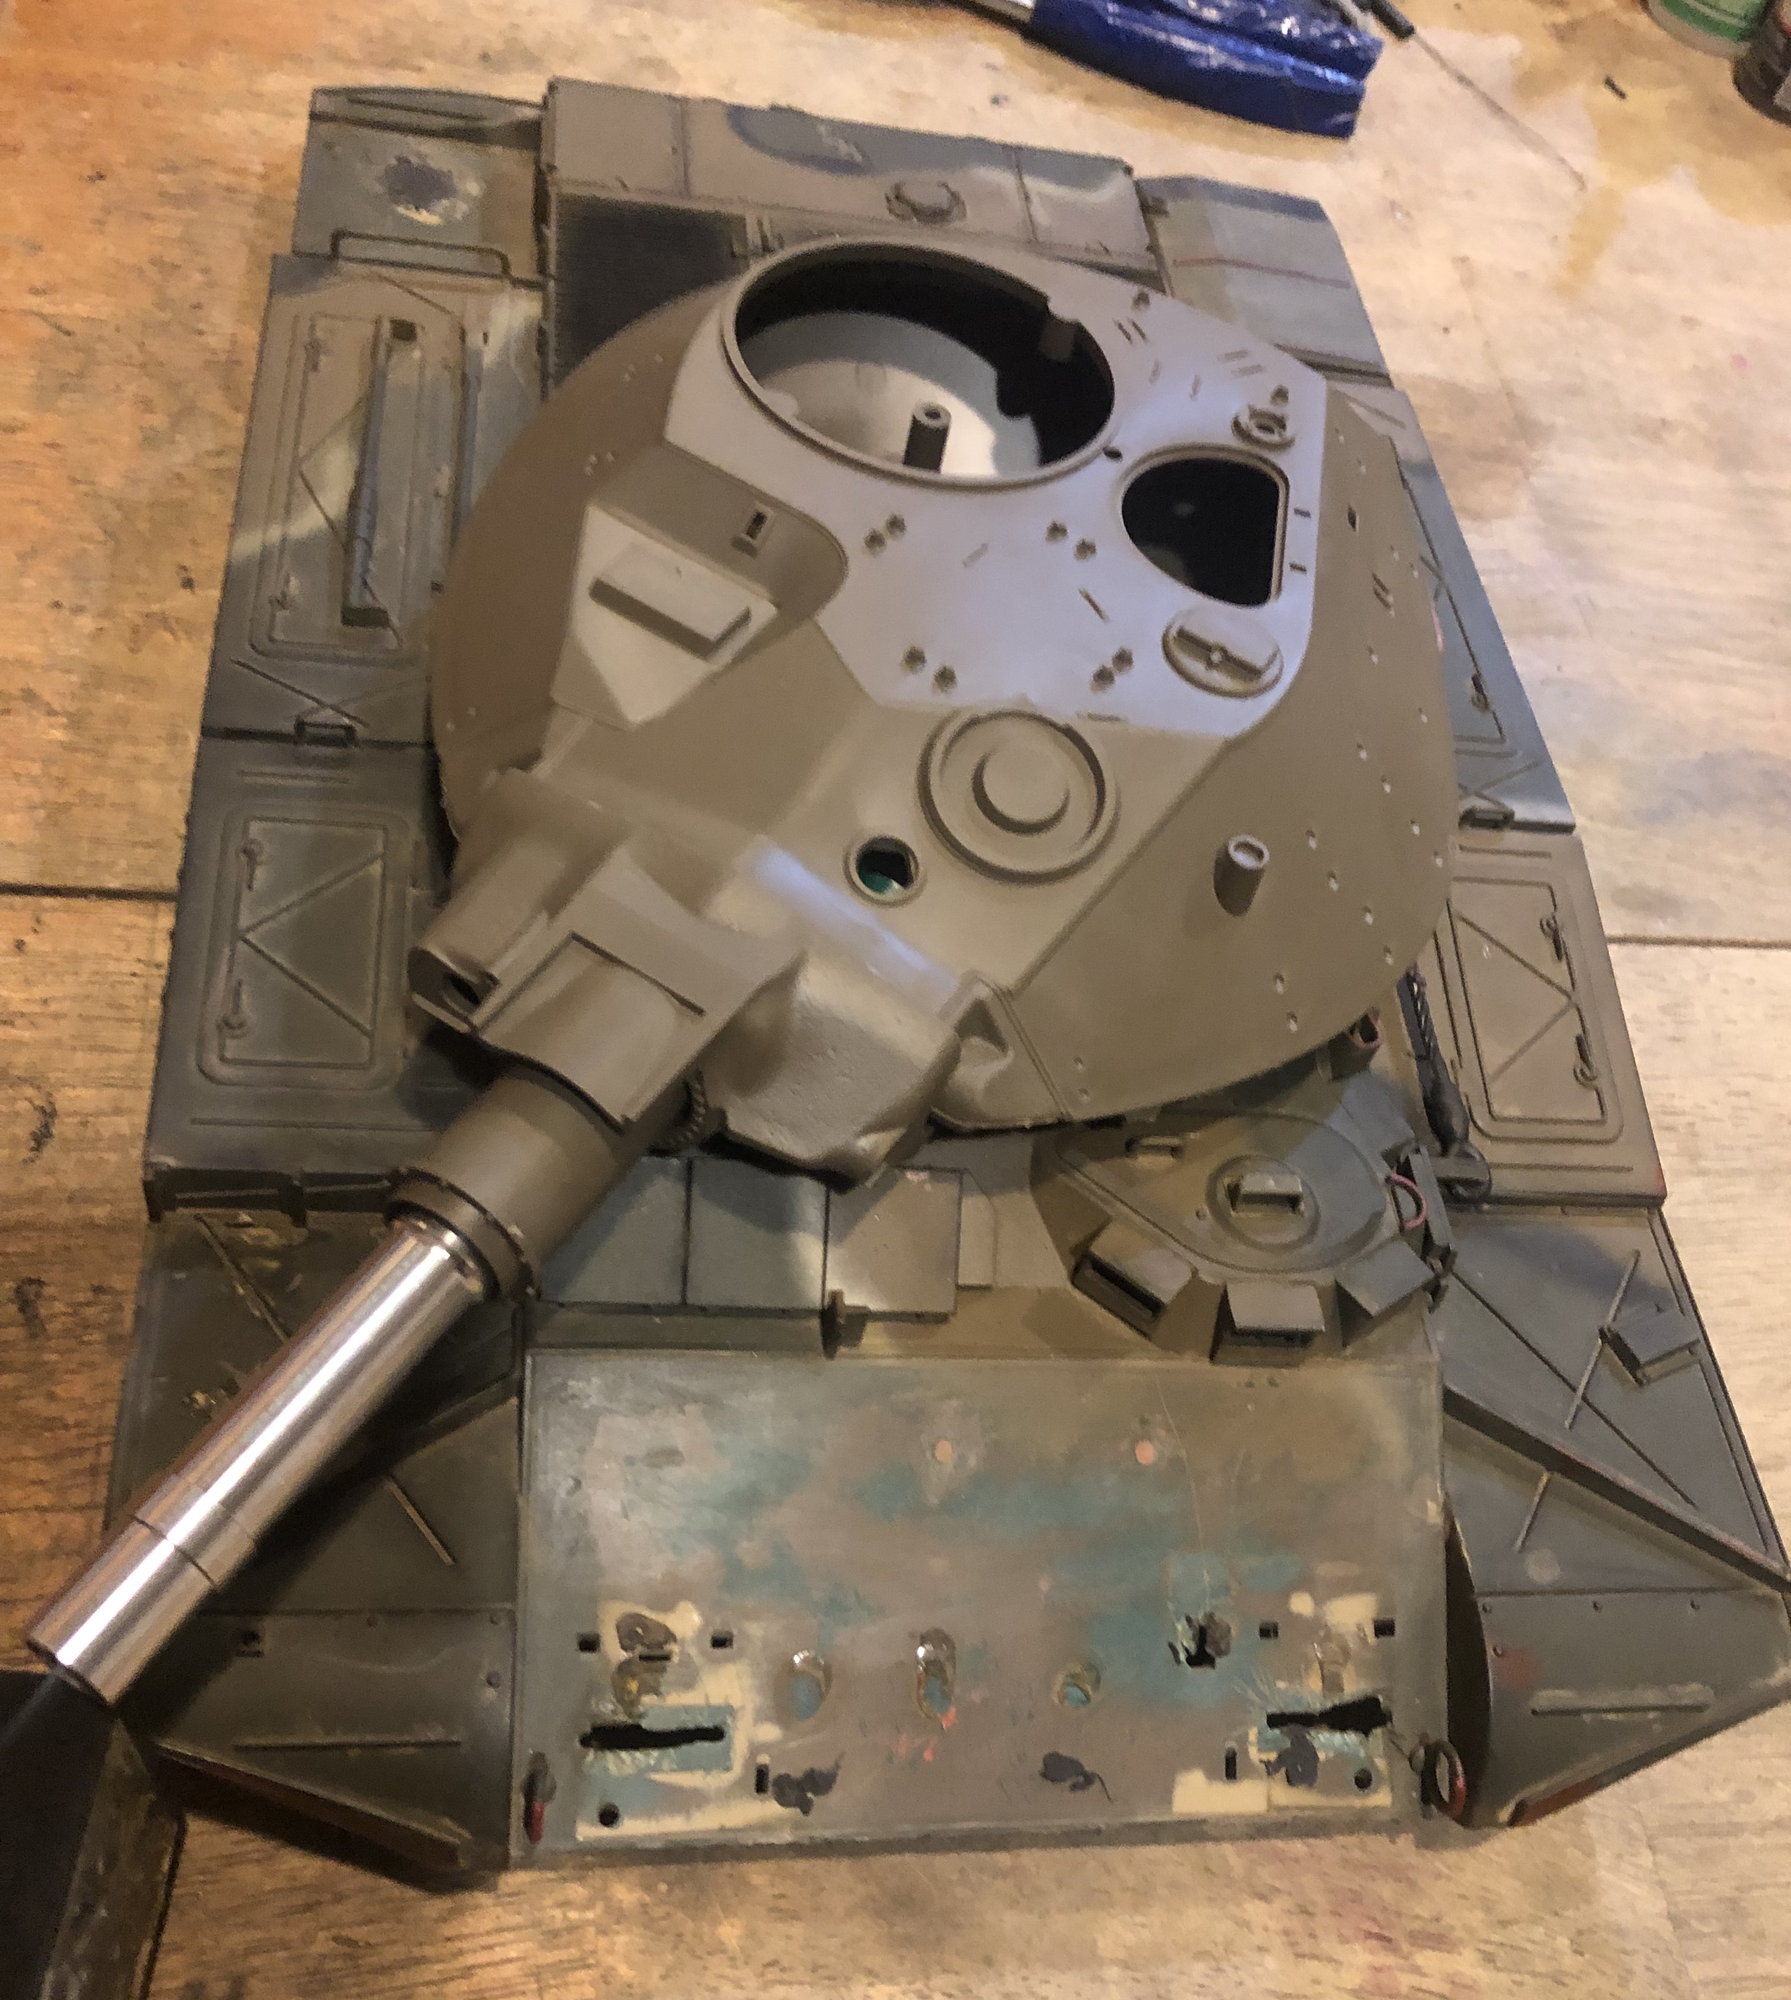
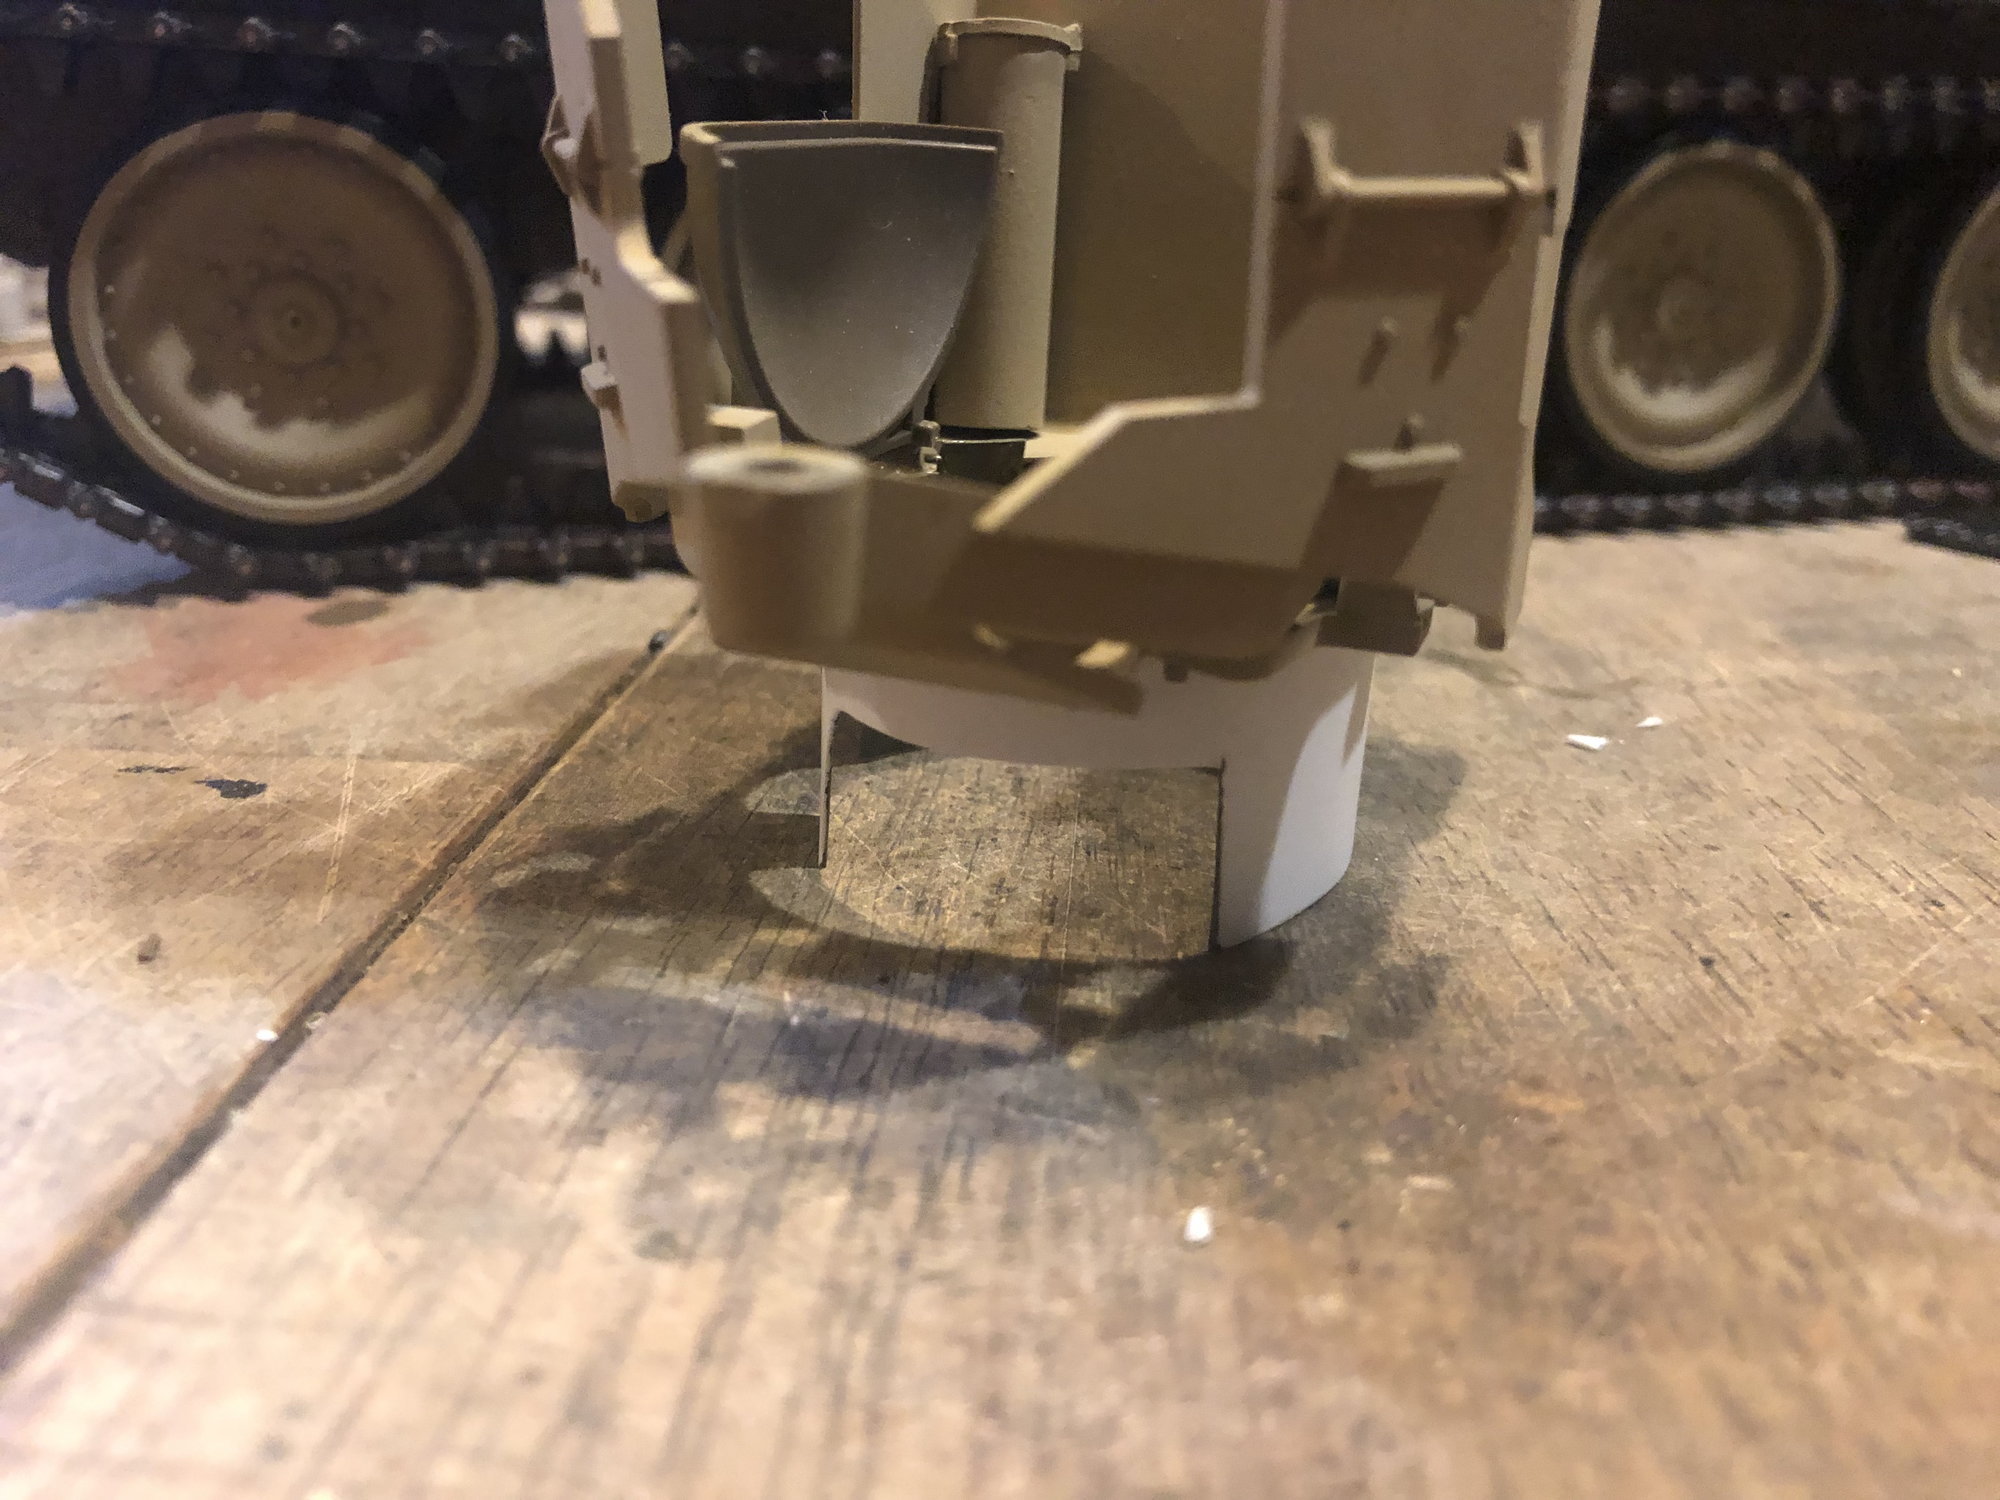
My Tamiya M551 Sheridan project was started as two fold. First was to build the Sheridan the second was to measure and check parts fit for an upcoming XM551 turret testbed tank, a XM551 turret mated to a M41 lower hull. Fitting up the Tamiya M551 turret to a HL M41 upper hull showed the to be a good overall fit and with some simple scratch building of a turret plate to bolt onto the HL turret gear ring would be an easy hour of work to complete (see below photos). With all the parts being available through Tamiya's web site for about $160 I look forward to building it in a few months.
Full discloser about the Tamiya Sheridan being tested. Largely it is stock with a few exception. Those being the placement and size of the battery, smaller speaker, the addition of a internal commanders cupola basket, more modern smoke launchers, rear stowage bin, and a rear commanders cupola shield. Only one, the battery due to its size and placement has any effect on performance. The battery is a heavy 8.4volt 7 cell 4200 MaH that is positioned centrally & longitudinally on the forward bottom portion of the hull pan parallel to the 1st-3rd road wheels. This provides for a far superior weight balance and lower center of gravity vs the stock Tamiya battery placement rearward sitting across and high on the hull above the 4th road wheel. To make this work I did not use the Tamiya hull speaker box and instead used a smaller speaker placed forward in the hull running along side the battery. Sound quality would be hard to distinguish to all but the most discerning ears.
The building of the Tamiya M551 Sheridan was the typical easy Tamiya style with no real surprises....that is with two exception folks should be aware of and I am surprised have not been mentioned, at least not that I have read or seen. The most critical are the motor shafts and pinion gears. The motor shafts lack a milled in flat spot on them for the very small allen screw to press flat and tightly too. Without the flat spot the allen screw with slip in very short order and the shaft will just turn inside the pinion gear. I would highly recommend filing a flat spot on the motor shafts for better allen screw and pinion gear hold.
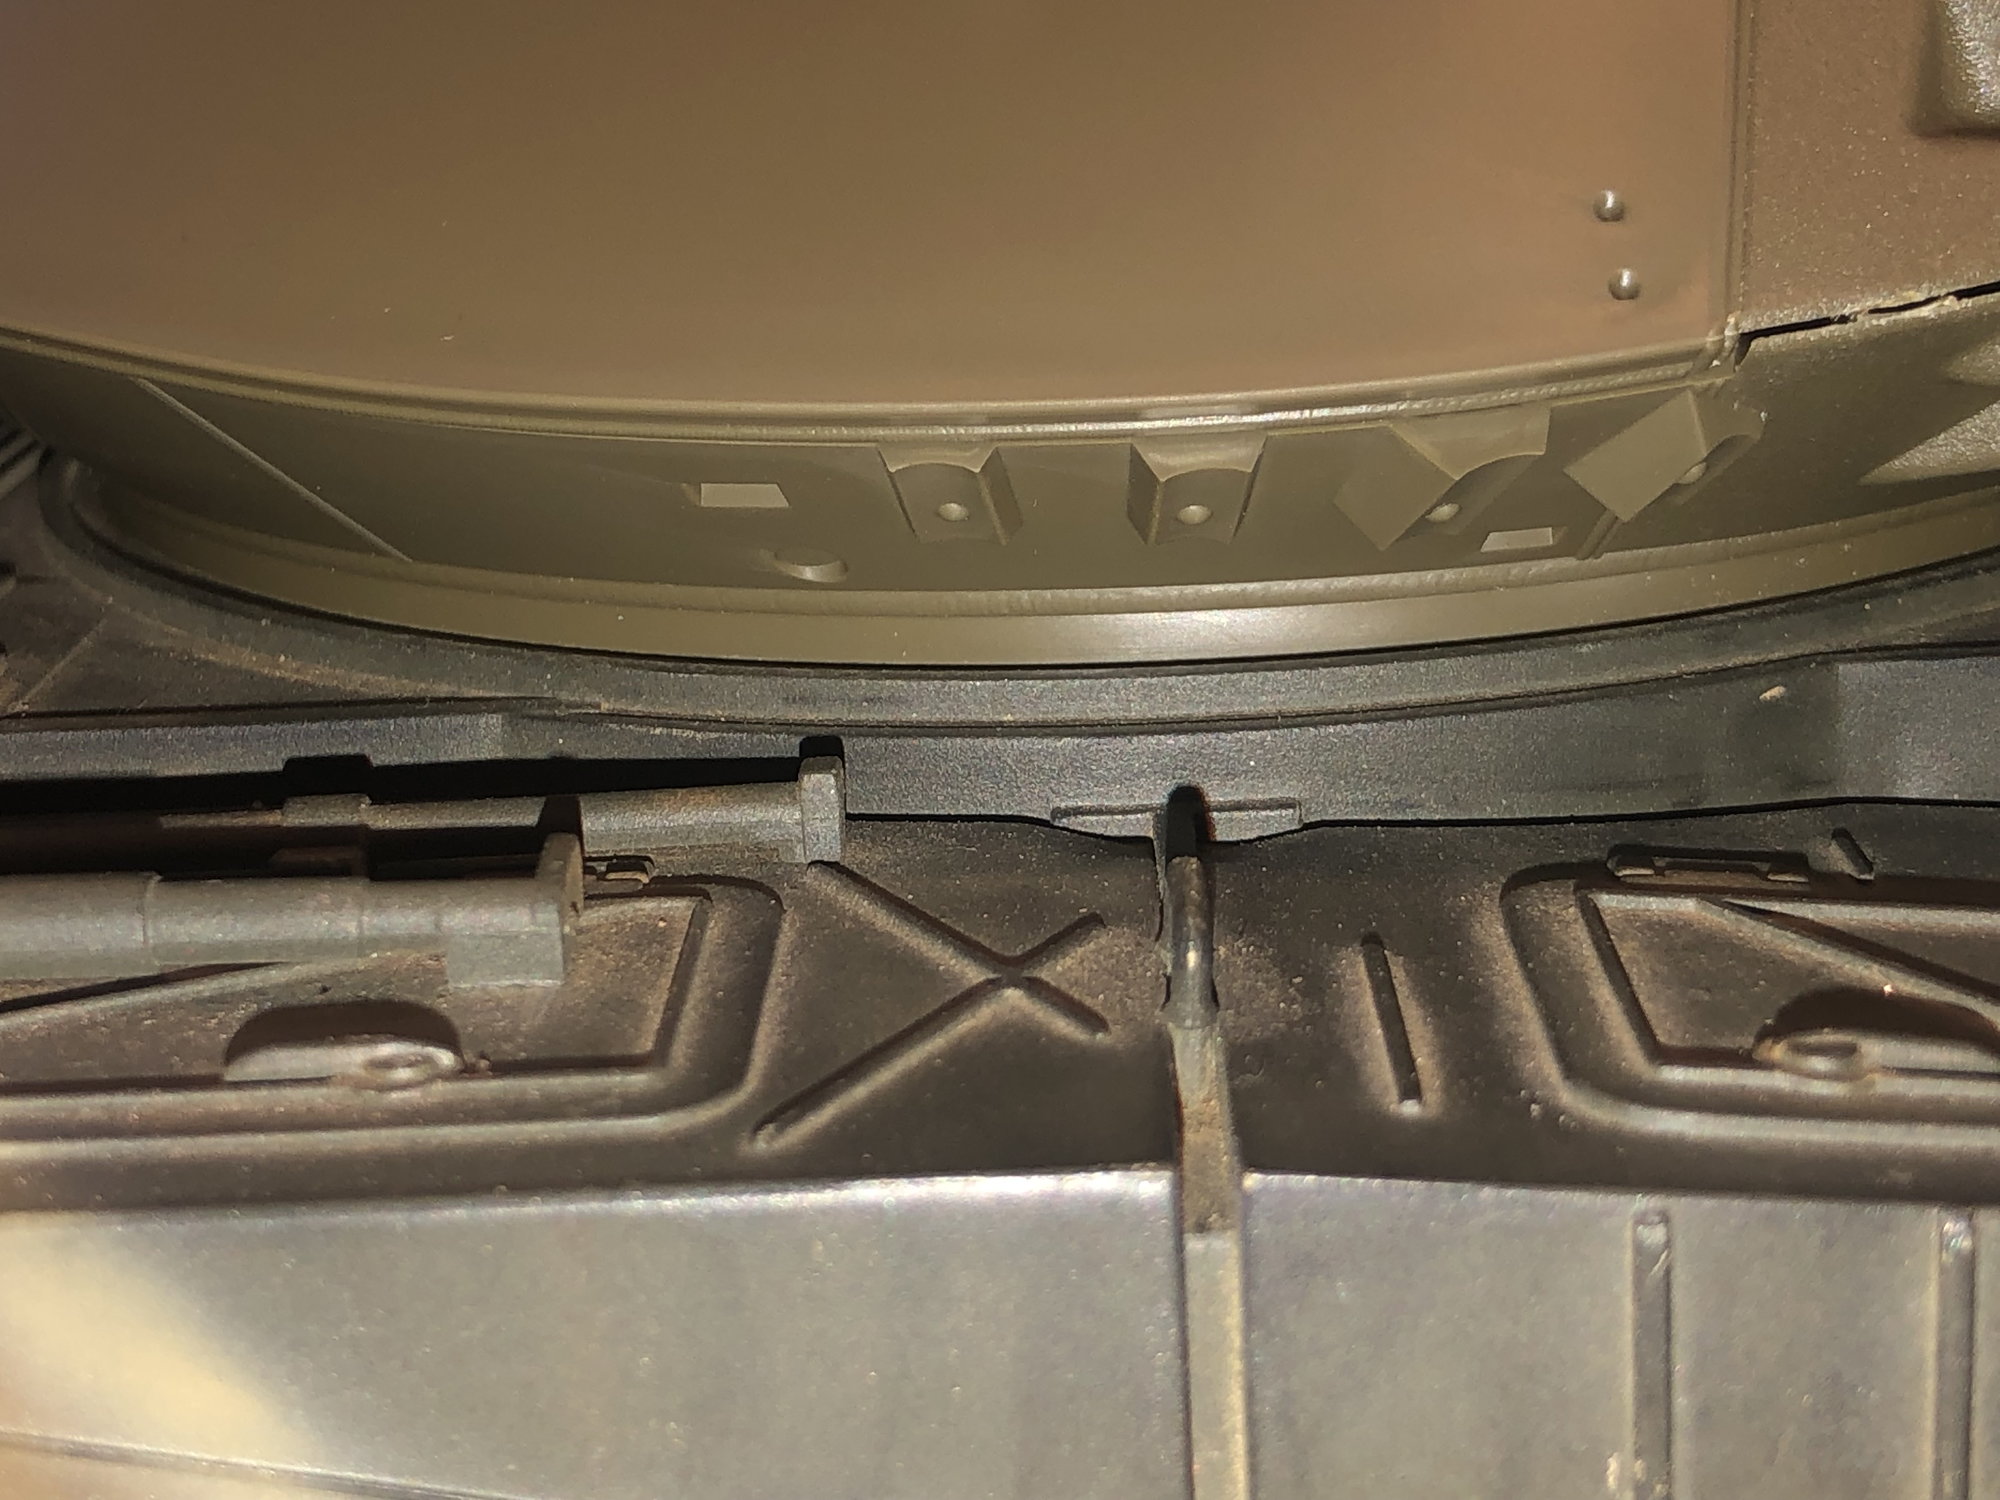
The second is the commanders MG, hatches, shields and the "ring" they are assembled on (not the cupola with the view ports). The "ring assembly" (see below photos) is to be removed when the IR receiver is installed according to the instructions. Ok makes sense so they do not block incoming IR beams, but there is no system included with the kit that secures them back onto the cupola if one just wants them attached while simply driving the tank around, the movement of the tank cause them to fall off. This was not acceptable so I built a "turret basket" out of styrene plastic and attached it to the "ring assembly". The basket slides down through the copula and into the turret. It is long enough to add just enough tension and hold "ring assembly" in place while driving even the roughest terrain (as you will see later), yet easy enough to simple slide out when I want to install the IR receiver.
That covers the changes made to the stock kit. Below are a few photo related to PART 1. Next up in PART 2 I will start into the driving review. In the mean time if you wish to see some of the short video clips of the testing please visit my Instagram
Fsttanks
 XM551 turret on M41 hull fitment test.
 XM551 turret on M41 hull fitment test.
 XM551 turret fitment test to M41 hull. As you can see the turret and hull rings are a reasonably good fit.
 Ring assembly basket.
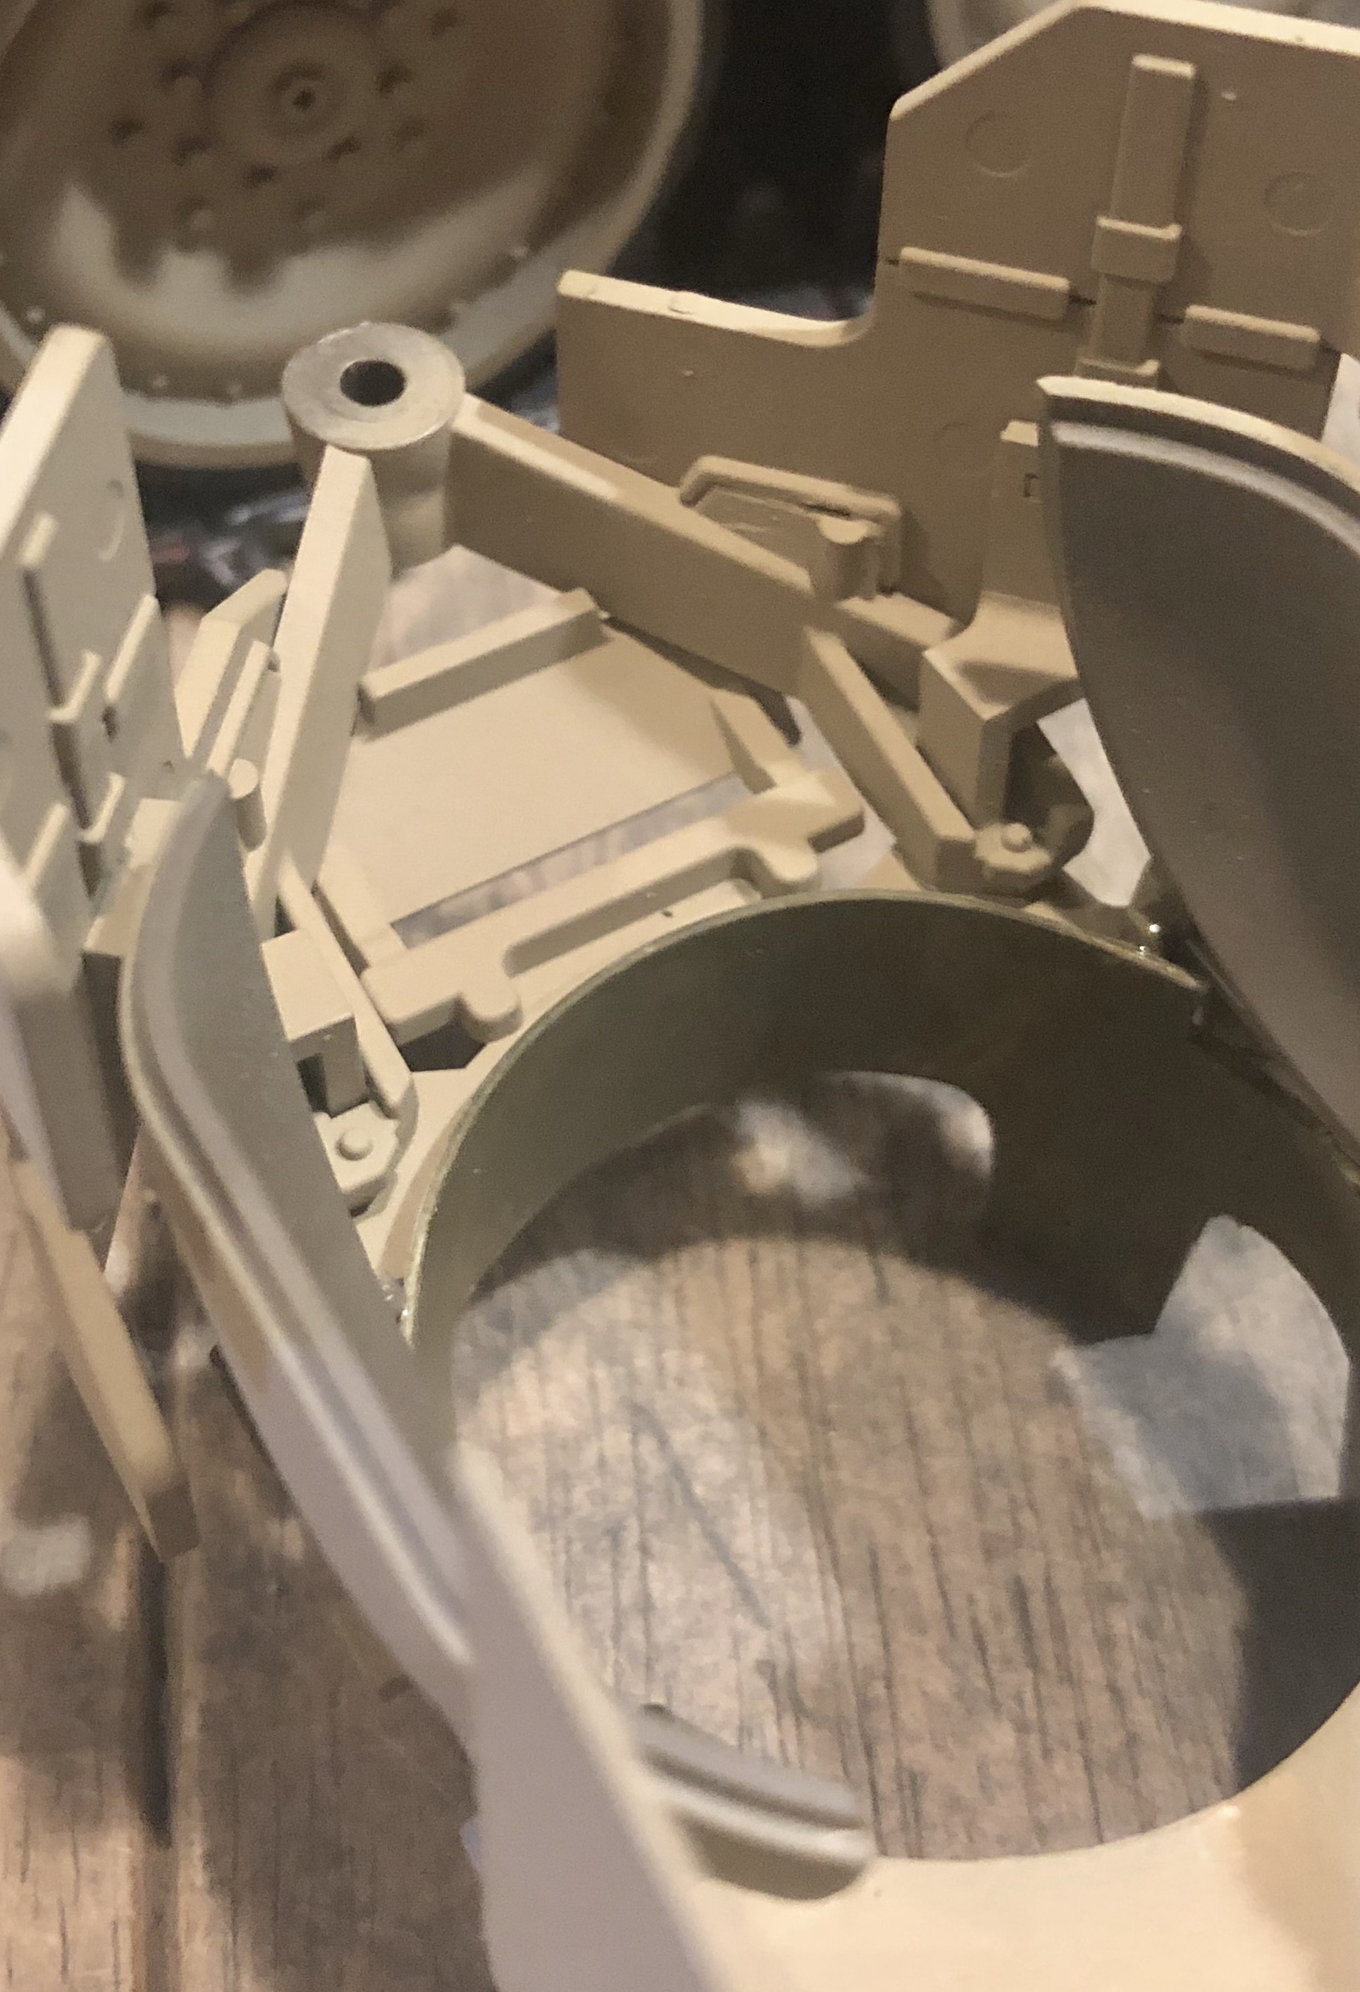 Ring assembly basket looking down into the commanders hatch.
 Ring assembly basket.
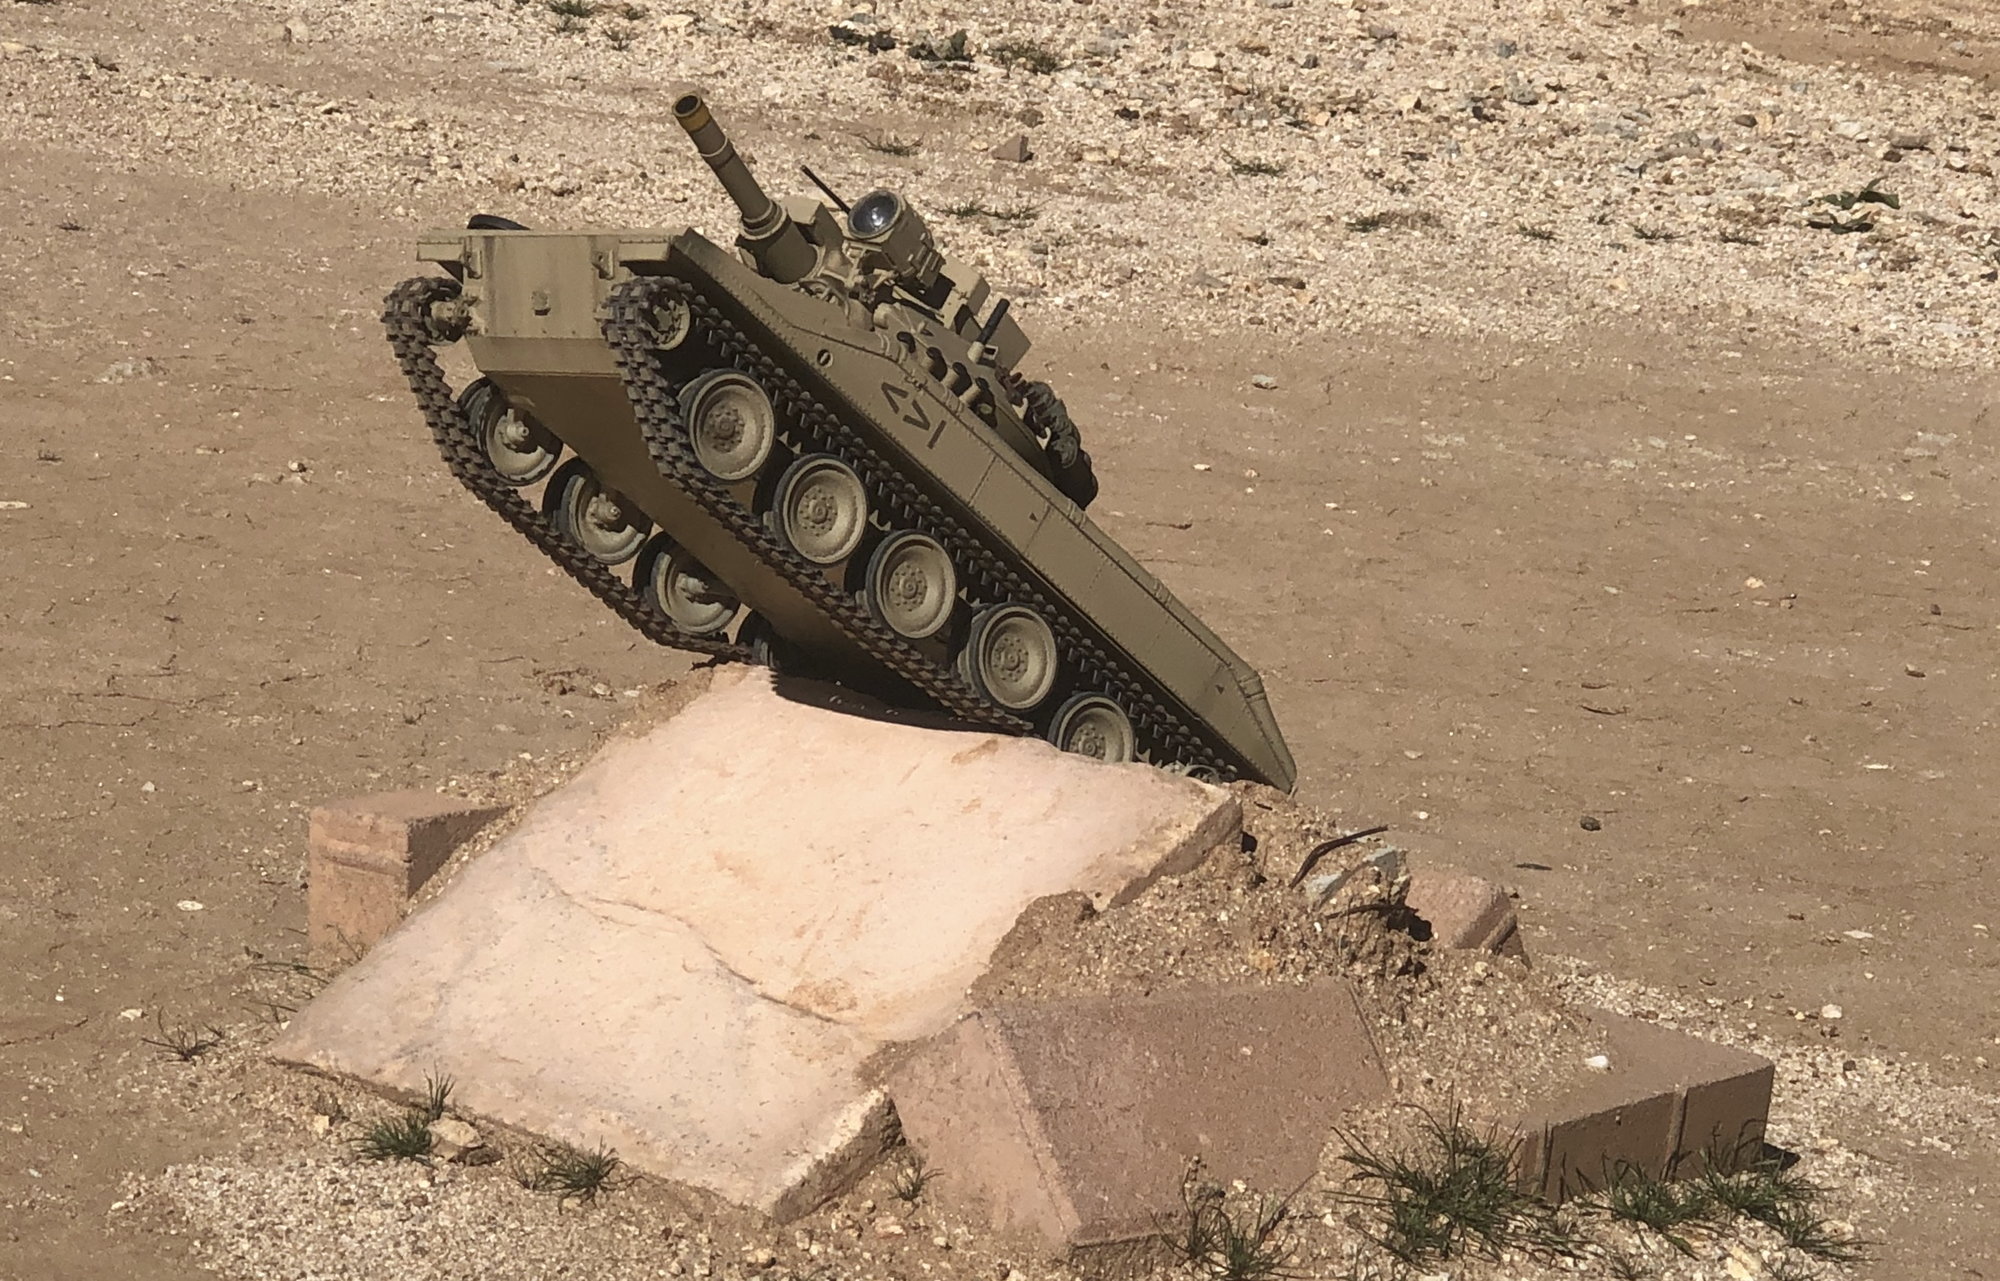 A quick fun photo from the trials test course. Lots more to follow shortly.....