Onto the fuselage panel lines. If you're like me, you haven't done a lot of this. I had a little warm up experience on 2 foamies T-28's that I covered with glass and the VQSBD that I recovered. Apparently that's not enough experience.
I was using/trying some 3M and Tamiya fine line tape that is supposed to handle small curves. The curves found on the stabilizer might be too much. Or it could be me.
I kept finding the tape lifting due to the stress of the curves. Not to mention the difficulty of getting 3-4 consecutive layers lined up well. So I came across a better method that probably everyone else has figured out, but if you're a newbie like myself, you might appreciate this hack.
Here are the steps. First, get rid of all the tape that keeps lifting off. Then...
 I used a fine point Sharpie to mark the panel line on the plane.
One layer of green 3M tape, nice and flat, and you get see this panel line well enough to trace on top of the tape.
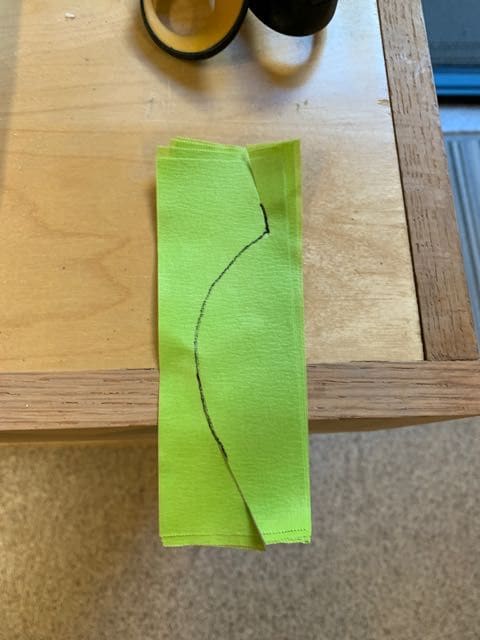 Take that piece off from the plane and add 3 more layers underneath.
Then cut along the line. I don't think I can get 4 layers and that curve doing them one at a time.
 Back to the plane. I did this for each side and then alternated the ends on the top where the 2 sides meet.
Use an Xacto blade to trim if you're not satisfied with the lines. Just be careful.
 I did this for the caps on the wing tips. This way the tape can lay flat without stress.
And that green tape has great tack but does not pull up on anything like primer or existing panel lines (just make sure everything has cured).
 Still use blue tape for the straight, easy stuff.
 Working my way from the back to the front. Keeping track of how the panels overlap each other.
The yellow icing is pretty easy to trim with a sharp blade, but can chip or flake easily before it's really cured.
One other project I'd like to get some traction on before putting this project on hold is the exhaust. I plan to put the engine back on and make a model of the pipes. A friend of mine is trying to convince me to let him help me make these out of SS rather than all of the copper fittings I purchased.